
Fine line looks gorgeous fresh and it is everywhere on saved boards, but the reality is different for long-term wear. I've seen fine line sleeves hold beautifully when placed on the outer forearm and spaced properly. I've also seen identical designs blur when packed too tightly or placed where sun and friction hit often. Read on to see 17 pretty girly sleeve tattoo ideas, what will hold up, and what to ask your artist before the stencil goes on.
1. Fine Line Floral Half Sleeve
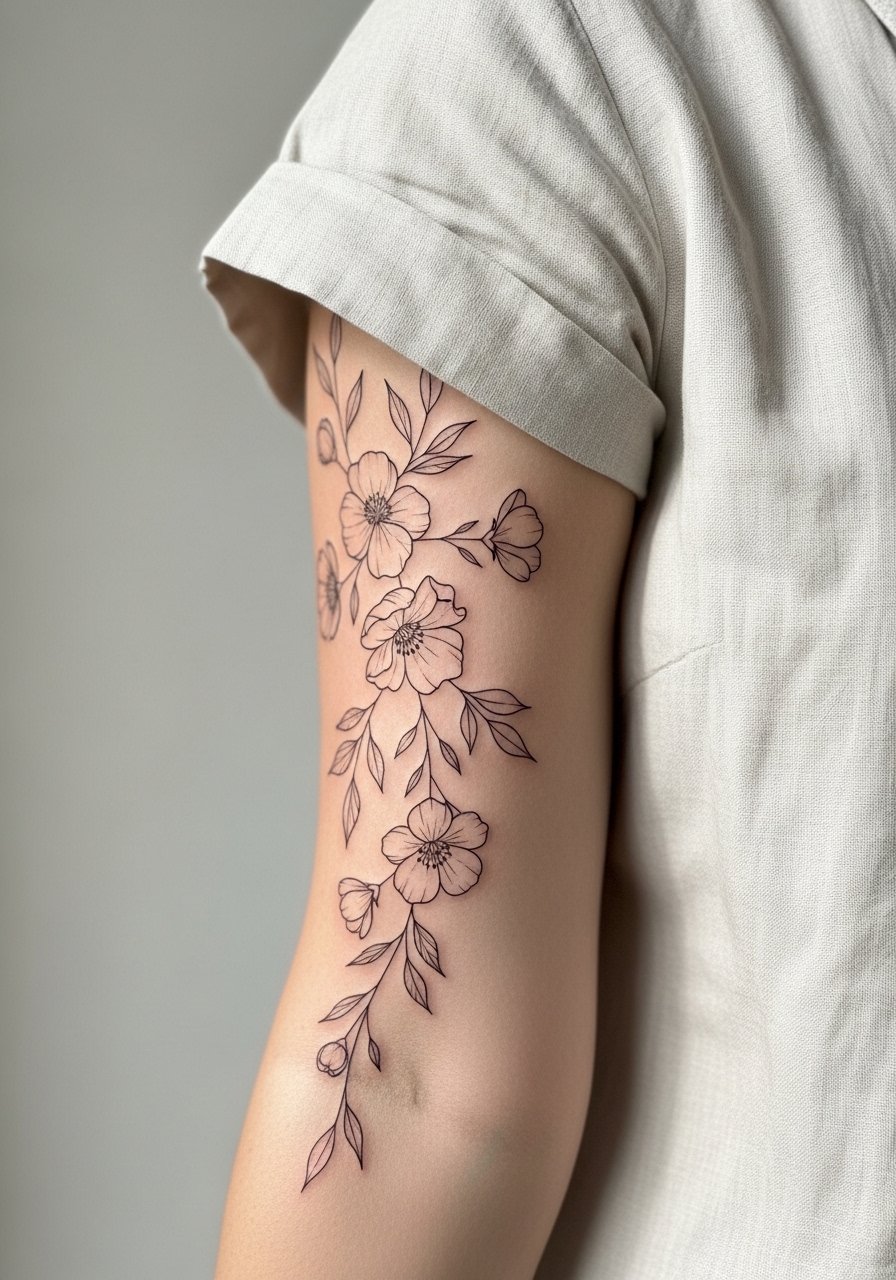
I recommend this when you want a feminine look without heavy saturation. In consultation, ask for slightly thicker outer stems and micro spacing between petals so the lines have breathing room as they age. The common mistake is packing tiny petals together, which causes the detail to merge after a couple of years. Expect 2 to 4 shorter sessions and mild pain that most people rate as a 3 out of 10 on the forearm. For the session wear, pick a linen rolled cuff blouse or a pastel tank top so the artist can work the outer arm easily. Touch-ups are common at year three for very fine details.
2. Watercolor Rose Inner Arm Sleeve
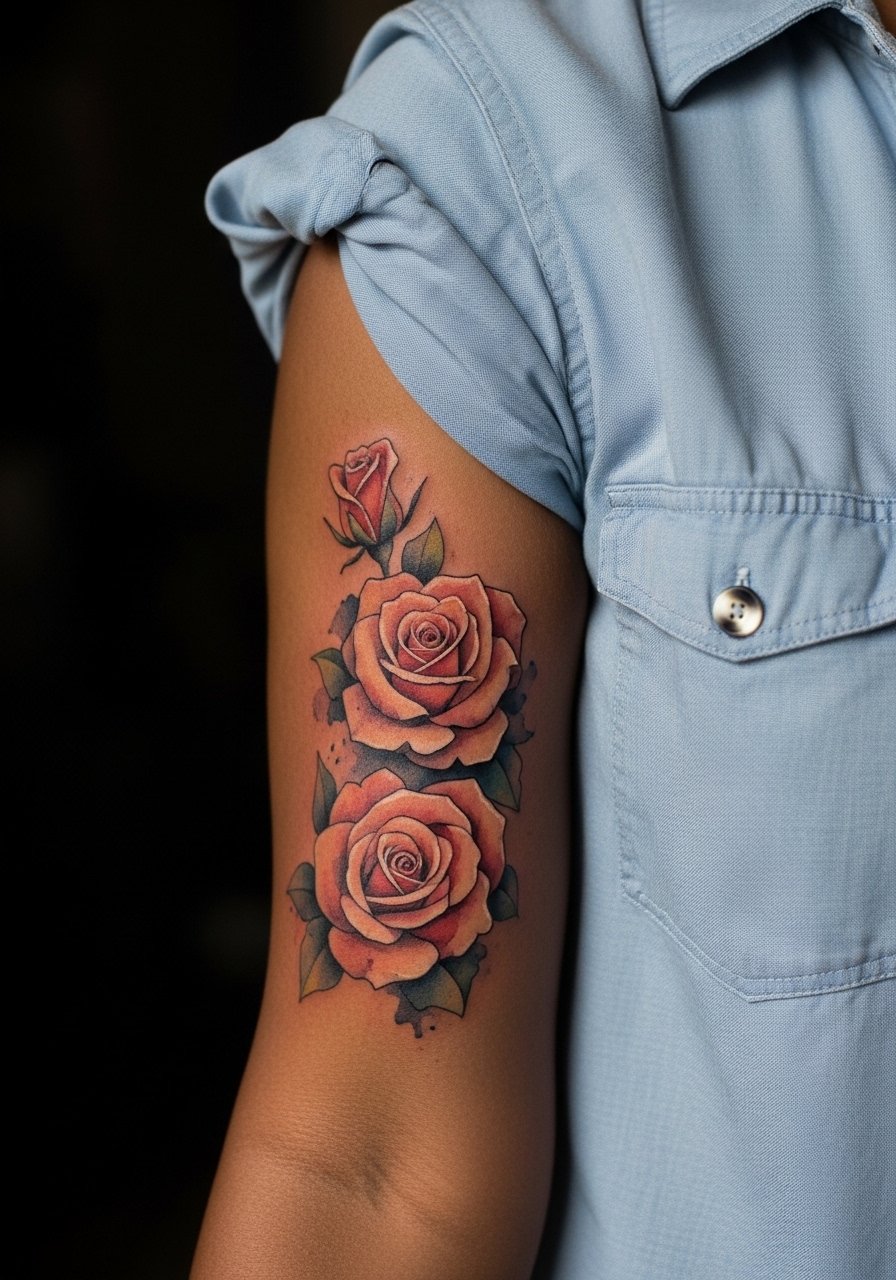
Fair warning, the inner arm is more sensitive and the skin there moves a lot when you bend. That extra movement makes watercolor wash look soft faster, so I tell people to pair color with a thin outline to keep definition. During consultation, request pigment layering rather than one saturated pass so the tones age with depth. Sessions feel tatty when the arm is raised, so short three-hour blocks work best. For showing it off, try an off-shoulder blouse pink to let the sleeve peek out without busy prints. Expect a touch-up at year two for vibrancy refresh.
3. Minimalist Vine Elbow Wrap

This one ages well when the vine follows muscle contours instead of a tight circular wrap. The biggest mistake is making the vine too thin at the elbow crease. That area sees bending and friction and thin lines can break up. Tell your artist to allow slightly thicker linework over the joint and to map the flow so it reads even when you bend your arm. Session pain at the elbow crease is higher than the outer forearm so expect sharp moments. For a look that highlights the wrap, consider elbow length gloves cream for styling photos or a rolled cardigan for everyday wear.
4. Neo-Traditional Butterfly Upper Arm Sleeve

I've noticed neo-traditional butterflies read large and graphic, which helps color hold up over time. Ask for strong outer linework and areas of solid saturation rather than tiny color gradients. A common regret is requesting ultra-fine shading inside wings, which tends to soften into a muddy look after a few years. Upper arm sessions are moderate on pain, and larger pieces may require four to six sessions. Show it off with a sleeveless tank cutout or strapless bralette for summer outfits. For career-sensitive folks, this placement is easy to cover when needed.
5. Ornamental Mandala Outer Bicep
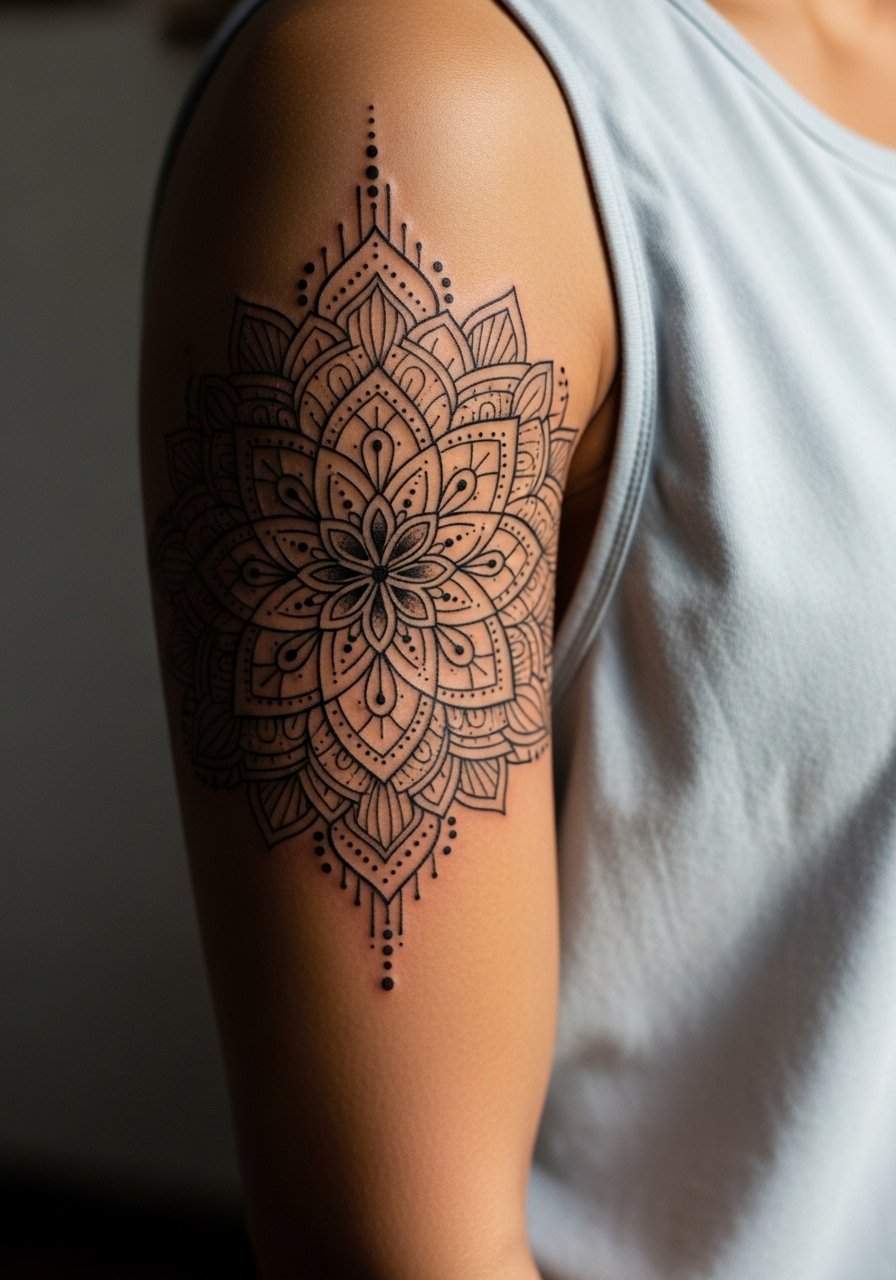
The mandala wins when given room. The common mistake is shrinking a complex mandala to fit a small spot. Dense geometry needs spacing or the tiny linework will fuse. During consultation, bring a reference that shows spacing at the edges so the artist crafts negative space intentionally. Sessions are steady and repetitive, so plan two to three focused appointments. If this design references cultural patterns, choose respectful motifs or slight variations out of consideration for origin. Wear a loose tank top for the session so the artist has clear access.
6. Micro-Realism Portrait Forearm Sleeve
Consultation matters more here than for most pieces. Bring multiple reference photos with consistent lighting and tell the artist which expression and crop you prefer. The mistake is asking for a tiny portrait with high detail. Small portraits lose those nuances and turn into an indistinct face after a few years. Forearm portraits typically need multiple long sessions and realistic touch-ups down the road. Expect higher cost and longer booking times. For session comfort, a loose short-sleeve or button-down that you can pull aside helps keep movement minimal. Artists differ on fine line versus saturated shading for realism, so ask where they land before booking.
Studio Day Picks
The first six designs above include delicate forearm and inner-arm work plus denser upper-arm pieces, so a few targeted items smooth out the session and the first week.
-
Stencil transfer paper kit. Lets you preview placement and make tiny alignment tweaks before the needle goes in, which is key for floral wraps and portraits.
-
Topical numbing cream. Helps take the edge off inner-arm and forearm sensitivity if your artist allows it, usually applied about 45 minutes before the session.
-
Thin protective film roll. Useful for wrist and inner-arm pieces that face frequent friction and hand washing in the first days.
-
Fragrance free gentle body wash. Cleans the area gently without stripping pigment, which benefits fine line work while it settles.
-
Aquaphor healing ointment. Thin layers the first two to three days help keep very fine line channels moist without heavy buildup.
7. Blackwork Daisy Chain Inner Elbow
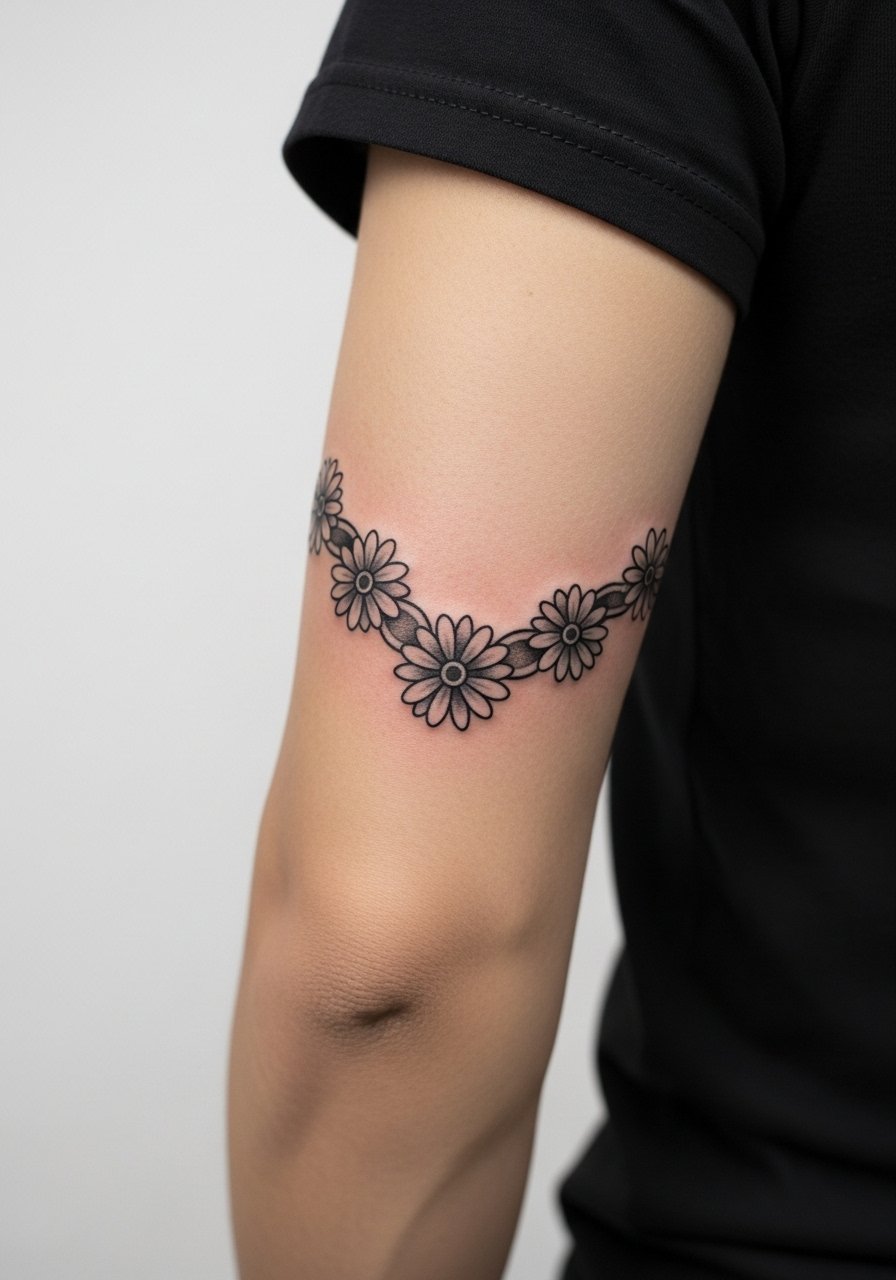
Visual impact leads here because solid black holds up differently than fine line. For lighter skin tones, bold black creates contrast that lasts. The key is not to let the daisies shrink into tiny petals over the joint. Ask for clear negative space between blooms and slightly thicker stems across the crease. Inner elbow pain spikes when bending during the session, so schedule shorter passes. Blowout risk exists at the crease if the needle depth is inconsistent, so discuss technique with the artist. For everyday styling, a rolled short sleeve or dainty elbow bracelet frames the chain without covering it.
8. Ignorant Style Heart Patchwork Forearm
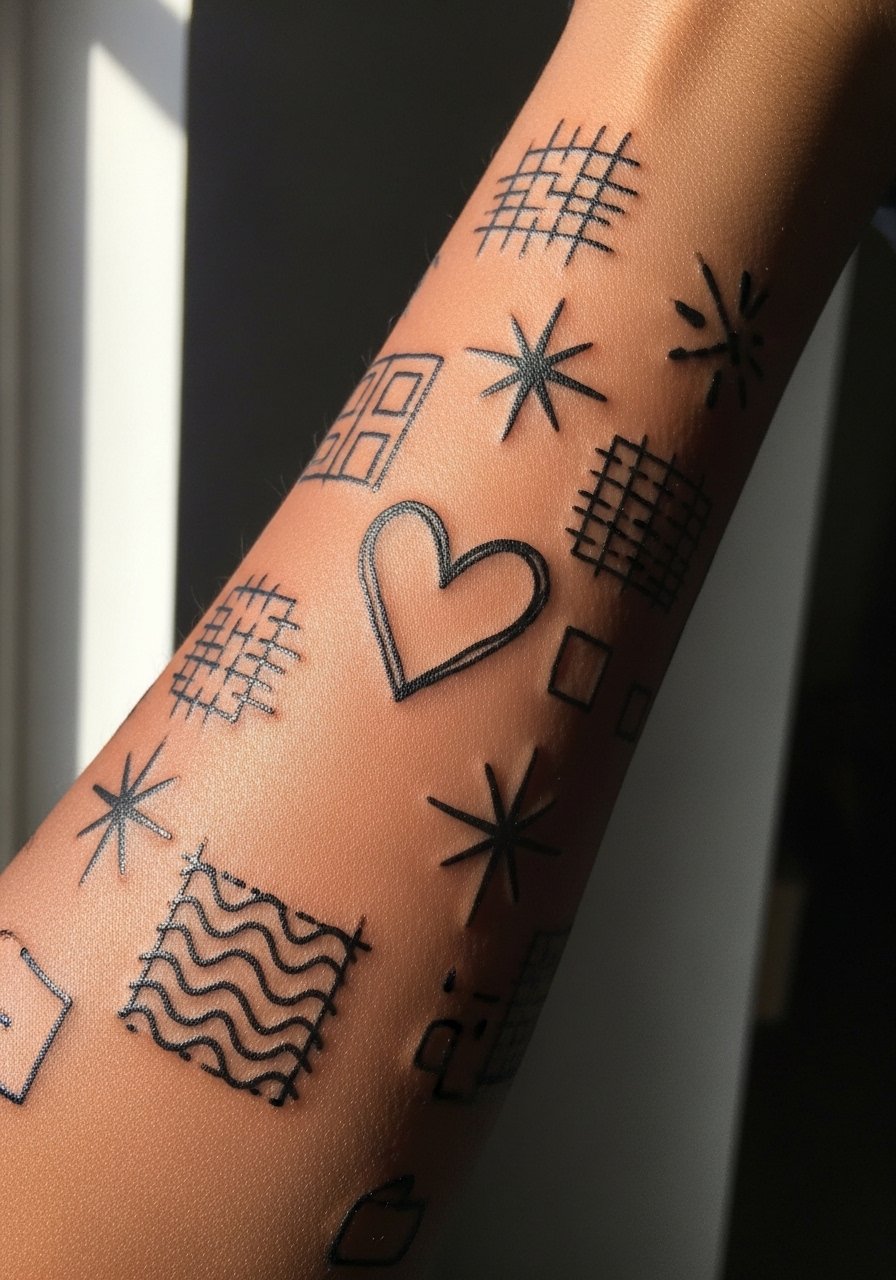
Mistake lead works well here. People often ask for a full collage all at once and end up with an overcrowded sleeve. The patchwork approach should be modular so you can build over time. Tell your artist you want obvious spacing between motifs so each piece can age separately. Sessions are forgiving and short for this aesthetic, which makes it ideal for walk-in builds. Style it casually with a loose button-down shirt worn open for easy access during booking. Over time you might choose to color some patches and leave others black.
9. Botanical Leaf Upper Arm Half Sleeve

Aging and placement matter for leaves because natural body changes can stretch the design. Opt for slightly larger leaf shapes and avoid tiny veins that merge with time. For clients worried about stretch from weight fluctuation, the outer forearm is more stable than the bicep. Sessions are moderate and you will get better saturation with repeat passes spread across two to three visits. Pair this look with a romper sleeveless women outfit when showing it off. If you want a naturalistic feel, ask for stipple shading rather than delicate watercolor washes.
10. Geometric Crystal Shoulder-to-Forearm Mix

Consultation lead applies because geometry needs measured spacing. The biggest mistake is over-compressing lines in tight mandala-like arrangements. Ask your artist to map the negative space so crystals have room to read clearly at three and five years healed. Shoulder placement helps the shapes breathe and reduces blowout risk compared with tight wrist geometry. Sessions will require multiple visits to balance linework and color fills. For show-off outfits choose a crop top wide strap to mirror the angular forms and metallics.
11. Traditional Anchor with Florals Half Sleeve
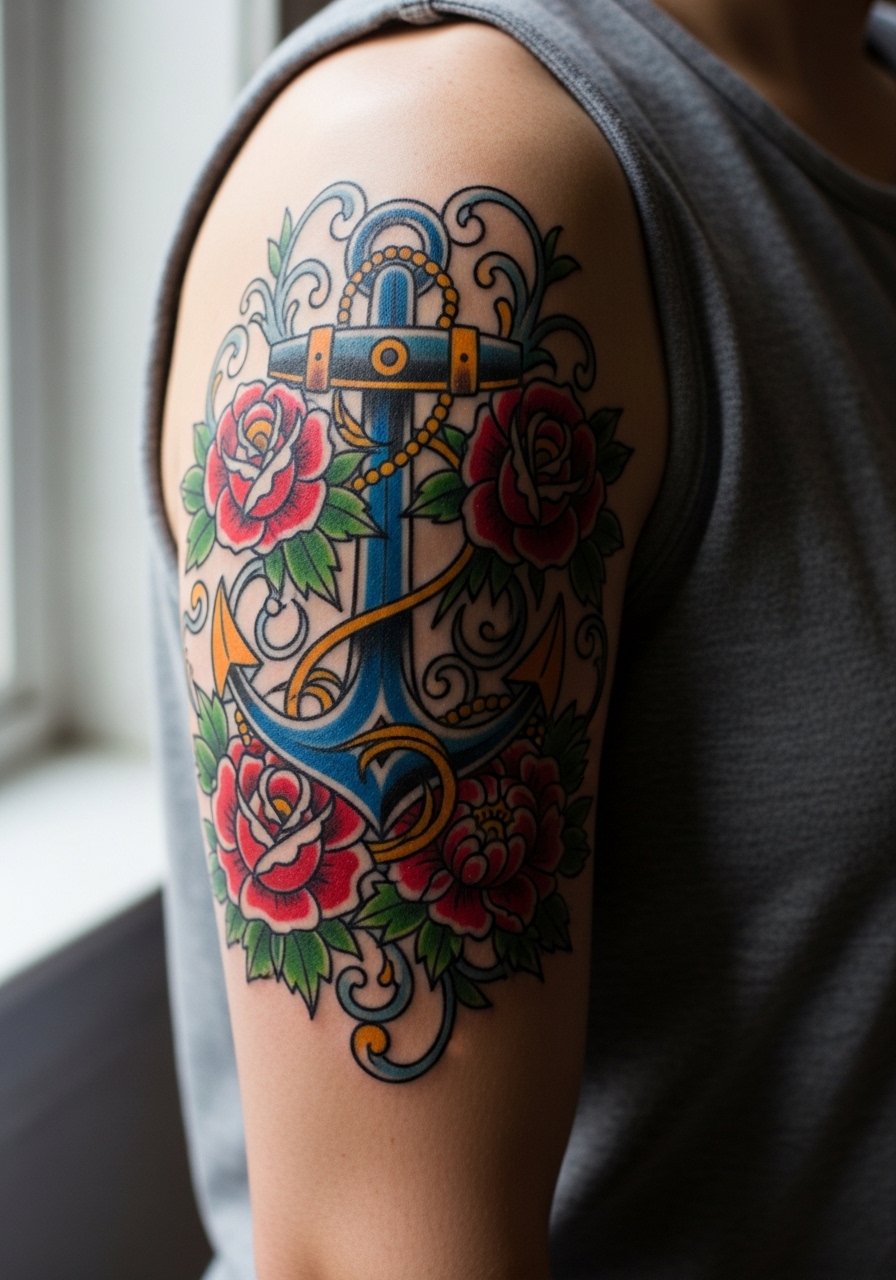
Personal observation lead. Classic saturation and thick outlines help this style age into a readable shape. The common regret is asking for tiny details inside the anchor that disappear after a few years. For longevity, request clear block colors and decisive outlines. Sessions are longer because of the color packing, so prepare for several visits. This is an easy coverable area if you need to hide it for professional reasons. Bring references of color balance and tell the artist which tones you prefer for the floral accents.
12. Delicate Fairy Wing Shoulder-to-Forearm
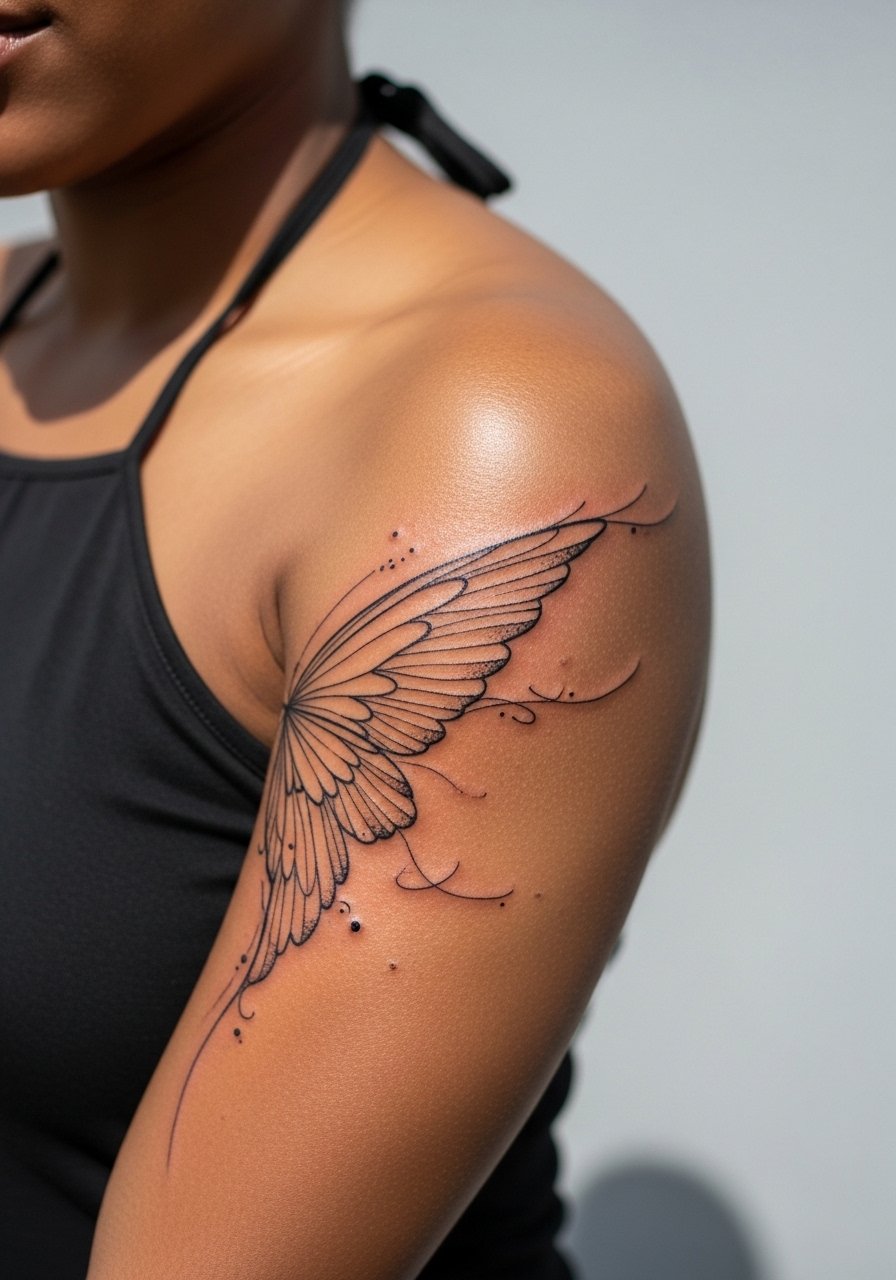
Styling lead here because the shoulder placement pairs with open-back or halter tops. Ask your artist to scale wing feathers so the lines are slightly bolder near stress points and finer toward the tips. The mistake is making the feather strands too tight, which creates a blurred soft patch later. Sessions feel moderate, and you can usually complete this over two appointments. For evenings try a metallic halter crop that complements the wing silhouette. If your wardrobe leans closed-neck, plan for a wider strap to let the wing show.
13. Patchwork Butterfly and Stars Modular Forearm

Aging/healing lead. Building a patchwork sleeve over multiple sessions solves commitment fears by design. Start with one large focal butterfly and leave space for stars and small motifs to be added later. The error is filling every inch from day one. Plan sessions seasonally so you can adjust color mixes based on how earlier pieces heal. Forearm placement means regular SPF and touch-ups if you spend lots of time outdoors. For casual wear, a sheer mesh long sleeve over a tank creates a peekaboo effect that highlights newly healed pieces.
14. Geometric Crystal with Inner Arm Accent

Mistake lead again because inner arm geometry needs extra spacing to avoid merging when the arm flexes. Ask your artist to plan the inner-arm accents with negative space and to avoid micro lines there. Inner arm pain is higher and sessions should be shorter. Because this uses both outer shoulder geometry and inner arm detail, it benefits from staggered appointments. For showing it off, a loose button-down shirt you can pull aside gives clean access and frames the shapes.
15. Minimal Script and Small Motifs Wrist-to-Forearm
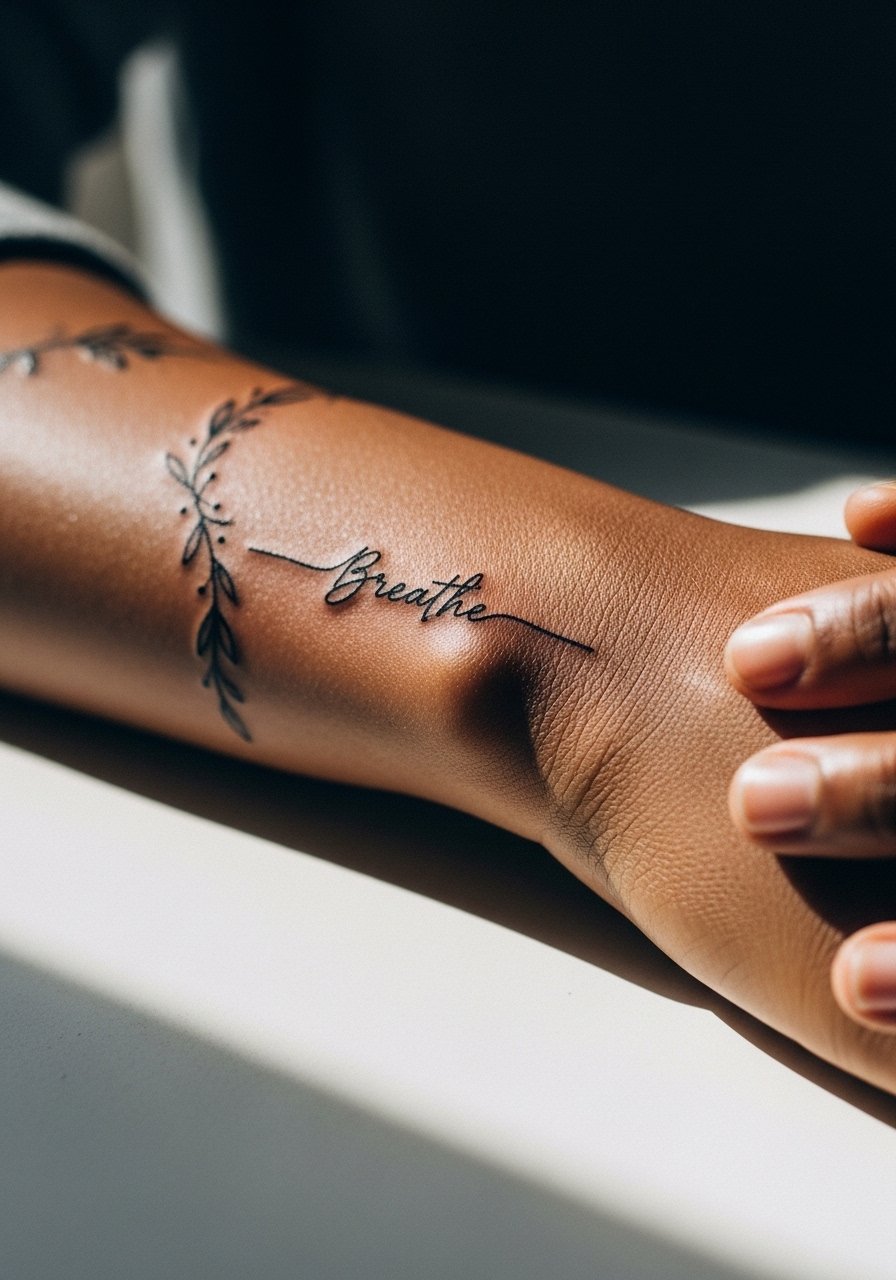
Pain warning lead. The wrist is high-friction and small script needs room. If you want legible text years from now, increase letter size slightly and ask for a balanced baseline so letters do not blur together. Tiny motifs near the wrist rub against watches and bracelets, so consider spacing or placing them slightly higher on the forearm. Session-wise, wrist work is more painful than the forearm and deserves short focused passes. Pair delicate wraps with a thin chain pendant necklace that sits above the script for layered photos.
16. Black and Gray Botanical Calf Sleeve
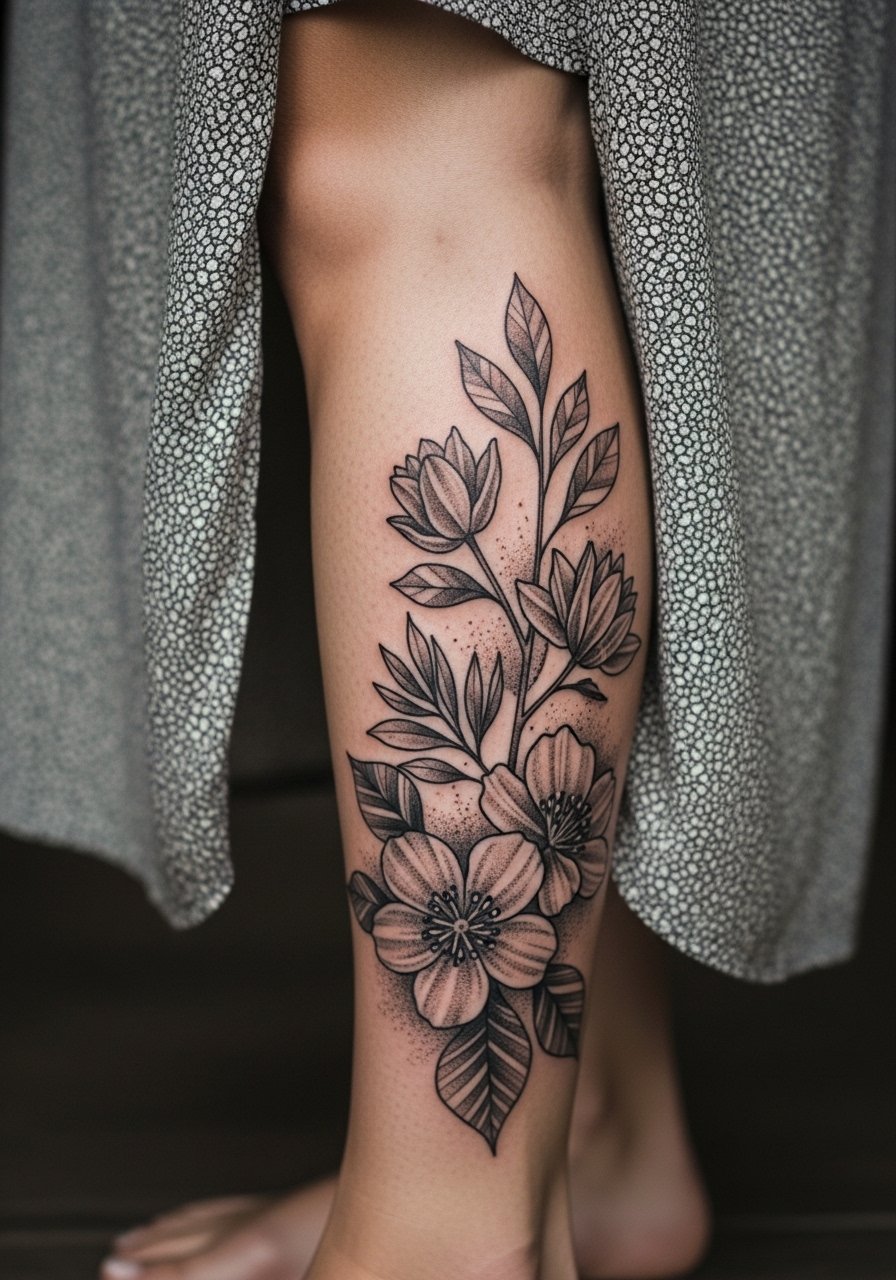
Consultation lead here because calf flesh and muscle create a tall canvas that suits long vertical compositions. The mistake is trying to cramp horizontally themed motifs onto the calf. Ask for vertical flow and stipple shading to age gracefully. Calf sessions are relatively comfortable and you can usually sit through longer blocks. If you want seasonal visibility, pair with skirts and sandals that let the sleeve breathe. Remember that calf pieces handle saturation differently than upper-arm work and may need a light touch-up after athletic seasons.
17. Patchwork Sleeve Built Over Time, Best for First-Timers

Decision-pressure lead. If you are nervous about a full sleeve, the patchwork approach is practical and forgiving. Start with a medium-size motif as an anchor and plan future pieces around it. The common mistake is committing all the way and then not liking the flow later. Break sessions into three-hour blocks, and use walk-in friendly styles so you can test an artist's touch first. For showing progress over years, a layered tank top keeps attention on individual patches while letting the sleeve grow. This method also helps manage cost and scheduling concerns.
Frequently Asked Questions
Q: Will fine line floral sleeves blur faster than blackwork ones on the forearm?
A: In my experience fine line tends to soften sooner than solid blackwork, especially in high-sun or high-friction spots. The difference comes down to spacing and initial line weight. Ask your artist to slightly thicken critical contours and plan for a touch-up at year two or three if you want the lines to remain crisp.
Q: Do watercolor-style inner-arm sleeves need different care than traditional fills?
A: Yes, watercolor pieces often rely on softer pigment placement and can look more faded without touch-ups. Clean gently with a fragrance-free wash and use high SPF when exposed to sunlight. Also discuss bold outlines with your artist if you want longevity on darker skin tones or in high-sun use.
Q: How do I avoid blowout on elbow wraps and inner-arm tattoos?
A: Blowout risk is technique dependent. Ask the artist about needle depth and whether they recommend slightly bolder linework near joints. Planning spacing and avoiding micro detail in creases reduces the chance of ink migration.
Q: Is patchwork the best strategy for someone on a tight schedule and budget?
A: It can be. Building a sleeve over time lets you spread cost and test different artists or styles. Start with a medium focal piece and leave room for connectors. That way you can adjust the direction without a single massive commitment.
Q: What should I wear to a shoulder-to-forearm geometric session?
A: Wear something with wide straps or a halter that you can move aside without tugging on the area, like a metallic halter crop or a loose tank. Comfort helps you sit still and keeps the artist from working around clothing.
Q: Artists disagree about Saniderm versus dry healing. Which side is right for a delicate fine line sleeve?
A: Both camps make reasonable points. One group likes Saniderm for less mess and a sealed environment. The other group warns about trapped moisture and infection risk without careful monitoring. For fine line sleeves I often recommend following the artist's proven protocol and asking whether they have many healed examples of the exact technique you want.
