
The stencil sat slick on the upper arm under the shop light and the client laughed at how big the peony looked on skin. There are a lot of pretty photos online, and not every look holds up the same way. I pulled together 21 Japanese flower directions that balance what reads great fresh with what actually ages well, plus practical notes to bring to the consultation so the finished piece still reads clean in a few years.
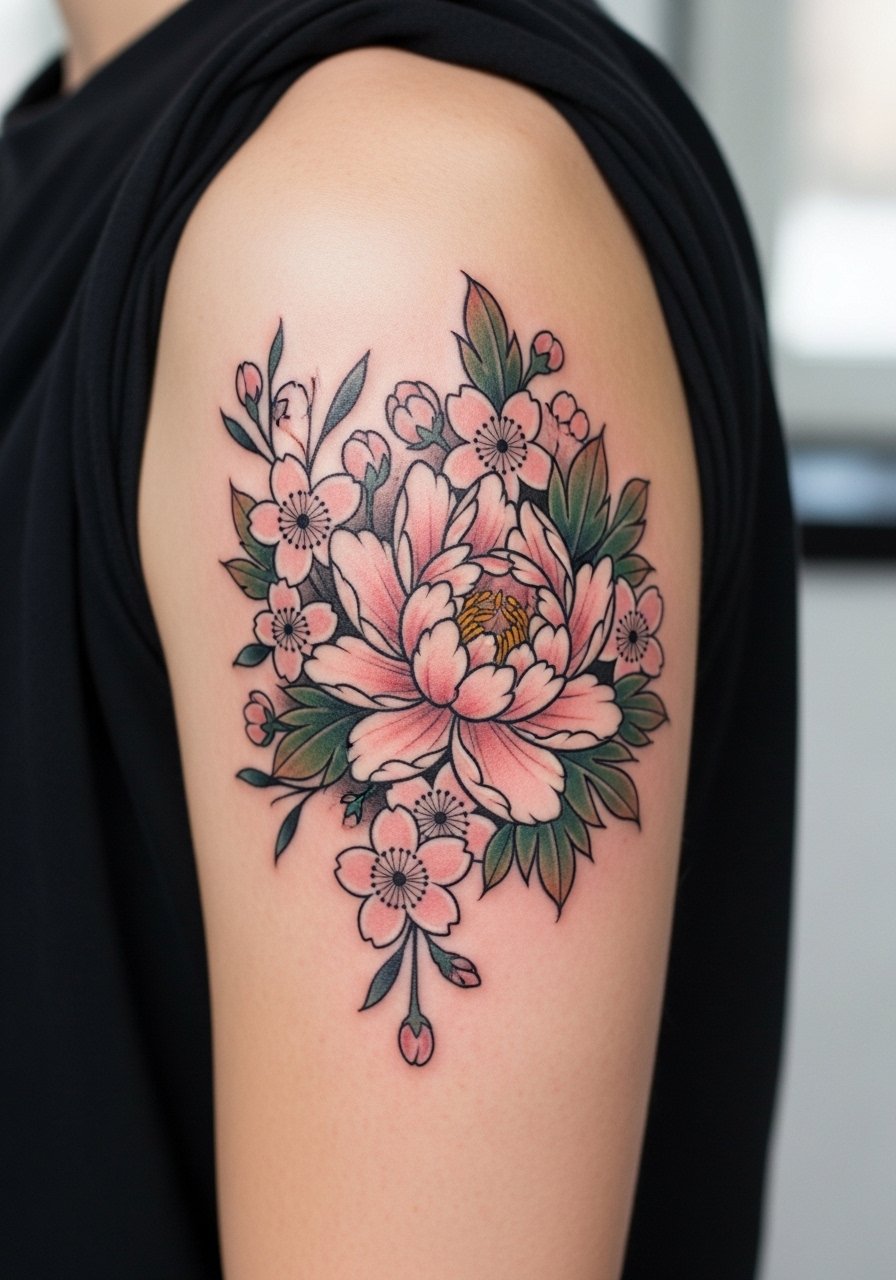
1. Peony Sleeve in Irezumi Style
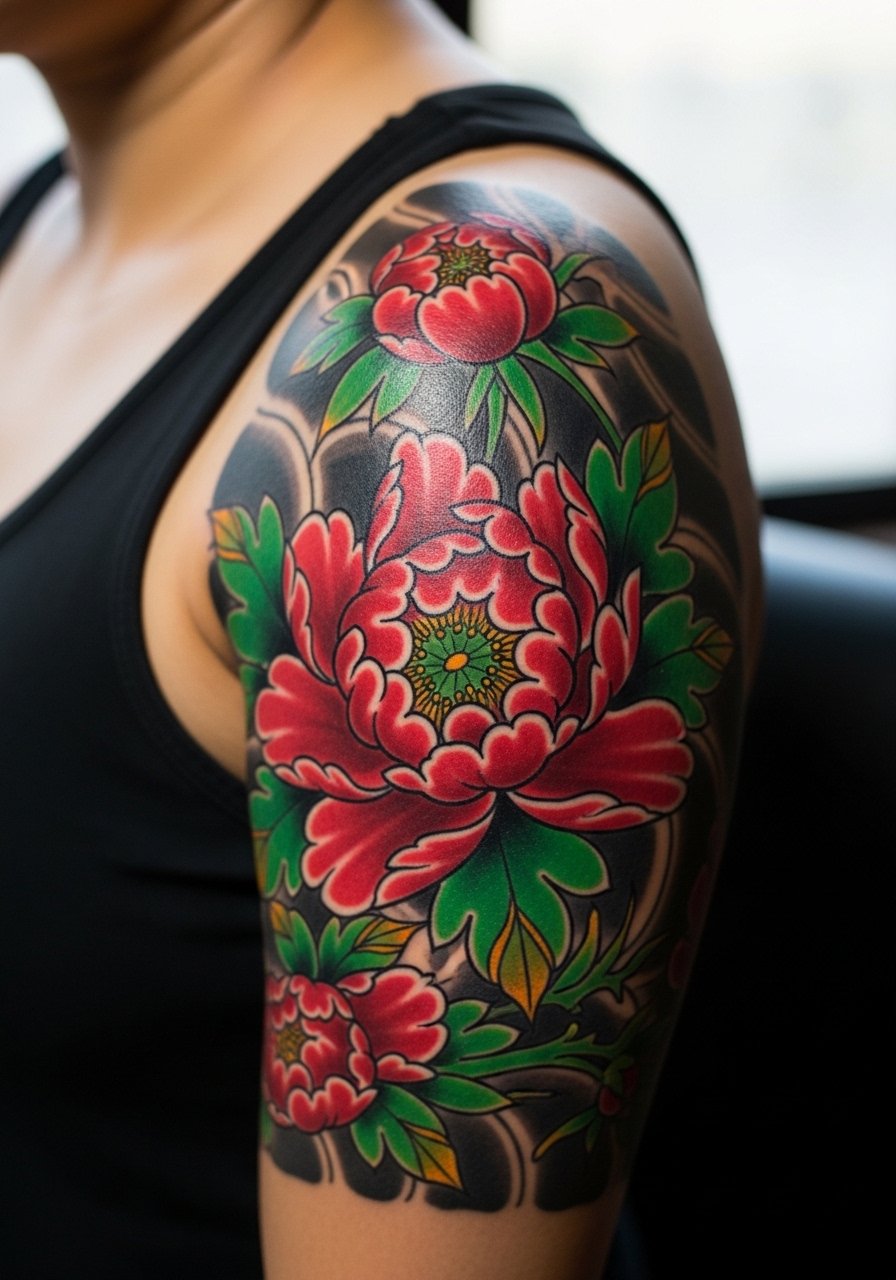
A full peony sleeve is a statement that reads best when given scale and heavy saturation. I recommend this if you want a piece that ages into solid color and presence rather than one that needs frequent touch-ups. Tell your artist you want bold linework, layered saturation, and room for traditional wave or wind bars so the petals breathe. Common mistake is shrinking an Irezumi peony down to micro scale where stipple shading and tiny petals blur within a few years. Expect 2 to 4 sessions, noticeable soreness on the outer arm, and a touch-up at year two to restore saturation if you spend time in sun. For showing it off, off-shoulder tops keep the shoulder blossom visible and frame the sleeve.
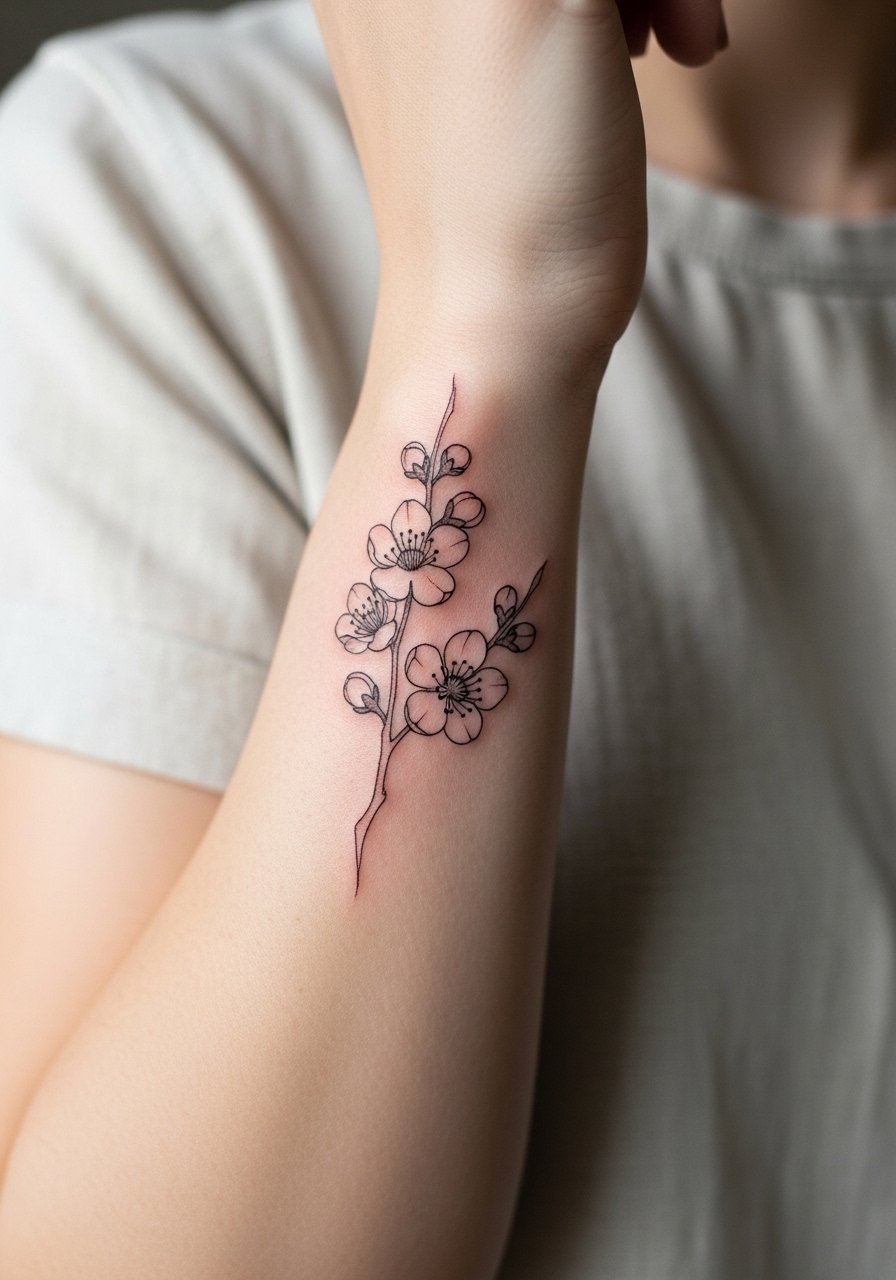
2. Cherry Blossom Branch on Forearm
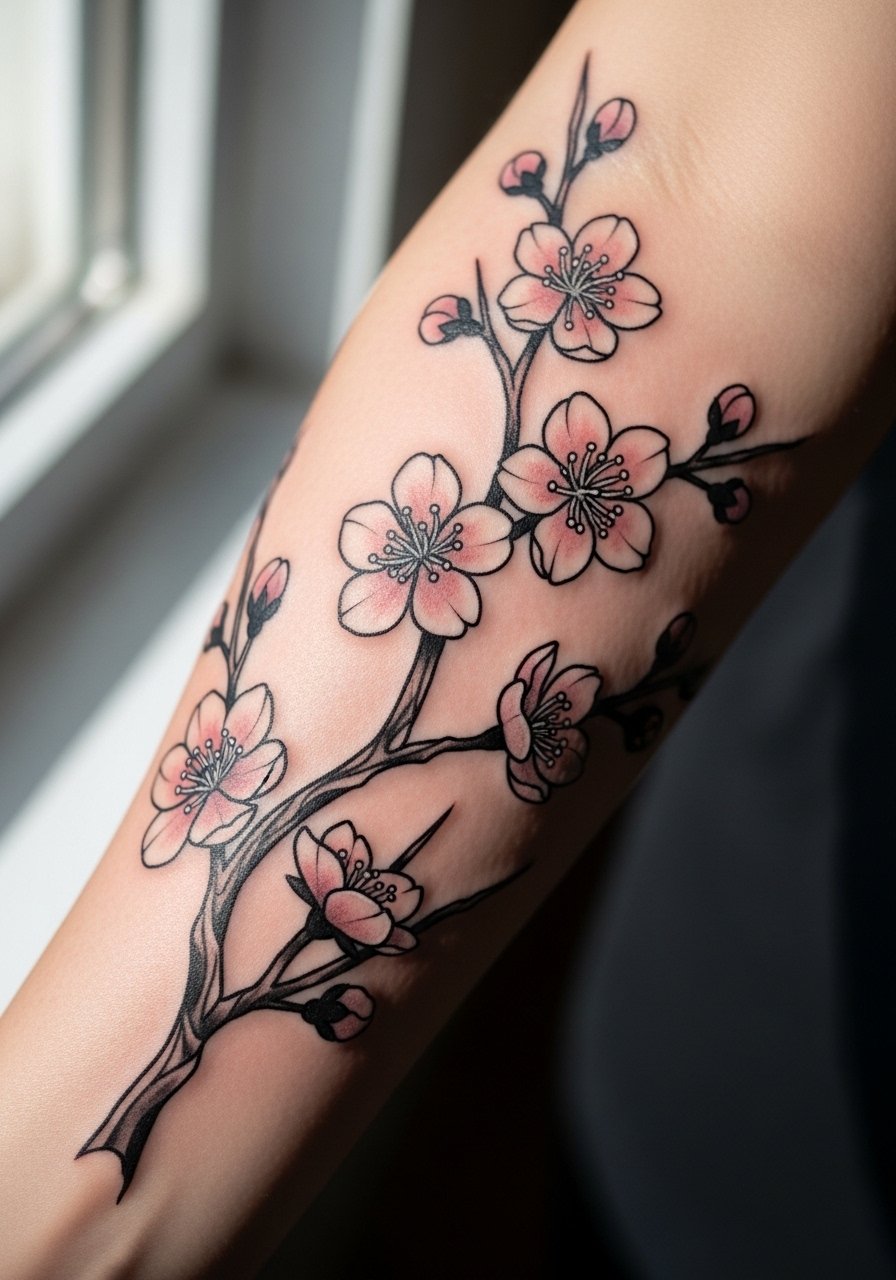
I suggest a flowing cherry branch when you want movement that follows muscle and bone on the forearm. In consultation, ask for slightly heavier linework on the branch and softer, almost watercolor fills in the petals so the design keeps structure as the pale pink fades. A common aging problem is too-fine petal edges that dissolve into blur. This placement hurts less than ribs and gives a visible spot for a first Japanese flower piece. For session comfort, wear a linen kimono sleeve blouse you can roll up, and when you want to show it off, rolled sleeves in ivory highlight the soft pinks.
3. Lotus Emerging from Waves on Thigh
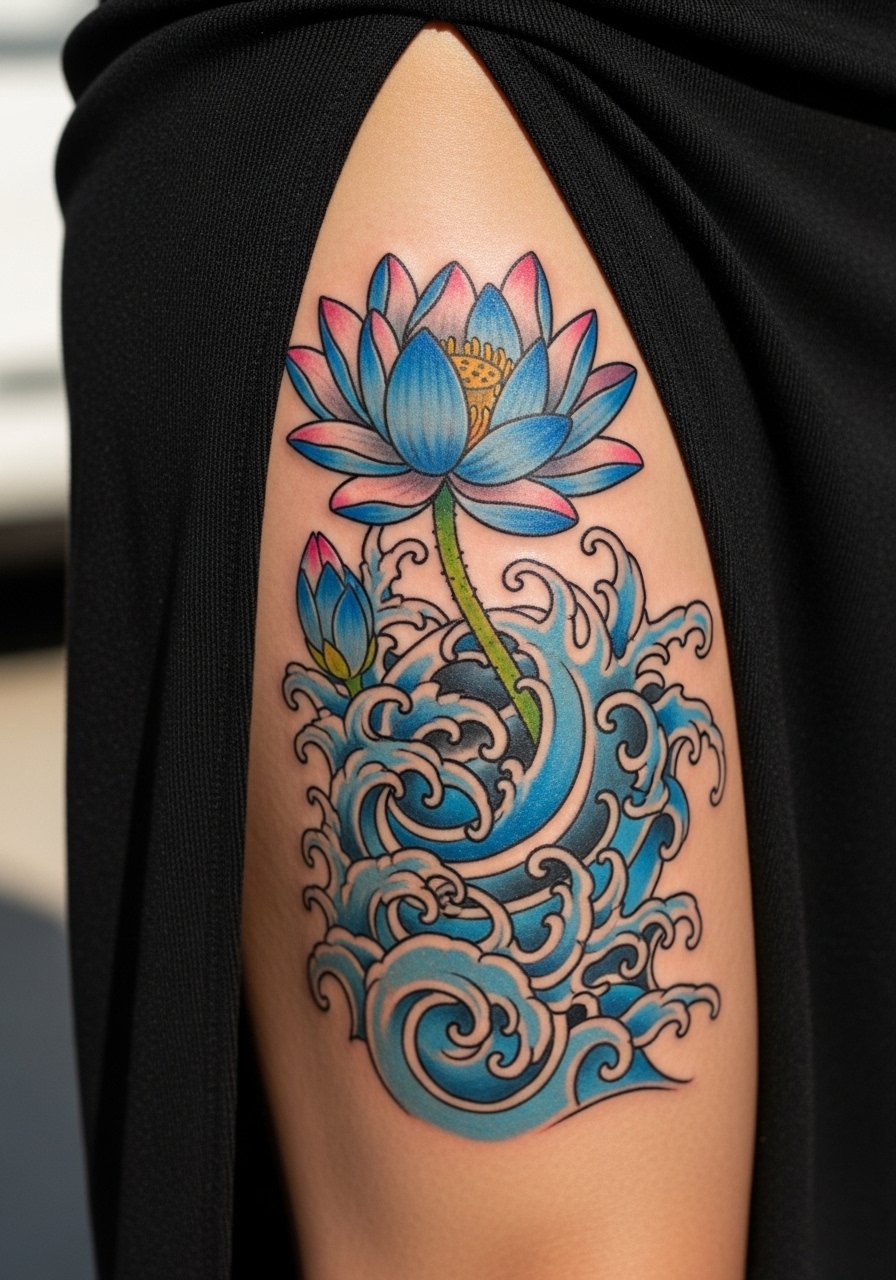
Lotus designs pair naturally with wave motifs to give symbolic depth and visual motion on the thigh. For longevity, ask your artist for slightly bolder outlines around the petals and layered color saturation in the center. Watercolor-style washes across the leaves look beautiful fresh but can fade into a bruise-like wash without heavy saturation under them. Artists debate bright washes versus solid fills for leg pieces. One camp prefers delicate washes and accepts earlier touch-ups, the other pushes saturation and deeper layering for durability. For studio day, bring drawstring linen shorts so the thigh is easy to access and stays comfortable between sessions. Expect medium pain and 2 to 3 sessions for a medium-sized thigh lotus.
4. Chrysanthemum Crest on Shoulder
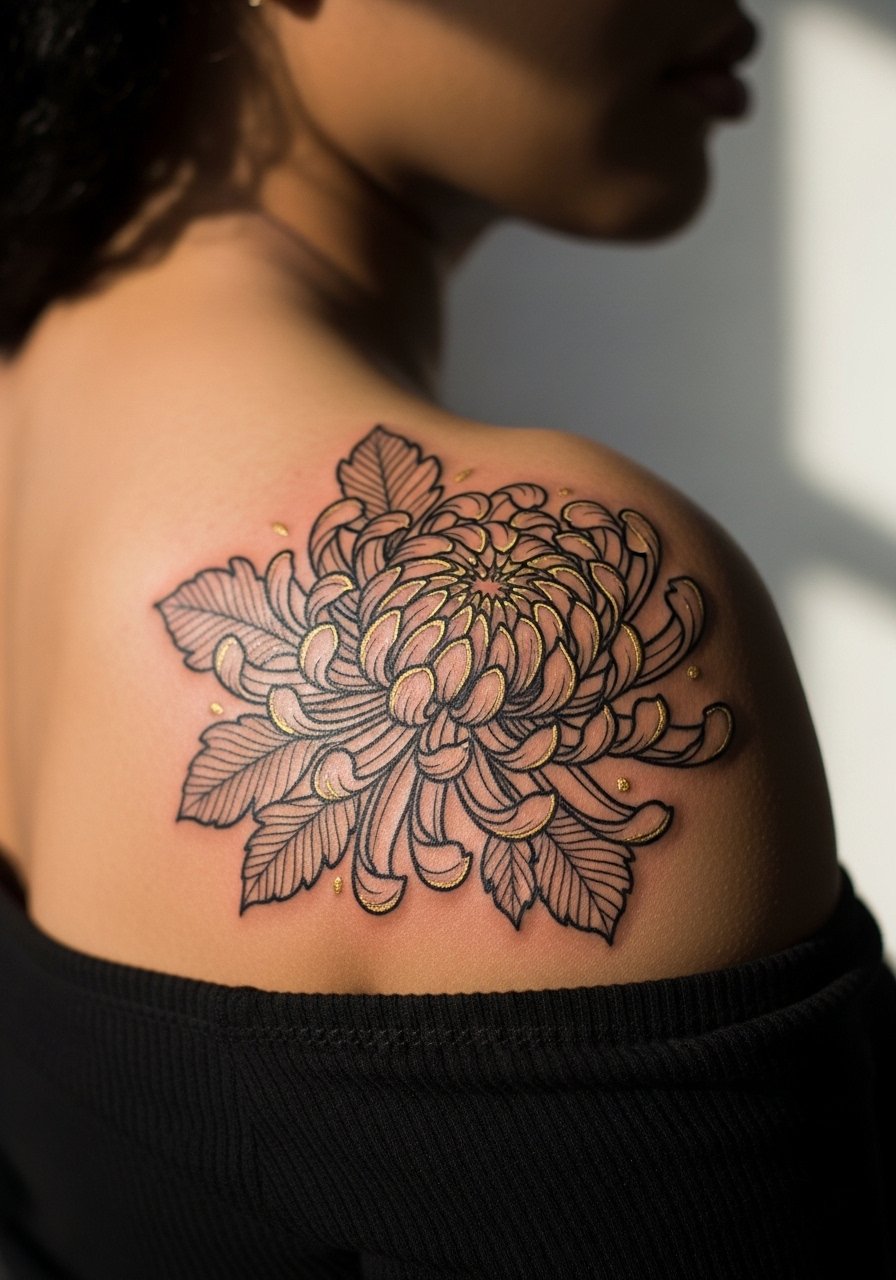
A chrysanthemum crest is compact and regal when placed on the shoulder blade. Ask your artist for clear petal separation and a simple crest border so the silhouette reads from across a room. Common mistakes include overly dense petal clusters that age into muddy areas because contouring was lost at the edges. This sits well under sleeveless clothes and pairs with off shoulder crop tops for an imperial vibe. The shoulder tolerates long sessions reasonably well and often needs only one or two sittings for small to medium crests. Mention from the start whether you want subtle metallic ink accents so the artist can plan saturation layers.
5. Wisteria Vine Wrapping Calf
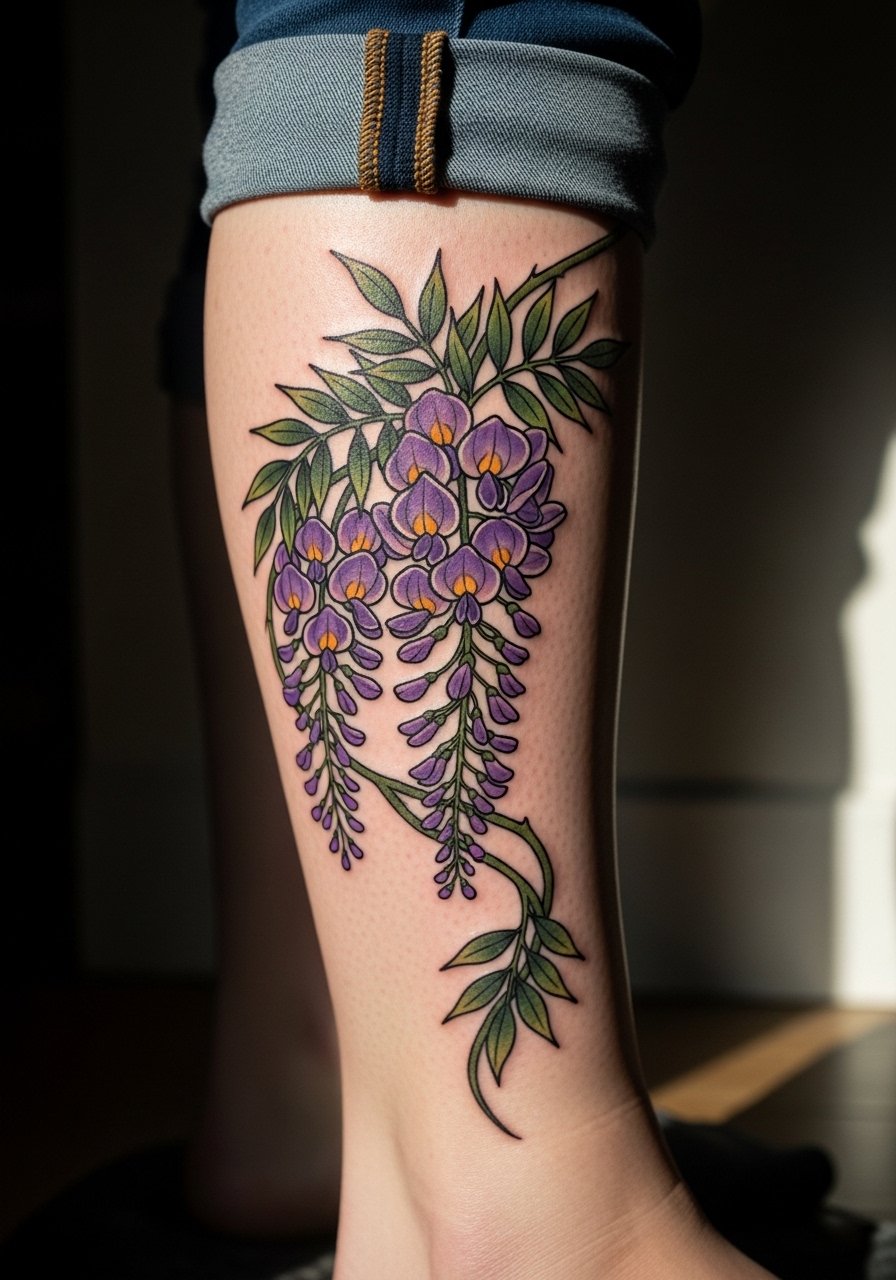
Wisteria works as a vertical, wrapping motif that reads elegantly on the calf because it moves with gait. During consultation, point out the flow direction so the vine complements muscle curves rather than fights them. People sometimes request tiny clustered blooms that merge after a year, so give each pod breathing room and ask for slightly heavier leaf outlines. Wear cigarette ankle pants rolled at the ankle for sessions and when showing off, roll them to reveal the cascade. Calf sessions are moderate in pain and usually finish in two sittings for a medium wrap.
6. Red Spider Lily Along the Collarbone
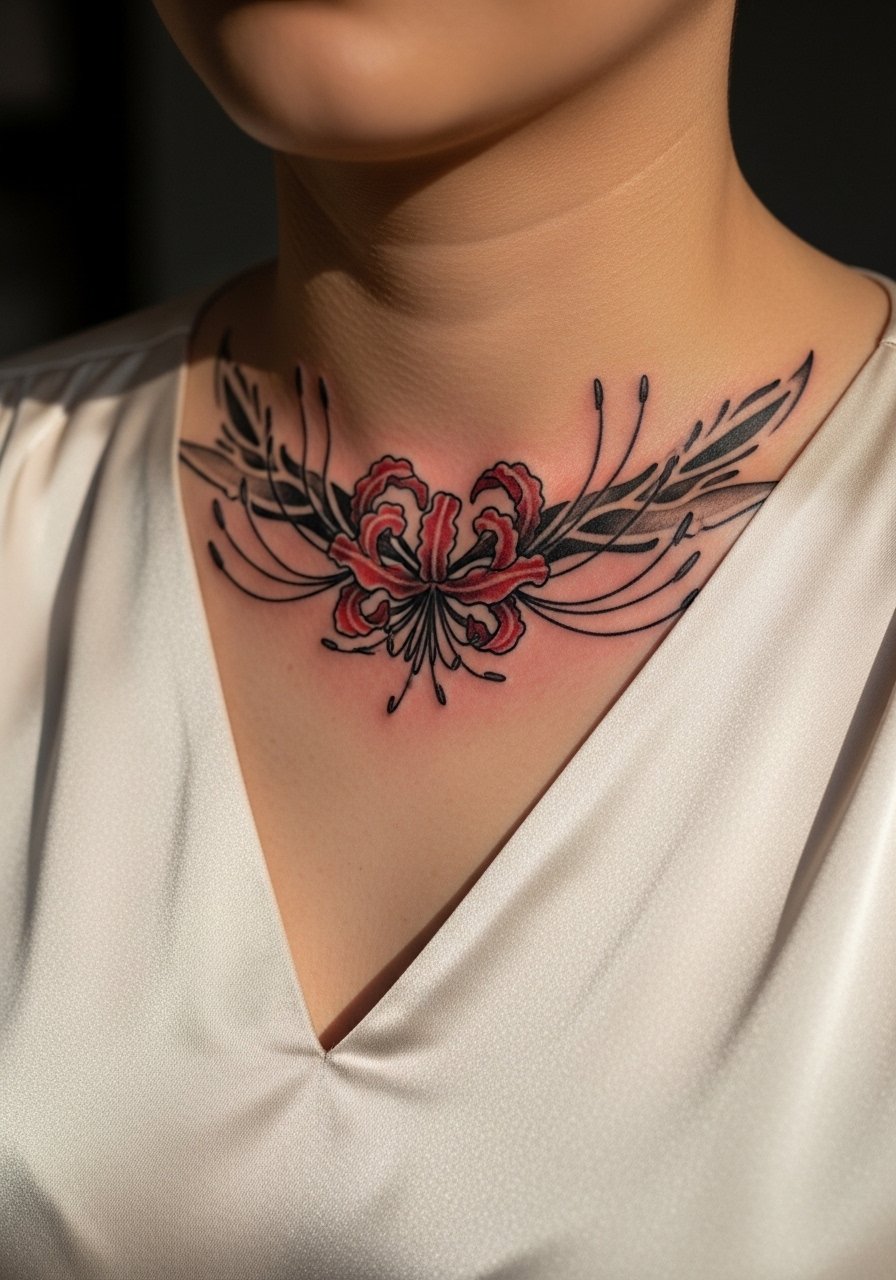
Collarbone pieces read delicate and dramatic because the bone gives natural contrast. For a red spider lily in blackwork, specify strong contour lines and leave negative space around the stamen to prevent clogging. Artists split on fine line in this area. One group says the thin skin over bone blurs quickly, the other argues precise depth and spacing keep fine line readable. Ask your artist which approach they favor and whether they recommend heavier contour for longevity. Session wear should be a v neck silk blouse or strapless layer so the collarbone is accessible without rubbing from straps. This area is sharp on the pain scale but heals clean when cared for.
Studio Day Picks
Those collarbone, calf, and shoulder sessions above ask for different prep than a wrist piece. A few targeted items smooth the session and the first week for the designs we just covered.
-
Stencil transfer paper kit. Lets you preview line placement on curved areas like the shoulder and calf before the needles touch skin.
-
Topical numbing cream. Applied as directed before a collarbone or thigh session reduces sharp surface pain without changing saturation when the artist knows you used it.
-
Thin protective film roll. Useful on the collarbone and calf to guard healing ink from clothing friction in the first 48 hours.
-
Fragrance-free gentle body wash. Cleans healing areas without stripping pigment from the finer contour work in shoulder and forearm pieces.
-
Aquaphor healing ointment. Thin layers in the first few days lock in moisture and help fine line work settle without clogging the tiny needle channels.
7. Plum Blossom (Ume) Micro on the Wrist
A micro plum blossom on the inner wrist is a low-commitment way to carry hanakotoba about perseverance. Because wrists are high-friction, ask for slightly bolder linework and avoid overly tiny dots at the center that can fade fast. A common mistake is requesting micro stipple in the wrist center that blurs into a gray speck. Plan on a single short session and a possible touch-up around year two if the piece gets daily wear. For session wear, a short sleeve linen tee keeps the area accessible. The wrist is visible every day so modest contour helps the design read longer.
8. Hibiscus Single Bloom on the Ankle
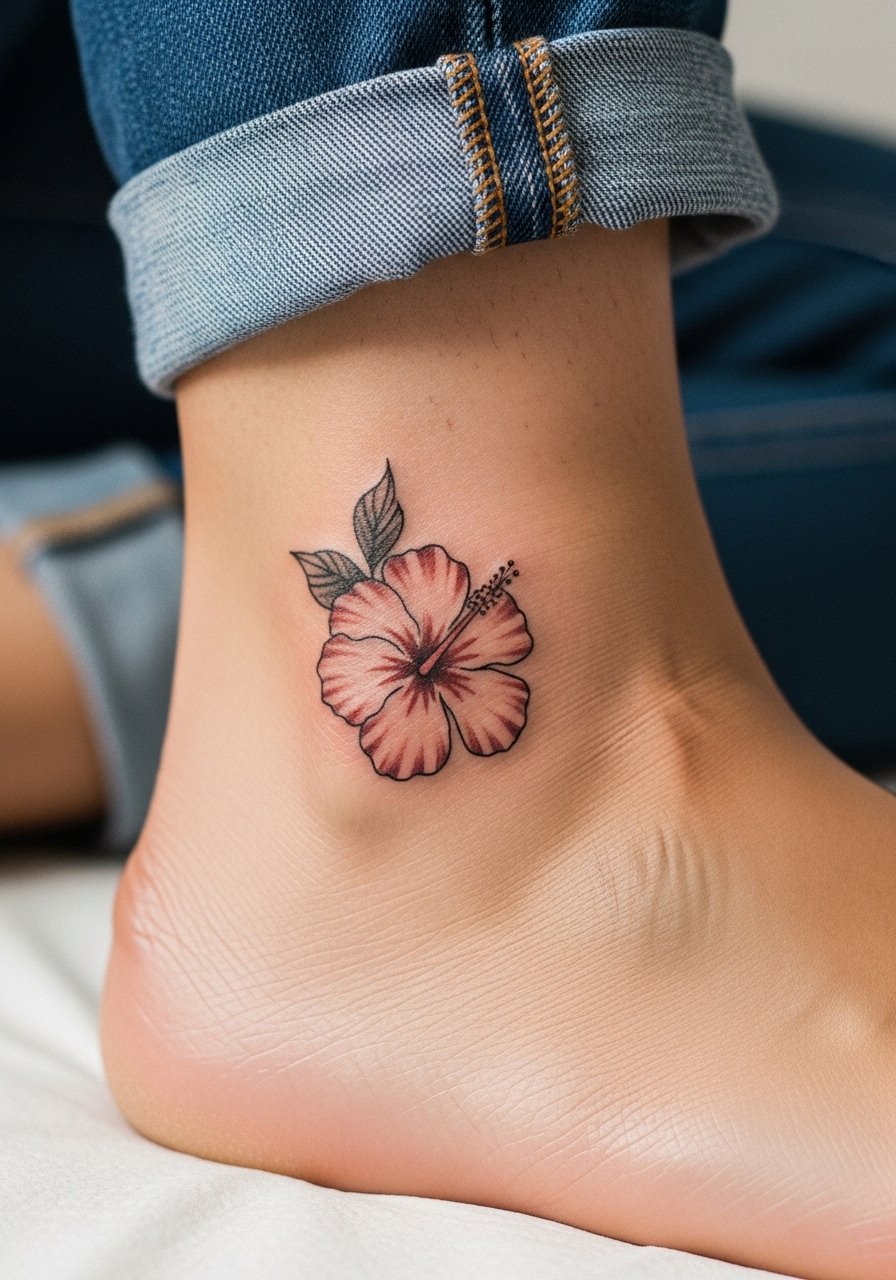
Ankle hibiscus pieces are charming and small, and they are forgiving if placed on the outer ankle where skin is less mobile. Tell your artist you want a clear negative space around the bloom so the small color fields do not merge with time. The biggest practical issue is friction from socks and shoes, so expect to alter footwear briefly after the session. For showing the piece, wear rolled jeans or sandals and keep the ankle clear during healing. The session is short and usually low to moderate pain. Plan for one session and a light touch-up if the color migrates after heavy walking seasons.
9. Orchid with Bamboo on the Ribcage
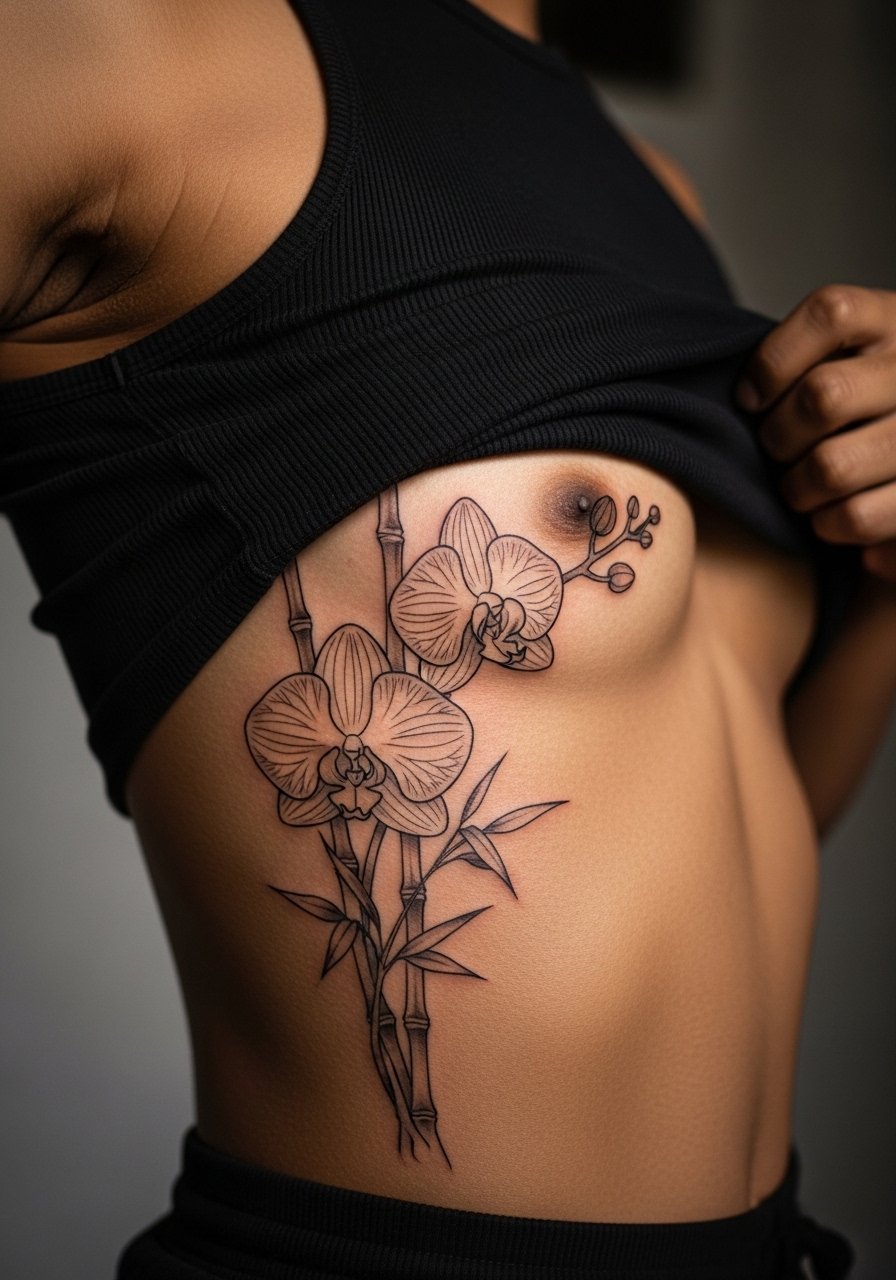
Ribcage orchids read as hidden elegance but the ribcage is a high-movement, high-pain placement. Artists are divided on fine line here. One camp says the stretch and motion blur delicate outlines quickly. The other camp holds that with slightly deeper needle placement and spaced linework the design will settle well. Tell your artist whether you prefer longevity over hairline detail so they can adjust line weight. For session wear, bring a sleeveless flowy tunic you can lift without tugging the area. Expect a painful session but a piece that reads beautifully once healed and usually needs a touch-up in two to three years.
10. Maple Leaves Falling on the Upper Back
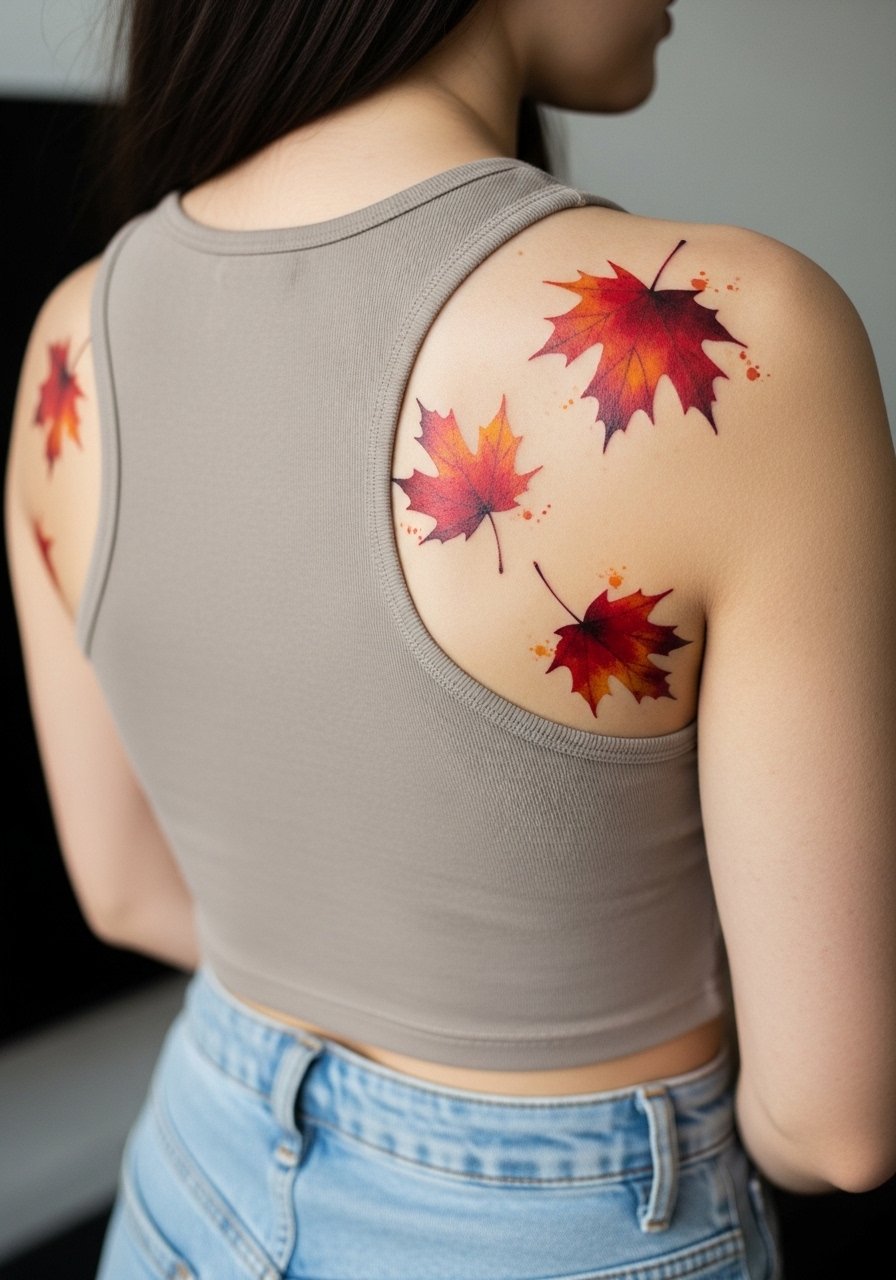
A back panel of falling maple leaves works when you want seasonally poetic color that moves across broad skin. Watercolor washes are dramatic fresh and often require more touch-up later. If you want the wash look and also durability, ask the artist to anchor the washes with subtle outlines on key leaves. A common misstep is trusting translucent washes alone for a large back piece, which can become diffuse over time. Session wear should be a loose tank that you can pull aside. Upper back canvases tolerate longer sessions and multiple sittings, so plan accordingly and expect several visits for a large composition.
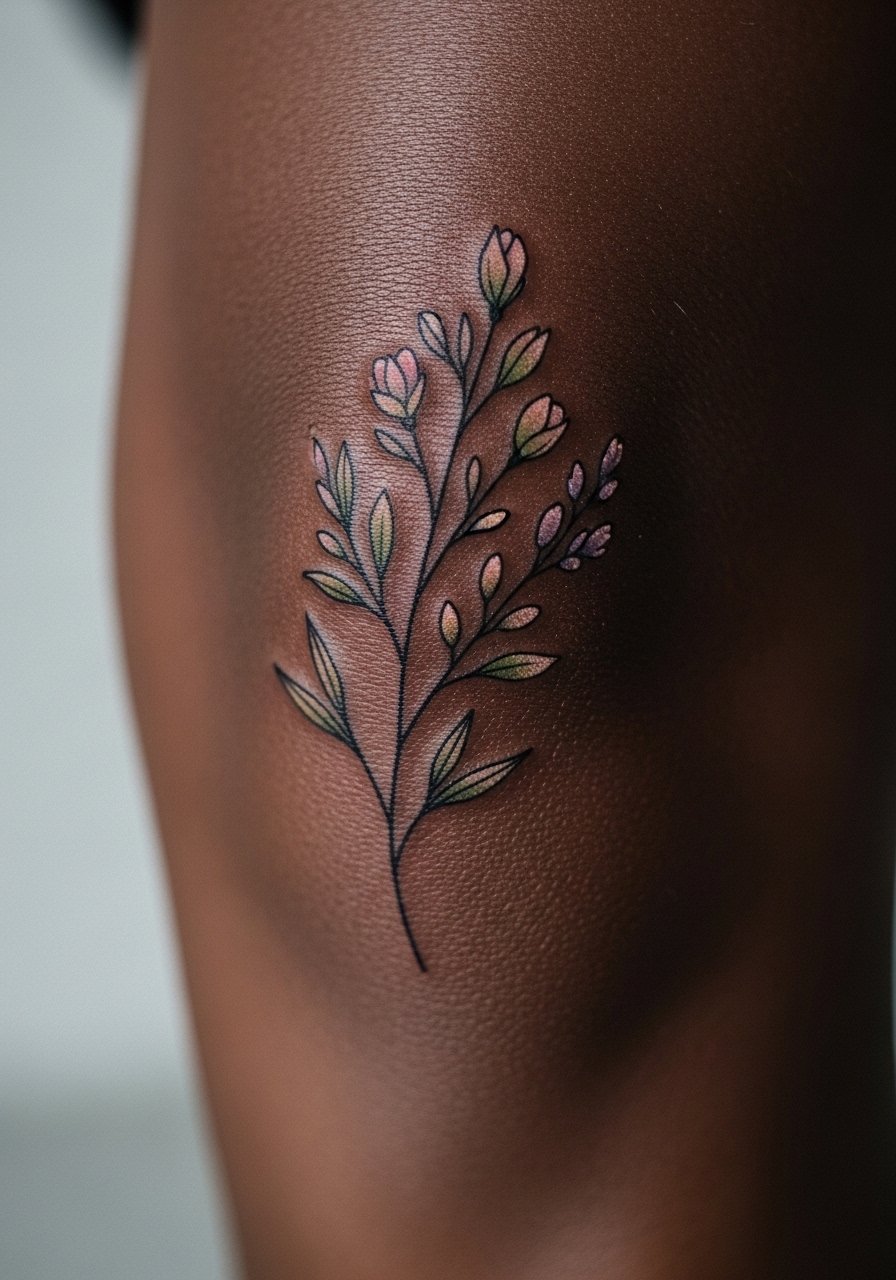
11. Bellflower Cluster on the Inner Arm

The inner arm takes line and detail well if given space. Bellflower clusters make lovely vertical pieces that follow the arm shape. During the consult, explain you want petal separation and soft color, not dense fill. A mistake people make is compressing too many blooms into a narrow strip which crowds the linework. Inner bicep skin can be stretchy so expect more tenderness during healing and mention any weight changes that could affect settling. For session wear, bring a loose tank top so the artist can access the area cleanly. Small clusters usually finish in one to two short sittings.
12. Peach Blossom with Koi on the Inner Thigh

This combination reads as a narrative piece when the koi arcs around the peach blossoms. Inner thigh work asks for careful session planning because the area is intimate and can be prone to friction during healing. In the consult, clarify how much negative space you want around each blossom so the koi and flowers do not visually crowd as pigment settles. Many people underestimate aftercare clothing needs for inner thigh pieces, so bring loose bottoms for the week after. Expect 3 to 5 sessions depending on scale and strong soreness during and right after each sitting. Discovery for specialized artists can start on directories focused on traditional Japanese work.
13. Camellia Accent Behind the Ear and Neck
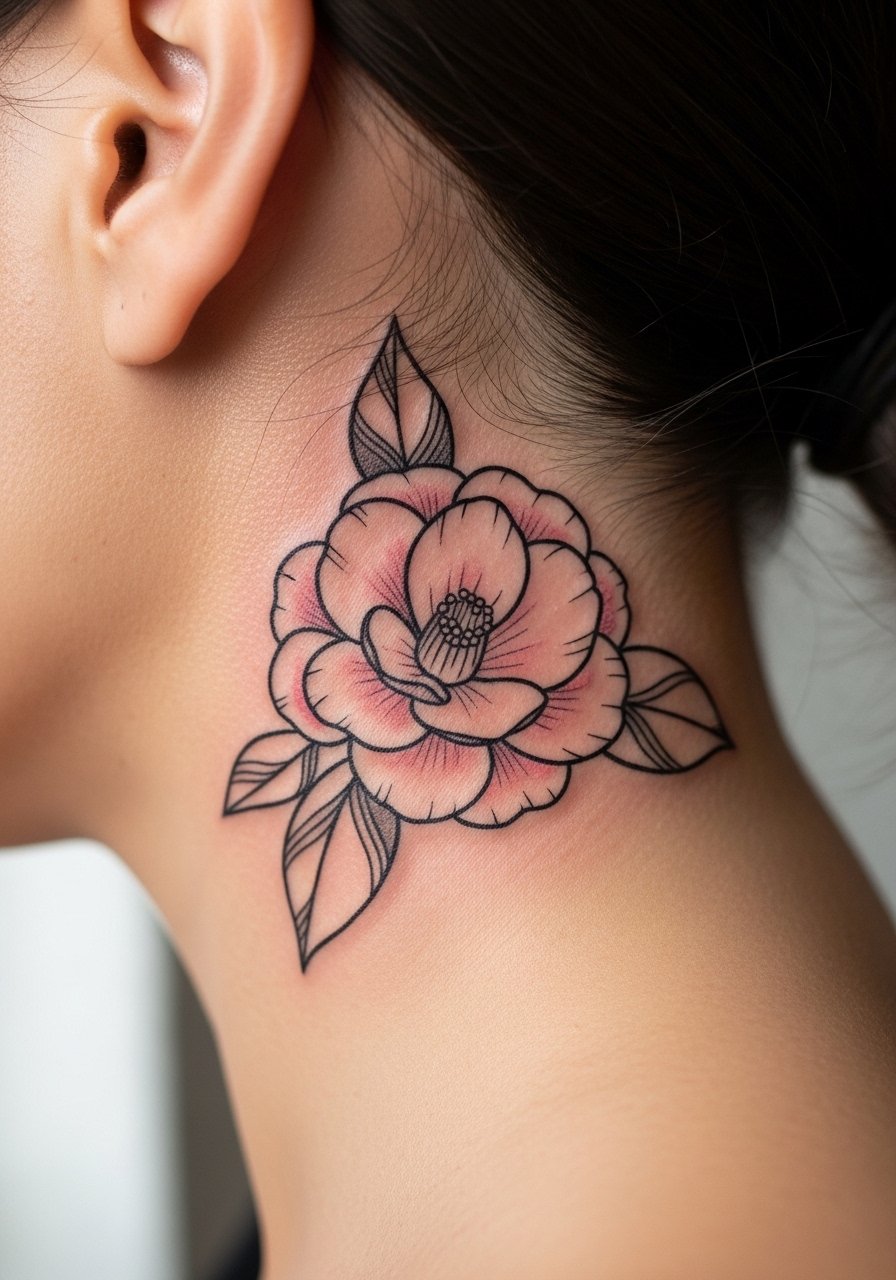
A small camellia tucked behind the ear reads intimate and decorative while staying mostly discreet. With behind-the-ear placements you need an artist experienced in tight placement because skin here shifts with hair and sleep. Keep the bloom small with clear negative space at the edges to avoid blurring over time. For studio day, wear hair up so the artist can see the area clearly. This placement belongs to the more sensitive categories for image prompts, so always confirm how your hair and wardrobe will affect healing. Most behind-ear pieces are completed in a short session and need minimal touch-up if protected from daily rubbing.
14. Hydrangea Cluster on the Lower Back
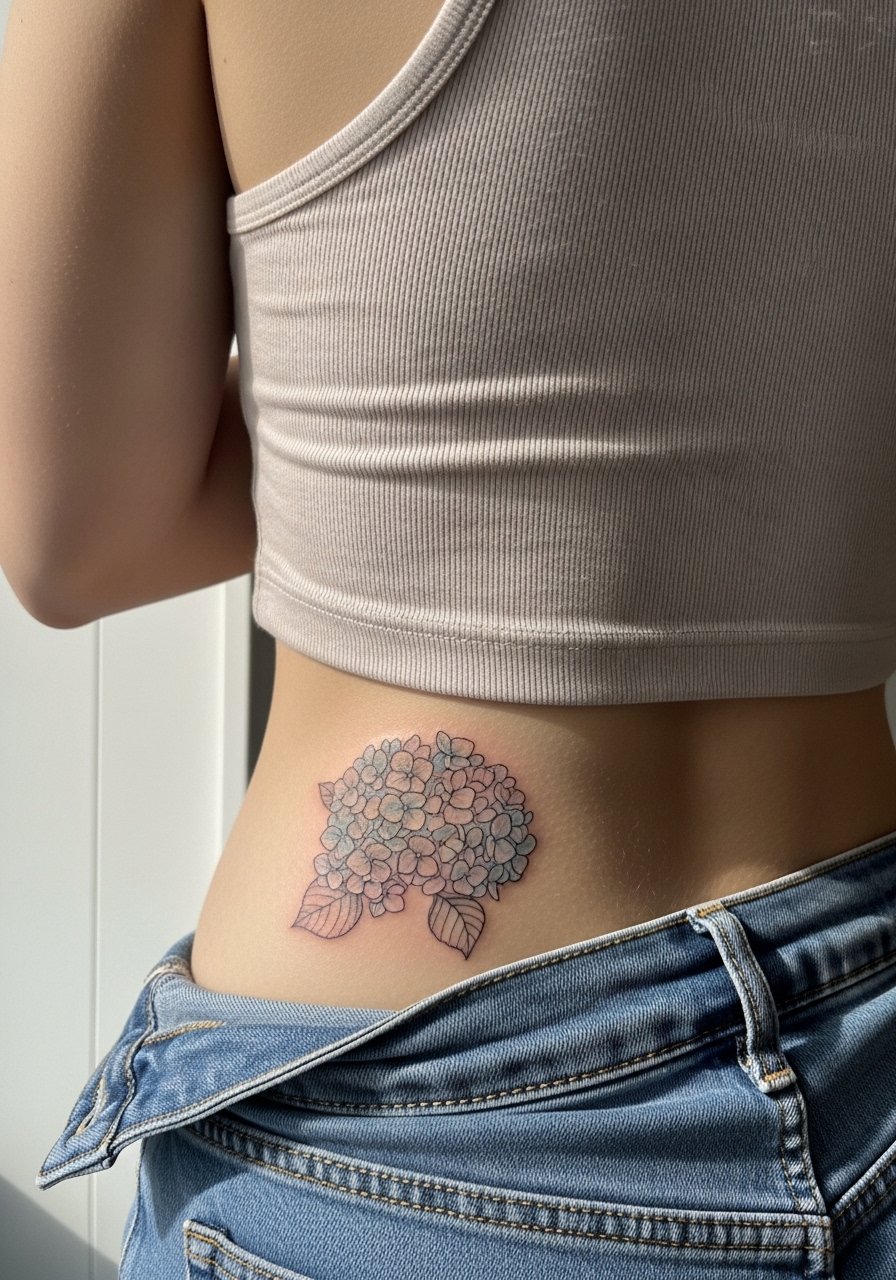
Hydrangea clusters make a soft, textural field when placed on the lower back. The lower back tolerates larger compositions and gives a flat canvas for careful stipple or dot work in the blooms. People sometimes neglect clothing friction from waistbands, which can scuff fresh ink. In the consult, ask for a design that keeps heavy saturation away from immediate waistband areas. For session wear, a tank top with high-waisted bottoms that can be lowered slightly helps access and protects healing skin. Expect one to two sessions for a medium cluster and a touch-up if you often wear tight belts or low-rise pants.
15. Iris Sprig Across the Upper Arm
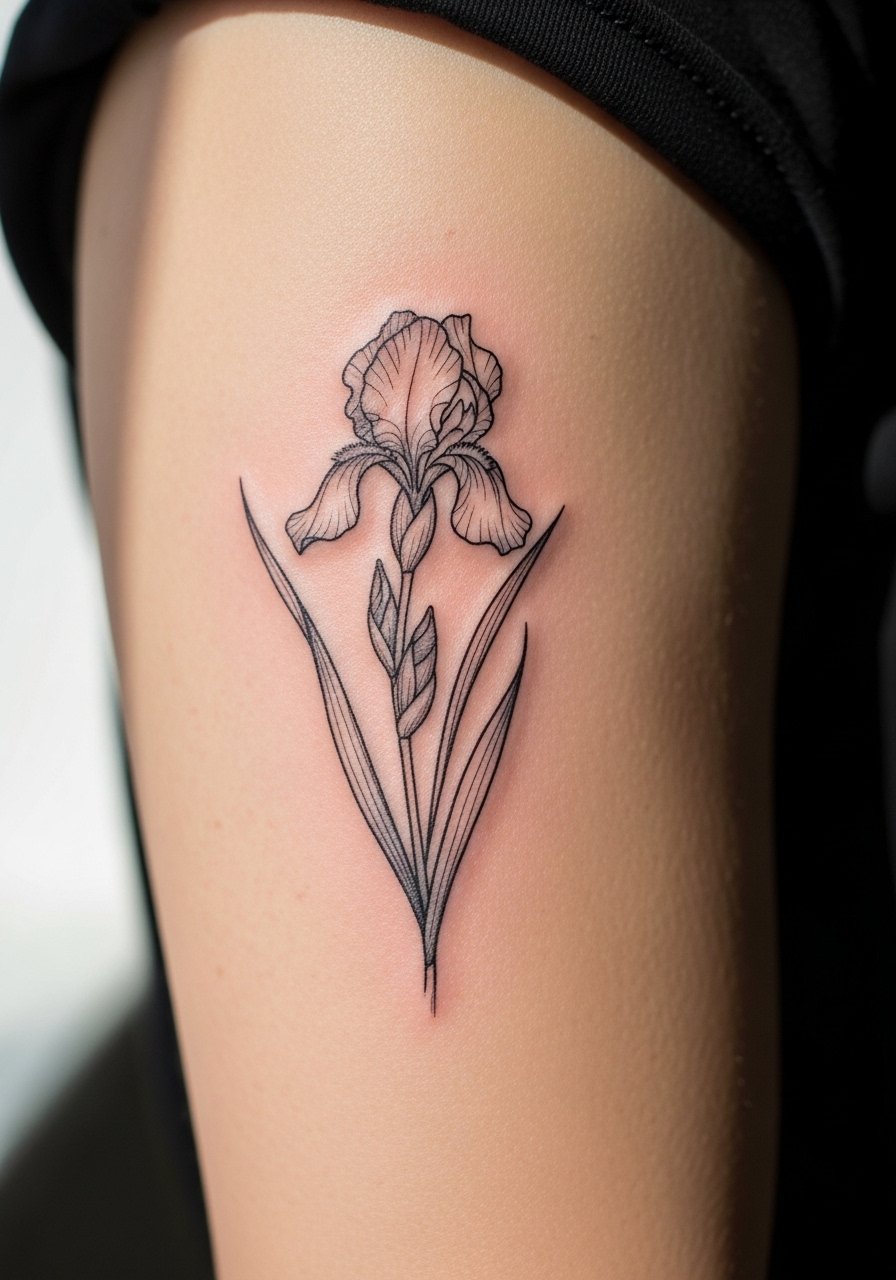
An iris sprig is a great upper-arm piece because it follows the natural curve of the muscle and reads elegantly even at small scale. Ask your artist to keep the main stem slightly bold and the petal edges softer so the silhouette stays readable over time. Avoid asking for very tight internal dot work in the petals since that can fill in and lose its texture. Upper-arm sessions are medium on discomfort and ideal for people who want a visible but not overpowering floral accent. For showing it off, sleeveless shirts or rolled sleeves let the iris sit naturally on the arm.
16. Morning Glory Curving Around the Ankle
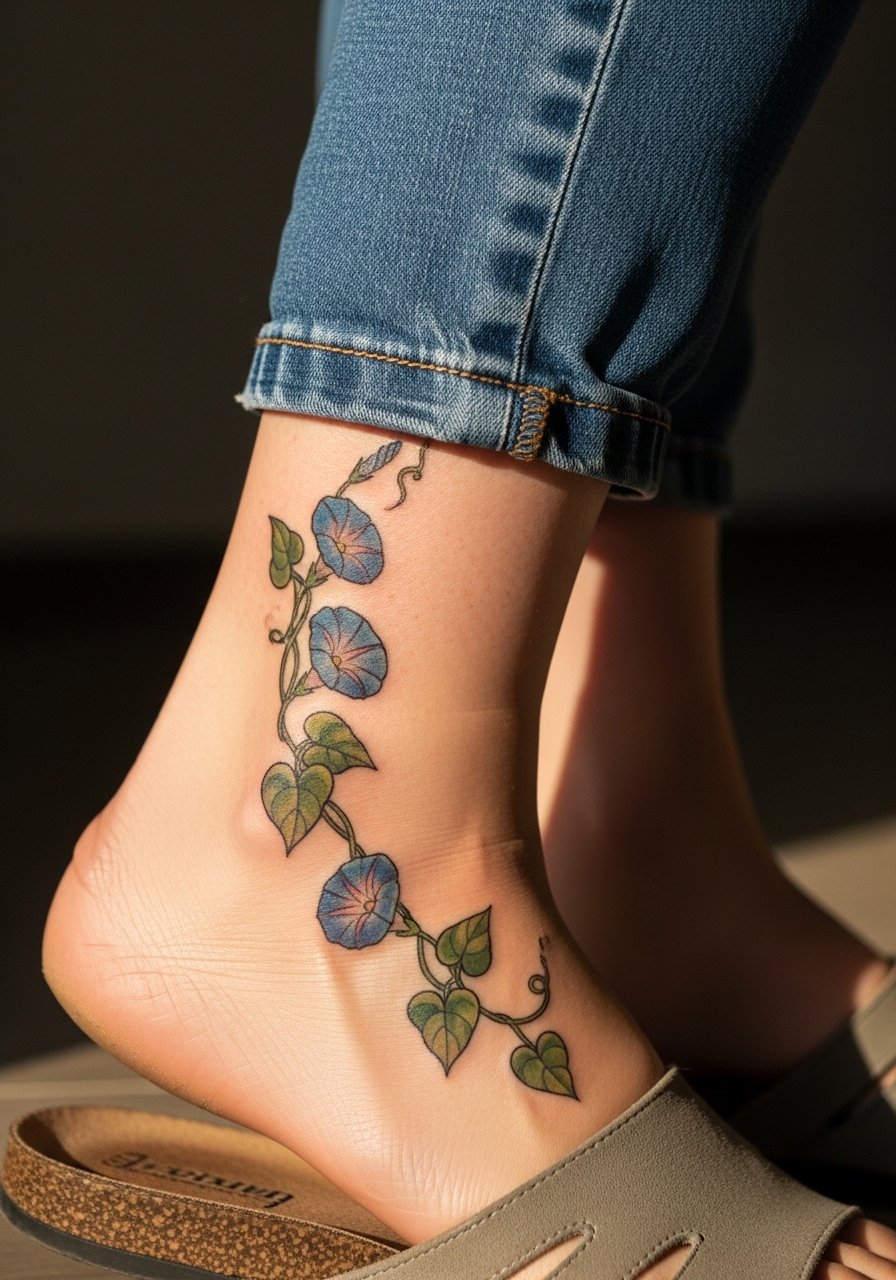
Morning glory is a classic small vine that suits ankle placement because the bloom faces outward when you walk. Ask for slightly stronger outlines at the base of the bloom so the shape does not soften into the ankle's motion lines. People forget ankle friction from socks and shoes and then wonder why color faded unevenly. After the session, keep footwear loose for a few days. Ankle sessions are short and usually low pain, with touch-ups common after lots of walking or a heavy summer. Pair with rolled jeans or sandals to show the work.
17. Small Camellia Cluster on the Sternum
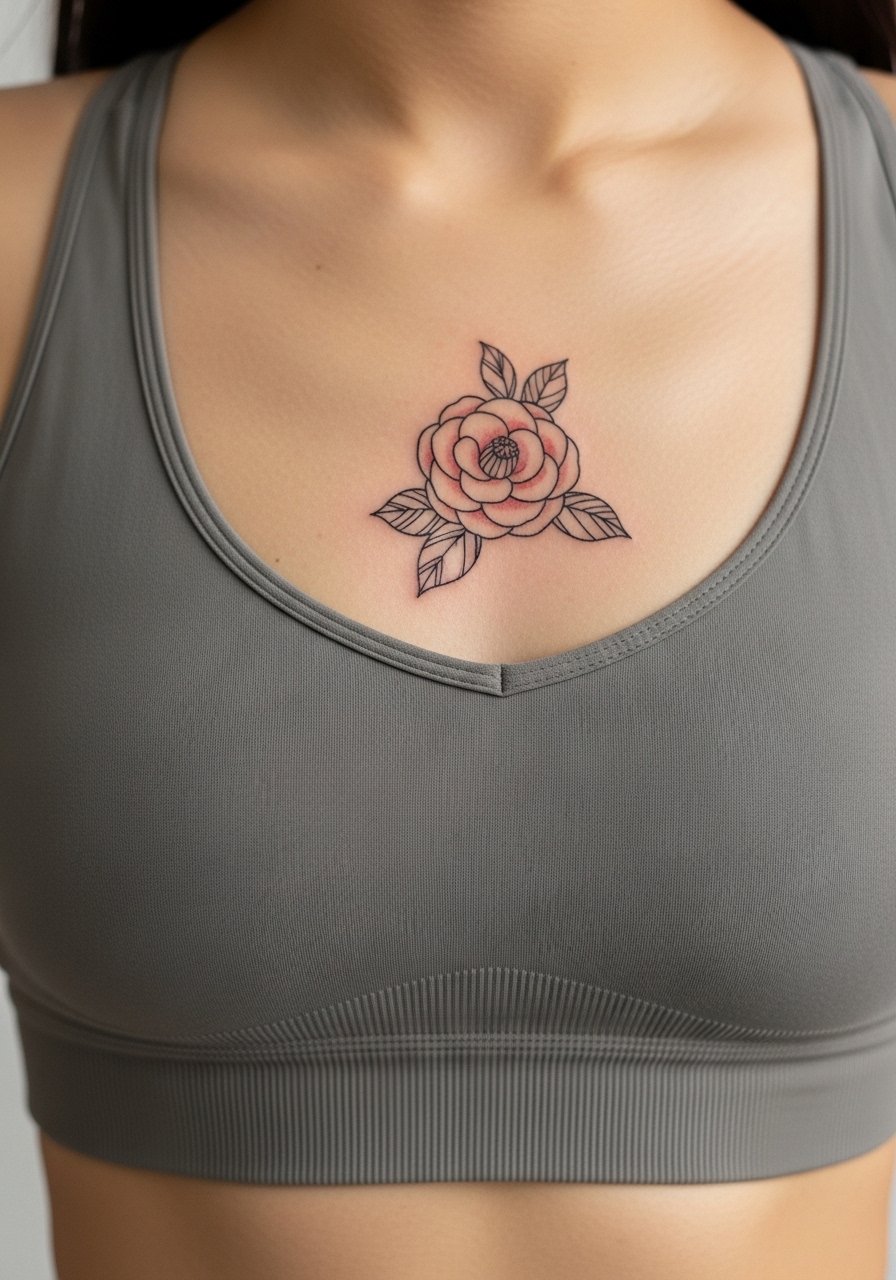
Sternum placements read intimate and centered but require specific studio techniques because of bone proximity and stretching with breath. Ask your artist whether they recommend slightly thicker contour lines to keep petals distinct as the area moves. Some artists avoid dense fine line across the sternum for longevity reasons. If you plan to show it, choose tops that sit above or below the design to avoid constant rubbing. The session can be painful due to ribs and breastbone, so plan shorter sittings. Expect a touch-up in a couple of years if you prefer very delicate detail.
18. Minimalist Cluster Above the Ankle
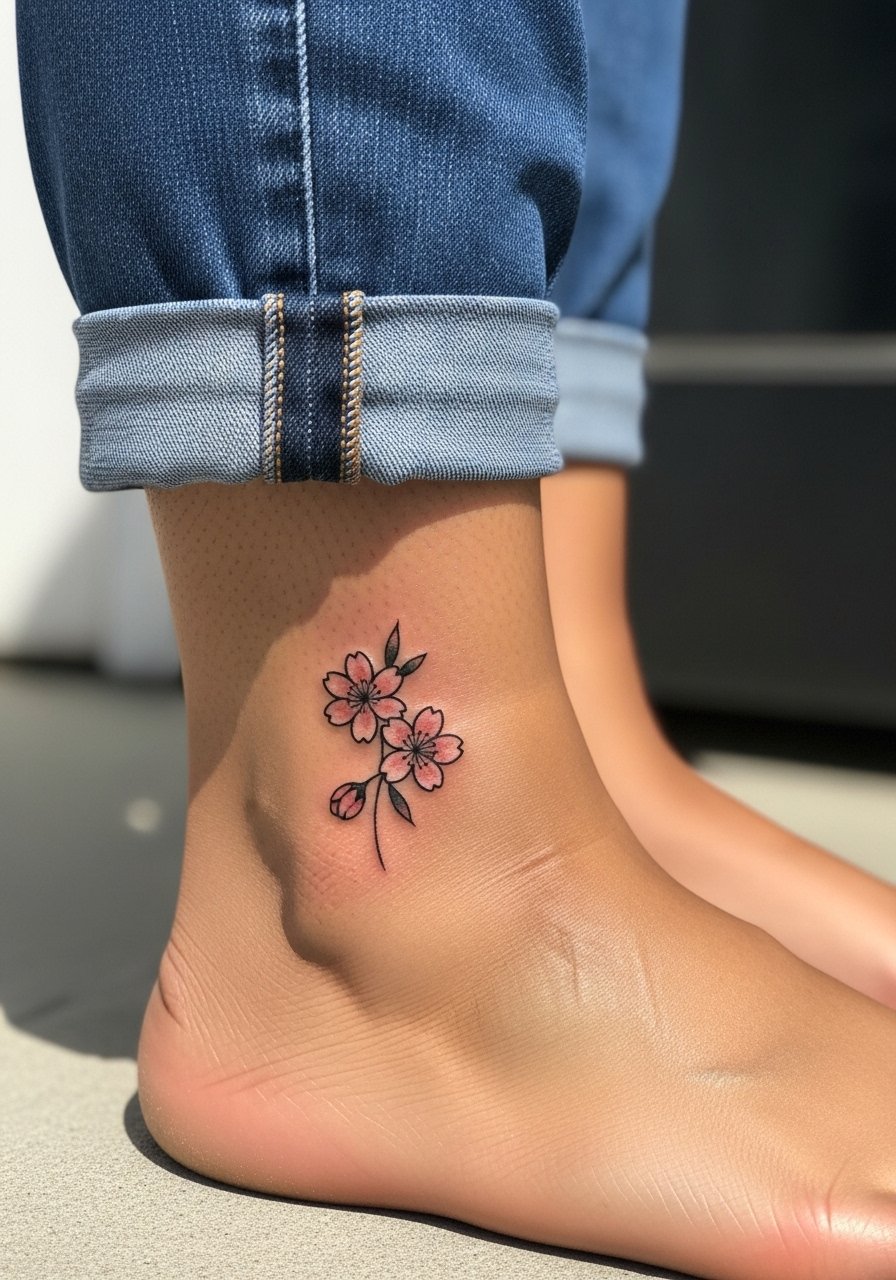
A tiny cluster above the ankle is perfect when you want subtle symbolism without a large commitment. For durability, ask that the artist keep the petals spaced and use a slightly bolder anchor line on each bloom. The usual mistake is compressing petals so the design becomes indistinct after everyday wear. This area is exposed to moderate friction so expect light touch-ups in a few years. For session day, wear pants you can roll up easily so the ankle is free and clean. One short session usually does the trick.
19. Mixed Floral Sleeve Section for Upper Arm
A mixed floral panel gives you variety without committing to a full sleeve. When composing, tell your artist which flower should be the focal point and which should play a supporting role so the eye has a clear path. A common error is equalizing detail across all blooms which flattens the piece. Upper-arm skin is forgiving for detail and usually handles stipple shading or whip shading well. This placement responds nicely to sleeveless and tank tops. Expect 1 to 3 sessions for a medium panel depending on saturation and shading choices.
20. Single Petal Finger Accent
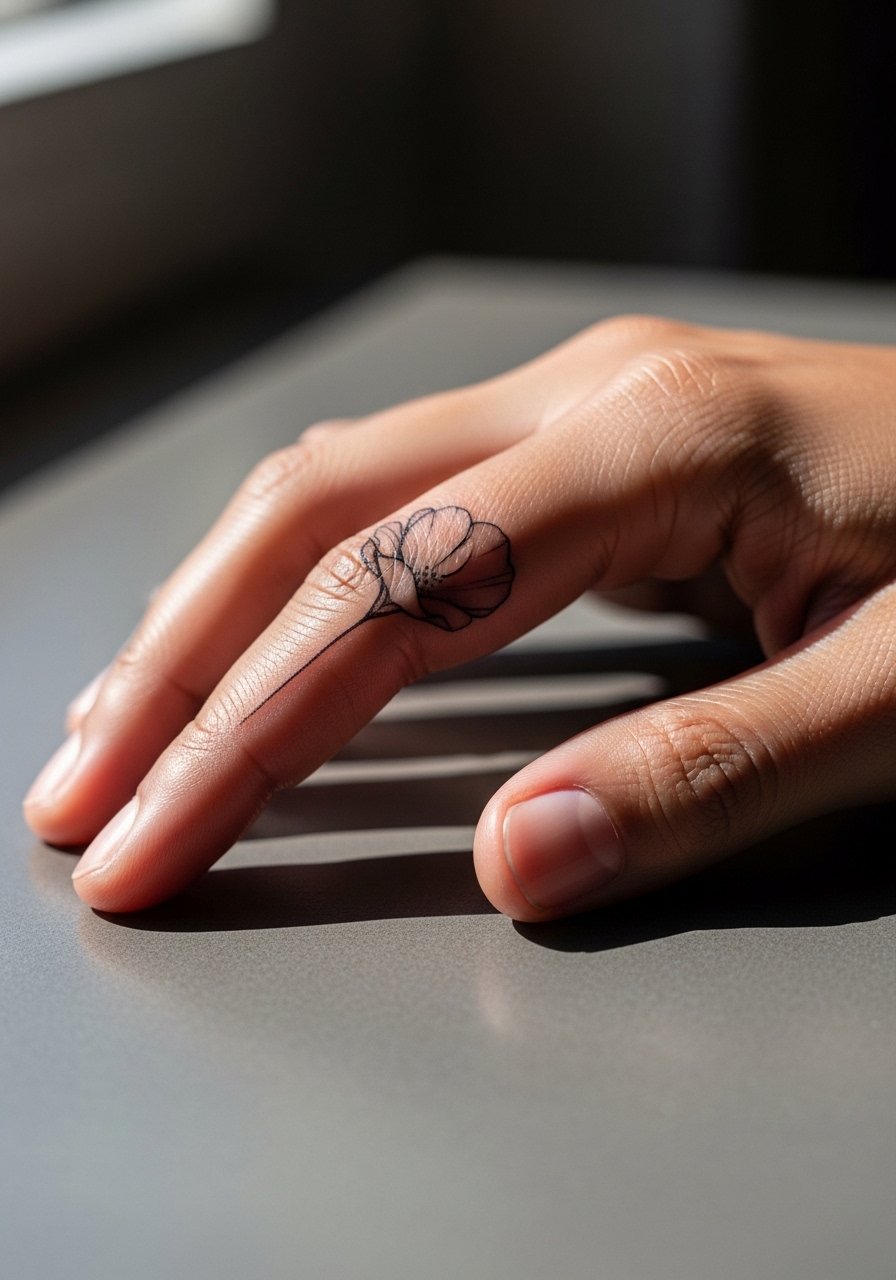
Finger accents are visible and small, and they require a different expectation for longevity. The skin on fingers cycles faster and has more friction, so micro work there often fades sooner. Ask your artist for a slightly bolder contour and agree on a realistic touch-up schedule. Many people treat finger tattoos as semi-permanent and expect to refresh them every couple of years. During the session the artist may recommend quick, focused passes to limit swelling. Keep the finger dry and protected while it heals and plan for a possible touch-up.
21. Garden Sprig Behind the Knee
The area behind the knee moves constantly, so small motifs like a garden sprig must be given spacing to avoid distortion. Ask your artist to place the main stem where the skin folds least and to avoid dense internal shading that will crease. A common mistake is centering the design on the exact fold which leads to early breakdown. For session day, wear loose bottoms that can be raised slightly without pressure. Expect moderate pain because of skin thinness and mobility and a likely touch-up once the area settles.
Frequently Asked Questions
Q: How much should I expect to plan for touch-ups on fine line Japanese blossoms, especially on ribs and wrists?
A: Fine line pieces on high-movement zones such as ribs and wrists commonly need one touch-up between year one and year three. The exact schedule depends on line weight, how much sun the area sees, and daily friction. Ask your artist what they typically recommend for that placement during the consult.
Q: Are watercolor or wash-style maple leaves a poor choice if I want longevity on the upper back?
A: Watercolor washes look gorgeous fresh but often need more frequent touch-ups than anchored color blocks. If you want the wash aesthetic and also longevity, request subtle outlines or anchored saturation points so the composition keeps its form as the washes soften.
Q: What should I wear to a thigh session for a lotus or koi piece so the artist has easy access and I stay comfortable?
A: Bring loose drawstring shorts or a high slit maxi skirt you can lift without compressing the area. Comfort makes longer thigh sessions more manageable and keeps the artist from working around awkward clothing.
Q: Do blackwork chrysanthemum crests need less maintenance than colored peony sleeves?
A: Blackwork crests often hold shape well because heavy contour resists fading, but they can still lose crispness if lines are too fine. Peony sleeves with deep saturation may need color refreshes over longer timelines. The difference often comes down to the initial saturation and your sun and skincare habits.
Q: Where's the best place to find artists who specialize in Irezumi or traditional Japanese flower work if I want a proper peony sleeve?
A: Start with tattoo directories and portfolios on places that categorize by style, search hanakotoba or Irezumi tags, and look for portfolios with healed photos of large work. Visiting shops in person and asking about full-sleeve experience helps you confirm the artist's comfort with scale and saturation.
Q: Will a small ankle hibiscus hold up if I walk a lot and wear boots seasonally?
A: Ankle pieces experience friction from boots and socks which can lighten color and flatten fine detail. If you walk frequently, ask for slightly bolder outlines and plan a touch-up after hiking or heavy boot seasons. During healing, keep footwear loose and avoid pressure on the area.
Q: How should I balance delicate detail and longevity when choosing a ribcage orchid or sternum camellia?
A: Be explicit with your artist about whether you prefer delicate hairlines or a design that will hold longer with stronger contour. Some artists adapt by spacing lines and using slightly heavier contour so the overall shape endures while still keeping a refined look. Trust your artist on technique but ask to see healed examples of similar placements first.
