
Fine line panther eyes and watercolor splashes dominate feeds, but what lasts on skin over three years often looks different. Heavy blackwork and well spaced detail age into readable shapes while some intricate trends need touch-ups sooner. These picks pair visual risk with practical advice on placement, session wear, and how each idea tends to heal so you book smarter and sit with fewer surprises.
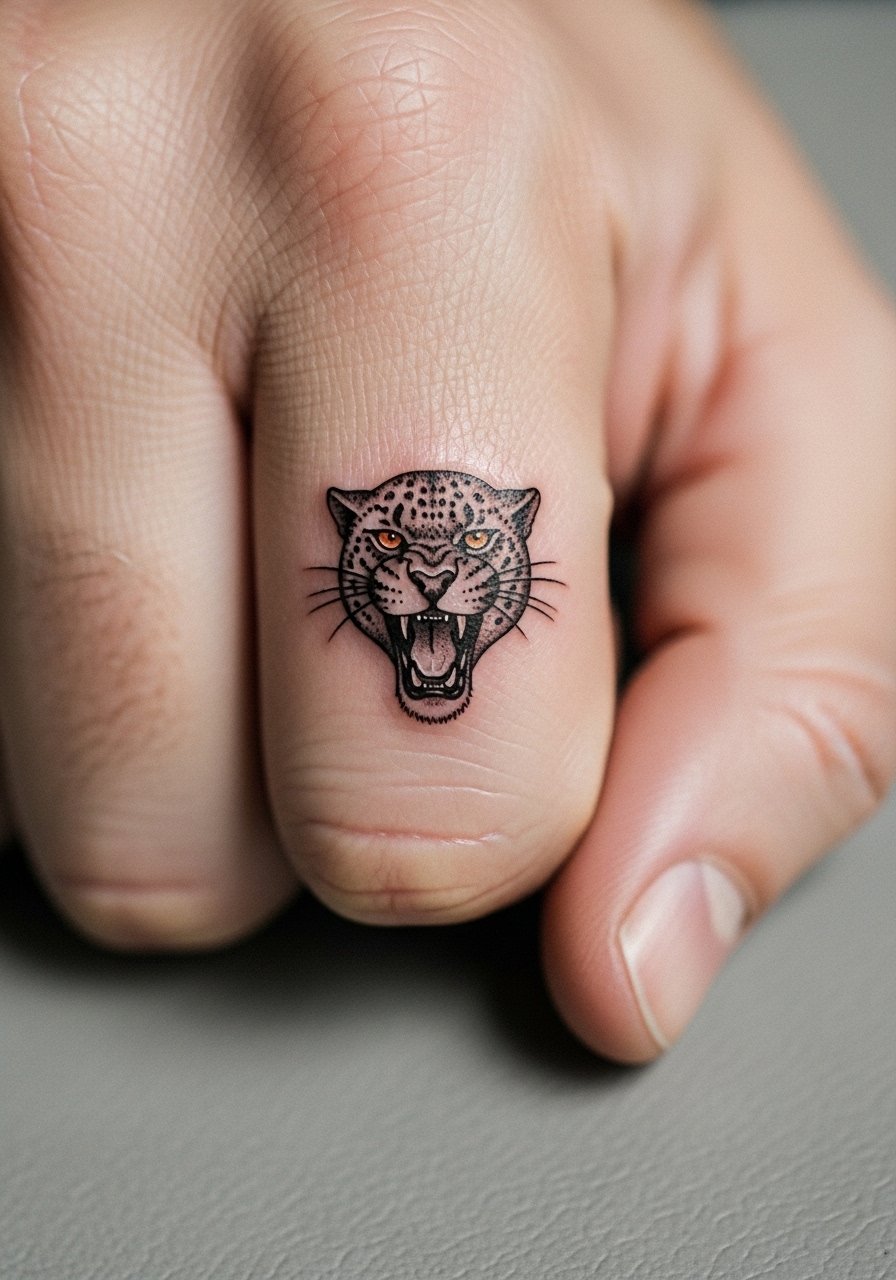
1. Edgy Snarling Panther Head Portrait on the Forearm
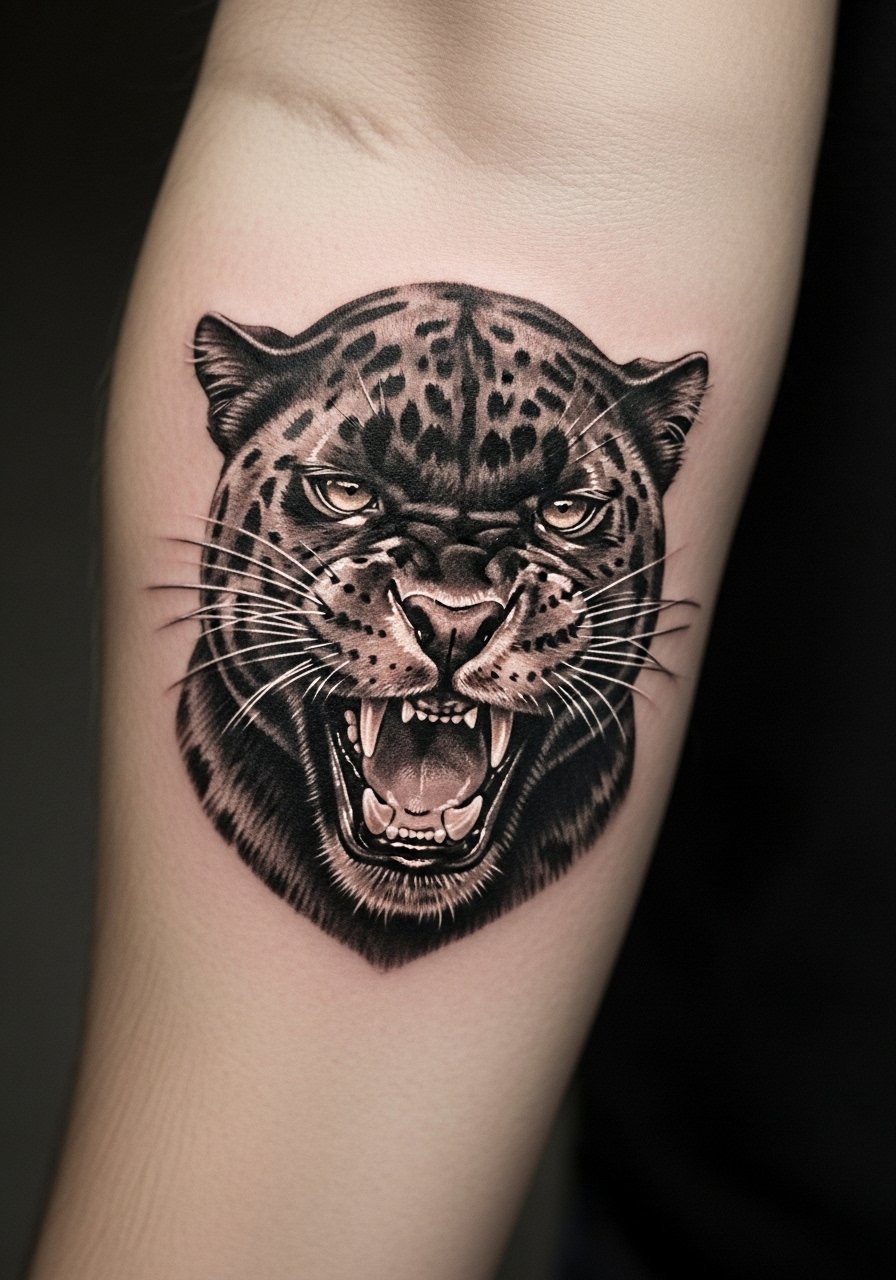
A forearm snarling head reads fast in a crowd and usually takes two sessions for the depth most people want. I recommend this for someone who wants a compact, highly legible focal piece and who wears rolled sleeves often. Tell your artist you want solid saturation and slightly thicker whisker linework so the teeth and snout hold up rather than getting muddy. A common mistake is asking for extreme hairlike strokes packed too tight, which tend to blur at year three. Expect moderate pain, an hour or two per session, and touch-up talk around year two. Trust your artist on spacing, and wear a fitted black t-shirt to show it off after healing.
2. Chrome-Embossed Panther Prowling Silhouette on the Upper Arm

This blackwork approach uses white highlights to sell a metallic finish, and the upper arm gives the space for a 6 to 8 inch composition. In consultation, point at photos that show the exact placement of white instead of saying "make it shiny." The staging that mimics a watch bezel or metallic edge is what makes a chrome illusion pop. Sessions run longer than a flat silhouette because the highlights require careful packing. The upper arm handles saturation well so longevity is good. For the session, wear a sleeveless athletic tank so the artist has clear access and you stay cool.
3. Traditional Panther Claw Slash with Dripping Blood on the Shoulder
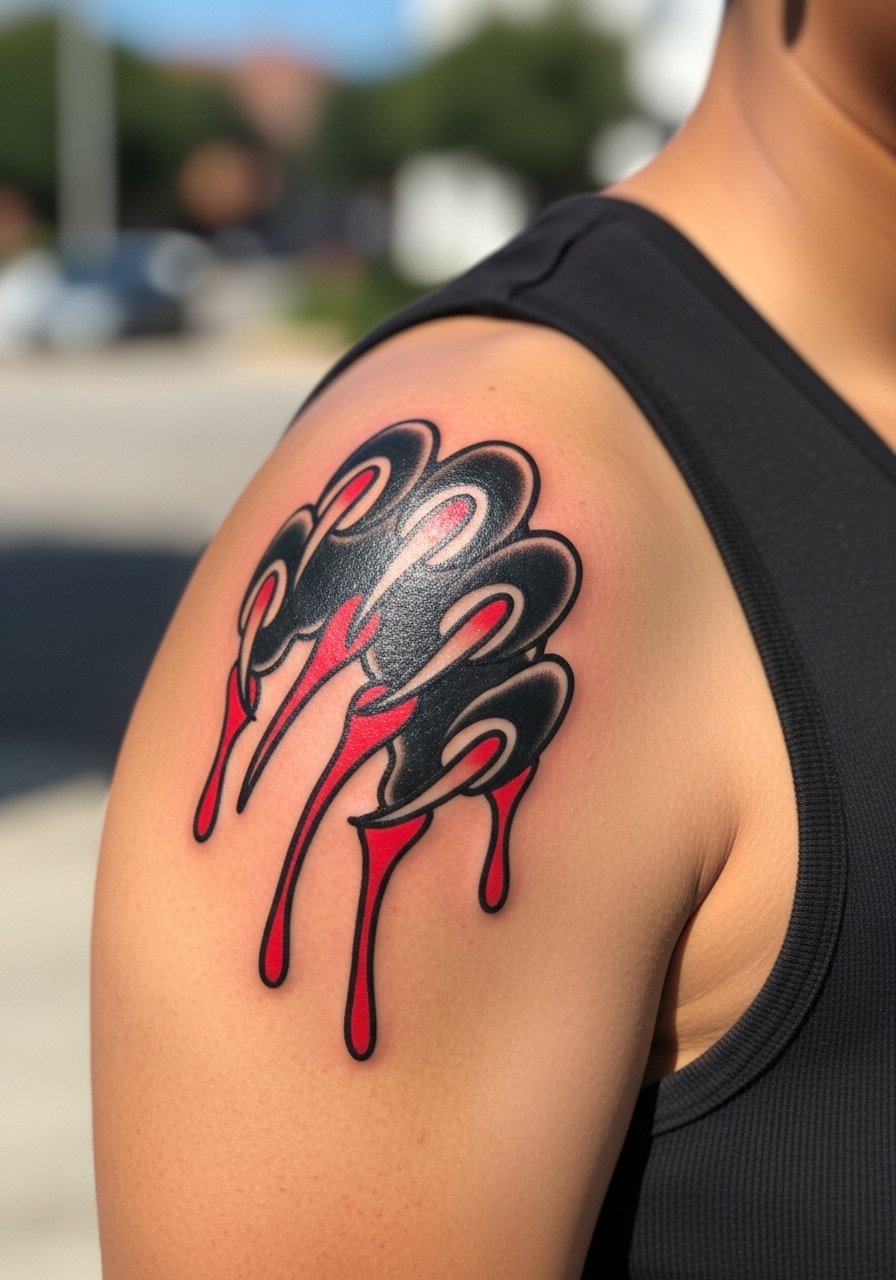
This shoulder piece lives in the flash tradition with thick outline and selective color. The shoulder accepts bold black lines and red accents that keep working even as the ink settles. A common error is shrinking the design to fit under a tight strap. Go slightly larger so the claw spacing breathes. It is low to moderate pain and usually finishes in one session. For showing it off, pair with an off shoulder blouse or sleeveless tee. During the consultation ask for the outline to be drawn heavier than your reference if you plan to place it where friction from straps is likely.
4. Realistic Black Panther Mid-Leap Across the Ribs
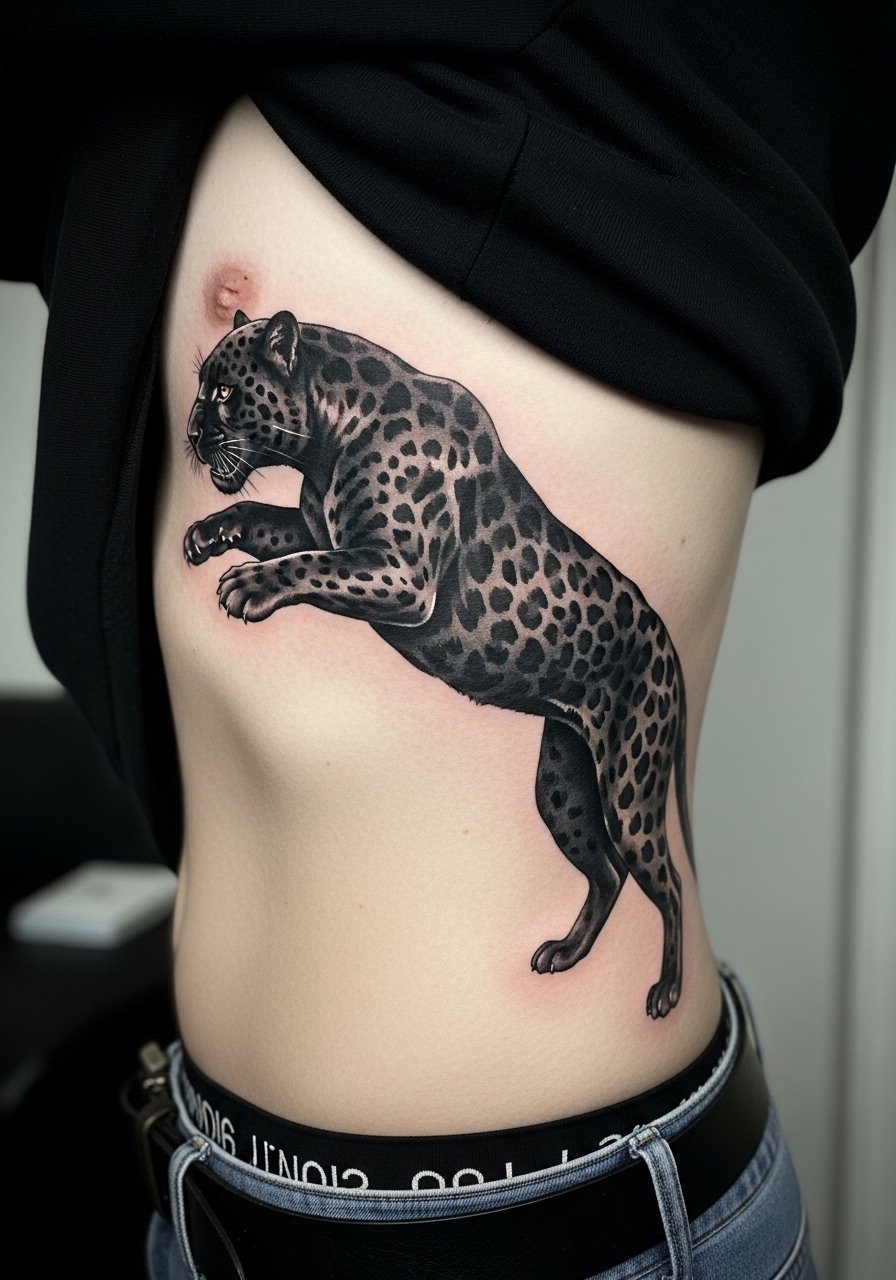
Fair warning, the ribcage is a high pain zone and a mid-leap realism piece can take several long sessions to layer in shadow and form. Artists disagree on numbing cream and long sessions. One camp says numbing masks the feedback the artist needs and can lead to overworking. The other camp prefers numbing for patient comfort during multi-hour realism sessions. Decide before you book and ask the artist where they stand. Also plan sessions spaced out to let saturation settle and check for blowout risk along curved ribs. Expect touch-up discussion around year two for tiny highlights. For session wear bring a cropped top you can lift so the artist has unobstructed access.
5. Minimalist Panther Eyes with Geometric Glare on the Wrist

Wrist placements demand compromise between subtlety and longevity. Fine filled eyes in tight geometry look razor sharp at six months and risk softening by year two unless the artist spaces negative areas well. There is an active debate about fine line on hands and wrists. One group warns that wrist skin and constant washing blur close lines by year two. The other says with correct needle depth and spacing, fine work stays crisp. Ask specifically about touch-up timelines in your consultation and be prepared for a touch-up at year two. Pair a fresh wrist piece with a thin silver chain bracelet on the opposite wrist so the subtlety reads intentional.
6. Neo-Traditional Panther Skull Hybrid on the Thigh

A thigh placement lets you merge death motifs with smooth feline curves without worrying about constant friction. The neo-traditional language means selective color and strong contours that age predictably. When you sit with your artist, describe which part you want dominant, the panther or the skull, and whether colors will be used sparingly for highlights. Thighs are forgiving if your weight fluctuates, but large compositions need staged sessions to avoid tattoo fatigue. For showing it off, slim black joggers or ripped denim shorts frame the piece well. Plan for two to three sessions and set a touch-up check six to twelve months after the last sitting.
Studio Day Picks
The wrist, forearm, and thigh pieces above need different prep than chest and ribcage work, and a few focused items make the session and the first week easier.
-
Stencil transfer paper kit. Lets you test stencil placement at home so a forearm snarling head or wrist eyes read how you expect before the needle touches skin.
-
Topical numbing cream. Applied per instructions it can ease long ribcage or thigh sessions when your artist supports its use.
-
Thin protective film roll. Useful for finger and wrist work that sees constant hand washing and friction during the first few days.
-
Fragrance free gentle body wash. Cleanses delicate areas like the thigh and forearm without irritating fresh linework.
-
Aquaphor healing ointment. A thin layer in the very first days helps keep fine line and shaded work from drying out while the skin begins to close.
7. Ignorant Style Panther Outline with Jagged Edges on the Forearm
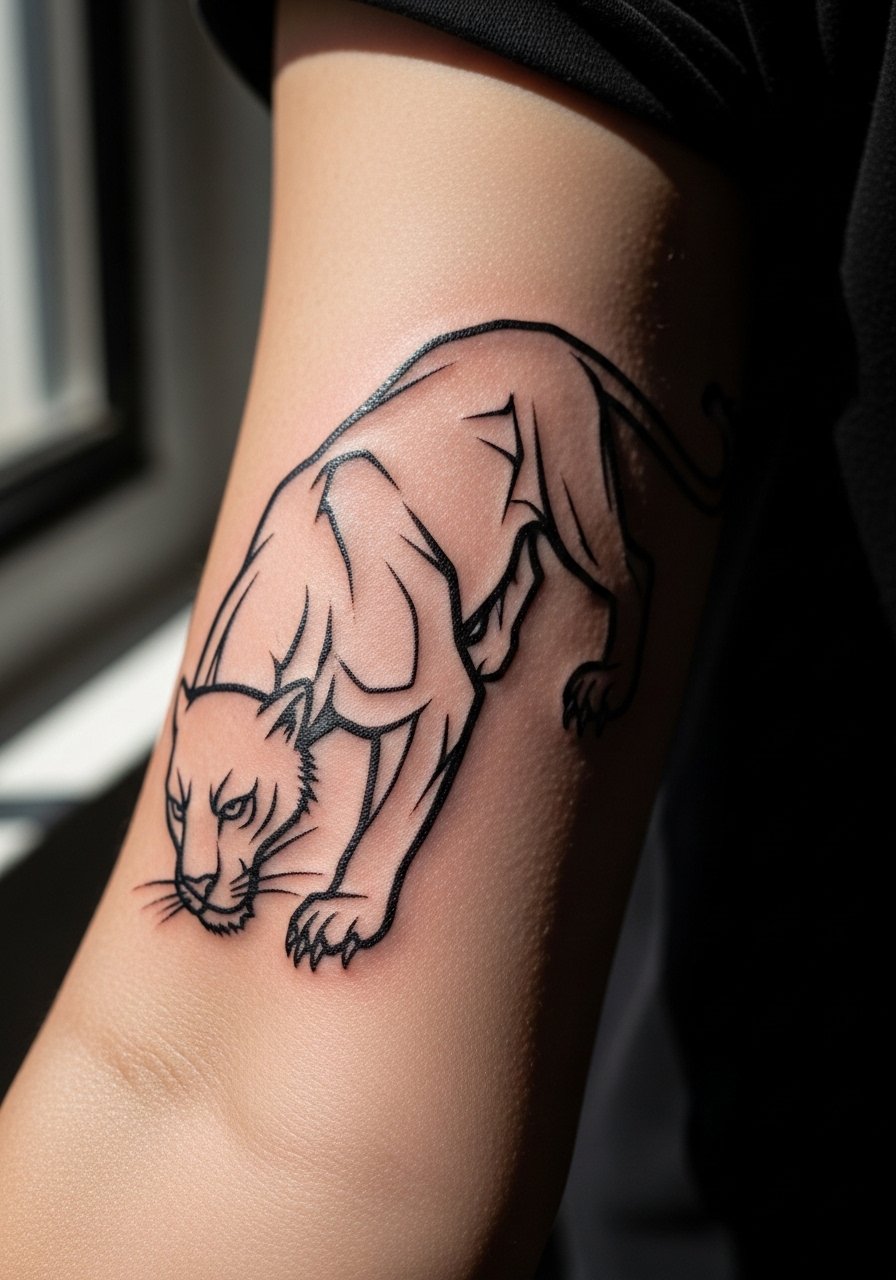
Ignorant style embraces a raw, hand drawn aesthetic and the forearm gives the visible gallery space for jagged strokes. Tell your artist you want uneven stroke weight and avoid requesting photorealism on this one. The common mistake is asking for both perfect symmetry and punk irregularity. Pain is moderate and sessions are short, which makes this a good pick if you want to build a sleeve of patchwork pieces. Expect that the single-needle look will soften a bit at year three, and plan for touch-ups if you want the edges redefined. For immediate show-off, roll sleeves or add a black leather cuff bracelet to frame the area.
8. Ornamental Panther Mandala Frame on the Upper Back
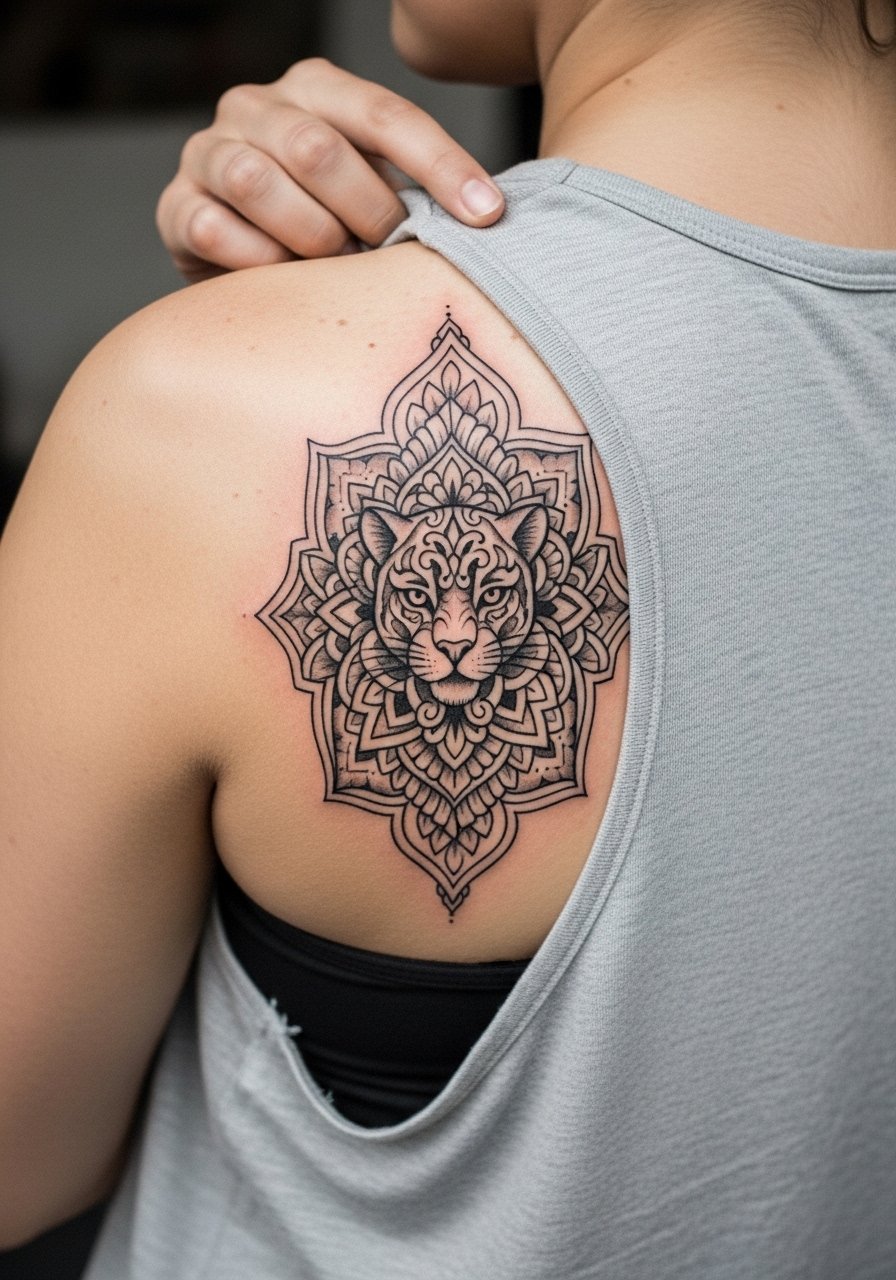
This upper back piece trades raw aggression for a disciplined graphic frame that still reads edgy. A mandala border needs breathing room so the dense linework does not merge. For placement, I advise a seven inch diameter at minimum to let stipple shading and dot work sit without crowding. Back pieces age well with proper sun protection because they are less exposed to daily friction. If your mandala draws from cultural patterns, consider a respectful variation rather than a direct copy. For nights out, backless crop tops and low back dresses make the symmetry sing, and a backless black crop top pairs cleanly.
9. Black and Gray Panther Stalking Through Jungle Vines, Full Sleeve
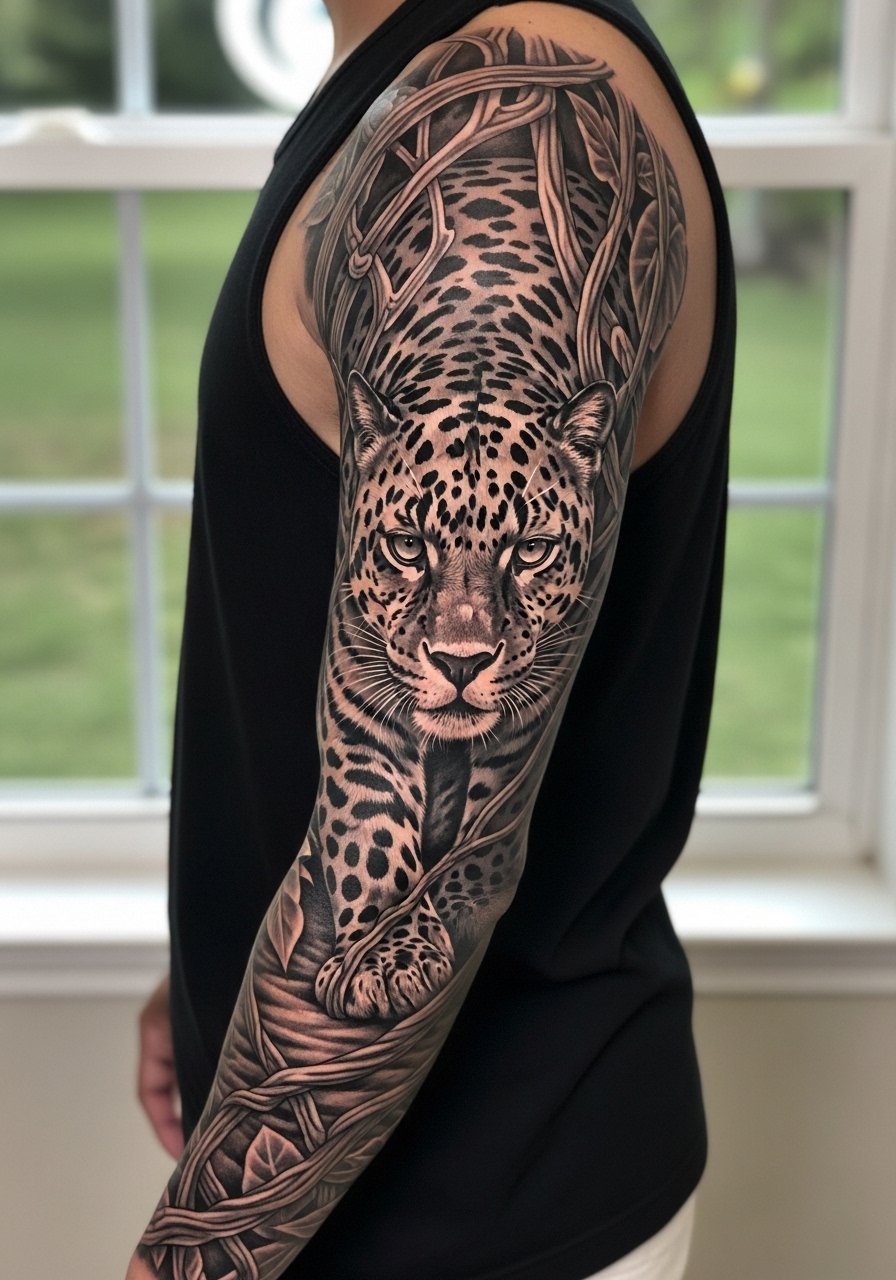
Sleeve narratives let a panther emerge and disappear across negative space, which works well for a long-term project. This black and gray realism needs staged sessions and patience. One common error is trying to force too many micro details into the first pass. Let the artist map the larger forms first, then return for micro contrast and stipple shading. Over five years, sleeves tend to mellow into a unified shadow if saturation is consistent. Sleeve work is a commitment in time and budget, but it also gives the artist freedom to compose an ongoing story that adapts to muscle and movement.
10. Small Panther Paw Print Trail on the Inner Wrist or Finger
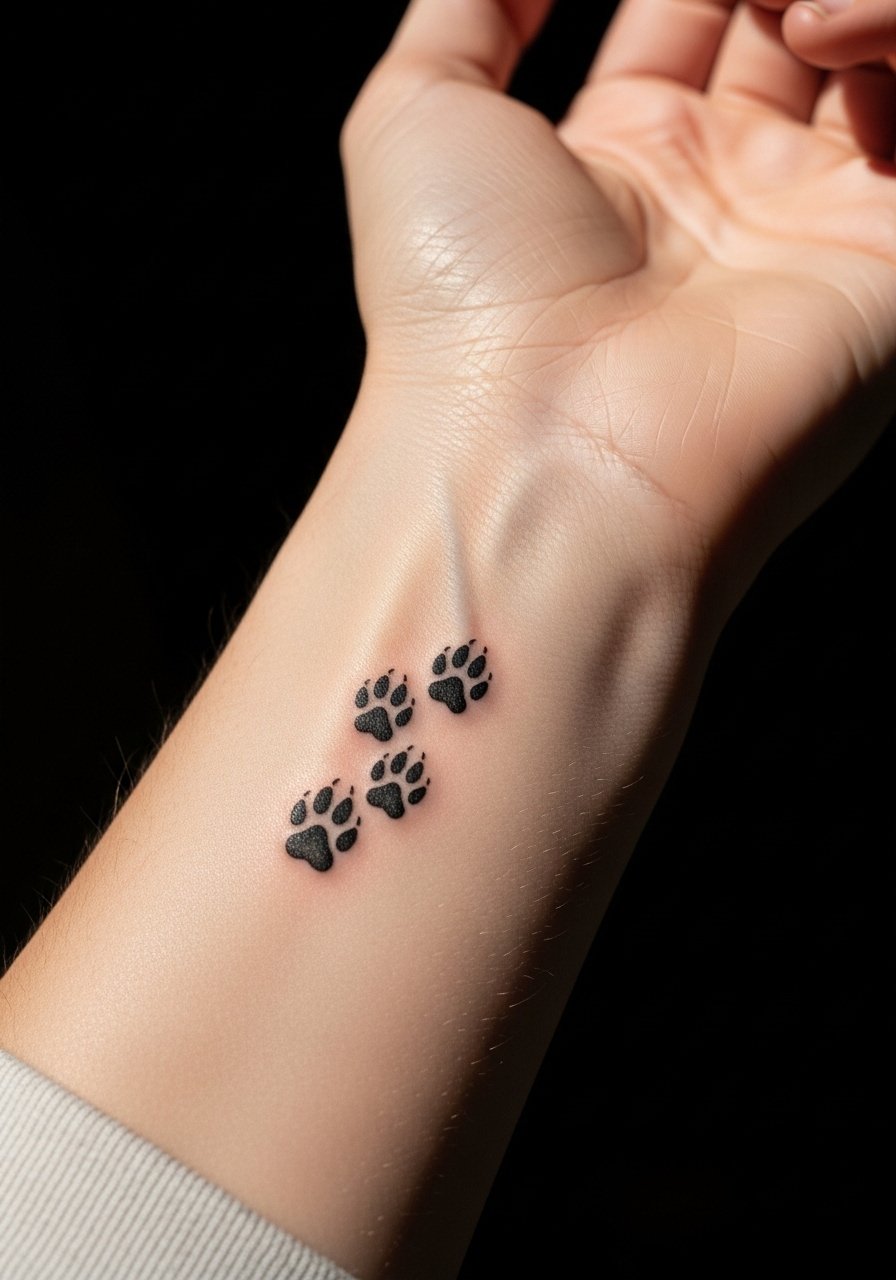
Tiny paw trails are discreet and scale-friendly for people who need low visibility. Hands and fingers face heavy wear so fine dotwork on knuckles or thumb joints blurs faster than inner wrist placements. If you pick the inner wrist, push for slightly larger spacing between the prints than the reference so they age separately. The usual mistake is packing prints too small to survive frequent washing and motion. This piece has low session time and modest pain, but plan for touch-ups in the first two years. Style it with a minimalist accessory like a minimalist chain stack on the opposite wrist.
11. Bold Panther Fangs Bared in Profile Along the Collarbone
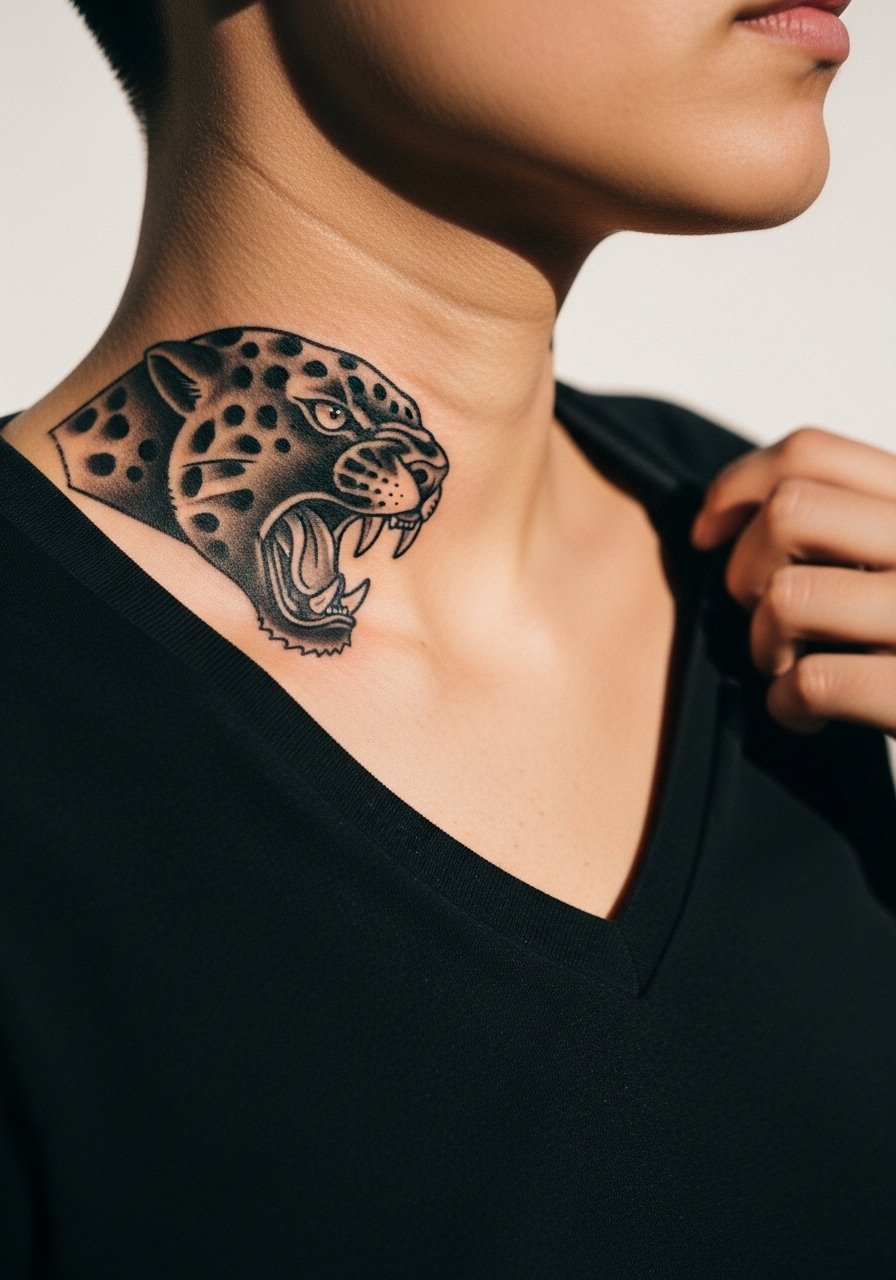
Collarbone pieces read off the bone and demand decisive linework. Thick outlines help prevent blowout where skin is thin. Tell your artist you want strong contour and minimal inside detail so the fangs read from a distance. The collarbone area can be sharp on the pain scale because of proximity to bone, but sessions are usually short. Over time, tiny shading can fade unevenly, so the safer play is bold black linework with limited micro shading. Pair the healed piece with a deep v neck black tee to frame the profile.
12. Watercolor Panther Splash with Shadowy Edges on the Shoulder Blade

Watercolor techniques give motion but they trade longevity if applied too diffusely. For an edgy black and gray watercolor, ask your artist to anchor the splash with a thin shadow outline so the shape survives fading. The shoulder blade tolerates diluted ink better than hands, but diluted work still loses contrast faster than saturated black. A mistake is asking for too many overlapping washes in a single session. Plan two shorter sittings to build depth without overworking the skin. Expect the piece to soften in contrast by year three and to consider a refresh if you want the splash to remain punchy.
13. Micro Panther Roaring on the Knuckle
Knuckle tattoos are high visibility and high maintenance. They hurt more than wrist work and they see constant abrasion. There is a clear split among artists about fine detail on knuckles. One camp says only thick symbolic marks hold up, while the other accepts micro-realism if you accept regular touch-ups. If you want a micro roaring head here, plan for annual touch-ups and avoid dense stipple that will blur. Also consider career implications, as hand tattoos are still visible in many professional settings. For the session, remove rings and avoid jewelry that can snag the bandaged area.
14. Chrome Illusion Panther Designed for Darker Skin Tones on the Upper Arm

There are creative techniques that use white highlights to sell a metallic effect even on darker skin. This approach needs an artist comfortable with contrast on pigmented tones and a careful consultation about which whites will remain visible as the skin heals. A frequent mistake is overusing diluted white that disappears under natural melanin. Bring healed photo references on similar skin tones and ask the artist about healed comparisons. The upper arm gives enough canvas to make highlights work without risking dense application over mobile areas.
15. Jungle Vine-Integrated Panther That Follows Rib Curvature

Designs that follow rib curvature should be composed to respect moving anatomy. If the panther crosses a fold or an area that changes with breath and posture, the pose must account for that. A common misstep is trying to force a straight mid-leap across a zone that shortens when you sit. Ask your artist to test stencils in different body positions so the motion reads both standing and seated. Expect longer sessions and a higher pain threshold. For long-term clarity, avoid very fine internal textures in areas subject to constant stretching.
16. Paw Print Trail as a Micro Cover-Up Base on the Hip
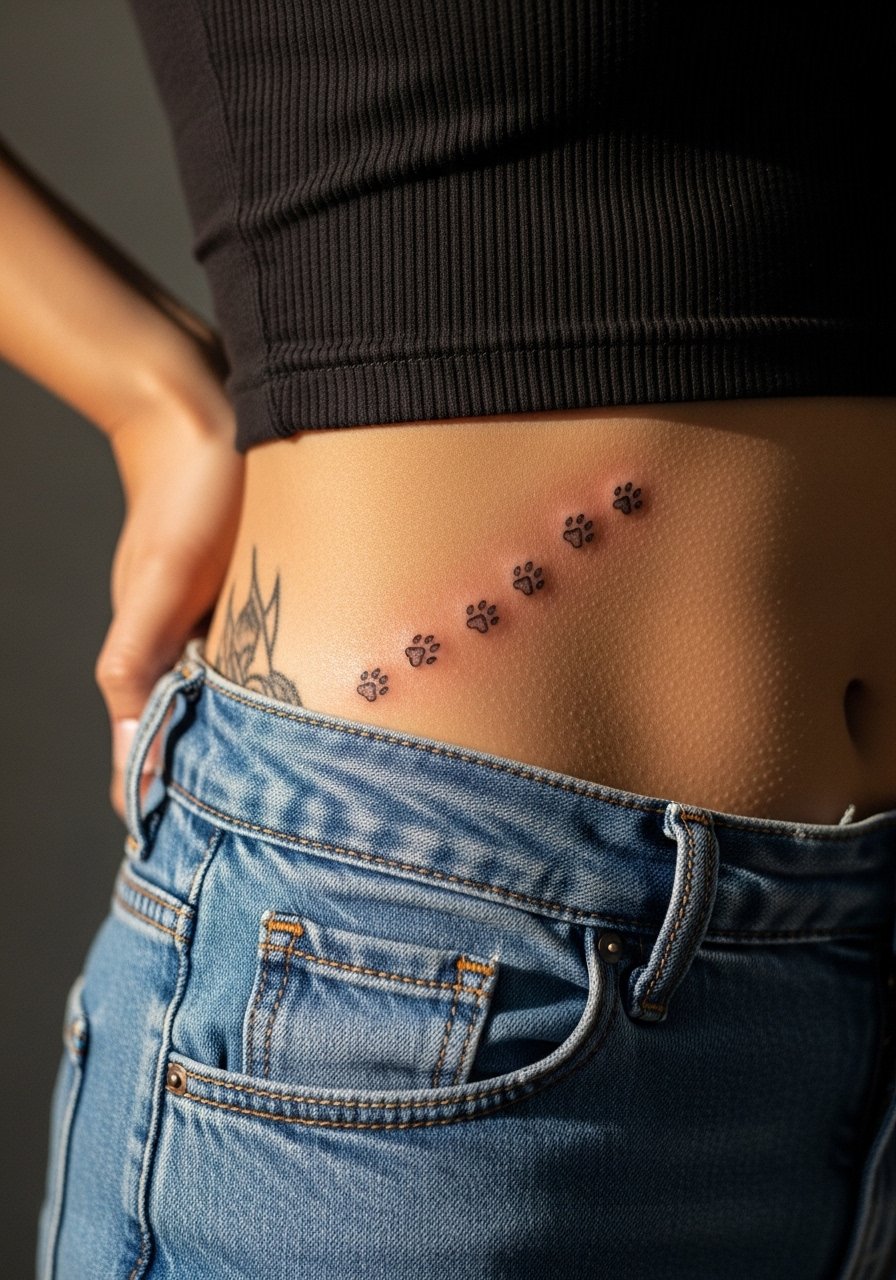
Using a paw trail as the start of a cover-up plan is clever because prints create variable negative space you can later expand. Hip placements offer discretion and room to grow a larger patchwork piece. The mistake is starting too small without thinking of negative space for future additions. In consultation, ask your artist to design the trail with potential expansion in mind and to mark where shading should remain light for future overlays. Pain on the hip varies but is generally tolerable and allows staged growth over time.
17. Minimalist Panther Whisper Behind the Ear
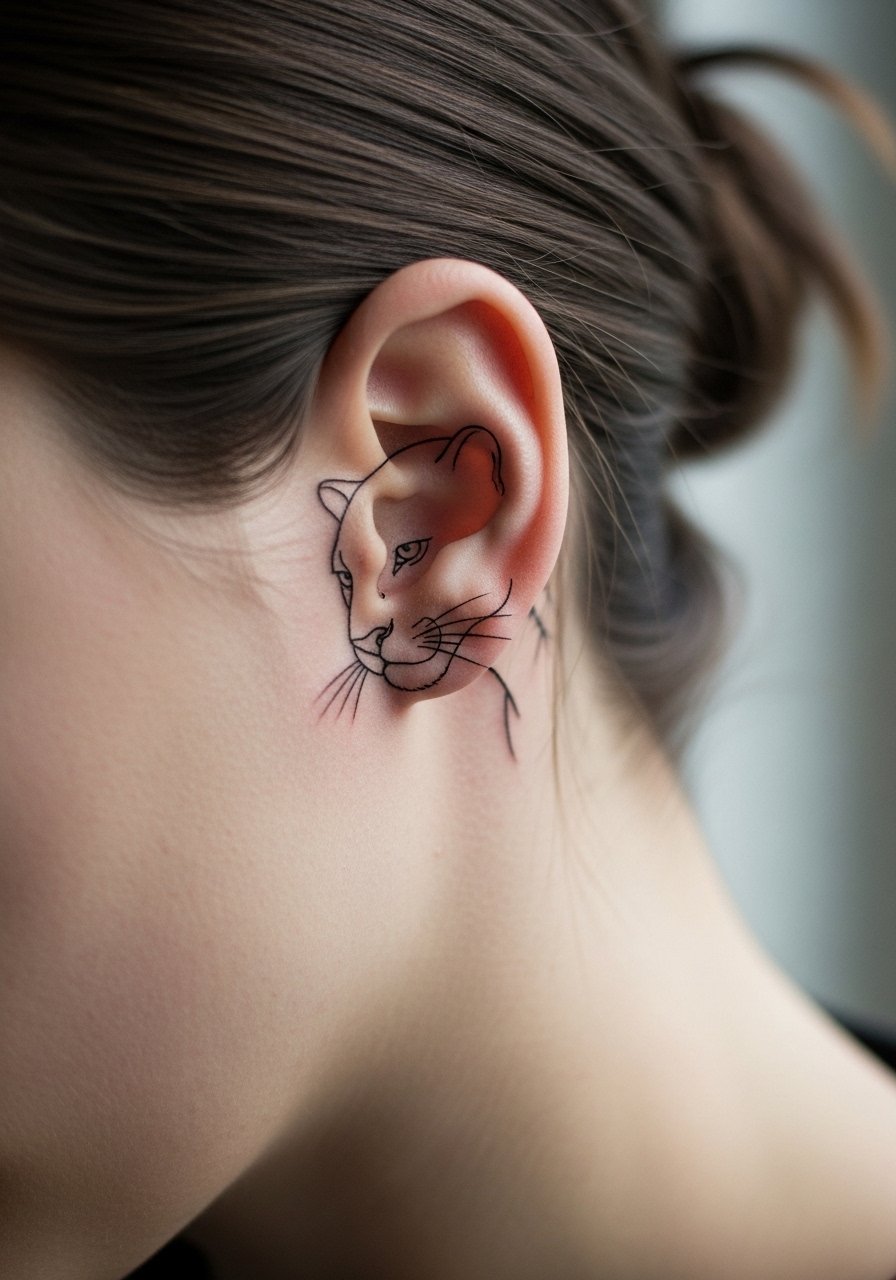
Behind the ear is a delicate spot both in visibility and technique. Keep the scale small, and ask for single needle confidence rather than crowded detail. The area heals quickly but also suffers from limited touch-up access, so spacing and needle depth matter more than in other zones. If you borrow motifs from cultural art feel, consider a respectful variation instead of a direct reproduction. This spot reads intimate and is best for someone who wants a tiny signature mark rather than a loud piece.
Frequently Asked Questions
Q: Will fine line panther eyes on the wrist need touch-ups sooner than a forearm head?
A: Yes, wrist skin and frequent washing mean fine line work often needs a touch-up around year two. A forearm piece with slightly heavier saturation and spacing usually holds longer. Ask your artist about planned touch-up timelines during the consultation.
Q: For a ribcage mid-leap, should I expect numbing cream or not?
A: Artists split on numbing cream. Some avoid it because it changes the skin feedback they use to judge depth. Others recommend it for sessions that stretch past three hours. Decide with your artist and, if you use numbing, follow their exact application guidance.
Q: How should I dress for a chest or collarbone session?
A: Wear an open button shirt or a loose tank so the artist can access the chest without you being exposed. A loose button down shirt is a practical session choice because you can pull it aside and keep your torso mostly covered.
Q: Are chrome highlight techniques visible on darker skin tones?
A: They can be, but only when an artist chooses the right contrast and healed white placement. Ask to see healed photos on similar skin tones and discuss whether subtle contrast or a bolder black silhouette will suit your goals.
Q: Do full sleeve black and gray panthers age differently than small micro pieces?
A: Yes, sleeves age into cohesive, softened shadow if saturation is consistent. Small micro pieces, especially on hands or knuckles, often require earlier touch-ups. Larger pieces have the benefit of surrounding value to mask small shifts in healed contrast.
Q: If I want an ignorant style forearm piece but also plan a sleeve, what should I tell the artist?
A: Tell the artist you want a hand drawn edge but that you plan to connect it later. Ask them to leave consistent negative space and to mark potential anchor points for future work so the piece integrates cleanly when the sleeve expands.
