
Fine line butterflies are everywhere right now, and the trend looks amazing in photos. The hidden reality is that small linework behaves very differently on ankles, wrists, and collarbones, and a little planning prevents early blowout or fast fading. These 17 compact butterfly ideas show what holds up, what asks for touch-ups, and how to style the piece so it reads like a natural accent on real skin.
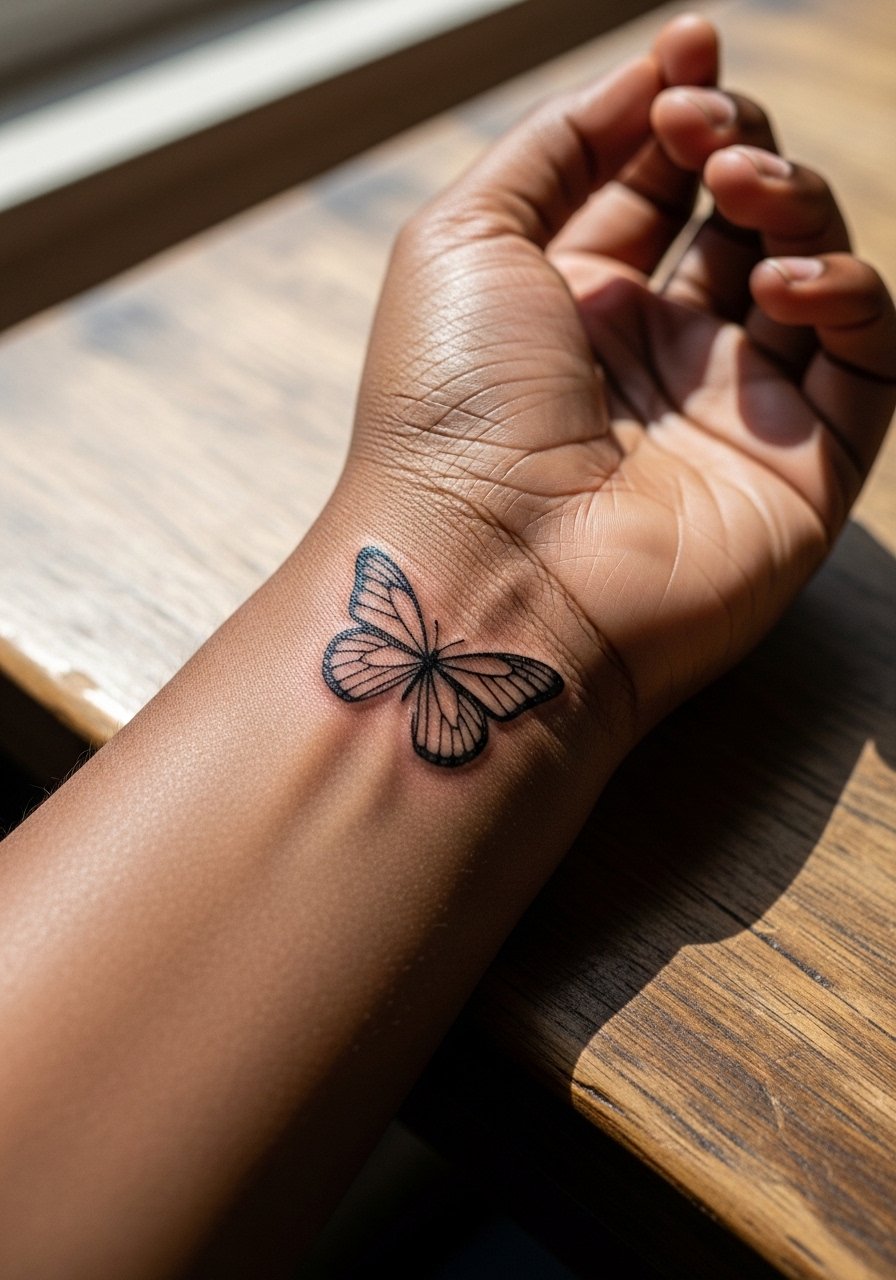
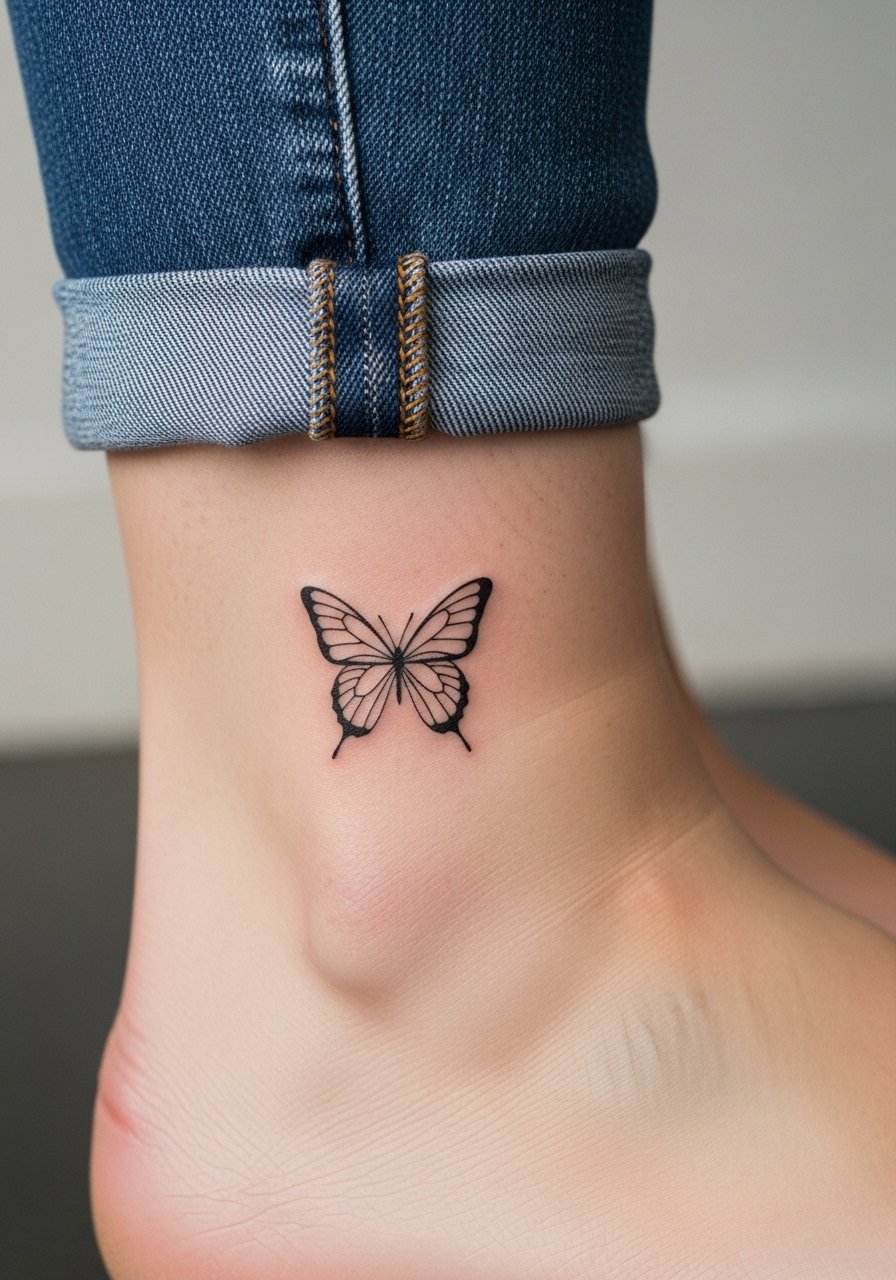
1. Tiny Single-Line Butterfly on the Wrist

I recommend this for someone who wants an almost-secret mark that still reads in photos. Tell your artist you want single-needle linework with a slightly bolder contour around the wings so the outline holds at year two. Common mistake is asking for every detail at 1 cm. The tiny size needs negative space to avoid merging. Expect a 20 to 30 minute session and low pain for most people. For showing it off, roll up a sleeve and pair with a rolled cuff blouse and a thin bracelet to frame the area without crowding the linework.
2. Minimalist Butterfly Outline on the Inner Wrist
Most people pick this as a first small tattoo. In consultation, ask for slightly increased line weight on the main contour so the outline survives frequent washing and sunlight. There is a debate in the community about fine line longevity. One camp says single-needle is elegant and ages gracefully if placed well. The other camp warns that single-needle on high-friction areas blurs faster and needs touch-ups. If you favor longevity, plan a touch-up at year two and protect the spot from sun. Wear a loose tank or a ivory sleeveless top to the session so the artist can access the inner wrist easily.
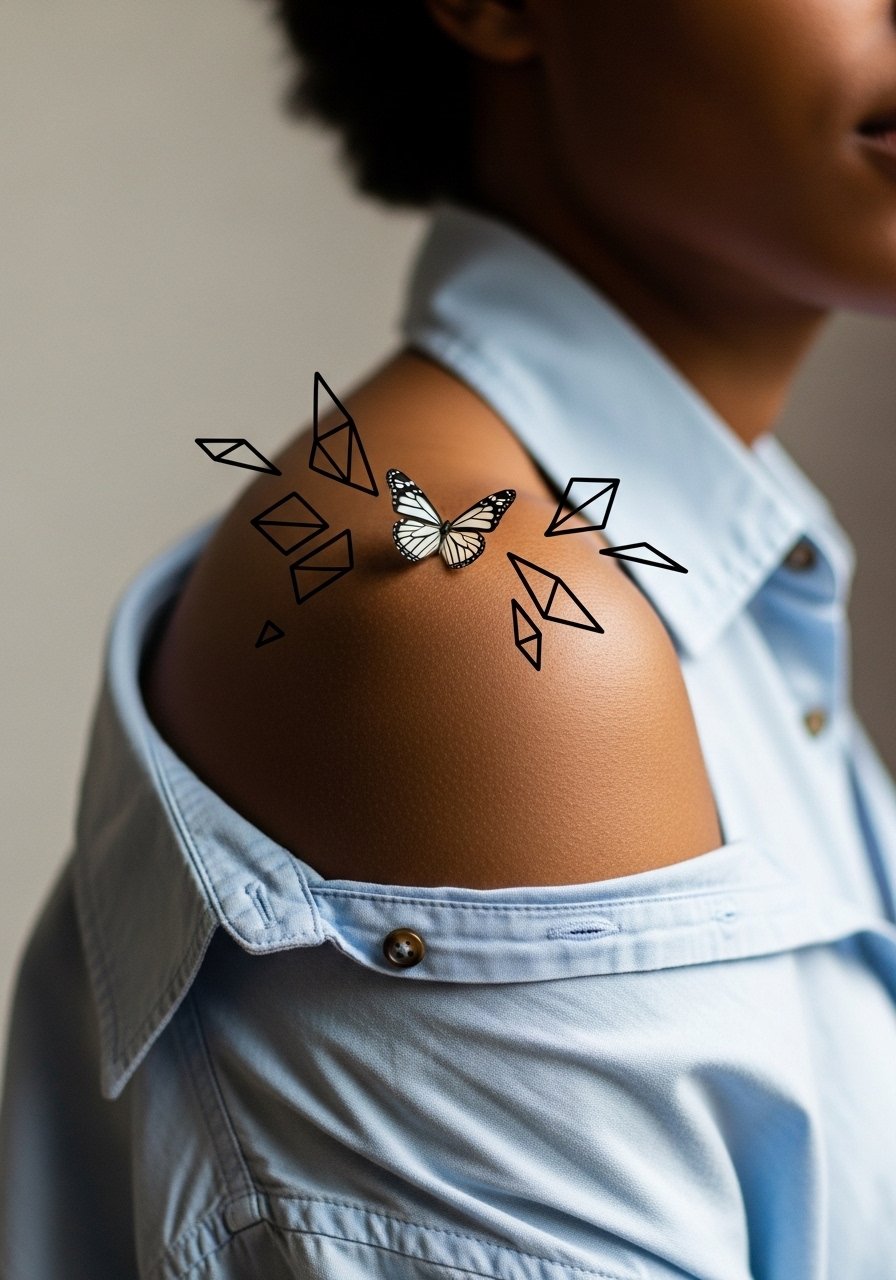
3. Abstract Geometric Butterfly on the Collarbone
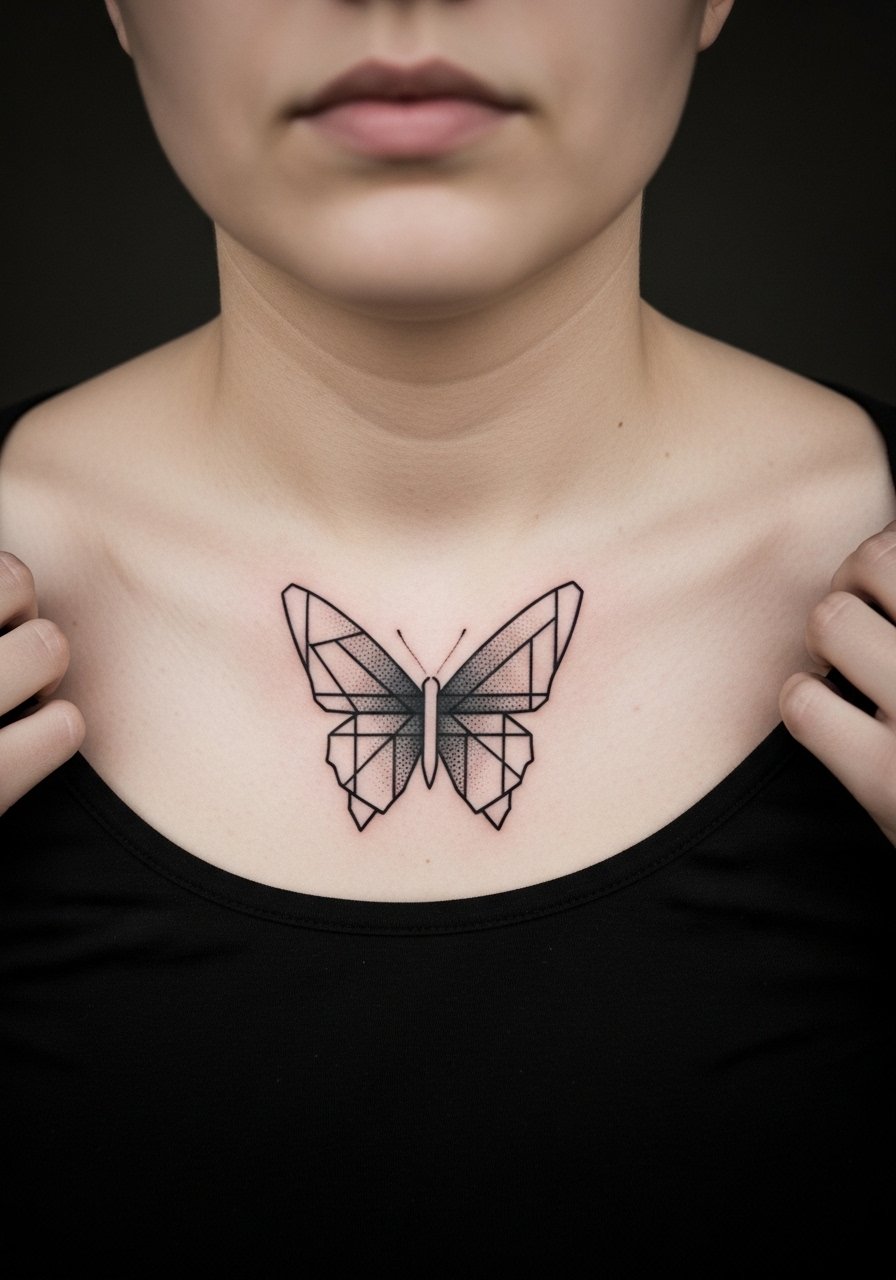
This solves the "too basic" look without adding bulk. Ask your artist to keep geometry open and use negative-space triangles to imply wing veins rather than tiny, dense lines that can blur. The collarbone is a great place for bold negative space because skin stretches less than the inner wrist. Expect a single session under an hour with moderate discomfort if the stencil sits close to the bone. For evenings out pair it with a dainty layered necklace so the tattoo sits as a complementary focal point.
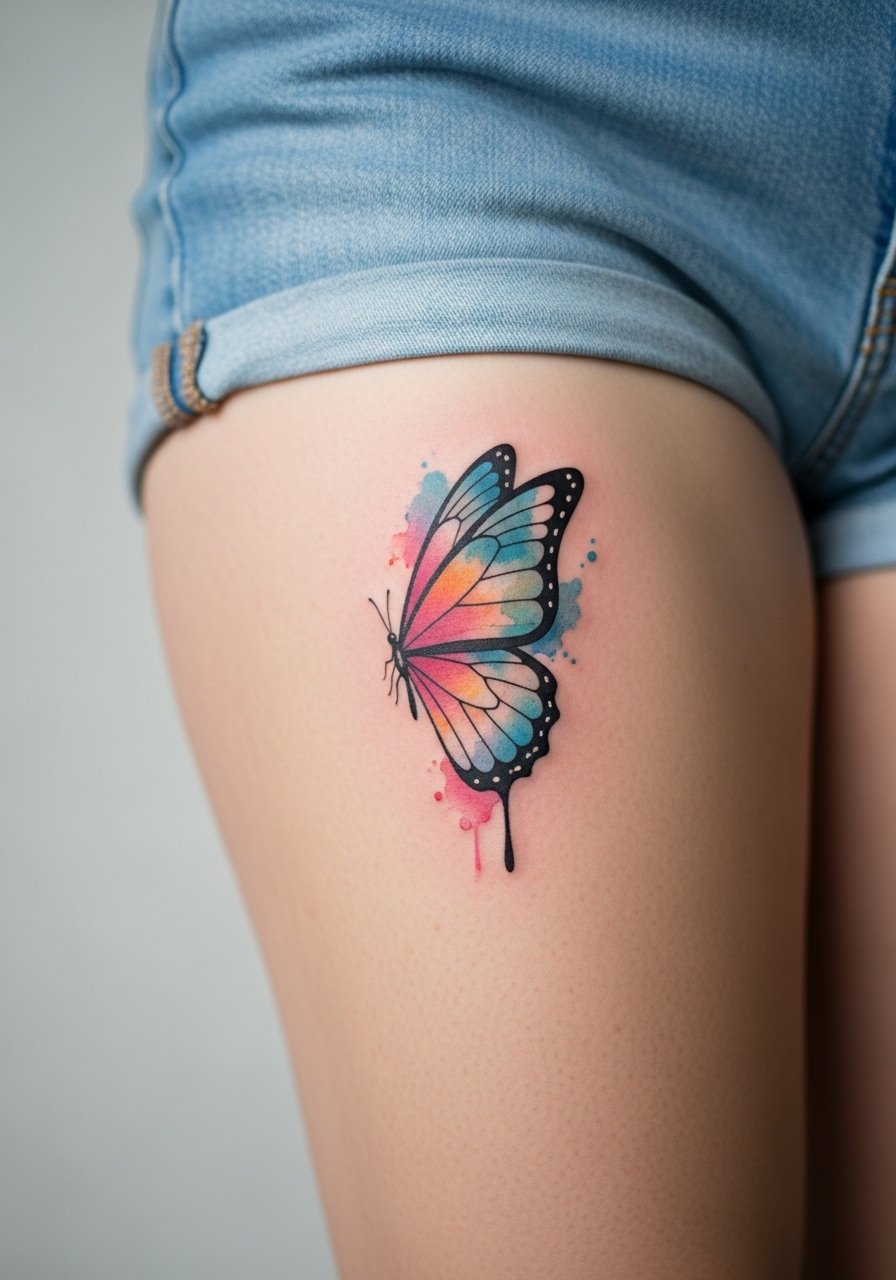
4. Watercolor Splash Butterfly on the Shoulder
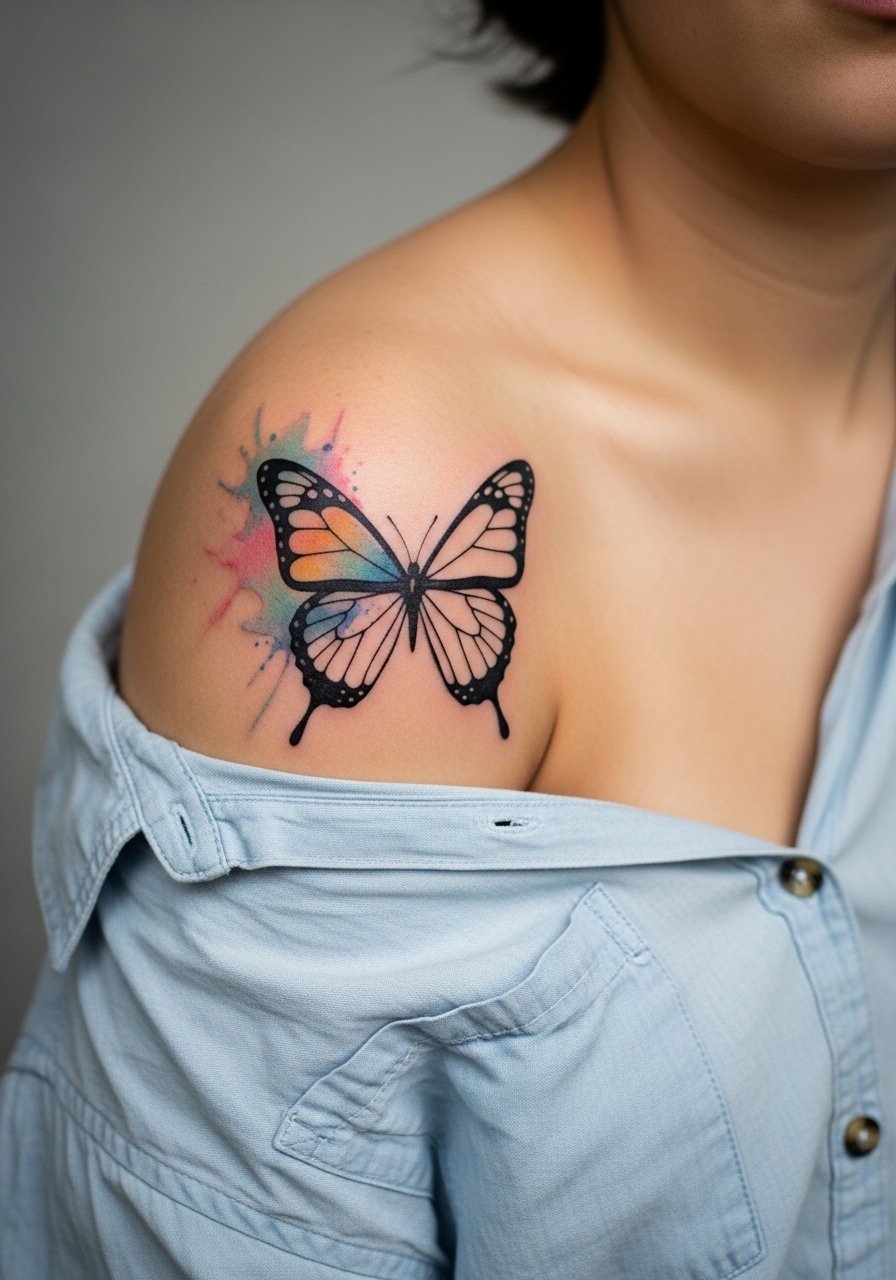
Watercolor adds personality to a small piece but it fades faster than black line. The trick is to anchor the splash to a crisp black outline and ask for one-sided color to keep maintenance low. Most watercolor small pieces need touch-ups to refresh pigment at year two to three. Pain is mild for shoulder placement and the session tends to be 30 to 50 minutes. For the appointment wear a button-front blouse you can pull aside so the artist has clear access and you stay comfortable.
5. Butterfly with a Single Floral Stem on the Inner Forearm
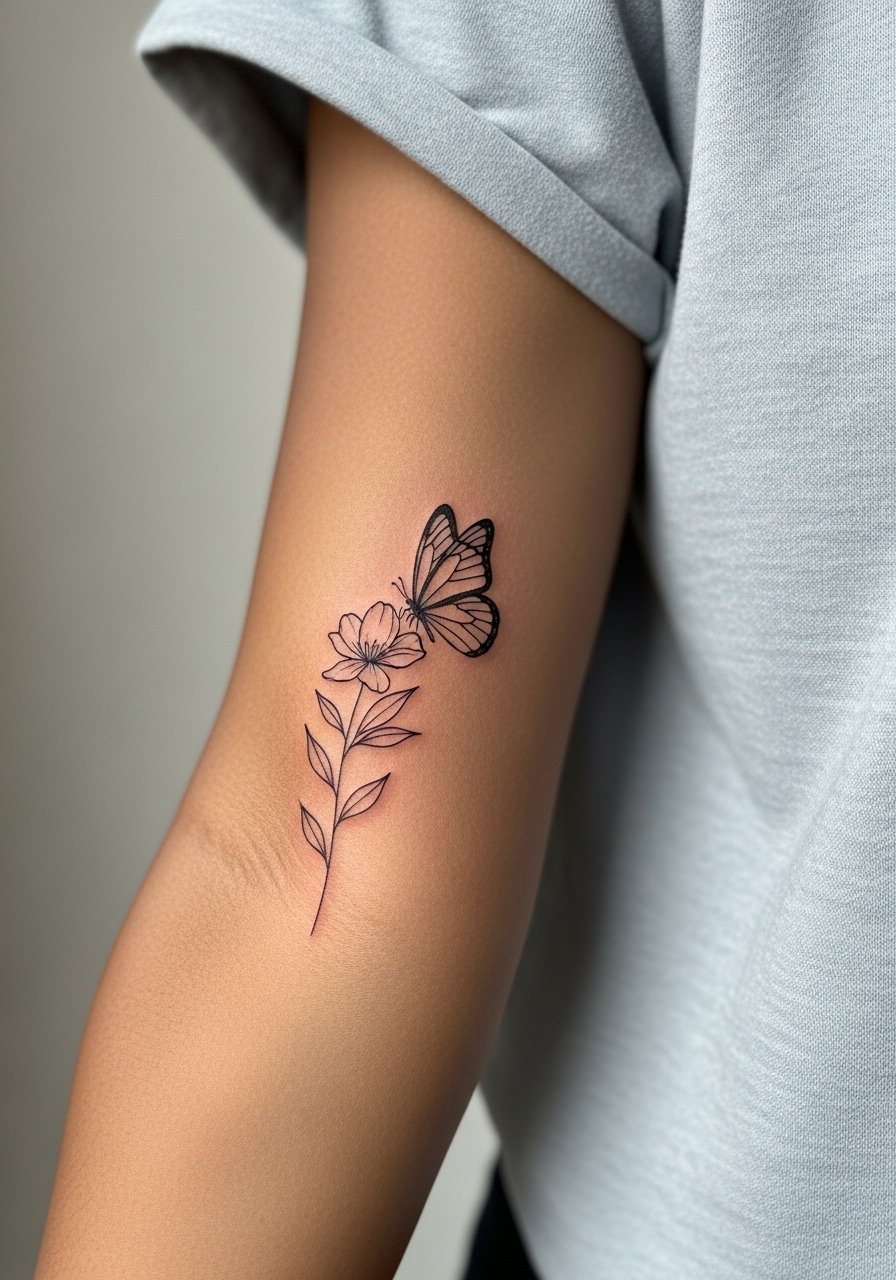
This is great if you want a layered nature motif without crowding. Tell the artist to keep stem spacing roomy so the tiny leaves do not fill in over time. A common mistake is packing foliage too close to the wing tips, which can muddy the silhouette after a year. Expect moderate discomfort and a 30 to 45 minute session. For show-off looks roll your sleeves and try a sage green button down that frames the forearm and complements the botanical linework.
6. Dotted Negative-Space Butterfly Behind the Ear
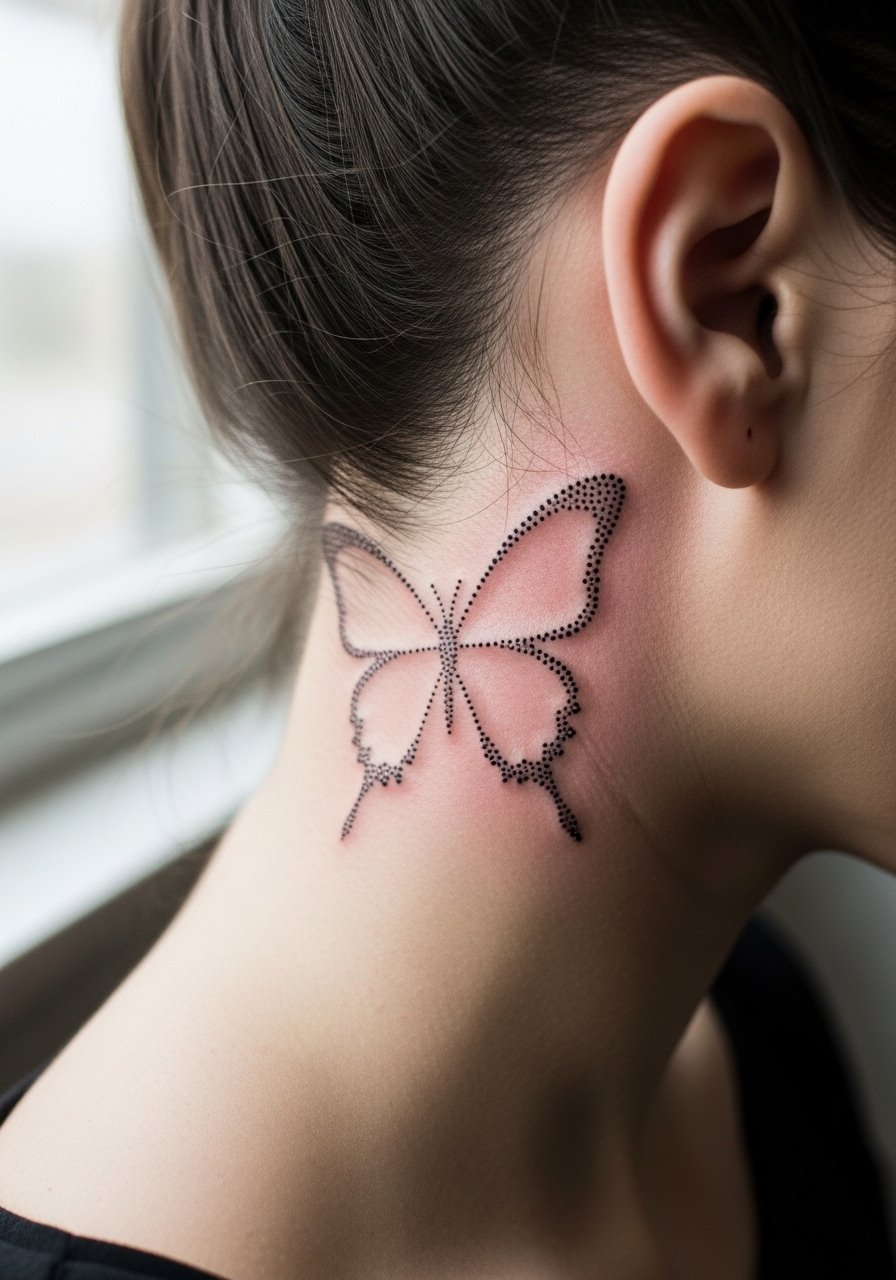
Micro dotwork behind the ear reads like a whisper when you tuck hair away. Ask specifically for a stipple texture with clear open areas to preserve the wing shape. Artists disagree on fine line behind ears because the skin is thin. One camp thinks tiny dots and single-needle outlines hold fine. The other camp warns that the area can blur with skin movement. If you want reduced risk, request slightly larger dots and a bolder outer contour. Session time is short and discomfort is low. For the appointment put hair in a sleek updo and bring a hair tie silk so the artist has clean access.
Studio Day Picks
The wrist, inner forearm, collarbone, and behind-ear pieces above ask for slightly different prep and first-week care than larger work.
-
Indie thin tattoo balm. Less greasy than heavy ointments so it soothes small wrist and finger pieces without leaving a thick film that traps sweat.
-
Breathable tattoo wrap roll. Useful for ankle work that rubs against shoes during the first couple of days and for keeping fine lines from catching on fabric.
-
Tea tree salve for sensitive skin. A lighter antiseptic option for minor flare ups on thin-line work behind the ear or on the neck.
-
Topical numbing cream. Applied as directed about 45 minutes before can ease wrist sensitivity for first-timers without altering linework when used properly.
-
Aquaphor healing ointment. A thin layer in the first 48 hours helps keep fine gauge lines from drying into thick scabs that pull pigment.
7. Symmetrical Twin Butterflies for the Wrists
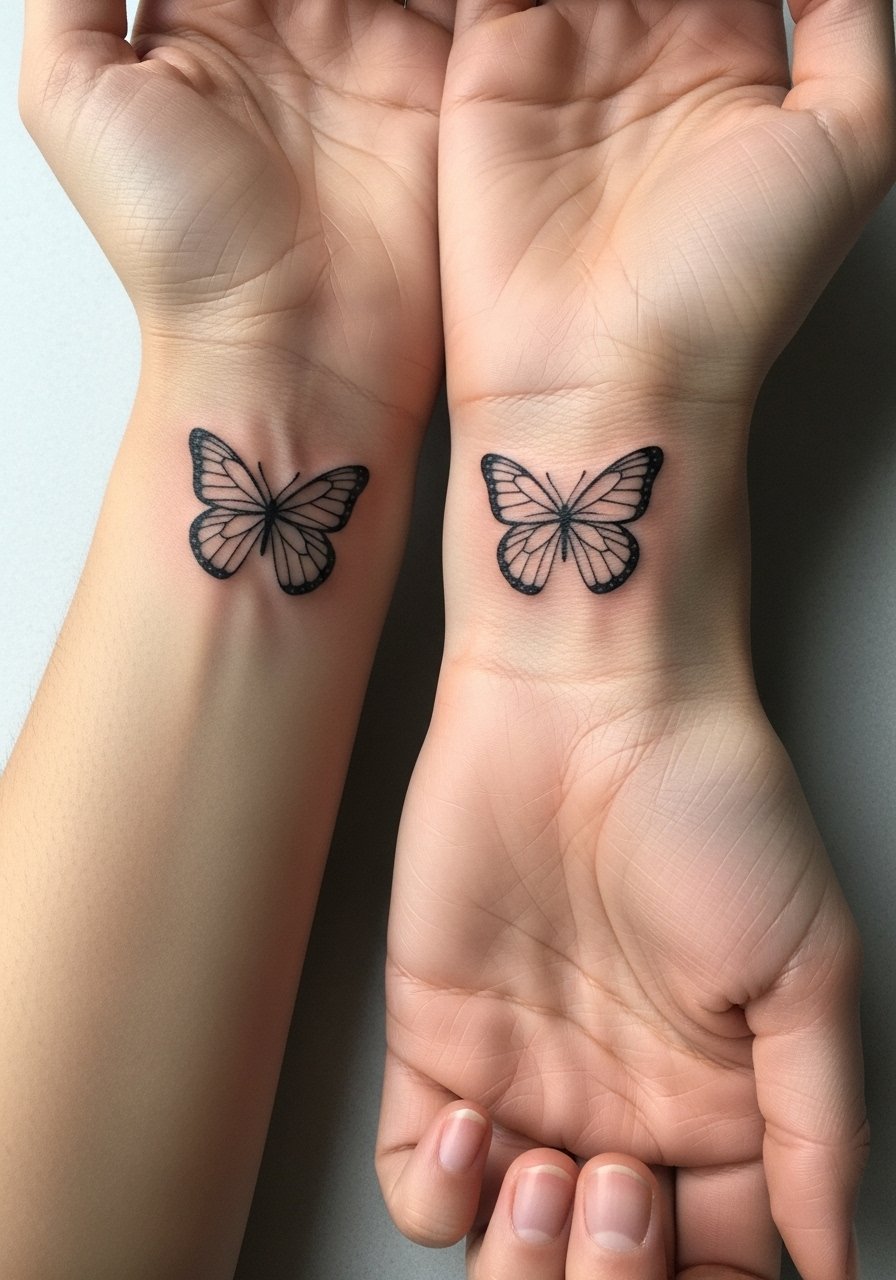
Twin butterflies are a neat way to extend the motif without a full collection. Ask your artist to mirror the stencils on both wrists while you are seated so placement reads balanced in motion. A frequent error is scaling them too small which makes the symmetry look off when wrists rotate. Expect two short sessions or one longer appointment under an hour. These pieces take more daily abuse than a collarbone tattoo. For styling stack a thin bracelet on the opposite wrist and wear a thin silver chain bracelet when you want the butterflies to peek out.
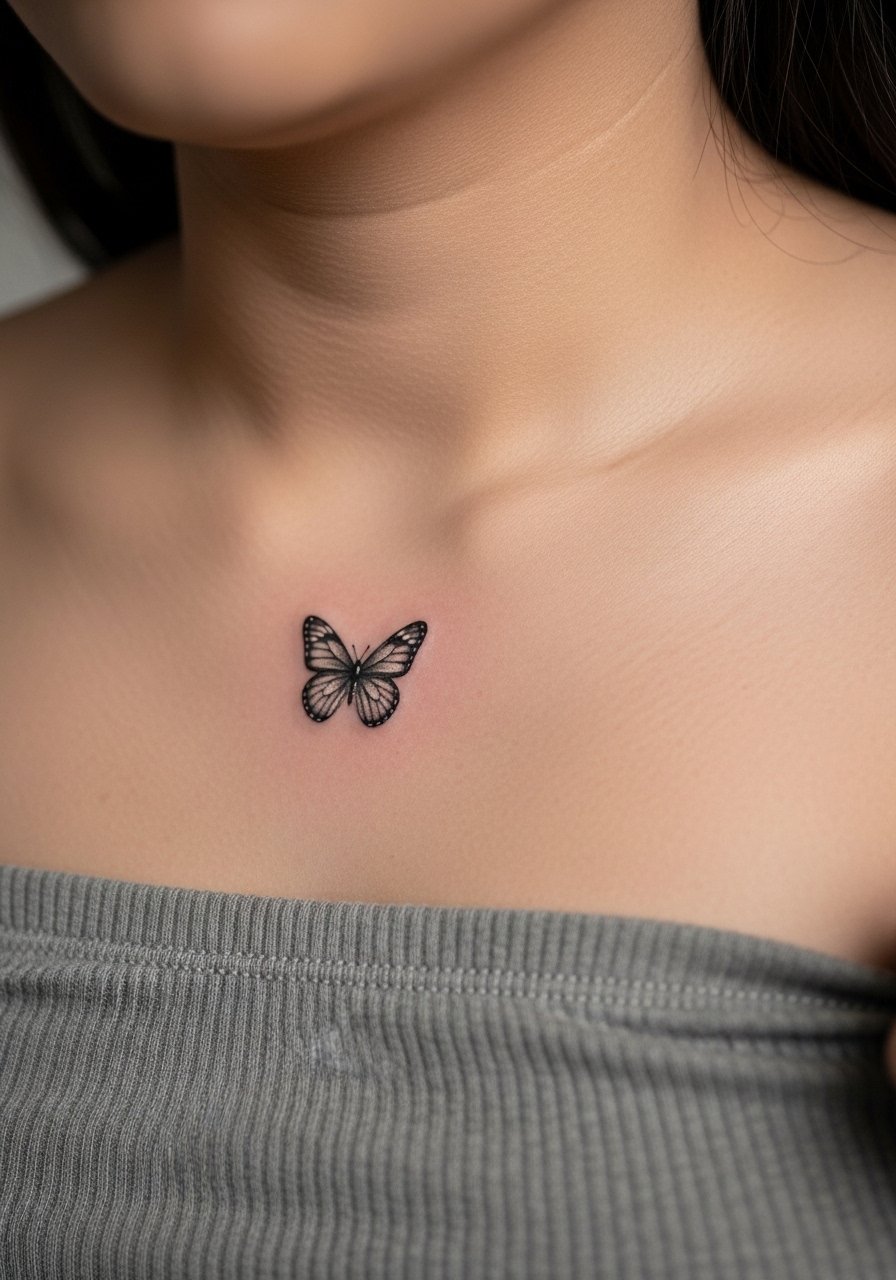
8. Micro Butterfly with Heart Accent on the Collarbone
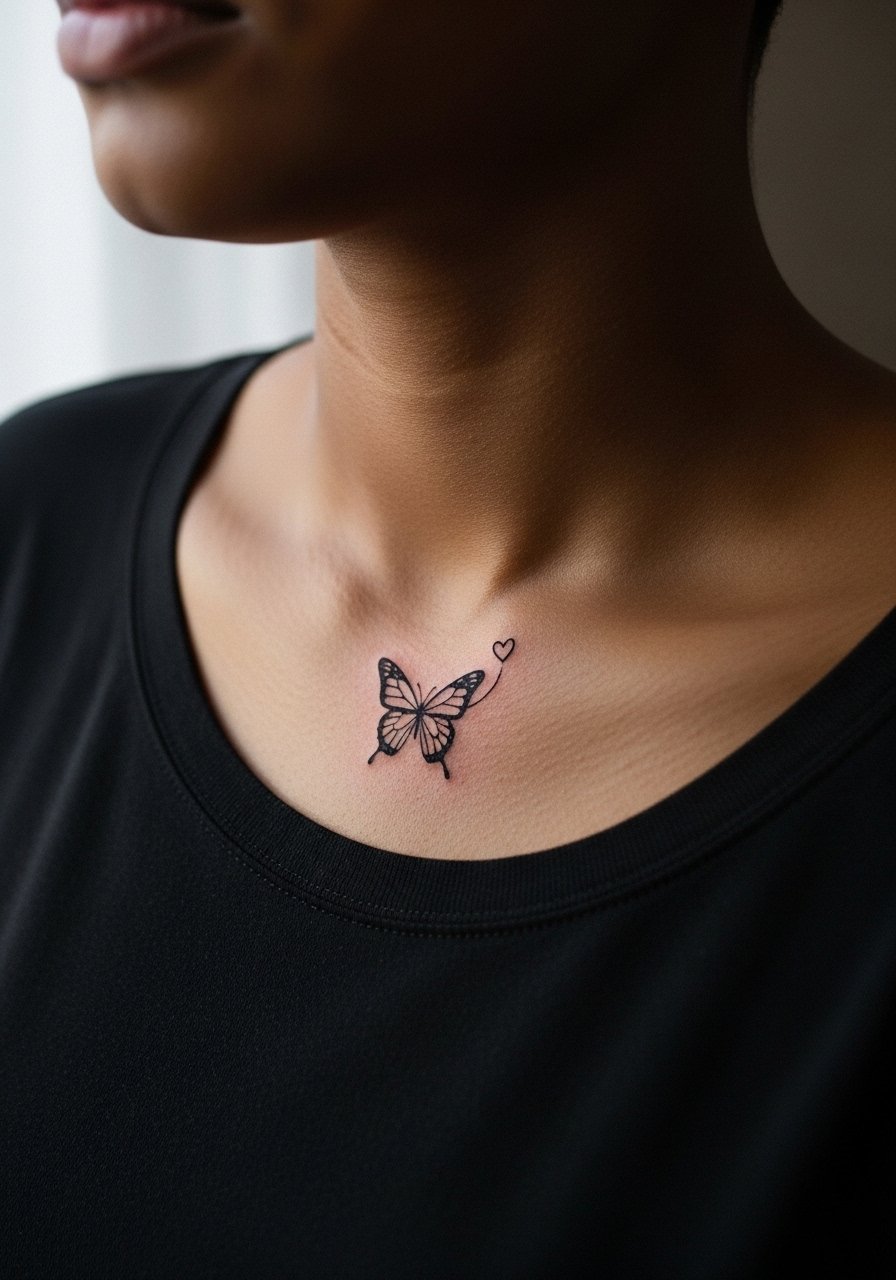
Under 1 cm, this design reads like a personal glyph. Tell the artist you want the heart separate enough from the wings so the two shapes stay distinct as the skin settles. The biggest mistake is asking for identical tiny details replicated from an enlarged reference. Micro-realism requires simplified shapes. Collarbone placement increases visibility but also UV exposure, so expect a refresh at year two to three if you sun tan often. For the session wear an open collar blouse you can shift for easy access.
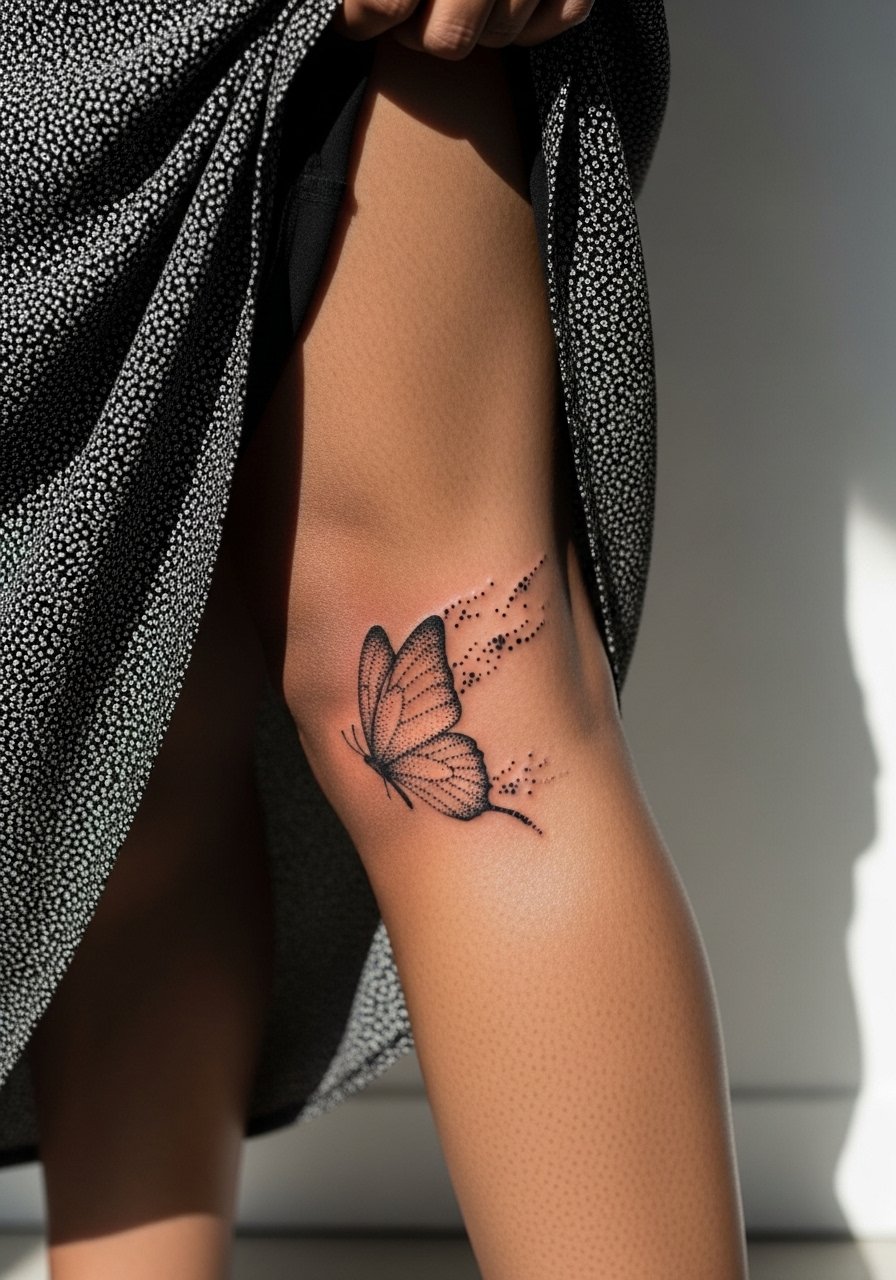
9. Lava Bark Leaf Butterfly Combo on the Ankle
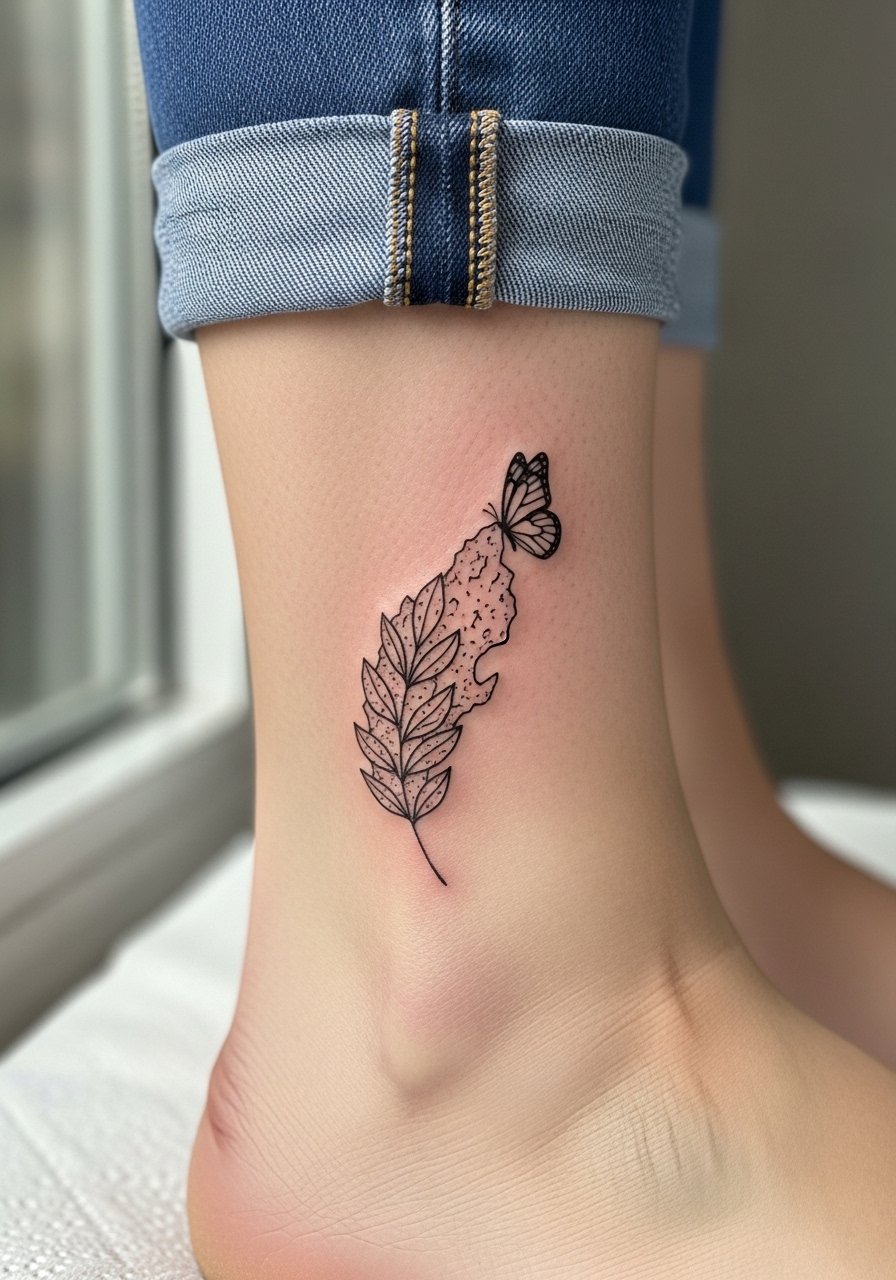
This earthy hybrid gives a grounded twist to the usual floral pairing. Ask for stipple texture on the bark section so it reads as texture, and keep the butterfly outline clean for contrast. A common misstep is over-detailing the bark on such a small spot which collapses into a gray patch over time. Ankle work has extra friction from shoes and socks, so plan for careful first-week protection. For show-off outfits choose strappy heeled sandals and cropped pants to let the design peek out.
10. Pastel One-Wing Watercolor Butterfly on the Thigh
Thigh placements tolerate softer washes better than wrists because pigment sits under more stable skin. Ask for one-sided pastel so the color ages into a subtle wash rather than a full fade. Expect a 45 to 60 minute session and moderate discomfort depending on proximity to muscle. Note the trend-versus-reality argument here. One group loves the look and is fine with periodic refreshes. The other group prefers black-only for minimal maintenance. If you like color, anticipate a brighter touch-up at year two. For summer styling wear high waisted shorts that let the watercolor show.
11. Tiny Abstract Shape Butterfly on the Shoulder
This modern take avoids clichés and reads artsy rather than sweet. Tell the artist you want clear gaps between shapes so the geometry breathes. The biggest mistake is compressing too many shapes into a 2 cm area. Shoulder skin is forgiving and the piece will age more slowly than hand or ankle work. Sessions are usually quick and tolerable. For the appointment wear a sleeveless button down so the artist can reach the area without tugging at fabric.
12. Micro-Realism Shaded Butterfly on the Collarbone
Micro-realism needs pigment packed precisely. Ask for slightly bolder anchor points and soft dot shading rather than heavy fill to keep definition as it heals. The collarbone placement is visible and flattering, but light exposure accelerates fading, so plan sunscreen after healing. Healed appearance at six months is usually soft and at two years it may read lighter on sun-exposed skin. Session time ranges from 30 to 60 minutes depending on shading. Pair with a thin pendant or a thin chain pendant necklace when you want to frame the piece.
13. Wing Silhouette Negative-Space on the Nape of the Neck
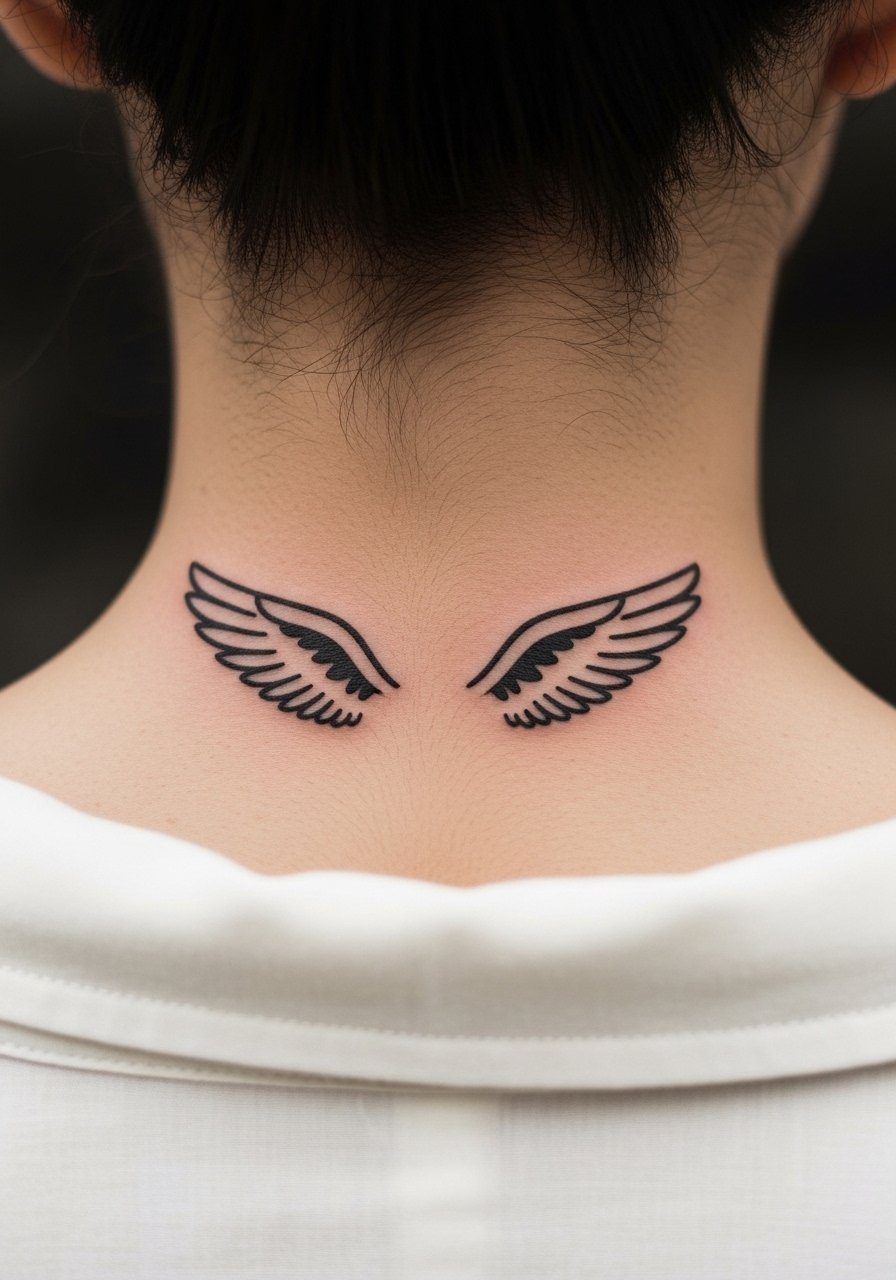
A nape placement feels peekaboo and is discreet under hair. Ask for a slightly thicker outer contour so the negative-space interior holds as the skin moves. The neck can be more prone to blur than the collarbone. If you prefer long-term crispness, the thicker contour option balances longevity and scale. The session is brief and comfort is moderate. For styling avoid chokers and choose open-neck tops to show the silhouette.
14. Stippled Dotwork Motion Butterfly on the Calf
Dotwork is ideal for implying movement without dense linework. Request graduated dot density so the wings fade into skin rather than a hard edge. The calf is a sturdy spot with low friction, so this style keeps texture well. Over-detailing at small scales is the usual error. Expect about 30 to 45 minutes in the chair and mild pain. For summer looks pair with a slit thigh skirt that lets the dotted wings peek when you walk.
15. Asymmetrical Half-Black, Half-Pastel Wing on the Back of the Shoulder
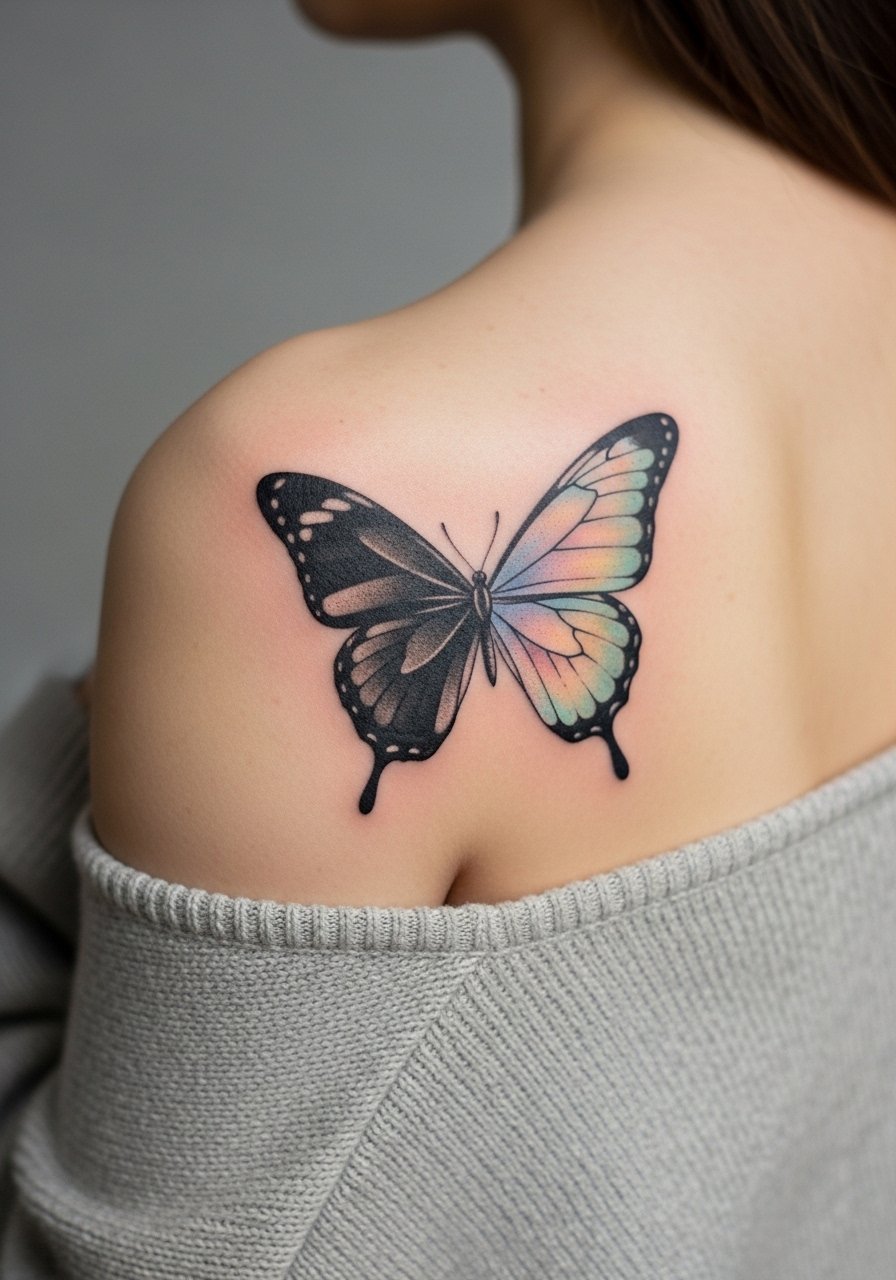
This design balances minimalism and color while reducing the maintenance of a full watercolor piece. Ask the artist to anchor the pastel wing with tiny black specks so the color has structure. The usual mistake is making both sides too intricate which increases touch-ups. Shoulder placement handles the look well. Session time is moderate and discomfort is low. For outfits choose an off shoulder sweater when you want the asymmetric contrast to show.
16. Chain of Micro Butterflies Along the Side Neck

A linked micro chain reads like a small accent and is ideal for building into a larger set later. Tell the artist you want varied spacing so each tiny butterfly has breathing room and does not blur into the next. A common error is repeating identical tiny shapes without scale variation. Side neck work needs an experienced hand for even spacing. Sessions are short and comfort is moderate. For the appointment wear a low neck tee to allow easy access.
17. Tiny Abstract Butterfly by the Ankle Bone
Ankle placement is great for footwear-friendly reveal but it suffers from shoe friction. Ask for a bolder anchor line at the base of the wing and lighter interior hatch so the contour holds against rubbing. The frequent mistake is packing interior dotwork too tight which turns muddy with socks and shoes. Expect slightly higher first-week care demands. For showing it off pick cropped linen pants or sandals that let the piece peek.
Frequently Asked Questions
Q: Will fine line butterflies blur faster than bold line options on wrists and ankles?
A: Fine line tends to soften quicker, especially on high-friction zones like wrists and ankles. Some artists prefer bolder contours for longevity. The practical approach is to ask for a slightly heavier outer line and plan a touch-up around year two if you want the airy single-needle look.
Q: Do watercolor wings need different aftercare than small black linework?
A: Watercolor pieces are more about pigment maintenance. Keep the area out of direct sun after healing and expect that pastel washes may require refreshes sooner than black ink. Follow the studio's timeline for initial protection and avoid heavy exfoliation.
Q: Are behind-ear and nape tattoos risky for blowout or fading?
A: Those areas have thin skin and move with hair and collars, so both blowout and fading are real concerns. Request stipple or slightly larger dots and a clear outer contour. If an artist says a design needs to be scaled up for clarity, that is a useful red flag to note.
Q: How should I dress to a collarbone tattoo session and how can I show it off afterward?
A: For the session wear an easy open shirt or a strapless item you can shift without undressing. After it heals, a strapless midi or an open-neck blouse highlights the area. Try a dainty layered necklace to draw attention below the piece.
Q: If I have darker skin, which small butterfly styles photograph best?
A: High-contrast approaches like slightly bolder black outlines, micro-realism with defined anchors, or negative-space geometric shapes tend to show up better in photos. Mention skin tone in consultation and ask to see healed work on similar skin.
Q: Is numbing cream acceptable for tiny wrist butterflies and does it affect the result?
A: Numbing cream is common for anxious first-timers and for sensitive wrist spots. When used correctly it reduces pain without changing how the ink settles. Ask your artist about their preferred application window so timing does not interfere with stencil clarity.
