
Thin-line trends flood feeds right now, yet what looks crisp on day one can soften fast depending on placement and skin tone. Dark ornamental work that actually lasts leans toward considered spacing, heavier fills in high-friction areas, and designs that flex with the body. Below are 27 carefully chosen dark ornamental tattoo ideas that balance visual drama with longevity, plus what to ask your artist the day you book.
1. Gothic Arch Mandala Chest Piece
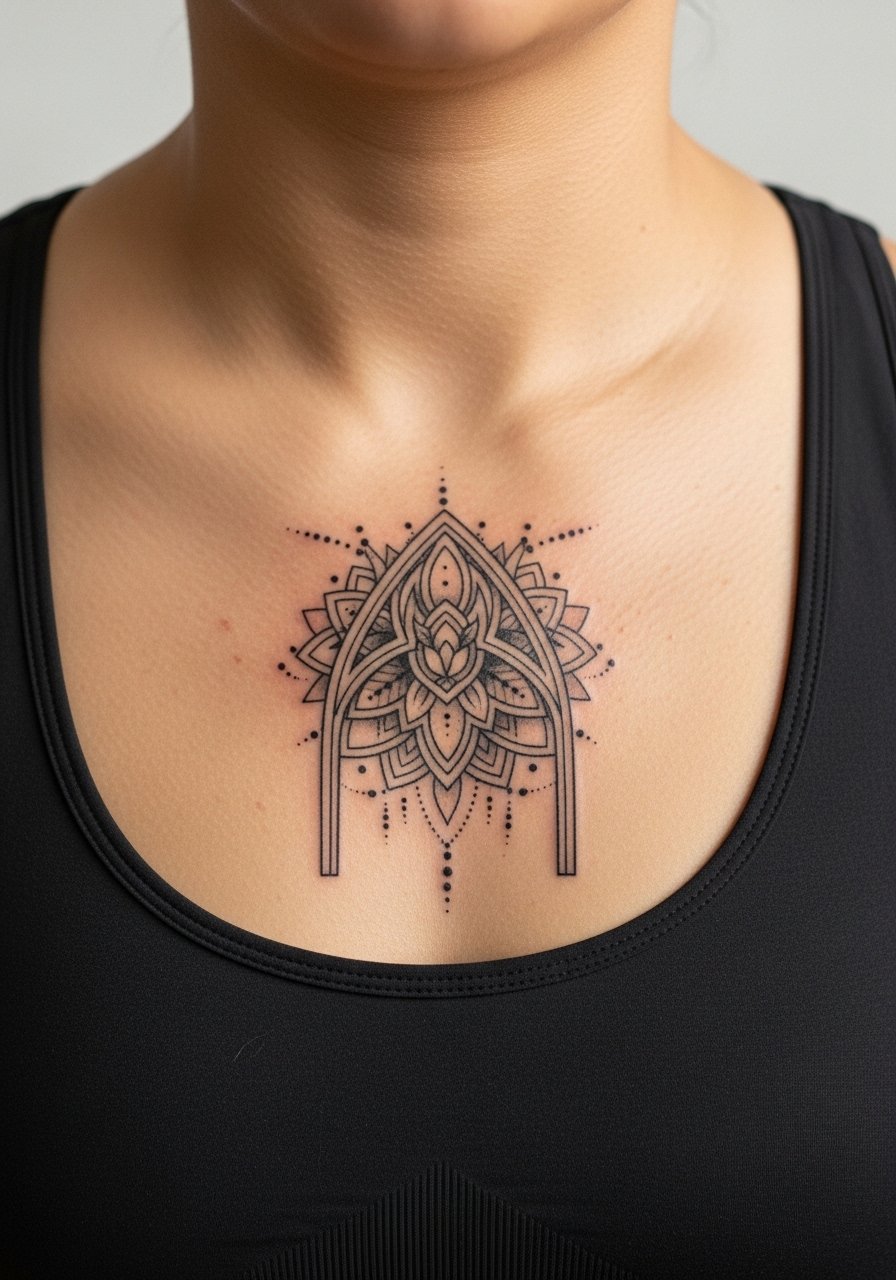
Start this one in consultation by asking for radiating composition that follows the collarbone curve. The sternum reads dramatic when the arches radiate outward, and I recommend heavier fill in shaded areas so negative space survives over time. Fair warning, sternum pieces shift with weight changes, so pick a layout that flexes with the torso. Expect 2 to 3 sessions and moderate pain from a typical chest placement. A common mistake is squeezing too much fine detail into a small radius, which looks busy as it heals. For session wear bring a strapless top or a zip-up you can pull down so the artist has tidy access.
2. Dot Work Sacred-Pattern Forearm Sleeve
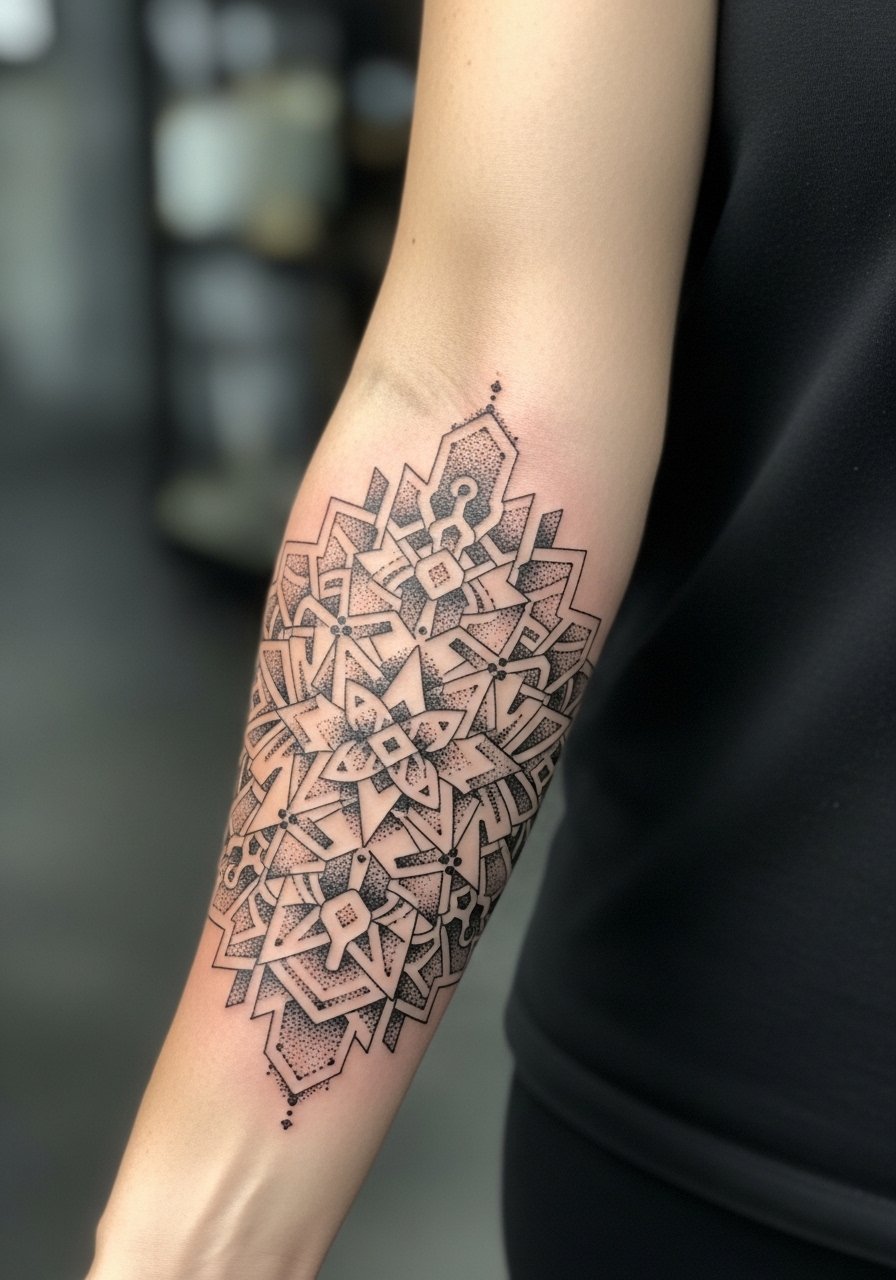
I've seen this type hold up when artists use heavier dot densities for depth rather than ultra-thin contour lines. For forearm sleeves ask your artist to map out spacing for the denser zones so the pattern breathes at the elbow crease. The session feels long but manageable since you can sit and shift. Linework that is too close is the most common version that ages poorly, with dots merging into smudged shading by year three. Expect multiple sessions and a likely touch-up at year two where repetitive motion hits the outer forearm.
3. Cyber Sigilism Thigh Wrap
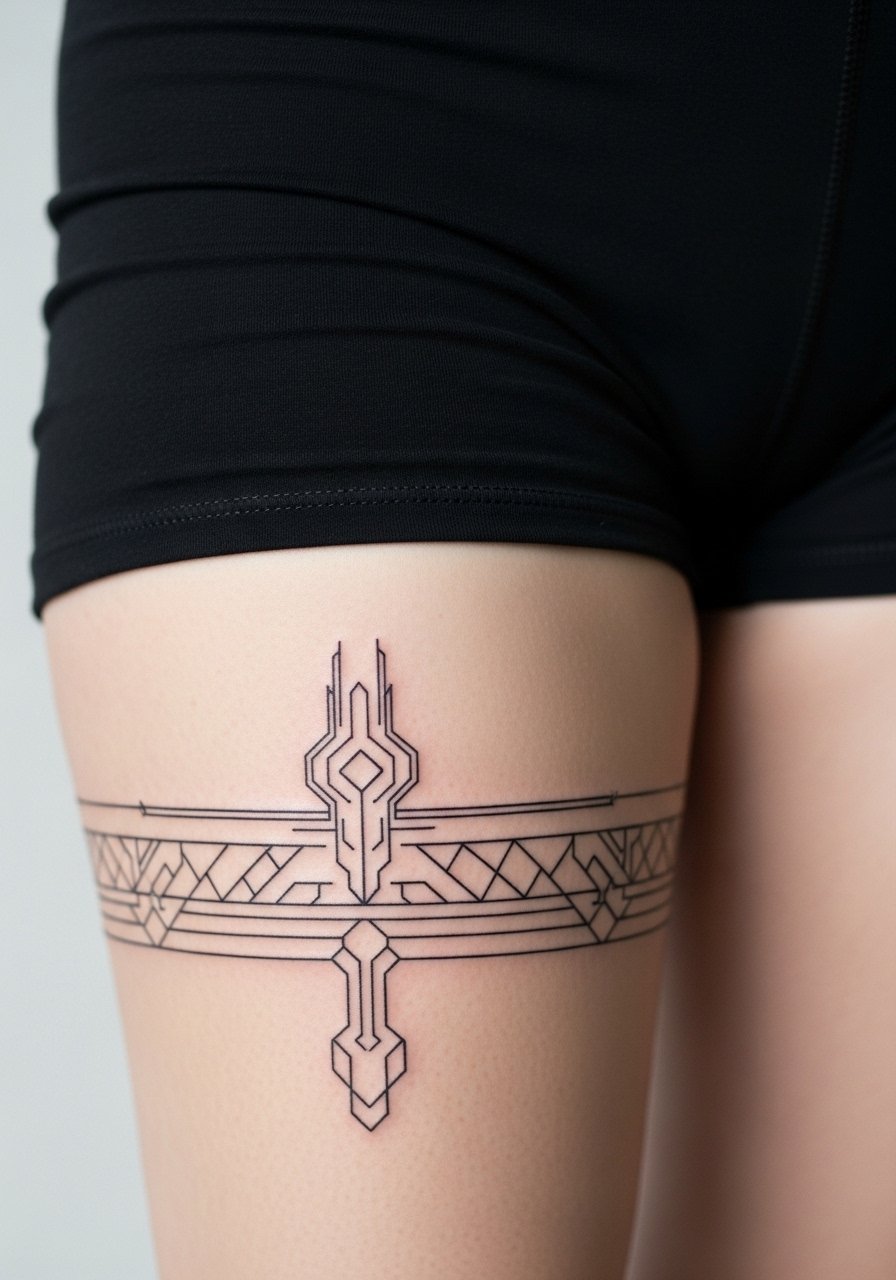
This modern ornamental mixes tech glyphs and knot motifs best on the outer thigh where the wrap can read like jewelry. Tell your artist you want slightly bolder anchor lines around the sigils so the thin connectors do not fade into the skin over time. The outer thigh is forgiving for thin detail, but the mistake is relying on ultra-delicate connectors without anchor bands. Session wear should be loose shorts or a skirt so the artist can access the area without stretching the skin. Expect low to medium pain and one to two sessions for an average band.
4. Mandala Knotwork Shoulder Cap
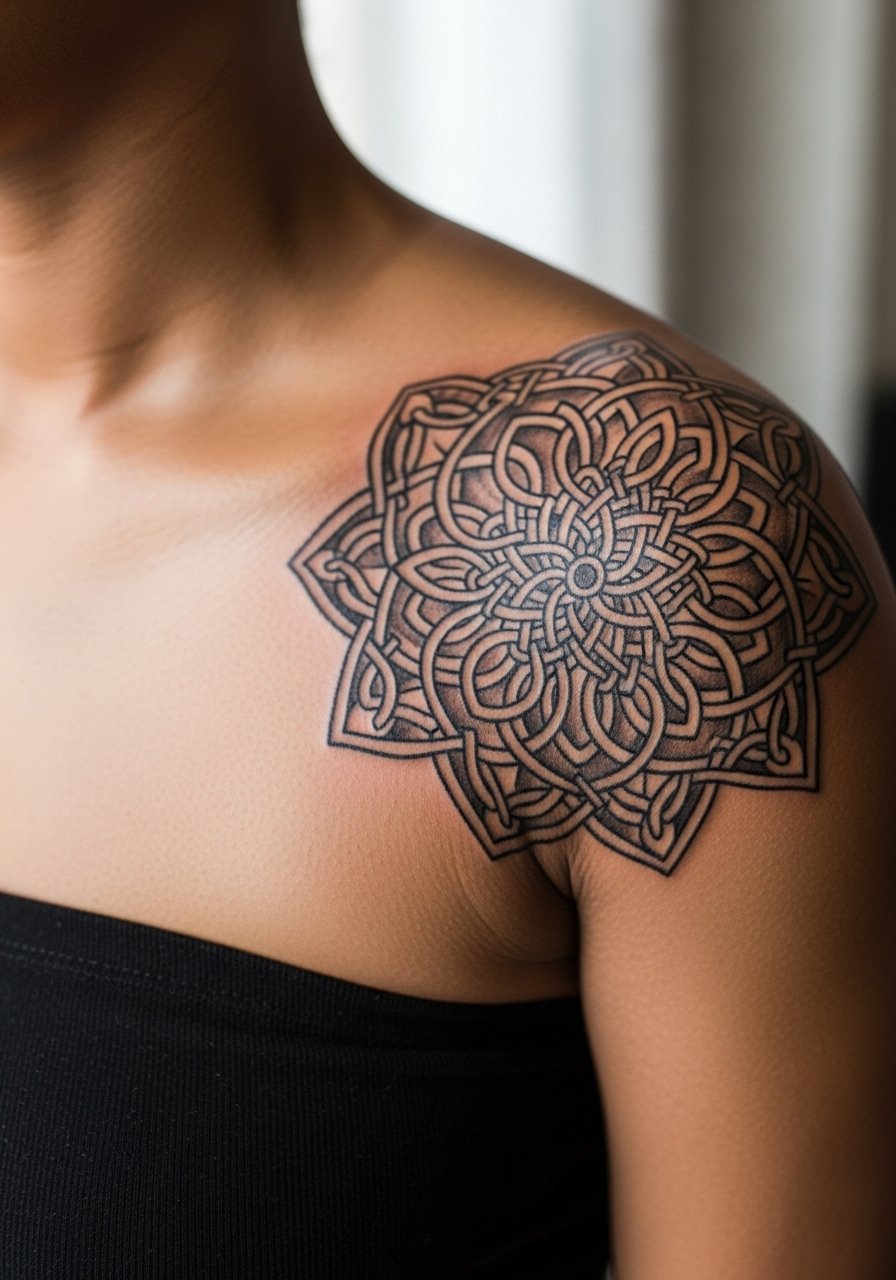
Fair warning: shoulders are a great place for bold knotwork because the round surface helps radial pieces read well at a distance. Ask for whip shading to keep gradients soft while preserving the knot outlines. A common mistake is starting the knot too close to the arm joint, which distorts when you lift your arm. For the session wear a loose tank or button-down you can pull aside. Expect two sessions and a touch-up window at year three if you want the knots to stay crisp.
5. Tessellation Honeycomb Ribcage Panel
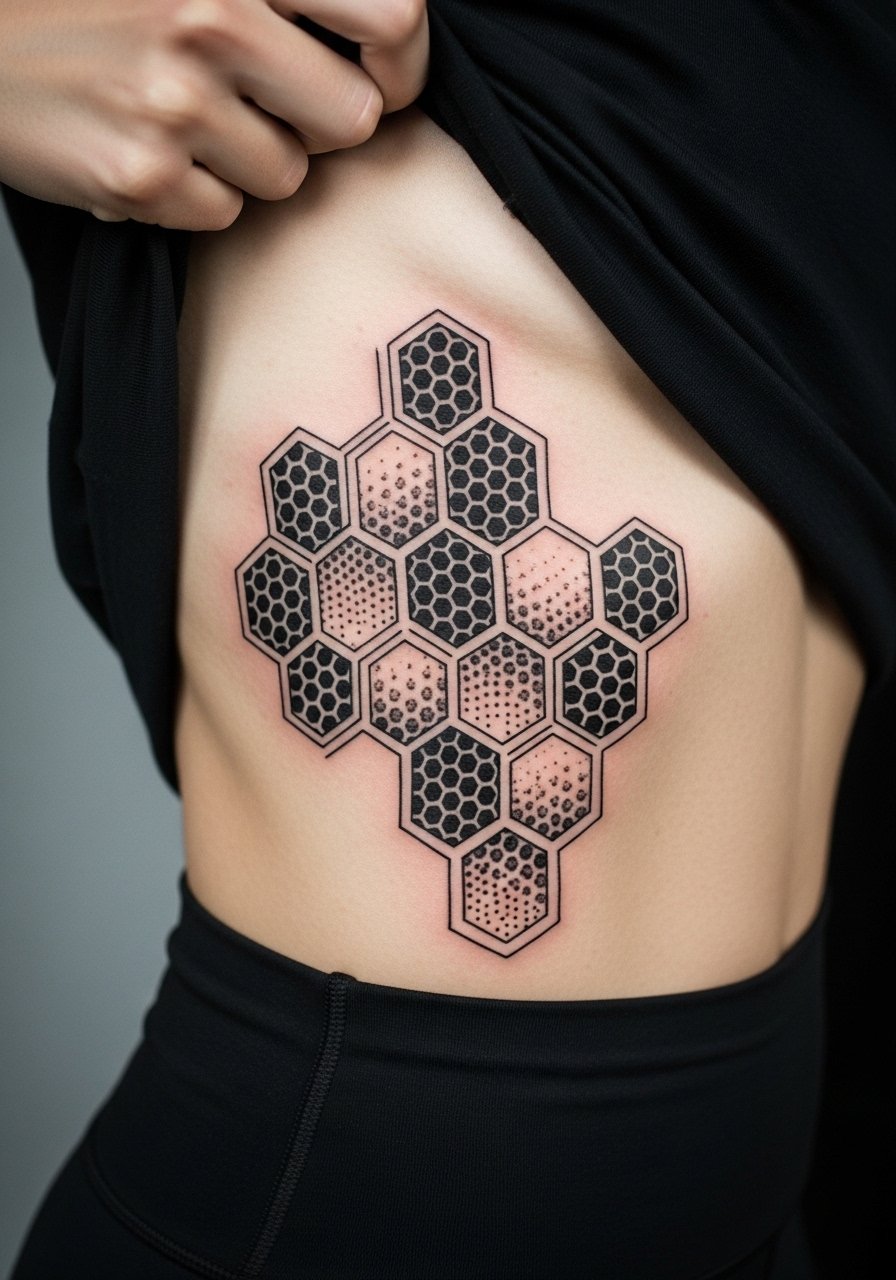
Fair warning: the ribcage rates high on most pain charts, but the result rewards the endurance. For longevity, ask for stronger negative space breaks between hex cells so the pattern does not merge on curved areas. A version that ages poorly often packs cells too tightly along the rib curve. Plan for three sessions and expect touch-ups in two to three years if you live in a humid climate. For the appointment wear a cropped top you can lift without binding. Also consider how the piece hides under layers if you need discretion during healing.
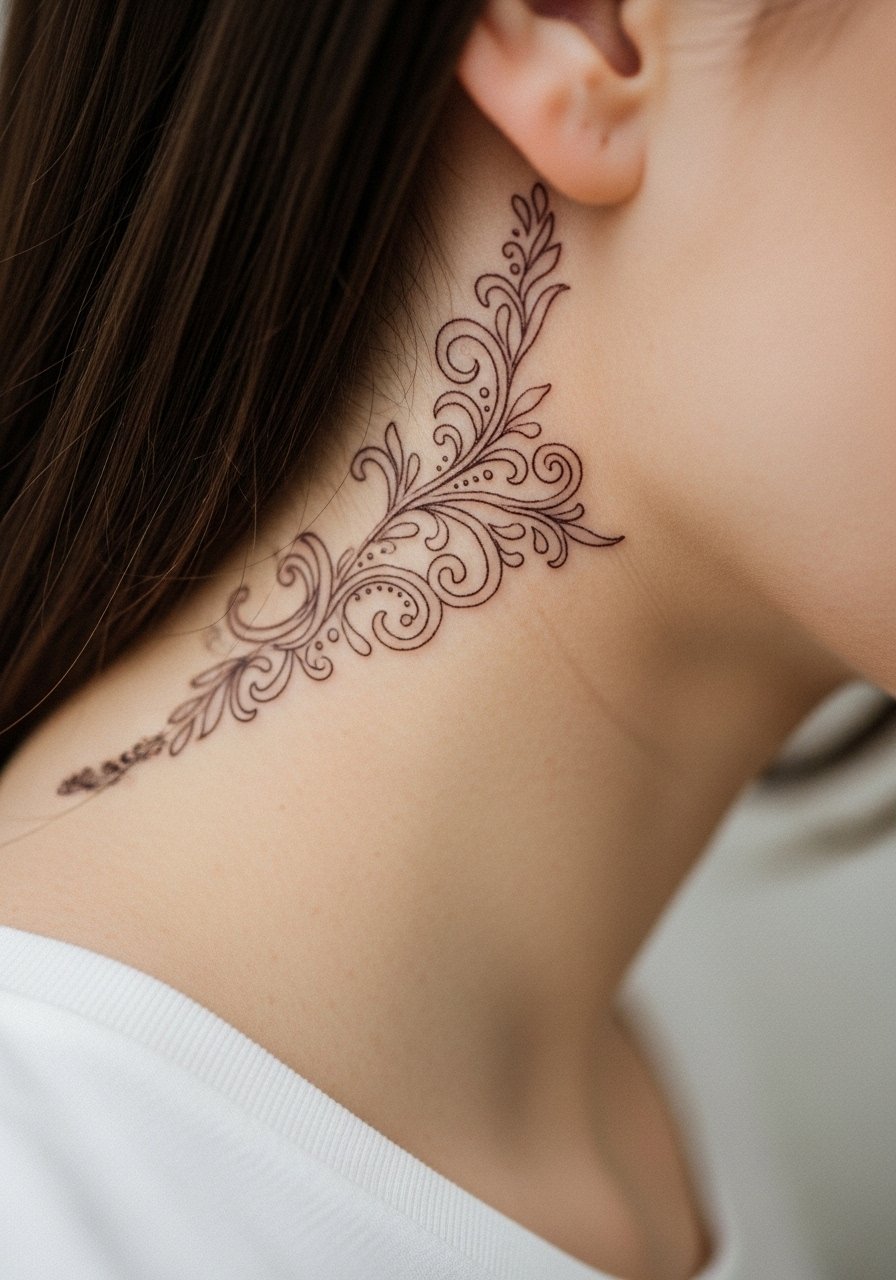
6. Evil Eye Floral Scroll Collarbone
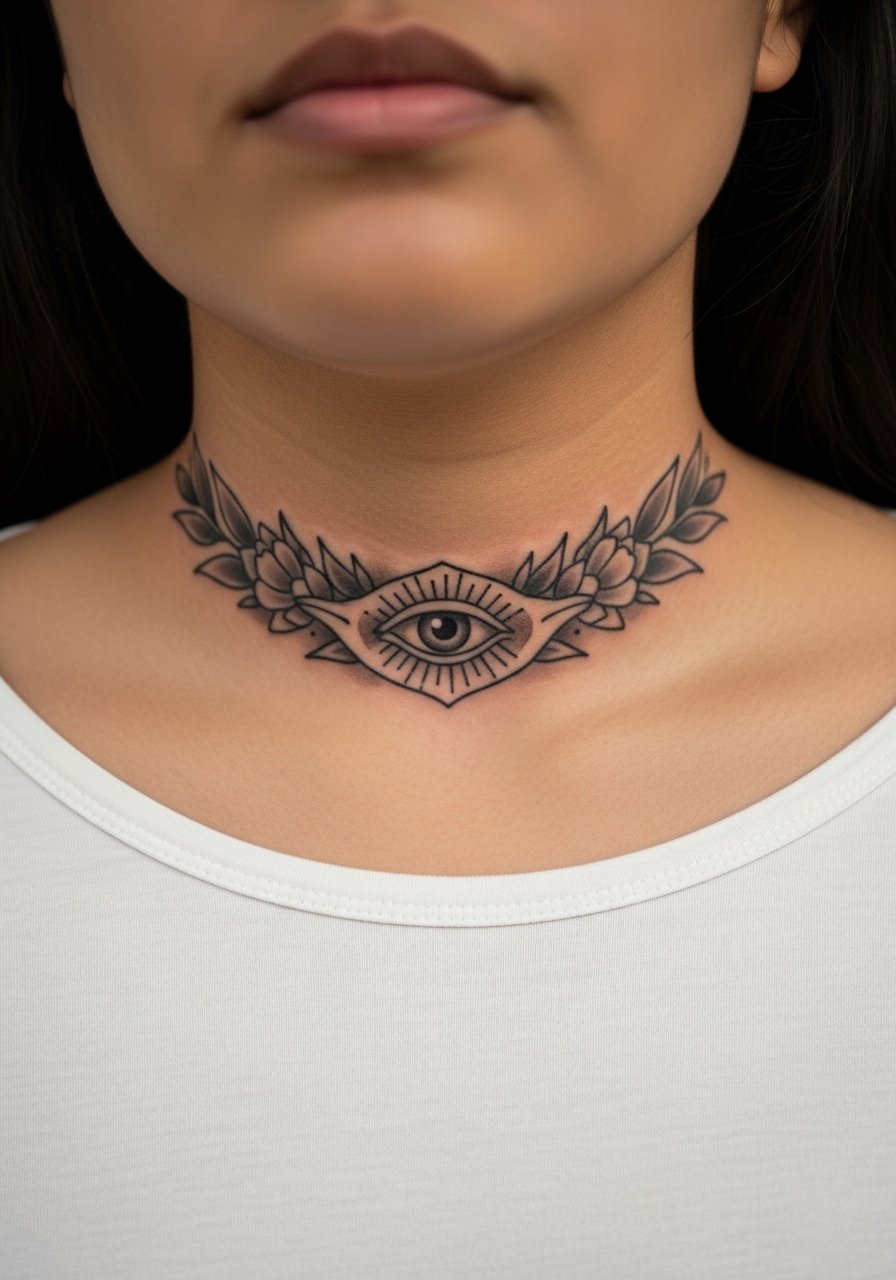
This collarbone design balances ornamental scrollwork with a central protective motif. Tell your artist to keep gradients shallow near the bone and to use heavier outline anchors along the scrolls so the negative space stays crisp. Collarbone is visible so session wear that exposes the area without rubbing helps. Expect two sessions and a touch-up around year two if you want the gradients refreshed. For showing it off, pair with an off shoulder black top in evenings and a thin choker when you want asymmetry.
Studio Day Picks
The chest, shoulder, and rib pieces above demand different prep than a wrist or ankle tattoo, and a few practical items make the session and the first week smoother.
-
Stencil transfer paper kit. Lets you preview the placement on skin, which is essential when planning radiating or tessellated pieces in ideas above.
-
Topical numbing cream. Applied as recommended before the session can ease ribcage and sternum sensitivity so the artist can work without you tensing up.
-
Thin protective film roll. Useful for small high-friction placements like wrists and ankles during the first days of healing.
-
Fragrance-free body wash. Gentle cleansing helps preserve dot work and thin connectors without irritating the area.
-
Aquaphor healing ointment. Thin layers in the first days lock in moisture for detail-heavy work without clogging the needle channels.
7. Gothic Tracery Window Sternum Panel
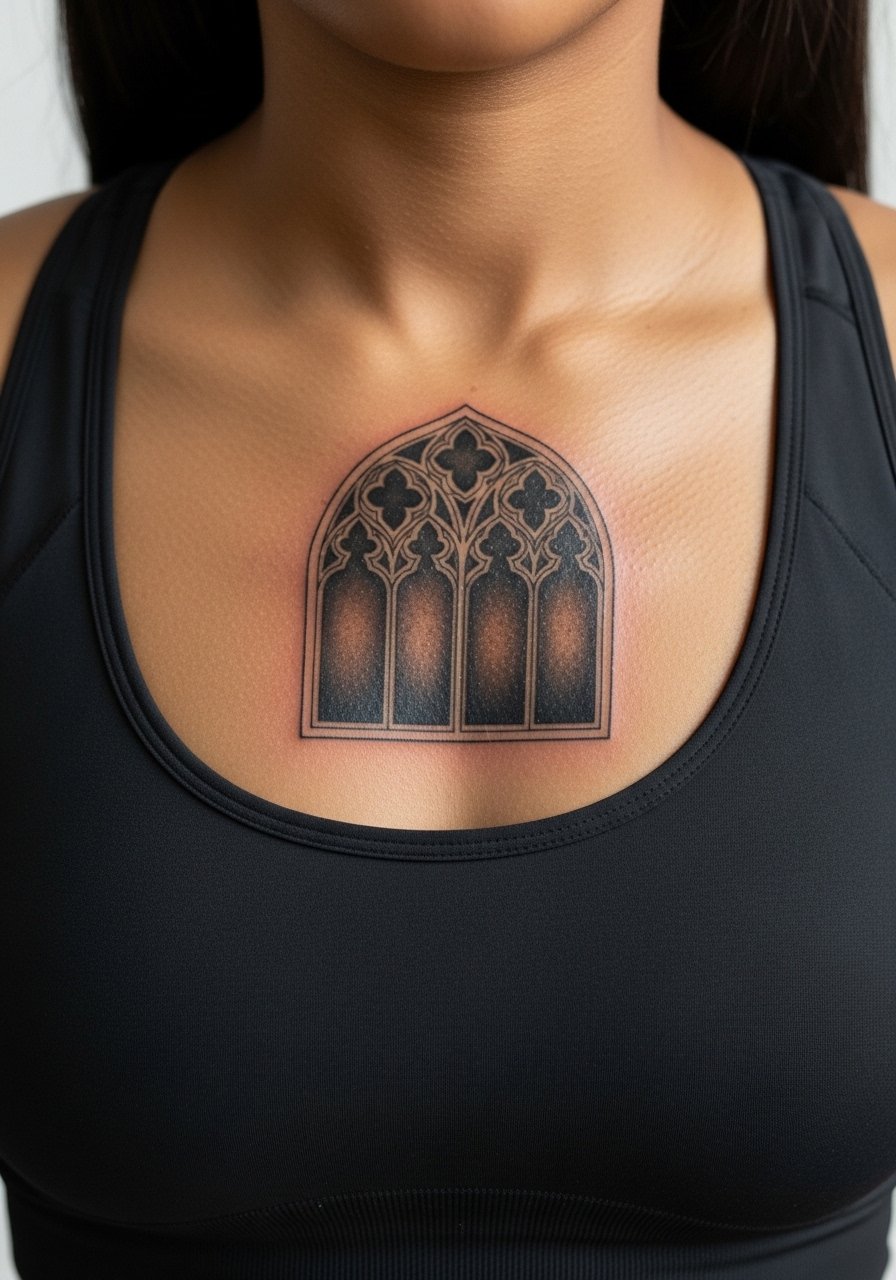
Artists often split on thin-line sternum work. One camp says the skin there stretches and blurs delicate lines quickly. The other camp says with correct needle depth and spacing, detail holds. Name both views in your consultation and ask which approach your artist favors. For a tracery window, I recommend stronger anchor lines around the arches and lighter stipple shading outward. Sternum tattoos need a measured layout so the radiating elements do not distort with movement. Expect three sessions and a realistic touch-up window at year three.
8. Snake Skin Diamond Tessellation Calf
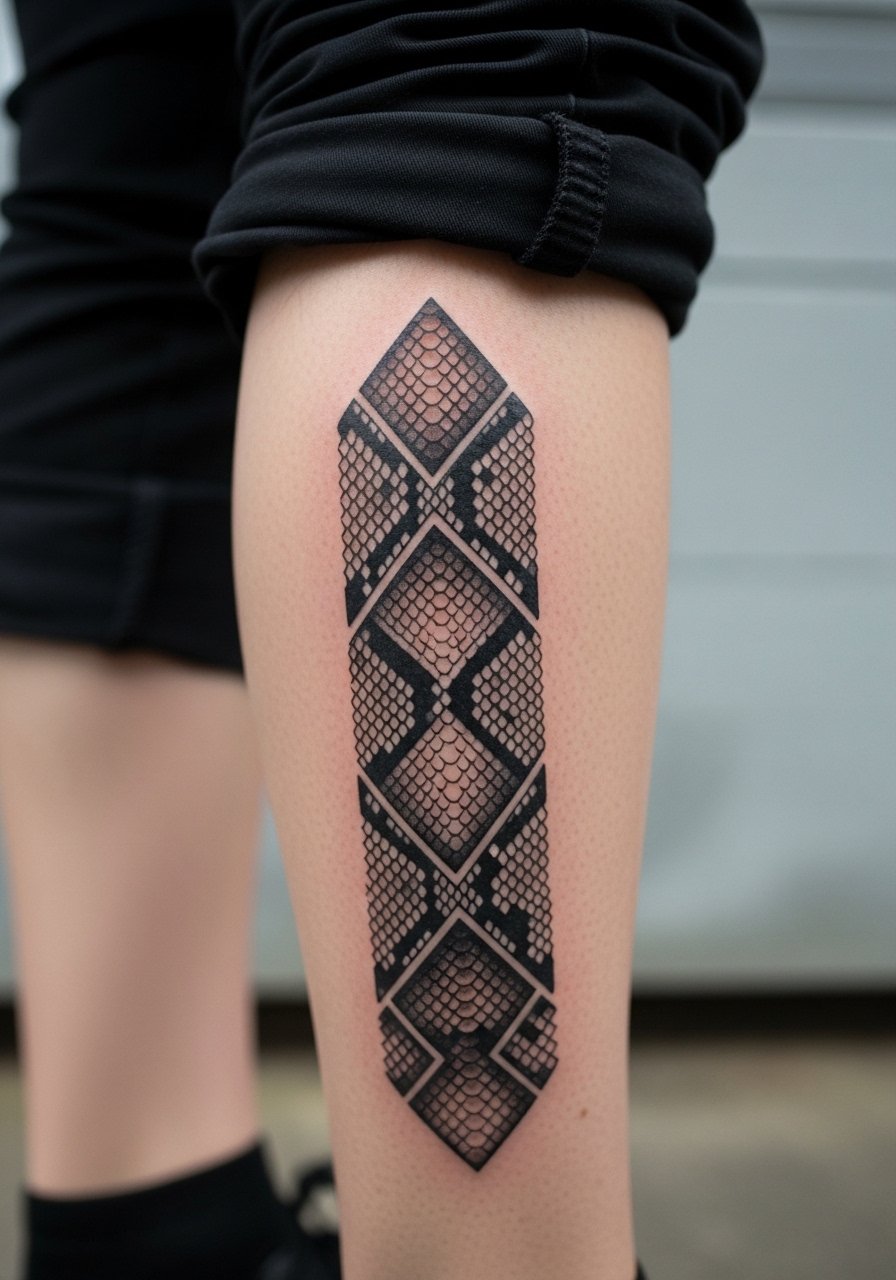
The calf is forgiving for heavy black fills and repeating diamonds that mimic natural patterns. Tell your artist you want bold dividers between diamonds to protect negative space on curved muscle. A common mistake is underweighting the dividers so the pattern blurs with muscle movement. Session feel is moderate and you can usually lie face down or sit comfortably. Allow for two sessions and one touch-up around year two where friction from socks or boots tends to wear the edges.
9. Lotus Radial Back Panel
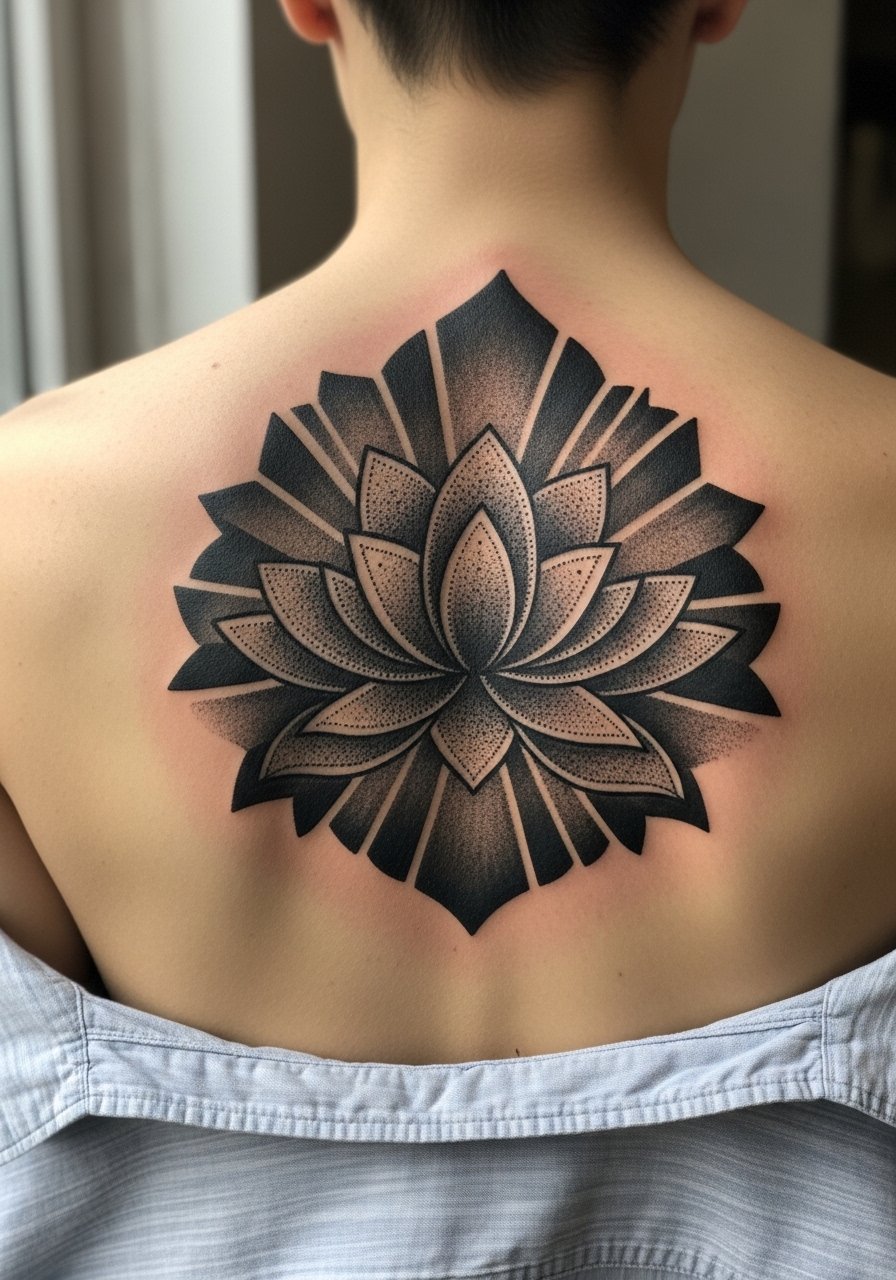
Large back panels give dot work room to breathe so a lotus can radiate cleanly. I advise mapping a light source on the design with your artist so shading planes remain consistent across the shoulders. The common version that ages poorly uses even tiny repetitive dots everywhere, which can merge on the lower back. Expect multiple long sessions and a long-term plan for touch-ups every few years if you want to maintain contrast. For showing it off during warm months, open-back dresses frame the radial geometry well.
10. Filigree Art Deco Wrist Cuff
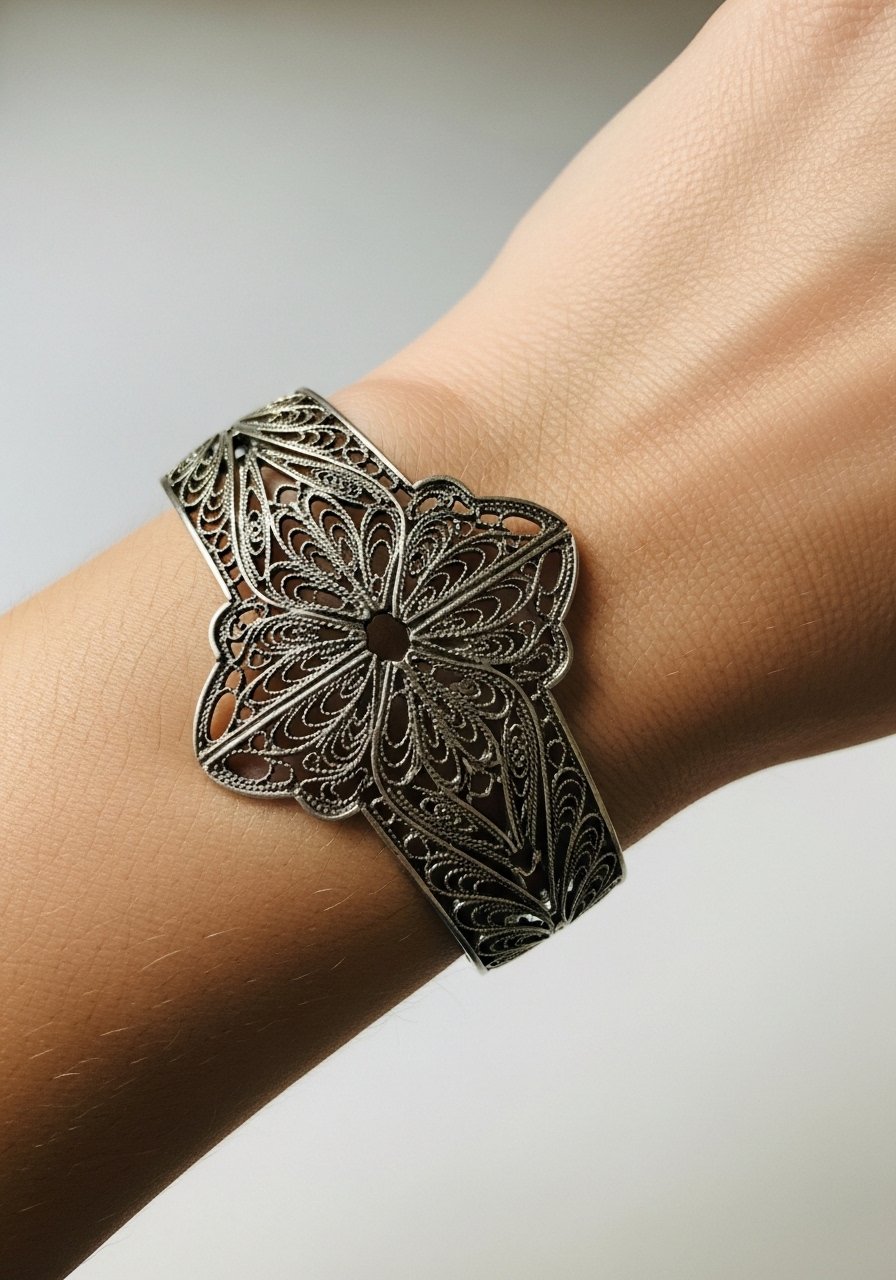
Wrist cuffs are compact and demand clear spacing. I recommend asking your artist for varied line weights and small negative breaks so the cuff does not become a dark band as it heals. The wrist sees a lot of washing and movement, so the most common mistake is too much tiny detail. Session time is short, but expect a touch-up within 18 to 24 months. For session wear, keep sleeves short and bring a wrist cuff that you can remove easily. For showing it off, try matte stackable rings on the opposite hand.
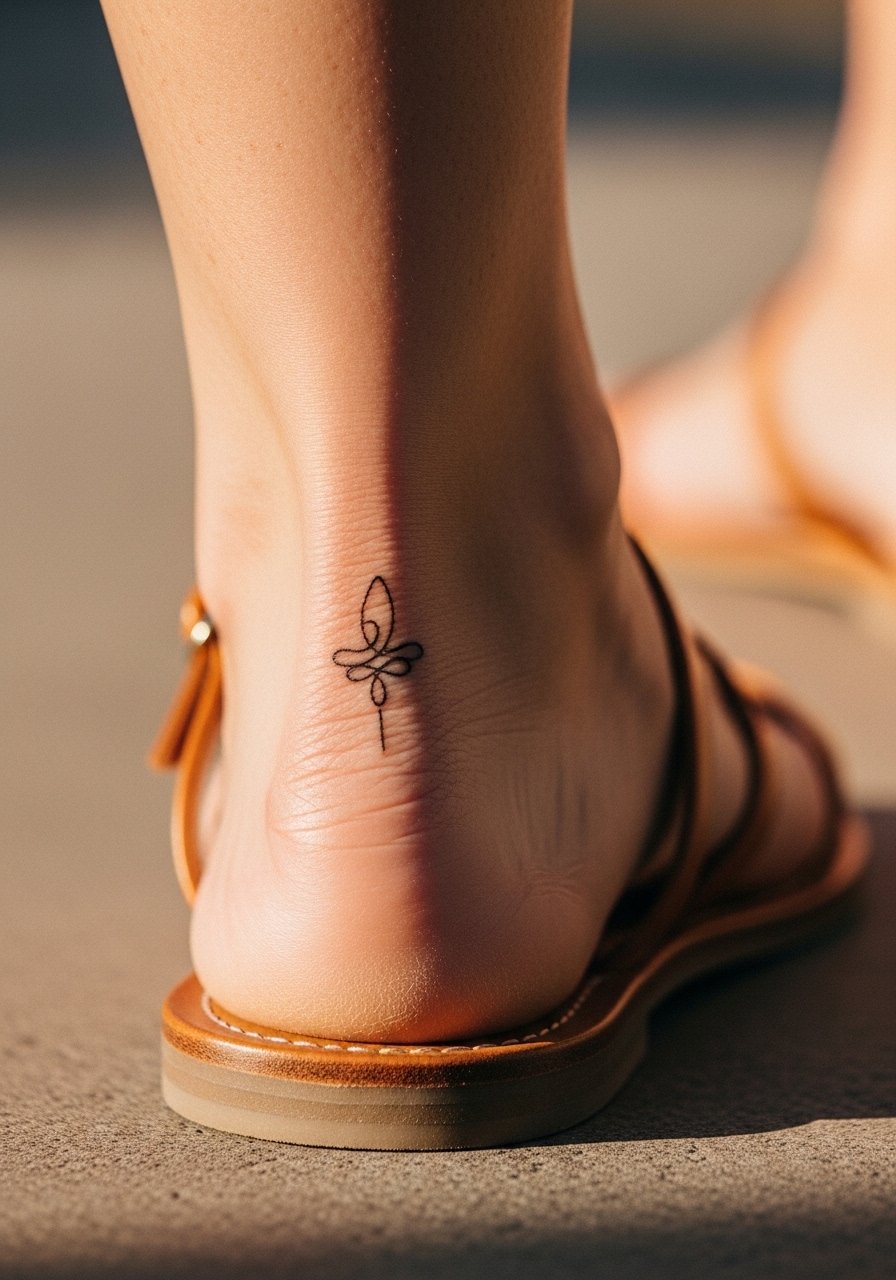
11. Blackwork Negative-Space Geometric Ankle
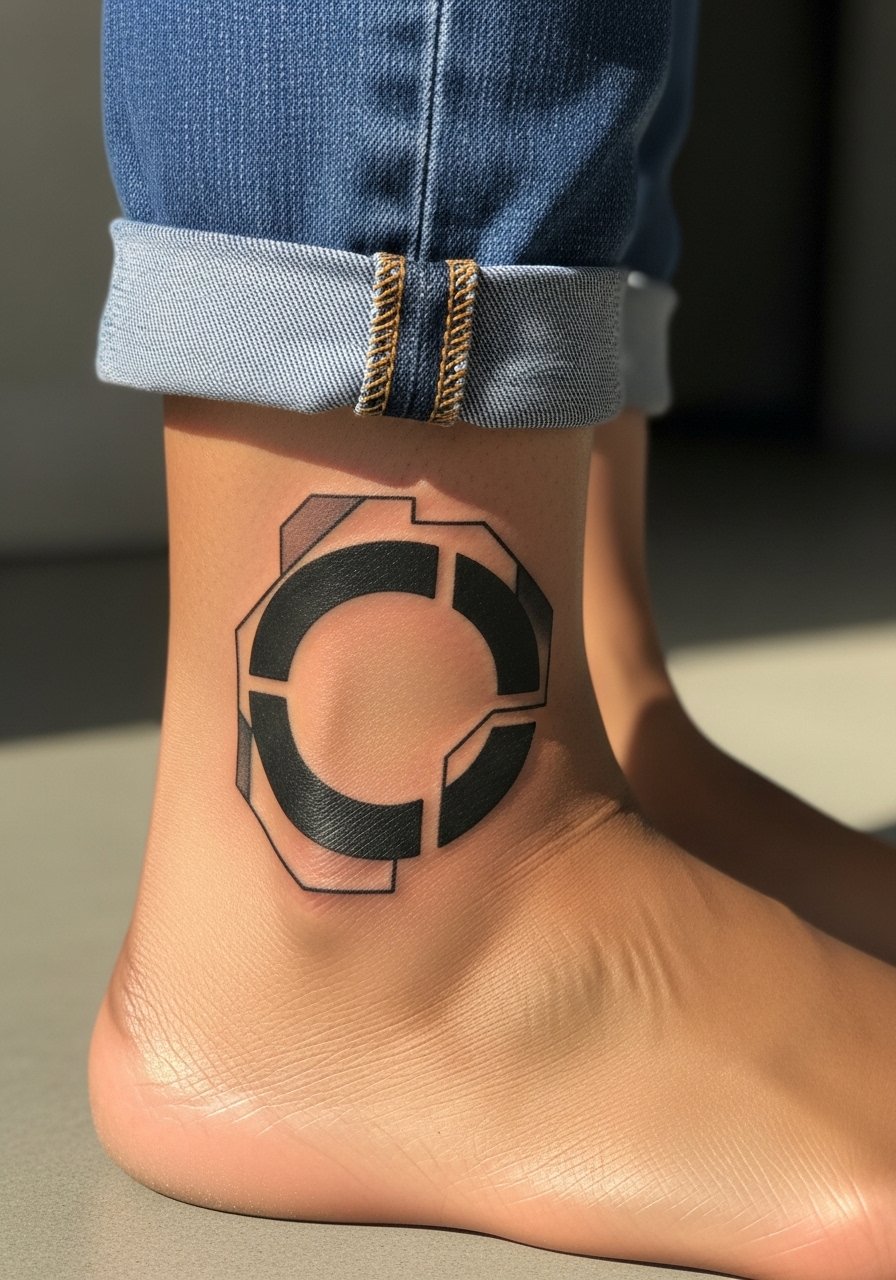
Ankle pieces need decisive blackwork with deliberate negative gaps to maintain shape under friction. I usually suggest larger negative shapes rather than tiny cutouts for longevity. Pain is variable but often sharp during the needle pass. A common aging error is relying on micro negative slots that disappear after regular shoe friction. For the appointment wear pants you can roll up, and for showing it off, cropped ankle-grazer pants highlight the panel. Expect one to two sessions and a potential touch-up at year two.
12. Ornamental Biomech Neck Column
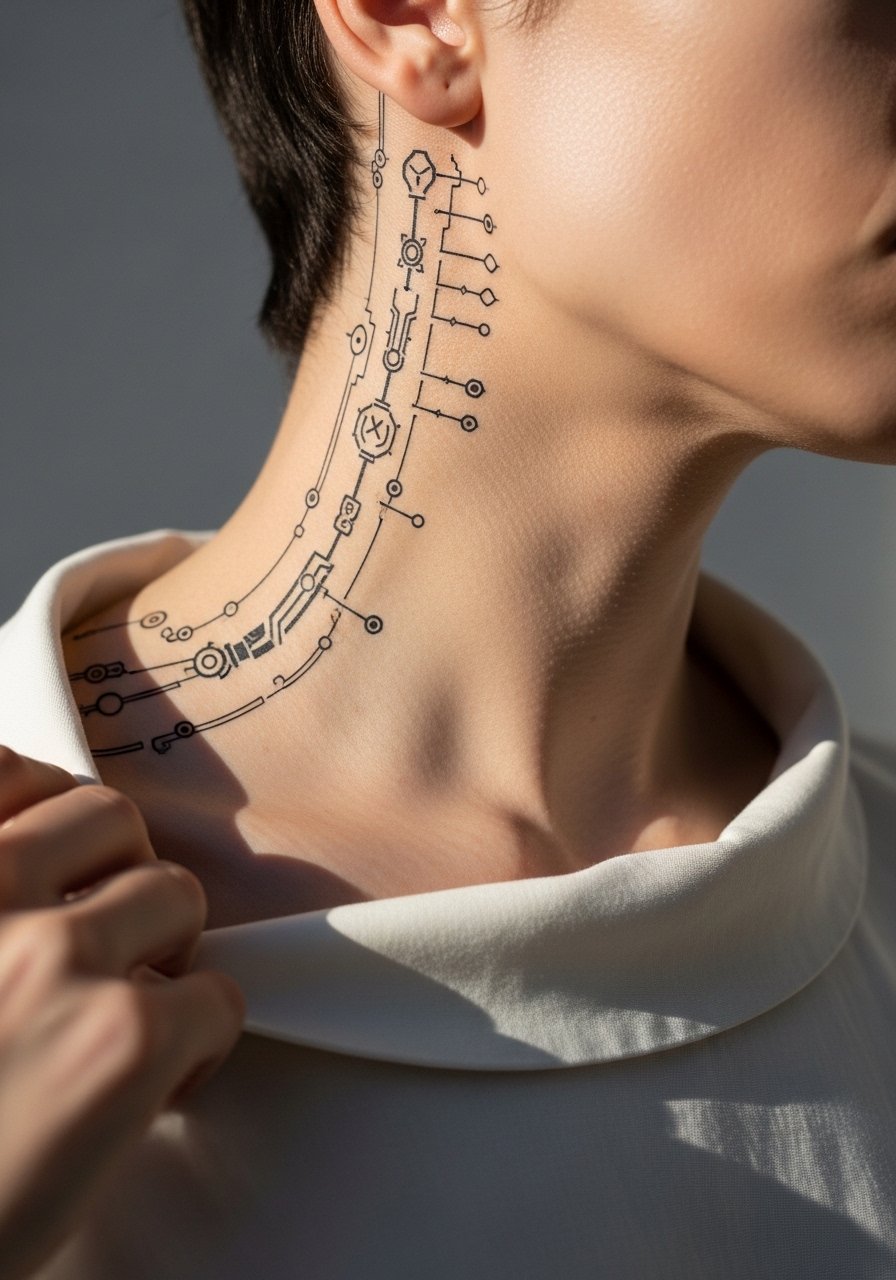
Neck pieces read bold because of vertical lines that follow muscle planes. For this biomech column ask for anchor bands so the thin connectors do not blur with sun exposure. Neck skin is finicky so many artists avoid extremely thin connectors here. Expect moderate pain and two sessions. Handing your artist explicit placement photos during the consultation helps avoid mistakes like running the design too close to the hairline or jaw. If you want to find a specialist, search location tags and style-specific hashtags for travel bookings.
13. Ornamental Spine Column

Spine columns work best when the flow follows vertebral spacing. Ask your artist to break dense areas between vertebrae to avoid heavy continuous fills that can warp with posture. The pain is higher here and sessions are often split. A typical mistake is packing too much density over the vertebrae where natural movement causes faster softening. Plan for multiple sessions and discuss touch-up timing up front. For the session wear a button-down you can slide aside or a loose tank for access.
14. Micro-Filigree Ear Cuff Zone
Behind-the-ear placements require a precise, compact layout and a steady artist hand. The skin there is thin, so ask for slightly bolder outlines for longevity. The mistake I see is requesting ultra-delicate filigree that fills the surface, which loses definition quickly. Sessions are short but the area is sensitive. When searching for an artist, use style-specific hashtags and local directories to find someone comfortable with small, awkward placements. Keep hair tied up for the appointment.
15. Geometric Compass Ankle Band
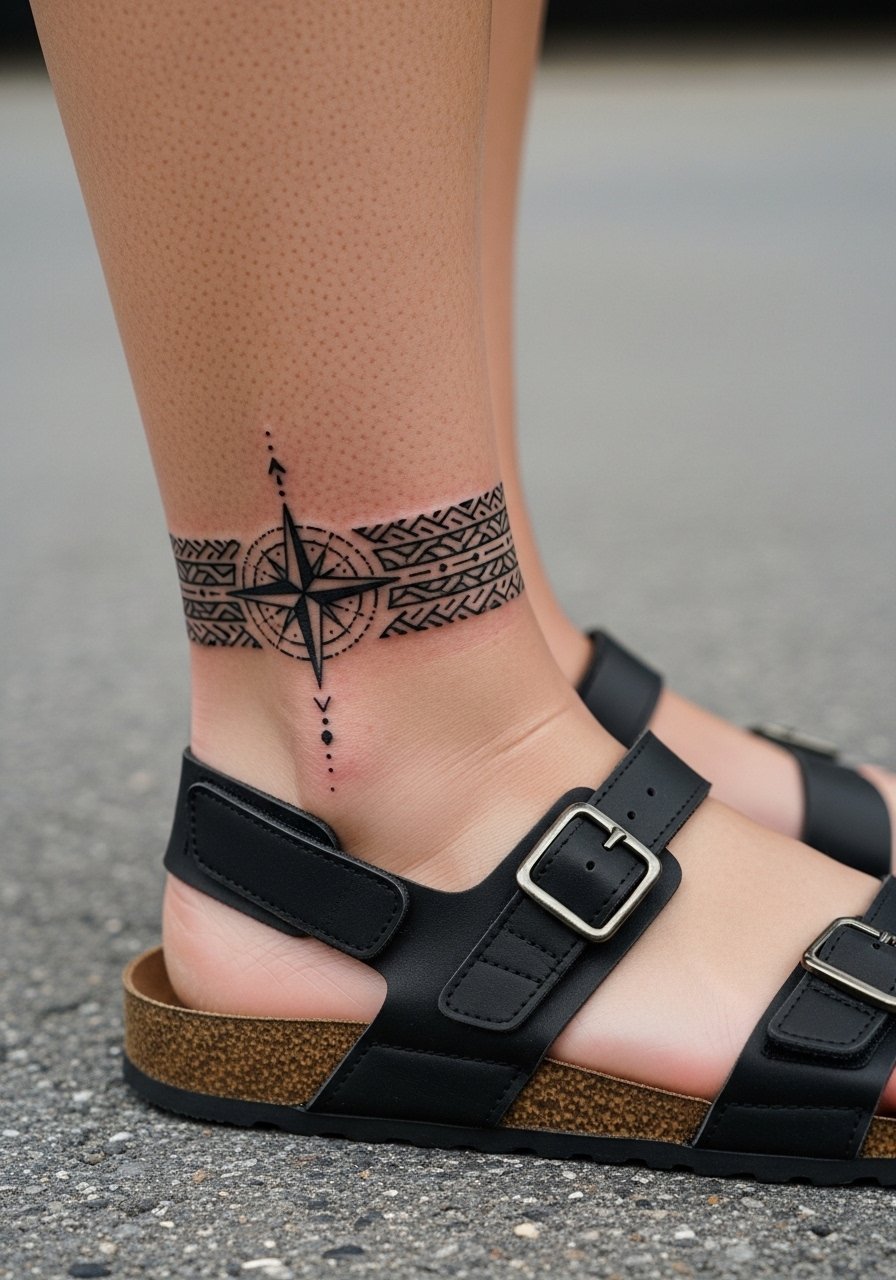
Bands around the ankle need clean negative breaks so the compass points do not blend with sock lines. Tell your artist to place the main axis lines slightly thicker and leave breathing room around the points. The ankle receives lots of movement and washing so thin lines are the usual cause for early blurring. Session time is short. For showing this off try cropped pants or sockless loafers in summer. Expect a touch-up at around year two if you wear boots often.
16. Ornamental Wrist Script Panel
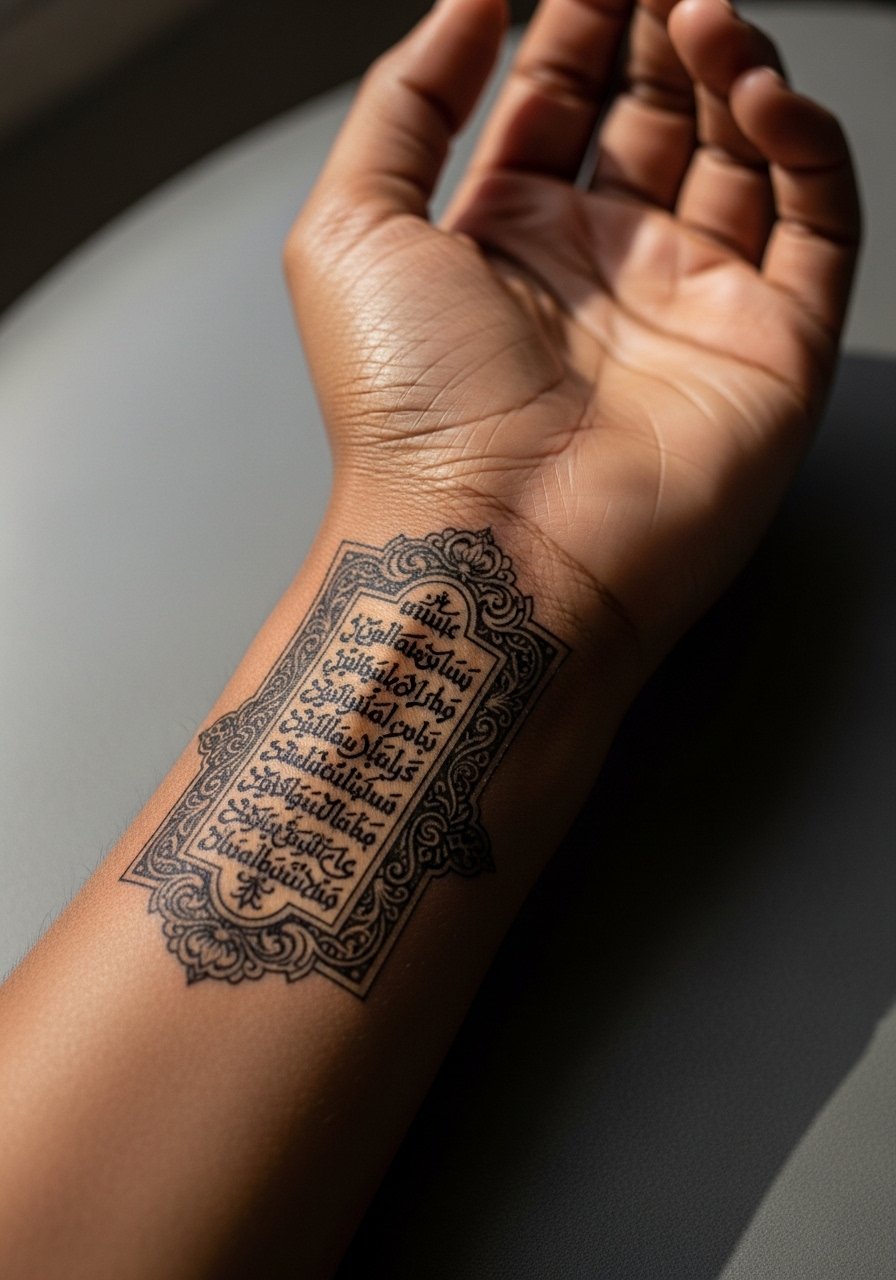
Inner wrist panels combine script and filigree best when the lettering is sized for six to eight months of wear. Ask your artist to space letters slightly and to use heavier anchors in the filigree so the frame reads clean. The wrist is high-motion and high-wash, so plan for an early touch-up. A common mistake is tiny lettering that blurs into a line. For the session wear short sleeves and remove jewelry. Stackable minimalist bracelets can complement the panel once healed.
17. Hexagonal Calf Panel

Hex tessellations on the calf benefit from heavier black grounds with clearly defined negative cuts to preserve geometry on muscle. Tell your artist to consider muscle flex when placing the pattern so the hexes remain consistent when you walk. The calf tolerates saturation well, and sessions are comfortable. The usual error is not compensating for muscle bulge which makes cells look skewed when standing. Expect two sessions and a touch-up if your daily routine includes heavy friction from boots.
18. Ornamental Hand-Fret Work
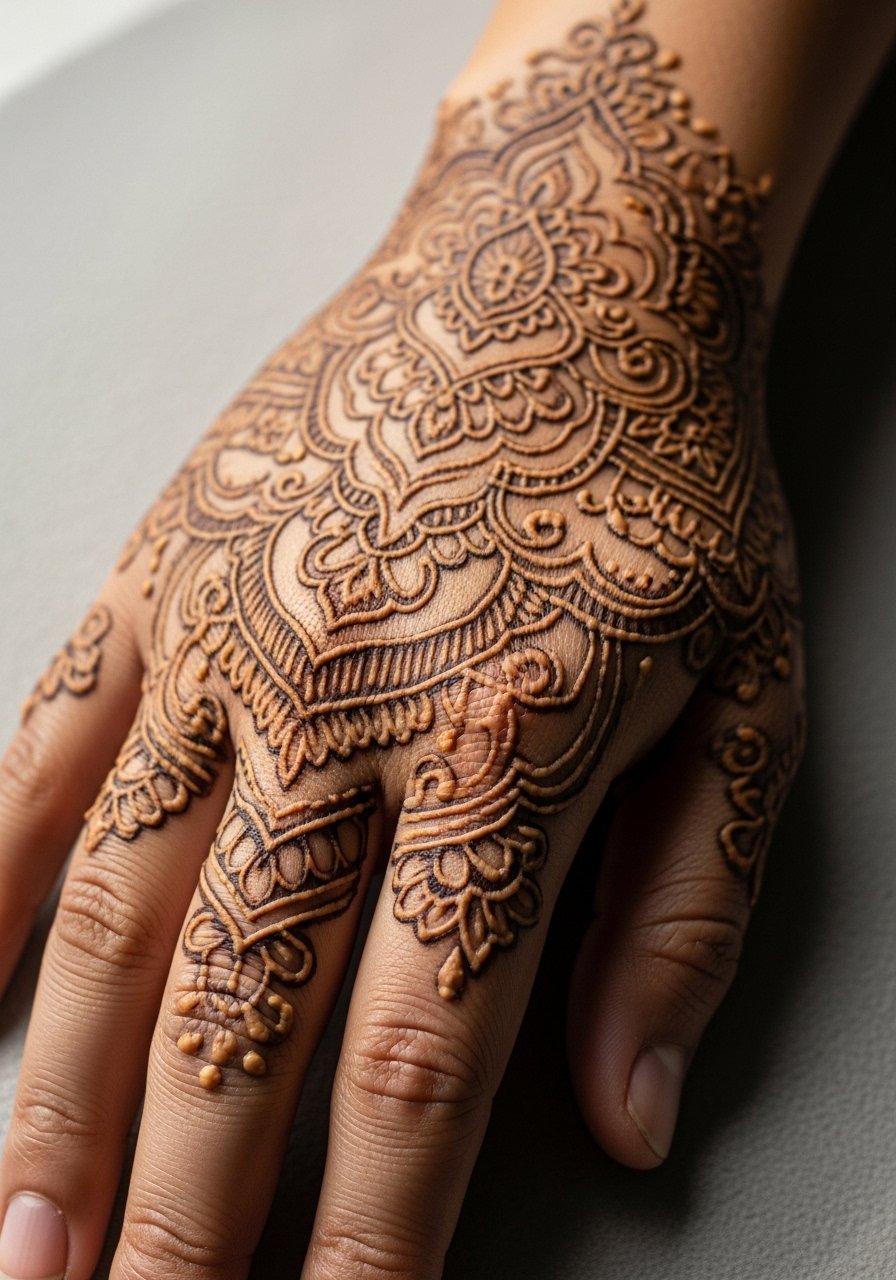
Hand tattoos face fast wear and possible workplace considerations. If you choose a hand fret, ask for bold anchors and larger negative breaks so the pattern survives daily washing. Artists differ on this placement because of fading issues. Be explicit in consultation about touch-up plans. Sessions are quick but you may need a follow-up within the first year. For showing it off choose fingerless gloves or rings that do not rub the tattoo during healing.
19. Ornamental Hip Crescent
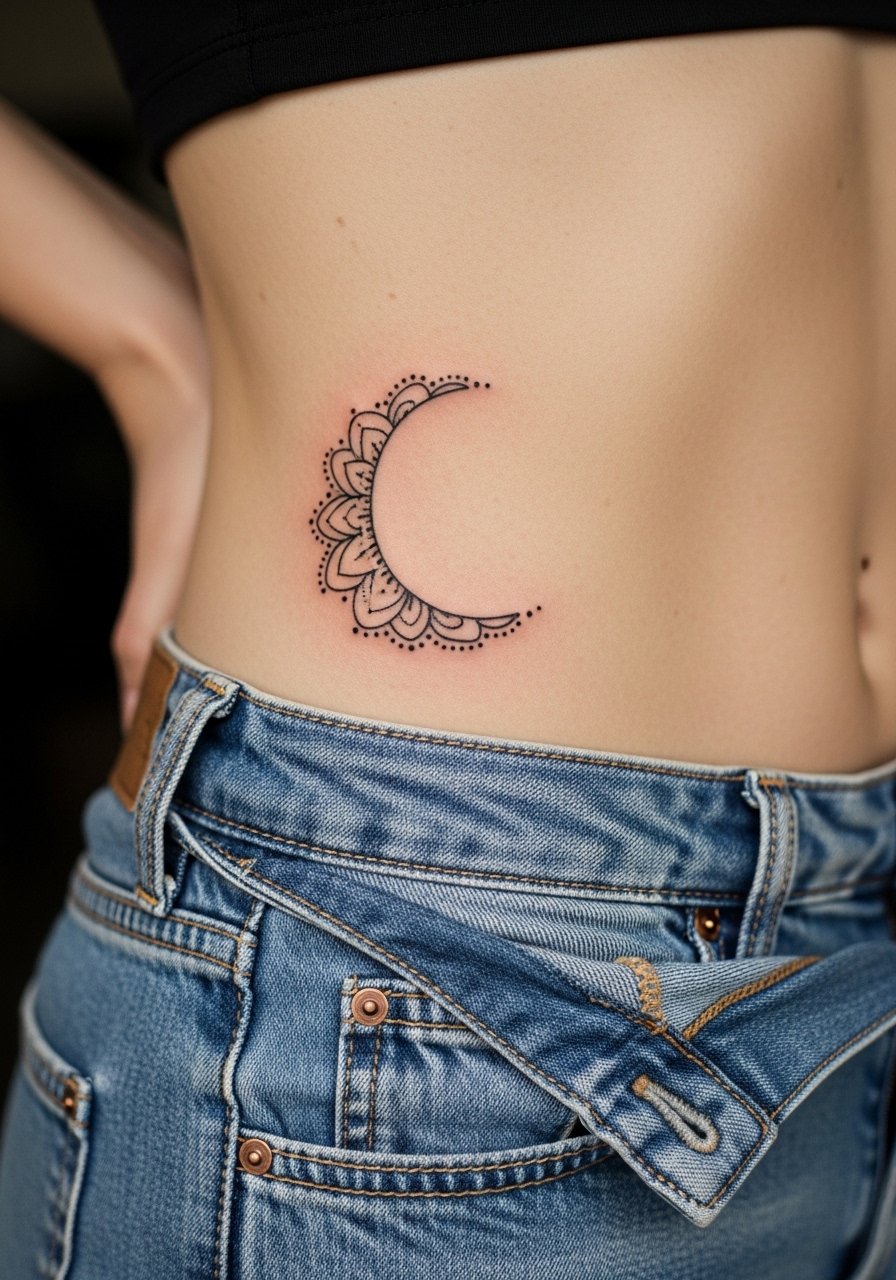
Hip pieces suit crescent motifs that follow the waistline. Ask your artist to avoid overly dense dot fills at the edge where clothing rubs. A common mistake is placing heavy fills directly under high-waist bands so the ink fades faster from abrasion. Session wear should be high-waisted bottoms you can shift down slightly. Pain is moderate and sessions are often short. For evenings pair the hip reveal with side-slit skirts that complement the curve.
20. Ornamental Thigh Lace Band
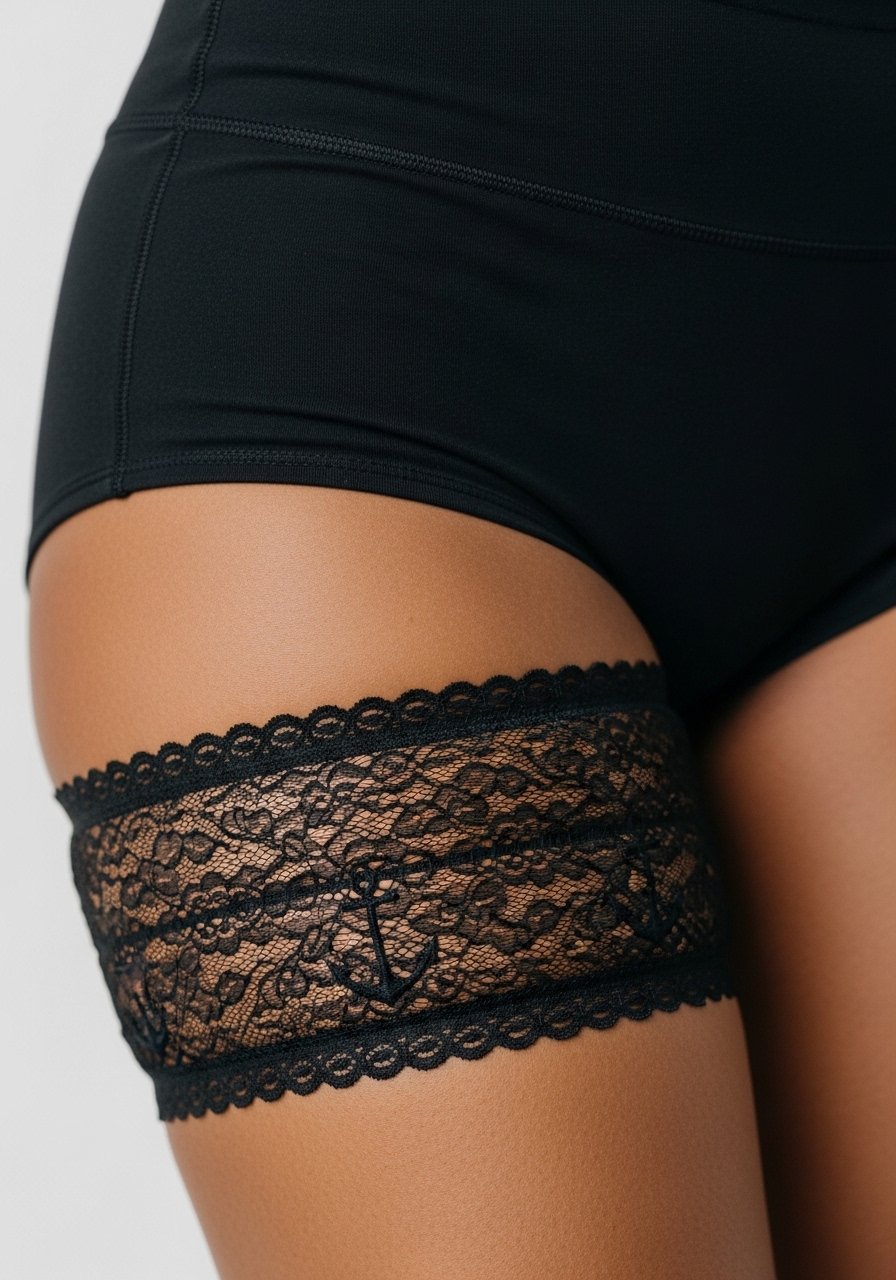
Thigh lace bands photograph like jewelry when designed with clear negative loops. For longevity ask for anchor outlines combined with delicate inner filigree so the main shape stays legible. The outer thigh allows thin connectors but avoid tiny internal knots that may merge. Session wear should be loose athletic shorts. For evenings, slim leather-look pants frame the band elegantly. Expect one to two sessions and a touch-up at year three if you wear tight garments frequently.
21. Ornamental Calf Lace Runner
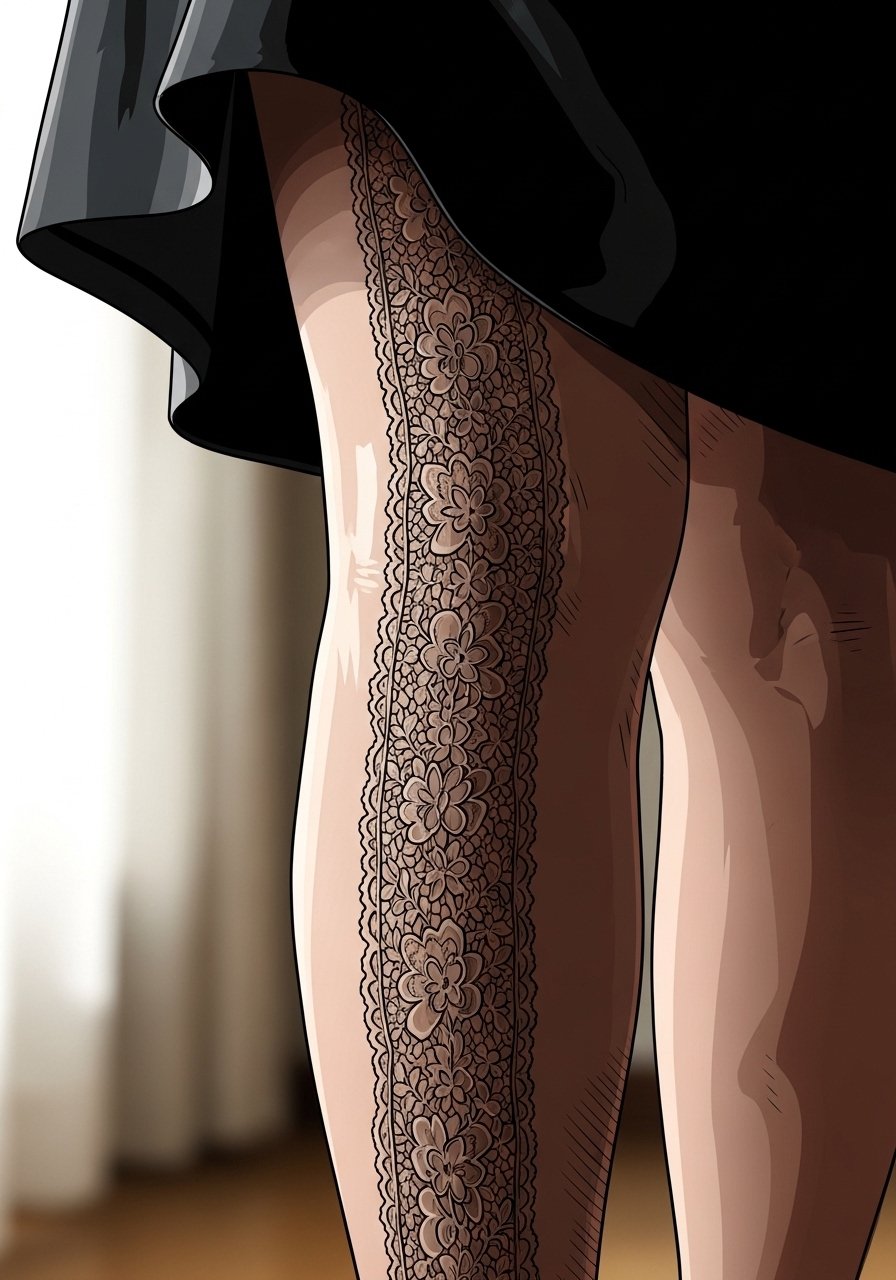
Vertical runners that emphasize length work well on the calf. Request alignment with the muscle flow and stronger outlines where the runner meets the ankle. The back calf sees less abrasion than the outer calf, so detail survives longer. A mistake is overcomplicating the lower section near the ankle where movement blurs tiny motifs. Session feel is comfortable and touch-ups are rarely needed before year three unless heavily exposed to sun.
22. Ornamental Collarbone Crescent
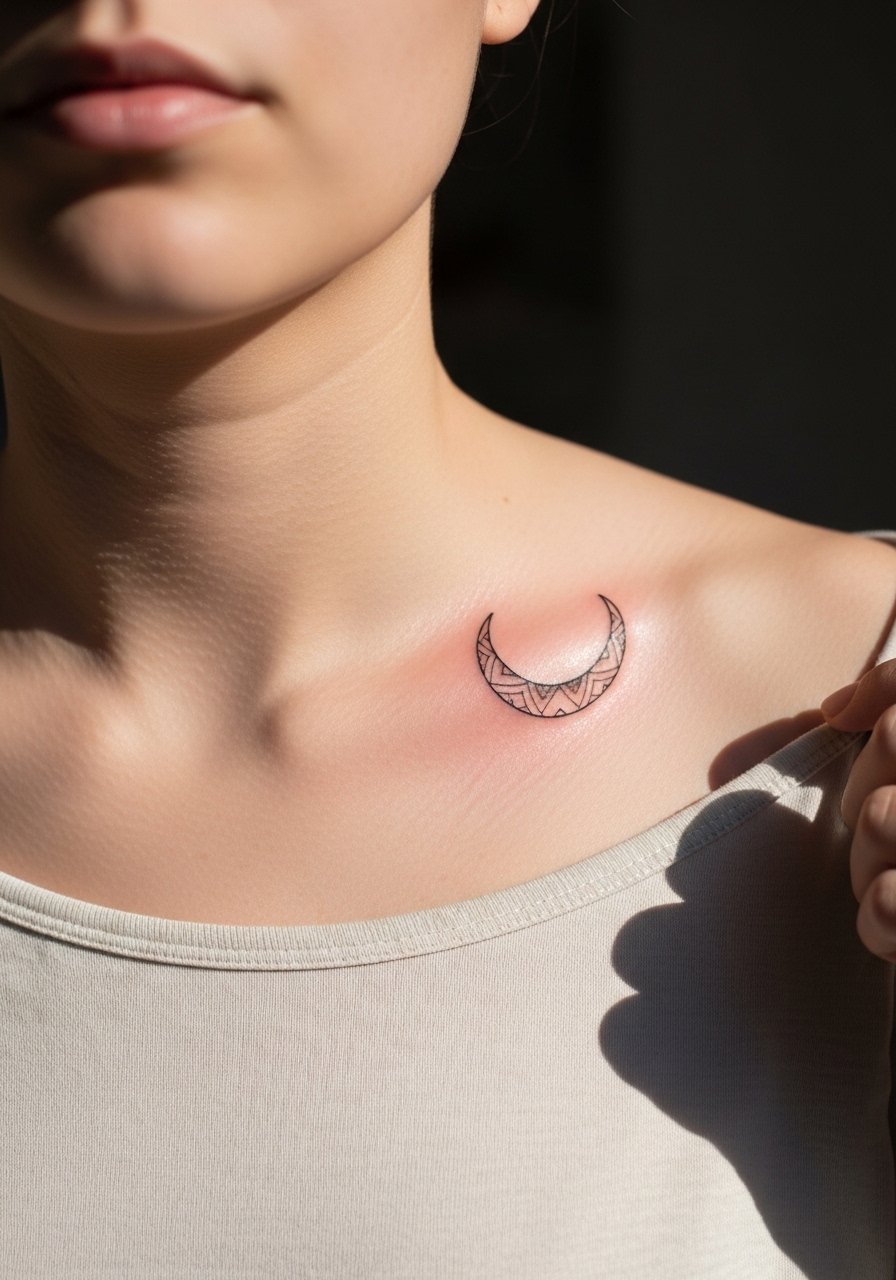
Collarbone crescents benefit from symmetry and breathing room. Tell your artist to keep the central motif slightly larger than the outer filigree so the piece keeps its focal point as lines soften. A common mistake is jam-packing the crescent with tiny loops that lose definition after healing. For the session wear a top that exposes the collarbone but does not press on the fresh ink. For evenings pair this with a deep V or wide-neck top to frame the work.
23. Ornamental Ankle Chevron
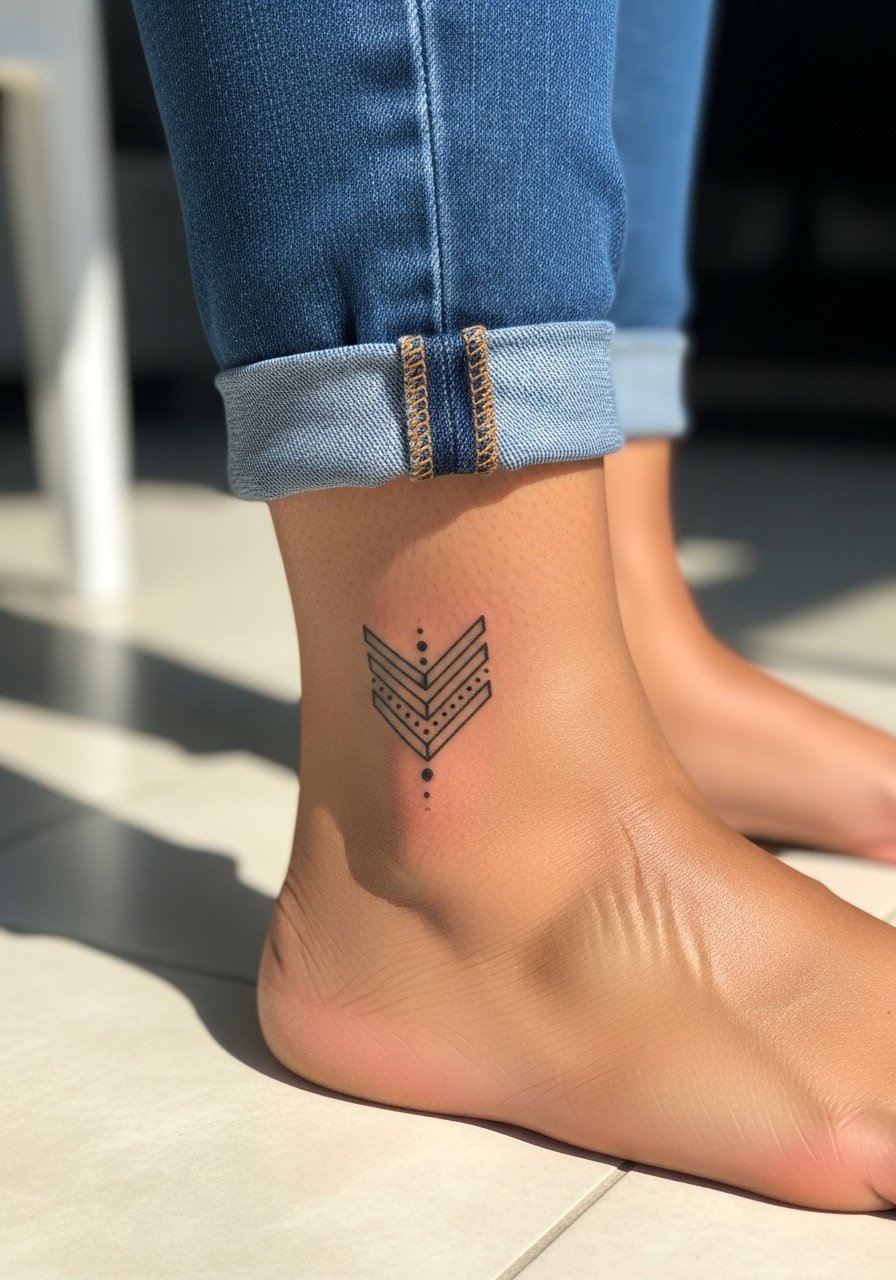
Inner ankle ornaments need decisive geometry and negative breaks so the chevron keeps shape through shoe friction. Ask your artist to avoid ultra-thin connectors and to use slightly heavier outer lines. The inner ankle can be sharp in sensation during the session but heals fast. A common error is tiny detailing that disappears under socks or tight shoes. For session wear bring shorts or pants you can roll up. For showing off pick ankle-grazer cropped pants.
24. Tessellated Shoulder Blade Panel

Shoulder blade panels allow wider tessellations since the surface is relatively flat. Tell your artist to stagger dense cells away from the spine and shoulder joint. The mistake I see is starting uniformly without considering movement between the scapula and arm. Sessions are comfortable when lying face down or seated. Expect two sessions and a possible touch-up where the pattern meets clothing seams.
25. Ornamental Heel Accents
Heel and lower Achilles accents must account for heavy friction from footwear. Ask your artist to place the design slightly off the most abrasive zones and to use bold anchors rather than tiny filigree. The session is brief but healing may be affected by socks and shoes. A common mistake is positioning the linework where sandals or straps will rub constantly. For showing off, sandals and cropped pants work well. Plan for a touch-up if you wear closed shoes daily.
26. Ornamental Inner Bicep Motif
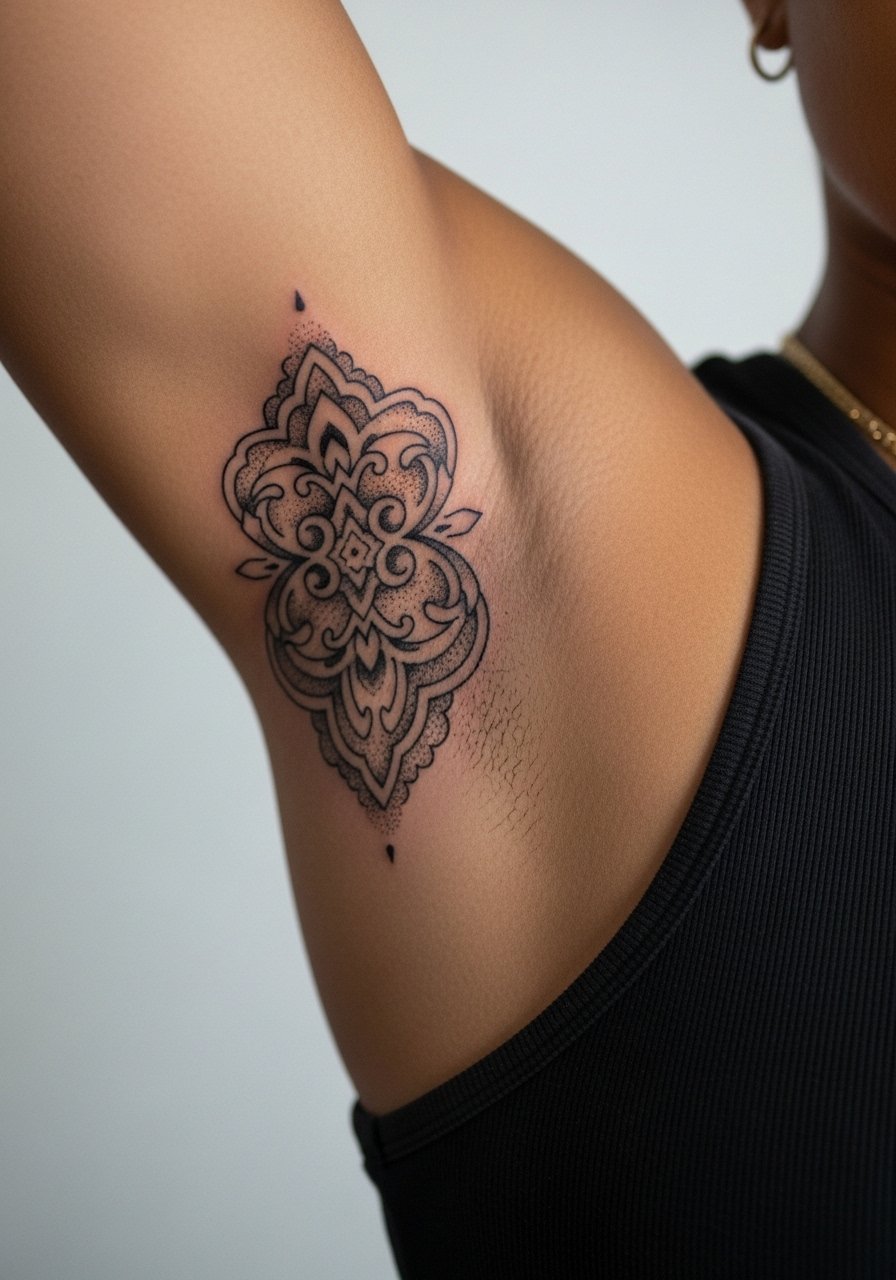
Inner bicep placements look intimate and hold detail when the artist spaces shading away from skin folds. The inner arm is sensitive so expect moderate discomfort and shorter sessions. A frequent mistake is squeezing too much detail into the fold where skin movement blurs dot work. For the session wear a tank top with a detachable sleeve so the artist can position your arm comfortably. Touch-ups may be needed sooner if you lift heavy weights regularly during recovery.
27. Ornamental Throat Bib
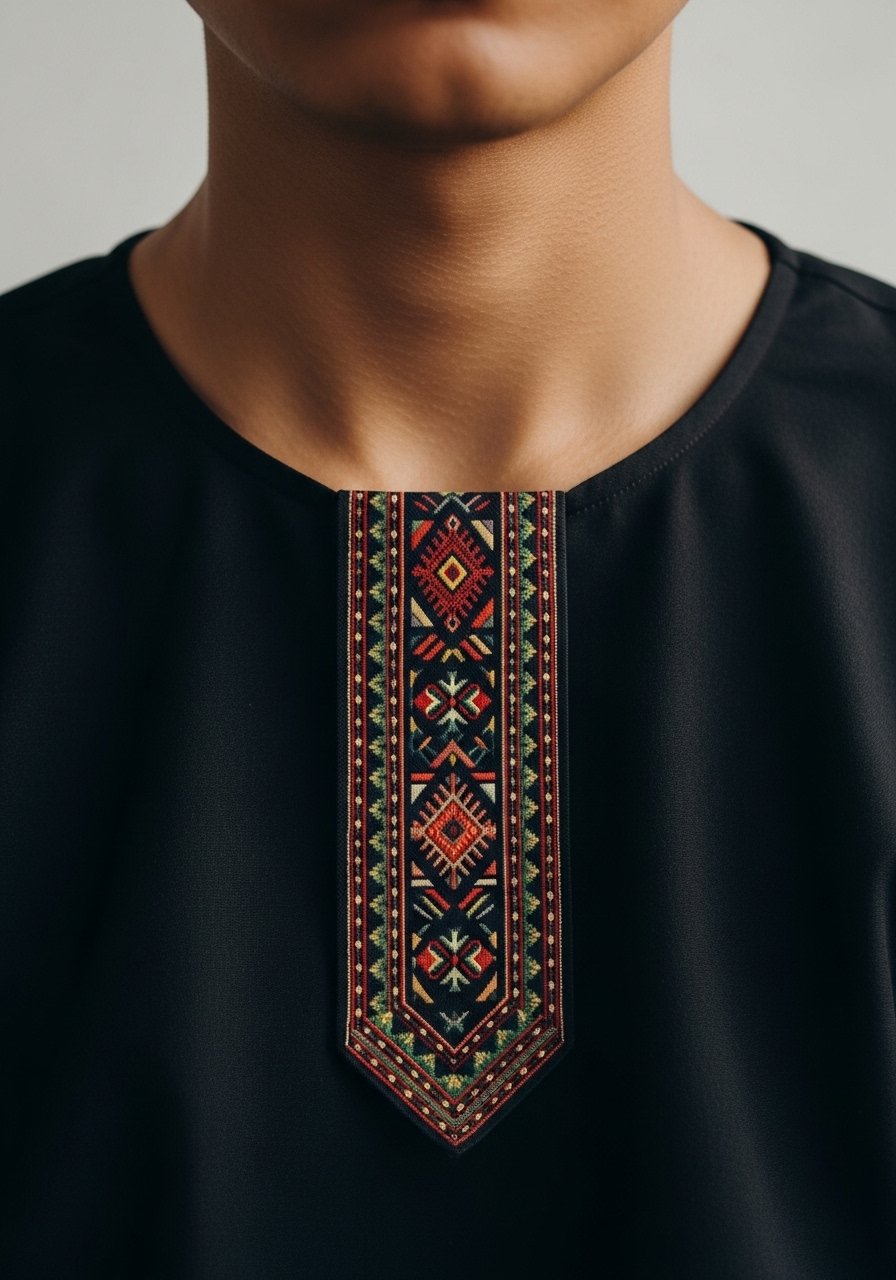
Throat or upper chest bib pieces demand clear negative structure and strong anchors for the vertical elements. The skin here reacts differently to sun and shaving, so bring that up in consultation. Artists disagree on ultra-thin verticals near the throat because of movement and shaving abrasion. Ask which approach they favor and plan for two to three sessions. Session wear should be a wide-neck or open-collar shirt and expect a realistic touch-up plan given daily exposure.
Frequently Asked Questions
Q: Will thin connectors in ornamental tattoos blur faster than bolder anchors?
A: Yes, in many cases thin connectors lose crispness sooner on high-motion or high-friction areas. If you want long-term clarity, ask your artist for stronger anchor lines around delicate connectors and slightly wider spacing where the skin creases.
Q: What ornamental styles hold best on darker skin tones?
A: Heavier blackwork and bold negative shapes tend to retain contrast longer on darker tones. If you have darker skin, request bolder anchors and larger negative breaks rather than ultra-delicate internal detail. Also discuss ink saturation and contrast strategies with artists experienced in monochrome work.
Q: How do sternum and ribcage ornamentals age compared with forearm pieces?
A: Sternum and ribcage pieces move with the torso and can distort with weight change. Forearm work generally faces more abrasion from daily motion but shows fewer stretching issues. For sternum, choose radiating designs that flex with the chest and plan for touch-ups as the shape of the torso changes.
Q: If I live in a smaller city, how do I find an ornamental specialist?
A: Use style-specific hashtags and location tags, check tattoo directories, and look for guest spots at regional conventions. Search for studios advertising dot work, tessellation, or ornamental filters and ask about portfolios that show healed pieces, not just fresh photos.
Q: How often will I need touch-ups for intricate ornamental sleeves?
A: Expect an initial touch-up around year one to firm up dense areas, then possibly another at year three depending on sun exposure and movement. Heavy black fills need less frequent touch-ups than ultra-delicate connectors.
Q: What should I wear to a session for a collarbone or sternum piece?
A: Wear an off shoulder black top or a wide-neck shirt you can pull aside so the artist has clear access without compressing fresh ink. Loose clothing reduces rubbing during the first days of healing.
