
Fine line tattoos are everywhere online, and they look incredible fresh. The reality is that a lot of those delicate pieces need careful placement and spacing to keep their clarity years from now. Pick the right body zone, ask for slightly stronger line weight, and plan for a touch-up window. Below are 27 aesthetic ideas that balance what looks great now with what actually heals well.
1. Fine Line Arrow on Inner Forearm
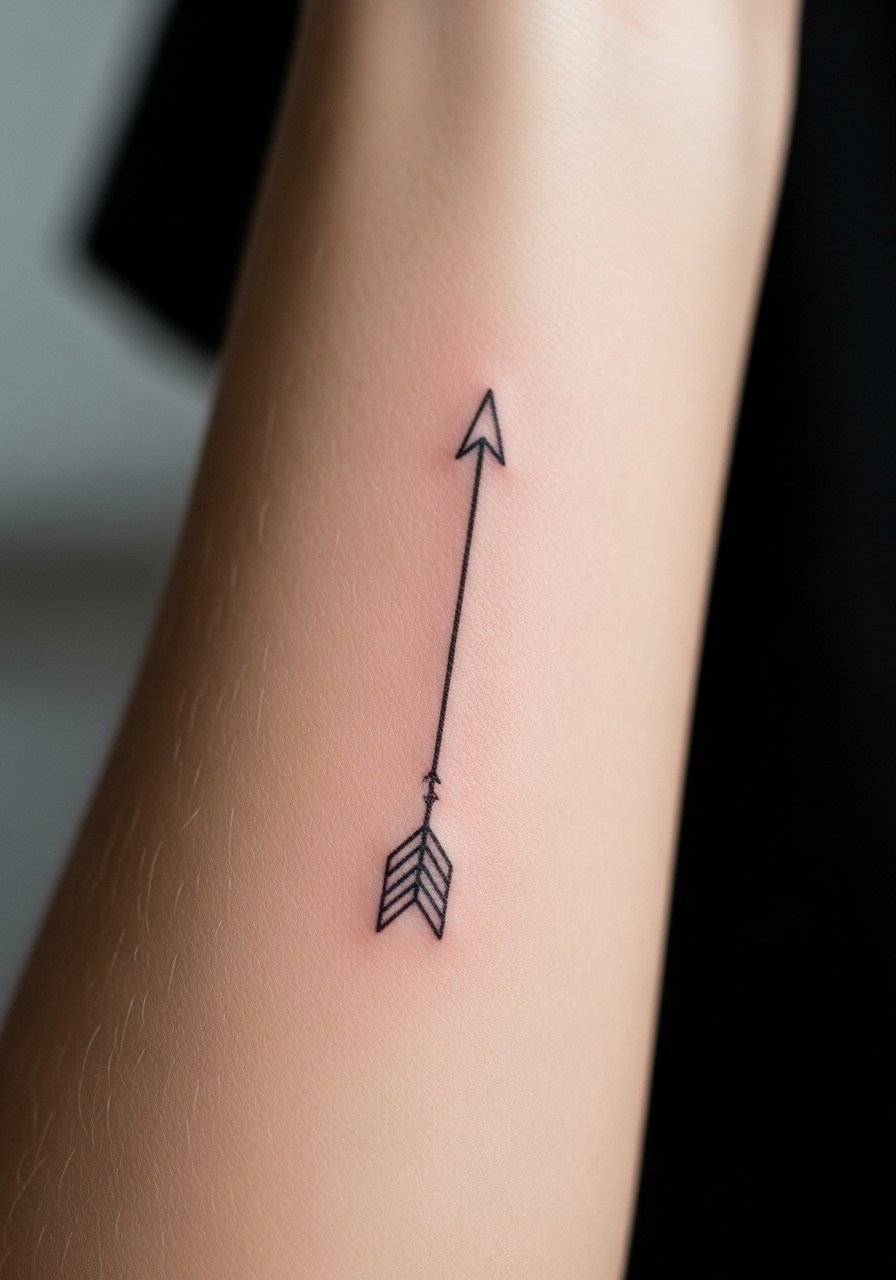
I recommend this for someone who wants low visual weight but clear geometry. Ask your artist for slightly heavier single-needle linework so the arrow reads at year three, not just year one. Pain is low to moderate and a single short session usually does it. Common mistakes are going too tiny or packing extra detail next to the shaft. For the session wear a loose button-down shirt so the artist can roll the sleeve up cleanly. Expect touch-up talk around year two for fine line pieces on the forearm.
2. Micro-Realism Wolf Head on the Bicep
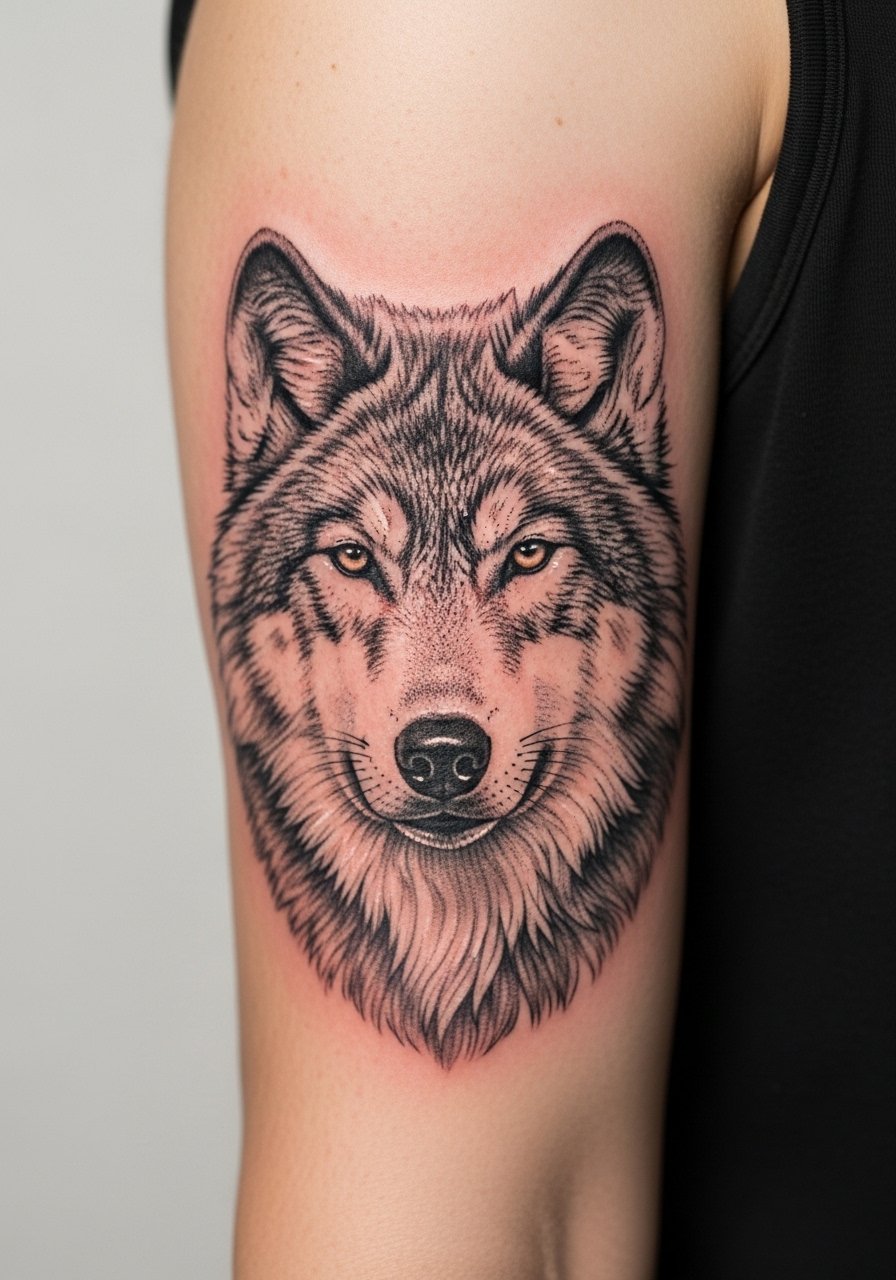
This sits well on the bicep where the skin moves but does not distort fine shading. Tell your artist you want strong contrast between the focal eye area and softer stipple shading around the fur. Sessions run longer than a simple outline, plan for two sittings if you want high detail. Common aging issue is loss of tiny highlights as saturation spreads, so a touch-up at year three is normal. Wear a sleeveless tank to the appointment to give full access.
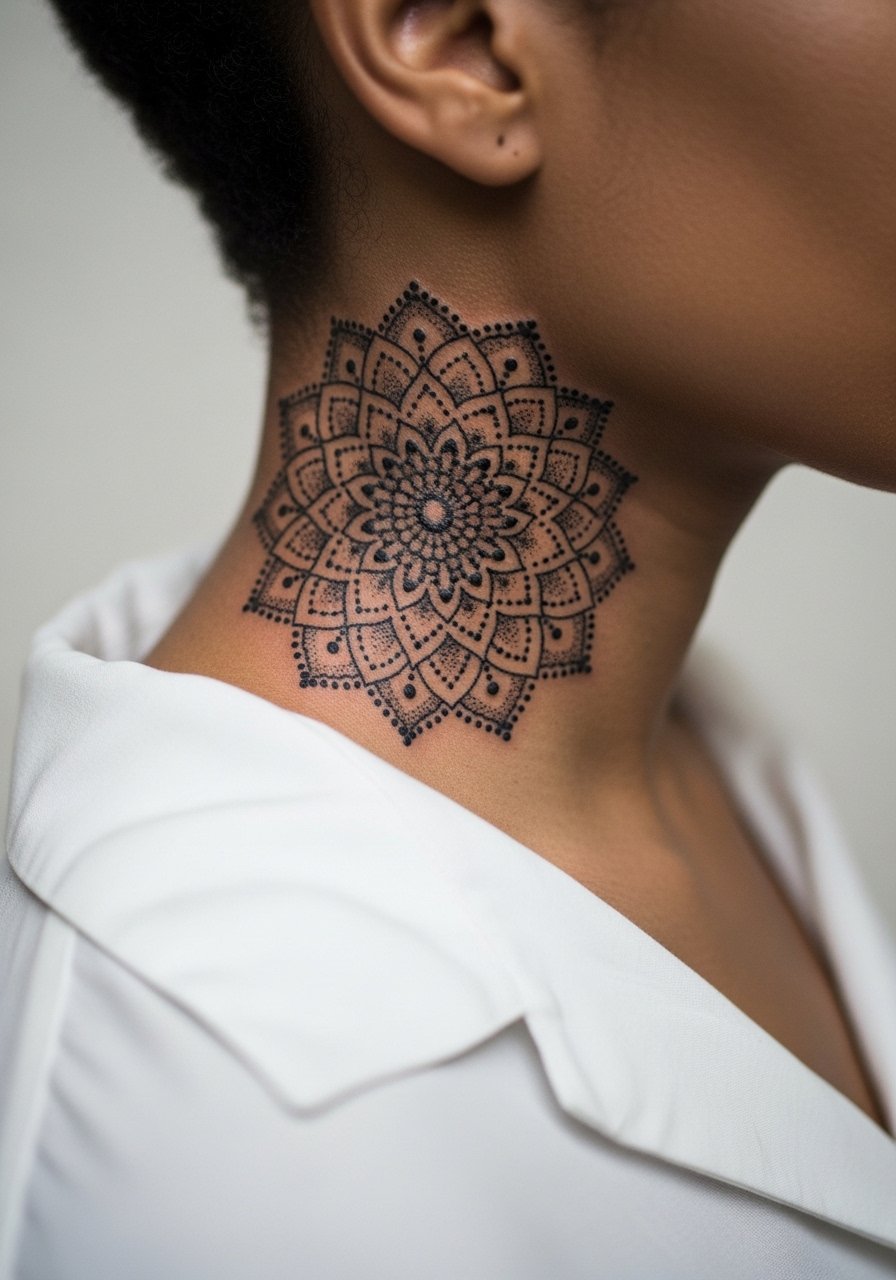
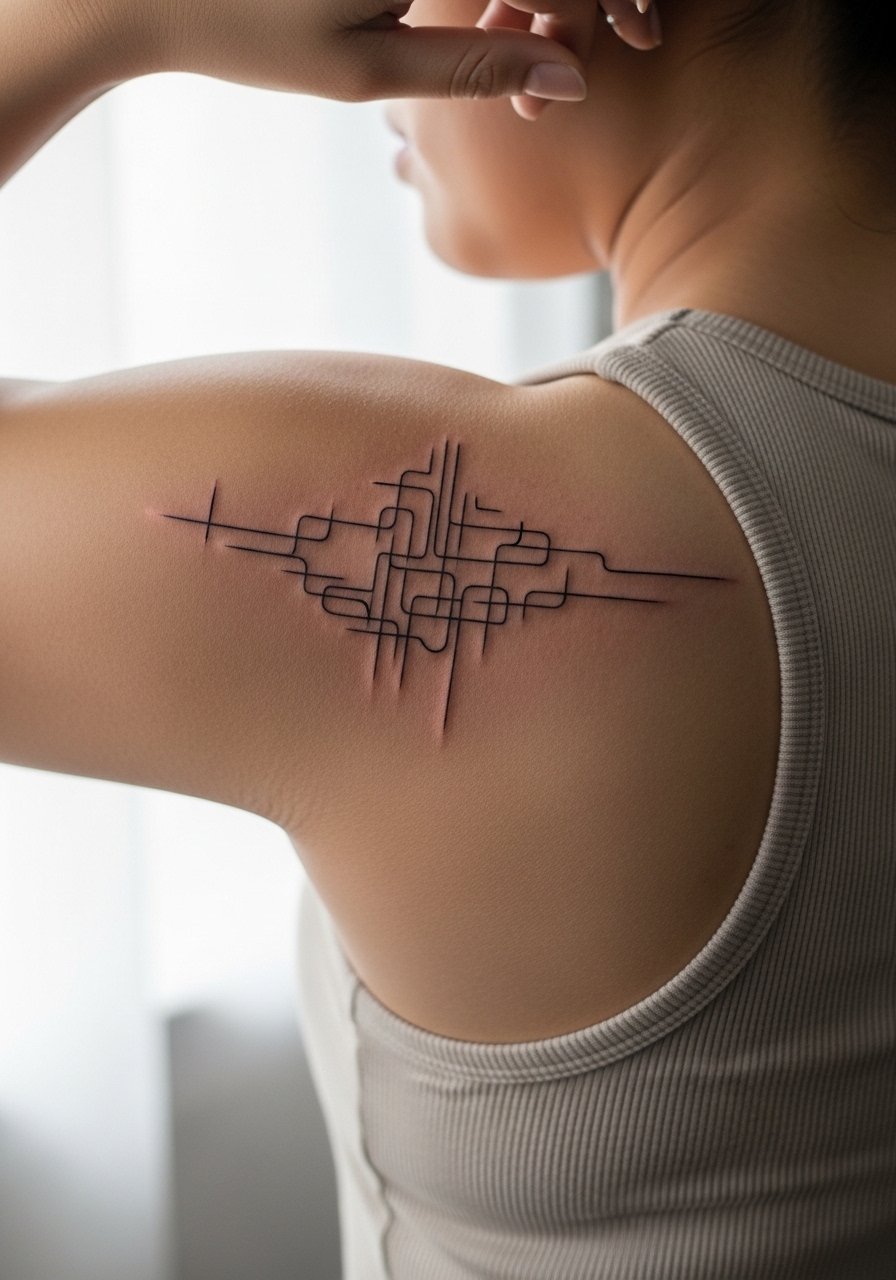
3. Geometric Mandala Near the Collarbone
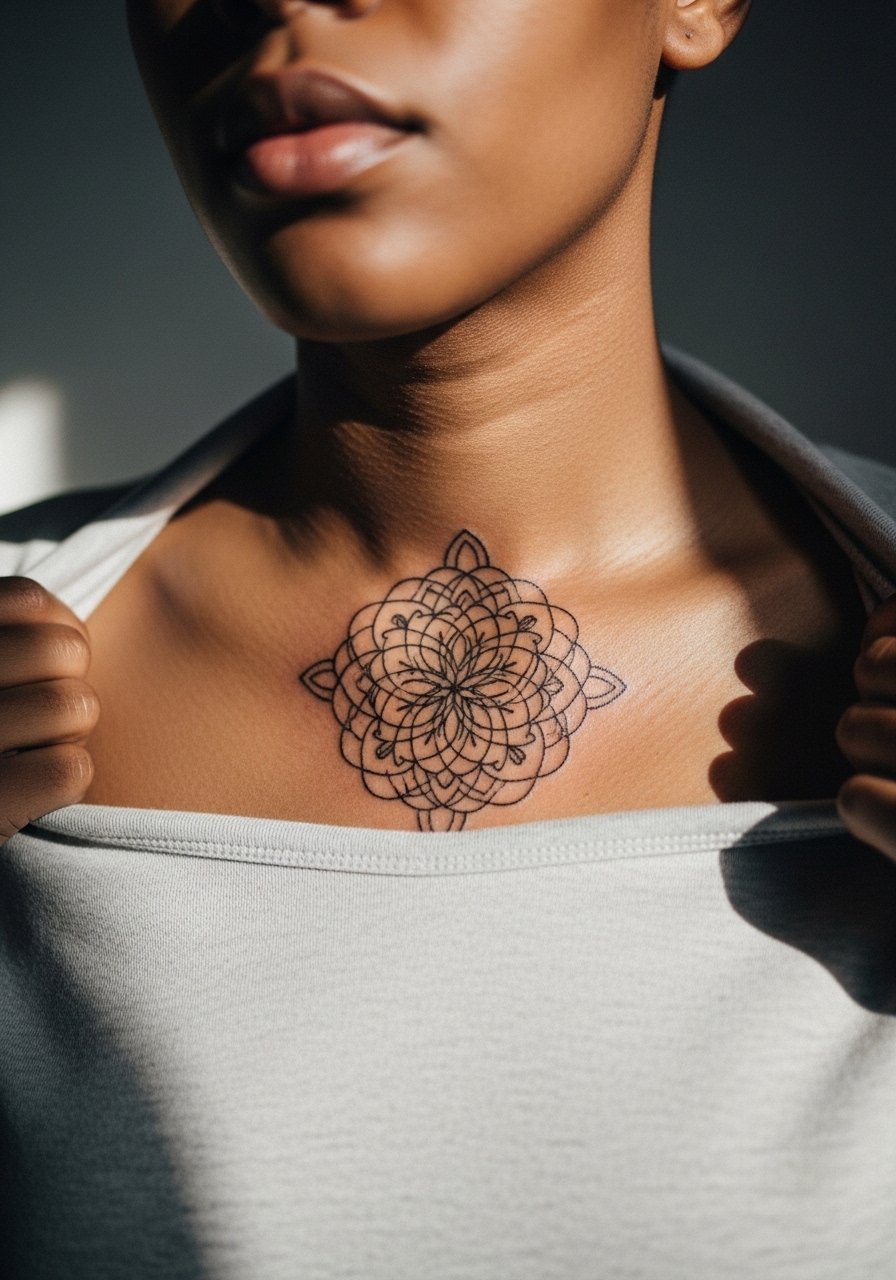
The upper chest holds fine geometry if the pattern gets some breathing space. I tell clients to increase negative space between dense segments so stipple shading does not merge over time. Pain is moderate and sessions can be broken into mapping then filling. One camp says mandalas can be safely small if done by an expert. The other camp warns that dense geometry should be bigger to avoid blur. Ask where your artist stands in that debate before booking. Pair the finished piece with a thin chain pendant necklace when you want to frame the collarbone.
4. Traditional Matchstick with Flame on the Wrist
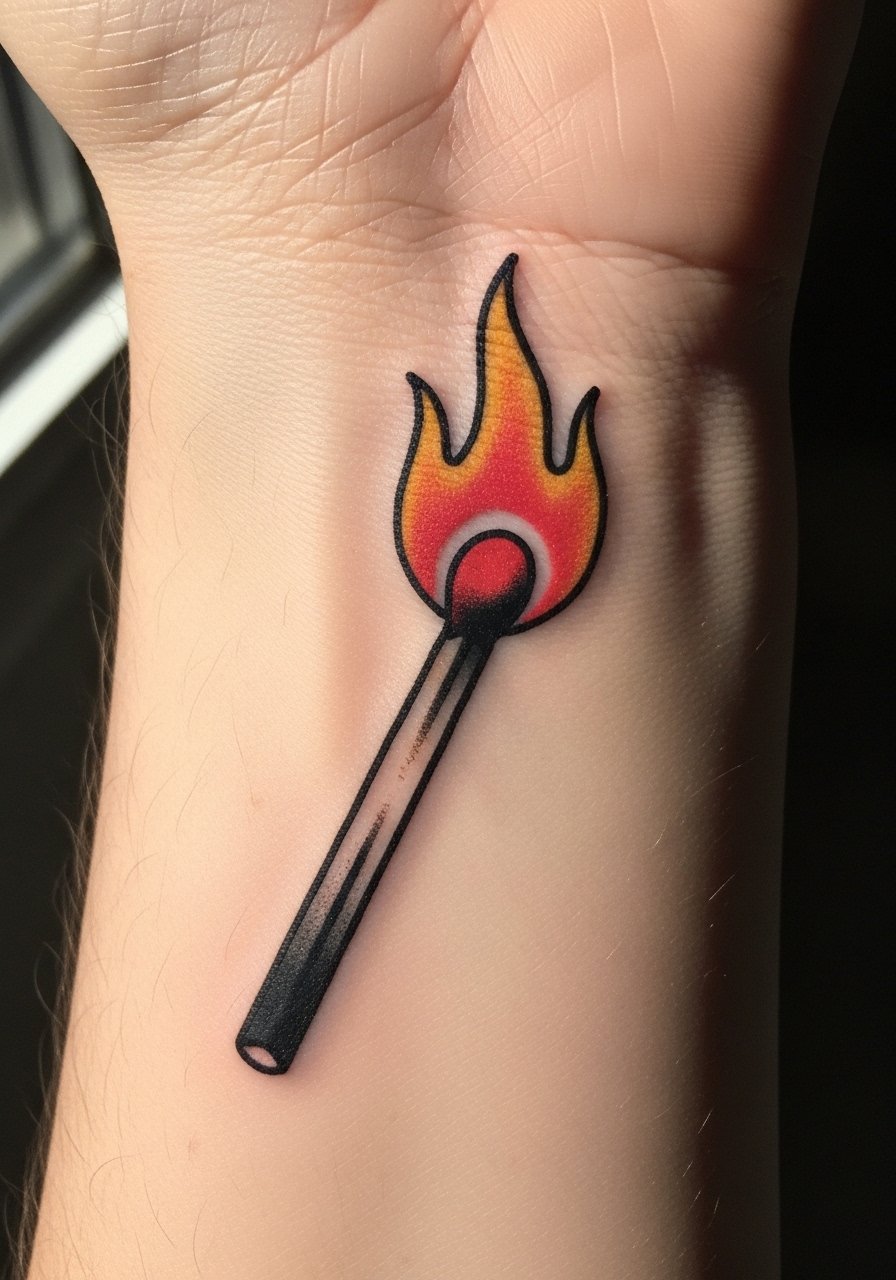
Wrist work reads immediately and ages more predictably when it uses strong linework and saturation rather than fragile details. Pain is noticeable but brief. For longevity ask for solid outlines and a bold fill in the flame so color stays vivid through daily washing. A common mistake is over-detailing the head of the match which goes soft after a year. For the session wear a minimalist watch you can remove easily so the artist can access the wrist fully.
5. Minimal Script Along the Ribcage
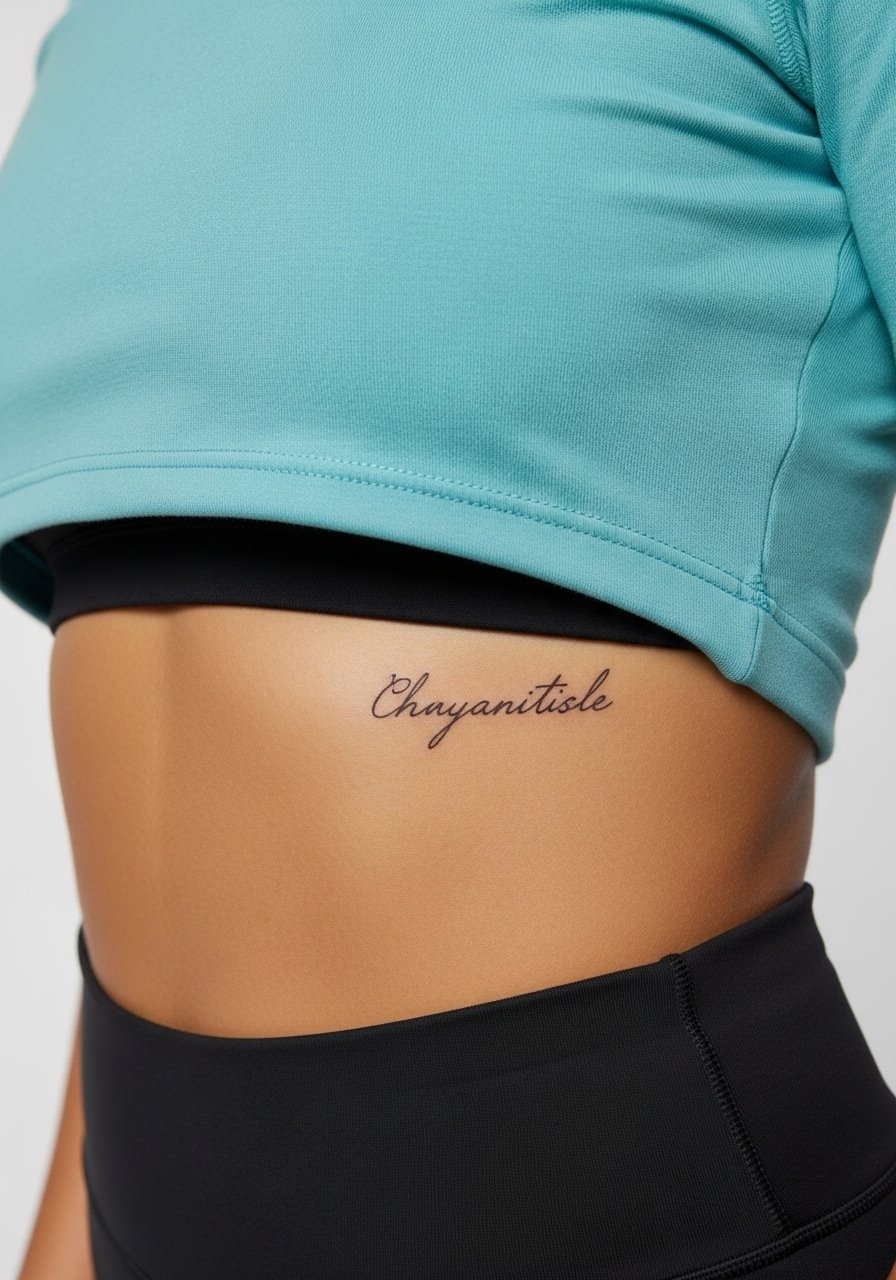
Fair warning, ribs score high on pain scales but the lines can hold if you size the letters larger than they look on screen. In consultations I push clients to pick a bolder script weight than the tiny mockup they prefer. The main mistake is asking for ultra-tiny lettering that blurs into a thin bar by year two. Expect a single longer session and a likely touch-up at year two. Wear a cropped top you can lift comfortably for the session.
6. Blackwork Geometric Half-Sleeve
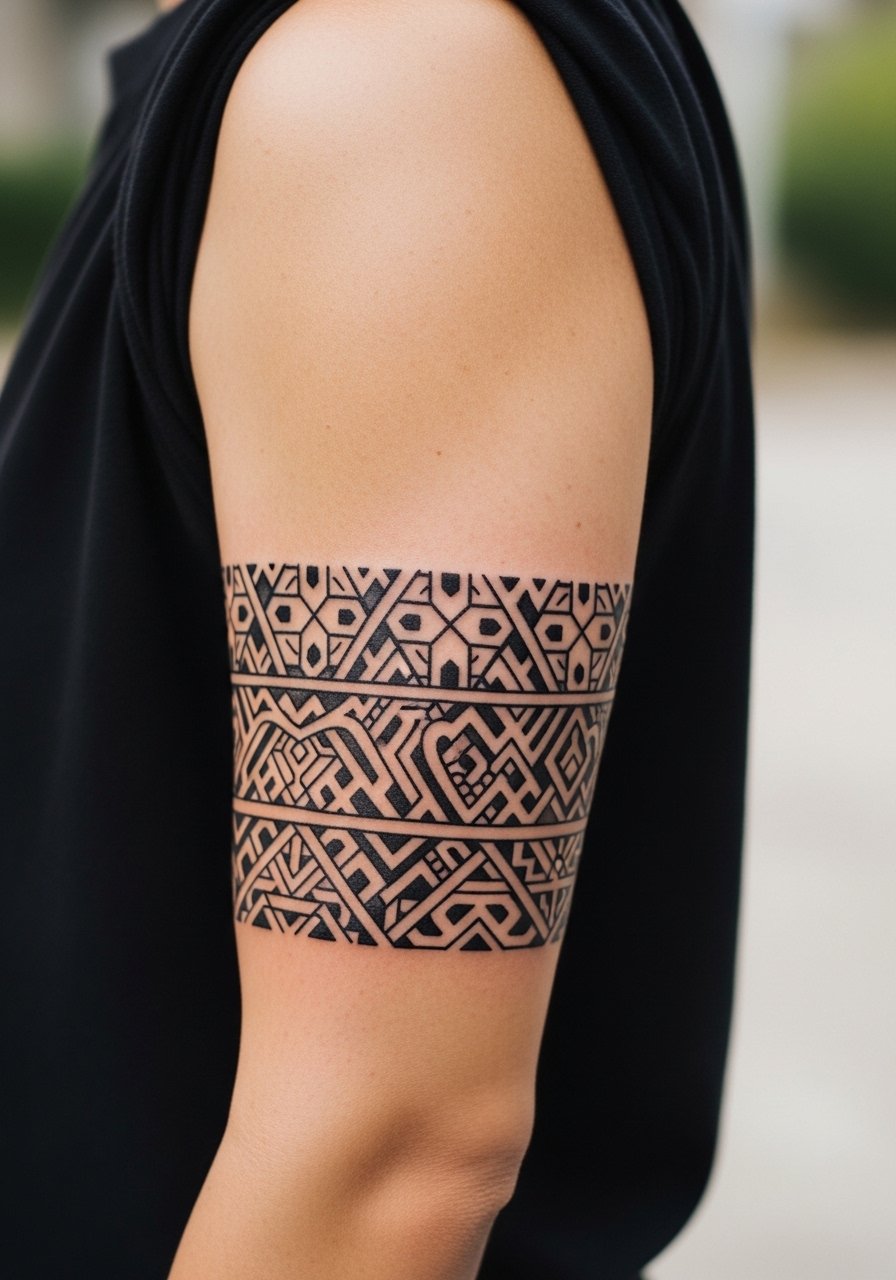
Bold blackwork holds incredibly well for years because saturation becomes a visual asset as skin ages. Pain varies across the arm and sessions are long, often split across two days. A common error is trying to combine too many motifs without a unifying flow, which reads messy on the arm. Tell your artist you want negative space mapped before filling so the piece breathes. For showing this off, roll sleeves and pair with a loose linen shirt that frames the sleeve without crowding the pattern.
Studio Day Picks
That wrist, rib, and bicep work above call for different prep and protection. These items smooth the appointment and the first week for small detailed pieces as well as larger blackwork.
-
Stencil transfer paper kit. Lets you preview placement and lineweight on skin before the needle hits, useful for the inner forearm arrow and collarbone mandala.
-
Topical numbing cream. Applied per instructions about 45 minutes before the session it eases braced areas like the ribs and sternum without altering linework.
-
Thin protective film roll. Keeps wrist and hand pieces clean through showers and reduces friction from clothing.
-
Fragrance-free gentle body wash. Cleans the healing skin without stripping the ink, which matters for delicate fine line work.
-
Aquaphor healing ointment. A thin film for the first few days keeps fine line channels moist and reduces scabbing that can pull out ink.
7. Micro-Realism Eye on the Inner Forearm
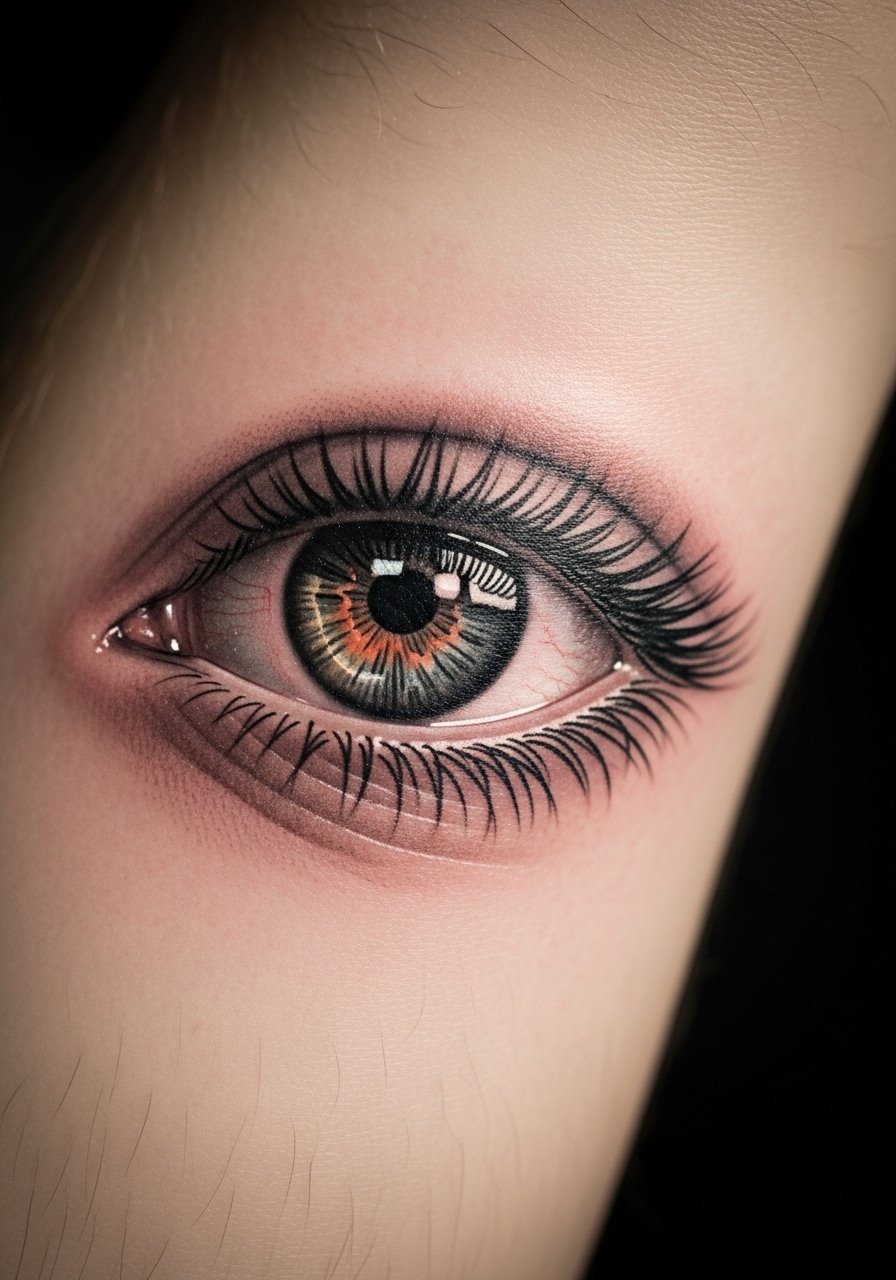
An inner forearm eye balances visibility and low stretch, so tiny realism can hold if the pupil and lashes get priority saturation. In consultation ask the artist to map the darkest point first and work out the surrounding textures. The felt session is steady buzzing with moderate discomfort and usually finishes in one longer block. A common mistake is asking for extreme tiny lashes that patch into a fuzzy line after healing. Roll sleeves and wear a loose button-down shirt for easy access.
8. Neo-Traditional Rose on the Shoulder Cap
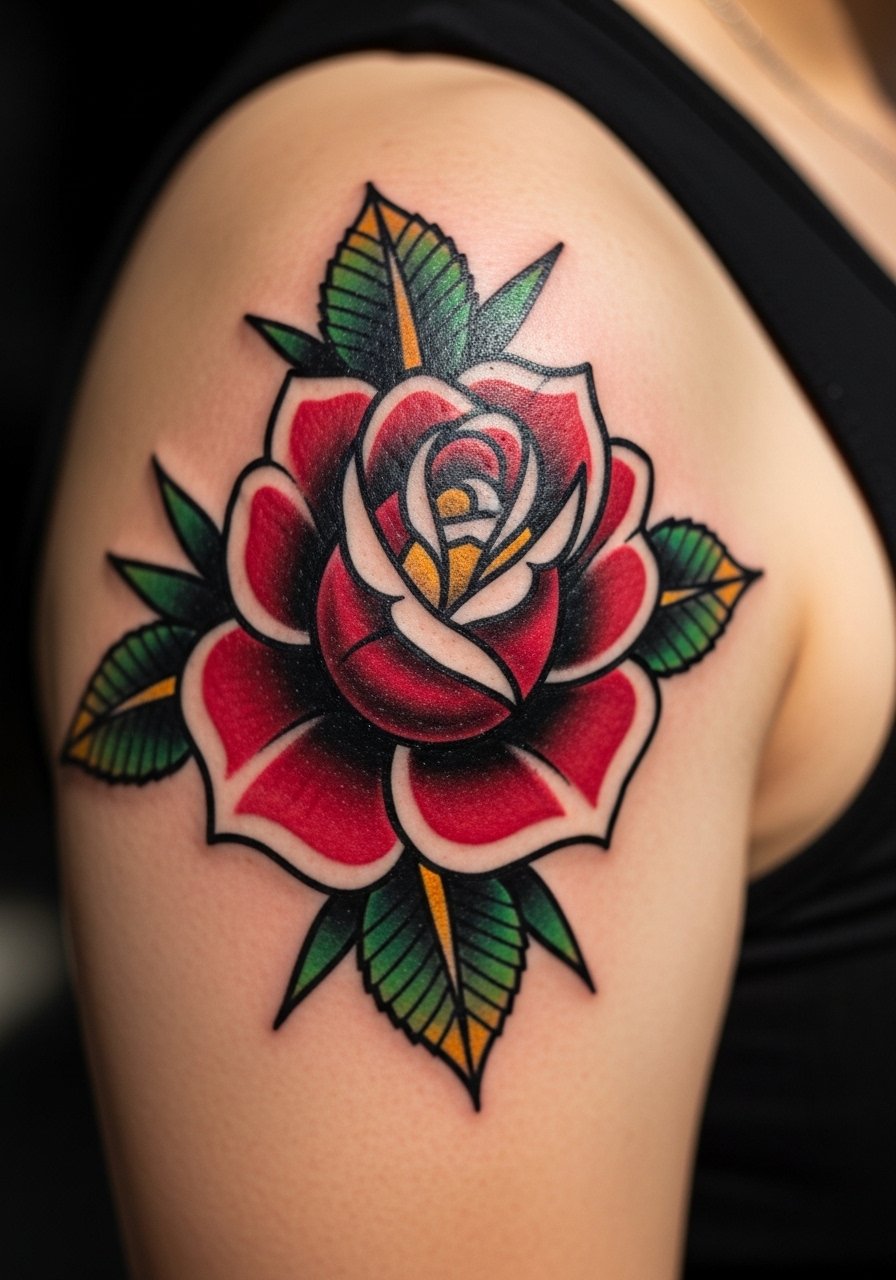
Shoulder pieces handle color saturation and bold linework well because the area sees less friction. Pain is moderate and sessions can be split into linework and color. Tell the artist you want clear outline hierarchy so petals read individually even after a few years. A mistake is crowding the shoulder with tiny filler details that merge into color blocks. Wear a loose tank top so the artist can rotate the arm easily during the session.
9. Dot Work Mandala on the Back of the Neck
Neck work asks for an artist experienced with dot work because the skin is thin and reactive. One camp says neck stippling needs looser spacing to keep dots distinct. The other camp says precise depth can make dense dot work last. Name both views in your consultation and ask to see healed neck examples. Pain is sharp but brief. For showing off wear a wide-neck shirt that frames the piece without covering it.
10. Minimalist Constellation on the Ankle
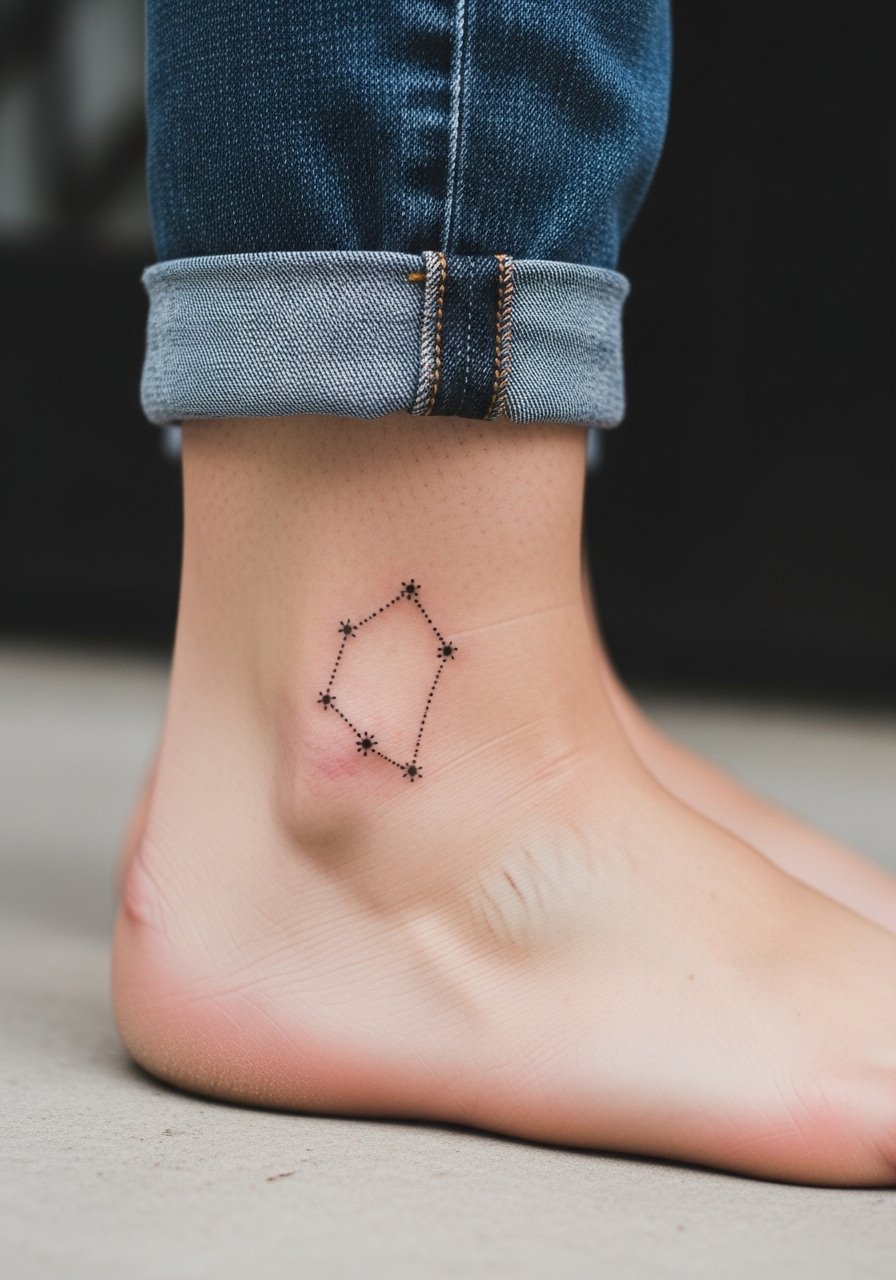
Ankle linework can survive when you avoid too many closely spaced dots. The main session issue is irritation from footwear after the appointment, so wear slip-on shoes that do not rub. A common mistake is expecting 1mm dots to stay separate when daily abrasion will blur them. For the session wear sandals or low-profile shoes that leave the ankle free. This placement heals differently than forearm work and may need a small touch-up in the first 18 months.
11. Script Band Around the Wrist
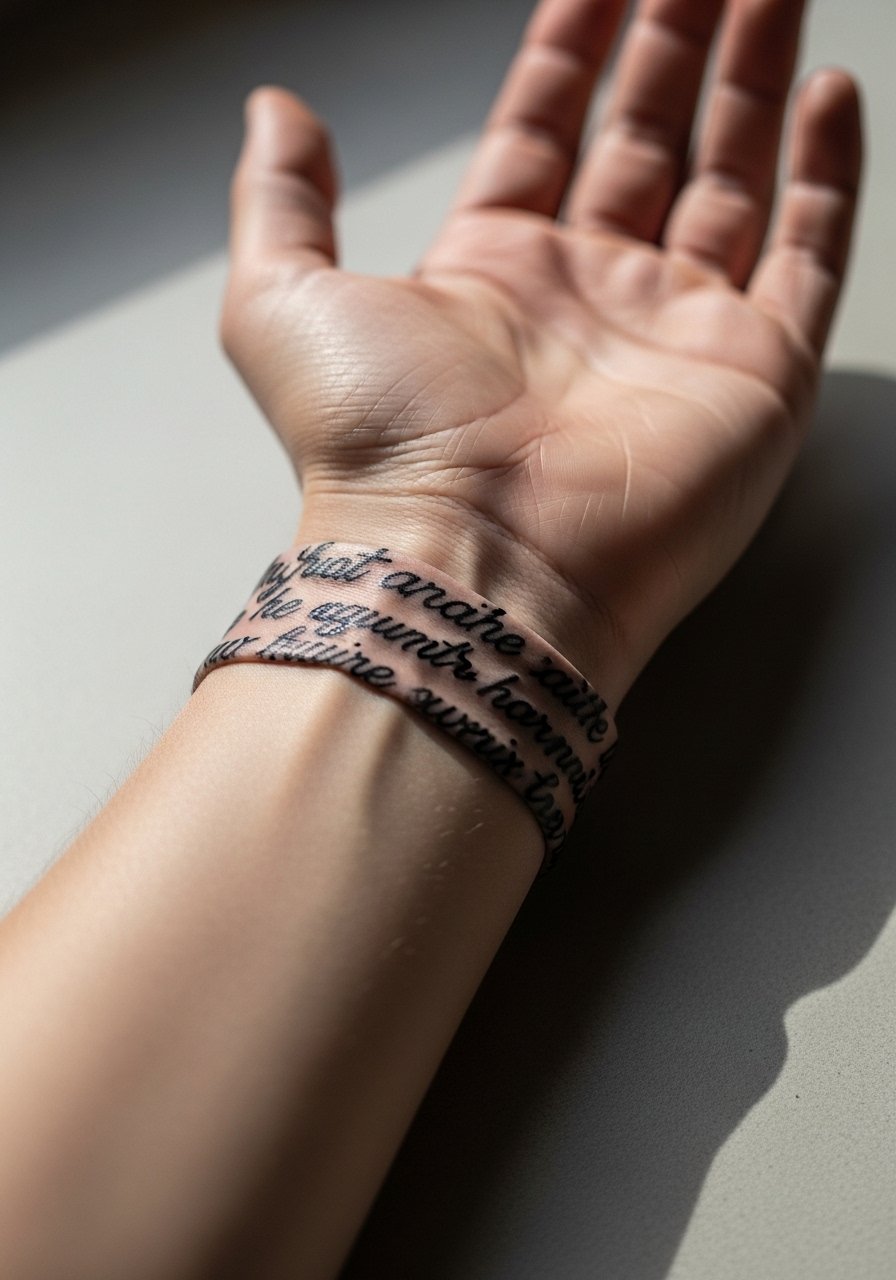
A script band reads best when letters are slightly wider and spaced so that washing and friction do not merge strokes. Tell the artist the exact font weight you want and ask for a stencil wrap preview. Pain is short and tolerable. Avoid requesting ultra-condensed type or tiny cursive loops that disappear into a gray line after healing. For showing off pair the band with a thin chain bracelet that sits adjacent without rubbing.
12. Traditional Sailor Swallow on the Chest
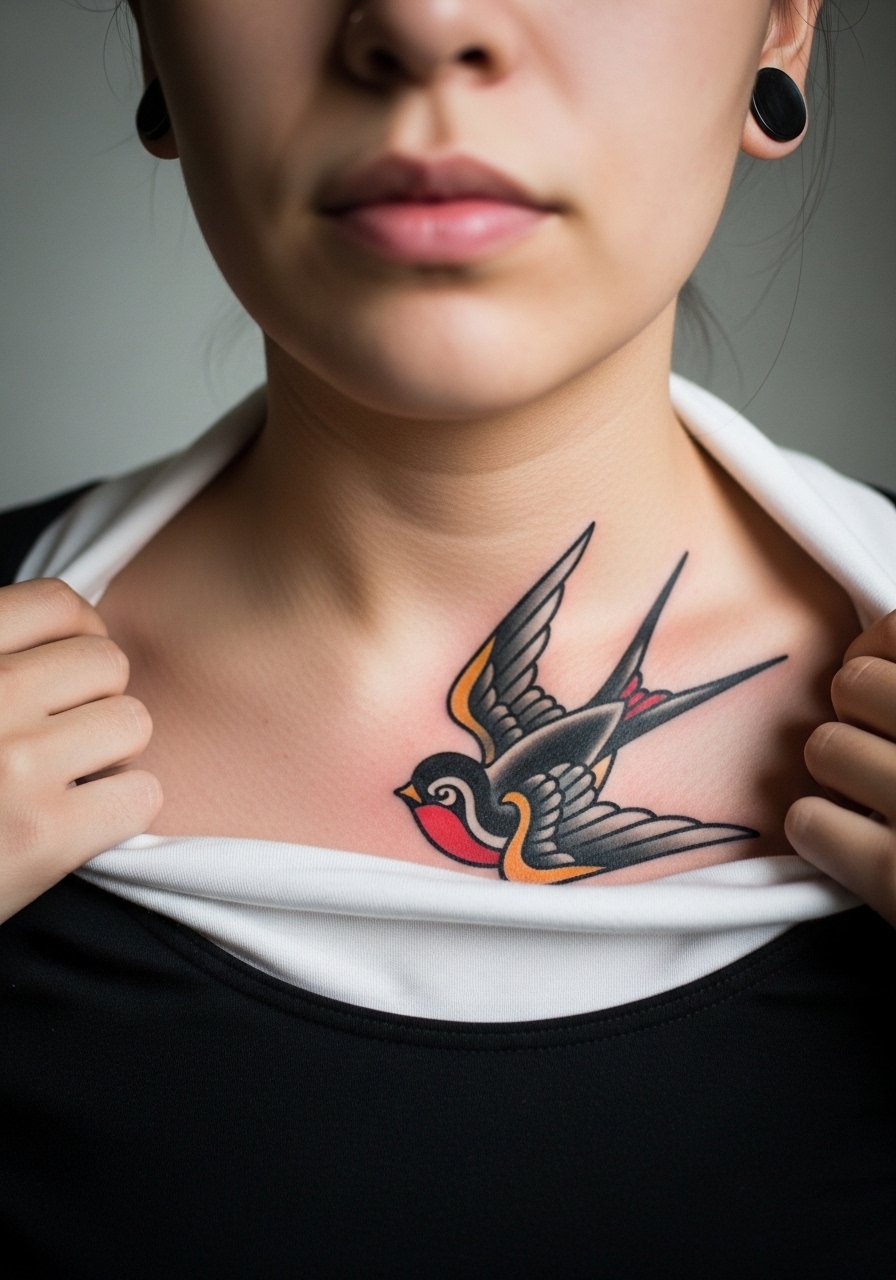
Upper chest handles bold, flat color well when the design has clear negative space. Pain is moderate and the area can be worked in stages. The mistake is over-detailing small feathers which read as texture noise when washed out over time. Bring reference for the exact silhouette and request strong outlines for lasting readability. Pair with open-collar shirts to highlight the motif.
13. Single Needle Crescent Moon on Behind the Ear
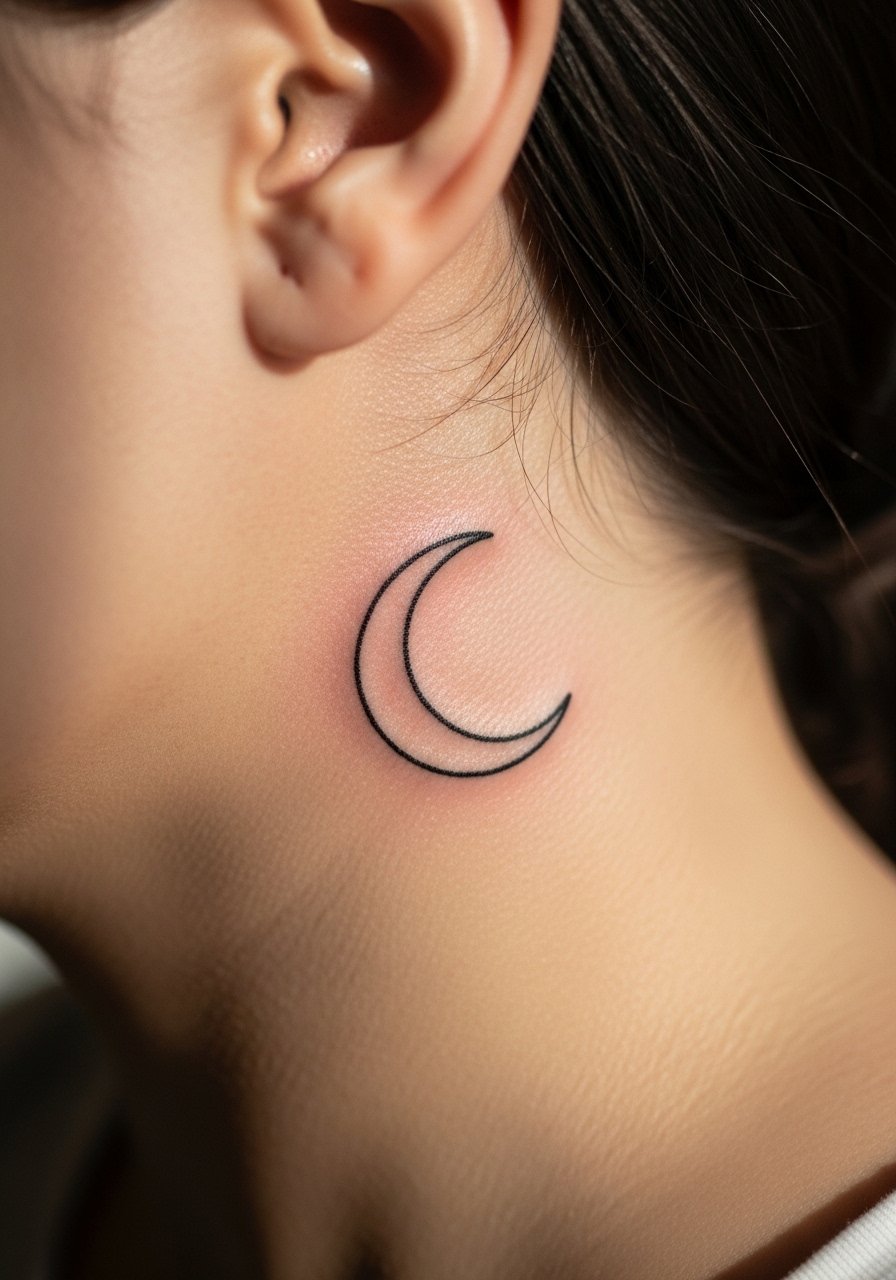
Behind the ear is delicate and needs careful stenciling because the skin curves and is thin. Pain is sharp but very quick. A common mistake is asking for too much line density which can cause blowout in this thin area. For the session have hair clipped or tucked and bring a thin headband so the artist has clear access. This placement is subtle and ages into a small dot if not sized correctly.
14. Blackwork Geometric Calf Panel
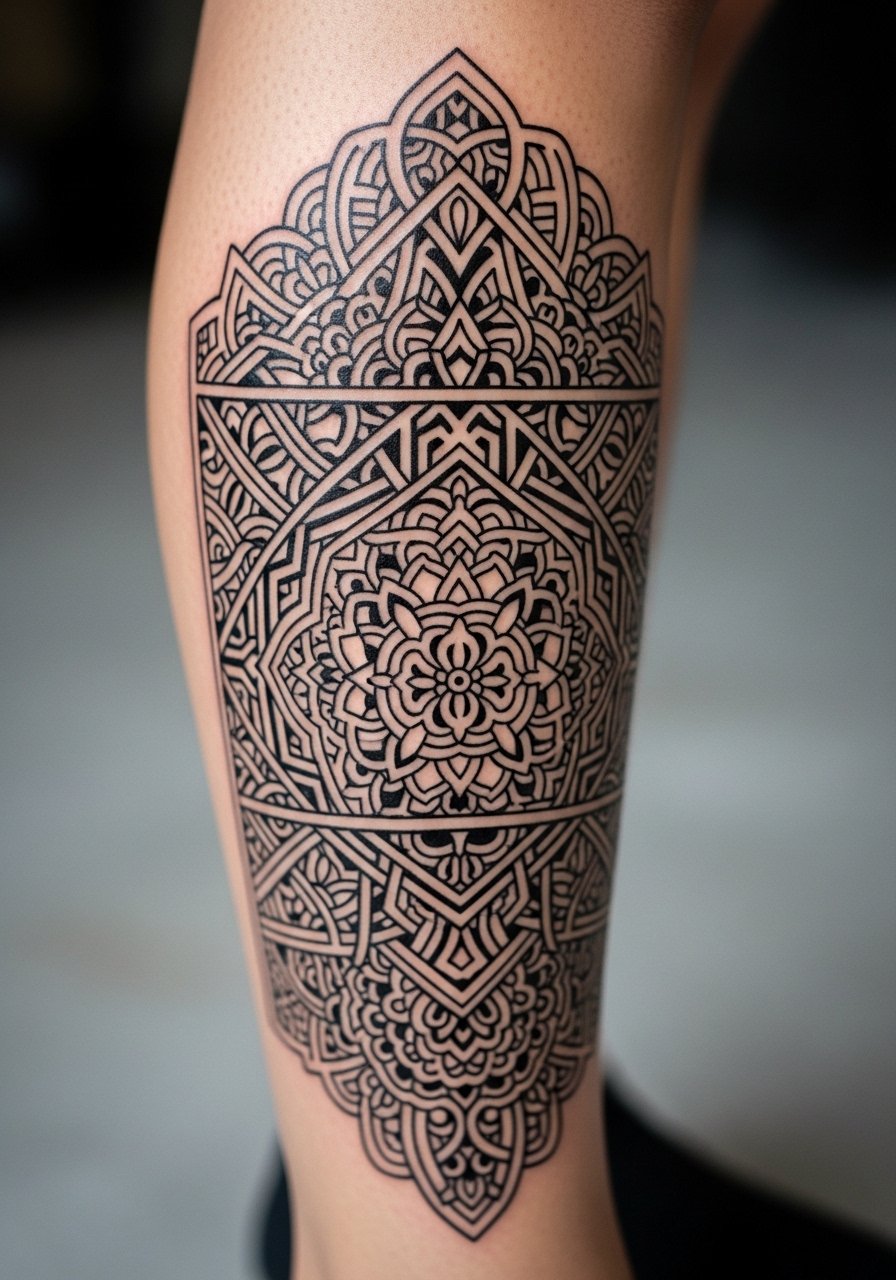
Calf skin tolerates blackwork and geometric fills because it sees less daily abrasion. Sessions can be longer and you may want a second day to finish saturation. A mistake is starting black fields too close to thin linework which makes edges fuzzy later on. Ask for a negative space buffer to preserve crisp borders. Wear loose shorts or loose drawstring linen pants so the leg is easy to access and remains comfortable afterward.
15. Tiny Finger Symbols Cluster
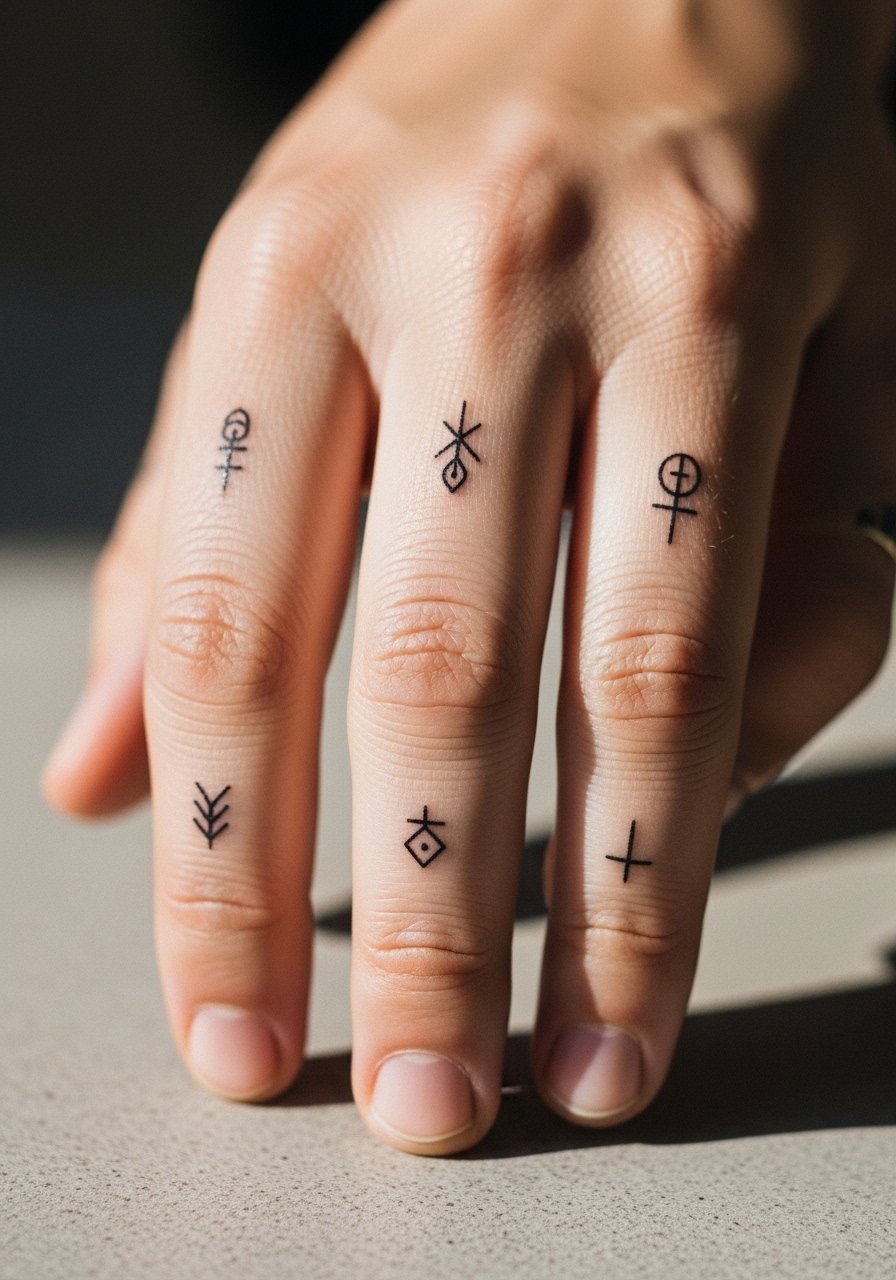
Finger tattoos are high touch and high fade risk because of constant washing and movement. The best approach is simple bold marks rather than micro-detail. Expect touch-ups frequently and be honest with your artist about career considerations. Wear minimal jewelry during the session and avoid rings that compress fresh ink. For showing, a minimalist ring set can frame knuckle symbols without rubbing them.
16. Watercolor-Style Wave on the Outer Forearm
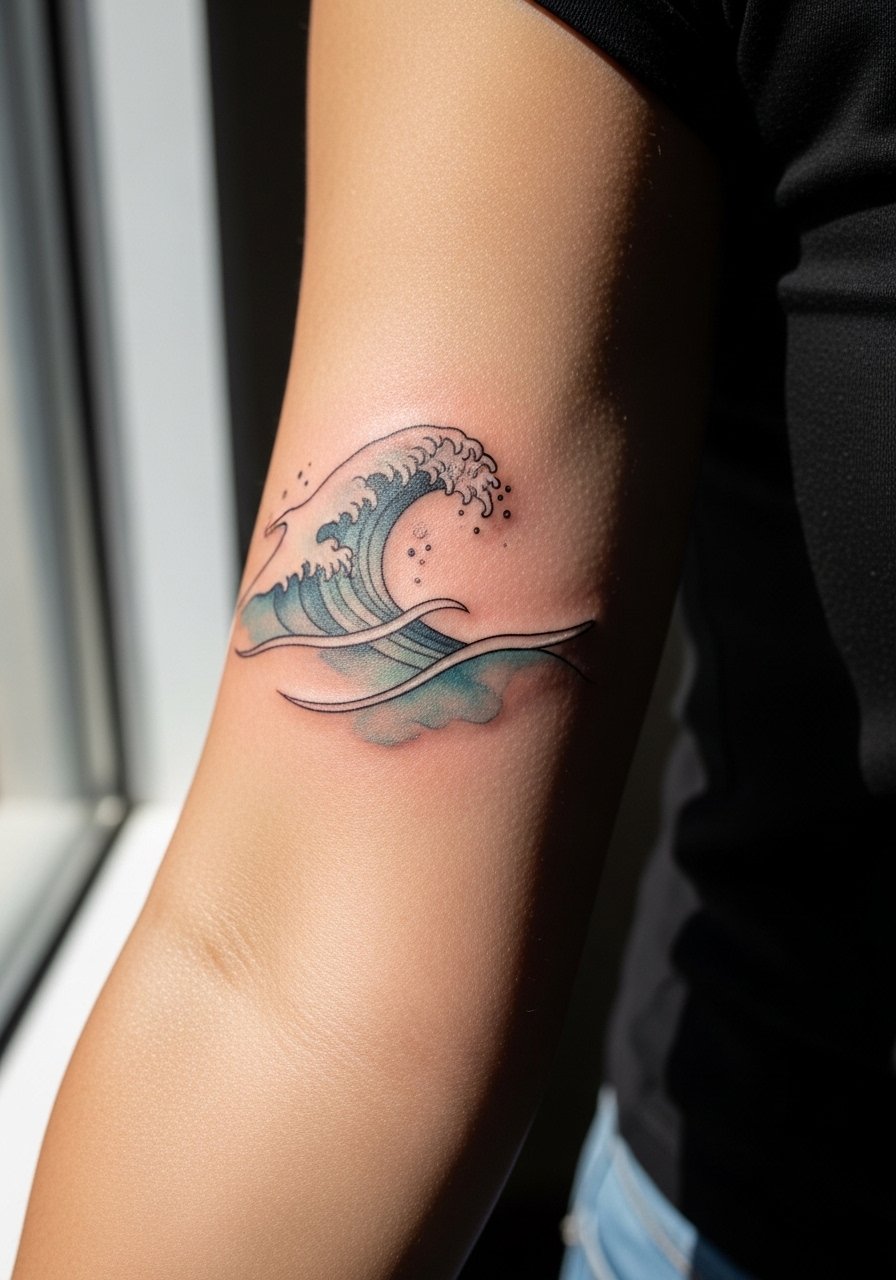
Watercolor effects rely on soft shading and light transitions so they fade differently than solid black. The common mistake is treating watercolor like a tattoo print that will stay identical over years. I tell clients to expect softening and plan for a refresher in three to five years. For session comfort wear a short-sleeve tee you can move up easily so the arm lies flat.
17. Minimalist Mountain Range Along the Upper Arm
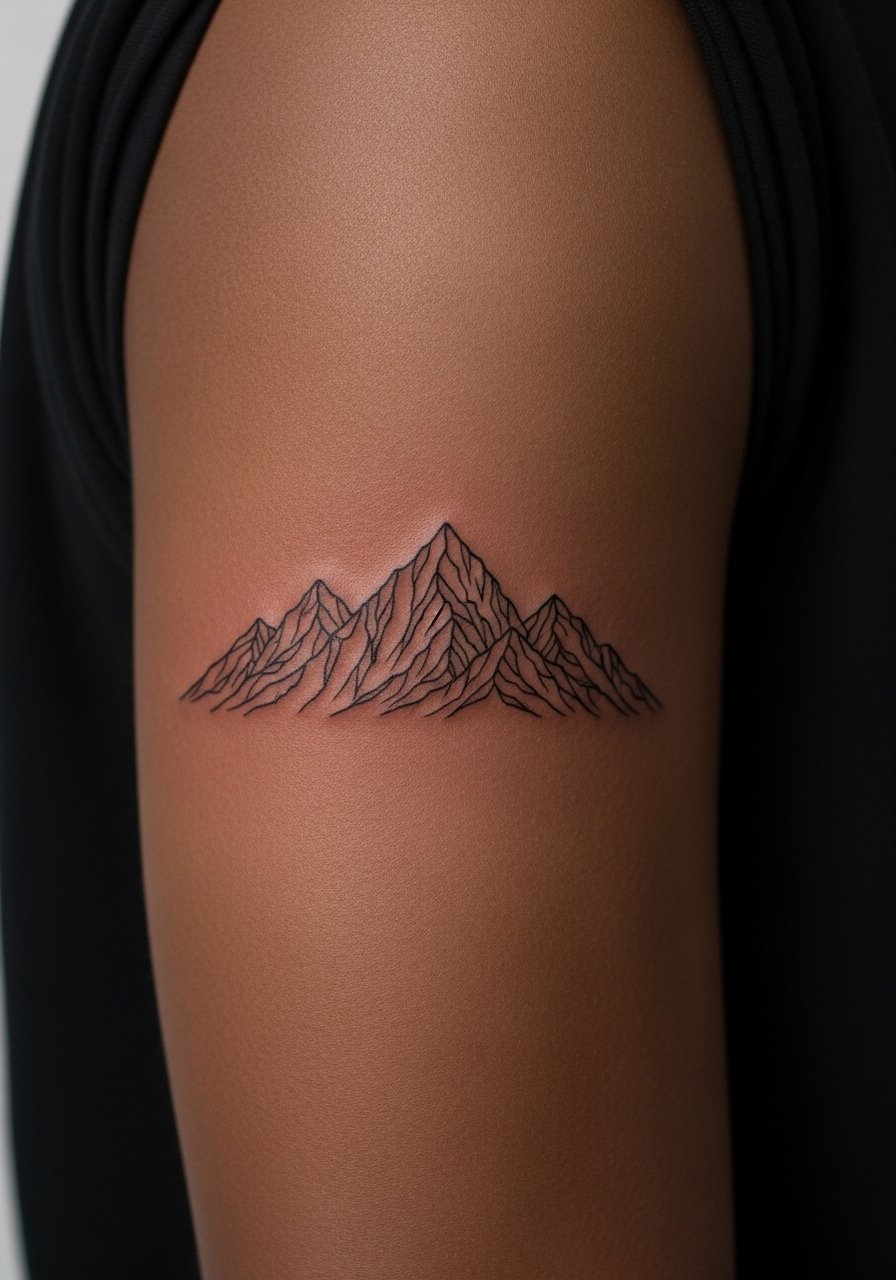
Upper arm contour helps preserve simple horizontal compositions like mountains. Ask for slightly bolder single-needle weight so peaks do not blur into a single bar over time. Sessions are short and tolerable. A common error is stacking too many tiny peaks which compress into a blob after a year. For showing, roll sleeves or wear a short-sleeve button-down that frames the landscape.
18. Neo-Japanese Wave Panel on the Thigh
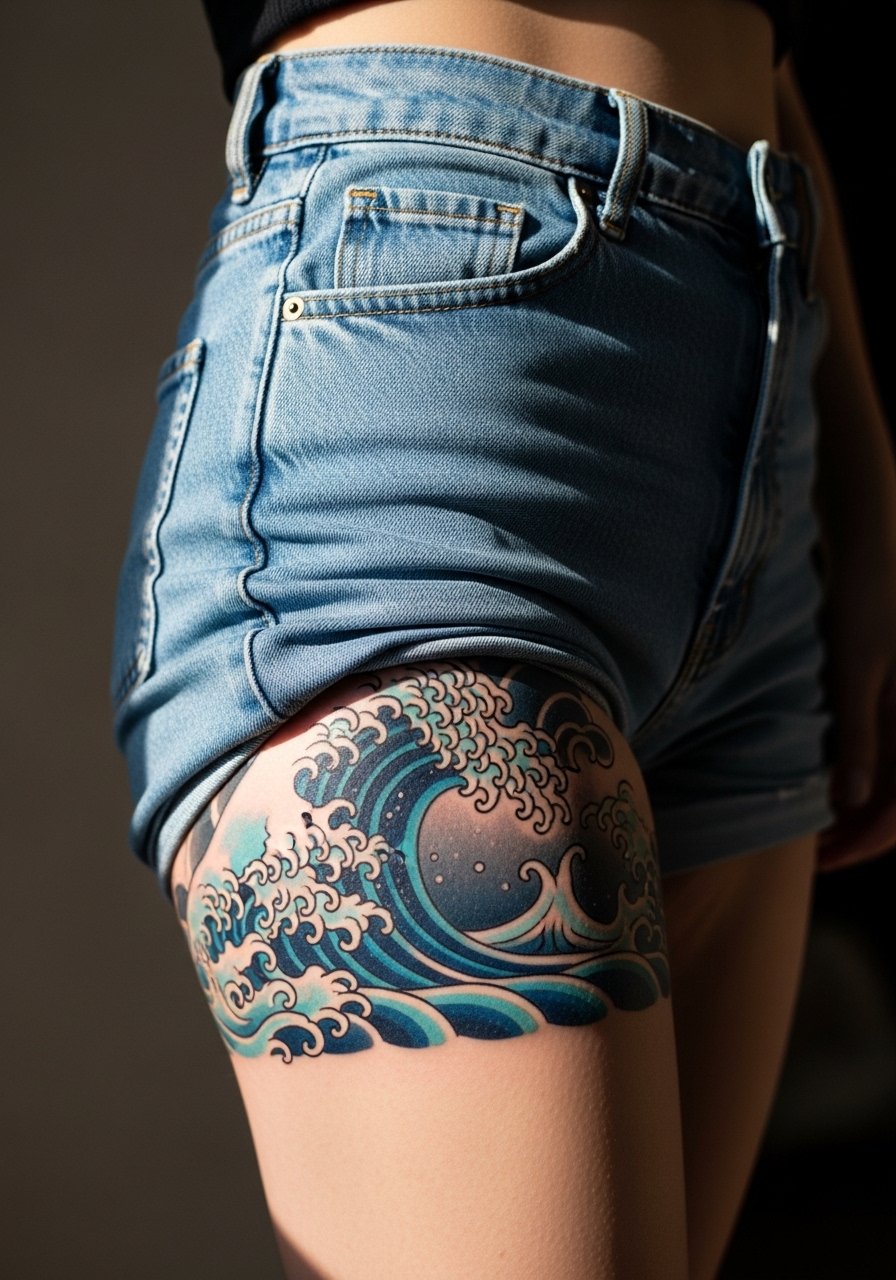
Thigh skin tolerates saturation and complex flow lines because it rests against fewer surfaces in daily wear. Sessions can be long and are often split into outlining and coloring. A common misstep is cramming too many motifs into one panel which muddies the composition. For the appointment wear high-waisted jeans you can lower slightly or a wrap skirt that lets the artist access the outer thigh comfortably.
19. Fine Line Sternum Script
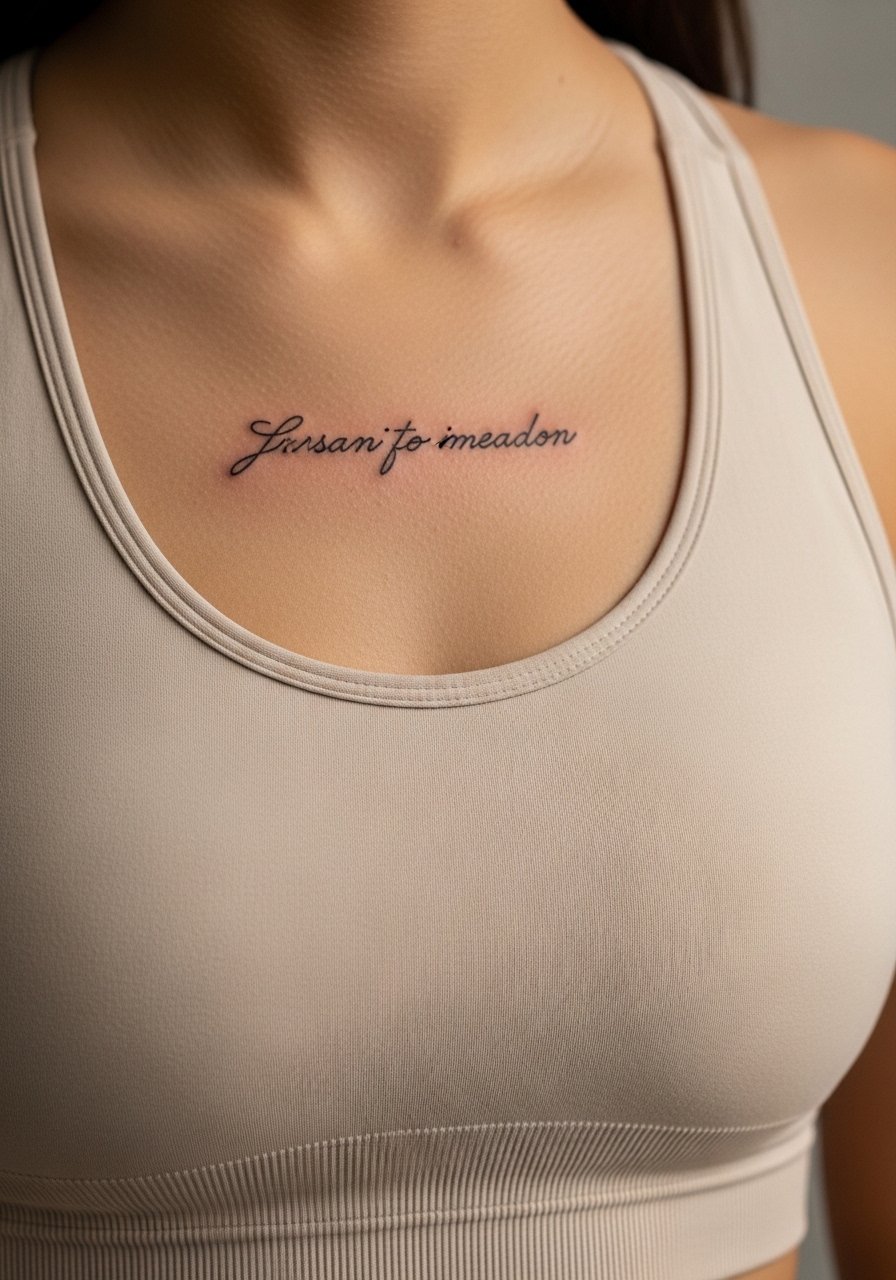
Sternum scripts are intimate and visible only in certain clothing, so text weight matters more than style. One camp in the community says sternum script should be bold to survive stretch. The other camp insists thin line can work with careful depth control. Ask your artist to explain their approach and show healed sternum examples before committing. Pain is high in the center chest and sessions may be split. Wear a sports bra you can adjust during the session.
20. Micro-Realism Portrait on the Upper Back
Upper back gives space for meticulous portraits because the skin is relatively stable and flat. Sessions are long and you should plan for multiple sittings. A risk is over-detailing at a small scale which loses nuance when the skin settles. Tell your artist specifically which feature should read sharpest, often the eyes. Wear a tank top you can slip or pull aside without disturbing the piece.
21. Geometric Compass on the Sternum Edge
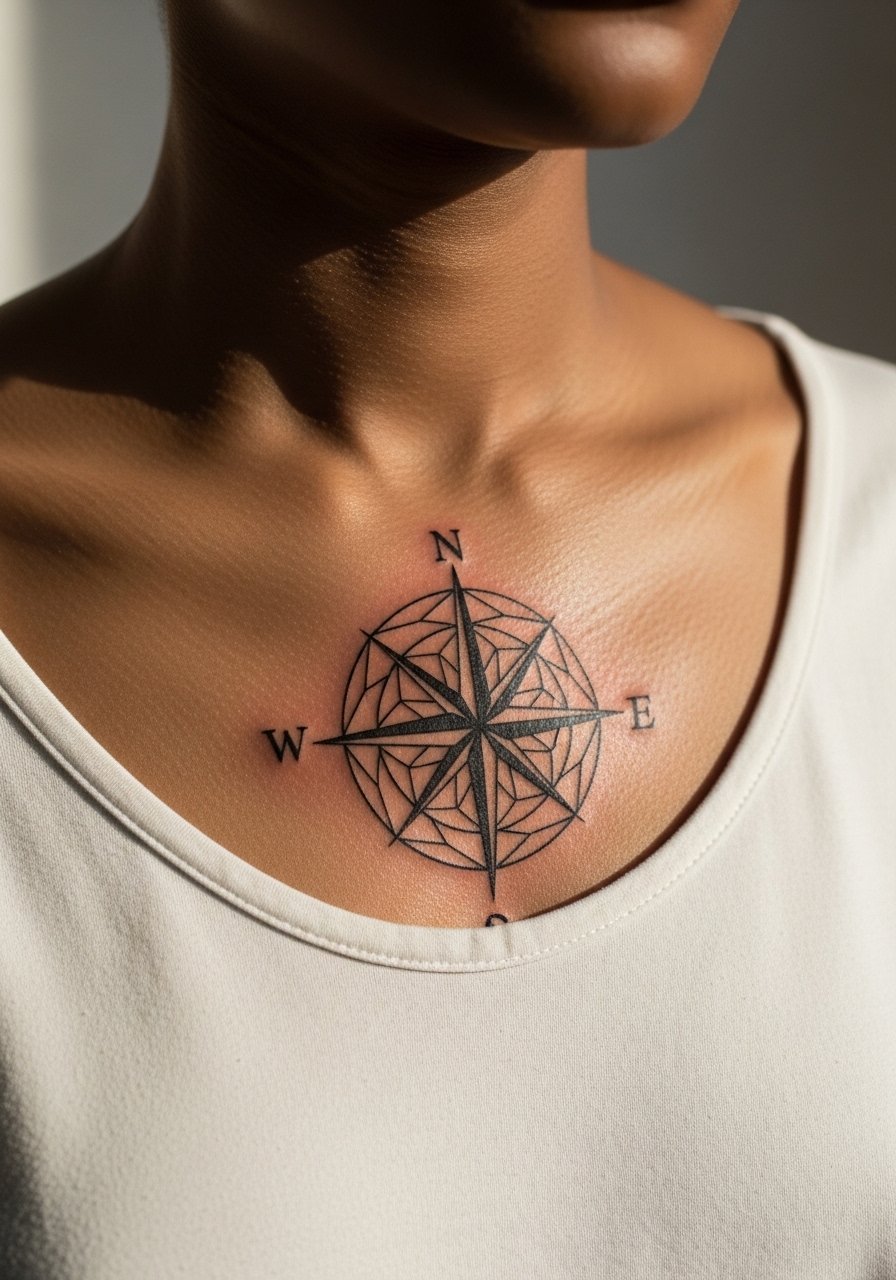
The sternum edge can hold crisp geometry when you keep the design symmetric and slightly enlarged. Pain is sharp centrally and the artist may advise breaking the session into two. A typical mistake is forcing very thin cardinal lines that do not withstand micro-movement. For showing the piece wear an open-collar shirt that frames the geometry without covering it.
22. Single Needle Script Along the Spine
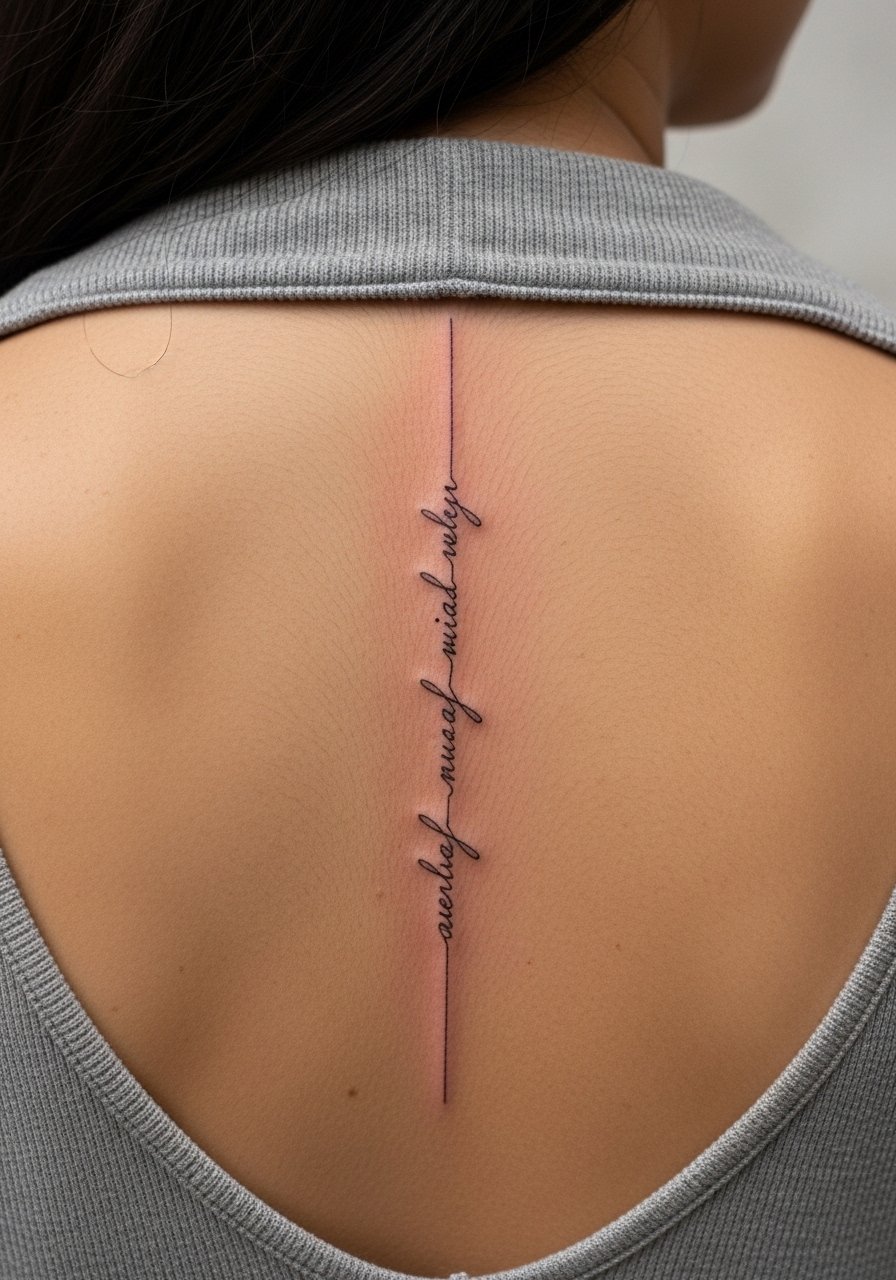
Spine scripts need careful placement so the letters sit along the vertebral line without twisting. Pain is high and sessions can be slow because the area needs steady hand placement. A mistake is asking for tiny cursive that loses definition as skin moves. Request a stencil that maps along the spine and consider slightly bolder lines for durability. For showing pair with an open-back top so the vertical script reads clean.
23. Minimalist Line Mountain on the Inner Wrist
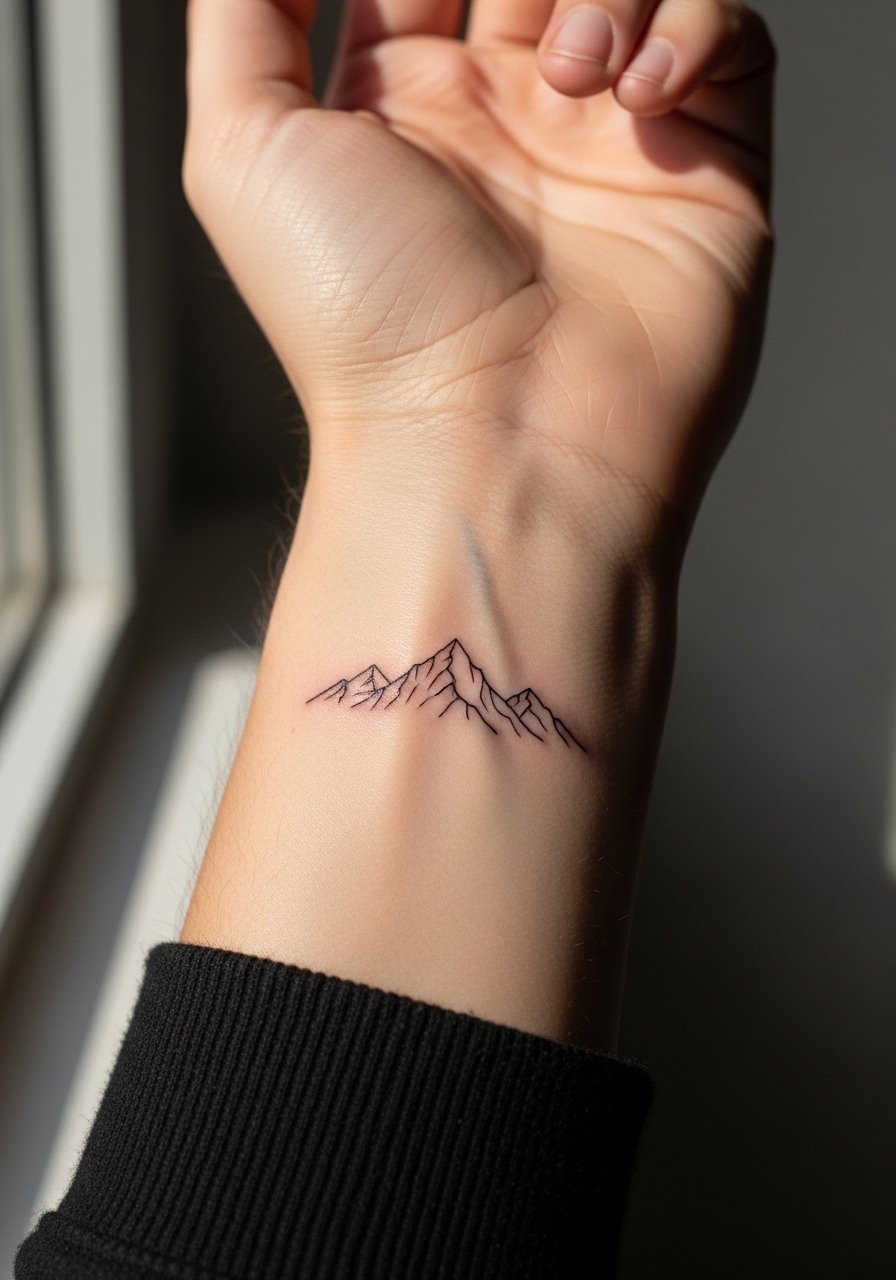
Inner wrist mountains work when you size the peaks so small line joins remain distinct. The main issue is constant washing which softens thin lines. Ask for slightly heavier line weight and expect a touch-up in the first two years. For the session wear a short-sleeve tee that makes wrist access easy. Avoid super tiny negative details that will vanish quickly.
24. Botanical Inner Thigh Piece
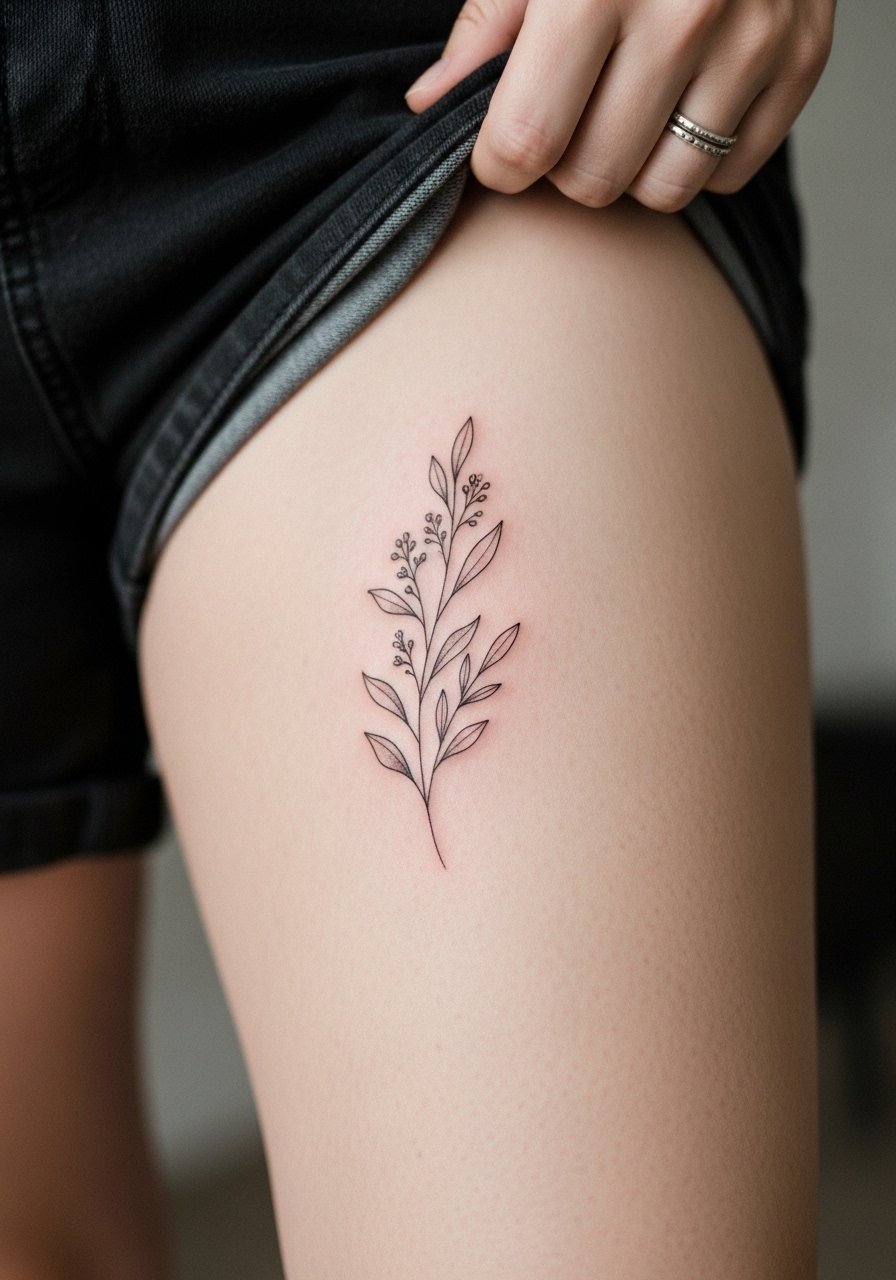
Inner thigh is sensitive and requires modest studio experience because skin texture and movement affect ink deposit. Pain ranges from moderate to high depending on proximity to nerve-rich zones. The mistake is expecting ultra-fine detail to look identical after healing. For the session wear shorts you can shift comfortably and consider a wrap skirt that gives easy access. This placement often needs a touch-up at year two.
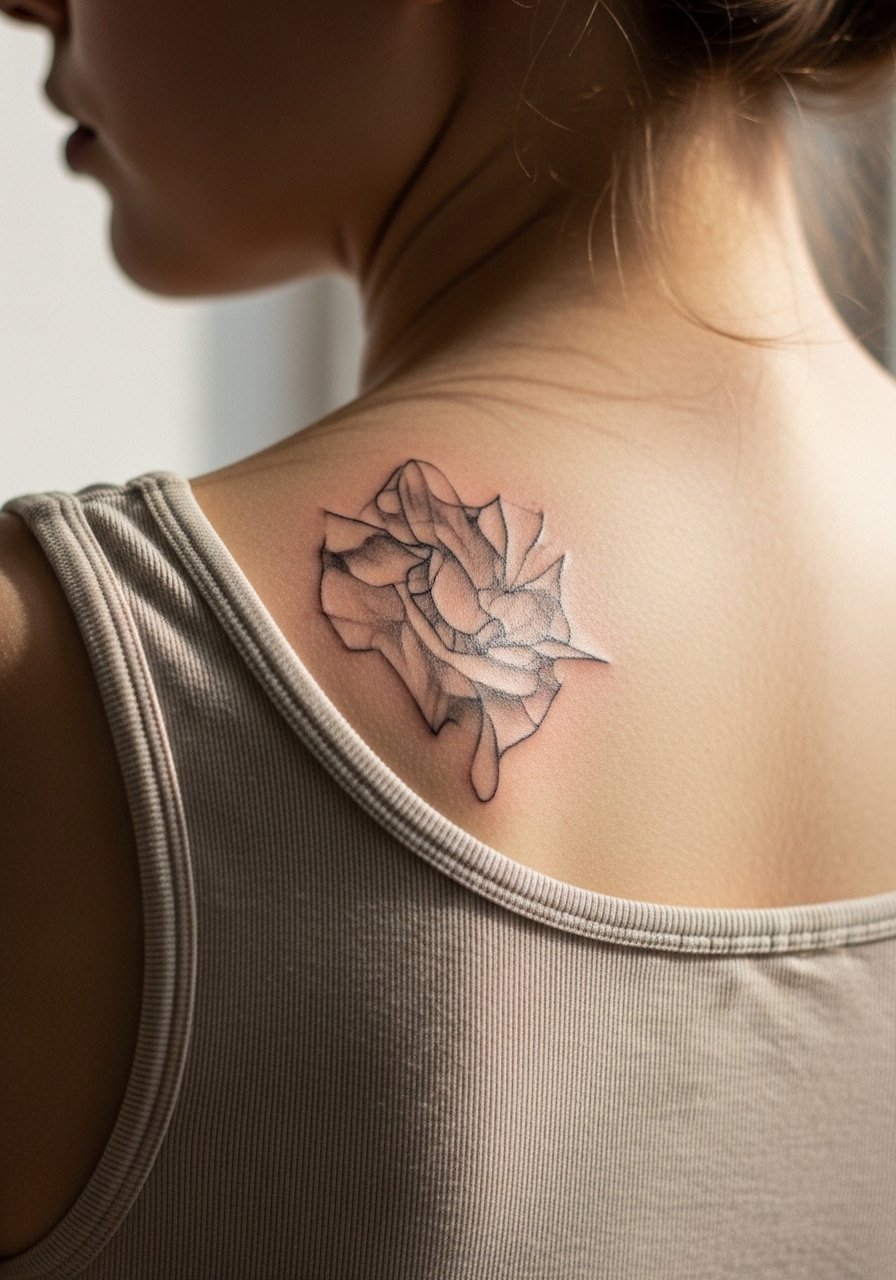
25. Abstract Linework Over the Shoulder Blade
Shoulder blade pieces benefit from movement in the design so lines flow with the muscle. Sessions are moderate and comfortable. A common error is forcing symmetry that fights the natural curve of the scapula. Ask your artist to map the flow with you while standing and moving. Wear a tank top so the artist can access the area and you can test how it looks with motion.
26. Single Needle Minimalist Anchor on the Ankle
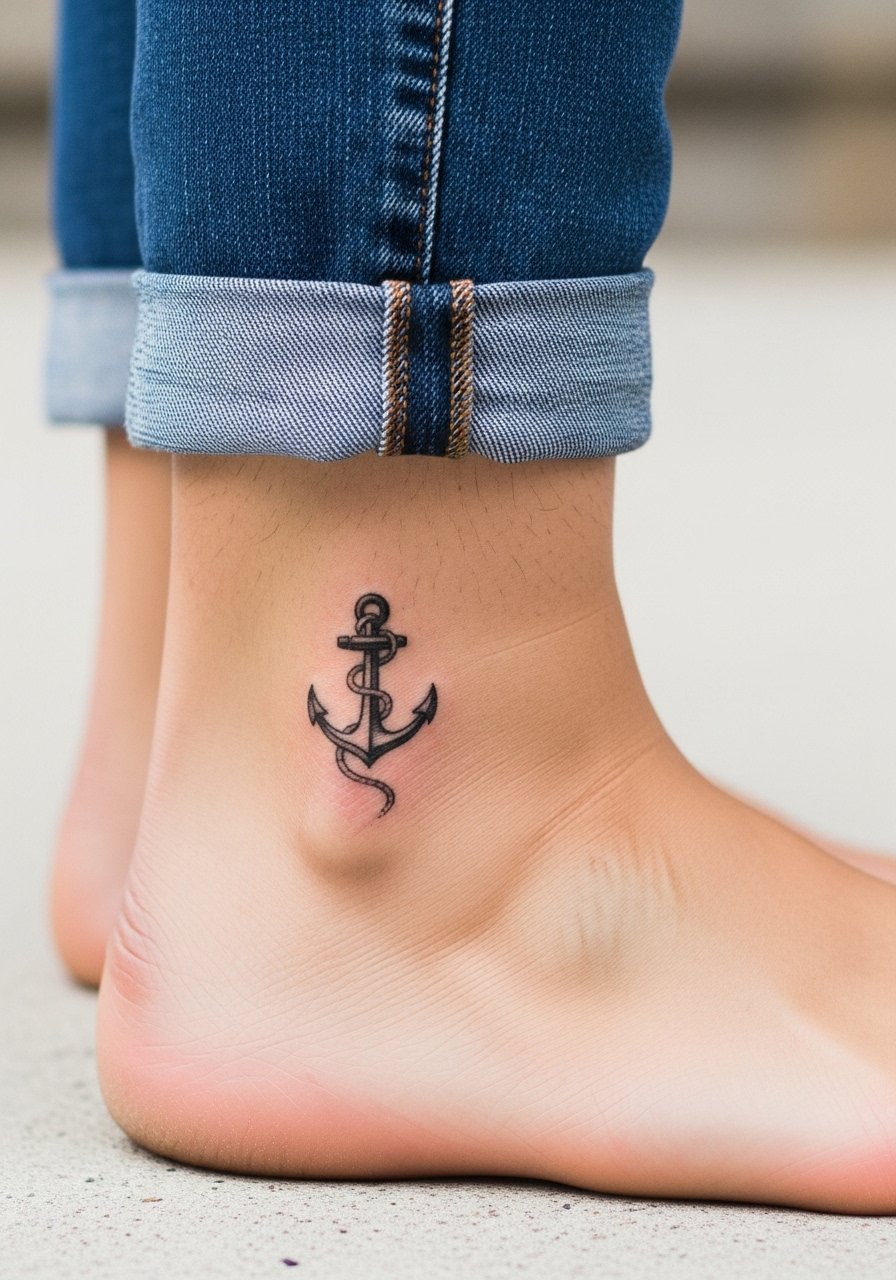
Small anchors on the ankle should use slightly thicker needle passes than a spa-style micro dot. The main session challenge is post-tattoo footwear rubbing. Wear slip-on shoes for 48 hours and expect a tidy touch-up within the first two years. Avoid overly intricate rope details that will blur. For the appointment wear slip-on sneakers so the area stays undisturbed.
27. Single Line Portrait Silhouette on the Chest
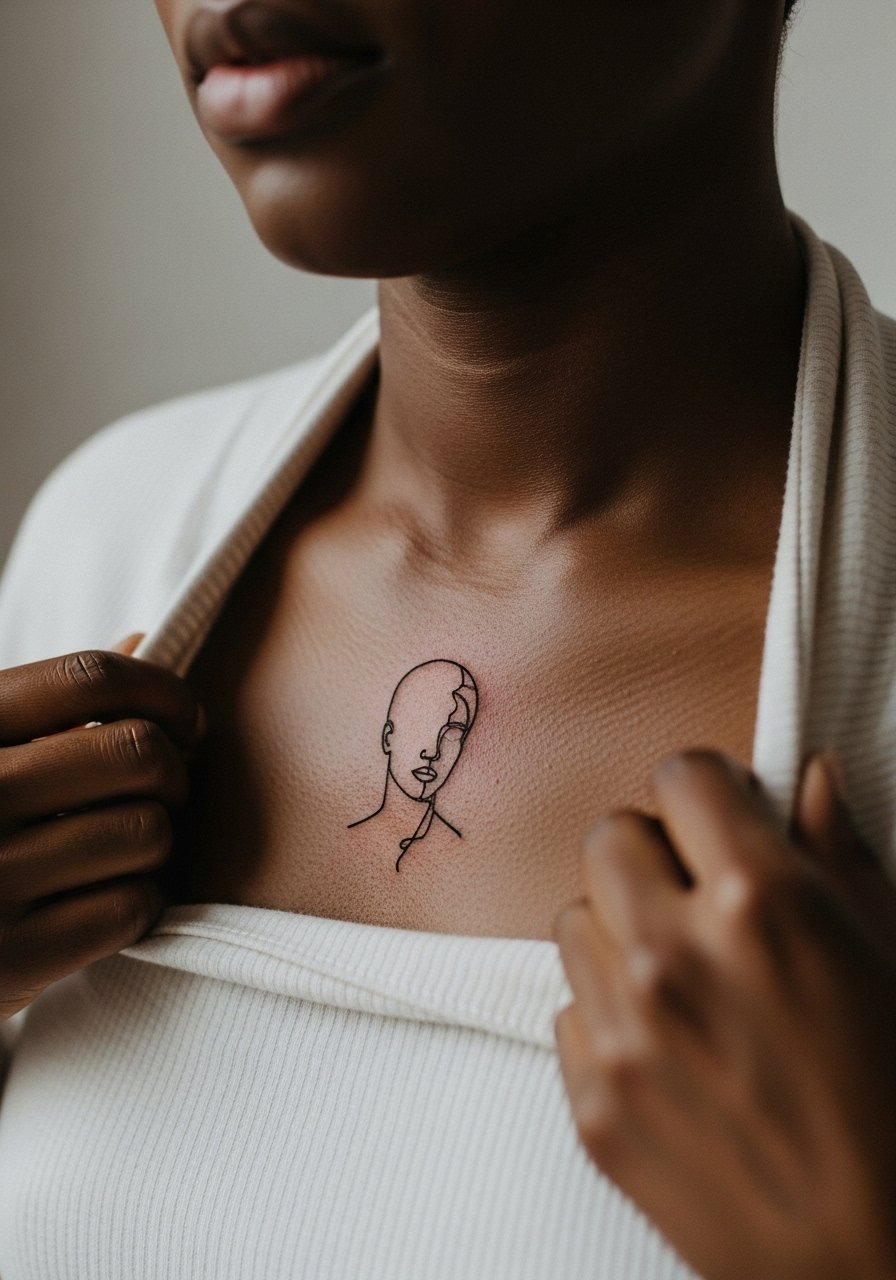
Chest silhouettes are graphic and age well if the line weight is consistent and slightly bold. Pain varies by proximity to bone and sessions can be done in one sitting if kept simple. A frequent mistake is insisting on ultra-tiny curves that pixelate into a gray blur. For session comfort wear a wide-neck shirt so the artist can adjust exposure without complete disrobing.
Frequently Asked Questions
Q: Will fine line tattoos on the ribs blur faster than on the forearm?
A: In my experience ribs and forearms behave differently. Ribs stretch with breathing and shift with weight, so extremely tight fine line may soften sooner on the ribs. Forearms see more sun but less stretch. If you want a rib piece, ask the artist to increase spacing and line weight slightly so the pattern stays readable.
Q: How often should I expect touch-ups for finger and hand tattoos?
A: Finger and hand work tends to need touch-ups more often because of constant washing and friction. Expect at least one follow-up within the first 12 to 24 months. If you need a subtle refresher, plan on periodic maintenance rather than a one-and-done timeline.
Q: Are watercolor tattoos harder to care for than traditional pieces?
A: Watercolor styles fade differently because they rely on soft gradients and low contrast. They are not necessarily harder to care for but they demand honest expectations. I tell clients that touch-ups around year three to five are common if they want to keep the original vibrancy.
Q: Should I worry about visible tattoos affecting work if I get hand or neck pieces?
A: Hand and neck tattoos still influence some hiring decisions depending on industry and location. If career flexibility is important, think about placement that is easy to cover. A good compromise is a chest or shoulder piece that you can reveal in casual settings and conceal for formal ones.
Q: What should I wear to a sternum or ribcage session?
A: Wear a fitted sports bra or a wide-neck top you can adjust so the artist has clear access without full exposure. A fitted sports bra is practical and keeps you comfortable during longer sessions.
