
Fine line trends look gorgeous on a feed, but the pieces that still read sharp after a few summers are often the ones that started with bold intent. I say that after watching too many delicate scripts blur and too many saturated black pieces settle into strong silhouettes. If you want edgy biblical tattoo ideas that actually age for years, this list focuses on styles, placements, and what to say in consultation so the ink you pick stays legible and purposeful.
1. Crucified Jesus with Thorns on Outer Forearm
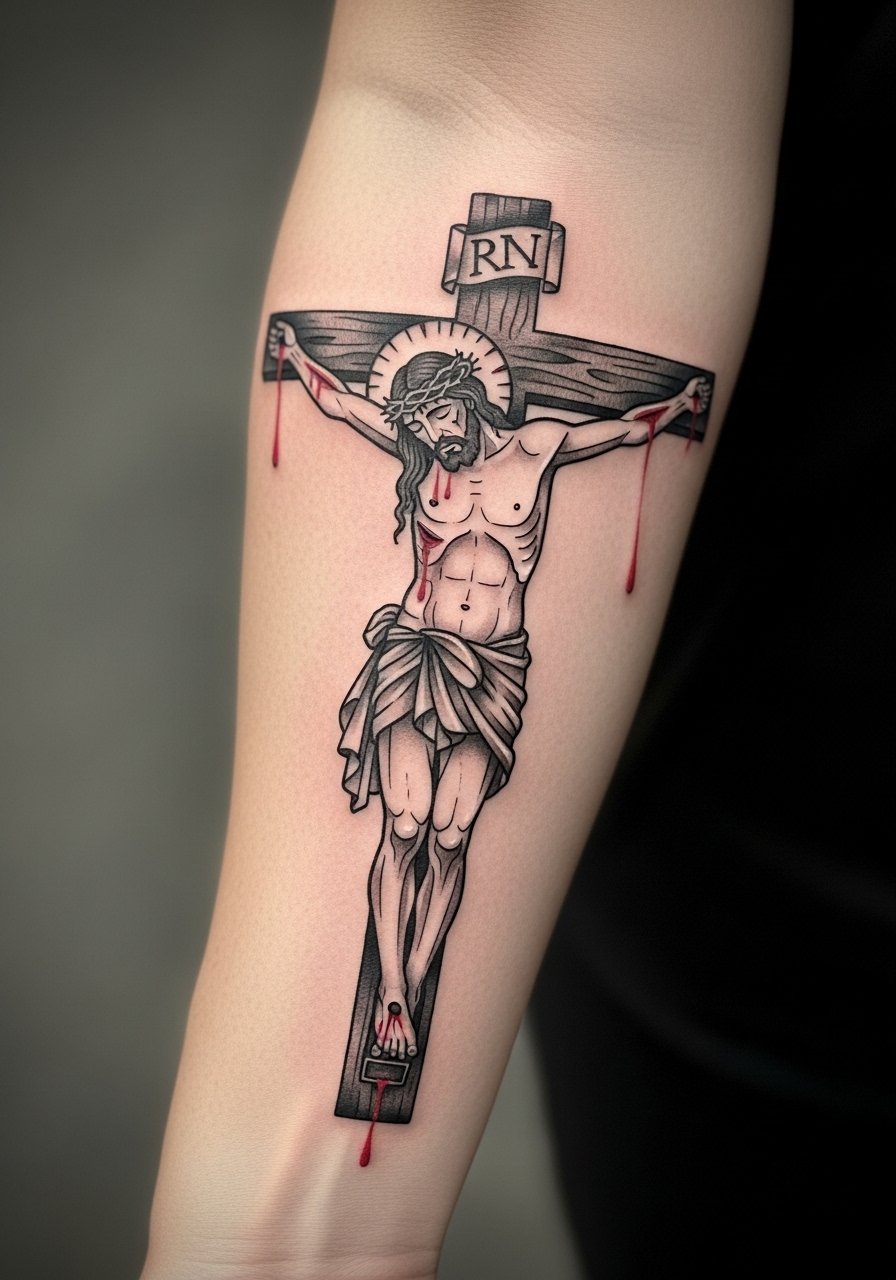
I’ve seen forearm crucifixion pieces age two ways. The best versions lean into blackwork realism with confident linework and controlled saturation. The mistake is asking for ultra-fine hairlines and expecting them to stay crisp on a mobile part of the body. Plan for about a two-hour session for a 4-6 inch piece, expect moderate pain, and budget a touch-up window at six to twelve months. In consultation say you want deeper line weight in the contours and subtle red accents only where the artist recommends. For showing it off, pull sleeves up and wear a black fitted tee with a leather cuff to frame the forearm.
2. Snake Wrapped Around a Flaming Cross on Calf

Calf pieces hold color well and sit low on the pain chart for most people. A neo-traditional snake and cross reads aggressive without needing tiny detail. Common error is compressing too many scales into a small area which gums up after a year. For a clean healed look ask your artist for bold outlines and larger scale patterning. One session of 1-2 hours will often do a medium-sized calf piece. For the session, wear loose joggers you can pull up easily. To show it off, cuff slim bootcut jeans or go with vintage leather work boots and shorts for summer visibility.
3. Fallen Angel with Shattered Halo on Shoulder Blade
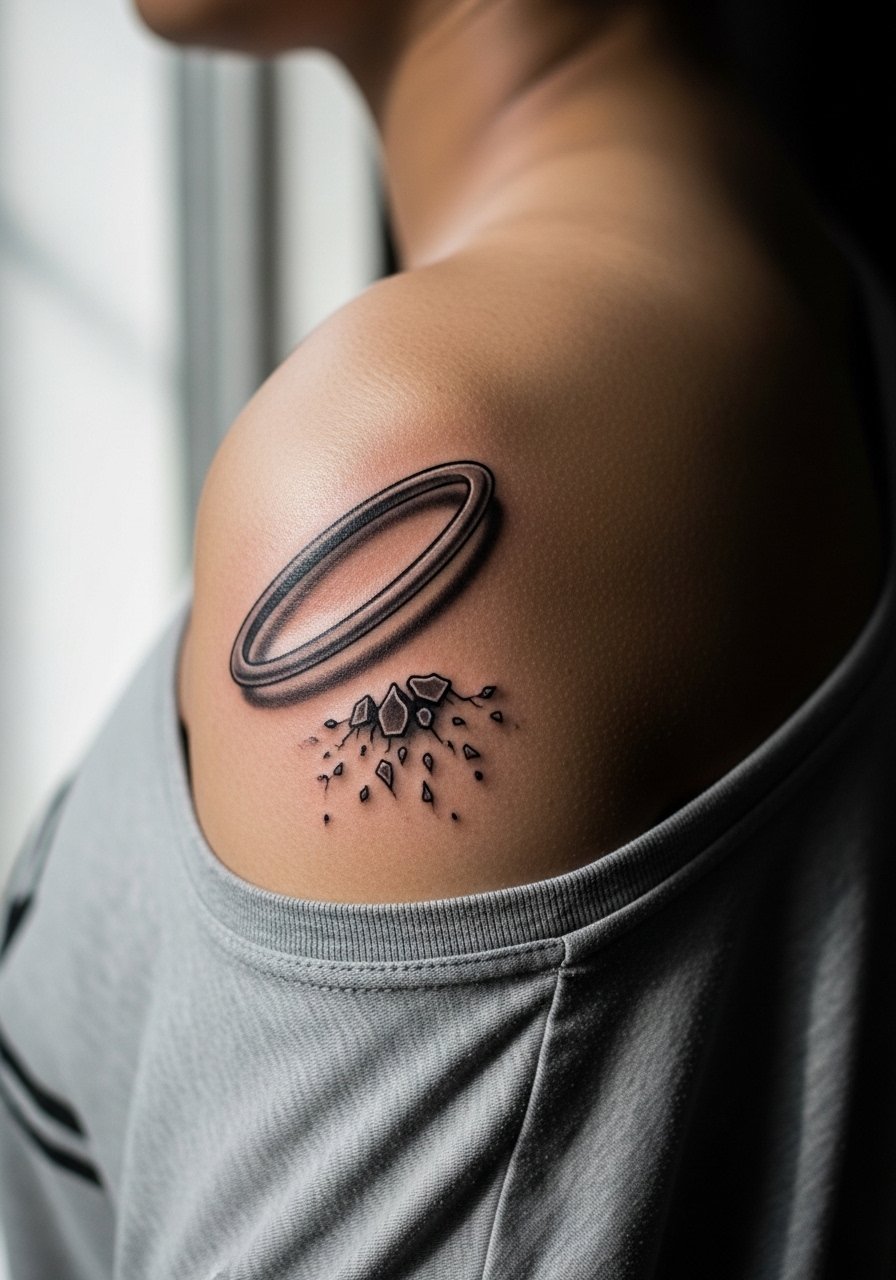
Shoulder blade micro-realism takes patience. Expect a multi-session plan around three sessions for a five-inch design and high detail. The skin here sits flat so stipple shading and micro detail fare better than on curved limbs. A frequent mistake is asking for a photographic face at tiny scale. Tell the artist you want a reference for the halo break and heavy contrast on the eyes so features do not wash out over time. Pain is mild to moderate. For the appointment, wear a button-down or loose tee you can remove or pull aside. An off-shoulder black crop top pairs well for reveals and complements the shadow work aesthetic.
4. Ezekiel’s Wheel Ornamental Blackwork on Upper Back

This ornamental blackwork loves scale. Upper back lets artists play with symmetry and dense black areas that stay bold as they age. Too many clients ask for the pattern small and then wonder why lines merge. Plan for a longer project across multiple sessions. Pain is lower than ribs but sitting through four-hour blocks for deep saturation is common. In consult, insist on previews of the symmetry and ask about touch-up timelines for large solid fills. For showing the piece off later, a backless halter or sheer blouse provides clean exposure without competing patterns.
5. Leviathan Sea Beast Devouring Ships on Thigh
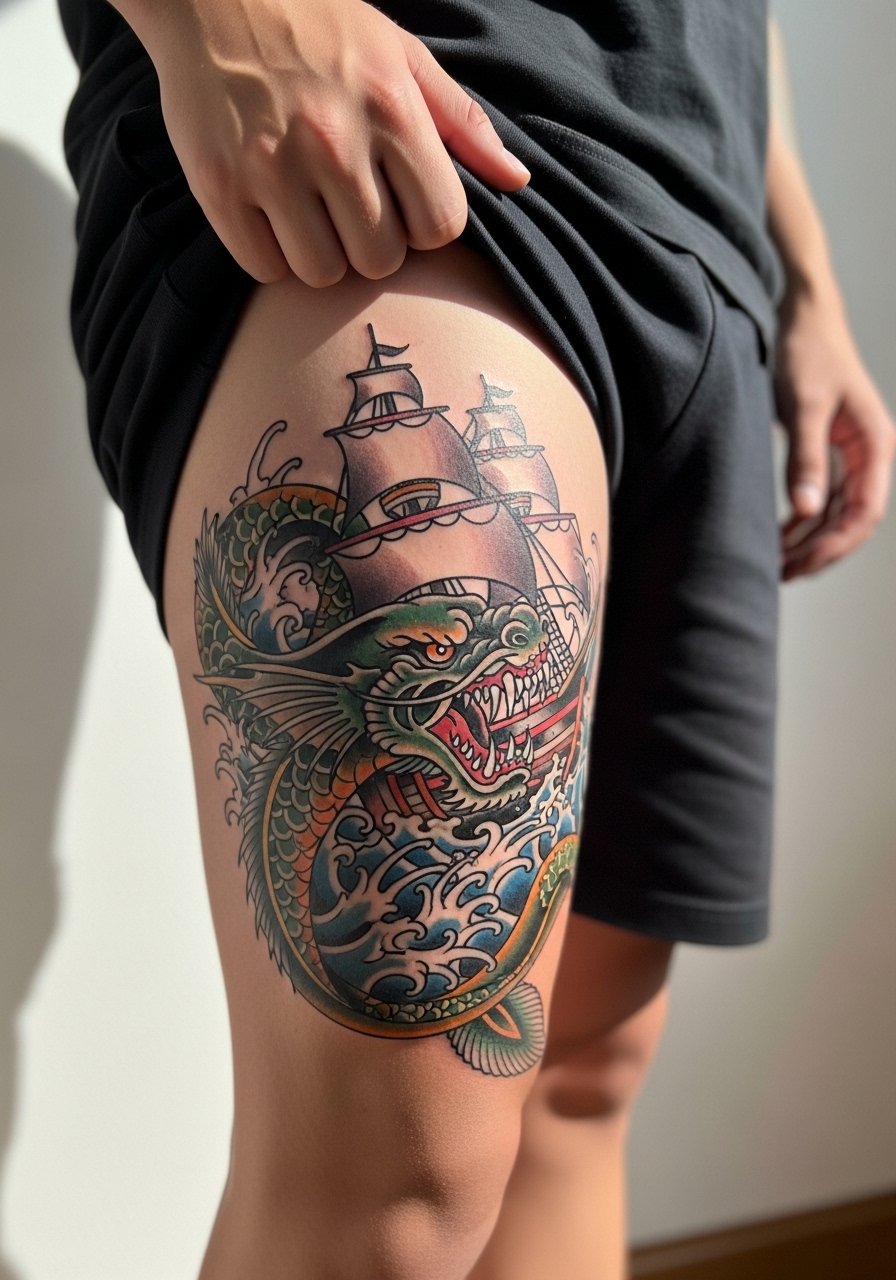
Thighs are forgiving for heavy illustrative work and typically heal with strong saturation. The common error is cramming highly detailed sails and tiny figures into a small thigh panel. For resilience ask for clearer negative space between elements and heavier black outlines on the beast. Expect one to two sessions for a six-inch piece and lower pain than ribs. Session wear should be loose shorts or a skirt so the artist can work without tension on the skin. To style it for summer, pair high-waisted shorts and a studded belt.
6. Revelation’s Four Horsemen Silhouettes on Ribcage
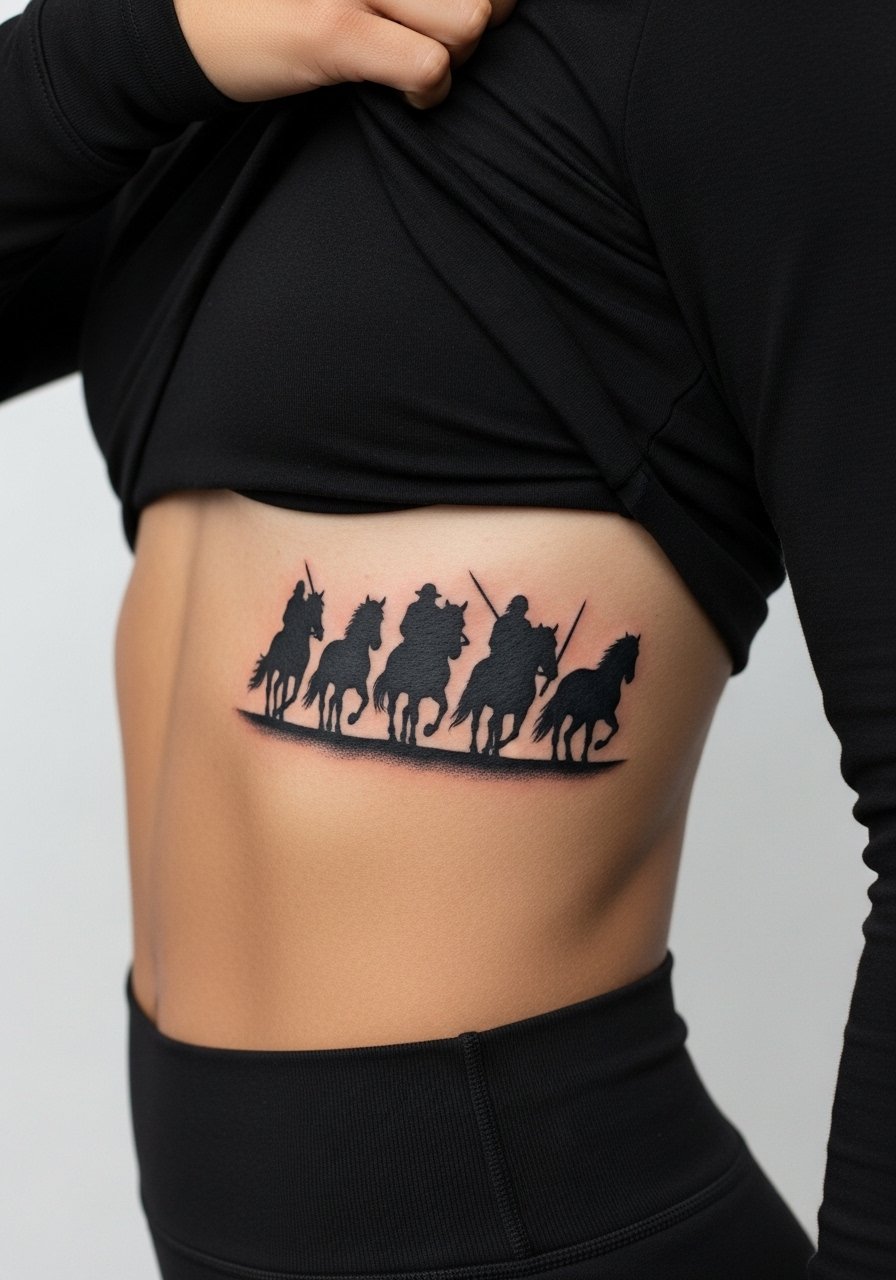
Fair warning, ribcage pieces hurt and breathe differently while you work. Minimalist silhouette horsemen translate well because the artist can use negative space and strong solid black to keep the image readable at five years. The big mistake is demanding tiny text or intricate linework on ribs. Expect two sessions, and bring a strapless bra or liftable top for access. Artists split on fine line here. One camp argues ribs stretch and blur fine lines within two years. The other camp says with proper depth and spacing, fine line can hold. Ask your artist their experience and view sample healed ribs in the same style before you book.
Studio Day Picks
The forearm and thigh pieces above need different prep from the ribcage work, and a few specific items make the session and first week smoother.
-
KM Elastic Tattoo Lotion. Favored for skin that stretches with weight changes, useful if you are worried about forearm or thigh distortion after body shifts.
-
Australian Tea Tree Aftercare Gel. Gentle anti-inflammatory properties help calm inflamed areas after larger sessions like the upper back wheel or thigh beast.
-
InkGuard Barrier Film. A no-residue barrier artists like for long sessions on curved areas such as the calf or shoulder blade.
-
Japanese Pine Tar Salve. Handy for dry-healing fine blackwork in small spots that are prone to scab cracking.
-
H2Ocean Aftercare Spray. A lighter alternative to thick balms during the first week, useful on the forearm crucifixion where crisp blackwork needs to avoid pore-clogging products.
7. Judas Kiss with Dagger on Inner Bicep
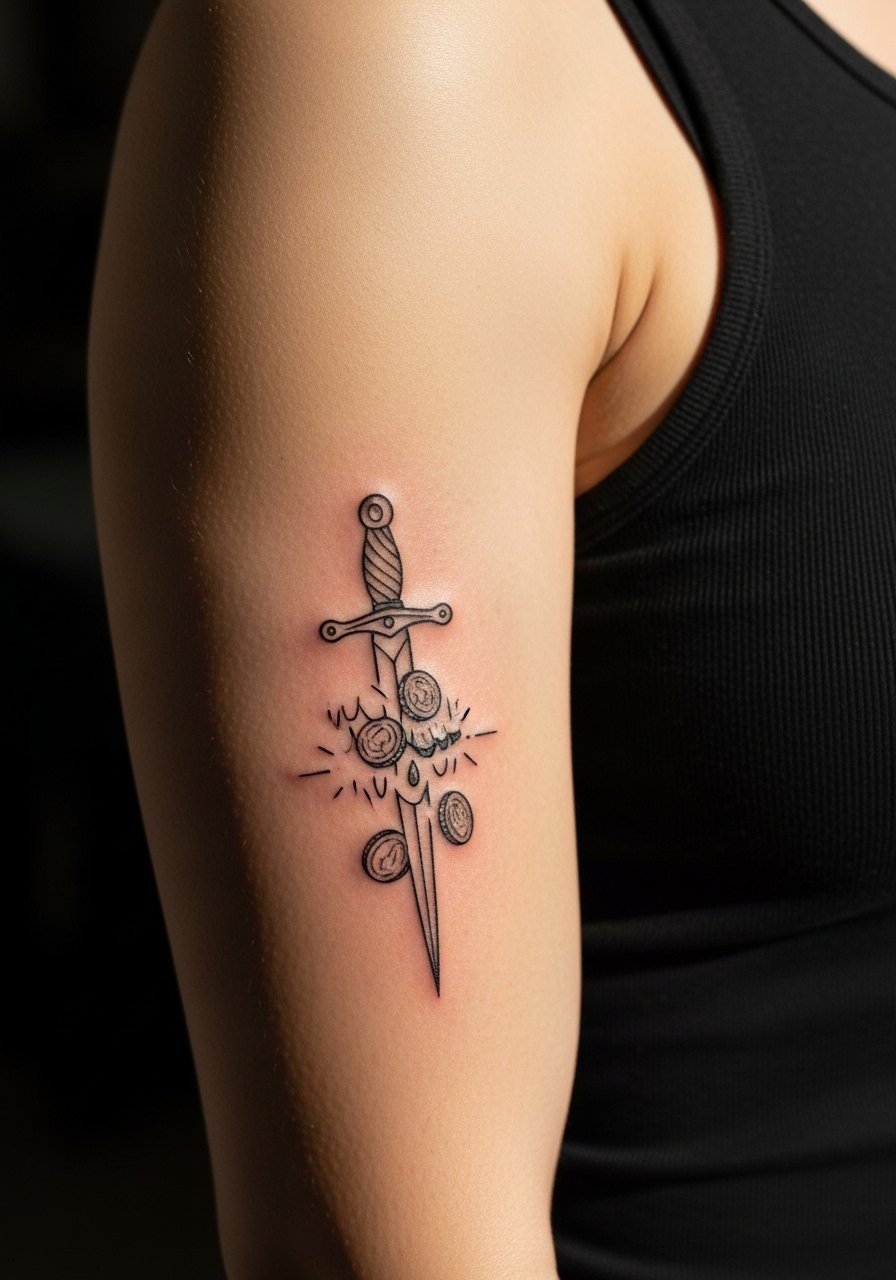
Inner bicep tattooing is intimate and the skin accepts fine line beautifully when scaled correctly. Pain is moderate and session time for a small-medium piece is around one hour. The most common mistake is picking hairline script near the dagger and expecting it to stay legible. For this narrative piece request stronger contour lines on the dagger and spaced coin details. Touch-up at six to twelve months is routine for fine line on the inner arm. For showing off, pair the tattoo with an olive green sleeveless muscle tank so the arm silhouette reads cleanly.
8. Whore of Babylon Sleeve Start on Upper Arm
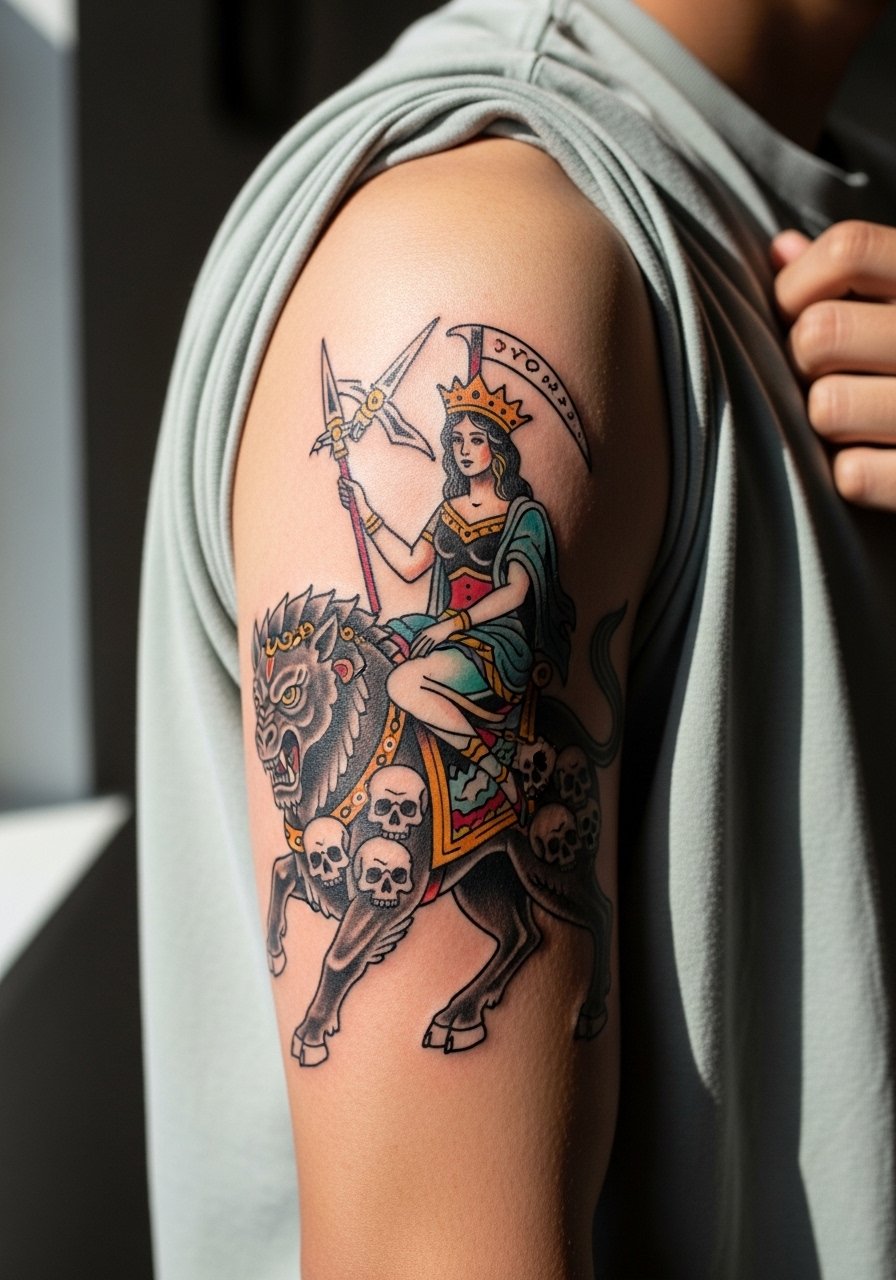
Sleeve starts demand commitment and clear narrative planning. A neo-traditional Revelation scene like this typically spans many sessions. Pain on the upper arm is moderate and sessions often run three to five hours depending on color workloads. The frequent error is letting designers add unrelated filler that steals focus. Tell the artist you want a cohesive palette and that skull elements should be spaced to avoid muddiness. Expect frequent saturation checks and a multi-session schedule. For session wear bring a loose short-sleeve shirt you can pull down. For show-off, a sleeved black tee that sits tight to the shoulder helps silhouette the sleeve start.
9. Mark of the Beast 666 Wrist Script

Wrist script is provocative and visible. Bold blackwork is the safer route here because fine scripts on wrist skin often blur from constant movement and hand washing. The session is quick, often under an hour, but expect higher touch-up needs if lines are too thin. A common user mistake is choosing a super-thin font for a wrist where friction is constant. For styling, layer a thin leather wrap bracelet on the opposite wrist rather than crowding the inked spot. During the appointment remove jewelry and wear a sleeveless or short-sleeve top.
10. Adam and Eve with Demonic Serpent Bite Marks on Lower Back
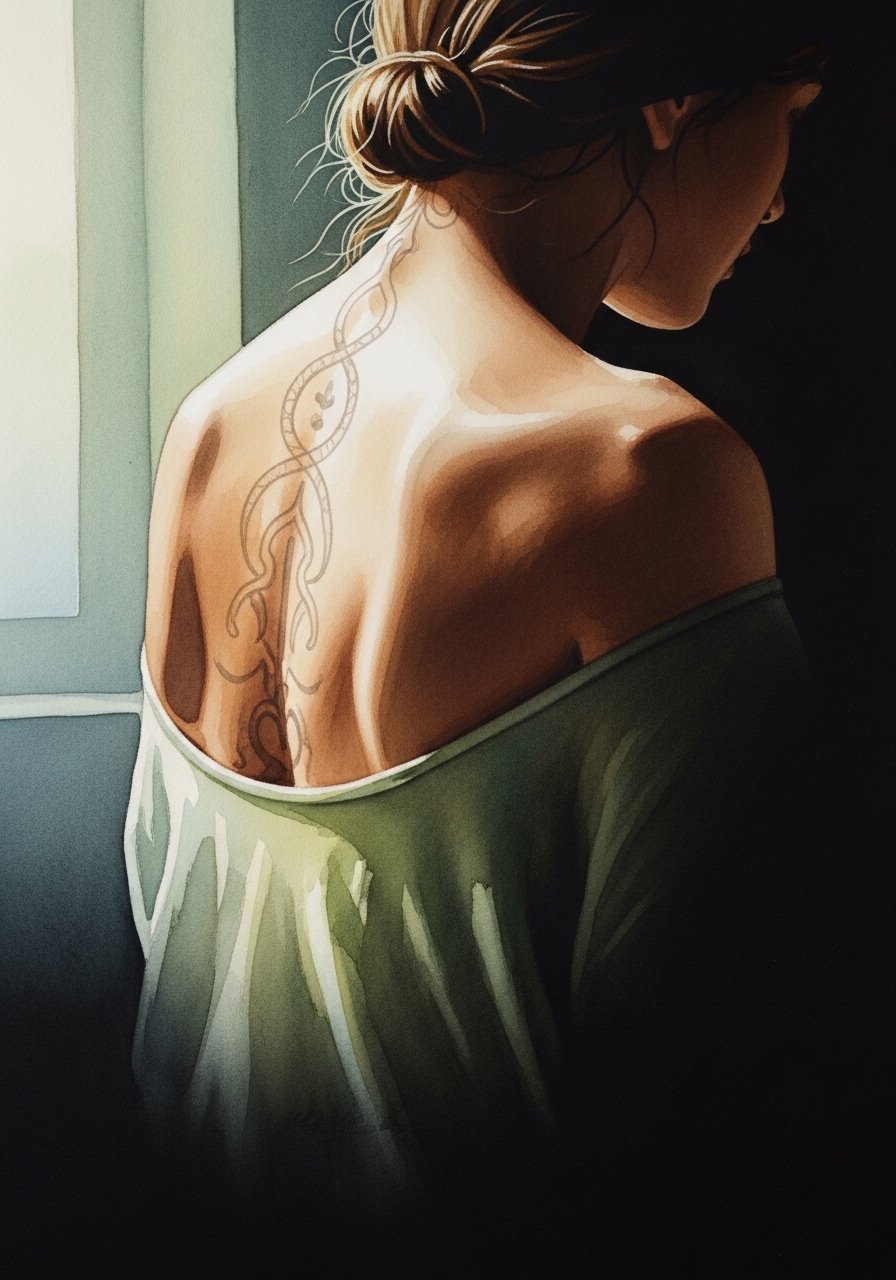
Lower back watercolor offers wide canvas and dramatic fade options. The risk with watercolor here is color migration if the fills are too soft. For longevity pick slightly stronger outlines to anchor the washes. Pain on the lower back is low to moderate and 2-3 sessions may handle medium compositions. Avoid tiny facial details; instead emphasize posture and the bite marks for narrative clarity. When getting this done, wear a tank top and high-waisted bottoms so only a narrow strip is exposed. For summer looks, high-waisted shorts and cropped tops dramatize the scene.
11. Goliath’s Severed Head by David on Chest
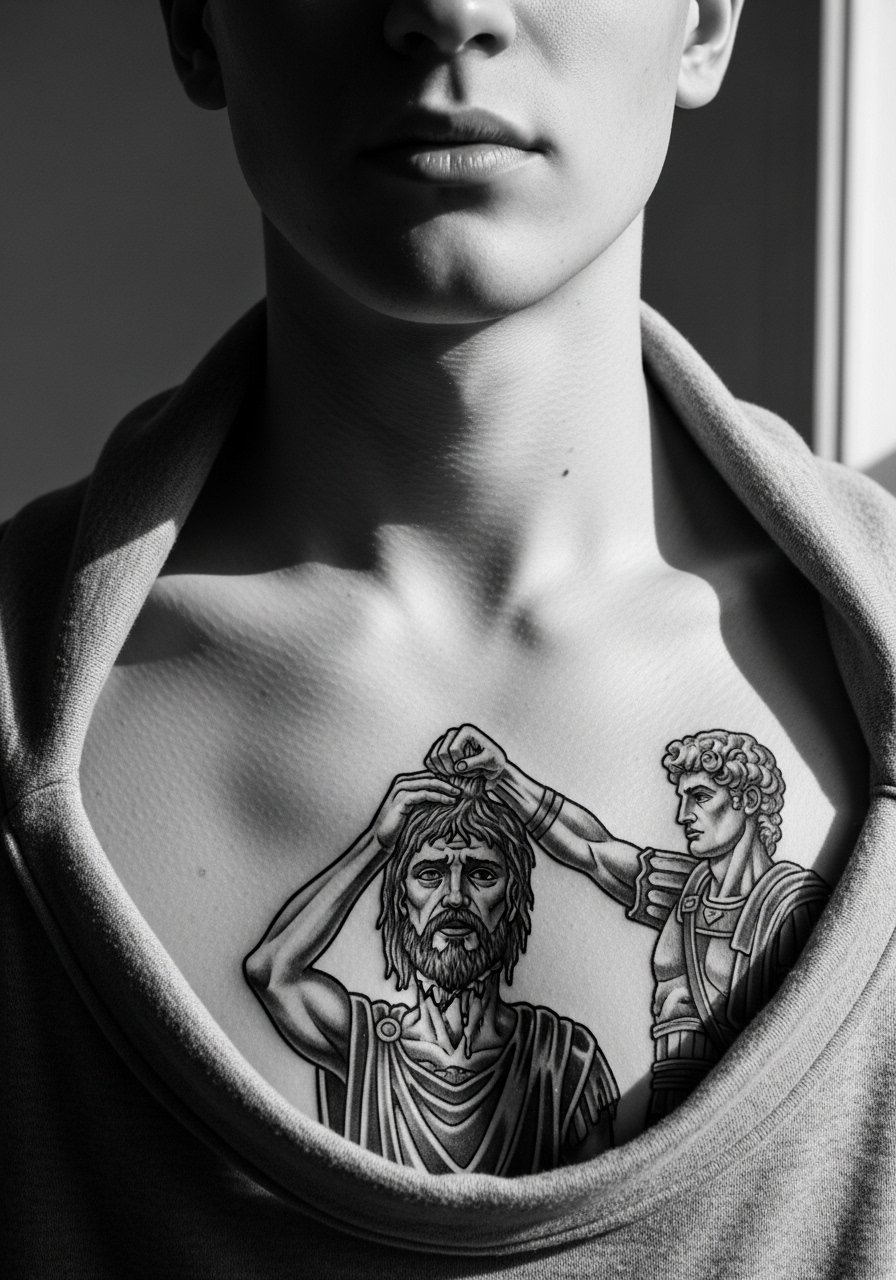
Chest pieces sit across a moving surface so portrait micro-realism must be sized correctly. A five-inch chest portrait often needs three sessions for shading and depth. The common error is cramming tiny facial detail without enough scale which leads to loss of nuance after healing. Pain ranges moderate to high depending on proximity to bone and sternum. In consult, specify contrast levels in the shading and ask to see healed chest portraits from the artist. For session day wear a wide-neck shirt you can pull aside easily. A thin silver chain sits nearby without competing with chest portraits.
12. Burning Bush with Screaming Faces on Neck
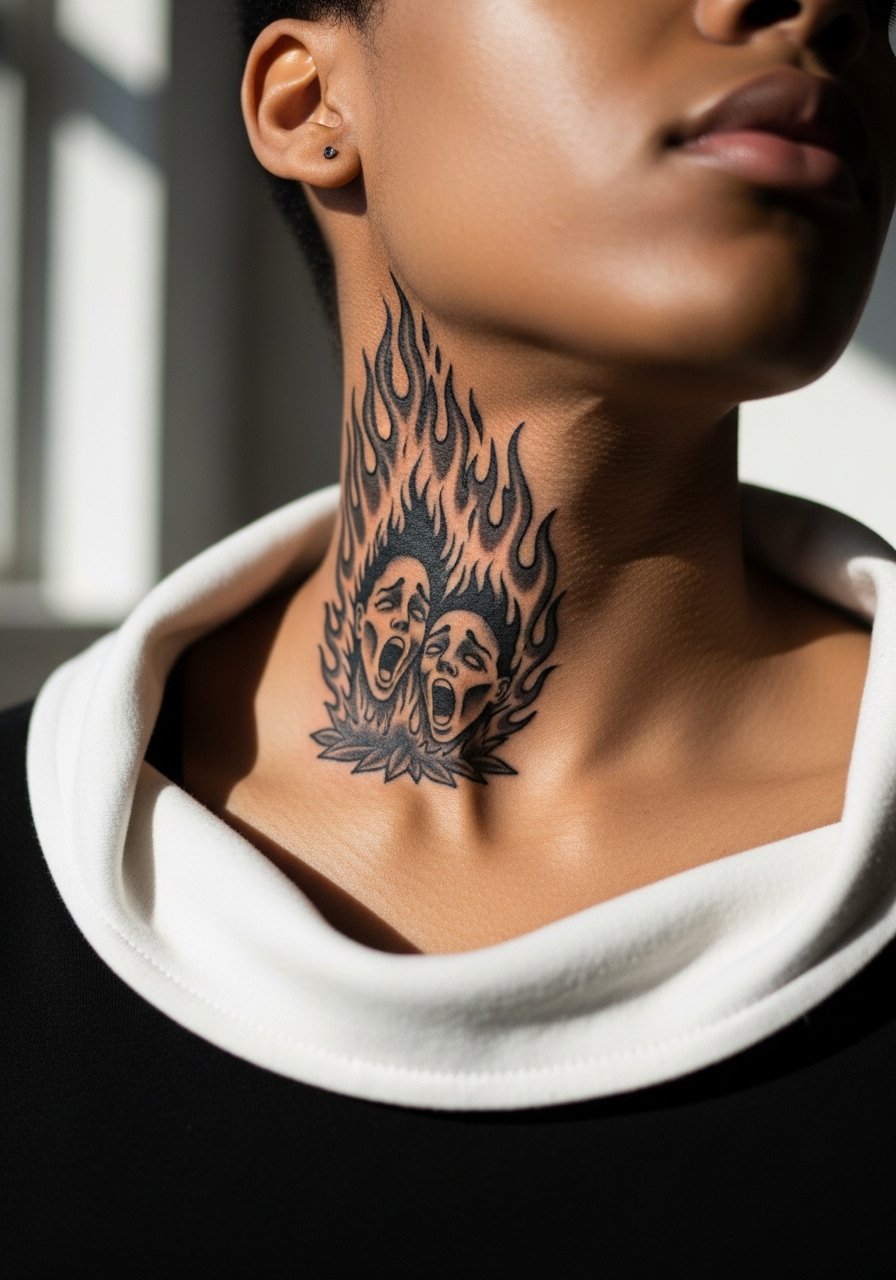
Neck tattoos are visible and painful. Ignorant style with bold shapes works here because dense black resists fading better than washed gradients. The risk is social and professional visibility. Pain is high and sessions are often short and focused. Ask the artist about line depth and insist on bold motifs rather than fragile details that will blur. For the session wear a collar you can shift and tie down hair. For styling choose a high-neck choker or open-collar shirts to frame the neck ink without covering it.
13. Locust Plague Swarm Forming a Skull on Calf

Dotwork and blackwork on a calf age well when density is managed. The calf gives room to design the swarm so small dots do not merge into a blot. The typical mistake is over-densifying the core skull which then fills in after healing. One to three sessions depending on scale is common. Calf pain is generally low to moderate. For the session wear loose shorts and flat shoes for positioning. In everyday style these pieces look great with cuffed jeans or athletic shorts.
14. Harlot’s Blood-Dripping Chalice on Ankle

Ankle placements endure lots of friction from socks and shoes, so fine line work here is delicate. The usual mistake is choosing thin ornamental stems that fade out after months. For better longevity request slightly thicker outline work and reserve color drips for contrast. Sessions are brief for small pieces and pain is moderate. For the appointment roll your pants up and wear sandals. To style the healed look, strappy heels or cropped joggers work well and keep attention on the ankle.
15. Burning Bush Sternum Variation for Collarbone Wear
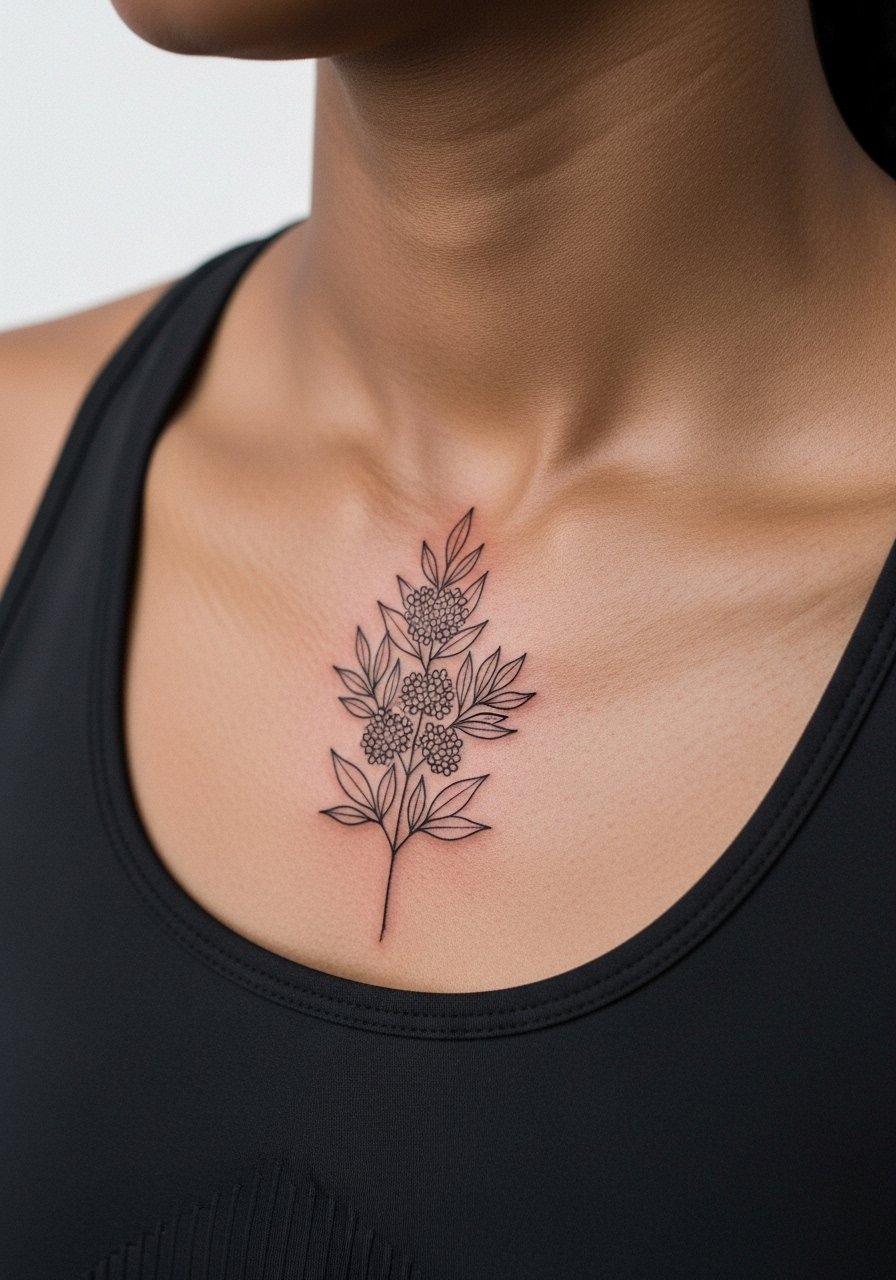
Sternum-adjacent work transfers well to collarbone areas when scaled for movement. Expect higher pain near the sternum. If you want the burning bush motif but are worried about sternum sensitivity, shifting the composition upward to the collarbone keeps the drama with less pain. Ask for slightly heavier anchor lines along the main branches so thin stippling does not vanish. One to two sessions is typical for a small-medium collarbone piece. For session wear a fitted sports bra or wide-neck top that reveals only the area needed. Pair with a thin chain pendant necklace for subtle framing.
16. Locust Swarm Knuckle Accent for Fight Club Vibe

Knuckle and hand placements are brutal on longevity because of constant motion and washing. Small iconography like tiny locusts can look crisp initially but often soften within a year. If you want knuckle edge keep designs bold, simple, and accept that touch-ups will be needed. Sessions are quick but healing demands careful protection from friction. If you work in a job where hands matter, think about visibility before committing. For the session remove rings and wear a short-sleeve top. A minimal leather cuff on the opposite wrist balances the look without crowding the knuckles.
17. Harlot’s Chalice Ankle Mini with Red Drips (Alternate Small)
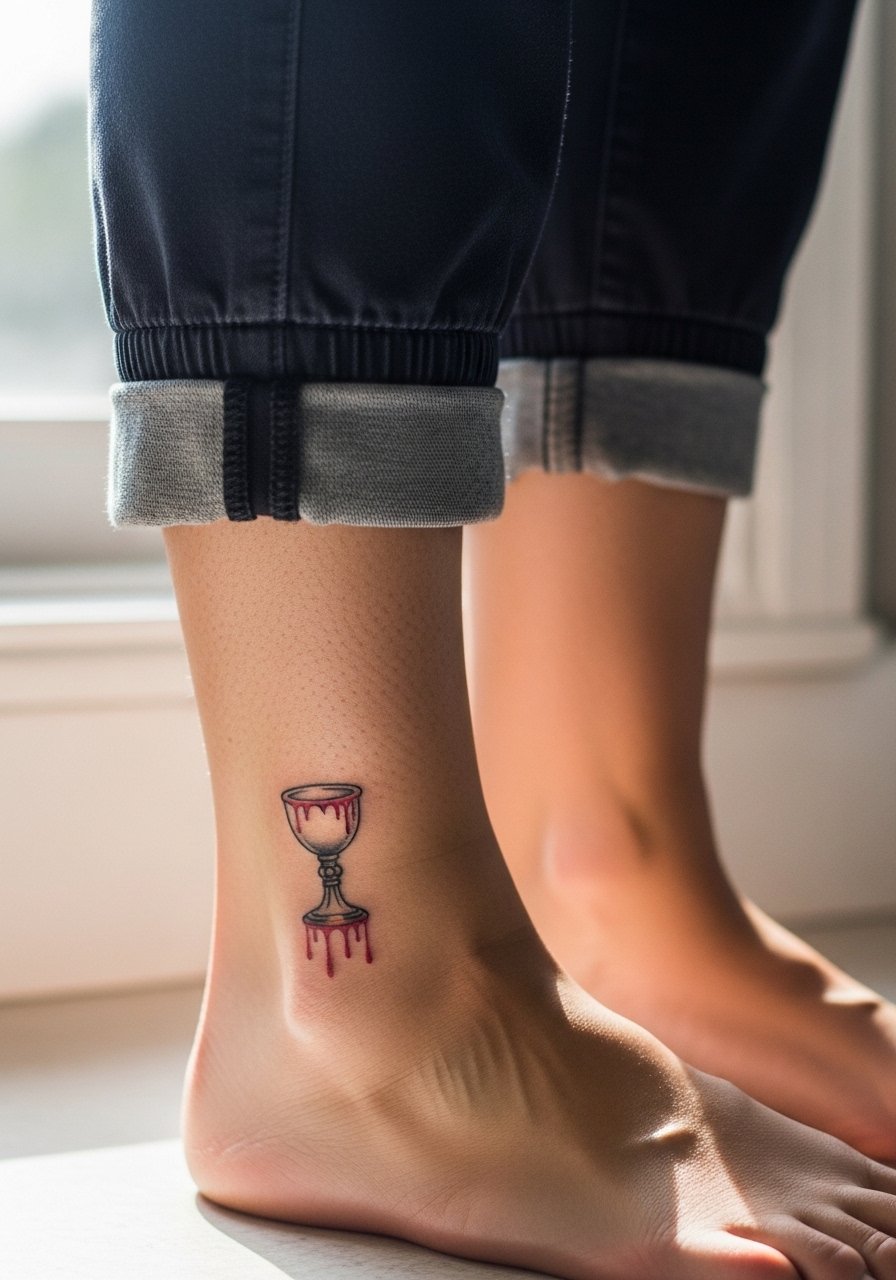
If you like the chalice idea but want a subtler placement, a tiny ankle version keeps the motif private and easy to hide. The trade-off is that very small fine line details will need touch-ups sooner on the ankle. Ask for a slightly bolder cup outline and reserve the red drips for a single accent so they do not bleed into the surrounding skin. Pain is low to moderate and sessions are short. For the appointment roll pants and wear sandals so the artist can work without interference. Gold anklet styling opposite the tattoo complements the negative space.
Frequently Asked Questions
Q: Will fine line scripts like Judas or wrist 666 blur faster than bold blackwork?
A: In my experience fine line does blur faster on high-movement or high-wash areas like wrists and hands. Many artists split into two camps on this. One group prefers fine line and accepts touch-ups as part of the plan. The other group recommends heavier line weight for longevity. The practical route is to ask your artist for healed examples on the same placement and skin tone.
Q: How should I prep clothing for a ribcage Revelation sleeve session?
A: Come in a strapless bra or a liftable crop top so the artist can work without pulling fabric over the area. Bring loose bottoms and a zip hoodie for aftercare comfort. The right clothing saves time and prevents fabric from rubbing newly tattooed skin between sessions.
Q: Does blackwork Ezekiel wheel on the upper back need different aftercare than a thigh leviathan?
A: The care basics are the same but practical needs differ. Large solid black fills on the back can trap moisture under thick ointments in humid conditions. For thigh work you might favor breathable balms that avoid maceration. Discuss drying vs film wrap options with your artist and ask which method they have had the best healed results with for the specific placement.
Q: How many sessions should I expect for a neo-traditional Revelation sleeve start?
A: Plan on multiple sittings. Sleeve starts often take at least three sessions to block in major figures and colors. Full completion depends on sleeve complexity. Your artist will map a schedule during the consult. Expect touch-up windows after the full piece heals.
Q: Are there discovery paths to find artists who specialize in edgy biblical work without using Instagram handles?
A: Yes. Search the hashtags and apps that focus on style rather than individual names. Look up #EdgyBiblicalTattoo and #BlackworkBible on social platforms, use filters in portfolio apps, check Reddit style threads for local recommendations, and browse guest spot listings on booking platforms. Ask for healed photos in the style and on skin tones similar to yours before booking.
