
The tattoos that still read clean at year ten are often the ones that looked the least polished fresh. Solid black saturation balanced with intentional skin breaks tends to age better than ultra-fine micro-detail. That said, common problems hang over blackwork: heavy ink can itch and heal slowly, blackout sleeves often cost far more than expected, and darker skin tones risk muddiness if saturation is uneven. Use the ideas below to plan placement, sessions, and wardrobe that help a piece last.
1. Sacred Geometry Mandala on Outer Forearm
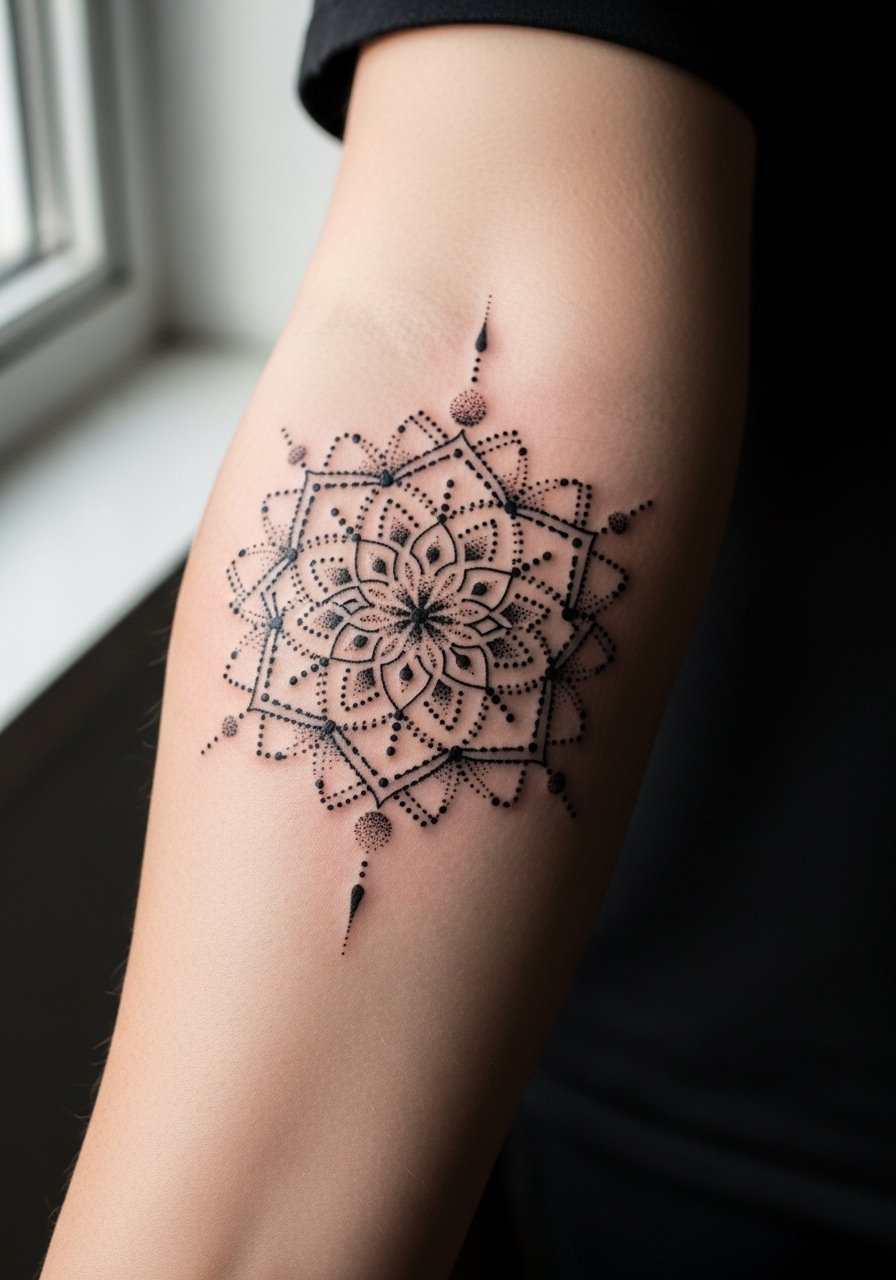
I’ve seen mandalas on forearms age well when artists give elements breathing room. Ask your artist for slightly larger petal spacing and heavier stipple in the darker sections to avoid early line merging. Expect moderate pain and a one to two hour session for a medium piece. A common mistake is squeezing too many concentric rings into a small wrist-adjacent placement, which causes saturation to blur by year three. For showing it off, this placement pairs with a black fitted t-shirt with sleeves rolled up and a leather cuff bracelet to frame the design.
2. Medieval Woodcut Skull on Upper Arm
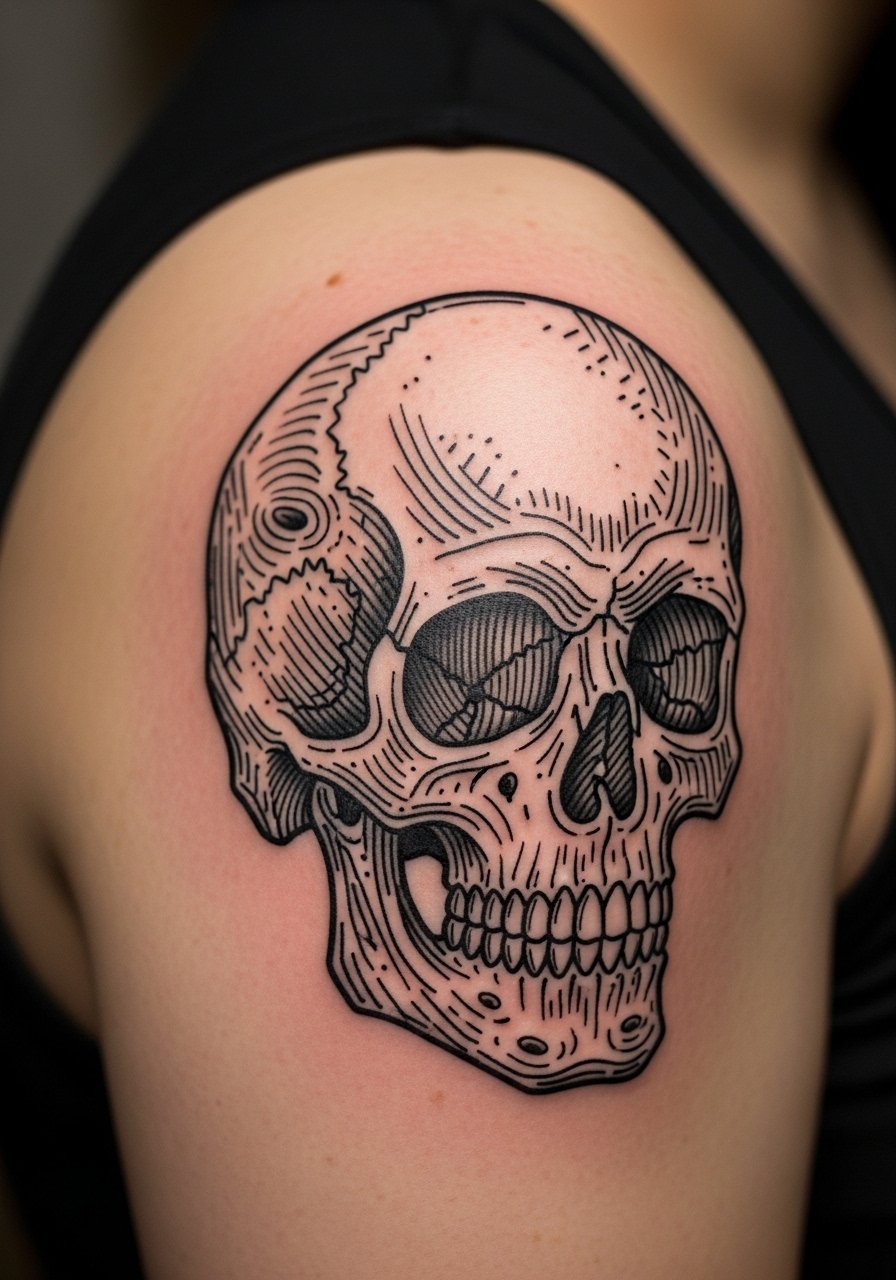
When you want gothic texture without gray washes, ask for woodcut hatching that follows the muscle grain. Tell the artist you want the hatch marks to curve with the shoulder cap so the piece reads three-dimensional after healing. Expect two medium sessions and noticeable soreness under the vintage leather jacket zone. The mistake to avoid is asking for ultra-fine hatch lines too small for the shoulder surface, which can bleed together after a year. For sessions, wear a sleeveless tank top or an open button-down so the artist has room to work.
3. Heavy Blackout Sleeve, Arm to Wrist
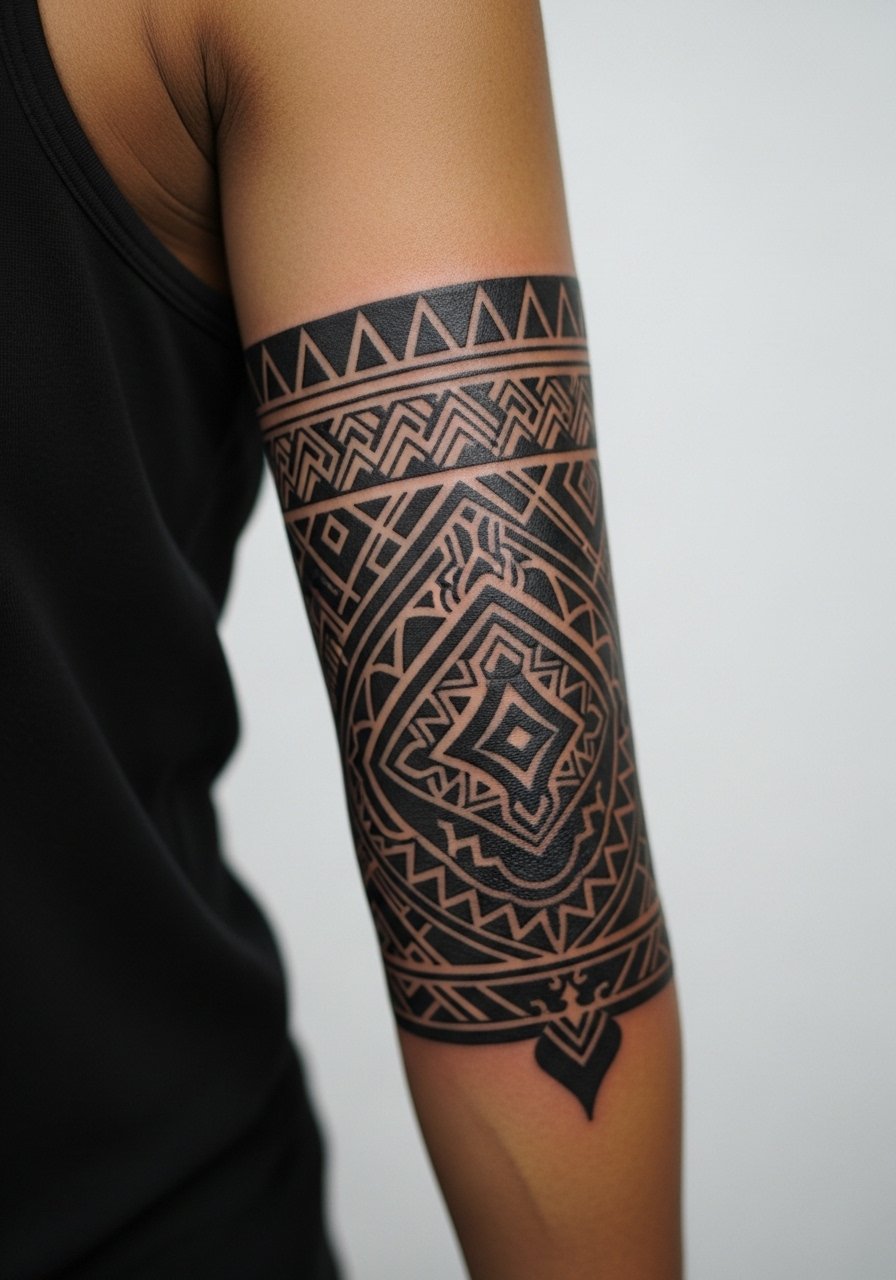
Fair warning, blackout sleeves are marathon projects, not quick fixes. From what I’ve gathered, one camp argues that with meticulous layering you get vibrant, even coverage that lasts. The other camp warns that poor saturation turns into a muddy patch within months. If you go blackout, budget for four to six long sessions and ask the artist about their technique for even saturation to avoid blotchiness on darker skin. The skin will itch more during healing and heavier aftercare discipline helps. For the chair day, a black tank top lets the artist roll and position the arm without tugging.
4. Geometric Tribal Band on the Calf
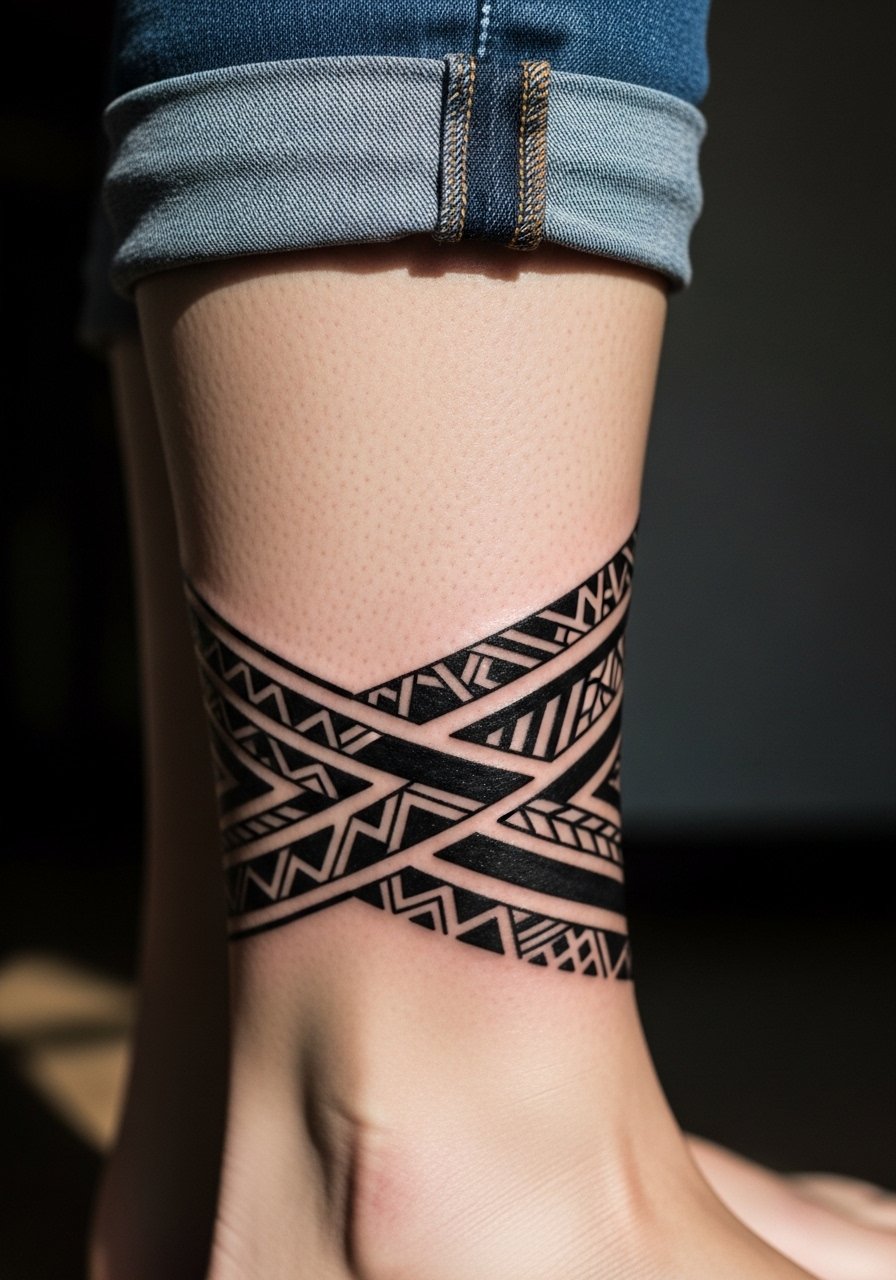
Calf bands age well because the lower leg sees less stretching than the torso. The biggest mistake is asking for hairline edges on a high-motion area. Tell your artist to keep line weight sturdy and repeat key motifs so the pattern stays readable as the skin shifts. Pain is moderate and most bands finish in a single session. For summer show-offs, pair the band with slim jogger pants rolled at the ankle or boat shoes to highlight leg definition without competing with the black work.
5. Dotwork Infinity Symbol on Inner Wrist
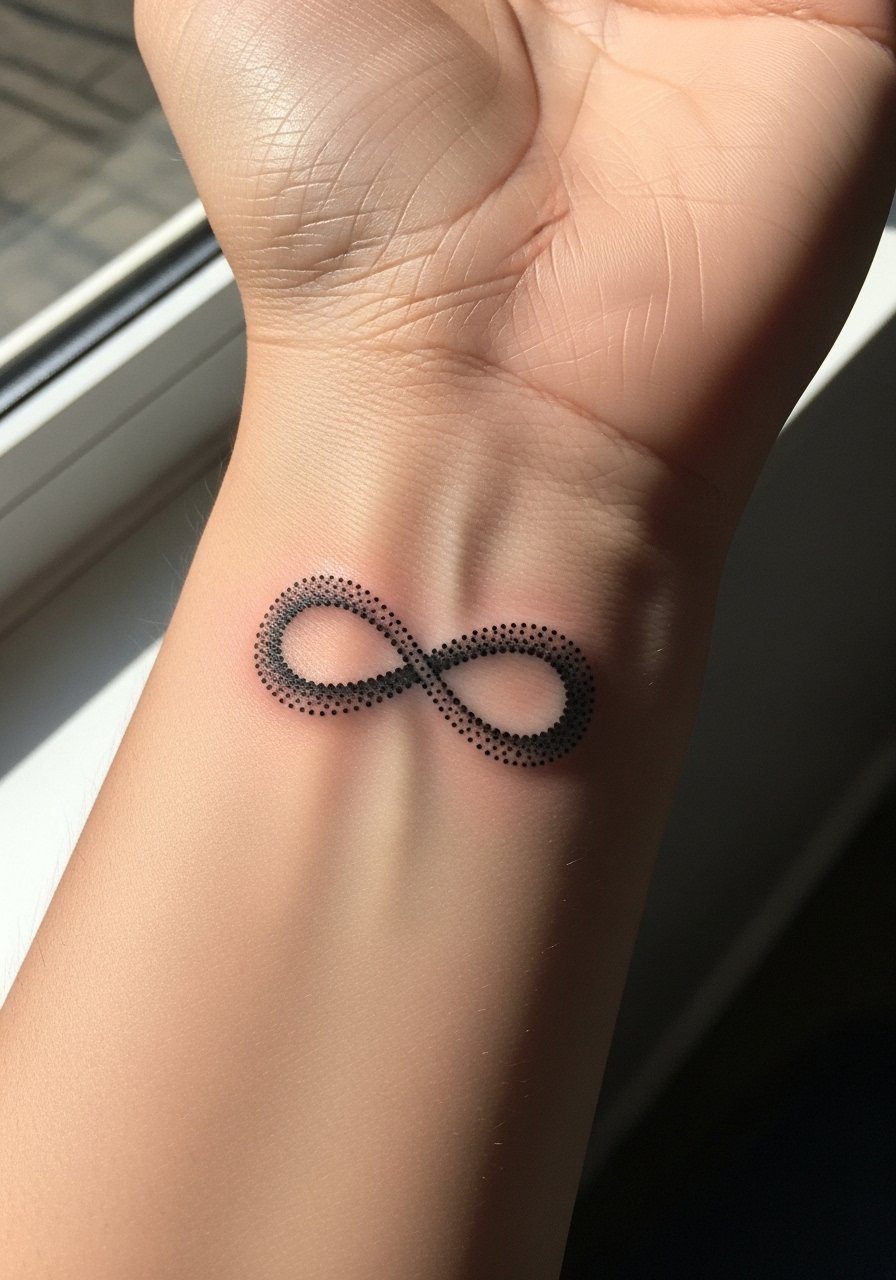
For wrist work, precision beats complexity. Ask for stipple density that leaves tiny skin gaps to prevent the dots from bleeding into one another. Expect light to moderate pain and a short session. A common aging issue is crowding the motif near veins which can warp how the dotwork reads. Touch-ups are common around year two for tiny loss in stipple crispness. Wear a thin leather cord bracelet on the opposite wrist to balance attention without crowding the motif.
6. Abstract Negative Space Rose on Upper Chest
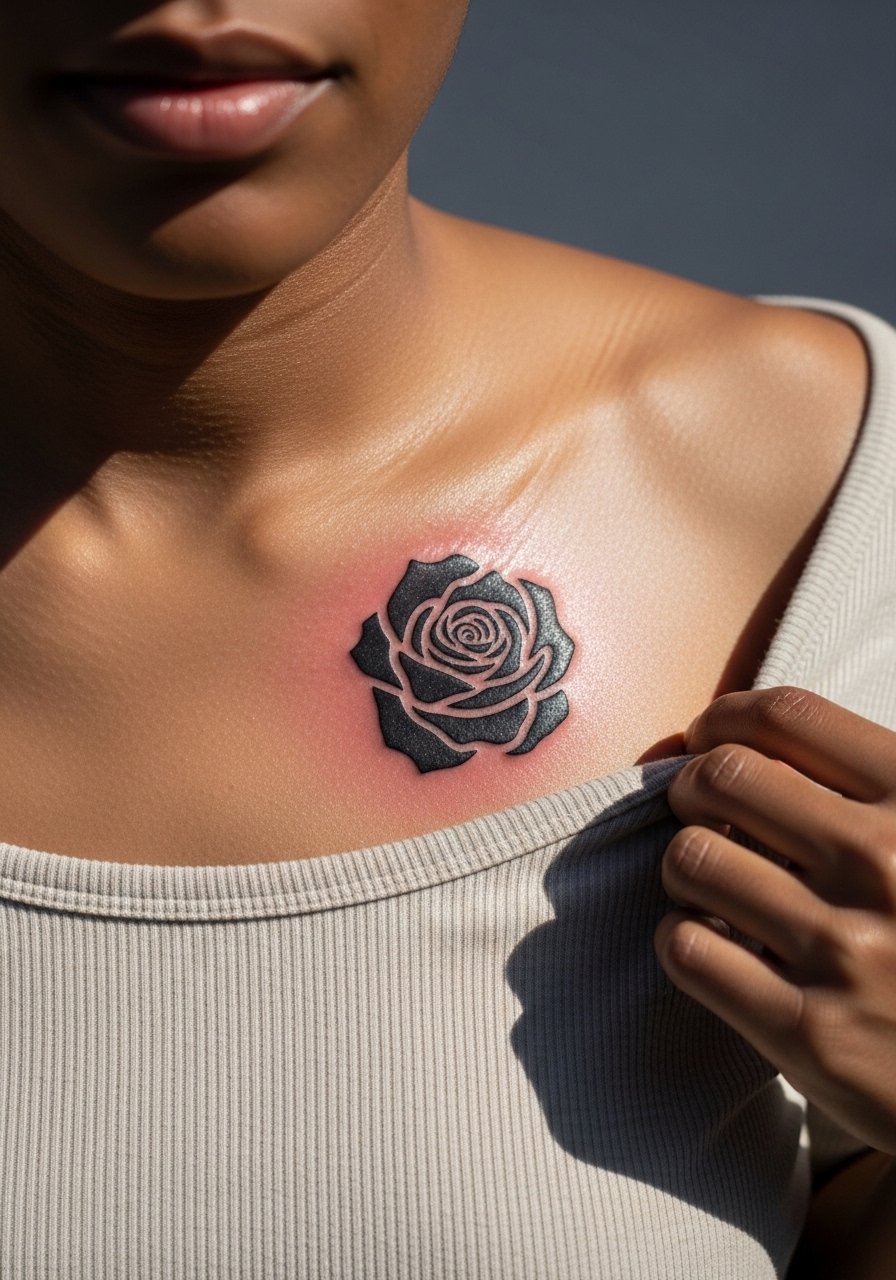
Chest pieces with deliberate skin breaks keep floral depth while avoiding heavy gray work. Tell the artist where you want the skin highlights so key petals read as gaps rather than faded ink. Chest sessions are more uncomfortable for many people and usually take two medium sessions. The wrong approach is trying to force soft gray gradients inside solid black panels, which creates muddy transitions. For evening show-offs choose a deep v neck tee and a thin chain necklace so the rose sits within the neckline without competing for attention.
Studio Day Picks
The chest, ribcage, wrist, thigh, and calf pieces above each ask for slightly different prep and healing aids so pack smart for session day.
-
Stencil transfer paper kit. Lets you preview placement on skin so a mandala or cuff reads the same live as it does on the phone reference.
-
Topical numbing cream. Applied before a long blackout or ribcage session it takes the edge off without changing the way the needle deposits pigment.
-
Thin protective film roll. Useful for wrist and finger placements where daily washing and friction risk early scab disruption.
-
Fragrance-free gentle body wash. Cleans healing skin around chest and thigh work without irritating freshly tattooed linework.
-
Aquaphor healing ointment. Thin layering during the first few days helps on small stipple and fine-line areas without clogging the channels the way heavy creams can.
7. Bold Geometric Sleeve Filler for Patchwork Arms
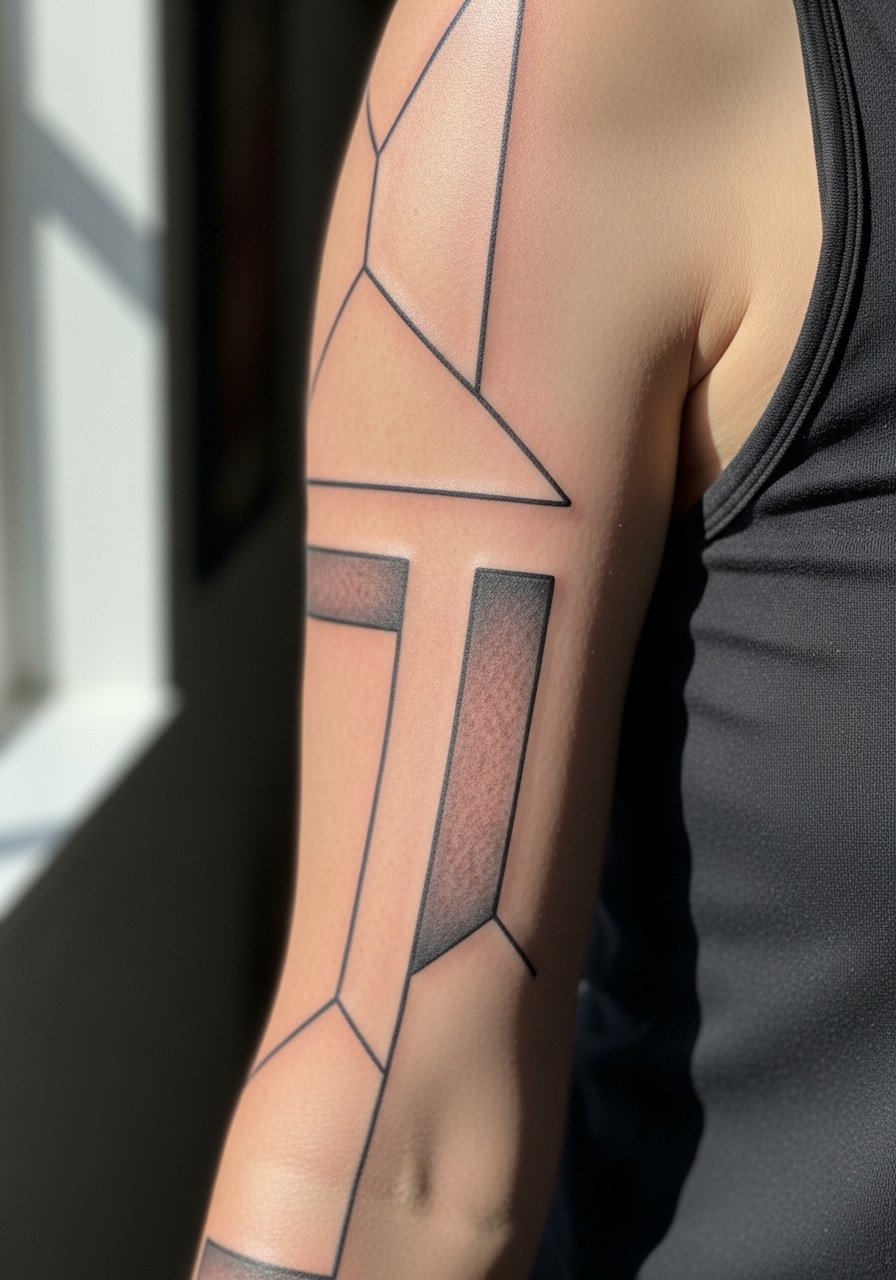
This design is workmanlike for covering gaps without changing existing pieces. In consultation, bring photos of the neighboring tattoos so the filler echoes key angles and preserves rhythm. Expect three to five sessions depending on how much coverage you need. A mistake is trying to match too many styles at once. Pick a unifying motif for cohesion and ask for slightly heavier linework near seams to protect against future blowout. For sessions wear a loose short-sleeve button-up so the artist can move your arm freely.
8. High-Contrast Demon Engraving on Outer Thigh
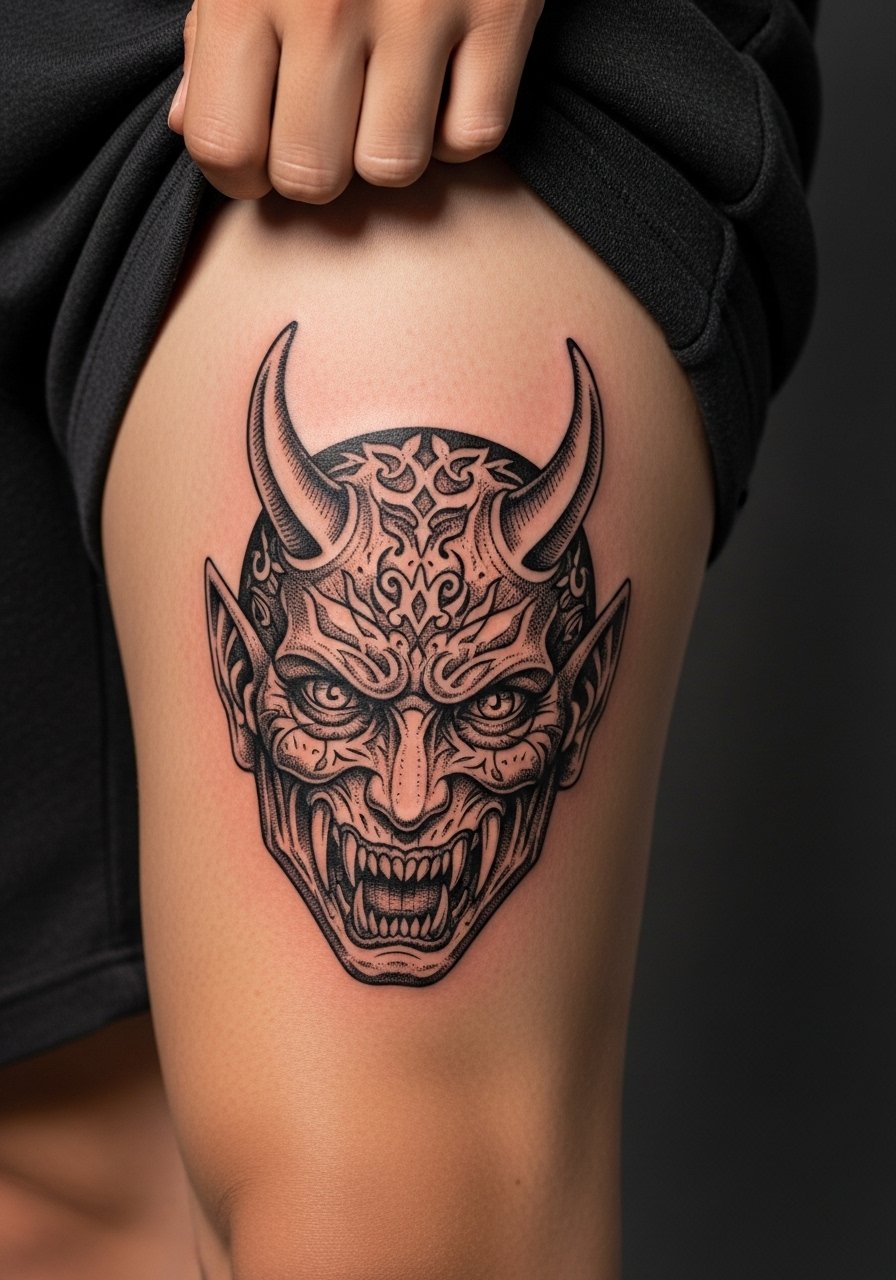
Thighs take detailed hatching well because the canvas is large and low-motion. Tell the artist you want gradations made with directionally consistent hatch marks that follow muscle flow. Expect three sessions and a fair bit of soreness the first 48 hours. People sometimes underestimate how often thigh tattoos ride against clothing while healing, which can rub scabs off prematurely. Wear loose shorts or bring a towel for the studio so the area stays breathable. For showing it off later choose tailored athletic shorts to keep the piece visible without fabric bunching.
9. Stippled Mandala Back Piece Across the Upper Back
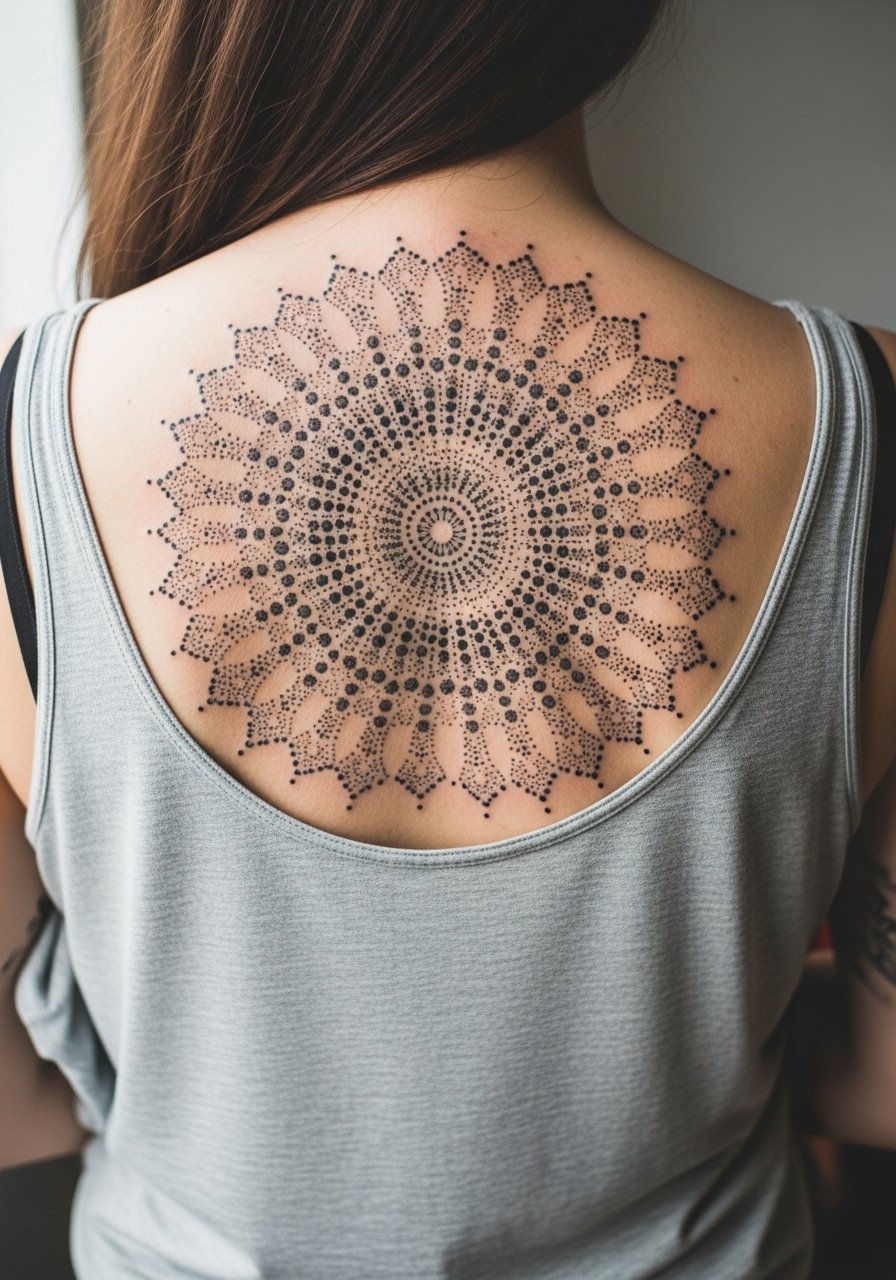
Large back mandalas reward patience. Ask for a plan that breaks the piece into staged sessions with the central hub done first to anchor the design. Expect five or more sessions for an extra-large mandala. A common misstep is making the central elements too tight, which causes ring compression as the skin settles. For mobility and comfort, bring a loose tank you can pull aside rather than a tight shirt that will rub the area after sitting in the chair.
10. Tribal Blackout Chest Panel
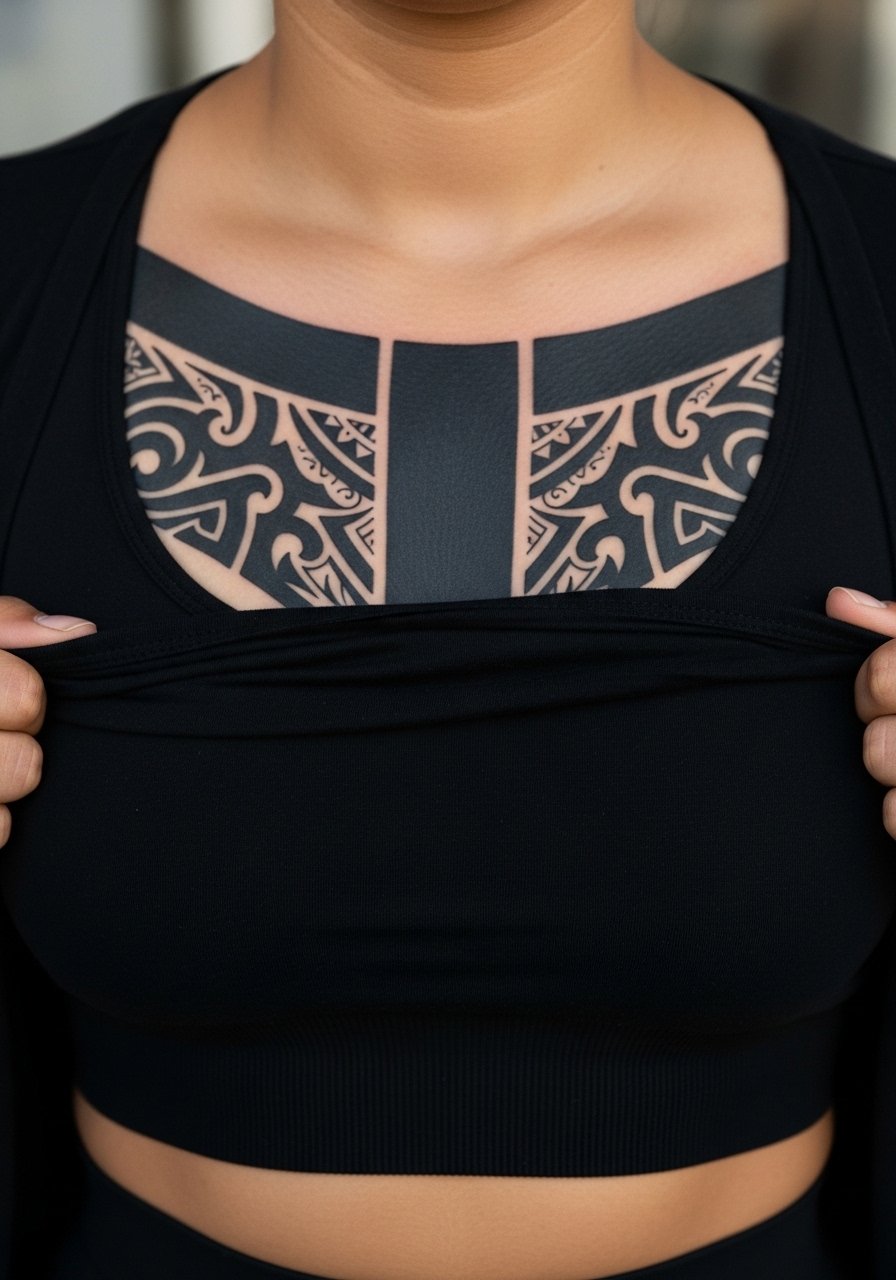
Chest panels can read like armor when done with anatomy-aware accents. The controversy around blackout for cover-ups applies here as well. One group sees blackout as an effective cover option that can add contour to the chest. The other group cautions that blanket coverage can overwhelm small areas and change how clothing sits. If you choose a chest blackout, plan multiple sessions and discuss how patterns will follow your collarbone and sternum so breathing and movement do not wrinkle the panels.
11. Hatching Botanical Vine on the Ribcage
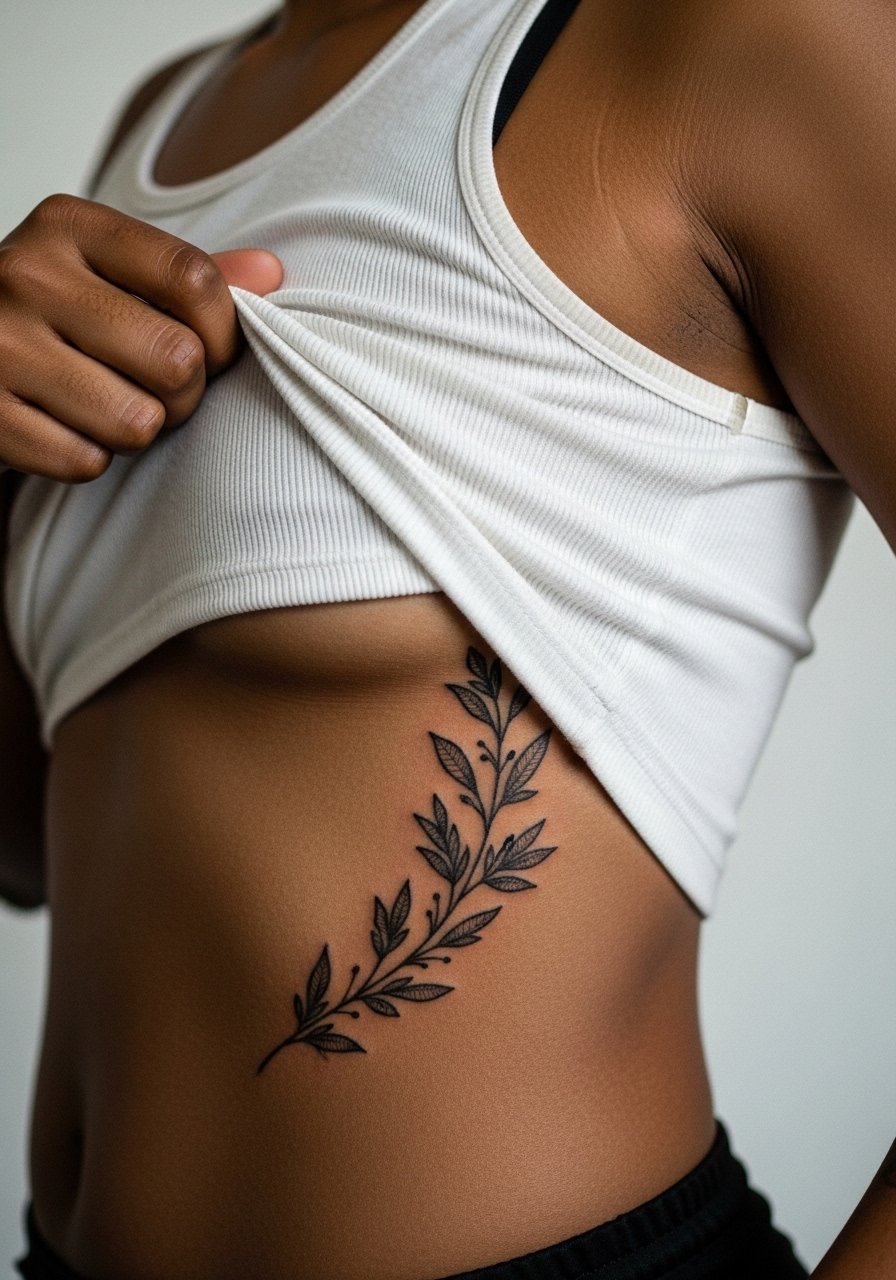
Fair warning, the ribcage rates high on most pain charts. That region is also prone to line blur if detail is packed too tightly. Ask the artist for broader hatch strokes and slightly larger leaf spacing to preserve form as the skin stretches. Sessions usually take two sittings and the after-itch can be intense. For the appointment wear a cropped tank top you can lift or remove easily so the artist has uninterrupted access.
12. Sharp Geometric Wrist Cuff
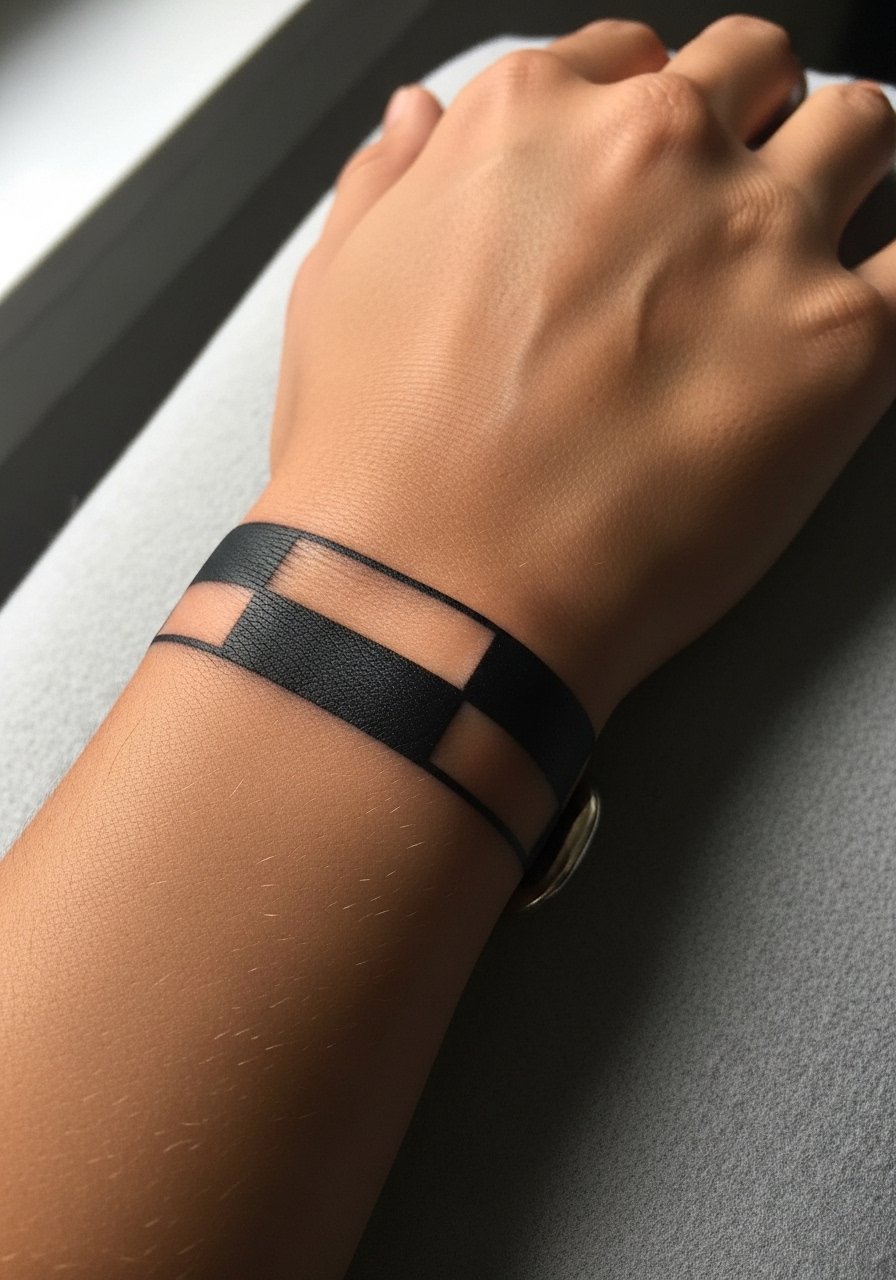
Wrist cuffs read clean when shapes are large enough to avoid vein interference. Tell your artist to leave a bit of skin gap at the inner wrist where veins show through. Pain is noticeable but the session is short. A frequent error is requesting micro details too close to the bone which makes touch-ups inevitable. To accessorize, pair the cuff with a minimalist leather bracelet on the opposite wrist so metal and texture do not compete with the ink.
13. 3D Body Model Preview for Placement Testing
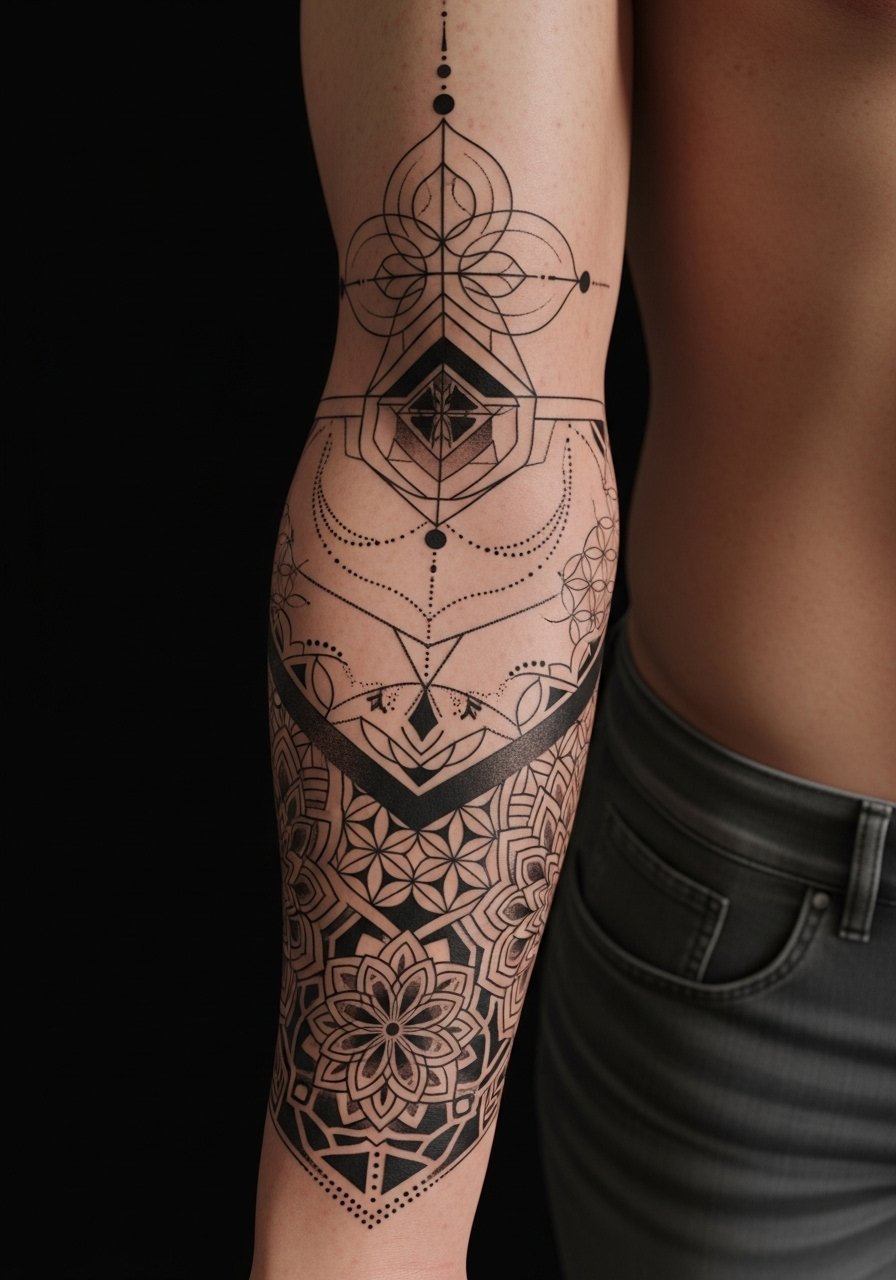
Before committing, try a 3D preview to test scale and how negative space reads on your actual contours. Mention the intent to your artist so they can print a life-size stencil or use a 3D mockup tool in the consultation. This step avoids the classic mistake of choosing a design that looks perfect on flat reference images but distorts once wrapped around an arm. For showing the final placement, rolled sleeves work best so bring a rolled sleeve shirt to see how the design fits everyday outfits.
14. Medieval Engraving Botanicals on the Outer Bicep
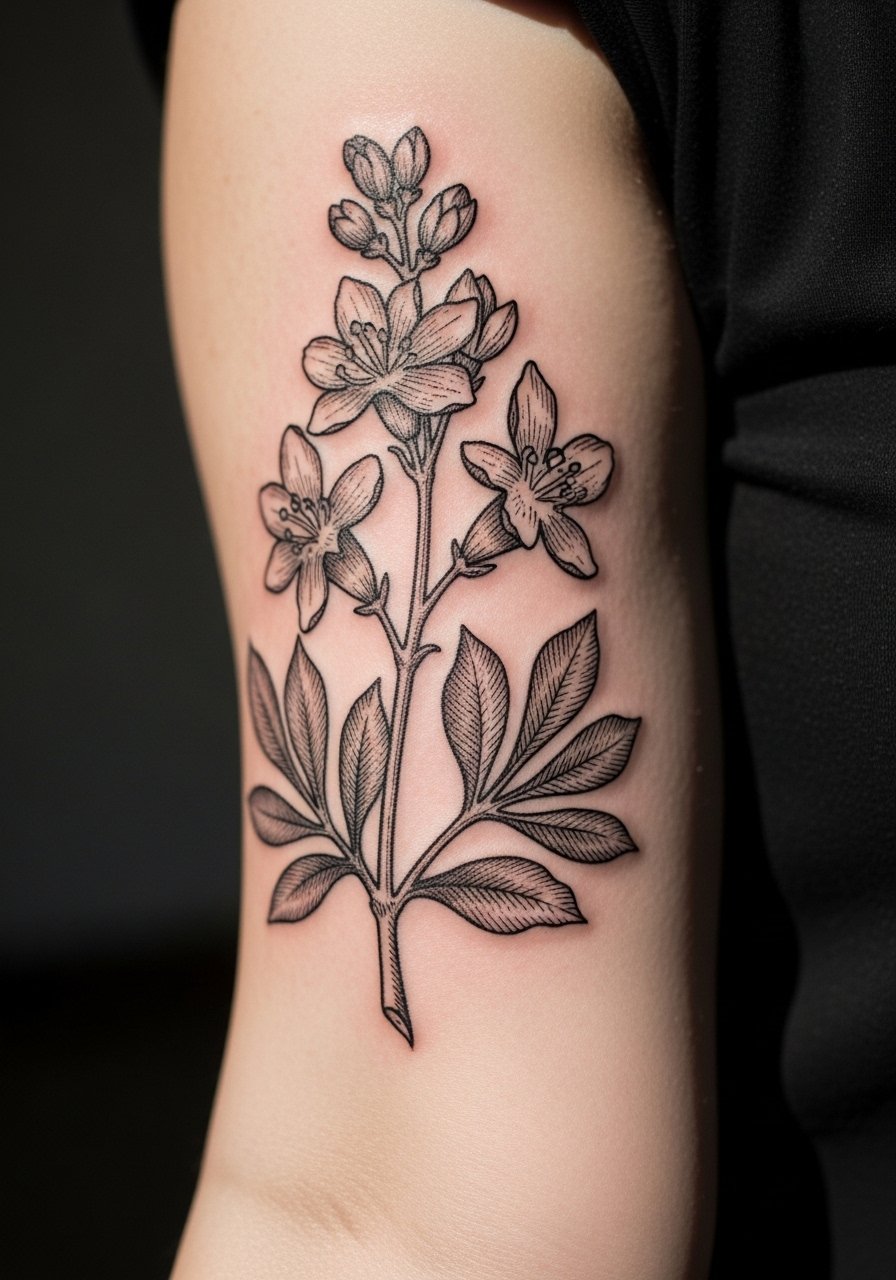
Engraving textures give botanical tattoos a gritty, aged look without color. Ask for directional hatching and a crisp border so the flowers read clearly when the arm moves. Sessions usually take two sittings and the bicep tolerates heavier linework well. A common mistake is softening the borders too early which makes the engraving read like a gray smear. For session comfort wear a loose short-sleeve button-up you can pull aside.
15. Blackout Accents on Chest Contours
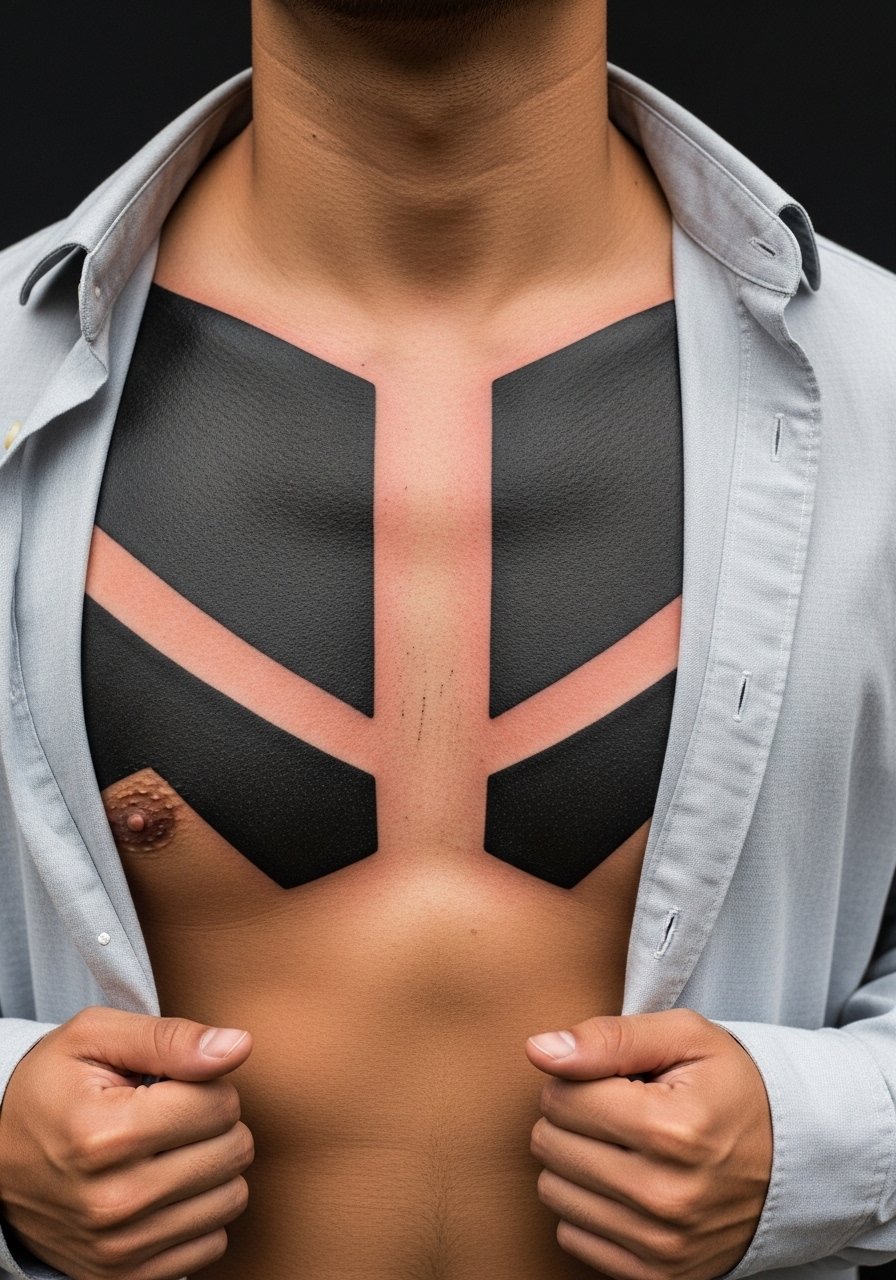
Using blackout to trace anatomical lines can emphasize chest shape without covering everything. Tell the artist you want accents rather than full coverage so the piece complements muscle flow. Expect multiple sessions and honest pricing conversations up front because even partial blackout eats studio time. This approach solves awkward cover-ups for small old pieces while keeping some skin tone as part of the design. For the session bring a loose button-down shirt that gives easy access and minimal friction when dressing after.
16. Stippled Infinity Behind the Ear
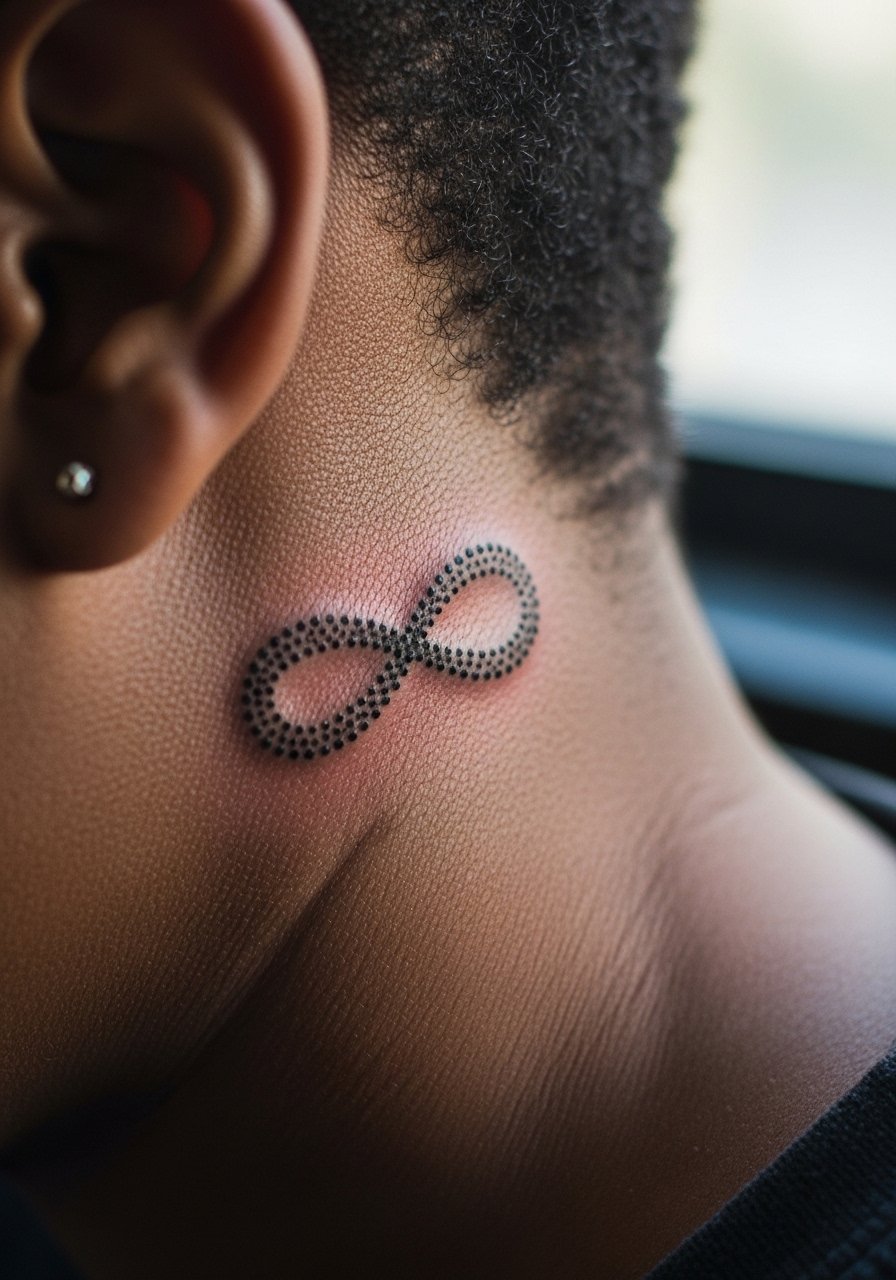
Behind-the-ear pieces are tiny and require an artist used to working close to hairlines. Ask for strong stipple anchors rather than faint dots because that spot can lose contrast fast. Sessions are short but the area can feel sore and you may notice sensitivity when sleeping on that side. Also consider the visibility factor for some work settings. If you like hidden details, this placement gives that payoff with minimal commitment.
17. Hatching Vine That Follows Sternum Curves
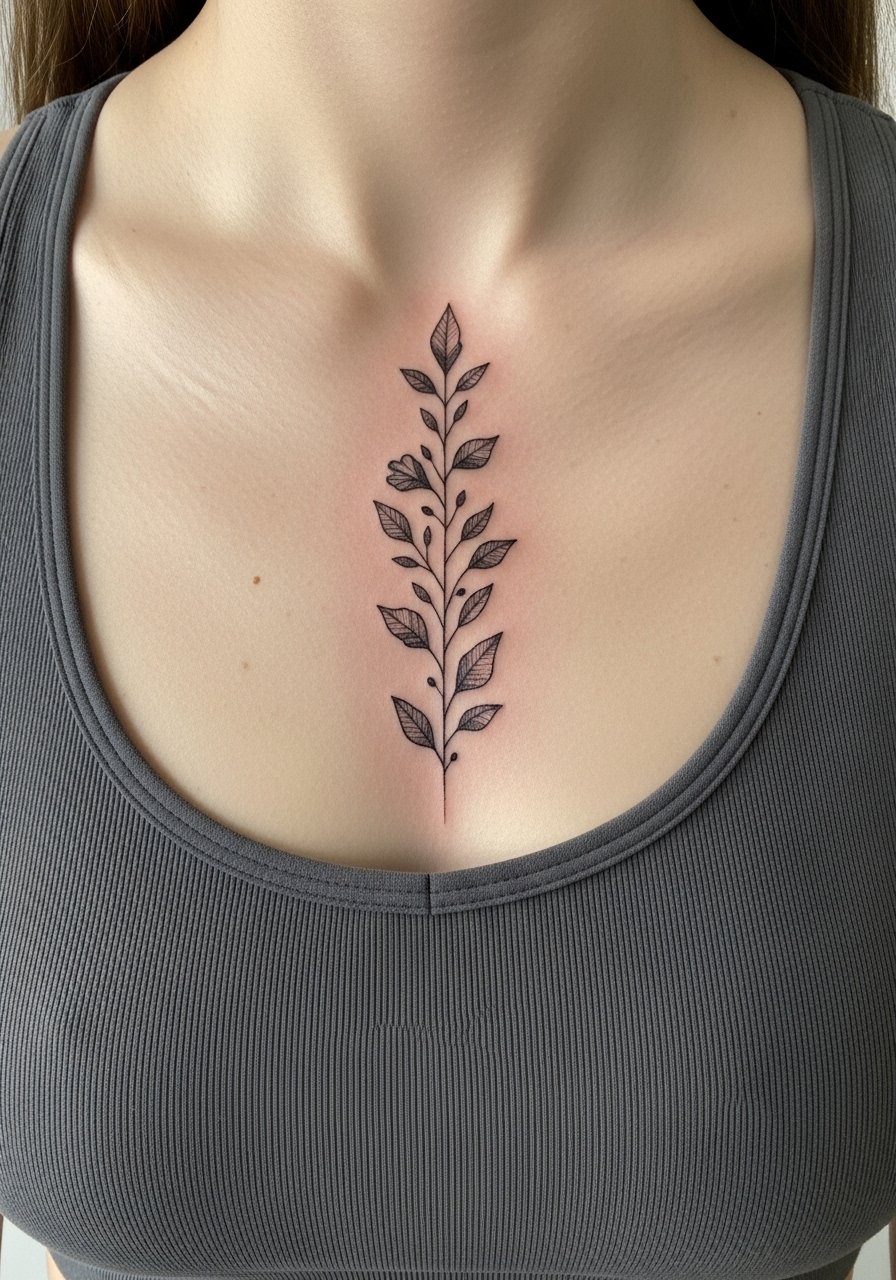
Sternum work needs careful planning because the skin there stretches with breathing and movement. One common mistake is packing fine hatch marks too close together which blends in a few years. Ask the artist to mirror the natural sternum curve and to space hatching to allow future touch-ups without reworking the whole piece. Pain varies by person and sessions are short but intense. For the appointment wear a fitted sports bra or a bandeau so the area is accessible and modestly framed.
Frequently Asked Questions
Q: Will heavy blackwork look muddy on darker skin tones over time?
A: It depends on the saturation method and artist technique. One camp insists even, layered saturation holds well and reads dense but crisp. The other camp warns that rushed saturation can settle into an indistinct patch. The pragmatic path is to ask to see healed work on similar skin tones and to book a test spot or a small first session.
Q: How many sessions does a full blackout sleeve usually take and why does it get expensive?
A: Blackout sleeves commonly need four to six long sessions because saturation must be layered and allowed to heal between passes. Pricing climbs with session length and touch-up needs for even coverage. Discuss a phased plan and a full-coverage estimate in your consultation so there are no surprises.
Q: Do geometric mandalas require different aftercare than simple linework?
A: Not fundamentally, but dense dotwork and tight geometry benefit from careful drying and minimal friction. Keep the area protected during the initial crusting window and avoid rubbing clothing. For lifestyle, choose shirt styles that show the piece without pressing on it, like a rolled sleeve shirt for forearm mandalas.
Q: How soon will I need touch-ups for fine stippling on a wrist or chest piece?
A: Expect small touch-ups by year two or three for very fine stipple, especially on high-motion or high-wash areas like wrists. Larger mandalas and thicker hatching often hold longer. Ask your artist for a realistic touch-up timeline based on how dense you want the initial work.
Q: What should I ask during the consultation to avoid a design that blurs with time?
A: Ask about line weight recommendations for your placement, whether the artist layers saturation, and to see healed photos of similar placements and skin tones. Also ask about how many sessions they plan for the piece and any aftercare preferences they advise. Those specifics expose technique more than vague credentials.
