
Bold linework and shadowed fur read like a statement on skin, but the pieces that still look crisp five years later are rarely the ones that photographed best on day one. Fine details need spacing and the right placement. High-contrast blackwork holds up differently than micro-realism. Read through these 21 black and grey panther ideas and you will find styles and placements that suit short sessions, multi-stage realism, and cover-ups, plus what to wear to your session so the stencil lands where you expect.
1. Realistic Snarling Panther Head on Forearm

I recommend this when you want a face with expression that's readable from arm length. Tell your artist you want varied stipple shading in the fur and strong negative space around the eyes to keep the gaze bright on darker skin tones. Fair warning, the forearm can show stretch from weight changes, so an elongated composition reduces distortion over time. Session time usually spans two sittings for depth and saturation. For showing it off, roll up sleeves and pair with a charcoal henley shirt or a slim leather cuff, both echoing shadow tones and framing the forearm without distracting from the linework.
2. Blackwork Panther Prowling Silhouette on Shoulder
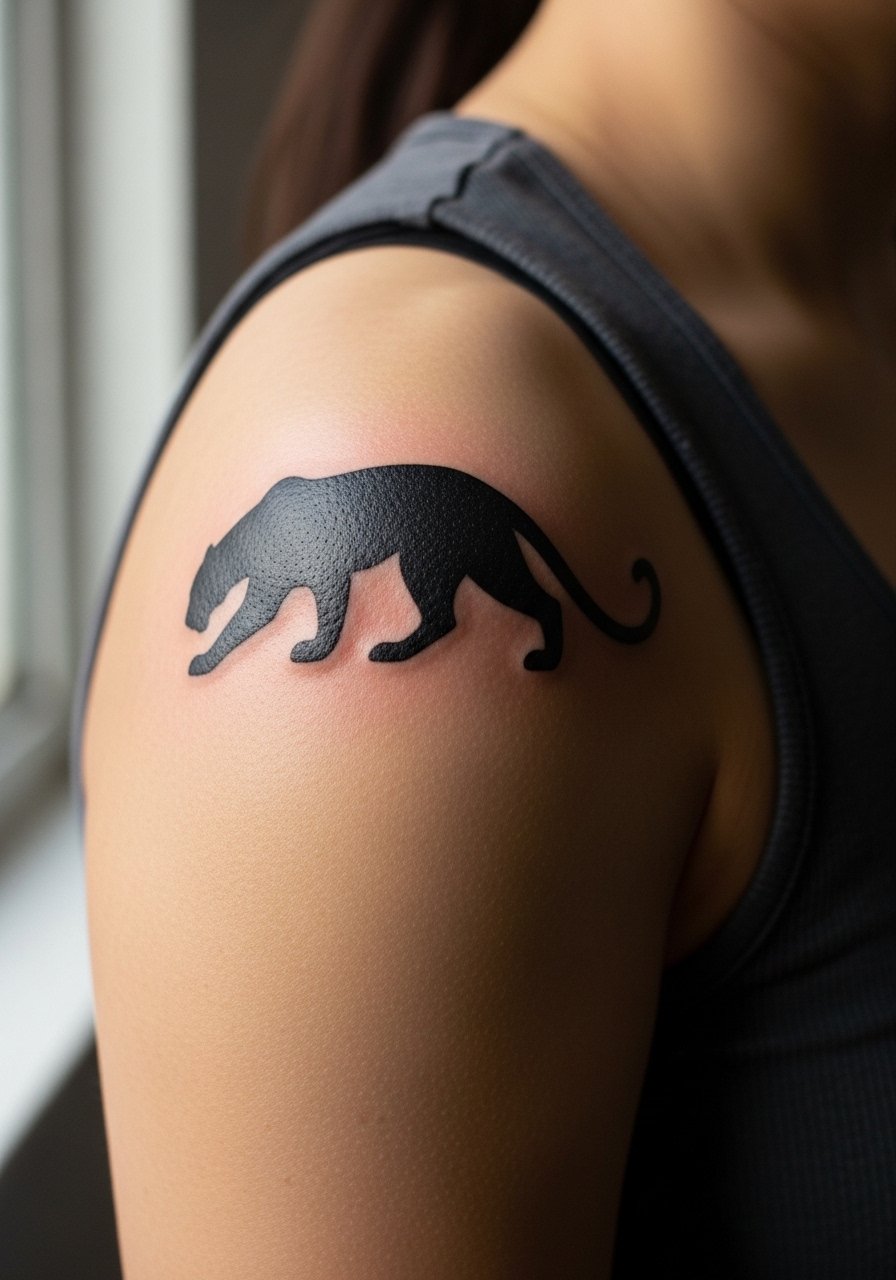
This is perfect for someone who prefers dramatic contrast and minimal detail. Ask for heavy outlines and a clean block of saturated black, and request that the artist leaves intentional skin gaps to form the contours. Pain is low for most people on the shoulder and sessions are often one to two sittings. A common mistake is over-detailing the silhouette which defeats the sculptural effect. For display, an off shoulder black top lets the curve read like part of the garment, while a sleeveless tank on session day keeps the area accessible and comfortable.
3. Illustrative Panther with Crescent Moon on Ribcage
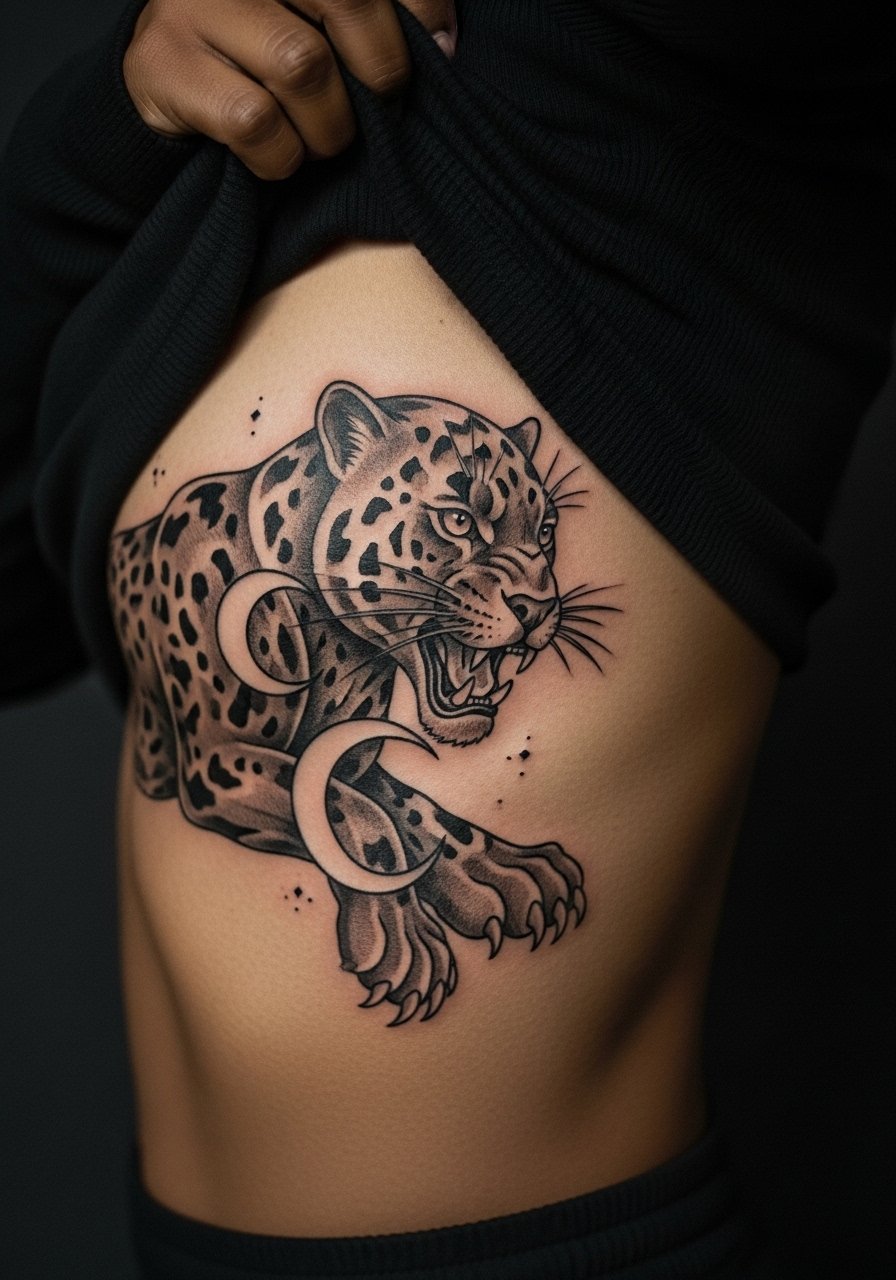
The ribcage is a high-pain area, so expect a tougher session. Artists differ on approach here and the debate is explicit. One camp says fine line on ribs blurs quickly because the skin shifts with breathing and movement. The other camp argues that with proper needle depth and spacing the lines settle and remain crisp. If you want the crescent and dot work to last, ask your artist for spaced stippling rather than dense compact lines. Plan for three sittings for dot work and shading. For showing it off, a crop top gray or side-cutout styling complements the illustration without covering the moon.
4. Traditional Leaping Panther on Calf
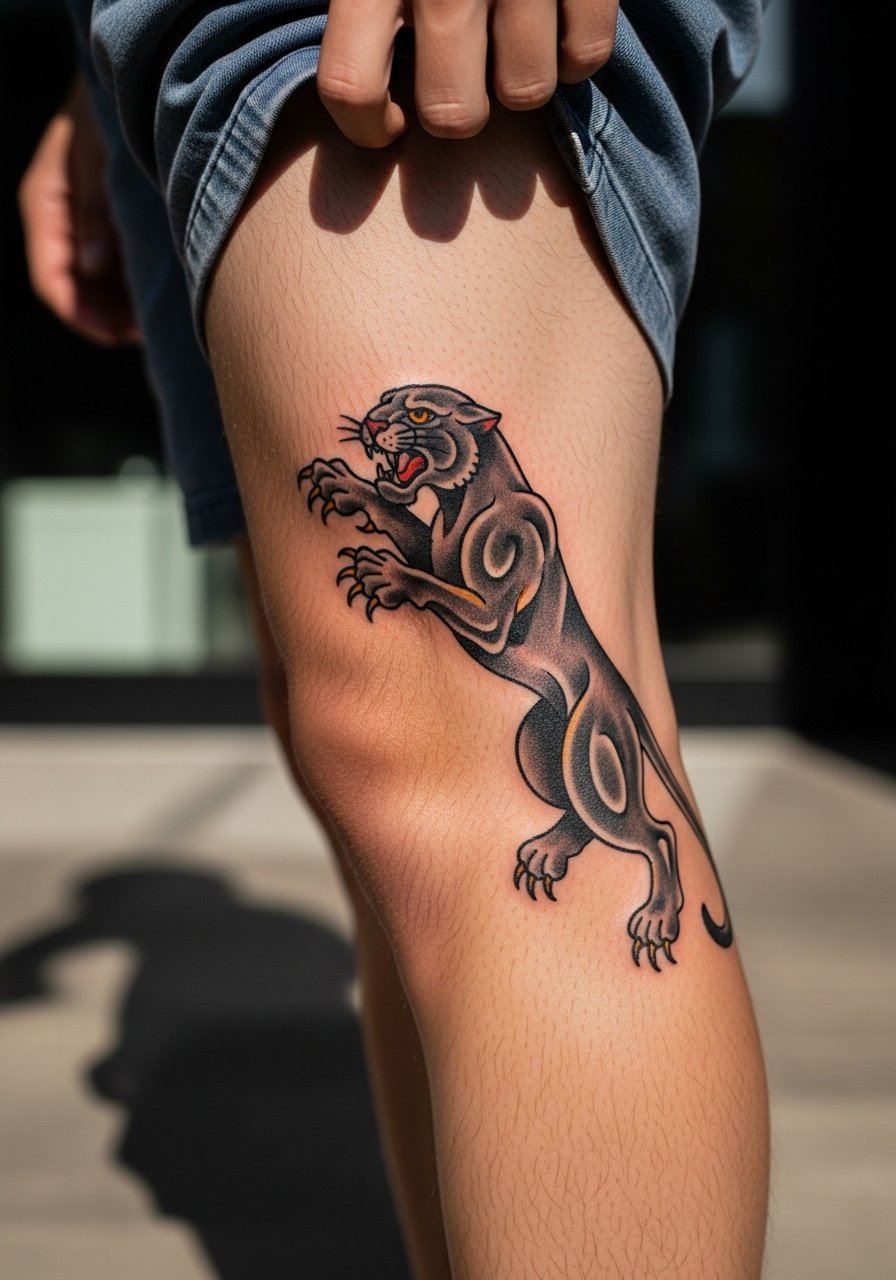
Calf placements are great for larger traditional pieces that read from distance. Expect two to three sessions depending on size and desired gray wash. The biggest mistake is reducing line weight to fit a smaller canvas, which risks aging into mush. For longevity, ask for solid outline saturation and a moderate gray wash that avoids tiny dots in the deepest shadows. Style with cuffed joggers or low top canvas sneakers for casual looks that frame the lower leg. For the session, wear loose shorts you can sit comfortably in while the artist works.
5. Realistic Panther Eyes in Negative Space on Wrist
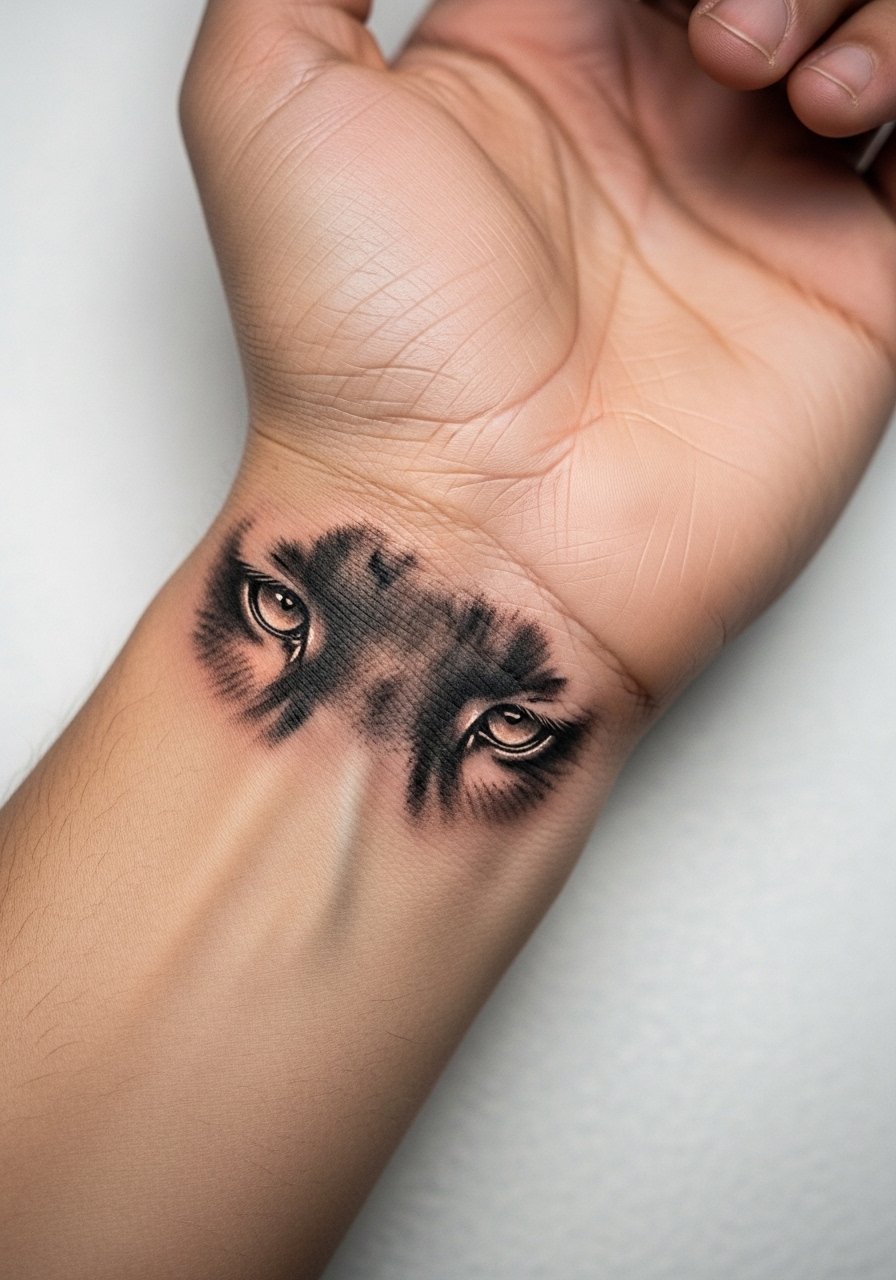
Small, focused wrist pieces like this rely on contrast to remain vivid. The trick is to ask for clean negative space around the irises so the eyes keep depth even as surrounding gray softens with time. Most artists complete this in a single session, but expect touch-ups earlier than larger work. The common error is packing too many tiny shaded lines into the wrist area which speeds up blurring. For showing it off, stack delicate bracelets or a thin chain pendant necklace nearby so the eye motif sits in a curated, understated frame. Wrist work means frequent washing contact, so plan on avoiding friction-heavy jewelry for the first month.
6. Abstract Panther Emerging from Mist on Spine
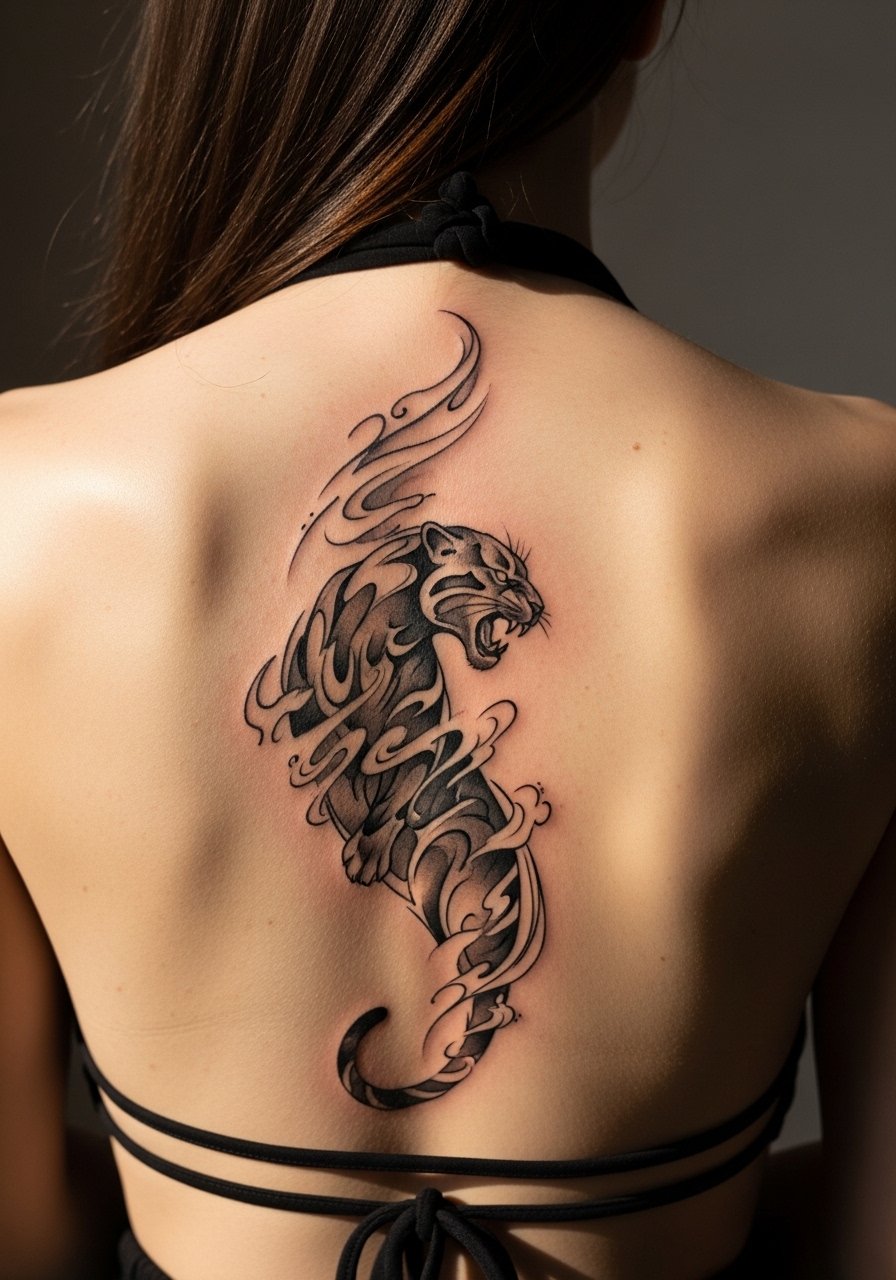
Spine pieces use the body's vertical curve to create a three-dimensional feel. Most people rate the spine as a 6 to 8 on pain scales but the visual payoff is strong. Ask for soft whip shading so the panther seems to fade into the mist, and request that the artist adapts the design to your vertebrae spacing to prevent distortion. A common aging issue is overworking the dense gray in the middle which can flatten the mist effect. For show-off wear, a backless halter top frames the vertical flow without covering it. Sessions are typically split into two sittings for comfort and even saturation.
Pre-Session Essentials
The wrist, ribcage, and spine pieces above demand different prep. These items smooth the session and reduce early friction on linework.
-
Stencil transfer paper kit. Lets you and the artist preview placement on skin before the needle hits, which is crucial for curved areas like the forearm and calf.
-
Topical numbing cream. Applied per instructions about 45 minutes before eases the sting on ribs and spine without masking necessary sensation.
-
Thin protective film roll. Useful for small zones like wrists and fingers where washing creates constant friction in the first week.
-
Fragrance-free body wash. Gentle cleansing keeps healing linework clean without stripping tattoo-friendly oils.
-
Aquaphor healing ointment. A thin layer during the first few days helps lock in moisture for delicate fine line work and prevents excessive scabbing.
7. Black and Gray Panther Cover-Up Full Sleeve Element

Cover-ups demand planning and patience. If you are concealing older flash, ask for layered shading and control of saturation so the new panther masks the old without reading as a patch. Artists who specialize in realism often schedule four to six sessions. The common mistake is underestimating how many sittings a good cover-up takes. Expect heavier shading and more sessions than a fresh custom piece. This approach suits someone who wants transformation rather than a quick fix. For session comfort, wear a loose short-sleeve button-up so the artist can access the upper arm and roll the sleeve without pressing on fresh ink.
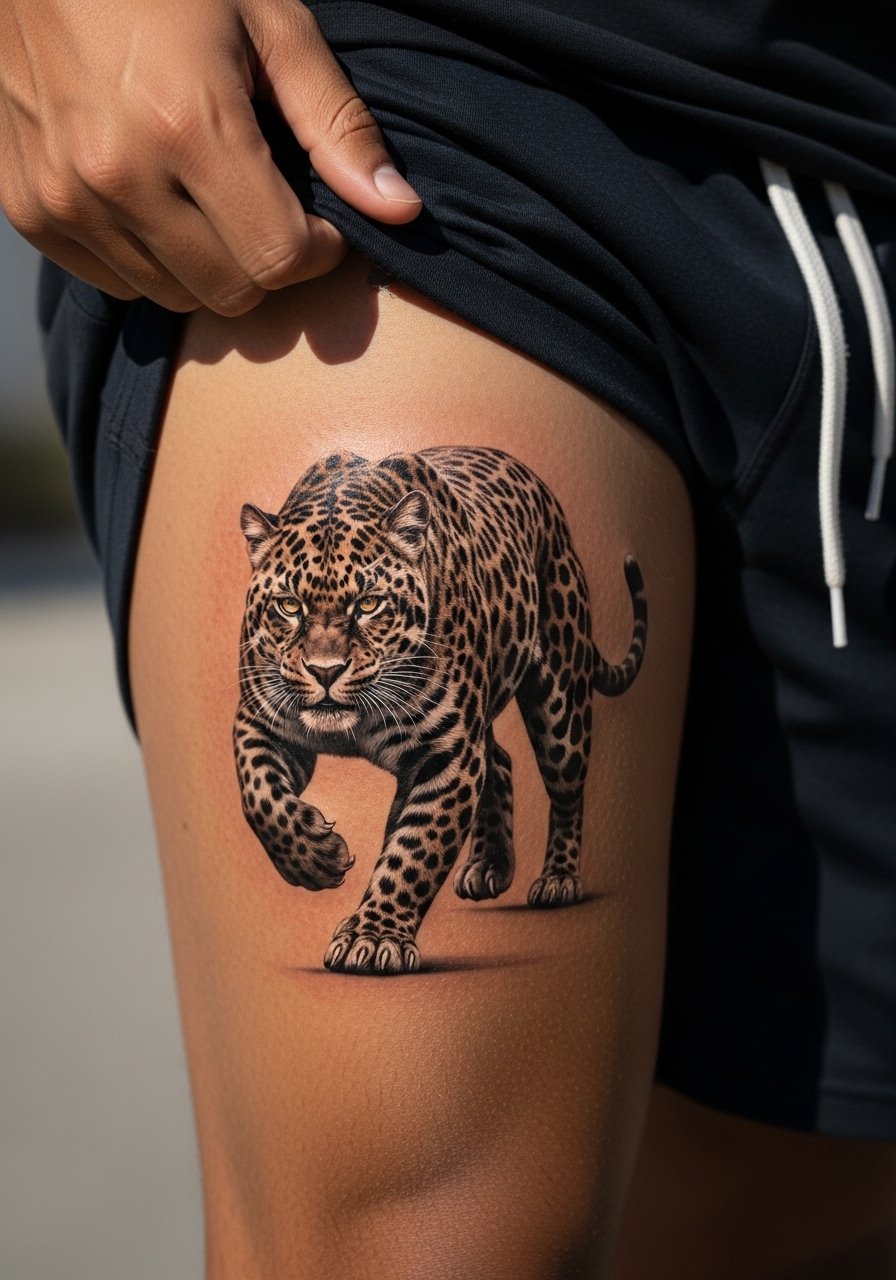
8. Muscular Panther in Motion on Thigh
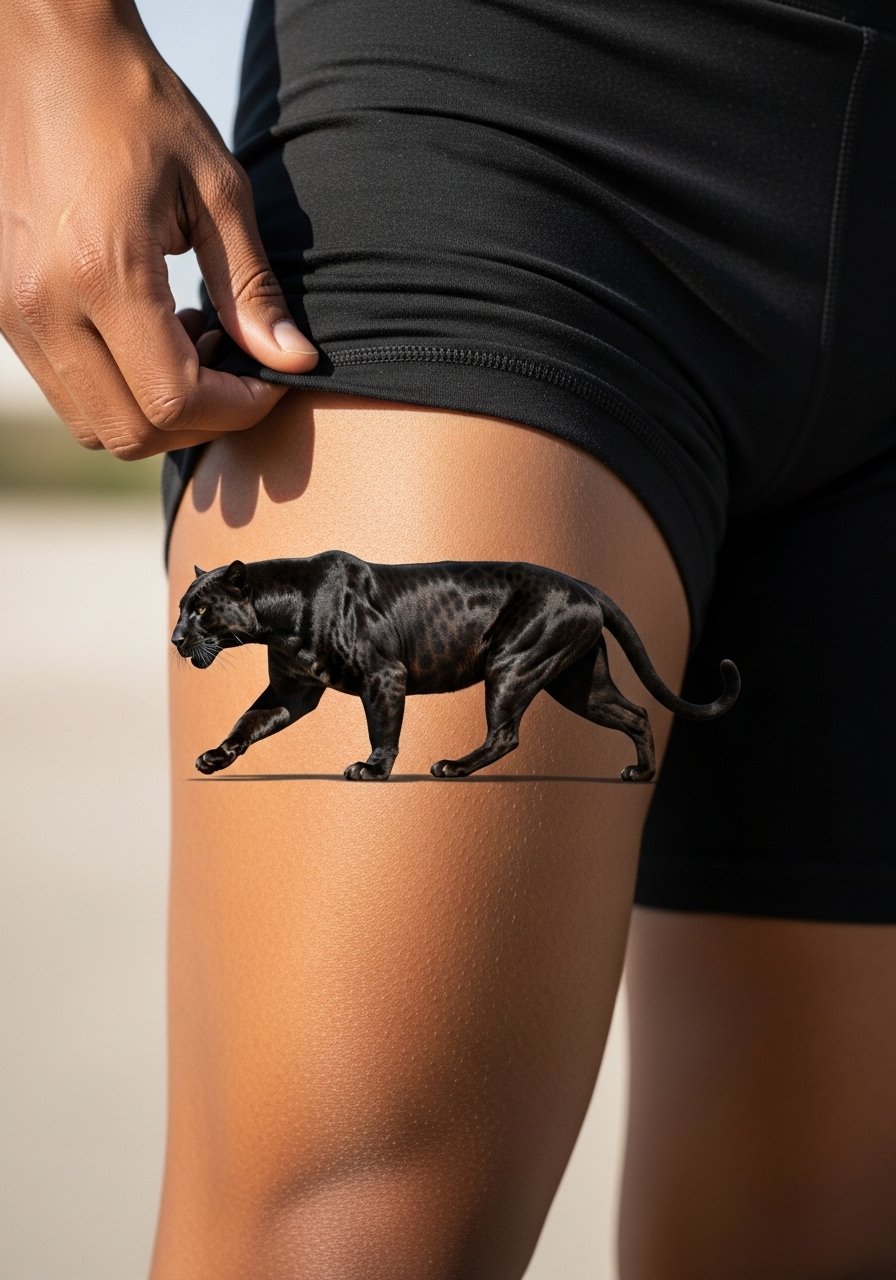
Thighs offer a generous canvas for motion pieces that emphasize muscle and fur flow. Plan for two to three sittings and ask the artist for directional fur strokes that follow the leg muscles to preserve the sense of motion as the body moves. A mistake is crowding too much tiny detail into a narrow vertical band which can blur with time. For sessions, loose boxer briefs or flowy shorts keep access easy and comfortable. For showing off, high-cut shorts or asymmetrical skirts pair well, and a high cut athletic shorts look keeps the piece visible without excessive exposure.
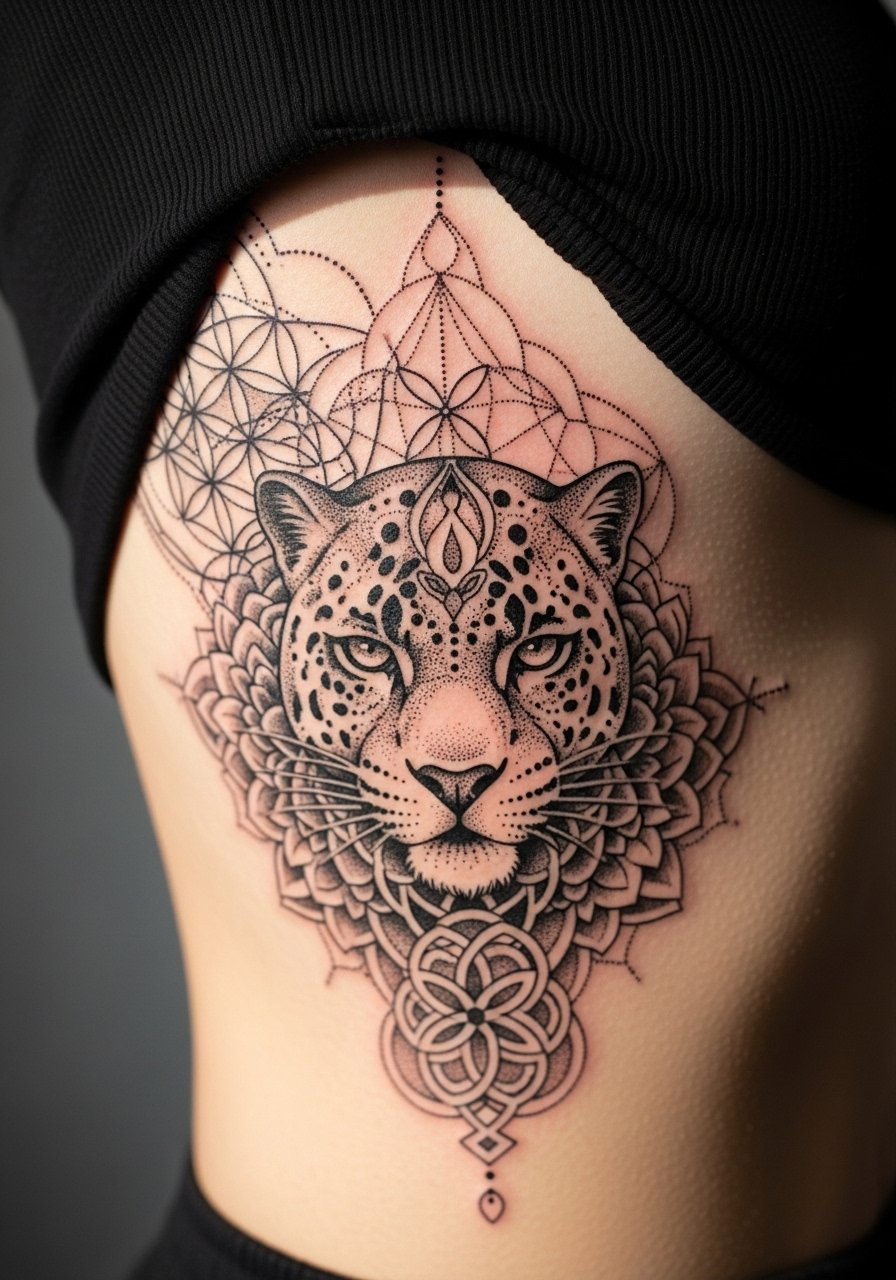
9. Panther with Sacred Geometry Backpiece
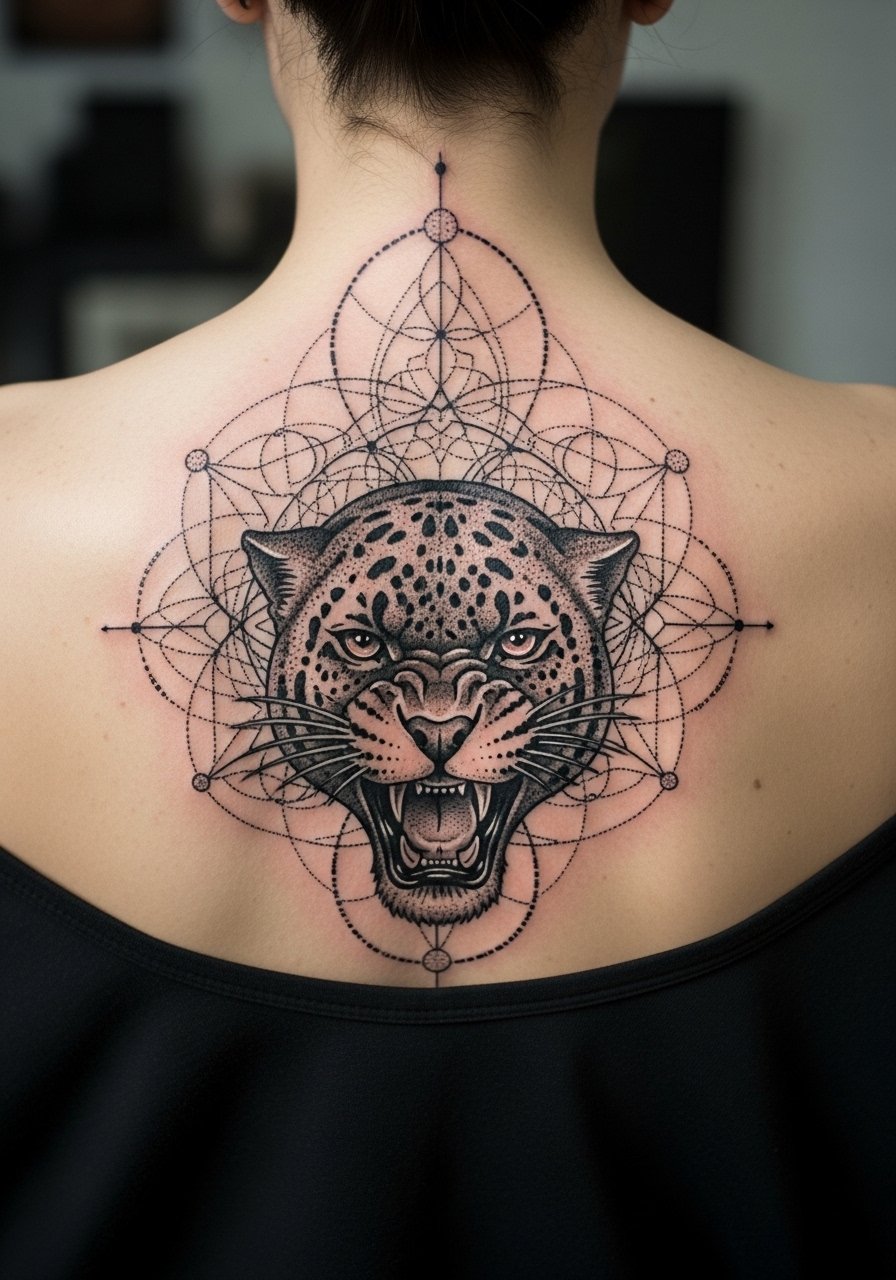
This design marries figurative realism and precision dot work. Dot work requires a steady hand and time, so expect three sessions for the geometry and shading to harmonize. Artists split on shading density here. One camp prefers denser black to read from a distance. The other favors lighter stippling so the geometry breathes. Ask your artist which approach they use and request healed photos of prior work for comparison. For showing off, an open-back dress or wide-neck shirt pulled slightly aside frames the backpiece elegantly. Keep in mind the back reads differently when standing or lying, so test stencils in both postures.
10. Minimal Panther Outline with Wind Swirls on Inner Bicep
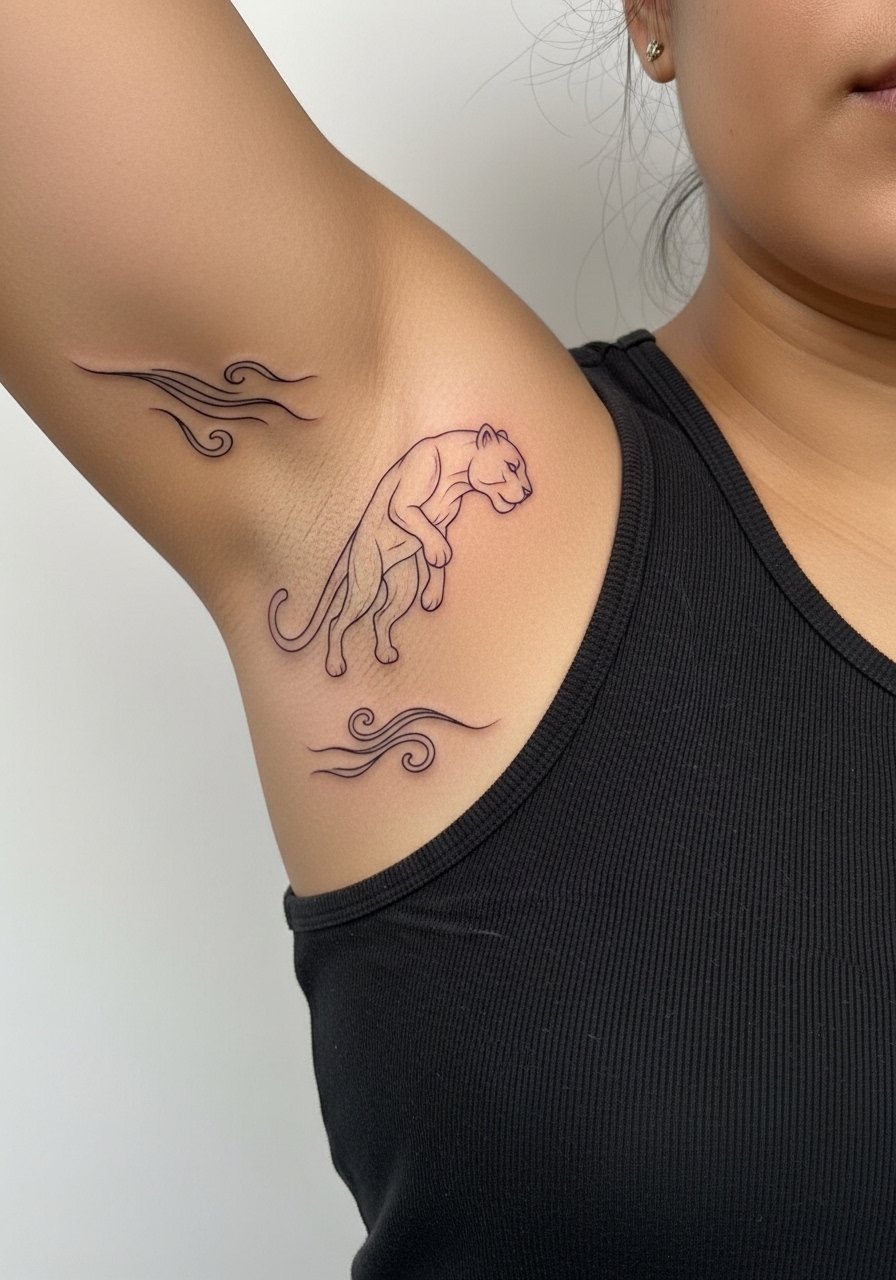
Inner bicep work hides nicely and is a good choice for first-timers wanting a personal piece. Pain is moderate and sessions are usually quick. The biggest error is choosing lines that are too tight. Fine line needs breathing room, especially against the softer inner arm skin which is prone to blowout if the artist goes too deep. For session wear, a loose button-down shirt you can pull aside keeps you comfortable and the artist able to work. Expect a touch-up within two to three years depending on how often the area sees friction.
11. Detailed Panther Fur Texture Portrait on Collarbone
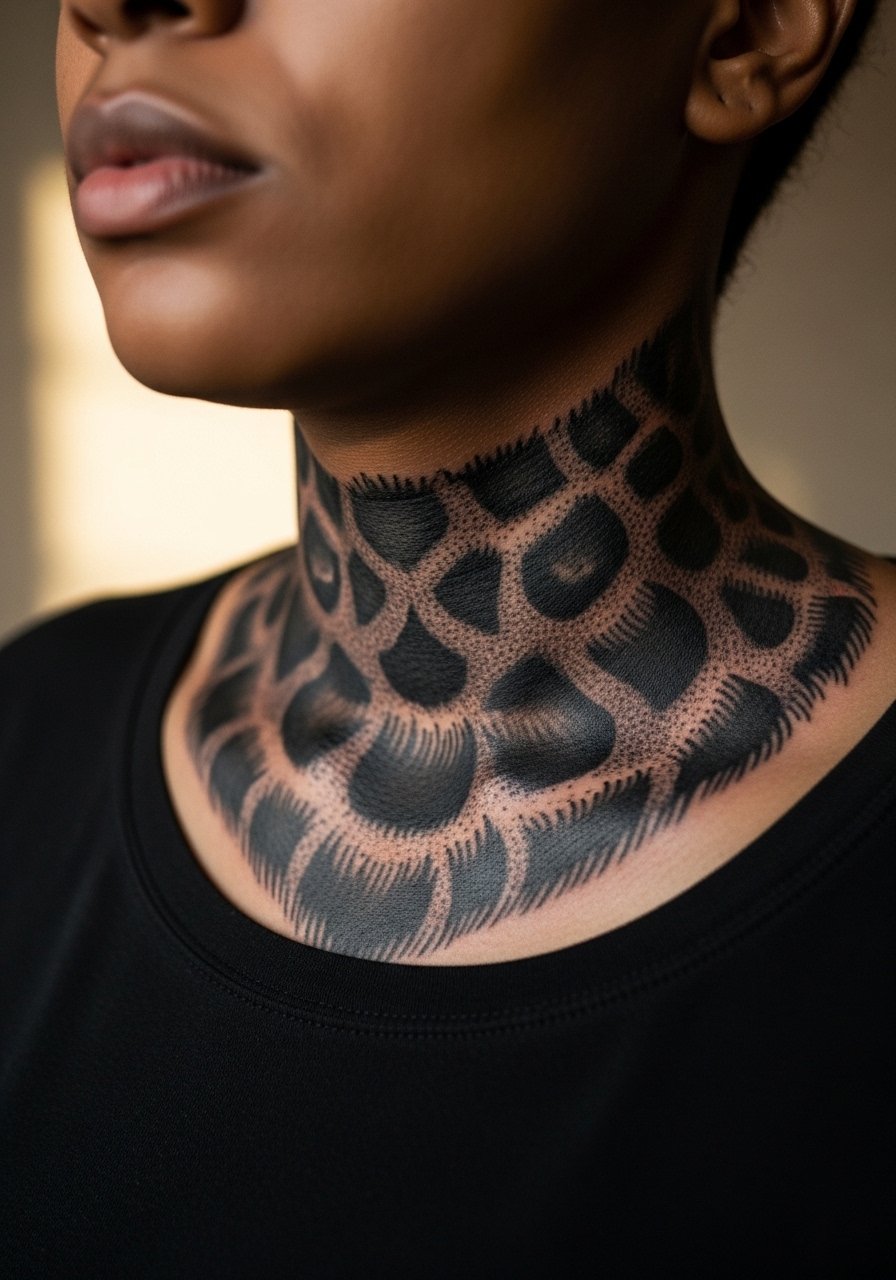
Collarbone pieces sit near moving skin and clothing edges. Stipple shading gives texture that ages predictably because tiny dots soften rather than blur into a block. Ask for heavier stippling in shadow zones and lighter dots on highlights to keep contrast. A common mistake is placing too-large dark blocks right at the collarbone where shirts rub. For showing off, a v neck black tee or strapless dress places the portrait in a flattering frame. Sessions often last two sittings to balance detail and comfort.
12. Panther Under Moon Phases on Shoulder Blade
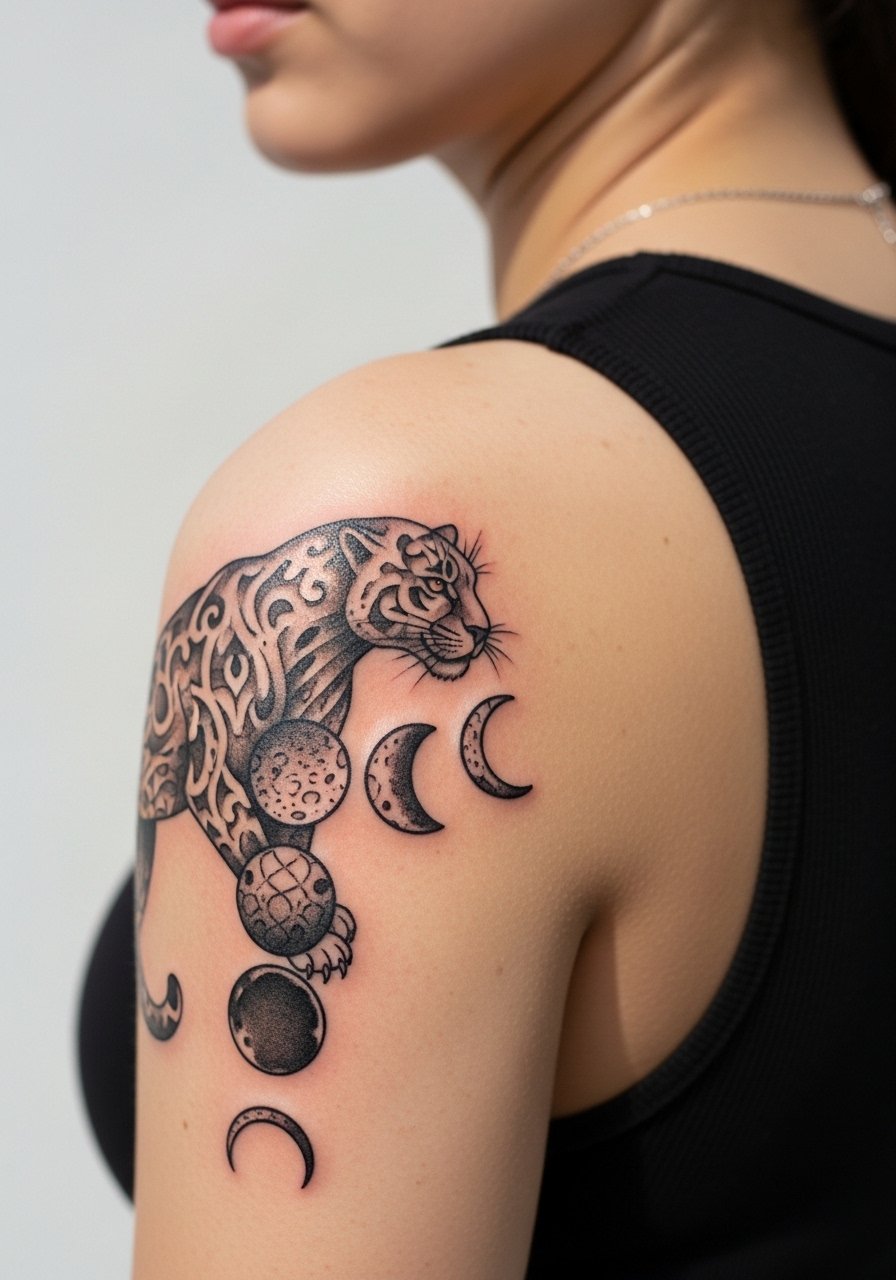
This illustrative blackwork ties animal imagery to cyclical symbols. Shoulder blade skin is forgiving and heals well. For durability, ask for solid black outlines around moon phases with light gray gradients inside to keep phases legible as the tattoo softens with time. A mistake is compressing too many tiny lunar crescents into a small area. Sessions usually take two sittings for clean dot work and shading. A sleeveless top on session day makes access simple. If the symbolism matters, mention whether you prefer specific moon arrangements so the artist can compose the arc visually.
13. Negative Space Panther Eyes Only on Finger
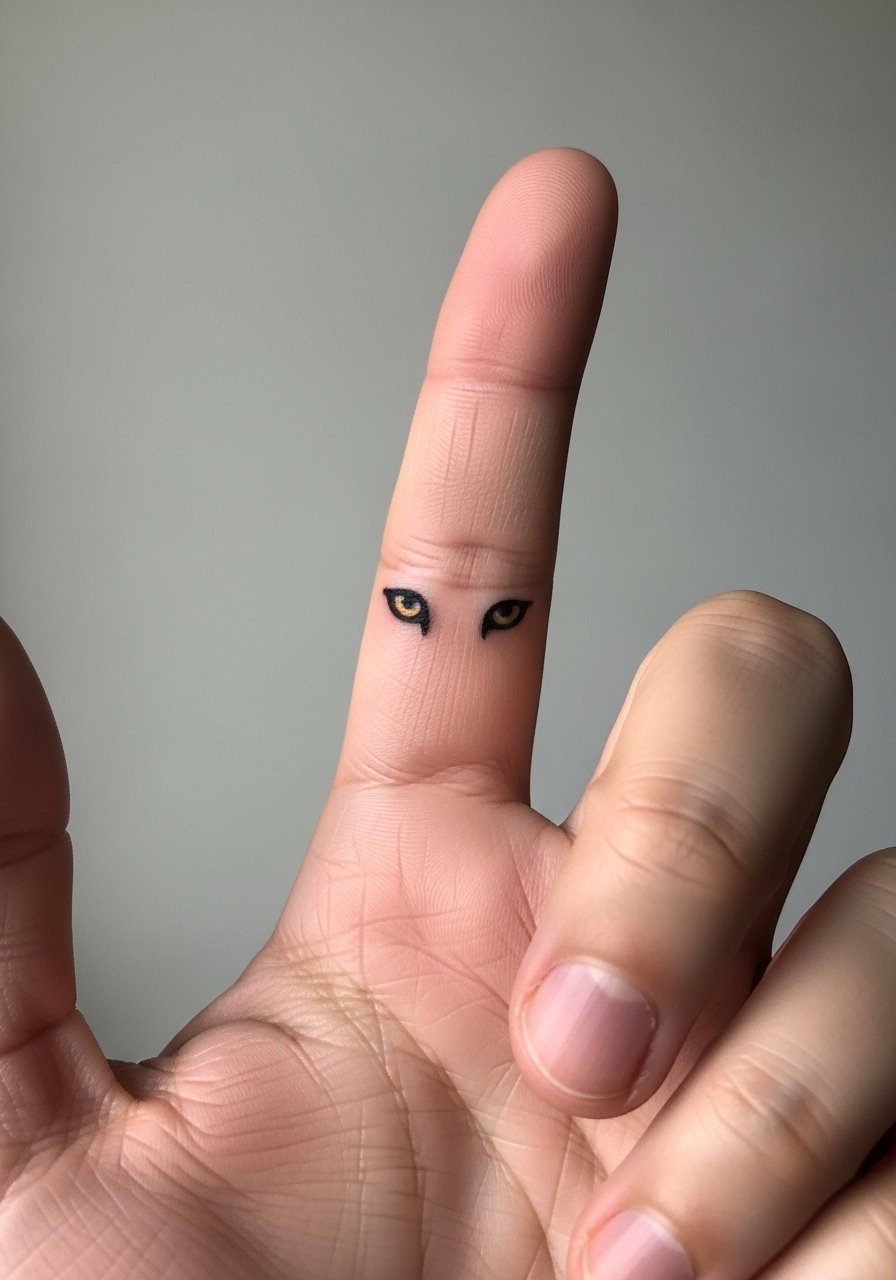
Finger tattoos are high-contact and often need earlier touch-ups. Negative space eyes avoid heavy shading which helps longevity because less saturated black is less likely to spread into soft blobs on fingers. The common error is using too many tiny details in a fingertip design. For session wear, make sure hands are clean and free of lotions. For display, keep accessories minimal and choose thin rings so the tiny motif remains visible. Expect touch-ups at year one or two depending on daily wear and washing habits.
14. Abstract Mist Panther on Lower Back
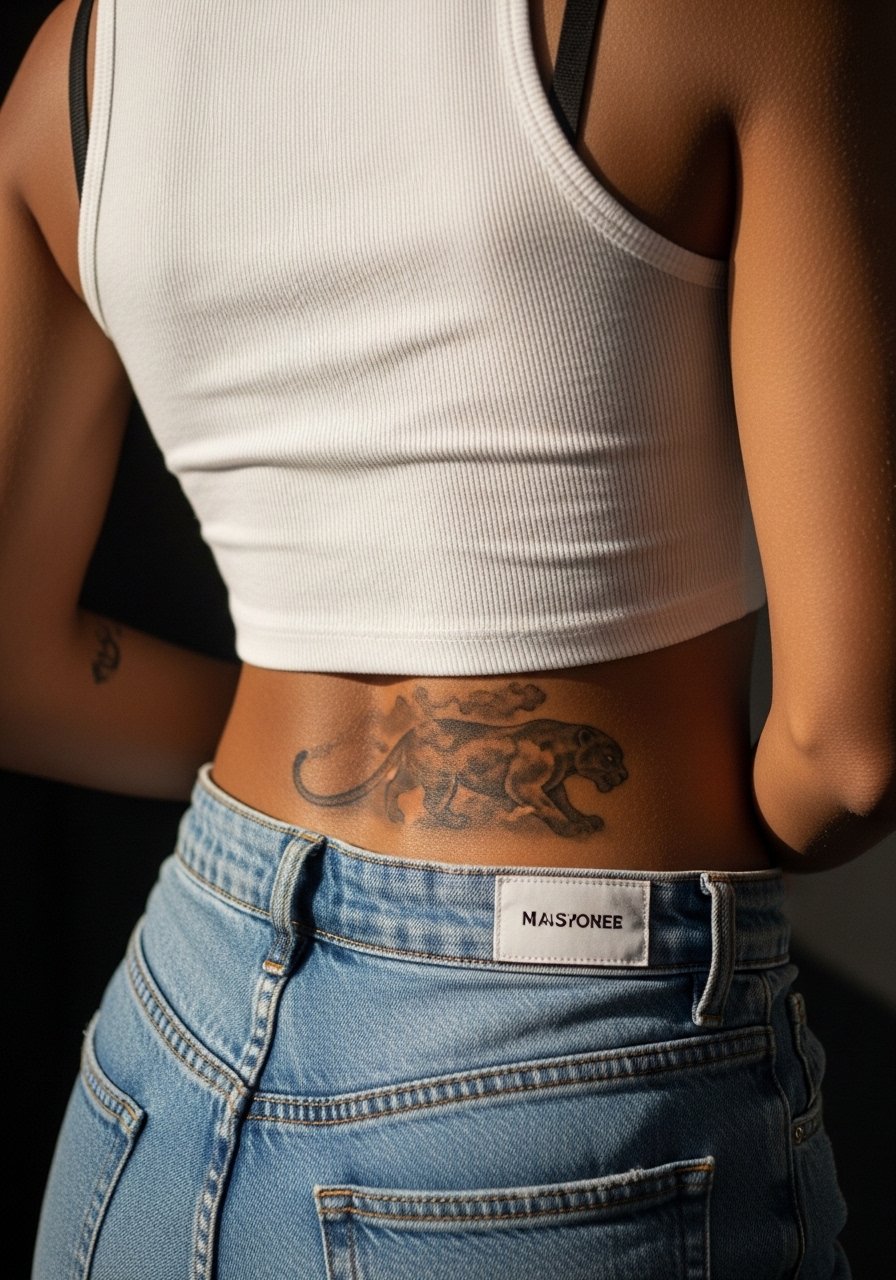
Lower back pieces benefit from smooth gradients and soft edges. Because the area sees clothing abrasion from waistbands, ask your artist to avoid placing darkest blacks directly where belts or waistbands sit. A common mistake is over-contrasting the lower band which increases scabbing risk. A loose tank top on session day reduces rubbing while healing. Sessions usually take two sittings for a balanced mist effect. Design adaptations that follow the spine curve can create a three-dimensional appearance across the lower back.
15. Small Minimal Panther Outline with Wind Swirls on Inner Arm
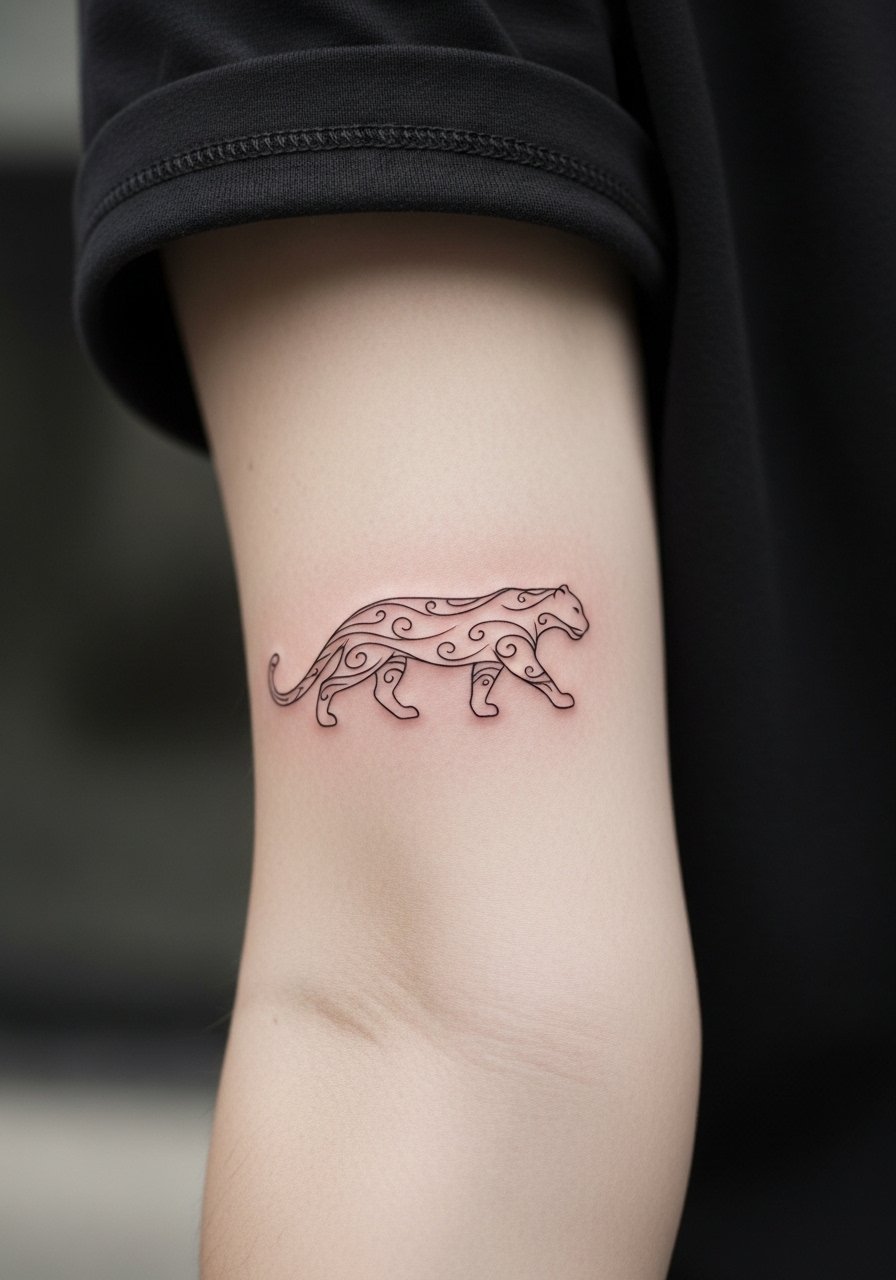
Small inner arm tattoos work well for someone after subtle symbolism without commitment to heavy shading. Ask for slightly stronger line weight than the pure ultra-fine line to resist early blurring. The mistake is choosing hairline thin strokes that lose definition under constant contact with clothing. For session wear, a loose short-sleeve button-up is ideal. For showing it off, rolled-up sleeves and a button up short sleeve loose put the small motif in plain sight. Expect a touch-up at two to three years depending on activity levels.
16. Traditional Panther Claws Extended Across Chest
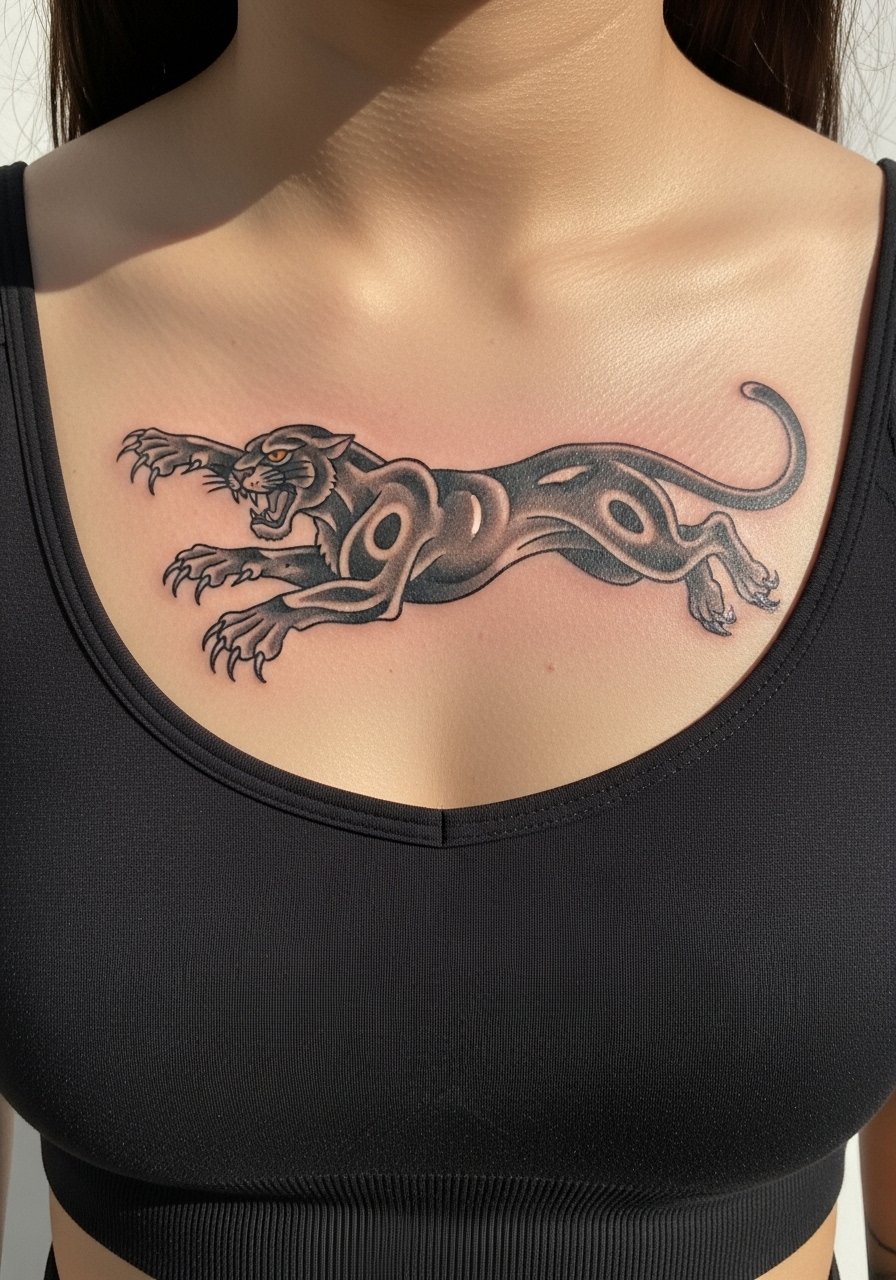
Upper chest work intersects with clothing and movement. The sternum area can be sensitive, and some people find these sessions intense. If you want the claws to appear three-dimensional, request subtle gray wash behind the claws to lift them off the chest plane. Avoid placing heavy blocks of black where shirt seams rest. For the session, a fitted sports bra or bandeau that exposes only the relevant strip helps the artist work cleanly. Expect two sittings for balanced contrast and to manage pain in the center chest area.
17. Muscular Panther in Motion on Thigh Side
The outer thigh tolerates large, high-detail pieces and is forgiving for heavier saturation. Ask for directional fur strokes that follow the leg muscles to reinforce motion. A common mistake is crowding too much micro detail into a single panel, which can lose definition as the skin shifts. For session comfort, wear loose shorts you can pull aside without pain. For showing off, high-cut shorts or a skirt in black will frame the piece well and emphasize the path of motion. Sessions typically require two to three sittings for full effect.
18. Panther with Sacred Geometry on Ribcage Side
Ribcage dot work needs spacing to avoid heavy-looking blocks once healed. The controversy here mirrors other dense pieces. One camp prefers heavy saturation to mask small errors. The other recommends lighter dot work and more negative space to preserve geometry clarity. Ask your artist to show healed portfolios with similar geometry on ribs. Sessions often span multiple sittings and are painful. For session wear, a sports bra you can momentarily lift or an open robe makes access easy. Plan touch-ups after the first year to maintain crisp points in the geometry.
19. Minimal Panther Eyes on Ankle
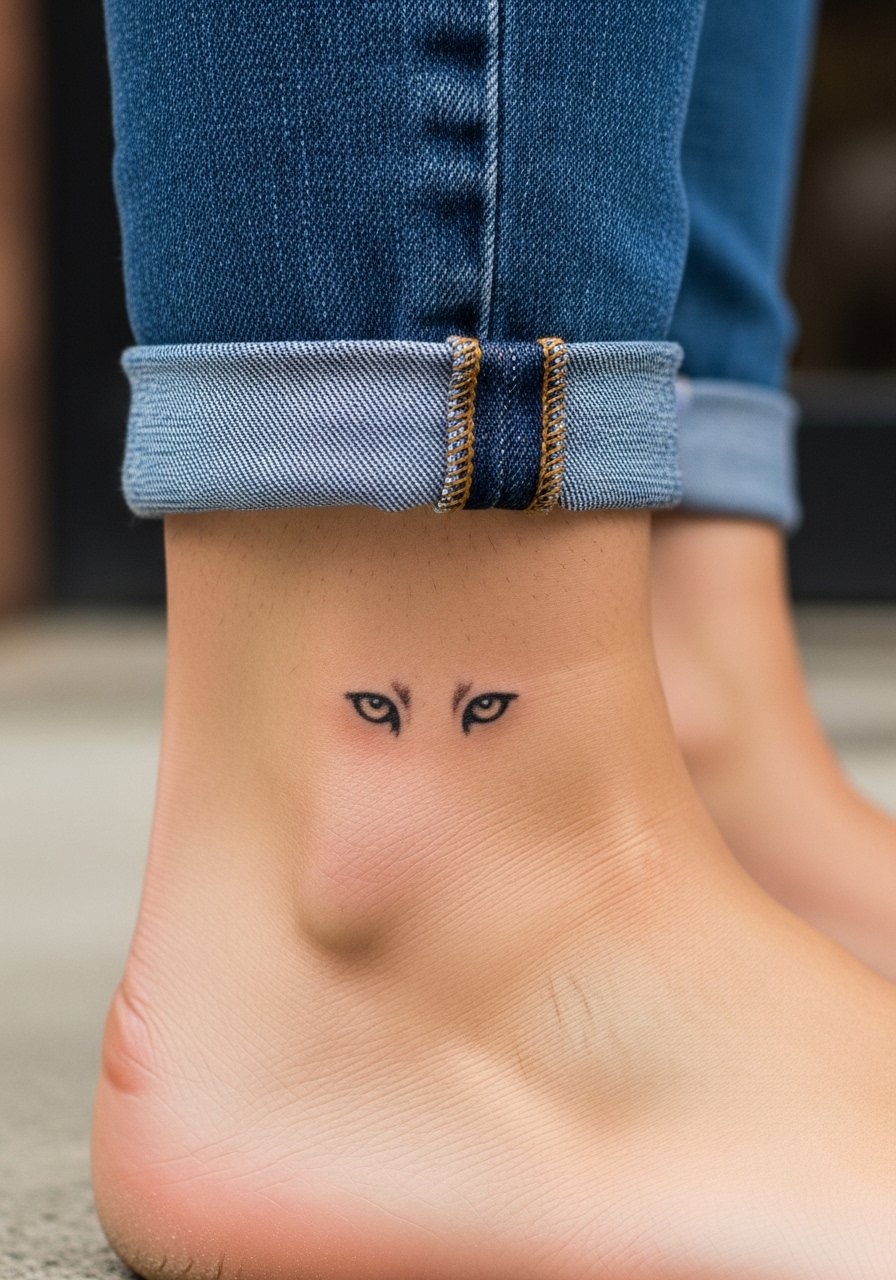
Ankle tattoos face friction from socks and shoes which accelerates fade. Minimal eye motifs benefit from slightly bolder negative space to keep the gaze visible. A common mistake is placing the piece too low where shoe collars rub. For sessions, roll jeans up or wear sandals. For show-off styling, cuffed joggers or cuffed joggers men work well in cooler weather, while sandals show the ankle motif directly. Expect touch-ups earlier than mid-arm pieces because of footwear abrasion.
20. Cover-Up Panther Over Script on Upper Arm
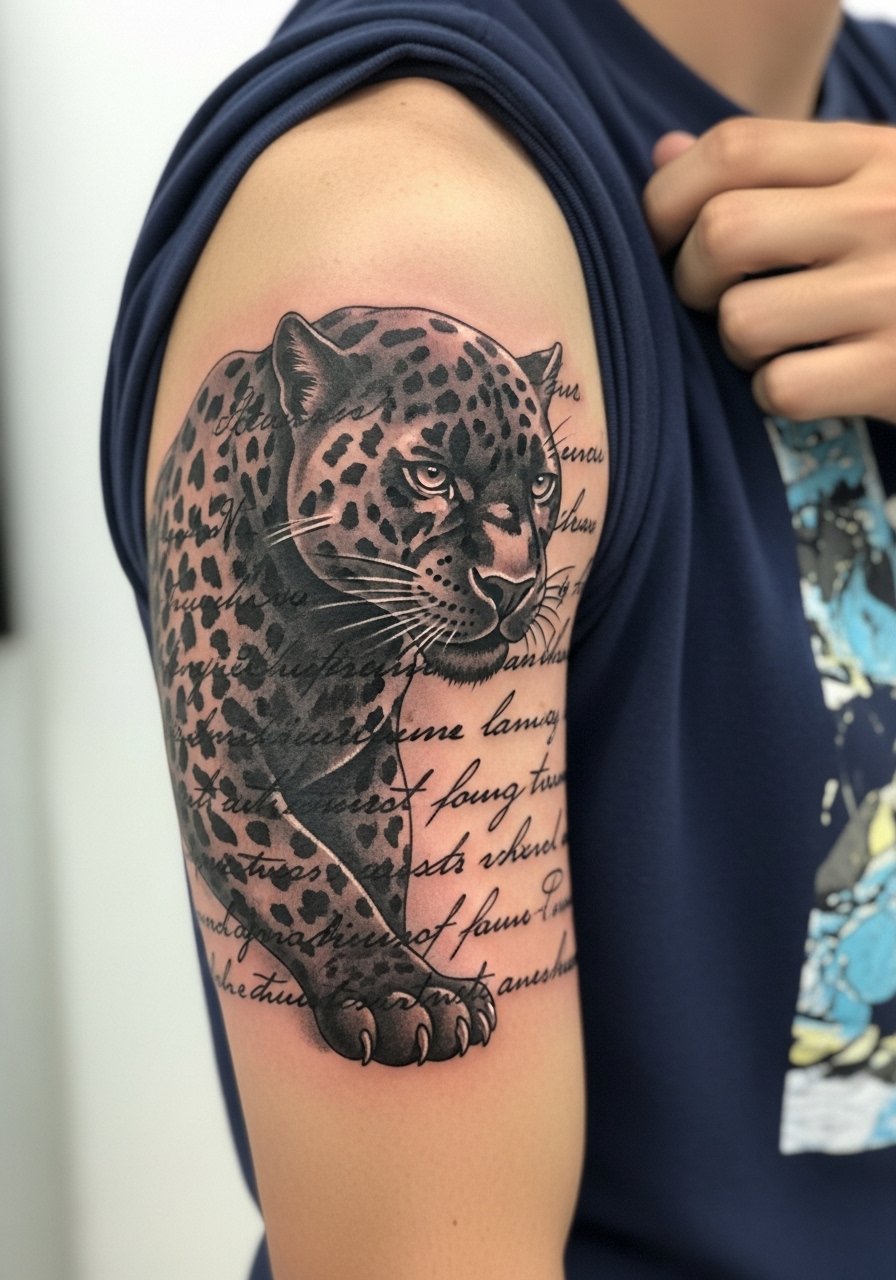
Covering script with a panther requires mapping dark zones so the old letters disappear under new texture. The common error is trying to hide dense dark lettering with light shading alone. Ask for layered black and gray with stippling transitions rather than abrupt blocks. Sessions are often split and may take four or more sittings for seamless integration. For the session, a loose short-sleeve button-up or tank keeps the area accessible. Be realistic about how much of the old ink can be removed versus masked.
21. Decorative Panther with Wind Swirls for Collarbone Side
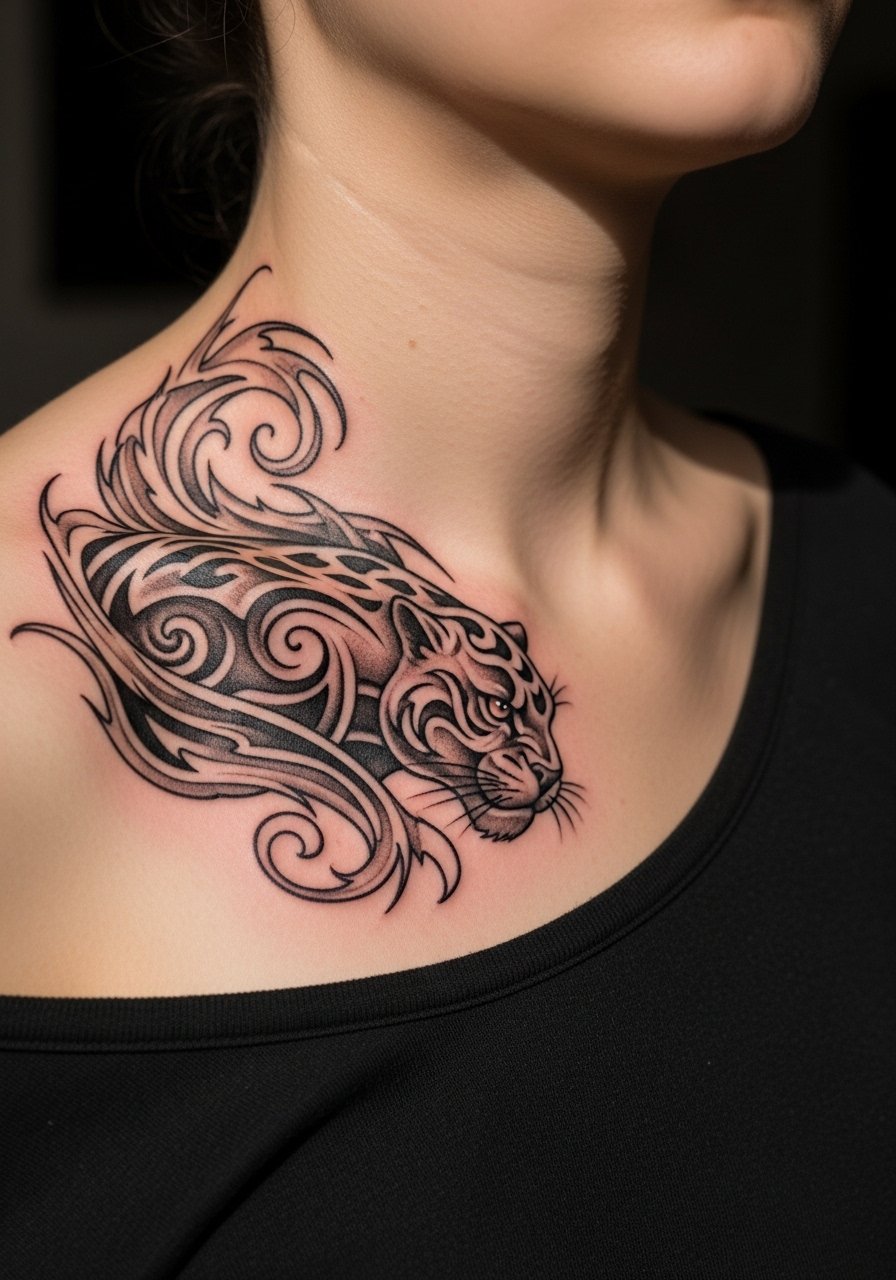
Collarbone side pieces interact with necklaces and shirt necklines, so plan placement carefully. A common mistake is placing dark blocks where necklace chains sit, which increases rubbing. For a piece that courts attention, request a composed negative space area near the neckline so jewelry can sit without crowding the art. For show-off wear, a v neck black tee or strapless option places the design front and center. Sessions often take one to two sittings depending on detail and pain tolerance.
Frequently Asked Questions
Q: How do black and grey panther tattoos age on darker skin tones?
A: From what I have seen, high-contrast negative space and bold blackwork read best on darker skin because they preserve definition as the gray softens. Ask for deliberate skin gaps and strong outlines in your consultation so eyes and key features stay readable over time. Touch-ups are common around year two to three for micro-realism details.
Q: Should I get fine line or bold blackwork for a ribcage panther?
A: Artists split into two camps. One group warns that fine line on ribs blurs quickly because the skin moves and stretches with breathing. The other group says proper needle depth and spacing allows fine line to settle well. The honest answer is that it depends on your skin type and the artist's experience. Bring up both approaches and request healed photos of similar ribcage work before committing.
Q: How long do cover-up panther pieces usually take to complete?
A: Cover-ups vary widely, but expect multiple sessions. For moderate-sized full-arm or upper-arm cover-ups plan on three to six sessions. The process is about layering and blending old ink under new shading. Being realistic about session count and budget up front prevents surprises.
Q: What should I wear to a thigh or calf session to be comfortable and give the artist access?
A: Loose shorts or flowy athletic shorts make thigh and calf sessions easier because you can adjust them without constricting the area. A high cut athletic shorts style or cuffed joggers keeps access simple and reduces fabric irritation during long sittings.
Q: Do small wrist or finger panther motifs need different aftercare than larger pieces?
A: Small high-contact zones need extra attention because frequent washing and friction speed fading. The best tactics are short bursts of gentle cleansing with fragrance-free wash, minimal ointment layering, and avoiding tight jewelry during the first month. Expect earlier touch-ups for fingers and thumbs.
