
Fine line dreamcatcher ideas are everywhere on saved boards, and the trend makes sense. The dotwork approach keeps the pattern delicate while letting the piece scale from a tiny wrist accent to a shoulder panel that flows into a sleeve. What matters most is spacing, density, and placement so the dots settle cleanly over the years. Read on for 27 dotwork dreamcatcher designs, how they age, what to ask your artist, and outfit tips that actually help the tattoo read the way you want.
1. Dotwork Dreamcatcher with Feathers on Forearm
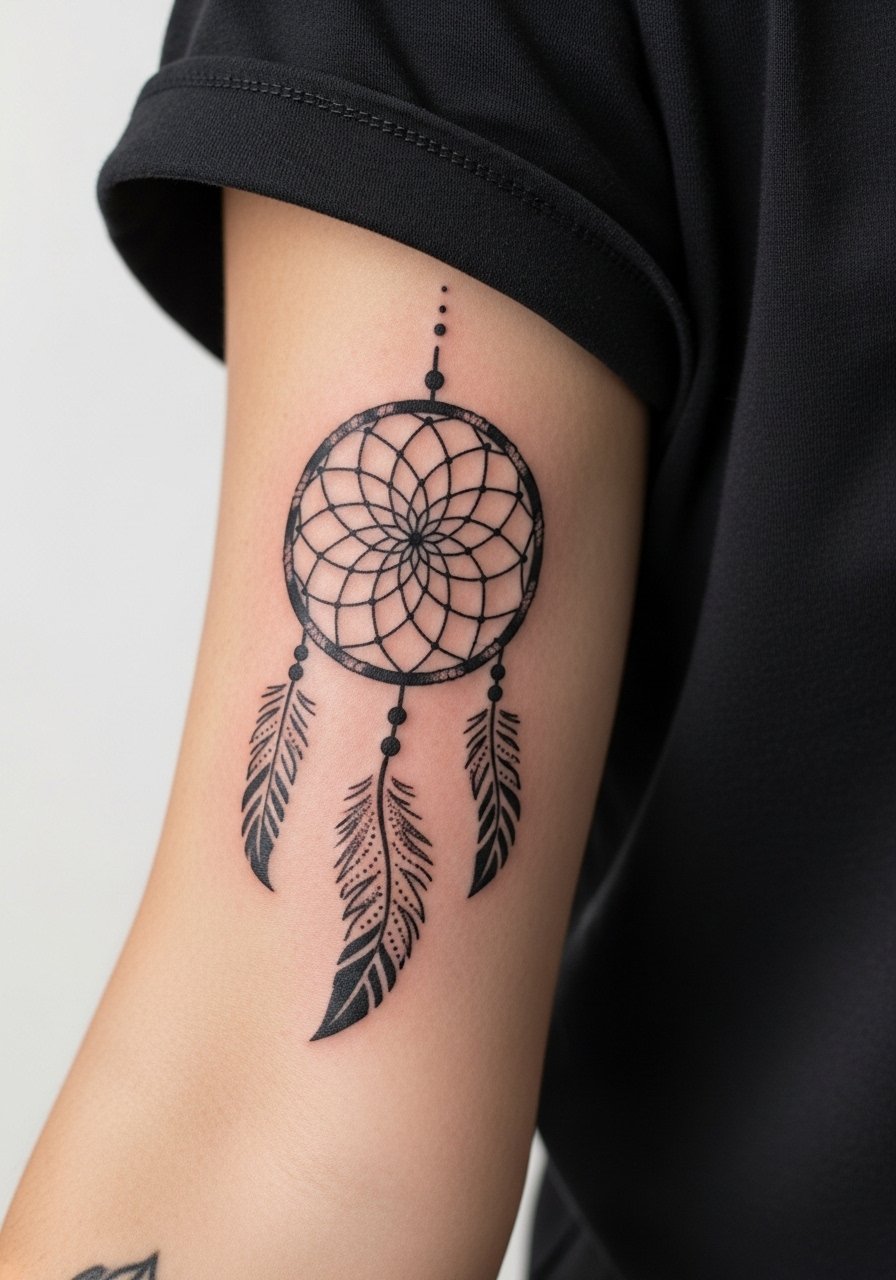
I see forearm dreamcatchers hold up better than tiny wrist pieces because the skin moves less and the design can breathe. Ask your artist for slightly heavier dot packing in the hoop so the center pattern keeps contrast after healing. Common mistake is asking for ultra-fine spacing and small diameter, which blurs by year two. Pain is mild to moderate and most sessions run one to two hours. For showing it off, roll a cotton rolled sleeve tee and add a leather cuff on the opposite arm for balance.
2. Minimalist Dotwork Dreamcatcher Outline on Wrist
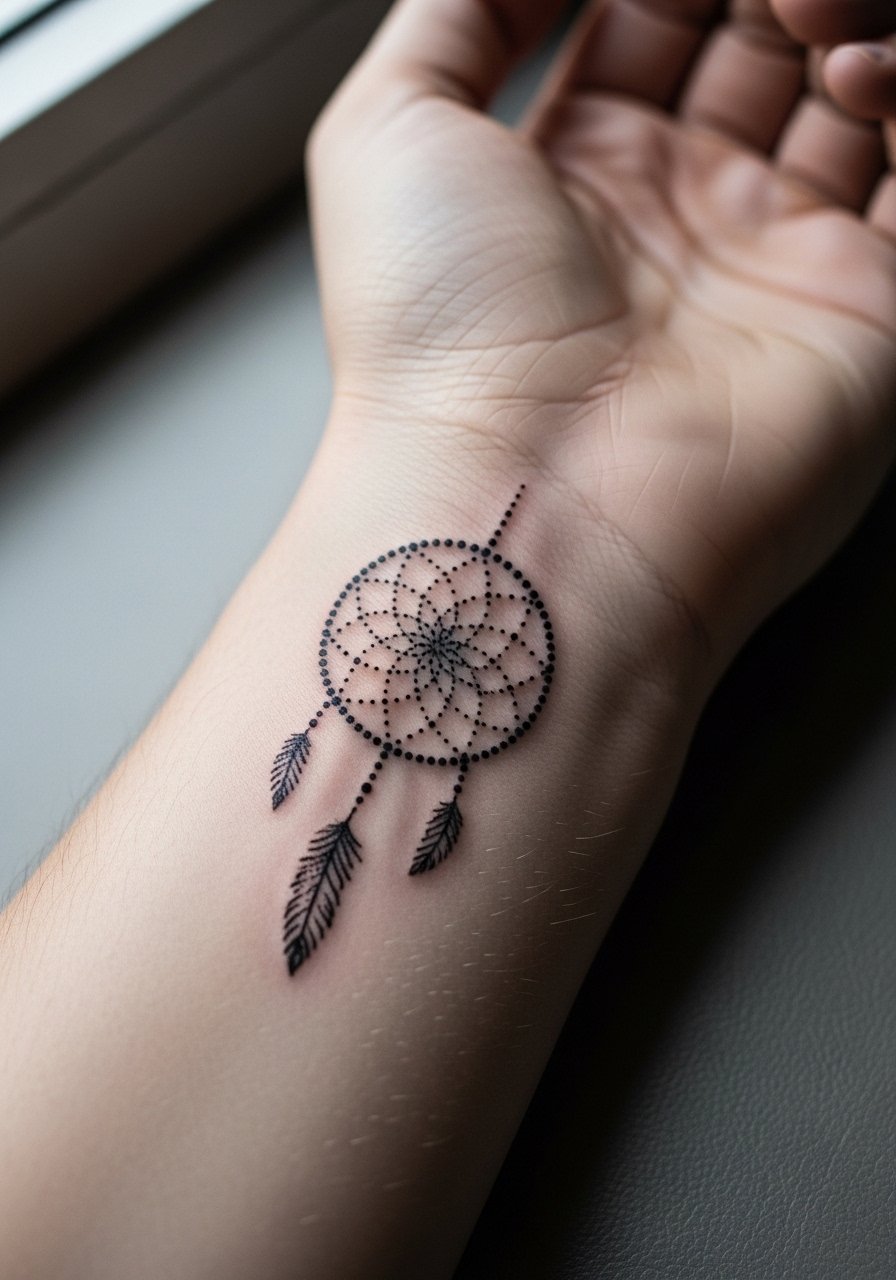
Wrist placements are perfect for tiny references that you see every day, but fine dotwork here needs denser dots than you might expect. Tell the artist you want "bold enough to last two years on wrist skin" and ask to preview the stencil size. The biggest aging problem is blurring from shallow dots and sunlight. Sessions are short, usually under an hour, and wrist tattoos are higher-touch because of friction with clothing and watches. Pair the finished piece with a thin silver chain bracelet on the opposite wrist to frame it without crowding.
3. Dotwork Dreamcatcher with Mandala Weave on Shoulder
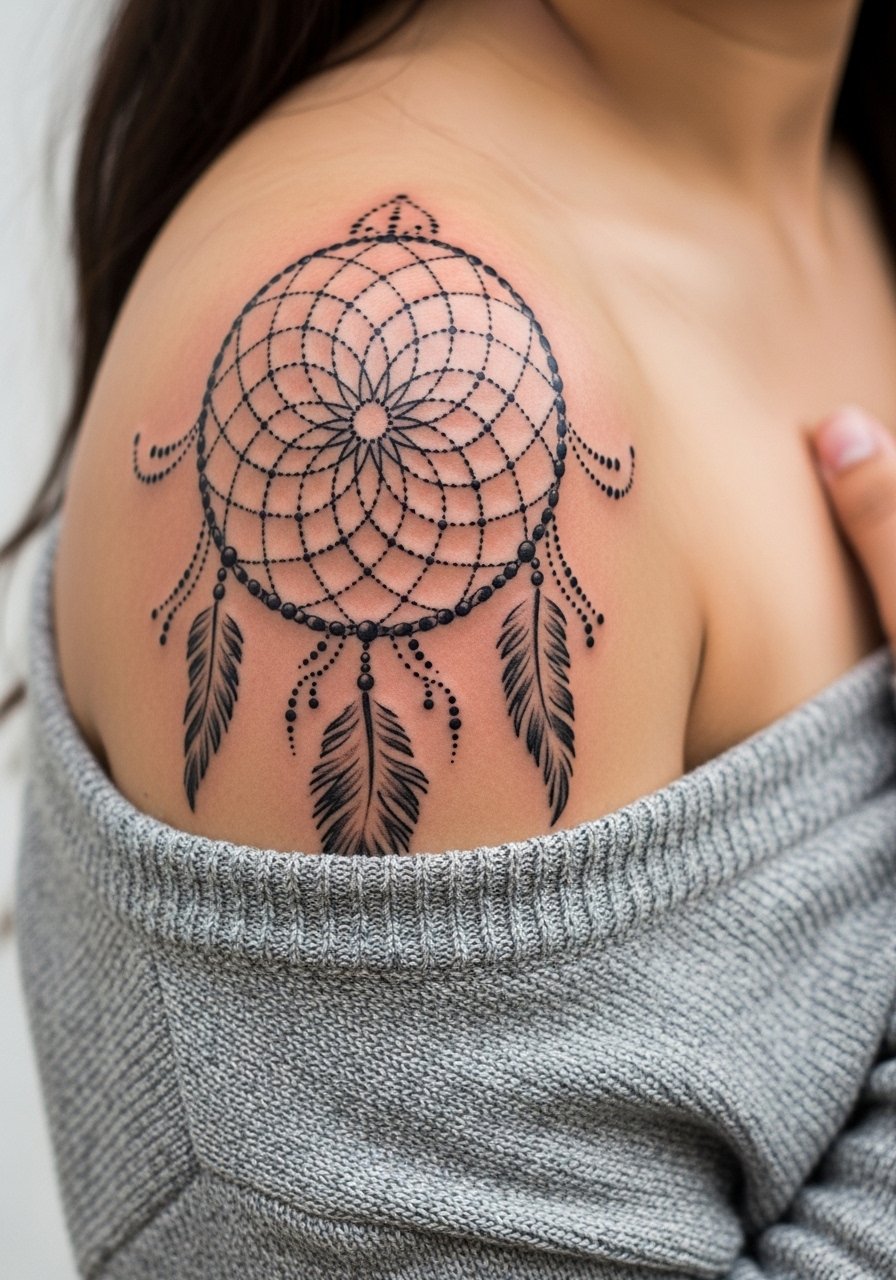
Most people pick shoulder work when they want detail without committing to a visible spot. The mandala weave benefits from expanding scale, so plan for a 4 to 6 inch diameter. When you consult, ask for slightly wider spacing in dense areas so stipple shading does not mush over time. Sessions often run two sittings. For the session, wear a loose button-down shirt you can pull aside, and for show-off moments try an off shoulder knit top to echo the curve.
4. Geometric Dotwork Dreamcatcher on Thigh
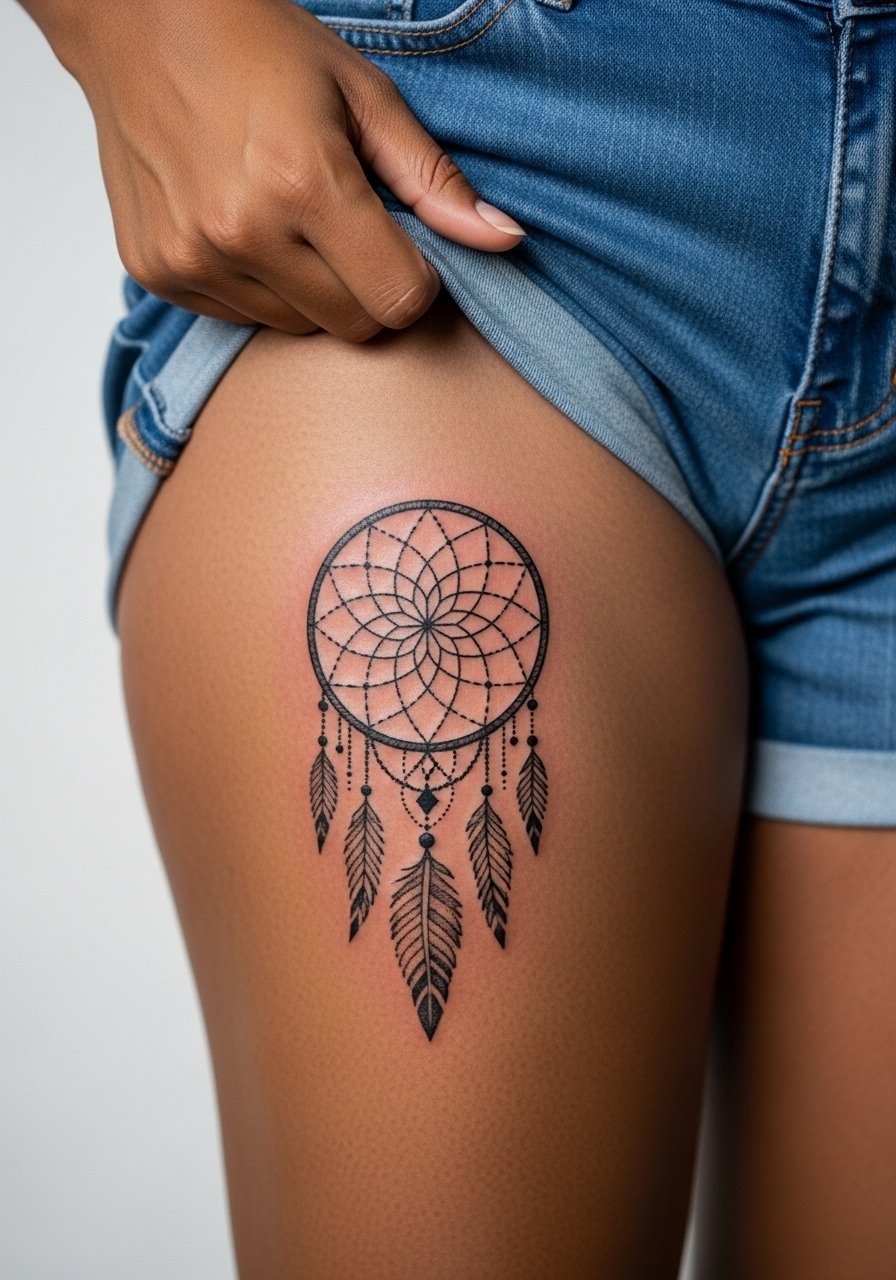
Thigh pieces are forgiving for tight geometry because the canvas is large and the skin tolerates dense stippling. I recommend planning size with future body changes in mind. Tell the artist you want scalable geometry that can survive muscle gain or weight shifts. Common mistake is going too close to the hip crease where stretch shows. Sessions vary from one to two hours depending on detail. For summer reveals, pair with high waist athletic shorts.
5. Fine Dotwork Dreamcatcher with Beads on Ankle
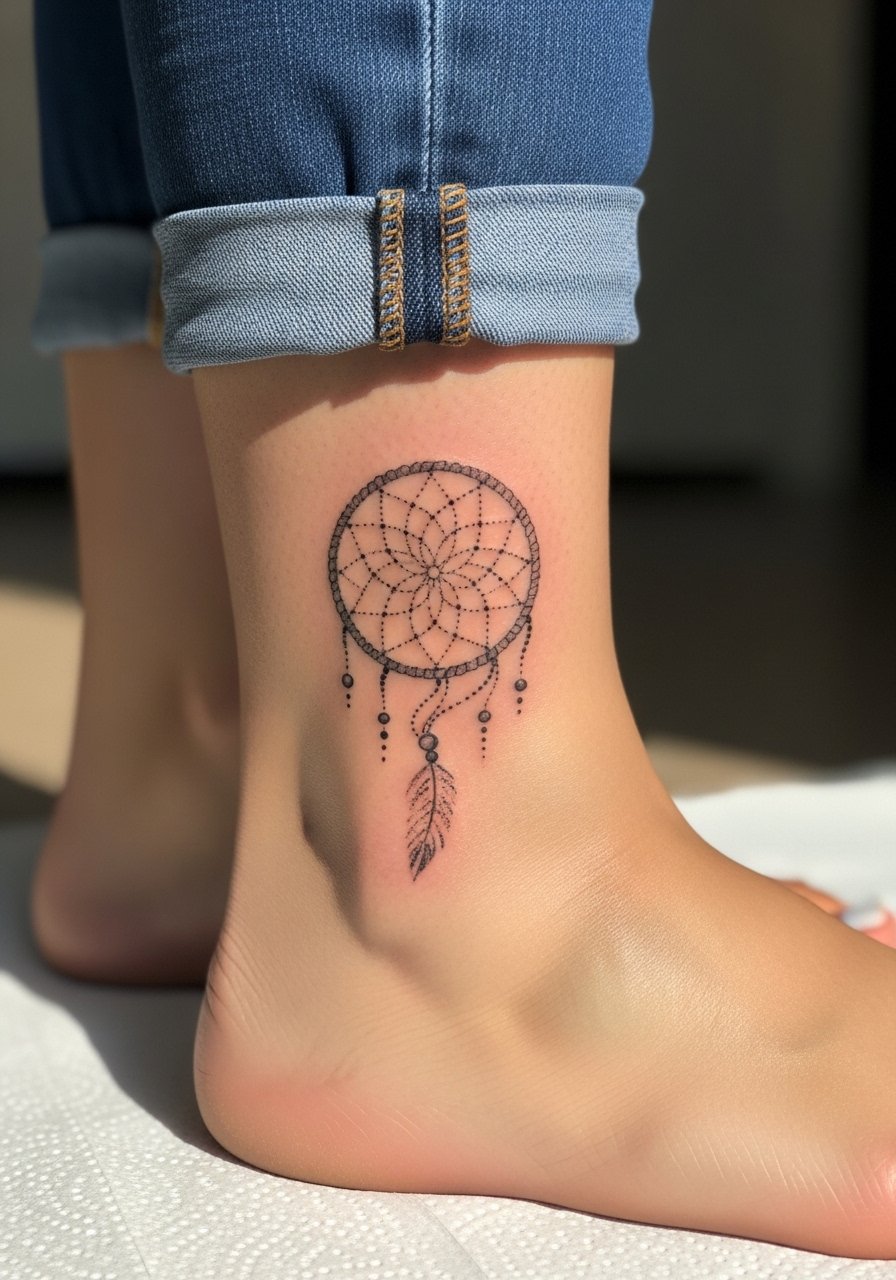
Ankle work is delicate and visible, but it endures less well because of footwear friction and sweat. Ask your artist for slightly bolder bead dots rather than hair-fine dots, and consider a 2.5 to 3 inch size for longevity. Expect higher touch-up rates if you insist on feather-fine beads. Sessions are short, often under an hour. Style it with ankle strap sandals and cropped jeans to frame the hoop without rubbing.
6. Dotwork Dreamcatcher Sleeve Starter on Bicep
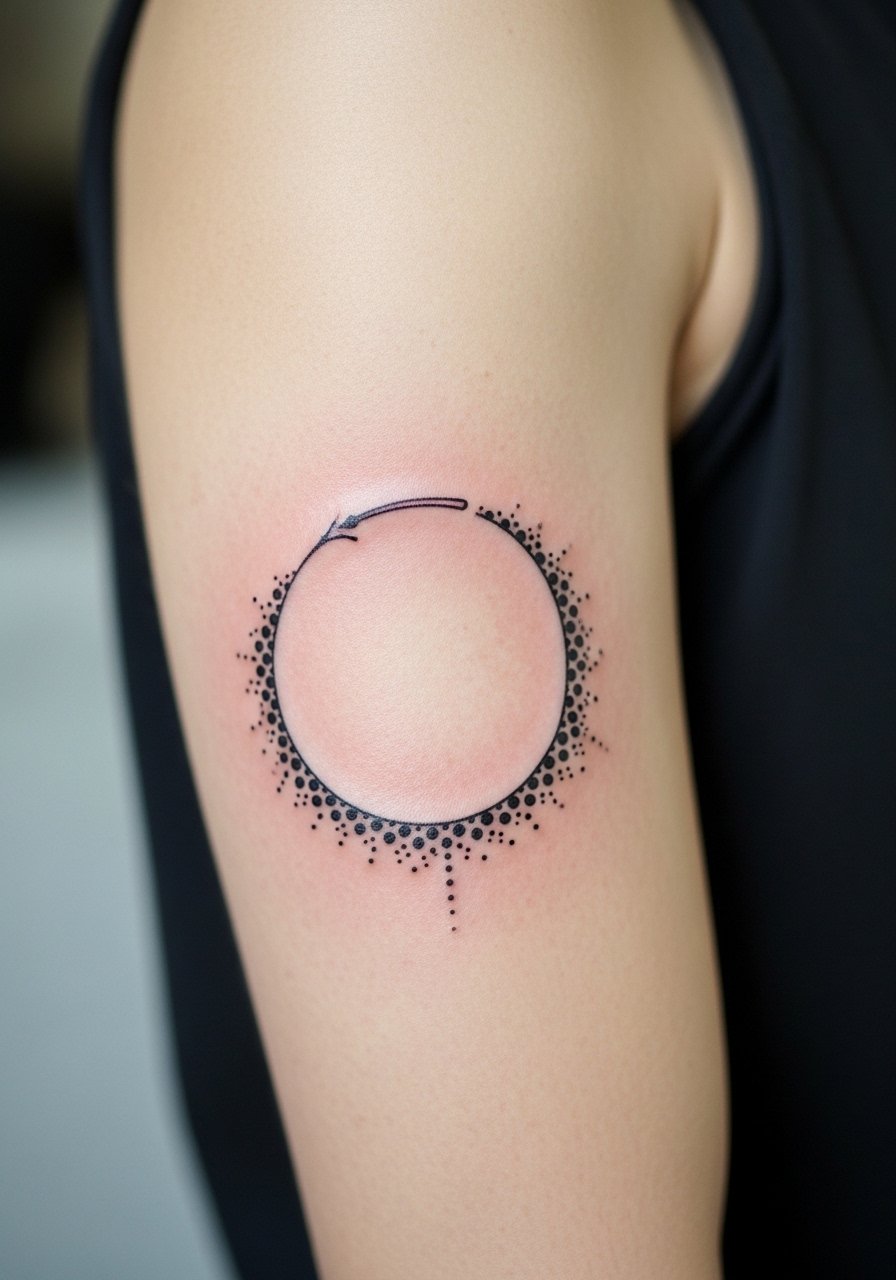
The bicep is a forgiving place for a sleeve starter because you can scale outward from a single hoop. In consultation, say you want expansion points left and right so the artist can add mandala or feather extensions later. A mistake is requesting a tiny, dense hoop and expecting to turn it into a sleeve without rework. Sessions run two to three hours for a sizeable starter. For session comfort, wear a loose button-down shirt you can slide for access.
Before You Book
The forearm, ankle, and bicep pieces above each ask for different prep and healing needs, so a short kit tailored to those placements keeps the session smoother and the first week cleaner.
- Tea tree salve from indie brands. Lightweight itch control without heavy grease, useful for dotwork pieces that need breathable moisture during scab phase.
- Australian eucalyptus balm alternative. Users report quicker scab drop on ankle and foot placements where sweat is common.
- Japanese rice bran lotion style balm. Non-comedogenic option that performs well on medium to deep tones without leaving a greasy film.
- Rice powder dry healer kit. For people doing a conservative dry heal, this minimizes moisture buildup on dense dotwork.
- Fragrance-free thin ointment. Thinner than classic options and useful when you want to avoid clogging tightly packed dots during the first few days.
7. Micro Dotwork Dreamcatcher on Collarbone
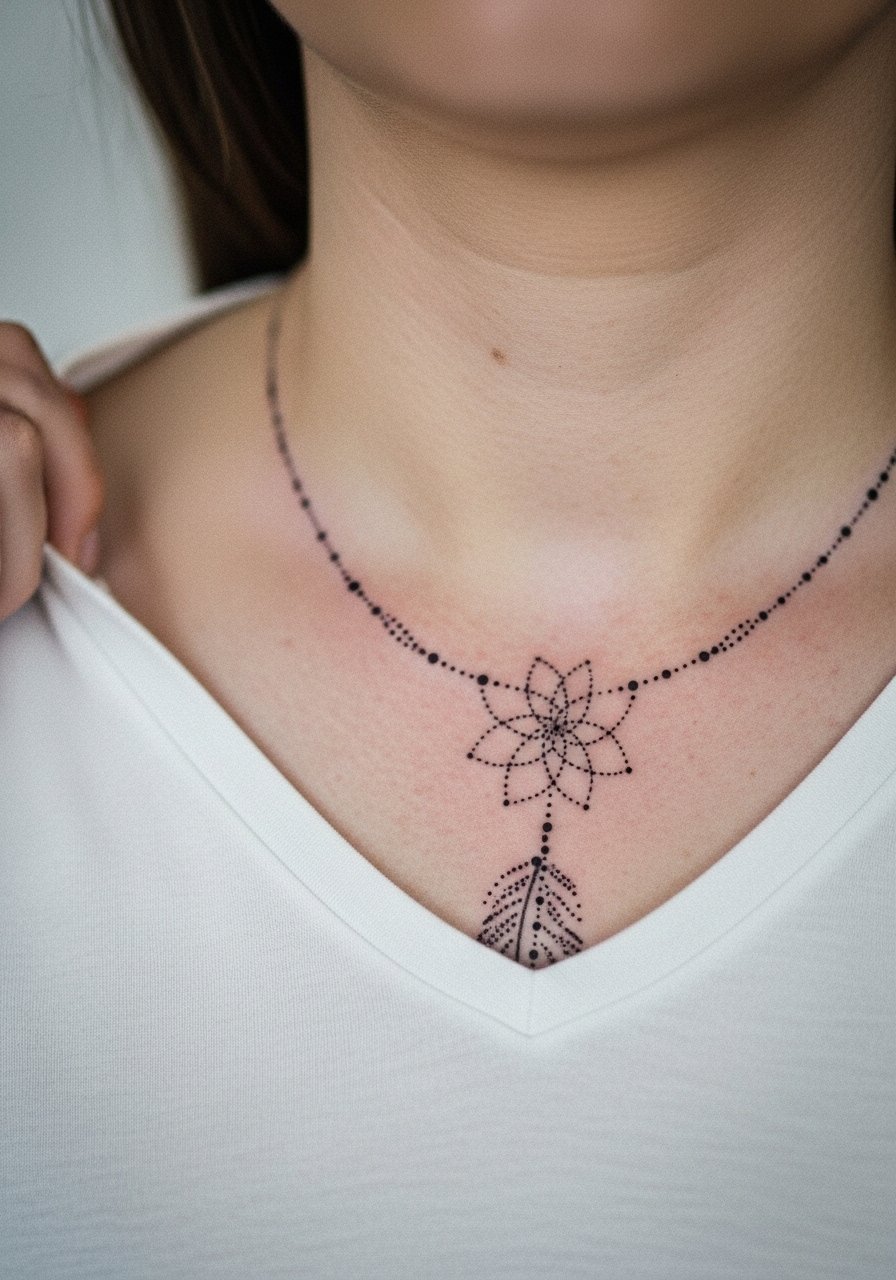
Collarbone pieces look refined with tiny dots but require higher density for darker tones. I suggest asking for a 2-inch piece with slightly thicker outer hoop dots so contrast remains at month six. Pain is low to moderate and touch-ups are common at the 18 month mark for ultra-fine work. For wardrobe, a v neck silk blouse frames the area without competing.
8. Dotwork Dreamcatcher with Web Focus on Ribcage
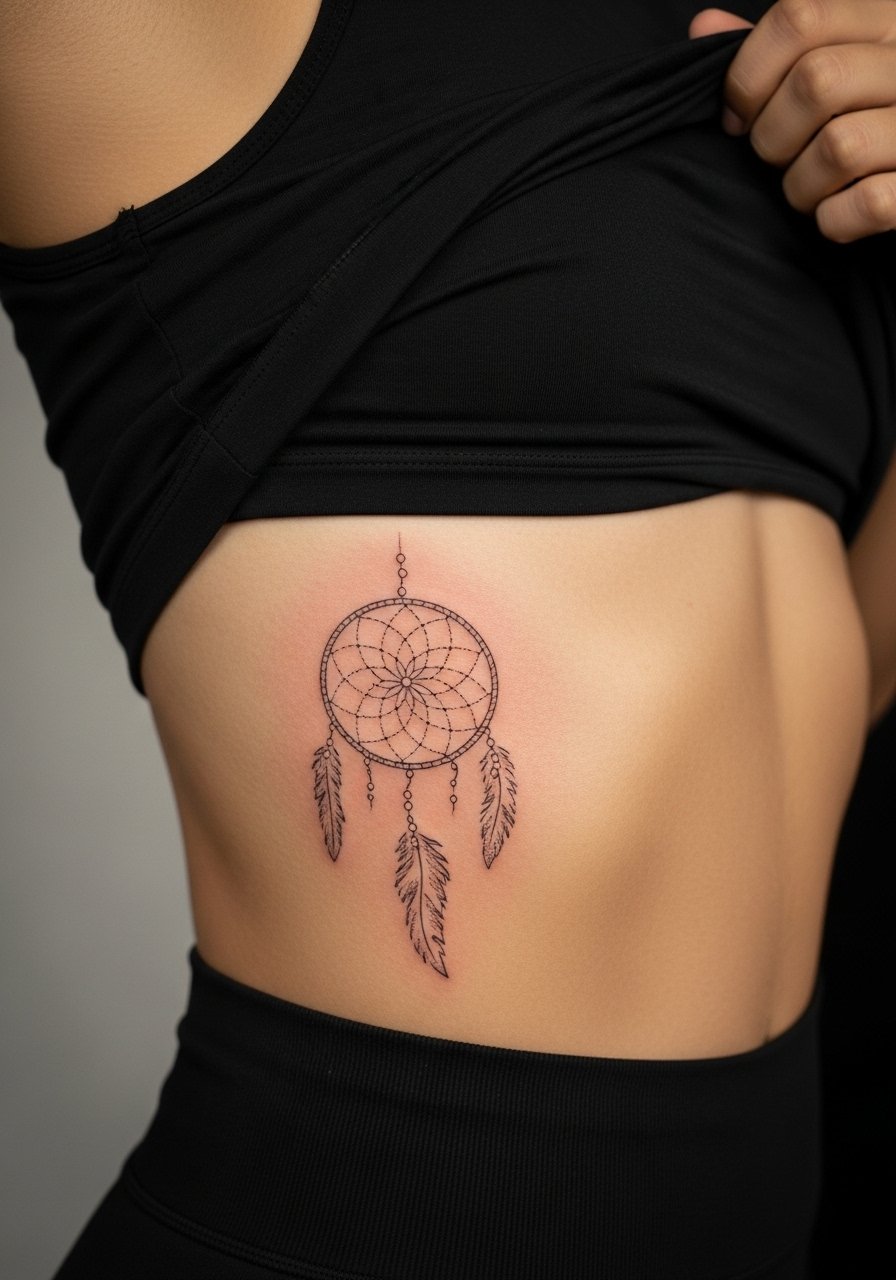
Fair warning, the ribcage rates high on most pain charts, but it is ideal if you want a personal piece that hides under clothes. Artists are split on fine line here. One camp says thin lines and light dots blur quickly because of skin stretch. The other camp argues that deeper dot placement with more spacing can hold fine detail. Ask your artist which approach they use and request a healed portfolio on the same placement. Sessions often run one to two hours with planned breaks. For showing it off, pair with a black crop tank when you want glimpses.
9. Bold Dotwork Dreamcatcher Hoop on Calf
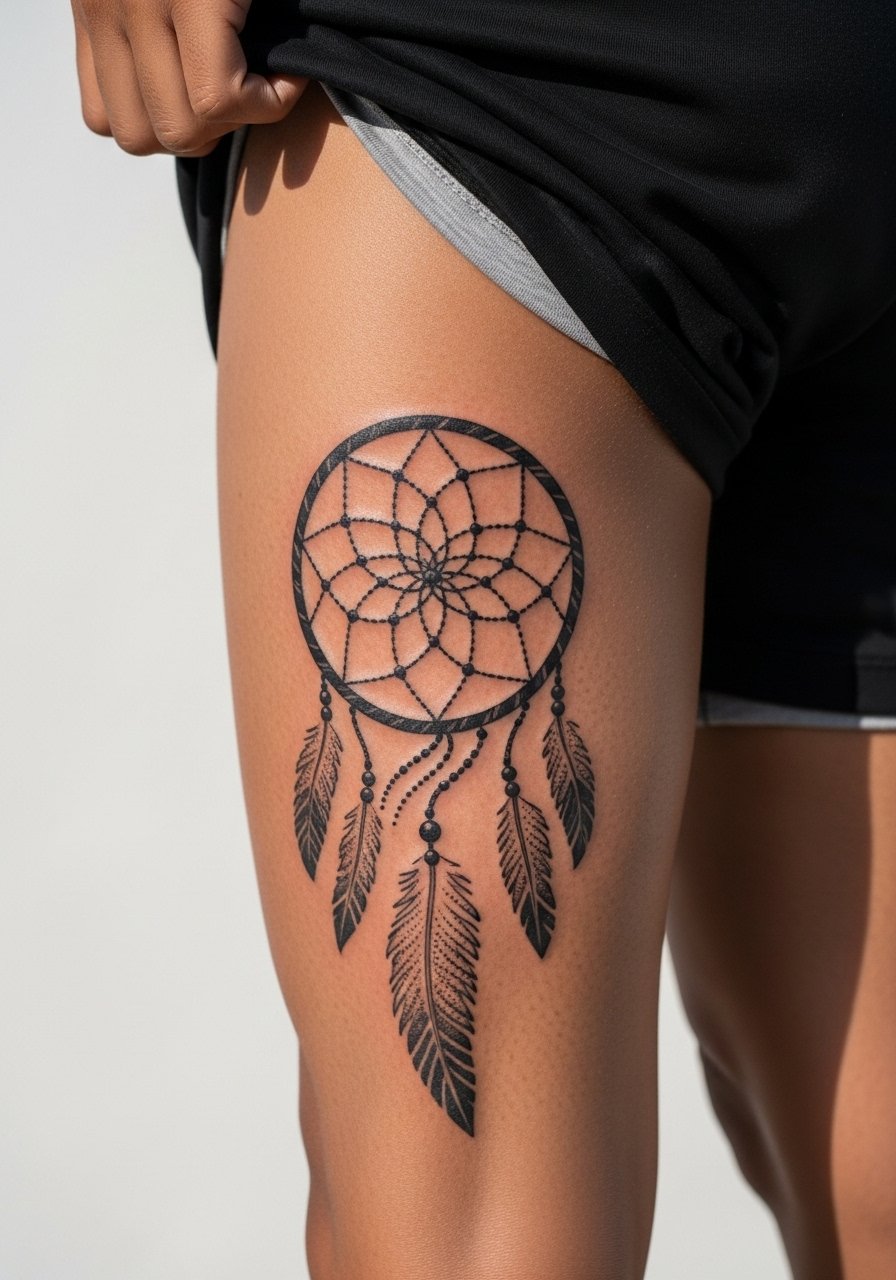
Calf placements suit bolder dotwork because the skin holds saturated dots well and you can read the pattern from a distance. If you want athletic visibility, ask for solid dot saturation in the hoop rather than faint stippling. A common mistake is keeping the hoop too small, which loses impact on thicker calves. Sessions are typically one session under two hours and touch-ups are less frequent than ankle work. Wear loose drawstring shorts for the session so the artist can access the area comfortably.
10. Ornamental Dotwork Dreamcatcher with Feathers on Back
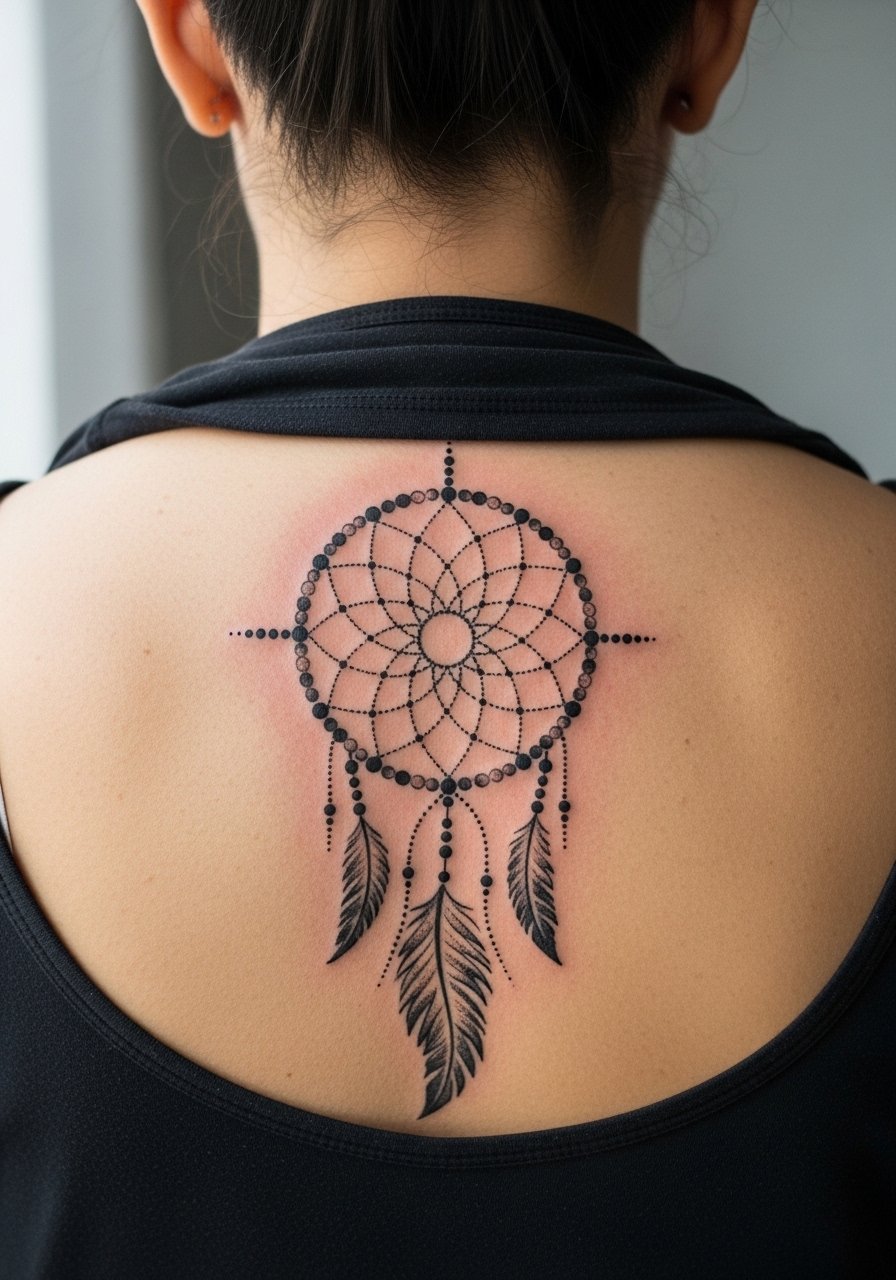
Back pieces are the place to go big. A symmetrical hoop with feather extensions reads well at 8 inches and can double as a centerpiece for a larger back composition. Tell your artist you want symmetry marks and a few bleed points left for later expansion. Common error is wanting a perfectly centered hoop without accounting for shoulder slope, which makes the design appear off. Sessions span multiple sittings and the pain is moderate. For session clothing, a button-up you can take off front-first is easier than pulling a top over your head.
11. Micro-Realism Dreamcatcher on Sternum
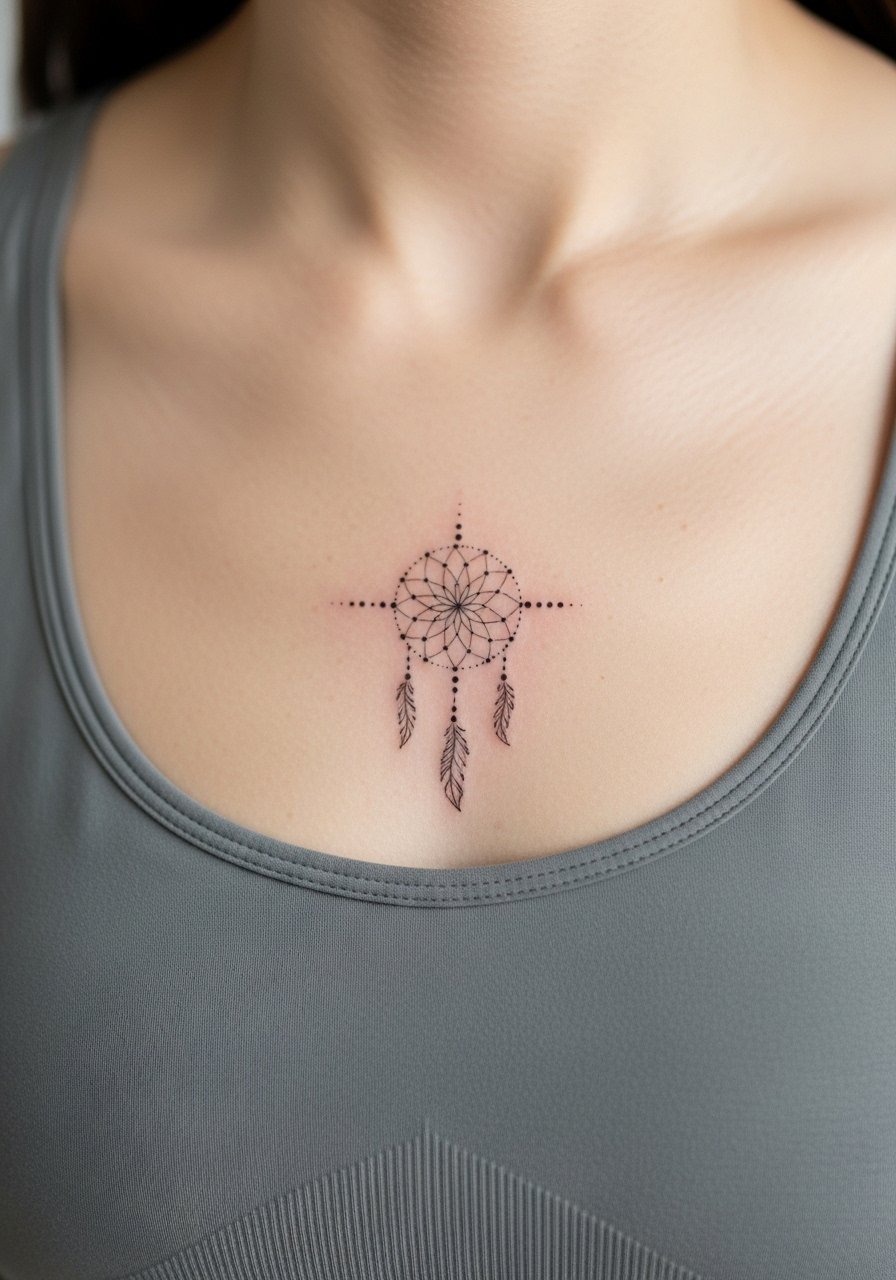
Sternum tattoos are intimate and they age differently because the area moves with breathing. Ask for slightly wider spacing in the central web so dots do not merge with healed motion over time. Pain is higher and sessions are often split into shorter windows. Because of the location, choose an artist with healed examples in the same spot. For studio comfort, wear a fitted sports bra so the artist can access the area without you exposing more than necessary.
12. Geometric Mandala Dreamcatcher for Thigh Inner Panel
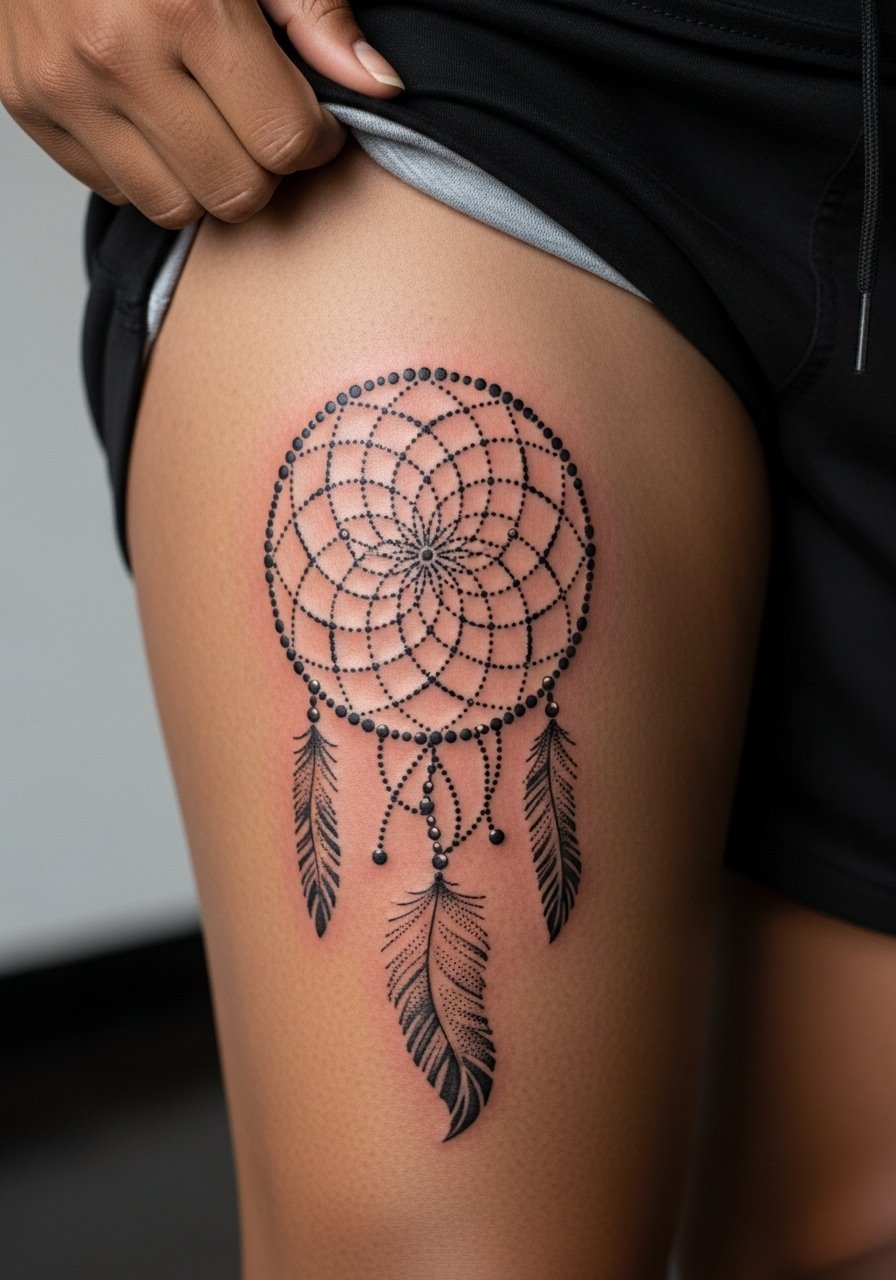
Inner thigh gives you a private canvas ideal for high-detail mandala meshes. I advise sizing the center larger than you think and keeping feather extensions short to minimize distortion from thigh movement. Common mistake is placing the hoop too close to the groin crease where friction accelerates fading. Sessions are comfortable with breaks and healing is private. For session wear, opt for shorts you can shift, like loose drawstring shorts.
13. Tiny Dotwork Dreamcatcher Behind Ear (Neck Framing)
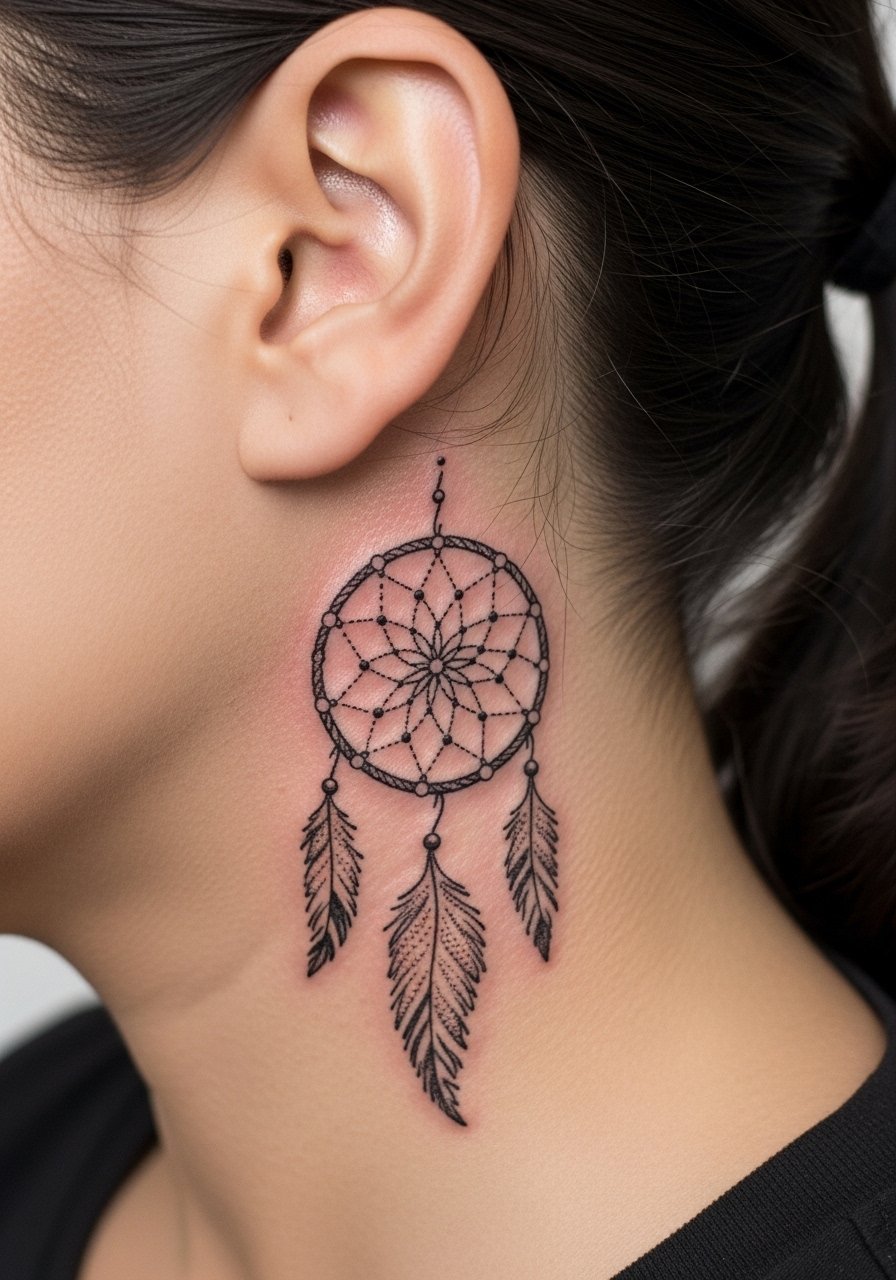
A behind-the-ear placement reads delicate and personal, but the area is small so dots need to be bold enough to survive hair oils and movement. Tell the artist you want a slightly larger outer dot size than typical micro work. The session takes under an hour but be aware of touch-up likelihood at year two. This placement is subtle with hair down and shows with updos.
14. Constellation-Infused Dotwork Dreamcatcher on Forearm Wrap
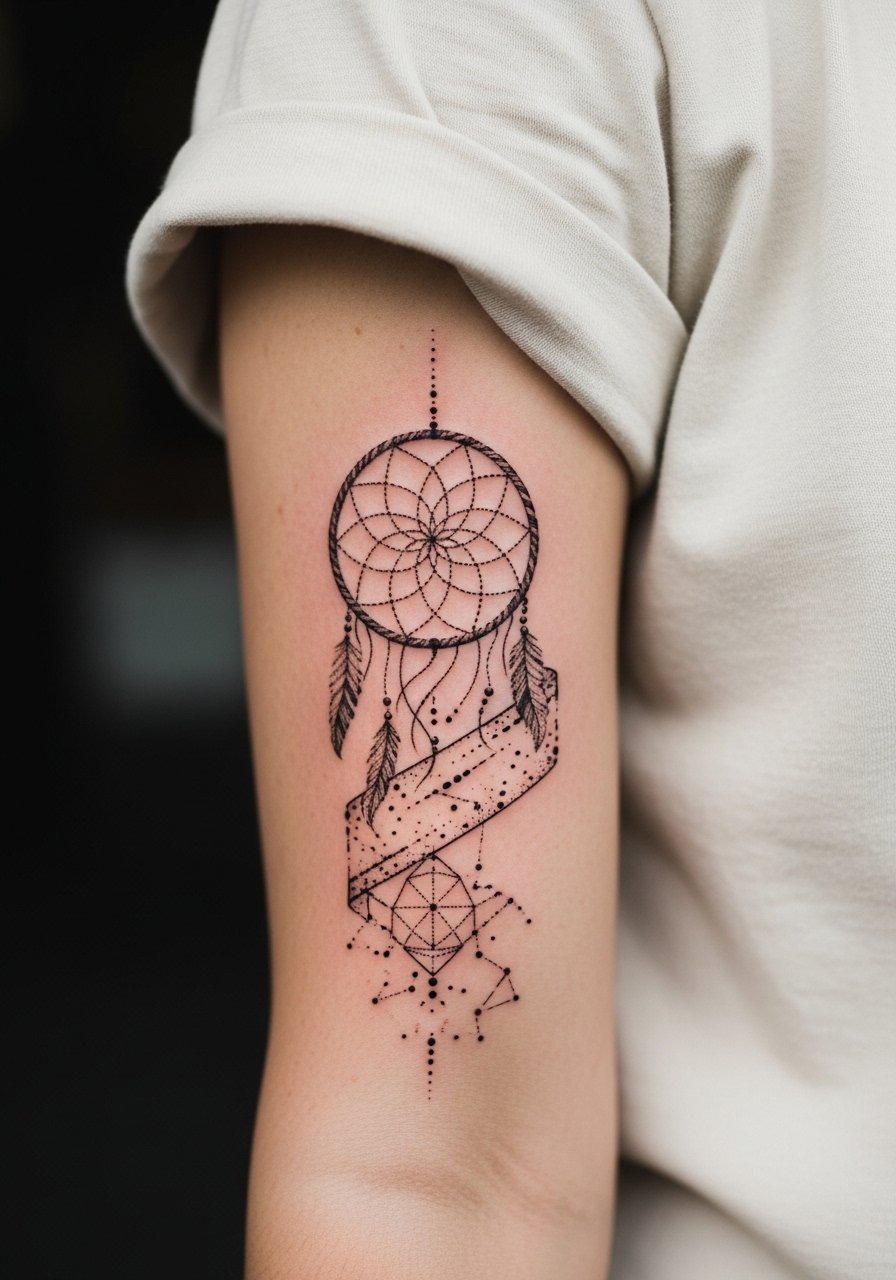
This design weaves tiny constellation dots into the dreamcatcher trails and works best on the outer forearm where you can read the sequence. When consulting, bring exact constellation references and ask the artist to space stars so they do not merge with the hoop dots after healing. Avoid packing stars too close to the wrist where sweat and friction accelerate fade. Sessions vary by length depending on wrap complexity. Pair with a cotton rolled sleeve tee to show the full wrap.
15. Black and Gray Dotwork Dreamcatcher with Shading on Shoulder Blade
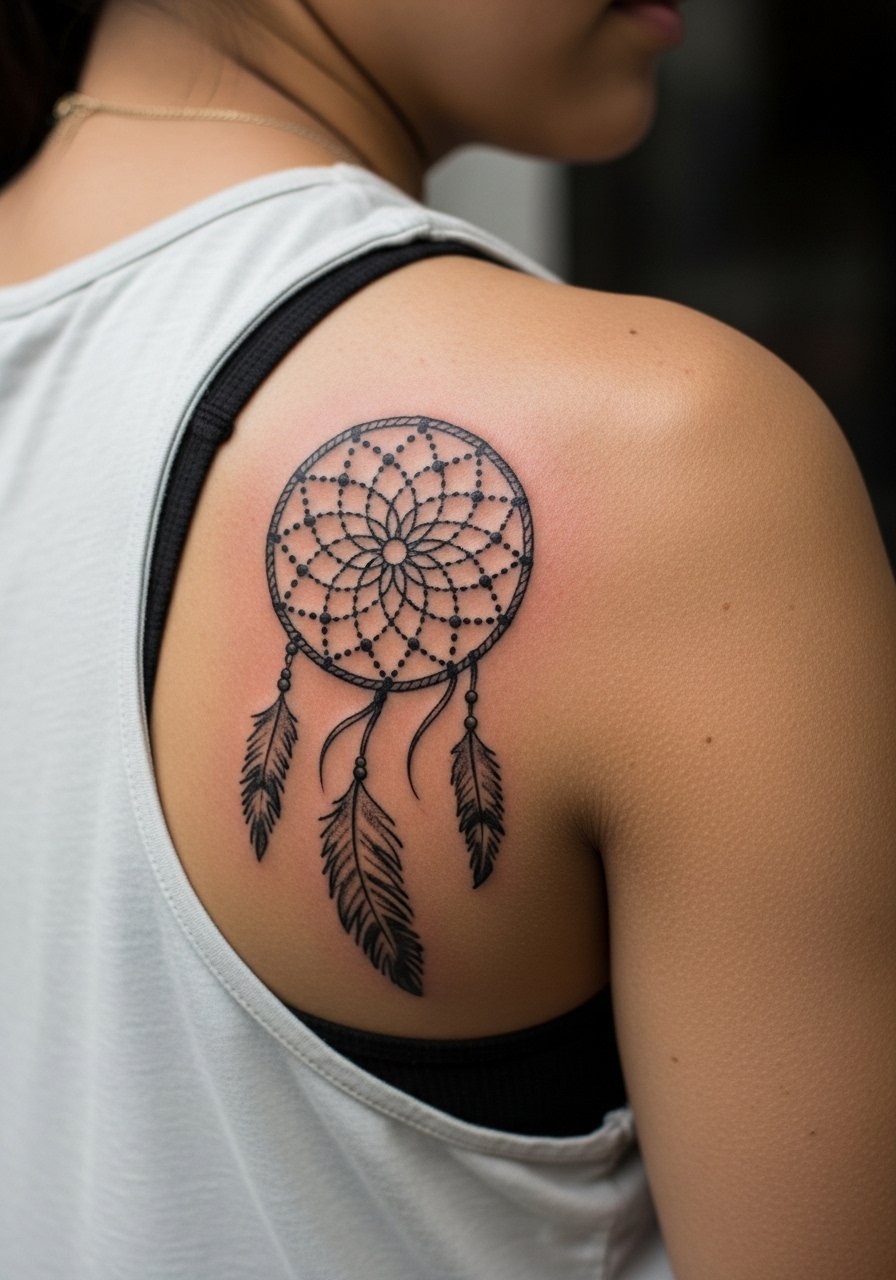
Shoulder blade placement takes shading well because the surface is stable and moves less than ribs. Ask for gradual stipple shading instead of packed black fills for a softer healed look that does not merge. A common mistake is packing too many dark areas near the hoop edge which can soften into a heavy blotch. Sessions often require two sittings for detailed stipple work. For reveal outfits, try an open-back dress or a loose tank.
16. Zodiac-Beaded Dotwork Dreamcatcher on Ankle Wrap
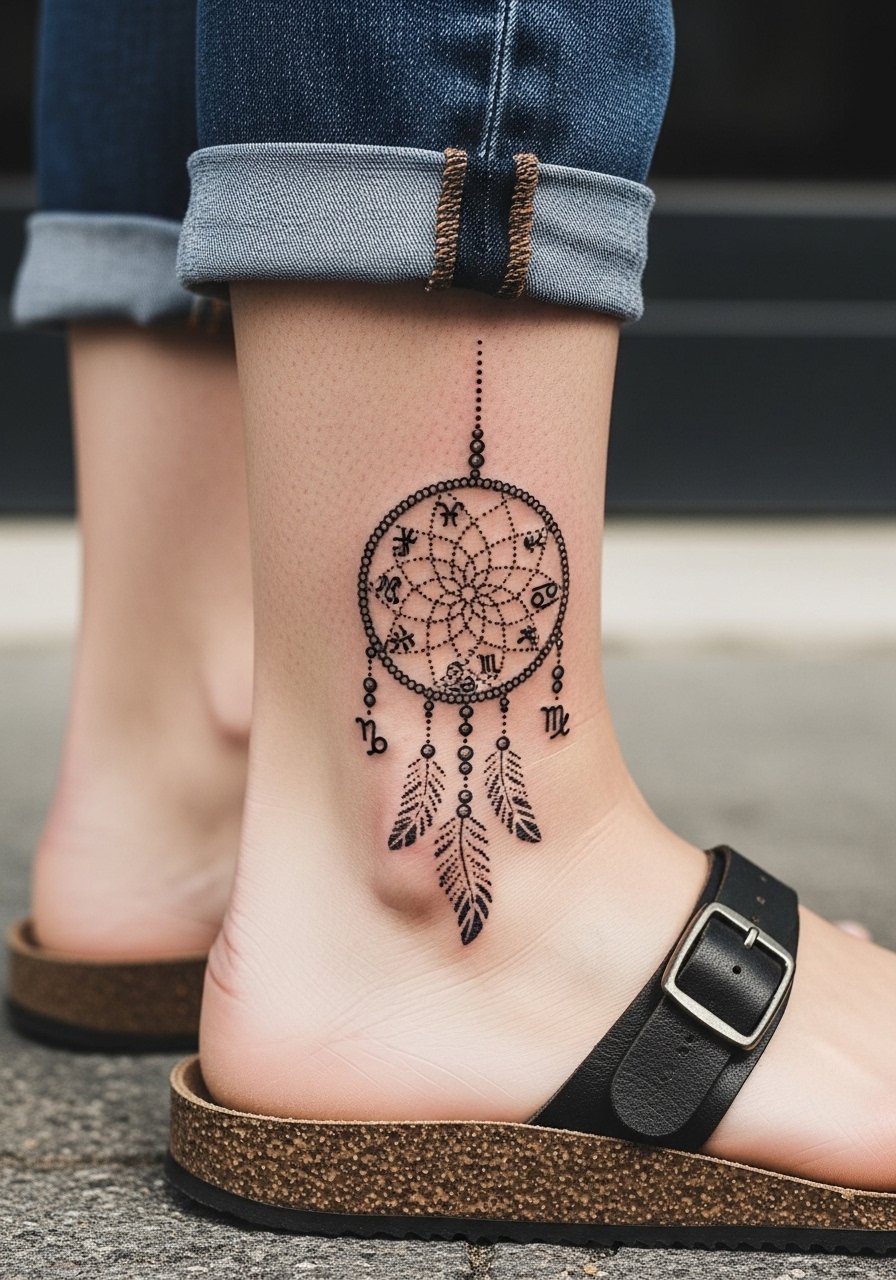
Embedding small zodiac beads adds a personal layer without overt symbols. Be specific with your artist about which glyphs you want and ask for slightly bolder bead dots to survive washing. A mistake is requesting tiny glyphs that read like blur after healing. Sessions are short and you should plan for a touch-up at the 12 to 18 month mark. Style with ankle strap sandals to let the beads peek when you want.
17. Spiral Mandala Dreamcatcher Across Upper Chest
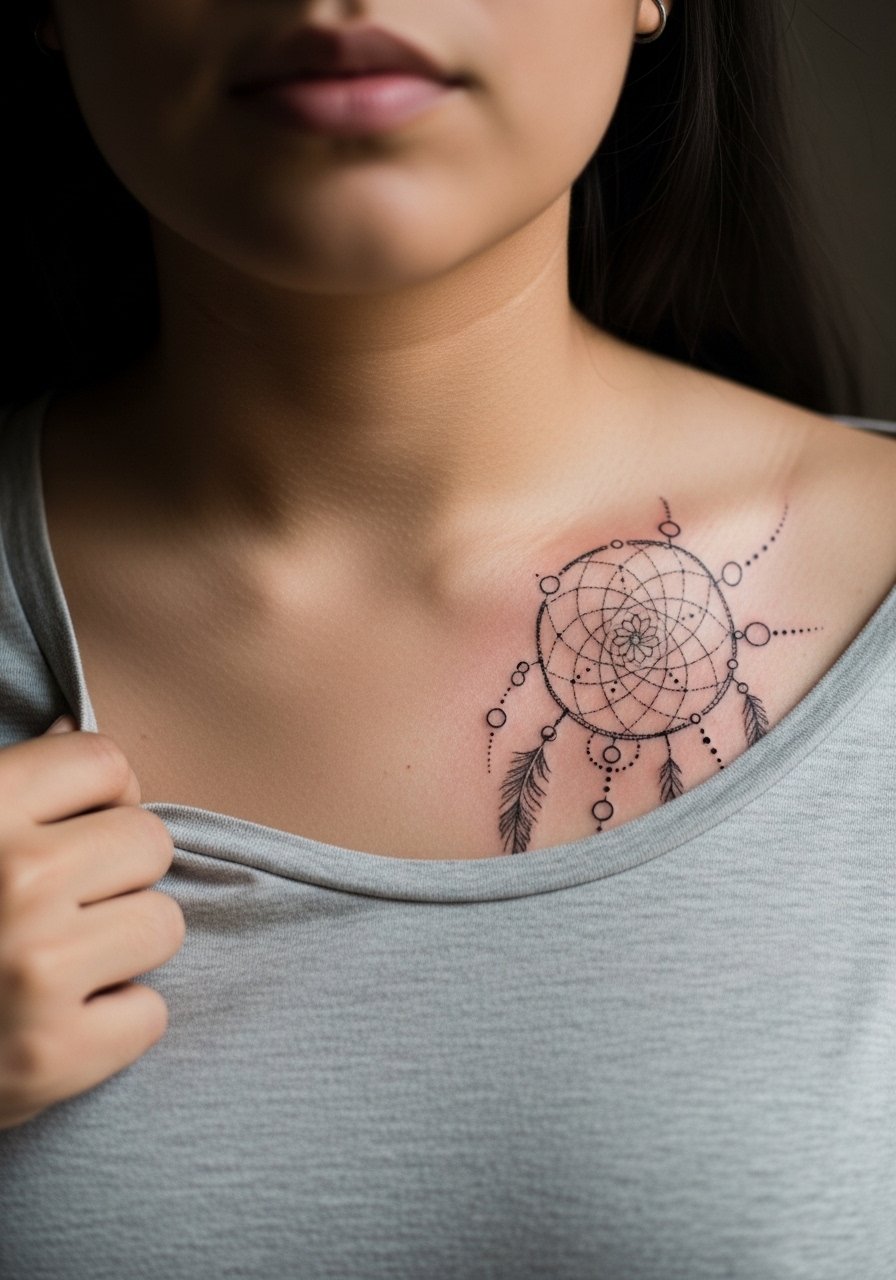
Upper chest work reads elegantly with a spiral mandala that mirrors the collarbone line. This area needs careful centering so the piece follows body contours. Tell the artist you want symmetry checks in standing and seated positions. The sternum and collarbone variations behave differently with motion, so expect a multi-session plan. For going-out outfits, a wide-neck top frames the piece nicely.
18. Sleeve Connector Dreamcatcher Between Shoulder and Elbow
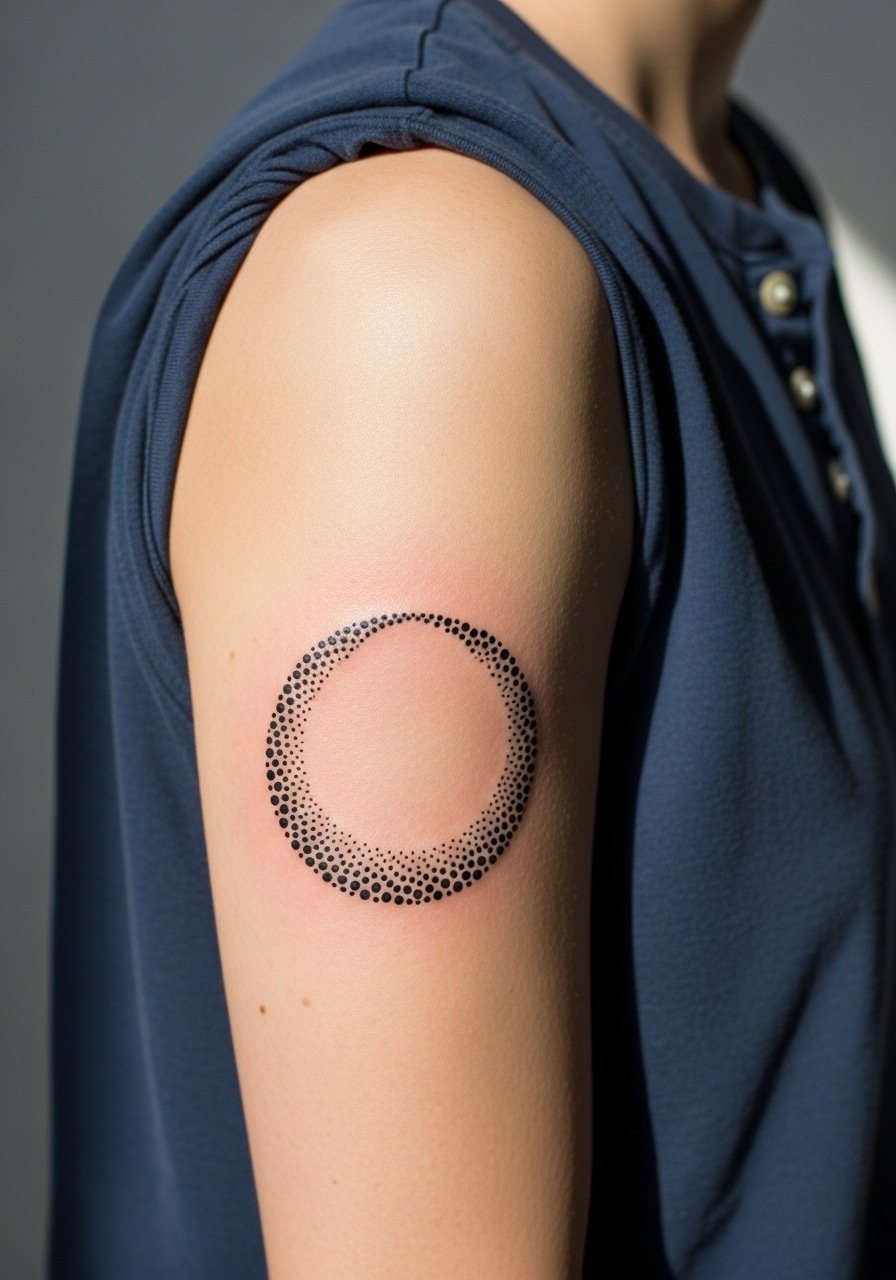
If you plan a sleeve, place the dreamcatcher where it can anchor future motifs. I advise clear expansion points and reserved negative space so new pieces do not crowd the main hoop. Common mistake is treating the connector as a finished piece without room to grow. Sessions are staged and you will feel consistent pressure over the area. For the session, a loose henley shirt is easy to remove and comfortable.
19. Feather Cascade Dotwork Dreamcatcher on Lower Back
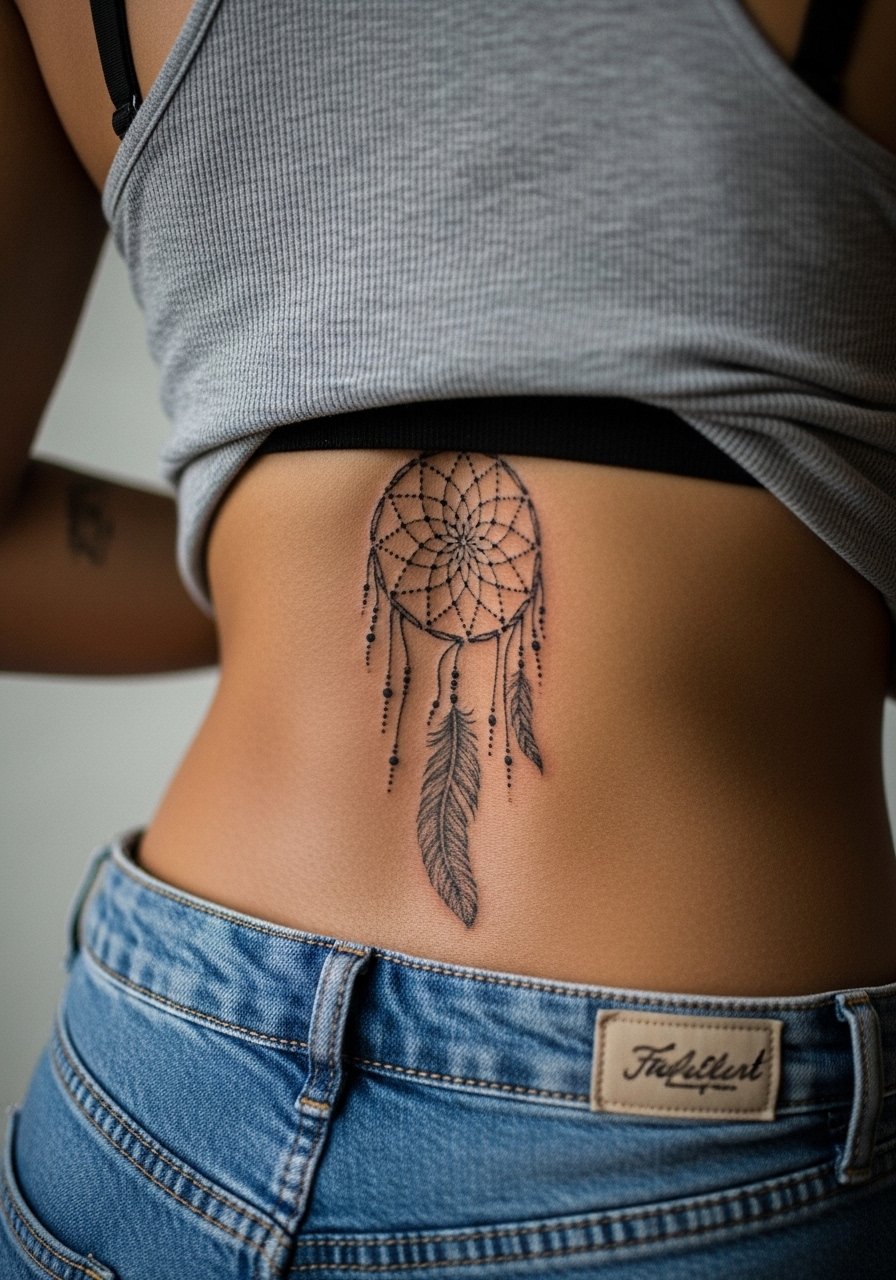
Lower back pieces give feather cascades room to flow and avoid the sun exposure that legs get. Tell your artist to anchor feathers with a few larger dots so movement does not blur the strands. A mistake is letting long feather tips drag into the hip fold where friction and jeans wear them down. Sessions may be split and healing is private. For reveal looks, pair with a tank top and high-waisted skirts.
20. Blackwork Hoop with Negative Space Mandala on Upper Thigh
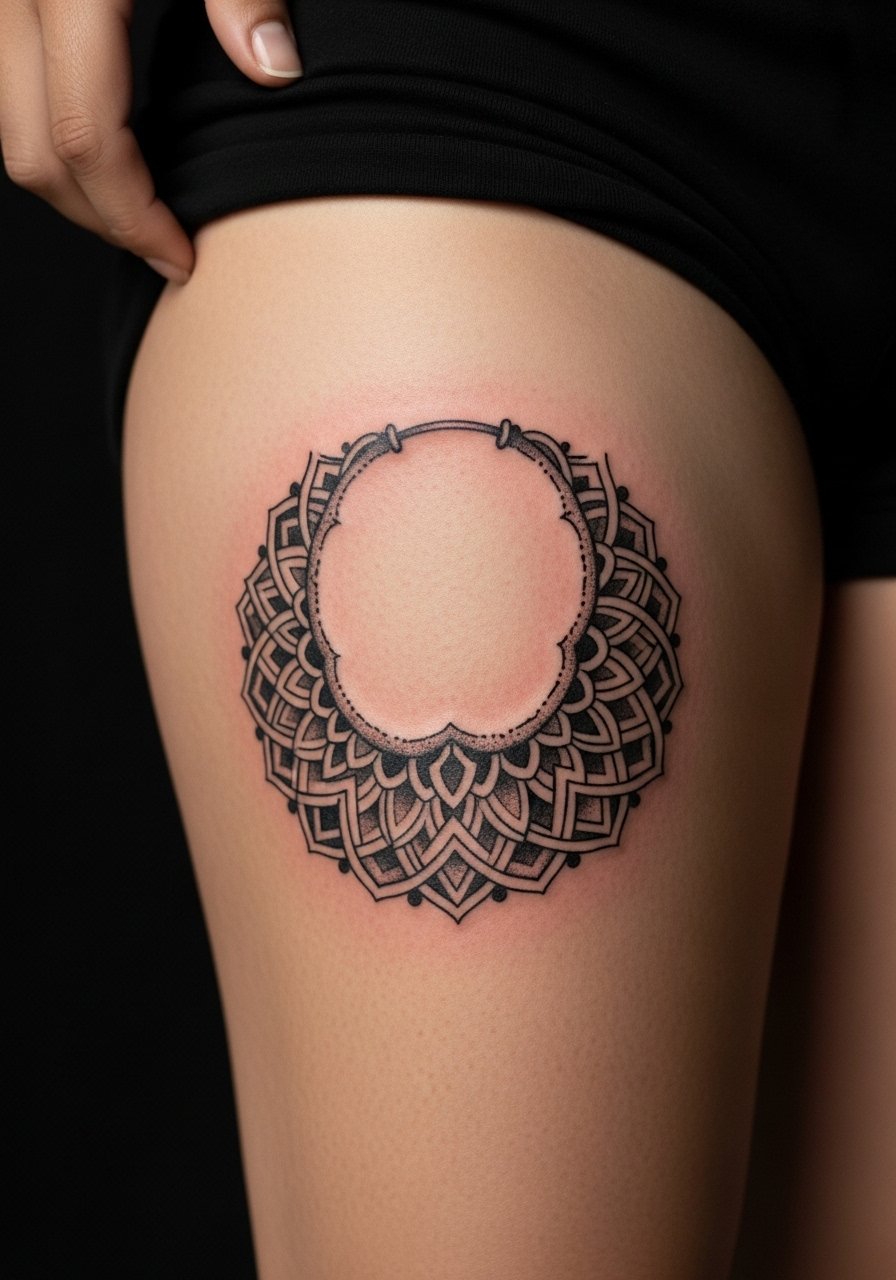
Using negative space inside a bold hoop creates strong contrast that holds for years. This is a smart choice for people who want a dramatic look without color. Ask your artist for crisp negative shapes and avoid ultra-fine dot gradients in the negatives. A common error is too many tiny negative fragments that fill in over time. Sessions are one to two sittings. For session comfort, pull on high waist athletic shorts.
21. Micro Dotwork Dreamcatcher at the Nape of the Neck
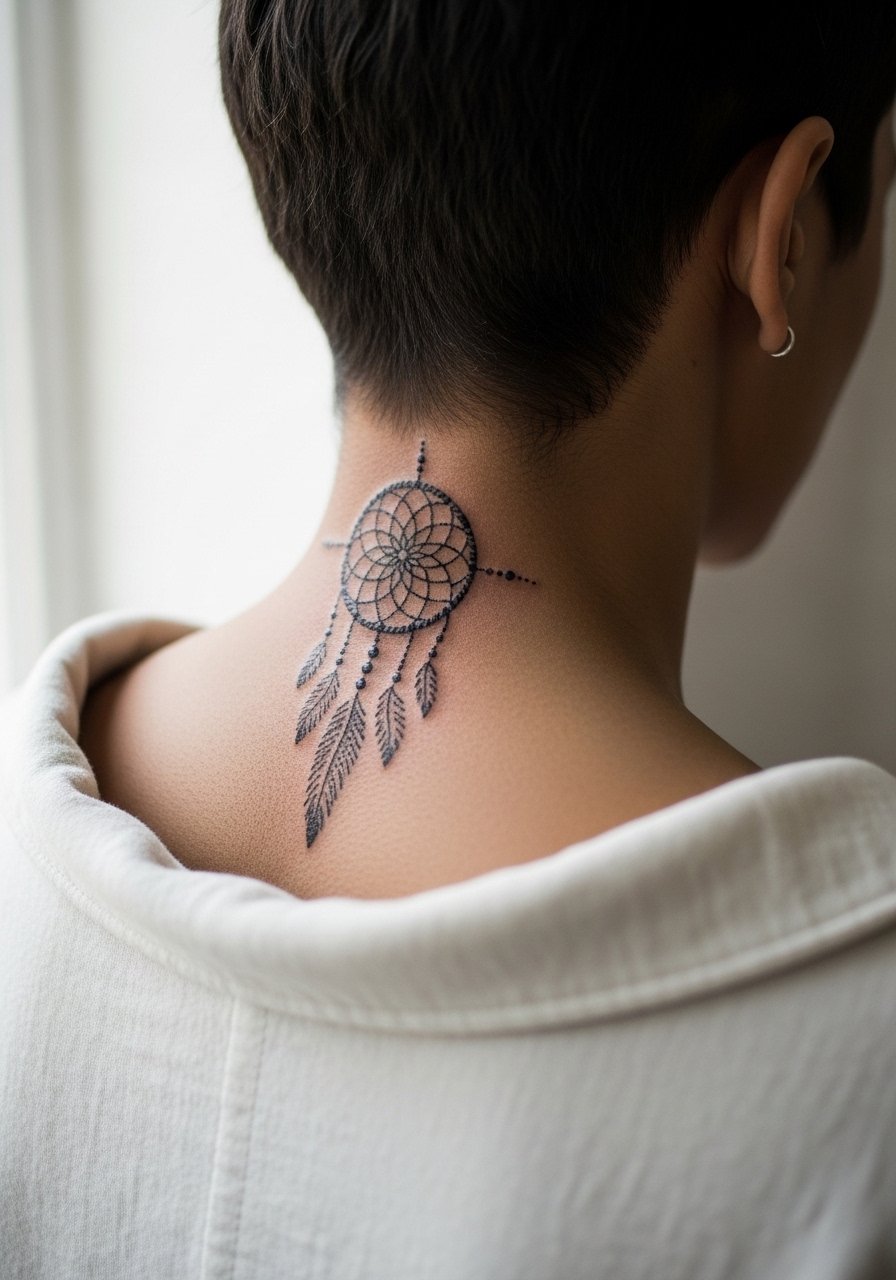
Neck placements are visible and age in unique ways because of sun exposure. Ask for bolder outer dots and request healed photos on similar skin tones. A mistake is treating the nape like a low-visibility spot and asking for hairline fine detail that will vanish. Sessions are quick but expect touch-ups within two to three years. Consider haircuts or collars that protect the area from constant sun.
22. Single-Line Hoop with Stippled Interior on Inner Bicep
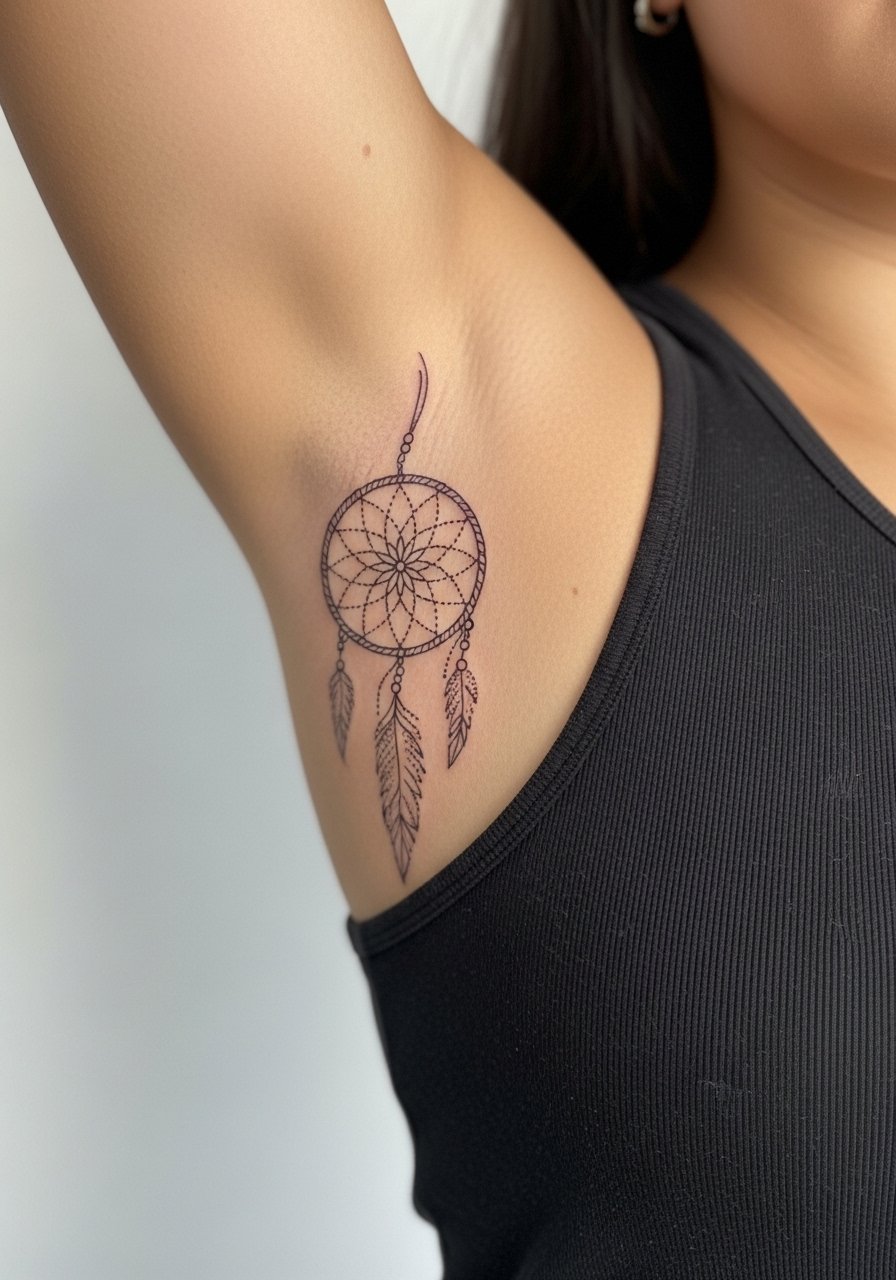
The inner bicep hides well and tolerates stipple shading. Ask your artist to keep the outer hoop clean and the interior stipple airy to prevent a heavy block on healing. Common error is packing interior dots too densely which turns into a smudge after a year. Pain is moderate and sessions can be split. For comfort, wear a tank top so the artist can access the area cleanly.
23. Ringed Dreamcatcher on Finger Proximal Phalanx
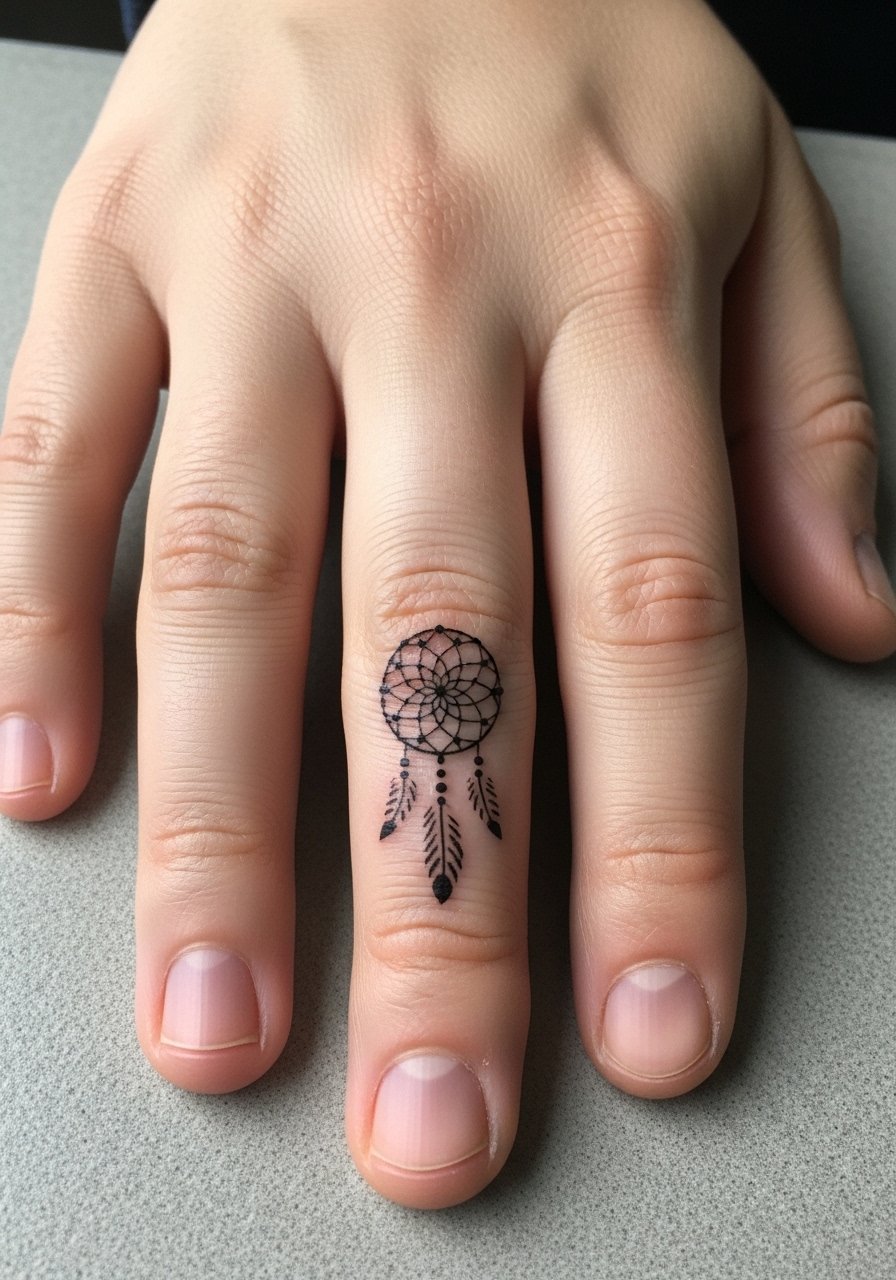
Finger tattoos are high-maintenance. Expect faster fading and touch-ups because the skin regenerates quickly there. If you want a finger hoop, ask for bold outer rings and accept the likelihood of yearly touch-ups. A common mistake is asking for script-level micro dots on the finger. Sessions are quick but the cost of upkeep is higher. Keep in mind daily hand washes and friction will affect longevity.
24. Asymmetric Dreamcatcher with Geometric Trails on Calf
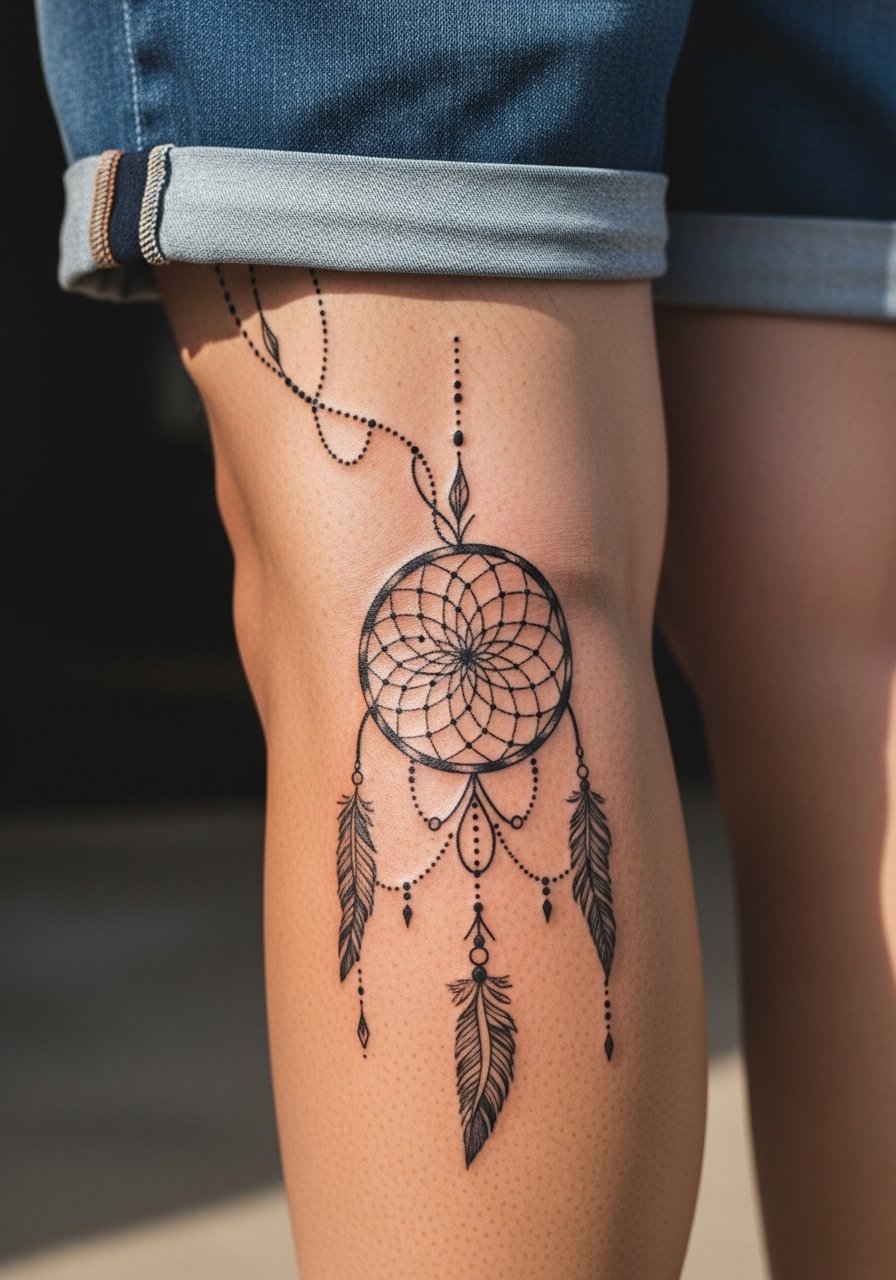
An asymmetric hoop that trails into geometric lines plays well on the calf where legs move in a predictable way. Tell the artist you want one dominant side to maintain balance with muscle shape. Avoid mirroring both sides which can look off when you stand. Sessions are moderate length and touch-ups are occasional. For show-off outfits, pair with shorts or midi skirts.
25. Scar-Concealing Dotwork Dreamcatcher Weave on Hip
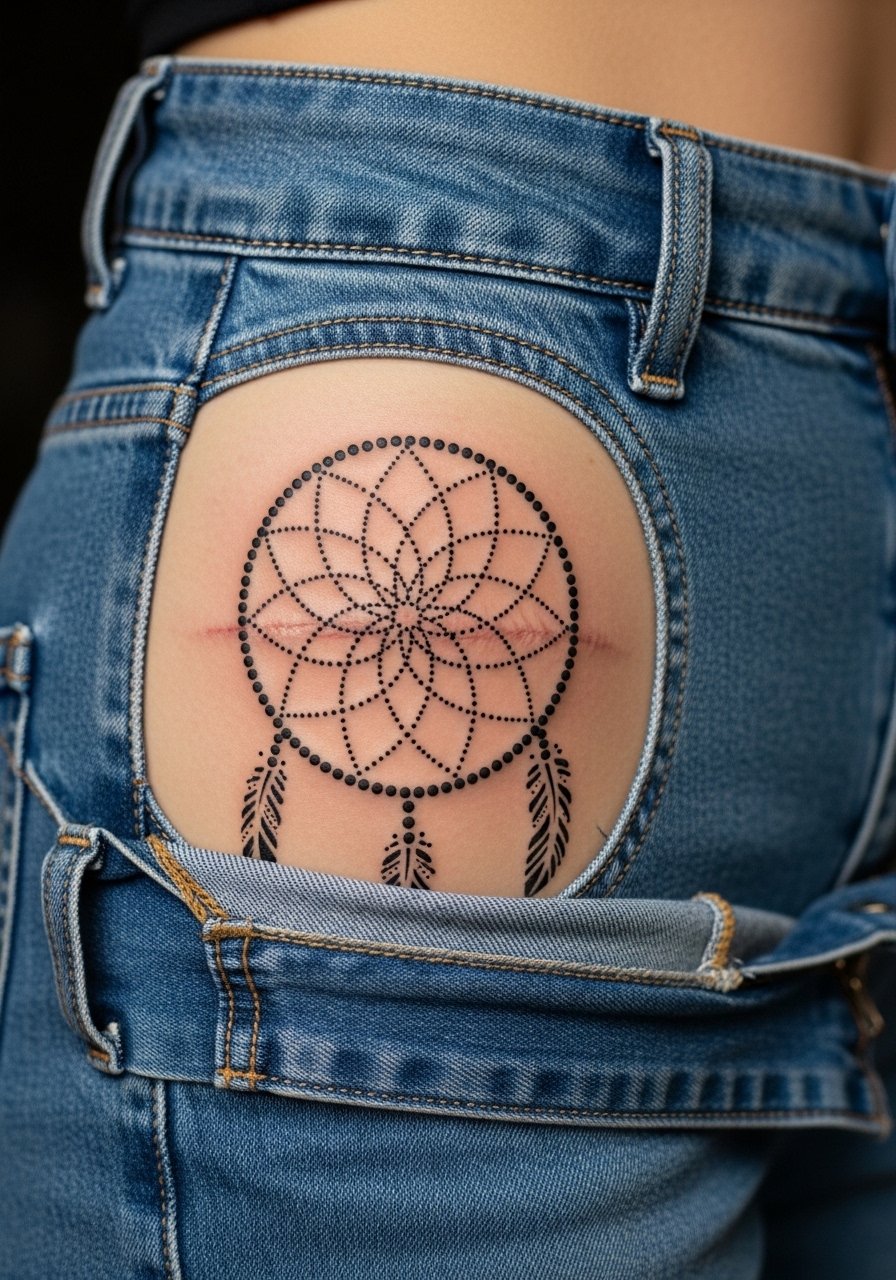
Using a dreamcatcher to disguise scars can be effective if the artist plans the weave to distract rather than cover. Tell them about the scar texture and ask for slight increases in dot contrast near scar edges. One misstep is trying to mask a raised keloid with fine dots rather than a bolder pattern. Healing may require longer sessions and a careful test patch. For session wear, bring high-waisted bottoms you can shift.
26. Minimal Hoop with Single Feather Drop Behind the Ear
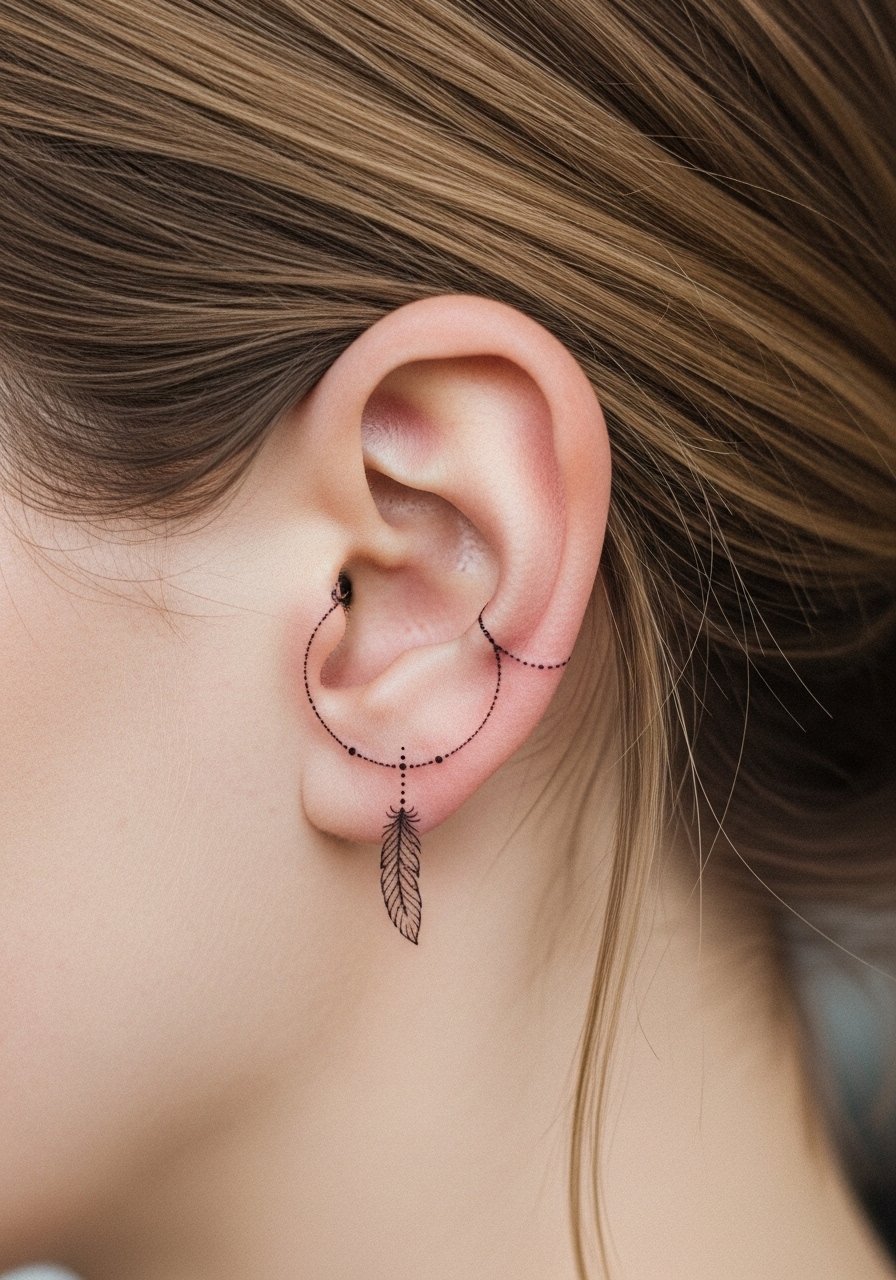
A tiny feather drop behind the ear is subtle and often chosen for private meaning. Ask for a proof stencil and a slightly larger feather quill dot to preserve shape after healing. Mistakes happen when clients request hair-fine quills that dissolve within months. Sessions are brief and pain is low. This placement looks great with short hair or pulled-back styles.
27. Healed-First Mockup Dreamcatcher for Darker Skin Tones
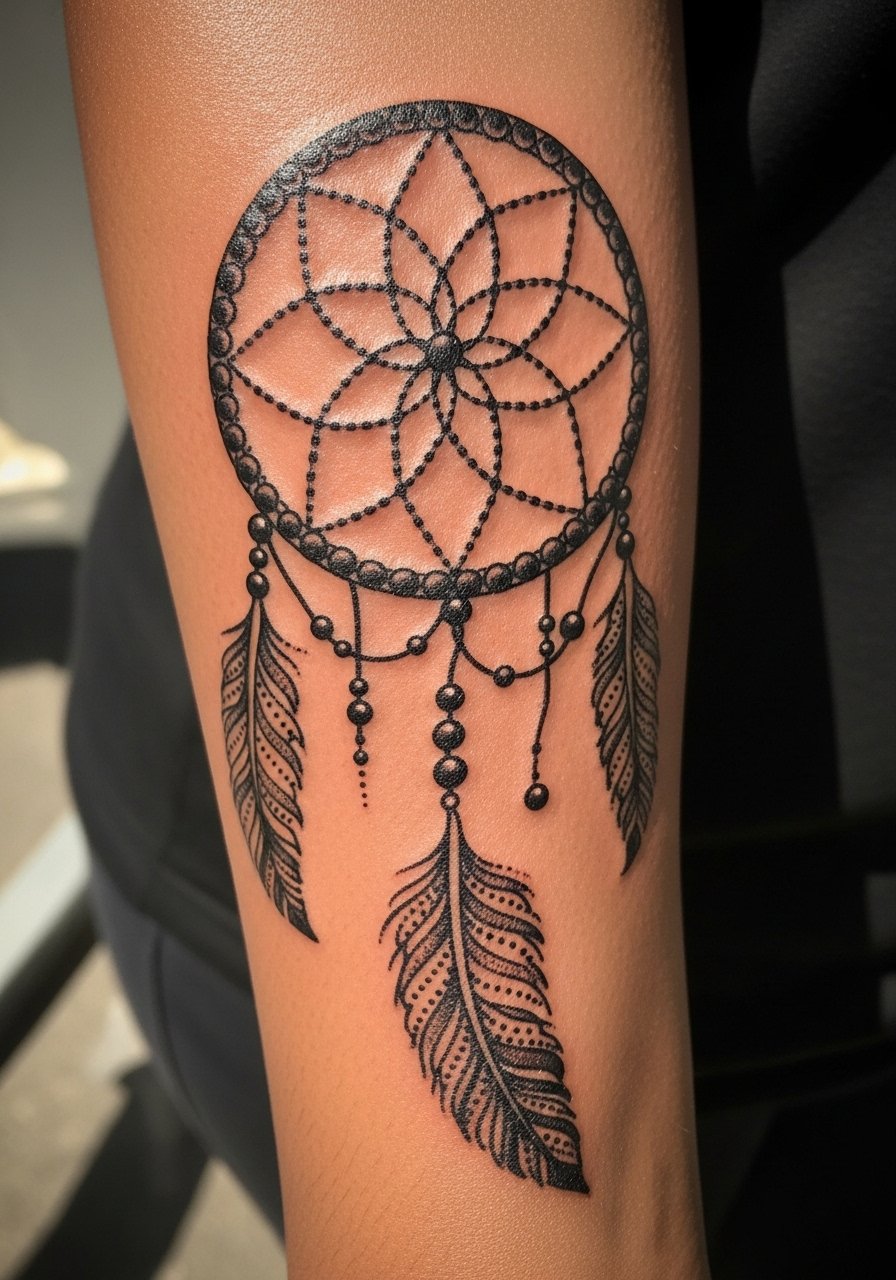
Dark and deeper tones require denser dot packing and slightly larger outer dots to keep contrast over time. I've seen collarbone and forearm pieces pop after the artist intentionally increased dot size and spacing strategy. When you consult, ask to see healed photos on similar skin tones and request a plan for touch-up timelines. A common mistake is bringing only pale-skin references which misleads placement decisions. Expect one to two sessions and bring up the density question early.
Frequently Asked Questions
Q: Do fine dotwork dreamcatchers fade faster on darker skin tones?
A: They can if the dot size and density are too small. From what I've seen, artists who adjust dot packing and slightly enlarge outer dots get much better longevity on medium and deep tones. Ask to see healed examples on similar skin before booking.
Q: What's the best placement for a dotwork dreamcatcher if I worry about body changes like weight gain?
A: Outer forearm and calf tolerate size shifts better than the thigh crease or hip fold. If you train legs or expect changes, size up and avoid placing thin feather tips across stretch zones.
Q: Should I use Saniderm or dry heal for dotwork pieces?
A: Artists are split. One camp prefers protective film for the first few days to reduce contamination. The other camp favors dry healing early on for blackwork crispness. It depends on your studio's workflow and how your skin responds, so ask the artist which method they recommend and why.
Q: Are numbing creams okay for long dotwork sessions on sensitive areas like ribs?
A: There is debate. Some clients find topical numbing cream essential for multi-hour stippling. Other artists worry it interferes with feedback during work. If pain is a serious concern, mention numbing in the consultation and follow the artist's protocol.
Q: How often should I expect touch-ups for micro dotwork on wrist or fingers?
A: Plan on a touch-up within 12 to 24 months for ultra-fine wrist or finger work. Fingers especially regenerate rapidly, so yearly touch-ups are common. Bigger dots and slightly larger spacing reduce touch-up frequency.
Q: Where can I find dotwork dreamcatcher portfolios and artists without naming people directly?
A: Search hashtags like #DotworkDreamcatcher and #DotworkTattoo on social platforms, and filter for "healed" examples. Use local directories and apps that let you search "blackwork ornamental" and check guest calendars for visiting specialists.
Q: What should I wear to my appointment for a shoulder or collarbone dreamcatcher session?
A: Wear something that gives clean access without overexposure. A loose button-down shirt or a wide-neck top you can pull aside is ideal for shoulder and collarbone work.
