
Fine line sun and moon matching tattoos are everywhere online, but the pieces that still read clean after five years are not always the ones getting the most likes today. The trick is matching realistic detail with the right placement, spacing, and saturation so the halves stay distinct as skin settles. Below are 21 realistic pairings, with what to ask for in consults and how they age.
1. Micro-Realistic Sun on Inner Forearm, Moon on Opposite Inner Wrist
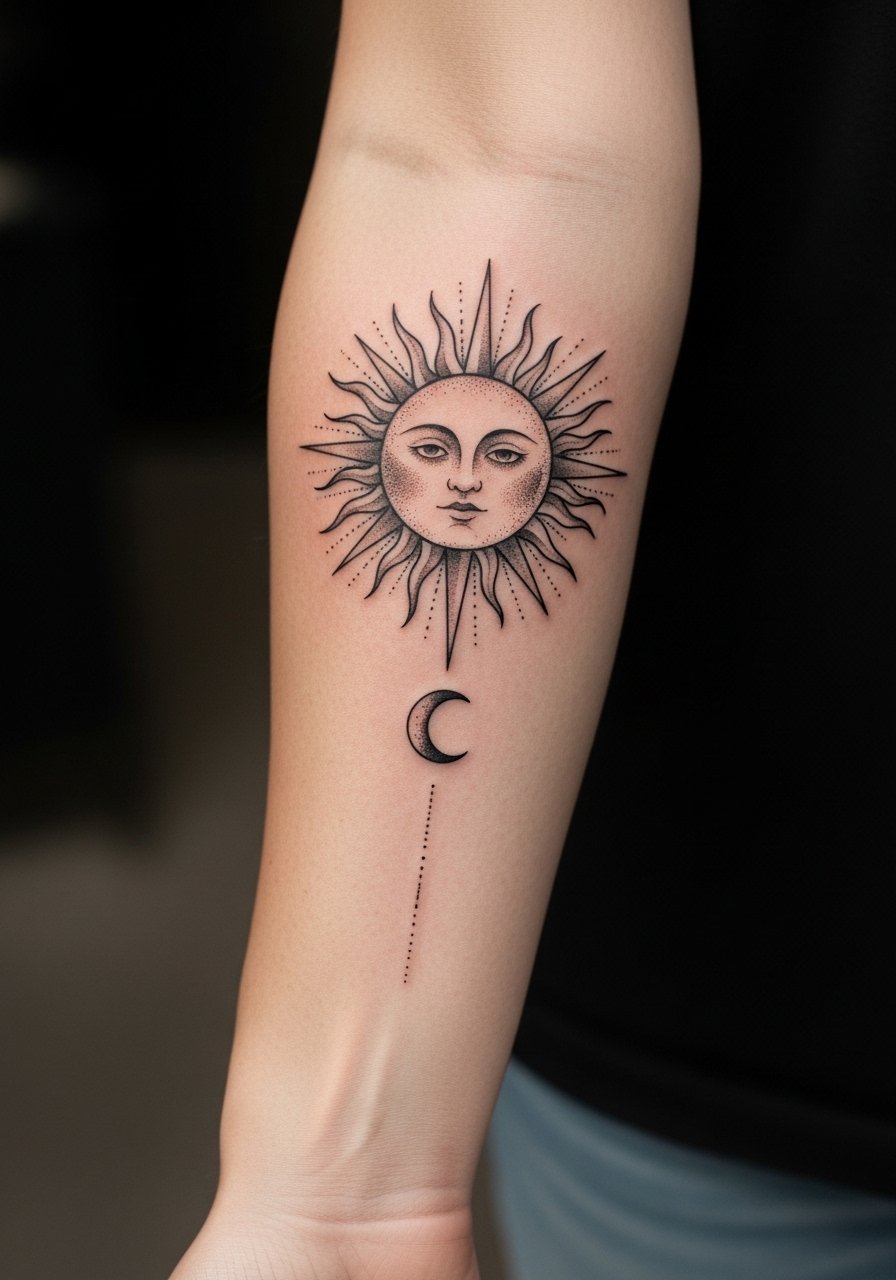
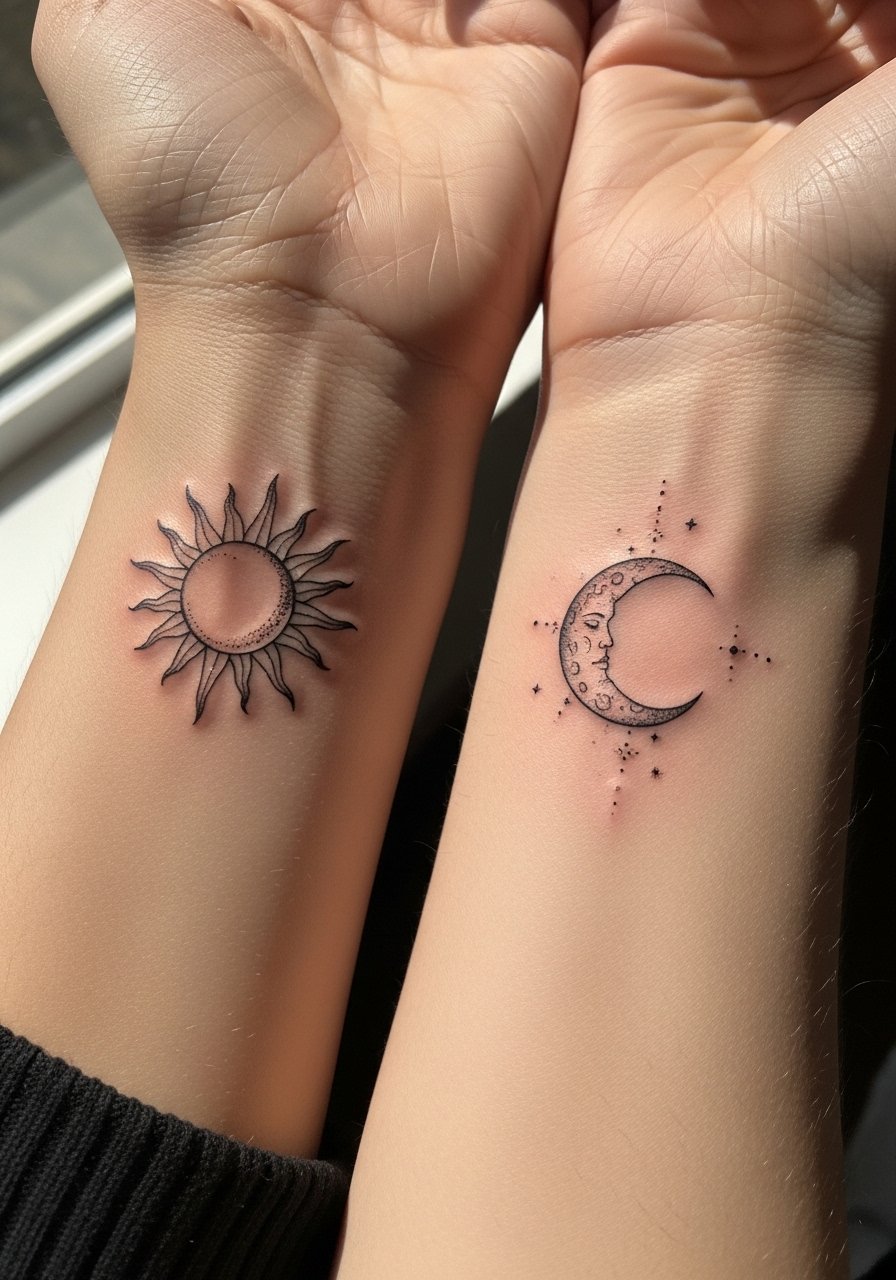
I've seen this layout on friends and in portfolios at five shops across Brooklyn, and it reads as a daily wearable when scaled right. Fair warning, the inner wrist has more friction and needs slightly bolder linework than the forearm piece. In consults, ask for slightly increased spacing around tiny rays so they do not merge with wrist motion. Expect a two-hour session for both pieces, moderate pain on the wrist. For showing it off, rolled sleeves and a loose button-down shirt make the forearm read like jewelry without covering the wrist work. Image below shows the forearm sun detail at six months healed, when light saturation keeps shine without clouding.

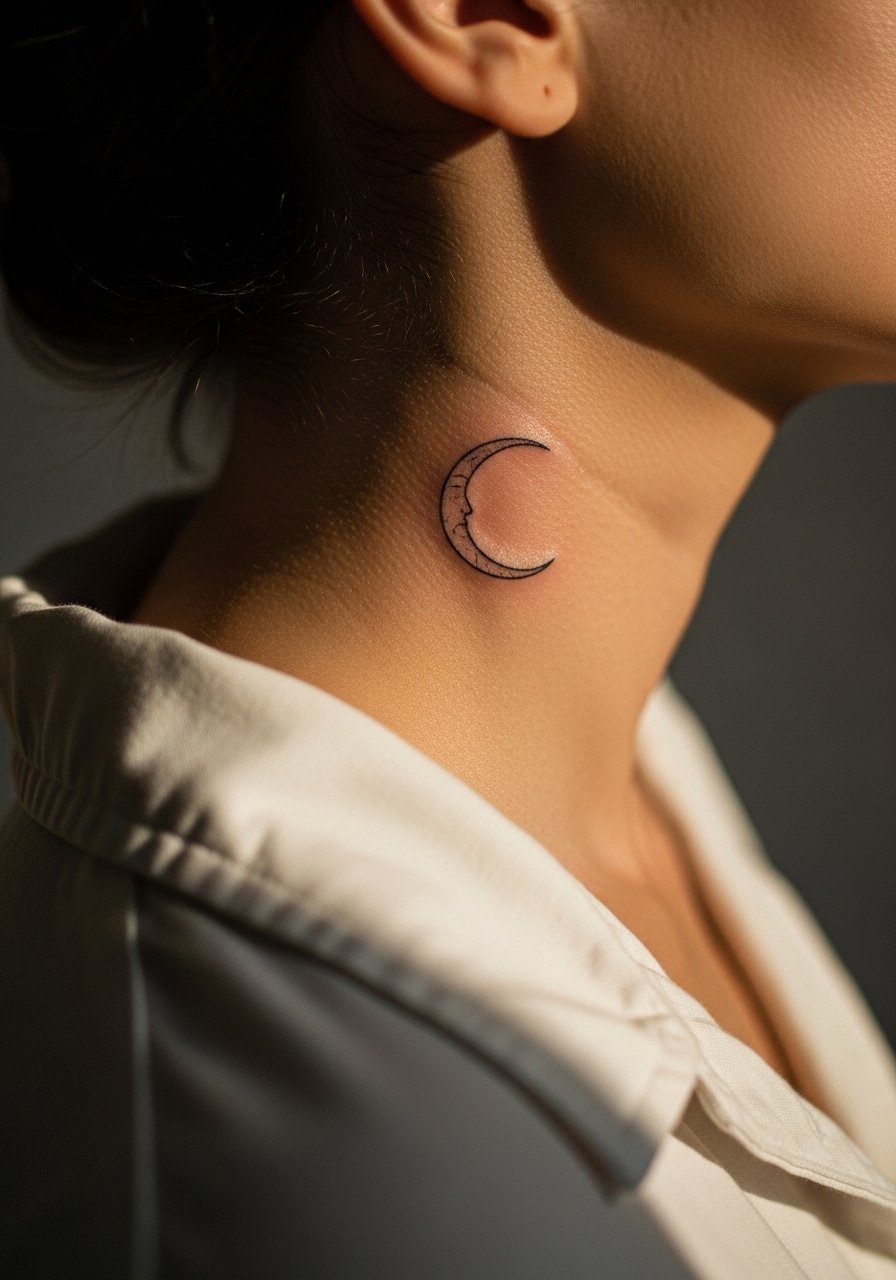
2. Fine-Detail Crescent Moon Nape, Matching Sun on Back of Neck
This placement reads intimate and symmetrical when the sun sits slightly higher on the back of the neck. Pain is mild but expect awkward angles during the session because the area is tight. Ask your artist for shallow needle depth near the hairline to avoid blowout. There is a real debate about neck work. One camp says neck skin moves and blurs fine details quickly. The other camp argues that with correct spacing and slightly heavier linework it can last well. If you plan to hide it for work, wear a wide-neck shirt pulled slightly aside during the session so the artist has clear access and you avoid tugging at the healing skin.
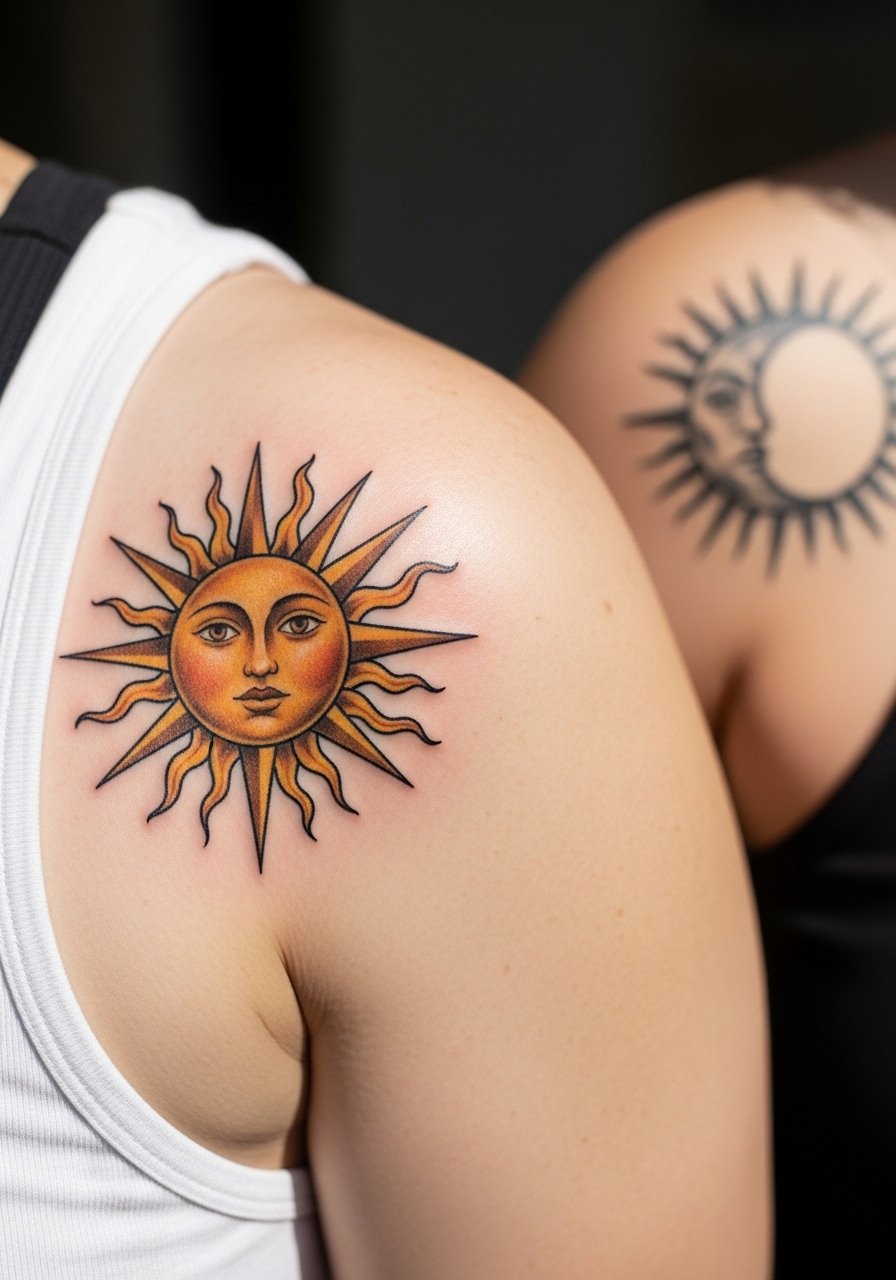
3. Realistic Sun Cap, Moon on Opposite Shoulder Blade
There is a reason shoulder caps are popular. The skin gives enough flat surface for shading and tiny stipple work without extreme distortion. If you want both pieces to read from across a room, ask for stronger saturation in the sun center and softer stipple shading for the moon. Expect a three-hour session with moderate pain at the blade. For the session, wear a tank top so the artist can shift fabric without dragging. After a year the shoulder sun will keep its depth while the moon’s dot work may need a touch-up depending on sun exposure.
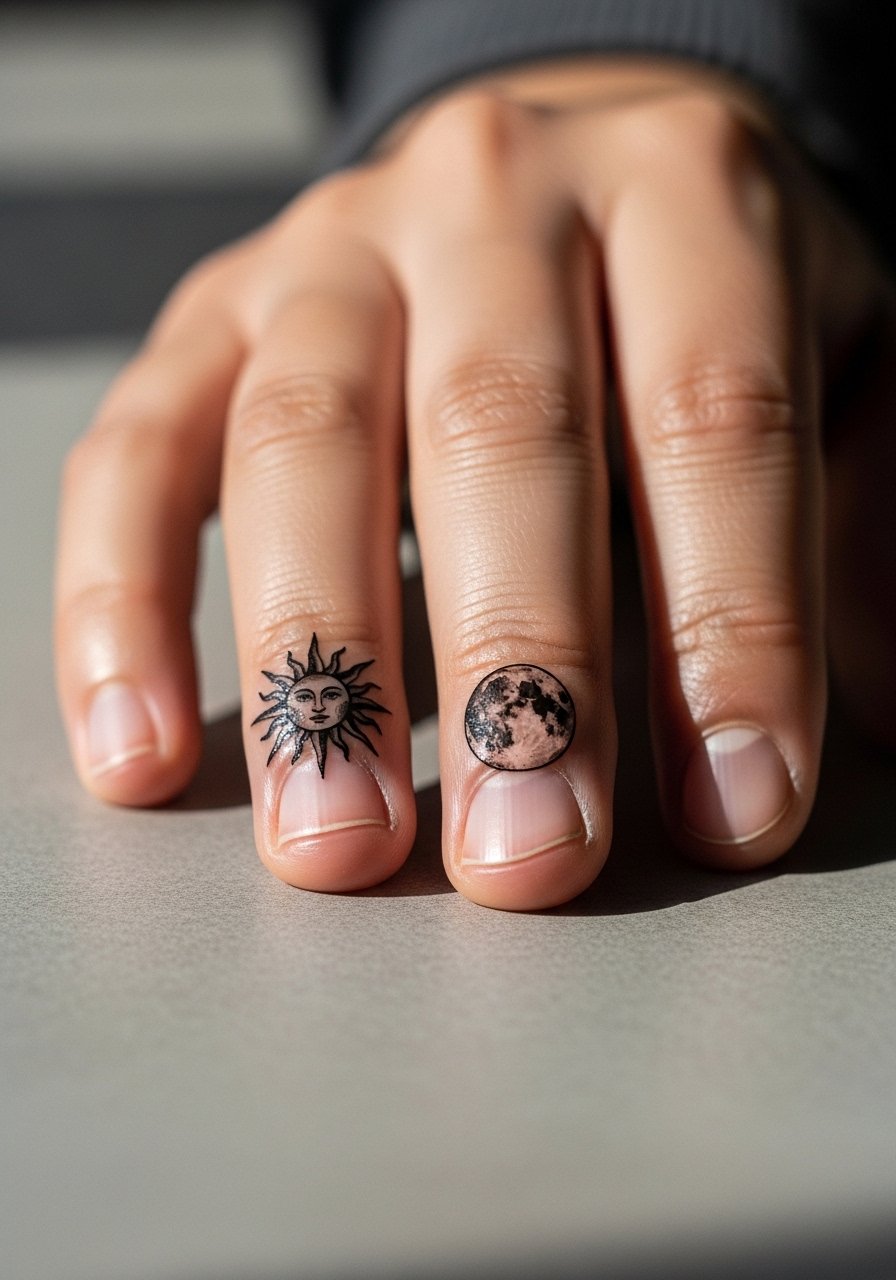
4. Tiny Sun on Finger, Matching Moon on Thumb Pad
Finger work reads crisp early, but the skin there is thin and sheds more, so expect fading faster than arm pieces. The biggest mistake is asking for too much fine detail in a tiny space. Instead, go for simplified rays and a small, bold crescent for contrast. Sessions are short, often under an hour per digit, but touch-ups are common around year two. Styling-wise, pair these with dainty stackable rings rather than chunky bands so the jewelry frames the tattoos without rubbing them. Fingers see a lot of hand washing, so plan for a touch-up timeline in consults.

5. Sternum Sun and Opposite Collar Moon
Sternum work holds detail beautifully when done with correct spacing and stopping just above the sternum line. Pain is higher, and sessions often come in halves because of sensitivity. The common mistake is trying to cram micro realism into too small a sternum area. Ask for a slightly larger scale and soft shading rather than packed tiny lines. For pro considerations, chest pieces still affect hiring in some industries so think about visibility and clothing choices. During consults discuss touch-up expectations at year three, because chest skin can shift with body changes.
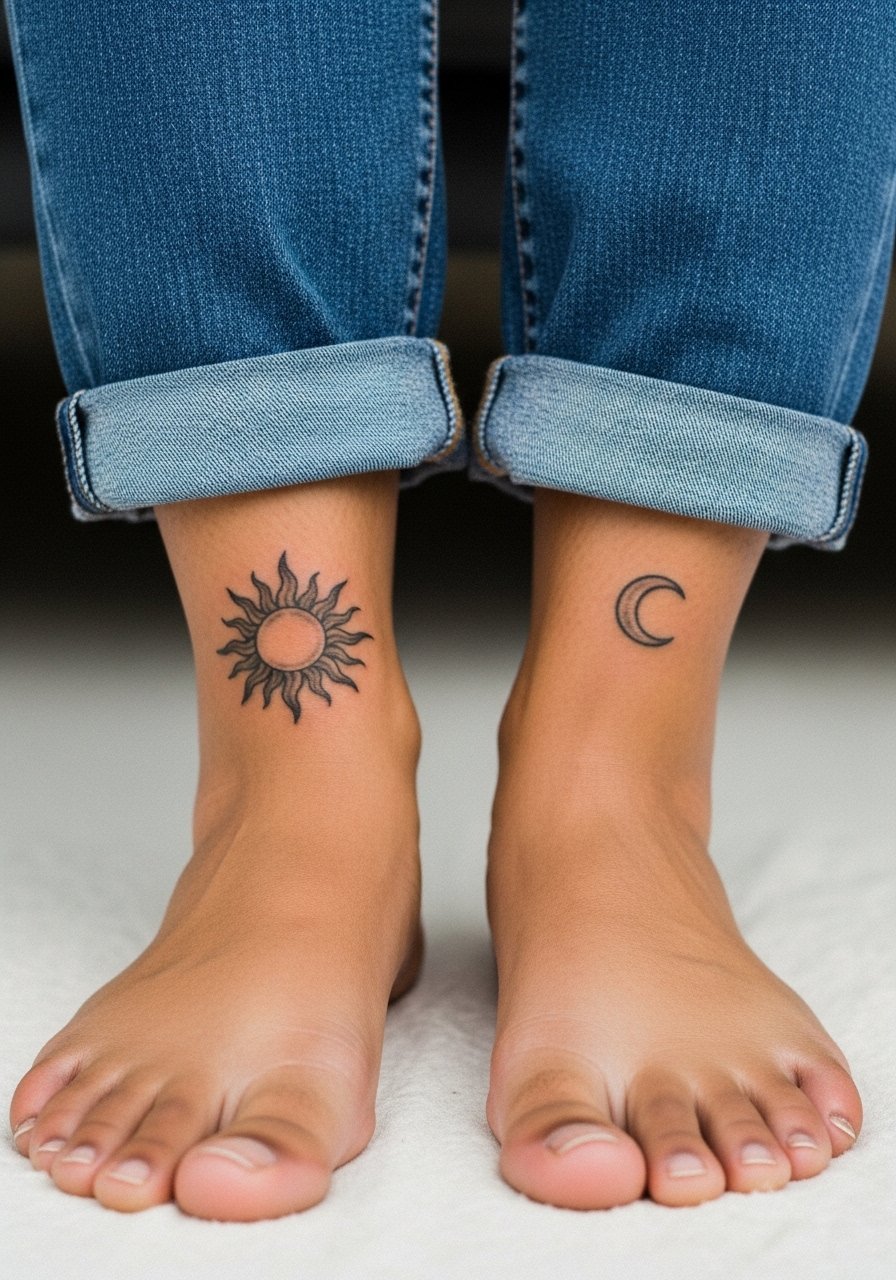
6. Quarter-Sun at Inner Ankle, Crescent Moon on Opposite Ankle
Ankle pieces are low on pain but high on friction from shoes. The ankle tendons create movement that can blur thin rays if they are placed across the joint. Ask for slightly thicker rays or a touch of saturation in the center to keep definition. Session time is often under two hours. For showing and to protect the area while it heals, wear jeans rolled up or a pair of sandals so the tattoo avoids shoe rub. Expect a light touch-up between year one and year three if you walk a lot or wear constricting footwear.
Pre-Session Essentials
The ankle and wrist pieces above heal differently from larger back and chest work, so a few targeted items smooth the session and the first week.
-
Stencil transfer paper kit. Lets you preview composition on the skin before the needle, which is helpful for matching tiny sun and moon placements.
-
Topical numbing cream. Applied as recommended eases discomfort for ankle and sternum sessions without changing the ink work.
-
Thin protective film roll. Keeps wrist and finger pieces clean during the first week of frequent washing and typing.
-
Fragrance-free gentle body wash. Cleanses healing skin around collarbone and chest work without stripping saturation.
-
Aquaphor healing ointment. Thin application in the early days locks in moisture for fine detail without clogging the needle channels.
7. Symmetrical Sun and Moon Along the Upper Back Spine Line
A matched pair that runs parallel to the spine reads architectural when the sun sits higher and the moon lower. The back gives room for heavier saturation in the sun’s core and soft whip shading for the moon. Sessions can be longer because of the scale, expect three to four hours across a sitting. If you want to show the upper back for events, an open-back midi dress frames the work without overexposing it. Blowout risk is low here compared with ribs, but talk touch-up timing at consult because shoulders get more sun exposure.

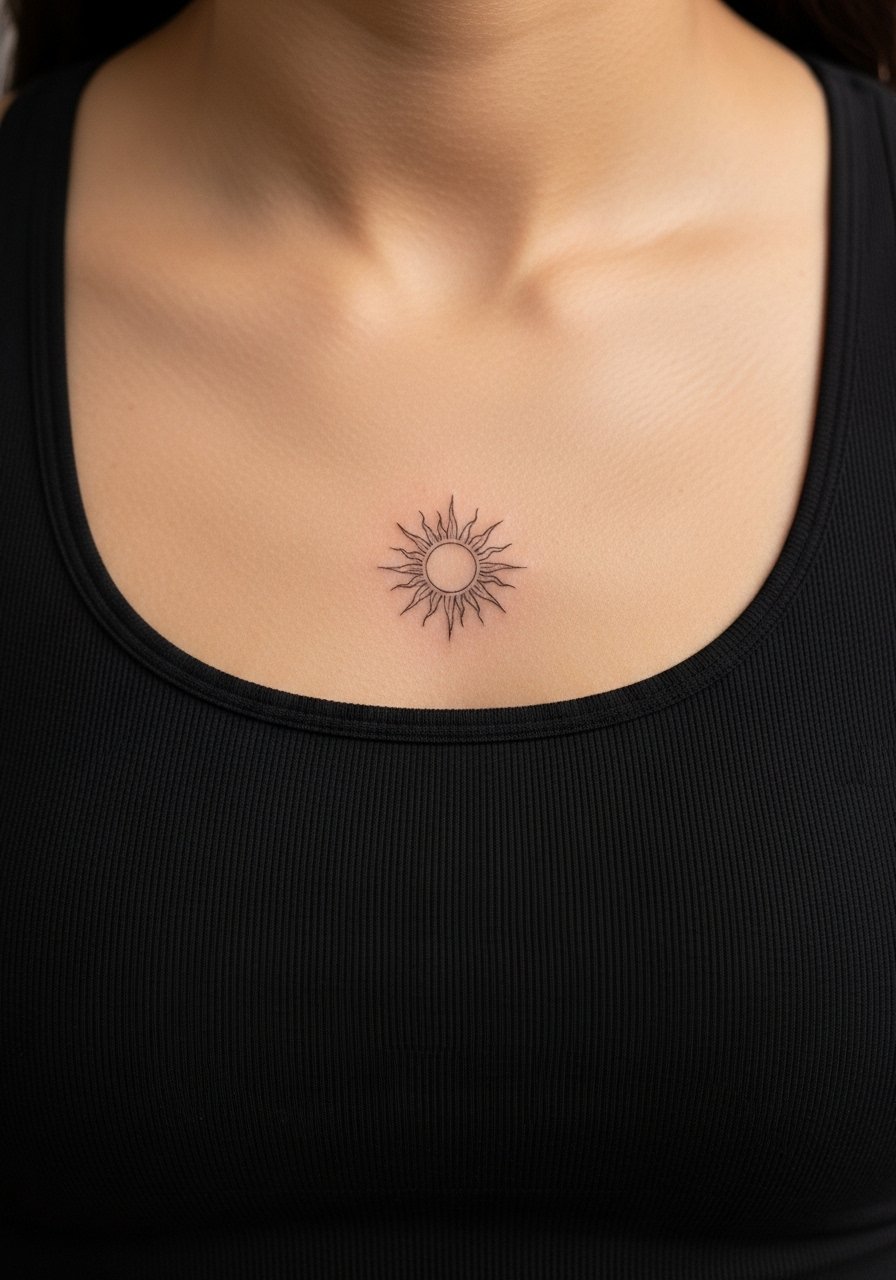
8. Micro Sun Above the Collarbone, Moon Mirrored on the Opposite Collarbone
Collarbone pieces need breathing room. The common error is packing too much tiny detail across the collar, which the bone highlights and can accentuate as it ages. Ask for gentle saturation and a thin halo effect around the sun rather than dense texture. Sessions are short and pain varies with proximity to bone. For sessions wear a wide-neck shirt you can pull slightly aside so the artist has clean access. When showing off the piece later, a thin chain sits just above the design without competing with the linework.

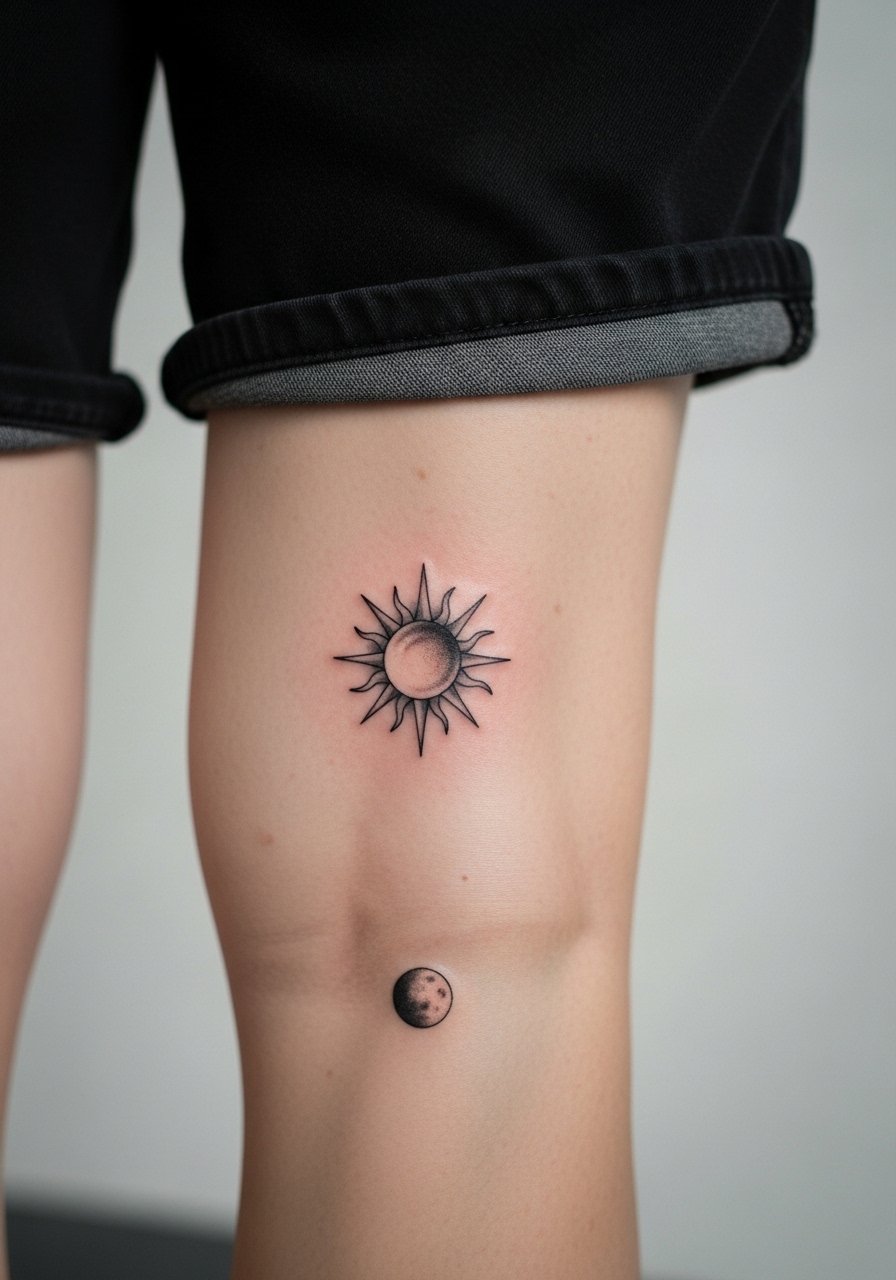
9. Thigh Sun Portrait, Crescent Moon on High Hip
Thigh skin takes saturation well, which is why realistic portraits work there. This pairing fits a larger sun with deep saturation and a softer moon near the hip. Sessions for the full sun portrait usually run longer and may be split into two sittings. The hip can be sensitive when sitting or wearing tight jeans so plan session-day clothing accordingly. For session wear, bring high-waisted bottoms that can be shifted to expose only the area needed. Expect slower fading on the thigh and touch-ups usually after three to five years depending on sun exposure and friction.

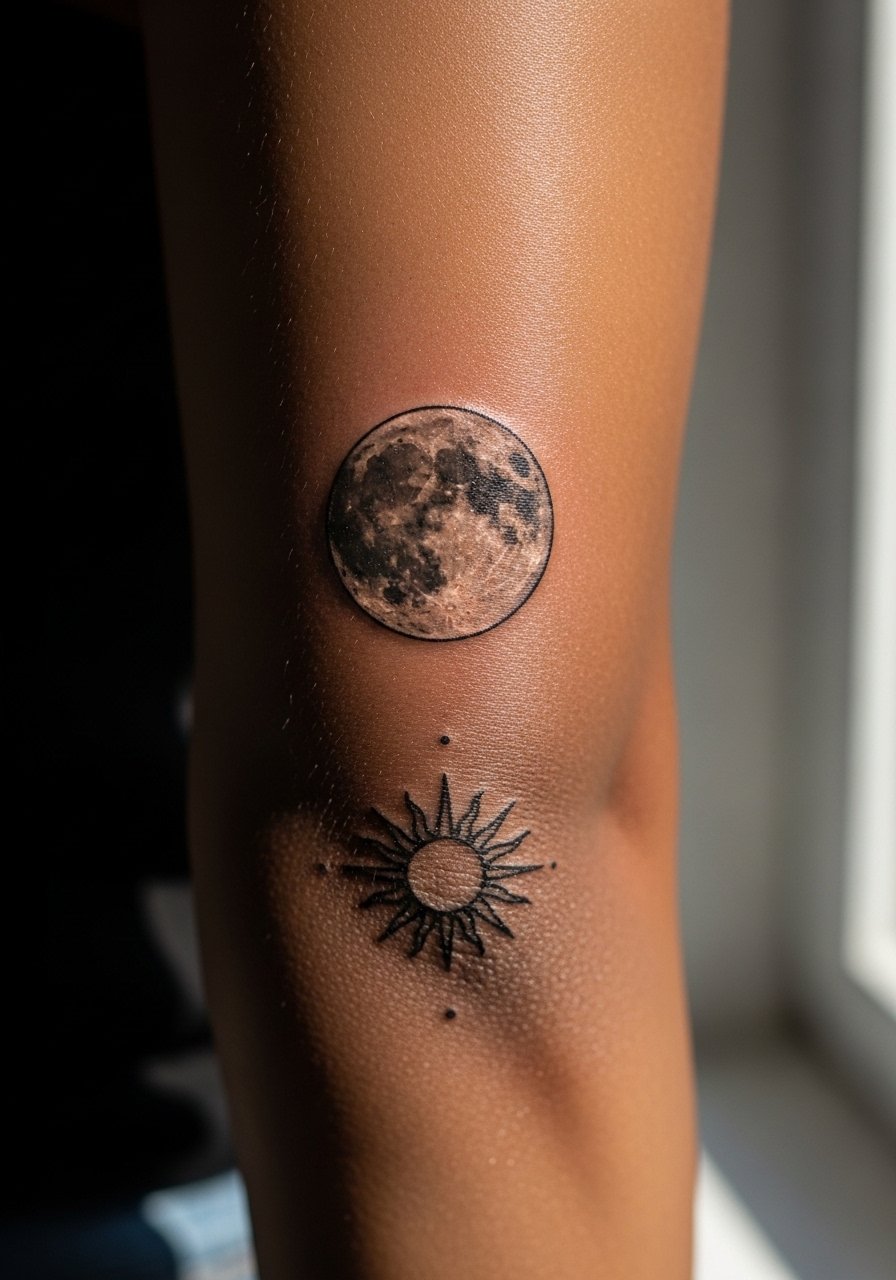
10. Bicep Sun with Inner-Bicep Moon
This pairing balances an outer bicep sun with a more private inner-bicep moon. The inner bicep skin is softer and moves a lot, so fine line moons there can blur. One good option is asking for slightly heavier linework on the inner side and stipple shading for the sun’s corona. Sessions are moderate in length and feel like a steady vibration during shading. For the appointment wear a loose button-down shirt you can pull aside so the artist can work without fabric catching the needle. Expect the inner bicep to need touch-up earlier than the outer sun.

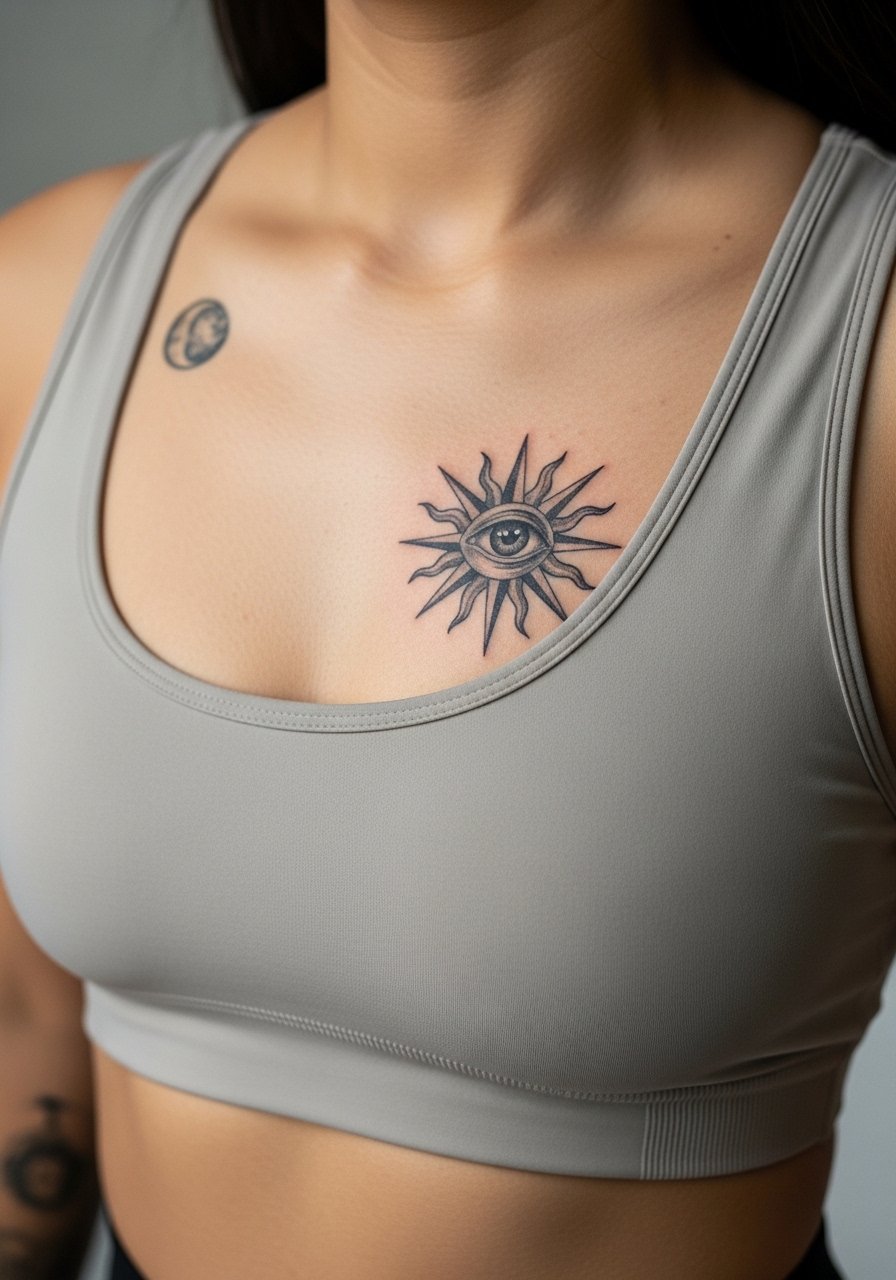
11. Sun Eye on the Sternum, Small Moon Above the Clavicle
Centering a sun-eye on the sternum with a distant moon above the clavicle creates a vertical narrative. This placement is higher on the pain scale because of the sternum sensitivity. The mistake is overly tight lettering or tiny iris details that blur into the chest texture. Bring references that show the exact line weight you want. Sessions may be broken into two to manage endurance. Also be explicit about how you sleep for the week after the session because chest pressure affects healing.
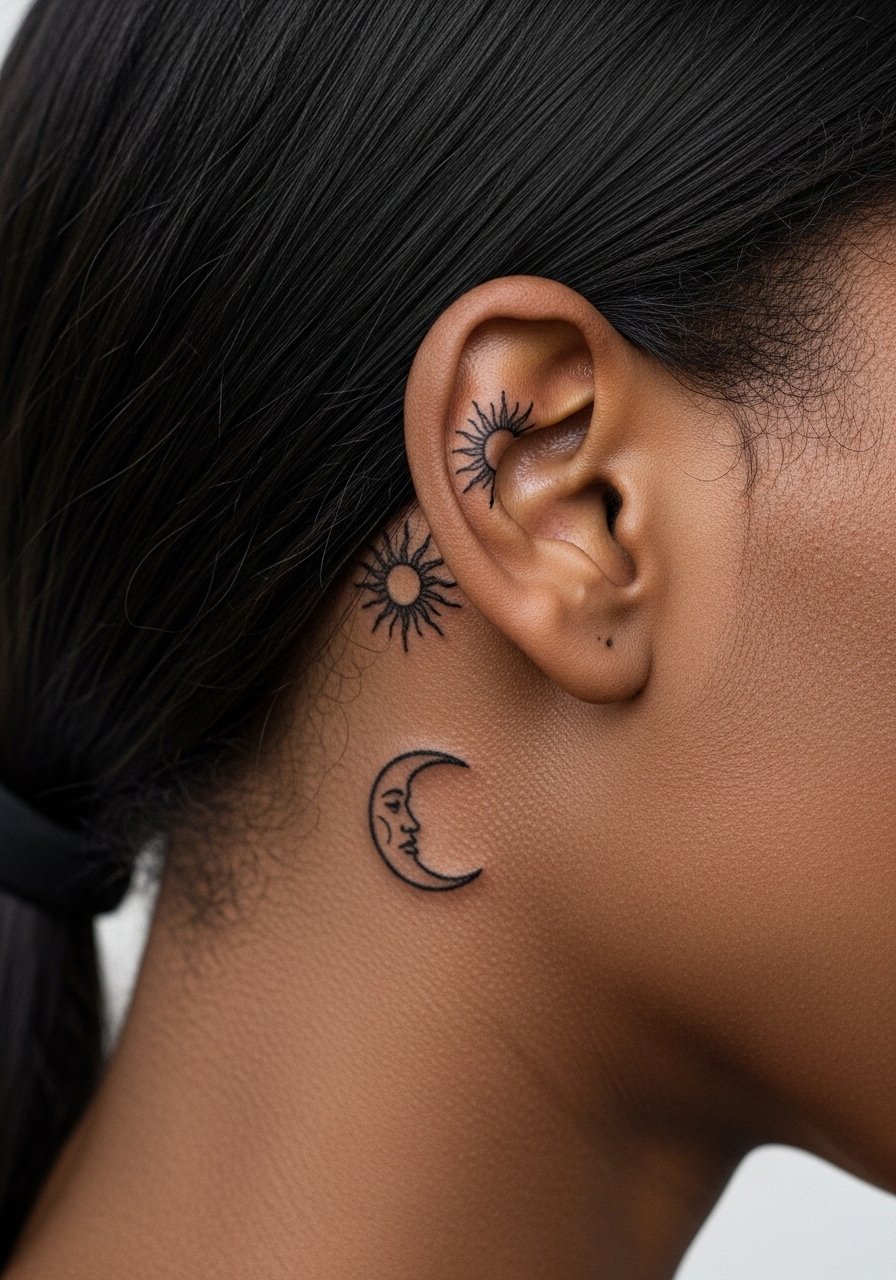
12. Behind-Ear Mini Sun, Moon on the Side Neck
Tiny realism behind the ear is subtle and intimate. The session is quick but the area is delicate and requires an artist comfortable with tight curves. There is a split in opinion in the community about behind-ear detail. One group worries about constant hair friction and fading. The other group says placement just below the hairline on the neck keeps the piece protected. If you choose this, ask to place the sun on the skin just behind the ear, below the hairline on the neck. For professional searches use clinic directories and hashtag discovery to find someone comfortable with small-area realism.
13. Forearm Sun Half-Sleeve Accent, Small Moon at the Wrist
A forearm half-sleeve sun with a wrist moon works when the main piece uses bold saturation for the sun center and softer stipple to suggest atmosphere. The forearm takes ink predictably but the wrist needs a slight design break so the two pieces do not visually merge. In consults request clear negative space between the sleeve edge and wrist moon. Session length is longer, often split into two. For daily wear and to show the work pair with a minimalist watch or stacked thin bracelets that do not cover the wrist moon. Expect touch-up around the sleeve edge after a few years depending on sun exposure.
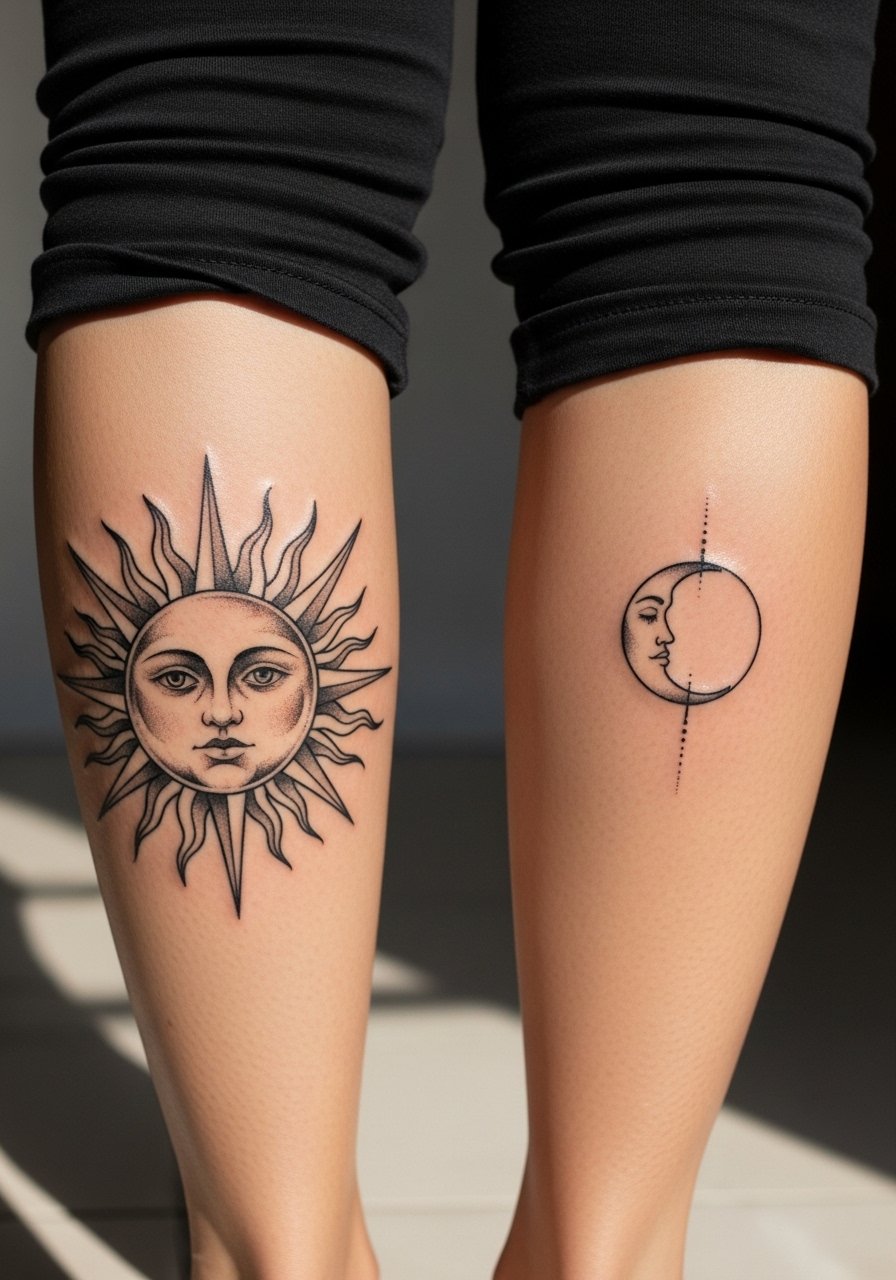
14. Calf Sun Portrait, Moon on Opposite Calf Calotte
Calves are forgiving for saturation and hold texture well. A detailed sun portrait here can keep crisp contrast for years. The common error is trying to place tiny rays across the back of the knee, which moves and stretches. Keep the composition above the knee line and use whip shading for softer edges. For showing it off wear cropped trousers or sandals, but during the session consider loose drawstring pants you can roll up without pressure. Expect minimal blowout risk and good longevity if you avoid constant abrasion from tight boots.
15. Ribcage Matching Sun and Moon Pair
Ribcage realism can look incredible fresh and then soften in tricky ways. Artists split into two camps on ribs. One camp says the skin stretch and movement blur fine detail within two years. The other camp argues that with correct needle depth, spacing, and slightly bolder linework it settles fine. The safe ask is spacing between dense areas and shallow stipple instead of packed micro-lines. Pain is high and sessions usually come in short increments. Touch-ups on ribs are common at year two to three. If you want this placement, probe your artist on rib experience and ask for healed examples at multiple time points.

16. Shoulder Blade Sun with Moon Near the Scapula
Shoulder blade realism ages well because the canvas moves less than mid-torso areas. If you favor detailed texture in the sun’s face, ask for soft stipple shading around the edges so the contrast fades gracefully. Sessions are comfortable and often under three hours. For the appointment wear a loose button-down shirt or a tank you can shift without rubbing the ink. Expect the scapula moon to stay readable for years with one touch-up as needed around year four.

17. Match Set: Tiny Sun on Index Finger, Tiny Moon on Ring Finger
Finger matching sets read like a coordinated phrase when the scale is consistent. Pain is quick but repeated hand use speeds fading. One practical tip is to avoid placing rays across knuckles where movement will break the line. Instead, use small bold crescents and micro suns with negative space around them. Sessions are short, but clients should expect at least one touch-up within two years. For styling pair these with thin stacked bracelets or a dainty chain bracelet that keeps attention on the hand without rubbing the fingers directly.
18. Popliteal Sun Accent with Moon Behind the Knee
The behind-knee area can hold surprising texture but it moves constantly when walking, so fine dot work will soften. For a popliteal sun choose larger shadows and avoid ultra-thin rays crossing flex lines. Sessions are awkward because the leg needs to be bent and supported for comfort. Wear shorts you can shift rather than tight fabrics. Healing can be uneven if you sit for long periods with pressure on the area, so sleep position for the first week matters. Expect touch-up timing around year three if you run or cycle frequently.
19. Elbow Dip Moon with Sun Accent Along the Forearm
The elbow dip is a high-motion zone that eats fine detail. Place the moon in the elbow hollow and the sun just below it on the forearm so the denser rays avoid joint folds. The session feels like more vibration during stipple work and the skin can be bouncy. Ask for more open negative space around the moon to reduce merging. For everyday wear consider short-sleeve tees that stop above the elbow so the forearm sun remains visible without dragging fabric over the joint.
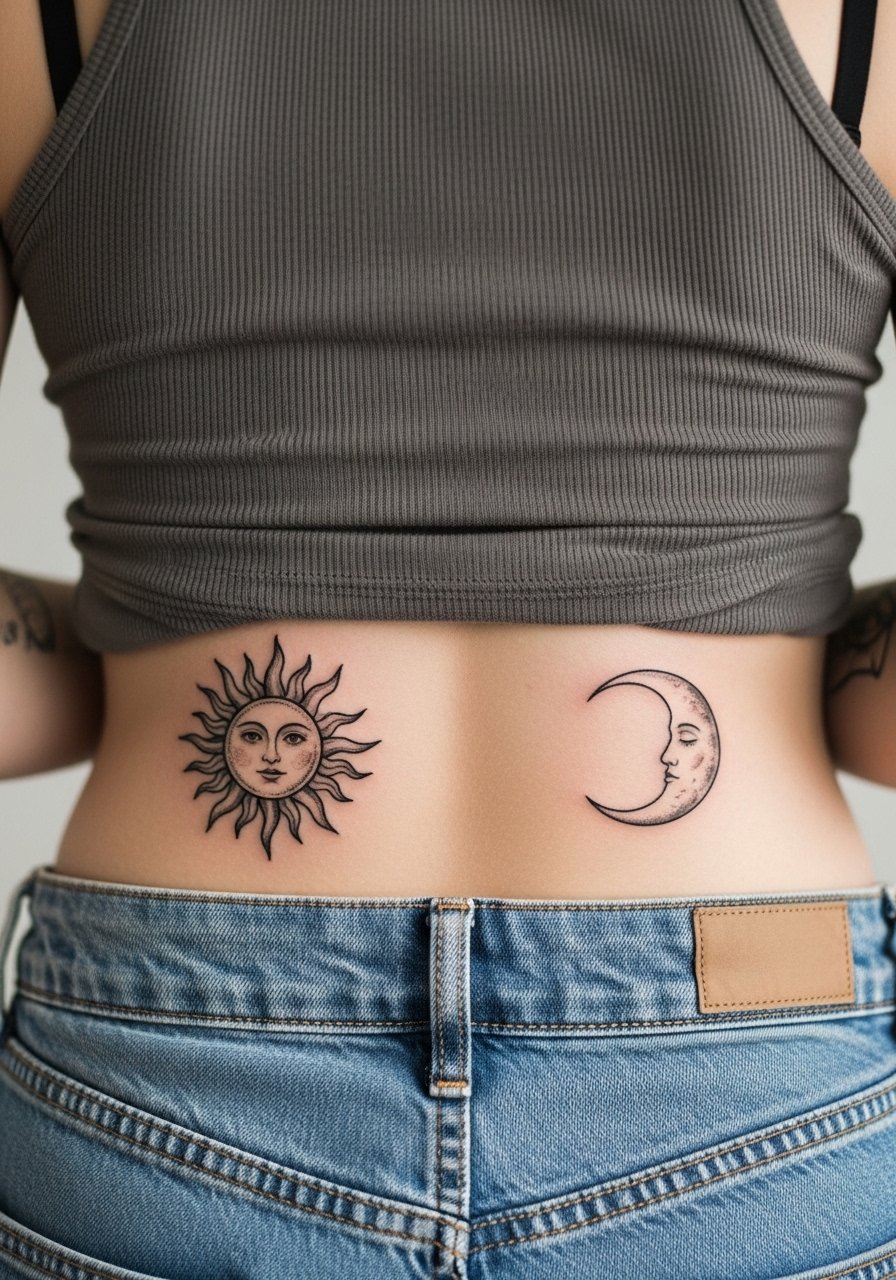
20. Lower Back Sun and Opposite Side Moon
Lower back placements can take saturation well but they require careful framing. The common error is placing delicate rays too near waistband lines where friction and pressure cause blurring. For sessions wear a tank top with high-waisted pants you can lower slightly so the artist accesses only the tattoo zone. To show it off, an open-back top highlights the central sun without overexposing rest of the back. Touch-ups may be needed after significant weight changes or years of belt pressure.
21. Inner Wrist Sun with Opposite Inner Wrist Moon Match
Inner wrists are a classic match because they face each other when hands meet. The area is small and sees frequent washing which accelerates fading. The best approach is slightly bolder inner contours with delicate internal shading so the pieces do not lose definition. Sessions are short and the pain is mild. For showing and to prevent rubbing while healing wear a minimalist watch strap that sits above the piece rather than a wide cuff. Plan on touch-ups between year two and four depending on sun exposure.
Frequently Asked Questions
Q: How do realistic sun and moon pairs age differently on wrists versus ribs?
A: Wrist pieces face daily friction from clothing and washing, so fine detail fades faster and you should expect touch-ups earlier. Ribcage pieces sit under looser clothing and can keep subtle shading longer, but ribs move with breathing and need more spacing in the design. In my experience ask for healed examples from your artist for both placements before booking.
Q: Will micro-realism on fingers hold up if I want crisp rays and tiny facial detail?
A: Fingers are thin skin and constant use speeds fading. Tiny facial detail is risky because the lines merge over time. Ask your artist to simplify faces into bold shadows and leave room around rays. Expect at least one touch-up within two years.
Q: Are there wardrobe tips to make my collarbone and upper-back matching tattoos stand out for events?
A: Yes. A wide-neck top or a low-back dress exposes the area cleanly and frames the work, while thin chains or minimal straps keep attention on the tattoos without competing.
Q: How should I find an artist for realistic sun and moon matching work without naming specific shops?
A: Use discovery pathways like local studio directories, hashtag searches, and convention guest lists to find portfolios that show healed realistic pieces. Also check community forums for healed photos and ask to see session-to-healed progress during consults.
Q: If I want sun and moon realism but plan to hide them for work, which placements balance visibility and concealment best?
A: Inner bicep, upper thigh, and ribcage are good options because they are easy to cover with everyday clothing yet offer enough flat skin for detail. The wrist and fingers are harder to conceal and fade faster.
Q: Should I worry about touch-ups and how soon will they be needed for a realistic sun and moon set?
A: It depends on placement, sun exposure, and your routine. Small visible places like fingers and wrists often need touch-ups at two to three years. Larger areas with good saturation like the calf, thigh, and shoulder can go four to five years or longer before a refresh.
