
Fine line watercolor lilies are everywhere in saved boards right now, but the pieces that still look intentional after years are the ones that plan for movement, skin texture, and sunlight. Think beyond the initial photo and toward how color bleeds, how linework settles, and what clothing will show or hide the bloom. The sections that follow jump straight into designs that balance painterly color with practical choices that help your lily last.
1. Delicate Inner Forearm Lily with Whispered Linework
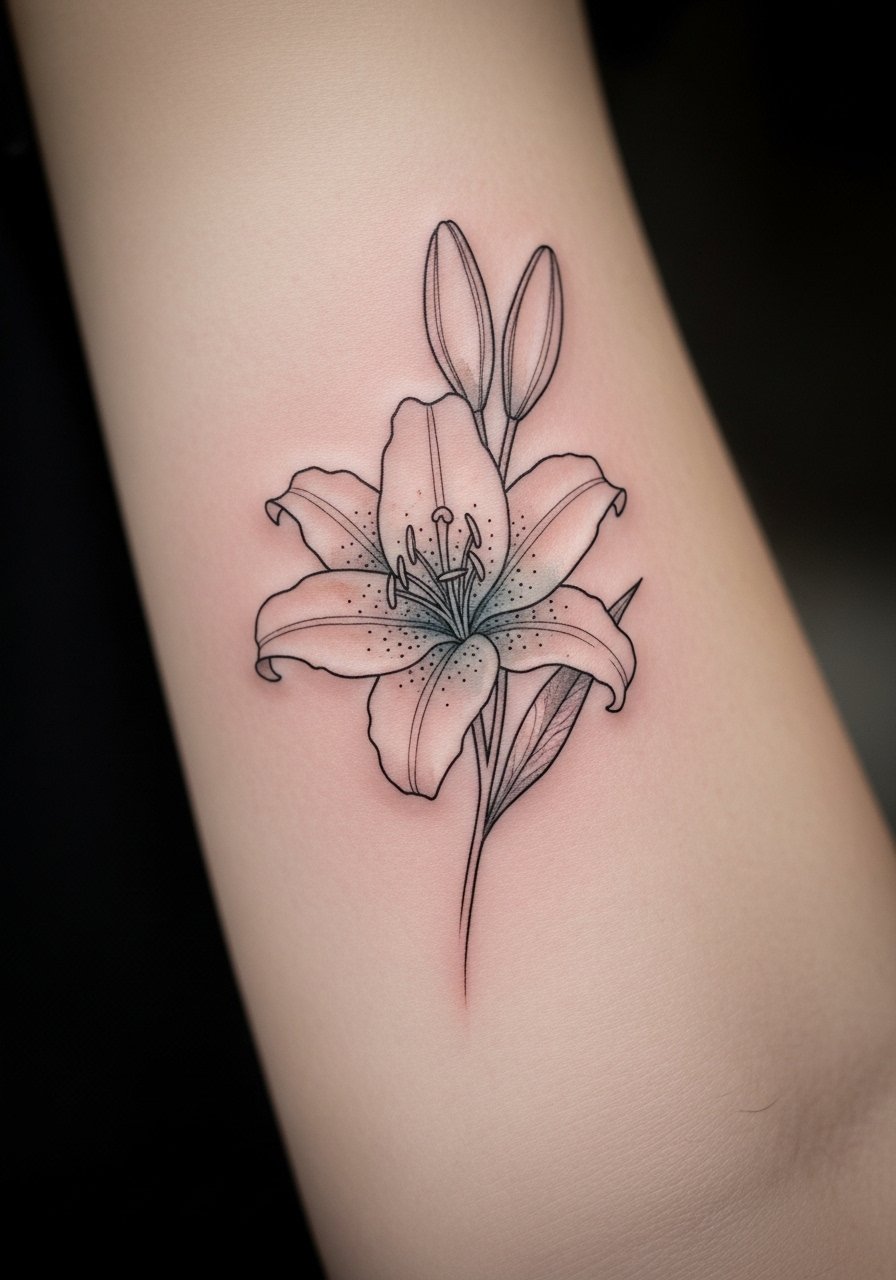
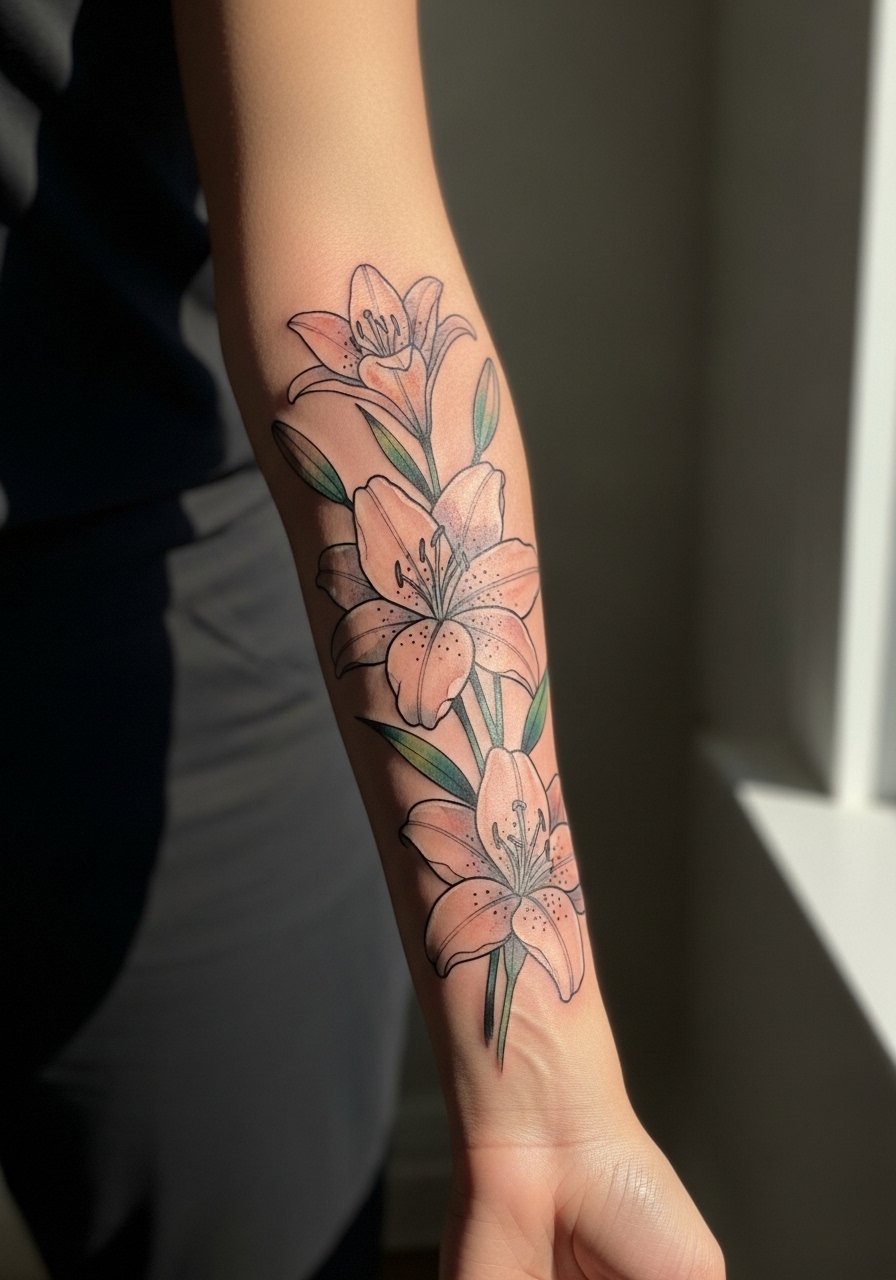
I've seen inner forearm lilies keep their presence the longest when the artist favors slightly heavier linework around the petals and lets the watercolor bleed stay airy inside those borders. Fair warning, the inner forearm is visible and gets frequent sun exposure, so you should expect touch-ups around year three to five if you want pigment to stay bright. In consultation, ask for a mix of stipple shading and thin outline rather than pure wash so the structure remains readable as saturation fades. The session feels straightforward, usually one to two hours depending on size. Pair this with rolled sleeves and a loose button-down shirt that frames the forearm without crowding the design.
2. Tiny Wrist Lily That Reads Like Jewelry
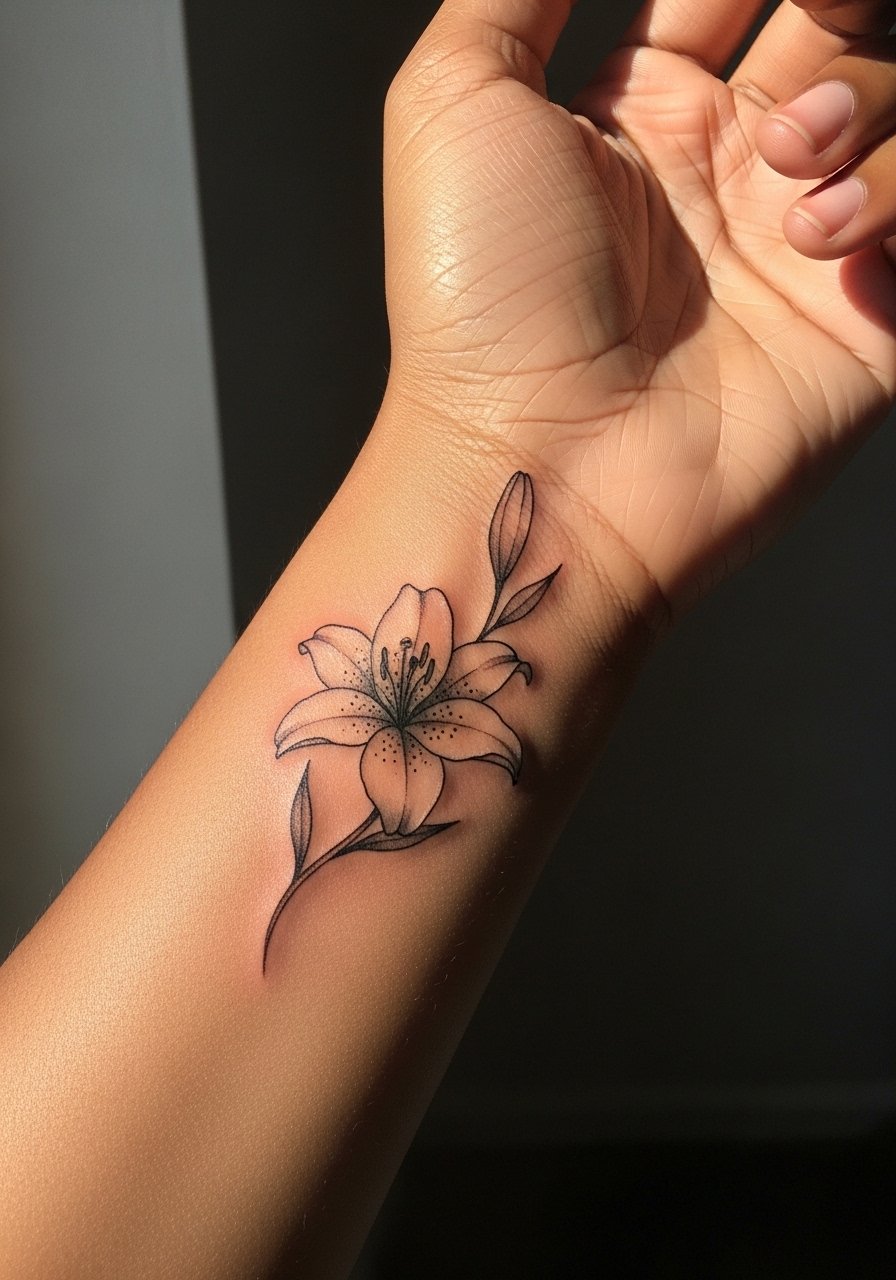
There is something about a tiny lily at the wrist that behaves like a bracelet. Pain is mild but the wrist experiences friction from watches and bracelets, which can pull pigment in the first week. During the consultation, say you want thin linework with a faint color wash only inside the lines so the edges keep definition. Expect a touch-up at year two for color refresh if you wear wrist jewelry often. For showing it off, wear a thin chain bracelet or a minimalist watch that sits just above the piece so the lily is the focal point.
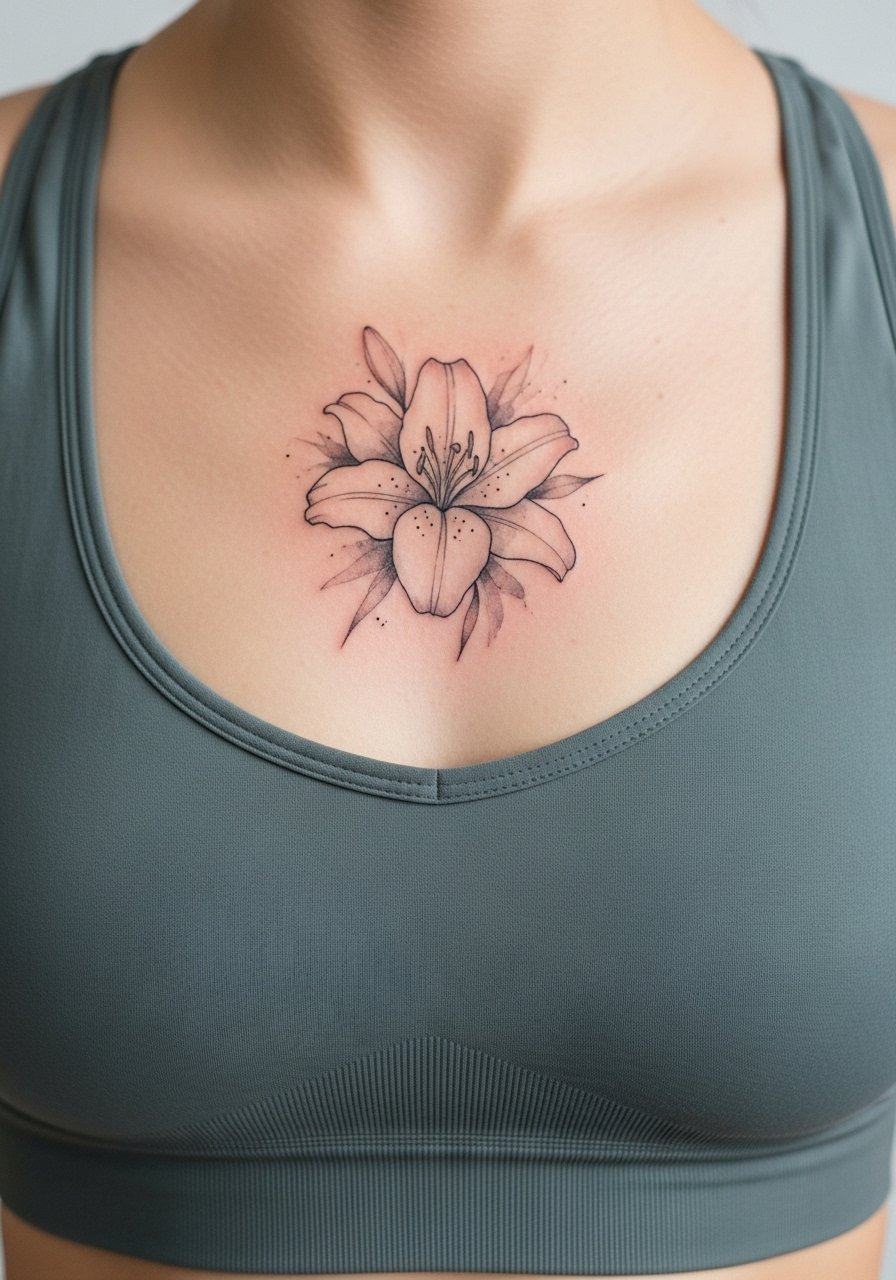
3. Collarbone Lily with Soft Watercolor Horizon
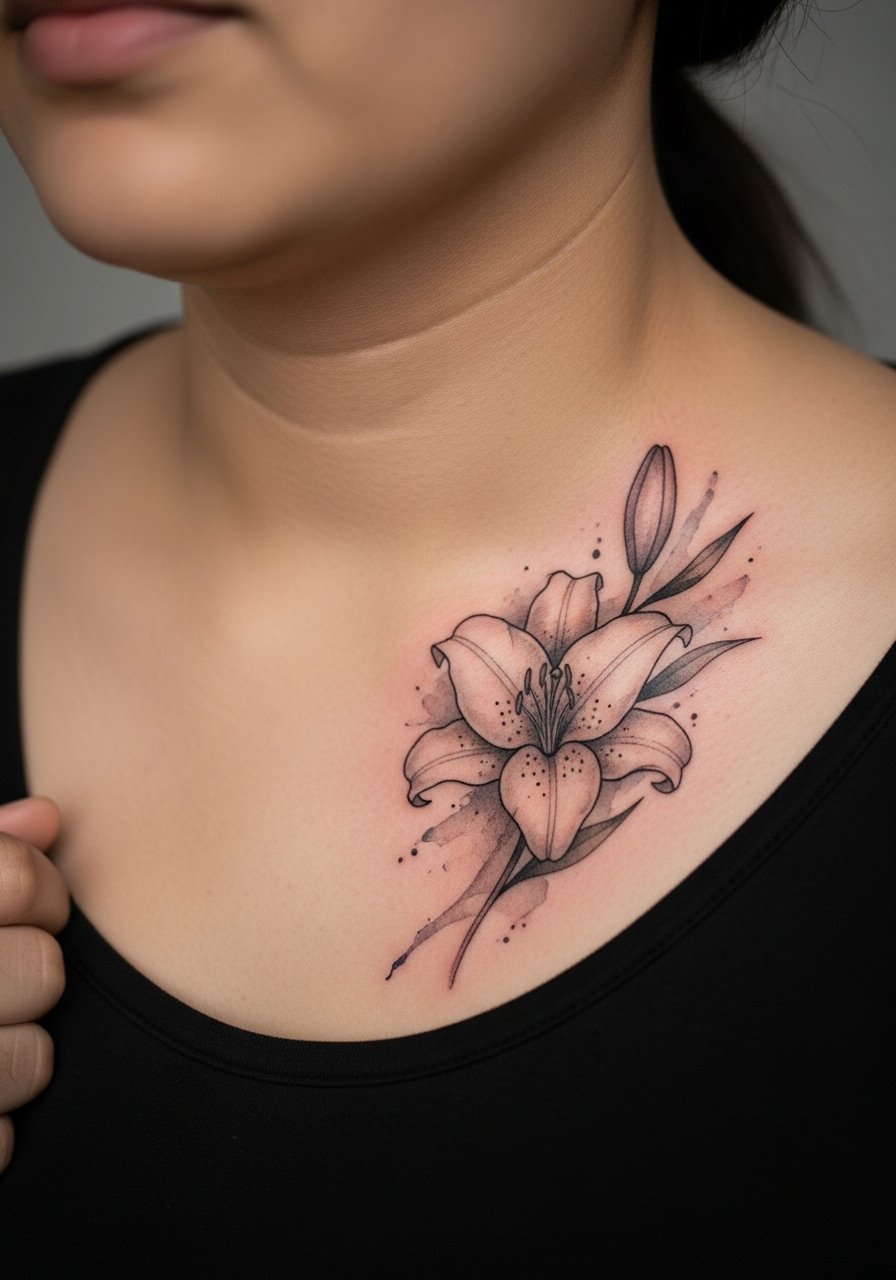
Most collarbone lilies gain an elegant edge when the wash flows horizontally along the bone instead of trying to be a full bloom. Artists split on whether heavy saturation belongs here. One camp says bold color anchors the piece and resists early fading. The other camp prefers lighter washes to avoid color migration on thin skin. Ask your artist which approach they have seen hold up on collarbone skin before booking. Sessions are usually one to two hours and the area is low to moderate on pain. Pair with open-neck shirts and a thin chain pendant necklace that sits above the lily and complements the linework.
4. Ankle Lily with Painterly Trails
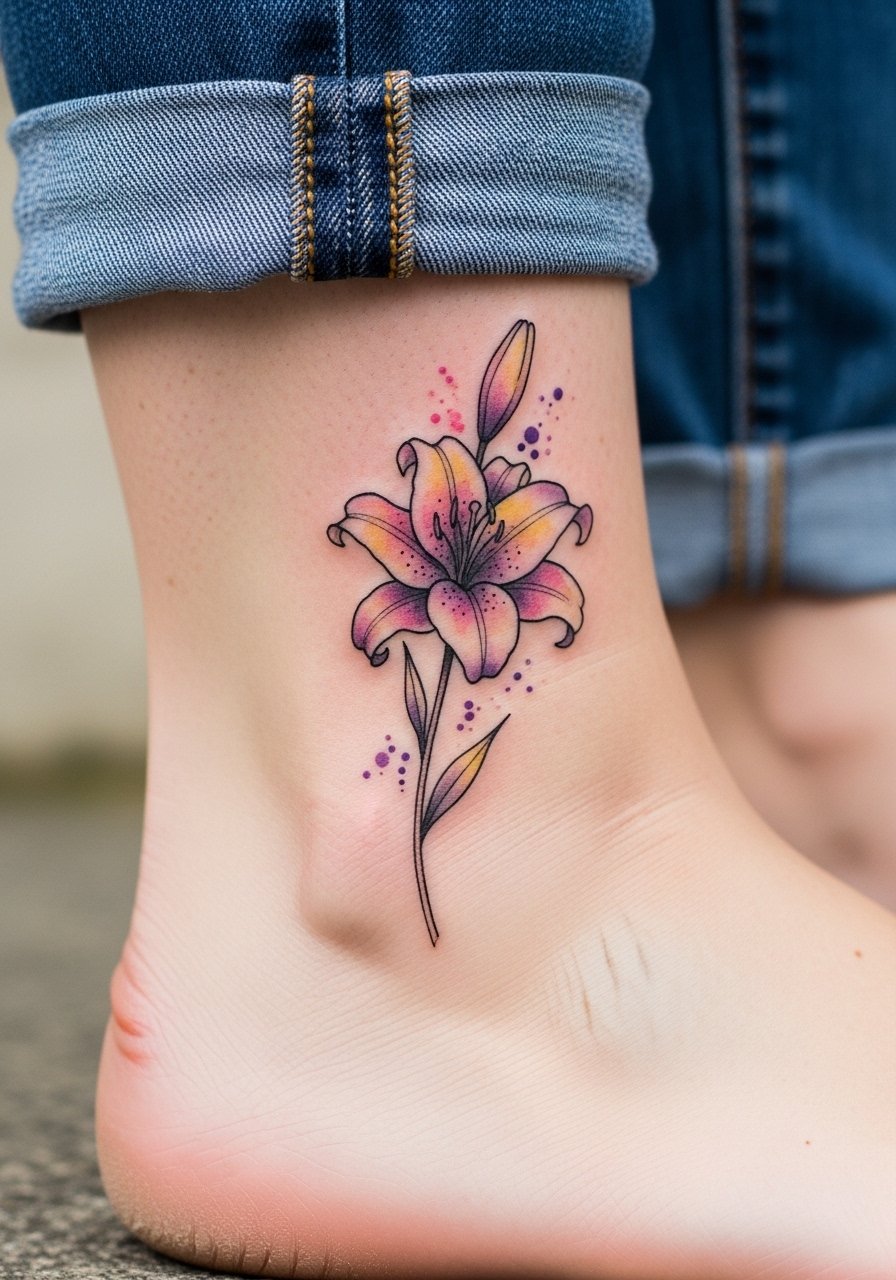
The ankle is charming and vulnerable. Expect a sharper session because the bone is close to the needle and the area feels more painful than a fleshy placement. The biggest mistake is asking for heavy saturation that will rub on socks and shoes during the first week. Tell your artist you want color placed away from the very edge of the sole and suggest a more translucent wash along the stem so the design survives friction. Plan on longer aftercare during break-in weeks, and show it off with sandals or rolled jeans that leave the ankle visible without rubbing the scabbed area.
5. Ribcage Lily with Flowing Petals
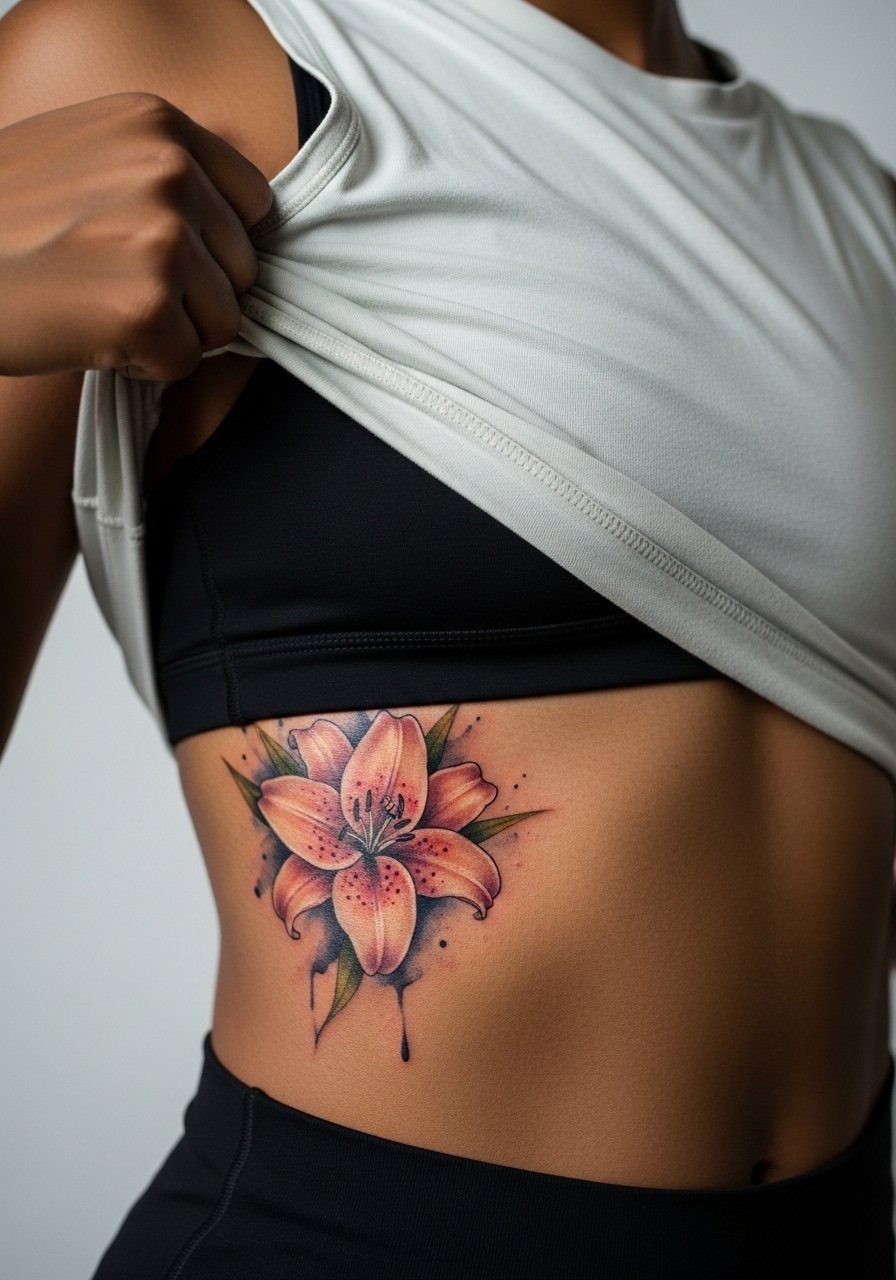
Fair warning: the ribcage is a sensitive area on most pain scales. That sensitivity can make longer sessions tricky, but the canvas is fantastic for a lily that wants to breathe. The common version that ages poorly has tiny tight linework jammed into crowded petals. Instead, request more negative space and wider petal separation so the design does not merge as the skin shifts. Artists are split on fine line here. One camp says lines blur fast because the skin flexes. The other camp says careful depth and spacing keep lines readable. Ask your artist where they stand. Wear a loose cropped top for the session so the artist can access the area cleanly.
6. Sternum Lily, Centered Watercolor Bloom
The sternum gives a dramatic axis for a centered lily, and it reads beautifully under low-cut tops. Pain ranges moderate to high depending on how close the design sits to the bone. A common mistake is asking for dense color right over the sternum. That area heals with scabbing more easily, so suggest lighter washes near the center and bolder edges where skin is meatier. The session typically breaks into shorter passes to manage comfort. For the appointment, a fitted sports bra or bandeau makes access easier while keeping exposure minimal.
Studio Day Picks
If you are considering forearm, wrist, or sternum lilies from ideas 1 through 6, a few specific items smooth the session and the first week of healing.
-
Stencil transfer paper kit. Lets you preview placement on skin before the needle touches, which matters for long, curving petals near joints.
-
Topical numbing cream. Applied per instructions about 45 minutes before can help with rib and sternum sensitivity so you get through longer shading passes.
-
Thin protective film roll. Ideal for wrist and ankle pieces that see friction from clothing and accessories during the first few days.
-
Fragrance free gentle body wash. A mild wash prevents irritation of fresh watercolor washes without stripping color or moisture.
-
Aquaphor Healing Ointment. A thin layer used in the initial days locks in moisture and helps delicate linework heal without excessive scabbing.
7. Thigh Lily with Loose Petal Movement
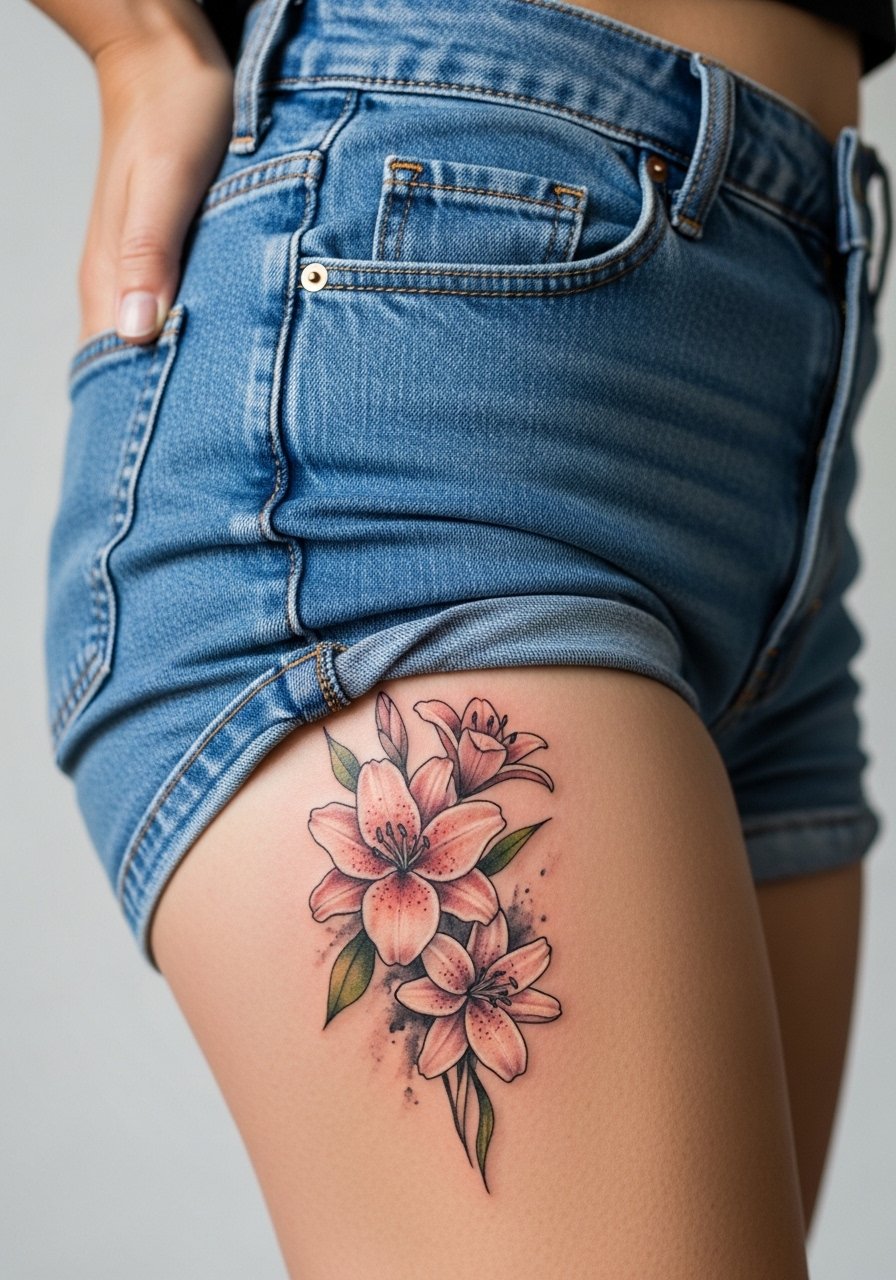
This placement works well when you want a larger painterly lily that travels with clothing. Pain is moderate and sessions can run longer because the thigh tolerates longer work. Avoid tiny details that will be hard to read when you wear jeans. Tell your artist you want the color to flow toward the outer thigh so clothing edges do not impinge on the main petals. For the appointment, wear loose drawstring shorts or high-waisted bottoms so the artist can access the area without pressure on the skin. Expect a touch-up at two to four years if you wear tight fabrics frequently.
8. Calf Lily with Vertical Movement
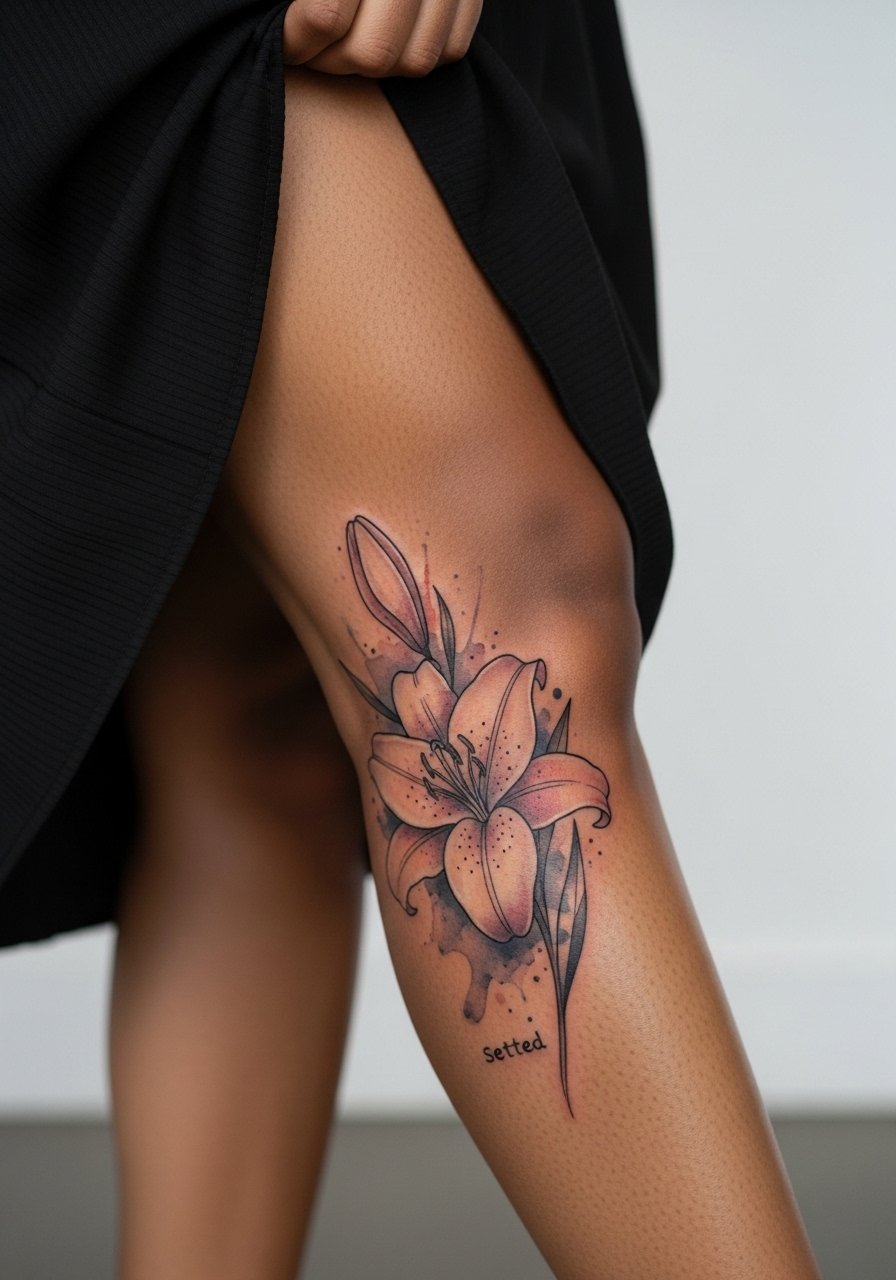
Vertical lilies on the calf read like a postcard when you walk. The calf is lower on the pain scale and holds color well because it sees less sun than the forearm. A visual impact lead works here because saturated blossoms that follow the calf muscle look great from a distance. The mistake is packing too many layered washes without structure. Ask for a clear stem and a few anchor outlines so the bloom reads as it ages. Session time depends on size, usually under three hours for a mid-sized piece. Pair with open-back midi dresses or cropped trousers that show the calf without rubbing the area.
9. Finger and Knuckle Lily Accents
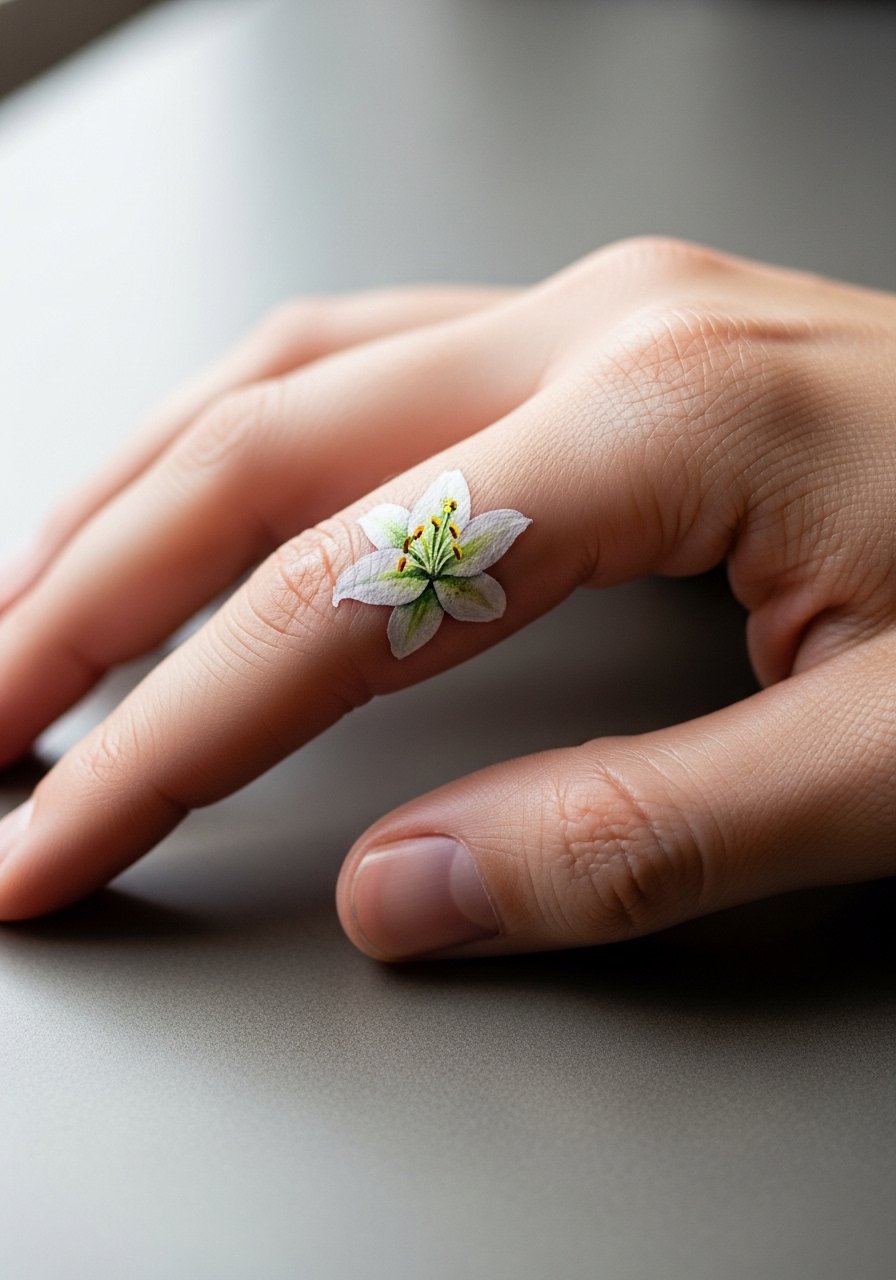
Finger lilies are compact and behave more like jewelry than body art. Pain is higher because fingers have thin skin and many nerve endings. The real mistake is trying to cram watercolor shading into a fingertip canvas. For longevity, stick to minimal color and crisp micro linework. Expect more frequent touch-ups than any other placement, sometimes annually. The session is quick but can sting. For showing off, keep stacked dainty rings spaced so the rings do not rub the pigment in the first week. A thin stacking ring set complements the lily without competing.
10. Back Spine Lily Column
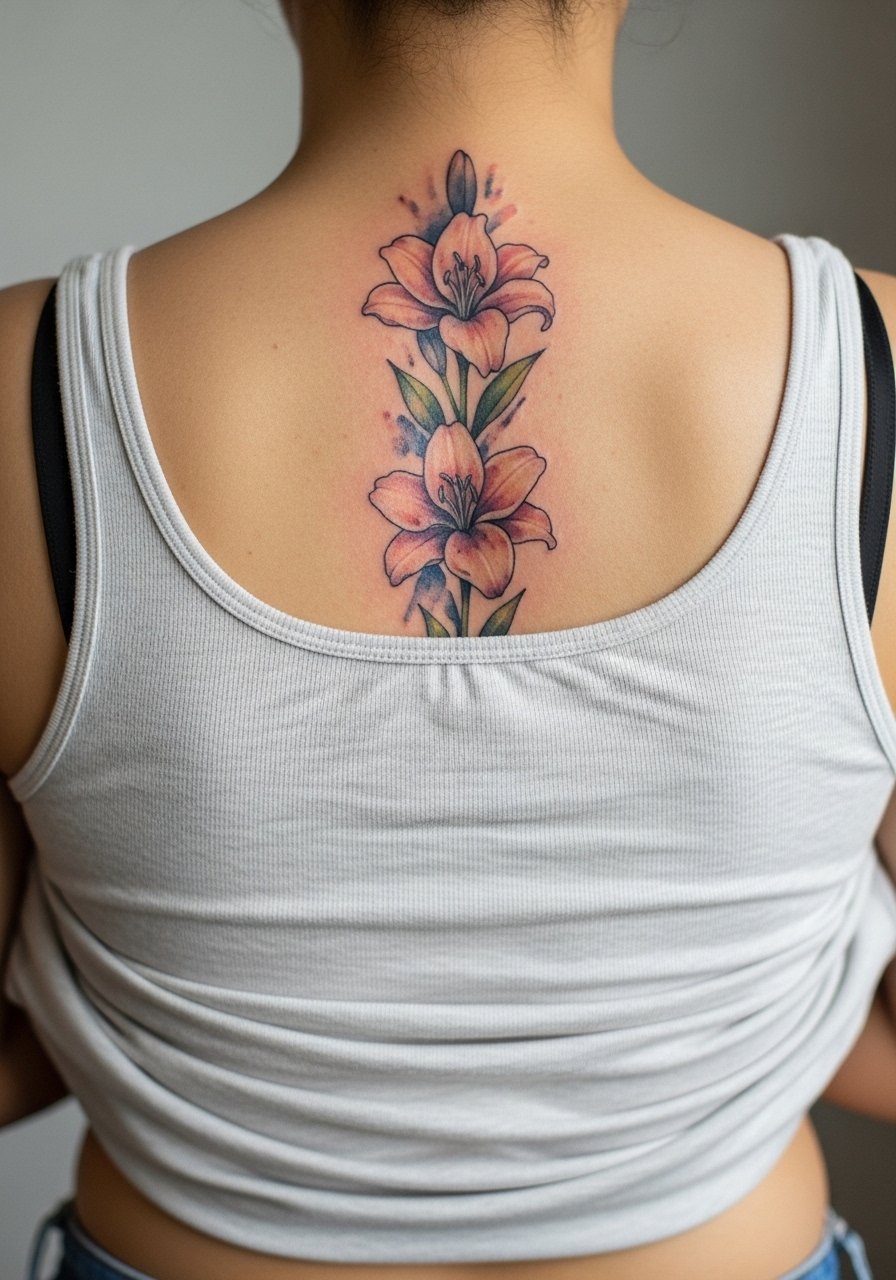
Most people want a spine piece because of the dramatic vertical line. Pain varies along the spine, and sessions may be split. There is a debate among artists about dense watercolor over the spinal column. One camp says that thin washes on the spine fade into uneven patches. The other camp argues that careful saturation with spacing holds if the artist staggers pigment placement. Ask directly how the artist plans to layer color on the spine. Keep expectations realistic about touch-ups, especially if you sunbathe or wear low-back tops. For sessions, a loose button-down shirt you can pull aside helps with access and comfort.
11. Shoulder Cap Lily with Soft Drop

The shoulder cap is forgiving for watercolor work because it sees moderate sun but heals predictably. Visual impact is high because shoulders catch light when you move. The common error is packing color too close to the joint where stretching can blur edges. Ask your artist for a design that extends slightly onto the upper arm so the bloom breathes across muscle. Sessions are often short bursts of under two hours. For showing off, slip into a loose tank top that frames the shoulder without rubbing the new ink.
12. Hand Lily That Reads as a Statement

Hand tattoos remain visible and can influence first impressions in some workplaces. Be honest about career considerations before committing. The hand experiences heavy friction and frequent washing, which accelerates fading. Many people underestimate how this affects watercolor pieces. If you choose a hand lily, favor bold outlines with minimal internal wash so the silhouette keeps reading. Expect touch-ups every one to three years. Sessions are short but uncomfortable. For showing off, pair with rings on other fingers rather than on the tattooed knuckles so the lily remains unobstructed.
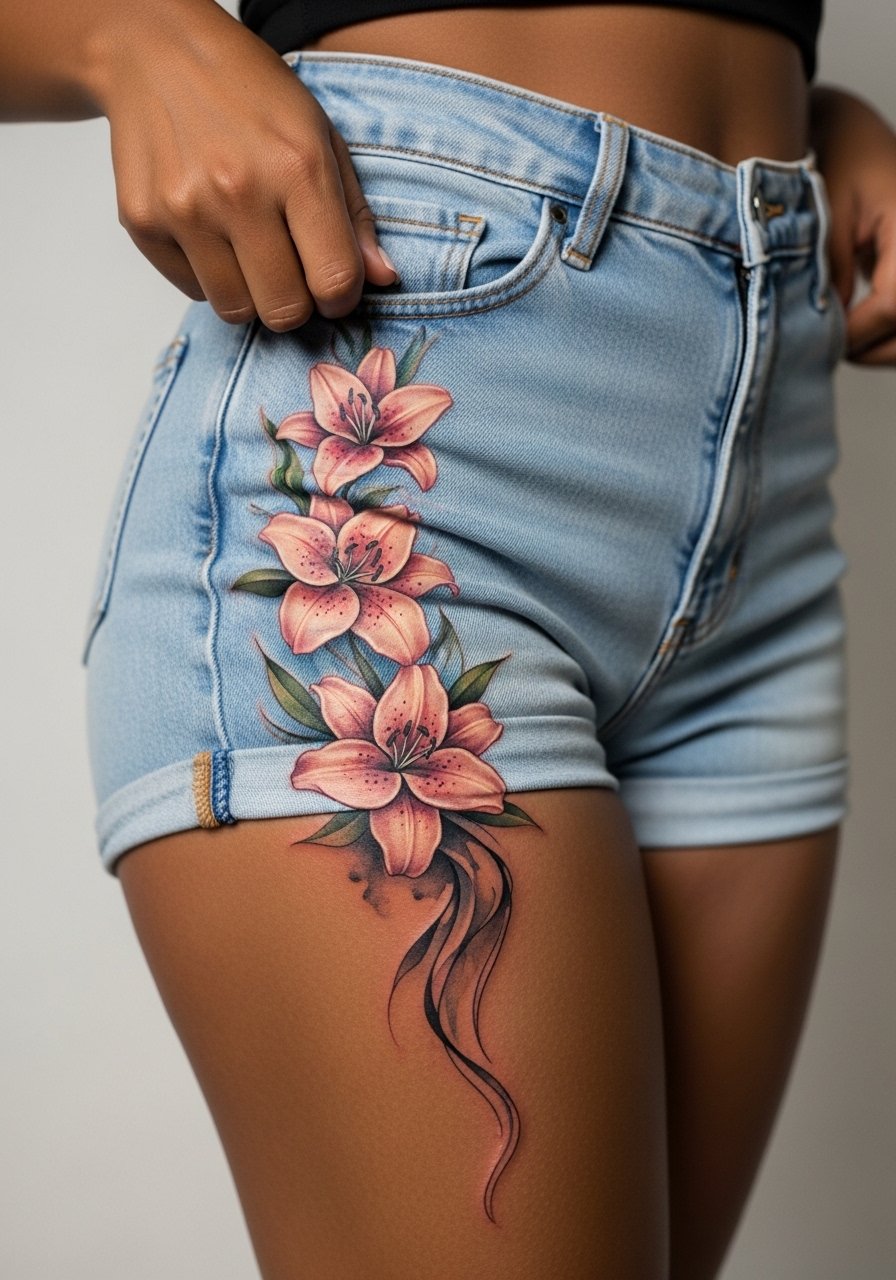
13. Hip Lily with Curved Placement
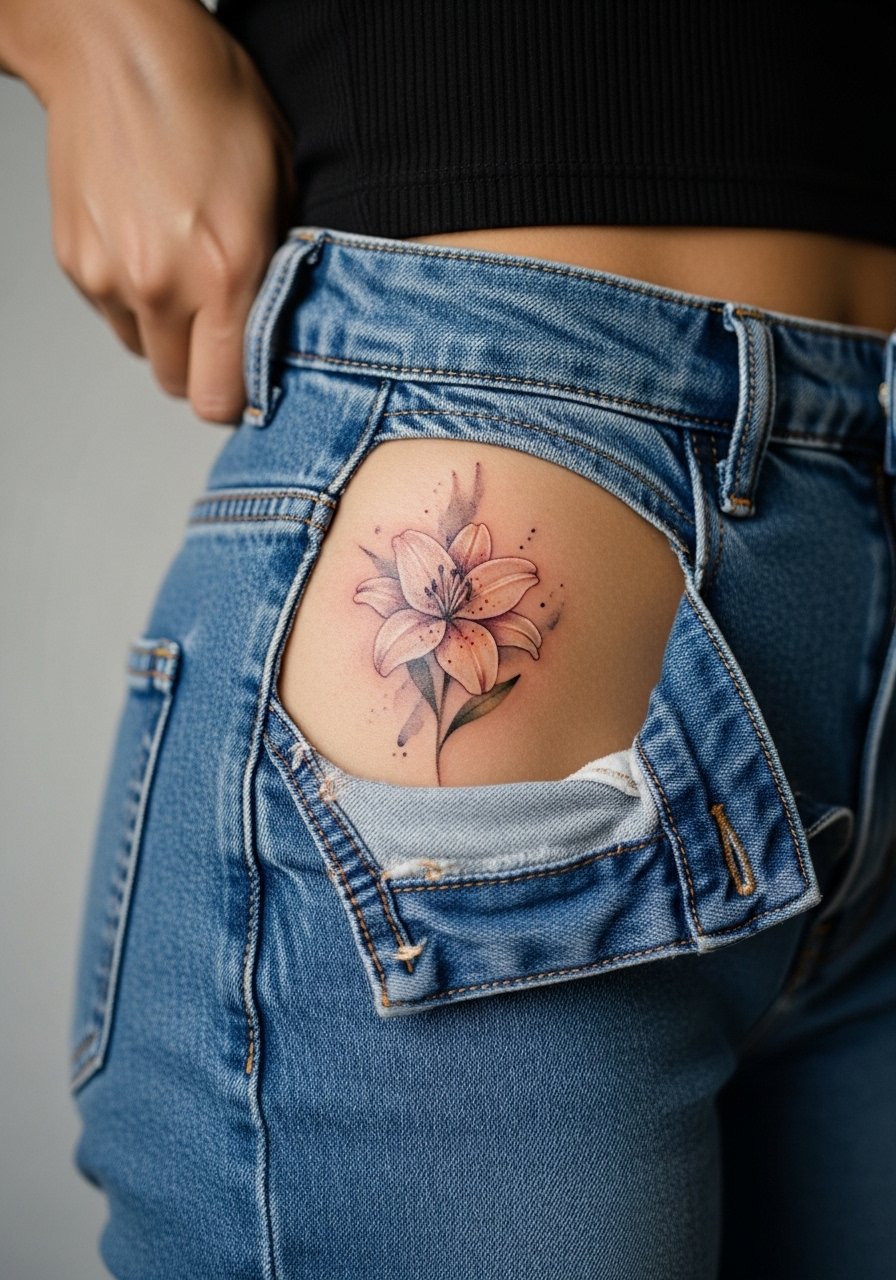
Hip lilies look sensual when they follow the curve of the pelvis, but the area often rubs against waistbands. A common mistake is seating the main color where jeans will press. During consultation, ask for the bloom to sit just above common waistlines so nightly friction does not dull the wash. Session discomfort is low to moderate. For the appointment, wear high-waisted bottoms that can be shifted without tightness. Consider pairing the final piece with high-cut swimsuits so the lily shows on the hip without being constantly rubbed.
14. Lower Back Lily as a Horizontal Accent
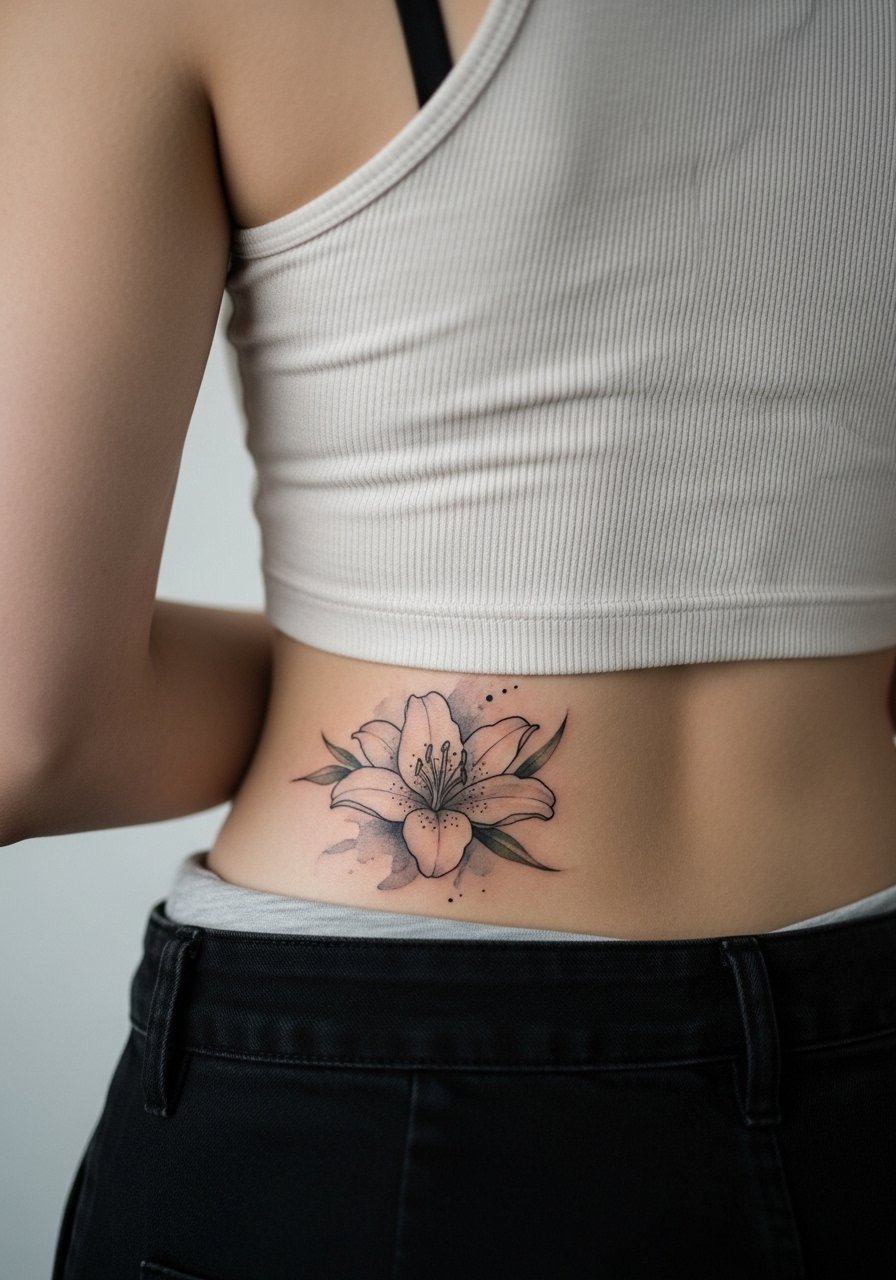
Lower back lilies can be wider and more panoramic than other placements. The area tolerates broad washes well because it sees less sun. The mistake is detailed micro work that will never be visible unless up close. If you want the piece to read from a distance, ask for bolder petal edges and broader washes. Pain is low and sessions can cover a lot of ground in one sitting. For showing it off, crop tops and low-back dresses reveal the sweep without risking constant abrasion.
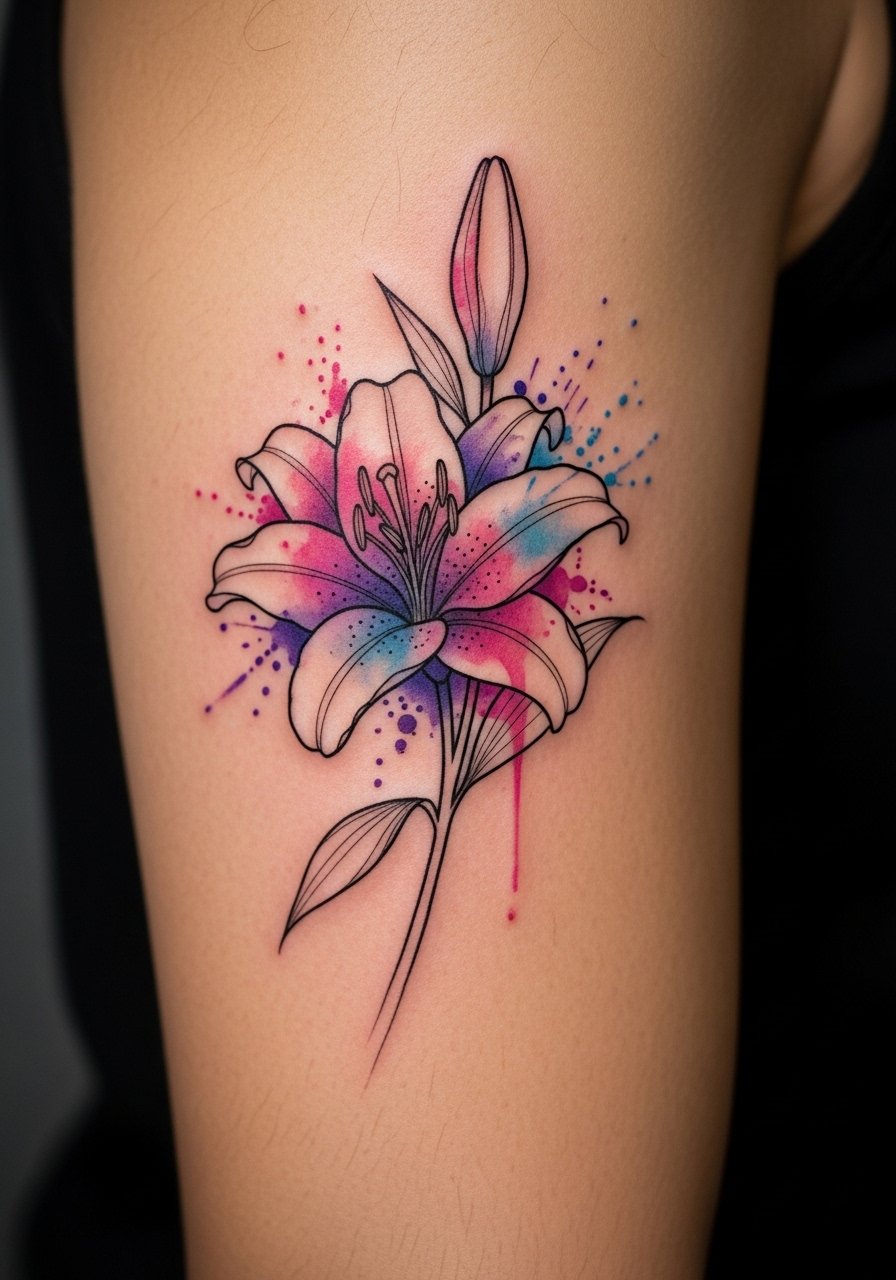
15. Inner Bicep Lily with Quiet Impact
This placement feels intimate and reads differently when your arm is down versus up. The inner bicep is softer and can be more painful for some, especially near the armpit. The aging reality is favorable because the skin here moves but does not see constant friction or sun. A common mistake is asking for too-fine linework close to the armpit crease. Ask the artist for slightly stronger outlines and stipple shading to hold shape. For the session, wear a loose tank top you can lift or shift so the artist has clean access.
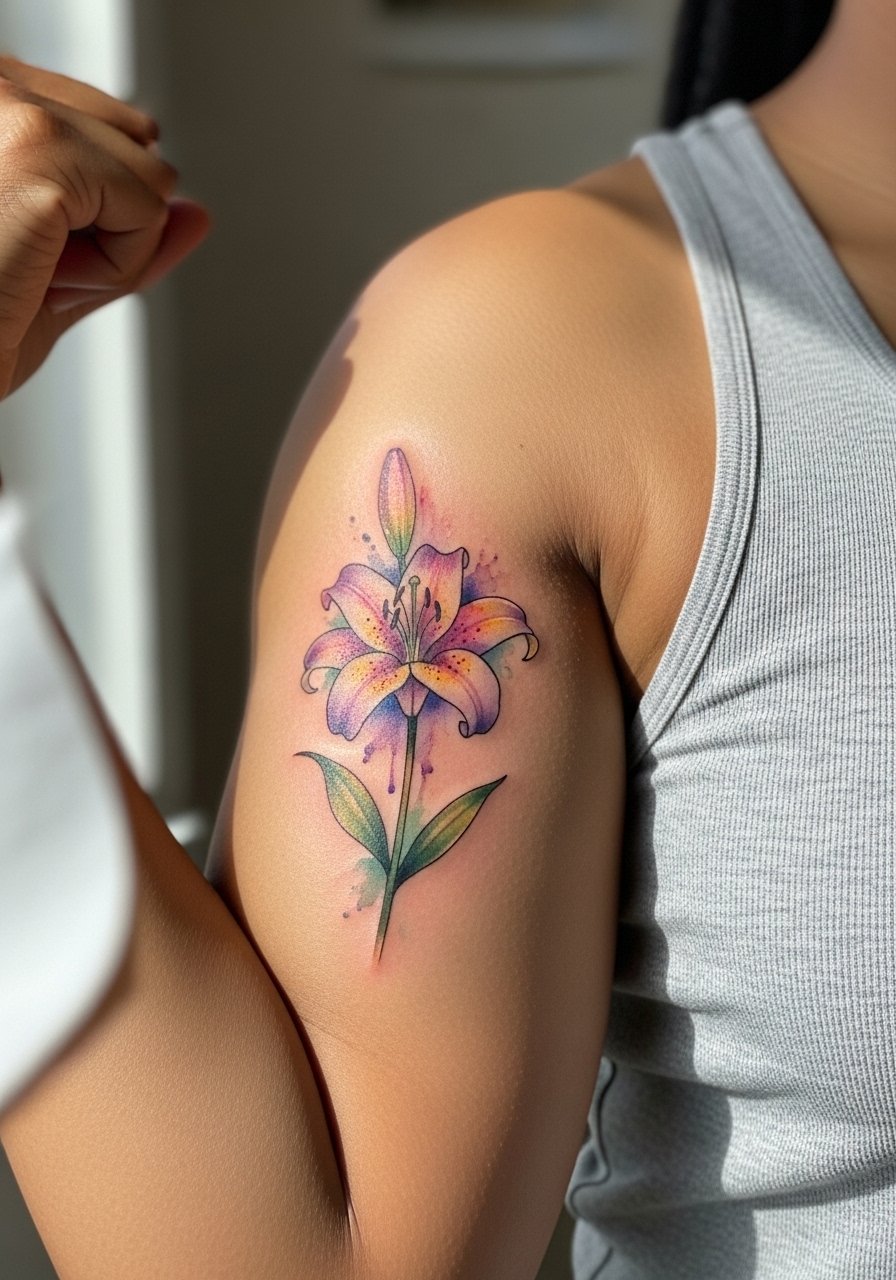
16. Upper Arm Bloom, Classic Placement
The outer upper arm is a classic for a reason. It tolerates saturation well and ages predictably because it is often covered and sheltered from UV. If you want a piece that needs less frequent touch-up, this placement is a safe bet. The most common error is compressing too much fine detail into a mid-sized space. Tell your artist you prefer broad strokes of color with defined outer linework to keep the lily readable at two and five years. Sessions are comfortable and usually under three hours. For casual wear, roll sleeves or wear short-sleeve linen shirts that let the bloom peek through.
17. Shoulder Blade Lily with Soft Negative Space
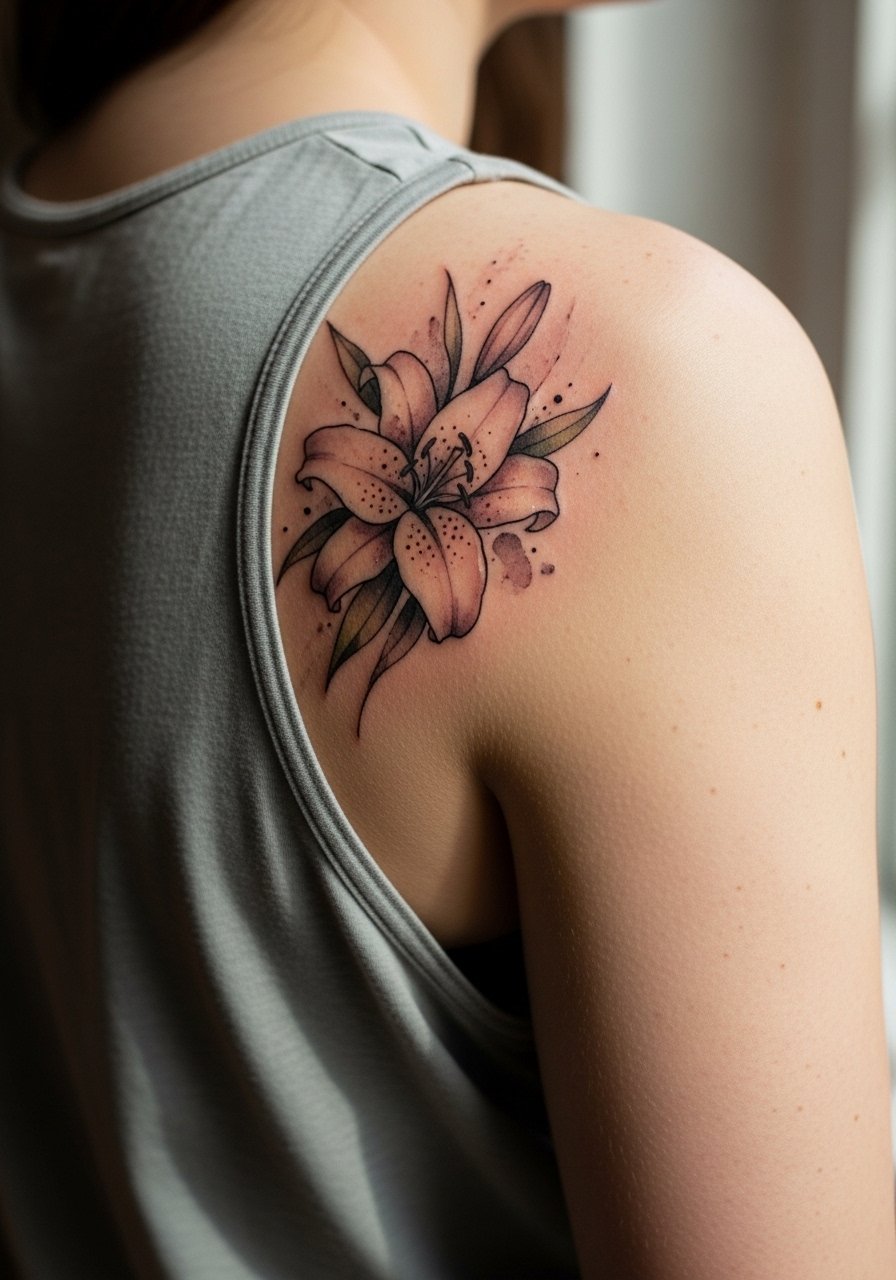
A shoulder blade lily looks painterly when artists use negative space to suggest petals. The area is low on pain and the piece can be expansive. A mistake is asking for an all-over wash without structural anchors. Request a few crisp anchor lines where the petals meet stems so the piece keeps shape as color migrates. Sessions are easy to break into shorter passes if you prefer. For evenings out, an open-back midi dress shows the shoulder blade without compromising comfort.
18. Ear-Adjacent Tiny Lily Accent
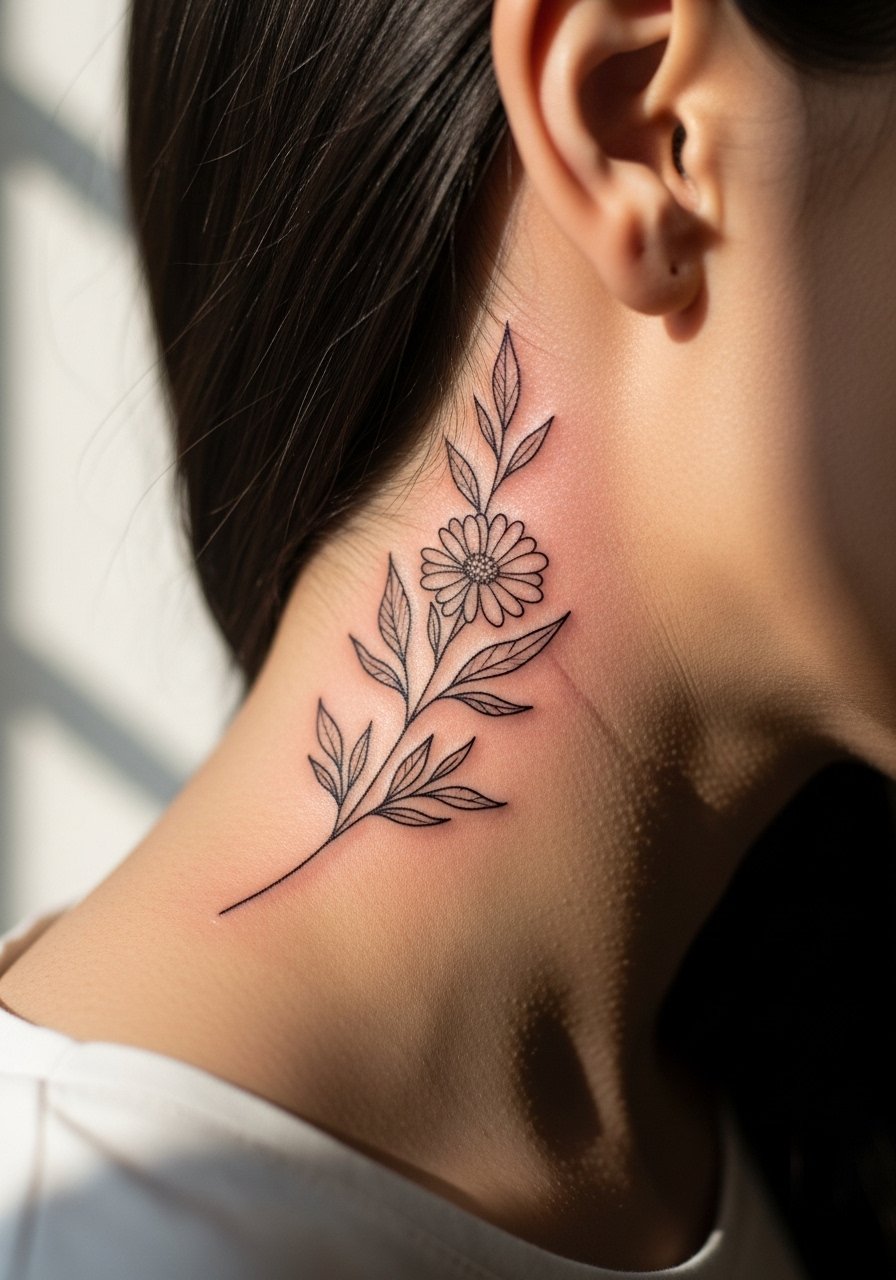
Behind-the-ear lilies are tiny accents and read best when simple. The area is sensitive and often hidden by hair, so consider whether you want daily visibility. The main mistake is requesting watercolor gradients in a space too small to hold them. Ask for a micro outline with a hint of color to keep the shape. If you work in environments that require a conservative appearance, this placement is easy to cover with hair or collars. For the appointment, wear a hairstyle or headband that gives the artist clear access.
19. Hip-to-Thigh Droplet Lily Panel
A panel that runs from hip into upper thigh is theatrical and allows the artist to use bigger washes. Inner thigh portions demand extra care because skin there is tender and more prone to smudging during healing. The mistake is over-detailing the inner thigh segment. Instead, place the most delicate elements on the hip and use broader color drops down the thigh. Wear loose shorts to your session so the artist can access the area while you stay comfortable. Expect touch-ups based on friction from clothing.
20. Collar Lily Framing the Chest Edge

This placement sits at the intersection of chest and collarbone, and it benefits from a deliberate composition that follows the bone. The most common aging issue is uneven fading on the thin skin toward the clavicle. Ask for slightly bolder outlines on that edge and softer washes toward the chest so the whole piece reads evenly. Sessions can be split to manage comfort. For show-off styling, a v-neck blouse reveals the lily without risking constant sun exposure.
21. Full Sleeve Concept: Watercolor Lily Cascade
A sleeve of lilies lets you mix scales, from micro blooms at the wrist to larger painterly heads near the shoulder. The big mistake is trying to pack sleeve detail into a single session. Plan this as a series of custom appointments so color and linework are placed thoughtfully. Ask your artist for a touch-up plan and a mapped color progression so the lower and upper arm pieces age cohesively. Expect multiple sessions and realistic touch-ups in the years ahead. For the chair, wear a loose button-down shirt you can shift to expose the arm without rubbing the fresh ink.
Frequently Asked Questions
Q: How long do watercolor lilies usually need before a touch-up?
A: It depends on placement and sun exposure. Visible areas like wrists and hands often need touch-ups every one to three years. Sheltered spots such as the upper arm or lower back can go longer, sometimes three to five years. If you plan to sunbathe frequently, expect earlier fading and factor a touch-up into your timeline.
Q: Do watercolor-style lilies need different healing care than traditional tattoos?
A: The basic steps are the same, but watercolor pieces often use lighter saturation and therefore show disruption more easily. Keep the area out of direct sun while healing and avoid abrasive fabrics. For session prep, bring appropriate loose clothing based on placement so the artist can work without repeatedly repositioning you.
Q: Will a watercolor lily work on darker skin tones?
A: Yes, but color choices and saturation plans change. Artists often use higher saturation and stronger outlines to make watercolor washes read on darker skin. Bring reference photos of healed work on similar skin tones and ask the artist how they adjust pigments for visibility.
Q: Are there lily designs I should avoid if I need to keep my tattoos discreet?
A: Tiny lilies on the inner forearm, behind the ear, or the collarbone can be easily covered or shown selectively. Hand, finger, and neck placements are hard to hide. If discretion matters, pick placements that clothing can cover during workdays.
Q: How should I choose an artist for a watercolor lily if I do not want to name or follow a specific tattooist?
A: Look for portfolios in discovery pathways like local studio directories, community forums, and hashtag searches that highlight healed watercolor work. Pay special attention to healed photos rather than freshly done shots. Ask artists about their approach to layering and spacing before booking.
Q: What should I wear to my appointment for a sternum, ribcage, or hip lily?
A: For sternum and ribcage, a fitted sports bra or a cropped top you can lift makes access easy while keeping exposure minimal. For hip and thigh work, loose shorts or high-waisted bottoms that can shift without binding are best. If you want a style suggestion for after the piece heals, an open-back dress or crop top highlights chest and hip lilies without rubbing the area.
