
Fine line butterflies on the collarbone look fragile and deliberate, and that is exactly why they are suddenly everywhere. The style reads intimate on camera and bold in person, but fine line demands honest planning around placement, skin movement, and future touch-ups. Below are 27 distinct collarbone butterfly ideas with what to ask your artist, how they age, and outfit tips to show them off without shortening their lifespan.
1. Delicate Single Fine Line Butterfly on Collarbone
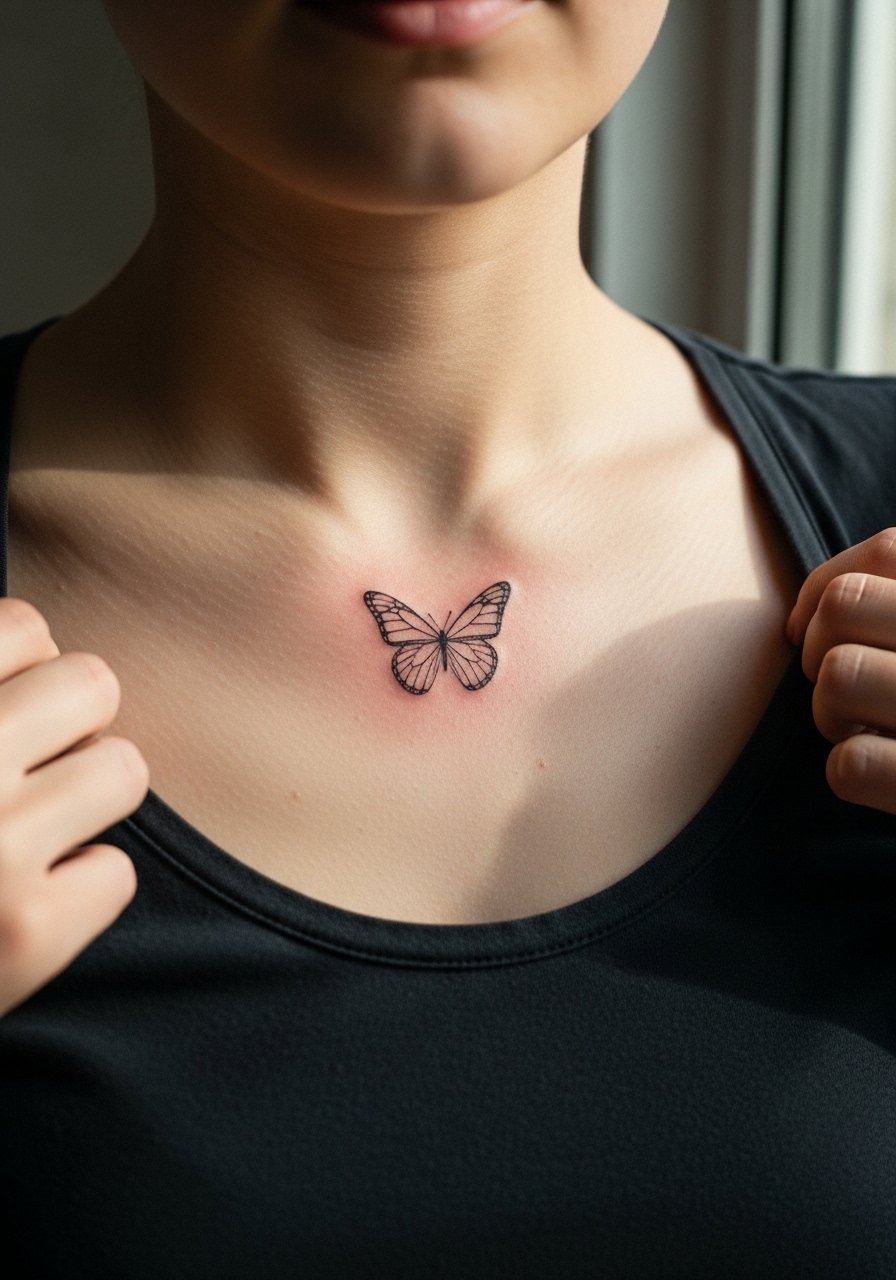
I recommend this minimal single butterfly when you want a piece that reads like jewelry. Tell your artist you want the antennae and wing veins to be slightly bolder than hairlines so they hold up without losing the delicate look. Expect a quick session, around 30 to 60 minutes, and fair pain because the bone sits shallow there. A common mistake is asking for hairline veins across tight negative space. The result can blur into a grey patch after a couple of years. For show-off styling, try an open-neck blouse that frames the clavicle without rubbing the fresh ink.
2. Mirrored Pair Spanning Both Collarbones
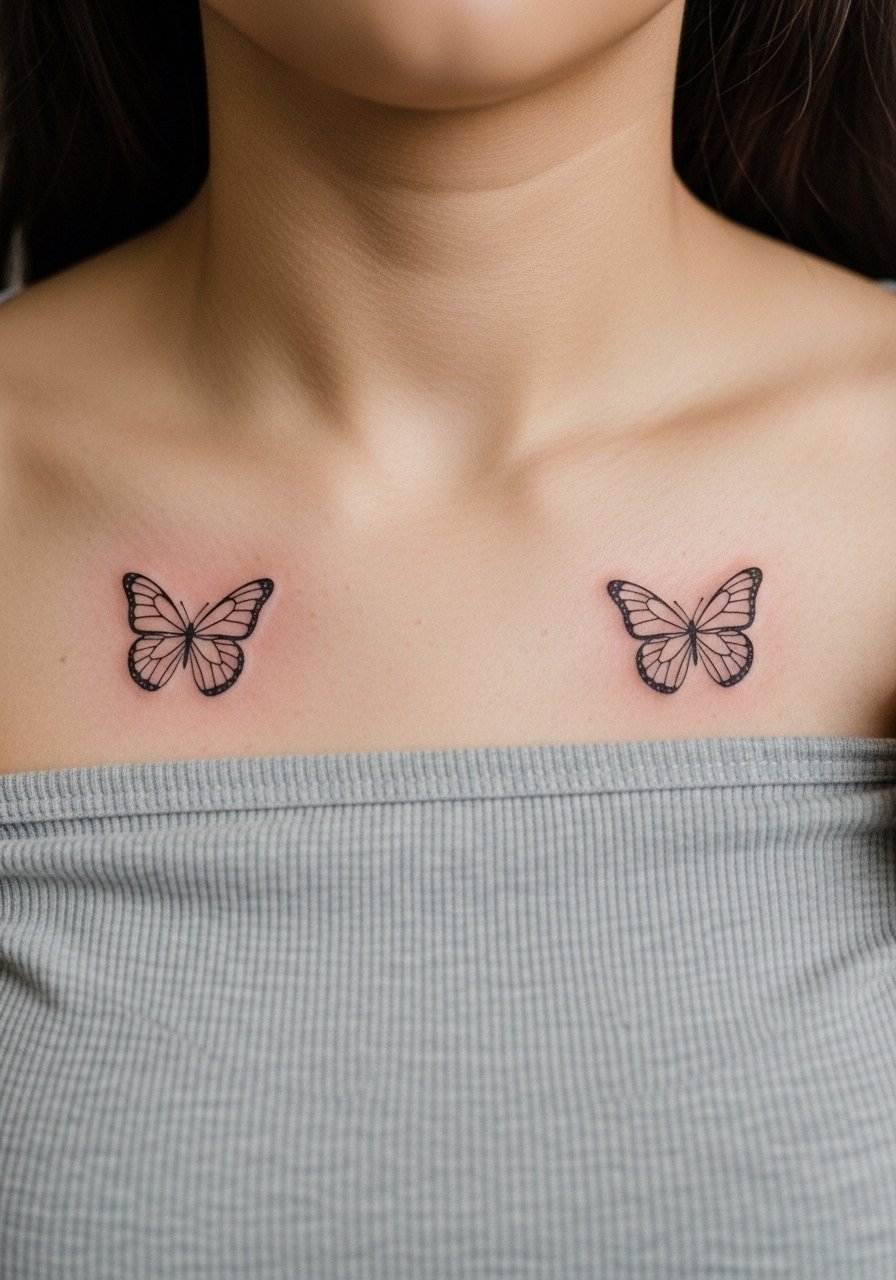
A mirrored pair reads deliberate and balanced across the chest. It's a good choice if you want symmetry without a single large focal point. During consultation ask for slightly staggered placement so normal breathing and body movement do not perfectly align wings over time. Pain and session time double compared to a single piece, but each side is short. Aging-wise, mirrored pieces can diverge visually as one side gets more sun. One real mistake is placing them too close to the sternum where movement and fabric friction speed fading. A delicate option to show the work is a boat-neck sweater that reveals the clavicle line.
3. Stipple-Shaded Butterfly with Negative Space Wings
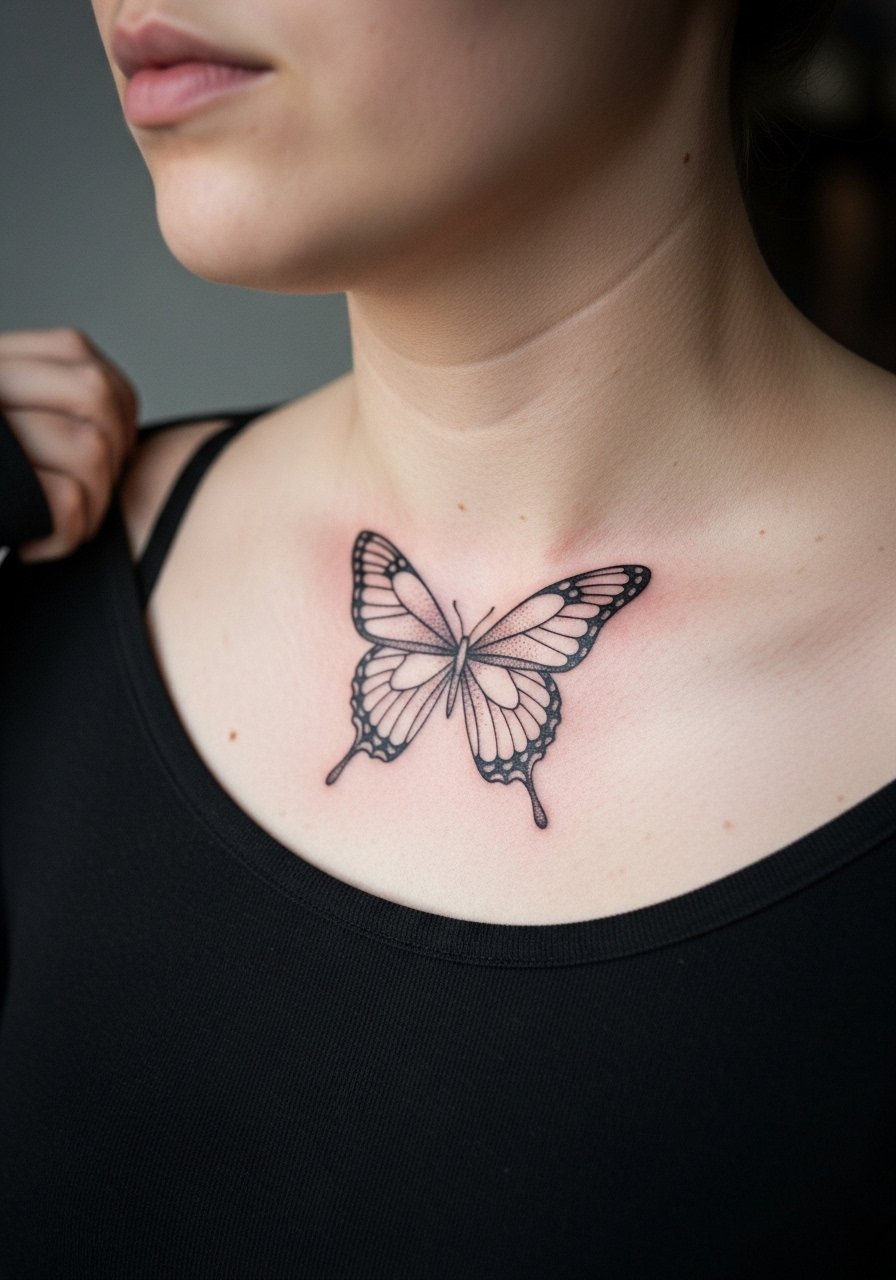
Stipple shading keeps the piece airy while giving depth without heavy saturation. Ask for larger dots toward the wing base and sparser dots outward so the texture softens rather than clumps. I tell clients this style ages better than full grey wash here because dots merge slowly. Pain is moderate, session about an hour. A common error is requesting micro-dot density that reads solid at month one and mud at year three. For outfits, pair the piece with a thin chain pendant that sits above the wings and draws attention without abrasion.
4. Tiny Micro Butterfly Nestled into the Clavicle Curve
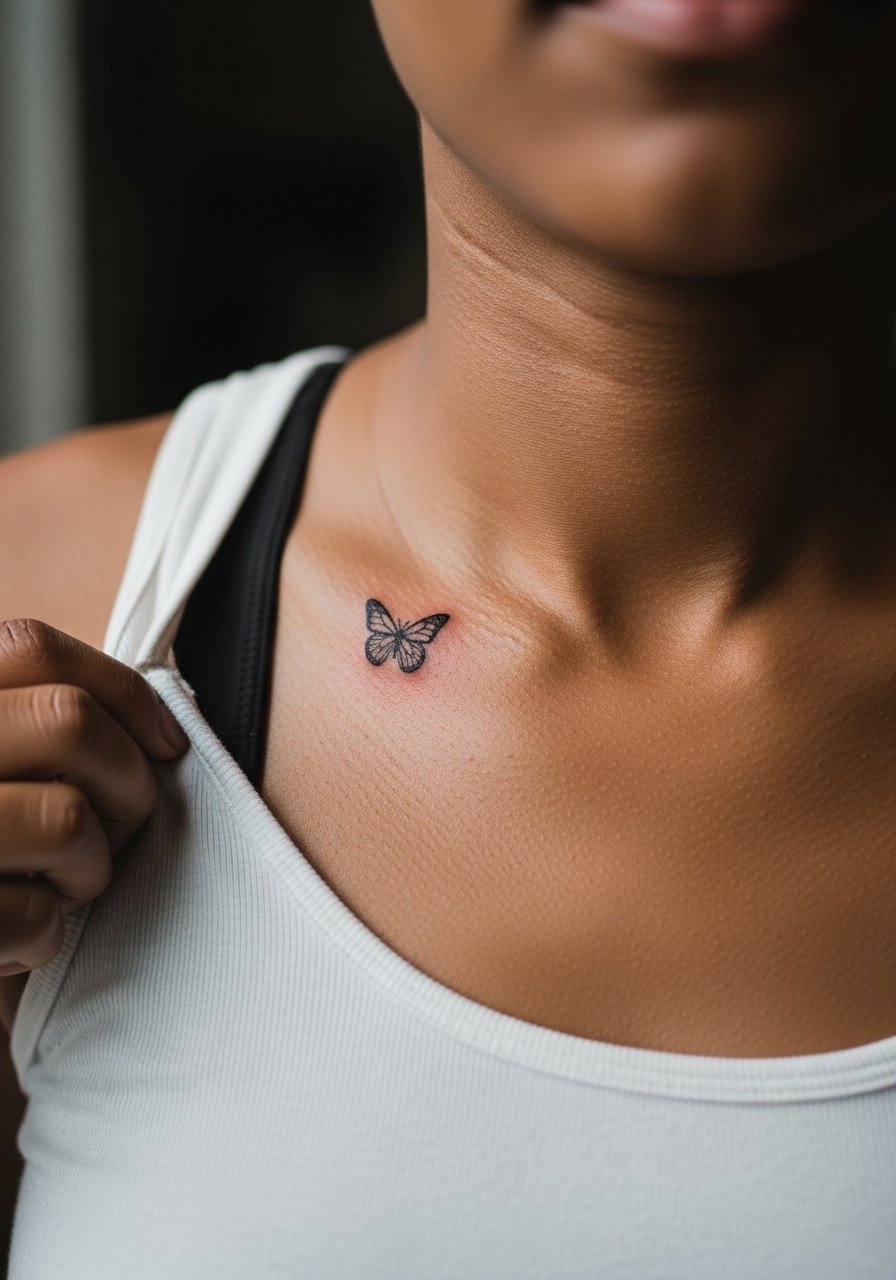
Micro butterflies are excellent if you want a subtle, starter piece that still reads intentional. Tell your artist you prefer slightly thicker anchor lines so the tiny wings do not disappear as the tattoo heals. Expect a quick 20 to 40 minute session and sharp sensation over the bone. The big mistake is making it too small for the level of detail requested. Tiny, dense detail equals early blurring. For showing it off without rubbing, choose a racerback tank that leaves the clavicle visible and avoids neckline friction.
5. Oversized Butterfly Drifting Toward the Shoulder
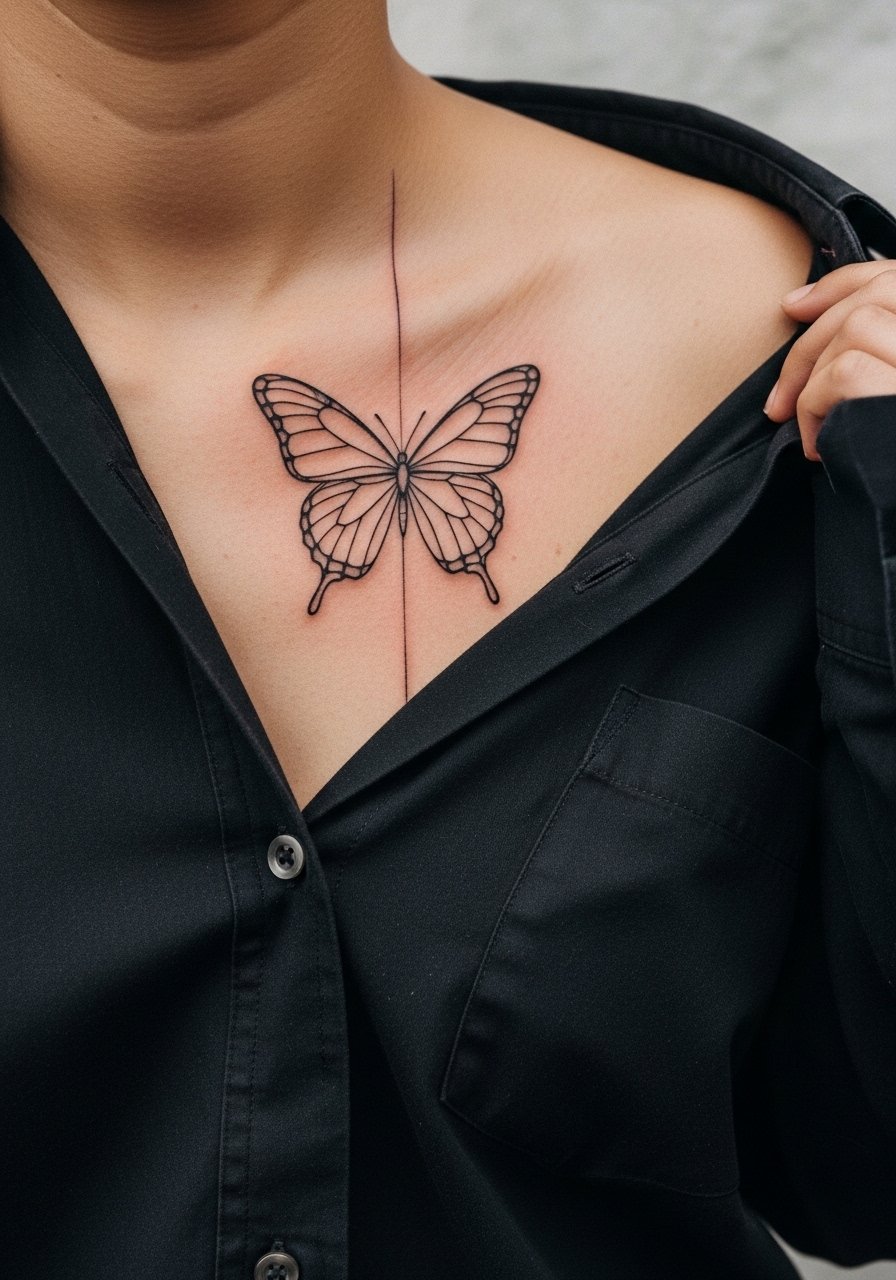
An oversized collarbone butterfly creates motion across the clavicle and into the shoulder. Ask your artist to plan wing margins so the outline sits on sturdier tissue away from the immediate bone. Sessions run longer, often one to two hours, and pain drops once the needle moves off the bone. Oversized linework can read beautiful fresh and then soften unevenly if the edges were placed directly over high-movement zones. A classic mistake is packing too much internal detail into an area meant for clean silhouettes. Wear a loose button-down shirt on session day so the artist can access the shoulder and collarbone without tugging.
6. Geometric Wing Structure with Fine Line Frame
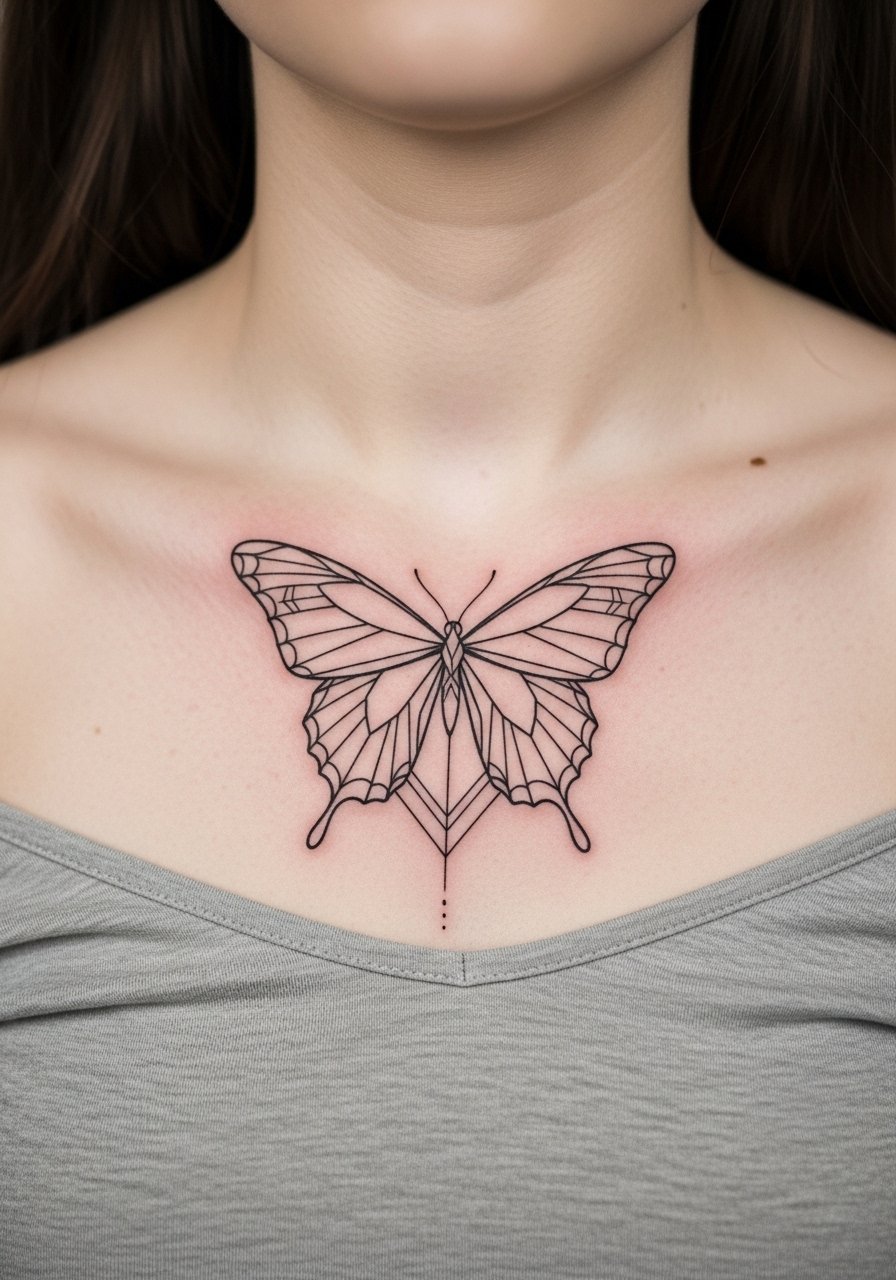
Geometric butterfly wings mix sharp angles and organic curves for a modern feel. When consulting, bring reference images that show the exact shapes you like and ask for slightly increased spacing between intersecting lines so the geometry does not collapse with time. Expect moderate pain and a one-hour session. A frequent mistake is packing too many crossing lines inside tiny wings. That causes merging as the skin heals. Pair this with an off-shoulder top for evenings where the wing geometry can be framed cleanly.
Studio Day Picks
The collarbone pieces above combine exposed bone, thin skin, and frequent fabric contact, so a few studio day items smooth the session and the first week.
-
Stencil transfer paper kit. Lets you preview placement on the collarbone and adjust before the needle touches skin, especially useful for asymmetric or oversized wings.
-
Topical numbing cream. Applied 45 minutes before the session can ease tenderness along the clavicle edge without affecting stencil adhesion.
-
Thin protective film roll. Useful for protecting the area from shirt friction during the first 48 hours, particularly for mirrored and shoulder-spanning designs.
-
Fragrance-free gentle body wash. Cleanses the clavicle zone without stripping the delicate linework that fine line wings depend on.
-
Aquaphor healing ointment. Thin application in the first days keeps the skin supple and reduces scabbing that can pull on fine lines.
7. Butterfly with Tiny Script Along the Wing Edge
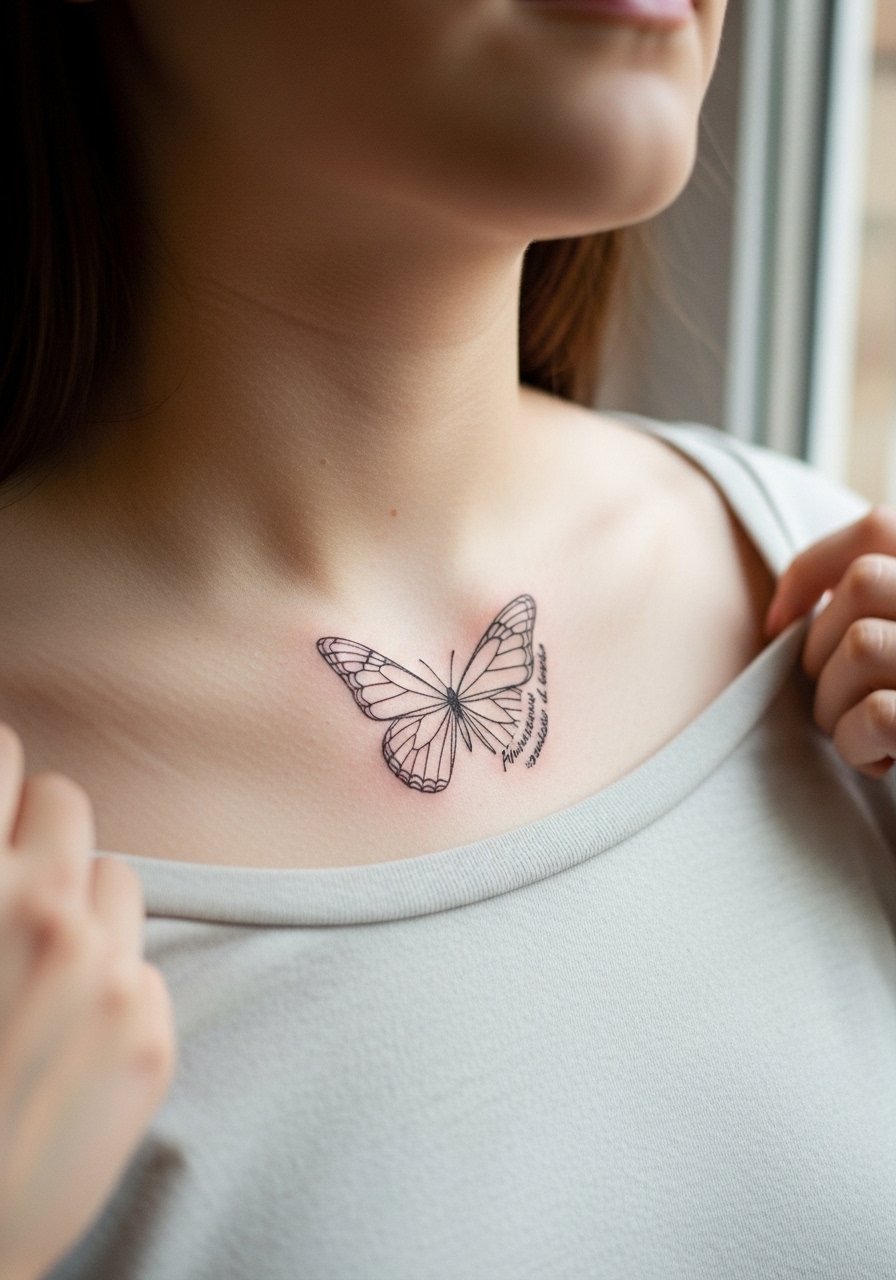
Adding a short word or date along the wing edge personalizes without crowding the design. Specify exact lettering and font to your artist because tiny text can blur faster than simple linework. Session time is usually under an hour with local discomfort over the bone. A common mistake is asking for script too small to remain legible after healing. If you like wearing necklaces, a thin pendant sits nicely above this placement. Try a delicate nameplate necklace that complements without rubbing the wings.
8. Gothic Moth Variant for an Edgier Look
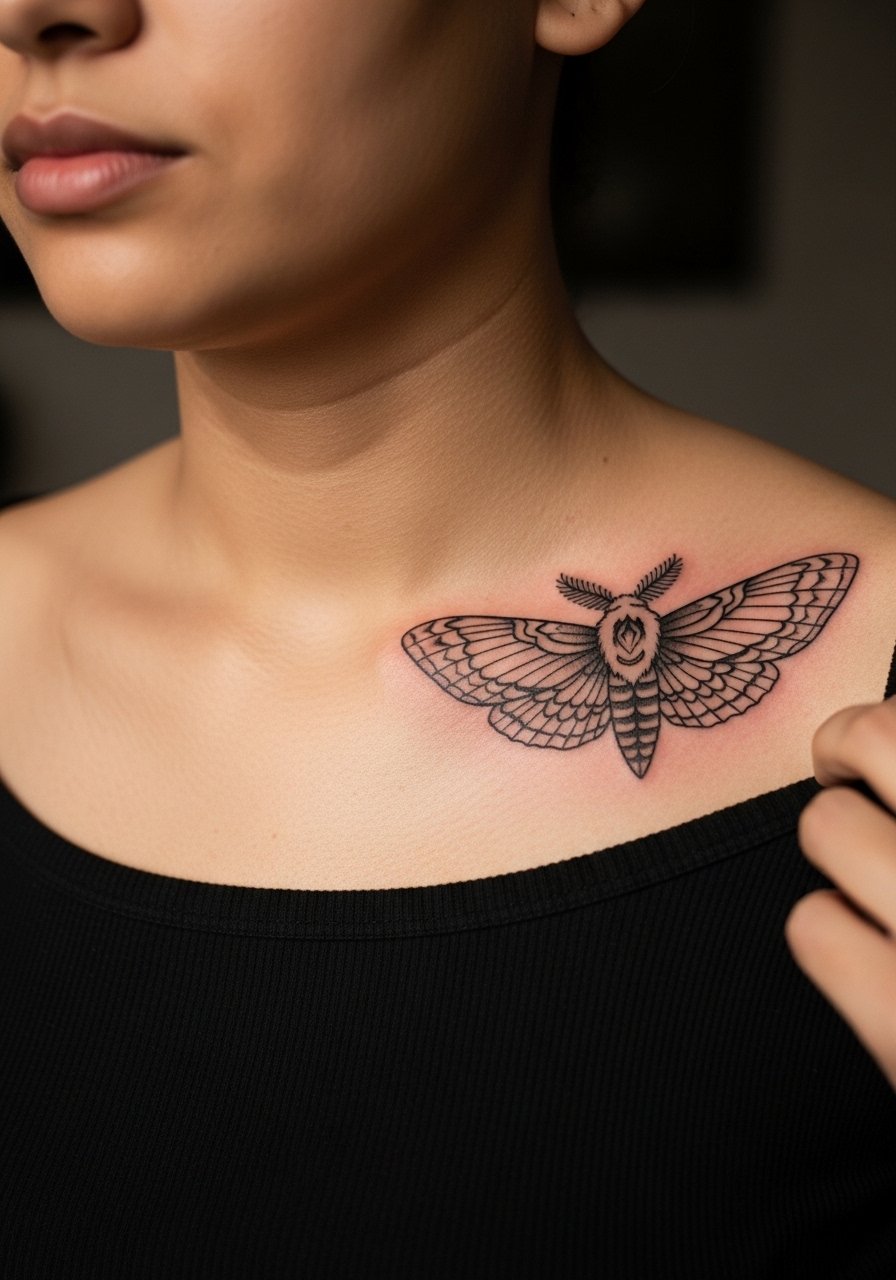
Choosing a moth over a butterfly gives an edgier mood while keeping similar lines. In consultation mention darker thorax detailing and bolder wing borders so the silhouette stays readable years later. Pain and session time mirror other collarbone pieces. There is a split in opinion among artists on how decorative thorax details age. One camp says keep thorax minimal to avoid blurring, and the other prefers confident lineweight and spacing to preserve detail. Ask where your artist stands and see healed examples before booking. For evening looks, an open-back dress can show the upper chest while keeping the sternum covered.
9. Broken-Wing Butterfly with Fine Line Cracks
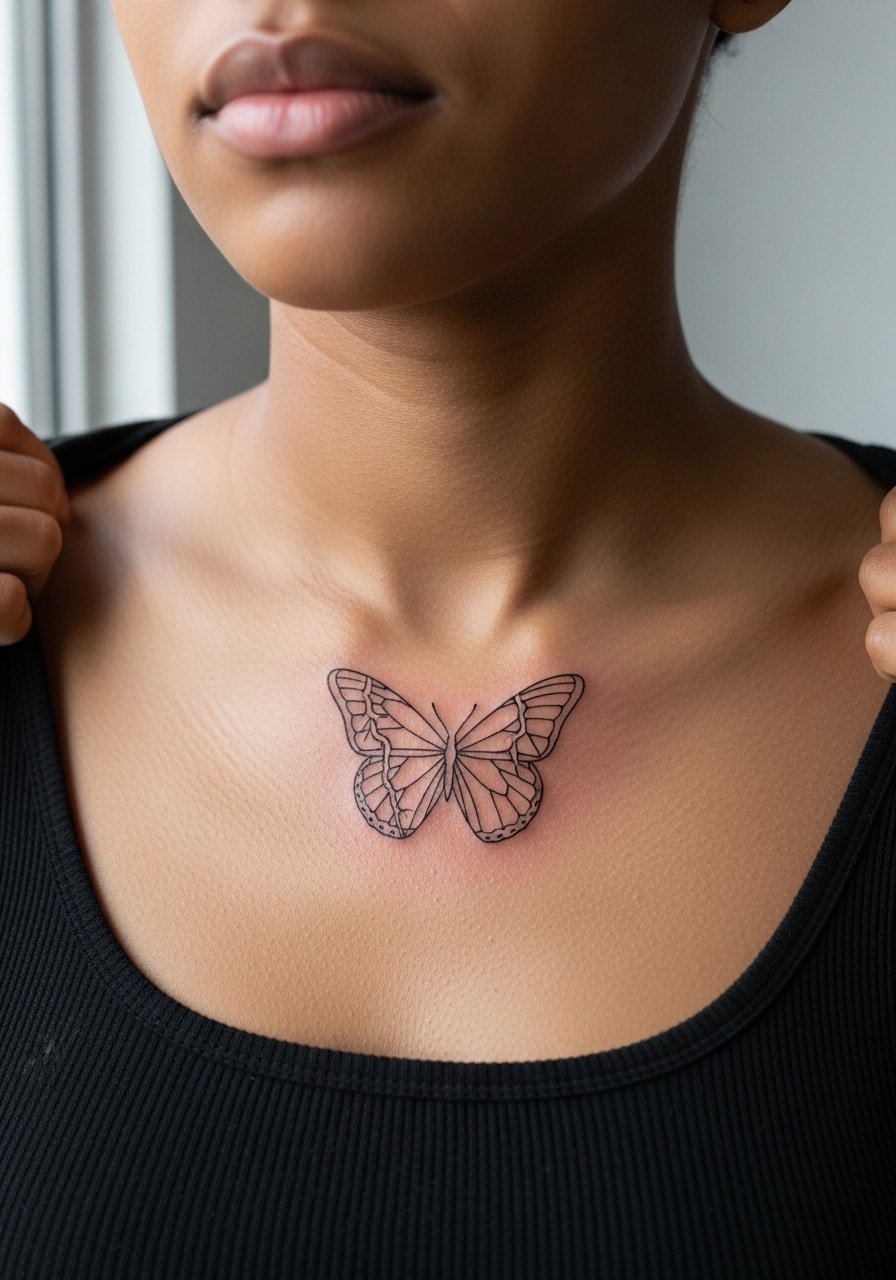
An intentionally broken-wing motif reads expressive and raw. Ask the artist to use controlled spacing in the crack lines so they do not knit together while healing. Expect a standard session length and sharper sensation over the bone. A common error is overfilling the cracked areas with shading that later blurs. If you plan to layer jewelry, leave space for a simple pendant rather than thick chokers that rub the broken edges. A simple cord choker works without crowding the tattoo.
10. Negative Space Butterfly with Dot Accents
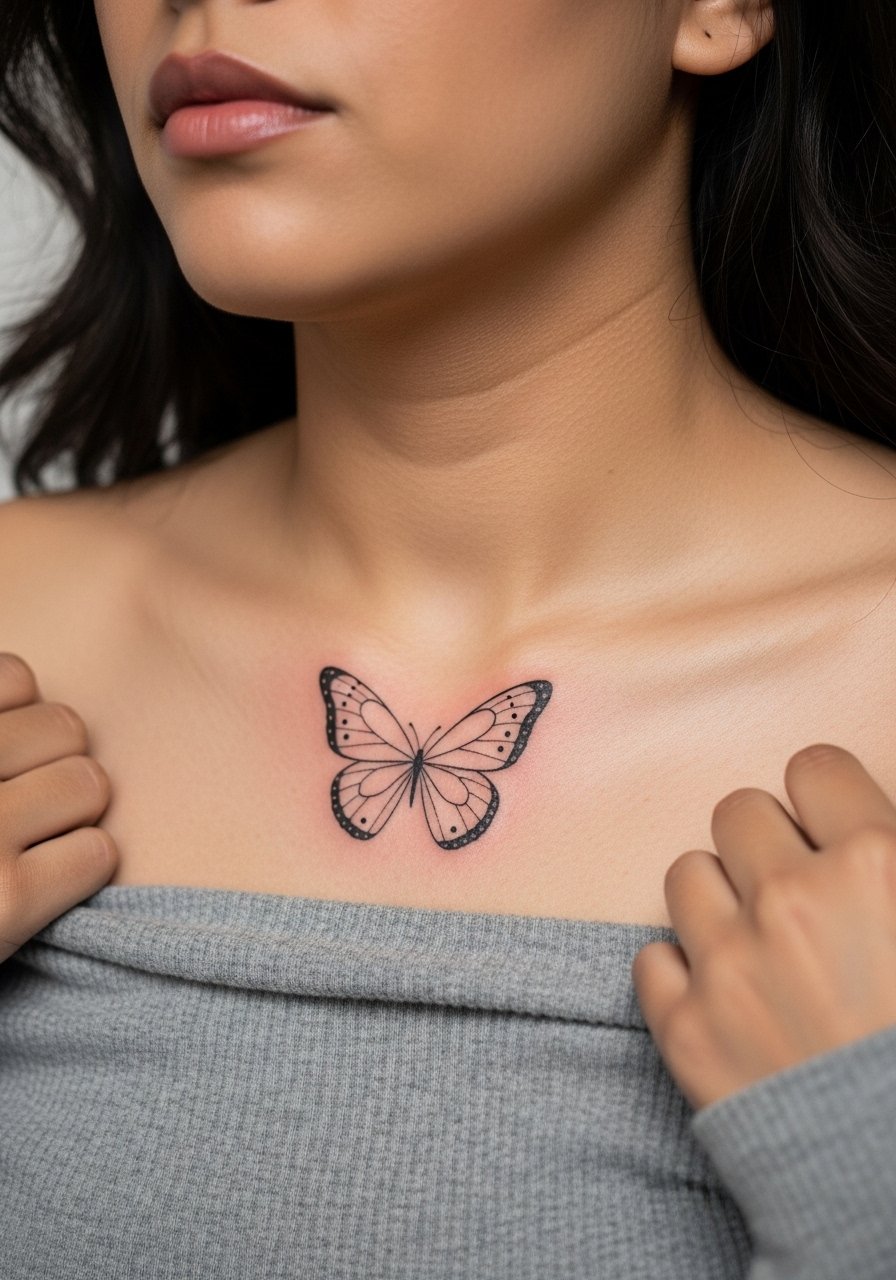
Negative space butterflies use skin as part of the design, which keeps the look light. When you ask for this, clarify the exact zones you want left untouched so the artist plans the stencil with breathing room. Typical session time is around an hour and pain is moderate. The main mistake is crowding negative pockets with tiny dots that look intentional at first and clump later. For clothing, an off-shoulder sweater frames the open wings while minimizing chafing by collars.
11. Butterfly with Minimal Watercolor Wash Accent
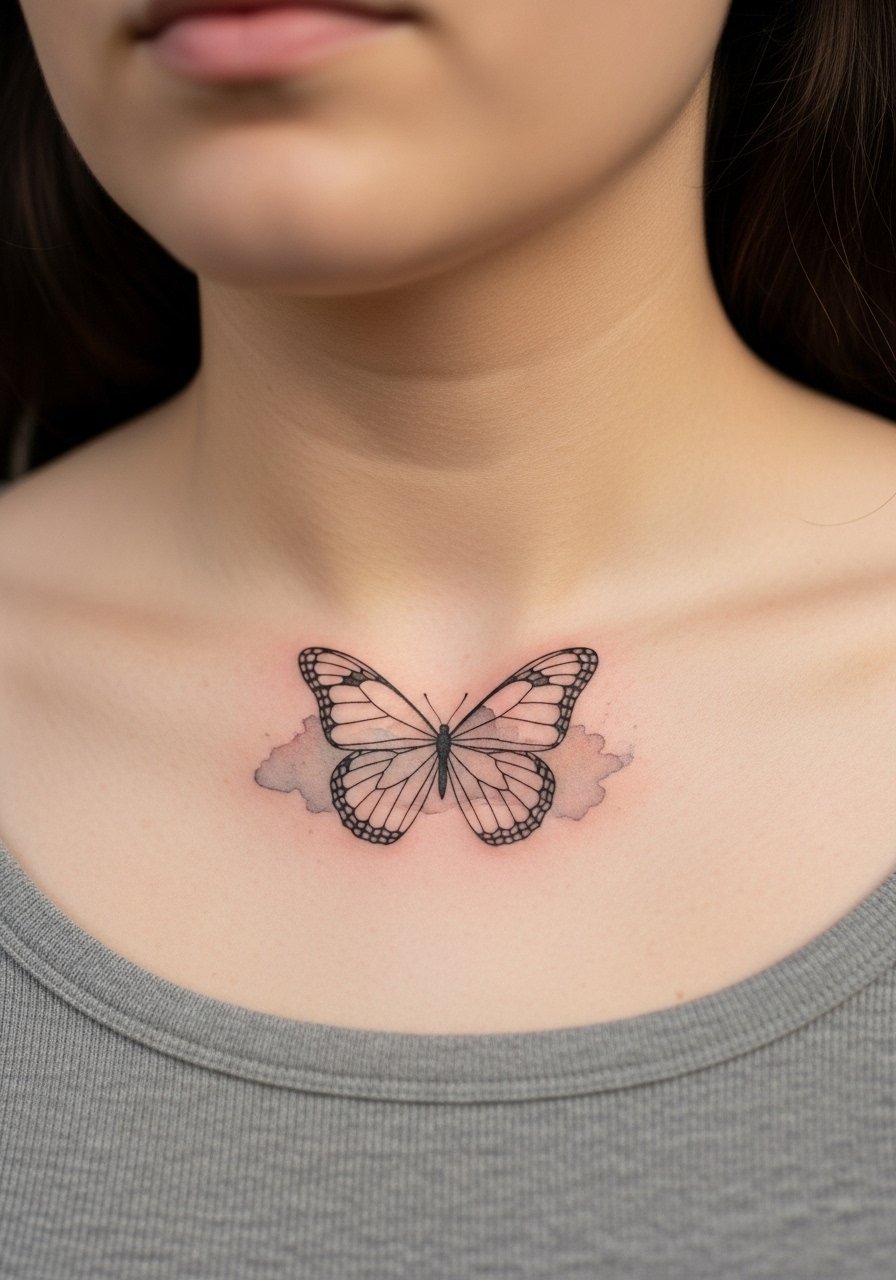
A faint watercolor wash can lift the fine line and keep the butterfly airy. Tell the artist the wash should be sparse and not touch the thin outlines directly. The controversy here is clear. One camp avoids watercolor near fine line because pigment diffusion can soften edges. The other camp says light, well-spaced washes complement linework when executed shallow. This design may need touch-ups sooner than solid black linework. Pair the piece with an open-neck blouse for subtle color moments that do not rub the area.
12. Stacked Tiny Butterflies Along the Collarbone Ridge
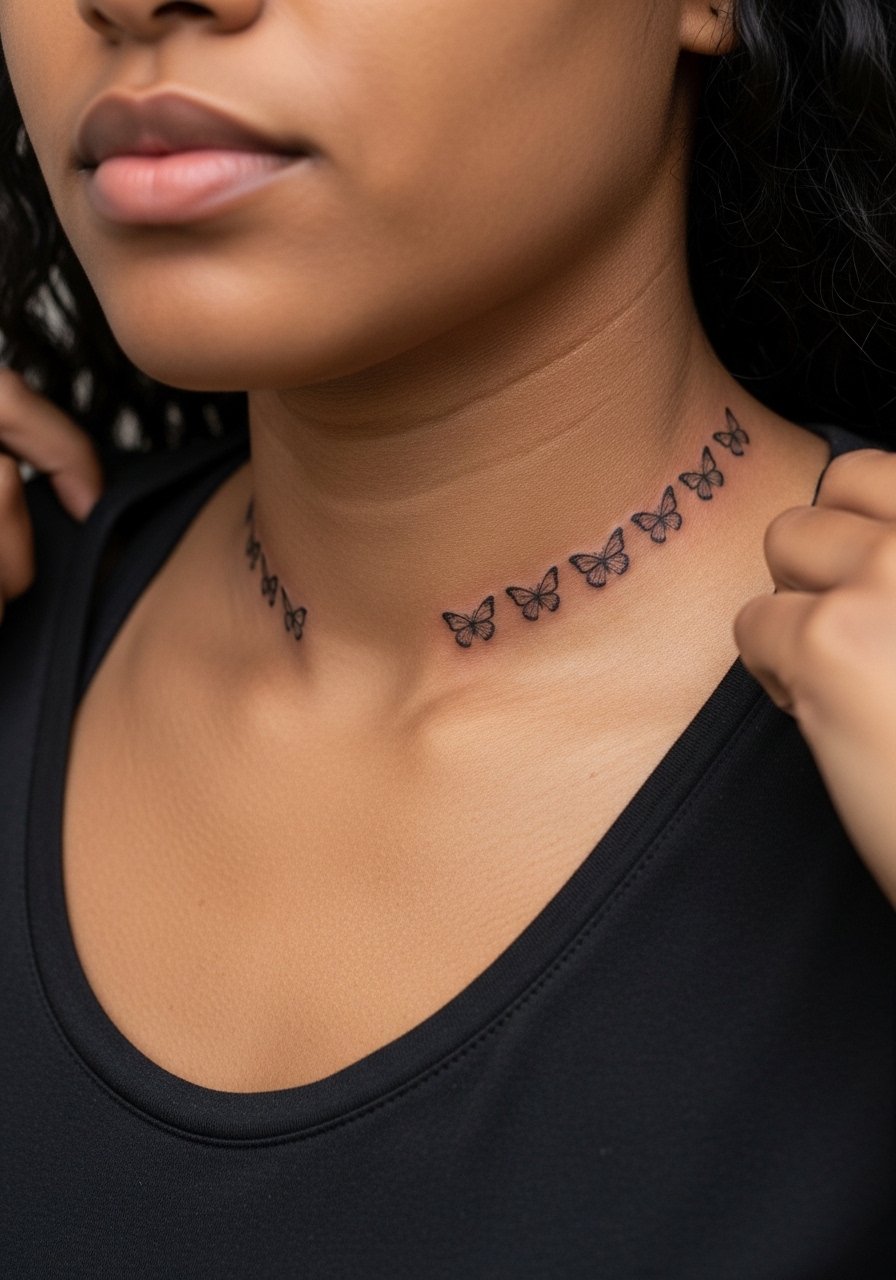
A chain of small butterflies follows the clavicle like a delicate garland. Ask for consistent spacing and slightly varied orientations so movement reads natural. Session time is longer than a single micro piece because of multiple placements. A frequent mistake is making each butterfly too detailed; keep them simple to avoid early merging. For day-to-day wear, a v-neck tee reveals the whole sequence without fabric overlap.
13. Anatomical Butterfly with Vein-Like Linework
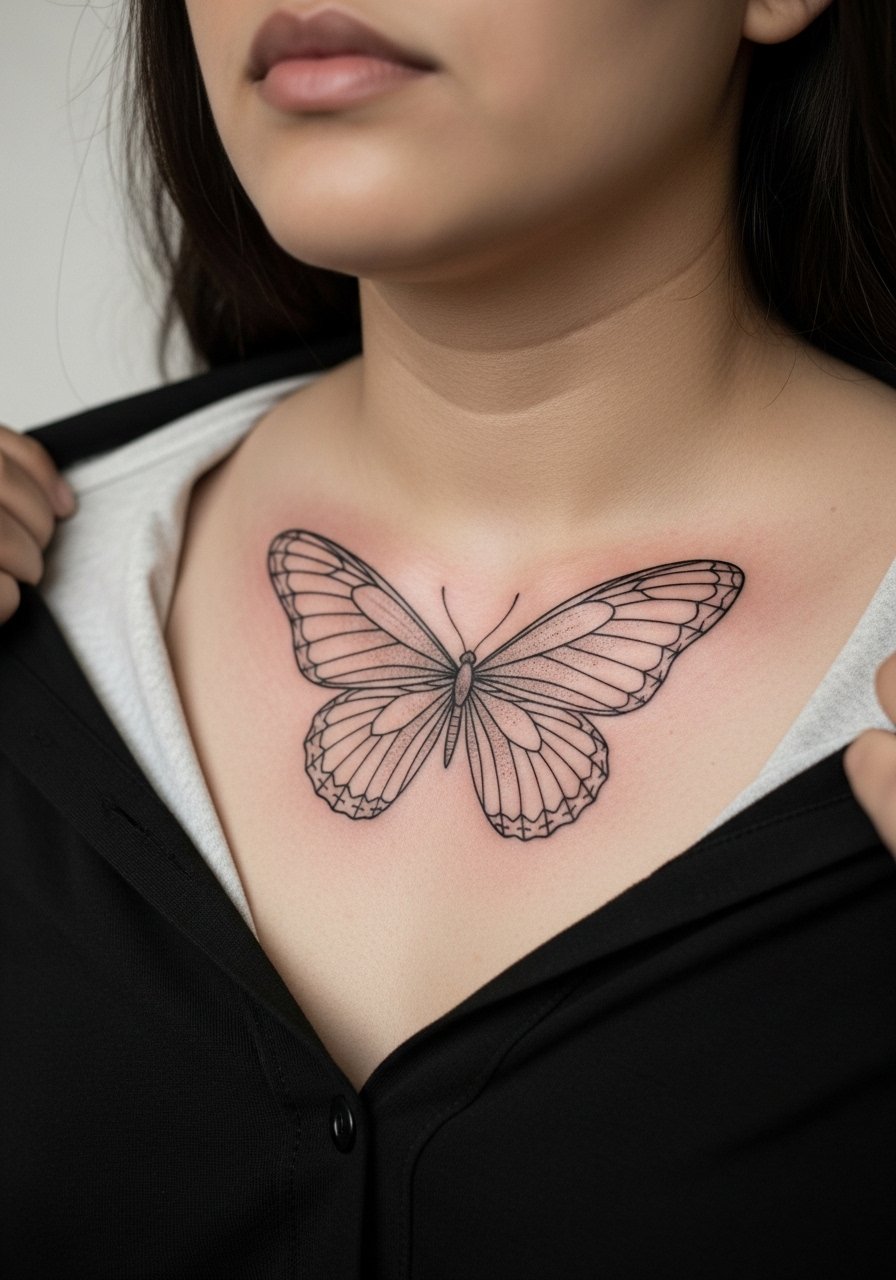
An anatomical take emphasizes internal vein structure for a moodier feel. During consultation ask for bolder primary veins with finer secondary lines to balance longevity. Sessions take longer because of the extra internal lines. One mistake is requesting the secondary veins too fine, which makes them vanish over time. This style pairs well with layered necklaces that sit above the wings. Try a stacked chain set to complement the anatomical lines without rubbing.
14. Barbed Wire Fringe with Tiny Butterfly Accent
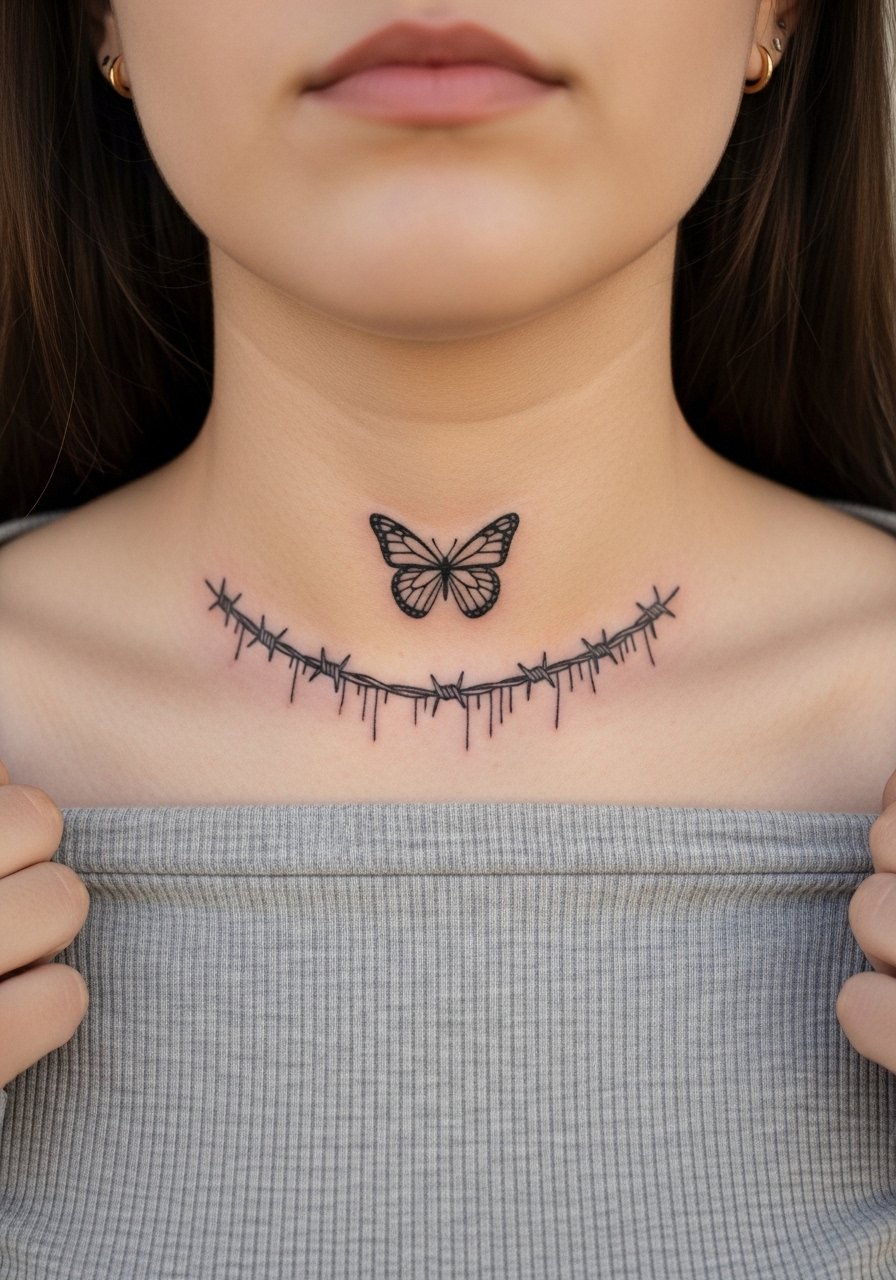
Combining barbed wire with a tiny butterfly offers contrast and edge. Tell your artist you want the wire lines slightly heavier so the fragile butterfly reads intact beside them. Expect moderate pain and a one-hour session. Common mistakes include making the barbs too dense close to the butterfly, which competes visually. For a look that balances hardness and softness, pair with a fitted crewneck tee that keeps fabric off the tattoo in the first week.
15. Origami Butterfly in Crisp Fine Lines
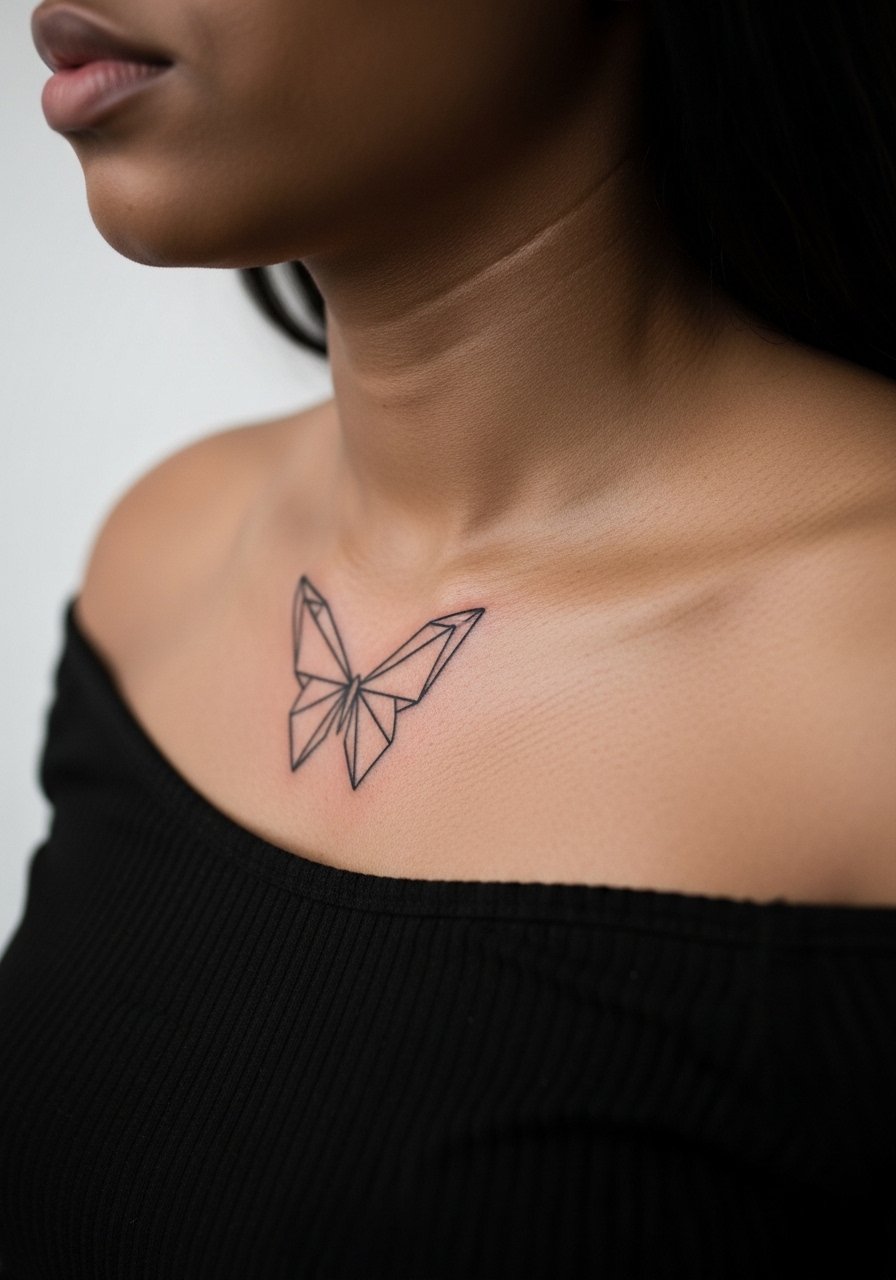
Origami butterflies read geometric and intentional. Ask the artist to treat fold lines as primary outlines with slightly thicker weight so the planes remain distinct at year two and beyond. Sessions are straightforward and under an hour for small to medium sizes. A misstep is crowding folds with tiny connectors that blur. This design looks great with a minimalist choker that sits above without rubbing the origami edges.
16. Halftone Wing Effect with Fine Line Outline
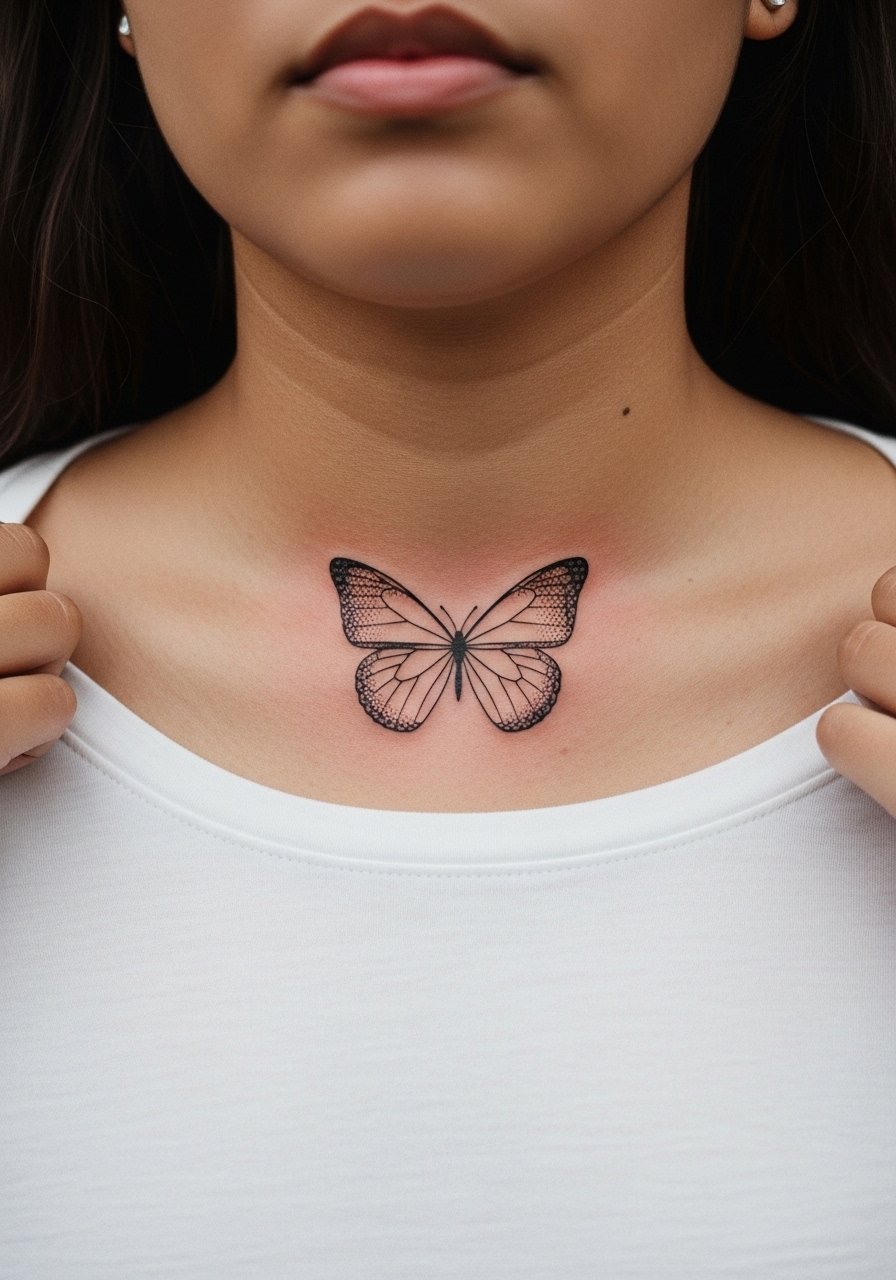
A halftone gradient gives depth without heavy shading. When you request this, make sure the artist maps dot density so the darkest area sits away from high-movement skin. Halftone ages more predictably than full grey wash because the dots merge slowly. Typical session length is about an hour and sensitivity is mild to moderate. Avoid asking for too tight a dot grid. For wardrobe, a crew-neck tank keeps the area exposed without collar friction.
17. Butterfly with Tiny Chain Link Trail
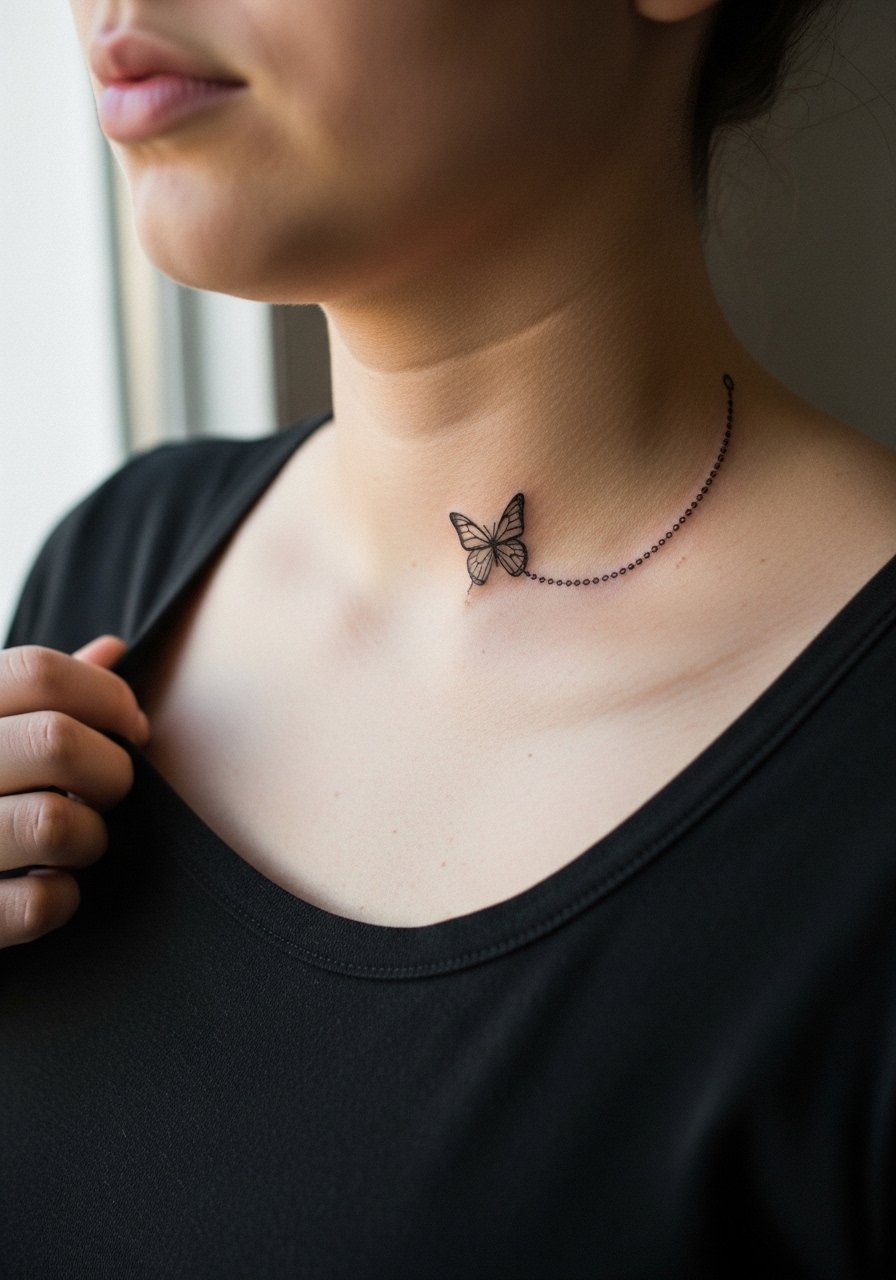
A chain link trail adds movement and a jewelry-like motif. Ask the artist to keep links open and airy so they do not block the skin texture. Session time depends on length but usually under 90 minutes. A common mistake is requesting solid black links at small scale, which become blobs. For an accessorized look, layer with a thin chain bracelet worn as a necklace that echoes the chain motif without rubbing the tattoo.
18. Butterfly with Crescent Moon Accent
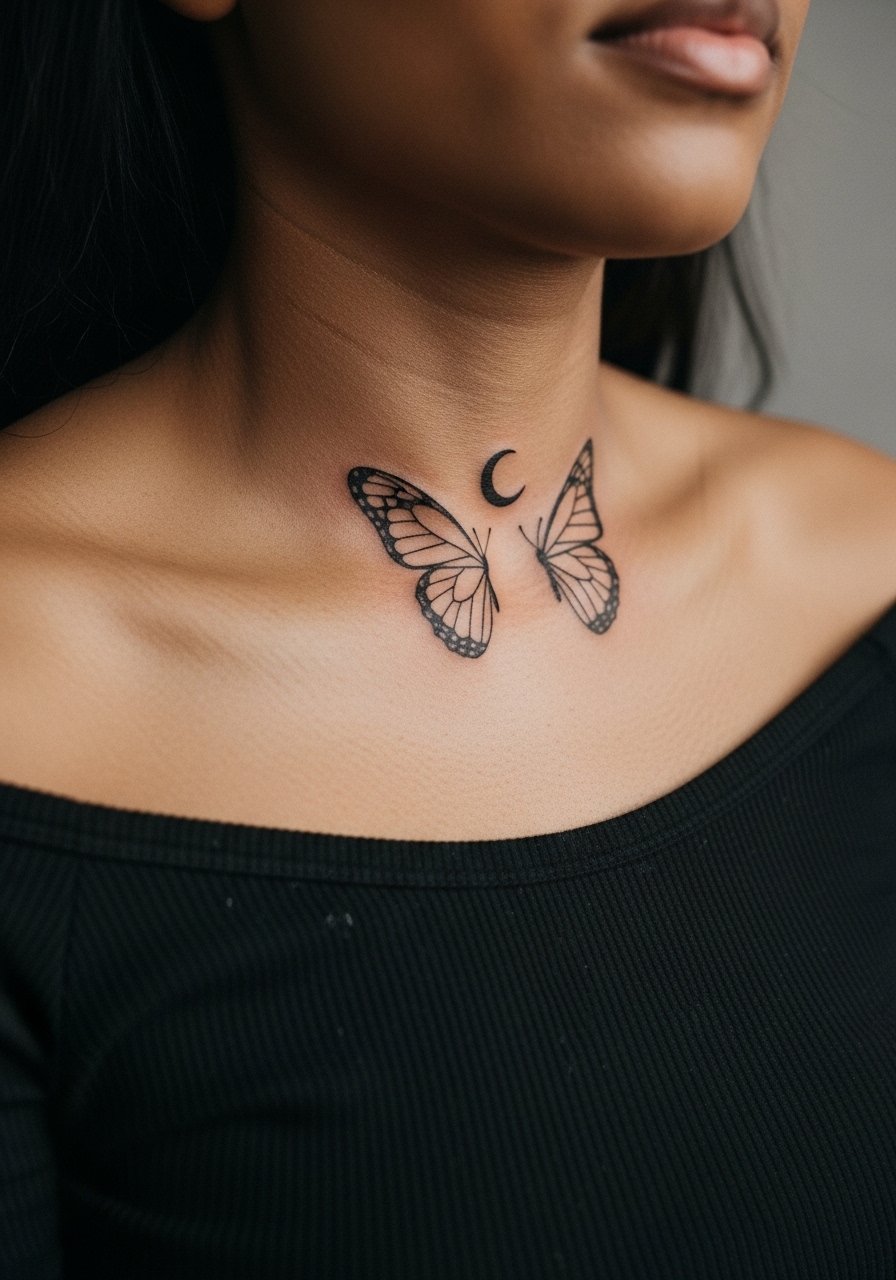
Pairing a moon with a butterfly adds celestial context and balances negative space. Tell your artist you want the moon separate from the wing to prevent merging in the first year. Sessions are short and sensitivity is typical for the area. A mistake is placing the moon too close so it overlaps after minor swelling. To show it off in cooler months, layer with a wide-neck sweater that frames the symbols without persistent friction.
19. Fragmented Barcode Butterfly
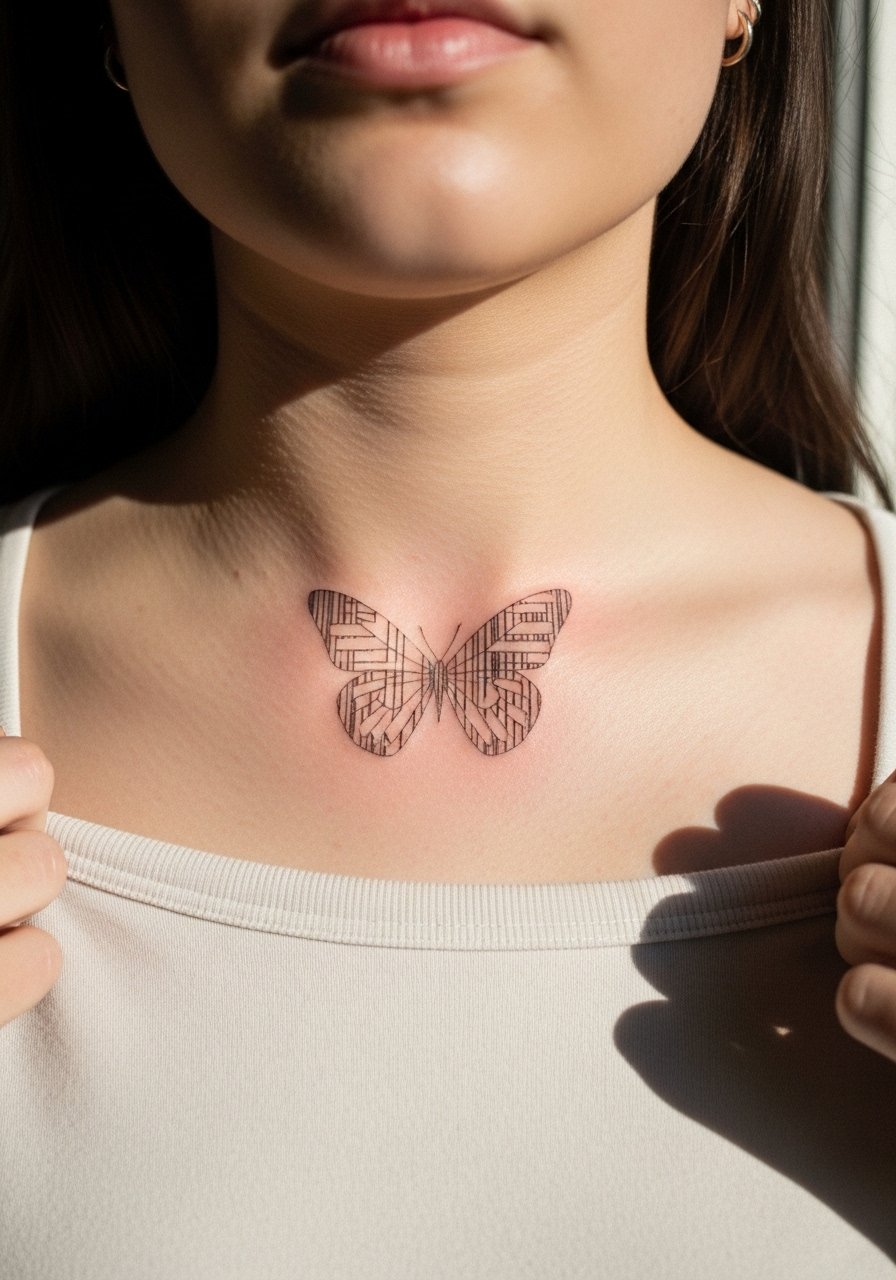
Barcode wings read modern and graphic. Ask for slightly thicker primary stripes and thinner secondary gaps so the pattern stays legible. Sessions run around an hour. A pitfall is making barcode bars too thin relative to skin texture, which leads to blending. For a streetwear look that still reveals the design, try a wide-neck sweatshirt with the collar lowered on one side.
20. Butterfly with Thorn Vine Embrace
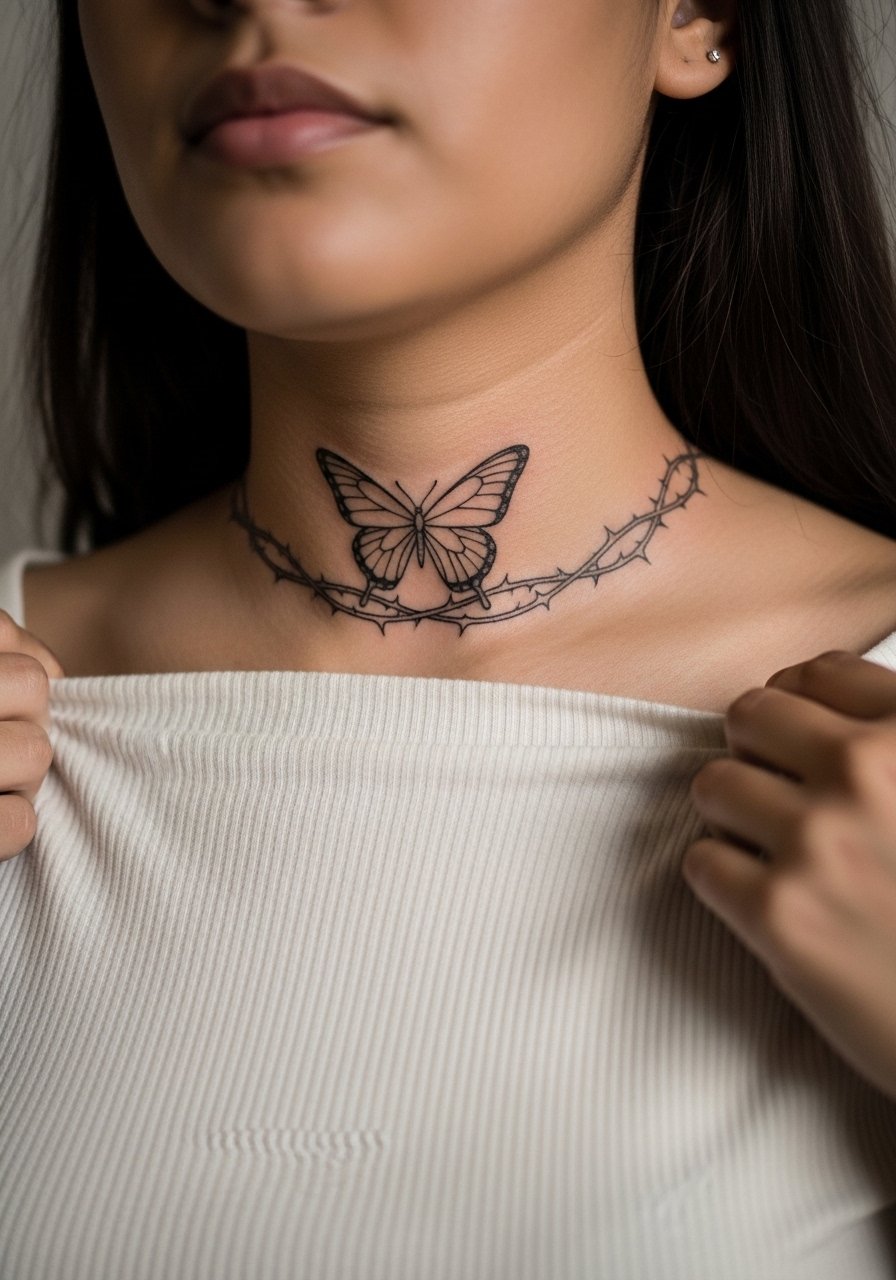
A thorn vine adds contrast and frames the butterfly. During consultation clarify vine thickness and thorn spacing so the pattern does not overpower the wings. Sessions generally last over an hour depending on vine length. The common mistake is overdrawing thorns too close to delicate wing veins. For layered looks, a button-down shirt worn slightly open shows the vine without constant contact.
21. Minimal Outline with Dashed Motion Lines
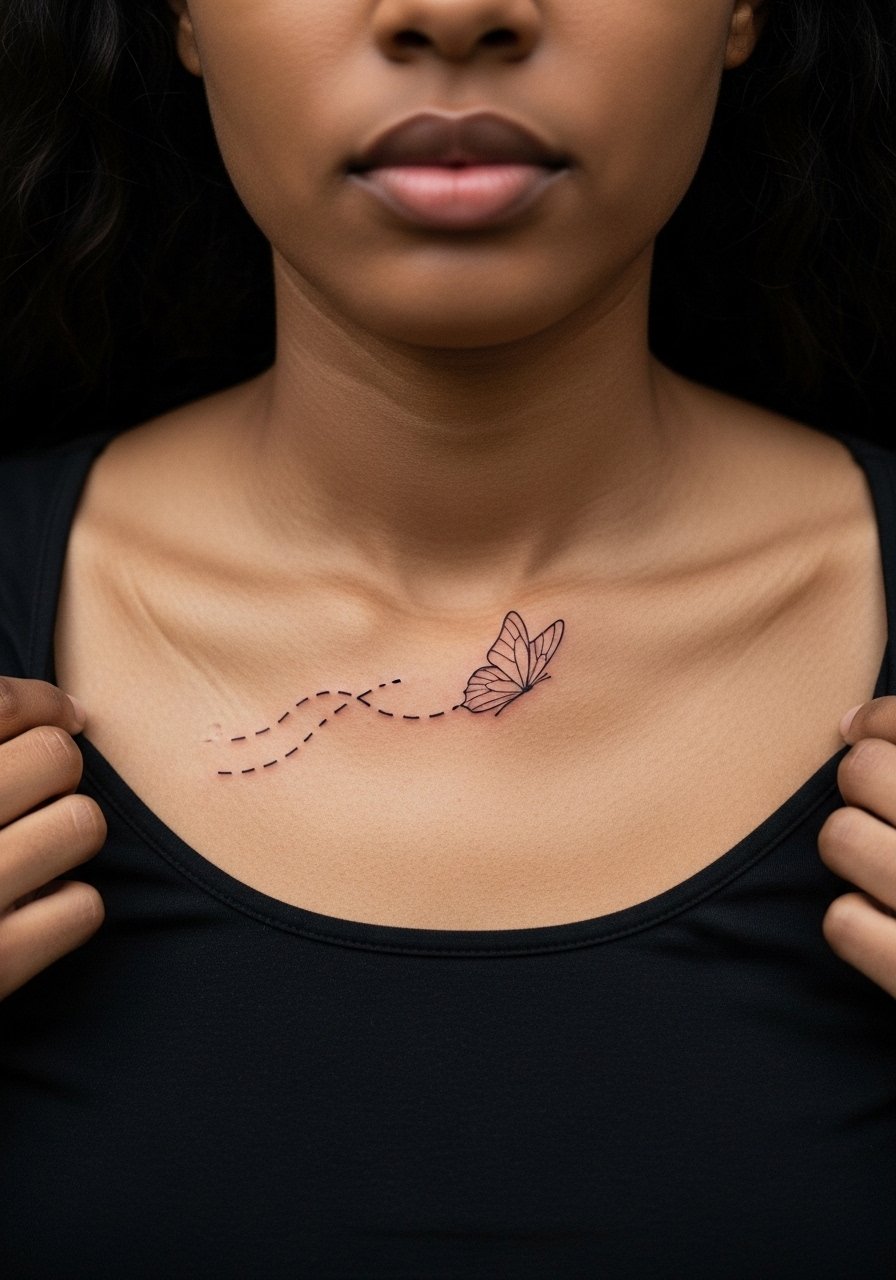
Dashed motion lines convey movement and keep the butterfly airy. Tell your artist how long and how spaced you want the dashes because tight dashes can merge. Expect a brief session and typical clavicle sensitivity. A mistake is using dashes too small to remain distinct after skin settling. This pairs well with a delicate pendant necklace that does not sit against the trailing lines.
22. Inverted Negative Wing with Bold Outline
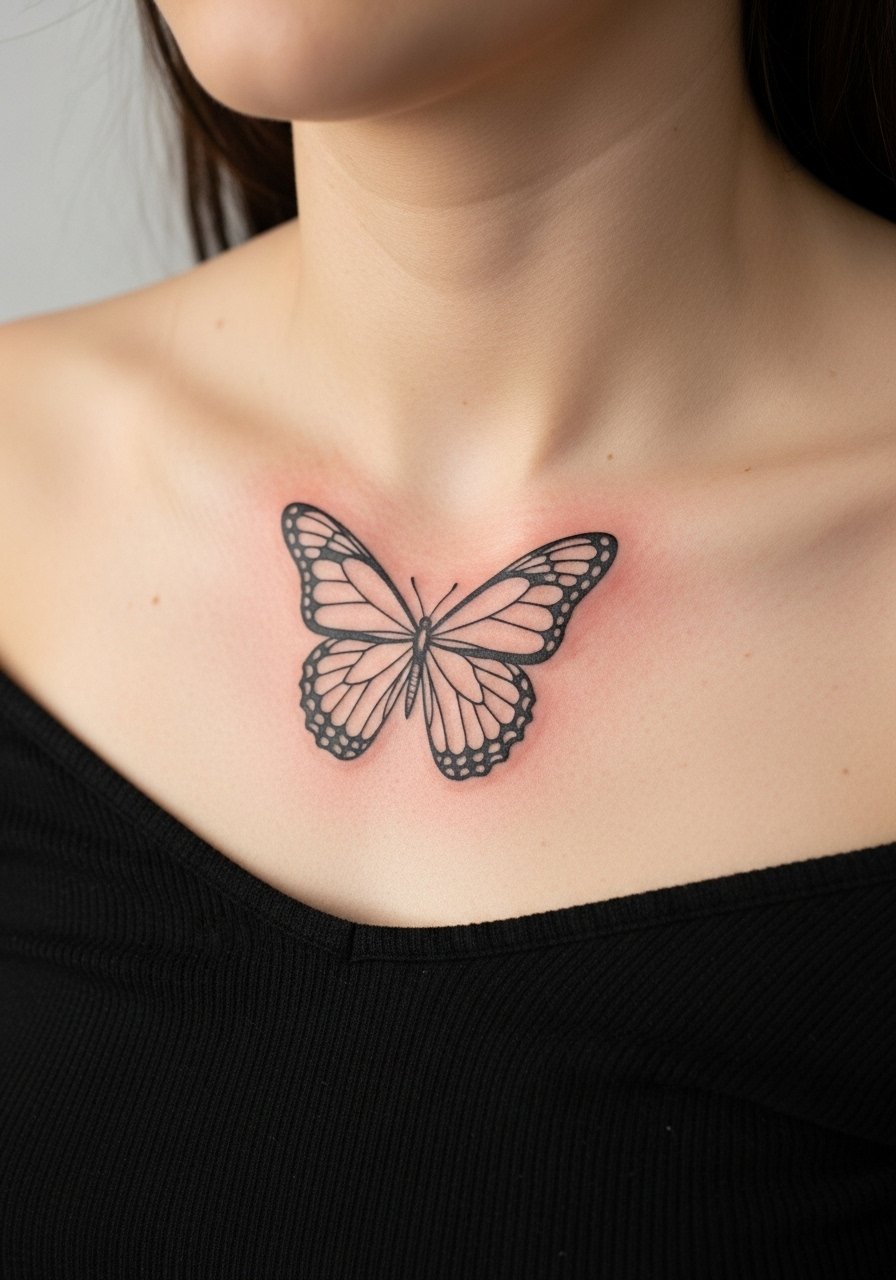
Using a bold outer outline with negative inner panels gives the piece longevity while keeping internal detail light. Ask the artist for contrast between the outer weight and inner linework to protect the shape. Sessions can be 60 to 90 minutes. Commonly, people try to add too much inner detail and then need touch-ups. Wear a wide-neck top that reveals the outline without repeated fabric pressure.
23. Memento Mori Butterfly with Small Skull Thorax
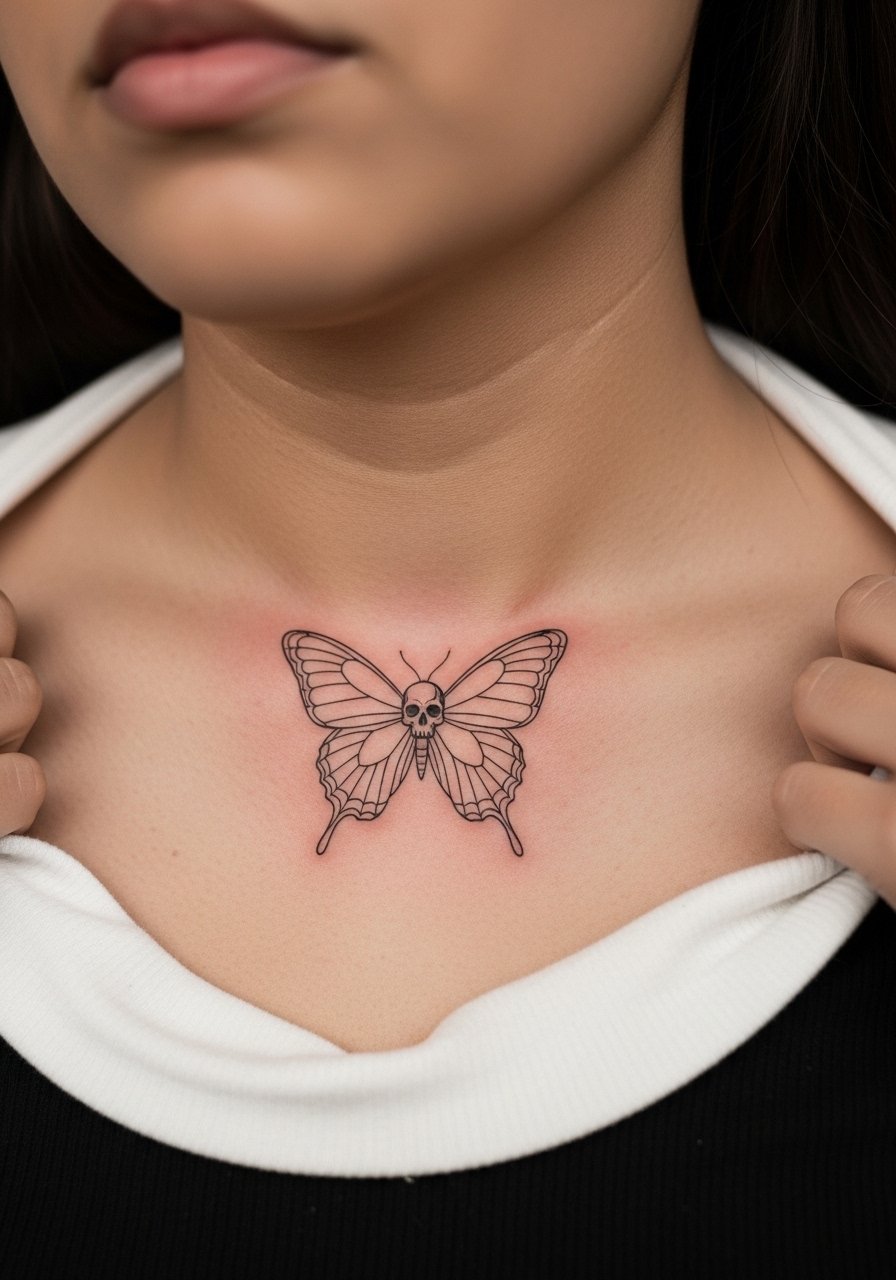
A skull element gives a subtle dark edge while keeping the silhouette feminine. When you bring this in ask for the skull detail to be simplified so it reads at small scale. Sessions are standard length and pain is typical. An error is over-detailing the skull which then fades into an indistinct shape. For outfits, a low scoop knit top frames the clavicle and the small skull thorax without rubbing.
24. Glitch Effect Butterfly with Offset Lines
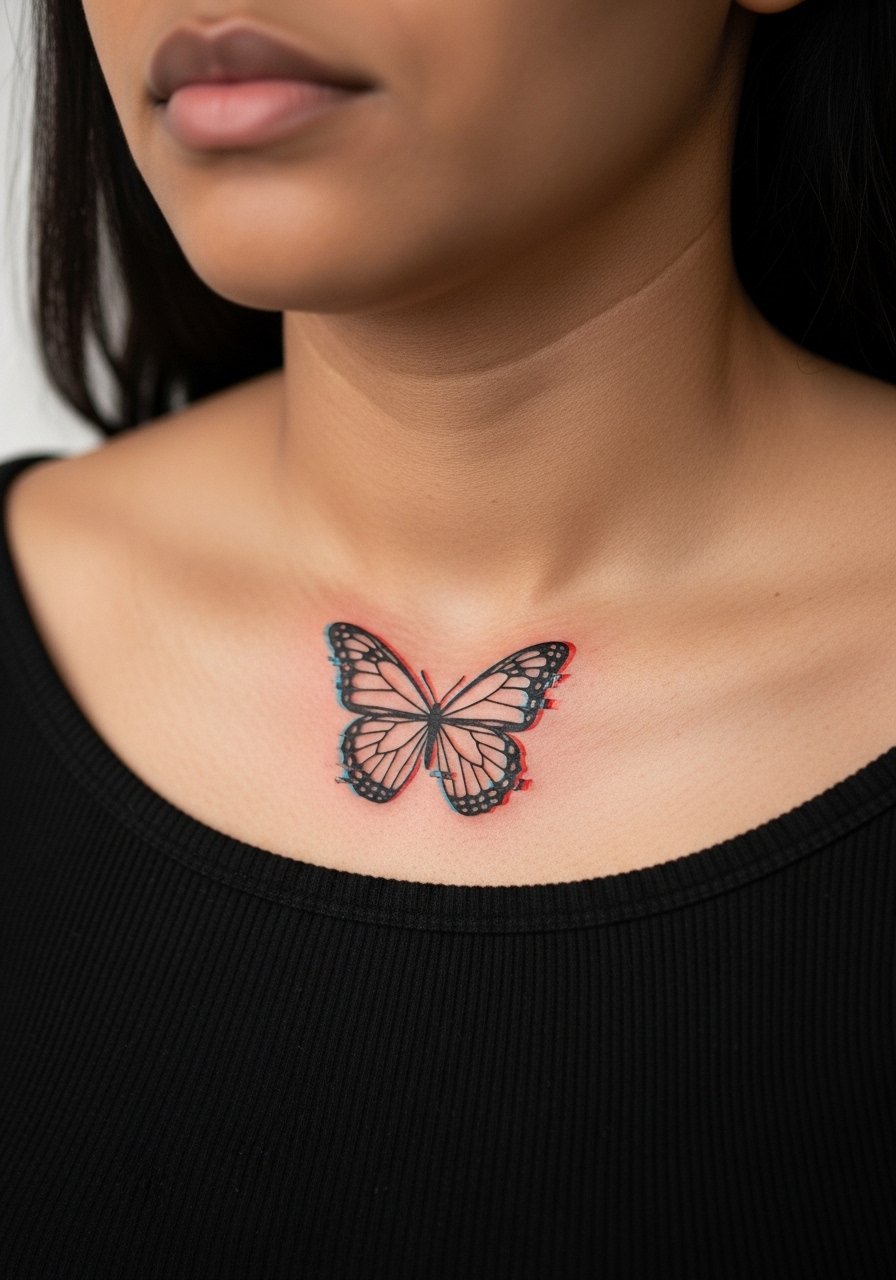
A glitch aesthetic uses faint offset outlines to suggest motion or interference. Tell your artist the offset should be subtle and not full saturation, so the fine line remains primary. Session time varies with complexity. Some artists argue glitch effects complicate healing because of extra shallow color placement. The safer route is minimal offset in one or two directions. Pair this with a cropped denim jacket slipped off one shoulder to reveal the glitch without constant friction.
25. Mandala-Patterned Wings in Fine Line Detail
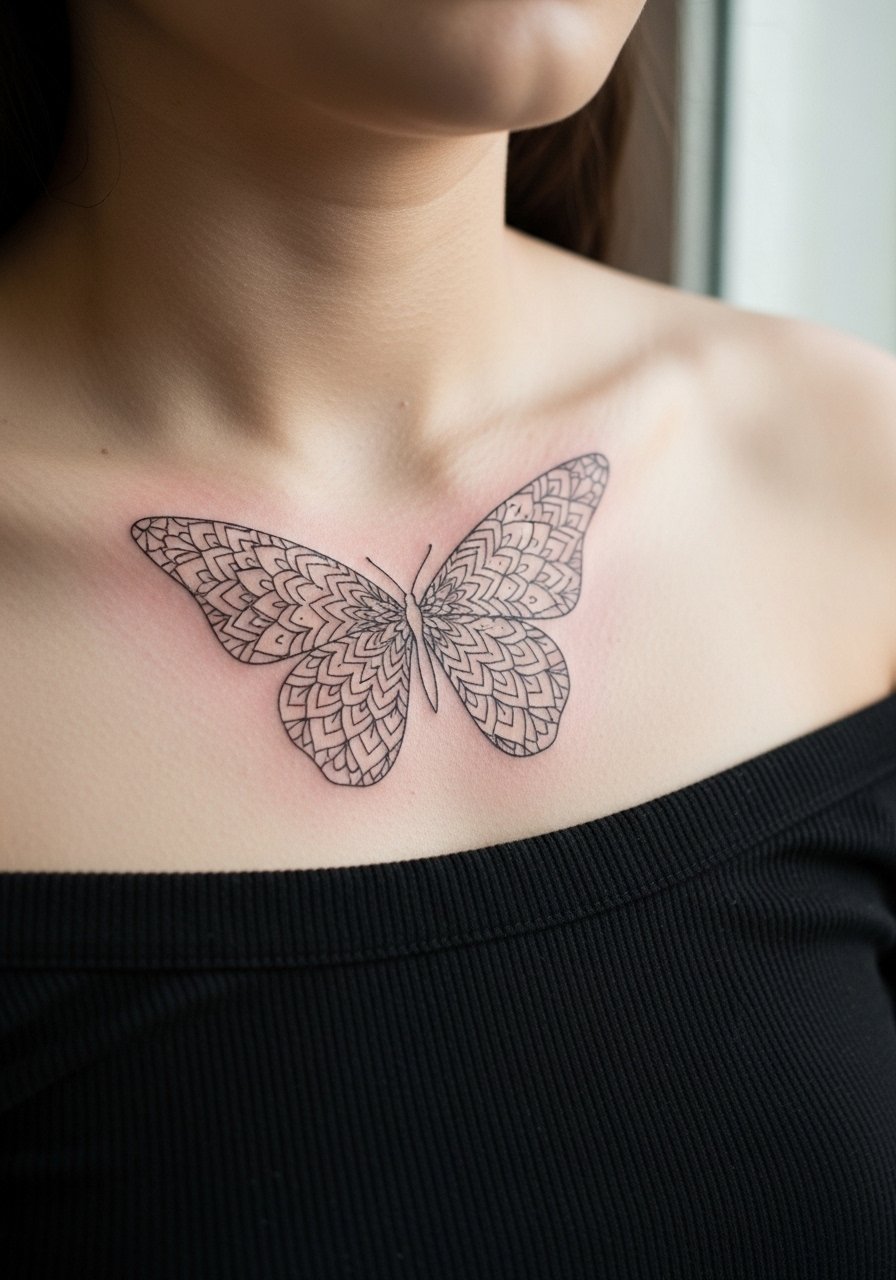
Mandala wing patterns offer ornate detail while keeping the central outline clean. When booking, insist on larger wing dimensions to give the mandala room to breathe. Expect longer sessions and a higher chance of needing a touch-up for tiny inner elements. The mistake is compressing mandala detail into small wings. For a balanced look, pair with a flowy off-shoulder dress that exposes the clavicle and matches the pattern's symmetry.
26. Anatomical Heart Shaped into Butterfly Outline
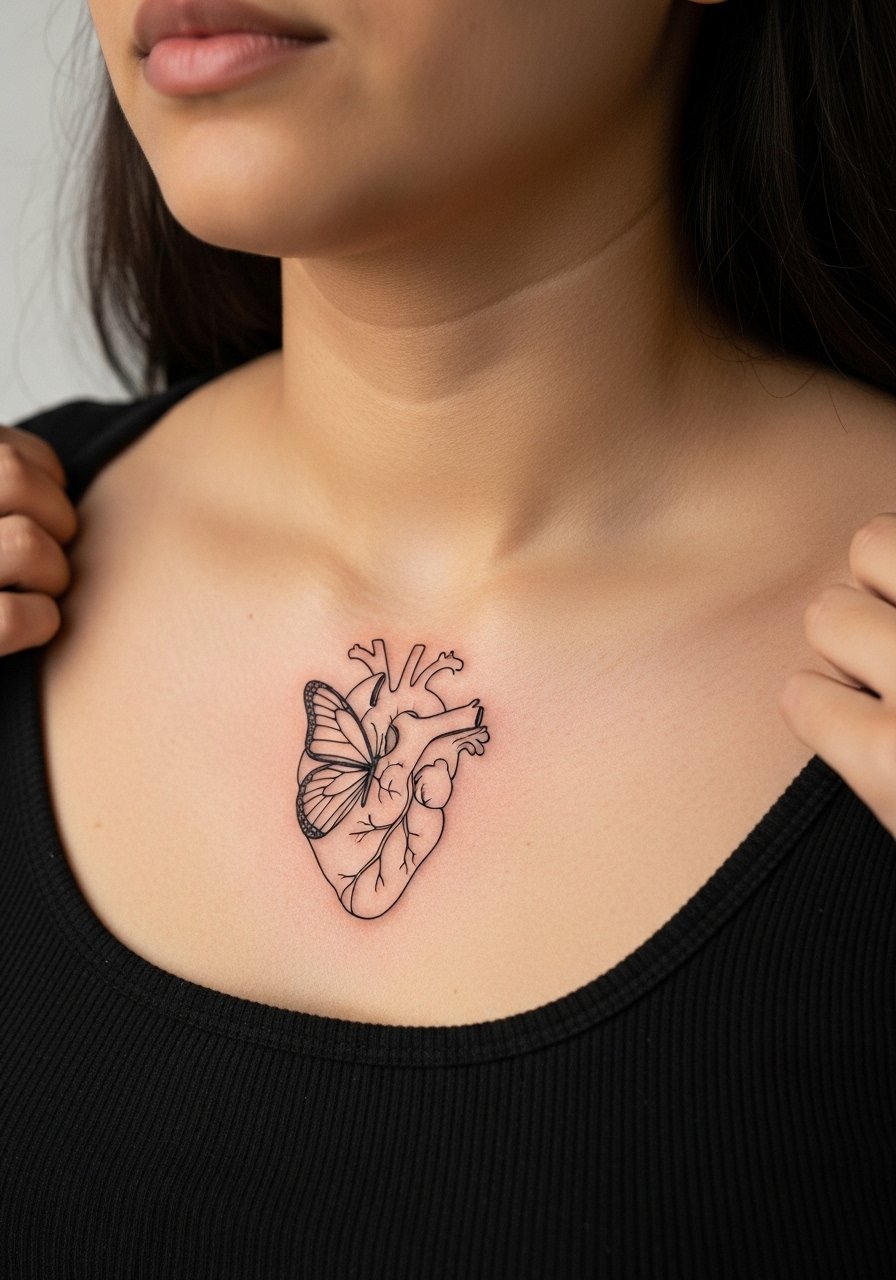
Merging an anatomical heart into butterfly wings blends symbolism and form. Clarify the balance so the heart does not read as excessive detail. Session time is standard and sensitivity is normal. A common error is placing too much micro-detail inside the heart portion. For a clean presentation, wear a low scoop tee that keeps neckline contact minimal.
27. Cage Butterfly with Open Bars and Free Wing Escape
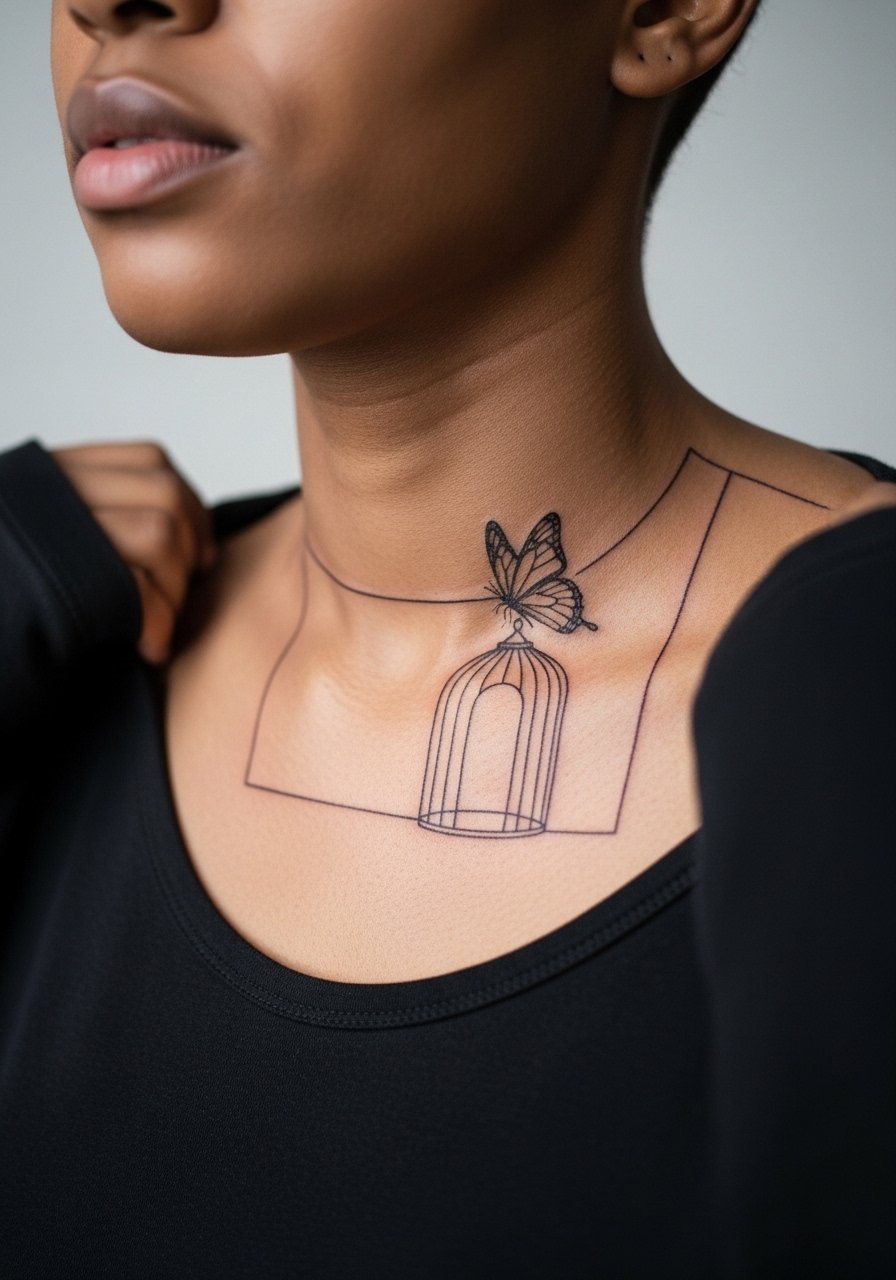
A cage motif creates a narrative where the butterfly appears poised to fly free. Ask your artist to keep cage bars slightly separated from the butterfly to prevent lines from knitting together in the first year. Sessions may run longer if the cage is detailed. People often request very thin cage bars that later blend, so request moderate line weight for the bars. For styling, choose an asymmetrical neckline top that favors the side with the wings so the story is visible without constant fabric contact.
Frequently Asked Questions
Q: Will a fine line butterfly on the collarbone fade faster than on the forearm?
A: In my experience fine line on the collarbone can fade faster because the skin is thin and the bone sits close to the surface, which can push ink out slightly more than on fleshier forearms. Expect touch-ups earlier than forearm work, especially if you get a lot of sun exposure in that spot. Ask your artist about slightly bolder anchor lines to increase longevity.
Q: How much will movement and clothing affect a collarbone butterfly?
A: Movement from shoulders and collars can rub new ink during the first two weeks, and repeated friction over months can speed softening. For the session wear a loose, button-down shirt or a wide-neck top you can pull aside. For showing it off, off-shoulder or scoop-neck pieces reduce constant contact and keep edges crisper.
Q: Are there designs here that require a specialist or different technique?
A: Yes. Dense mandala fills, micro script, and extremely fine dot gradients benefit from artists who specialize in fine line and stipple work. Artists split on some approaches, with one group favoring conservative spacing to prevent blowout and the other using confident shallow passes to preserve lightness. Look for healed photos of similar work before booking.
Q: Can I get a watercolor wash with fine line and still keep the edges sharp?
A: You can, but it depends on placement and how the wash is applied. Light, well-spaced washes that avoid touching the thinnest outlines age much better than washes layered directly beneath hairline strokes. If you love that look, ask for a test spot or a very subtle wash and be prepared for a potential touch-up at year two.
Q: How long does a typical collarbone fine line session take and what about pain?
A: Small to medium fine line butterflies usually take 20 to 90 minutes depending on detail and size. Pain on the collarbone is generally sharper than on fleshier areas because the needle rides close to bone. Numbing options can help for sensitive clients, and wearing a loose top makes the appointment less awkward.
Q: Should I be worried about career perceptions with a collarbone tattoo?
A: Collarbone tattoos are visible with many clothing choices, so consider how often they will be exposed in your day-to-day work. Some industries remain conservative about visible tattoos. If that is a concern, keep the design small and easily covered by a collared shirt or scarf.
Q: What should I ask my artist in consultation for a fine line butterfly?
A: Ask for healed photos of similar collarbone pieces, discuss line weight for anchor outlines, and talk through placement while standing so the stencil sits where you expect. Ask how they space interior detail to avoid future merging, and whether they recommend a touch-up timeline based on your skin type and lifestyle.
