
Fine line angel wing tattoos keep appearing in saved boards and DMs, but trend photos do not tell the whole story. Fresh, fragile-looking wings can look razor-sharp after a session and then soften faster than people expect if they are placed over moving skin or drawn too tight. Below are 27 considered ways to wear delicate angel wings, with what to ask your artist, how they heal, and how to style them so the ink still reads well years down the line.
1. Tiny Wings on the Inner Wrist
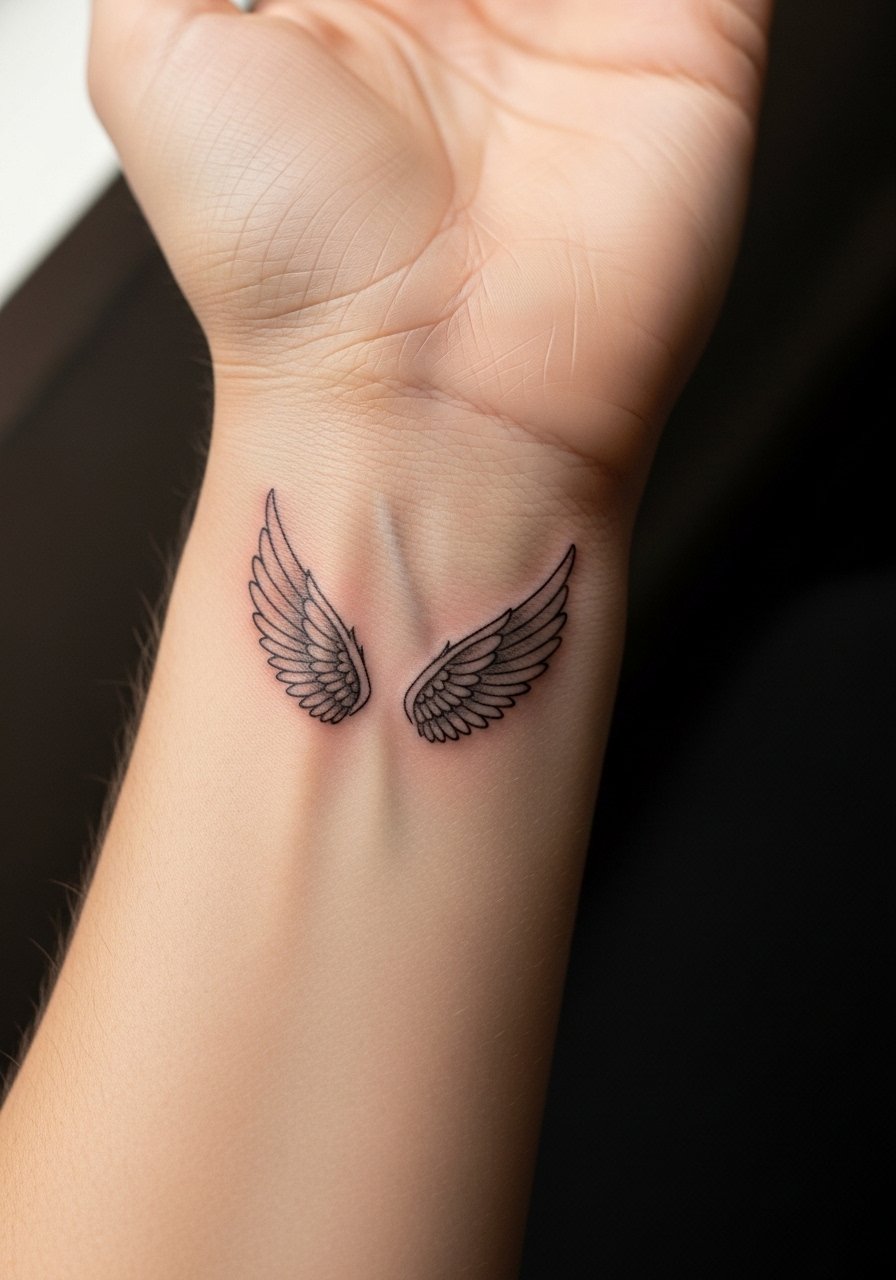
I recommend this if you want a discrete, personal mark that reads like jewelry. Pain is low to moderate and a session runs about 30 to 45 minutes. Tell your artist you want slightly spaced feathers and a single-needle weight so the wings keep definition at six months and beyond. Common mistakes are drawing the wings too dense, which leads to blurring by year two. Expect a touch-up around year two if you use that wrist a lot. For showing it off, rolled sleeves or a minimalist watch frame the piece without crowding the linework.
2. Delicate Back-of-Neck Wings
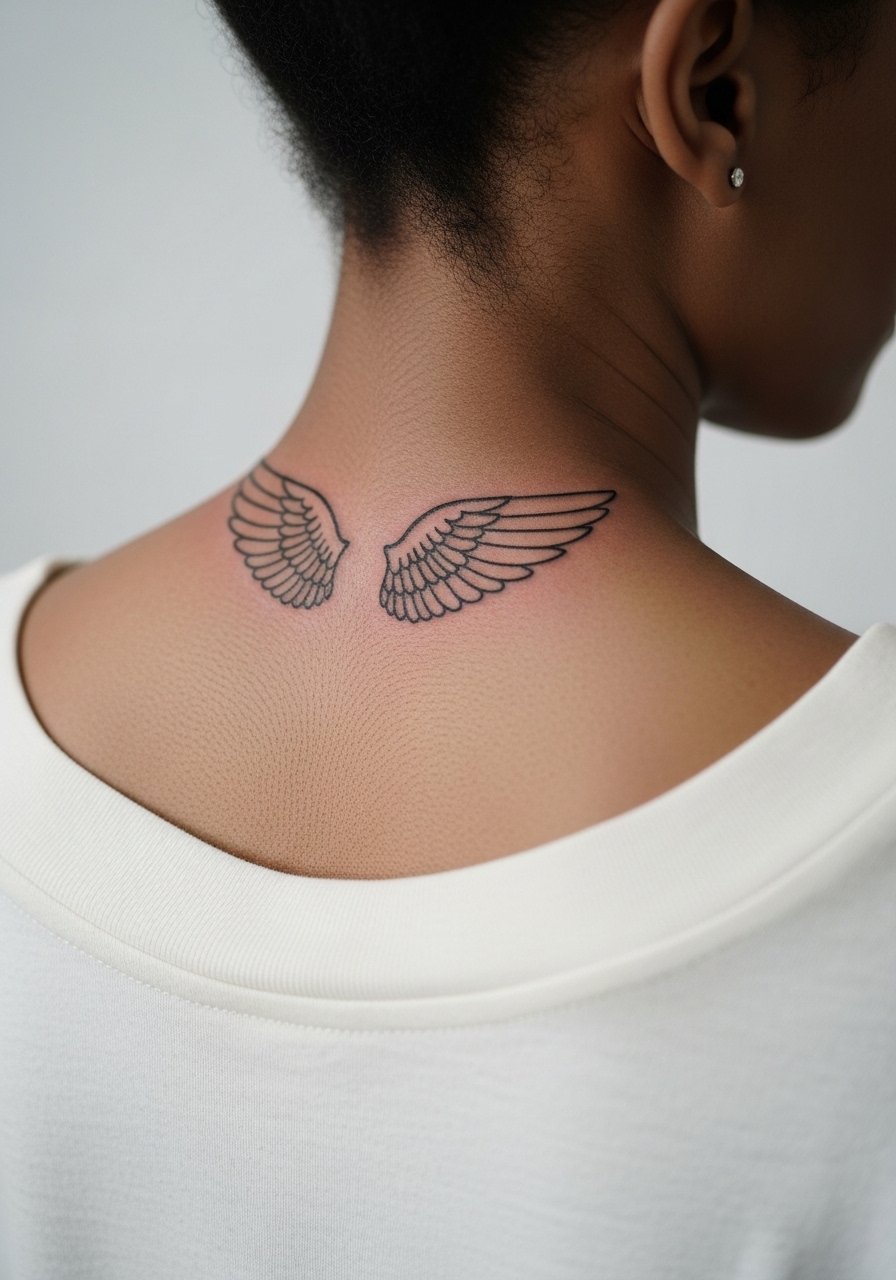
This placement reads like a secret when hair is down and like a statement when hair is up. Pain is moderate and sessions are short, often under an hour. Ask for slightly bolder anchor lines where the wings meet the spine so the piece retains shape as it heals. The main mistake is going too small across moving tissue, which fades unevenly. If you get cold weather layers often, a lightweight scarf can showcase or conceal the area depending on your plans.
3. Fine Line Wings Along the Collarbone
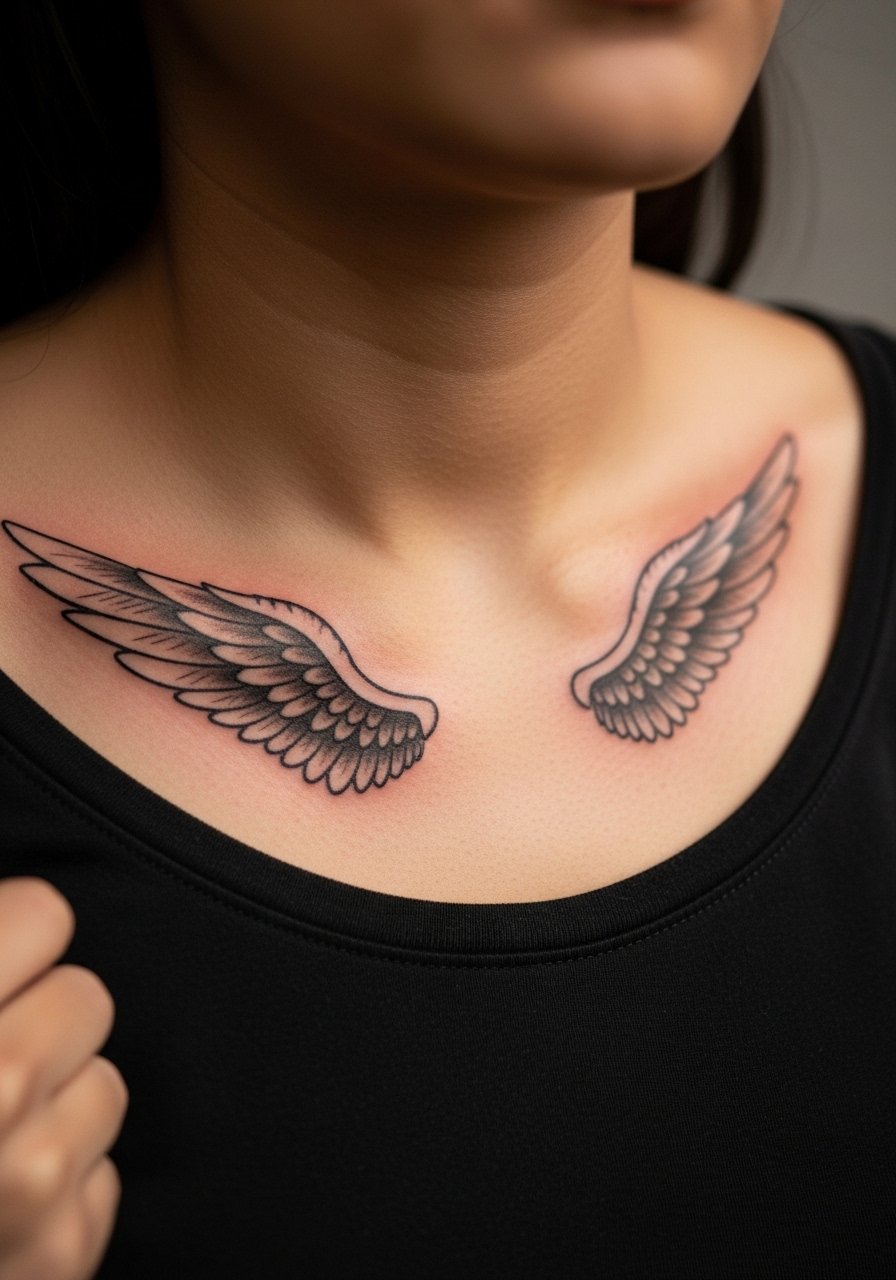
This placement gives a graceful horizontal read and is visible with low-cut tops. Pain is moderate because the skin is thin near bone. Tell your artist to space feathers so negative space endures rather than pack lines tightly. Most people notice the piece looks crisp at six months but loses micro-detail by year three if it was inked too fine. Wear open-neck blouses or delicate chain necklaces that sit above the wings so they do not rub against the linework.
4. Sternum Halo Wings
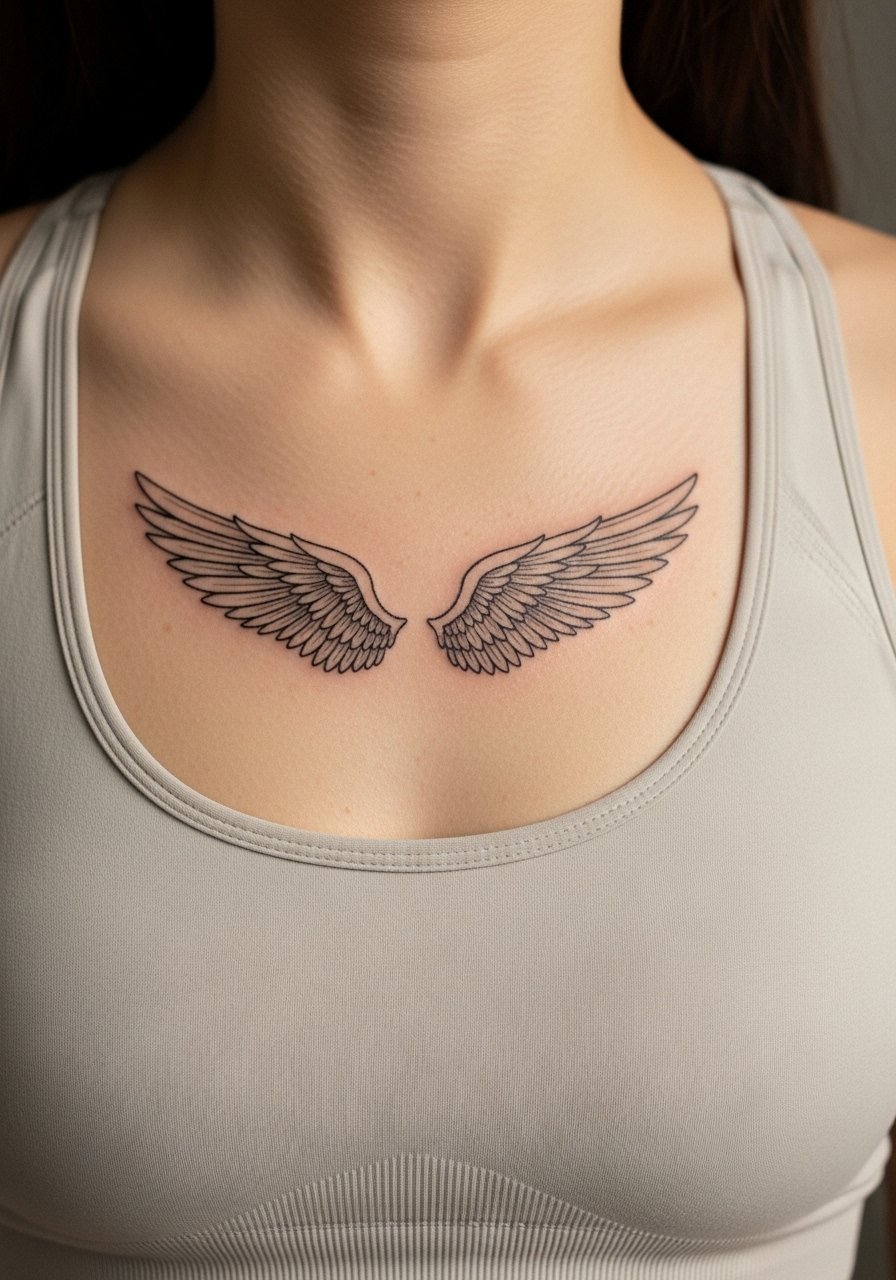
Sternum work is intimate and can be sensitive, often a 7 to 8 on pain scales. Sessions are 45 to 90 minutes depending on size. Artists split into two camps on fine line for this area. One camp says the movement and breath here blur the smallest lines within two years. The other camp argues that with slightly stronger line weights and proper spacing, fine line holds. Ask where your chosen artist sits on that debate. For the session wear a zip-up or strapless layer so the artist has access without you being uncomfortable.
5. Inner Forearm Angel Wing Cluster
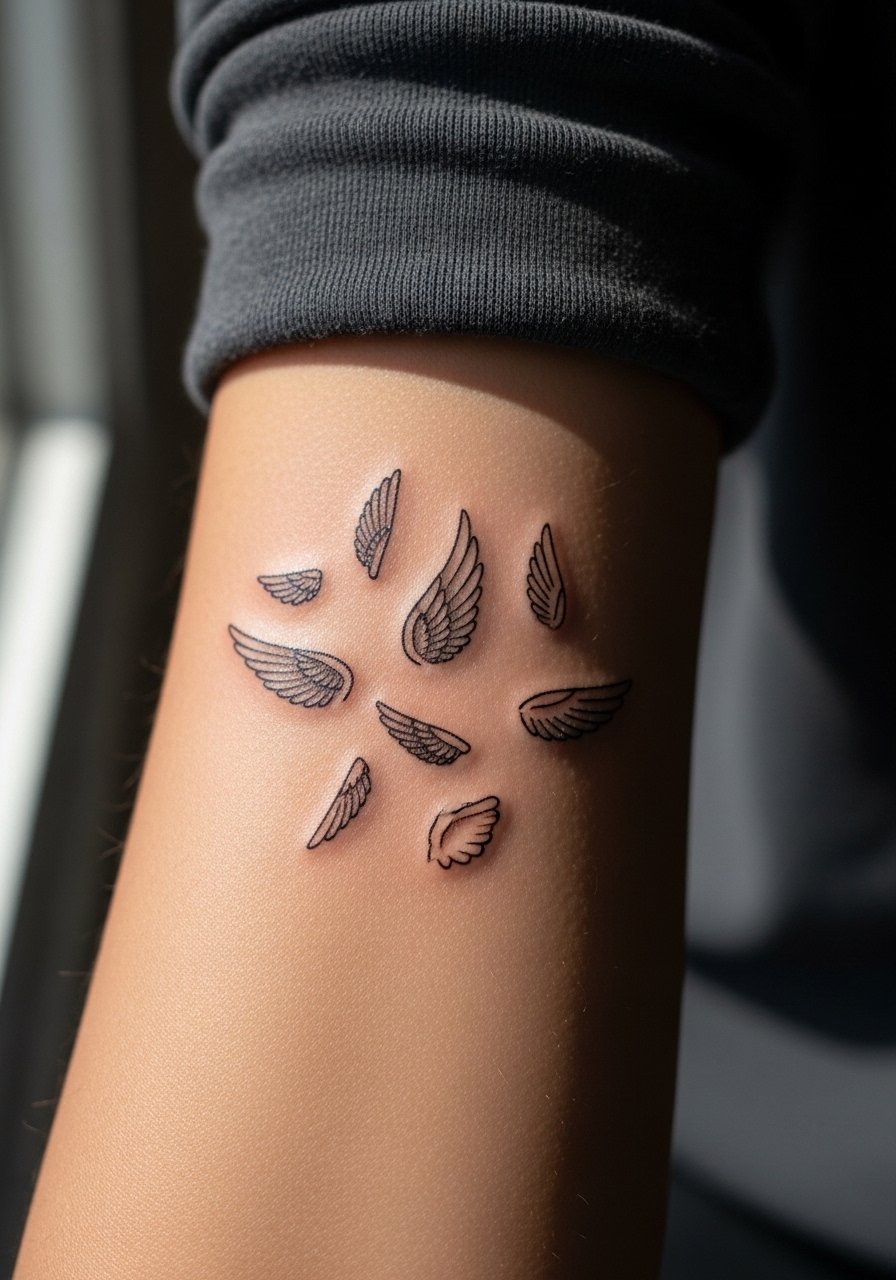
This is one of the most resilient placements for fine line because the skin stays relatively flat and the area receives less constant abrasion than hands. Pain is low to moderate and session time for a small cluster is typically under an hour. Ask for slightly heavier contrast near feather bases to maintain silhouette as minor blurring occurs with age. A common error is requesting ultra-thin strokes that the skin cannot retain. For showing it off, roll sleeves and pair with a stack of dainty bracelets that complement without covering the wings.
6. Ankle Wing Accent
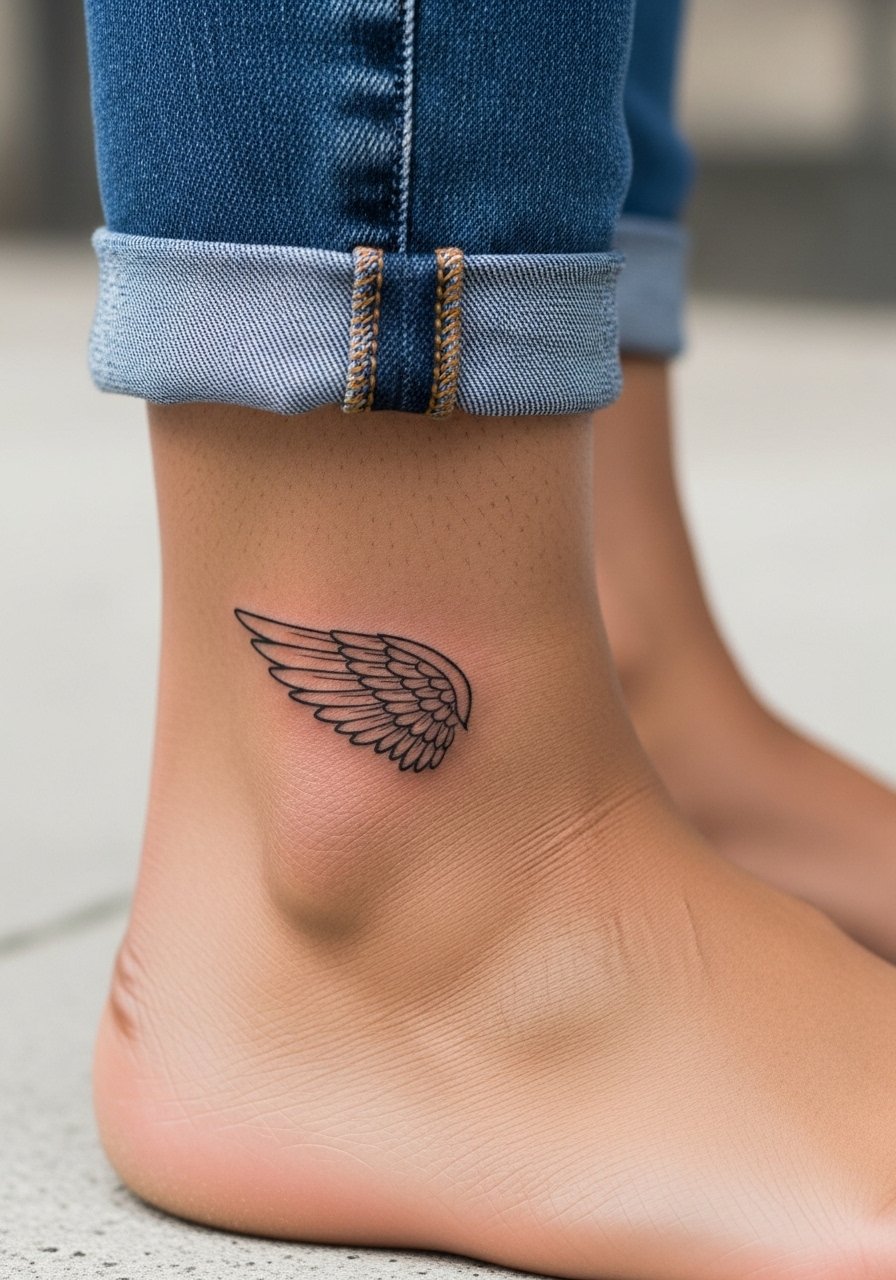
Ankle tattoos face constant friction from shoes and socks, so expect slightly faster fading. Sessions are short and pain is moderate because of thin skin over bone. Ask for a simplified silhouette with fewer interior lines to avoid early smudging. A rookie mistake is packing too much detail into a small ankle piece. For the session, wear pants you can roll up easily and for styling use low-cut sneakers or sandals that let the piece breathe.
Studio Day Picks
These picks help with the fine line placements above, from wrists to collarbones to ankles.
-
Stencil transfer paper kit. Lets you preview exact placement on curved areas like the sternum and collarbone before the needle hits skin.
-
Thin protective film roll. Useful for ankle and wrist pieces that face friction during the first week of healing.
-
Topical numbing cream. Applied per instructions, it can ease the sting for sternum and rib sessions without changing the artist's linework when used correctly.
-
Fragrance-free gentle body wash. Cleanses delicate fine line work without irritating the fragile channels where ink sits.
-
Aquaphor healing ointment. A thin layer in the very first days helps keep moisture in for tight needle channels that fine line needs.
7. Micro Wings Behind the Ear
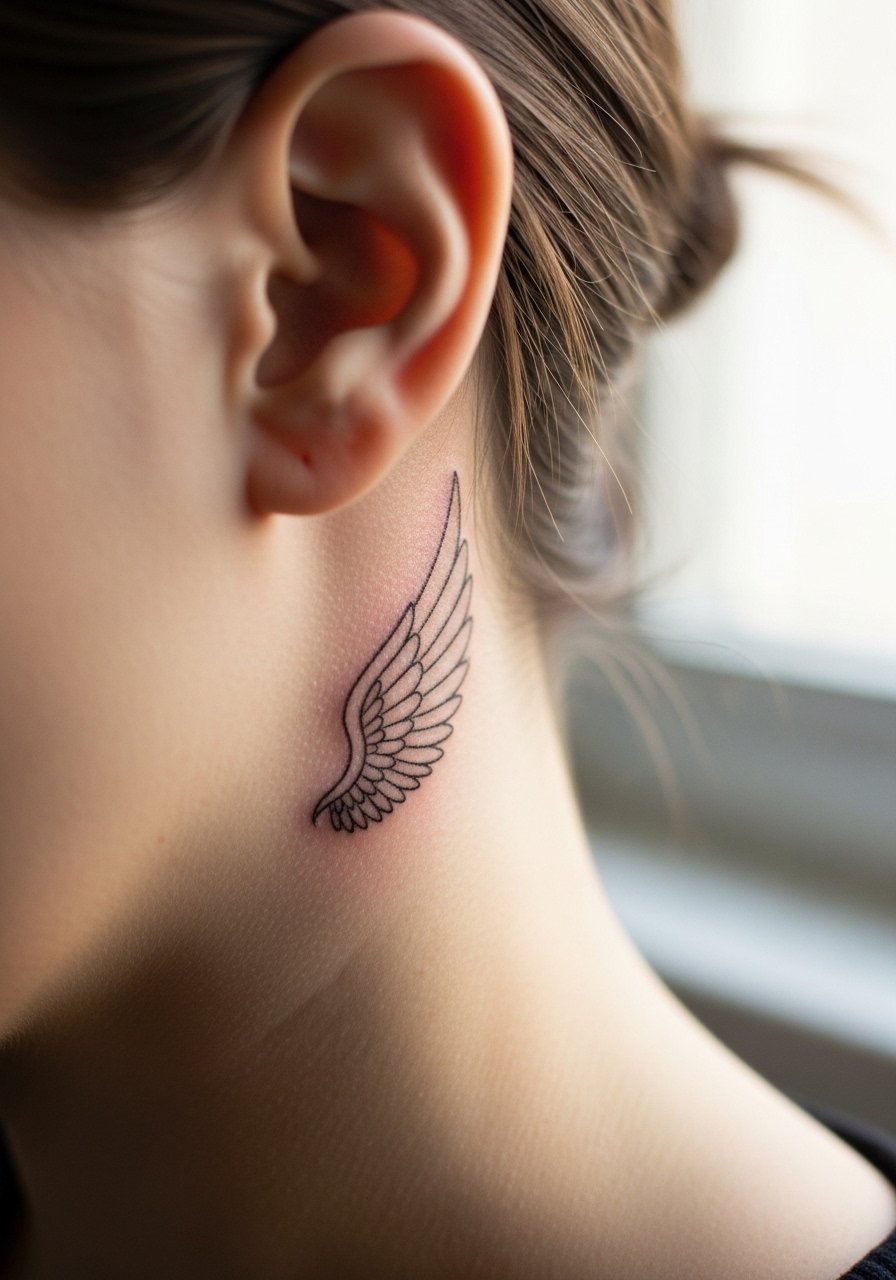
Behind-the-ear pieces are naturally tiny and feel intimate. Pain is low but placement requires precision in consultation due to curvature and hairline. Tell your artist to avoid excessive internal feather detail and to place the base slightly back so it reads when hair is pulled up. The common mistake is assuming the same size that works on paper will hold on this curved spot. For the session, wear hair tied up and bring a soft hair tie set so the artist can work without snagging your scalp.
8. Ribcage Wing Outline
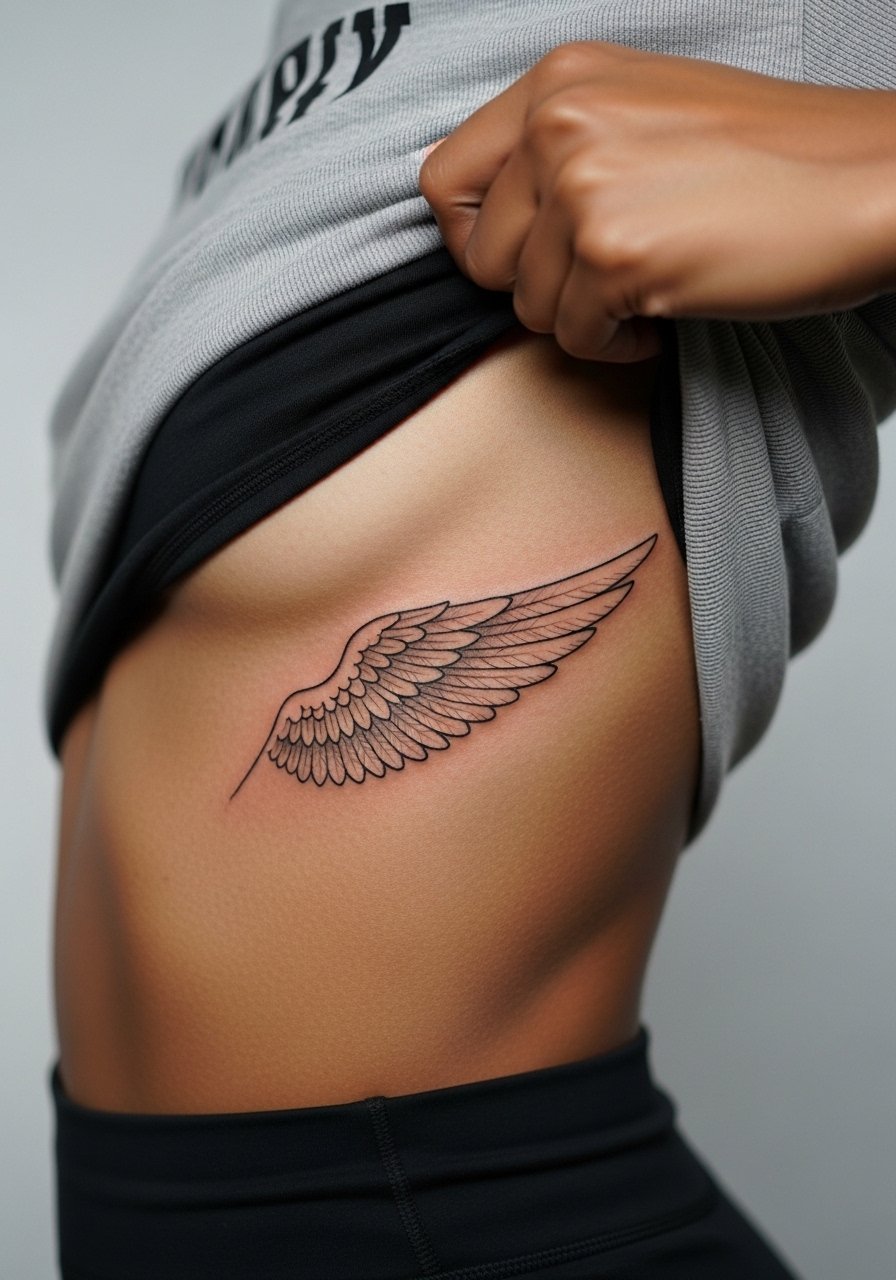
Ribs are notorious for both pain and movement. Most artists treat rib fine line as a specialist skill. Sessions can take 60 to 120 minutes depending on size. There is a clear controversy here. One camp says rib skin stretches with breathing and sleeping and so tiny lines merge within a few years. The other camp argues that with slightly bolder anchor lines and intentional spacing, fine line holds. Ask your artist which method they use and why. Expect modest blurring at year three and plan for a touch-up if you want crisp detail to persist.
9. Spine-Adjacent Vertical Wings
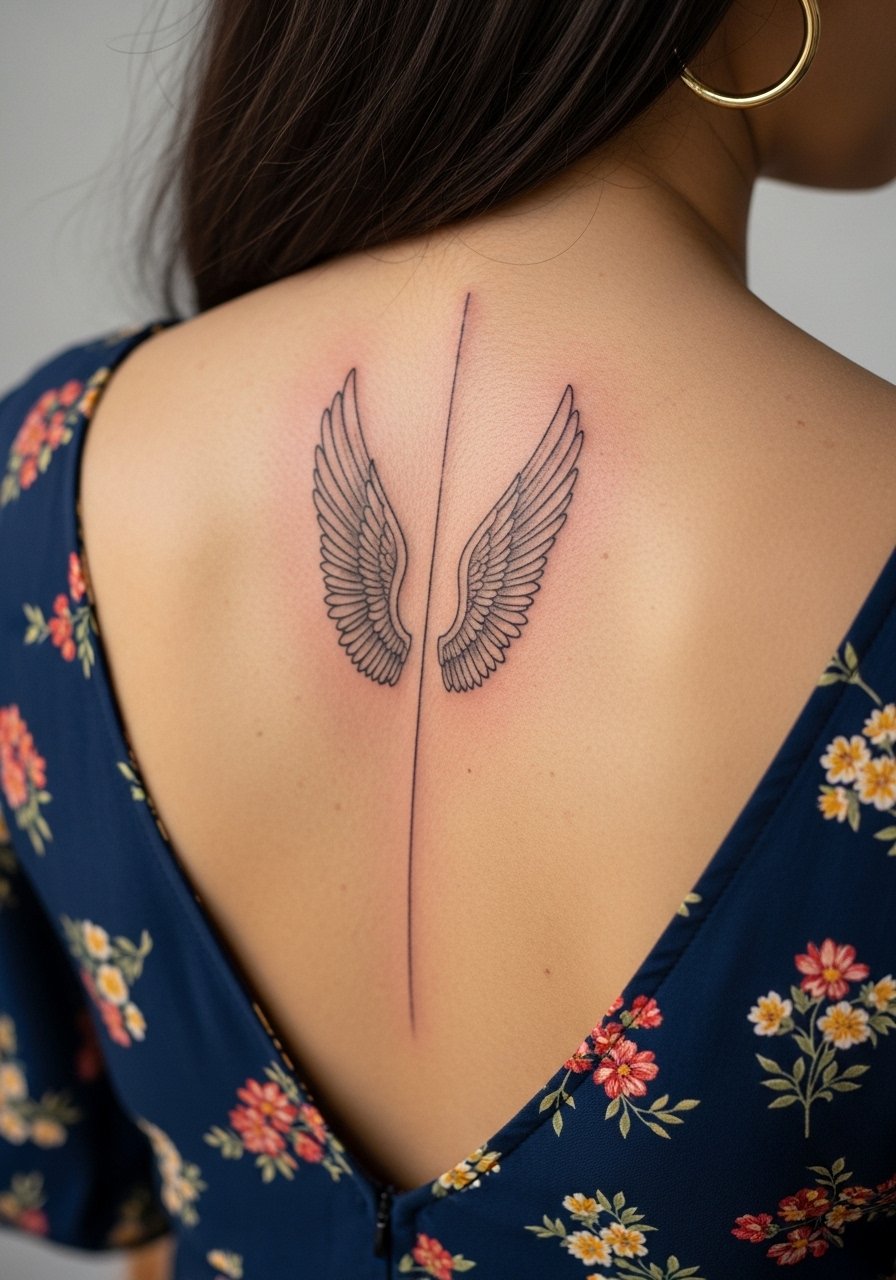
This layout benefits from symmetry and reads strongly with open-back clothing. Pain is moderate to high near the spine and sessions vary by length. Tell your artist you want negative space between feathers to avoid dense patches that age into a blur. A common mistake is overcrowding the spine area with tiny cross-hatching. For evenings out, an open-back top or dress emphasizes the vertical flow and pairs well with a delicate backless dress.
10. Delicate Thigh-Wrap Wings
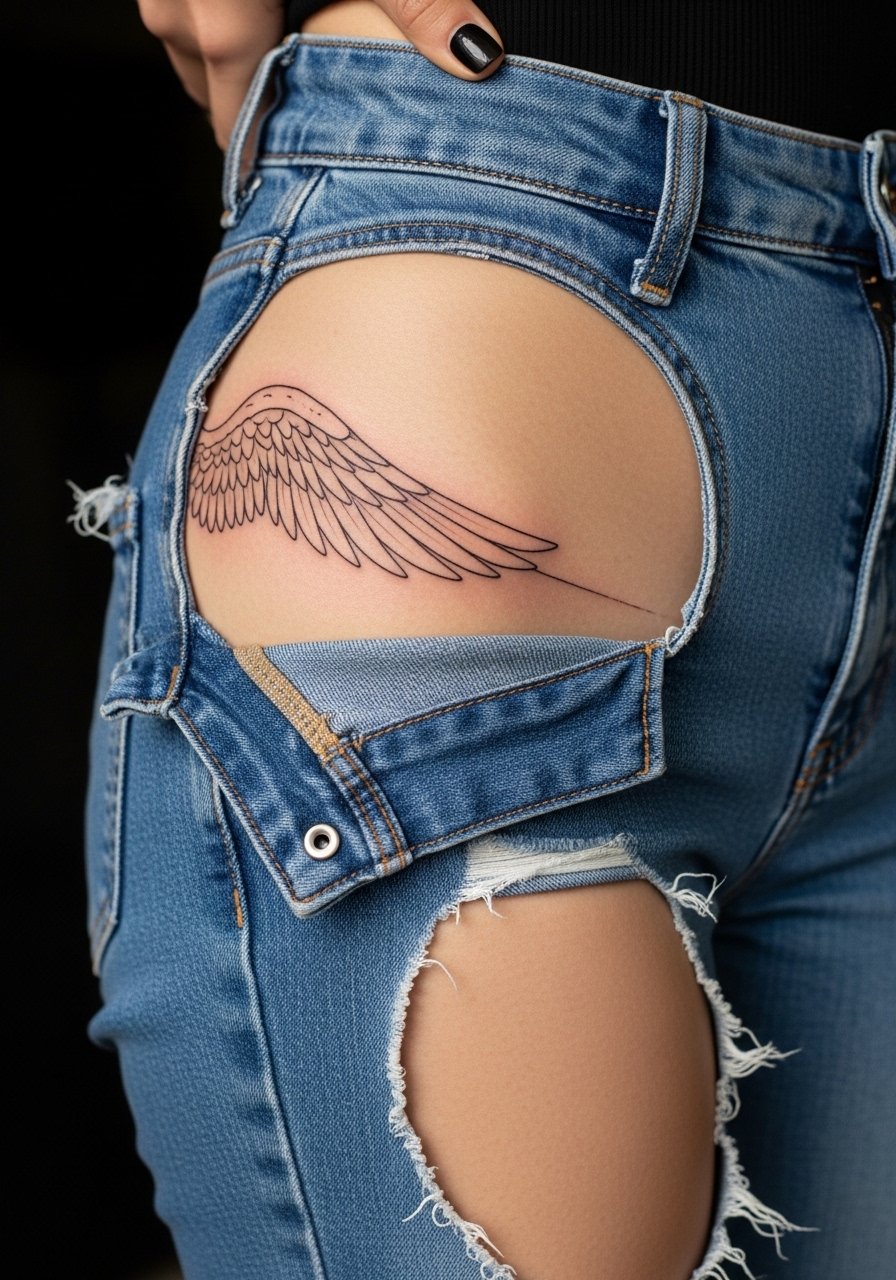
Thigh skin tolerates fine detail better than hands or ankles and the area is easier to protect during healing. Pain ranges from low to moderate and sessions can be 45 to 90 minutes. Ask for slightly denser base lines where the wing connects to the hip to keep the silhouette intact over time. A mistake is over-detailing the inner feathers that will blur. For the session, choose loose shorts or a skirt and consider a high-waisted denim short so the artist can access the outer thigh comfortably.
11. Sternum Under-Wire-Friendly Wings
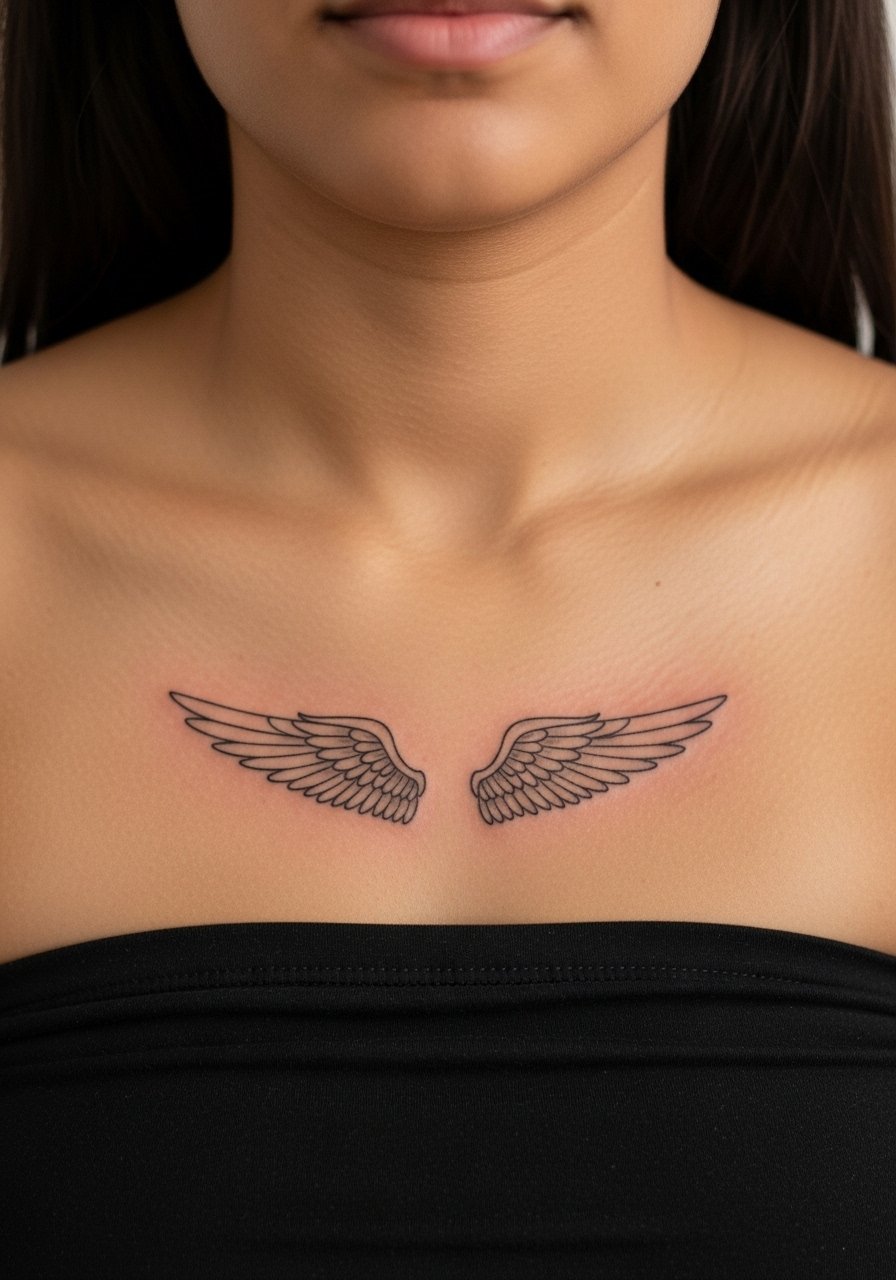
If you wear underwire bras often, discuss placement so straps do not rub directly over new lines. Pain is higher here and sessions can be shorter with breaks as needed. Tell the artist you want slightly simplified interior feathering so the piece heals clean under frequent fabric contact. The common mistake is ignoring daily wardrobe when choosing exact placement. For support during the appointment, a strapless or front-zip top makes access easier and more comfortable.
12. Foot Arch Wing Accent
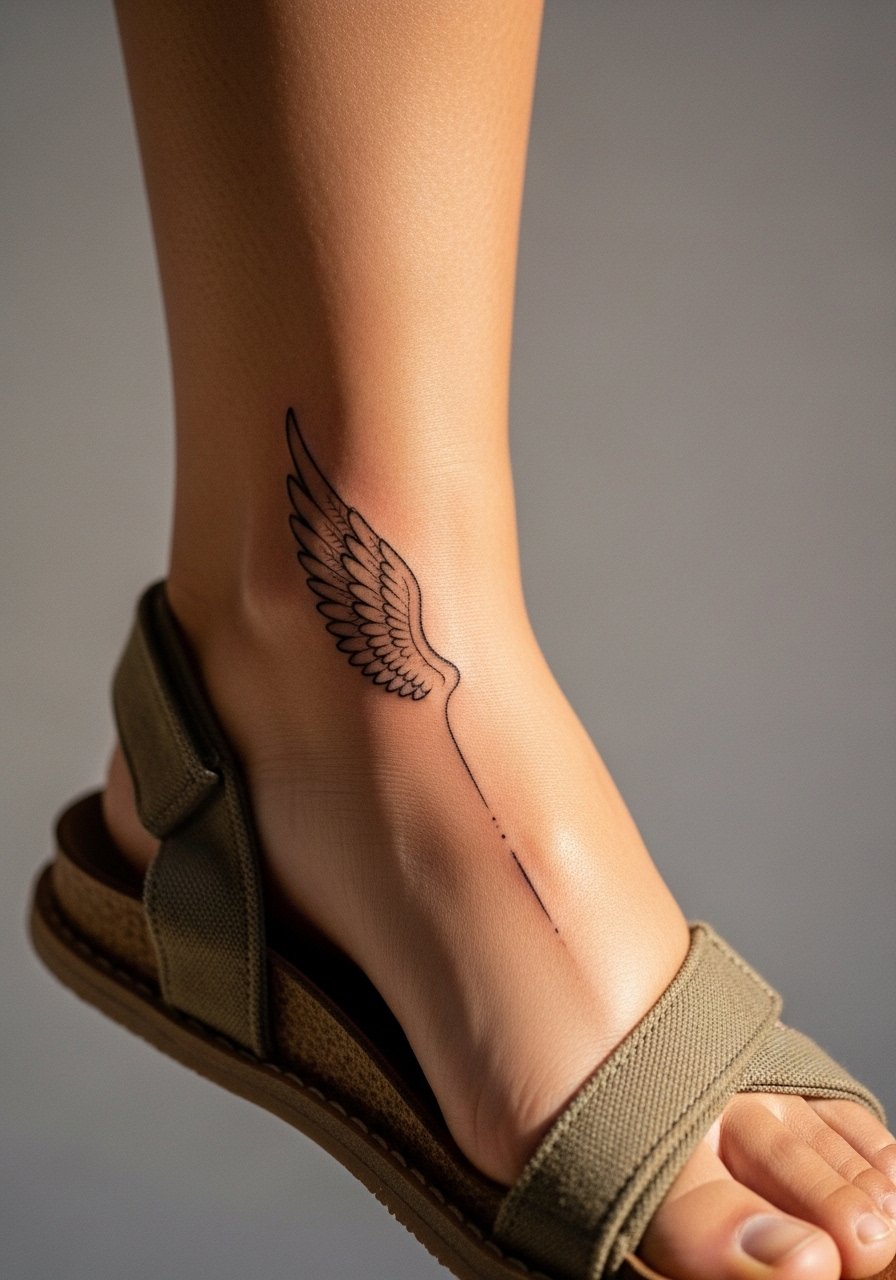
Foot tattoos face heavy wear from shoes and are prone to fading and occasional patchy healing. Pain can be high due to proximity to bone. Keep the design simple and avoid interior micro-lines. Expect irregular fading and plan a touch-up at year one if you want crisp edges. For showing off, low sandals highlight the arch without rubbing, or pair with a simple ankle bracelet to draw the eye.
13. Wrist-to-Hand Floating Wings
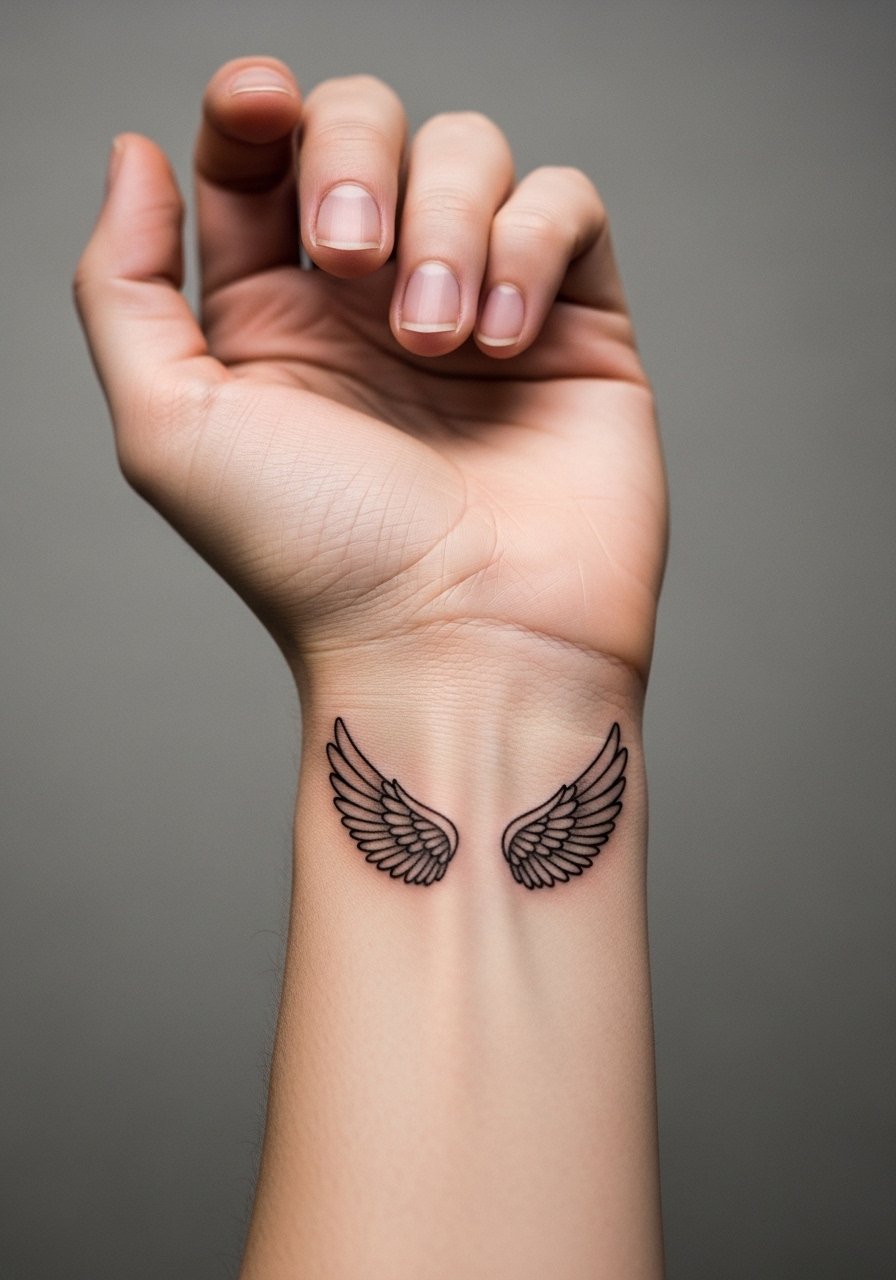
Hand work is very visible and can affect professional settings. Pain is moderate and healing is touchier due to frequent washing and use. Artists are divided about fine line on hands. One camp warns that constant motion and friction blur tiny strokes quickly. The other camp uses bolder outer lines and minimal interior detail to make them last. Tell your artist how much hand exposure you expect day to day. Wear a thin glove liner to the appointment if your hands get cold so you do not tense during shading.
14. Sternum to Collarbone Wing Span
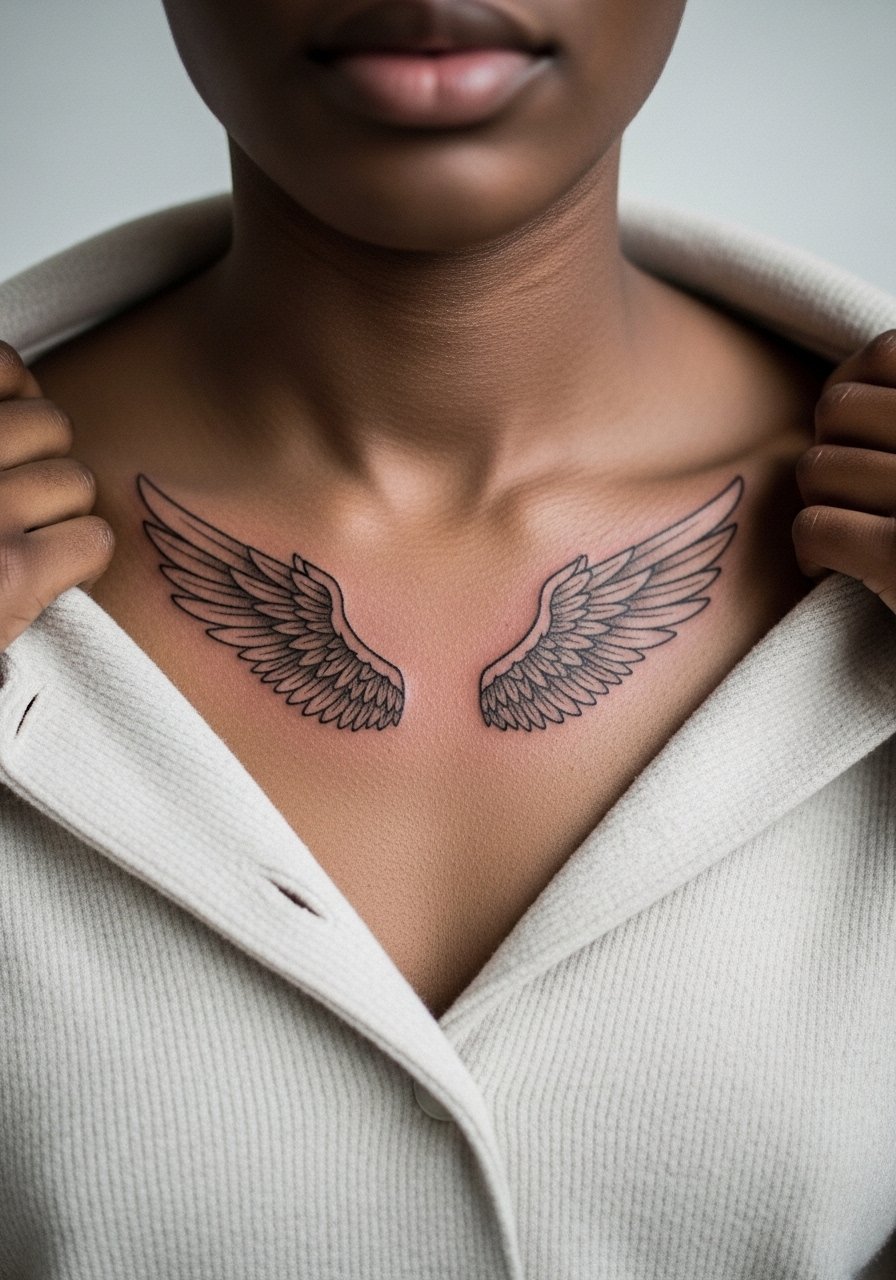
This broader layout makes a statement while staying delicate. Pain and session length vary with span. Ask for graduated feather sizes so the outer feathers keep negative space and do not blurrily merge with time. A common error is balancing both wings without accounting for how the chest moves with breathing. If you prefer low-profile styling, a thin pendant necklace sits above the piece without rubbing.
15. Shoulder Blade Single Wing
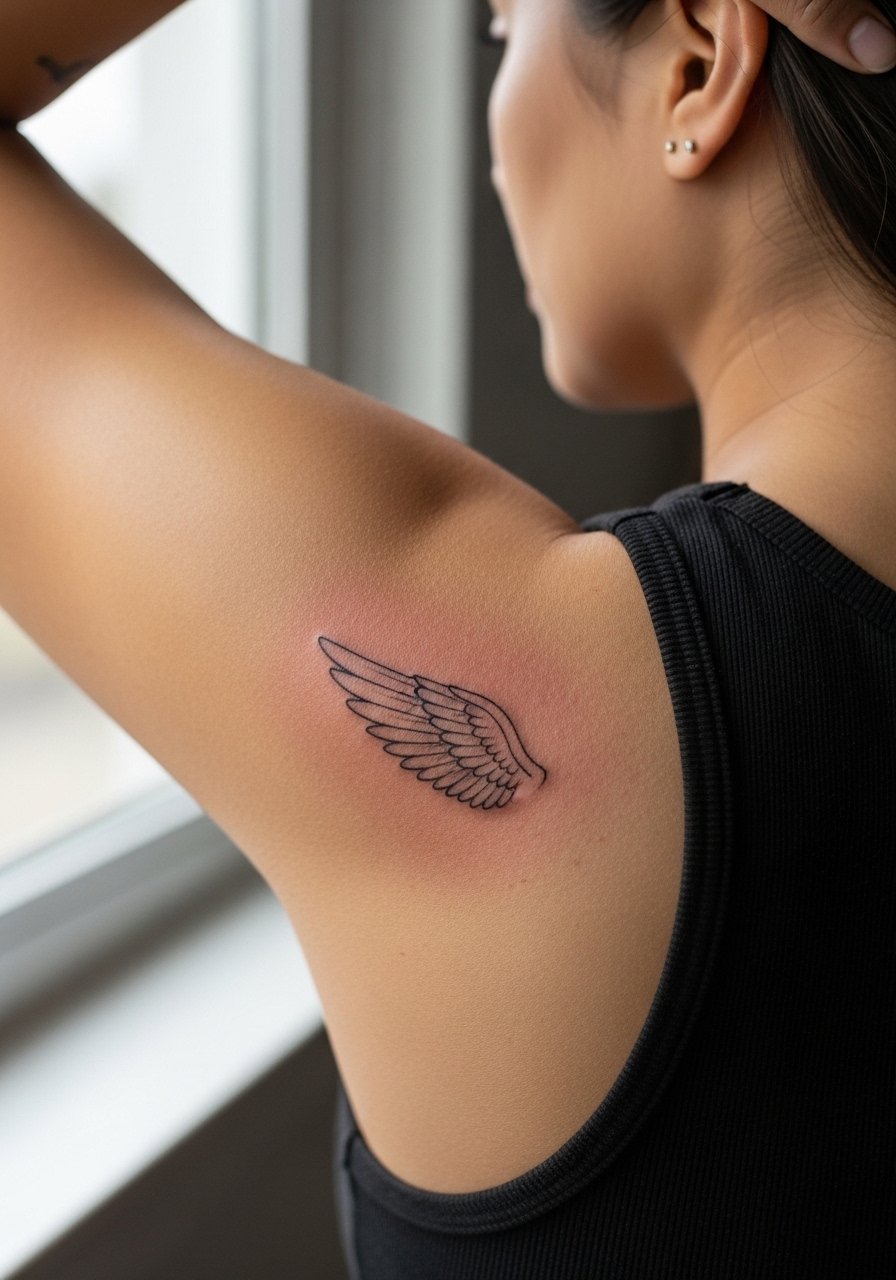
This is a forgiving area for fine detail and can age well with proper placement. Pain is moderate and sessions can be brief. Tell the artist to keep linework slightly less tight near the scapula where muscle movement can soften fine strokes. The usual mistake is centering too close to the spine. For showing it off, sleeveless tops or a simple tank top put the shoulder blade on display.
16. Micro Realism Wing Over Heart
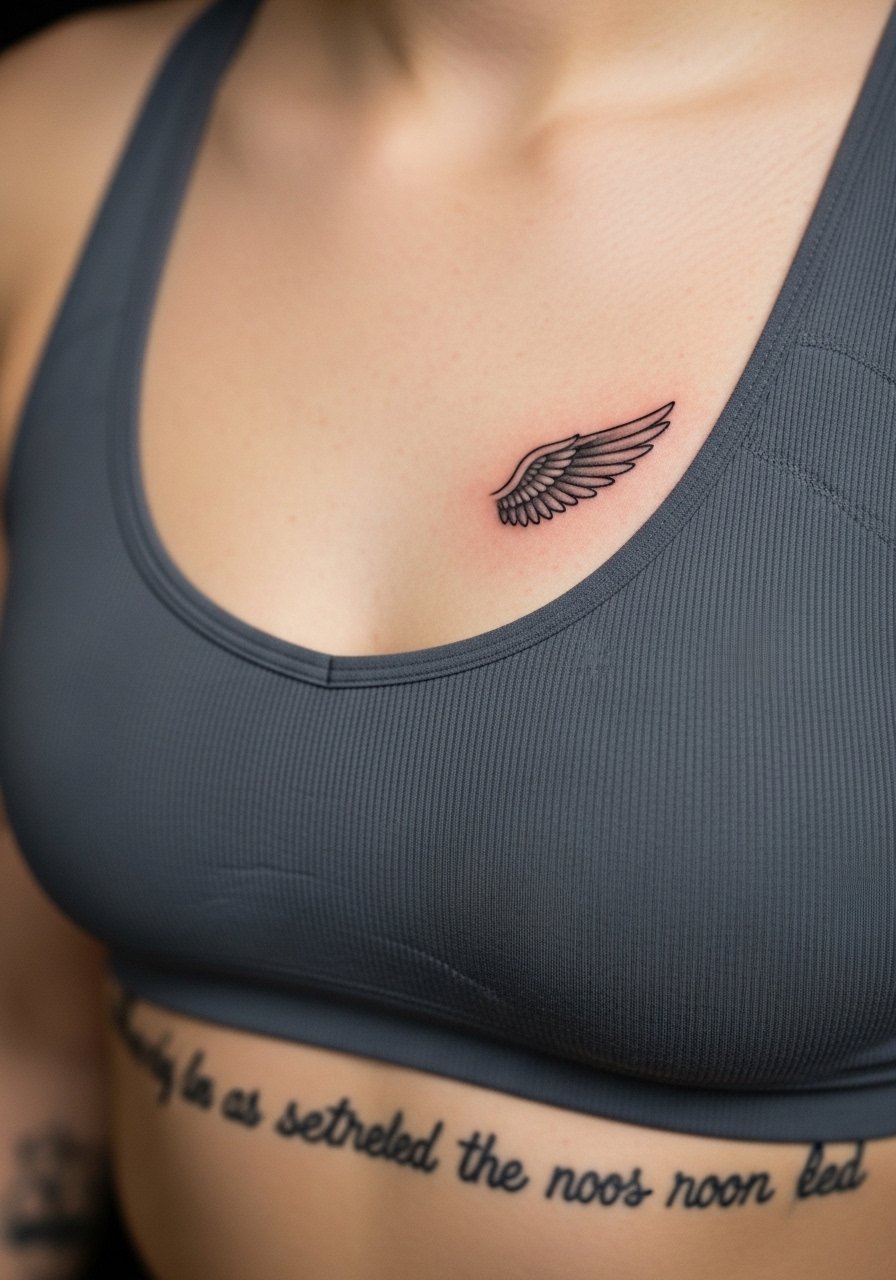
This is a sentimental placement and often chosen for symbolic reasons. Pain is moderate and sessions are short. Ask for subtle gradation in feather edges so the tiny shading reads at six months without becoming a gray patch. Avoid asking for hyper-fine cross-hatching that the chest will not preserve. For the session, a front-zip sports bra makes access simple and less awkward.
17. Collarbone Mini Wing with Script
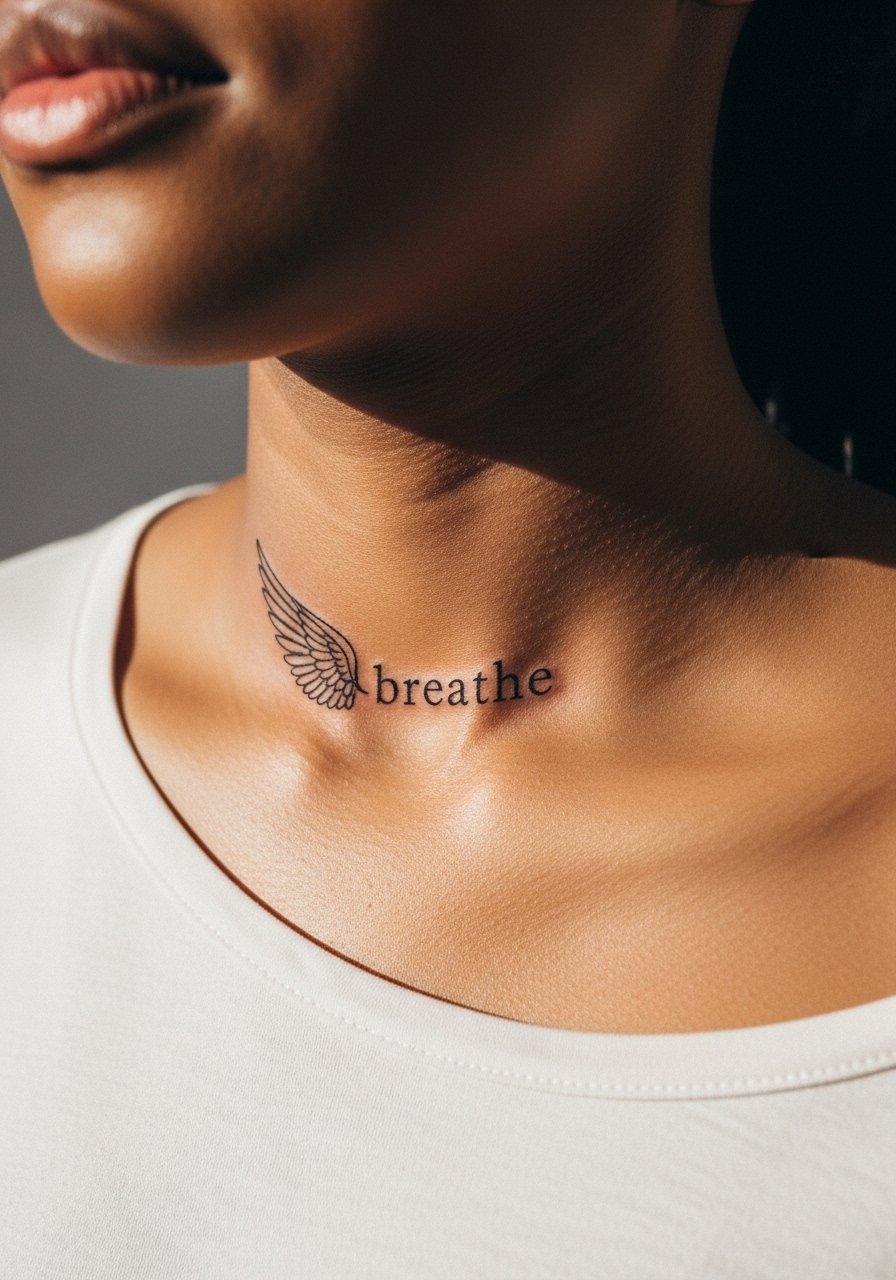
When text is included, specify the exact word and font; image prompts require exact text for accurate rendering. Have the artist set the script a finger-width from the wing so neither element competes. Pain is moderate and the session is short. A common mistake is crowding the script into the wing. For show-off looks, pair with a delicate chain necklace that sits above the lettering.
18. Inner Bicep Vertical Wings
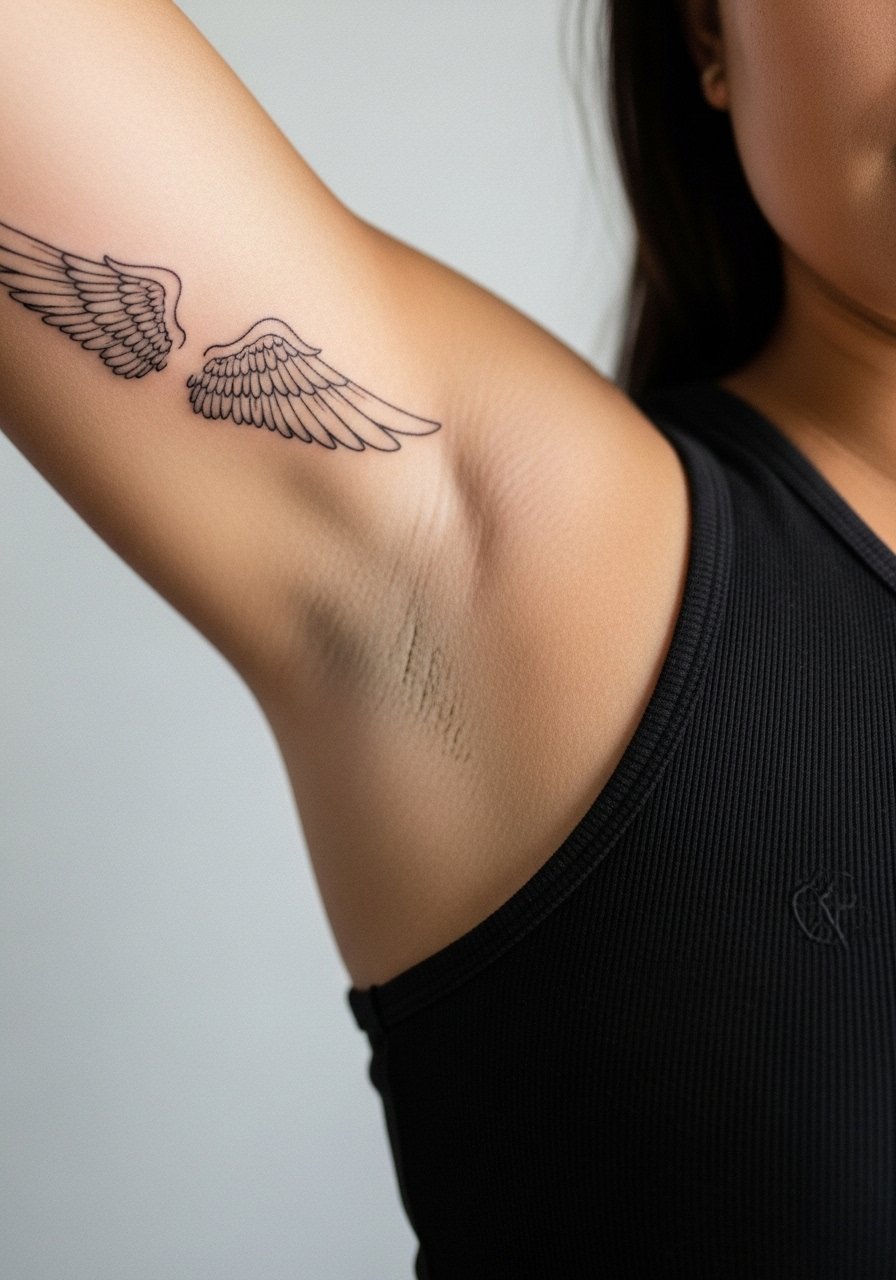
Inner bicep placement keeps work private but visible when you want. Pain is moderate and sessions are comfortable if you wear loose clothing. Tell your artist to keep feather detail balanced left to right so movement does not produce one blurred side. A mistake is underestimating how often the area stretches with daily motion. For the appointment, wear a sleeveless tank you can move freely in.
19. Clavicle Anchor Wings
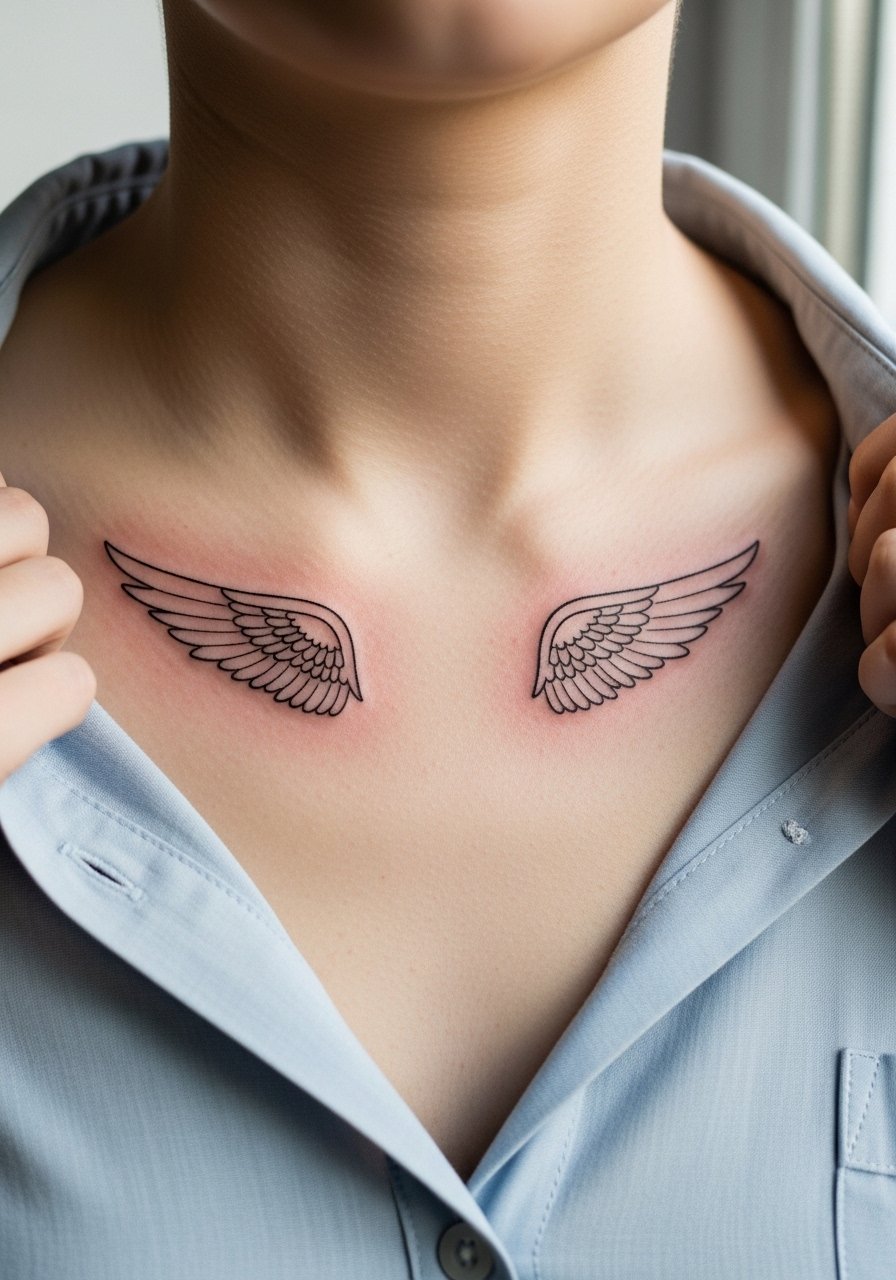
This placement creates an anchored look that reads well in shirts with open collars. Pain ranges low to moderate. Ask for a tiny gap between feathers and skin so the edges age with more clarity. The common error is mirroring a photo exactly without accounting for your bone structure. A lightweight button-down pulled open at the collar showcases the wings without friction.
20. Lower Back Wing Pairing
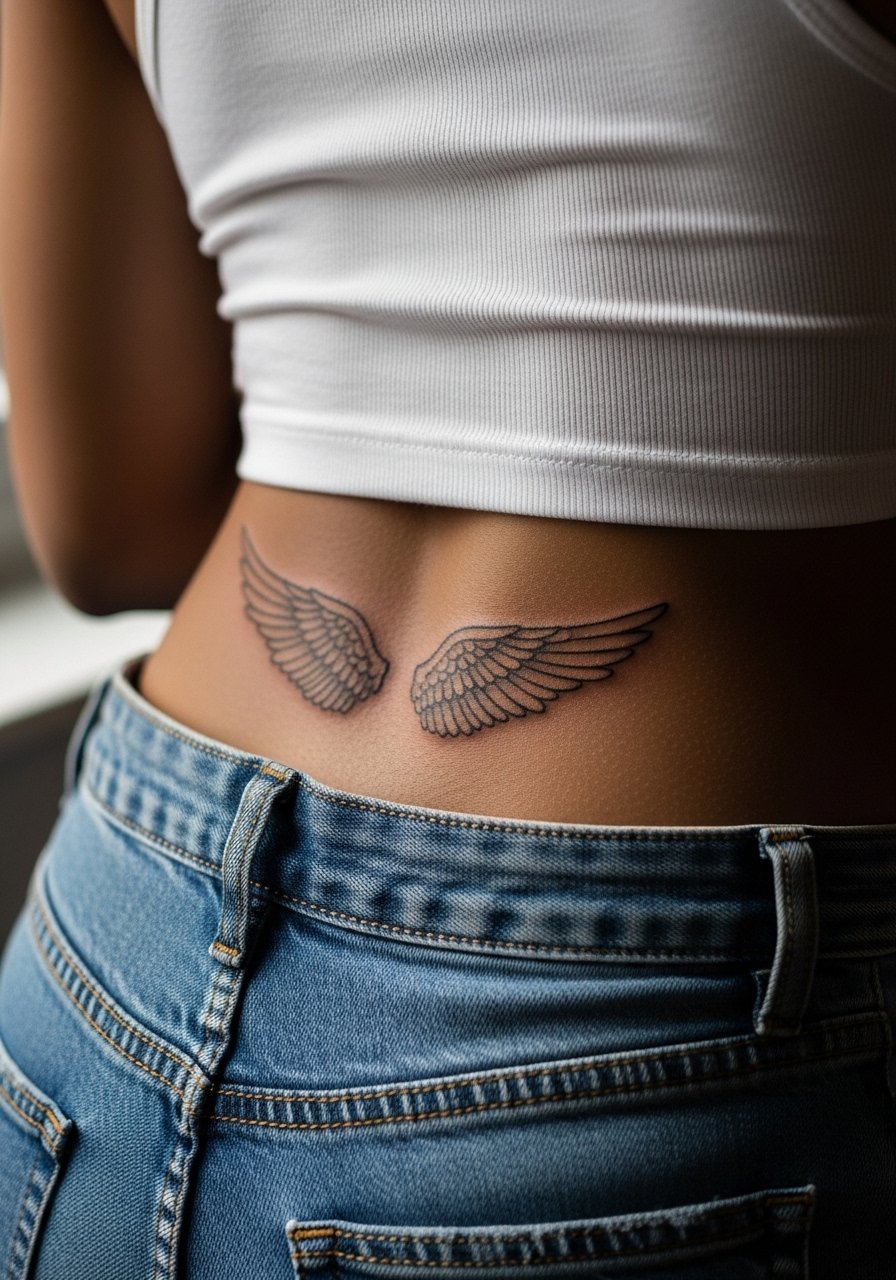
Lower back skin handles fine detail well if you can protect it from sun and waistbands while healing. Pain is low to moderate. Advise the artist to avoid ultra-thin interior feather lines near waistband lines. The usual mistake is ignoring daily clothing rub. For recovery, high-waisted styles can avoid pressure on the area while healing.
21. Finger Base Mini Wing
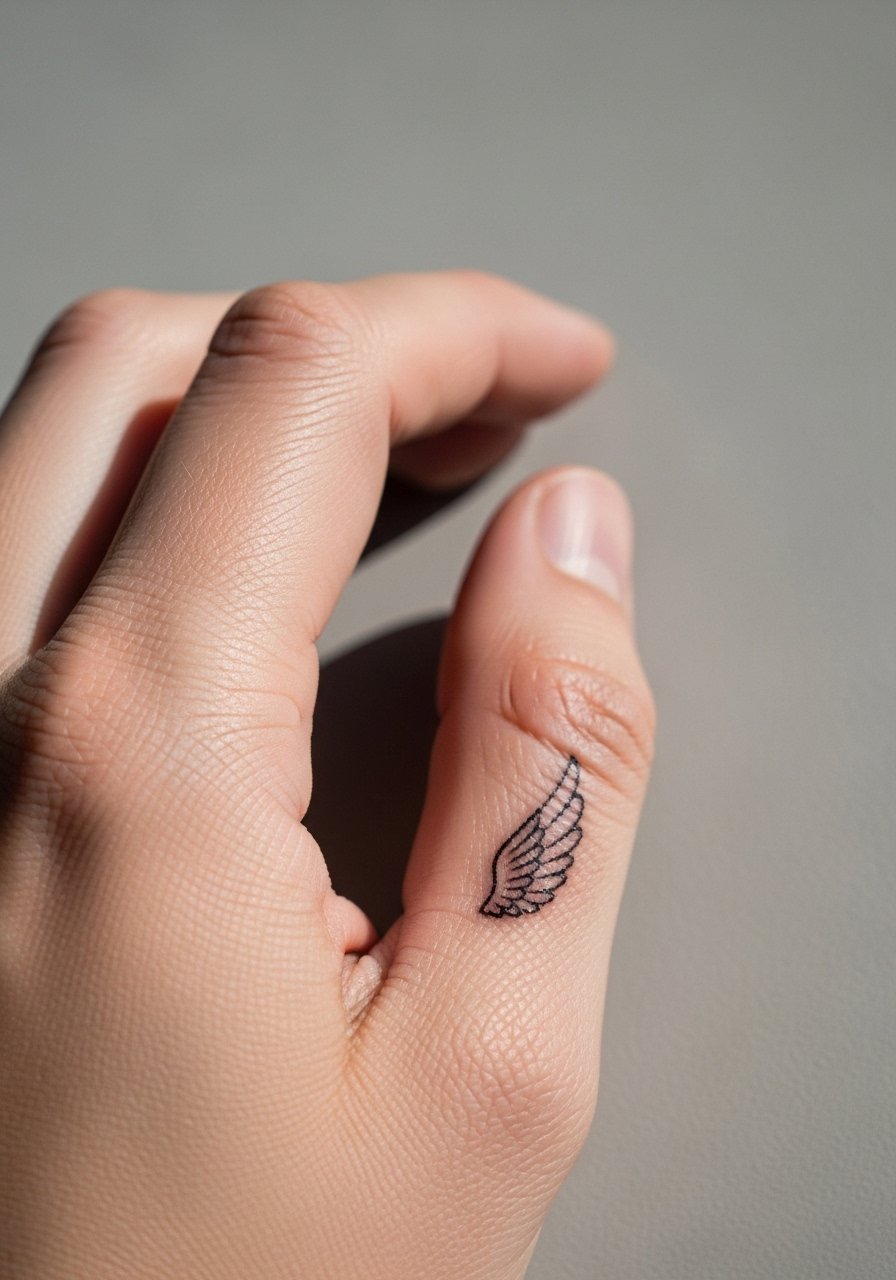
Fingers are high-risk for fading and patchy healing because of constant use and washing. Pain is moderate and sessions are very short. Most artists caution against intricate detail on fingers. If you still want it, choose a silhouette style and plan on touch-ups sooner than for arm work. A thin ring set can complement the placement without covering the ink.
22. Calf Wing Accent
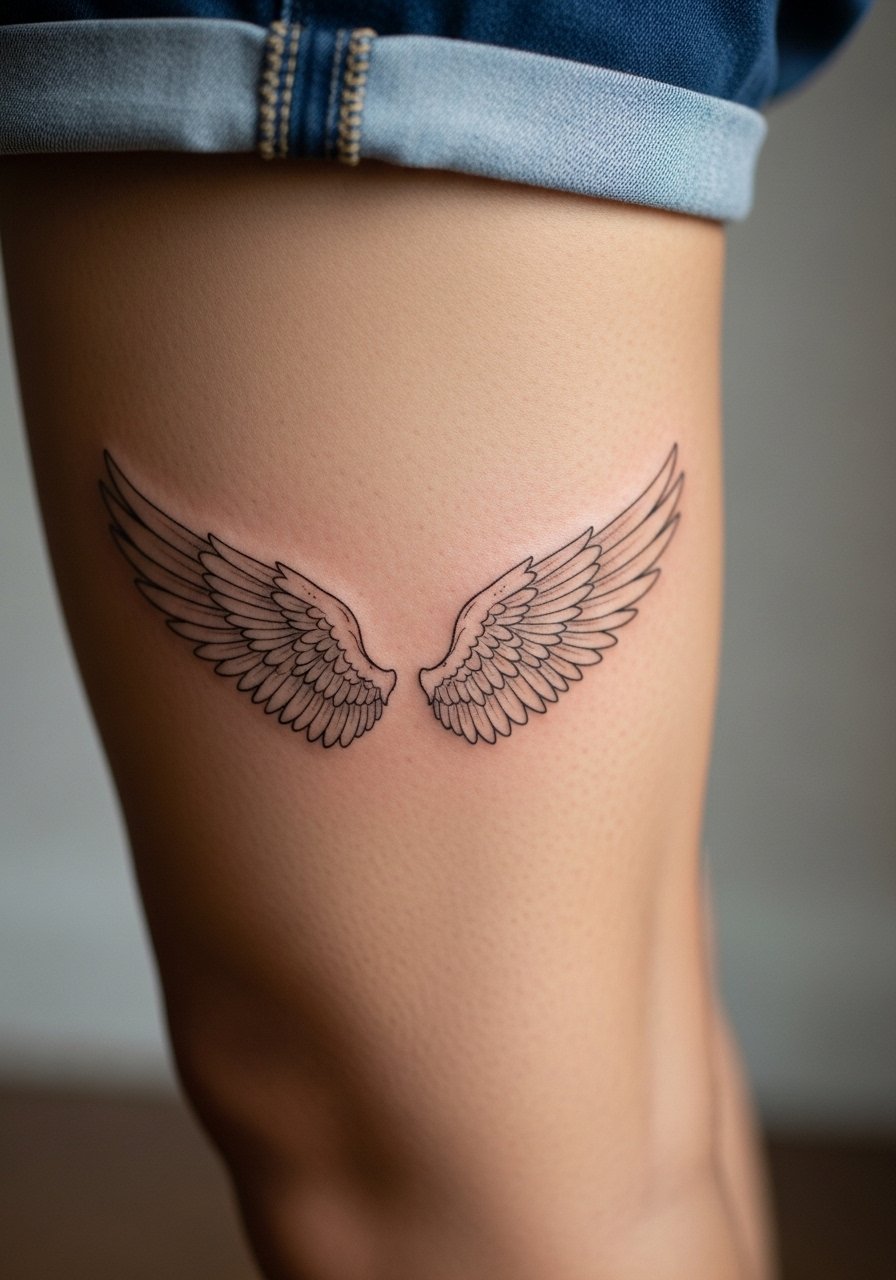
Calf skin provides a flat canvas and tolerates fine detail well, with low to moderate pain. Sessions vary by size. Ask for an elongated feather structure so the wing reads along the calf muscle rather than across it. Common mistakes include centering a wing where pants seams or socks will rub. For evenings, cropped pants or a midi skirt puts the calf on display.
23. Hip-Side Wing Flourish
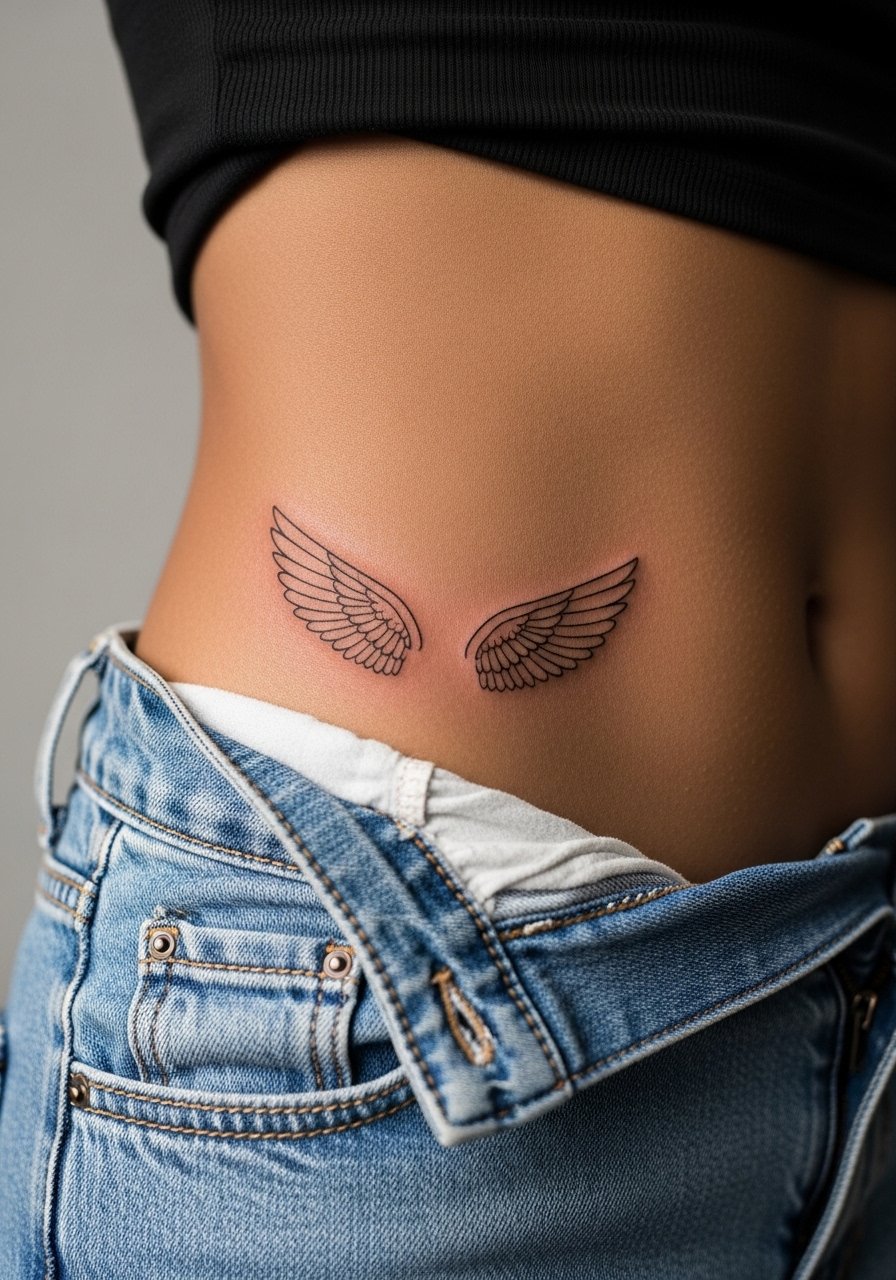
The hip accepts larger wings and details better than many small spots. Pain is moderate during sessions that can last up to 90 minutes for complex layouts. Tell your artist how often you wear tight waistbands so they can advise on exact placement. A common error is brandishing a design meant for the thigh onto the hip without resizing. For the session, high-waisted bottoms that can drop slightly make access easier.
24. Upper Thigh Inner Wings
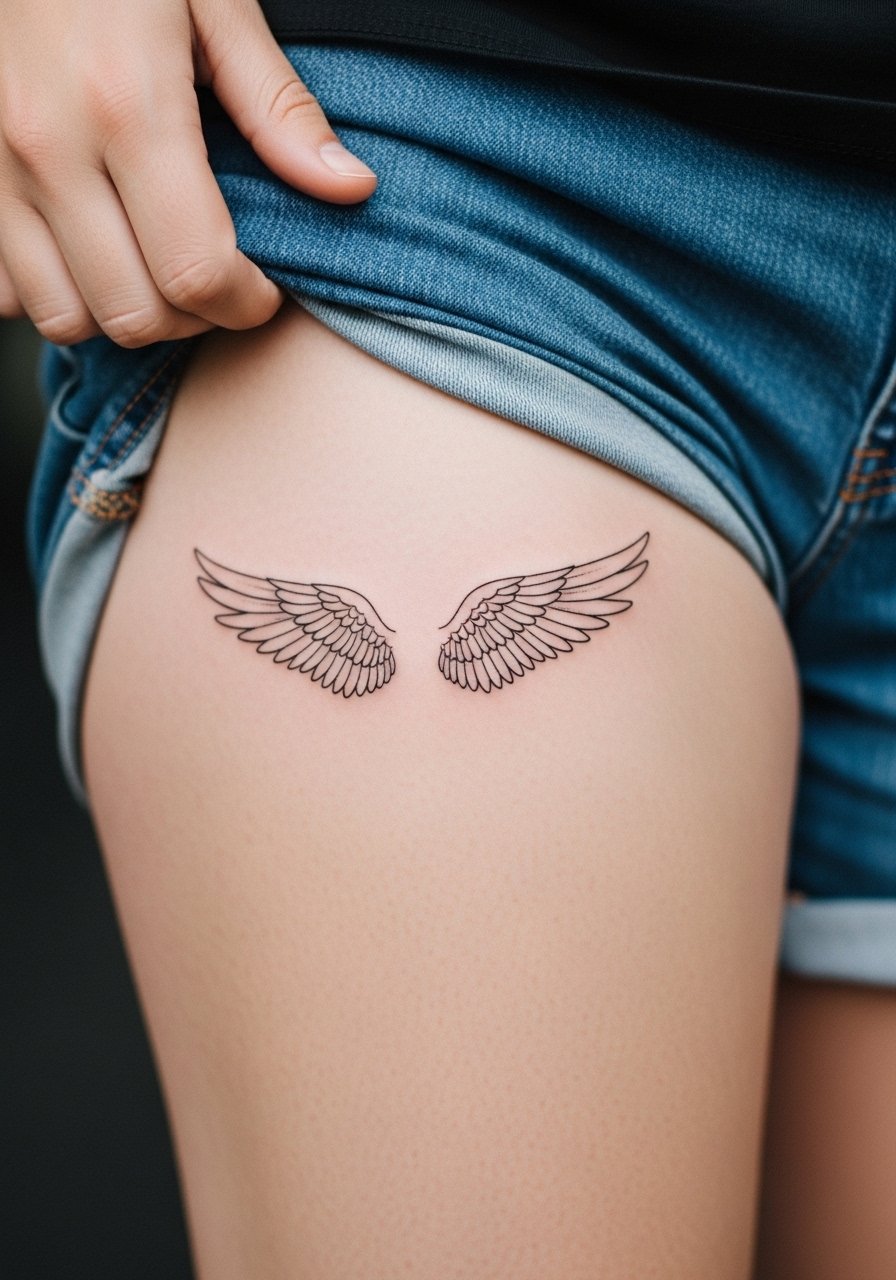
Inner thigh pieces are intimate and heal under less sun exposure, which helps longevity. Pain can range from moderate to high depending on sensitivity. Ask for broader feather spacing so the detail does not congregate in a small zone. A mistake is ignoring post-session mobility when choosing size. For the appointment, wear loose shorts or a wrap skirt and consider a pair of loose linen shorts for comfort.
25. Shoulder Cap Wing with Negative Space
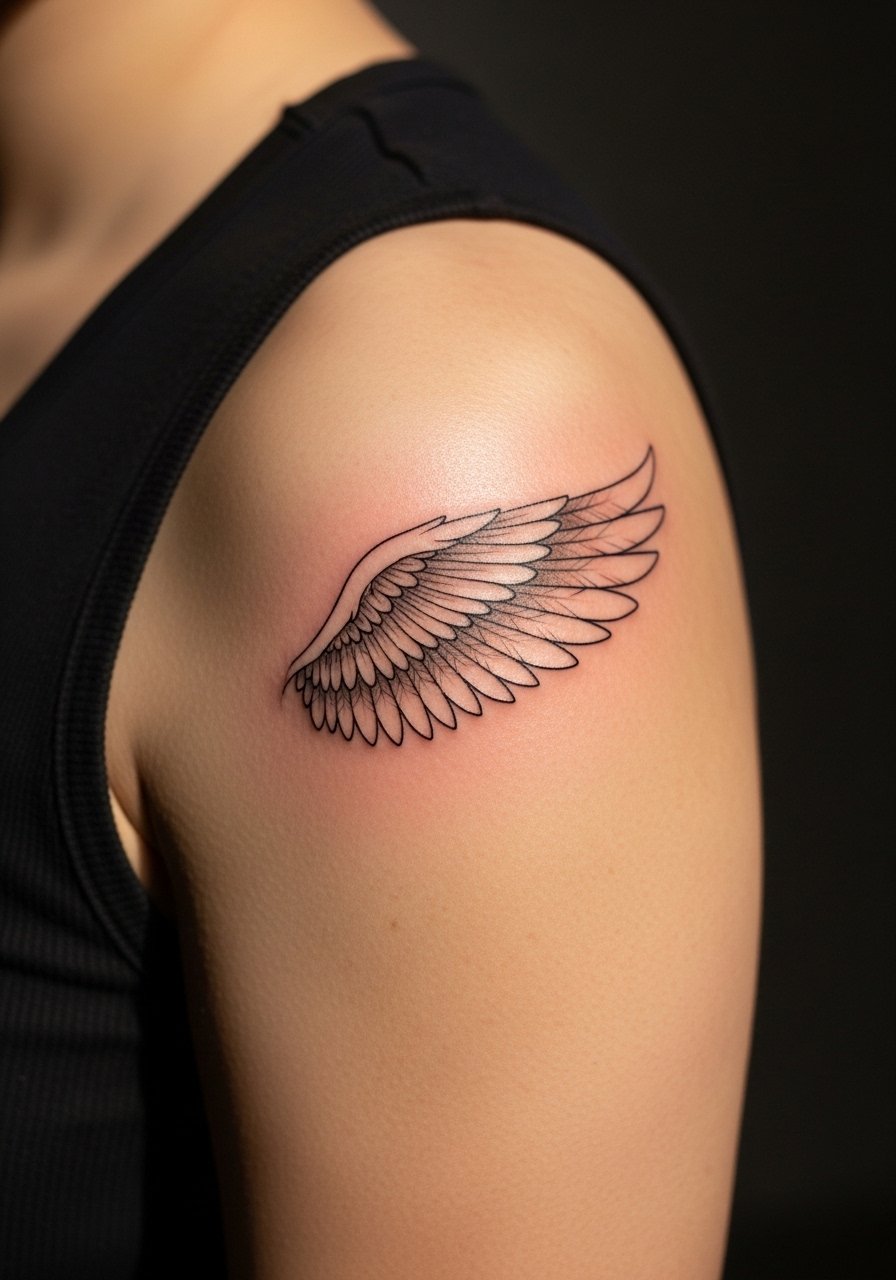
Negative space is your friend here because it preserves a clean silhouette over time. Pain is low to moderate and sessions are usually under an hour. Tell the artist you want the feather interiors simplified and to emphasize outer contour lines slightly for longevity. The common mistake is trying to cram micro-detail into the curve of the shoulder cap. Pair with sleeveless tops or a boxy tank to let the wing read.
26. Tiny Nape Wings Above the Hairline
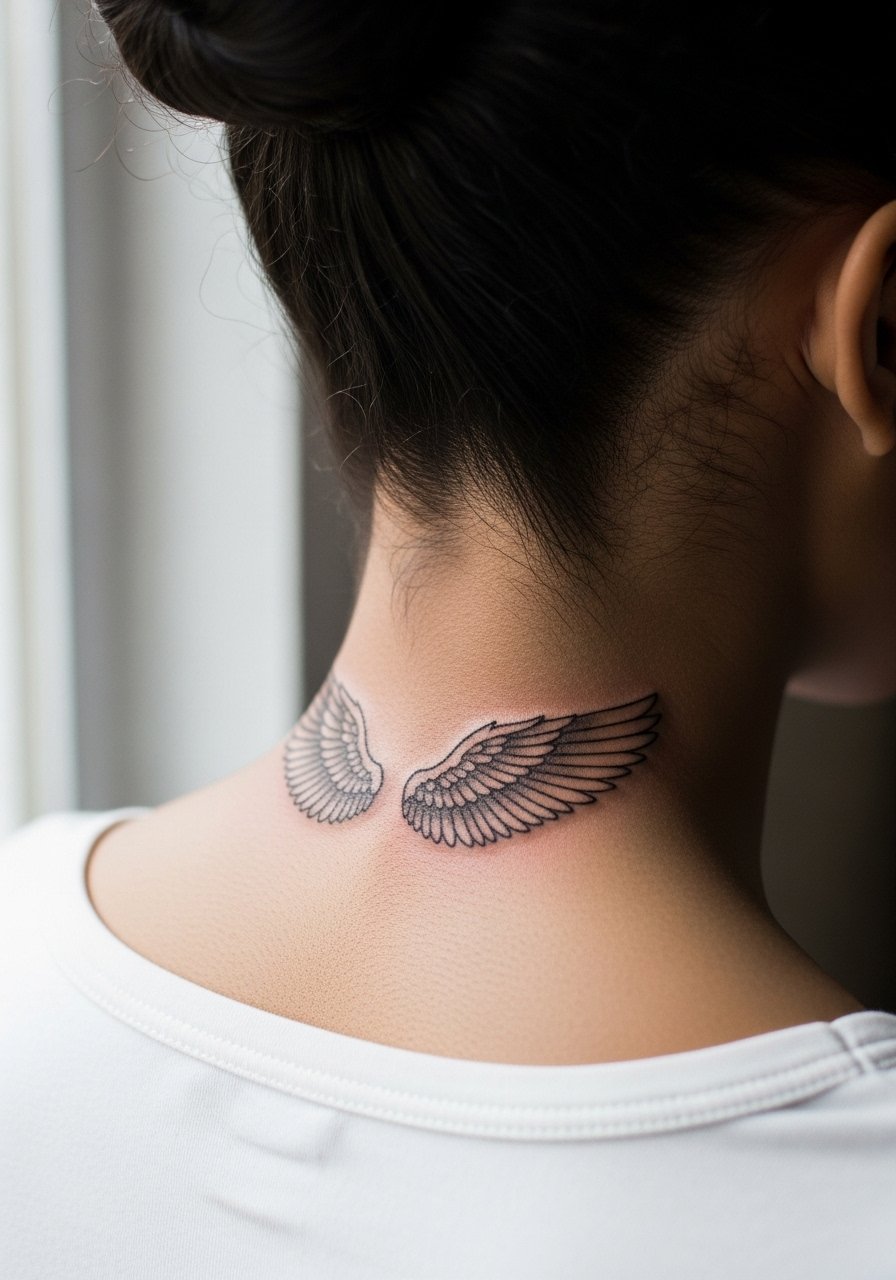
The nape is similar to the back-of-neck placement but sits lower. Pain is low and sessions are brief. Tell your artist to consider hair growth and parting when positioning so the lines are visible when you want them to be. A mistake is not accounting for how often you change hair length or style. Bring a soft hair clip set to the session so the artist can work unobstructed.
27. Chest Collarbone Micro Wings
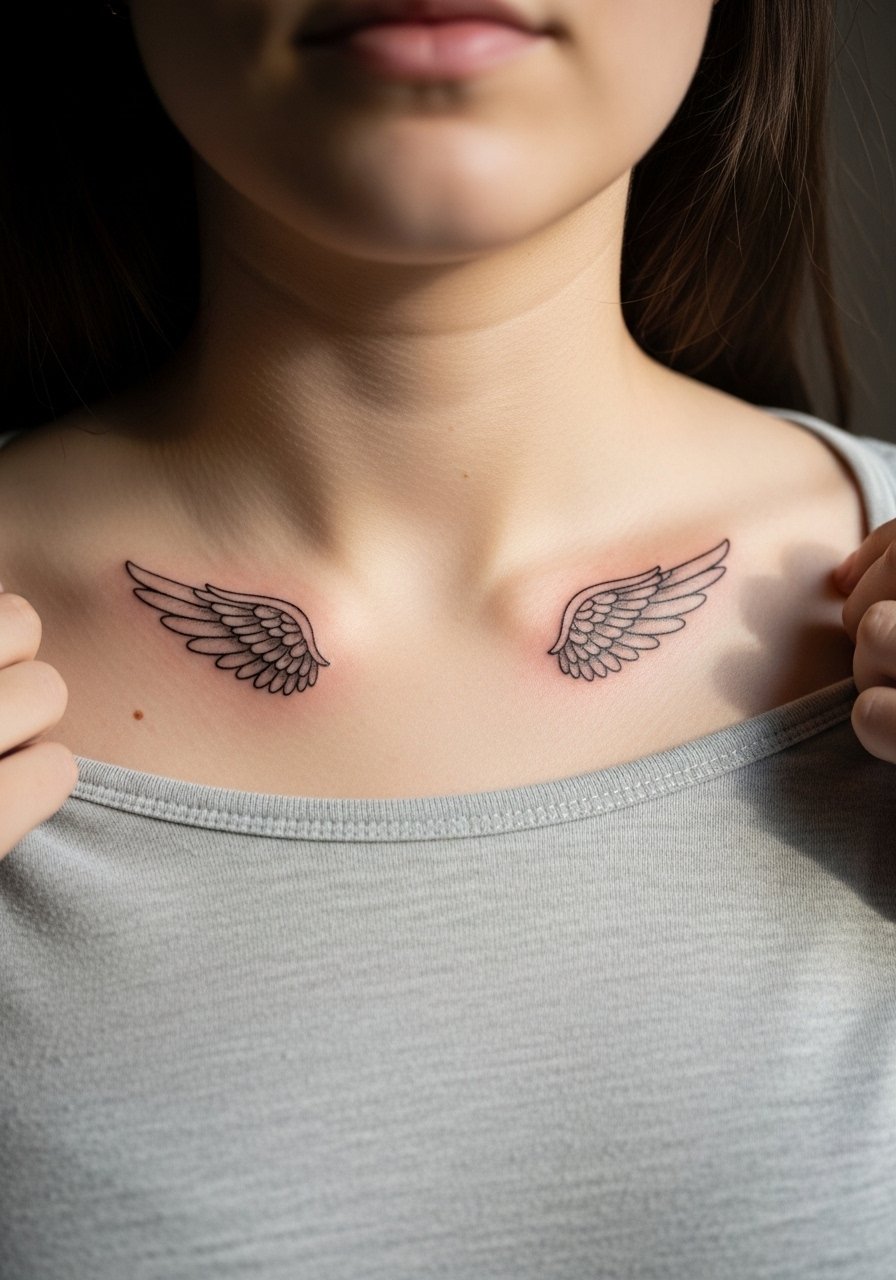
Tiny chest pieces are visible with certain necklines and require careful spacing. Pain is moderate and sessions are quick. Tell your artist you want the wings scaled to your clavicle width so they do not look crowded. A common mistake is using an image meant for a broader chest on a narrow one. For styling, open-neck shirts or a button-down worn loosely let the wings be seen without friction.
Frequently Asked Questions
Q: Will fine line angel wings blur faster than bolder wing tattoos on the ribs or sternum?
A: From what I've seen, the smallest lines on ribs and sternums can soften sooner than bolder outlines because of breathing and fabric contact. One group of artists prefers stronger anchor lines and spacing to combat this. The other group avoids tiny internal detail altogether. Ask your artist which approach they use and why for your skin and lifestyle.
Q: How often should I expect touch-ups for fine line wings on high-friction areas like the wrist or ankle?
A: Expect a realistic touch-up window of around one to three years for wrists and ankles, depending on exposure to sun, friction, and frequency of washing. If you type a lot or wear ankle straps often, plan for earlier maintenance and protect the area while it heals.
Q: What should I wear to keep the artist comfortable during a sternum, rib, or chest session?
A: For chest areas, a front-zip sports bra or a wide-neck shirt you can pull aside is best. That gives access without full exposure and keeps you comfortable. Many people bring a loose zip-up hoodie to the studio for after the session so the area is protected.
Q: Are there wardrobe pieces that help show off small collarbone or wrist wings without rubbing the tattoo?
A: Yes. For collarbone pieces, open-neck blouses and thin chain necklaces sit above the artwork and avoid rubbing. For wrists, rolled sleeves and a minimalist watch or delicate bracelets highlight the tattoo without constant friction.
Q: How do I find an artist who specializes in fine line angel wing work if I do not want to name specific shops?
A: Use discovery pathways like niche hashtags, local shop directories, and community threads on forums to narrow candidates. Look for portfolios that show healed work, not just fresh photos, and ask about touch-up rates and experience with the placement you want.
