
Fine line hand pieces look effortless on a feed. The reality is that the hands are one of the harshest places for ink, and the designs that still read crisp after two years are usually the ones planned around friction, spacing, and a realistic touch-up timeline. Read the first idea and you will see why size, placement, and what you wear matter as much as the design itself.
1. Micro Script on the Side of a Finger
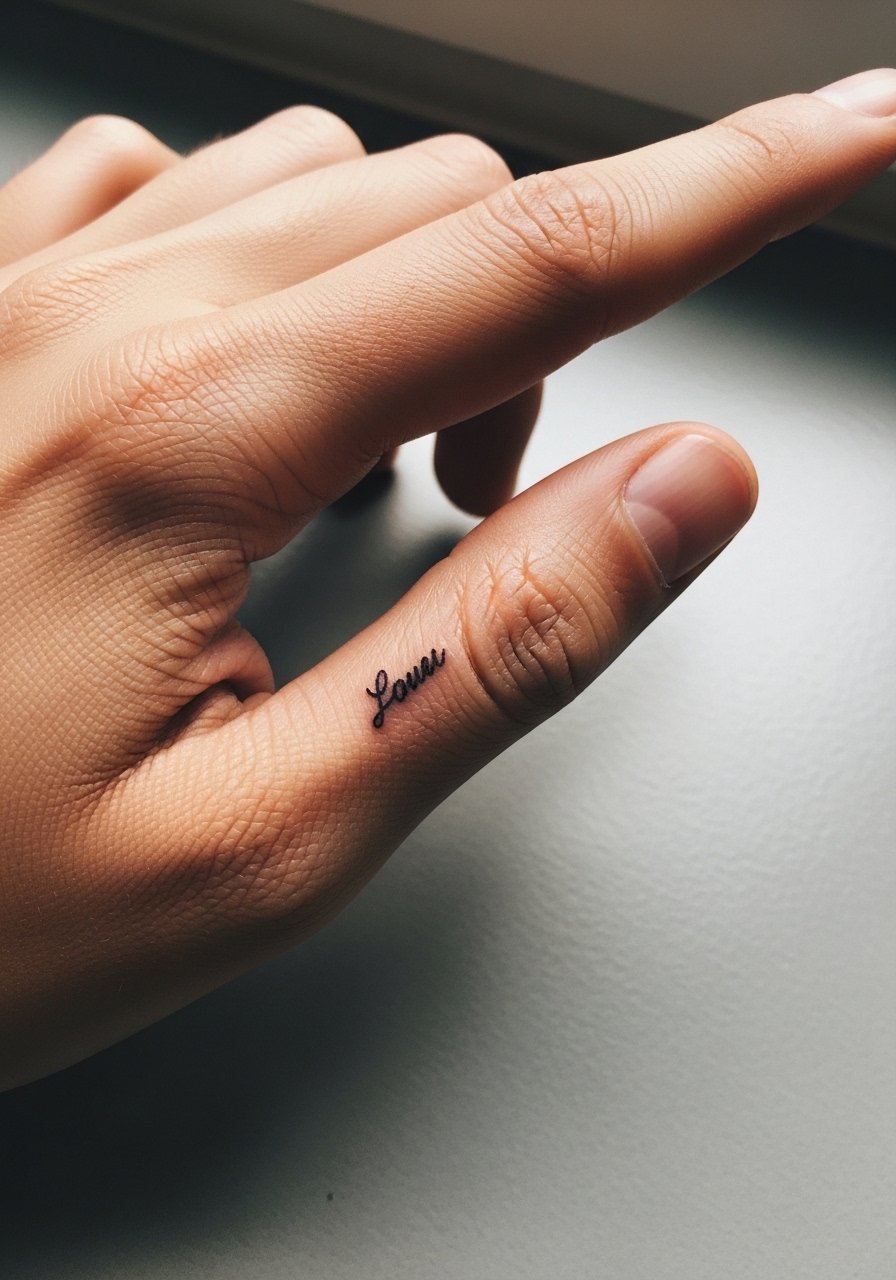
I recommend this when you want a private message that peeks out when you gesture. Fair warning, finger script is a high touch-up candidate because skin there regenerates fast and friction from rings and washing fades letters. Tell your artist to scale the lettering slightly larger than the reference and use heavier linework for each stroke to give the letters room as they soften. Session time is short but the area is sensitive. For showing it off, stacked dainty bracelets sit above the wrist and shift attention to the fingers when you gesture, try stacked+dainty+bracelets.
2. Single-Needle Minimal Glyph on Knuckle
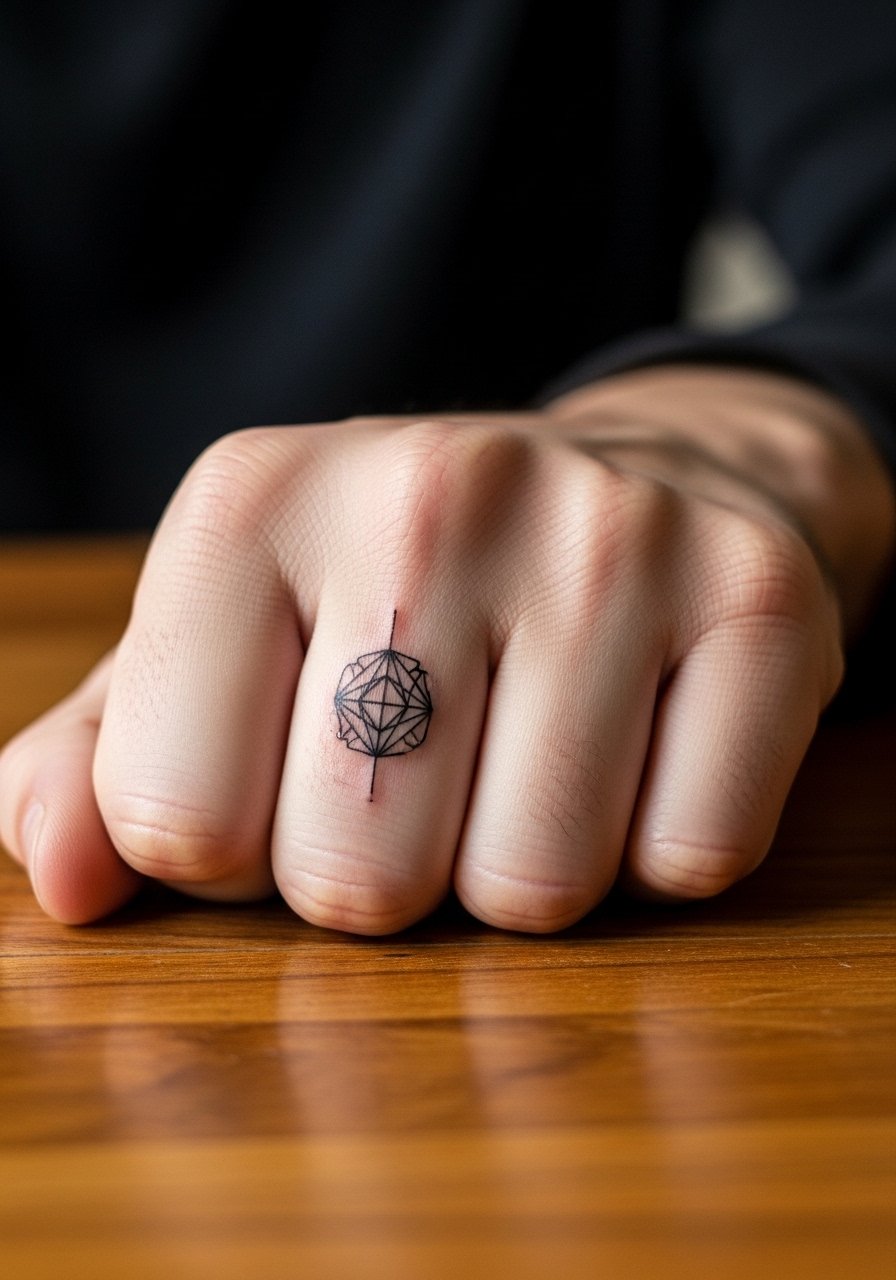
Knuckle glyphs read bold when the strokes are slightly thicker than the inspiration image. The main mistake is asking for ultra-fine detail that cannot survive daily use. Expect the session to feel sharper because bone is close under the skin. The controversy around knuckle work is vocal. One camp says knuckle tattoos rarely last and are best avoided. The other camp argues that with proper depth and bold shapes, knuckle pieces can age predictably. Ask your artist where they stand and what touch-up schedule they recommend. Wear a thin+ring+set when you show this off.
3. Micro-Realism Eye on the Back of Hand
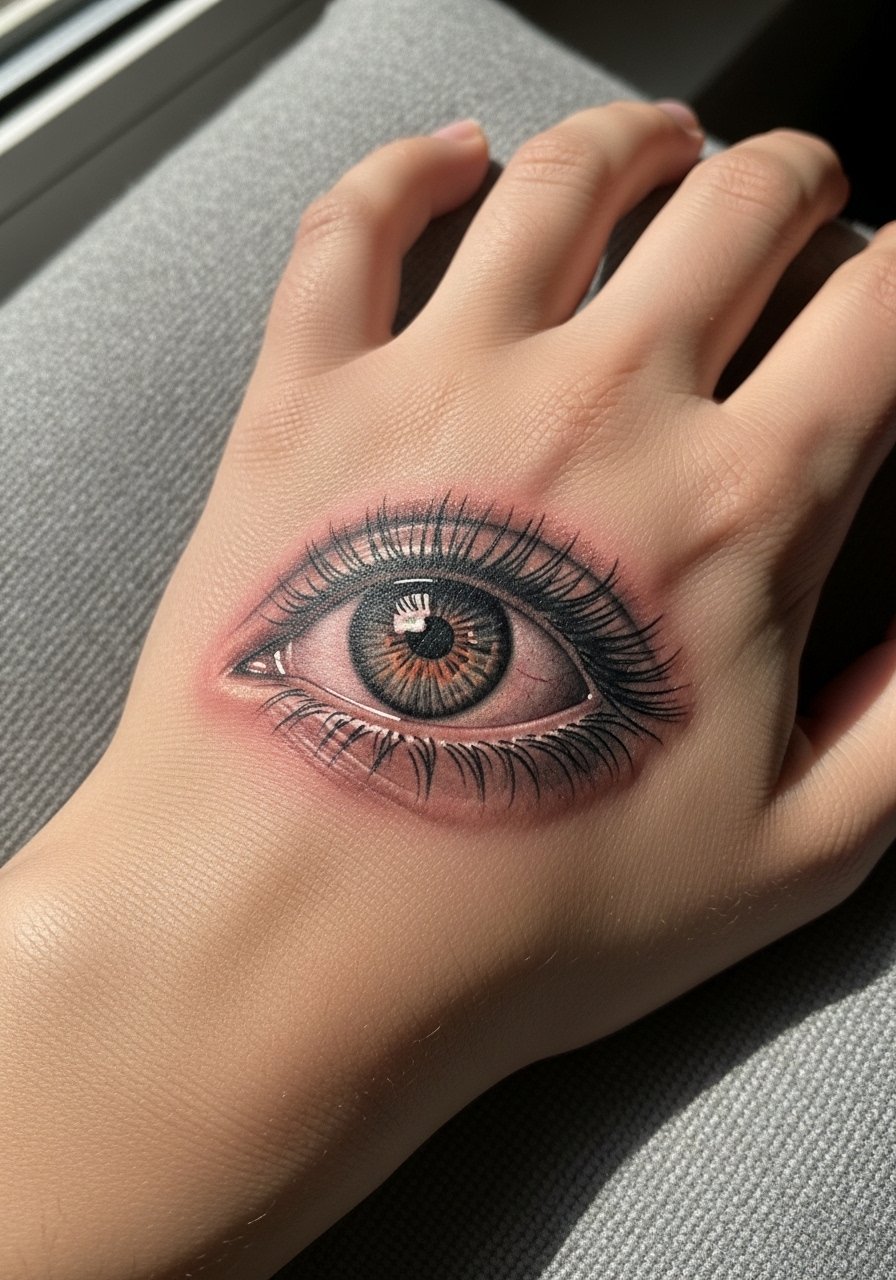
A tiny micro-realism eye reads striking up close but needs clear negative space around it to avoid merging with veins and natural hand texture over time. When booking, ask the artist to avoid packing tiny stipple into the lashes so the pupil keeps definition. The common error is cramming too much contrast into a small area. Expect light swelling for 24 hours and careful washing for a week. For sessions, wear a loose long-sleeve you can pull up without rubbing the fresh ink, such as a cotton+long+sleeve+shirt.
4. Dot Work Circuit Pattern Across the Back of Hand
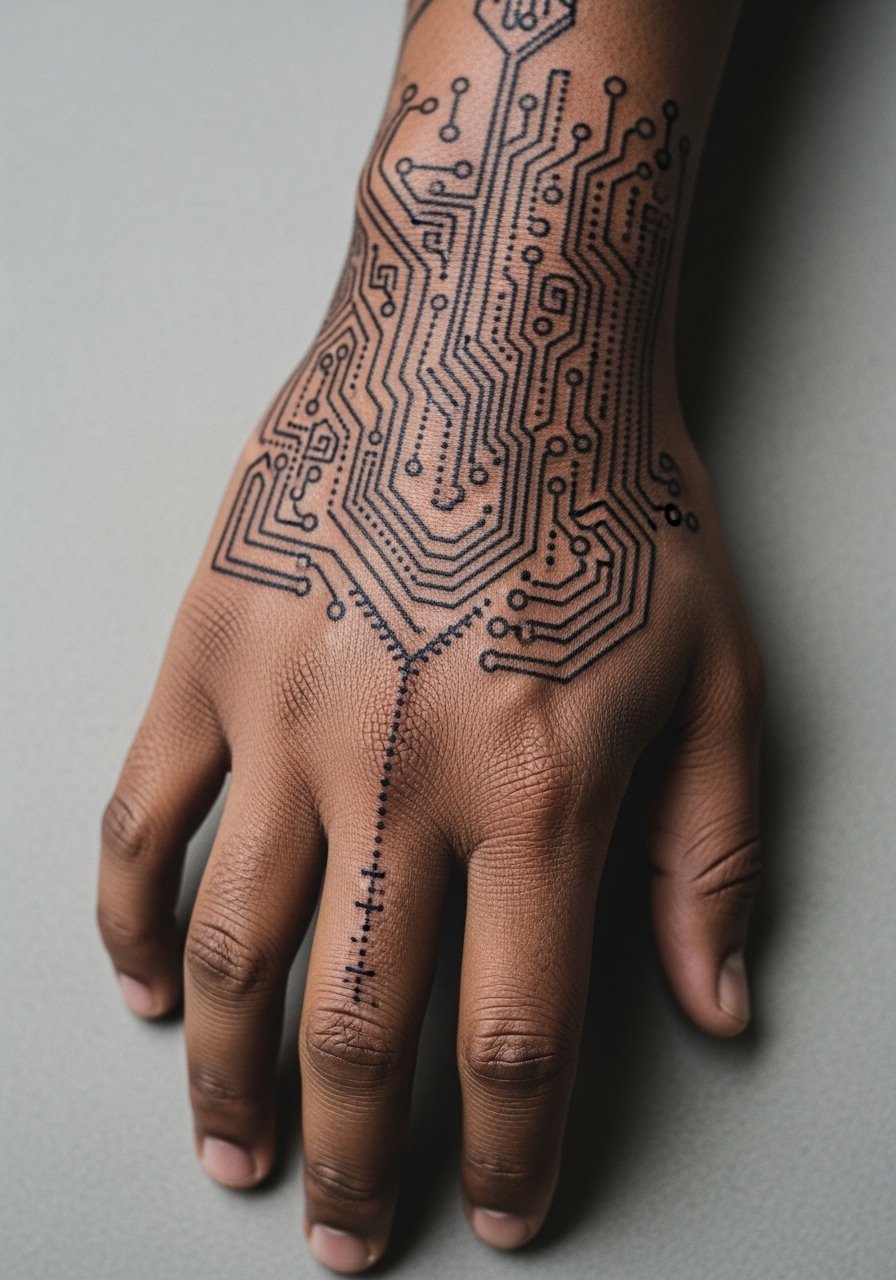
Dot work reads clean longer than dense shading because each dot has breathing room. The common mistake is overfilling the negative space which leads to a muddy look at two years. Tell your artist you want increased spacing in key areas and a tapered edge toward the wrist. Pain sits in the middle range and sessions can be broken into short passes to reduce fatigue. Pair this grid-like graphic with a minimalist watch or modern+black+watch+band when you want the tattoo to feel intentional.
5. Tiny Barcode on the Side of the Thumb
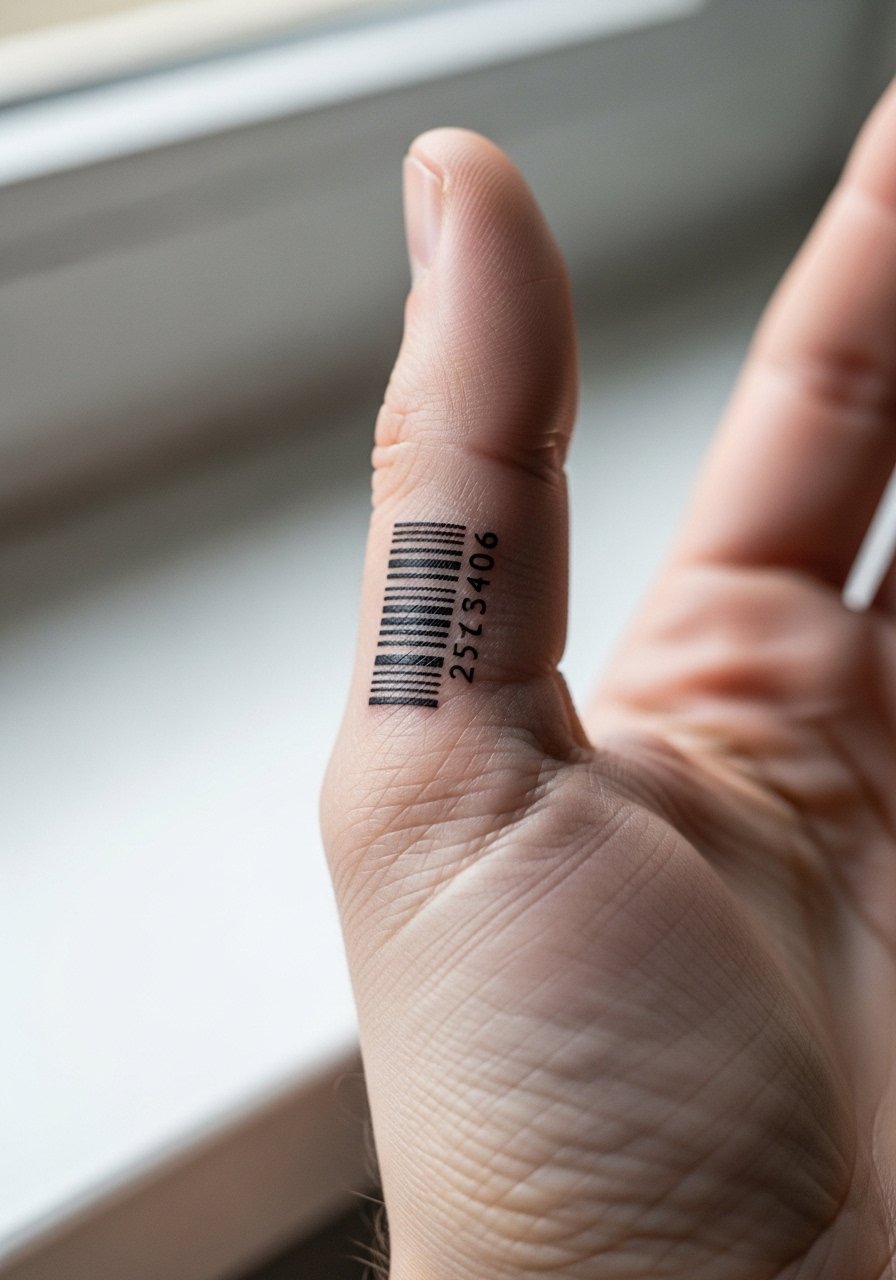
Thumb-side placements are exposed to constant movement and contact, so line integrity is the main concern. The biggest mistake is asking for ultra-fine bars without allowance for slight spread. Ask for bolder bars and clear spacing between them. The session is brief but sensitivity is high because the area bends and flexes often. For the appointment, wear a button-down you can roll up easily so the artist can work without pressure on the hand, like a loose+button+down+shirt.
6. Blackwork Micro-Mandala Centered on the Hand
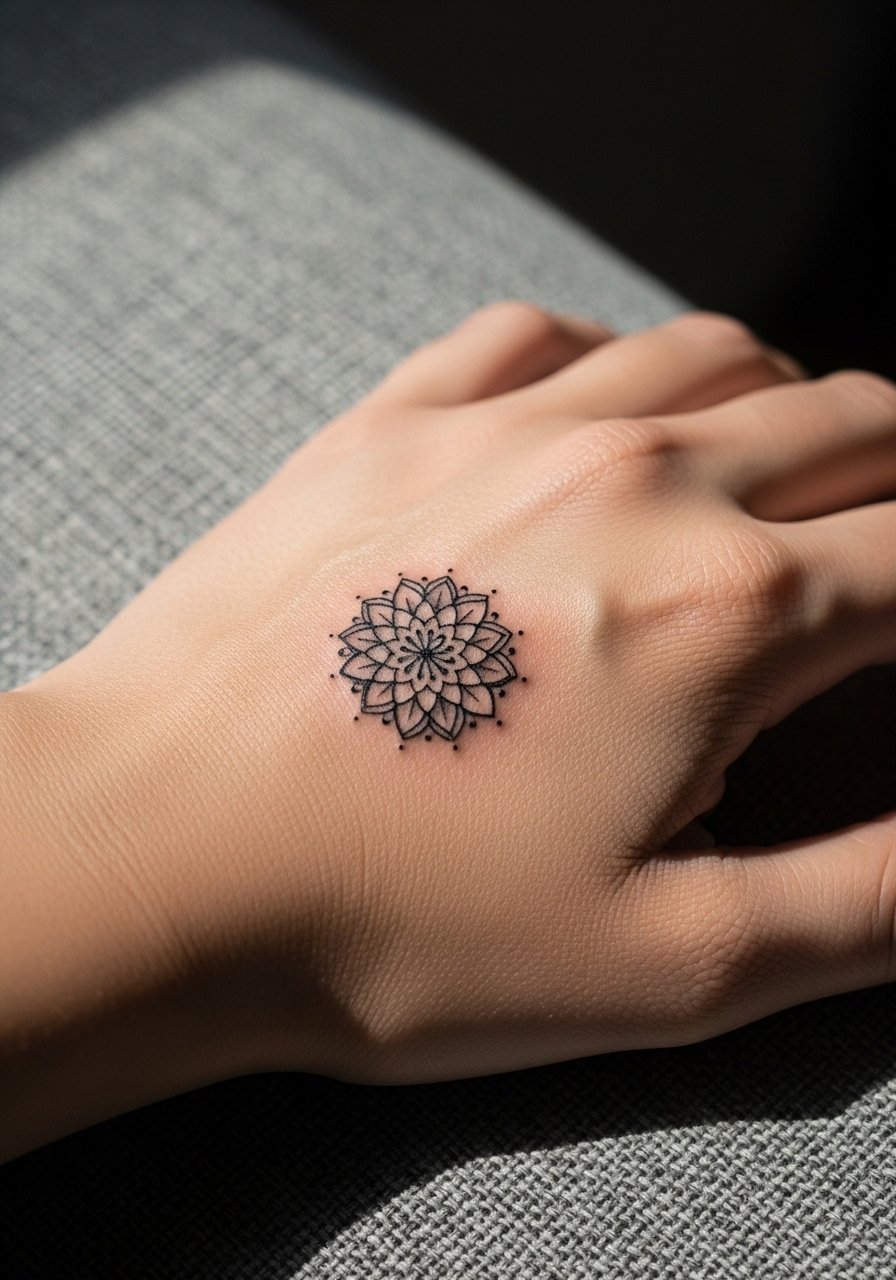
Micro-mandalas look crisp if the design emphasizes open negative space instead of packed dots. The mistake is shrinking a complex mandala so much that the petals merge after a year. During consultation, request scaled spacing and a simplified outer ring. The session can take longer because the artist will need to pace dot work. For evenings out, an open cuff or rolled sleeve frames this piece well. A stacked+thin+bracelet keeps the attention on the center without crowding it.
Studio Day Picks
The back-of-hand, thumb, and knuckle pieces above all face friction and frequent washing, so a few select items smooth the session and the first week.
-
Stencil+transfer+paper+kit. Helps you and the artist preview exact placement on the hand, which is vital for knuckle and thumb work that looks different in motion.
-
Topical+numbing+cream. Applied as directed before the session eases sensitivity on finger and thumb placements without changing line quality.
-
Thin+protective+film+roll. Keeps hand tattoos cleaner during the first week when friction from daily tasks is highest.
-
Fragrance+free+gentle+body+wash. Gentle cleansing avoids irritation that can blur fine lines on the back of the hand.
-
Aquaphor+healing+ointment. A thin layer in the first days locks in moisture for delicate linework while allowing the skin to breathe.
7. Minimal Geometric Line Along the Finger
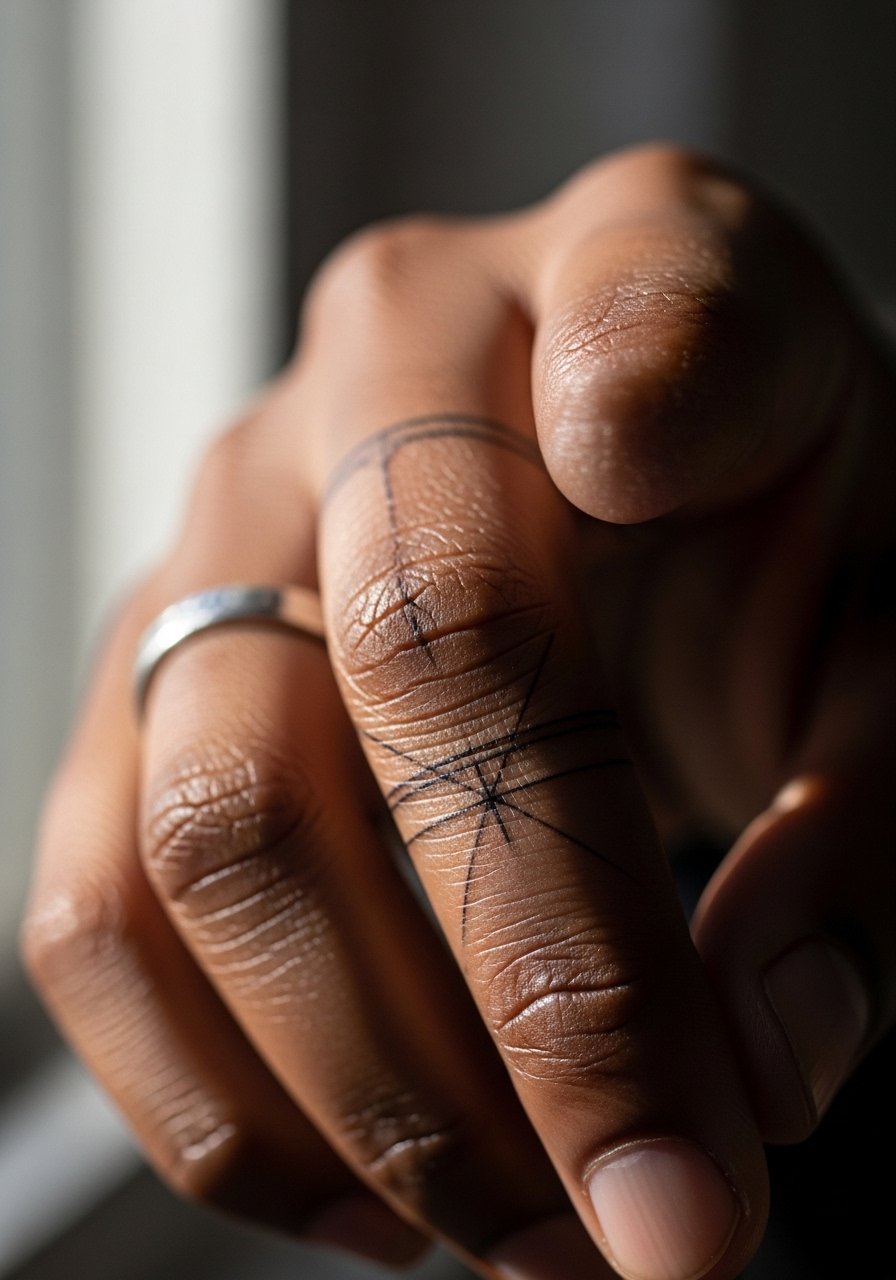
A single geometric line is deceptively simple. The mistake is matching the exact thinness from a photo without giving it guard space from adjacent knuckle creases. Ask the artist to place the line so it avoids primary crease intersections. The session is short but expect tenderness for 48 hours. For showing this off, small rings and a minimalist watch strap maintain focus on the finger without overwhelming it, try a minimalist+watch+band.
8. Tiny Circuit Sigil on the Side of the Palm Near the Base of Fingers
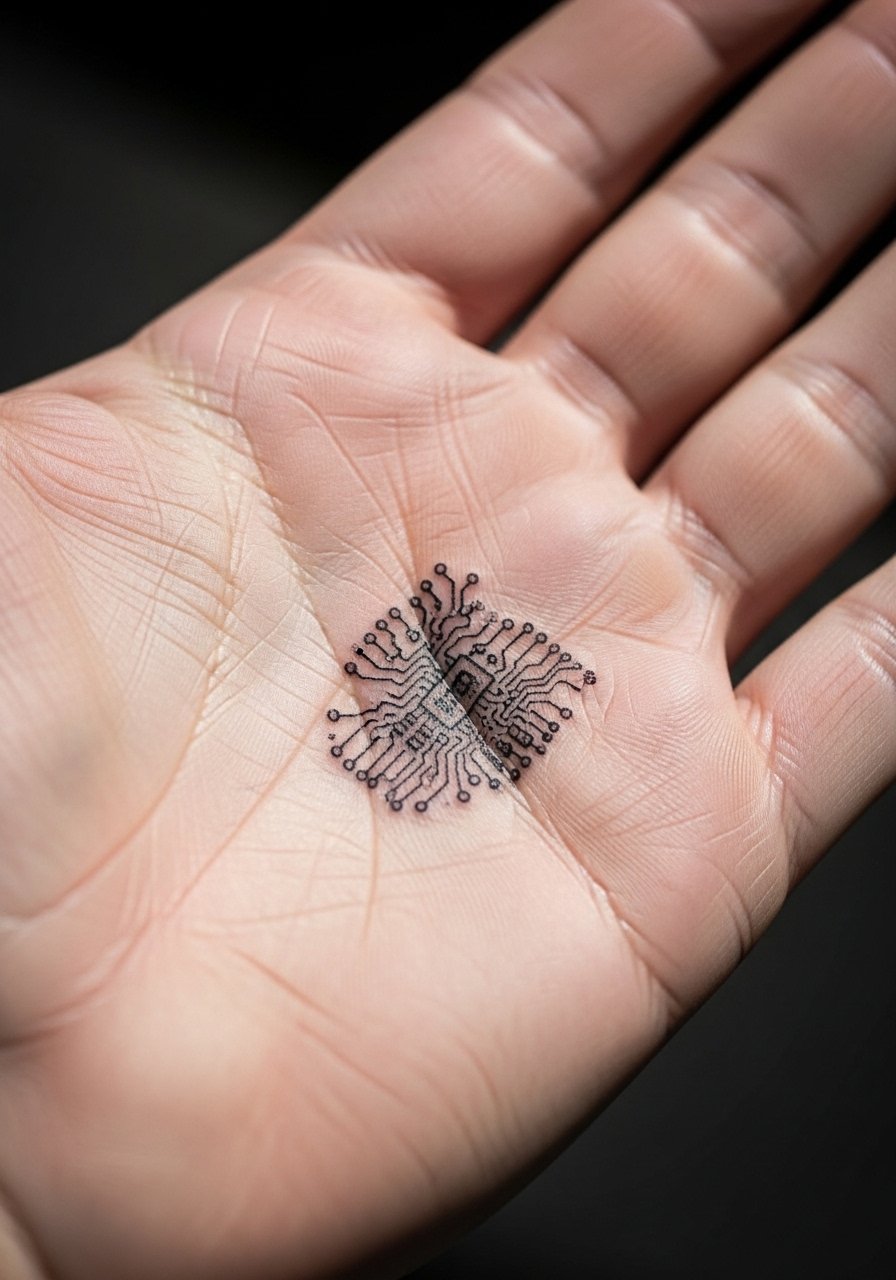
Palm-adjacent placements need careful planning because skin here renews quickly. The common failure is placing detailed work directly on the palm where it will fade rapidly. This version sits just off the palm to improve longevity. Tell the artist you want slightly bolder nodes so tiny elements remain readable. Sessions can feel more abrasive due to skin texture. For the appointment, wear a short-sleeve shirt that keeps the forearm free and avoids rubbing the hand.
9. Micro Portrait Pixel Square on the Back of Hand
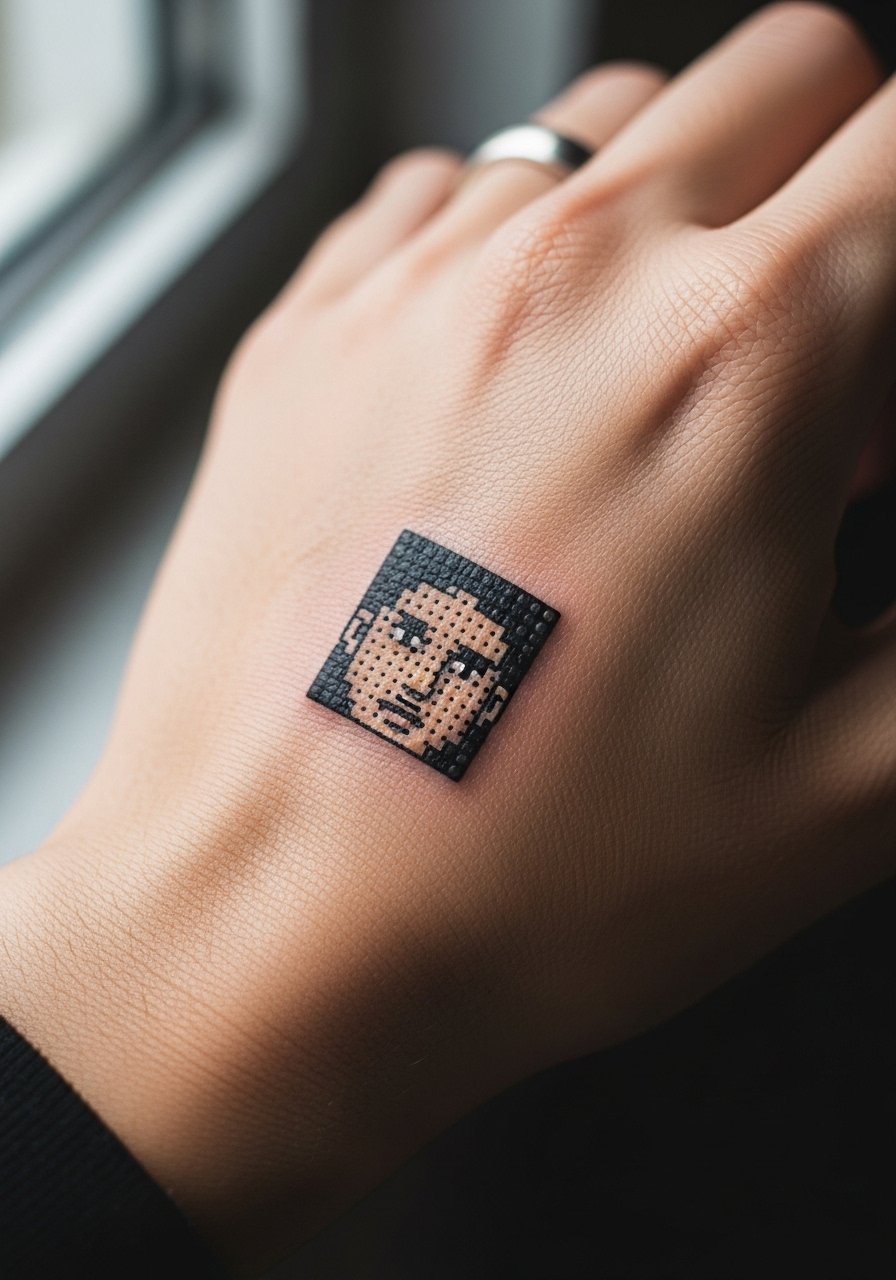
Pixel squares translate to a strong graphic when the grid is large enough to allow intentional blur later. The mistake is compressing a portrait into too few pixels. During consultation, ask for a 6×6 or larger grid so the main features hold at year two. The session takes moderate time due to precise dot placement. Pair the piece with a chunky ring or a matte bracelet to make the pixel block read as design rather than random marking.
10. Thin Wave or Signal Line That Wraps the Wrist Edge
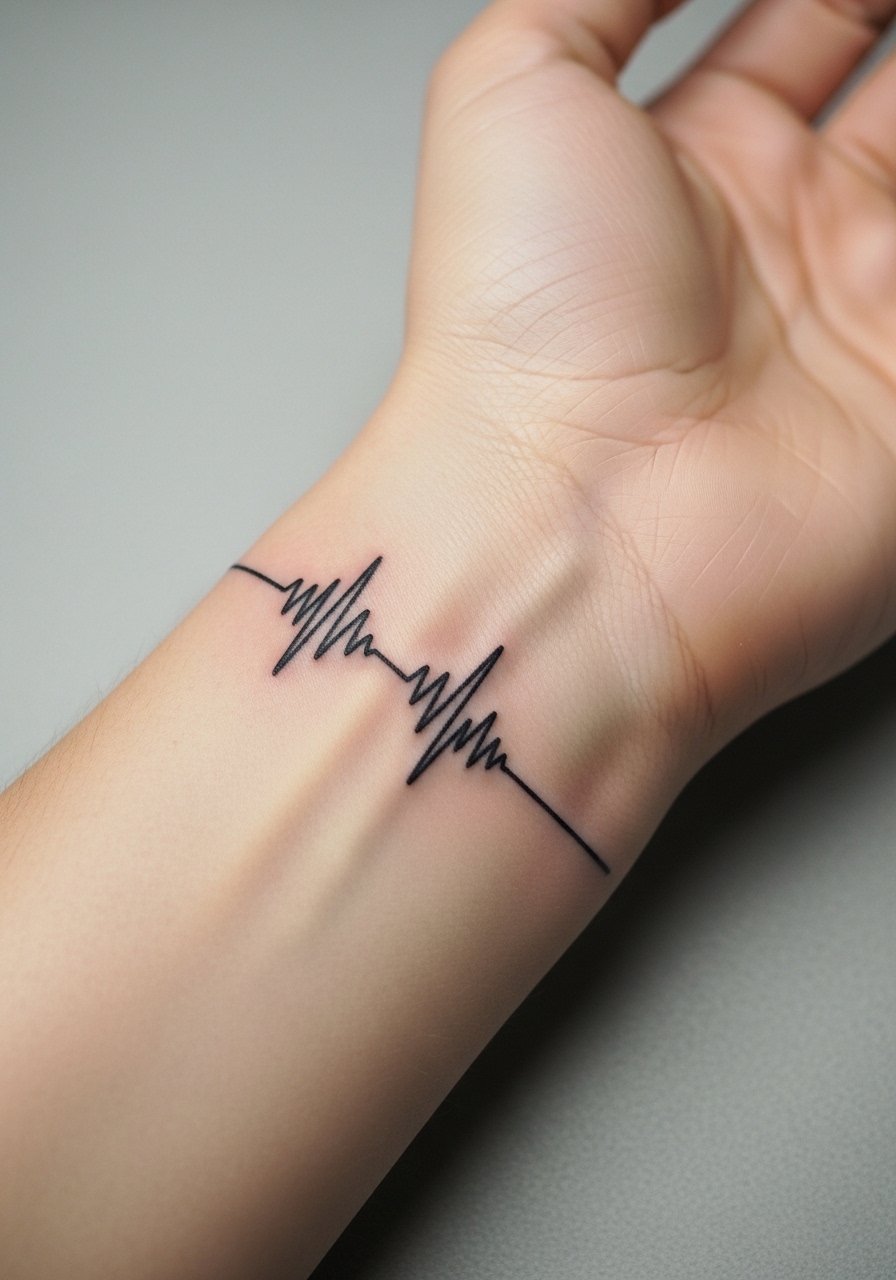
Edge-wrapping lines age differently because the wrist moves constantly. The usual mistake is making the line too fine where it crosses the wrist fold. Ask for a slightly heavier anchor at the fold and a taper on the outer wrist. This placement is noticeable when you turn your wrist, so think about daily activities like typing and washing. For sessions wear a loose button-down you can move aside, like a loose+button+down+shirt.
11. Micro-Blackout Patch Under a Ring Finger
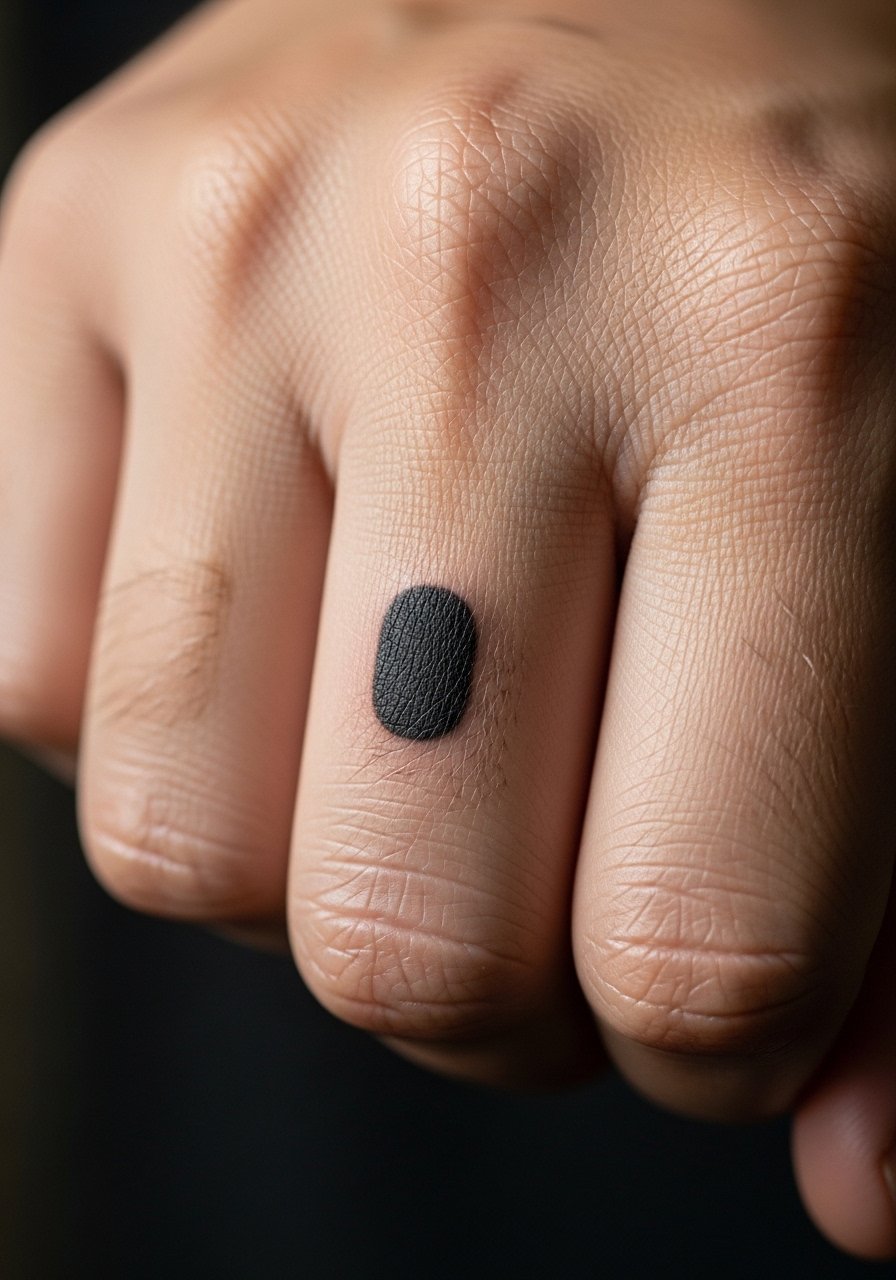
A tiny blackout anchors a ring finger visually without needing a physical band. The mistake is expecting a perfect rectangle on a curved surface. Request a slightly beveled shape so coverage sits naturally with skin movement. Expect the session to be brisk but sensitive. For showing it off, a slim metal ring on the finger above complements the patch and keeps focus, try slim+metal+ring.
12. Tiny Constellation Row Across the Side of the Hand
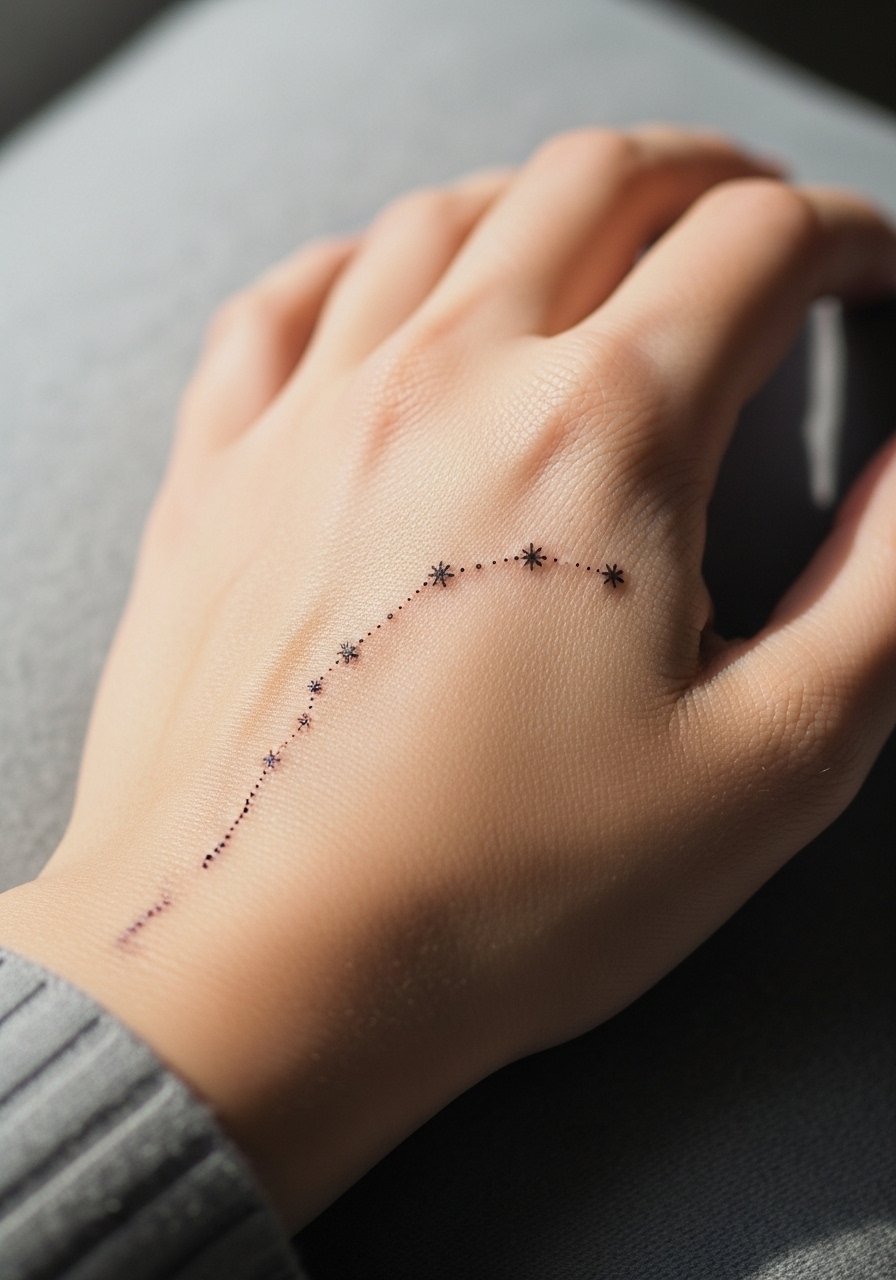
Constellation rows work when spacing between stars is deliberate. The error is clustering stars too tightly so they blur into one shape. Ask your artist to map the negative space with the stencil and to keep at least a few millimeters between dots. This placement is low to moderate pain and heals unevenly if you sleep on that hand. For evenings, roll a sleeve or pair with a thin+chain+bracelet to draw the eye along the line.
13. Script Tattoo Along the Thumb Fold
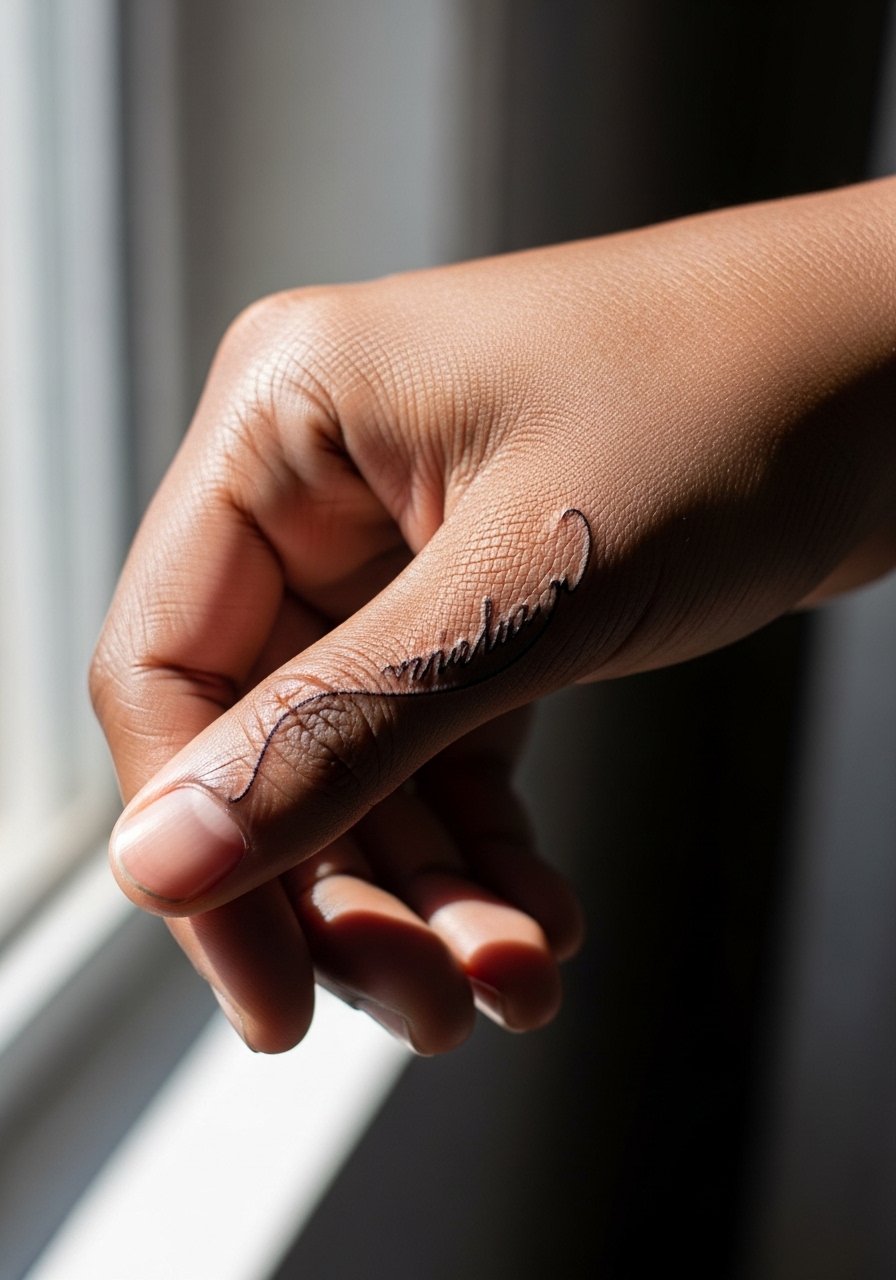
Script on the thumb fold needs room to age. The common mistake is tight cursive with thin joins that disappear. Ask the artist for slightly heavier connectors and for letters to avoid sitting directly in the deepest fold. Touch-ups are common around year two. The session feels sensitive since movement is central. For the appointment, wear a shirt you can roll up easily so the artist has unobstructed access.
14. Small Abstract Tech Sigil at the Base of the Palm
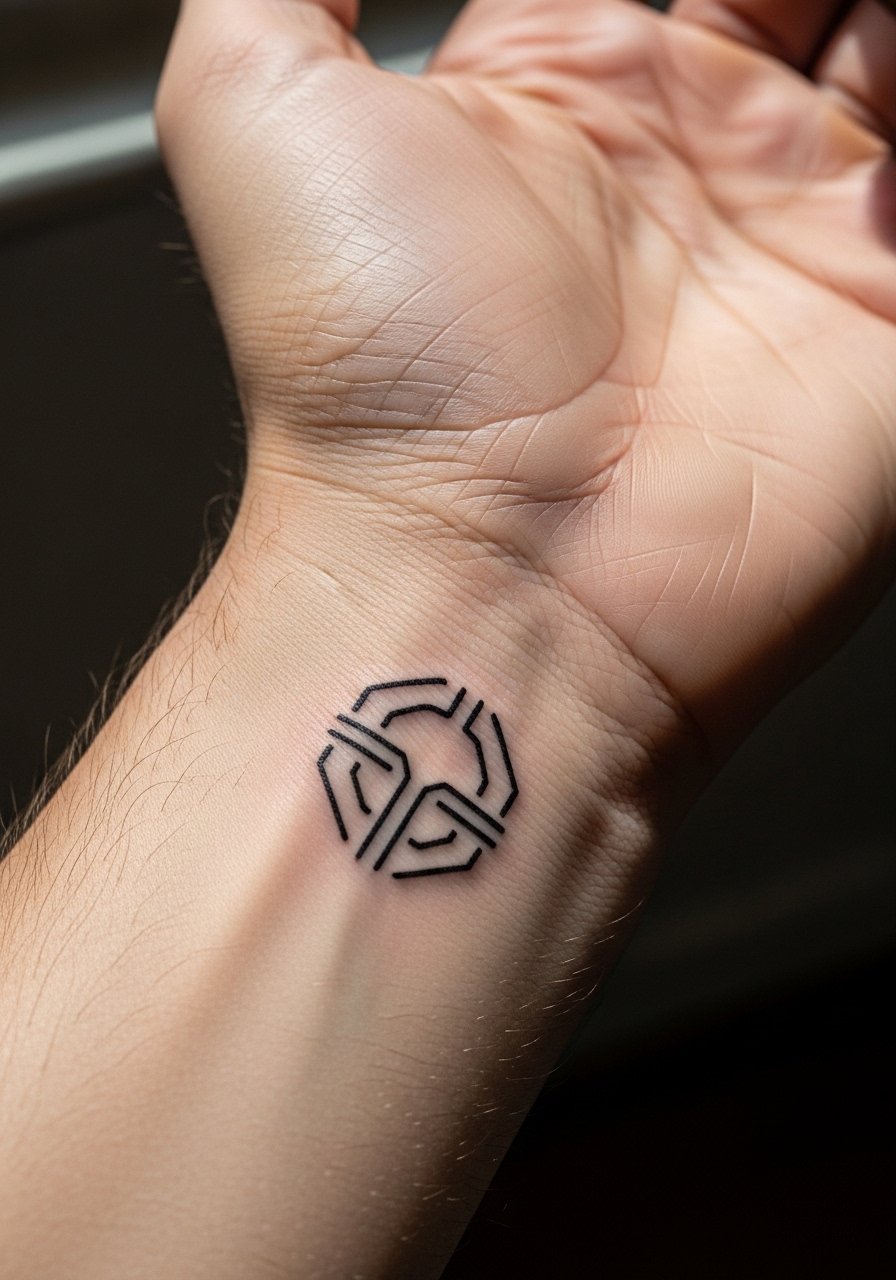
Sigils with negative space survive better than filled tiny shapes. The error is filling in the sigil too densely which causes loss of definition under wear. Ask for line separation and for the artist to check the stencil in motion. The area is moderate in pain and will require extra shielding from soap and water for several days. For showing it off, cuffed sleeves or short sleeves keep the base visible and intentional.
15. Tiny Floral Bud Along the Side of the Pinky Finger
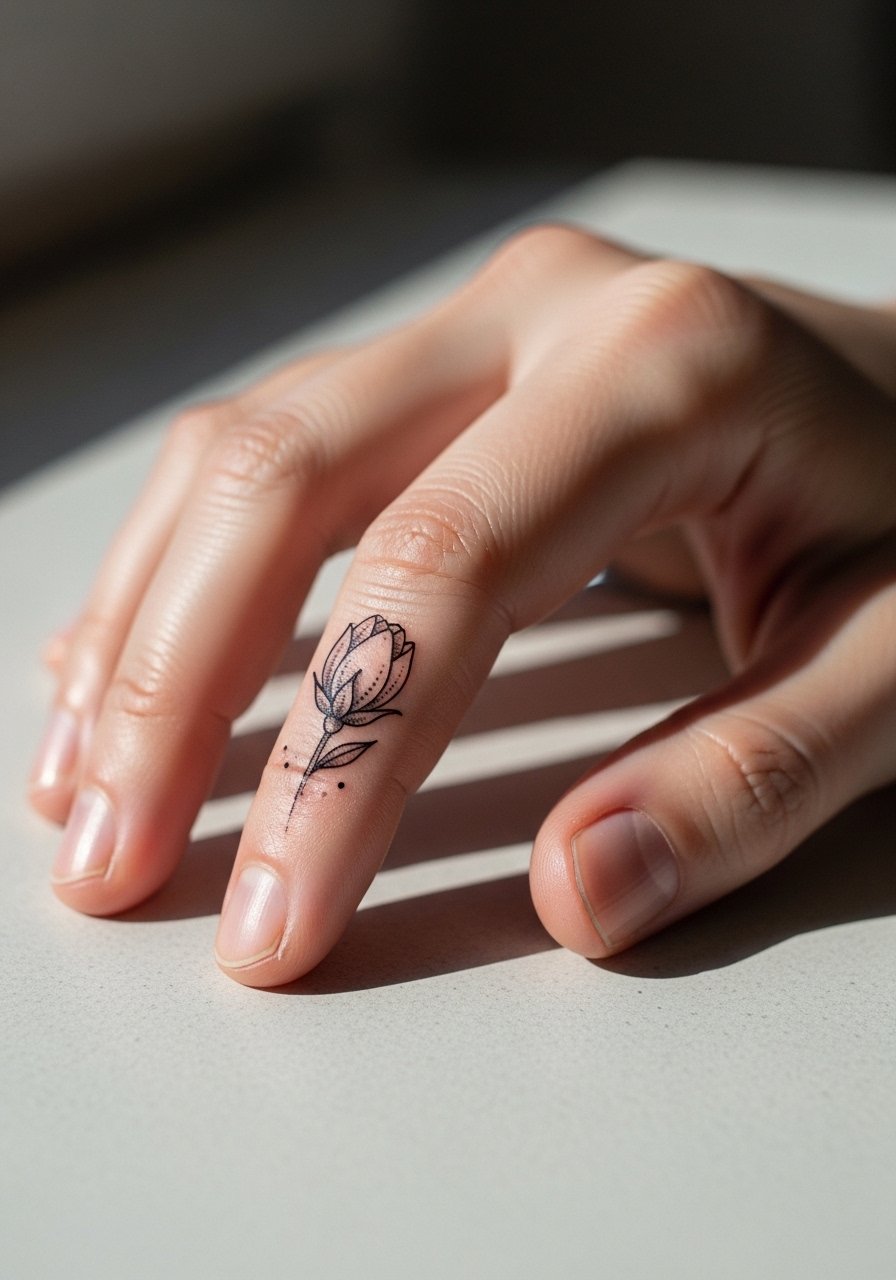
Pinky-side florals are charming but the skin is thin and prone to touch-ups. The common mistake is asking for heavy petal detail. Ask for simplified petals and a bold central dot to anchor the bud as it softens. The session is quick but expects sensitivity. Stacking dainty rings above keeps attention on the blossom and helps it read as jewelry, try a delicate+pinky+ring.
16. Fine Line Circuit Script Across the Web Between Thumb and Index
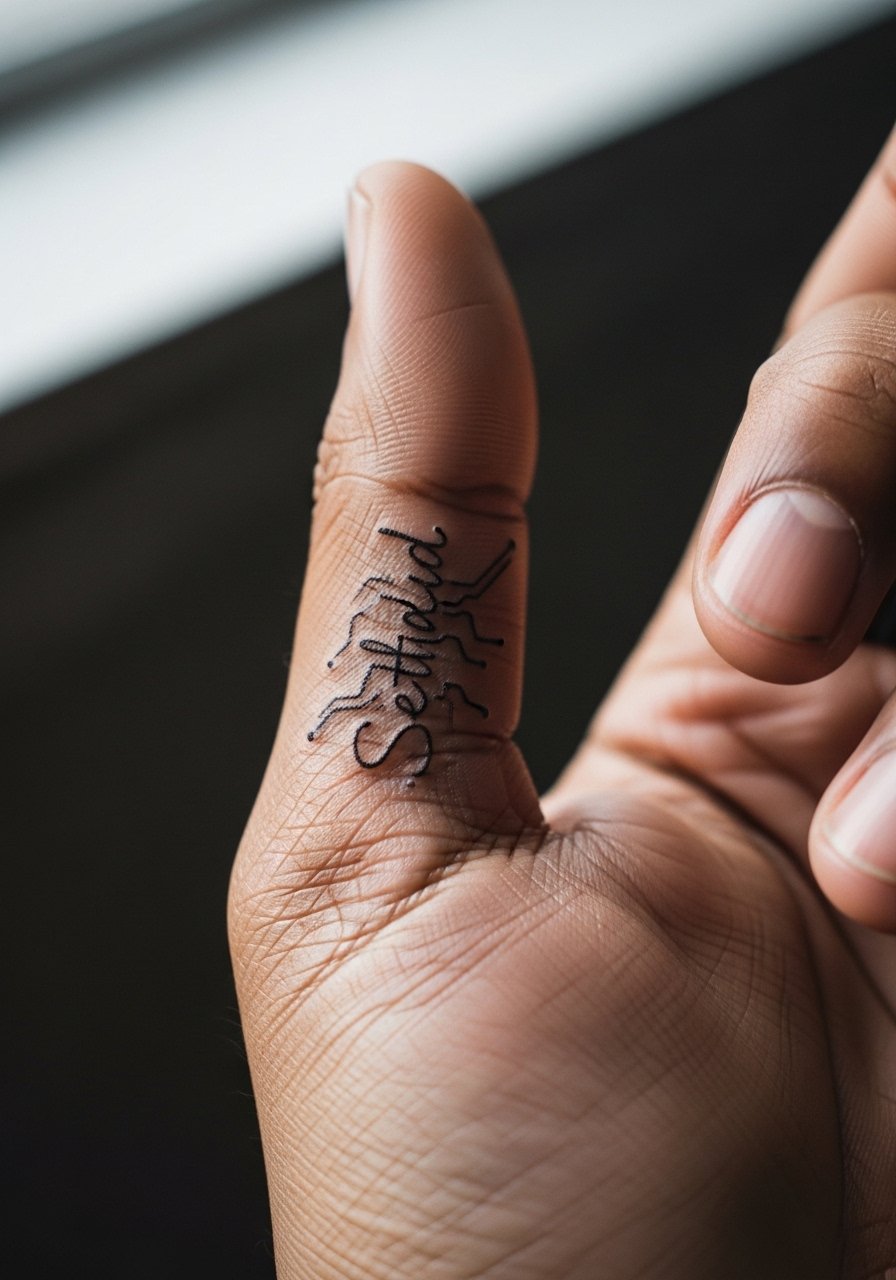
Webbing tattoos age differently because the skin flexes a lot. One camp of artists avoids this area for fine line because of rapid blur. Another camp uses slightly deeper placement and simplified line weight and reports better longevity. Name both viewpoints in consultation and ask where your chosen artist lands. Sessions can be sharp. For the day, wear a short sleeve and avoid gripping heavy bags for a week.
17. Tiny Barcode Coordinates Just Below the Ring Finger
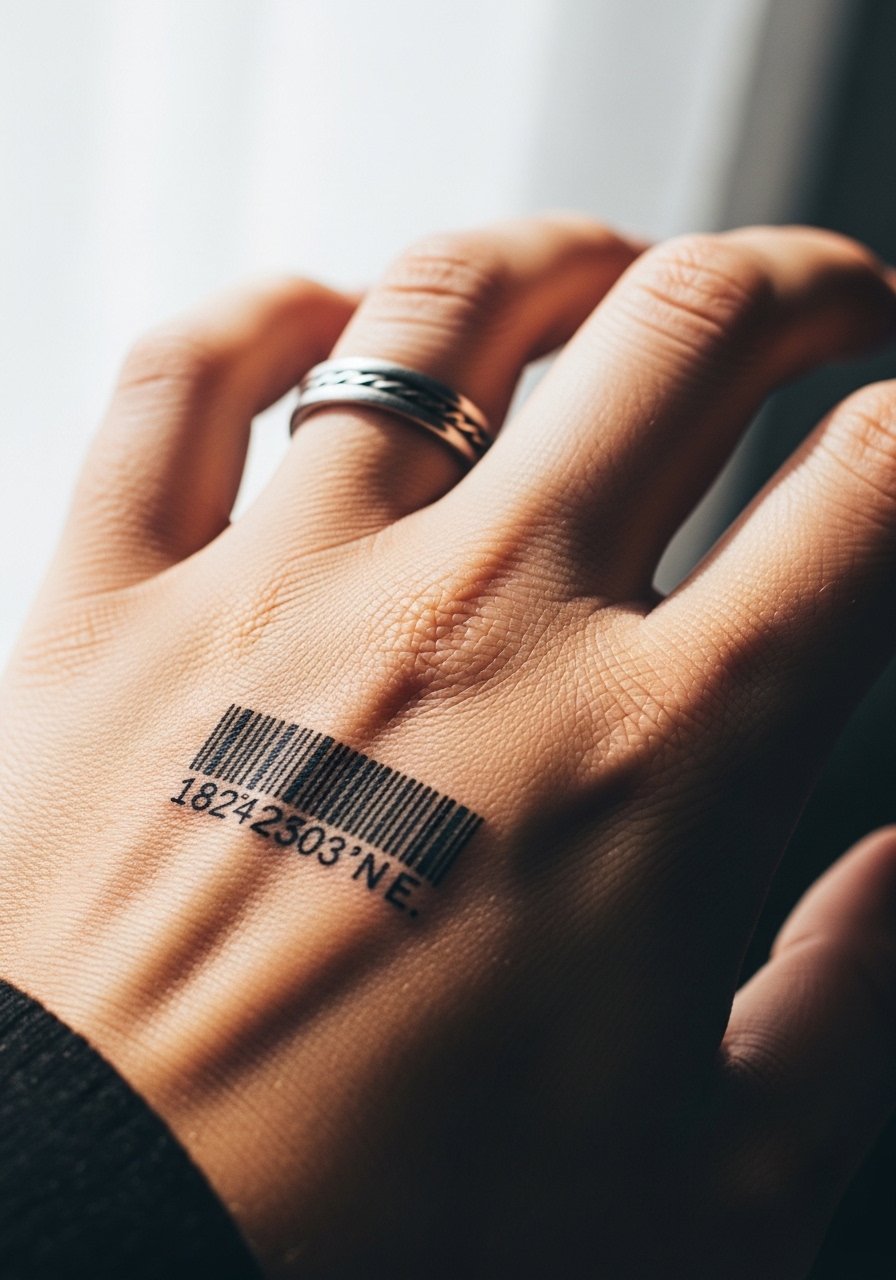
Coordinates and barcode combinations are a modern take on personal markers. The frequent mistake is requesting extremely tight bars which bleed across time. Ask for balanced spacing and a small safety margin. The session feels manageable. For a subtle reveal, a simple ring or bracelet keeps the area readable without overstating it.
18. Micro-Realism Seedling Behind the Thumb Joint
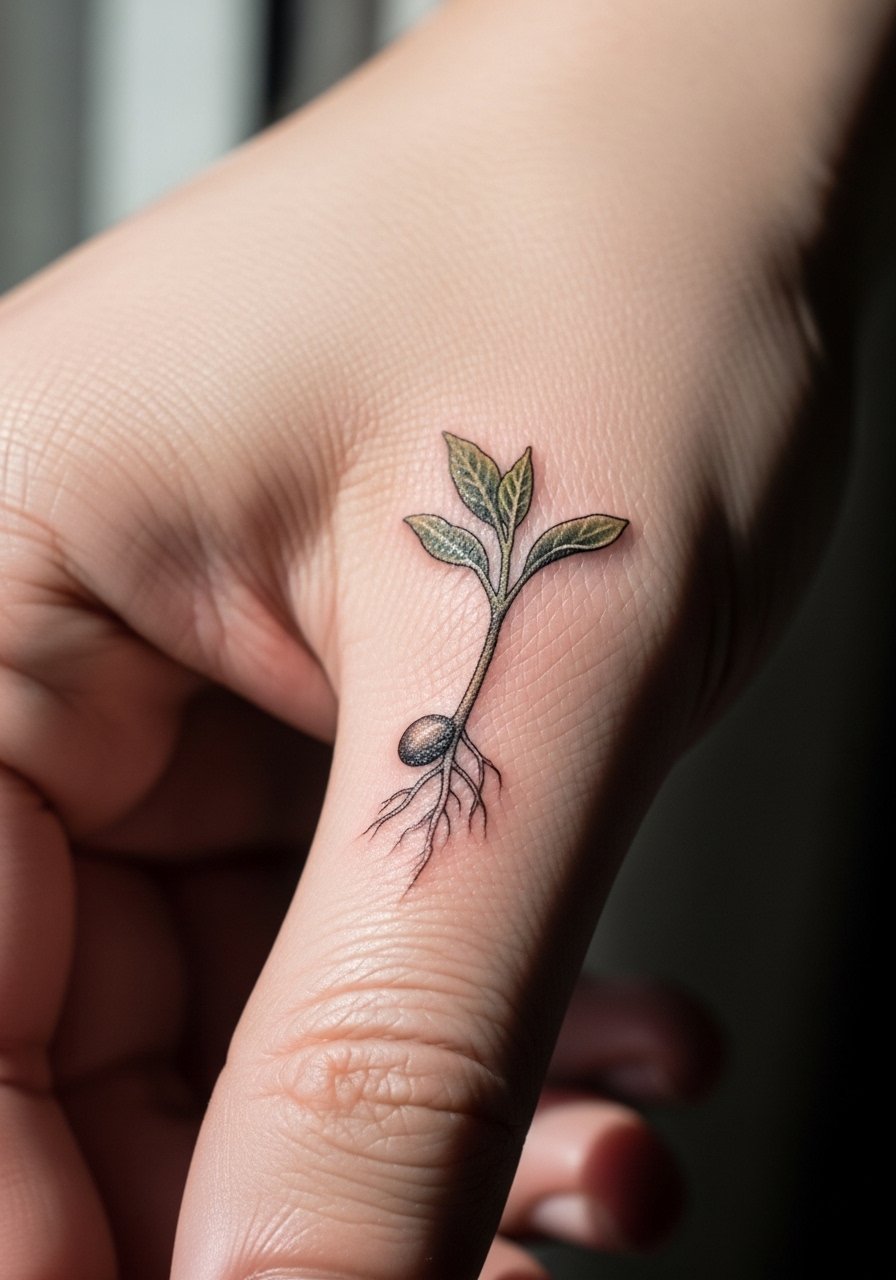
Small organic shapes work well when positioned where the skin does not crease heavily. The error is placing a stem exactly over a joint. Ask the artist for a slight offset from the joint. Sessions are short but precision matters. For showing it off pair with a casual cuff or rolled sleeve so the seedling sits between accessories.
19. Tiny Geometric Arrow Along the Finger Bone
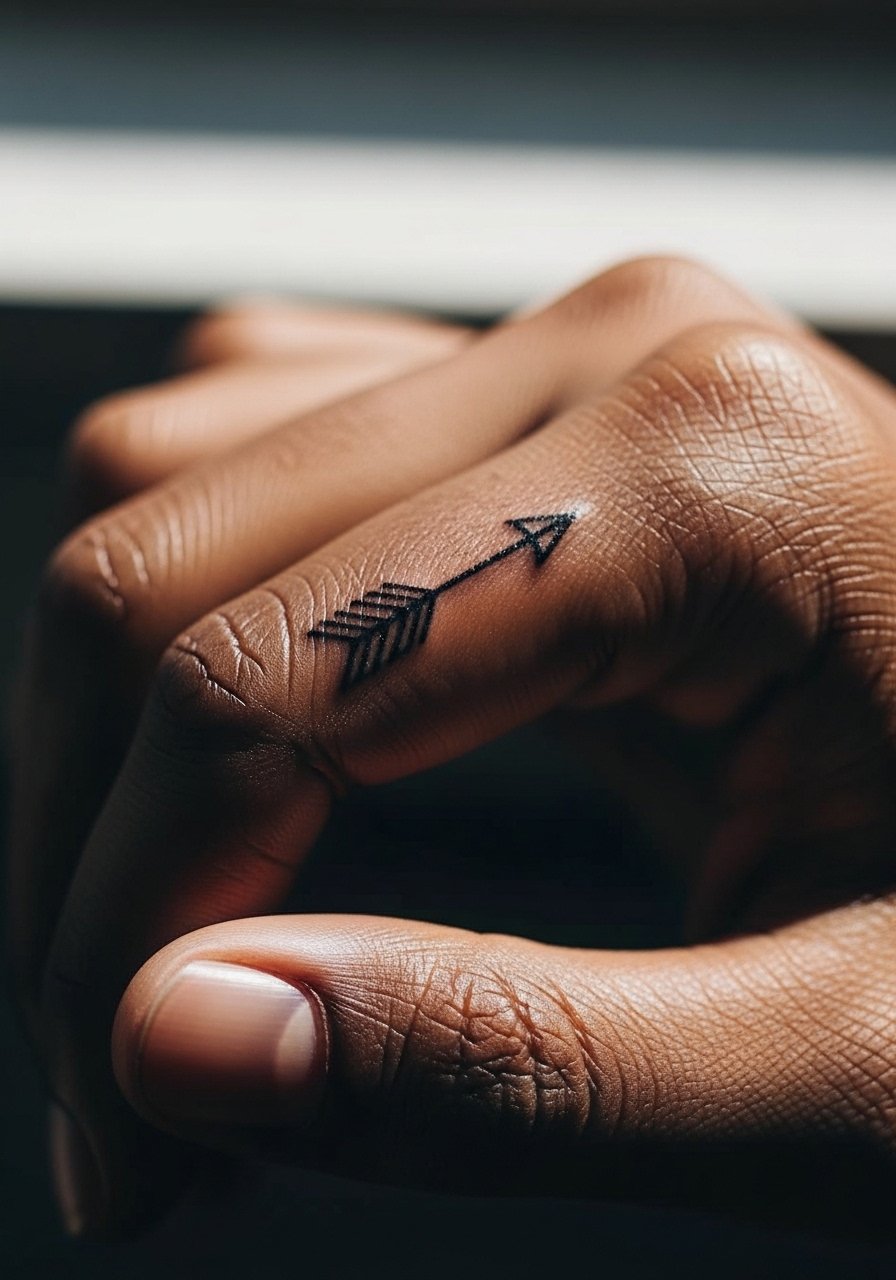
Arrows need to account for knuckle movement. The mistake is pointing the arrow across a major crease. Ask for alignment that follows the finger bone from joint to joint, with slightly heavier arrowhead points to hold over time. Sessions are quick and sensitive. Pair with thin stackable rings to carry the visual line up the finger.
20. Minimalist Chain Link That Starts at the Wrist and Tapers onto the Hand
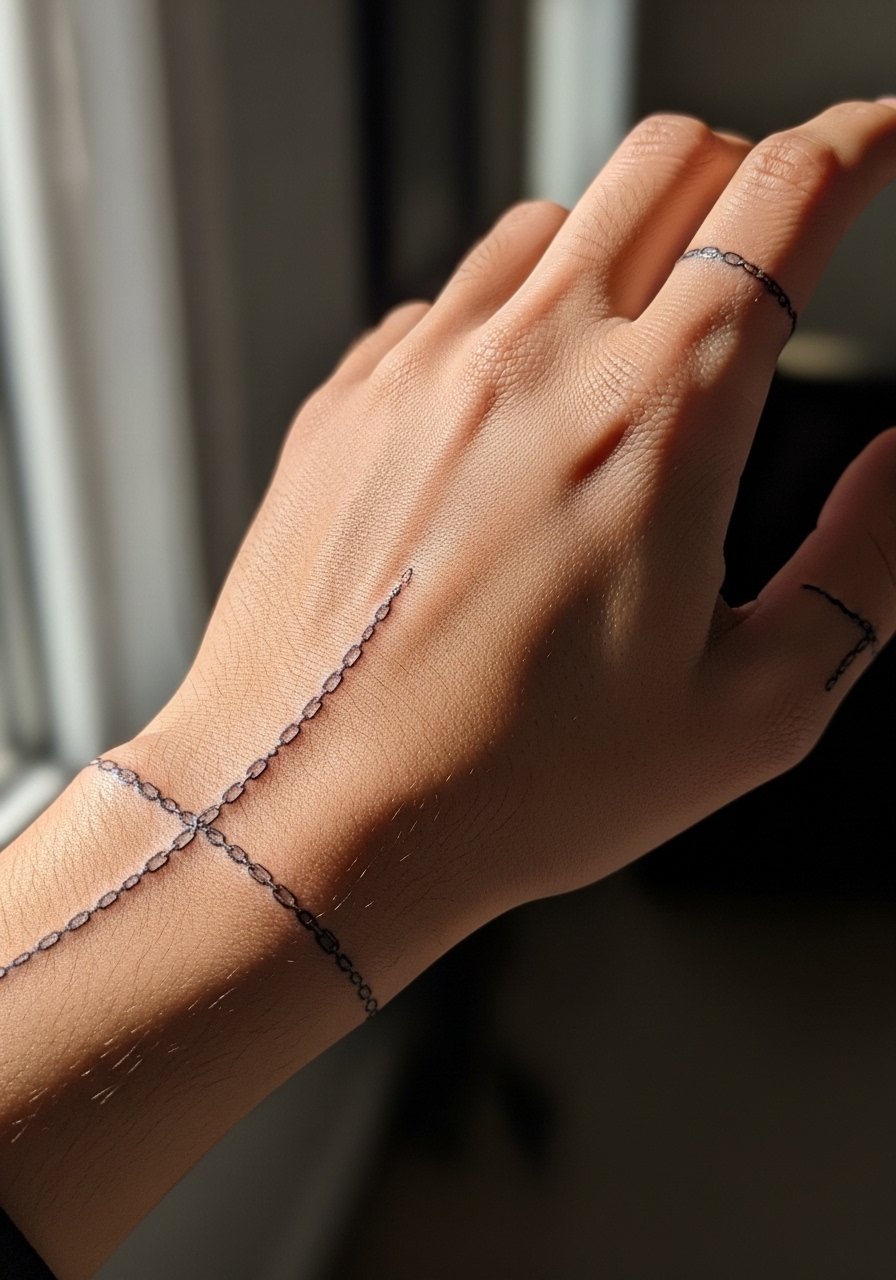
Chain motifs need controlled spacing to avoid merging. The common error is placing links too tightly near the wrist fold. Ask for gentle tapering and spacing adjustments so links breathe. The session time varies with coverage. For evenings, a slim bracelet layered with a cuff makes the tattoo read like jewelry rather than body art. Try minimal+bracelet+cuff.
21. Micro Black Dot Grid Near the Thumb Base
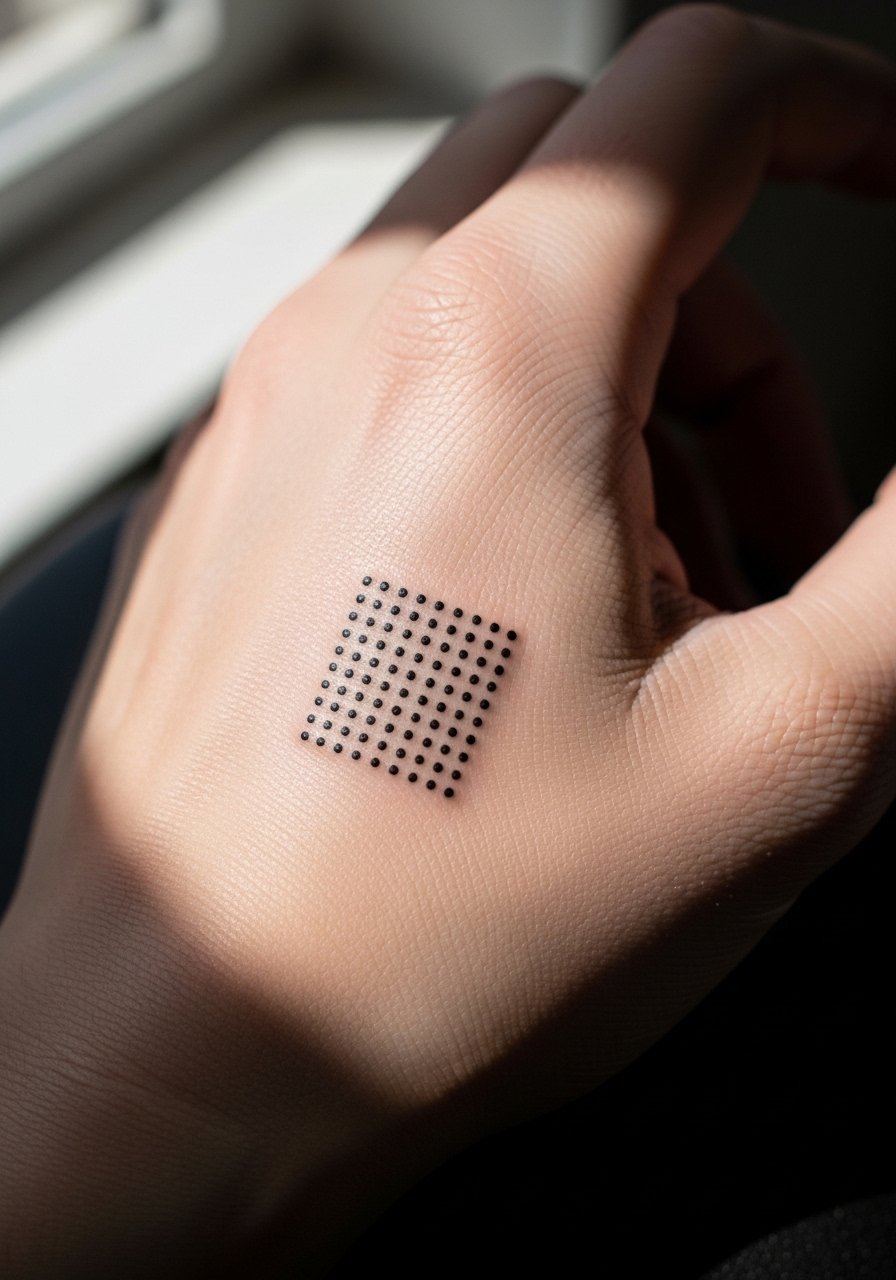
A dot grid can look architectural if the grid is spaced for future softening. The mistake is a grid that is too dense which turns into a block over time. Ask the artist to leave every third row less dense to create intentional texture. Sessions are methodical but tolerable. For the session wear a top you can move aside without brushing the area.
22. Tiny Script Phrase Along the Outer Wrist Bone
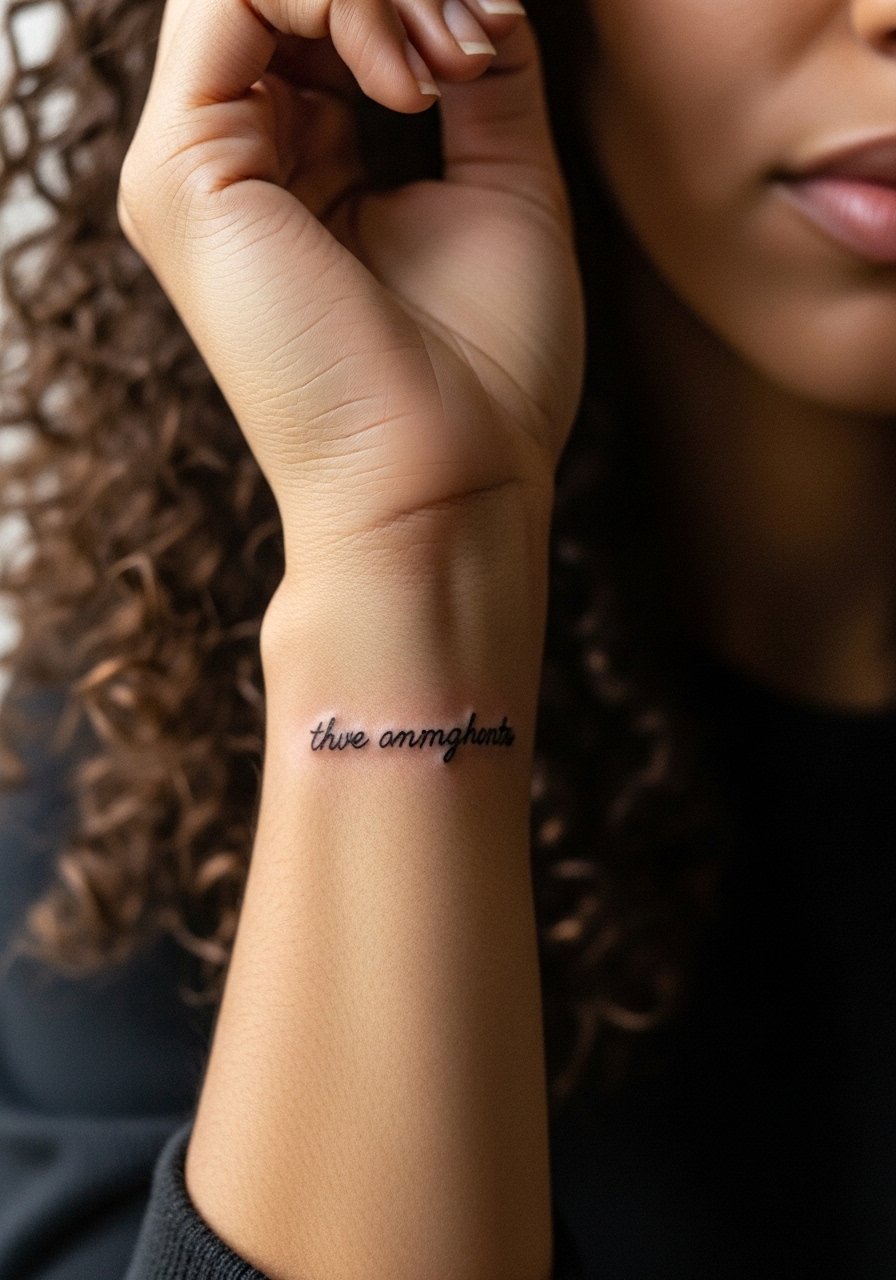
Script on the outer wrist is readable and ages reasonably if the line weight is slightly heavier than on paper. The error is ultra-fine cursive with tight loops. Ask for open-letter spacing and to test the stencil under movement. Expect light tenderness and avoid heavy wristwear until the scab sheds. A thin chain bracelet complements the phrase without blocking it.
23. Micro Tech Sigil Under the Little Finger Knuckle
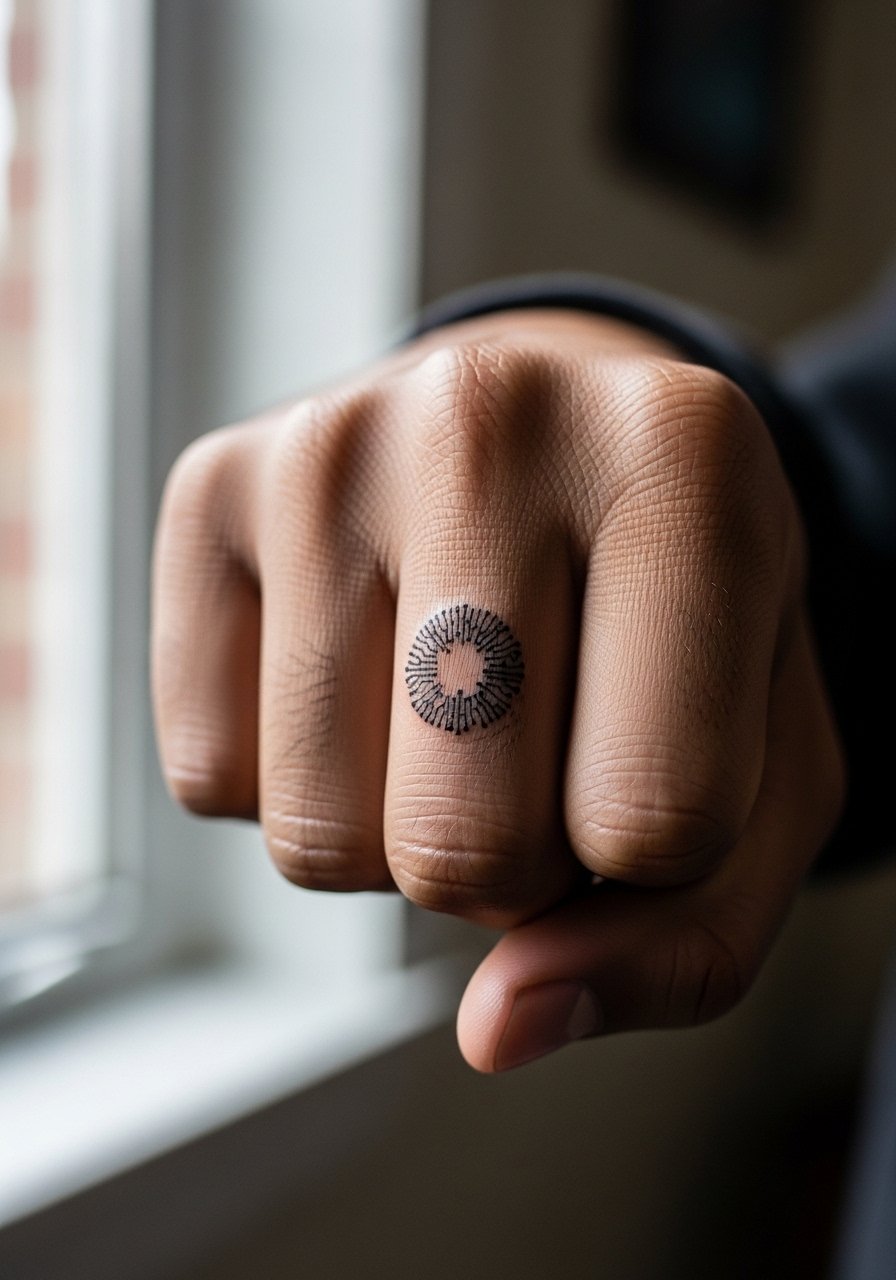
Tiny sigils under knuckles must account for repeated impact and contact. The common mistake is choosing thin negative elements that disappear. Ask for bold nodal points and simplified lines. The session is sharp. For display, keep ring choices minimal so the sigil reads cleanly rather than competing with jewelry.
24. Small Stipple Crescent on the Back of the Hand
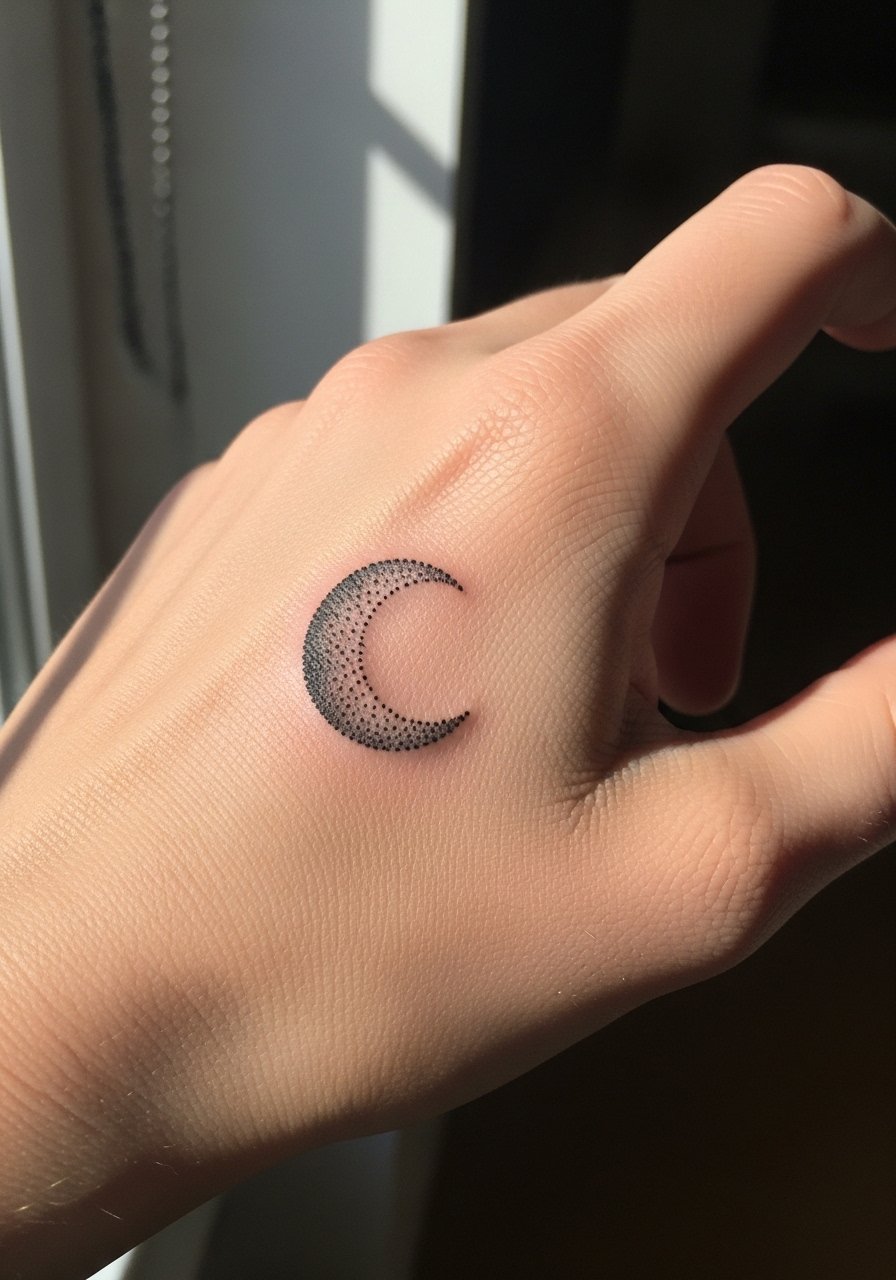
Stipple crescents hold texture longer than smooth gradients on hands. The error is overworking the stipple which creates dense patches. Tell your artist to use graduated dot density and to leave a soft outer halo for breathing room. Sessions are relaxed but precise. A minimalist watch band keeps attention focused on the moon when worn.
25. Micro Geometric Compass at the Wrist Edge
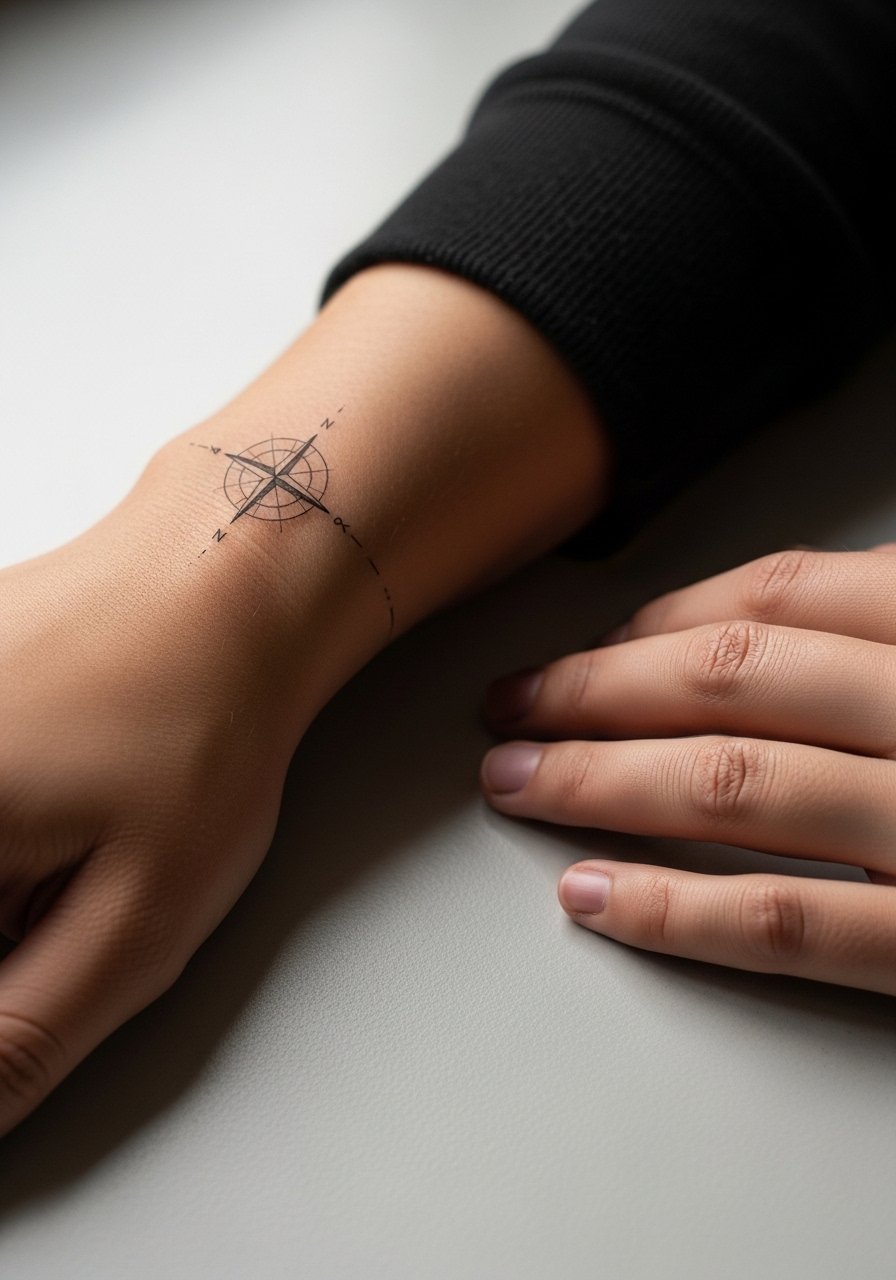
Compasses need clear cardinal points to remain legible. The mistake is squeezing too many ticks into a tiny disc. Ask for defined north, south, east, and west marks with simplified inner lines. Sessions are moderate in time and sensitivity. For showing it off, roll sleeves or wear a slim cuff so the compass peeks out at the wrist.
26. Tiny Script Name Along the Side of the Palm Near the Wrist
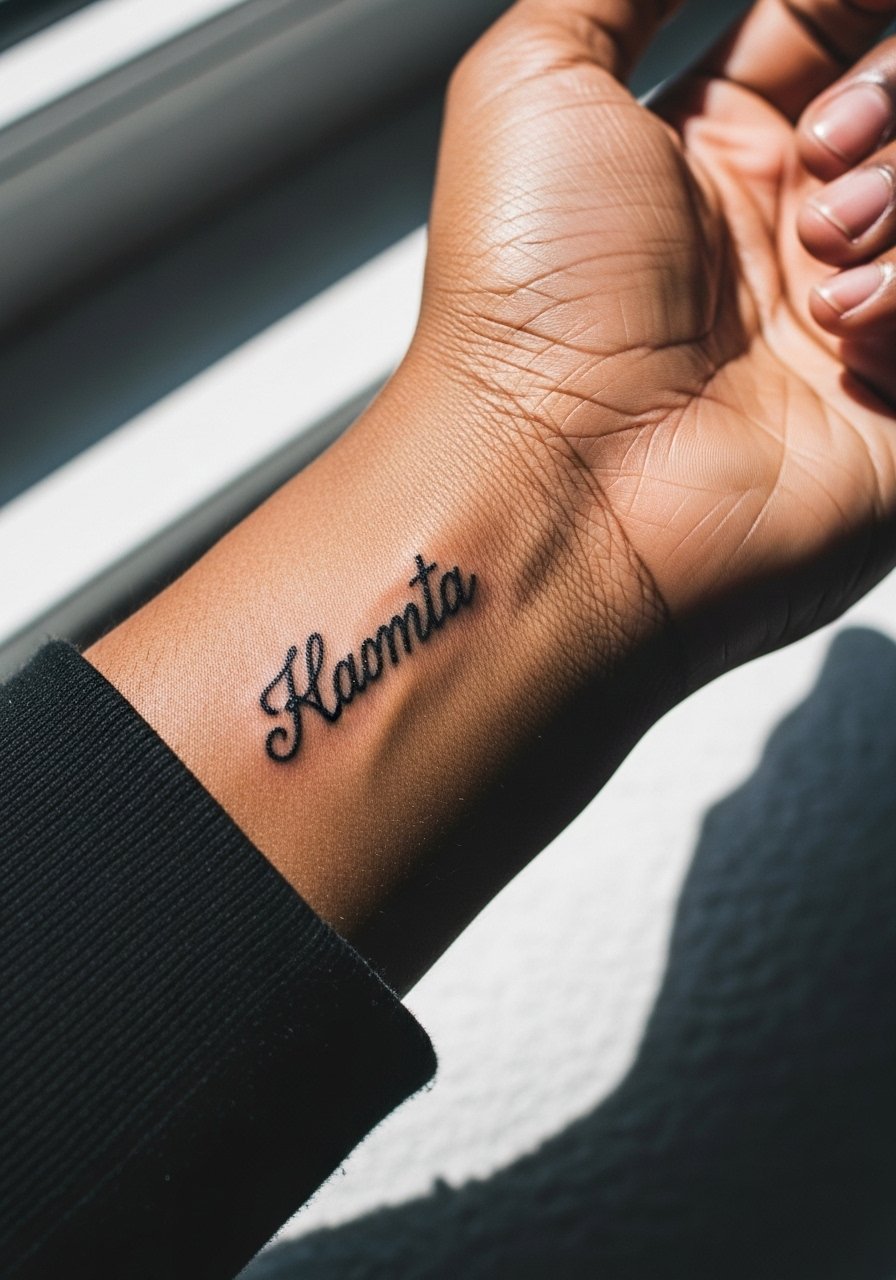
Side-palm scripts ask for heavier joins because skin there flexes. The error is tight connected cursive that dissolves quickly. Ask for letter spacing and thicker line anchors. Sessions are sensitive. For the appointment plan to avoid heavy hand use for 48 hours.
27. Single-Needle Micro Sigil Centered on the Back of the Hand
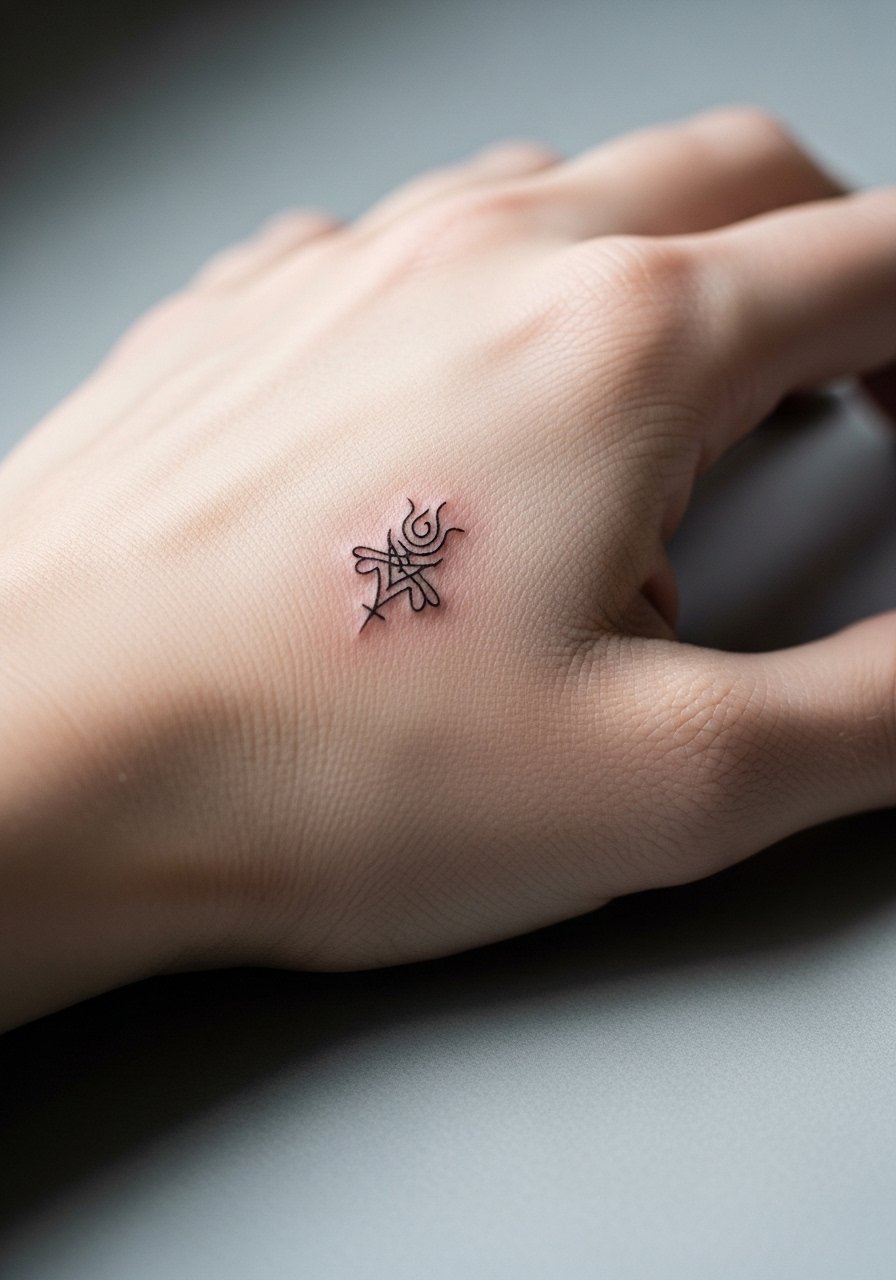
Single-needle sigils are elegant but vulnerable to blowout if placed too shallowly. The controversy around single-needle on hands is similar to other fine-line debates. One group warns that the technique is too fragile for constant use. The opposing group says intentional depth and spacing produce a lasting result. Ask the artist their exact approach and request a touch-up plan. For showing it off, pair with a thin metallic ring that echoes the sigil’s geometry.
Frequently Asked Questions
Q: Will tiny finger and knuckle tattoos ruin quickly if I type a lot or wash my hands frequently?
A: Frequent hand use accelerates fading because of constant friction and cellular turnover. Expect denser or slightly bolder linework, and plan for touch-ups around year two. During healing, avoid heavy scrubbing and let the scab fall away naturally.
Q: Do single-needle designs on the back of the hand need a different touch-up schedule than blackwork patches?
A: Yes. Single-needle work loses crispness sooner than saturated black patches. Blackwork can hold its silhouette longer. For single-needle pieces, check in with your artist about a one to three year touch-up window depending on your skin and sun exposure.
Q: How should I dress to keep a fresh hand tattoo protected during the first week?
A: Loose sleeves and minimal wrist jewelry reduce rubbing. For sessions, wear a button-down or short-sleeve you can move aside without pressing the fresh ink. A soft cotton top works well for comfort and access.
Q: Are palm or true palm tattoos recommended for longevity?
A: True palm placements fade fastest because of thicker skin and constant abrasion. Many artists prefer placing small work just off the palm to gain more longevity. If you want palm work, accept that frequent touch-ups are likely.
Q: Where can I find artists who specialize in micro hand work without naming specific shops?
A: Search local shop portfolios using hashtag discovery, community directories, and convention lineups. Look for portfolios that show healed hand pieces and ask to see healed photos in consultation. A shop that documents healed work is a strong sign.
Q: Will rings and bracelets interfere with healing or the appearance of hand tattoos over time?
A: Jewelry that sits directly on fresh ink can rub and cause early fading or scabbing. During healing, remove tight rings and avoid bracelets that press on the area. Once healed, rings and bracelets can frame the tattoo well but pick ones that keep the design visible rather than covering it.
