
Fine line and painterly tattoos trend on feeds, and people fall in love with the fresh contrast between swept color and delicate linework. What rarely gets said is that what reads perfect on a phone can age in surprising ways. Placement and spacing matter more than color complexity when you want that Van Gogh energy to still read well after five years. The first idea shows a safe way to translate those brushstroke swirls to the inner forearm.
1. Swirl Study on Inner Forearm
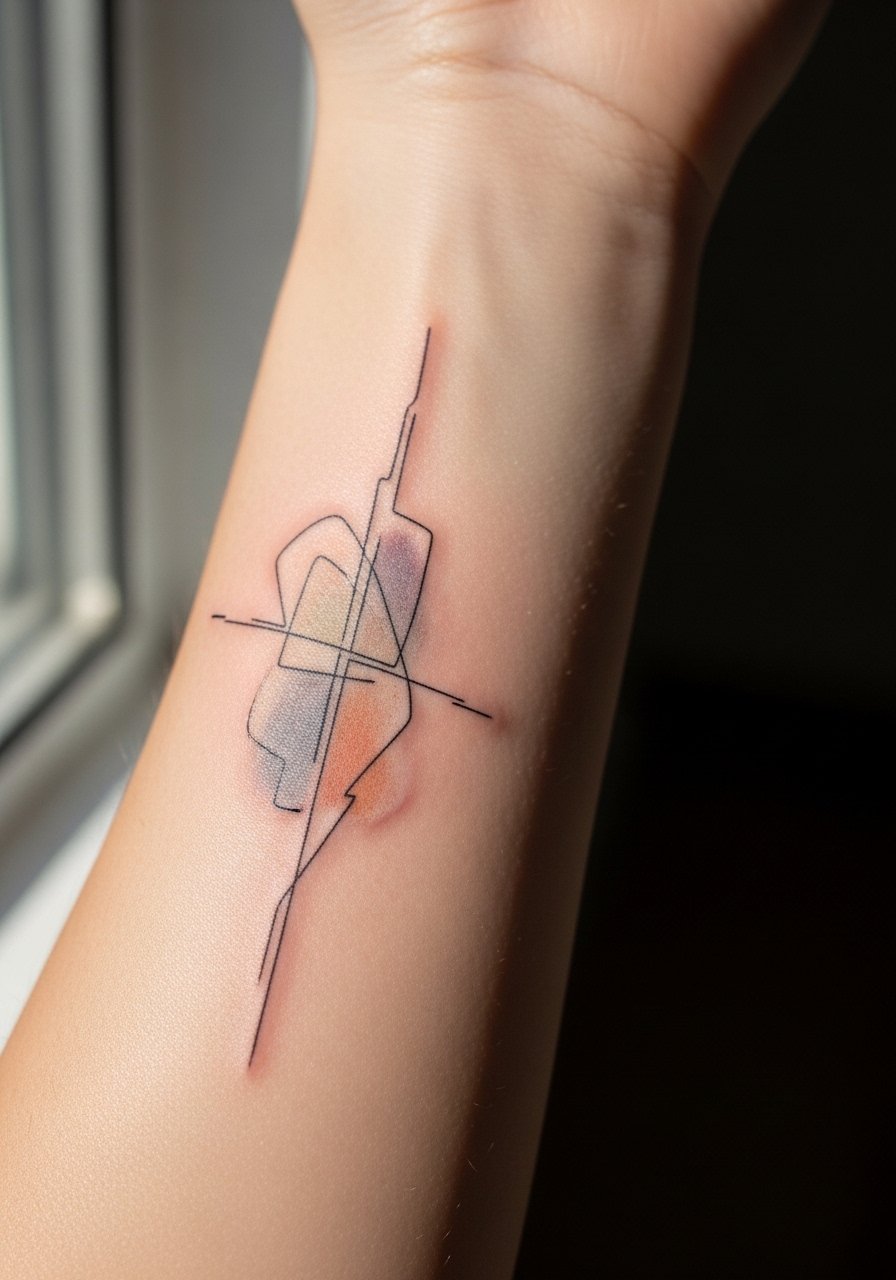
I recommend this placement when you want a Van Gogh-like swirl that people can actually read without squinting. Tell your artist to keep the color planes slightly separated and the linework bold enough to hold after a few years. Common mistakes are cramming too many tiny details into the forearm width and asking for ultra-thin lines that blur. Expect mild discomfort during the session and a touch-up around year three for color refresh. For showing it off, rolled-up sleeves and a loose button-down shirt keep the forearm visible while framing the piece.
2. Mini Night Sky on the Wrist
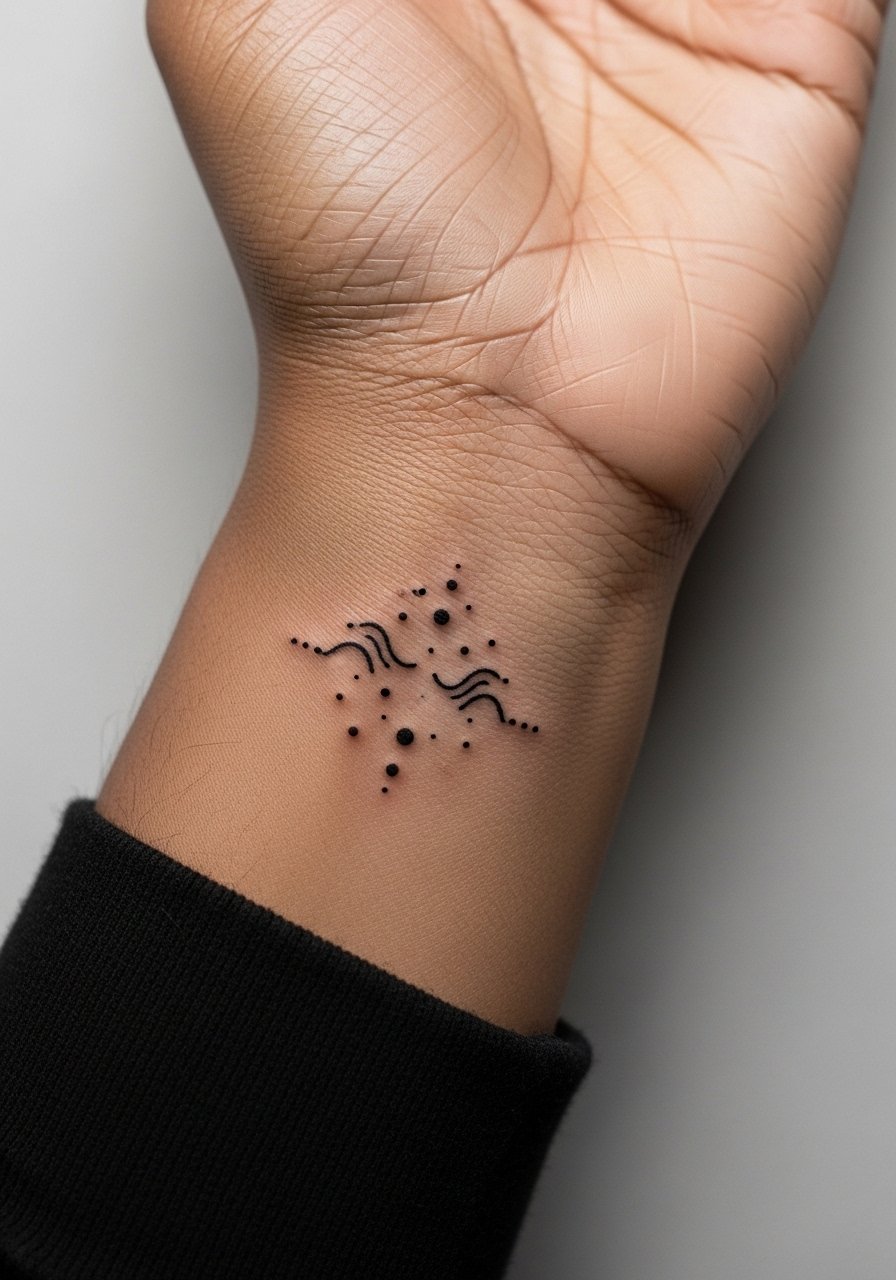
Fair warning, wrist skin moves and gets more friction than the arm. The best version of this idea uses bold micro linework and sparse color dots so the composition stays readable after daily washing and bracelets. Ask for slightly thicker outlinings around the main swirls to cut blowout risk. Sessions are short but the area is sensitive. Plan on a light touch-up at year two to keep the stars crisp. For display, this wrist piece pairs well with a thin chain bracelet that sits below the ink rather than over it.
3. Sunflower Patch on Upper Arm
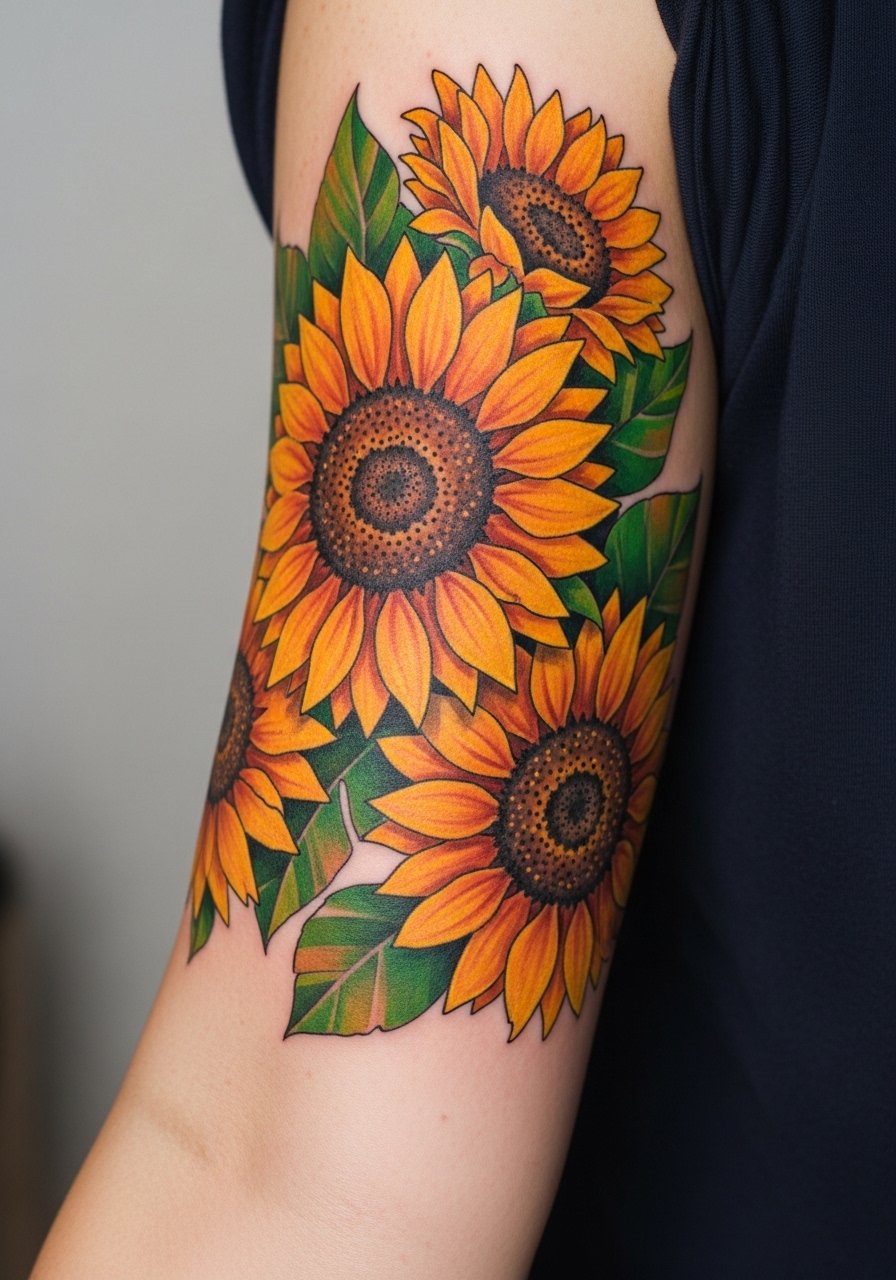
This shoulder-adjacent upper arm piece takes Van Gogh's sunflower palette and translates it into solid color patches with stipple shading for texture. In consultation, ask for separate color fields instead of blended watercolor washes. That decision reduces long-term bleeding between pigments and keeps the composition readable at six months and at five years. Sessions are moderate in length and the area tolerates saturation well, so expect one session for a medium patch. Avoid requesting tiny, highly detailed petals that will compress over time. Pair with a short-sleeve linen shirt when you want to show off the color without crowding the artwork.
4. Ribcage Swell in Brushstroke Lines
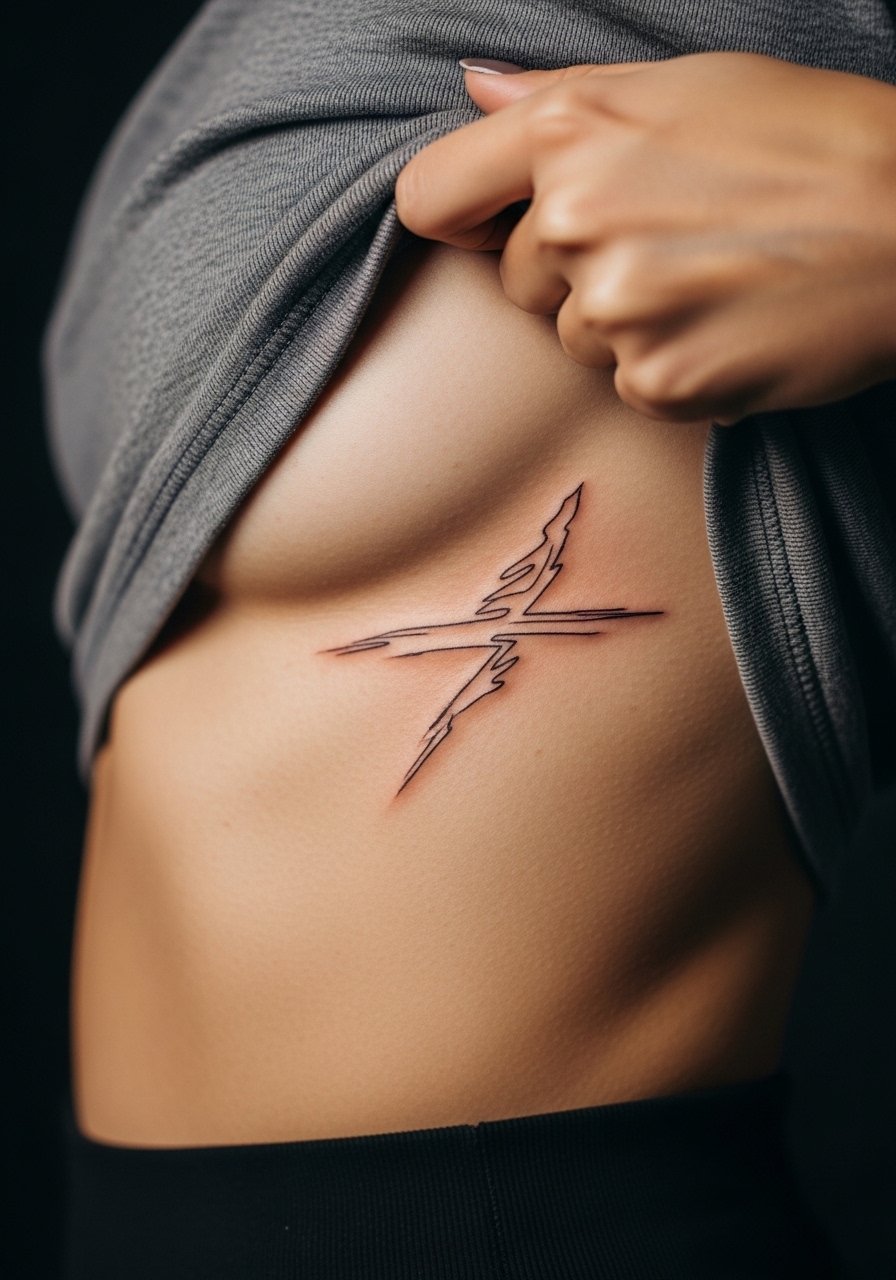
Artists split on fine line work on the ribs. One camp warns that skin stretch and movement blur lines within two years. The other camp says that with correct needle depth and generous spacing, fine line settles well on the ribcage. My advice is to err on spacing and ask for slightly larger negative space between strokes. Sessions here are intense because the rib area is sensitive, and you should prepare for breaks. Expect touch-ups if you want crisp detail maintained. For the appointment, wear a cropped athletic top you can lift without removing layers.
5. Ankle Cypress Accent
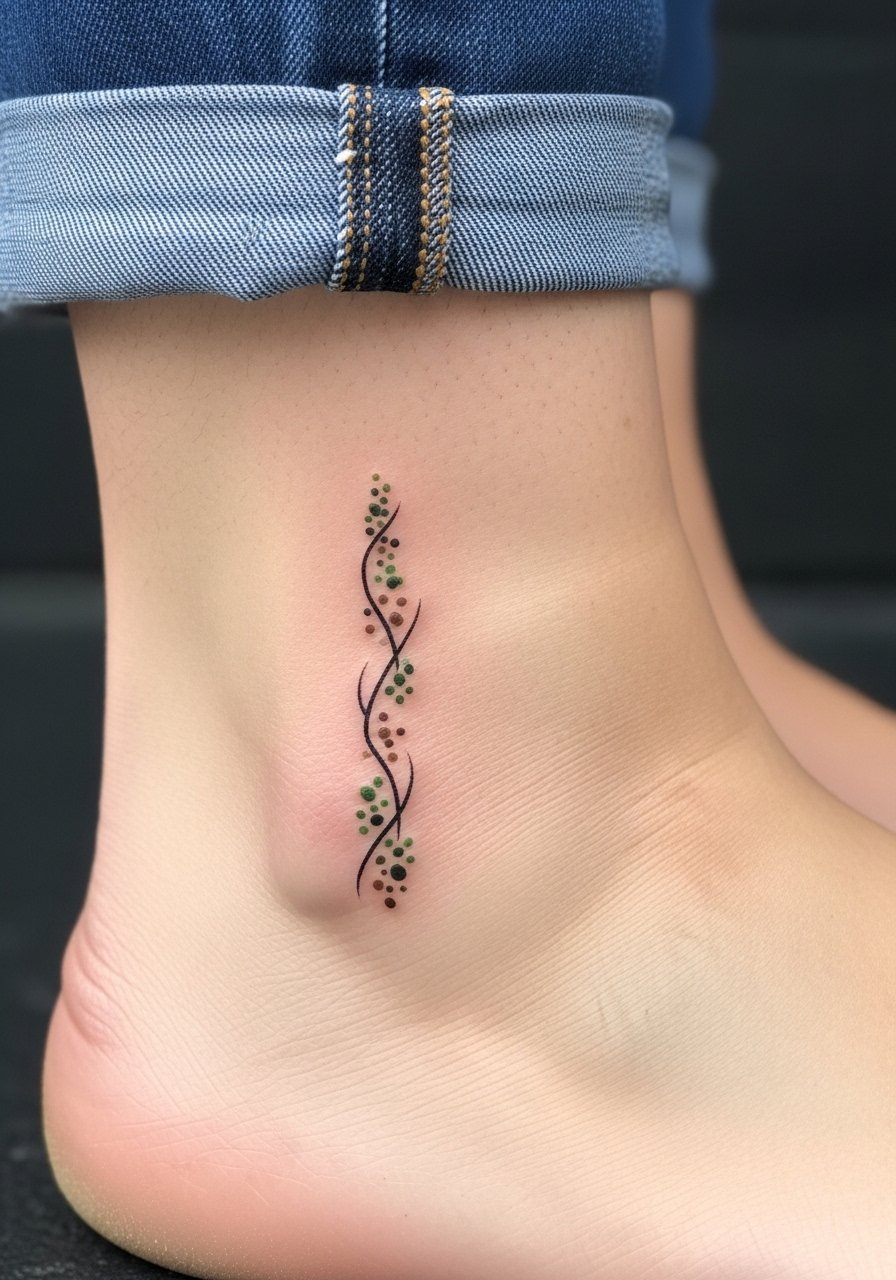
The ankle is a spot that sees a lot of rubbing from shoes and socks. For an abstract Van Gogh nod, keep the palette confined to one or two colors and favor linework over heavy saturation. A common mistake is heavy packed color at the ankle. It often fades fast and gets patchy in high-friction zones. Sessions are short and the pain is moderate. Plan a touch-up in the first two years if you wear ankle boots frequently. For showing it off, sandals or rolled-up jeans work best and a minimalist anklet can highlight the placement without rubbing the tattoo.
6. Collarbone Paint Stroke
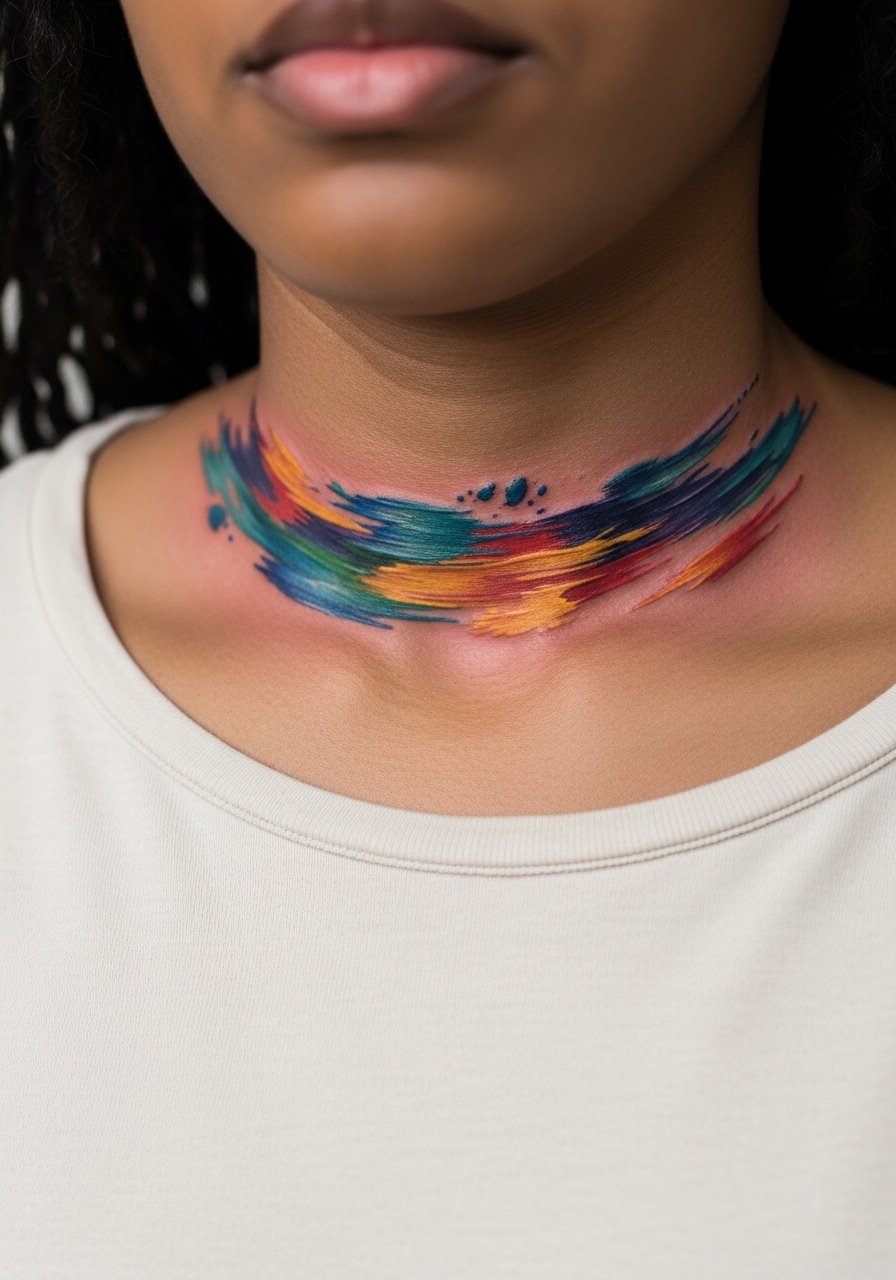
Collarbones are great for elongated brushstroke designs because the skin lays flat and the piece reads when layered with tops. The mistake is asking for overly dense color that wants to spread across the chest. Tell your artist you want defined edges with light saturation so the strokes keep movement and separation. The session is tolerable but expect twinges on the bone. If you plan to wear necklaces, leave a narrow gap so jewelry does not sit directly on the fresh ink. A thin chain pendant necklace pairs cleanly once healed.
Studio Day Picks
The ribcage, collarbone, and ankle pieces above all ask for slightly different prep and healing tools, so a small kit tuned to placement smooths the session and the first week.
-
Stencil transfer paper kit. Lets you preview placement on skin for pieces like the inner forearm swirl and the collarbone strokes before the needle hits skin.
-
Topical numbing cream. Applied about 45 minutes ahead it can blunt the edge for sensitive rib and collarbone sessions without altering how the artist works.
-
Thin protective film roll. Keeps ankle and wrist pieces cleaner during the first week when friction from shoes and bracelets is highest.
-
Fragrance-free body wash. A gentle cleanser is kinder to fine line and lightly saturated areas during the shower routine.
-
Aquaphor healing ointment. A thin layer in the first days helps seal moisture around delicate lines without suffocating the channels.
7. Fragmented Starry Sky Sleeve
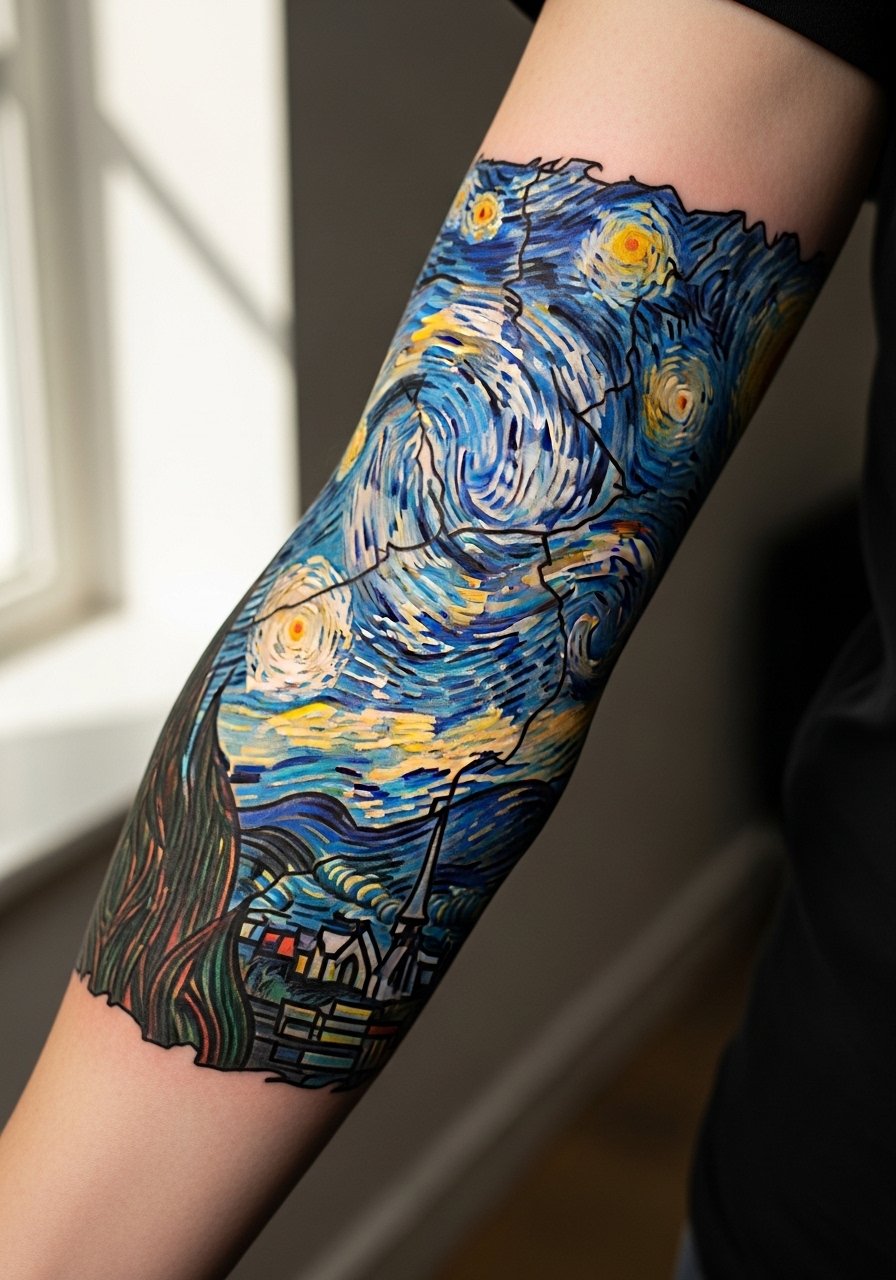
If you like the drama of a sleeve but not a full arm commitment, a fragmented approach keeps areas breathable and easier to touch up. Tell your artist to plan the composition as clusters separated by negative space. That spacing prevents merging across high-motion zones like the elbow. Sessions are split into two visits and saturation levels should be medium to avoid early muddiness. The most frequent mistake is asking for continuous dense color from wrist to elbow. For casual wear, roll sleeves or push a racerback tank top and rolled cuffs to reveal sections without exposing the whole arm.
8. Ear-to-Neck Hairline Accent
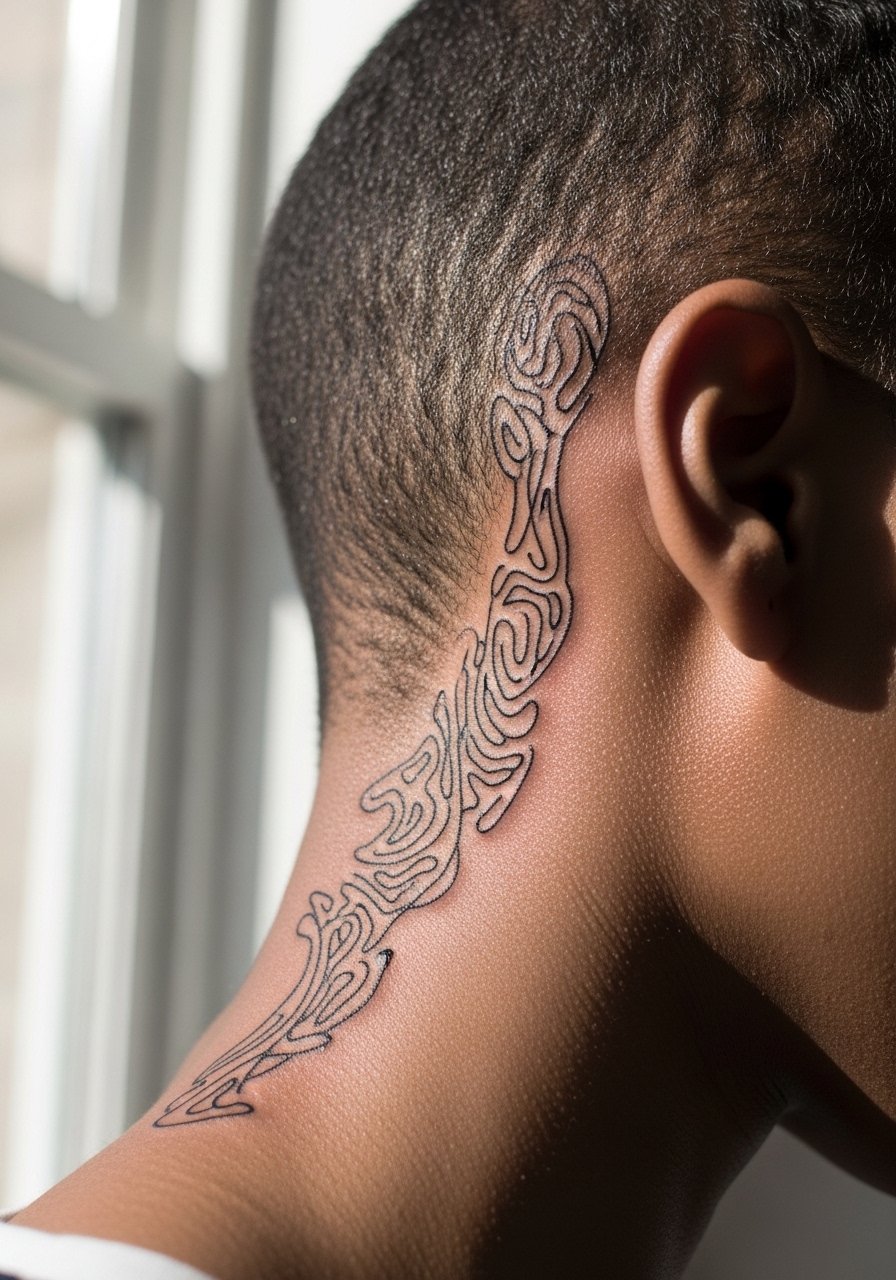
Behind-the-ear placements need careful framing because hair and sweat can affect healing. The safe version sits below the hairline on the neck and uses sparse linework. A common error is requesting dense color that traps moisture under hair. Sessions are quick and the pain is low, but you should ask about aftercare steps for hairline areas. This placement is subtle for showing off or hiding, which is useful for workplace considerations. If you want to plan visibility, use scarves and collared tops during the first week.
9. Impasto Texture on Calf
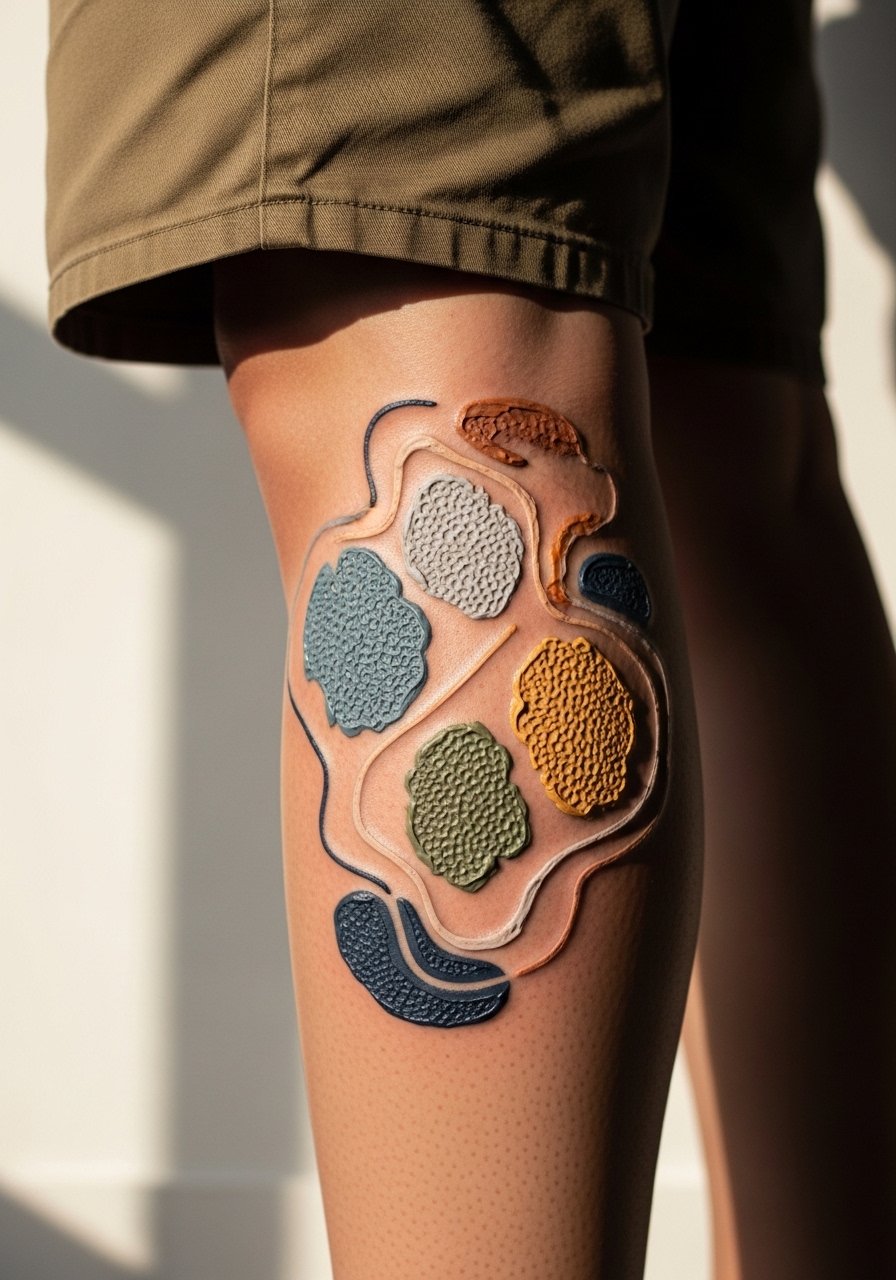
The calf tolerates saturation and textured work well, so rendering Van Gogh's impasto with stipple shading and layered color is viable. Ask your artist for dot work and whip shading to mimic brush texture. Expect the session to be medium length and a bit uncomfortable near bone around the ankle. The major mistake is asking for tiny micro-detail that loses contrast from a distance. Calf pieces age well because the skin is stable. For summertime shows, pair with high-waisted shorts.
10. Small Earthen Bowl on Wrist Band
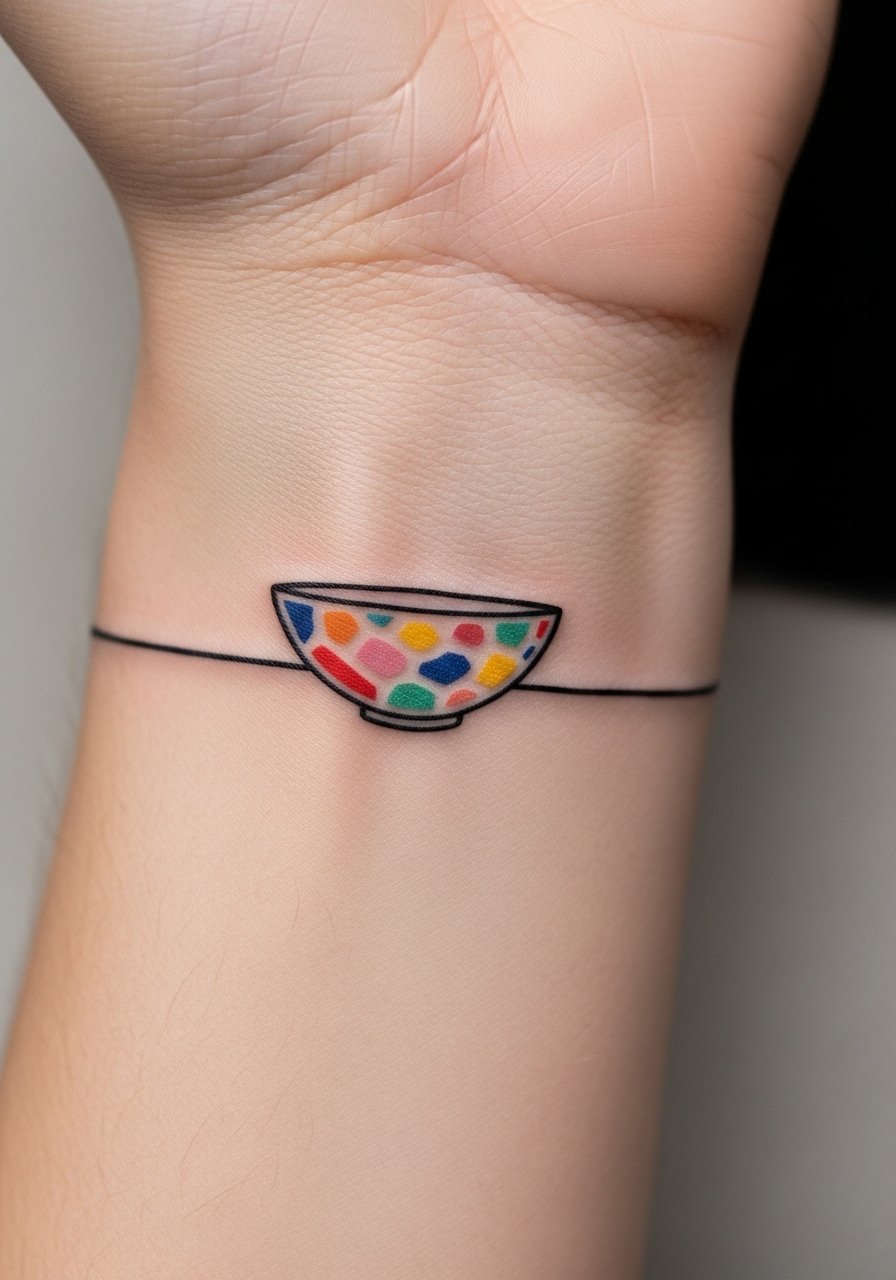
This banded composition reads like a painted cuff and works well if you want a wearable Van Gogh nod without full imagery. The pitfall is making the band too thin. Bands need enough space to avoid line migration into a blur. Sessions run fast and the wrist is sensitive. Recommend a slightly bolder outline and light internal texture so the piece stays defined at six months and at two years. For daily wear, avoid bracelets that sit directly over the band while it heals.
11. Sunflower Stem Along the Side Wrist
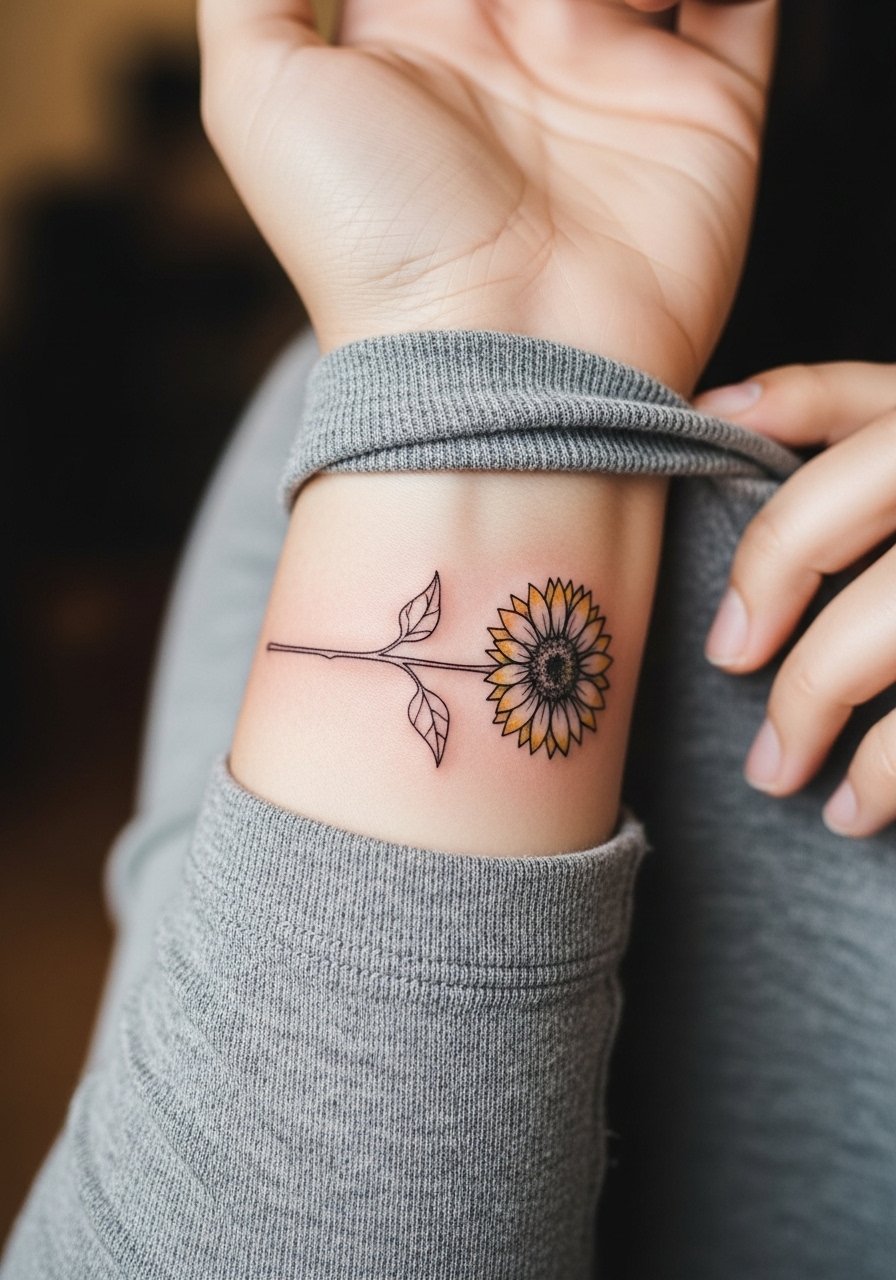
Side-wrist placements work for elongated botanical elements inspired by Van Gogh florals. Tell your artist to use continuous linework with intermittent stipple shading for the stem and petals. A common mistake is packing too much petal detail into a narrow vertical band. That detail compresses and becomes indistinct. Sessions are short but the side wrist is particularly sensitive. For the session wear a loose button-down shirt that you can slide to the elbow without rubbing the fresh ink.
12. Sternum Brushstroke Cluster
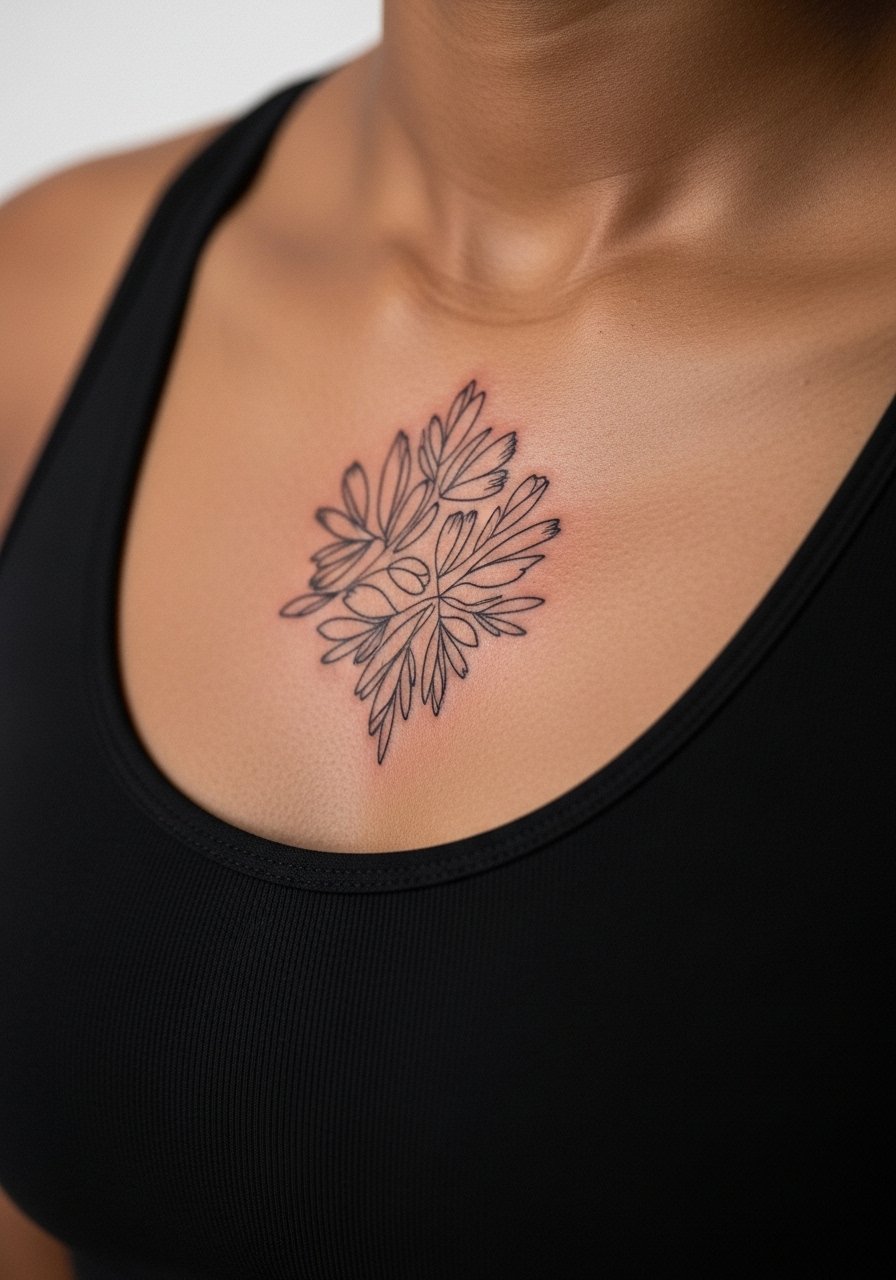
Sternum work requires an artist comfortable with central chest symmetry and sensitive skin. The controversy with very fine details here mirrors the ribs debate. One group warns that chest movement and tension obscure fine lines quickly. The other group maintains that careful depth and balanced spacing preserve detail. My recommendation is to prioritize spacing and to expect a longer session with breaks. For the appointment, wear a fitted sports bra so the artist can access the area while keeping exposure minimal.
13. Palette Knife Abstract on Thigh
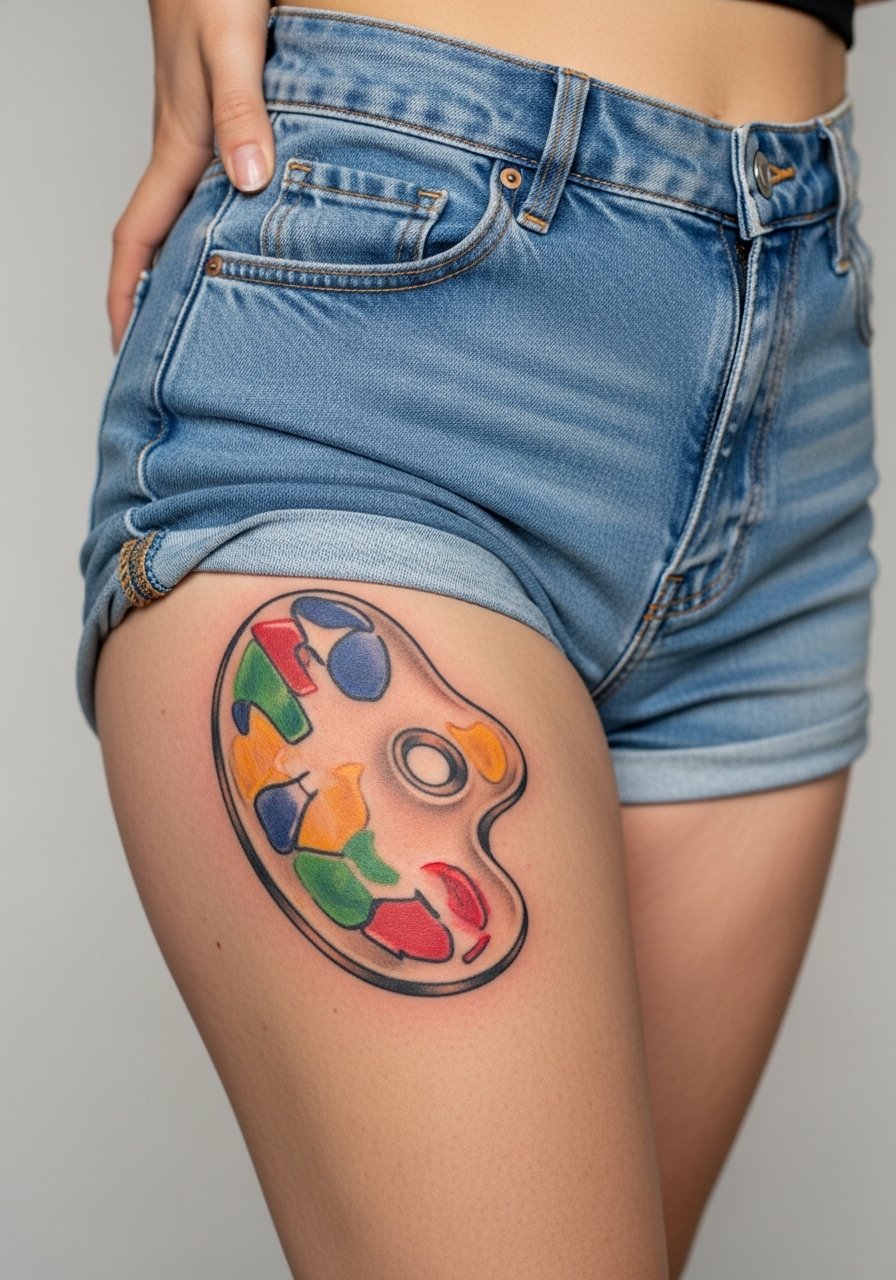
Upper-thigh canvas allows more painterly experimentation because the area holds saturation and adapts to larger brush-like marks. Ask for separated color blocks and textured stipple to suggest impasto without full blending. The common mistake is dense full-lot color without breaks. That approach leads to patchy fading along movement lines. Thigh sessions are longer but less painful than ribs. For the session, wear high-waisted shorts you can shift down slightly without full undressing.
14. Crescent Cypress on Lower Back
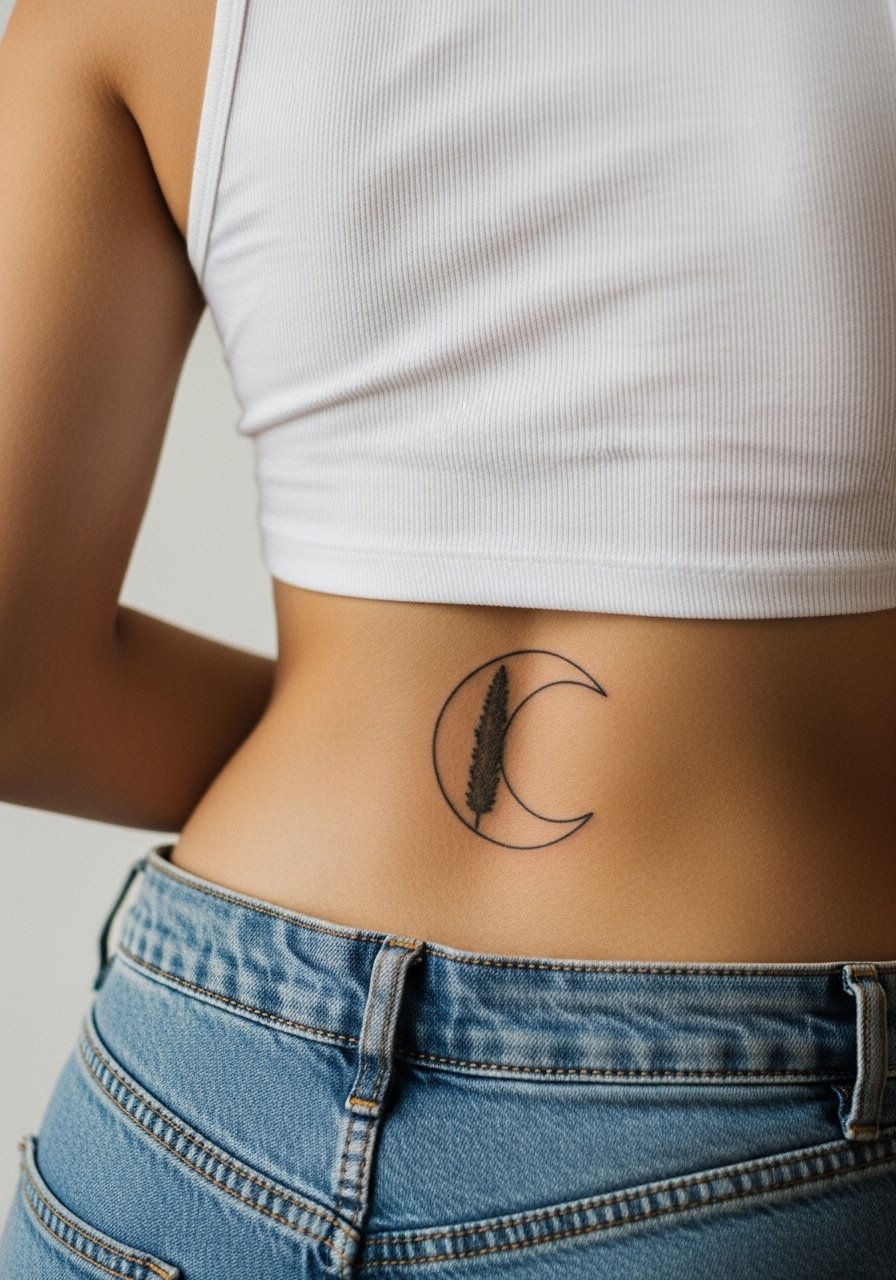
Lower-back placements let you play with sweep and negative space. The artist should plan fluid curves that follow the spine line rather than a rigid repeated motif. A common error is centering heavy saturated patches that compete with clothing waistlines and cause friction while sitting. Expect moderate session time and easy touch-ups if clothing rubs during healing. This area is less exposed to sun, so colors can hold longer than forearm pieces.
15. Tiny Ear Motif Behind the Lobe
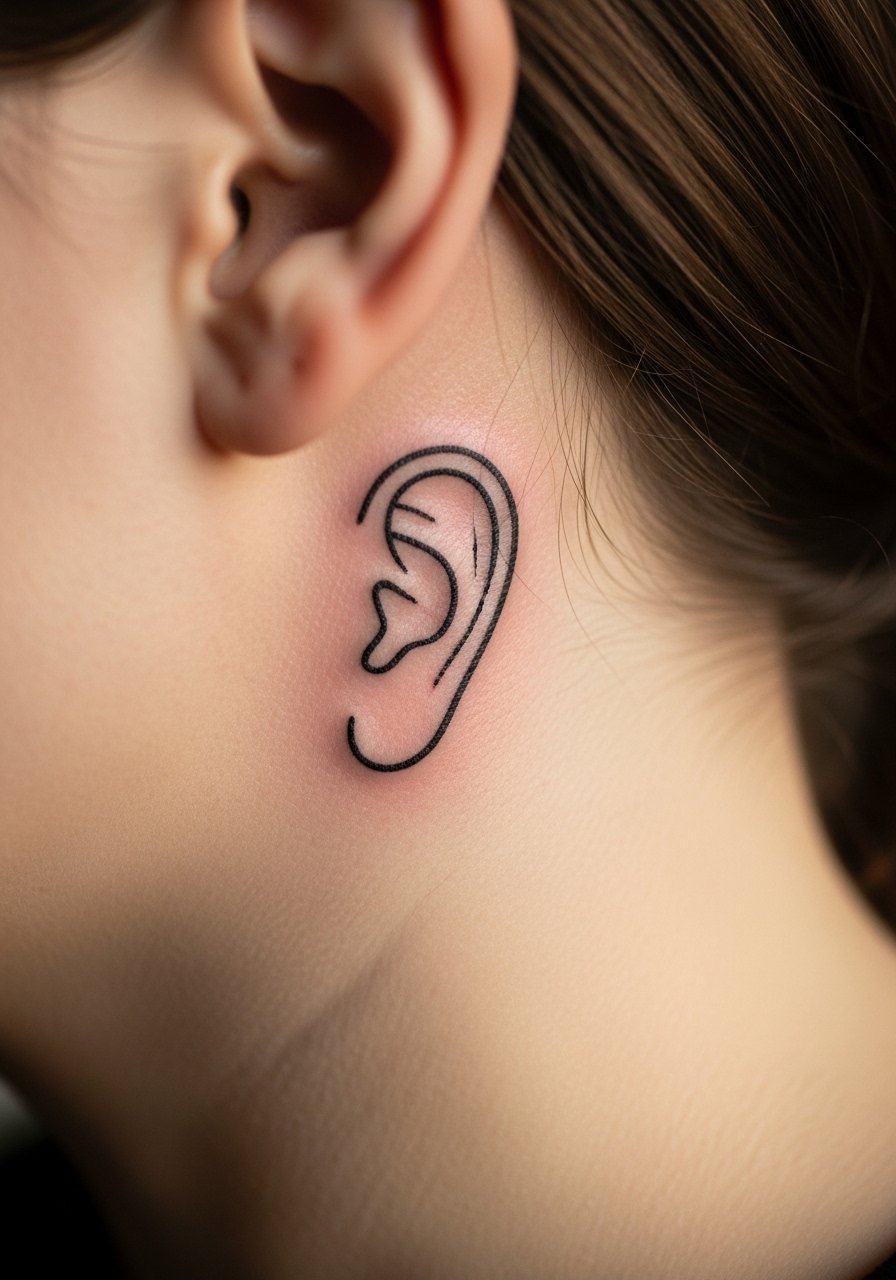
A tiny ear-inspired mark behind the ear offers a playful nod to Van Gogh without full portraiture. Make sure the placement is described as below the hairline on the neck to avoid the tattoo ending up on the ear itself. The area heals quickly but keep hair away during the first week. Sessions are very short and discomfort is low. For small visible spots, plan clothing and hair styling options if you need to conceal it for work.
16. Night Sky Hem on Calf Wrap
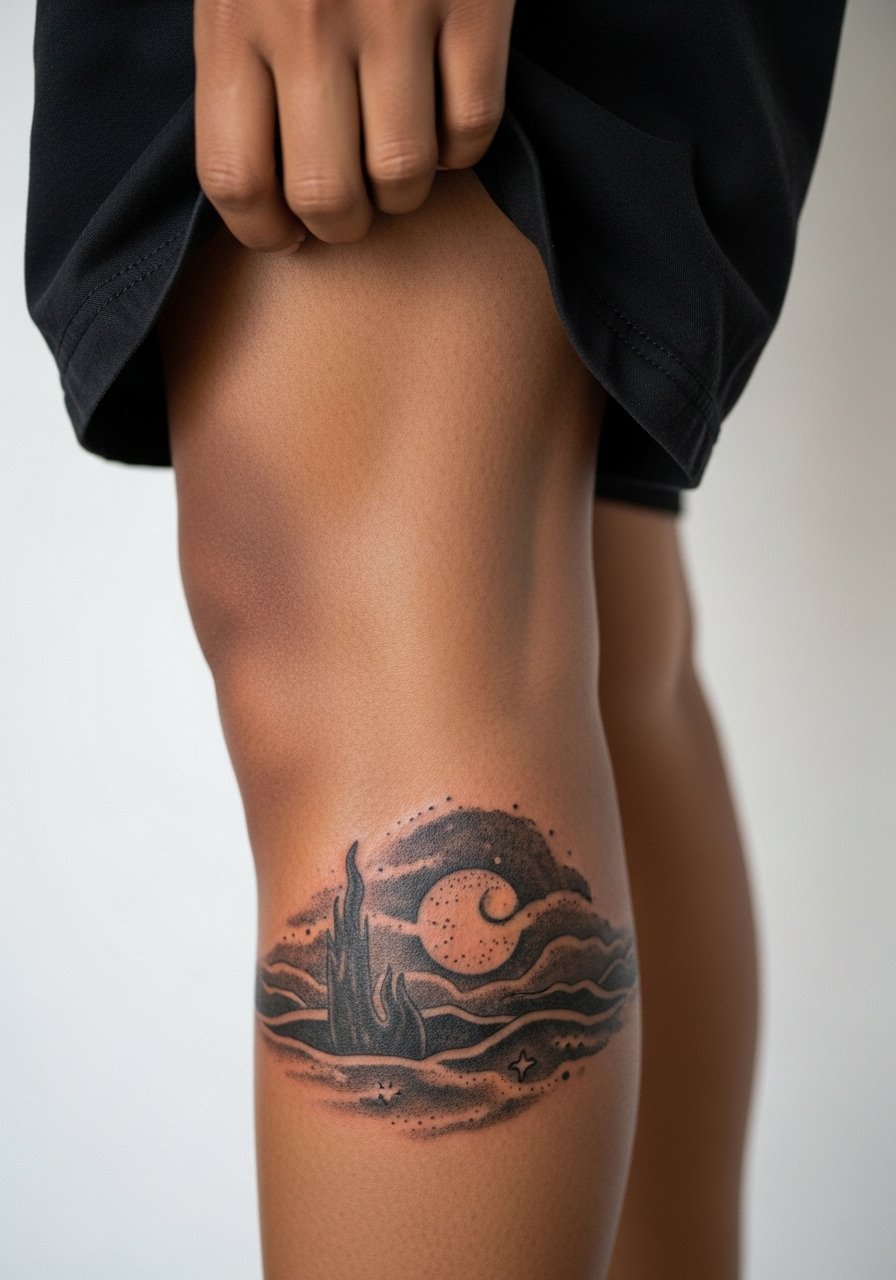
A wrap-around hem uses negative space to create movement. The risk is overworking the edges so they look like a fading band instead of a composed sweep. Ask for interrupted strokes and intentional gaps. Sessions may require two appointments for consistent saturation. Calf skin is forgiving, but the lower area near the ankle needs lighter saturation to avoid patchiness. For evening looks, ankle boots can frame the piece nicely without rubbing the fresh edge.
17. Painterly Pocket on Upper Back
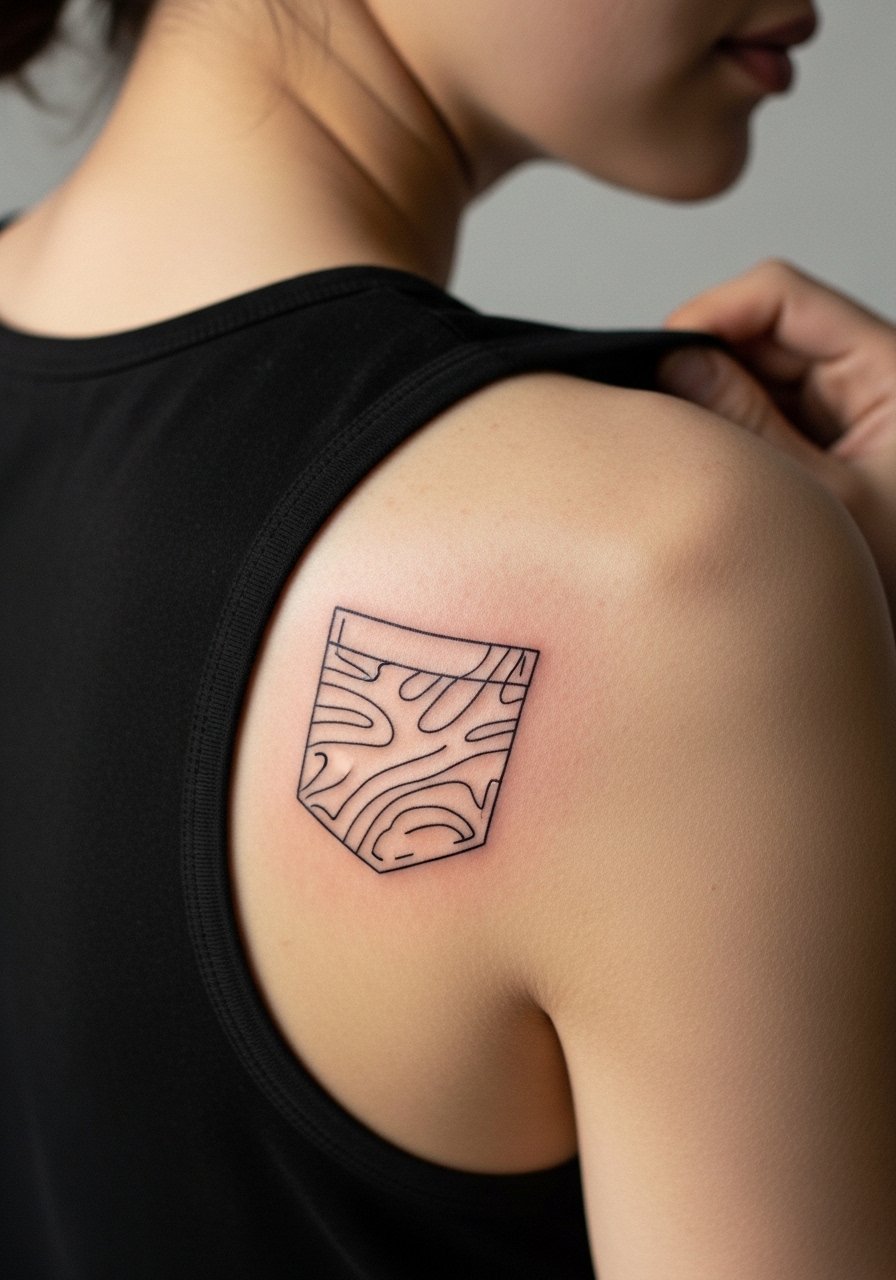
Upper-back placement is great for a tucked-away Van Gogh nod you can reveal selectively. Ask for compact composition and moderate saturation so the piece survives occasional sun without heavy fading. The frequent mistake is making the pocket too detailed for the viewing distance. Sessions here are moderate and often combined with other back work. For the appointment, wear a tank top you can pull to one side for access without full exposure.
Frequently Asked Questions
Q: Will fine line Van Gogh-style strokes blur faster than bolder versions on areas like the ribs or sternum?
A: It depends. Fine line on flexible areas tends to need more spacing and sometimes touch-ups by year two or three. One camp says ribs blur because of skin movement. The other camp says careful depth and spacing preserve detail. Ask your artist which approach they use and what spacing they recommend.
Q: How should I dress to make a ribcage or sternum session easier for the artist?
A: Wear a fitted sports bra or a cropped top that can be shifted to expose only the tattoo zone. That keeps exposure minimal while letting the artist work. A fitted sports bra is often the simplest option for chest or sternum sessions.
Q: Do painterly color patches need different aftercare than fine line work?
A: The basic aftercare is the same but color patches usually benefit from gentler patting and less friction during healing. Avoid tight clothing that rubs saturated areas. Expect color to need a touch-up before linework does.
Q: How visible will an ankle or calf Van Gogh nod be after a year if I wear boots often?
A: Friction from boots can cause early fading on ankle edges. Calf pieces generally hold better. If you plan heavy boot wear, ask your artist to reduce saturation near the ankle edges and plan for a touch-up between year one and two.
Q: Can I get a Van Gogh-inspired design as a very small piece and still keep the painterly feel?
A: You can, but scale matters. Tiny painterly marks should be simplified into single strokes or dots. Overly detailed miniatures tend to compress. Tell your artist you want a distilled brushstroke rather than an exact miniature painting.
Q: How do I find an artist who understands translating brushwork into tattoo techniques without copying a reference directly?
A: Use discovery pathways like local shop directories, convention booths, and community forums to find artists who post process shots and healed work. Look for portfolios showing stipple shading, whip shading, and controlled saturation. Ask for healed photos at different intervals before booking.
