
Fine line and heavy saturation age very differently on a leg than they do on an arm, and the choices you make now determine whether a full leg piece reads sharp at year one or mushy at year five. Bold black and grey pieces that respect muscle flow and leave breathing room for dense areas tend to last cleaner. Below are 17 full-leg directions with when to pick each, what to say in consult, and how they hold up over time.
1. Irezumi-Inspired Full Leg Sleeve with Wave and Koi Panels

If you want the scale and rhythm of Japanese work across the whole leg, ask for distinct paneling so each motif can age on its own. In consult, request heavier outlines around the koi and softer whip shading in the water areas to avoid muddiness when the shading settles. One common mistake is compressing too many motifs into one plane, which leads to blowout in high-saturation zones. This style hurts more near the shin and kneecap than on the thigh, so expect longer sessions and short breaks. Some people worry about cultural use. One camp says strict protocols should govern traditional motifs. The other camp sees adaptation as part of living tattoo culture. If you use motifs tied to specific meaning, mention that to the artist and consider subtle variations rather than literal copies.
2. Geometric Mandala Wrap from Hip to Ankle
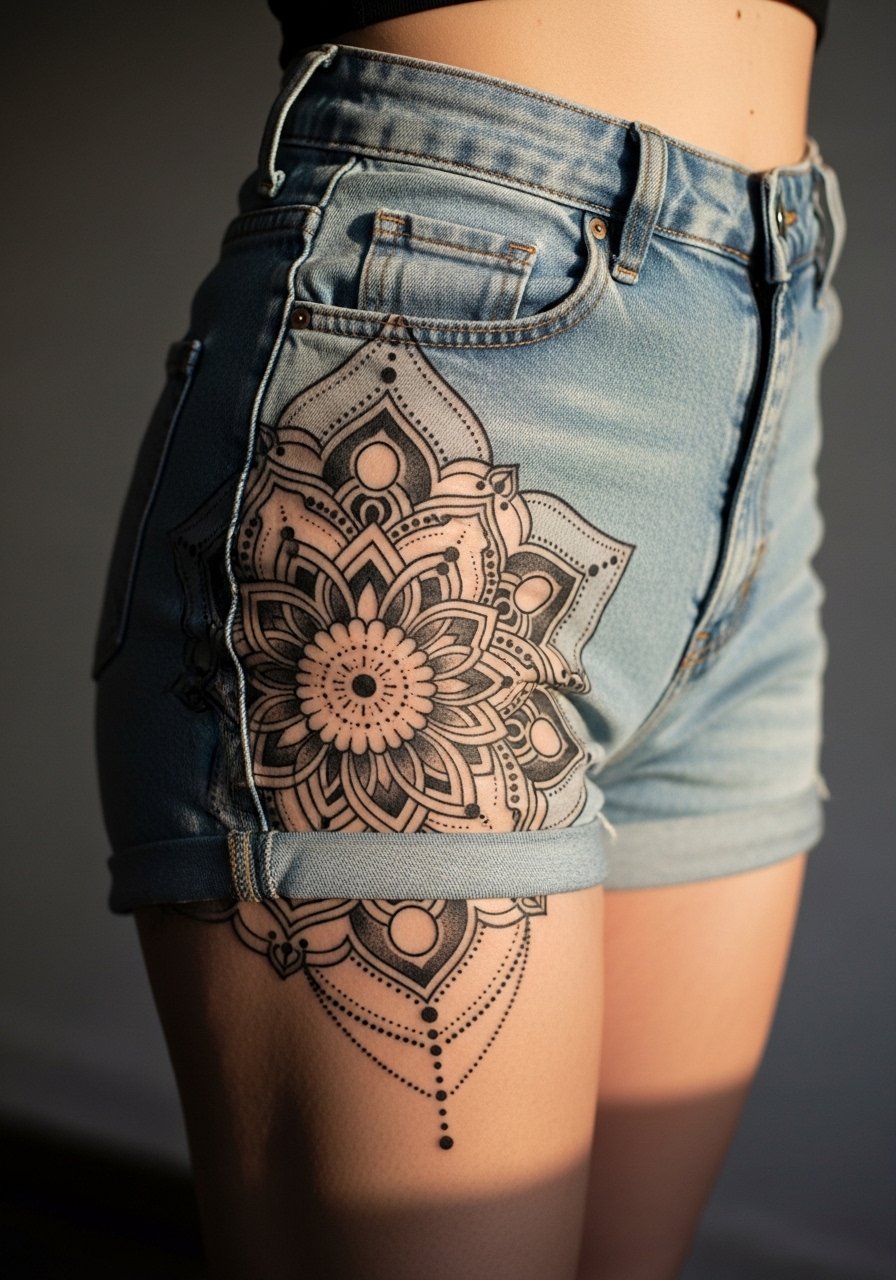
This is a good pick if you want a leg that reads cohesive at a distance. Tell your artist you want spacing prioritized over density. The biggest aging issue is doing the mandala too small. When details are packed tightly they merge within two to three years. For a full-leg mandala, plan multiple sessions so the center motifs get thicker linework and the outer areas stay airy. Pain is highest near the hip bone and lower near the calf. Show-off styling works well with knee-length denim shorts that stop at the design break, or pair with canvas low-top sneakers to keep attention on the ankle detailing.
3. Photorealistic Wolf and Landscape Full Leg Narrative
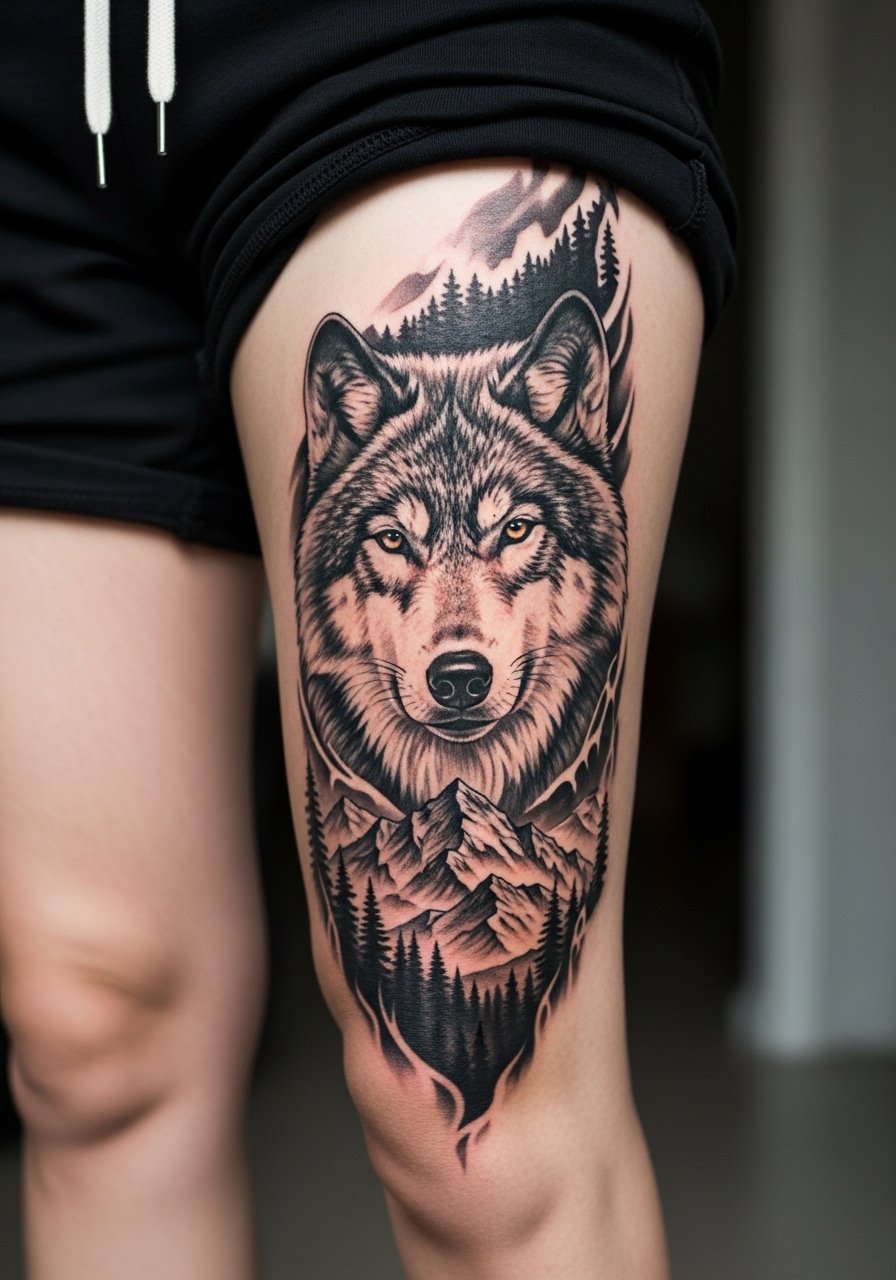
Pick this when you want a single visual story running down the leg. In the consultation bring multiple reference photos that show exact fur texture and horizon contrast. A real mistake is asking for extreme tiny detail over an entire leg in one session. Break the narrative across two sessions so the artist can nail saturation without pushing the skin. Photorealism on the shin risks blowout where the skin is thinner, so plan touch-ups sooner for those areas. Expect the piece to look very crisp at six months and slightly softer by year three. For session comfort wear loose drawstring shorts so the artist can work up and down the leg without re-draping.
4. Blackwork Negative Space Sleeve with Floral Breaks
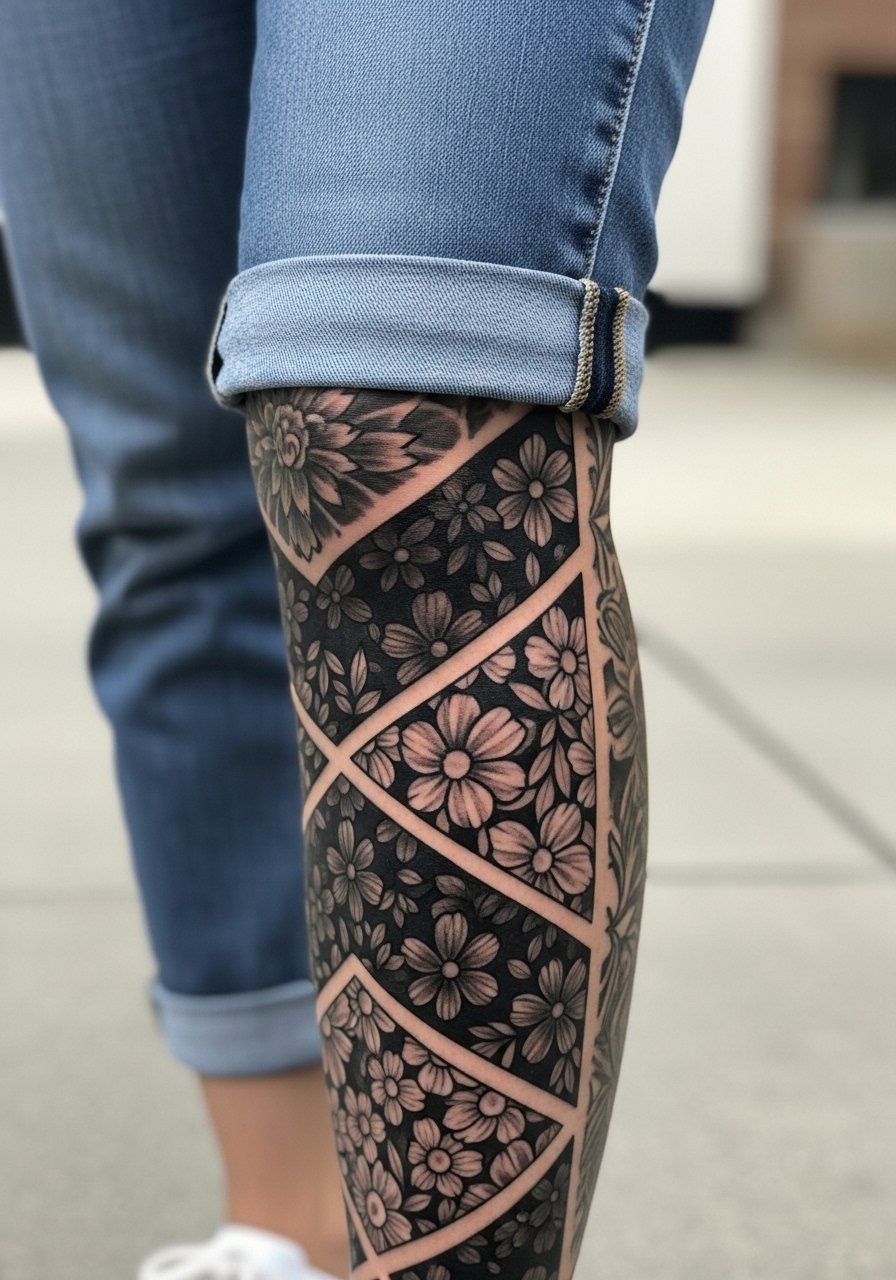
This approach uses heavy saturated fields balanced by untouched skin to create shape. Tell your artist you want clean blocks and deliberate untouched gaps. The main mistake is inconsistent saturation across panels, which makes the negative space read accidental. Expect long sittings because saturated black needs careful layering. Blackwork ages into a graphic silhouette if the fill is dense and even. Plan a touch-up at year two in high-motion areas like the knee. For showing it off, pair this with rolled cuff jeans or short boots that stop above the sleeve edge. The contrast works well with both casual and dressier footwear.
5. Neo-Traditional Skull and Rose Column

This classic column is good if you want recognizable motifs that read at a glance. Ask for slightly heavier cores on the skull outlines so structural elements hold as color softens. A common version that ages poorly uses thin outlines on both roses and skulls, which leads to soft edges down the road. Pain is moderate across the thigh and increases toward the tibia. Sessions tend to be modular, one motif at a time. Expect the saturated black elements to remain bold while lighter grey fills mellow. For the consult, show scale references so roses and skulls are not competing for space.
6. Dotwork Celestial Map Leg Sleeve
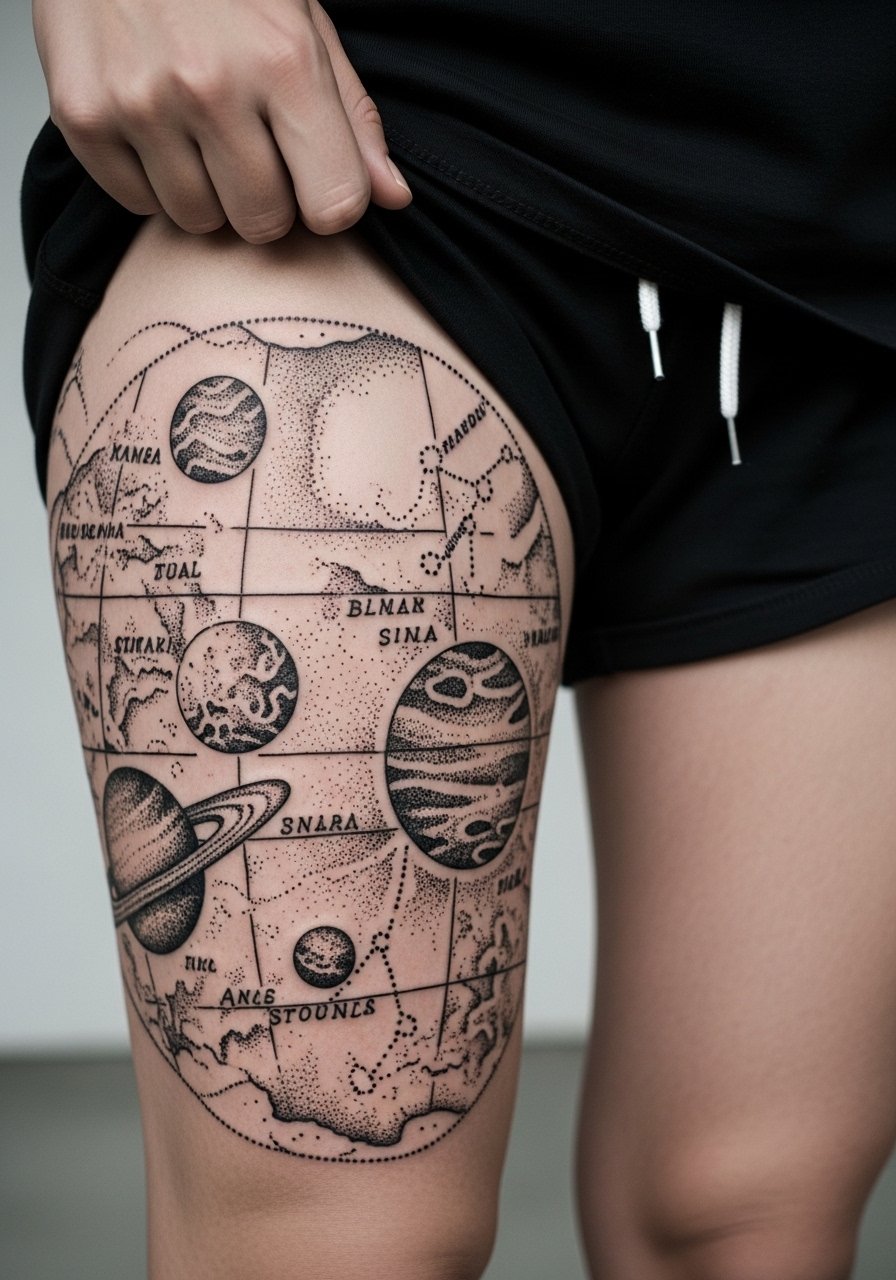
Dotwork creates a soft, tactile look that ages predictably when spaced well. Tell your artist you want stippling density noted in the design so darker areas are composed of many dots rather than heavy greys. The mistake is treating dotwork like a wash. Dense dot clusters can compact and read muddy after a few years. Pain varies across the leg, but expect longer sessions for stippling because the hand needs consistent rhythm. For the session wear a loose tank top you can move without tugging the thigh area. To show it off, a boardshort style swim trunk keeps the focus on the full-leg map.
Pack Smart
The first six leg themes above include dense saturation, stipple work, and areas near the knee that need different prep. A few targeted items smooth the session day and first week.
-
Stencil transfer paper kit. Lets you preview panel placement across the thigh and calf before committing, which matters for full leg narratives.
-
Topical numbing cream. Helpful for long calf and shin sittings when nerve sensitivity spikes in thinner skin zones.
-
Thin protective film roll. Keeps saturated fields protected from rubbing in the first days when clothing friction can cause scabbing in high-saturation areas.
-
Fragrance-free gentle body wash. Cleans the full leg without stripping moisture from stippled or heavily shaded zones during showering.
-
Aquaphor healing ointment. A thin layer for the initial days helps prevent excessive scabbing across large areas while still allowing the skin to breathe.
7. Biomechanical Full Leg With Mechanical Shading
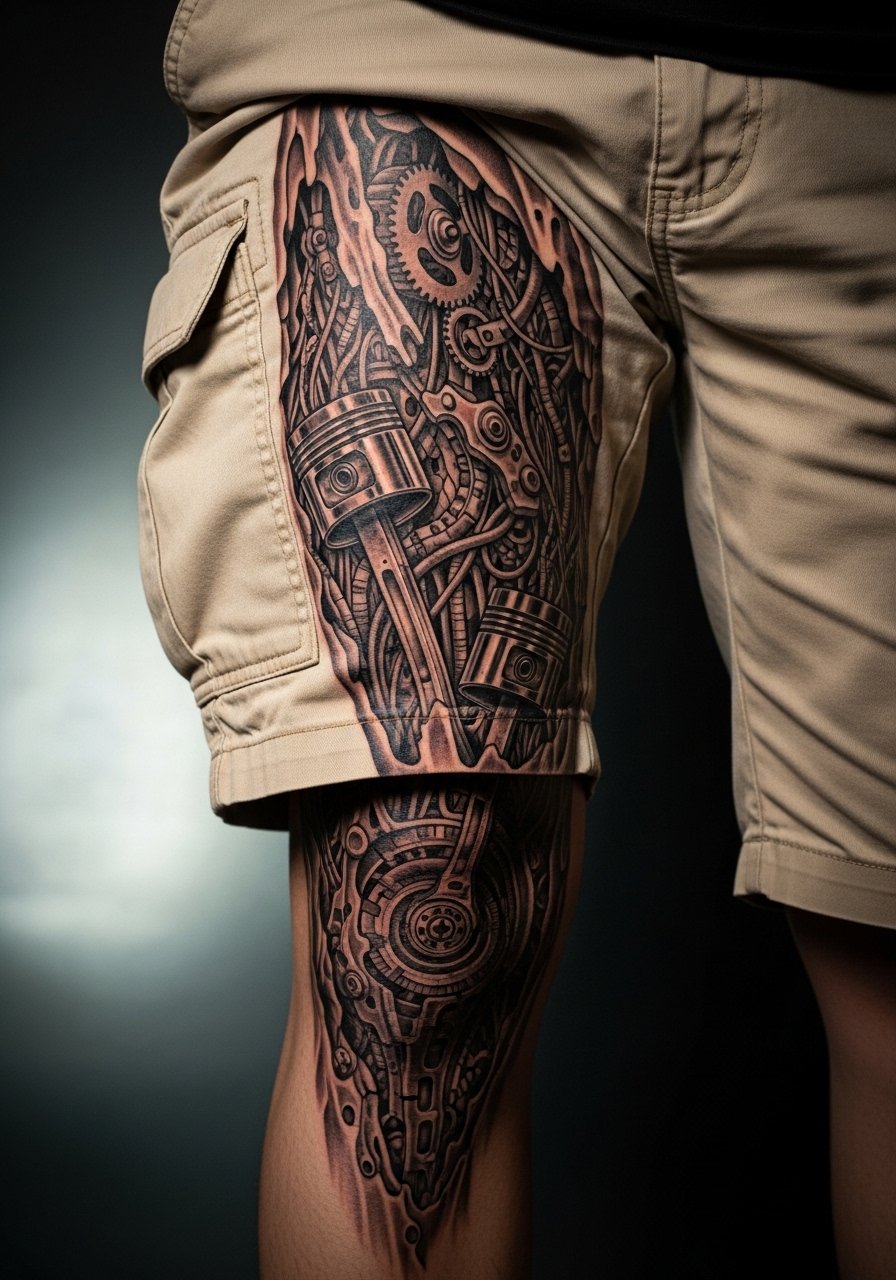
Biomechanical reads as motion when the shading follows muscle lines. Tell your artist you want highlights to sit where the leg moves so the piece feels animated when you walk. A common mistake is using flat shading that ignores anatomical contours, which makes the mechanical parts look pasted on. Expect moderate to high pain on the inner thigh and around the knee. Sessions are often staged around major elements so saturation remains even. For the session wear a loose button-down shirt you can easily pull aside to keep the leg free without tugging, and consider durable leather boots to frame the lower leg when showing the finished piece.
8. Portrait Sequence Along the Thigh to Calf

Sequence portraits work if you want a narrative or generational theme. Bring multiple high-contrast references so the artist can match light direction across frames. The mistake is mixing inconsistent lighting between portraits which makes the story read disjointed. Portraits near the knee need careful needle depth because motion and thinner skin can blur fine detail. Expect realistic portraits to require touch-ups at year two to maintain facial fidelity. In consult, be explicit about which facial features must remain crisp and which can be suggested with softer shading.
9. Polynesian-Inspired Pattern Banding
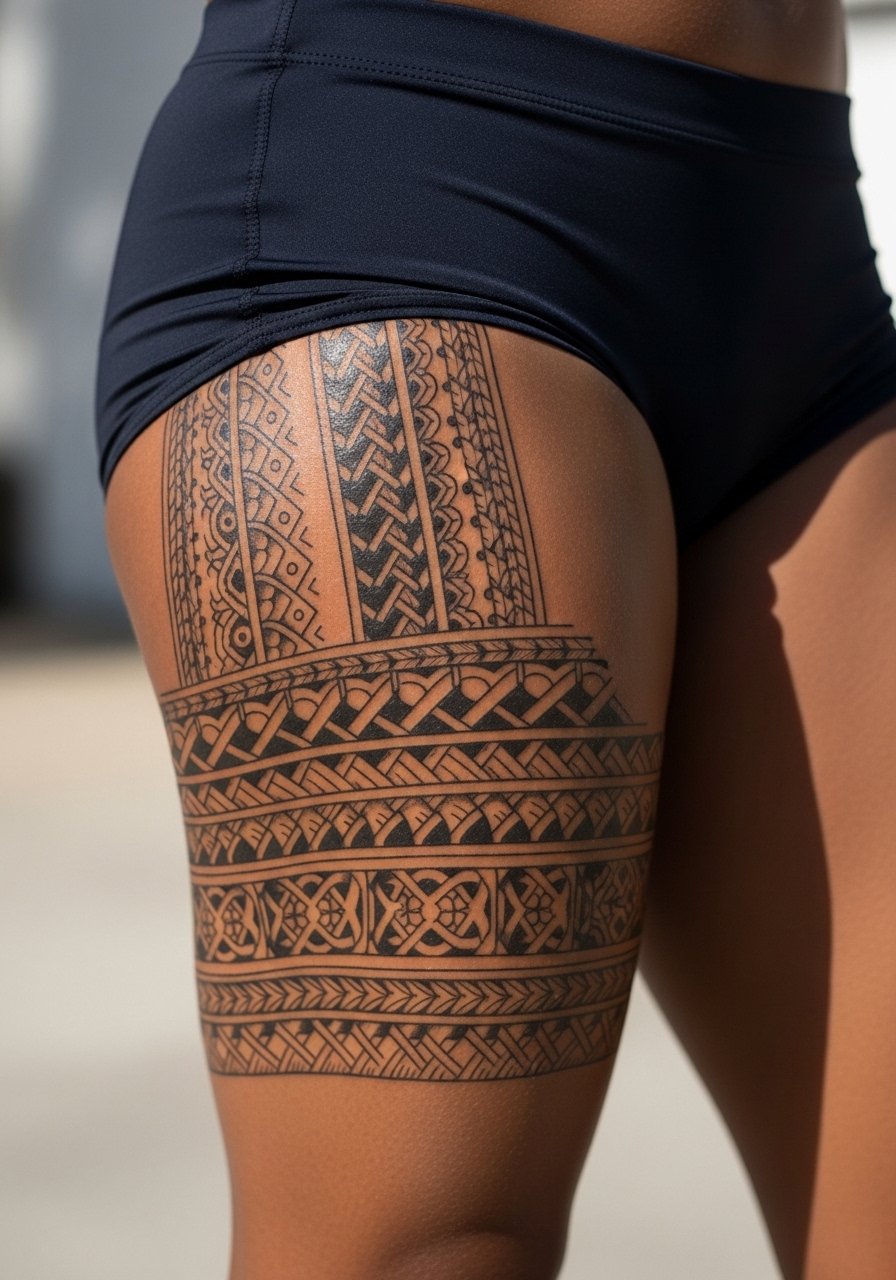
These motifs rely on repetition and rhythm across the leg. If you choose this route mention cultural origins and the motifs you are comfortable using. One camp insists on preserving strict cultural context and protocols. The other camp accepts stylistic interpretation and personal adaptation. If you use motifs tied to identity, consider subtle personal edits and discuss provenance with your artist. The main technical trap is inconsistent line weight, which makes panels look amateur. For heavy banding, the thigh tolerates saturation well while the ankle demands lighter touch.
10. Script Bands and Coordinate Rings Around the Leg
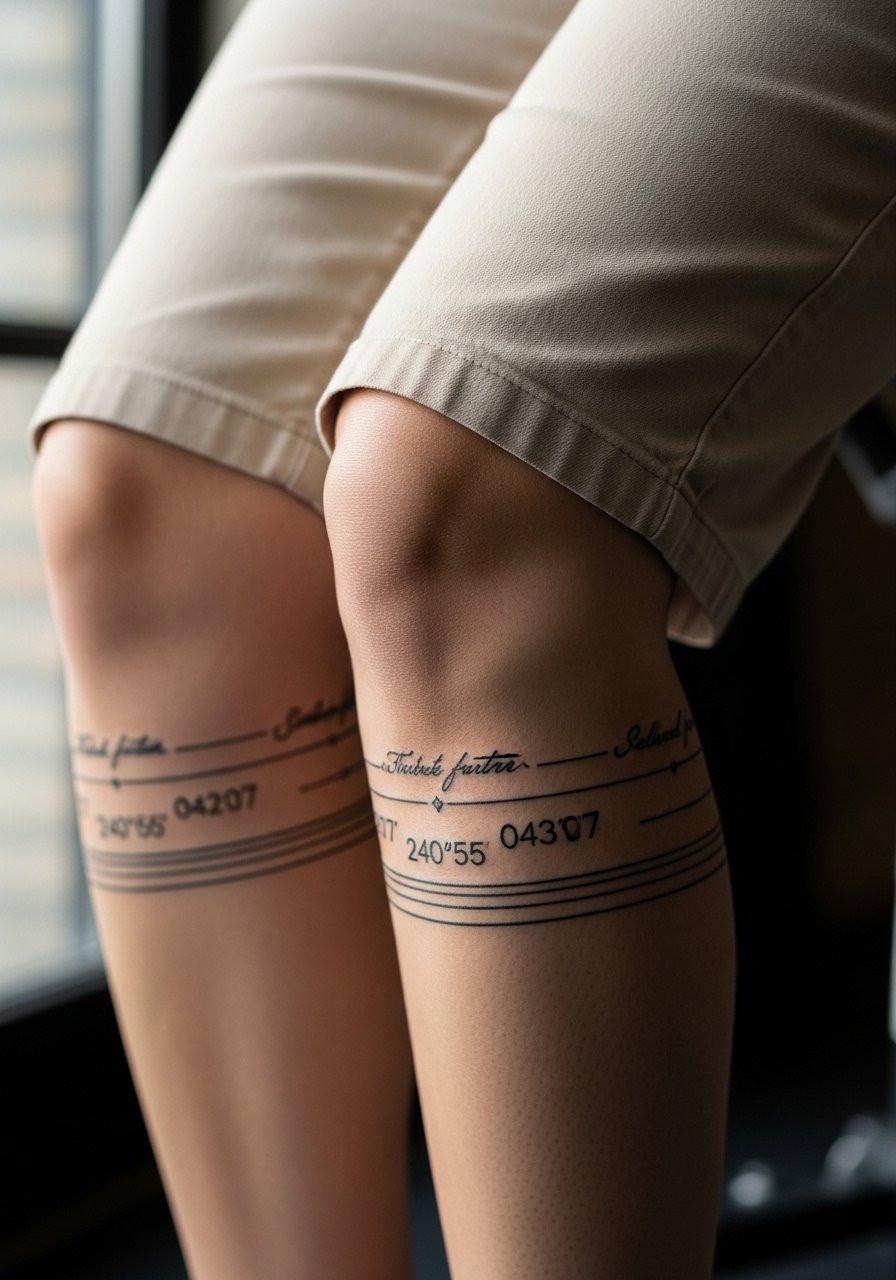
Text bands create rhythm when spaced with visual breathing room. Ask your artist to stencil the exact wrap on the leg in standing position so the script sits level when you walk. A mistake is wrapping text too tightly around curves which leads to distortion when muscles flex. Small script on thin skin near the ankle blurs faster. For session comfort wear loose cotton shorts you can adjust without stretching the inked areas. If you want a timeless look, choose bold black lettering over fine script for bands that will hold longer.
11. Abstract Brushwork Collage with Heavy Grey Washes
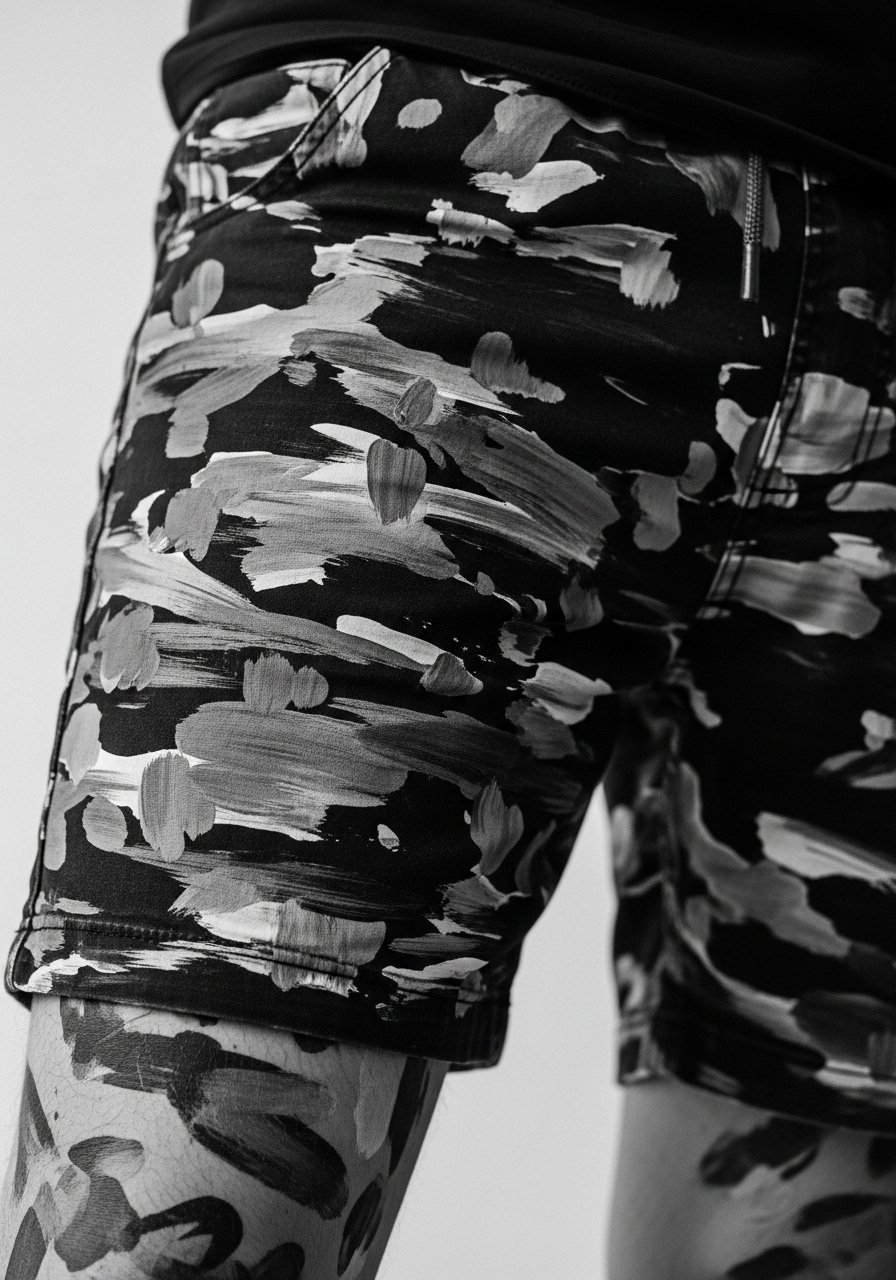
This style reads like wearable contemporary art. Tell your artist you want defined anchor marks that will still read when larger grey washes soften. The common error is making washes too uniform which causes the whole leg to gray out together. Sessions for large grey fields include rest days so saturation can be layered without overworking the skin. For showing it off pair the piece with rolled linen shorts or a monochrome boot to let the brush textures breathe. Expect touch-ups for gradients after heavy sun exposure seasons.
12. Map and Cartography Full Leg Storyline
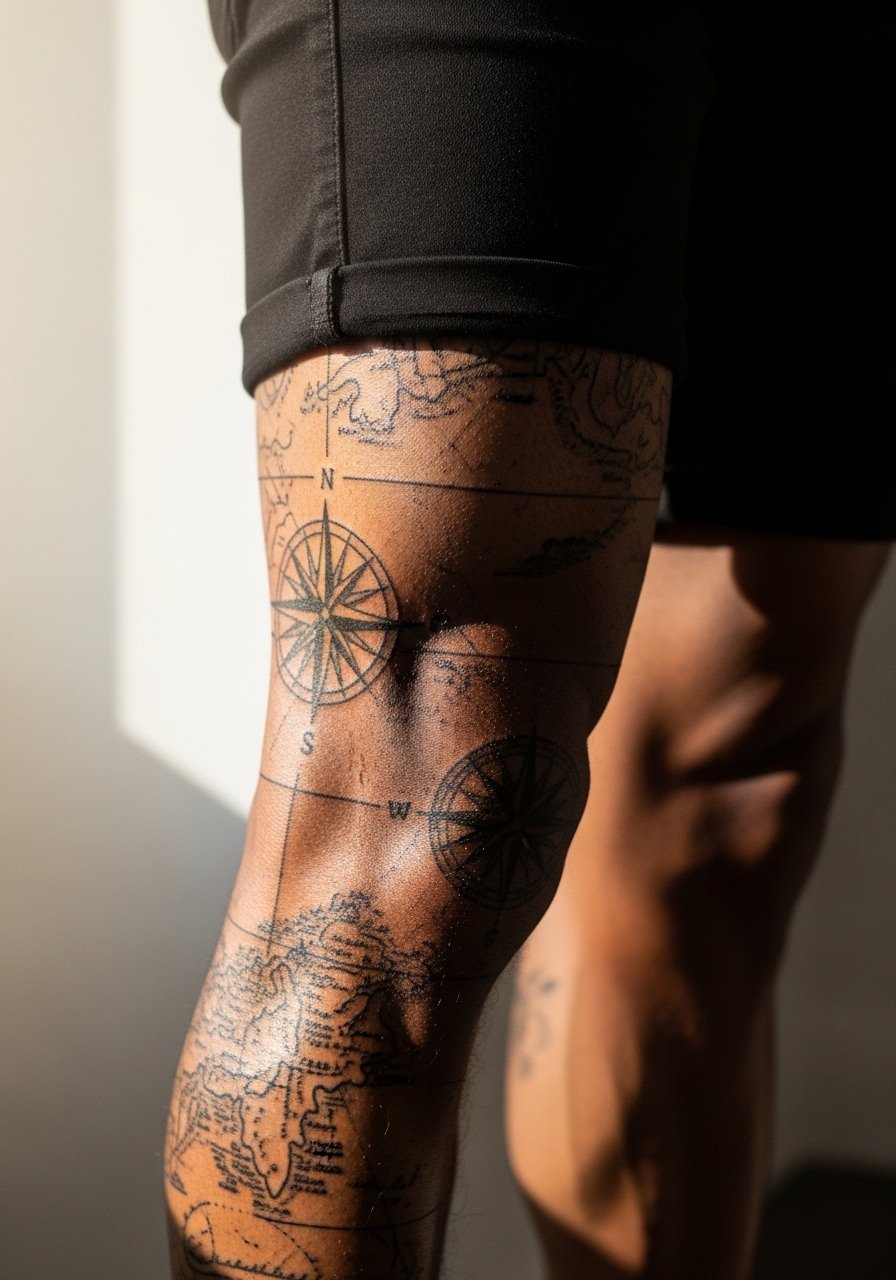
A map sleeve is great for travel narratives. In consult, specify scale so place names and coordinate text remain legible without cramping other map elements. The mistake is cramming tiny labels into shaded valleys which become unreadable as the linework softens. Map lines near the knee and ankle need slightly heavier linework to avoid opening into thicker strokes over time. For session day wear comfortable drawstring shorts to keep the thigh accessible. If you plan to add pins or small icons later, leave designated margins when laying out the first session.
13. Stipple-Shaded Mountain Range Wrap
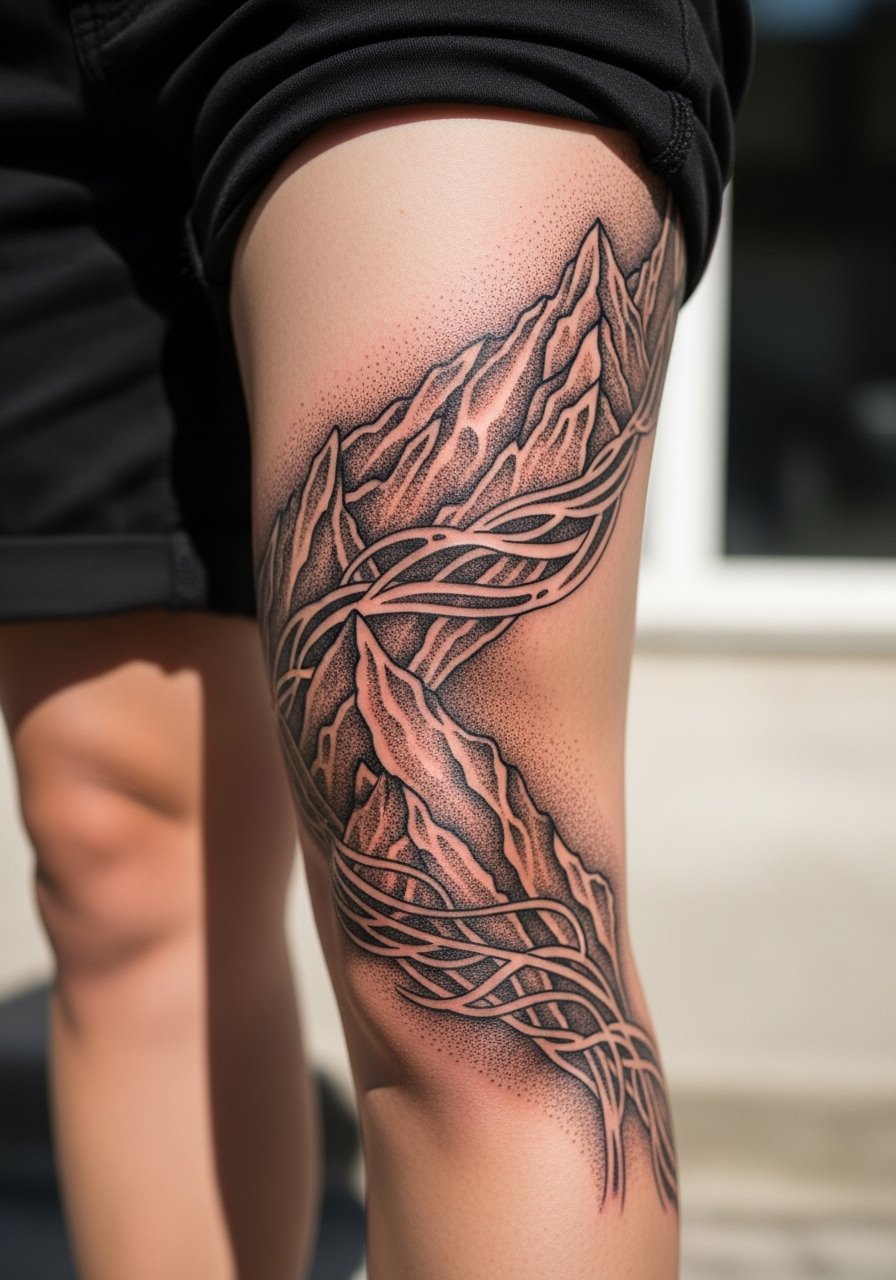
Mountain ranges in dotwork need consistent dot density so ridgelines remain defined. Ask for a mockup showing how stipple transitions will behave across muscle. A frequent error is uneven stippling density which leads to blotchy texture after healing. Pain is highest at the inner thigh and around the knee ridge. Plan staged sessions and expect the highest-wear areas to need touch-ups by year three. For the consult, request shading cues that echo the natural directional light you prefer in the composition.
14. Gothic Script and Ornamental Filigree Column
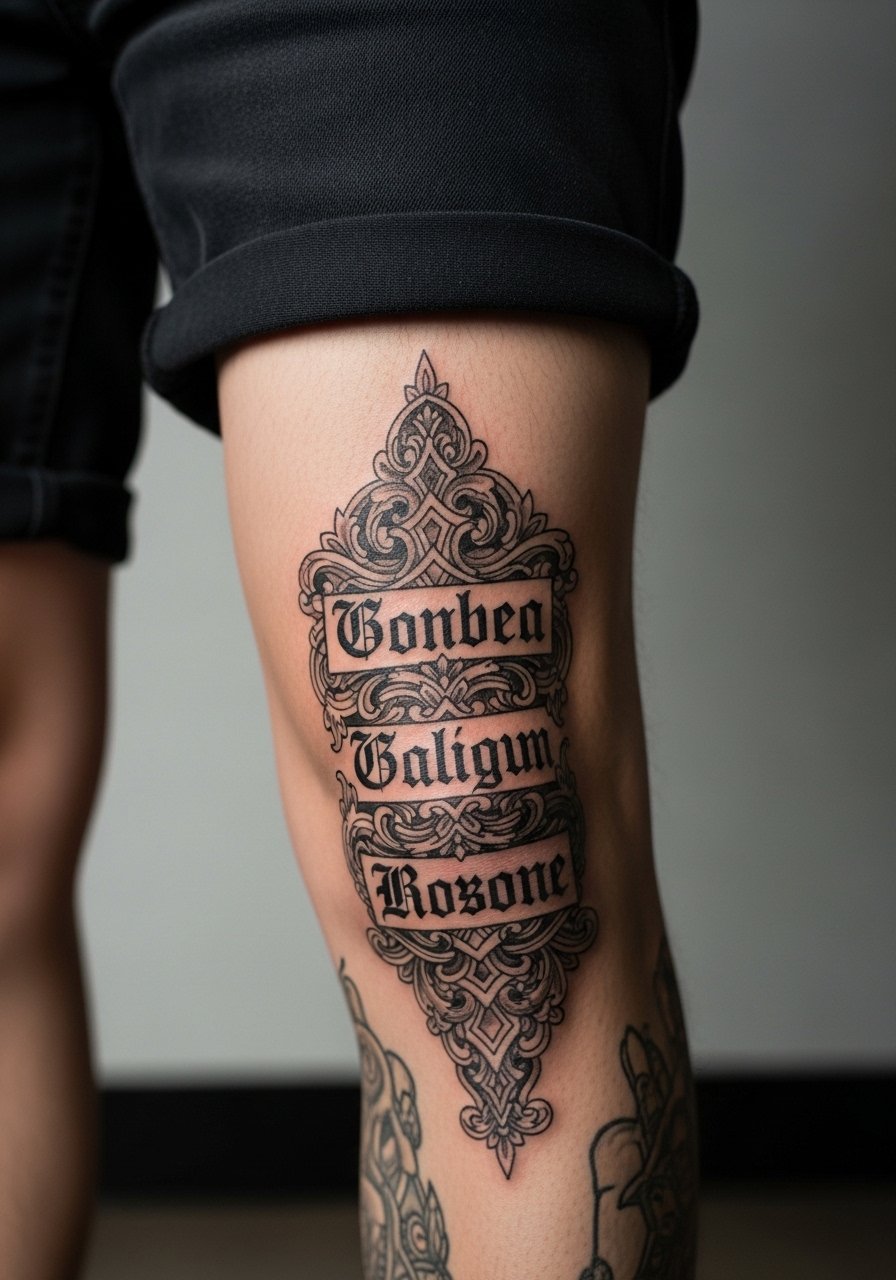
This layout is ideal for names, phrases, or phrases of significance wrapped as columns. Tell your artist the exact font and line weight you want and insist on a stencil preview standing up. The biggest mistake is choosing a delicate blackletter at small scale which blurs into an unreadable texture. Filigree fills should be designed with negative space to avoid plating out as the piece heals. For the session wear a loose tee you can move without affecting thigh placement.
15. Floral Botanical Wrap with Vine Movement
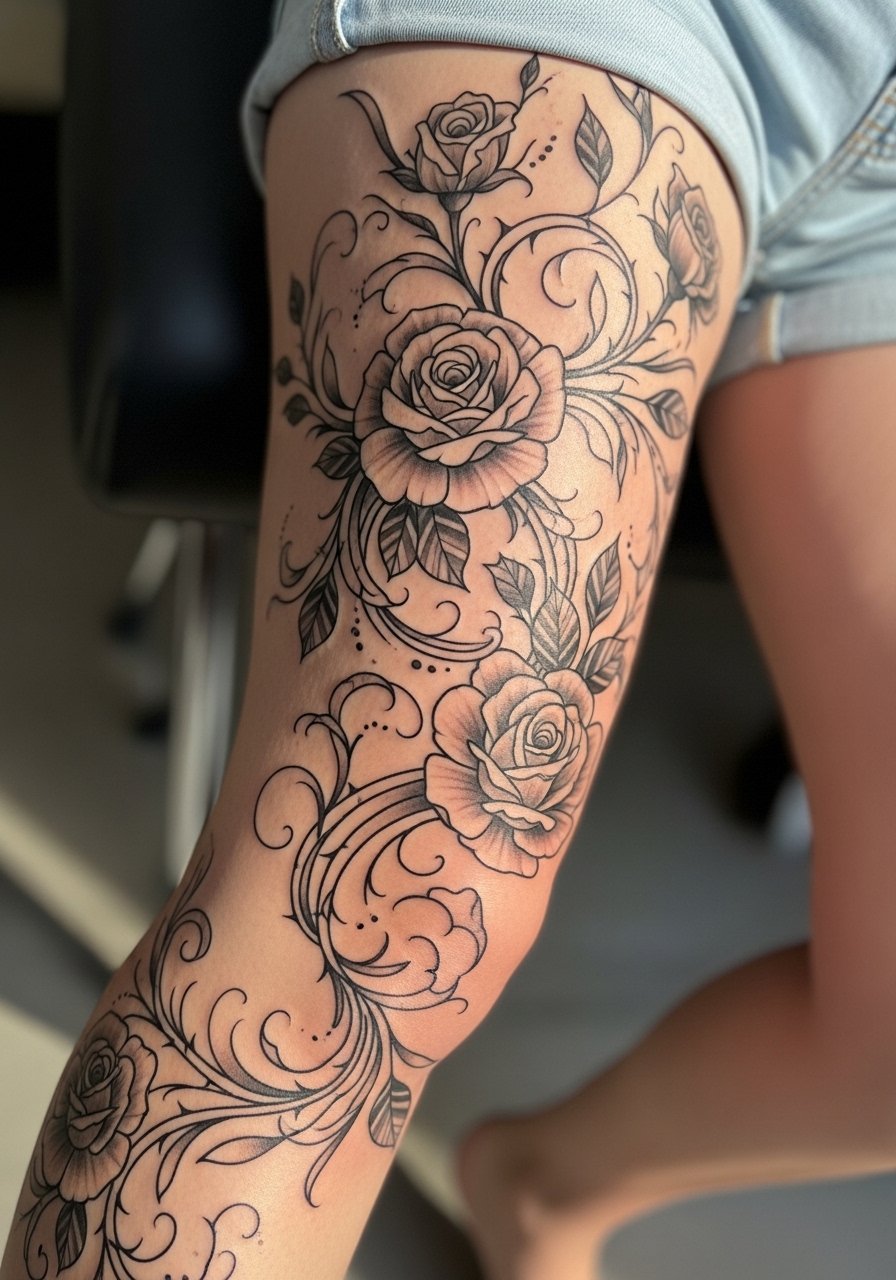
A botanically-driven leg sleeve works when the vine follows muscle pathways so it looks natural in motion. During consult ask the artist to place leaves to break across joints so the design moves with you. The common mistake is repeating identical flowers which reads static across a long surface. Expect lower pain overall but local sensitivity at the knee. For showing the piece, pair it with short linen shorts or a neutral sandal so the vine has visual breathing room and does not clash with patterned clothing.
16. Traditional Sailor Black and Grey Nautical Sleeve
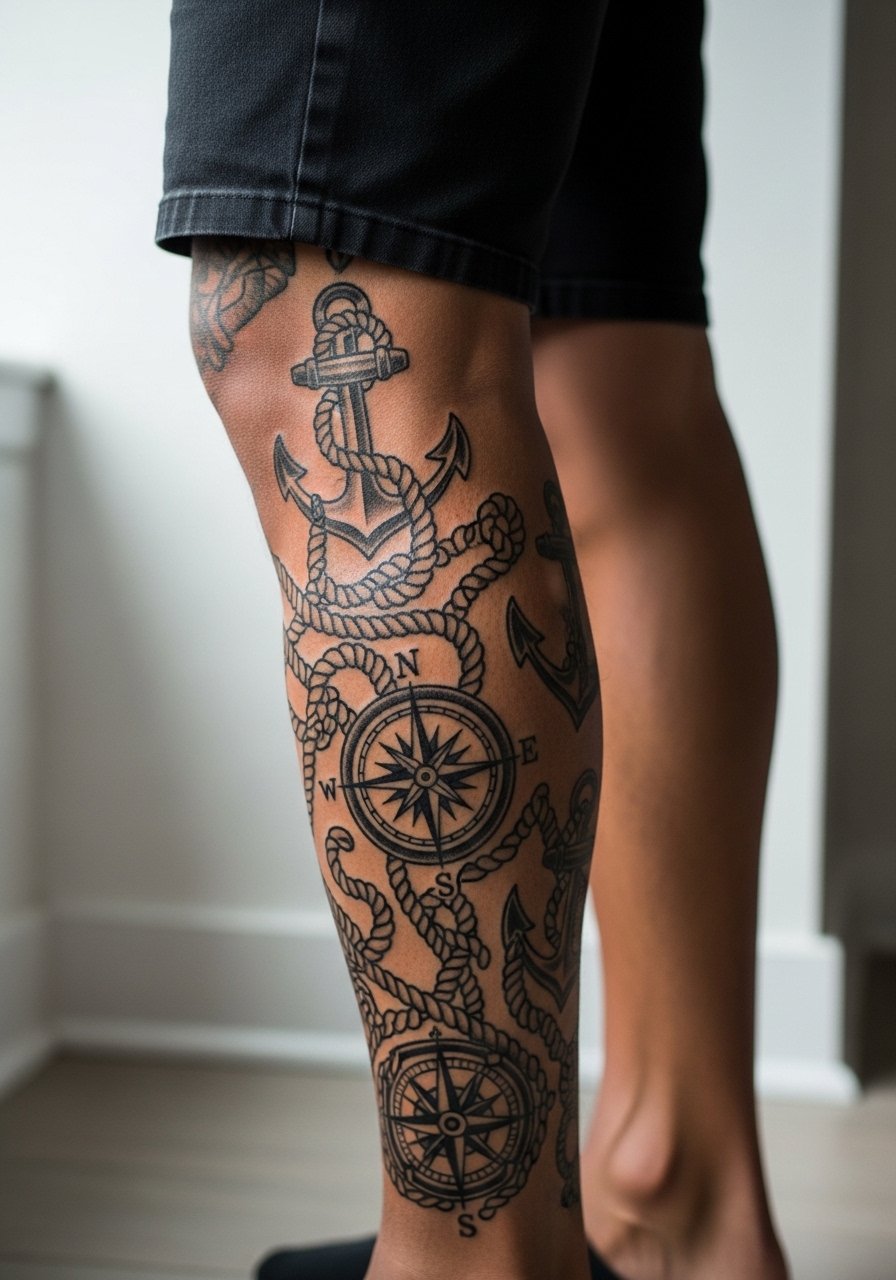
Traditional motifs age well when outlines are bold and fills are solid. In consult ask for anchors and ropes to have reinforced outer lines so they remain distinct as greys soften. A mistake is using thin contour lines on a long column which can disappear in high-motion areas. Sessions can be modular by motif, which helps with pain management and saturation consistency. For showing it off, a striped boatneck tee and rolled shorts frame the nautical story without competing.
17. Composite Skulls, Timepieces, and Weathered Textures Timeline
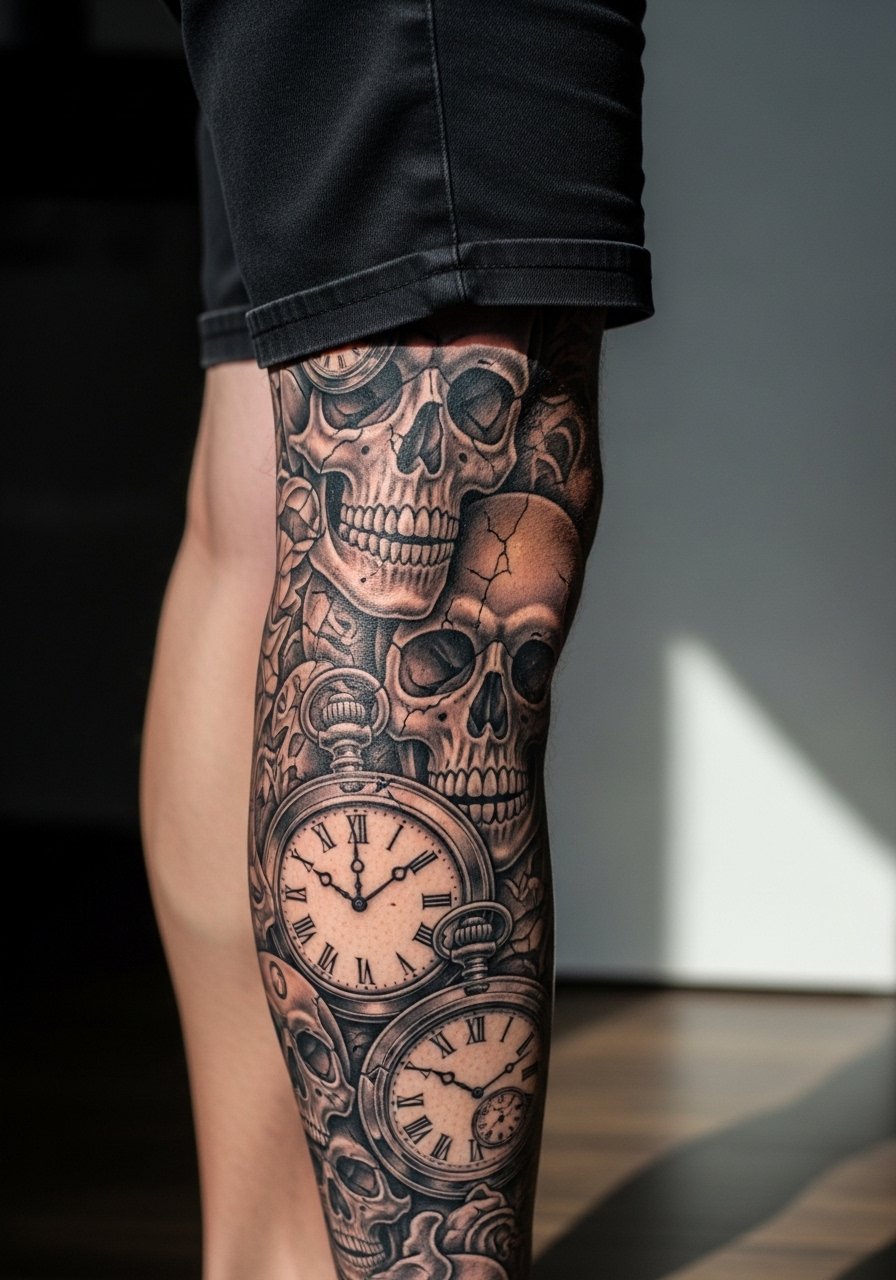
This timeline-style sleeve is about pacing and contrast. Tell your artist you want pockets of heavy saturation for anchor points and softer weathered textures between them. One clear mistake is treating every element with the same detail level which makes the overall piece read chaotic. There is a controversy among artists about how much fine detail to pack into one leg. One camp favors dense realism and regular touch-ups. The other prefers bold anchors with softer transitions that age without intervention. Both approaches work if you align expectations before booking. Expect touch-ups at year two for the fine detail zones, and plan display outfits around boots that sit under the ankle work.
Frequently Asked Questions
Q: How long do black and grey full leg tattoos usually take to complete?
A: It depends on scale and density. A full-leg sleeve can be done over several sessions ranging from a few three-hour sittings to many six-hour days. Heavily saturated blackwork and photoreal pieces take longer because artists layer saturation gradually to avoid overworking the skin.
Q: Will dotwork or stippling fade faster on the shin and knee?
A: Stippled work near the knee and shin faces more movement and thinner skin, so it can lose crispness sooner than on the thigh. Ask for slightly denser stippling and expect touch-ups earlier in those zones.
Q: What should I wear to a full leg tattoo session to stay comfortable?
A: Wear loose shorts or drawstring pants you can easily pull up without stretching the area. A loose drawstring short keeps the artist's access clean and keeps you comfortable between breaks.
Q: Are there leg placements I should avoid if I want fewer touch-ups?
A: Areas with thin skin and constant movement like the knee, inner ankle, and around the tibia tend to need touch-ups earlier. Thigh panels and the calf usually hold saturation longer, all else equal.
Q: How should I address cultural designs I like but do not belong to?
A: Be transparent with the artist and mention the motifs you admire. One approach is to adapt elements respectfully and credit origins in the conversation. Many artists will suggest alterations that honor the source while fitting your personal story.
Q: Can I combine multiple styles in one full-leg sleeve and have it age well?
A: Yes, but plan transitions deliberately. Use anchor motifs or bold black panels to separate different styles so each zone can age on its own. Discuss staging during consult so saturation and line weight are considered across sessions.
