
Fine line tattoos dominate Pinterest right now, and the artists pushing them are quietly booking touch-ups at year two. The aesthetic looks delicate on-screen. Longevity depends on placement, skin friction, and how much room the linework has to breathe. These 27 forearm ideas focus on designs and tweaks that keep detail readable, outfit pairings that frame the ink, and what to ask in the consultation so the forearm piece still looks intentional after a few summers.
1. Fine Line Arrow on Inner Forearm
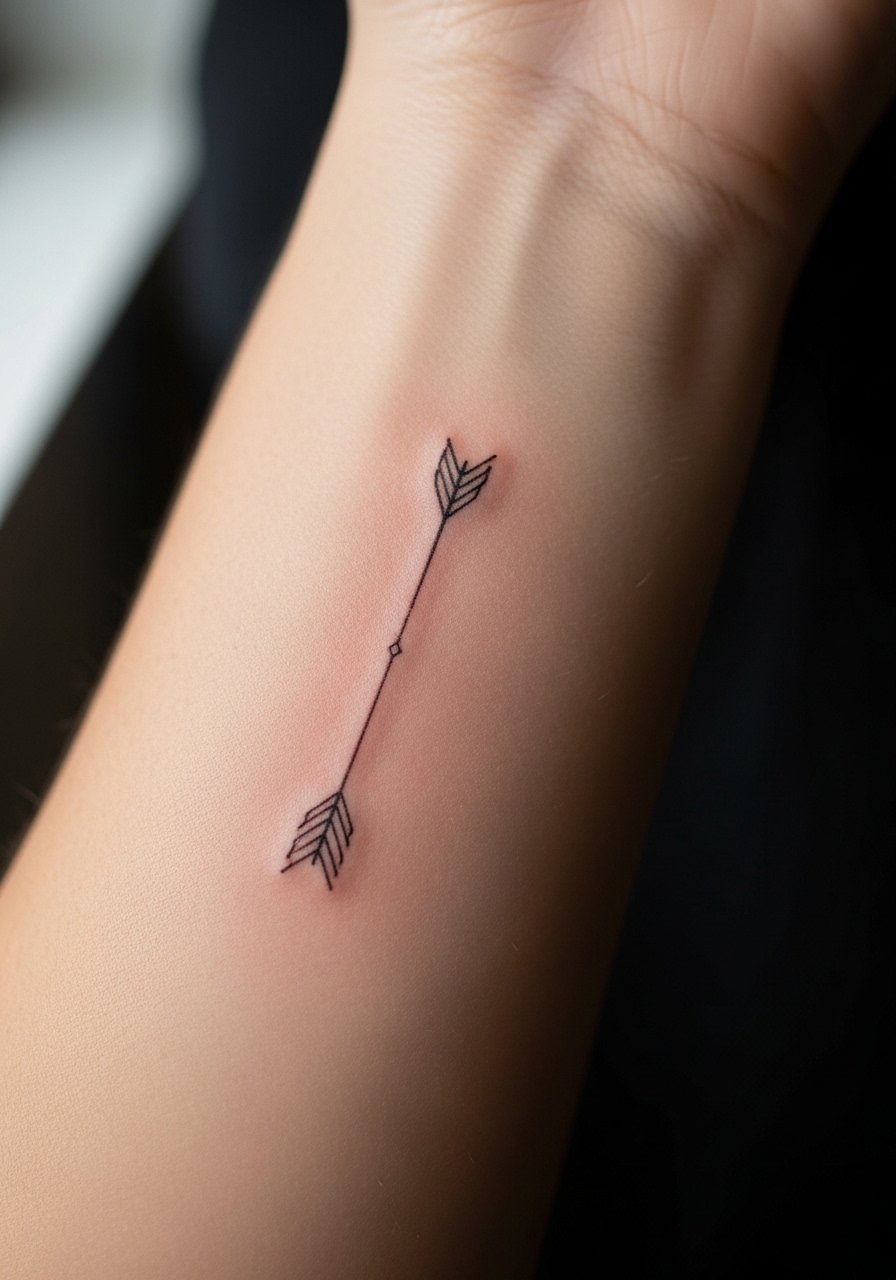
This small arrow reads sharp when the line weight has breathing room. I recommend asking the artist for a slightly bolder primary shaft and feathered ends kept airy. Common mistake is asking for needle-thin lines that sit too close together. That version looks fragile at six months and often needs a touch-up by year two. Pain is low to moderate on the inner forearm and the session usually runs 30 to 60 minutes. For the appointment wear a loose button-down shirt you can slide aside without twisting, and plan a gentle touch-up check at year two.
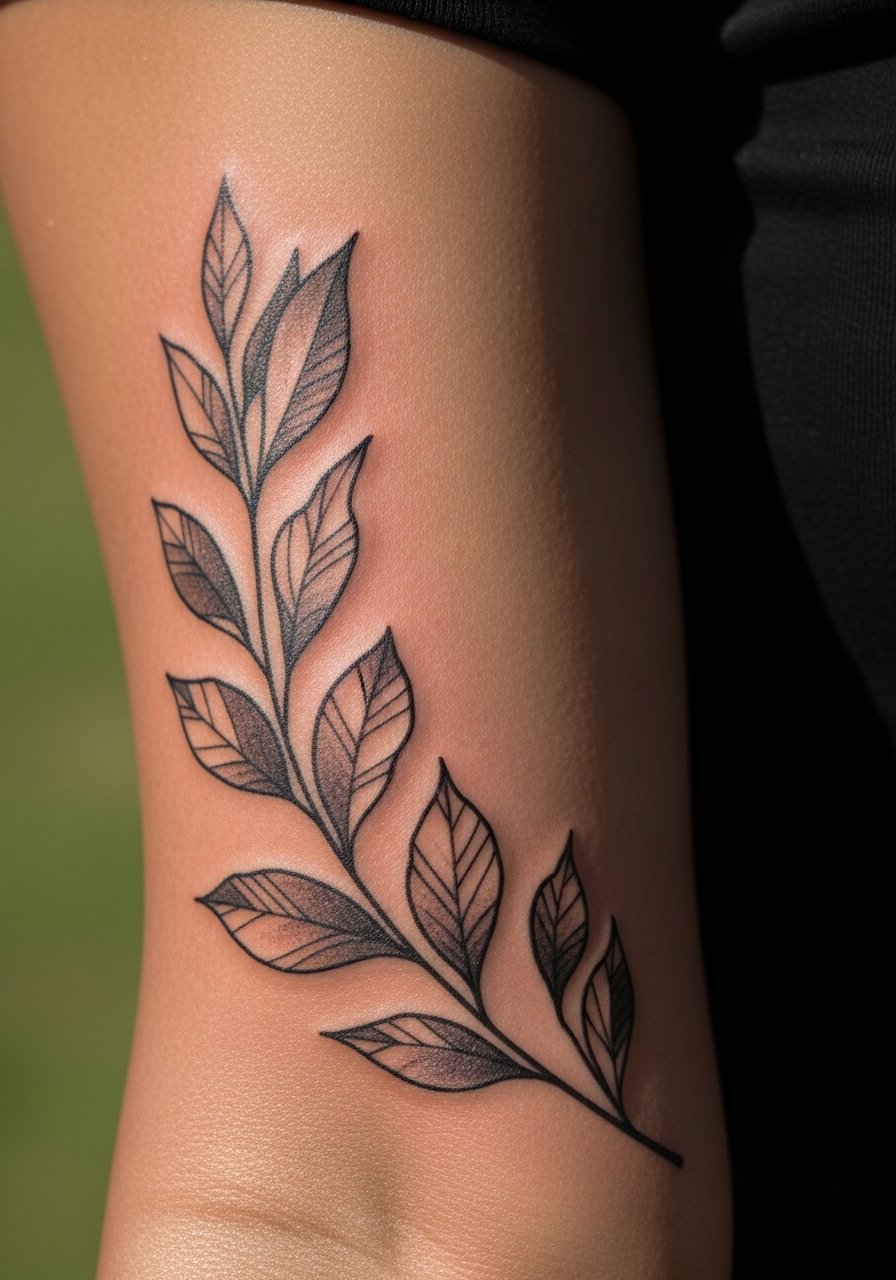
2. Botanical Vine Along Outer Forearm
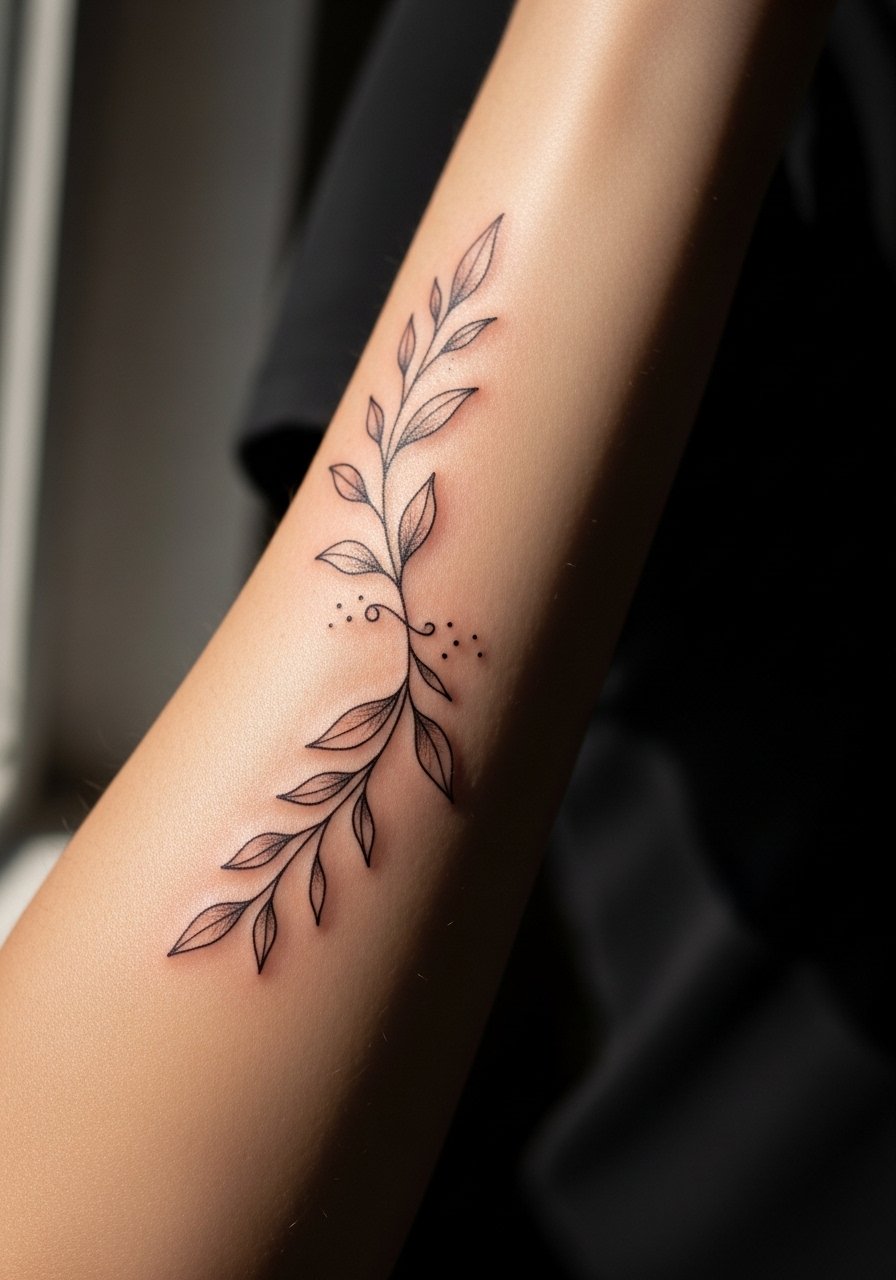
A flowing vine follows the forearm curve naturally. Tell your artist you want gaps between leaves so stipple shading can age without merging. The biggest aging issue is over-dense leaf clusters. At six months the stipple holds, at two years the leaves still read separate if spacing is right. Session time is ninety minutes for a modest vine. For showing it off, rolled-up sleeves frame the piece well. Pair it with a rolled linen shirt in neutral tones to let linework stand out without competing fabrics.
3. Minimal Script Phrase on Inner Forearm
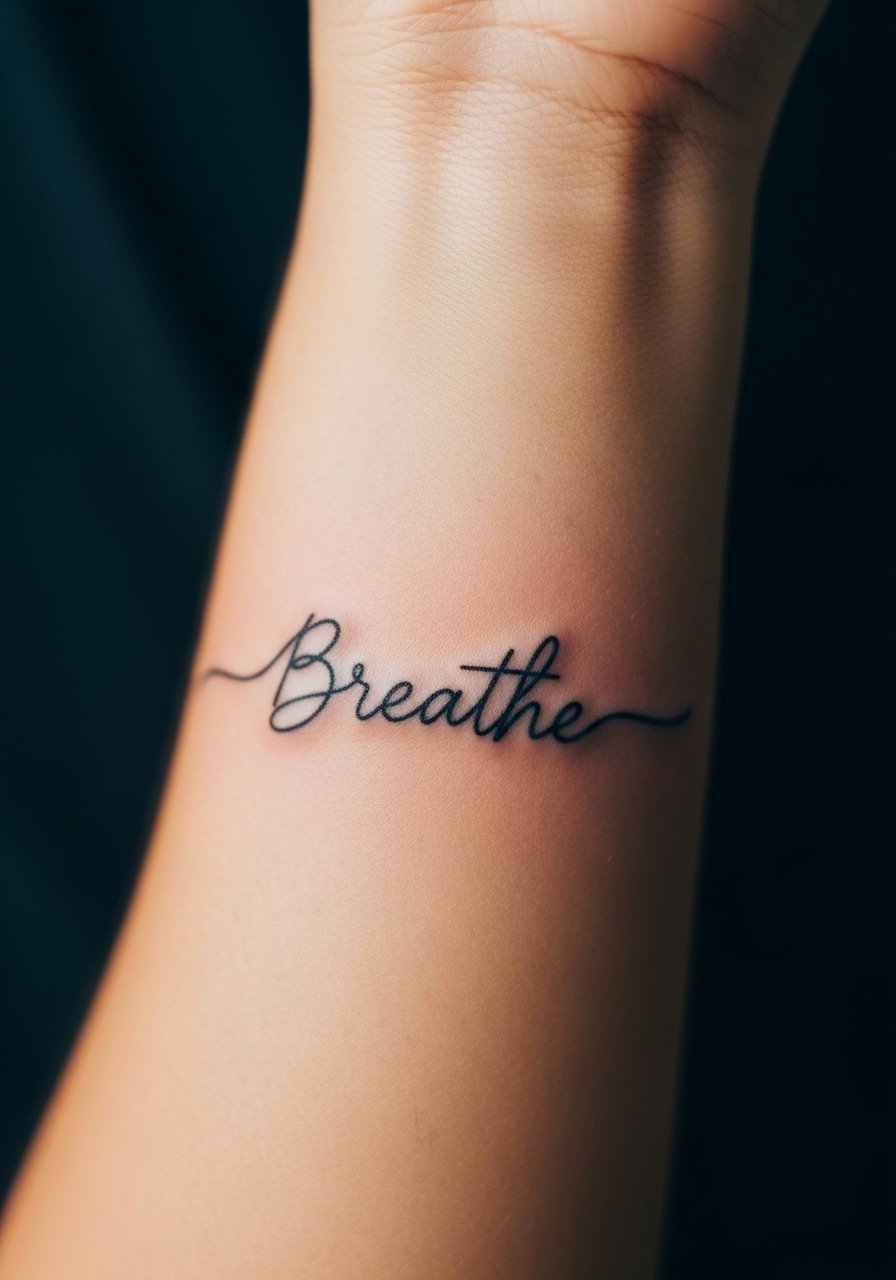
Text tattoos on the forearm need exact spacing and font weight planning. Bring the exact phrase and font examples to the consult so the artist can size letters for longevity. A common error is shrinking script to fit, which leads to blurring of counters by year three. Expect a 45 to 90 minute session depending on length. The inner forearm heals with minimal friction but gets sun exposure, so plan touch-up sooner if you spend a lot of time outdoors. Stack with a thin chain pendant or dainty bracelets to balance the script when you show it off.
4. Micro-Realism Portrait Patch on Upper Forearm
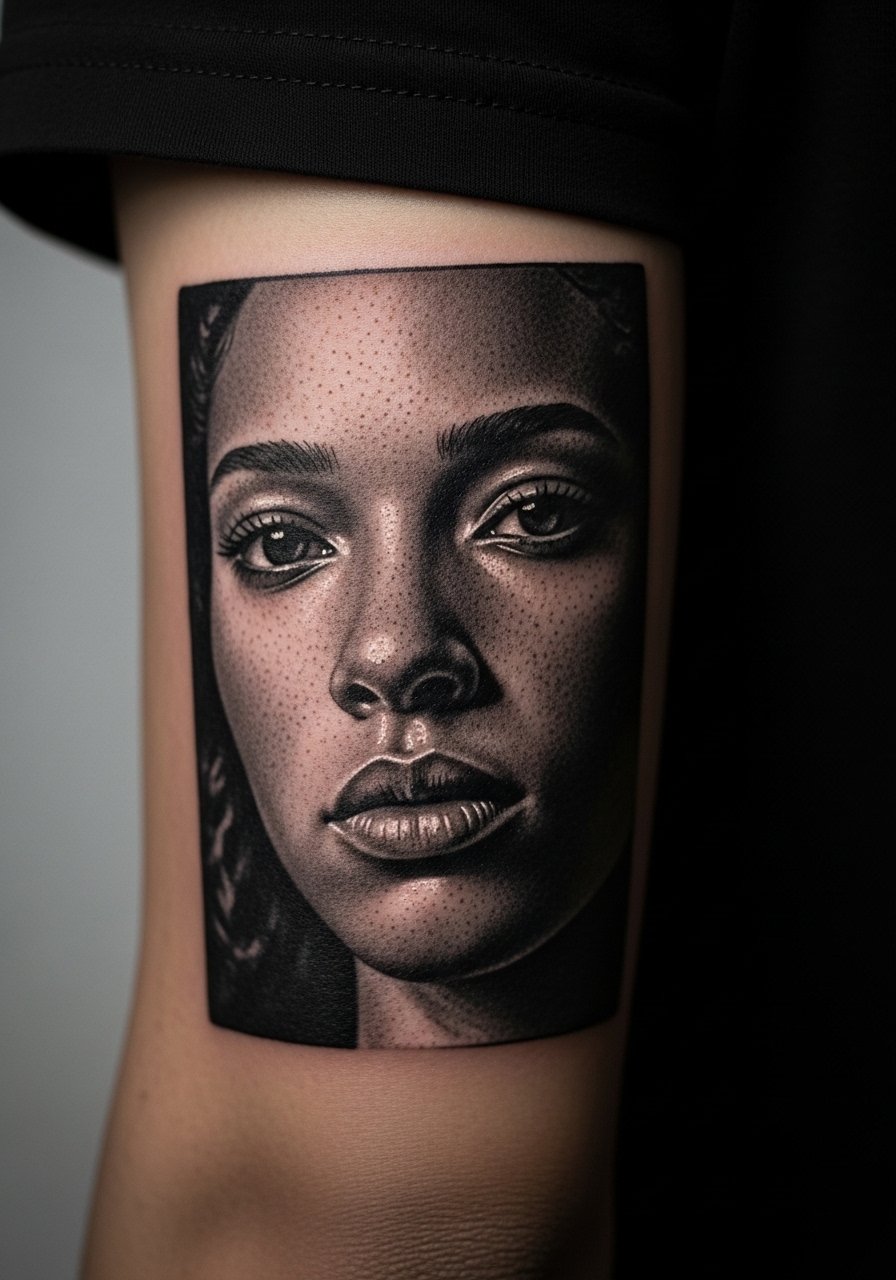
Micro-realism needs contrast and punchier line edges on the forearm or details wash out over time. Ask for slightly stronger contrast in the first session so stipple shading settles into recognizable planes at year two. The main mistake is packing ultra-fine detail into a tiny patch. Expect two to three hour sessions for a small portrait. Blowout risk is low on the upper forearm but increases if the needle goes too deep. For the session wear a racerback tank or loose short-sleeve that gives the artist room to work without pushing on the skin.
5. Geometric Mandala Band Around Forearm

Mandala bands read best when scaled to the forearm width. The biggest mistake is compressing a dense mandala into a thin band. One camp argues that fine line mandalas are practical on forearms if spacing is generous. The other camp warns that dense geometry will blur within two years. Name both camps to your artist and ask where they stand before booking. Session time varies but expect ninety minutes to two hours. For longevity request open negative space and heavier outer rings so the center can breathe.
6. Watercolor Splash With Fine Line Anchor
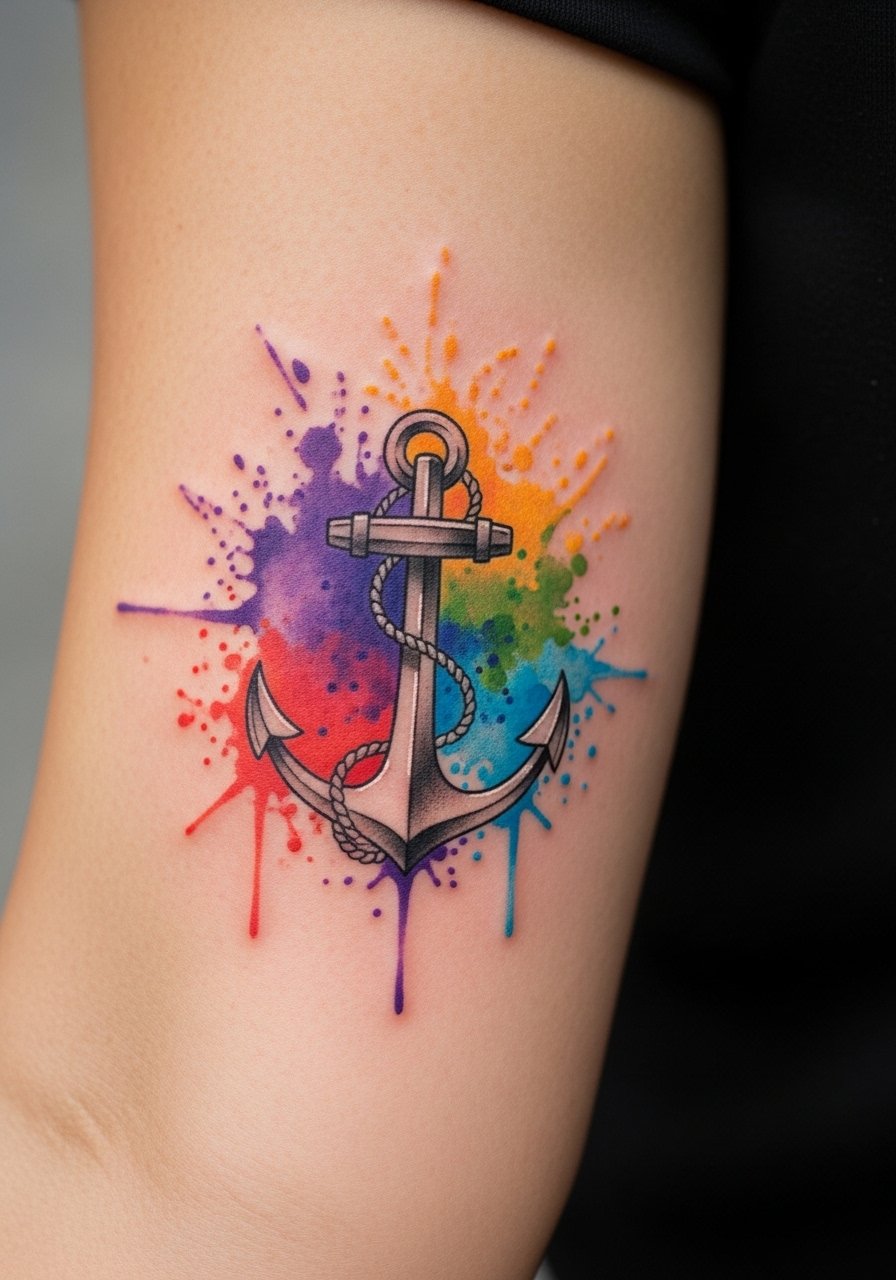
Watercolor effects can be forgiving when paired with crisp fine line anchors. Tell the artist you want the watercolor washed subtly behind, not saturated up to the linework edge. A common issue is over-saturated watercolor that bleeds into linework as it settles. Expect a two hour session for color placement and line anchor. For after-session photos and casual showing, pair this with a racerback tank or rolled short sleeves so the color reads cleanly against skin.
Studio Day Picks
The wrist and inner forearm pieces above need different prep than large saturated panels, so a few compact items smooth the appointment and the first week.
- Stencil transfer paper kit. Lets you double-check placement and font size directly on skin, which matters for script and tiny geometric bands from ideas 1 to 6.
- Topical numbing cream. Use as directed before wrist and inner forearm sessions to reduce discomfort during fine line passes.
- Thin protective film roll. Keeps wrist and finger-adjacent work clean during the first days when hand washing and friction threaten fresh linework.
- Fragrance-free gentle body wash. Cleanses healing forearm ink without stripping delicate pigments that fine line pieces depend on.
- Aquaphor healing ointment. A thin layer in the first 48 hours locks in moisture and soothes areas where saturation is light or stipple shading was used.
7. Minimalist Crescent Moon Cluster

A row of tiny moons works well along the forearm bone line. Tell your artist you want distinct spacing between crescents so dot work and negative space stay readable at year three. The session is brief, often under 45 minutes, and pain is mild. A mistake is clustering moons too close together which causes loss of separation as the ink spreads. For style pairings, stacked rings or a slim cuff draw the eye to the moons. Try stackable rings when you want an accessory that echoes the motif.
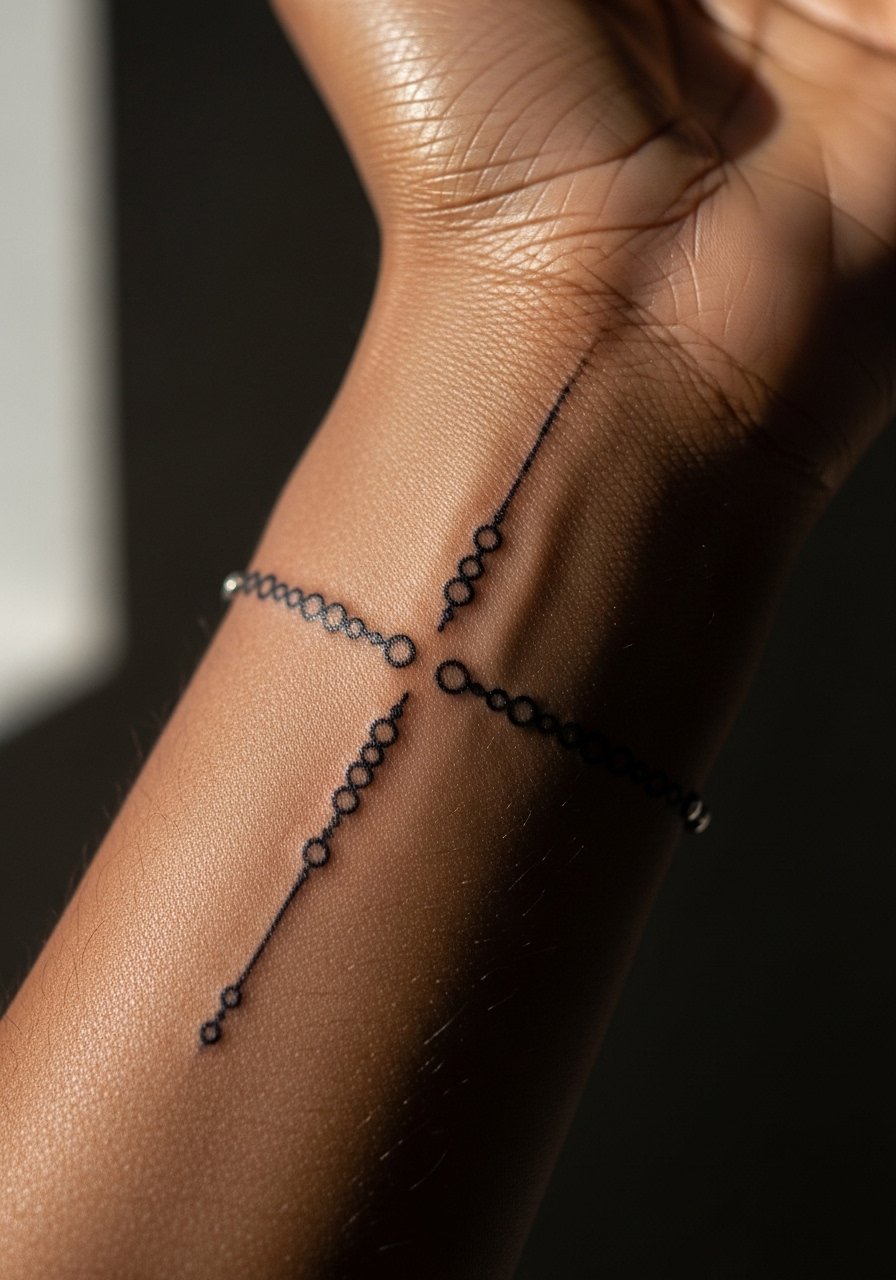
8. Chain-Link Fine Line Accent
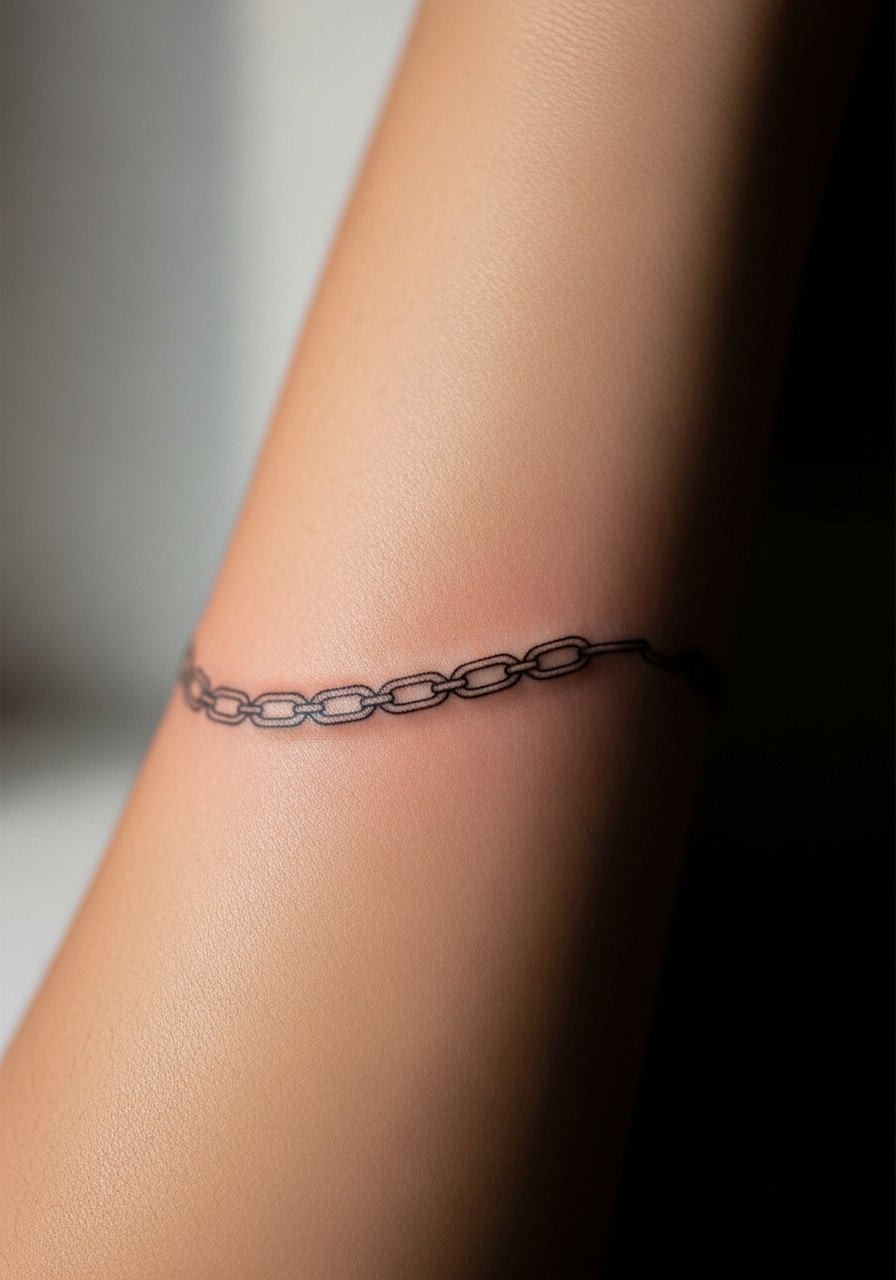
Chain-link motifs read modern but need consistent link spacing. Ask for wider loops instead of ultra-thin connections, because tiny joins often blur within two years. The session can be one hour for a short accent. Blowout risk is moderate where skin flexes, so keep the chain on flatter forearm planes. For appointment comfort wear a loose button-down shirt you can slide to access the mid-forearm without stretching skin. For showing off, pair with a minimalist watch or dainty bracelet.
9. Bold Blackwork Band Near Wrist

Blackwork bands age reliably when saturation and edge definition are strong. The common issue is undersaturated fills that spot and thin out. Expect a one to two hour session depending on width. Pain is higher near the wrist bone. Ask the artist for a slightly rounded outer edge to reduce chances of uneven fading. Touch-up timelines vary but saturated black often needs less frequent refresh than fine line inside the band. For showing off, short sleeves or cuffed shirts give a clear frame.
10. Dot Work Floral Forearm Panel
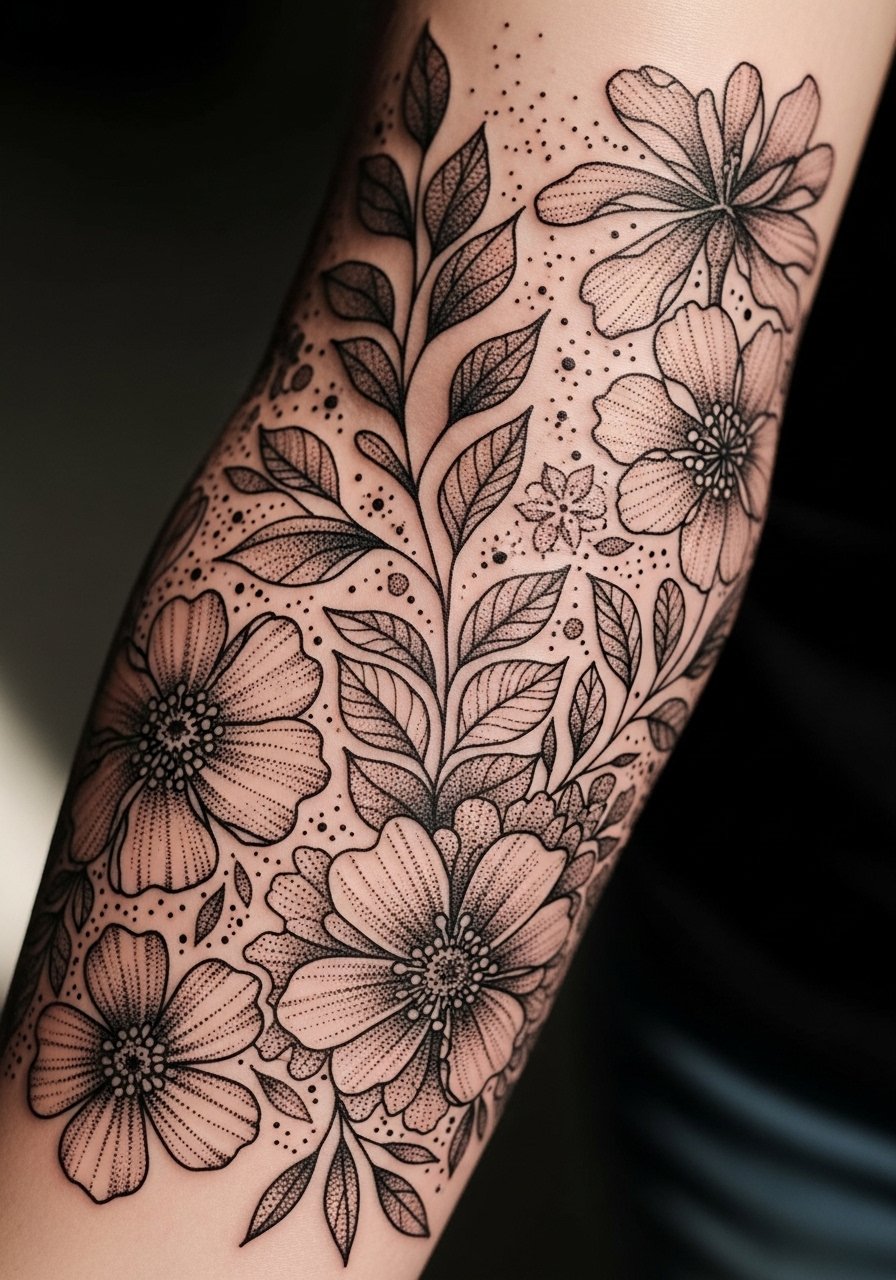
Stipple shading builds depth without heavy lines. Tell your artist you prefer staggered dot density with negative space so the flowers keep separation at two years. A frequent mistake is compressing dots too densely which makes the panel look muddy as it heals. Sessions run two hours for a moderate panel. Dot work on the forearm tends to feel like long, patient passes rather than sharp jabs. Pair with layered thin bracelets to echo the stipple texture, and try a dainty bracelet set for nights out.
11. Single Needle Constellation Row Near Wrist
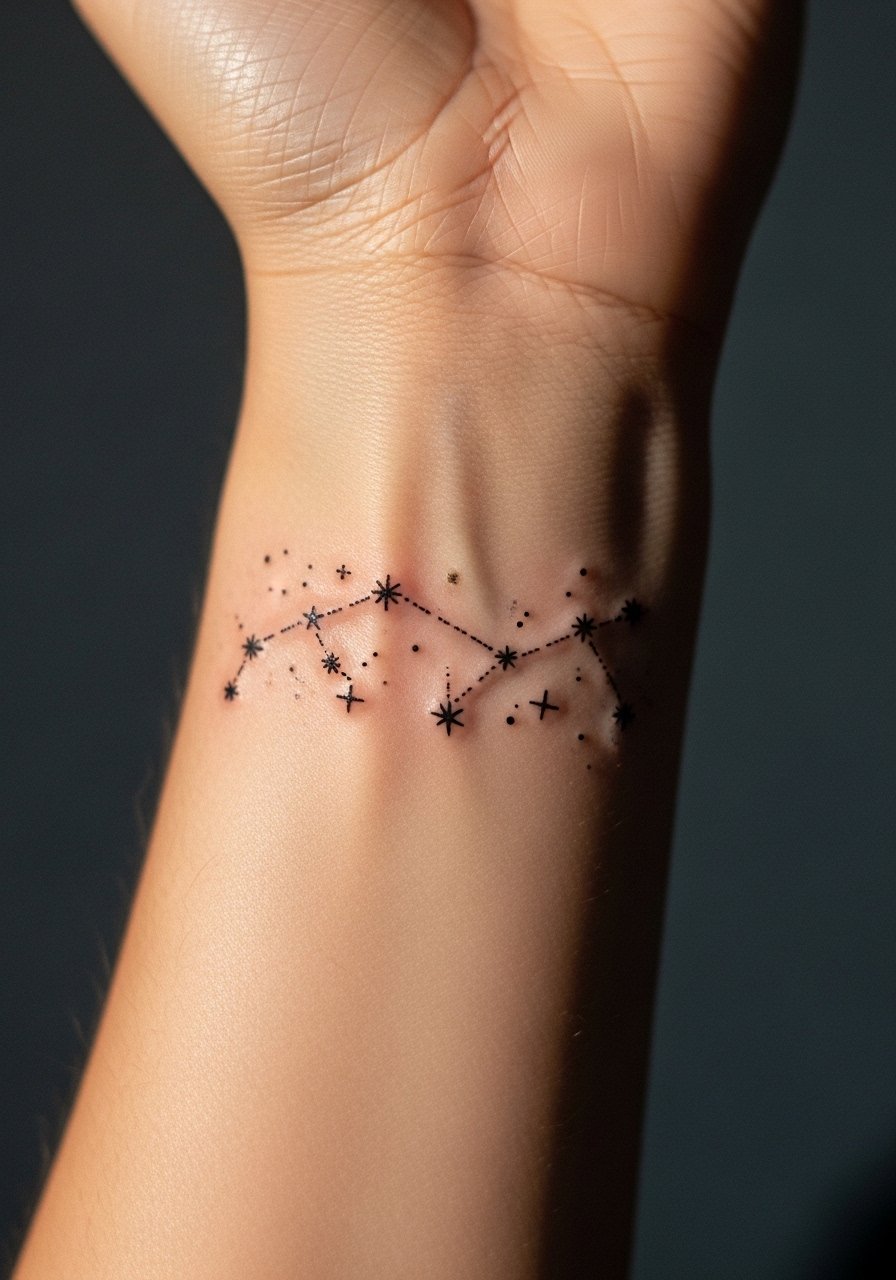
Tiny star clusters and connecting dots look delicate but need spacing to avoid merging. The mistake is cramming too many stars into a short span. Expect a 30 to 60 minute sit. For longevity, ask for slightly thicker primary stars and finer connector dots. The wrist sees lots of washing and friction which accelerates fading, so protective habits help. Pair with a minimalist watch or stacked narrow bracelets when showing the constellation.
12. Whip Shading Mountain Range Along Outer Forearm

Whip shading creates a soft horizon that holds if the artist spaces strokes. Tell them you want trails of negative space between peaks to prevent merging. The session is typically one to two hours. Mistakes include overworking dark ridgelines which can form dense patches after healing. The outer forearm tolerates broader shading better than the inner curve. For session wear pick a loose short-sleeve tee so the artist can access the whole outer plane comfortably.
13. Abstract Line Art Figure
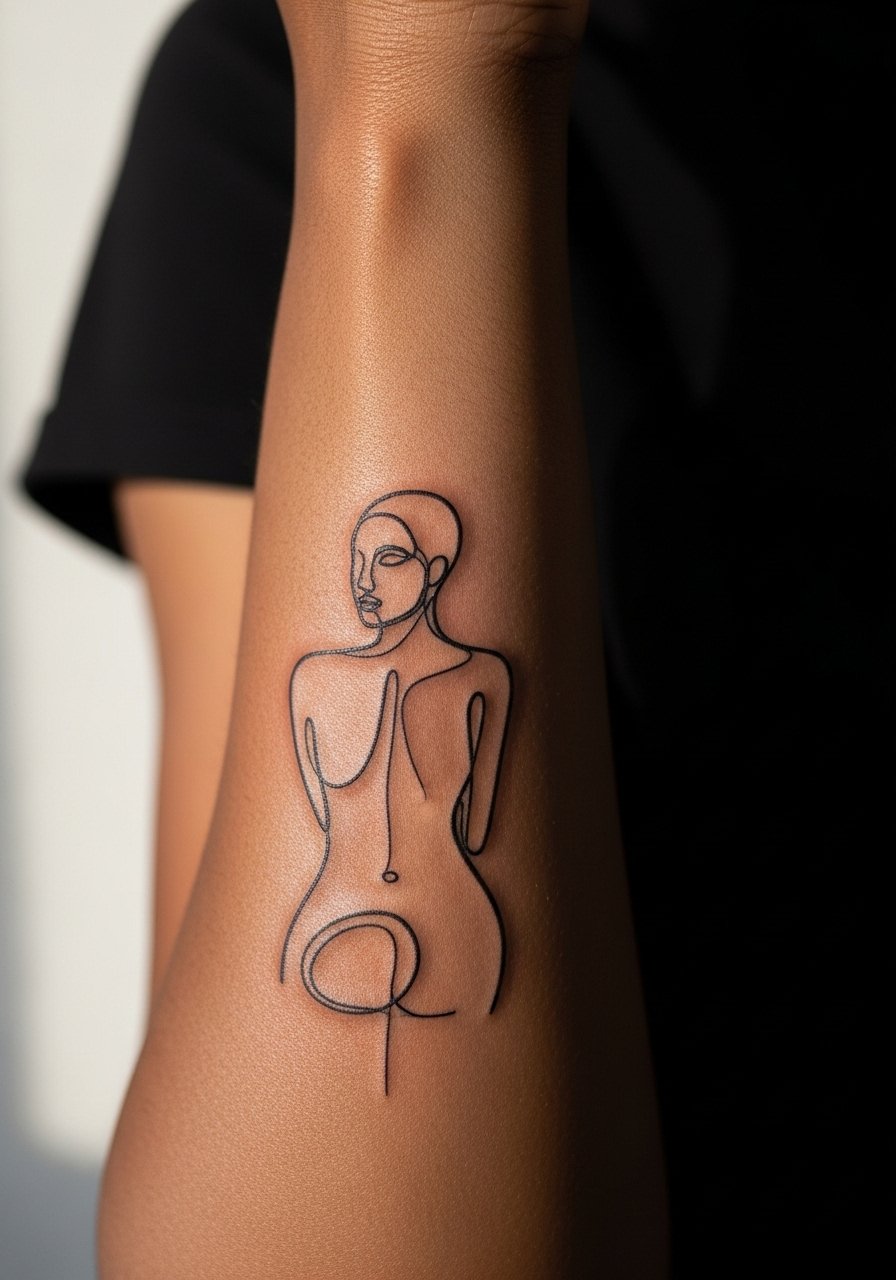
Continuous line figures depend on confident single passes. Ask the artist to map the motion in skin-safe scale so curves are not forced into tiny bends. A common mistake is trying to compress a sweeping line into a small patch which kills the intended rhythm. Sessions are 45 to 90 minutes. The forearm shows this style beautifully with rolled sleeves. Pair it with a simple cuff bracelet that nods to the single-line flow without crowding.
14. Tiny Symbols in a Row
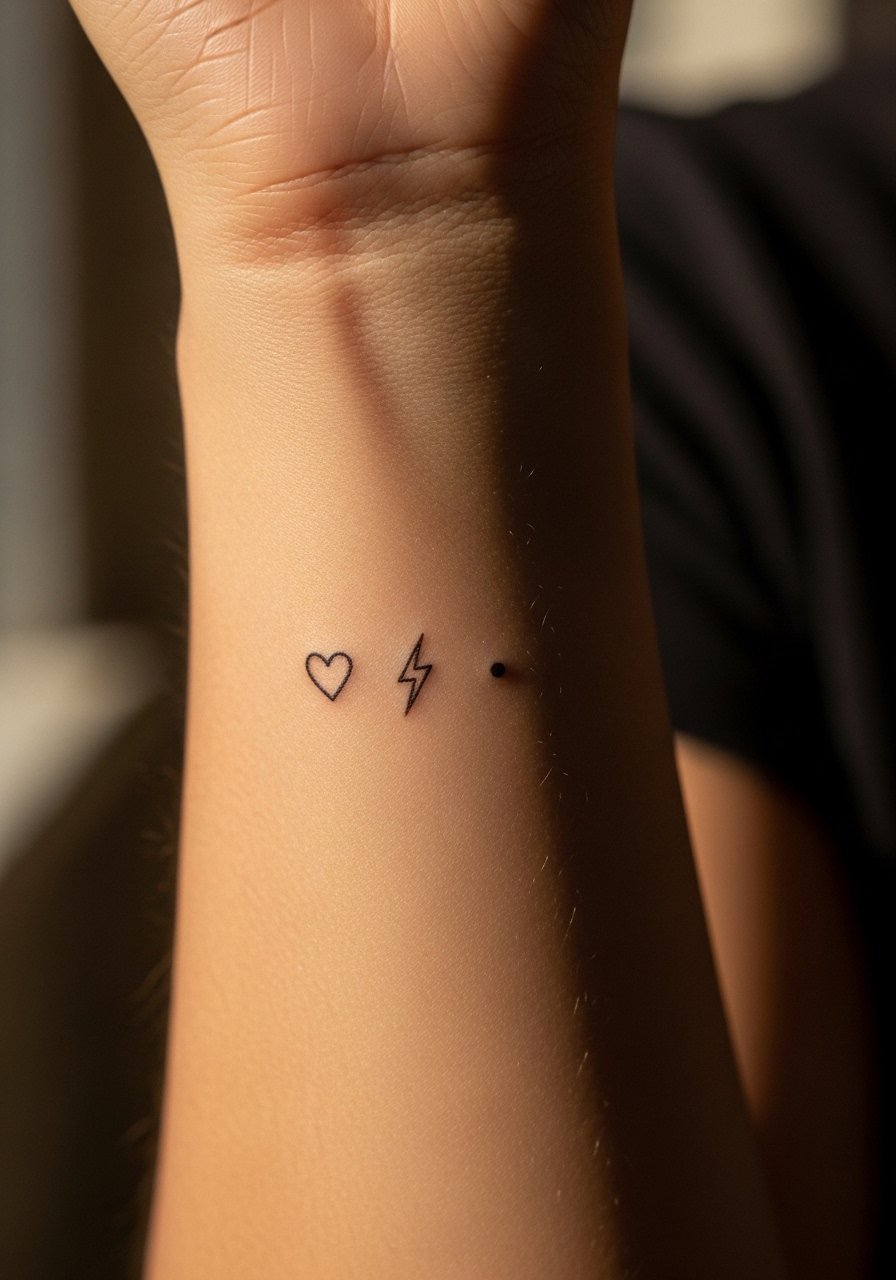
A row of small icons works as a modular system you can add to over time. Tell the artist you want at least 6 to 8 millimeters between pieces to keep them distinct after two years. The mistake is lining them up too tight for an aesthetic that depends on spacing. Each symbol session is short, often under 30 minutes. Accessory pairing like stackable rings and slim bracelets frames the row. Try stackable bracelets to echo the linear arrangement.
15. Mandala Sleeve Starter Patch

A sleeve starter patch lets you build outward without committing to a full sleeve at once. One controversy here is whether mandala elements should be dense from the start. Some artists say dense pieces provide anchor points for sleeves. Others prefer open spacing to avoid early blurring. Name both camps to your artist and choose a path. Sessions vary widely but plan for a series of two hour blocks. Wear a long-sleeve shirt you can roll up for the appointment so the artist can work without fabric interference.
16. Minimalist Compass Near Wrist

Compass tattoos benefit from bold cardinal points and finer interior strokes. Ask for slightly thicker cardinal markers so orientation stays readable at five years. A common error is making all marks the same weight, which loses directionality. Expect a 45 minute session. Friction from bracelets and watches near the wrist accelerates fading, so rotate accessories during the day. Try a leather wrap bracelet when you want a rugged contrast.
17. Floral Forearm Band in Stipple Shading

A floral band works as a subtle bracelet that does not compete with jewelry when scaled correctly. Ask the artist for alternating flower sizes to keep the band rhythmic. The risk is uniform flowers that blur into a single dark band over time. Sessions usually run one to two hours. For showing off at events, sleeveless or cuffed shirts keep the band visible. Pair with a dainty bracelet set to complement without crowding the design.
18. Scripted Coordinates Along Inner Forearm

Coordinates are a precise text tattoo so bring the exact numbers formatted how you want them. The image prompt must reflect exact text to avoid gibberish in reference for the artist. Common mistakes are mismatched spacing and script size that becomes unreadable. Sessions are often under an hour. For showing the piece off, pair with stacked thin bracelets or a slim watch. A thin chain bracelet sits nicely beside the coordinates.
19. Pop Color Sticker-style Icon
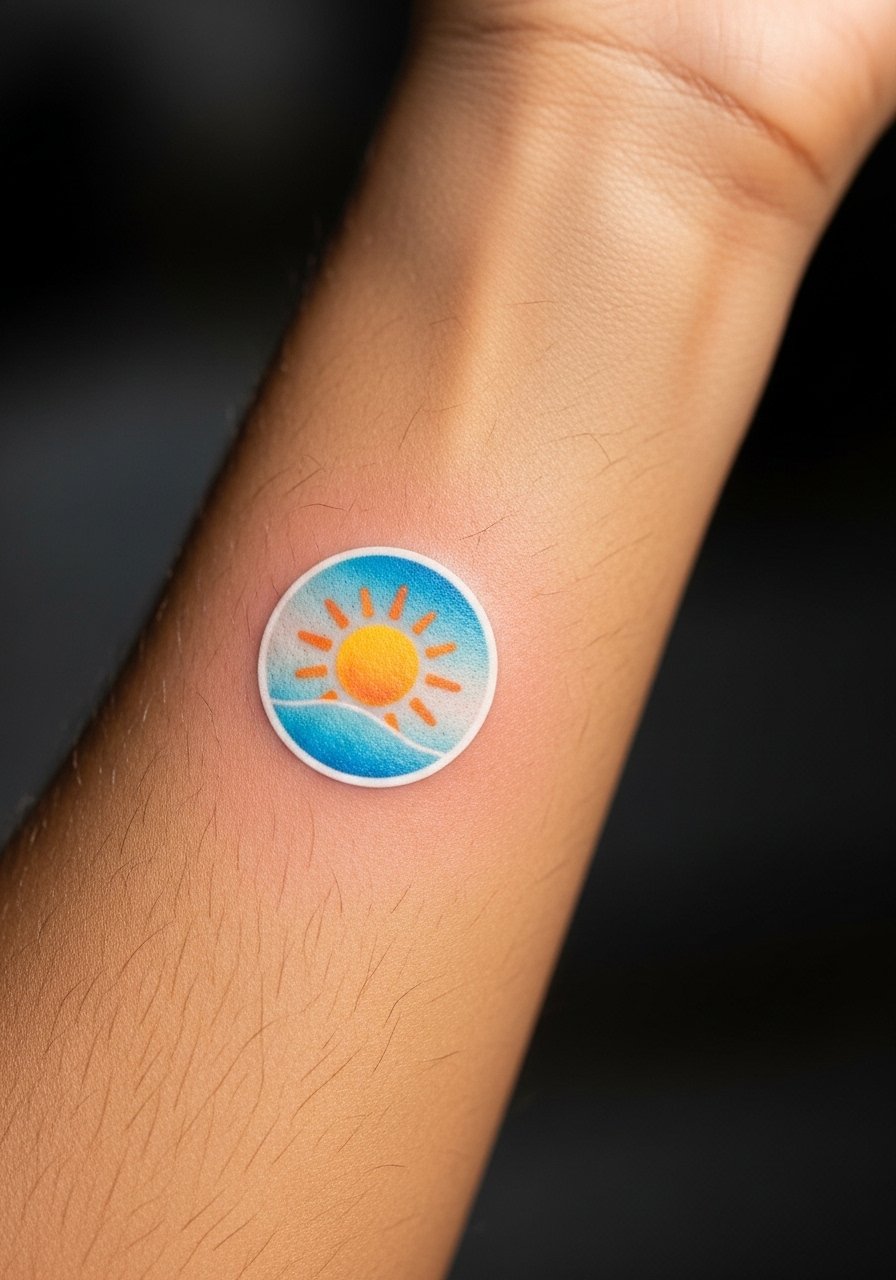
Bold flat color icons age depending on pigment saturation and placement. Ask your artist for slightly larger color blocks than you think you need so the edges stay crisp after settling. The common error is choosing very small, highly detailed color patches which tend to soften with time. Sessions are usually under an hour. For show-off layering, cropped sleeves and tank tops keep the icon visible. Try pairing with a cropped tee to make the icon pop.
20. Botanical Sleeve Corner With Negative Space
A corner piece forms the foundation of a sleeve while preserving breathing room. Tell the artist you want deliberate negative space channels that future pieces can slot into. Mistakes happen when artists and clients cram the first patch so full that additions look tight. Sessions run two hours for a detailed corner. For showing, sleeveless tops or sleeved garments rolled to elbow make the placement come alive. Pair with a sleeveless linen top.
21. Fine Line Snake Coiling Inner Forearm
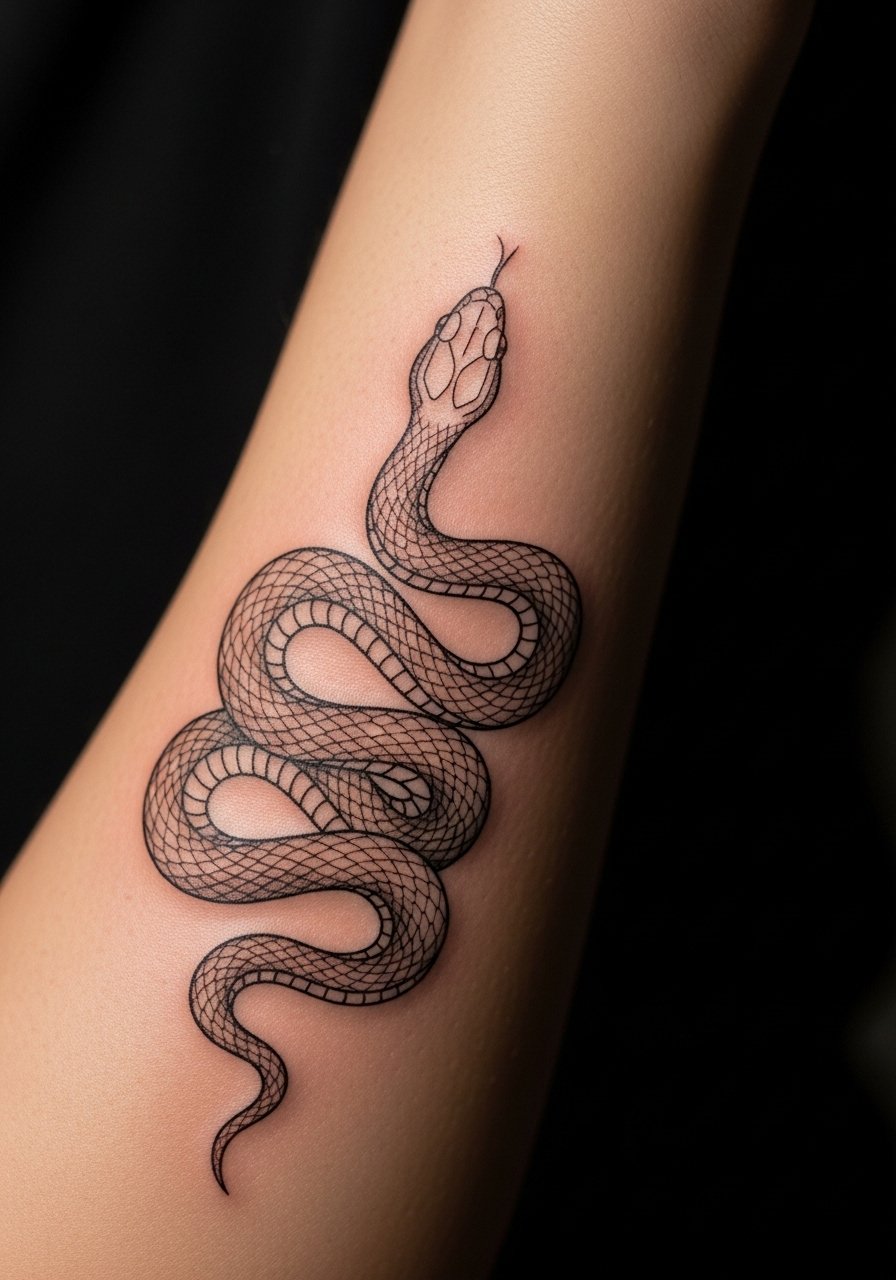
Snakes that coil require consistent spacing between coils for long-term readability. One camp warns that fine line snakes on inner forearms blur quickly due to skin movement. The other camp says careful depth and spacing settles fine. Discuss both views with your artist and ask how they handle needle depth. Sessions are one to two hours. Avoid tight bracelets that sit over the coil during the first healing weeks. For a matching look try simple stackable rings to keep the focus on the motif.
22. Abstract Waterline Band
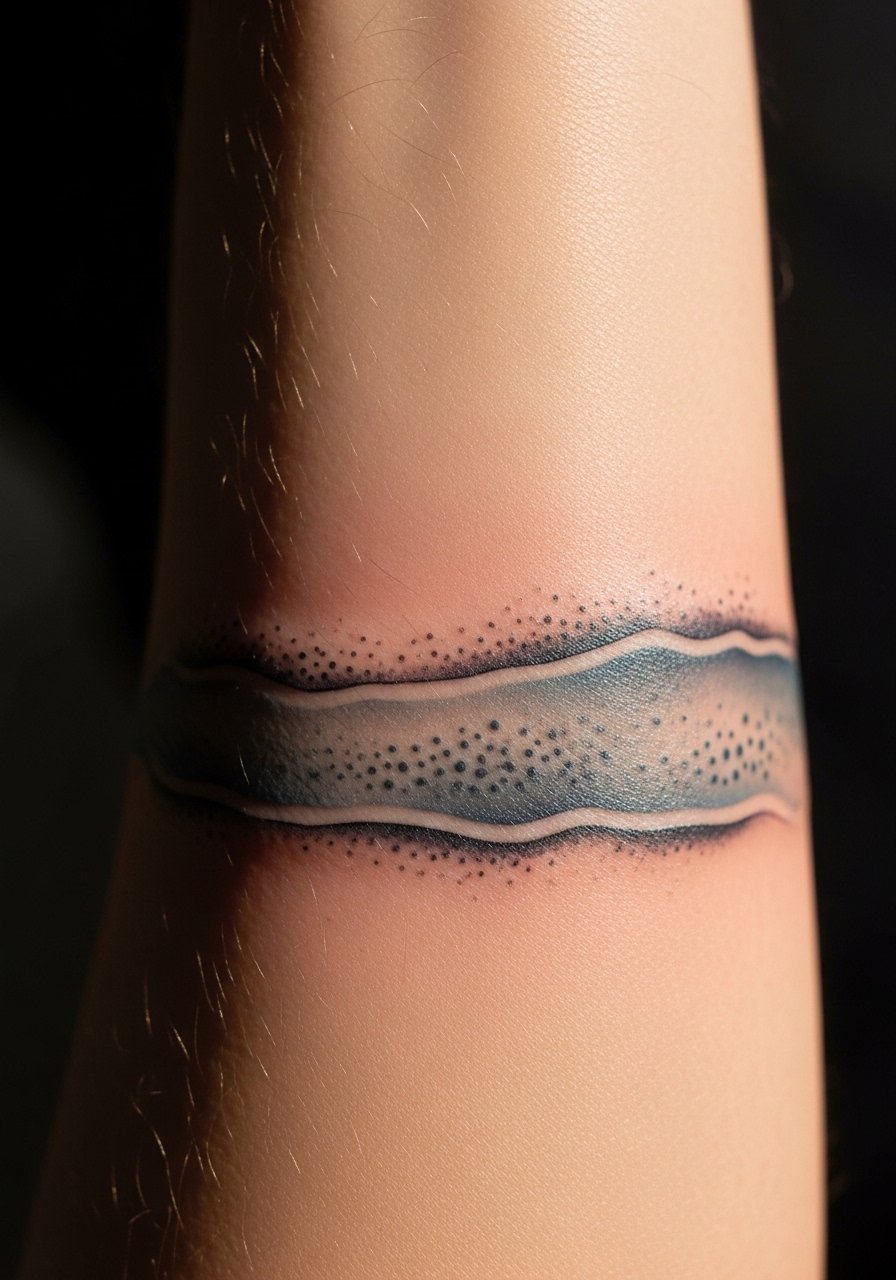
Soft wash bands need deliberate edges to prevent color bleed into surrounding linework. Tell your artist you want a feathered outer edge with a clear inner guard line. Common mistakes include uncontained wash that drifts into adjacent fine line pieces. Sessions run one to one and a half hours. For showing it off, pair with a minimalist watch or bracelets in complementary tones.
23. Vintage Flash-inspired Anchor Piece
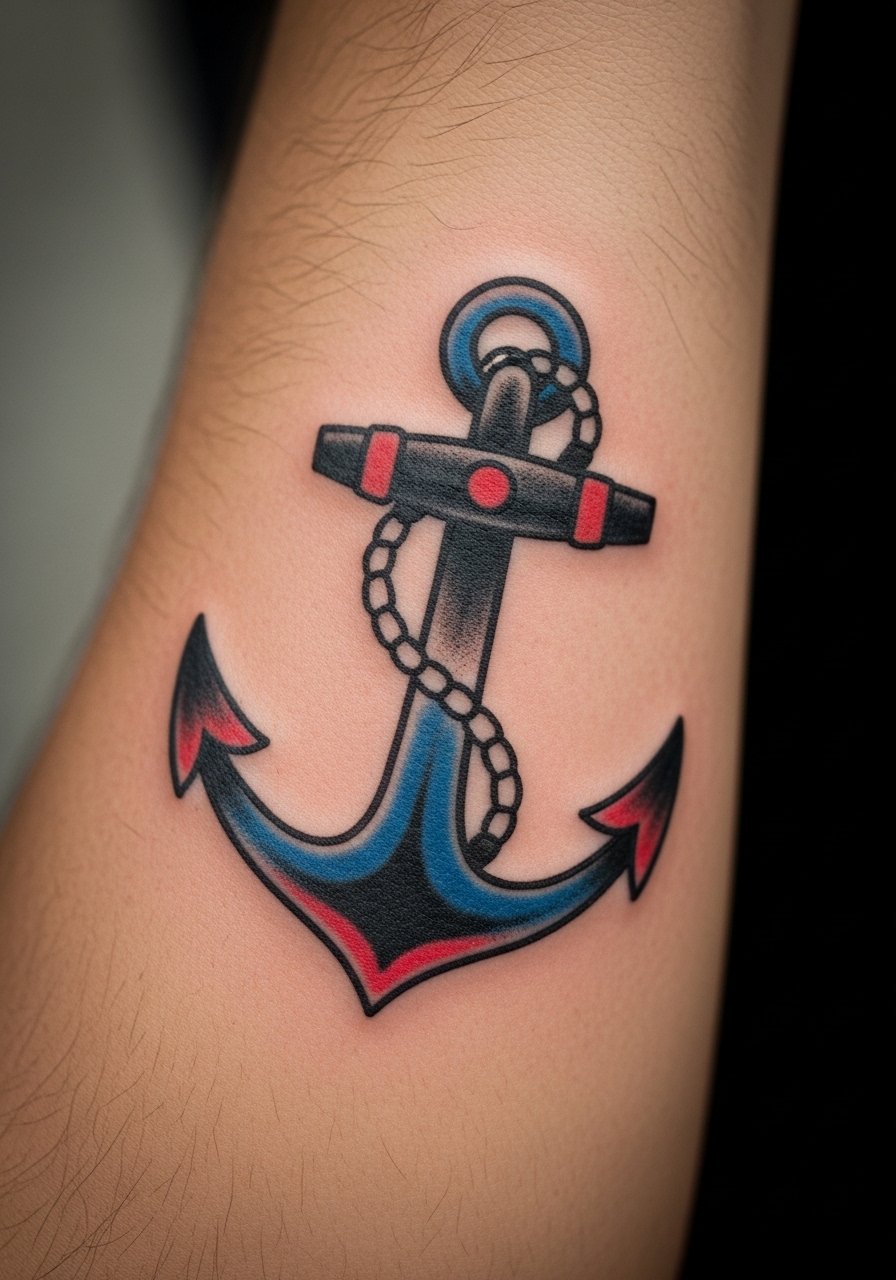
Classic flash ages predictably because bold lines and saturated fills hold shape. Ask for clean outer lines and even saturation to avoid patchy healing. The biggest mistake is adding too many small details that the style was never meant to carry. Sessions can be 45 to 90 minutes. For a maritime wardrobe nod, cuff a denim shirt or roll sleeves. Pair with rolled denim sleeves style choices for photos and everyday wear.
24. Single Needle Feather Along Forearm

Feather tattoos rely on graceful gradient linework. Ask the artist to plan tapering line weight from quill to tip so the feather keeps directionality as it heals. A common error is uniform line weight which flattens the motion at year two. Sessions are under an hour to 90 minutes. For the session wear a racerback tank or short sleeve so the inner forearm is accessible without contorting.
25. Micro-Realism Floral Portrait

Combining micro-realism elements needs distinct contrast anchors so floral shapes do not merge with facial planes. Tell your artist to prioritize darker accents for defining features and lighter stipple in petals. The risk is placing too much micro-detail in one compact area. Sessions are multiple passes but often completed in two hours. For showing off, stacked thin bracelets and cuffed shirts frame the patch. A slim bracelet set keeps attention on the artwork.
26. Geometric Arrow Compass Combo
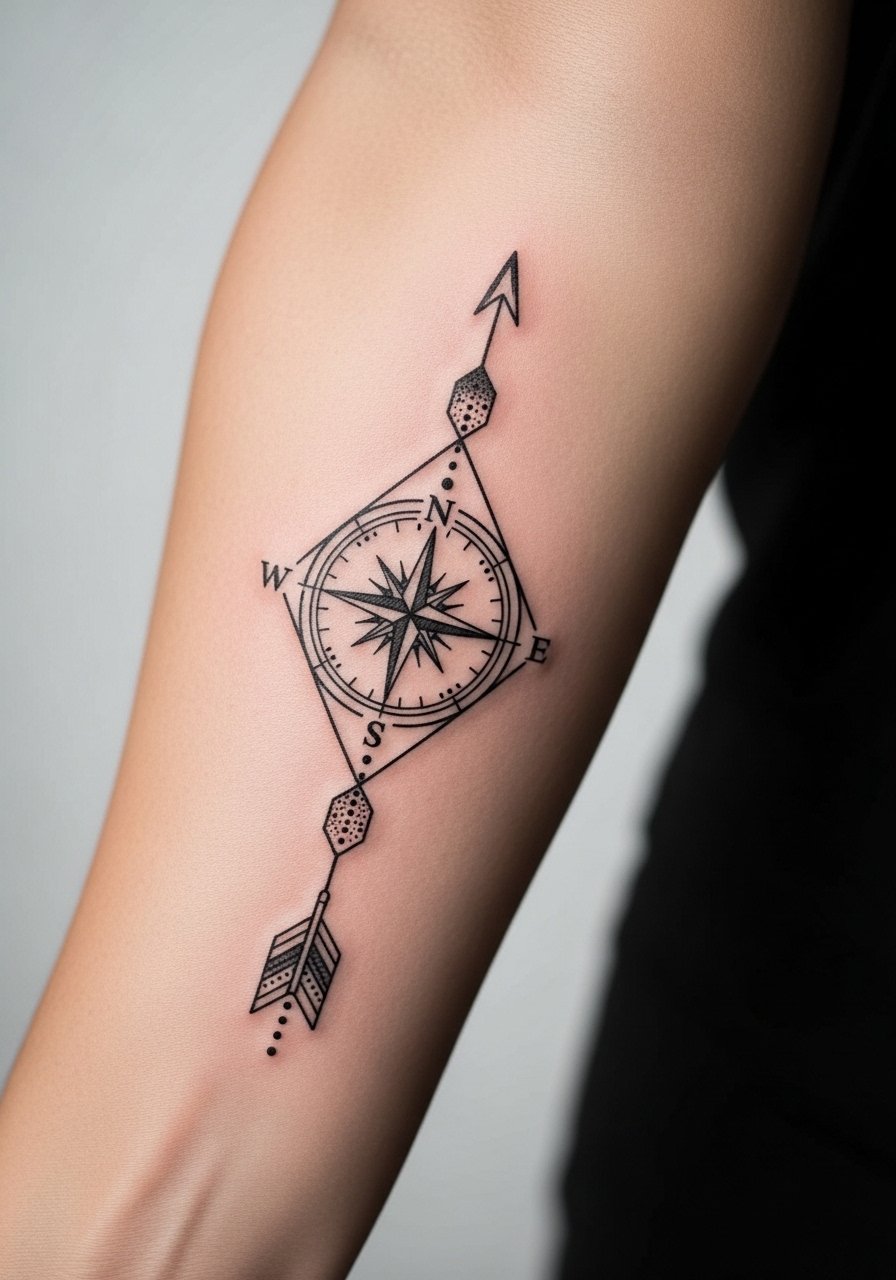
Combining geometry with symbolic motifs needs hierarchy. Ask the artist to make the arrow the focal line and reduce interior geometry density so the compass reads with distance. Mistakes occur when both elements compete at the same scale. Sessions are about 60 to 90 minutes. For showing, cuffed sleeves and a minimalist watch highlight the geometric alignment.
27. Wrist-to-Forearm Bracelet Tattoo
A bracelet tattoo that extends onto the forearm creates a jewelry illusion. Tell your artist you want clear spacing at the wrist so hand washing and rings do not blur the edges quickly. The usual mistake is placing dense decoration right at the wrist bone which gets extra wear. Expect a session of one to two hours for a neat wrap. For showing, stack with thin real bracelets or a dainty bracelet set that echoes the tattoo without overcrowding.
Frequently Asked Questions
Q: Will fine line forearm tattoos blur faster than bold work?
A: From what I've seen, fine line tattoos can blur sooner because the needle channels are narrower. Placement, sun exposure, and spacing matter more than style alone. Ask your artist for slightly bolder anchors and spaced composition if longevity is a priority.
Q: How should I dress for a forearm session that includes inner and outer work?
A: Wear a loose short-sleeve or a button-down you can slide to expose both sides without stretching the skin. A loose button-down shirt is flexible for most artists and keeps the area accessible.
Q: Do watercolor forearm tattoos need different care than black linework?
A: Watercolor pieces often use softer pigment loads which can fade faster, so sun protection and gentle cleansing matter. The first two weeks of healing are similar across styles, but expect color to need touch-ups sooner than saturated black.
Q: Can I add to a small forearm design later if I want a sleeve?
A: Yes. Starting with a corner patch, band, or central motif that leaves negative space makes future additions smoother. Tell the artist you plan expansions so they can leave appropriate channels for new elements.
Q: Are tattoos on the inner forearm more painful than the outer forearm?
A: The inner forearm is generally more sensitive but still moderate on most pain scales. The outer forearm is less sensitive and tolerates longer shading sessions. Numbing options and breaks help if you feel anxious.
Q: How do I find a tattooer who understands longevity for fine line forearm work?
A: Search local studio portfolios, community forums, and tag directories to find artists showing healed photos, not just fresh shots. Look for healed images that indicate how their linework and stipple age, and ask during consults about touch-up policies and their experience with forearm pieces.
