
Fine line trends look fragile online, but black work tattoo art is the style that keeps its edge long after the photo stops trending. Deep saturation, smart negative space, and bold linework age differently than delicate inks. If you want designs that read as graphic statements five years from now, these picks balance longevity with a modern look. Read the first idea to see how placement and spacing decide what holds up.
1. Linear Arrow Cluster on Inner Forearm
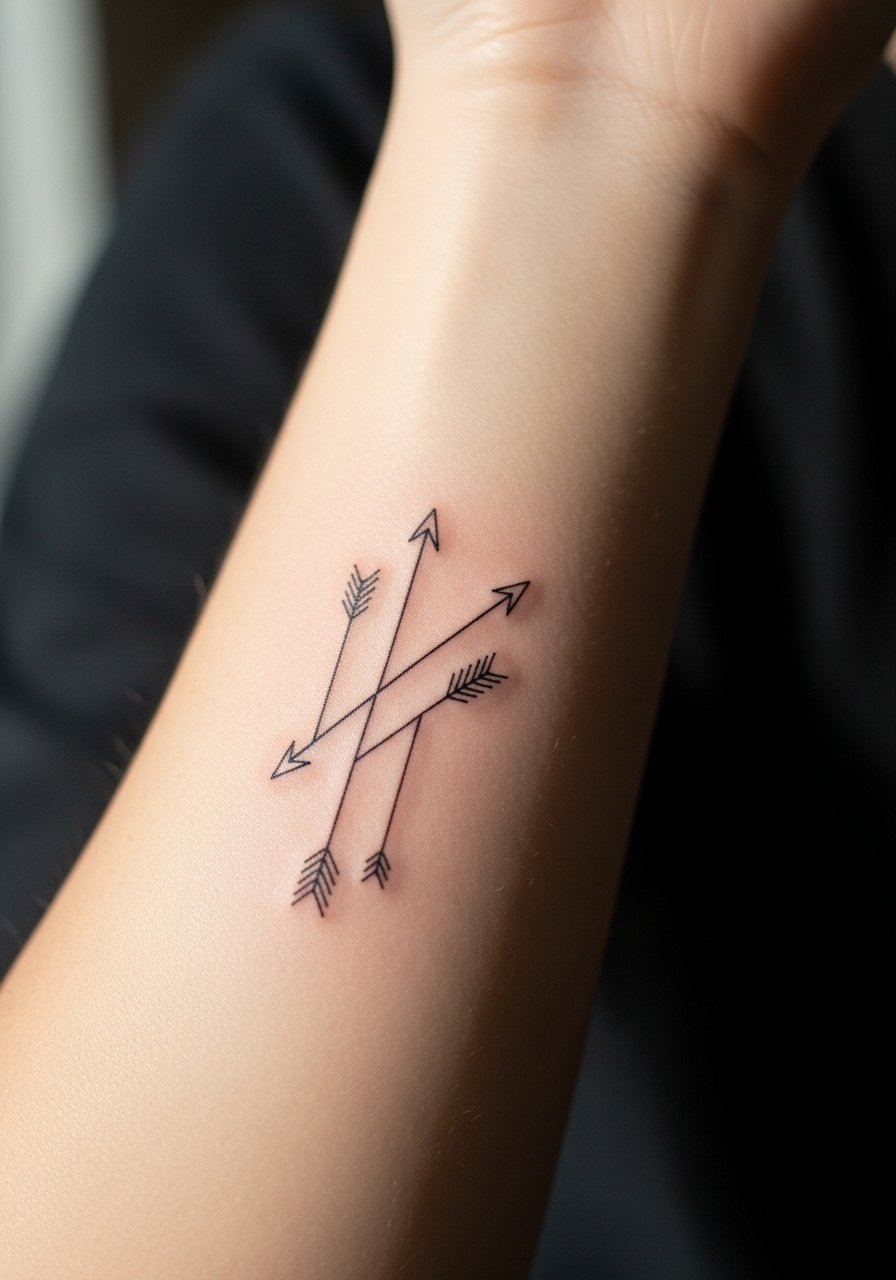
I've seen this simple cluster keep its clarity when the arrows are scaled for the forearm. Ask your artist for slightly heavier linework than a true micro design, and space the arrows so the negative space reads at arm distance. The forearm feels like a five out of ten for pain, so expect one short session. Common mistake is asking for ultra-thin lines that merge at year two, especially if you wear tight long sleeves that rub the area a lot. For showing it off, roll up sleeves and pair with a loose linen button-down to frame the cluster without crowding the linework.
2. Geometric Mandala Near the Collarbone
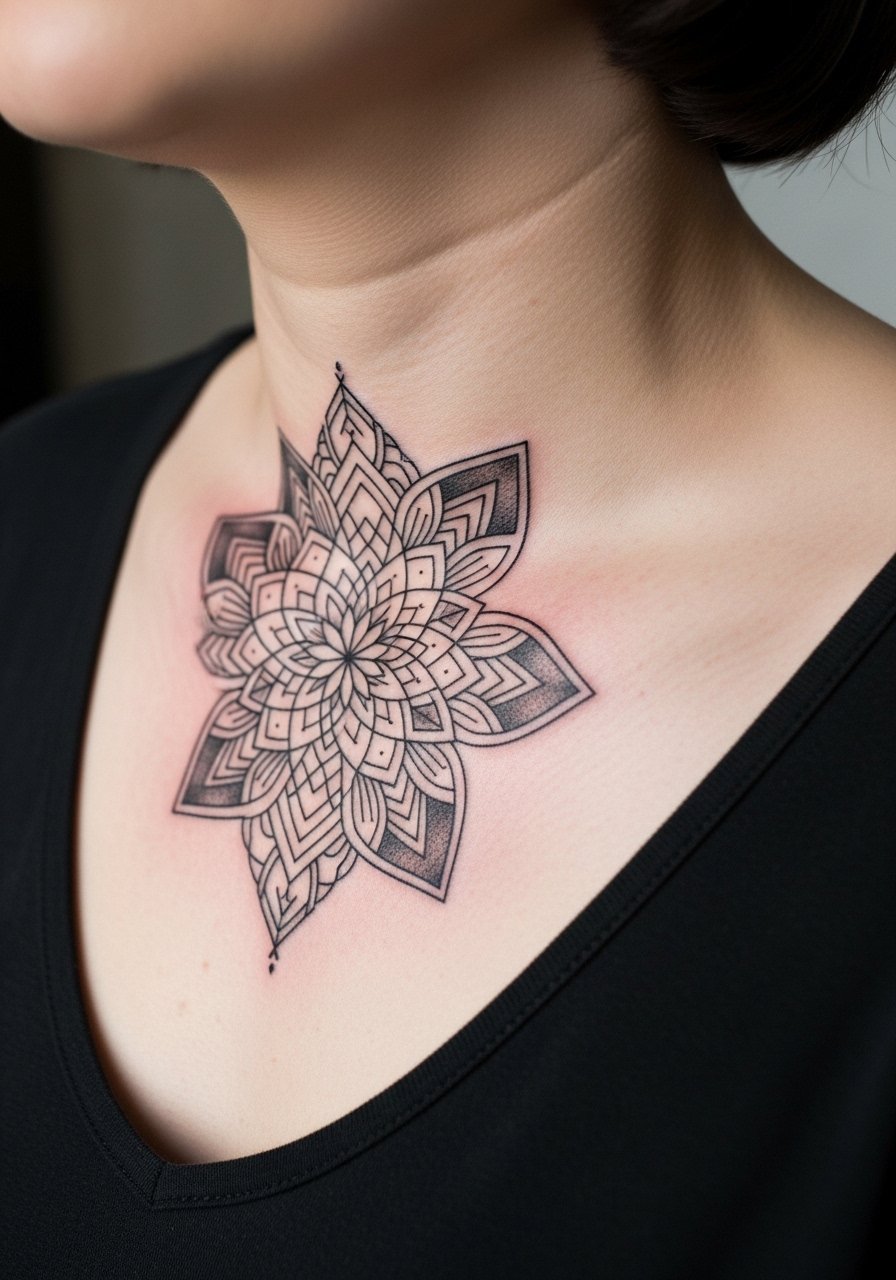
Fair warning: collarbone skin shifts with movement, so the design needs breathing room. I recommend a mandala with alternating thick and thin linework so the central detail does not disappear as the outer rings soften. Tell your artist you want negative space between pattern rings and a touch of stipple shading to hold contrast as it heals. Session comfort is good, pain sits around a five. For evenings, a delicate chain pendant sits above the design and keeps attention on the collarbone rather than the neckline.
3. Micro-Realism Crow on Upper Arm
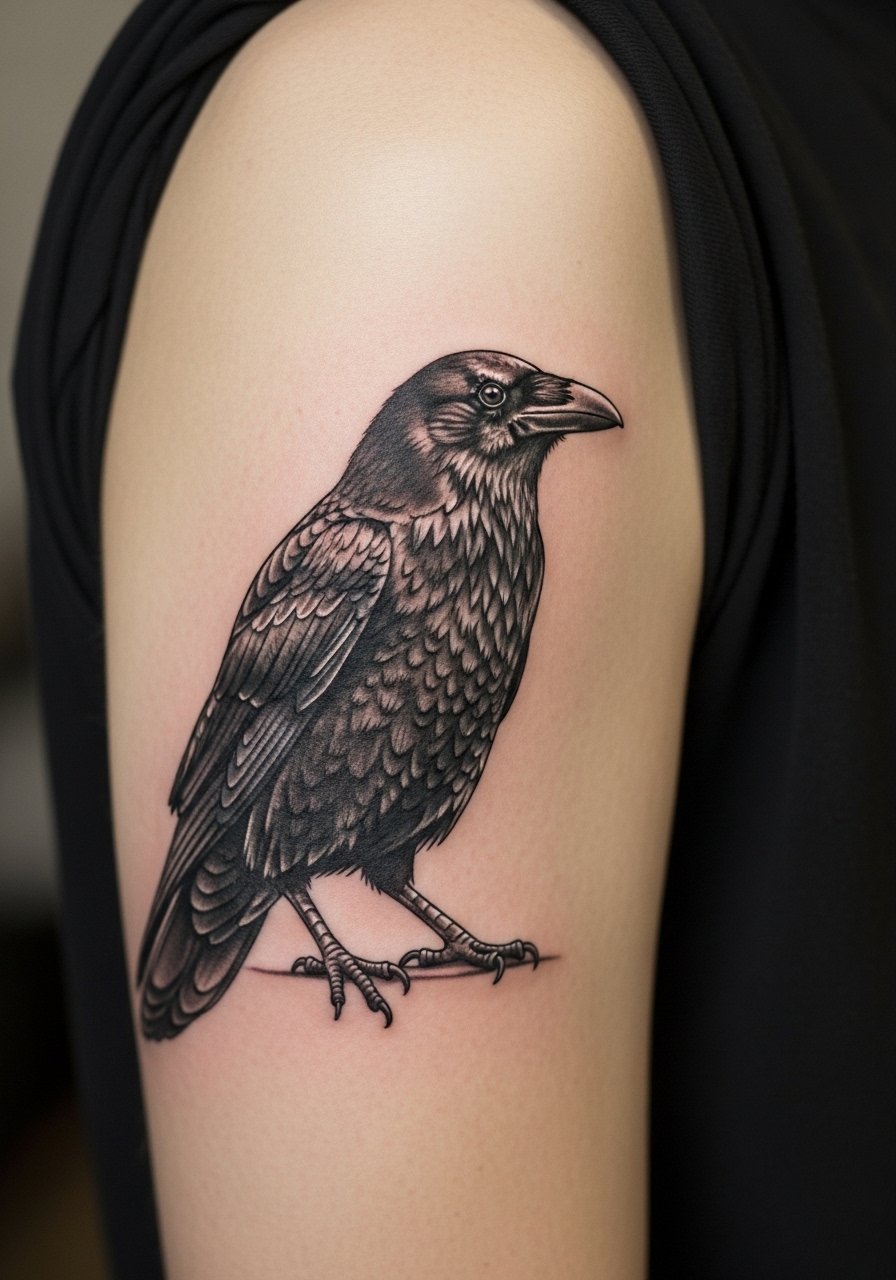
When a client wants realism without color, micro-realism in blackwork can read cinematic on the upper arm. In consultation, bring close-up photos that show the feather texture you want, and ask the artist for a mix of whip shading and stipple to keep depth without muddying. A common error is compressing too much detail into a small patch, which flattens at year two. Session time is moderate, usually a single longer appointment. For the session, wear a loose tank top so the artist has clear access and you stay comfortable while they work.
4. Stipple Moon on the Ribcage
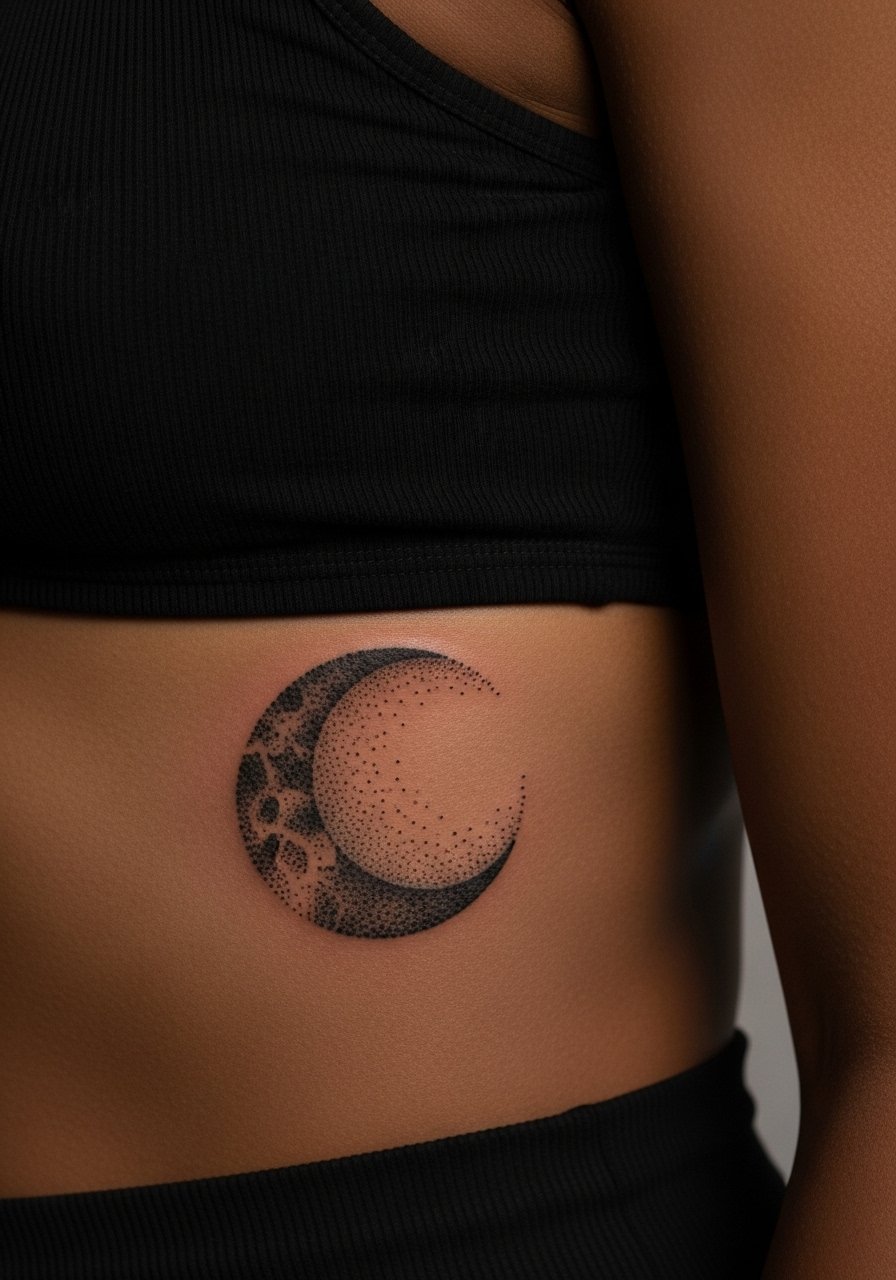
Artists split on rib tattoos in general. One camp says the rib skin stretches and contracts too much for fine detail to hold. The other camp argues that deliberate spacing and slightly bolder stippling make rib pieces settle beautifully. I recommend treating this as a medium-complexity piece. Ask for larger dot work and wider gaps in dense areas so the image keeps shape as the skin moves. Pain is high, often an eight out of ten, so plan breaks and a short session length. Expect a touch-up window at year two for dense blackwork in this zone.
5. Negative-Space Botanical Sleeve
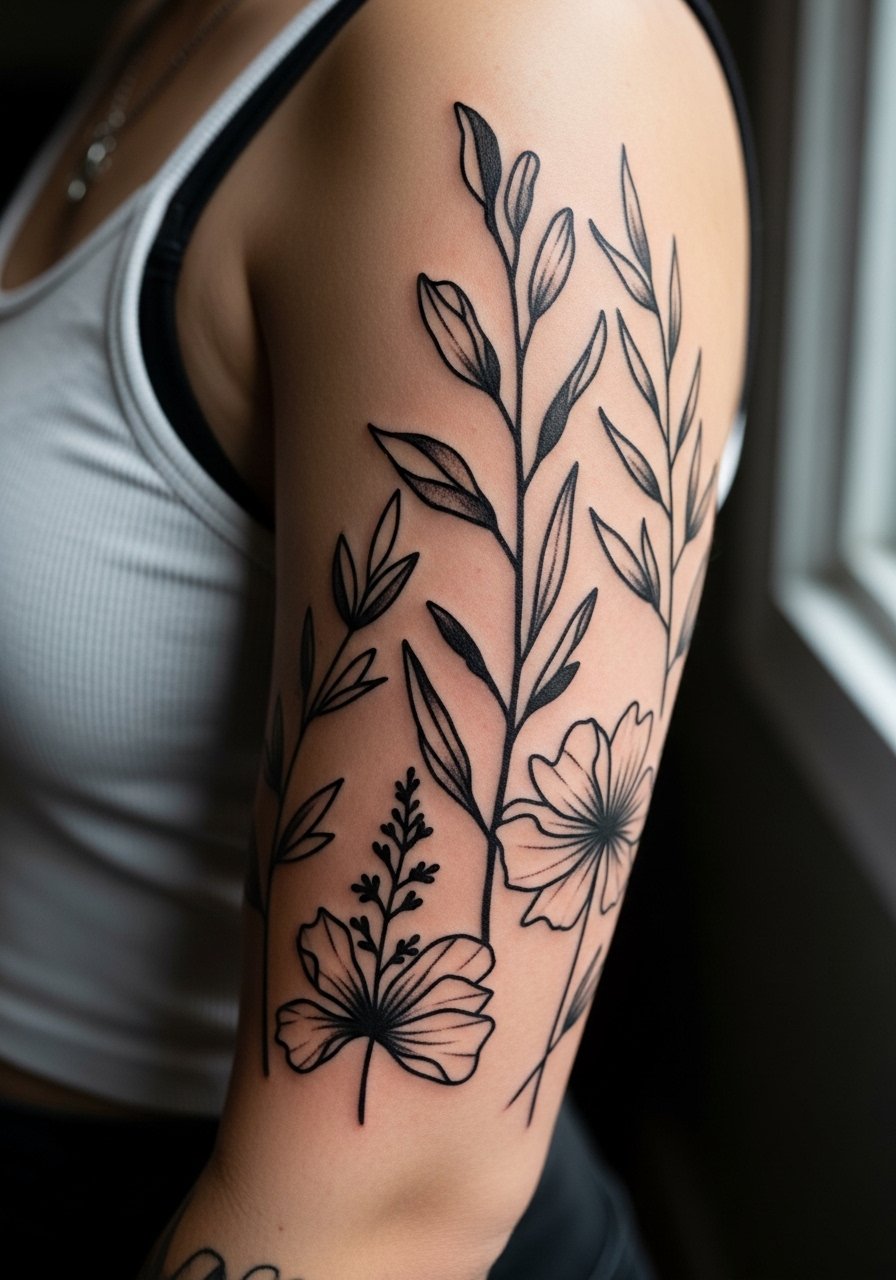
There is something about heavy black fill around uninked veins of skin that reads modern from across a room. When I see sleeves like this, the best ones start with a mapped negative-space plan. During the consult, ask the artist to sketch where they will leave skin, that way you know the silhouette will be bold without filling the arm into a block. Mistakes happen when clients ask to cram more elements in, which causes loss of individual motifs long-term. Trust your artist on spacing for sleeves, but bring references for the negative-space shapes you want. For show-off outfits, a loose button-down shirt with sleeves rolled frames the art and avoids distraction.
6. Minimal Symbols on the Fingers
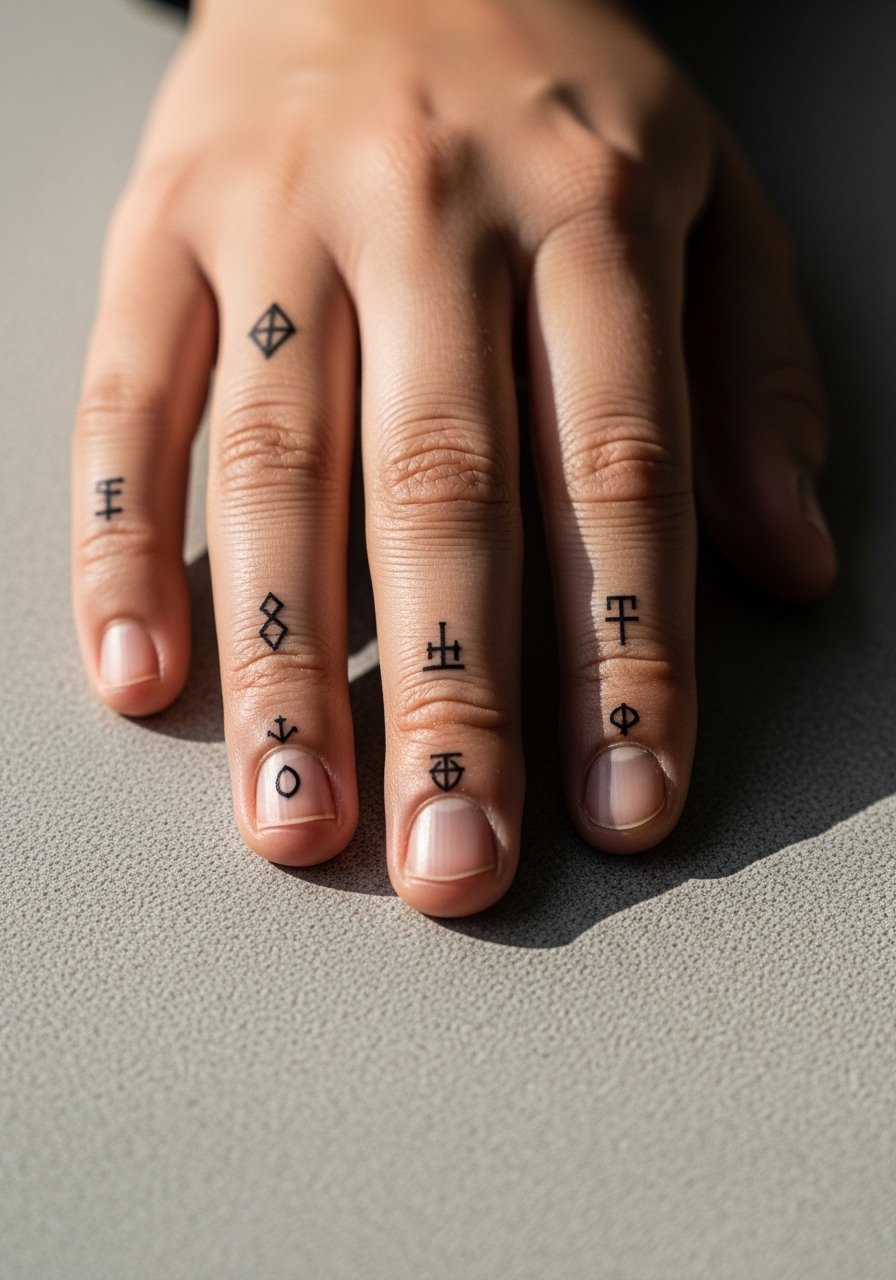
Hand and finger tattoos provoke debate. One side says visible hand work still harms career prospects in many fields. The other side points to growing acceptance and creative industries where hands are part of the resume. Decide based on your day job and future goals. Fingers blur faster due to constant washing and friction. If you want longevity, opt for slightly thicker lineweight and plan for touch-ups every 1.5 to 3 years. The session is brief but painful because skin sits over bone. Rings and thin bracelets complement these pieces well, and a simple stackable ring set can help the symbols look intentional rather than impulsive.
Studio Day Picks
These first six designs include a mix of forearm, chest, rib, sleeve, and finger placements, so a few targeted items smooth the session and the first week.
-
Stencil transfer paper kit. Lets you preview line placement on skin before the needle goes down, which is helpful for chest and forearm layouts above.
-
Thin protective film roll. Keeps finger and wrist pieces safe from friction and frequent washing in the first days.
-
Topical numbing cream. Applied before a high-pain rib or sternum session this eases the initial sensitivity without interfering with the linework.
-
Fragrance-free gentle body wash. Cleanses healing areas like the forearm and chest without irritating the black ink contrast.
-
Aquaphor healing ointment. A thin layer in the first few days helps maintain moisture around linework and supports even healing for fine and dense black pieces.
7. Vertical Script Along the Spine
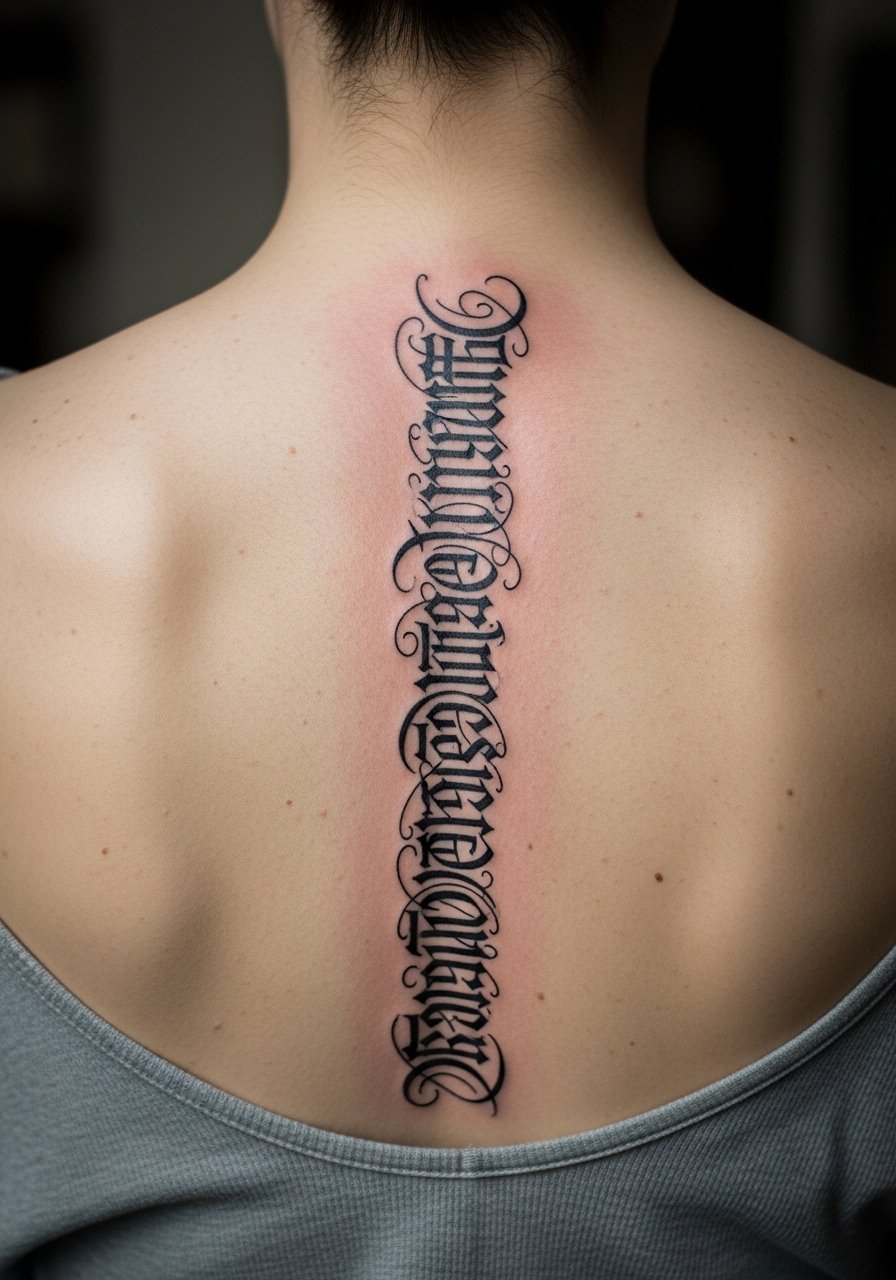
There is real drama to a vertical spine placement when the lettering is spaced to read in motion. During the consult, have the artist lay the stencil while you stand and bend so you can see how letters align with posture. The area can be sensitive around the lower thoracic spine, so expect a mix of dull pressure and needle vibration. A common mistake is making the script too small. For longevity, choose mid-weight linework and ask about touch-up timing, usually a top-up after two years if you want the crisp contrast to last.
8. Solid Black Band on the Calf
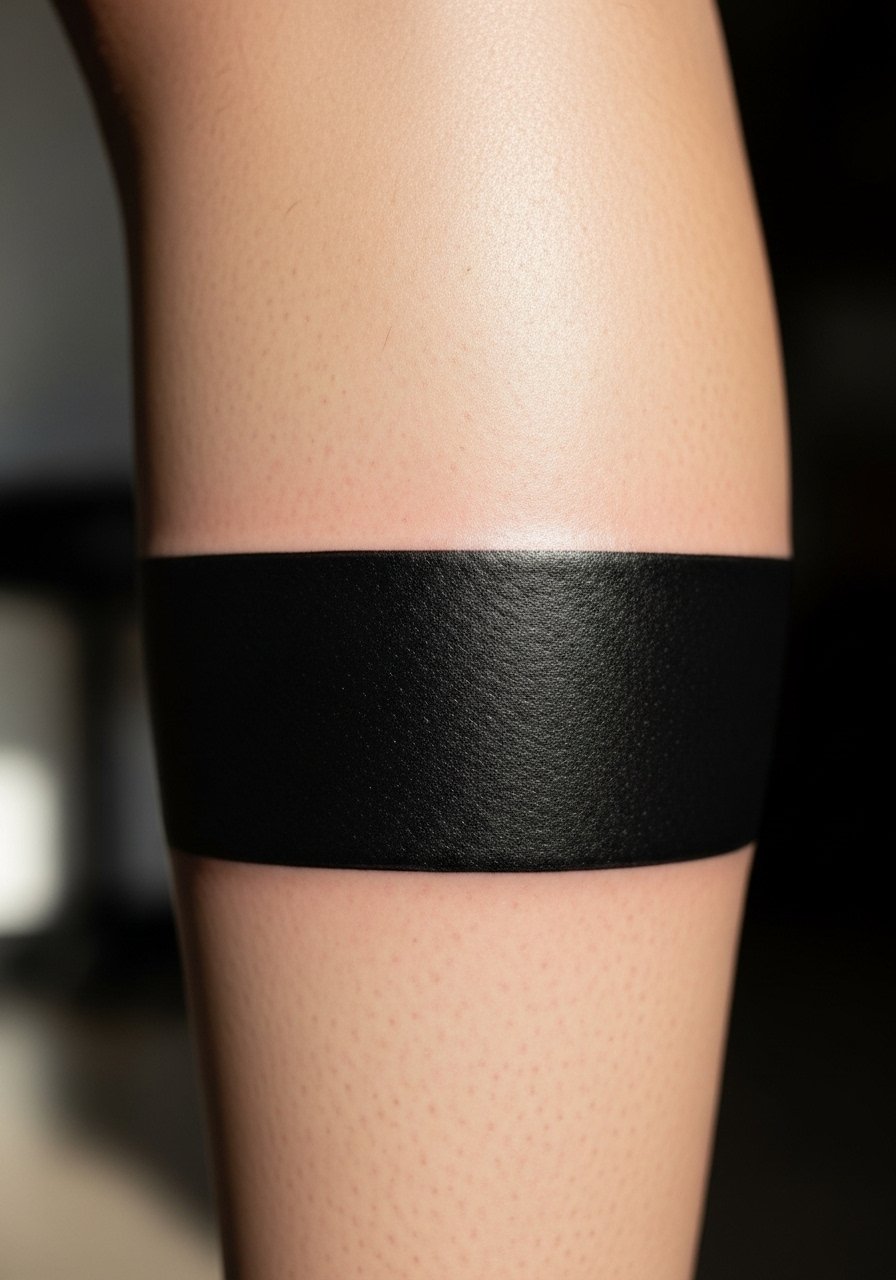
Bold bands age predictably when the edges are clean and the fill is even. Tell the artist you want a tiny margin of uninked skin between edges of any adjacent bands to avoid merging over time. Calf sessions are relatively comfortable, often a three to four out of ten, and allow for longer sittings. For showing off shorts season, a pair of casual sandals or rolled-up jeans frames the band without distracting from the silhouette.
9. Traditional Black Anchor on the Shoulder Blade

When clients want a more traditional anchor but in blackwork only, the trick is saturated fill with clean linework that won’t soft-focus as the shoulder moves. Ask your artist for slightly rounded edges rather than razor-thin corners, which can sharpen then wear oddly. Shoulder blade sessions are relatively low pain. For the session, wear a tank top you can pull to one side so the area is exposed without being uncomfortable.
10. Geometric Panel on the Upper Thigh
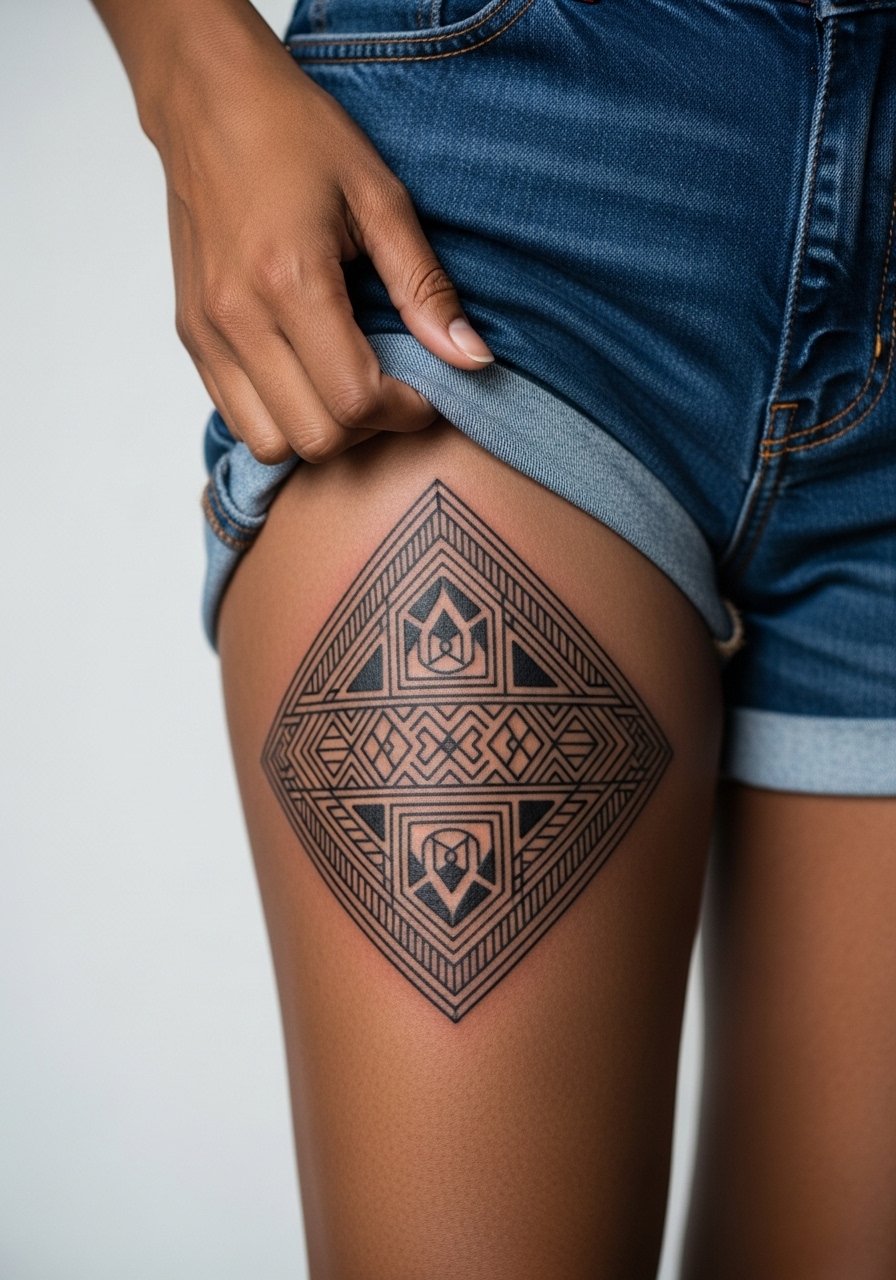
Thigh pieces allow you to go large while keeping edges crisp with room for negative space. For geometric panels, request clear guides for angles and symmetry in the consult. One mistake is packing multiple small motifs into the same panel which reduces contrast over time. The inner thigh is more sensitive than the outer side, so if you want a pain-moderate experience ask to stagger work across two sessions. Session wear should be loose shorts so the artist can roll the leg without pressure.
11. Dotwork Sun by the Ankle
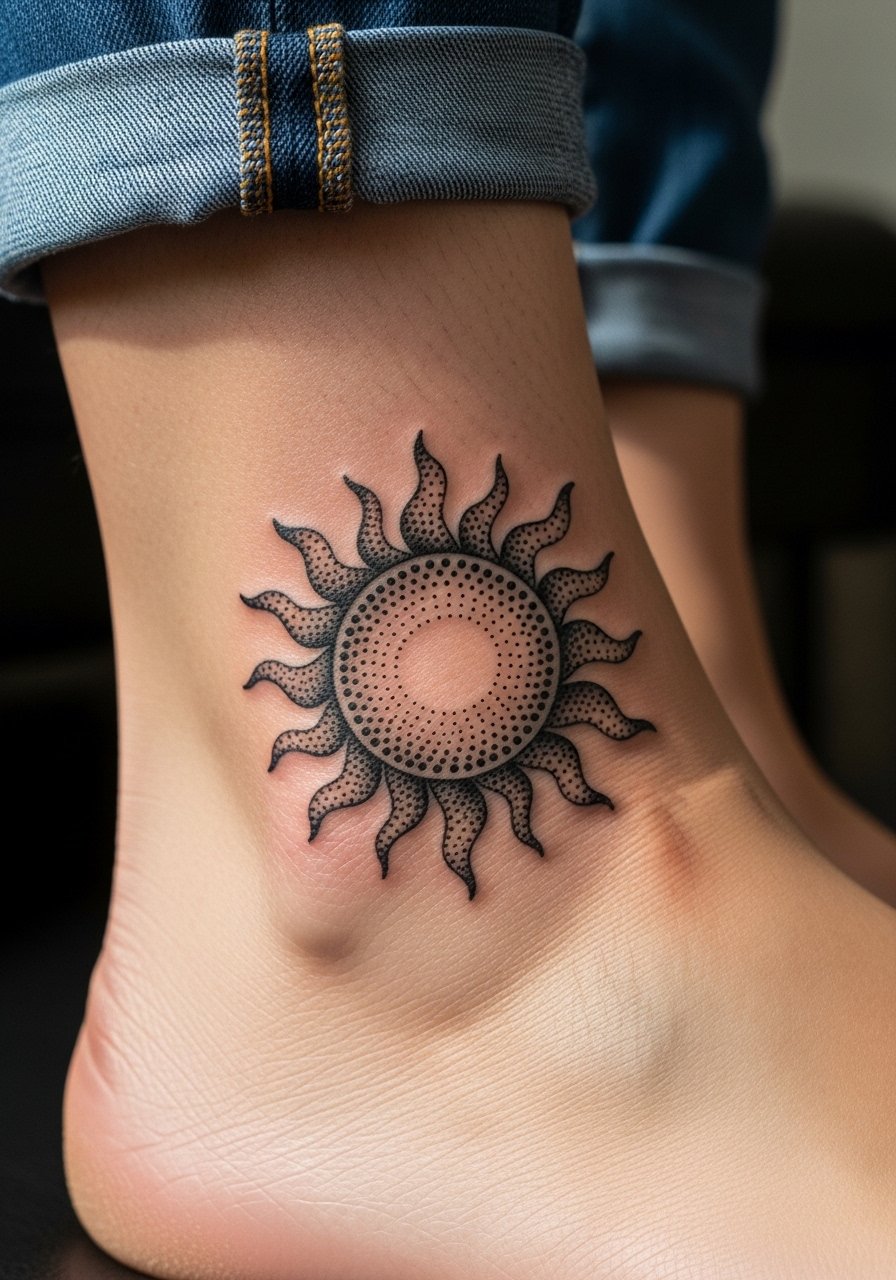
Ankle tattoos face friction from socks and shoes, so dotwork benefits from slightly larger spacing between dots to keep the central shape readable. Tell your artist you plan to wear low socks while healing, and ask for a small buffer zone away from the ankle bone to reduce blowout risk. Sessions are short but the area is sensitive. For summer wear, sandals show off the art and a minimalist ankle bracelet can frame it without crowding the silhouette.
12. Short Script at the Nape
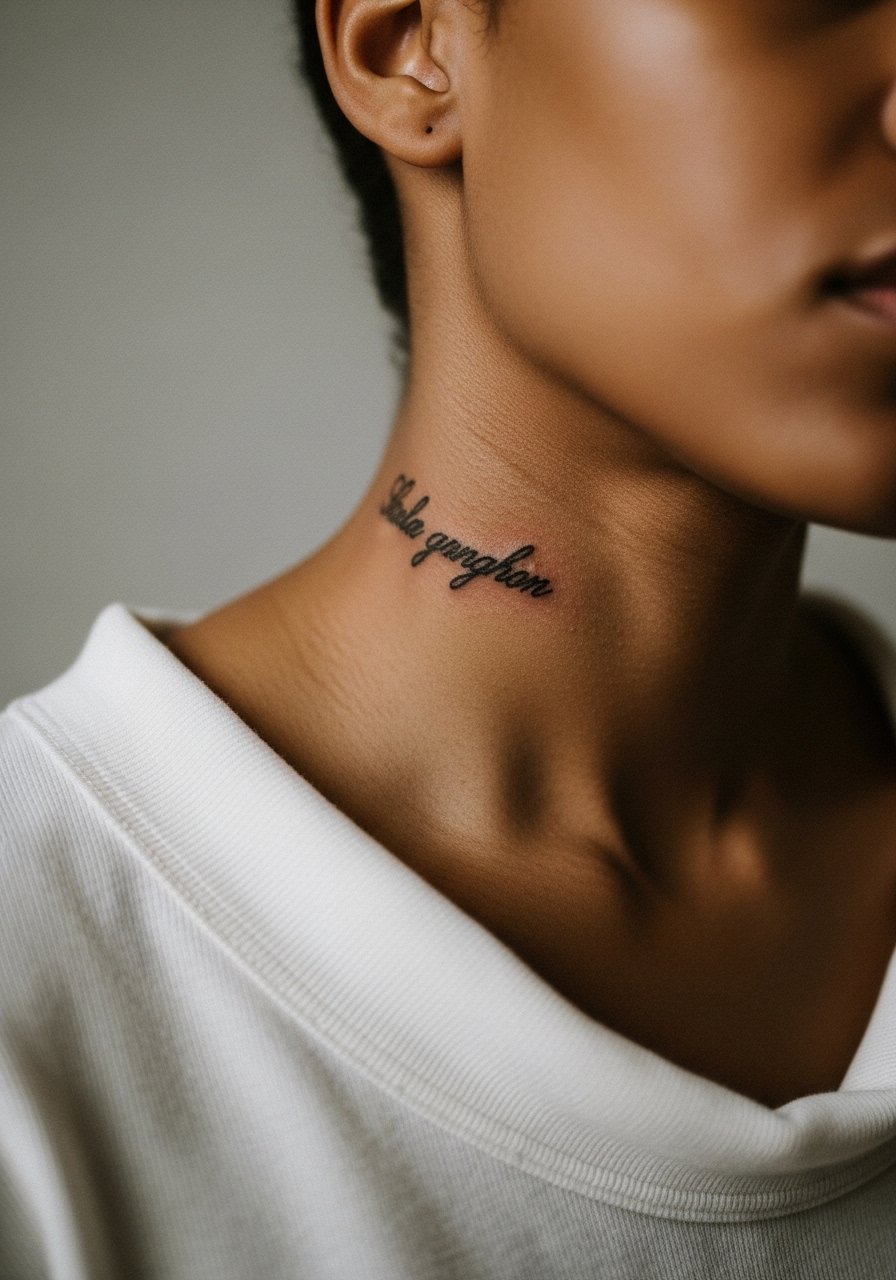
Neckline pieces require clear boundaries because movement and clothing rubbing can blur fine work. I advise clients to pick a shorter line of text and ask for slightly bolder script than they would for the wrist. The nape heals with more scab tackiness than arm work, so expect a slightly longer initial recovery period. Because this sits where shirts rub, plan wardrobe with soft collars for the first two weeks.
13. Sternum Connector in Dense Blackwork
Sternum pieces need deliberate spacing so central motifs do not merge into the chest crease. In consultation, ask the artist how the design will sit against movement and breathing, and whether they recommend a series of shorter sessions. Pain and sensitivity are high in this zone. Some clients prefer a fitted top on arrival so the artist can work without the strap interfering, and that also makes post-session dressing easier.
14. Micro Black Eye on the Back of the Hand
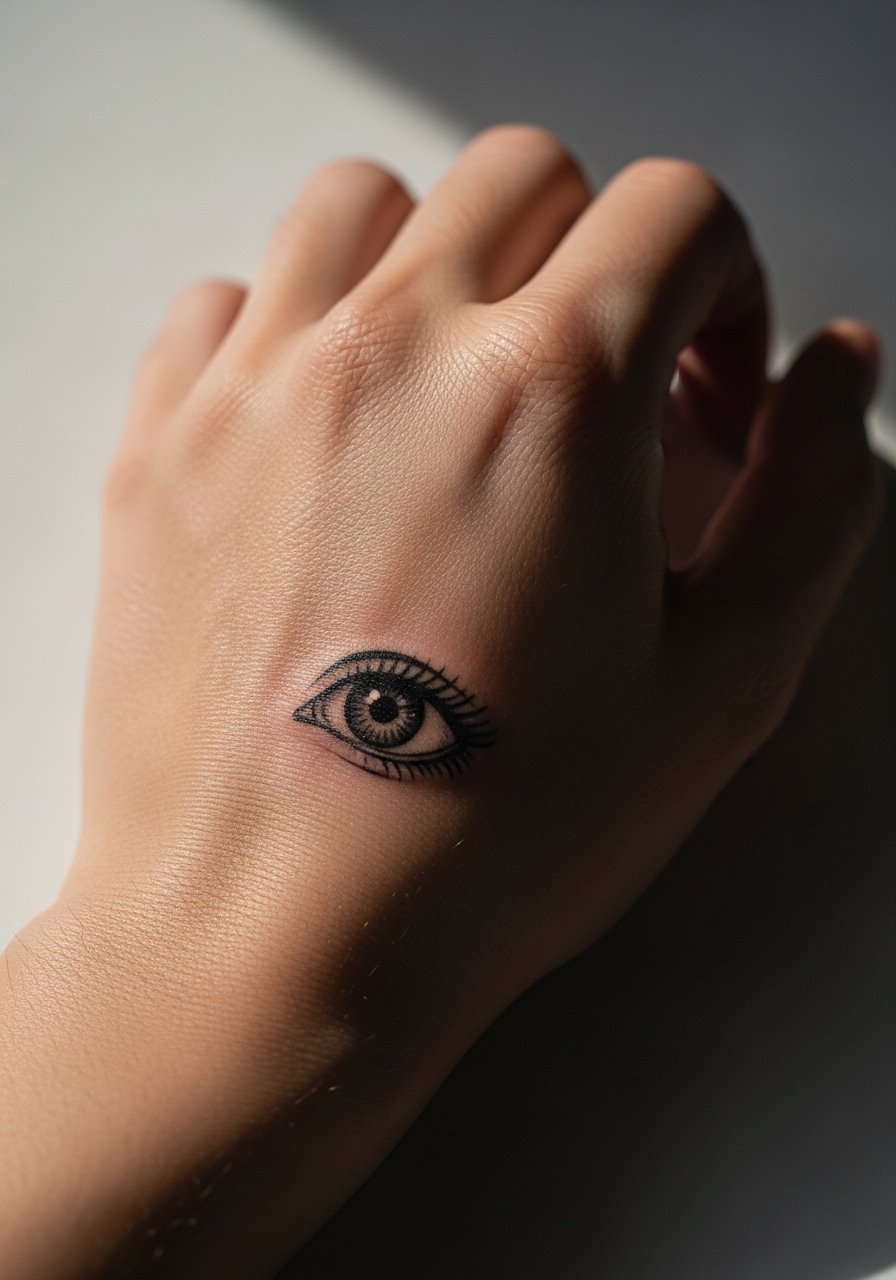
Back-of-hand tattoos read bold immediately but require tough expectations. Skin there is thin and in constant motion, so touch-ups are often needed sooner than elsewhere. A common mistake is treating hand skin like forearm skin and expecting the same longevity. Talk to your artist about mid-weight linework and the reality of annual refreshes if you want crisp edges. Keep in mind that visible hand work still affects professional impressions differently across industries, so consider that when choosing placement.
15. Large Rib Panel with Negative Geometry
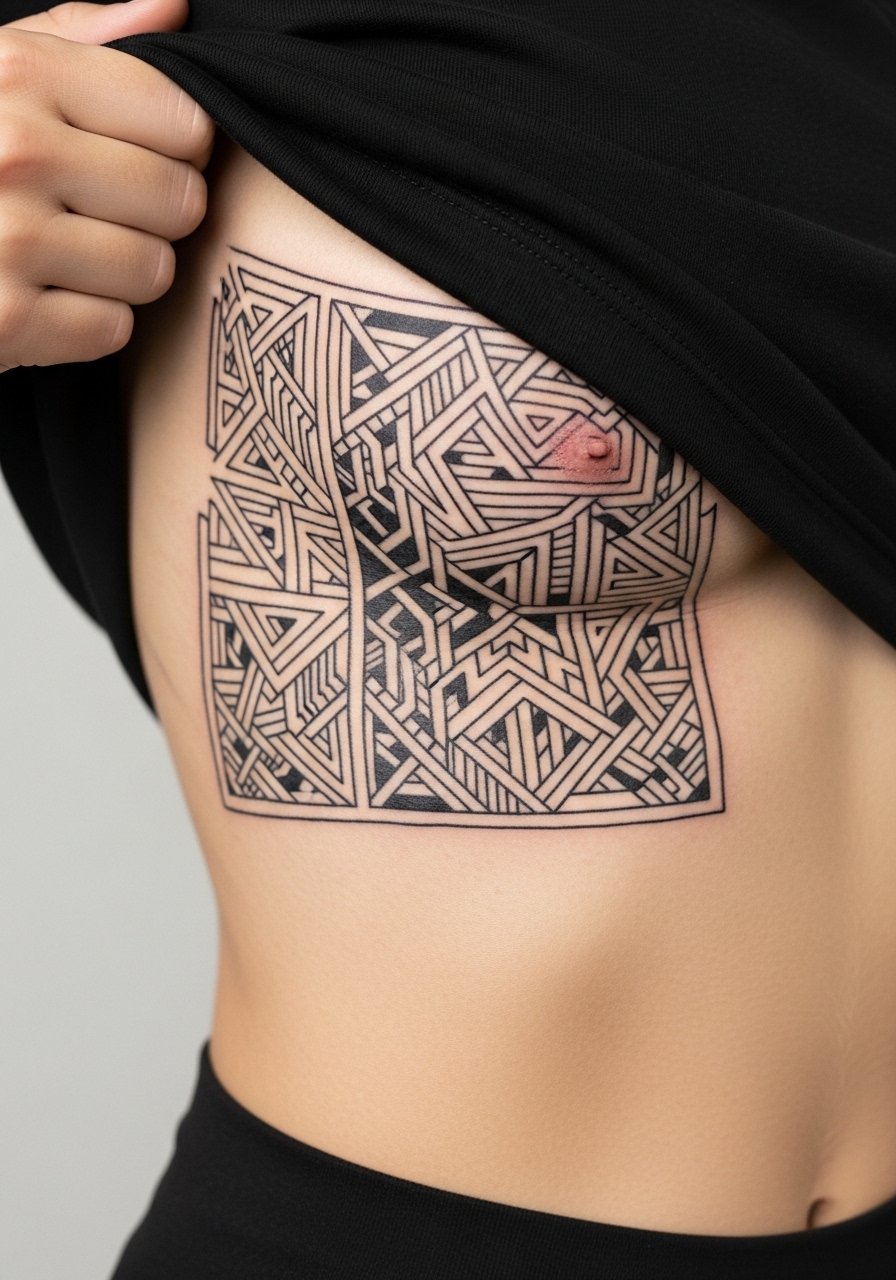
Another rib example highlights the same split in the community. One camp says dense geometry in the rib area will lose its definition quickly because the skin flexes. The opposing camp says carefully scaled geometry and intentional negative space prevent that outcome. For a large panel, I advise leaning into negative geometry and avoiding overly fine internal detail. Plan for longer sessions broken into two appointments and expect a realistic touch-up window at year two for the densest fills.
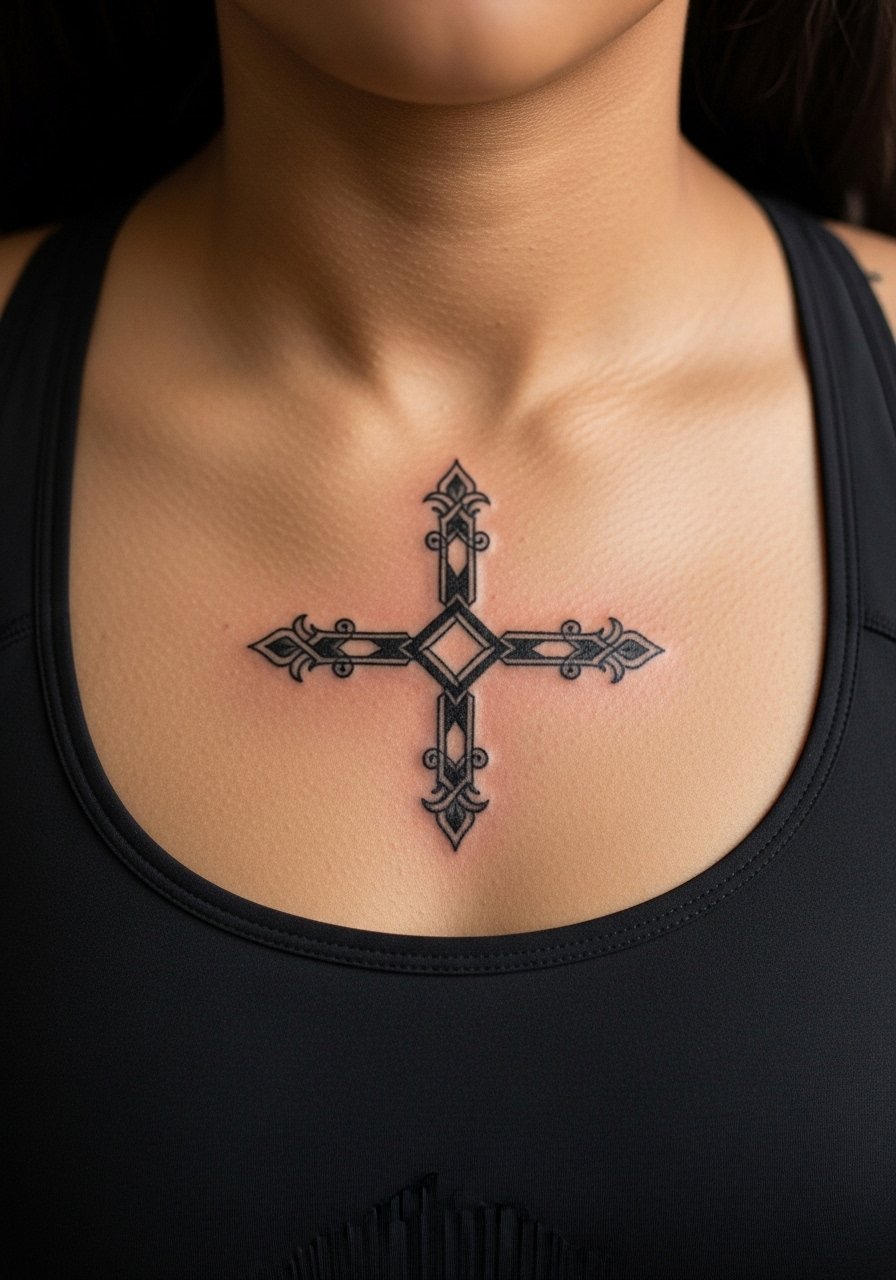
16. Minimal Bar Along the Collarbone Edge
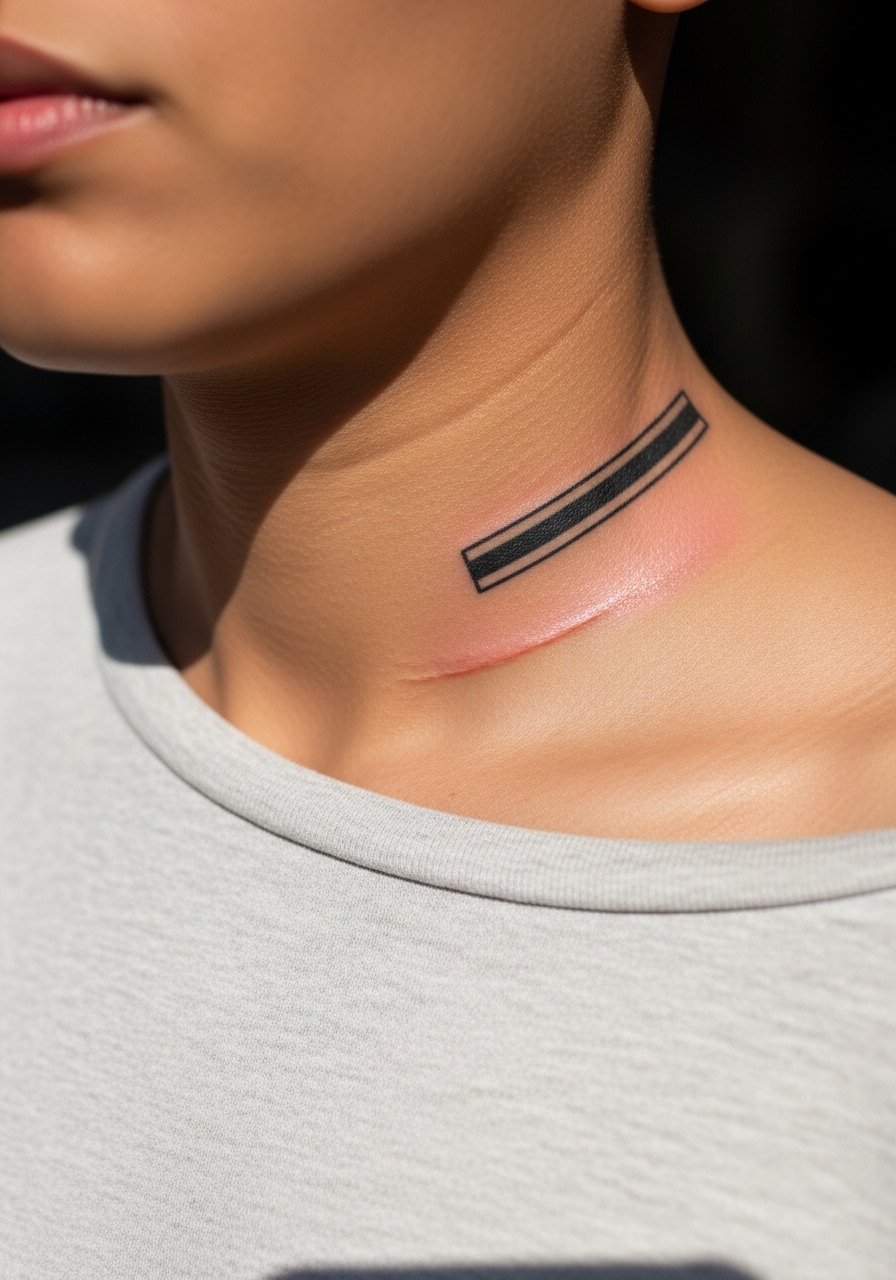
Short linear pieces at the collarbone look contemporary when placed to follow bone landmarks. I recommend asking for a slightly thicker bar than you think you need, because ultra-thin bars can fade into faint marks. Pain is modest and healing is straightforward. For show-off styling, pair it with an open-back midi dress or a wide-neck top so the bar reads as an intentional accent.
17. Bold Tribal-Inspired Calf Panel
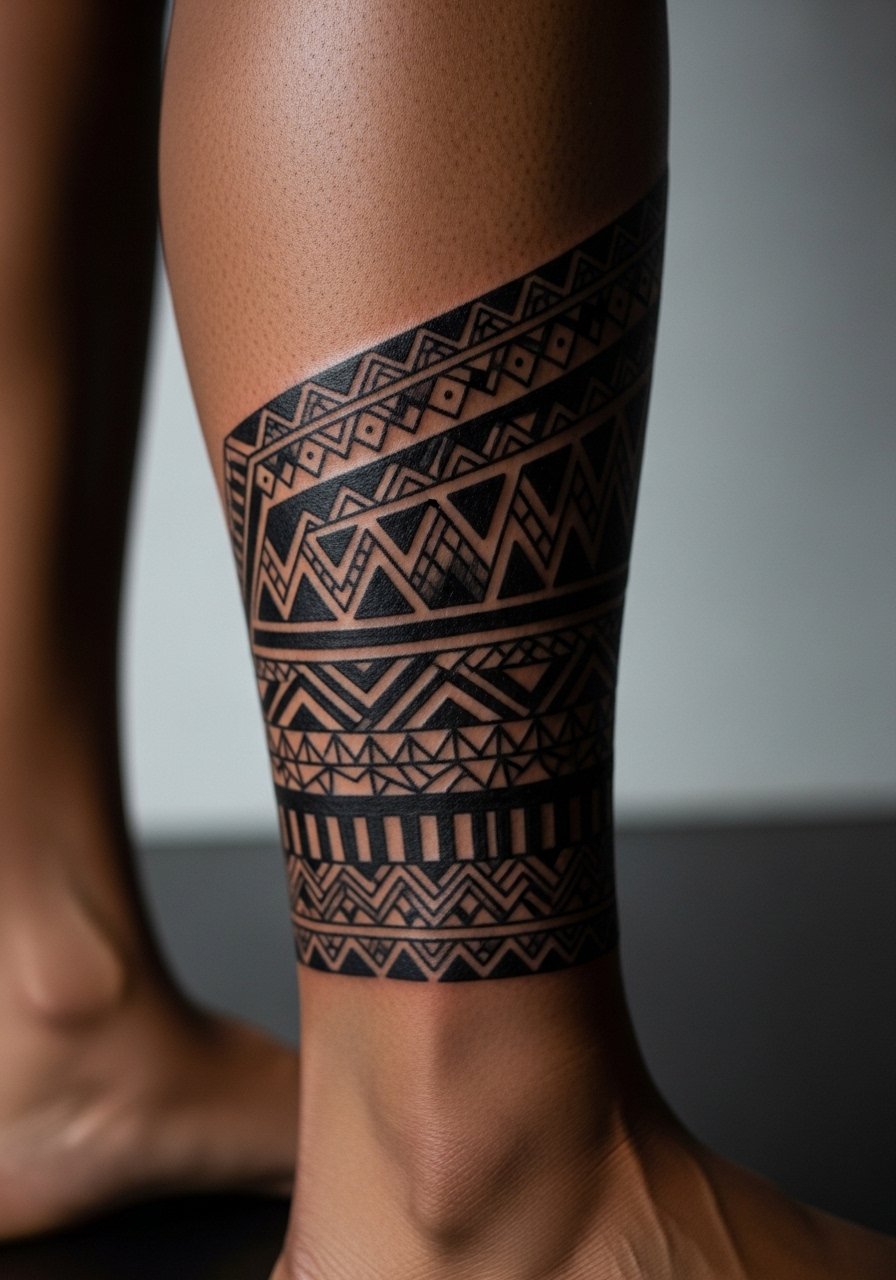
Tribal-inspired blackwork benefits from anchor shapes and consistent fill. During the consult, make clear you want cultural respect and not a direct replica of sacred motifs. Many artists will adapt patterns while preserving the boldness. Calf work tolerates heavy saturation well, and sessions are comfortable enough for longer fills. Pair the panel with shorts and a clean silhouette, and a simple canvas sneaker keeps the focus on the lower leg.
18. Tiny Leaf Behind the Ear
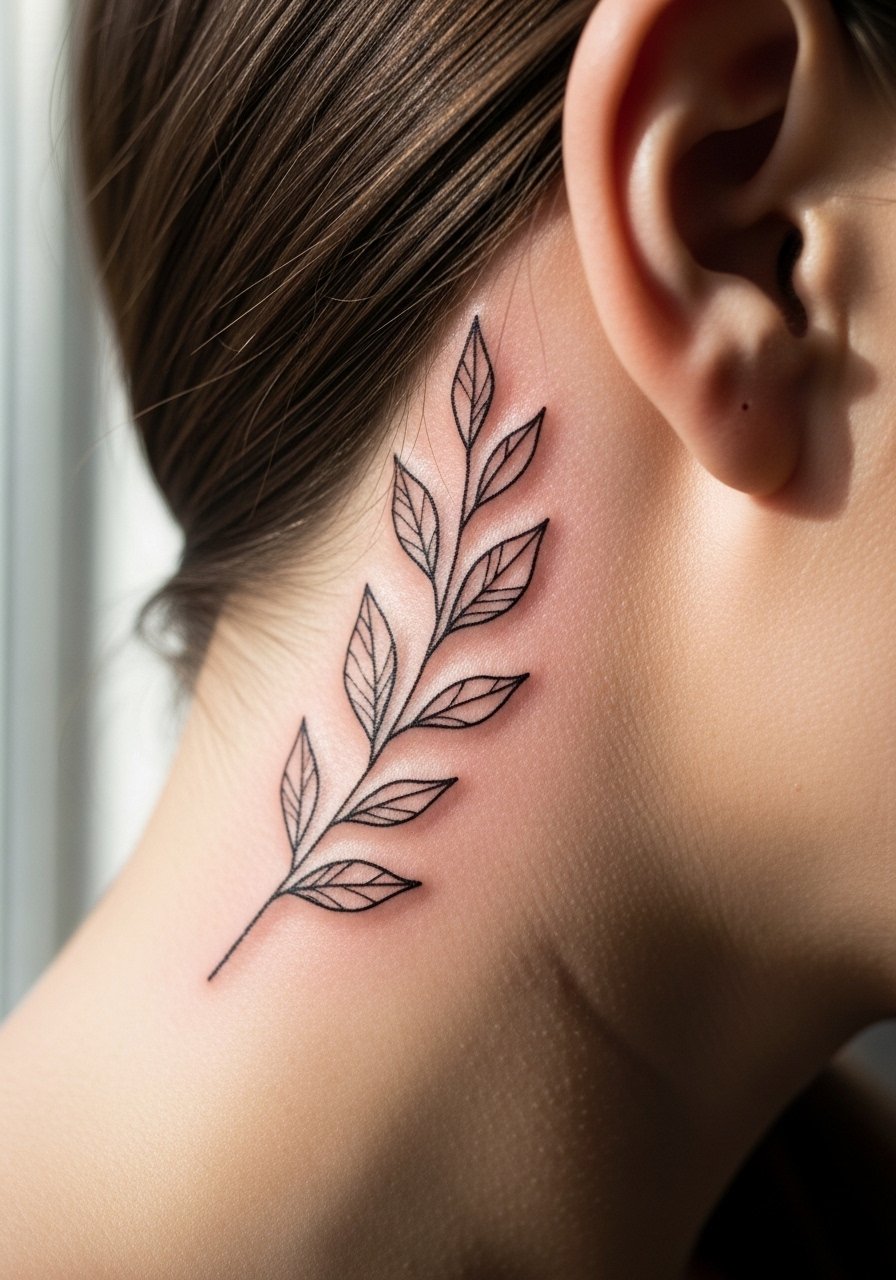
Behind-ear work is discreet but requires precise placement because hair and collars can obscure healing. Ask the artist to place the stencil below the hairline on the neck rather than on the ear itself. This area is low on bulk and feels like a quick pinch. Because it sits close to hair, expect some extra care during showers and avoid rubbing shampoos into the area while healing.
19. Abstract Sternum Linework Connector
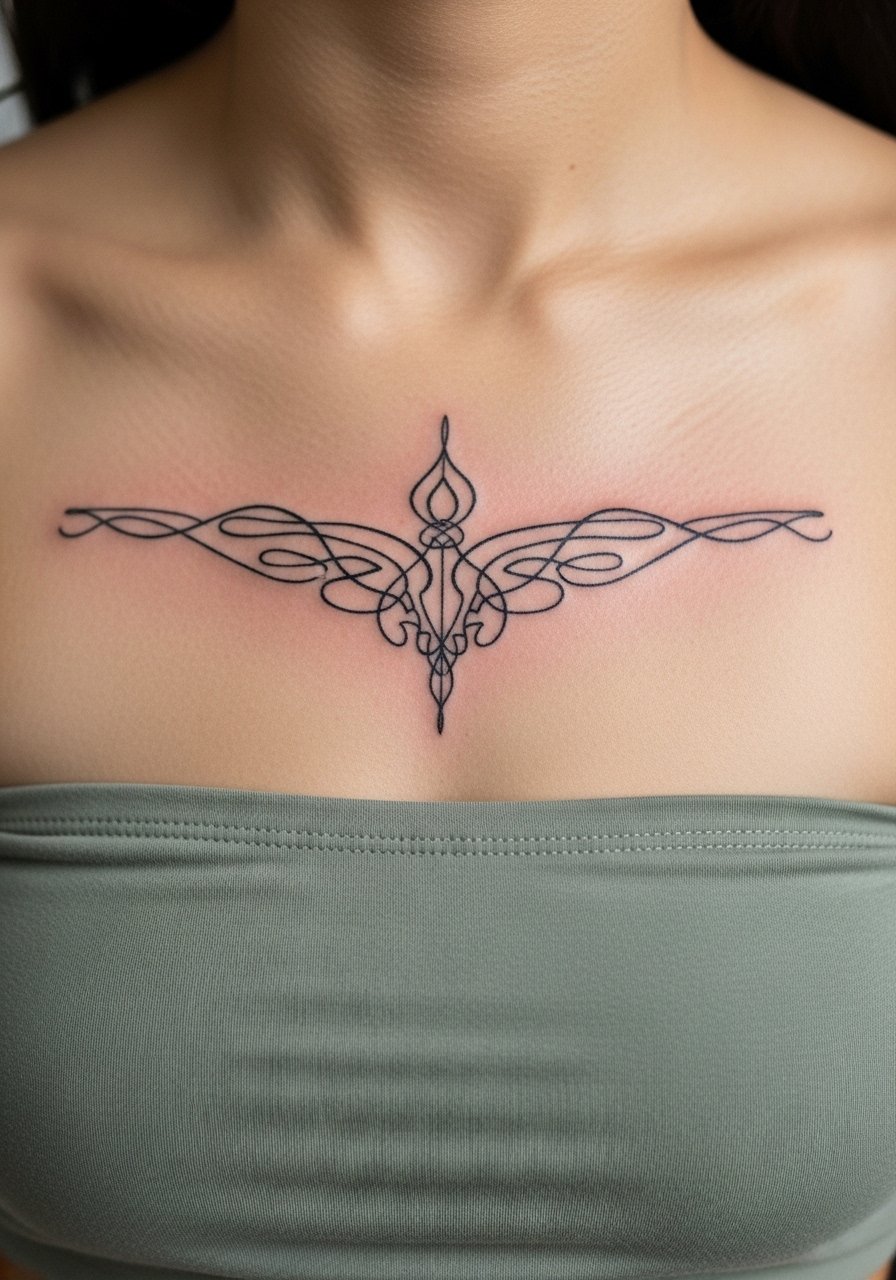
Abstract connectors across the sternum need intentional gaps so breathing and motion do not collapse detail. Ask for a plan that emphasizes open channels of skin between heavy black areas. The sternum is sensitive, expect the session to be intense but short. Many clients choose slightly staggered sessions to manage discomfort and monitor how the first pass settles before committing to denser fills.
20. Full Back Panel with Negative Space Figures
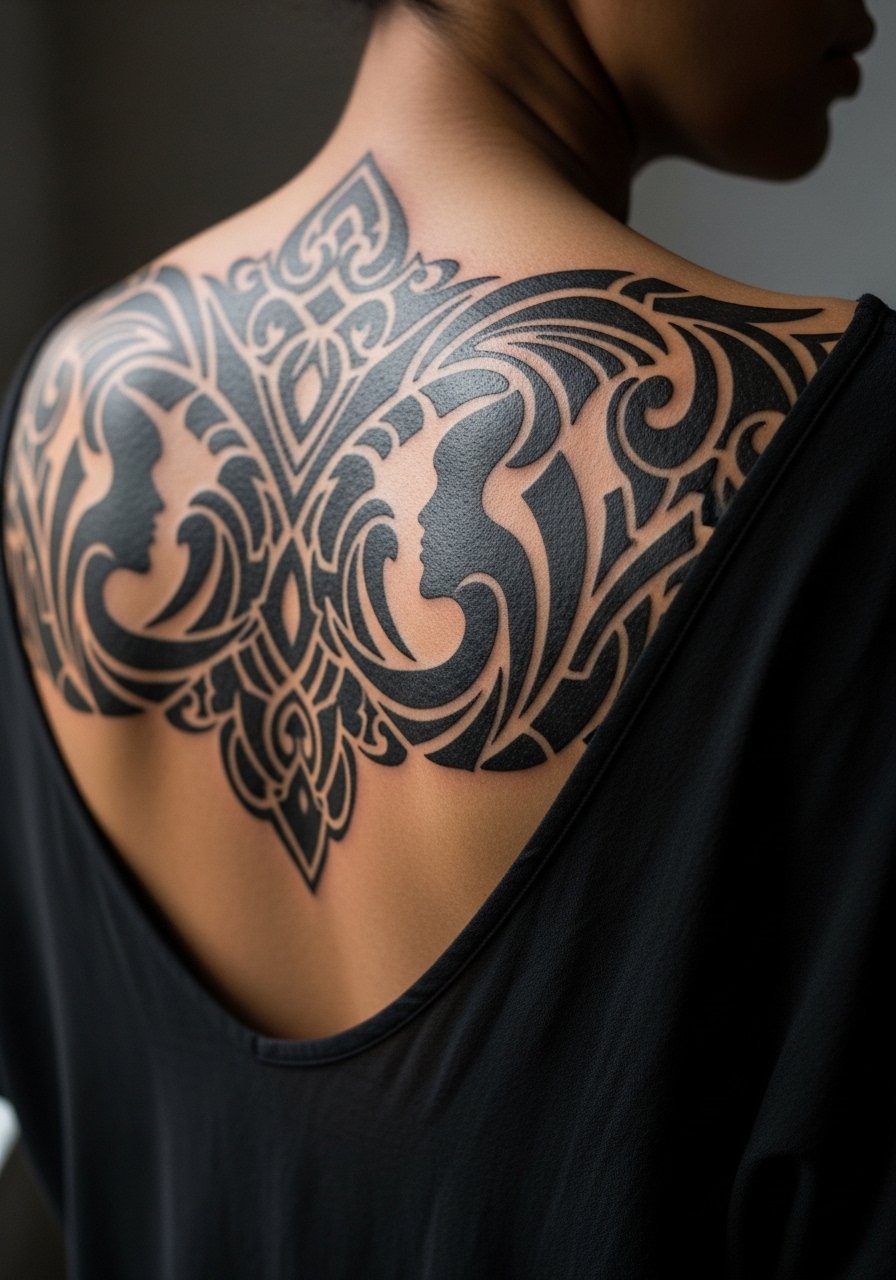
Back panels let you combine bold fill and uninked skin to create silhouette-driven art that reads from a distance. For longevity, plan large shapes and avoid tiny textures in the center. The session will likely require multiple long appointments. For showing the back piece during events, an open-back gown or halter top highlights negative space and keeps the figure readable without competing elements.
21. Hip-to-Thigh Chain Link Cluster
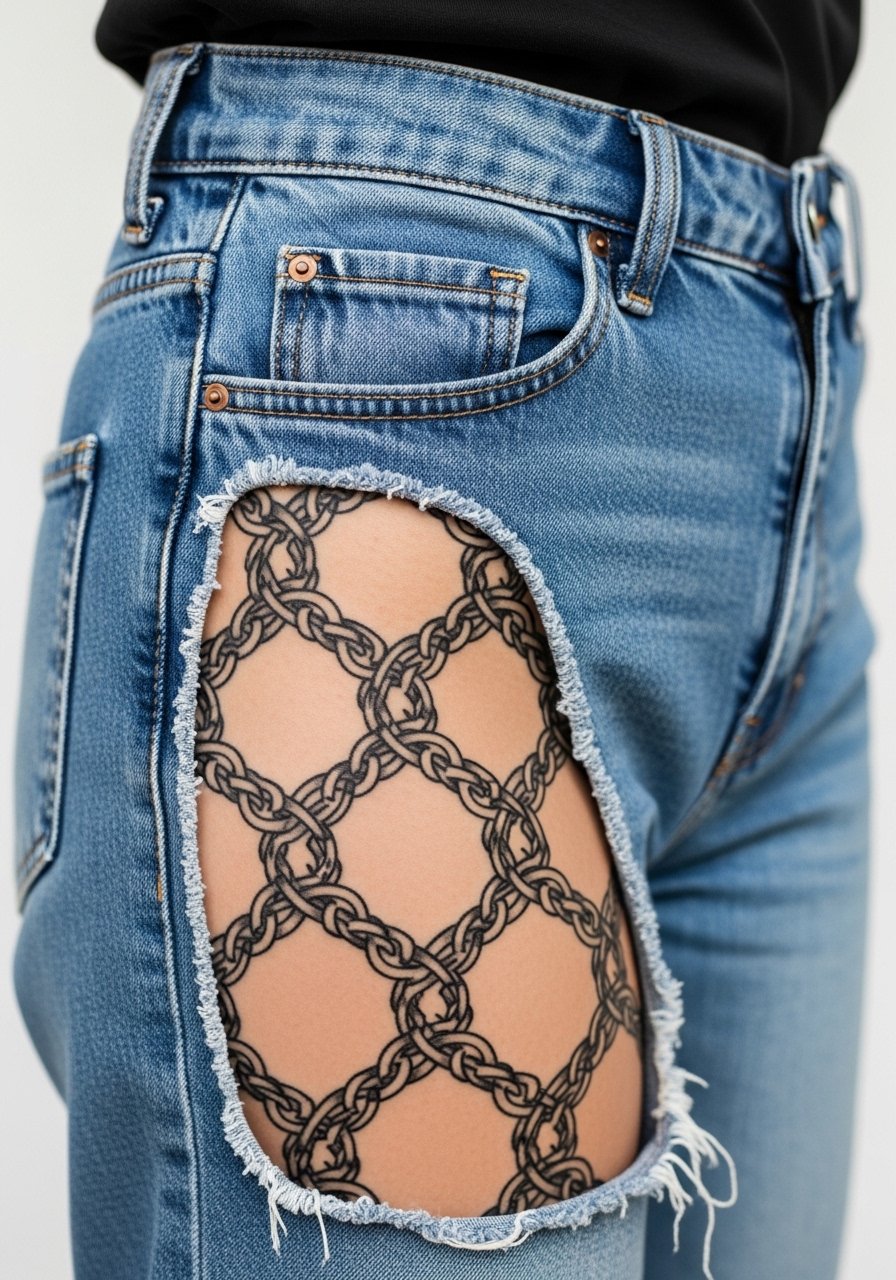
Hip and upper-thigh work reads intimate and bold, and it ages well when the lines are given breathing room. For this route, wear loose shorts to your session so the artist can access the area without irritation. The skin here tolerates dense blackwork, but avoid tiny internal details that could soften as the body moves. Plan two shorter sessions to map curvature and maintain contrast along the hip line.
Frequently Asked Questions
Q: How long will bold blackwork stay crisp compared with fine line pieces?
A: From what I have seen, bold saturated blackwork tends to hold shape longer than ultra-fine lines. Thick outlines and solid fills resist blur because the contrast remains even as skin shifts. Fine line pieces can look delicate and fresh, but they usually need touch-ups sooner, often around the two to three year mark depending on placement and sun exposure.
Q: Should I pick a heavier lineweight for rib and sternum work to avoid early blurring?
A: It depends on the design, but I usually advise slightly heavier linework for ribs and sternum so detail does not vanish as the skin moves. Ask your artist how they scale lineweight across the piece and whether they plan staged sessions to evaluate how the first pass settles.
Q: Can I wear jewelry to show off a collarbone or wrist piece while it heals?
A: You can, but keep jewelry away from the fresh scab area. For show-off looks after the first week, thin chains and stacked dainty bracelets work well. If you want a specific suggestion, a thin chain pendant sits above a collarbone piece without competing for attention.
Q: Do hand and finger tattoos really affect job prospects?
A: That depends on your industry and location. Creative and hospitality sectors are often more permissive. Corporate or client-facing roles can still have restrictions. I recommend thinking about long-term career paths and placing highly visible pieces where you can cover them if needed.
Q: When should I book a touch-up for dense black panels?
A: Plan a touch-up check around the one to two year window for dense fills, and a realistic refresh every few years after that if you want the highest contrast. The exact timing depends on sun exposure, skin type, and how much friction the area receives.
