
Sitting in the chair with the stencil already taped down is the exact moment most people realize pain ratings matter more than the reference photo. You can love a design and still hate the placement, so mapping tiny ideas to sensible spots saves a lot of surprise. These 21 sketches pair small visual concepts with realistic pain notes, session timing, and showing-off tips so you can study what a tiny piece will actually feel like and how it ages.
1. Fine Line Arrow on Inner Forearm
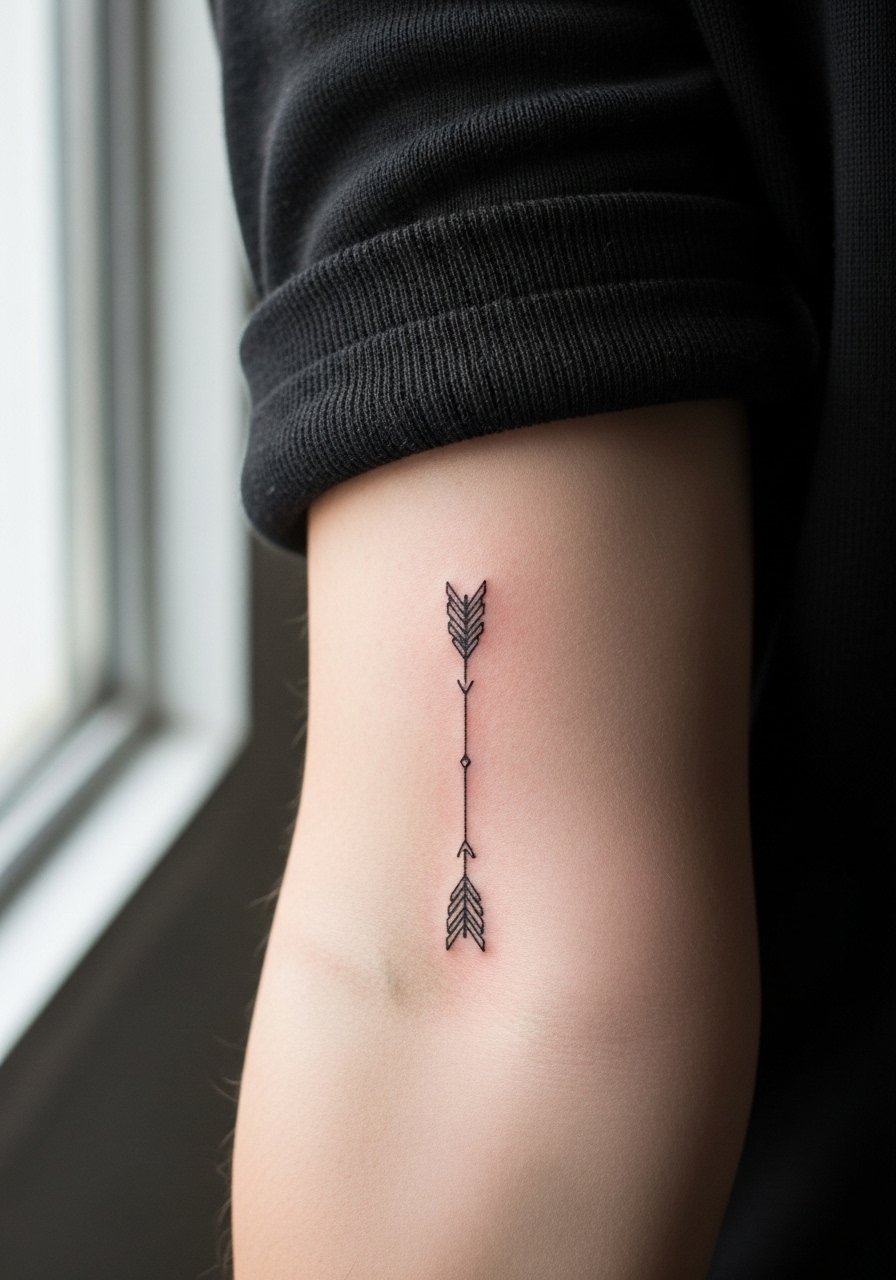
This one is an easy starter if you want low pain and a clean graphic. Pain level: about 2-4 out of 10 on most charts, because the outer forearm has comfortable padding. Expect a short session, often under an hour, and a single touch-up possibility at year two if you want the lines sharp. Tell your artist you want slightly bolder lineweight than a hairline, so the arrow keeps its shape as the skin ages. Common mistake is shrinking the arrow too small, which crowds the arrowhead and speeds blurring. Pairing note for showing off: rolled sleeves frame the forearm well, and during the session keep a loose button-down shirt you can pull aside for access.
2. Tiny Palm Dot Cluster
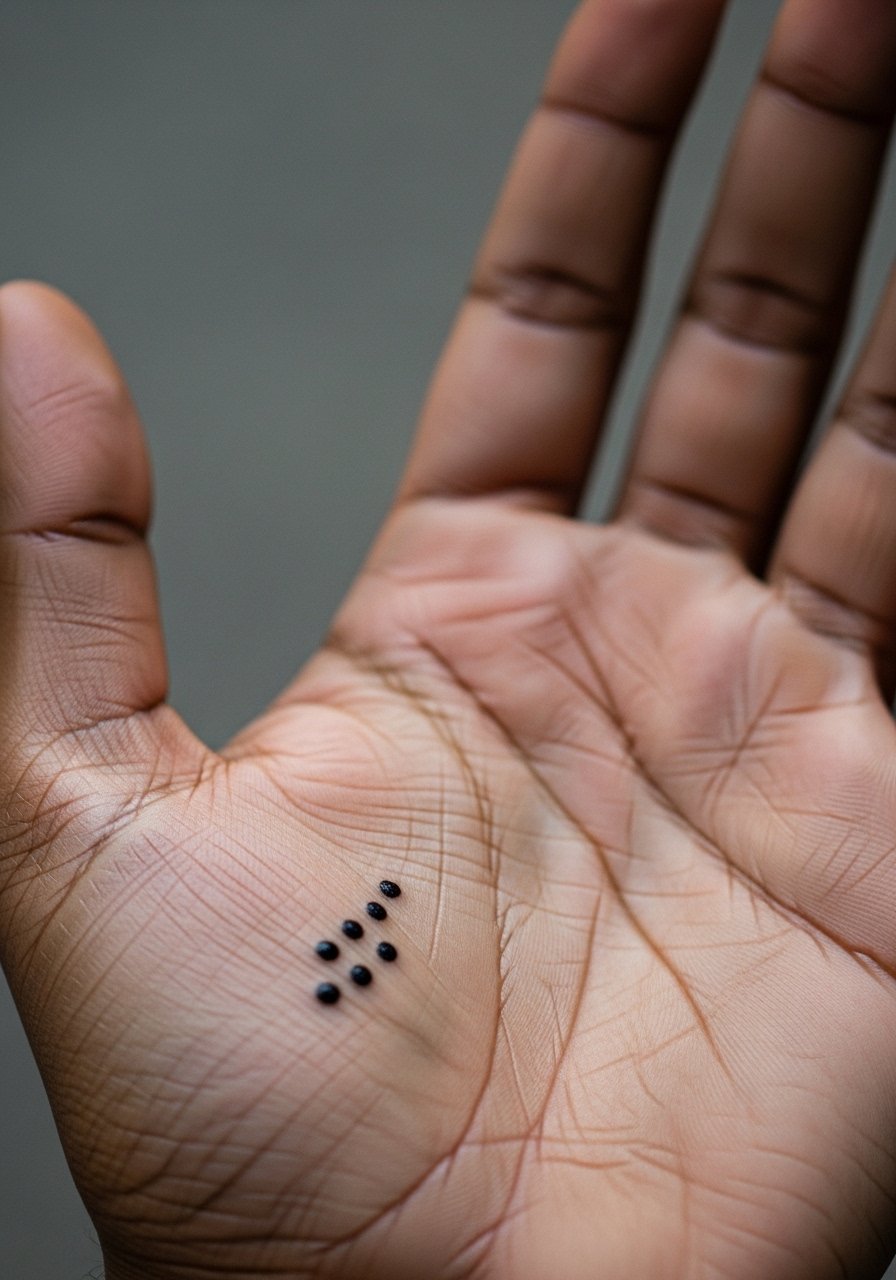
Palms are surprisingly brutal on pain charts, often rated 8 out of 10, because the skin there is thick but sits on top of a lot of nerve endings. Sessions are short for good reason, usually under 45 minutes, and healing is unique because the palm sheds and regenerates skin rapidly. If you want a tiny cluster, expect faster fading and the likelihood of at least one touch-up. A common mistake is treating a palm piece like a wrist piece, assuming the same longevity. Note that repeat clients tend to tolerate palm sessions better than first-timers, so consider a test dot somewhere less sensitive first. Also remember palm tattoos can affect manual jobs, so think through career implications.
3. Minimal Wrist Script
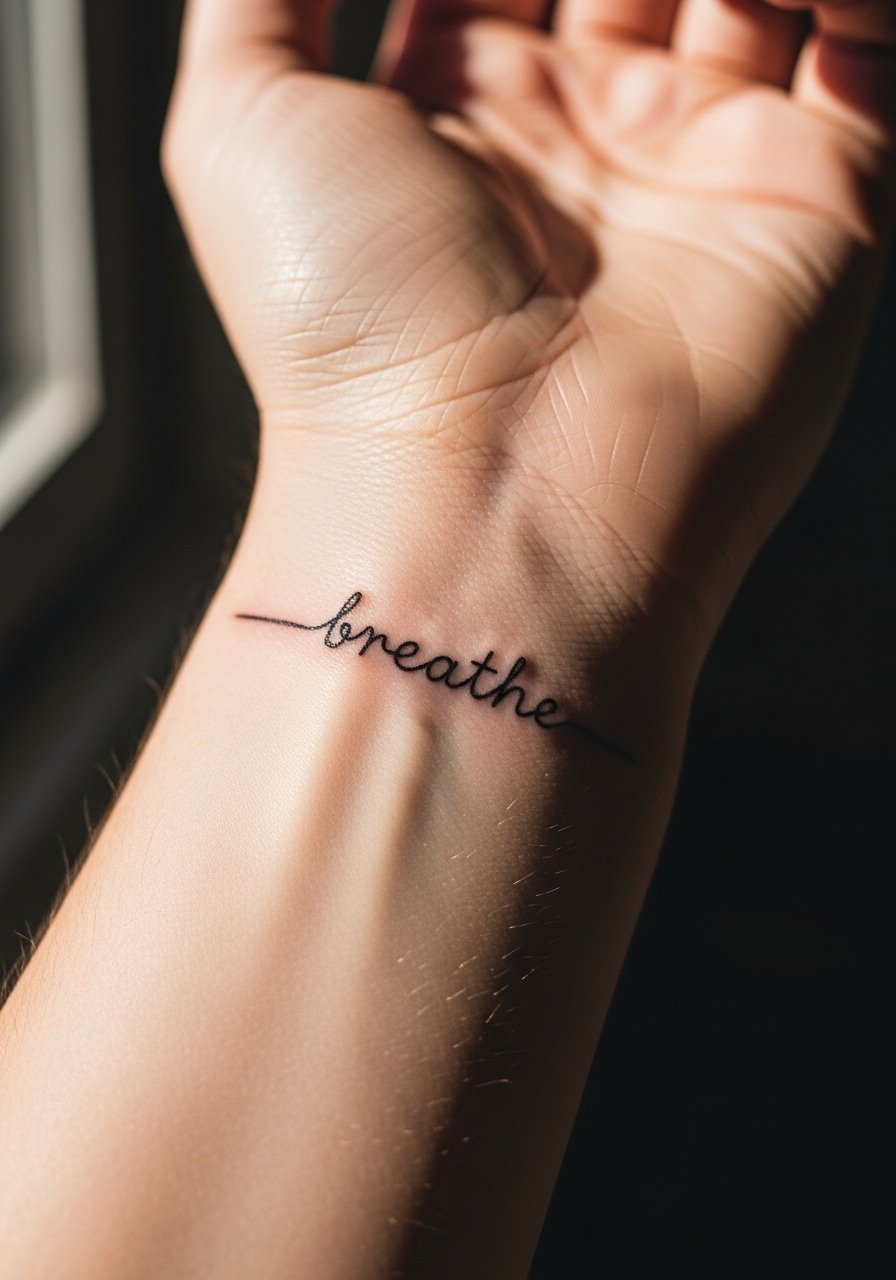
Wrist placements read higher on pain charts than the outer forearm, typically 4-6 out of 10, because the area is thin and the needle feels closer to bone. A single-word script is usually 20 to 40 minutes of machine time plus prep. Tell your artist to space letters slightly more than you think they need, so the loops do not merge after a year. The mistake I see most is requesting very tight cursive at tiny size, which softens into ink smudging. For showing off wear an open cuff shirt that leaves the wrist visible and a small, minimalist bracelet that does not crowd the lettering.
4. Micro-Realism Eye on Sternum

Sternum placements register higher on pain charts, commonly 7-9 out of 10, due to the thin skin over bone and the central sensitivity. Even tiny micro-realism pieces here need careful depth control, and sessions can be split into short bursts of 30 to 45 minutes. Artists disagree on fine line here. One camp says the stretch of the chest blurs tiny work quickly. The other camp says with correct spacing and needle depth it can settle well. Ask your artist which side they take before booking. Expect a touch-up at year two if you want the detail crisp. For the session, wear a wireless sports bra or fitted top that you can easily adjust without sticking adhesive near the area.
5. Tiny Ring Finger Band
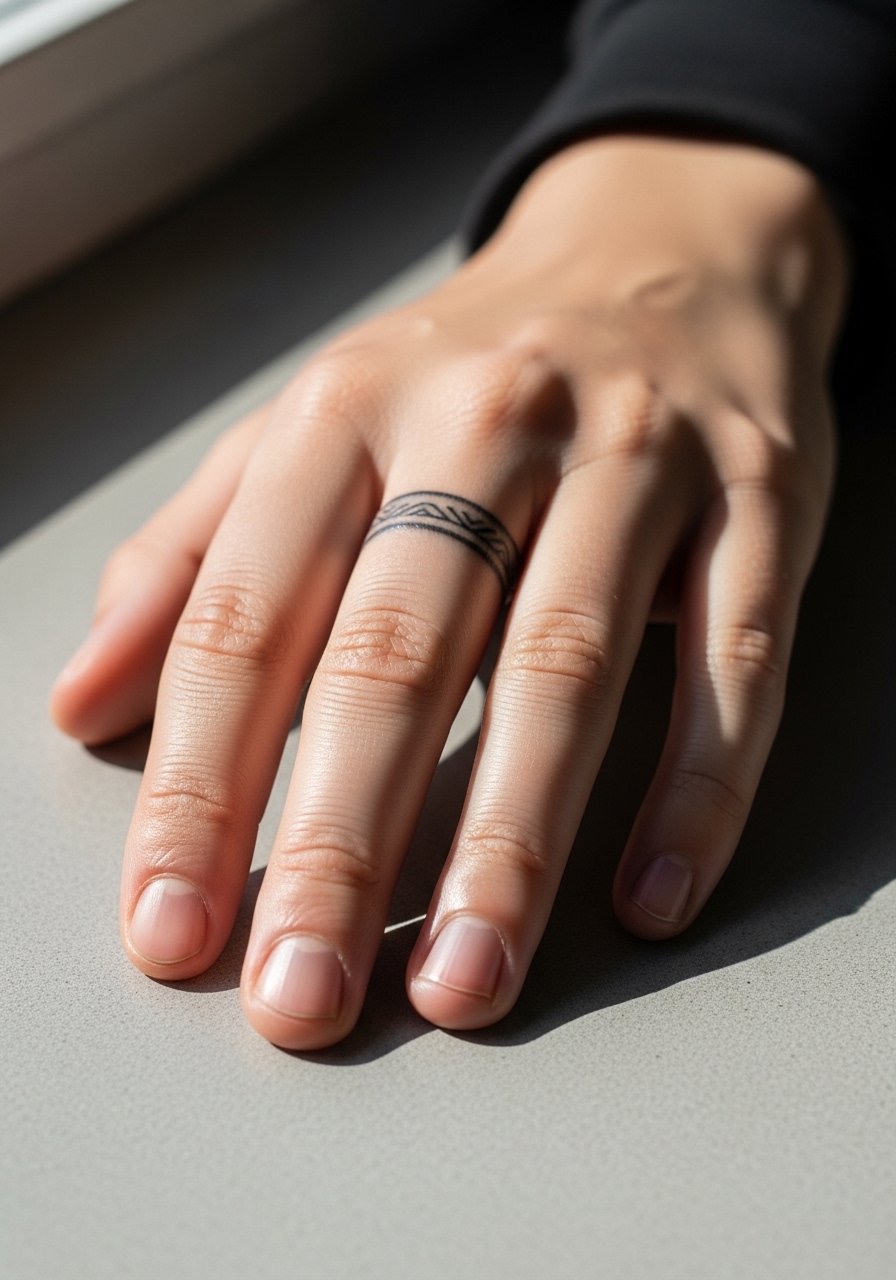
Finger bands sit mid to high on pain scales, about 6-8 out of 10, because the skin is thin and the bone sits close. Sessions are surprisingly short but the aftercare is fiddly since fingers are in constant use. Expect faster fading and a realistic need for a touch-up within 12 to 24 months. The usual error is going too fine on the band. Slightly thicker lines hold better. For the appointment, remove rings and wear no hand jewelry. To show it off in cooler months pair with fingerless leather gloves that frame the knuckles without hiding the band. Note that hand tattoos can affect employment in some fields, so weigh that in.
6. Stipple Shaded Ankle Constellation
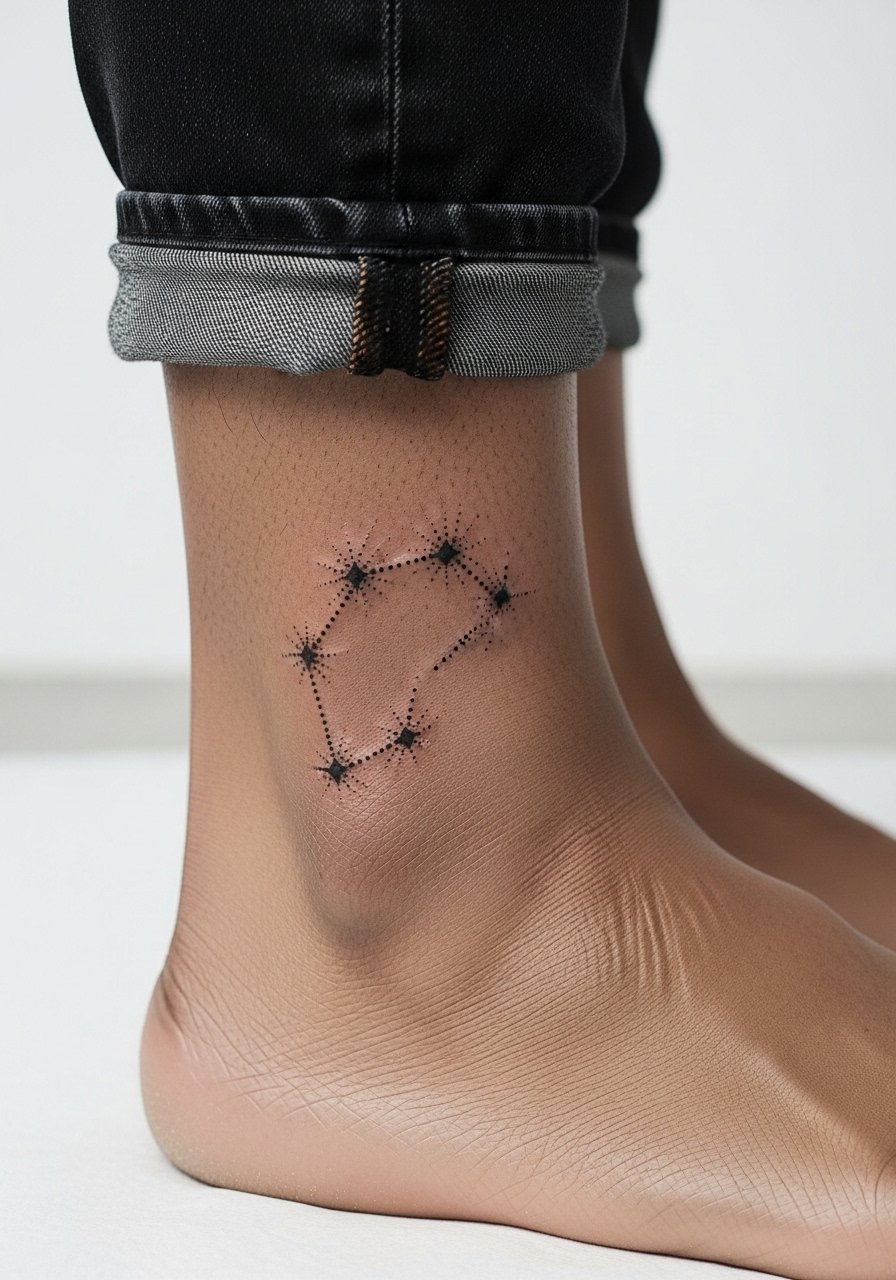
Ankle and foot pieces often score around 7 out of 10 on pain charts and have healing challenges because of friction with shoes. A stipple-shaded constellation is session-friendly at 45 to 90 minutes depending on size, but expect slow saturation in the first six months and a likely touch-up at year one. During consultation, ask for slightly more spacing between dots to prevent merging in healed skin. The common mistake is too much black packed into tiny dots, which can bloom into a gray patch over time. For session comfort roll your pants and bring slip-on shoes, and when you want to show it off in summer pick strappy ankle sandals that leave the area visible.
Studio Day Picks
The small hand and ankle pieces above demand different prep than chest or rib work, so these picks smooth the session and the first week.
-
Stencil transfer paper kit. Lets you preview exact placement on tricky areas like wrists and ring fingers before the needle touches skin.
-
Topical numbing cream. Applied before an ankle or wrist session can reduce the edge for very sensitive spots.
-
Thin protective film roll. Useful for finger and palm work where friction and washing accelerate wear.
-
Fragrance-free gentle body wash. Keeps healing areas like the ankle or sternum clean without irritating delicate lines.
-
Aquaphor healing ointment. A thin initial layer can protect fine line work in the first few days without suffocating the area.
7. Tiny Geometric Nape Symbol
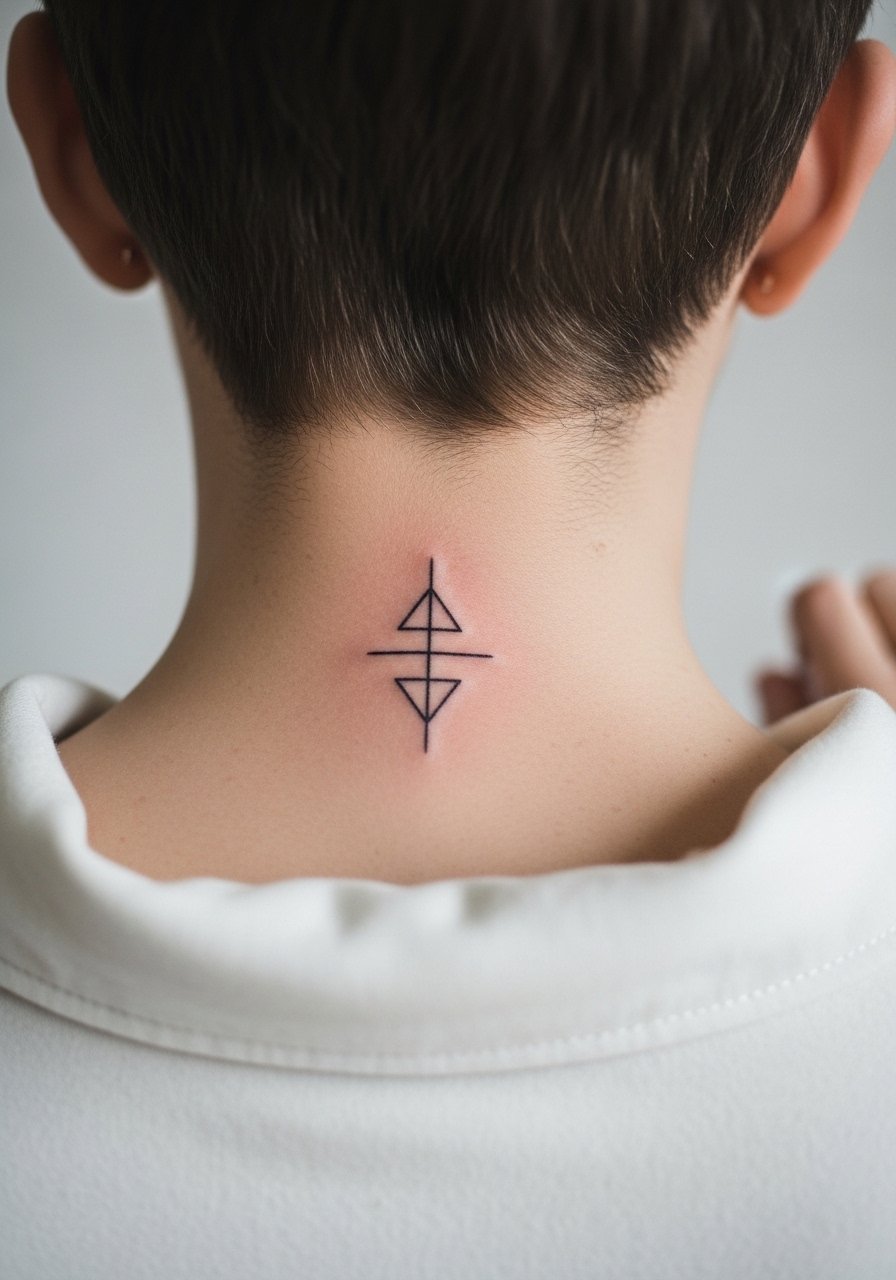
The nape tends to be a 5-7 out of 10 on most pain guides, because there is a mix of soft tissue and sensitive nerves. Small geometric marks here are low session time, often 30 to 60 minutes, and they age depending on hairline friction and sun exposure. Tell your artist if you wear your hair up frequently so they can place the piece where it avoids constant rubbing. A common misstep is choosing tiny dense geometry which can blur; give lines room. For showing off, wide-neck shirts let the symbol peek out. Sensitive placement note: neck work can affect professional visibility, so consider placement with your daily attire in mind.
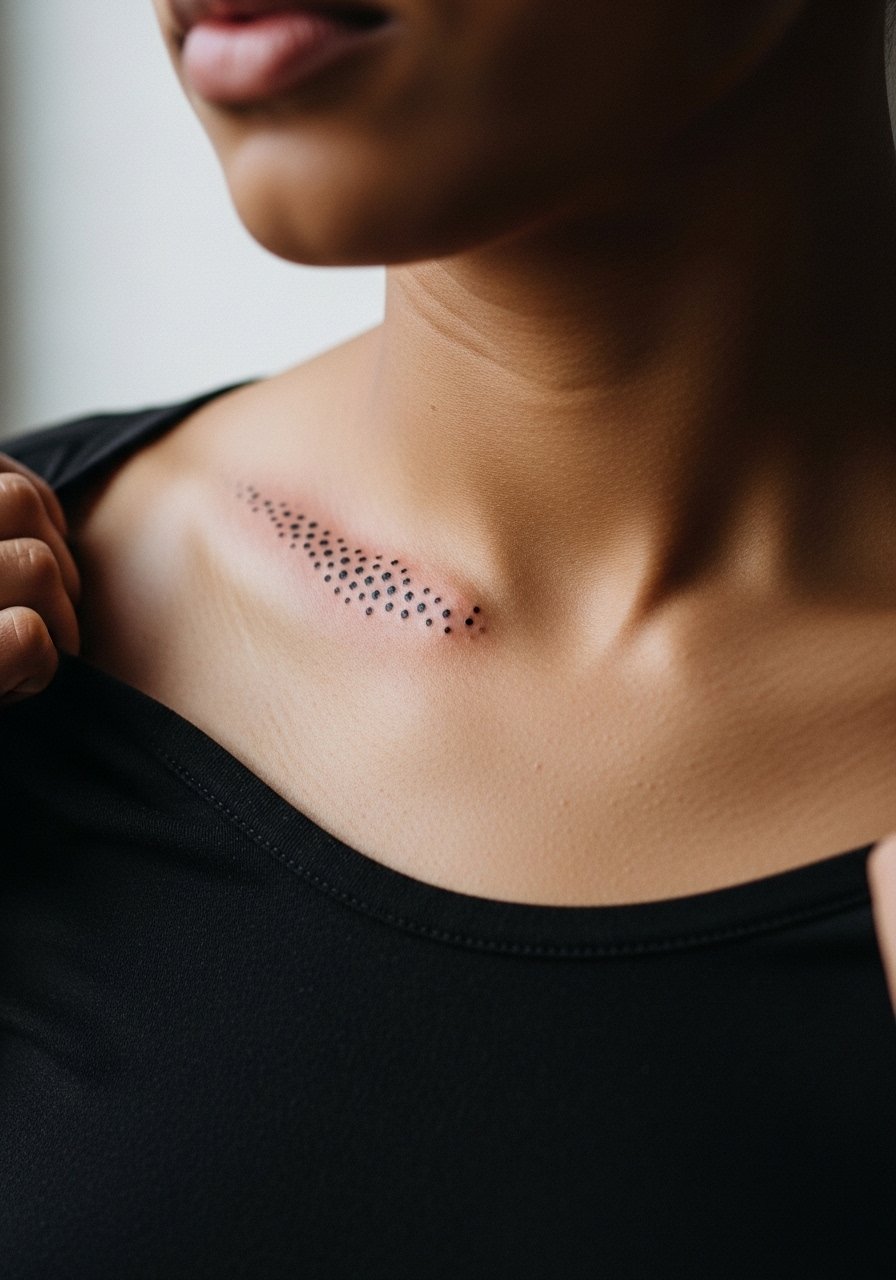
8. Micro-Flash Collarbone Daisy

Collarbones read around 4-6 out of 10 on pain charts. A tiny daisy here is an ideal balance of visibility and manageable discomfort, usually a 30 to 60 minute session. Ask for slightly bolder petal outlines than your reference so the flower keeps structure as it settles. Mistakes I see include squeezing too much detail into one small blossom, which softens over two years. For evenings out a backless halter top or a wide-neck sweater frames the piece without covering it. Keep sunscreen in mind once healed, because collarbones get a lot of sun.
9. Micro-Realism Spine Linelet

Upper spine and center back placements can be rated 7-9 out of 10 depending on proximity to bone and nerves. A tiny vertical linelet is deceptively intense during the session, so you may prefer 20 to 40 minute bursts. Artists disagree on fine line here. One group says the constant movement of the back leads to blurring quickly. Another group says with proper depth and spacing the work can hold. Ask your artist which approach they trust. The common error is too-small spacing between marks. For appointment ease bring a loose button-up shirt you can pull aside to expose only the upper back without risking fabric sticking to the fresh ink.
10. Tiny Calf Silhouette
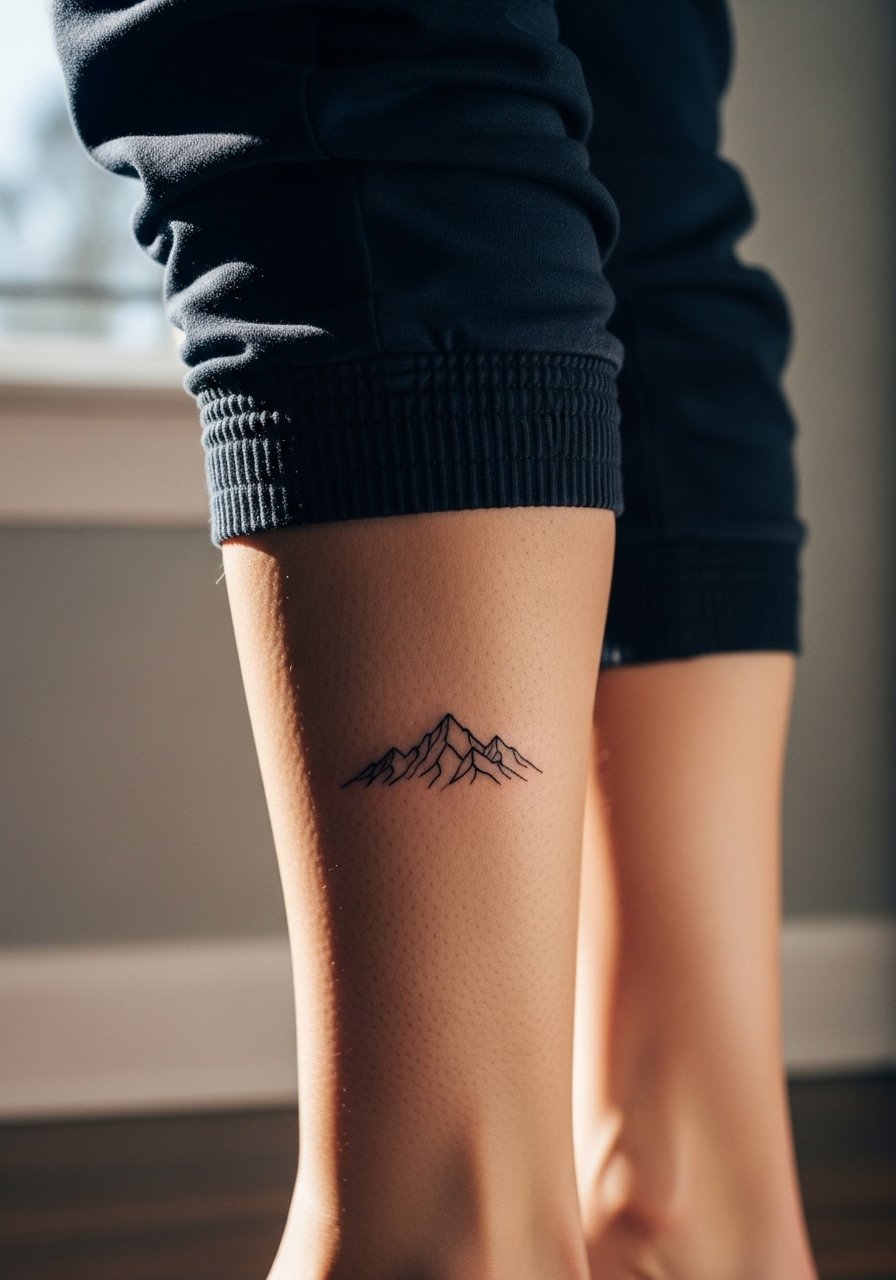
Calf tattoos sit on the lower end of pain charts, commonly 2-4 out of 10, because the muscle and fat cushion the needle. A simple silhouette can be done in 30 to 60 minutes with low blowout risk. Tell your artist you want a modest negative space between peaks to prevent merging as the calf flexes. A common mistake is making the silhouette too narrow which disappears in motion. For both session comfort and show-off wear consider cropped jogger pants so the artist can roll the leg easily and you can reveal the piece day to day.
11. Single Needle Elbow Ditch Star

The inner elbow is higher on pain charts, often 7-8 out of 10, due to thin skin and nerve clusters. Single-needle tiny stars need careful depth and short sessions of 20 to 40 minutes. The major mistake is pushing too much saturation into that zone which can cause persistent soreness and uneven healing. Ask your artist for a gentle touch and plan for a touch-up at six to twelve months for crisp edges. For the session wear a loose fit tank top so you can raise the arm without fabric pulling the area. Hand movement after the session affects scab formation, so keep activity light.
12. Minimalist Hip Crescent

Hip pieces fall in the mid-range for pain, usually 5-7 out of 10, depending on how close the needle hits pelvic bone. A tiny crescent is a quick session, about 30 to 45 minutes, but swelling and soreness may be higher for a day or two. The usual mistake is placing the curve too close to seams of clothing which rub during healing. During the appointment wear high-waisted bottoms you can shift slightly without full exposure. If you plan to show it off poolside choose high-cut swim bottoms that let the crescent peek out because friction from low-rise jeans can dull lines during healing.
13. Delicate Ankle Chain Link
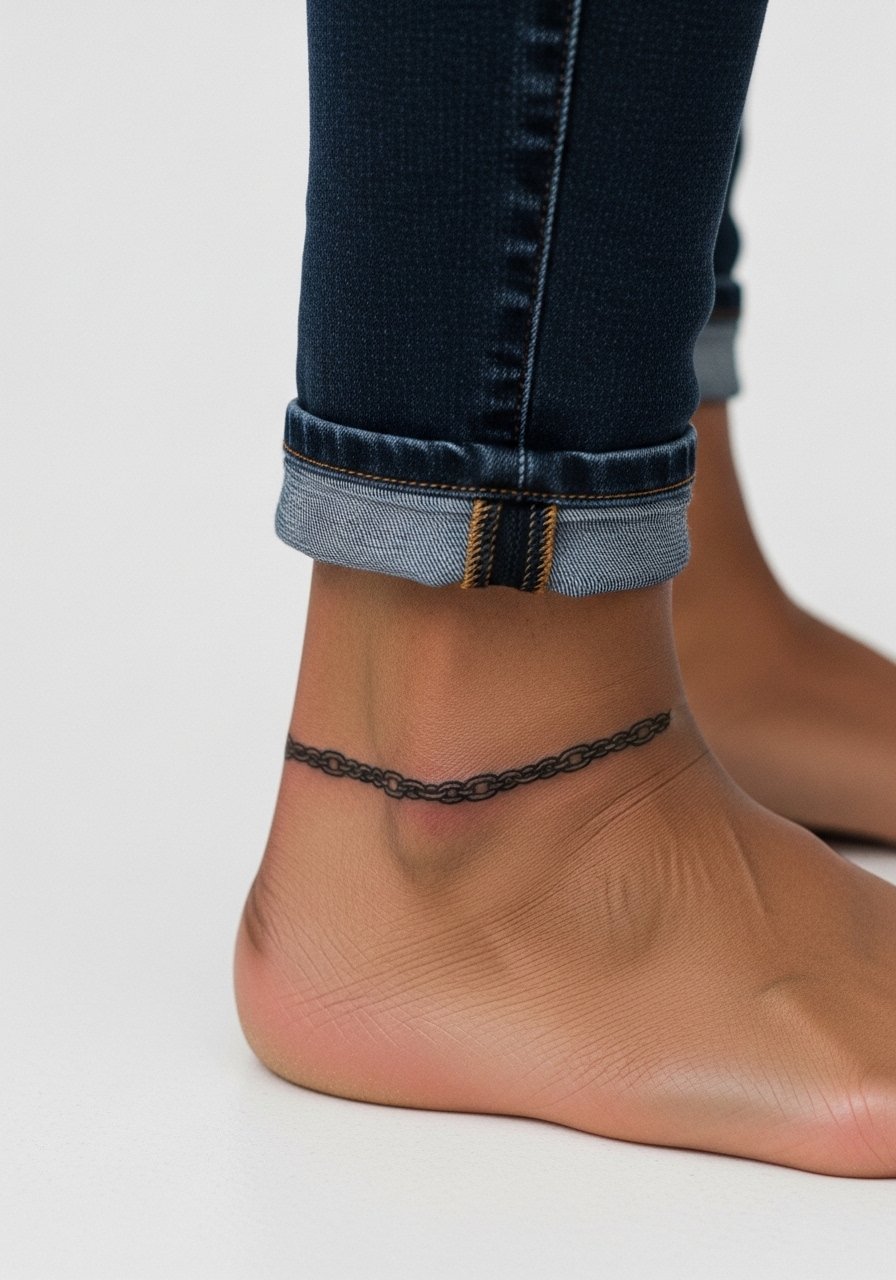
Ankle chain links share ankle pain characteristics, around 6-7 out of 10, and the healing is vulnerable to shoe friction. A delicate wrap can be done in a single 45 to 75 minute session but expect at least one touch-up after the first year. Common mistakes include adding too many links in a tiny band, which blurs into a gray line. For showing off pick slim fit rolled jeans or open sandals to keep the area visible without constant rubbing. During the initial healing avoid boots and tight socks.
14. Tiny Clavicle Dot Cluster
Clavicle spots read about 4-6 out of 10 on pain maps. Tiny dot clusters look intentional and can be compact, making for short sessions under an hour. Ask your artist to space dots with negative space, because dense stippling in a tight area tends to blur over a few years. A mistake is requesting invisible filler between dots, which collapses into a wash. For evening outfits a wide-neck or off-shoulder top shows the piece off cleanly. Sunscreen is important once healed because collar bones see frequent exposure.
15. Micro Tribal Wrist Badge

Outer wrist work is mildly sensitive, roughly 4-6 out of 10. A compact tribal badge sits well here but avoid overly tight concentric patterns which risk blurring. Sessions run 20 to 45 minutes. The common mistake is asking for super-fine repetition at tiny scale, which looks busy when healed. For showing off rolled sleeves and a simple thin chain pendant necklace sit above the badge without competing with the lines. If you work with frequent wrist movement, expect a touch-up window around 12 to 24 months.
16. Tiny Inner Thigh Leaflet
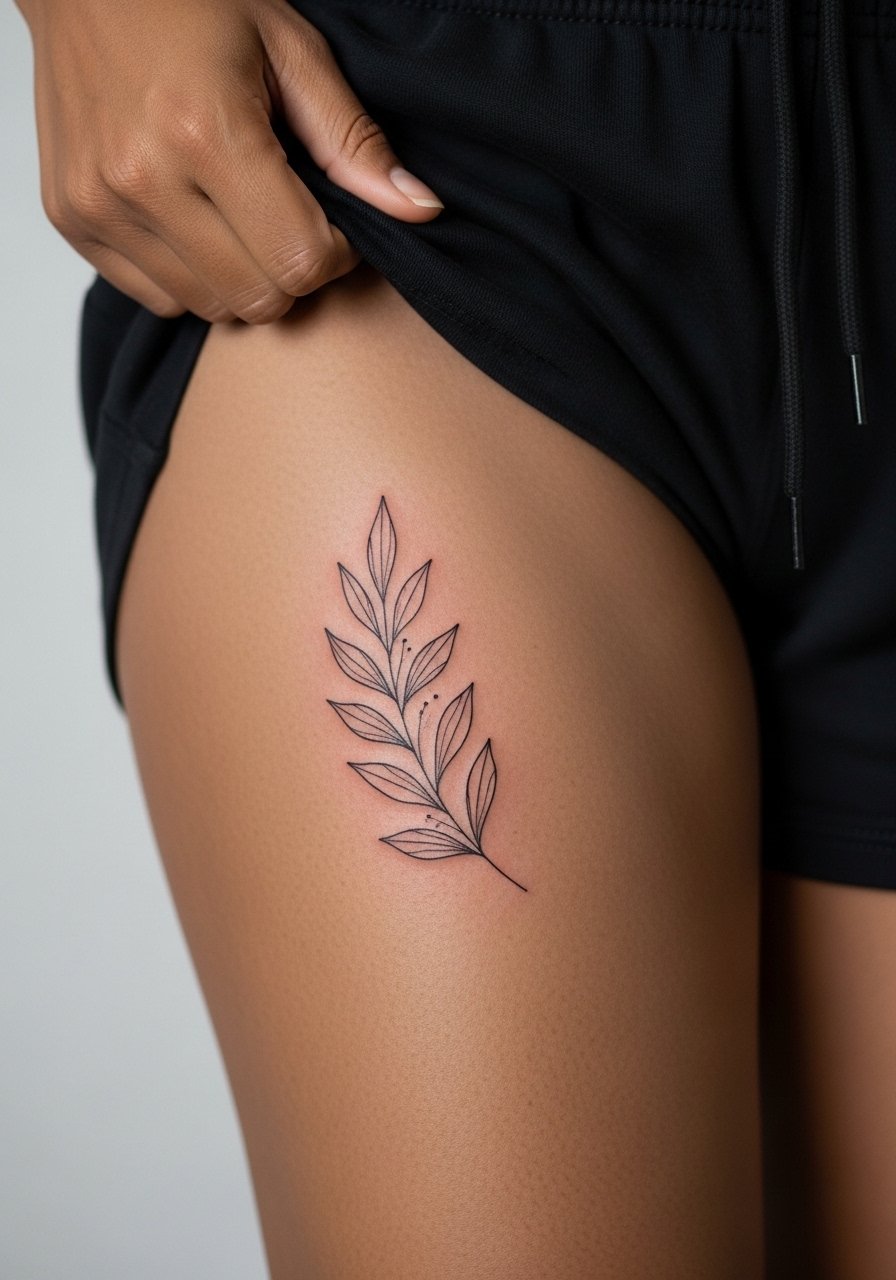
Inner thigh placements sit in the mid pain range, often 5-7 out of 10, and healing tends to be quieter because fabric can be chosen to avoid friction. Expect 45 to 90 minute sessions for detailed leaflets and a touch-up at year one depending on movement and weight changes. A common mistake is placing very dense detail that looks great on paper but merges during healing. For sessions wear loose shorts or a wrap skirt so the artist can access the area without full exposure. Sensitive placement note: find an artist comfortable with private placements since technique and hygiene matter more here.
17. Tiny Sternum Script Accent
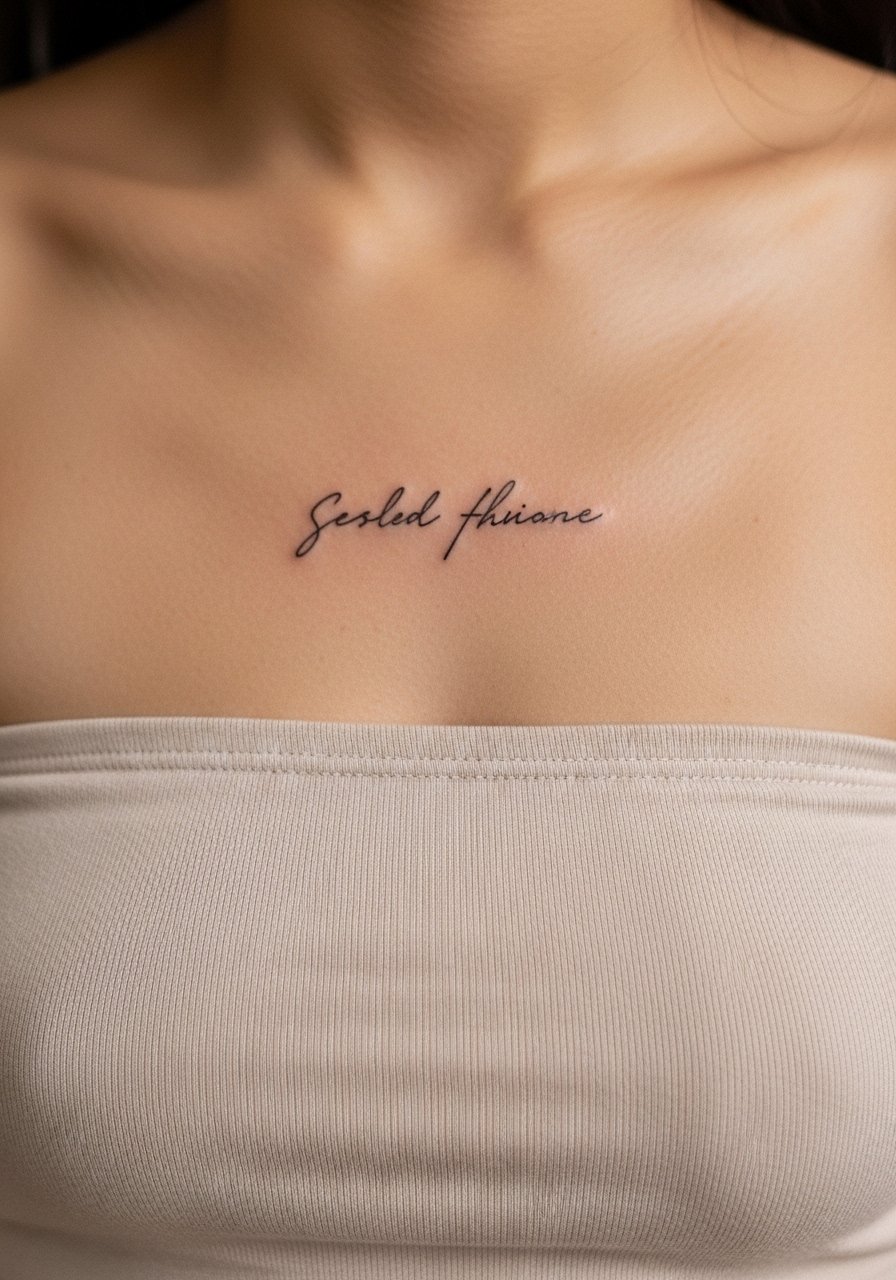
Sternum text lands high on pain charts, 7-9 out of 10, often because of proximity to the ribcage and sternum. Short scripts are quick in machine time, 30 to 60 minutes, but expect soreness for a day or two. The bad call is cramming long phrases into the sternum at tiny scale, which needs touch-ups. Artists are split on whether tight script holds there. One camp insists on heavier spacing and depth, the other favors slightly bolder letters. Ask which they prefer. For the session choose a strapless or bandeau top you can shift without adhesive, and consider off-shoulder styles to frame the healed piece.
18. Micro Dot Work Shoulder Blade Crescent
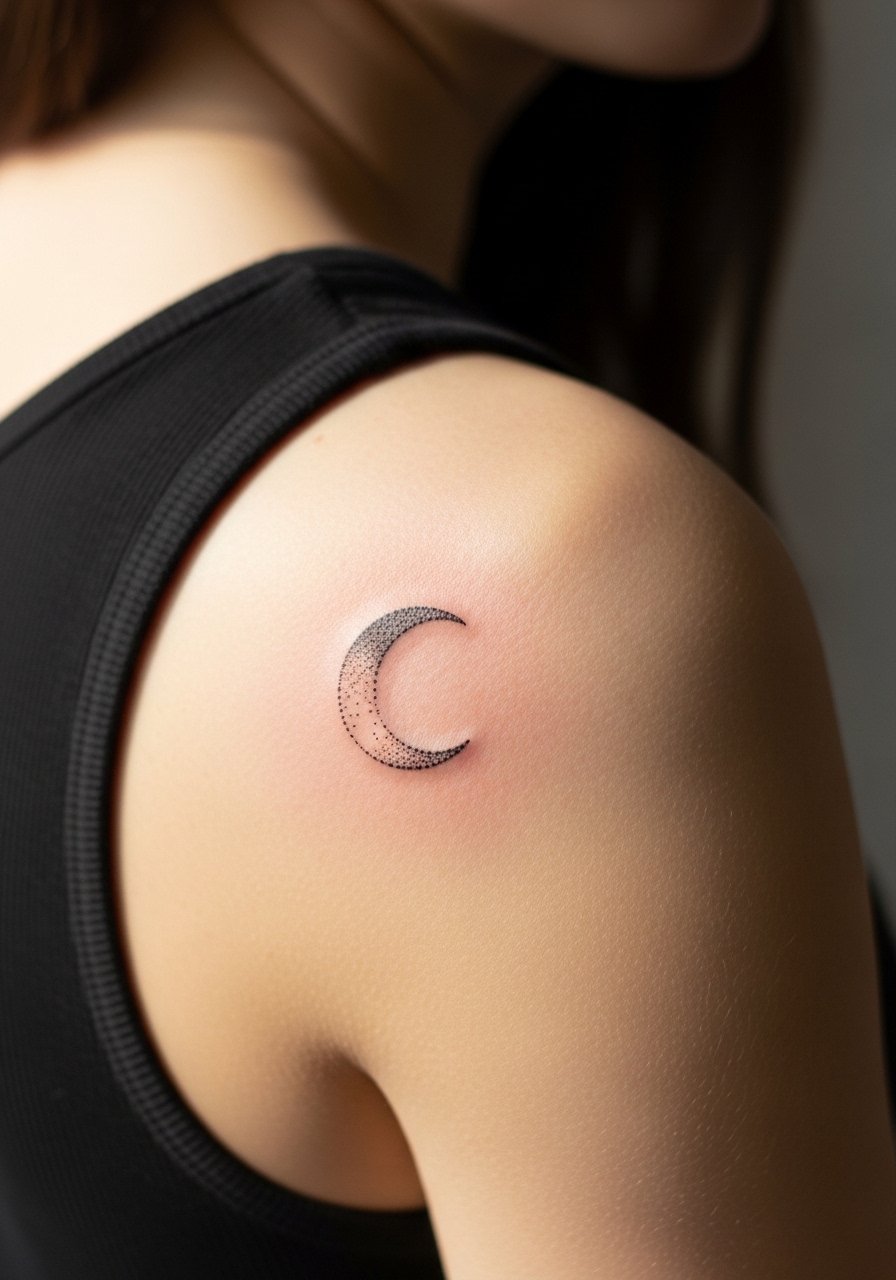
Shoulder blade areas are among the easier zones, usually 2-4 out of 10. Dot work crescents are low risk for blowout and tend to age well because movement is moderate. Expect 30 to 60 minutes. The common mistake is packing dots too tightly near the spine where movement is greater. For the appointment wear a loose button-down shirt or tank you can pull aside without shifting the rest of your clothing. If you want a seasonal reveal, off-shoulder dresses highlight the shoulder blade without overexposure.
19. Tiny Ribcage Whisper Line

Ribcage placements top many pain charts at 8-10 out of 10 for most people. Even a tiny whisper line here can be intense, so artists split on technique. One stance holds that ribs stretch and blur fine work quickly. The other argues precise spacing and needle depth allow small pieces to hold. If you go for ribs, plan sessions in short blocks of 15 to 30 minutes and expect a higher likelihood of a touch-up. A common mistake is underestimating the pain and booking long sessions. For the appointment wear a backless halter top or a loose top that you can shift without exposing more than the area the artist needs.
20. Tiny Footside Wave
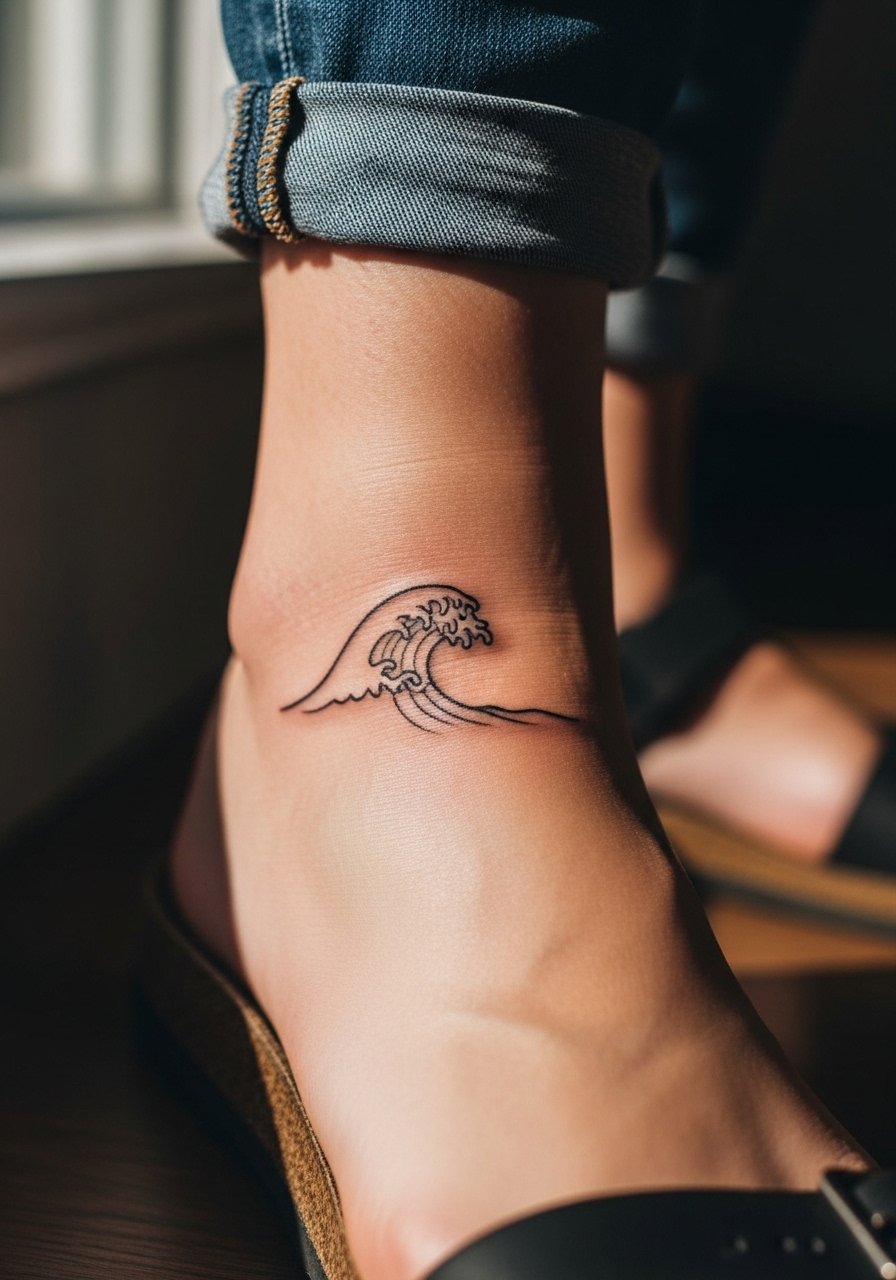
Foot tattoos often score around 7 out of 10 on pain charts and have notable healing friction, especially from shoes. A small wave can be done in a single session of 30 to 60 minutes, but expect slower saturation and faster fading in the first year. The mistake most people make is walking into a long session in boots; instead plan for short visits and avoid tight shoes for two weeks. For showing off pick open toe booties or sandals that reduce rubbing and let the healed line remain visible.
21. Micro Palm Tracker Line

Repeat of the palm placement showcases why palms sit at the high end of pain scales, often 8 out of 10, and why longevity is limited. Palm trackers tend to fade fastest due to skin turnover and constant use, so expect multiple touch-ups over the first two years. If you have jobs involving frequent washing or manual labor, think twice. The big mistake is treating palm work like a standard wrist piece and expecting similar longevity. Consider starting with a less exposed body zone if you want permanent clarity. Sessions are short and are often booked as single small appointments to limit tissue trauma.
Frequently Asked Questions
Q: I want a fine line piece on my ribs but I am worried about longevity. What should I ask my artist?
A: Ask the artist whether they lean toward wider spacing and slightly stronger line weight for rib work, and if they can show healed examples on similar skin tones. Mention your pain tolerance and ask if they prefer splitting the session into short segments. If they cannot show you healed ribs at this size, consider a placement that tolerates fine line better.
Q: Do foot and ankle tattoos need different session planning than wrist pieces?
A: Yes, foot and ankle sessions often require short appointments and explicit aftercare to avoid shoe friction. Plan to be barefoot or wear loose sandals for a week and bring a slip-on shoe for after the session. If you travel by public transit, think about a protective covering to keep the area clean on the way home.
Q: Why are palm tattoos more painful than back-of-hand tattoos and what are the trade-offs?
A: Palms register higher pain because of the nerve configuration and frequent use. The trade-off is faster fading and a higher chance of touch-ups. A back-of-hand tattoo is less intense and can last longer but still faces wear. Consider starting with a less vulnerable location if you want lasting crispness.
Q: How much shorter should sessions be for armpit or inner elbow placements?
A: Plan on 30 to 60 minute bursts for armpit or inner elbow work since these areas amplify discomfort. Ask for breaks during the appointment and schedule a follow-up touch-up rather than pushing one long session.
Q: Can wardrobe choices really affect healing and visibility?
A: Yes, clothing makes a big difference. For example a fingertip or ring finger piece needs no rings during healing, and ribcage work benefits from removable tops like a loose button-down shirt during the session. Picking garments that reduce friction and let the area breathe speeds recovery and preserves line clarity.
Q: Are there placements beginners should try first to build a tolerance?
A: If you want to ease in try outer forearm, calf, or shoulder blade pieces first. Those spots tend to rate lower on pain charts and still give visible results that build confidence for higher-pain zones later.
