
Fine line forget-me-not tattoos look delicate in photos, and they can feel fragile when you are booking the session. Sizing anxiety, fear of early fading, and not knowing what to wear on appointment day are the three things people ask me about most. These ideas walk through small pieces and larger clusters, show how they age, and explain what to tell your artist so the flowers still read clearly after a few years.
1. Single Forget-Me-Not on the Inner Wrist, Fine Line
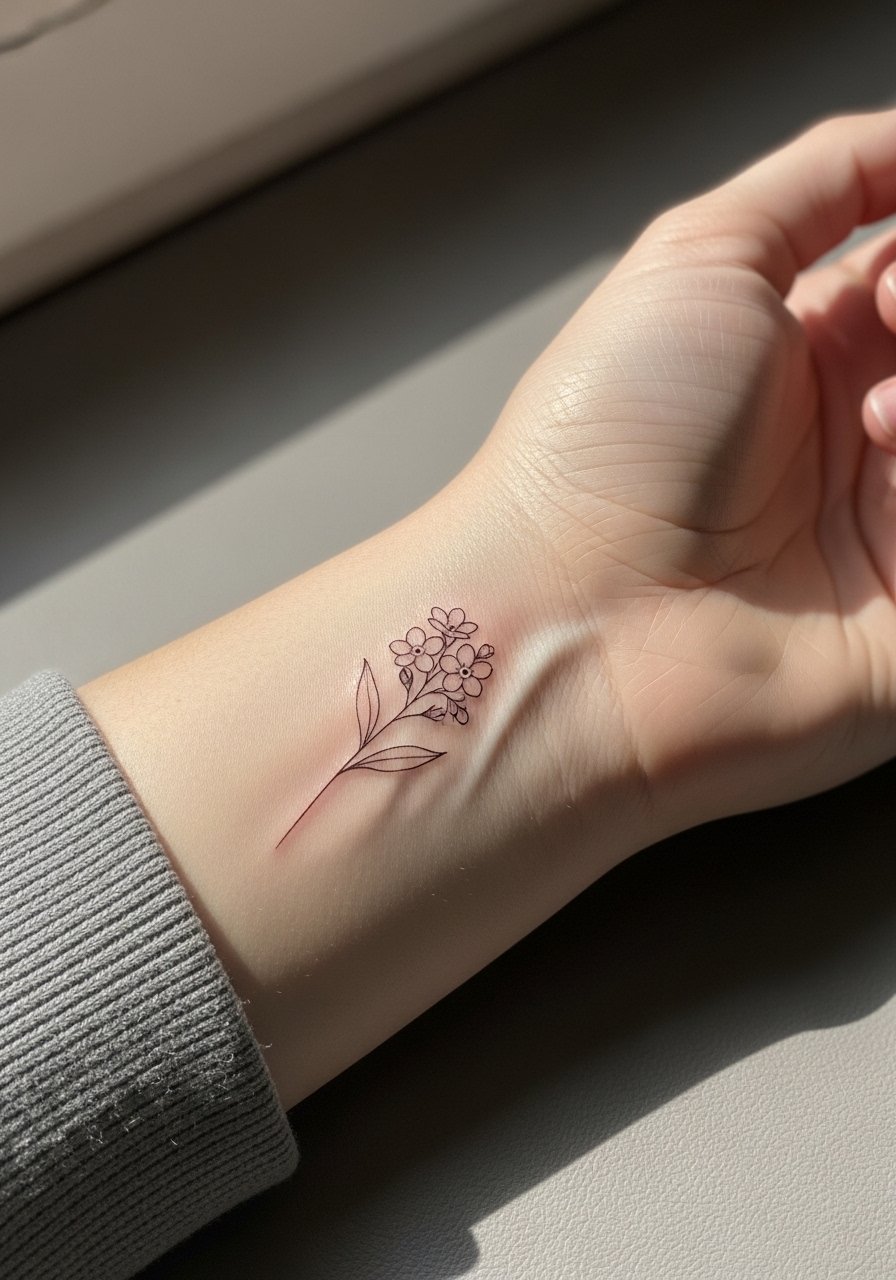
A single blossom on the inner wrist is the classic small option people pick when they want one tiny symbol without a lot of fuss. Tell your artist you want 1.5 to 2 millimeter linework with an open petal spacing so the petals do not merge as the ink settles. Pain here is low to moderate, and a short session usually does the job, about 30 to 45 minutes. The common mistake is asking for ultra-fine, dense detail in a one-inch piece, which blurs faster. For showing it off, pair with a thin chain bracelet on the opposite wrist so the tattoo reads as an intentional accent rather than a lone speck. Expect touch-up talk at year two if you want razor-sharp edges.
2. Minimalist Outline Forget-Me-Not, Inner Wrist Blackwork
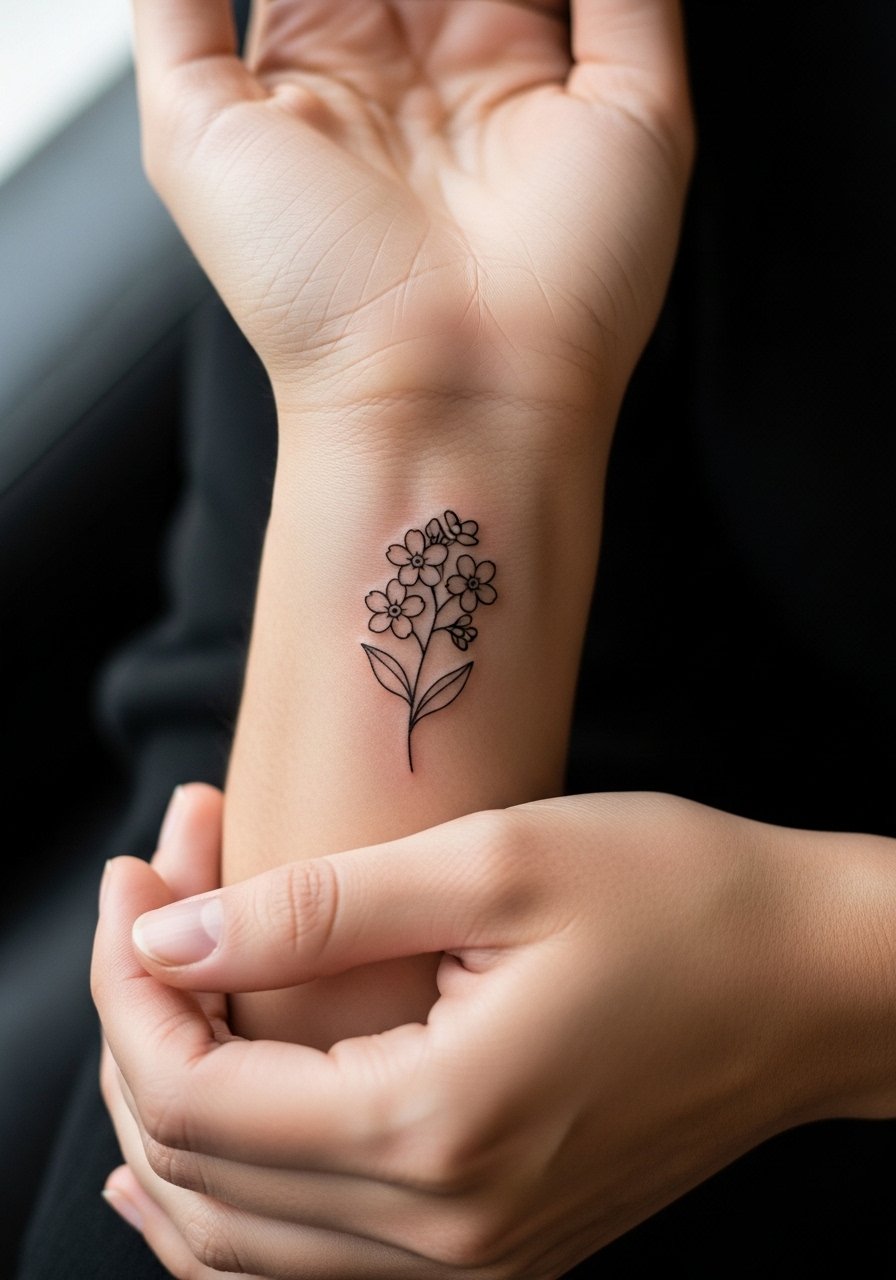
This pared-back black outline works if you want something bold enough to age cleanly without color maintenance. Say in consultation that you prefer slightly thicker outline weight so the contour maintains shape at three to five years. The session is quick and the pain level is mild. A frequent error is asking for pin-thin outlines that disappear into natural skin lines. For longevity, ask the artist about spacing between petals and avoid tiny loops where blowout can creep in. If you are nervous about visibility, ask how the same stencil would look at 1.5 inches versus one inch on your wrist so you can choose scale rather than guessing.
3. Dainty Ankle Cluster with Green Leaves, Fine Line Illustrative
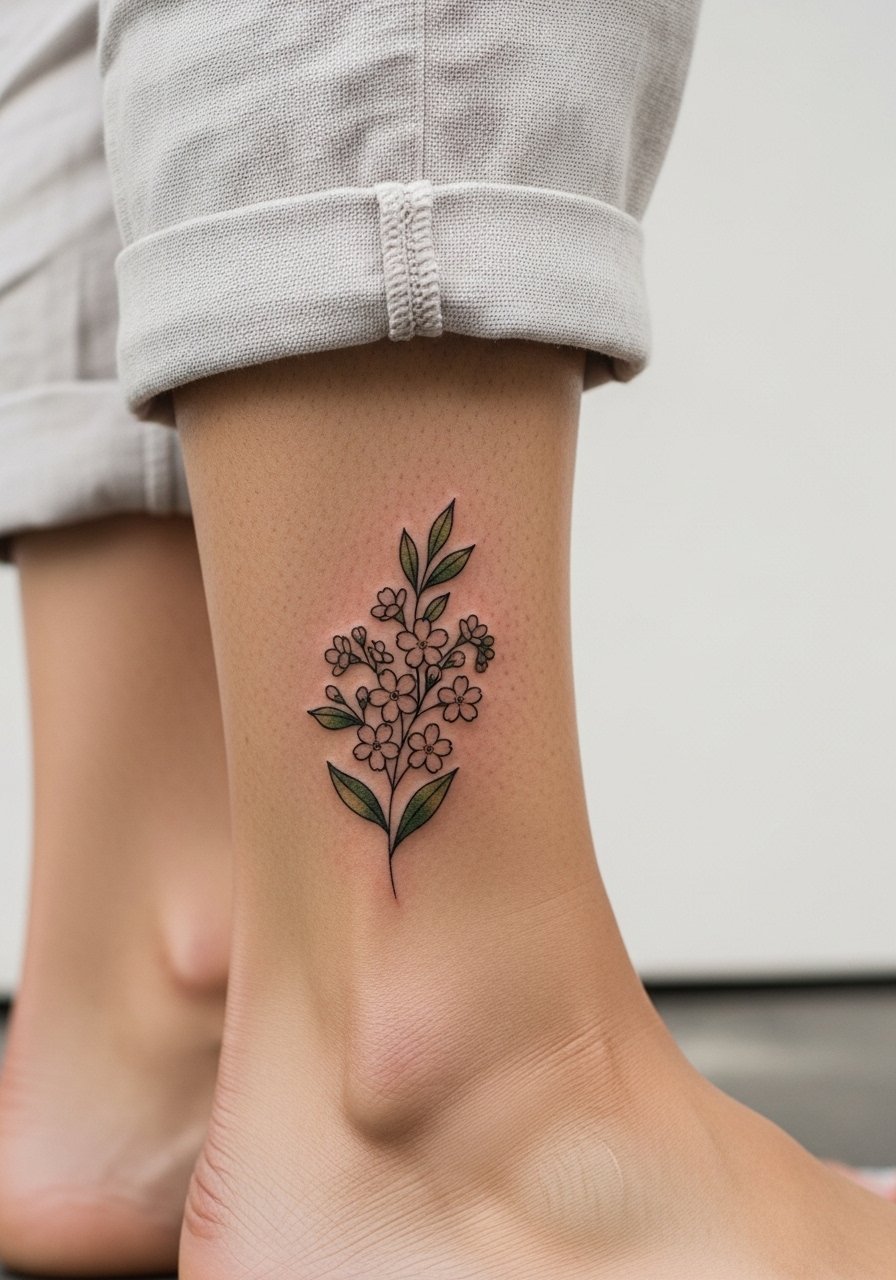
An ankle cluster reads as a summer piece and is forgiving for a first tattoo because it stays low key when you wear boots and shows off in sandals. Tell the artist you want 2 to 3 inch total spread with airy negative space between flowers so the blues and greens keep their shape instead of merging. Pain at the ankle is moderate depending on placement near bone. The session usually runs 45 to 75 minutes. A real mistake is cramming a dense cluster into a two-inch square, which looks busy fresh and blurs over time. For dressing, roll cropped linen pants or slip into strappy sandals to show the piece, and wear linen cropped pants to keep the area accessible during the appointment.
4. Single Needle Forget-Me-Not Petal on the Side Ankle
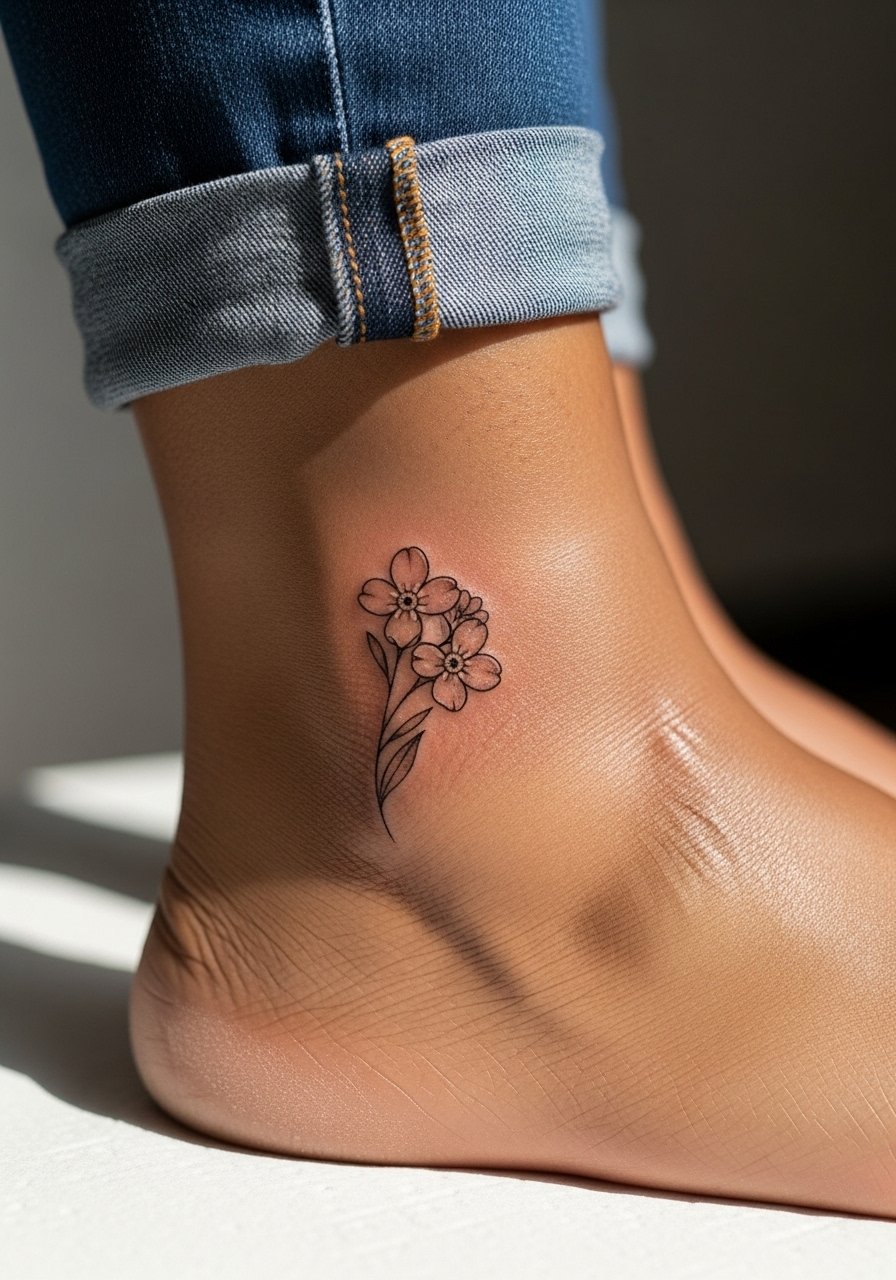
Single-needle work is all about precision and it pays off when you want a tiny, detailed petal without heavy saturation. Give the artist a photo that shows the exact petal placement, and ask for a slightly bolder outline than they would normally use for a one-centimeter piece. Pain is mild but can spike near the bone. Sessions are short, often under 45 minutes. The common issue is over-detailing micro pieces, which leads to early softening. Expect a potential touch-up at around year two if you want to keep the petal crisp. For healing, avoid tight socks and shoes that rub the area in the first week.
5. Bunch of Bright Blue Forget-Me-Nots on the Forearm, Traditional Single Needle
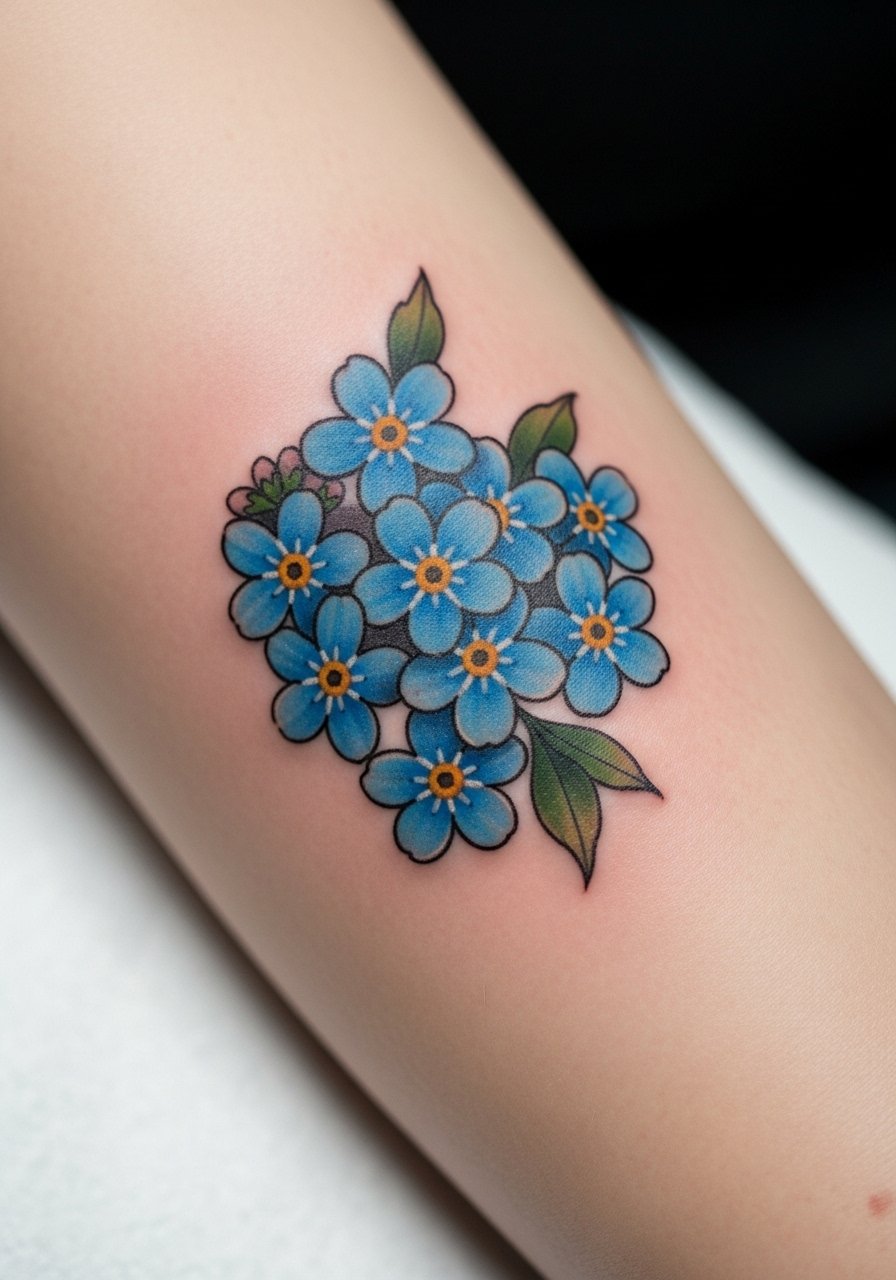
This forearm cluster reads well from a distance and builds into floral collections as a sleeve filler. Ask for bold primary petal colors with varying saturation so the cluster keeps depth without relying on heavy black outlines. Pain on the outer forearm is low, and a 1.5 to 3 inch cluster takes 1 to 2 sessions depending on saturation. A common mistake is requesting all petals in the same blue value, which flattens when healed. For showing it off, roll sleeves or wear a short sleeve button down so the tattoo sits in a natural frame while you work or socialize. Expect touch-up discussion at year three for heavy color pieces.
6. Watercolor Forget-Me-Not Cluster on the Collarbone
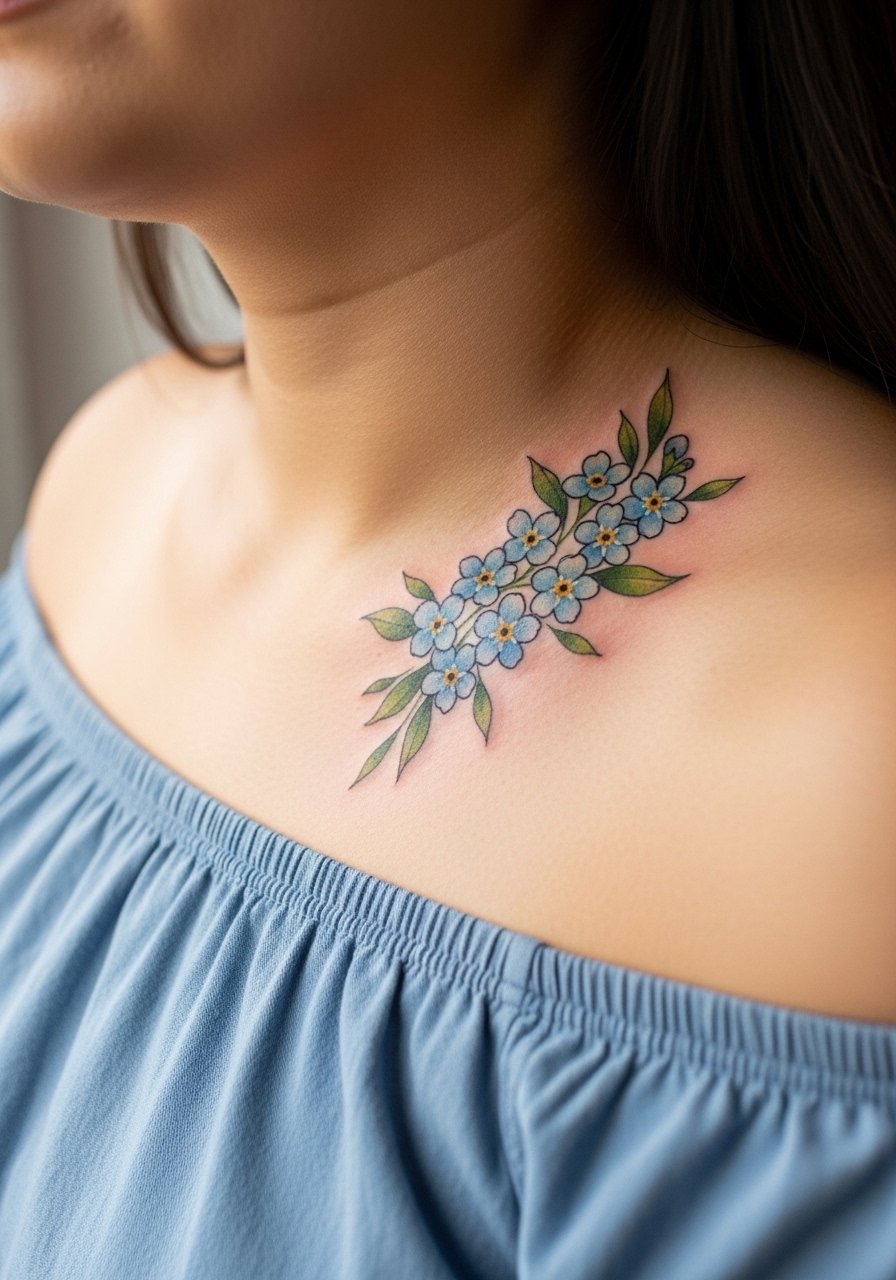
Watercolor on the collarbone gives the petals a fluid, painterly edge that sits nicely along collarbone contours. For the consultation, bring images that show how watercolor fades into skin rather than strict outlines and ask for gentle edges so the piece breathes with movement. Collarbone work can be tingly and rates moderate on most pain scales. Expect a single 60 to 120 minute session for medium clusters. The typical error is over-saturation in the first session, which heals into patchy color. For wearing after the session or showing it off, an off shoulder blouse frames the ink without covering the art. If the watercolor reads patchy at six months, plan a follow-up to balance saturation.
Studio Day Picks
The six designs above include wrist, ankle, forearm, and collarbone placements that ask for different prep and first-week protection.
-
Stencil transfer paper kit. Lets you check exact placement and scale on skin before the needle hits, which is useful for wrist and collarbone pieces.
-
Topical numbing cream. Helpful for sensitive ankle and behind-the-ear spots when you want the session to be more manageable.
-
Thin protective film roll. Keeps low-friction areas like fingers and ankles clean in the first 24 to 48 hours while you do light movement.
-
Fragrance-free body wash. Gentle cleansing for color pieces on the forearm and collarbone while the scabs soften.
-
Aquaphor healing ointment. A thin layer in the first days helps maintain moisture for fine line pieces and avoids crusting that can pull out delicate ink.
7. Forget-Me-Not with Monarch Butterfly, Scaled for Behind-the-Ear
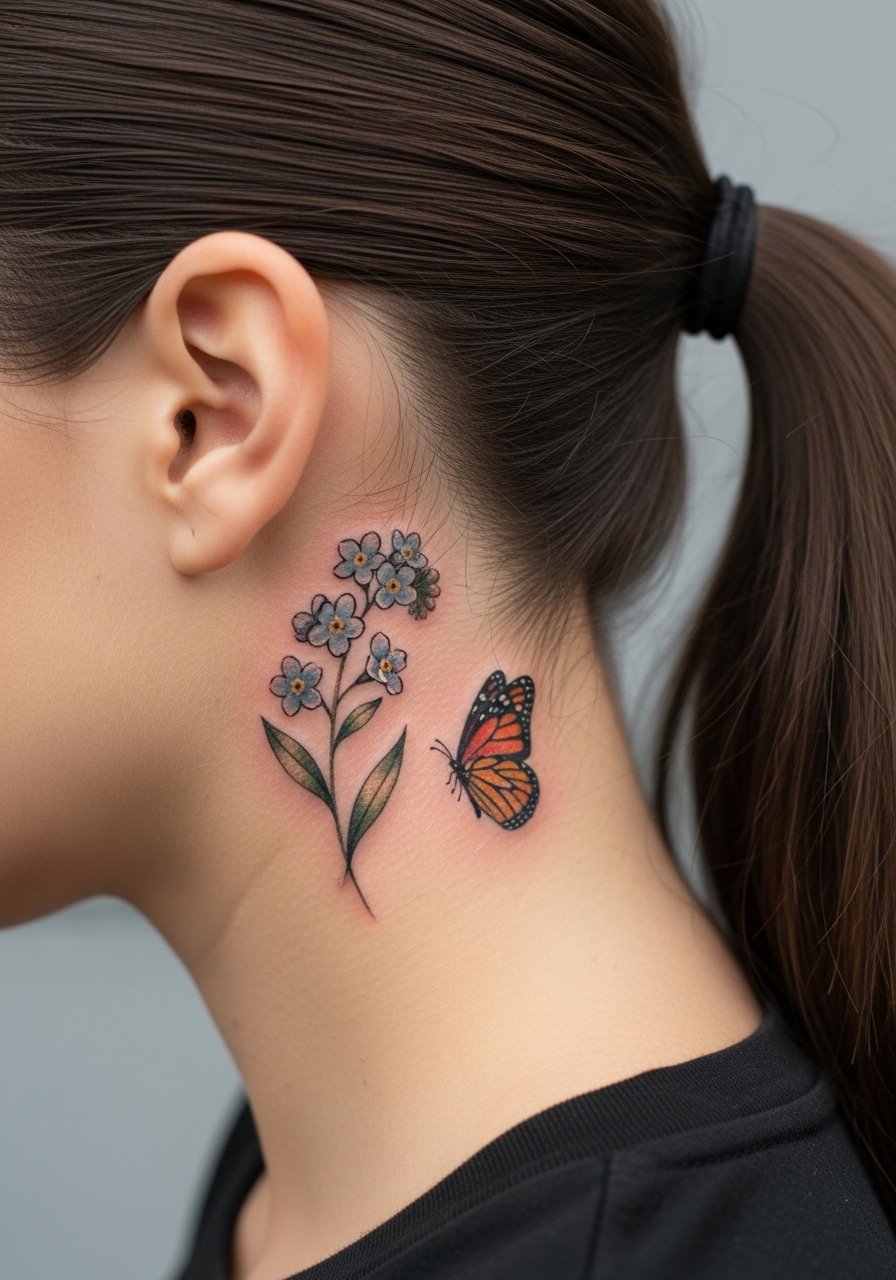
Behind-the-ear placements need small, well-scaled elements so they read correctly in a tight space. Ask your artist to scale the butterfly and flower cluster to under two inches and to use soft color transitions rather than heavy outlines. The session is brief, but the area is sensitive and can sting more than the arm. Artists are split on how fine detail holds in that thin skin, so name both camps in the chat: some say fine line settles poorly there, while others say careful depth works fine. For the session, tie hair back and bring a hair ties silk option so the artist has clear access. Small behind-ear pieces tend to need touch-ups earlier than forearm work.
8. Vibrant Blue Sleeve Filler with Forget-Me-Nots, Illustrative
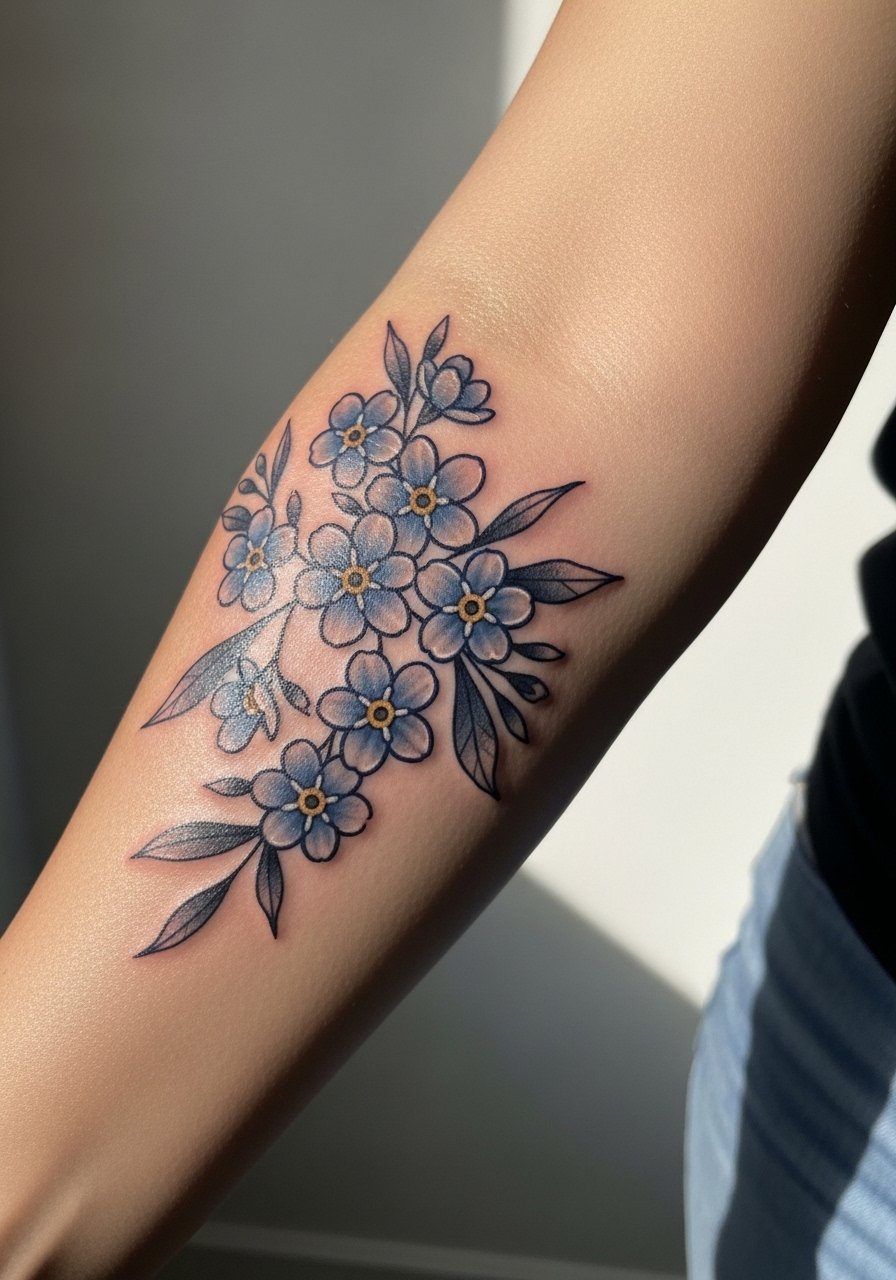
As a sleeve filler, forget-me-nots act as connective tissue between larger motifs and help a sleeve read cohesive. Bring reference photos that show how the flowers tuck under bold elements so the negative space breathes. Expect multiple sessions and moderate cumulative pain, especially where the arm curves. A common mistake is overworking the same area in one session, which can cause excess swelling that obscures color. Talk to your artist about saturation strategy across visits so you do gradual layering rather than an all-at-once approach. If you are building a sleeve, ask how the forget-me-nots will age next to heavy blackwork and plan touch-up windows accordingly.
9. Forget-Me-Not with Memorial Elements on the Upper Arm, Neo-Traditional
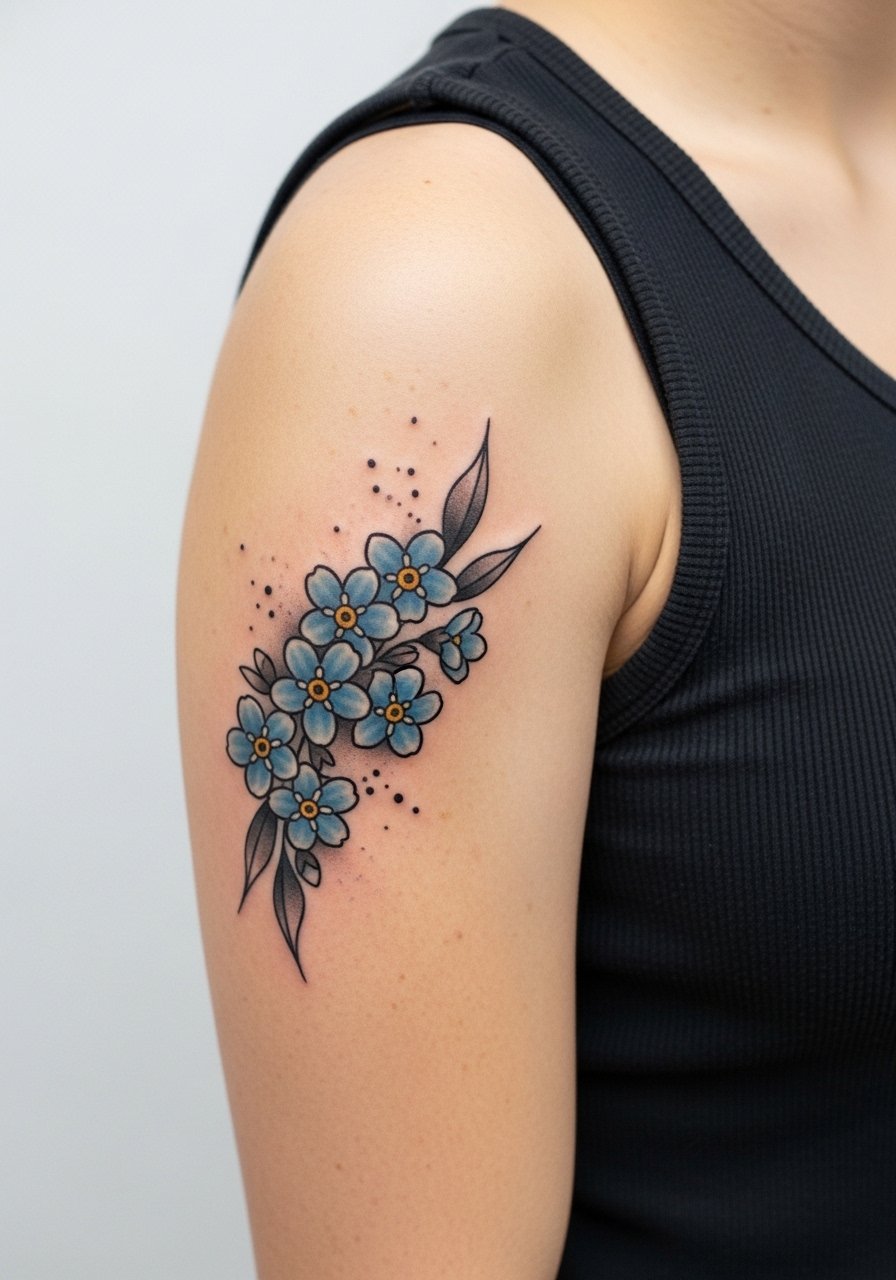
When forget-me-nots become part of a memorial piece, people often add dates, small objects, or protective motifs for context. Ask how to integrate grayscale shading so memorial elements avoid competing with blue petals. Upper arm sessions are moderate and often done in two sittings for medium 4 inch pieces. A frequent misstep is crowding symbolic elements too close to the flowers, which makes the narrative hard to read. For the appointment, a sleeveless tank fitted keeps the shoulder accessible and frames the piece when you want to show it later. If the memorial contains text, specify exact lettering in the stencil review so the artist can size it for legibility.
10. Abstract Forget-Me-Not with Christian Symbols, Shoulder Ornament
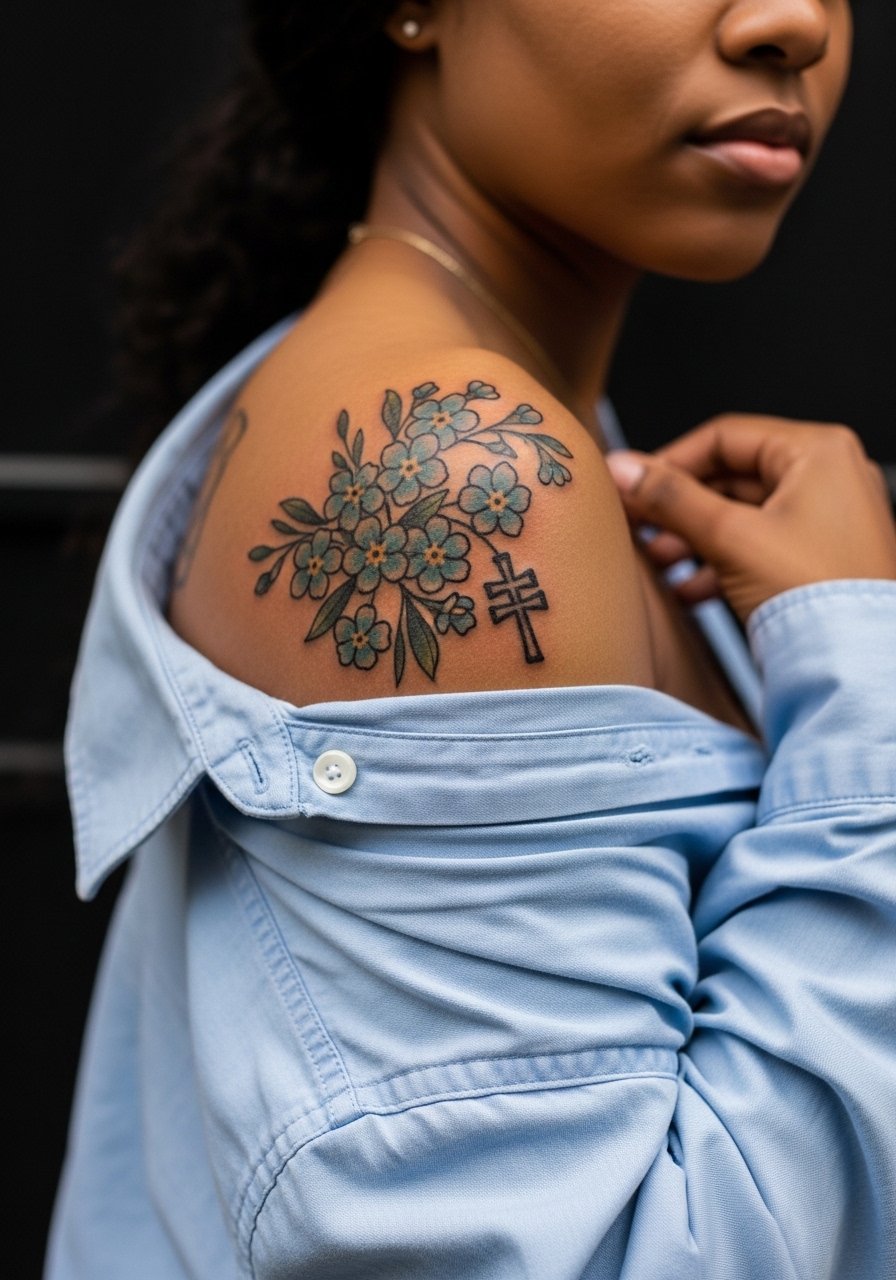
Faith-based designs ask for sensitivity to symbolism and scale. Discuss with the artist whether a literal symbol or a simplified motif better fits the floral composition. Shoulder placements take about 60 to 90 minutes for medium-sized ornamentals and are mild to moderate on pain scales. A common error is mixing highly detailed religious iconography with tiny flowers and expecting both to read clearly. Consider substituting a simplified emblem that complements the forget-me-nots rather than duplicating complex iconography. If origin or tradition matters to you, state that in the consultation so the piece respects the source.
11. Single Needle Petals on the Ribcage, Fine Line
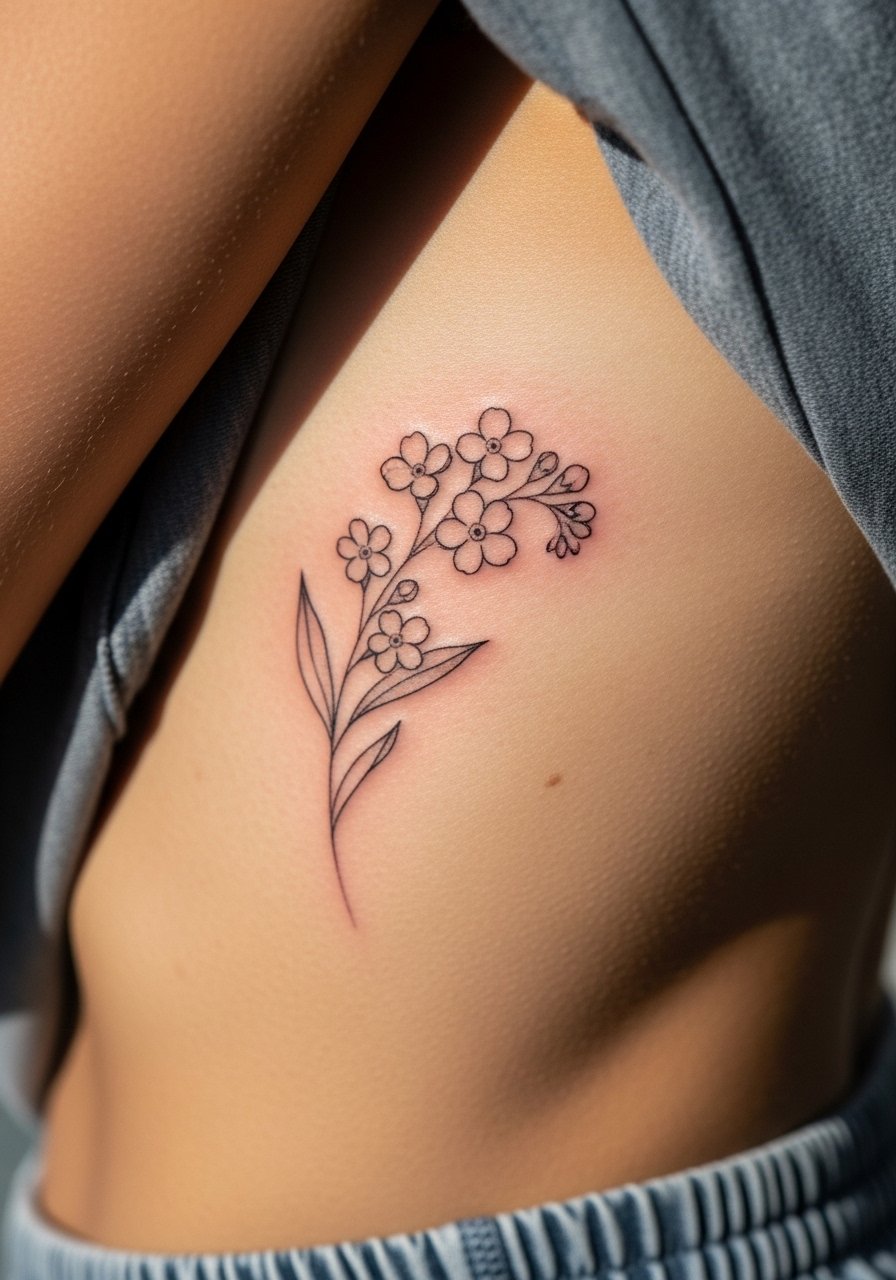
Ribcage pieces look intimate and they test the limits of fine line work. The pain here is higher and sessions may pause frequently. Artists split into two camps on fine line for ribs. One camp says the moving skin and stretch blur ultra-fine work within a couple of years. The other camp says precise depth and spacing let fine line hold up fine. Ask your artist where they stand and request slightly more spacing between petals if you lean conservative. A real mistake is packing dense detail into a rippling area. Plan for a touch-up conversation at booking so expectations are clear before the needle starts.
12. Sternum Cluster in Watercolor, Center Chest
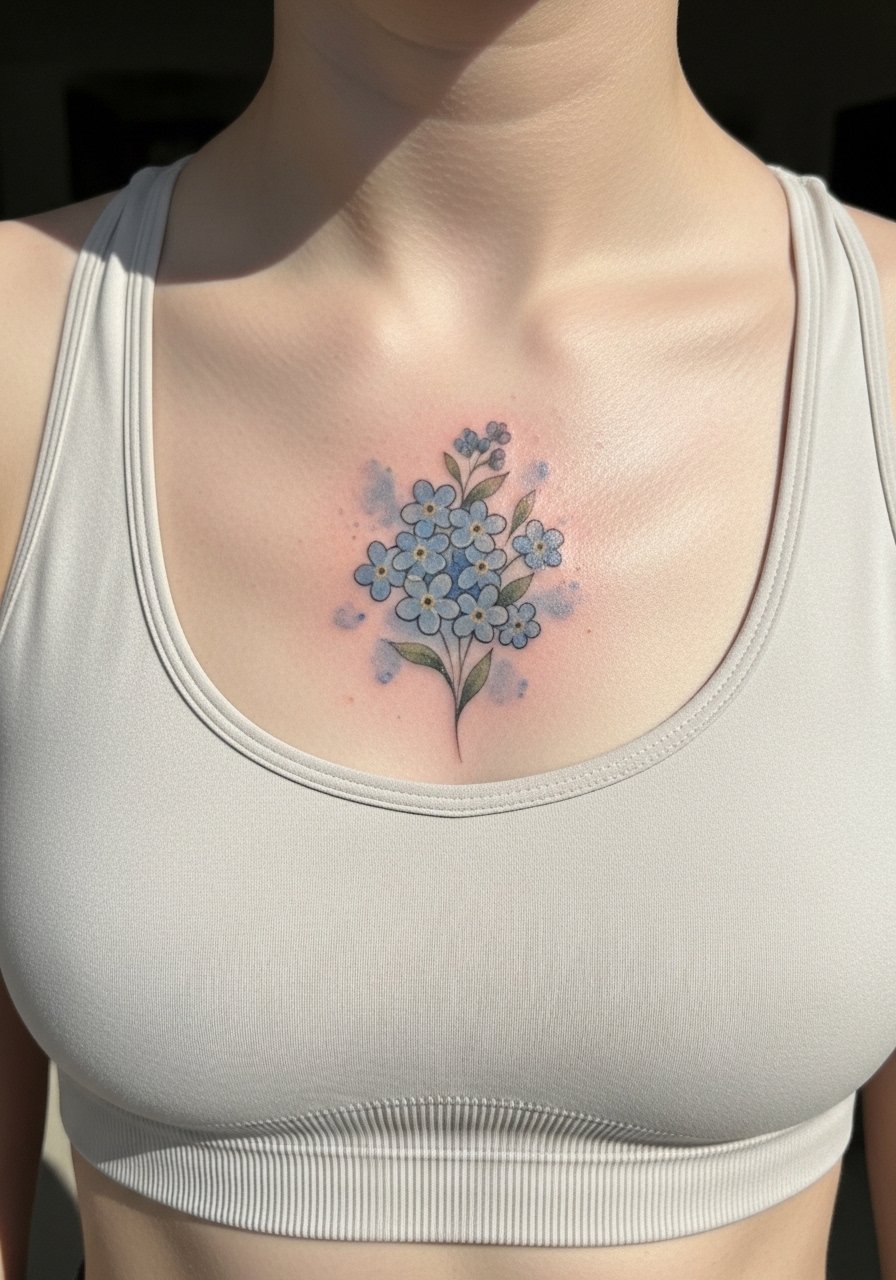
Sternum watercolor reads as a soft, personal statement that works well with low necklines and layered necklaces. Mention you want color washes rather than heavy outlines during consultation so the artist maps edges to skin tension lines. Sternum sessions are moderate to high on pain scales and often done in one to two sittings depending on coverage. A common error is expecting crisp edges from watercolor technique, which is a softness-first approach. For the appointment, a strapless top or a supportive sports bra helps the artist access the area without exposing excess skin. Plan a brief check-in around month six to see how the washes have settled.
13. Forget-Me-Nots as Fillers in Abstract Personal Pieces, Forearm or Rib Connectors
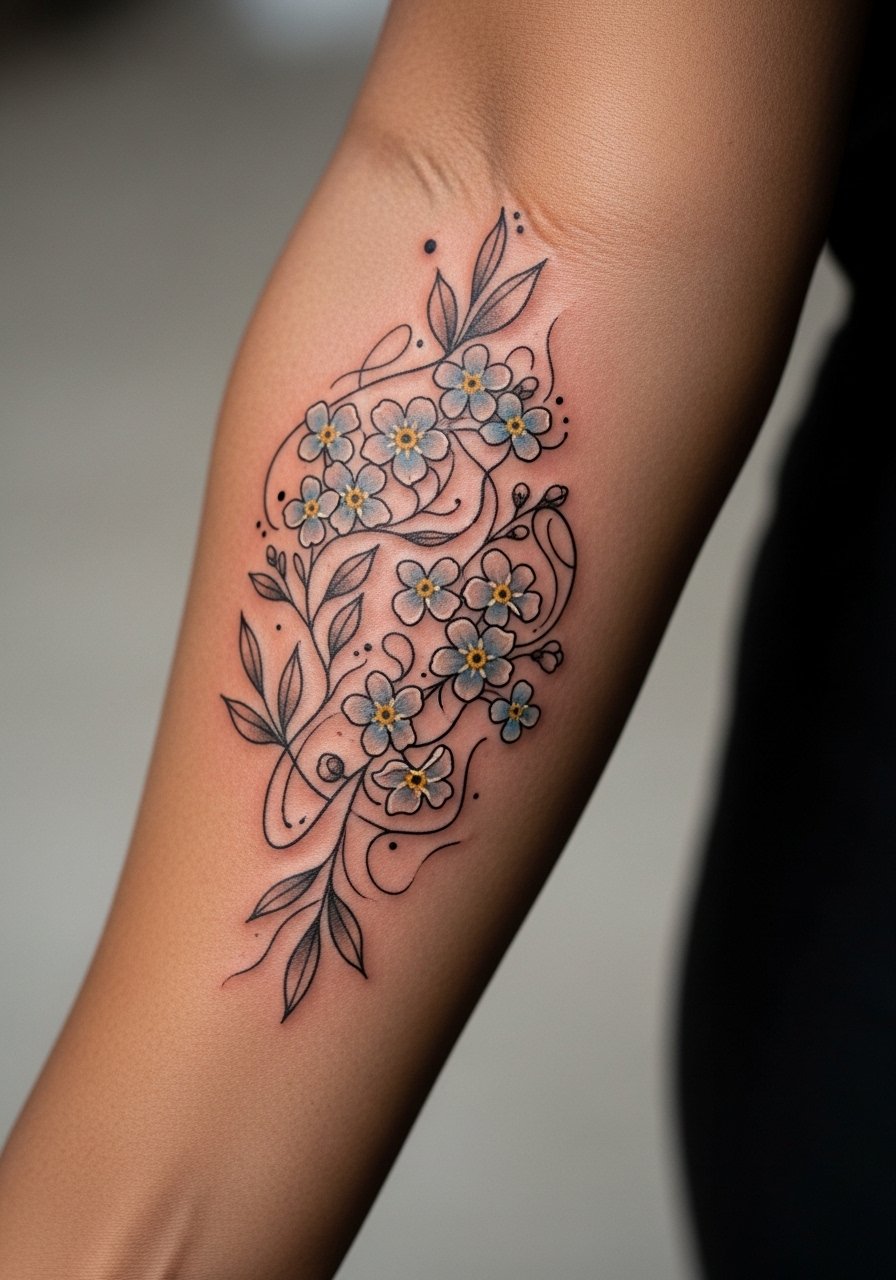
Forget-me-nots excel as small connectors in custom abstract work, filling gaps and softening transitions between styles. During consultation, point out which motifs you want bridged and ask for small 1 to 2 inch clusters with variable saturation so the filler reads supportive, not dominant. Pain depends on placement, forearm being low and ribs being high. A mistake is asking for identical copies of the main motifs instead of adaptable fillers that follow the flow of the larger piece. For showing off sleeves or forearm strands, roll sleeves and consider a short sleeve button down so the fillers appear as intended without fabric interference. Expect touch-up planning as you add more elements over multiple sessions.
14. Tiny Forget-Me-Not at the Base of a Finger
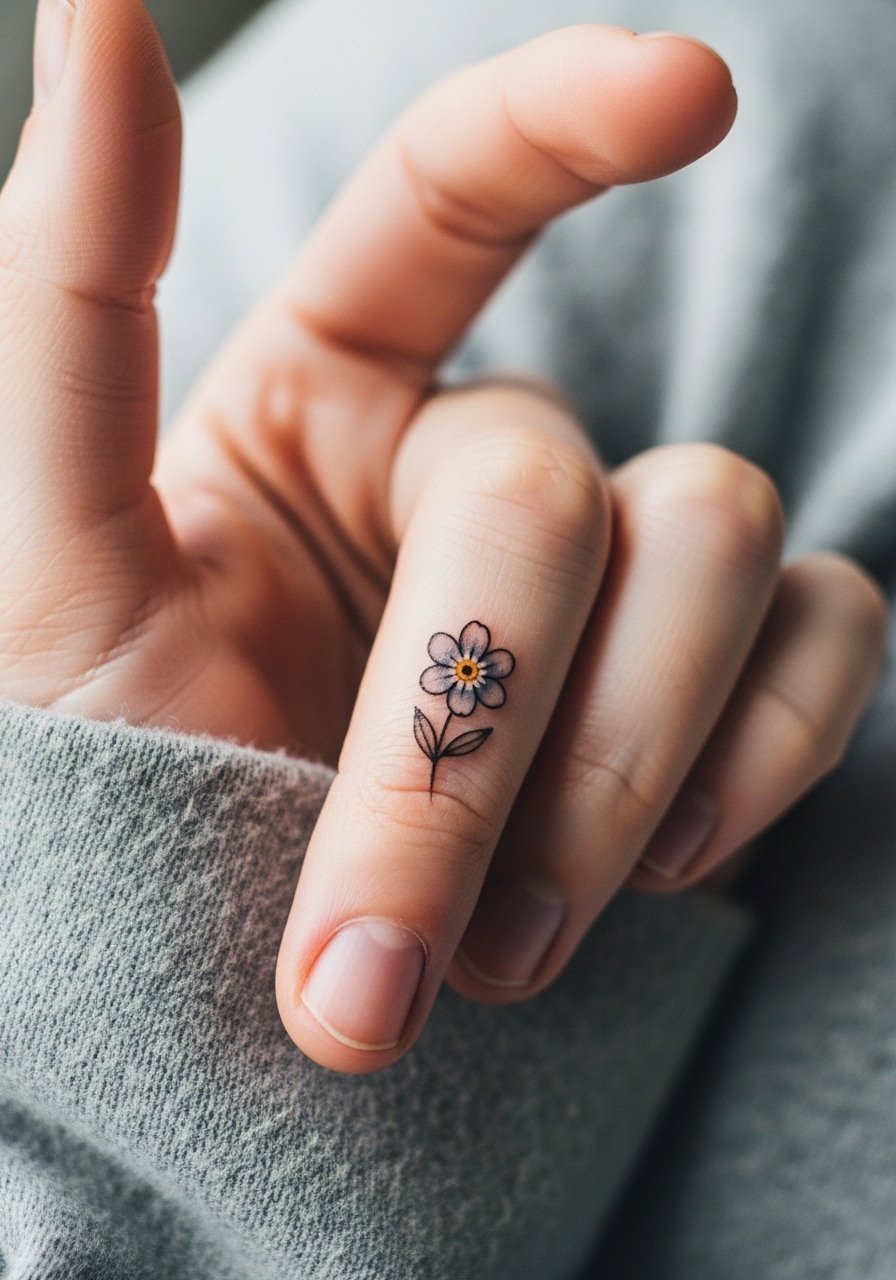
Finger tattoos are visible and high-contact, which affects healing and longevity. For this spot, ask for a simplified design with minimal internal detail because the skin moves and drinks pigment differently than flatter areas. Sessions are short but the area is finicky, and touch-ups are common. The biggest mistake is treating finger skin like forearm skin and expecting the same retention. Expect the ink to soften faster and plan a follow-up window. If you work in a job with frequent hand use, consider placement trade-offs before committing.
15. Forget-Me-Nots as Sleeve Connectors Between Bold Motifs
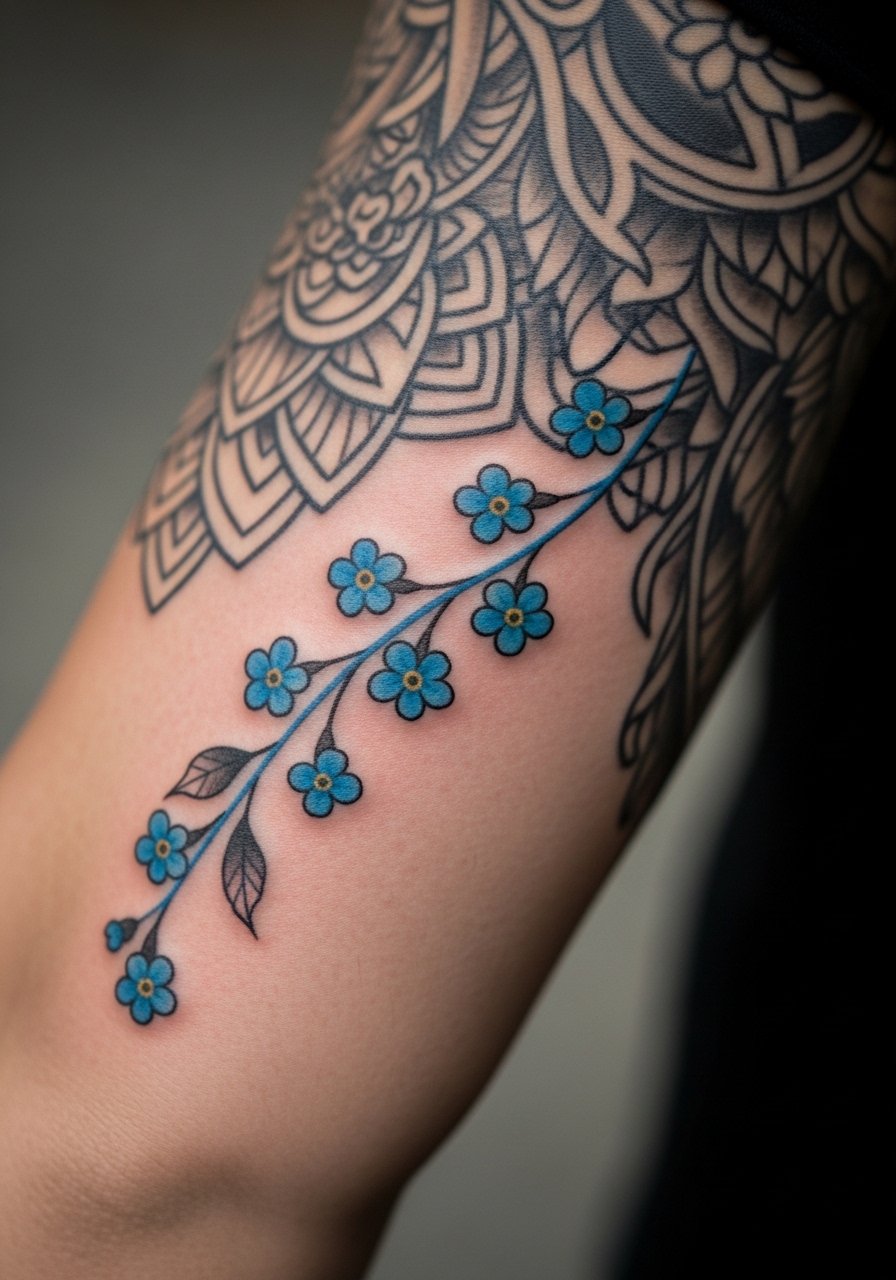
When building a full sleeve, forget-me-nots are the subtle threads that tie bolder imagery together. Tell the artist you want the flowers to act as negative space buffers so the big motifs keep their hierarchy. Hour-long sessions over multiple visits are normal, and cumulative soreness can increase if too much layering happens in one sitting. A common misstep is using the same scale for connectors as for focal pieces, which confuses the eye. Pair sleeve work with unobtrusive accessories, like a thin cuff bracelet on the opposite arm to balance attention without crowding the tattoo. Plan touch-ups after the full build so color levels match across sessions.
16. Calf Cluster of Bright Blue Forget-Me-Nots, Traditional
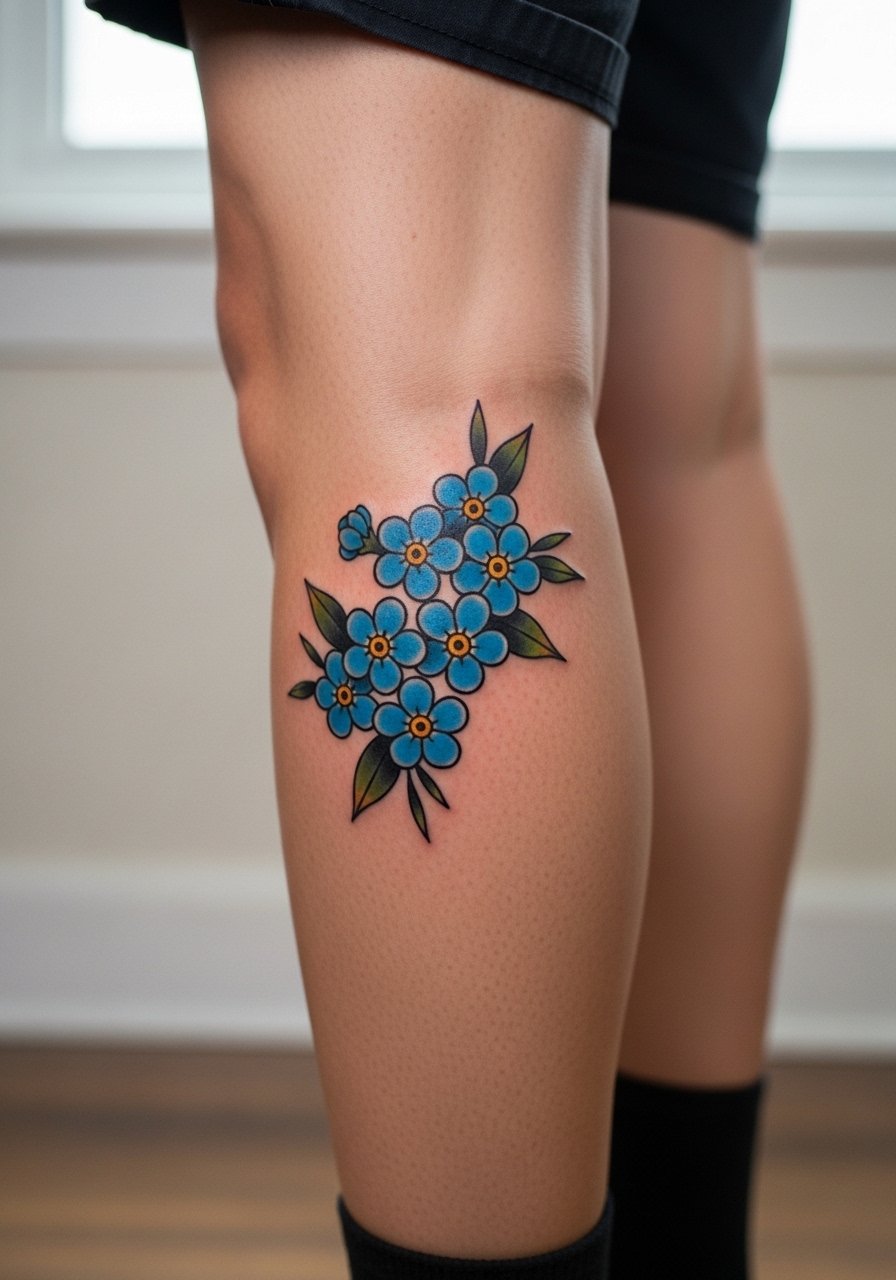
Calf pieces are great when you want a larger cluster that is still easy to hide with pants. Ask for broad petal shapes and deeper blues for the lower leg so the colors stay vivid against movement and sun exposure. Calf sessions are moderate and tolerate longer sits than ankle work. A mistake is using too many tiny elements in a single spot, which flattens when healed. Expect the piece to behave like forearm color work, but remember the calf sees different friction from socks and boots, so plan clothing accordingly in the first two weeks.
17. Hip or Upper Thigh Delicate Cluster, Wearable and Hidden
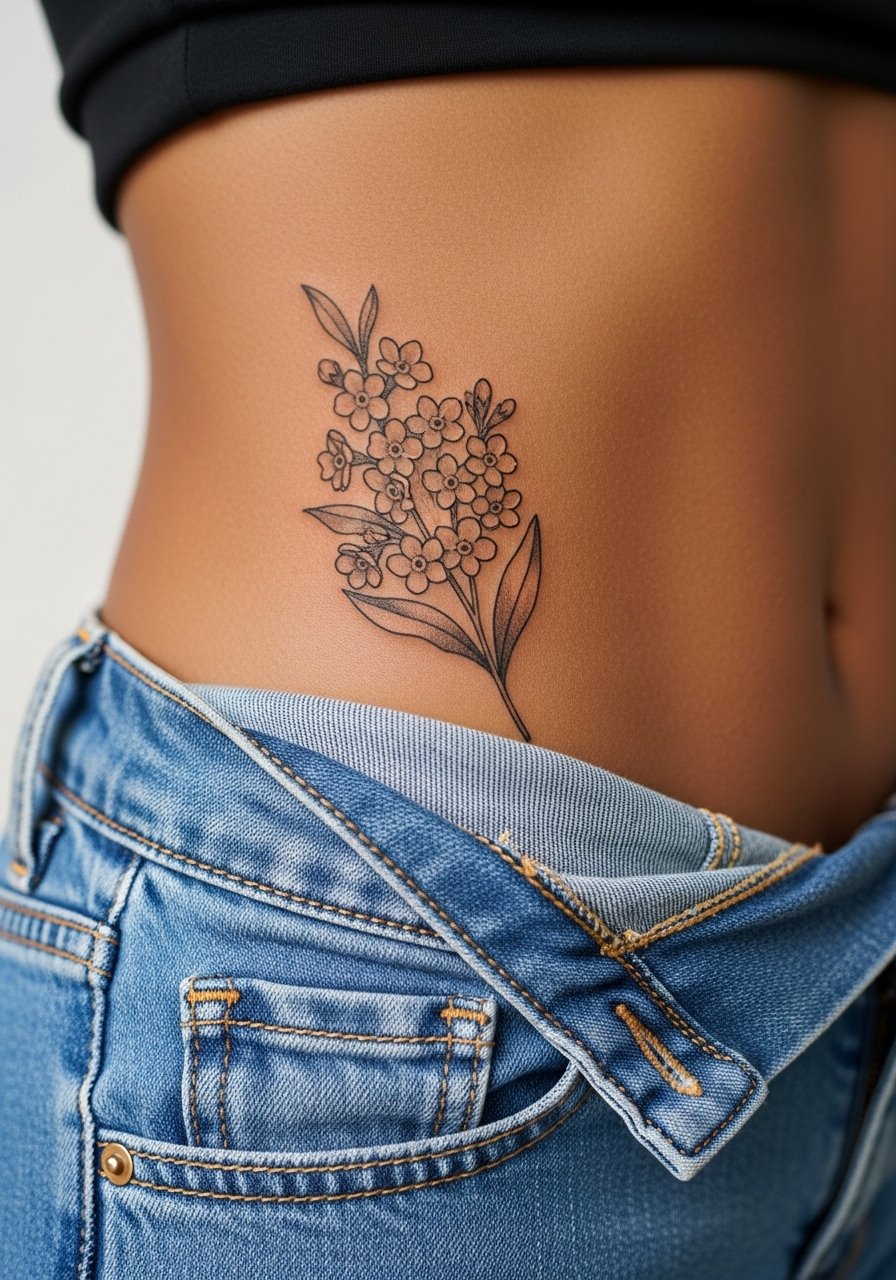
Hip and upper thigh placements let you keep a piece private most of the year and reveal it intentionally for swim or summer outfits. During consultation, decide whether the cluster will be horizontally spread or crescent-shaped so it sits comfortably with clothing. Sessions are moderate and usually single visits for small to medium clusters. A common error is placing the design where pant seams will continually rub, which slows healing and dulls color. If you plan to show it selectively, note that weight fluctuation can change how the piece reads over many years.
18. Small Cluster at the Back of the Neck, Framed by Hair
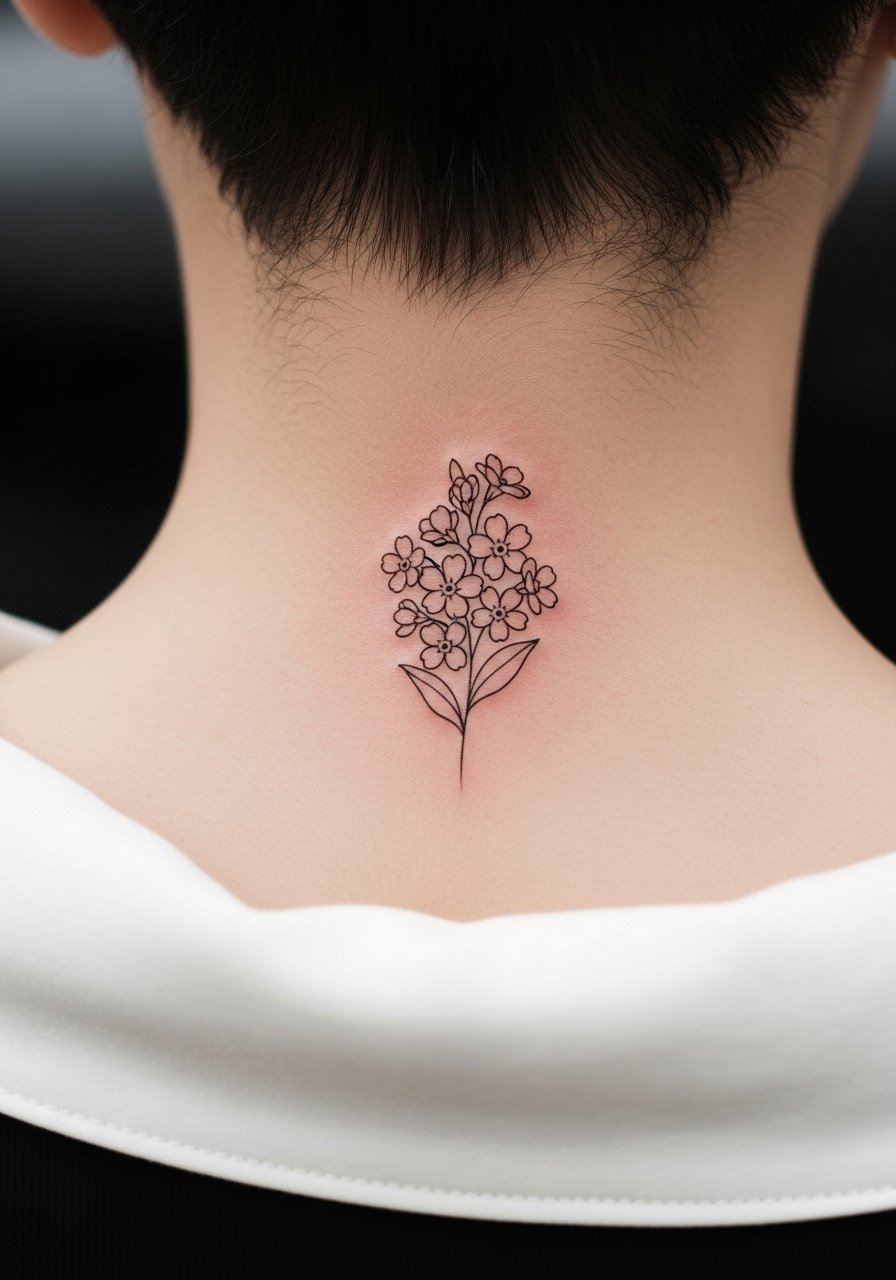
Back-of-neck tattoos read as playful when they peek out from hair and collar lines. Ask your artist to design a compact cluster under two inches that works both when hair is up and when it falls. The area is medium on the pain scale and heals quickly when kept clean. A common mistake is over-detailing a spot that sits under hair, which hides too much of the work. For showing it off with hairstyle choices, pick tops with a wide neck shirt so the small cluster gets the framing it deserves. Expect occasional touch-ups where hair friction is heaviest.
19. Inner Bicep Micro-Realism Forget-Me-Not
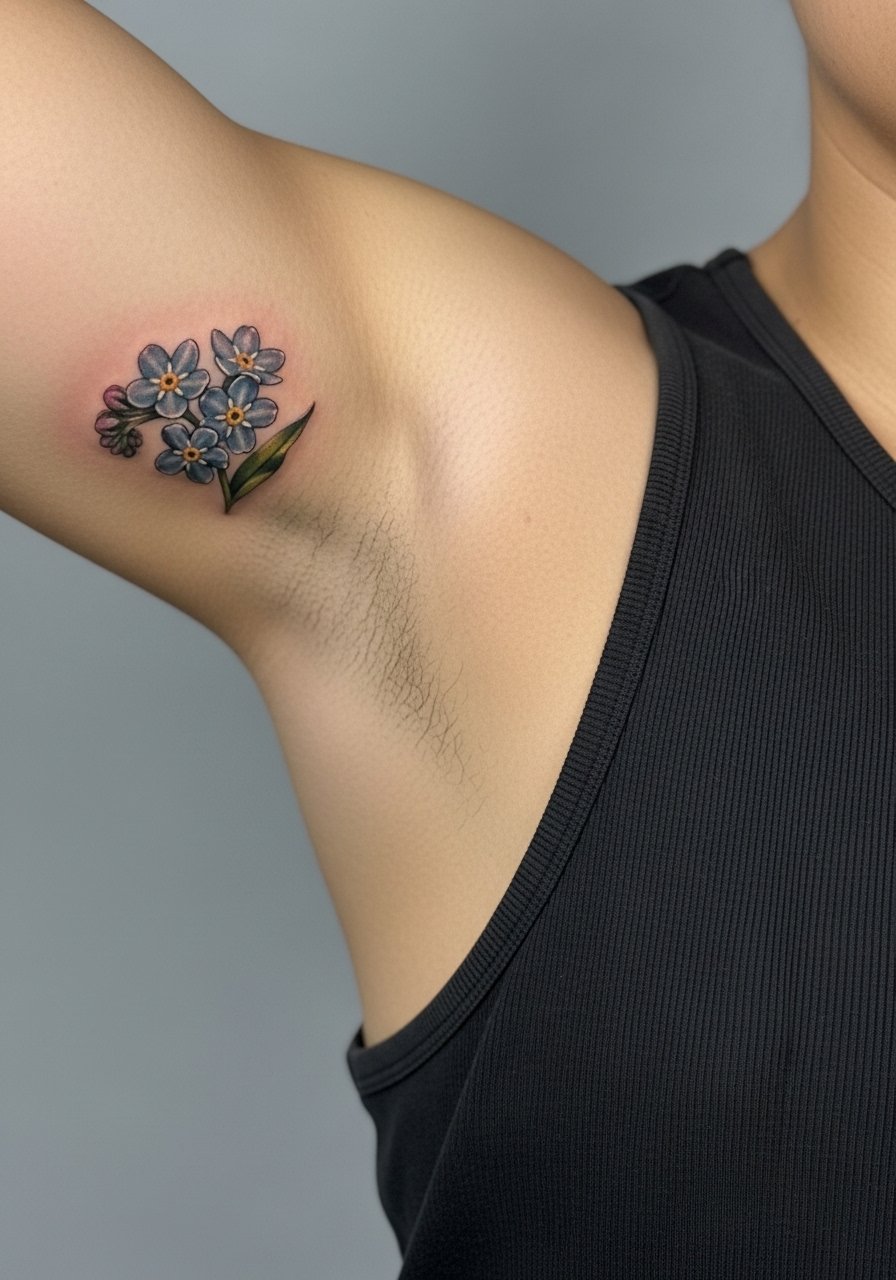
Inner bicep work is intimate and sits where the skin stretches during everyday motion. For micro-realism ask that shading stays light and that the artist plans for a slightly bolder contour than a flat micro piece. Pain varies but the area can be tender for many clients. The main mistake is placing ultra-detailed work without accounting for skin stretch, which blurs edges as the arm moves. Plan for touch-ups at a realistic cadence and avoid constant friction from tight sleeves while healing. If you need the area accessed during the appointment, a sleeveless top makes things easier.
20. Lower Back Forget-Me-Not Band, Fine Line Row
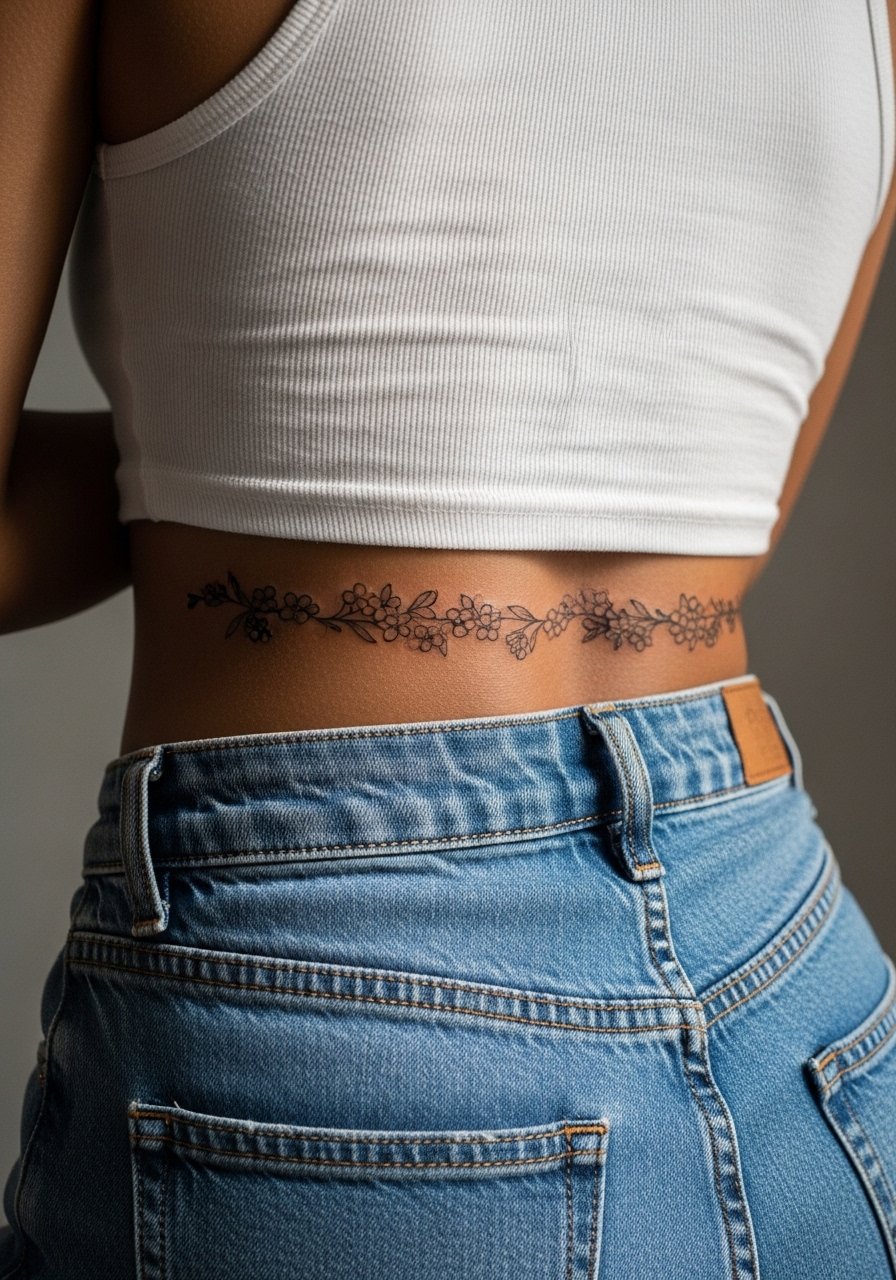
A lower back band uses repeated blooms to create symmetry that looks good with cropping and swimwear. Ask for consistent spacing and small stem lines so the band reads clean when you bend or twist. Lower back sessions are moderate and often done in a single visit for narrow bands. A common misstep is asking for too many tiny motifs that merge into a line after healing. For showing the piece, tank tops and high-waisted jeans reveal the band as designed. Plan for touch-ups if you notice early fading along the centerline.
21. Historical-Inspired Forget-Me-Not, Nodding to Protective Folklore
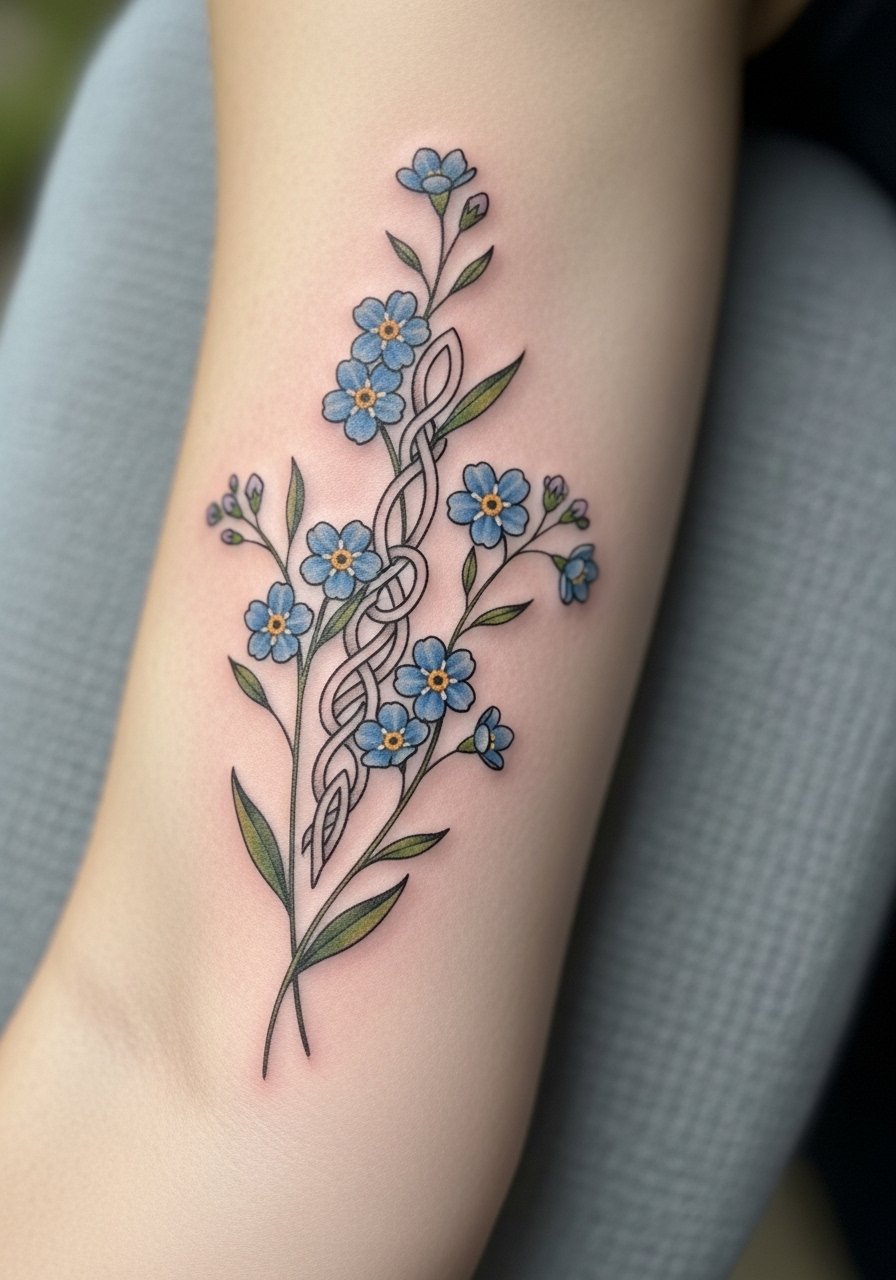
A design that references historical folklore adds narrative while staying floral. If you like the King Henry IV exile story or protective folklore, ask for a small knot motif or a marginal symbol that reads as historical rather than a direct portrait of period imagery. Forearm placement is low pain and shows off the story well when the arm is relaxed. A common mistake is trying to reproduce exact historical texturing without allowing the flowers to maintain clarity. When you explain the folklore connection in the consultation, the artist can suggest a stylized approach that honors the reference while avoiding literal missteps.
Frequently Asked Questions
Q: Will fine line forget-me-not tattoos fade faster than traditional ones on the wrist and forearm?
A: Fine line generally loses crispness sooner than heavy traditional work because the pigment sits in thinner channels. On forearms you often see subtle softening by year two to three. On wrists the thinner skin and frequent washing accelerate that. If longevity matters, ask for slightly increased line weight and plan a touch-up window when you book.
Q: How should I dress to make a collarbone watercolor tattoo easy to see at an event without irritating it?
A: Choose off-shoulder or V-neck tops that rest just outside the ink so the tattoo is visible without rubbing against fabric. A delicate option like a delicate necklace chain sits above the cluster without competing. Avoid tight straps that cross the exact tattoo zone during the first few months.
Q: If I want a forget-me-not with memorial elements, what should I ask during the consultation?
A: Ask how the artist will balance color and grayscale so the memorial elements do not overwhelm the flowers. Request a stencil review that includes proposed text size and placement, and set a follow-up in the booking plan for touch-ups after initial healing.
Q: Are behind-the-ear forget-me-nots worth it if I worry about detail holding up?
A: They are worth it if you accept a simpler execution. Because the skin is thin, small motifs should avoid dense internal detail. Ask the artist whether they recommend slightly bolder lines or a softer watercolor hint. Also discuss touch-up frequency ahead of time.
Q: How often should I expect to need touch-ups for single-needle ankle or finger forget-me-nots?
A: Fingers and ankles are high-friction zones. Many people see noticeable softening within two years, and a touch-up in that window is common. Plan for a touch-up conversation when you book so the session includes a realistic follow-up timeline.
