
Fine line cyber sigils dominate feeds, and the same hands who push them are quietly booking touch-ups at year two. I have talked to artists at five shops across Brooklyn and watched which pieces hold and which need rescue. The trick is placement, spacing, and honest needle depth. Start here with joint-friendly sigils that read clean after the first year and then move into larger templates that age with intention.
1. Elbow Spike Flow for Joint Movement
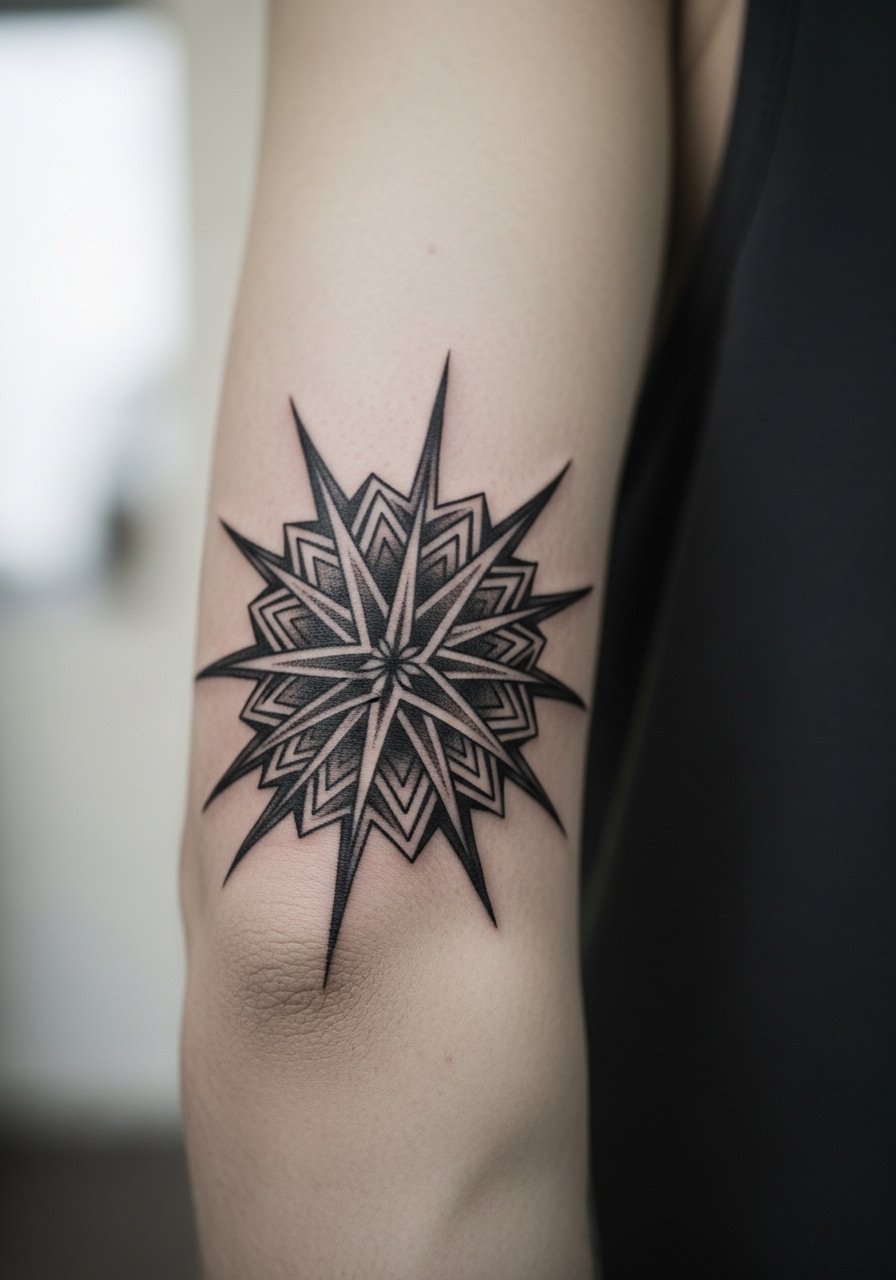
Fair warning, the elbow is one of the trickier joints for linework because the skin folds every time you bend. I recommend a slightly looser spike spacing than you might sketch on paper so the design breathes when it folds. Tell your artist you want the spikes to follow the crease, not sit across it. The session feels bumpy and oddly loud when the needle crosses the joint, but most medium pieces finish in a single appointment. Expect a touch-up at year two if you do a lot of manual labor. For showing this off, layer a fitted black tee with an elbow cutout tee or roll sleeves so the spikes peek out.
2. Ribcage Flow Pattern That Sways With Breath
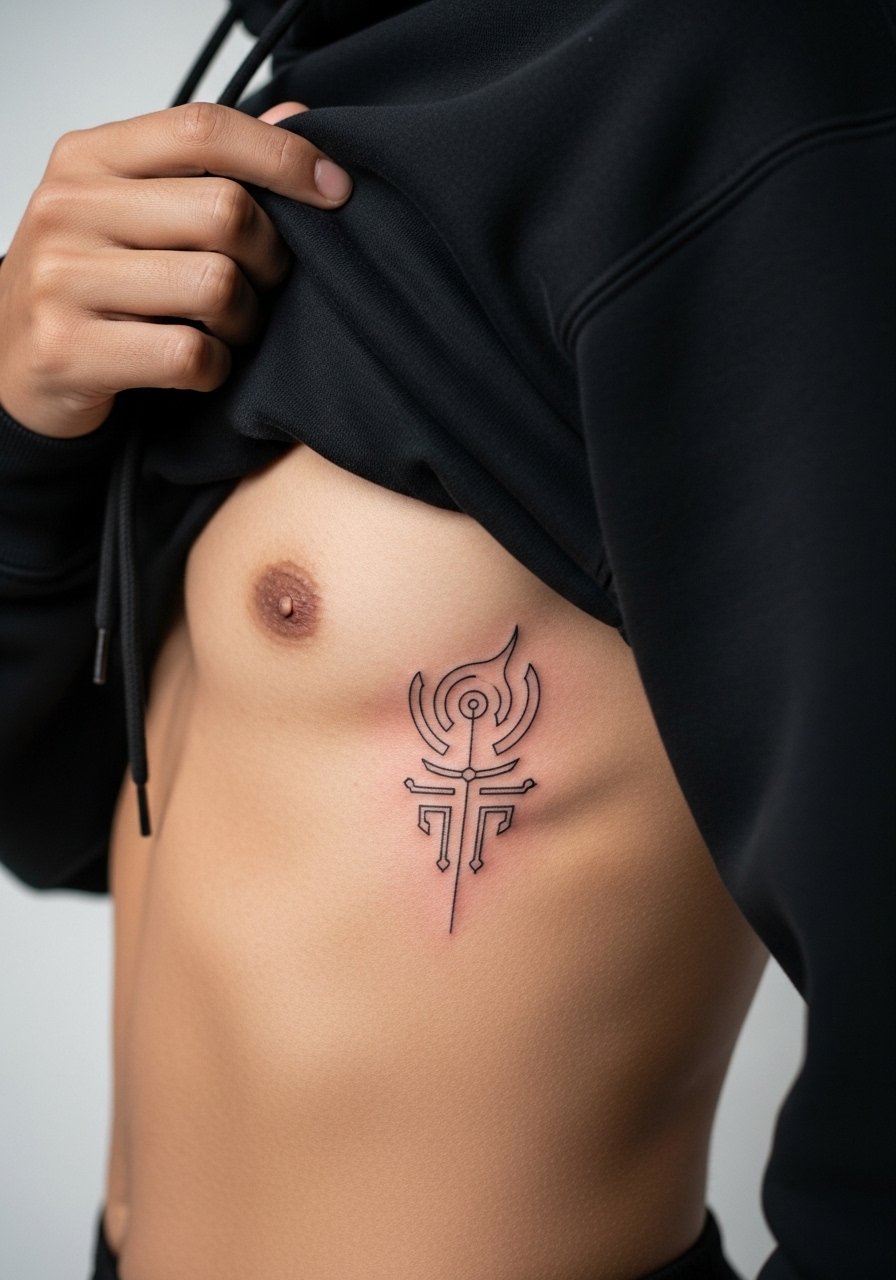
The ribcage is frequently rated high on pain charts, and that matters because sitting still for long runs improves line consistency. Artists are split on fine line there. One camp says the thin lines blur fast because the area stretches and shifts. The other camp argues spacing and correct depth keep lines readable. When you book, ask which camp your artist belongs to and request wider spacing if they favor thin lines. Bring a loose button-down or sports bra you can remove easily. For showing it off, a side slit tank top frames the curves without pulling at the skin.
3. Knee Geometric Cluster That Reads on Bend
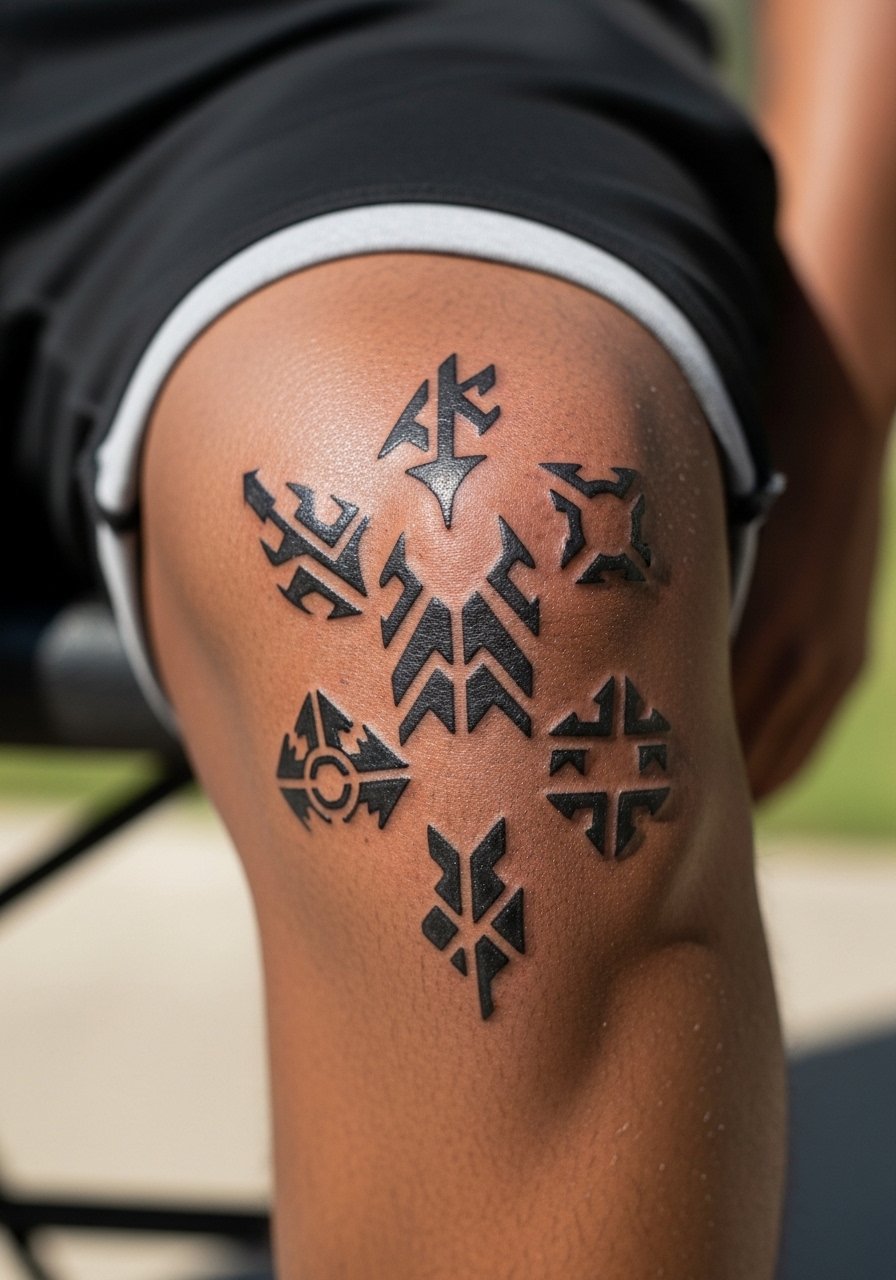
Most people underestimate how much the knee changes when you walk. A common mistake is packing too many thin angles into a small cap. The version that holds best uses slightly thicker primary bars and thinner infill for texture. The session is short and intense. Expect brief stinging when the needle crosses patella-side skin. Blowout risk is moderate if lines are too close to one another. For a streetwear finish, pair this cluster with knee high combat boots and ripped jeans so the geometry reads against hard edges.
4. Upper Back Negative-Space Sigil That Breathes
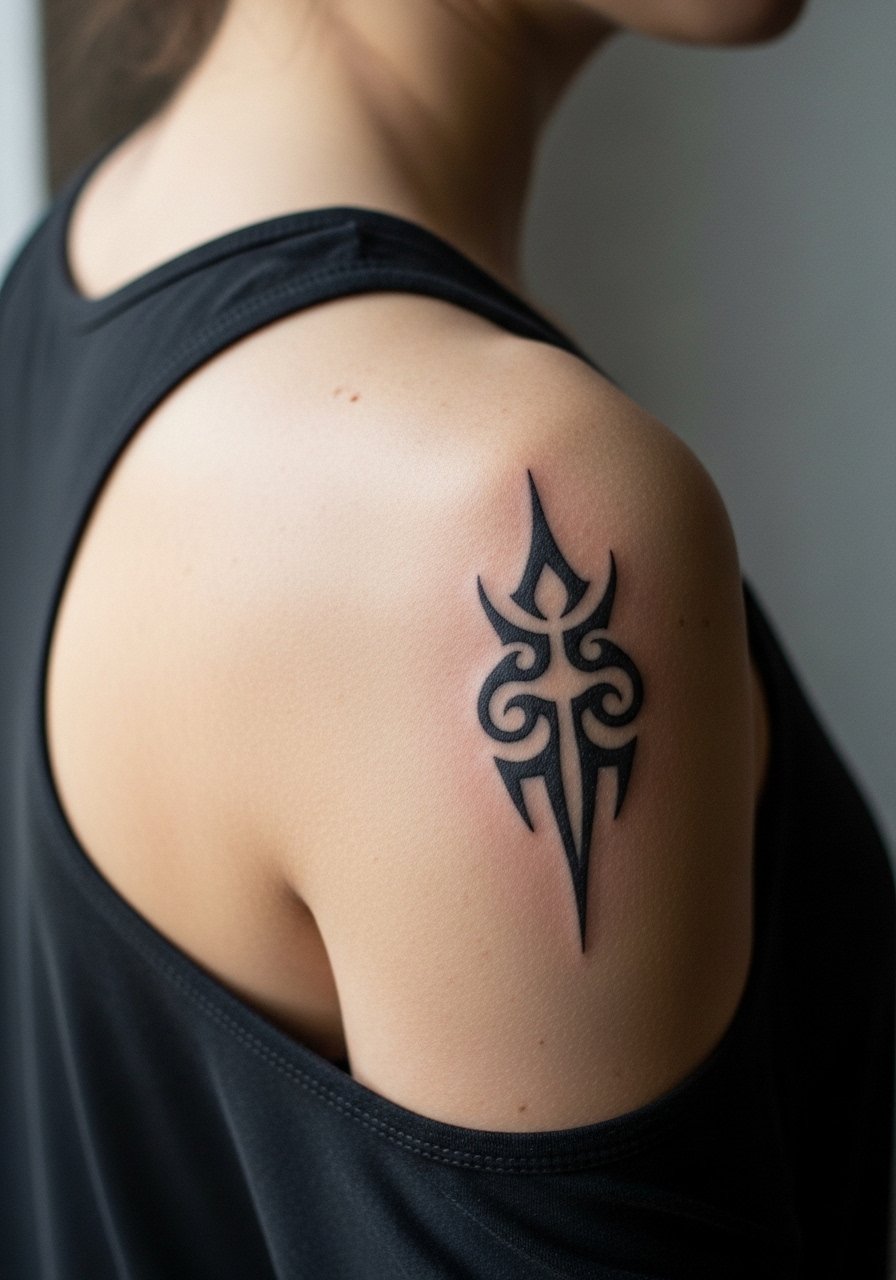
Large shoulder pieces are where negative space earns its keep, as long as it is intentional instead of filler. The danger is over-relying on voids to suggest shape rather than building readable blackwork forms. In consultation, ask for mockups that show how the voids read from arm's length. These pieces often need 2 to 4 sessions because of coverage and layering. If you prefer asymmetrical tops, an off shoulder black top showcases the cartridge shapes without competing for attention. For people who sleep on their back a lot, expect a slightly longer settled window before the piece looks fully even.
5. Central Chest Mechanical Sigil Over the Heart
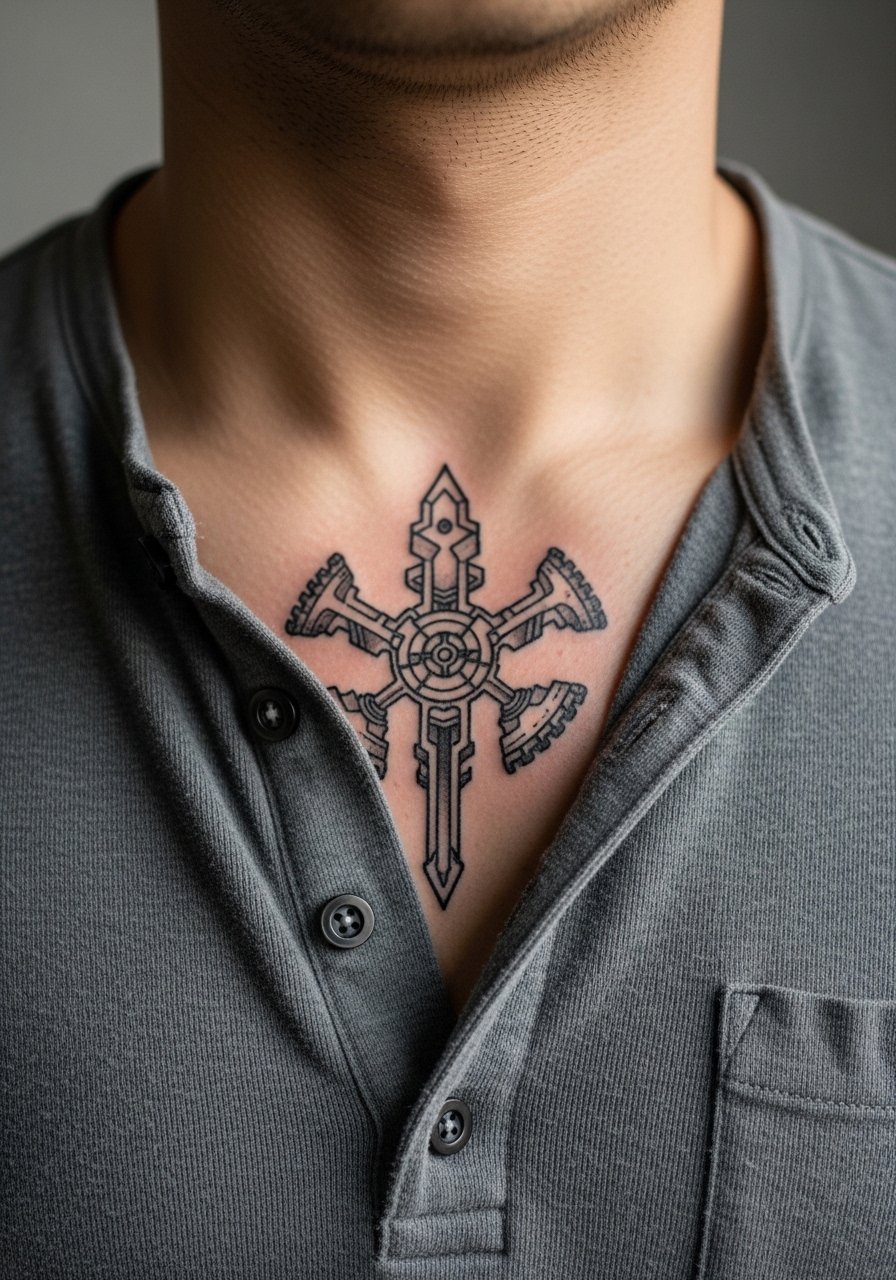
The chest reads bold because of its flat planes, but the sternum demands careful planning. A frequent mistake is centering too low or too high relative to clavicle lines, which changes the whole rhythm. Tell your artist you want the main axis to align with the sternum and the smaller sigils to mirror collarbone spacing. Sessions are often 1 to 2 appointments depending on saturation needs. For a casual reveal, unbutton a button henley black or wear a deep V to let the mechanical angles breathe.
6. Forearm Tribal Fusion for Daily Visibility
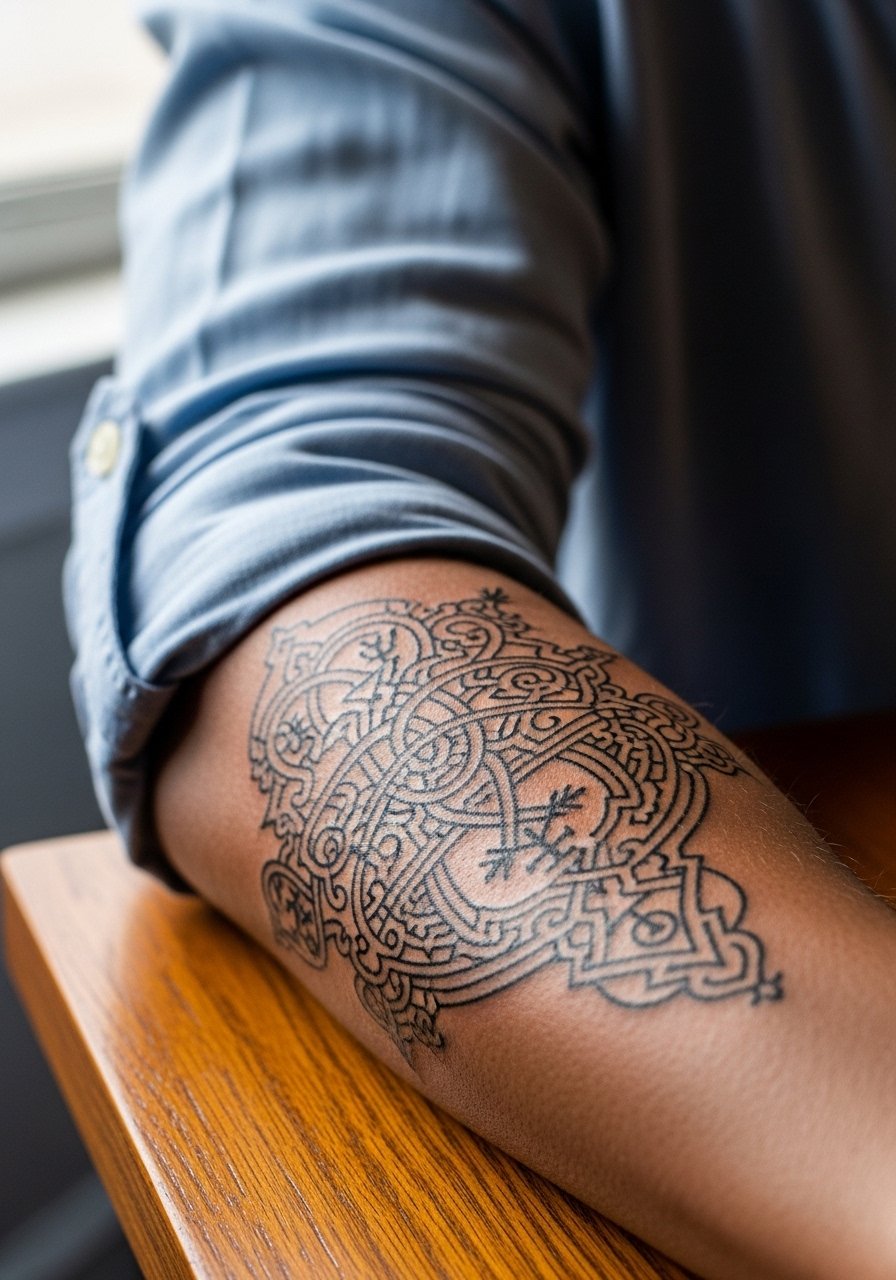
I've seen forearm fusion pieces last well when the client asks for slightly heavier primary linework and light stipple in the fills. The biggest mistake is ordering overly fine filler that disappears after a year. Tell your artist you want the main anchors stronger and the organic spikes to taper into stippling rather than dense texture. The session usually finishes in one sitting, but daily sun exposure shortens the crispness of thin fills. For showing this off, a rolled cuff shirt frames the forearm without distraction.
Pre-Session Essentials
The elbow and wrist pieces above need different prep than the chest and back work, and the right kit smooths the session and the first week.
- Stencil transfer paper kit. Lets you preview exact linework placement on skin, which is critical for joint-aligned spikes and chest symmetry.
- Topical numbing cream. Apply per directions before elbow or rib sessions to soften pain for sensitive zones.
- Thin protective film roll. Useful for finger and wrist work where daily washing causes friction.
- Fragrance free gentle body wash. Cleanses without irritating fine line fills on the forearm or chest.
- Aquaphor healing ointment. A thin layer helps keep new blackwork moist the first few days without blocking ink channels.
7. Hand Dorsal Web for Small Visible Sigils
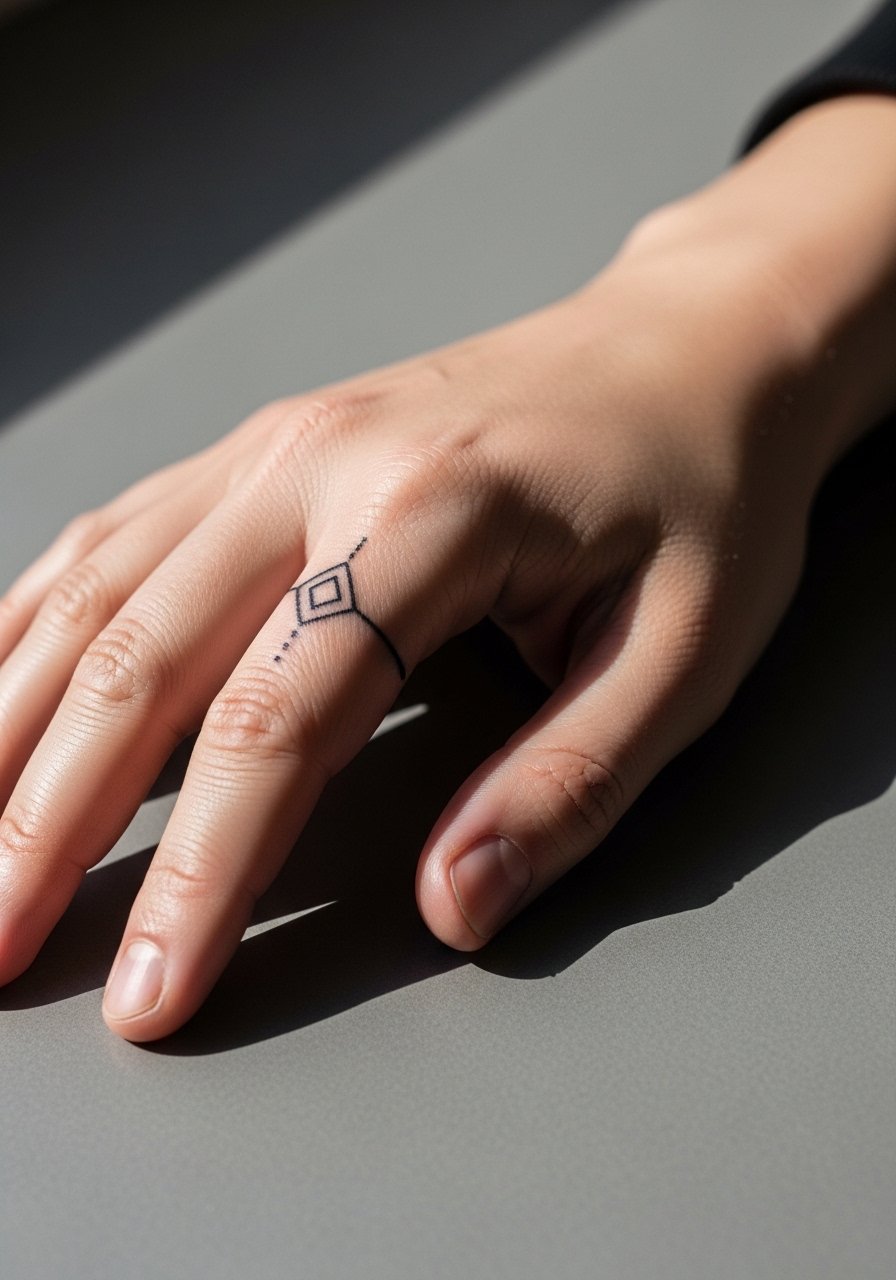
Hand work shows quickly and ages faster because of constant washing and sunlight. The typical version that looks best keeps the sigils slightly larger than a finger dot and avoids tiny fills that crust into blobs. One real mistake is expecting a one-and-done on top-of-hand pieces. Touch-ups every 12 to 18 months are common. If you need the area accessible at the session, remove rings and wear a sleeveless black tank top so the artist has full range and your sleeve does not rub the fresh lines.
8. Thigh Curve Wrap That Moves With Stride
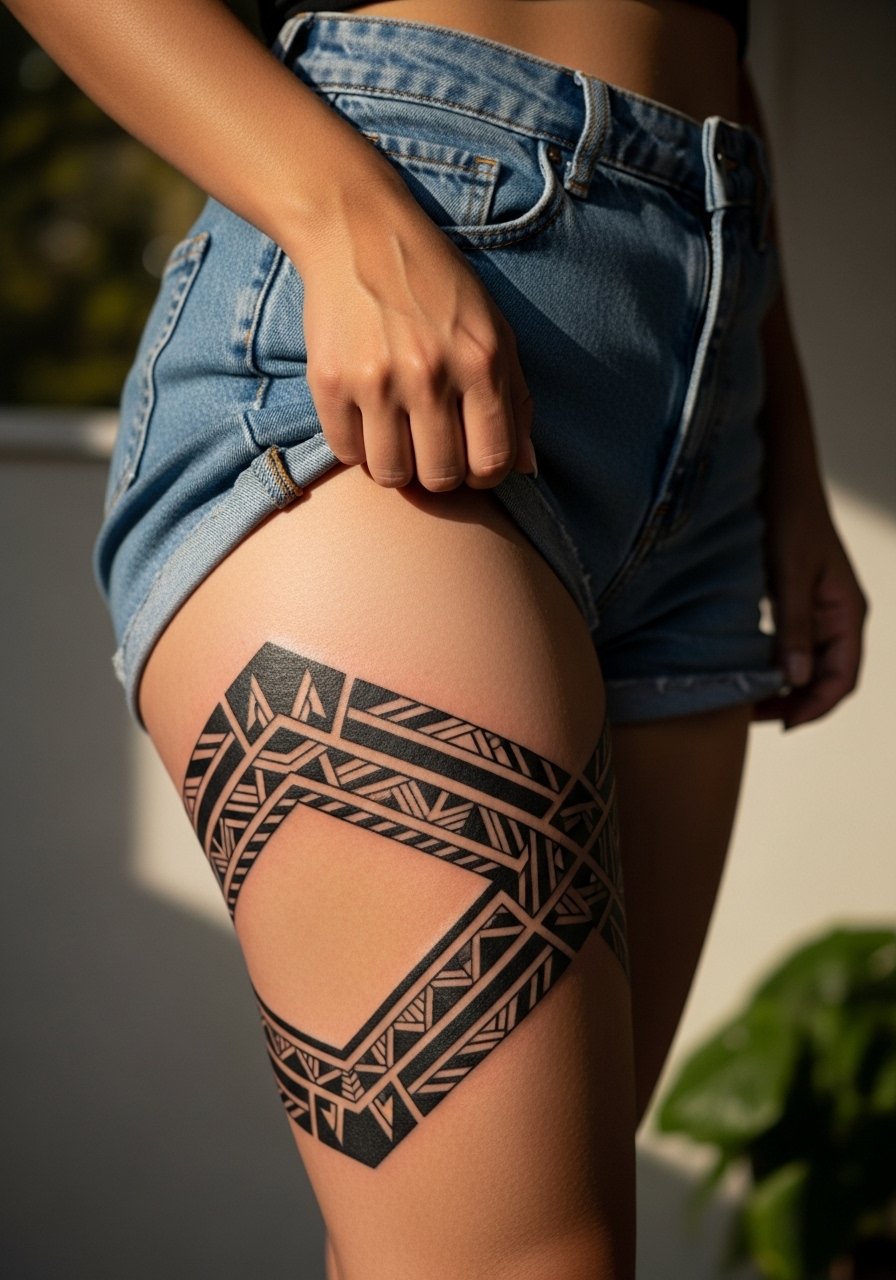
The thigh is forgiving for larger sigils because muscle movement helps designs breathe. The common error is over-detailing small sections that the leg will soften over time. Instead, design sweeping angular bands that use negative space for rhythm. Session time is usually 1 to 2 appointments depending on size. For appointment wear, pick loose shorts so the artist can access the outer thigh without fabric pressure. For nights out, these designs pair well with high-cut bottoms that let the wrap read along your stride.
9. Inner Wrist Symbol Stack for Subtle Rituals
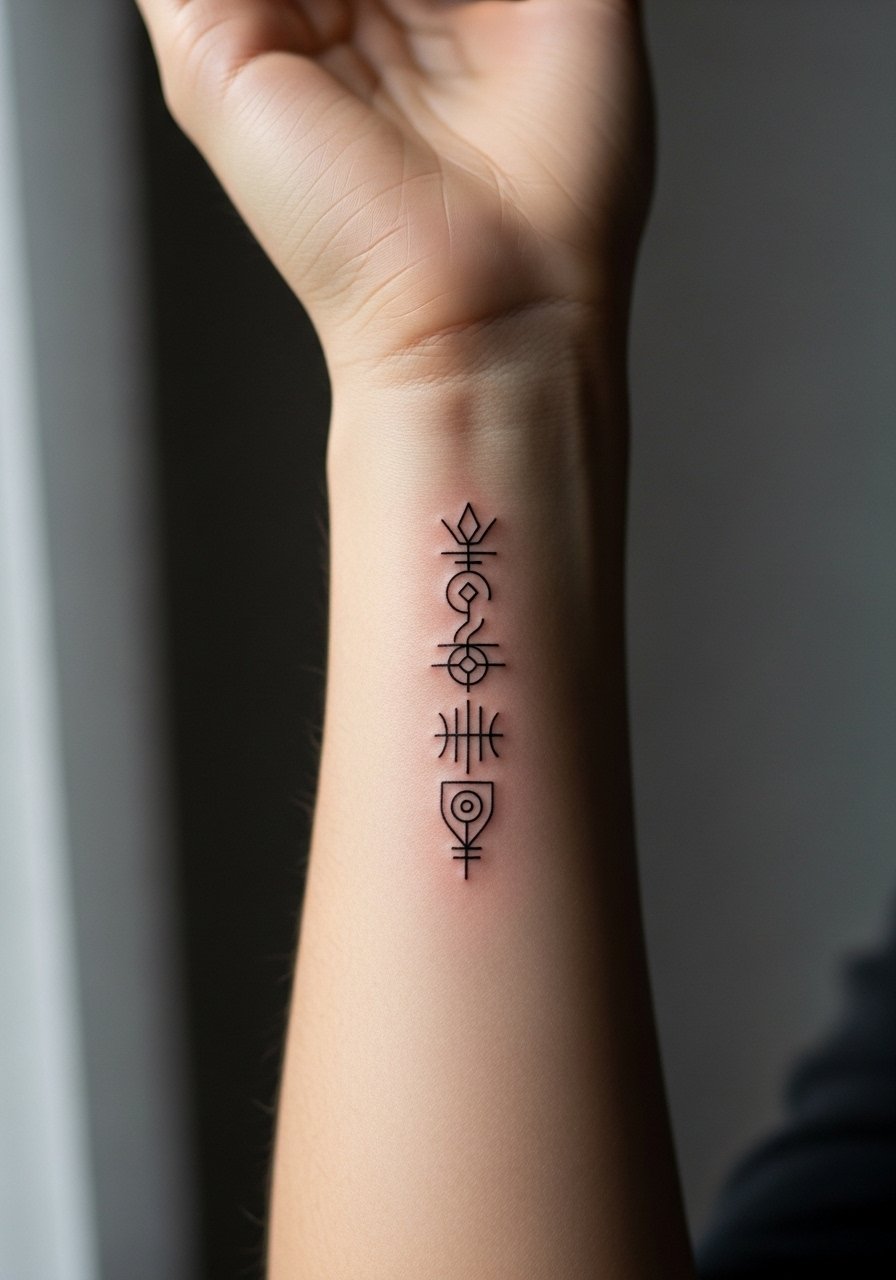
The inner wrist is ideal for stacked minimalist sigils, but the wrong scale makes them merge quickly. The common mistake is asking for lines that are too close. Ask for tiny gaps between symbols and slightly firmer primary strokes. The session is quick and tolerable for most people. Expect touch-ups sooner than forearm work because of hand movement and soap exposure. A thin accessory like a thin black cuff bracelet on the opposite wrist complements these stacks without crowding.
10. Spine Column Sigil for Vertical Presence
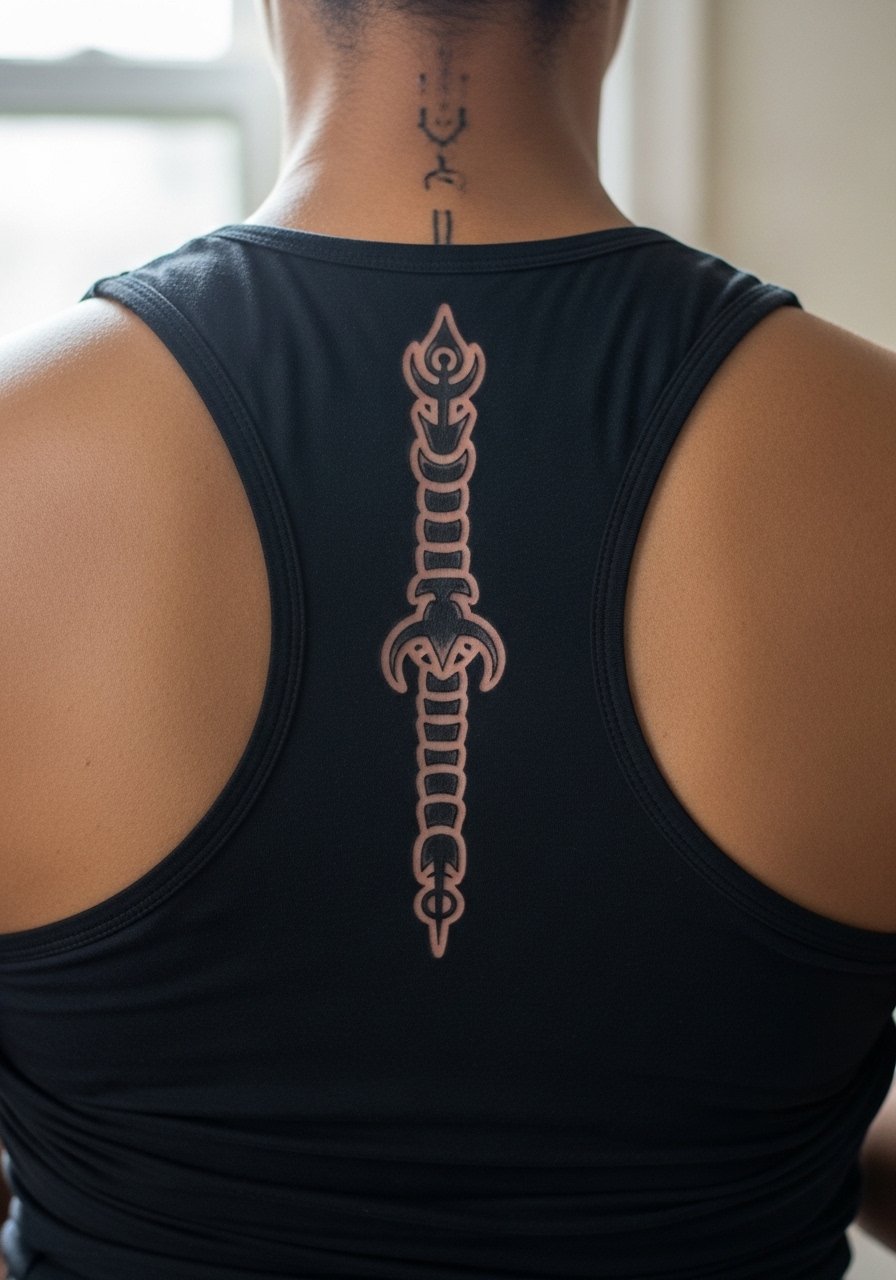
A spine column reads as ritualistic because of its verticality, but it requires symmetry to sit right with the body axis. A common misstep is offsetting the central line by even a few millimeters, which becomes obvious. Plan for two sessions if you want heavier fills or deep black voids. Pain varies but the midline can be more sensitive than surrounding muscle. For showing this piece, open-back dresses or a racerback tank reveal the column cleanly.
11. Collarbone Edge Framing for Neckline Accent
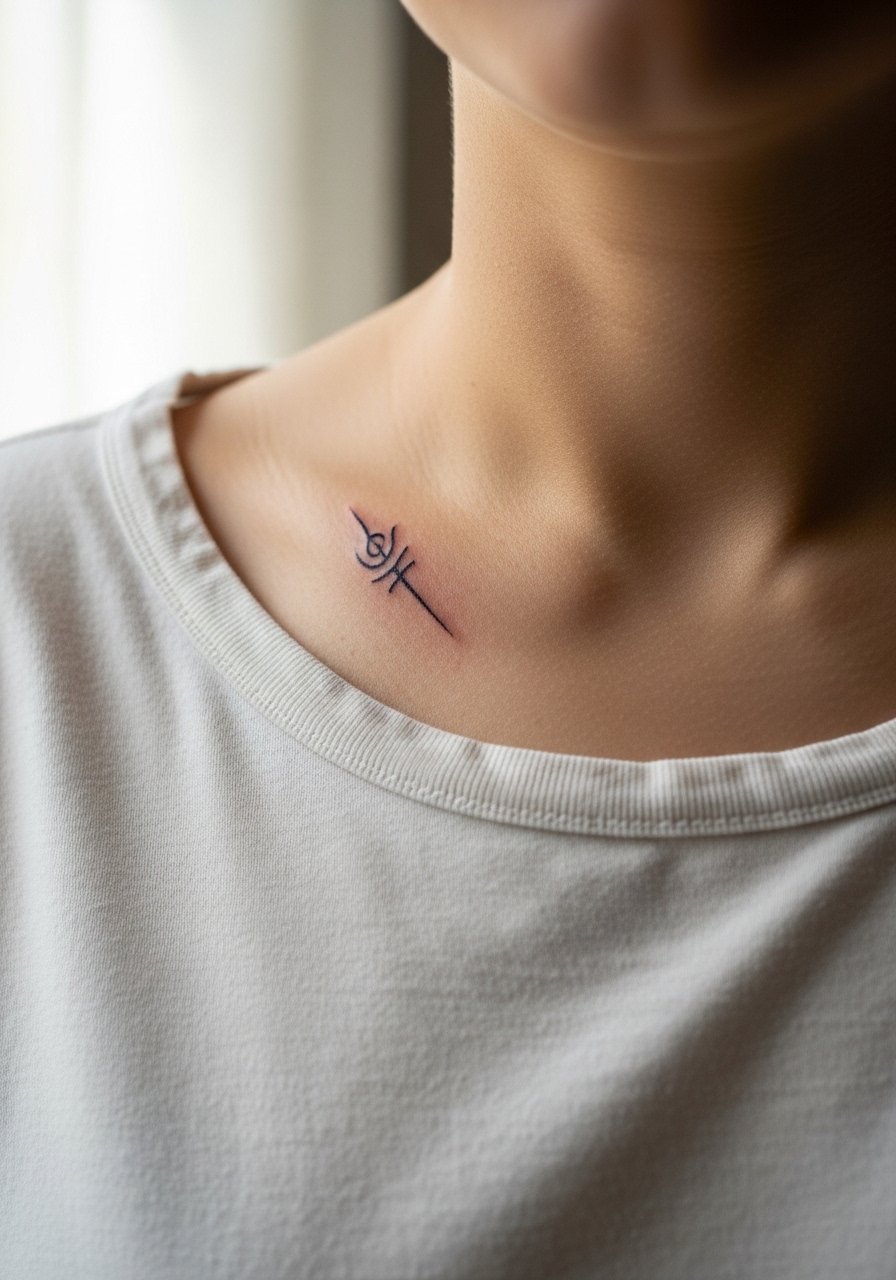
The collarbone area frames the face, so small shifts matter. The biggest mistake is making lines too dense near the bone, which can read muddy over time. Ask for subtle spacing and angled terminations that echo the clavicle line. One session often suffices. Pair the result with a deep v neck black shirt or a simple chain that sits above the sigil for balance.
12. Calf Wrap That Moves With Motion
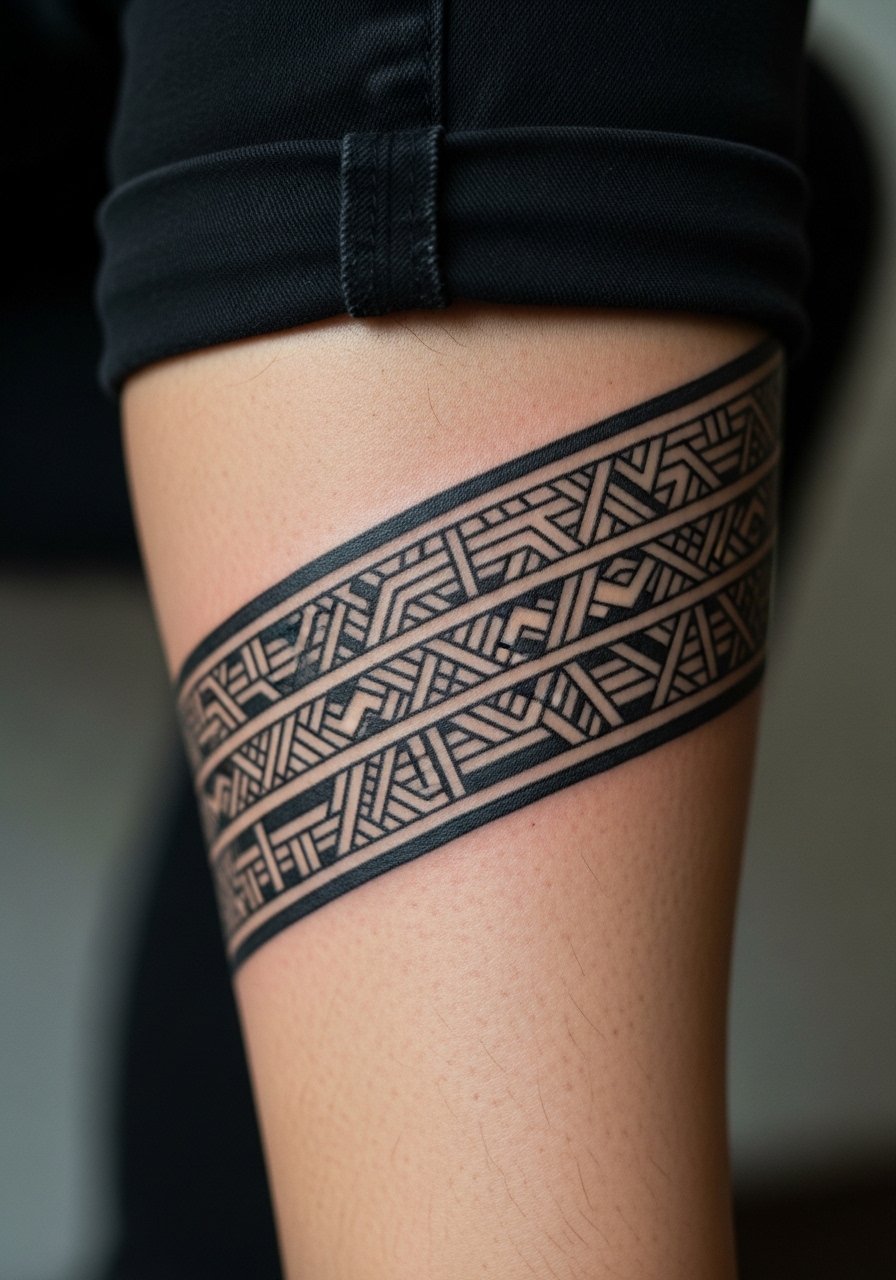
Calf pieces age well because the area avoids constant abrasion. A common error is wrapping too tightly so the design compresses when you flex. Leave breathing space in the bands and plan for flow that follows muscle curves. Session time is usually 1 to 2 hours. For show-off outfits, combine the wrap with cropped trousers or boots so the negative space reads in motion.
13. Micro-Fine Finger Sigils for Tiny Statements
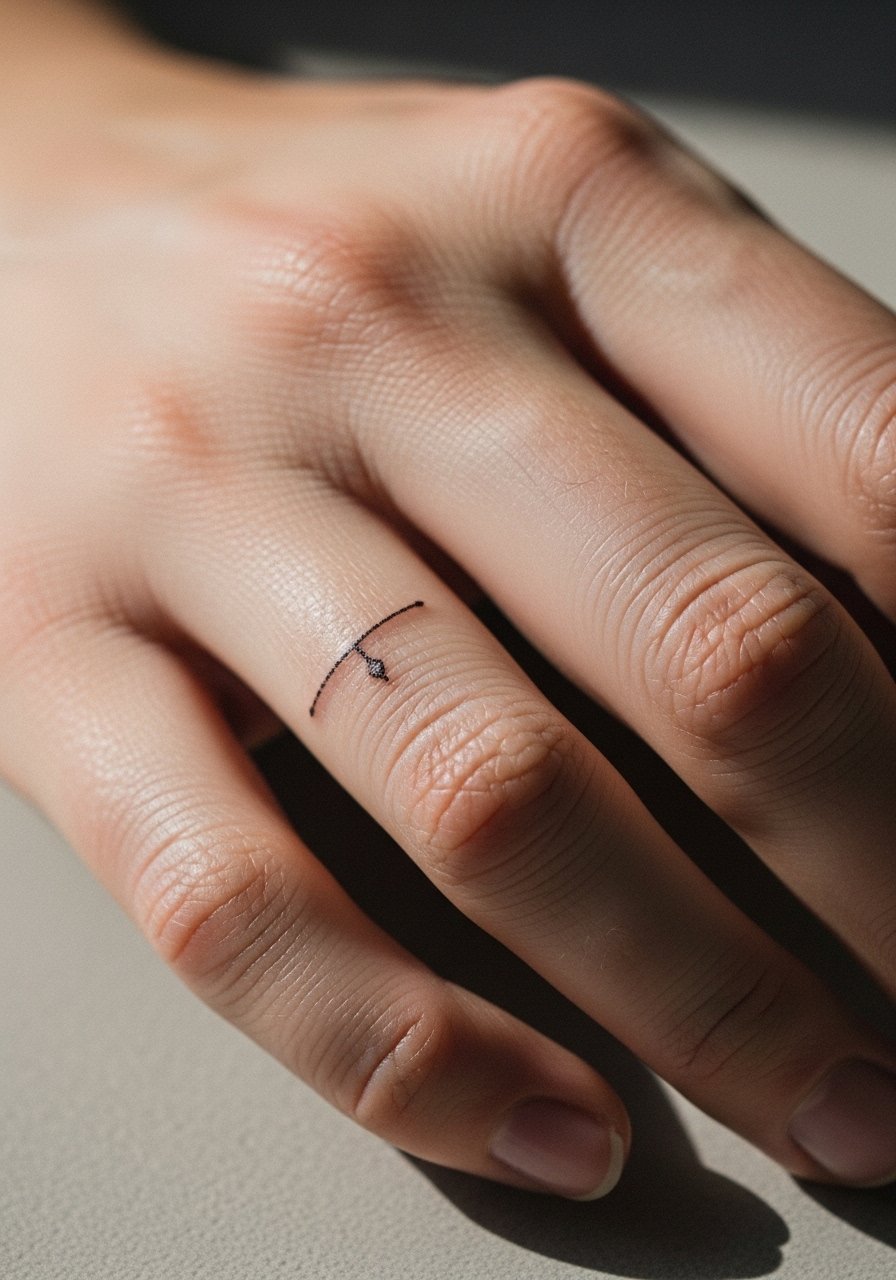
Finger sigils are bold because they are always visible, but they demand realistic expectations about longevity. The mistake is asking for dense fills in a tiny area. Request a minimal anchor with simple linework and expect yearly touch-ups. Healing is fussy due to frequent washing and friction. For the session, remove rings and wear something easy to slip on after the appointment like a sleeveless black tank top so jewelry and fabric do not rub the fresh ink.
14. Throat-Side Sigil Near the Neck That Whispers
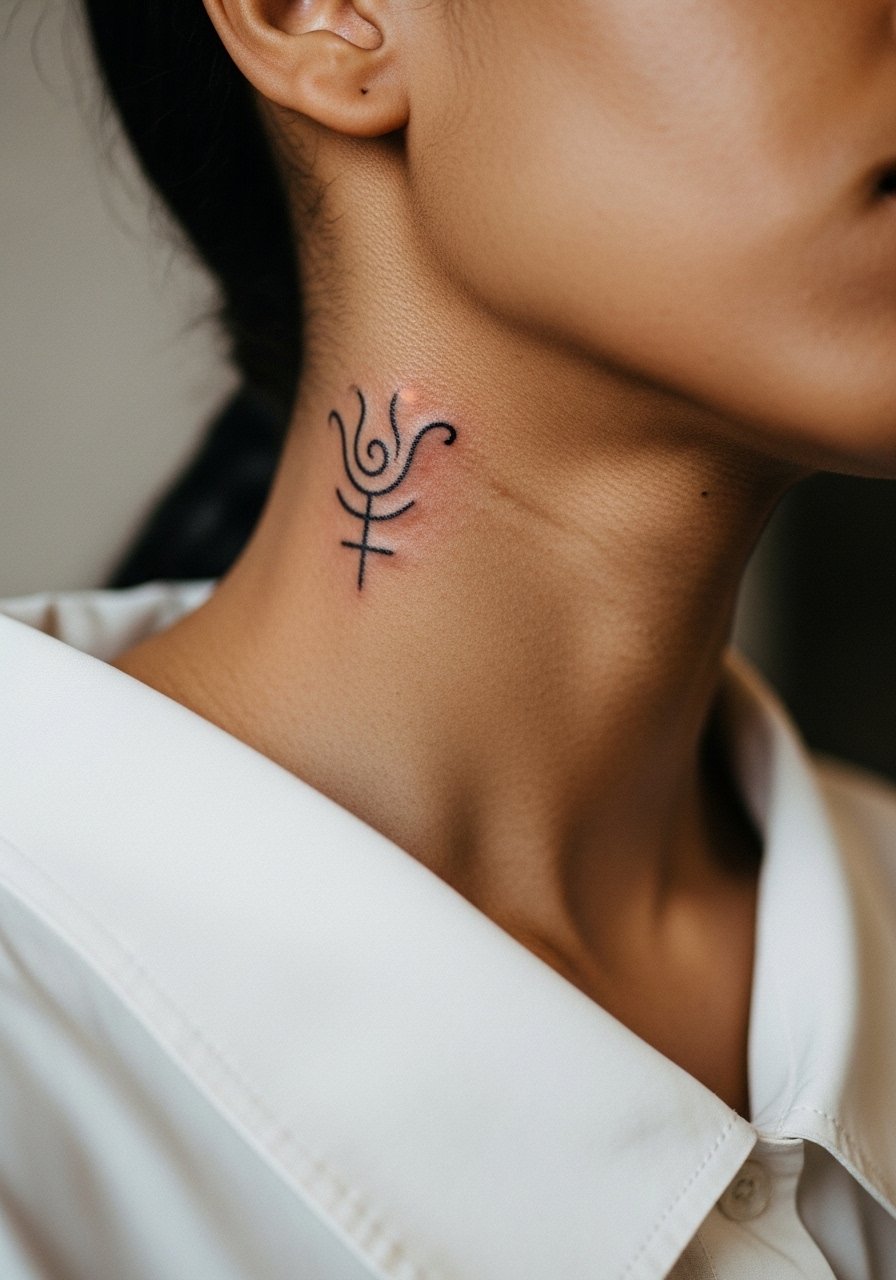
Neck placements have social and professional considerations. Keep designs small and ask about breathing room so the tattoo does not sit too close to vocal cords. The big debate here is visibility versus longevity, because neck skin gets consistent sun and motion. A sensible consultation discusses potential career impact and future touch-ups. Sessions can feel sharp. Ask your artist how they protect the area during healing.
15. Hip Hook Sigil That Works With Swimwear
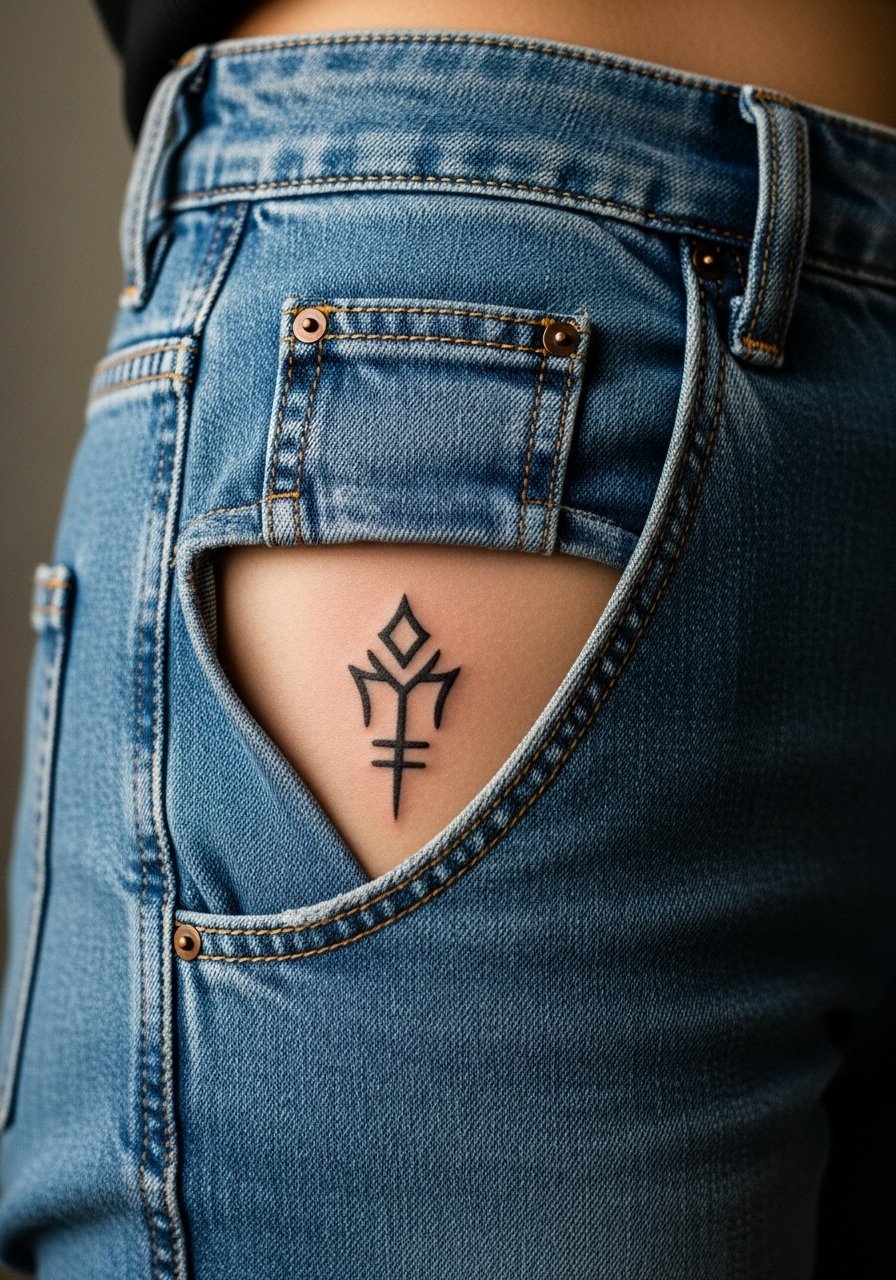
Hip designs are lovely for partially hidden sigils because they move with clothing lines. The common mistake is making the motif too wide so it spills onto lingerie seams. Keep the key elements compact and aligned with waistband curves. One or two sessions usually complete a mid-sized design. For beach reveal, a high-cut swimsuit or jeans that sit below the design make it read cleanly.
16. Ankle Circuit Tiny Sigils for Subtle Movement
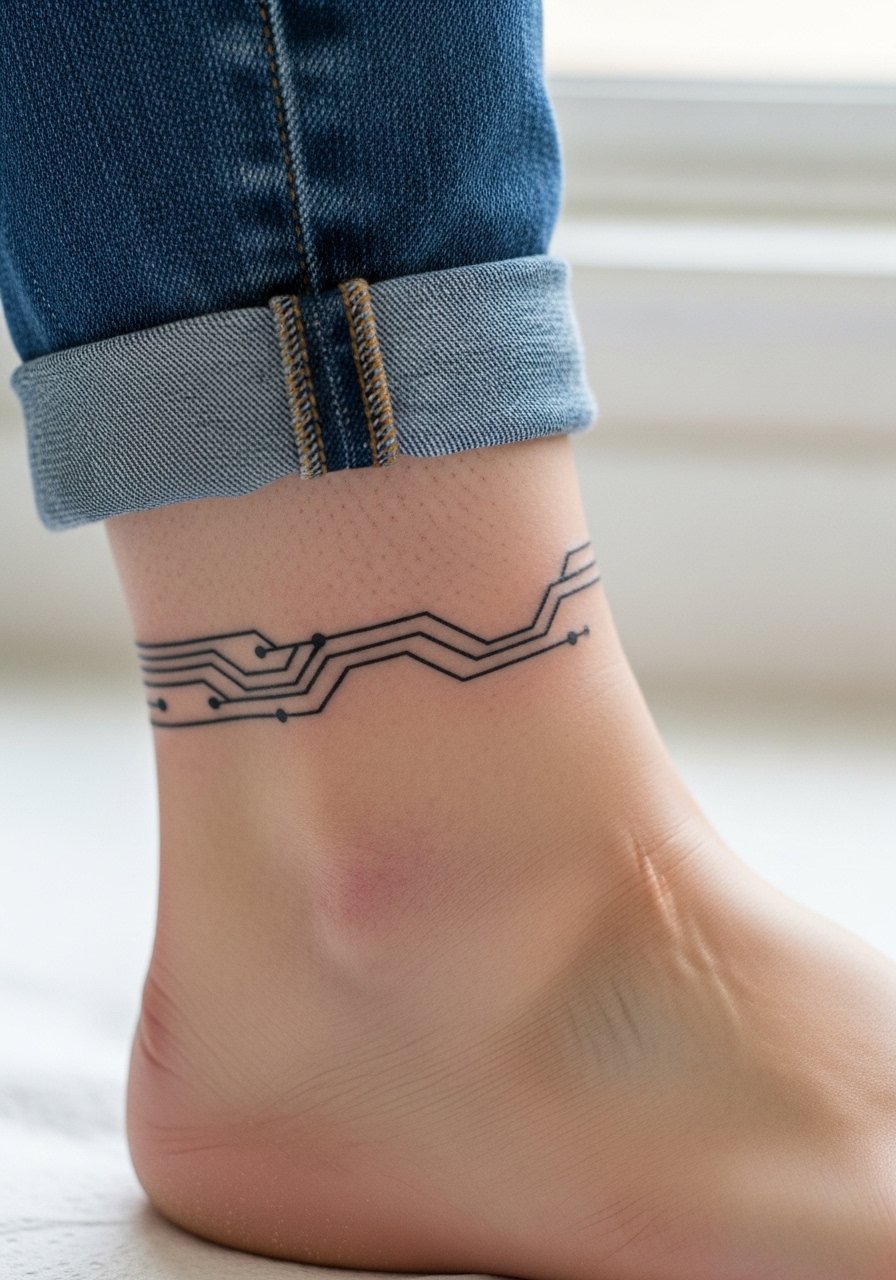
Ankle sigils fit casual spaces and seasonal showing. A typical error is over-detailing in a tiny zone that will soften quickly. Keep the main form slightly larger and the connectors thin. Healing can be interrupted by socks and shoes, so wear sandals or rolled pants to appointments. For styling, rolled jeans or sandals highlight the ankle without crowding the small motif.
17. Sternum Linear Sigil Under a Band
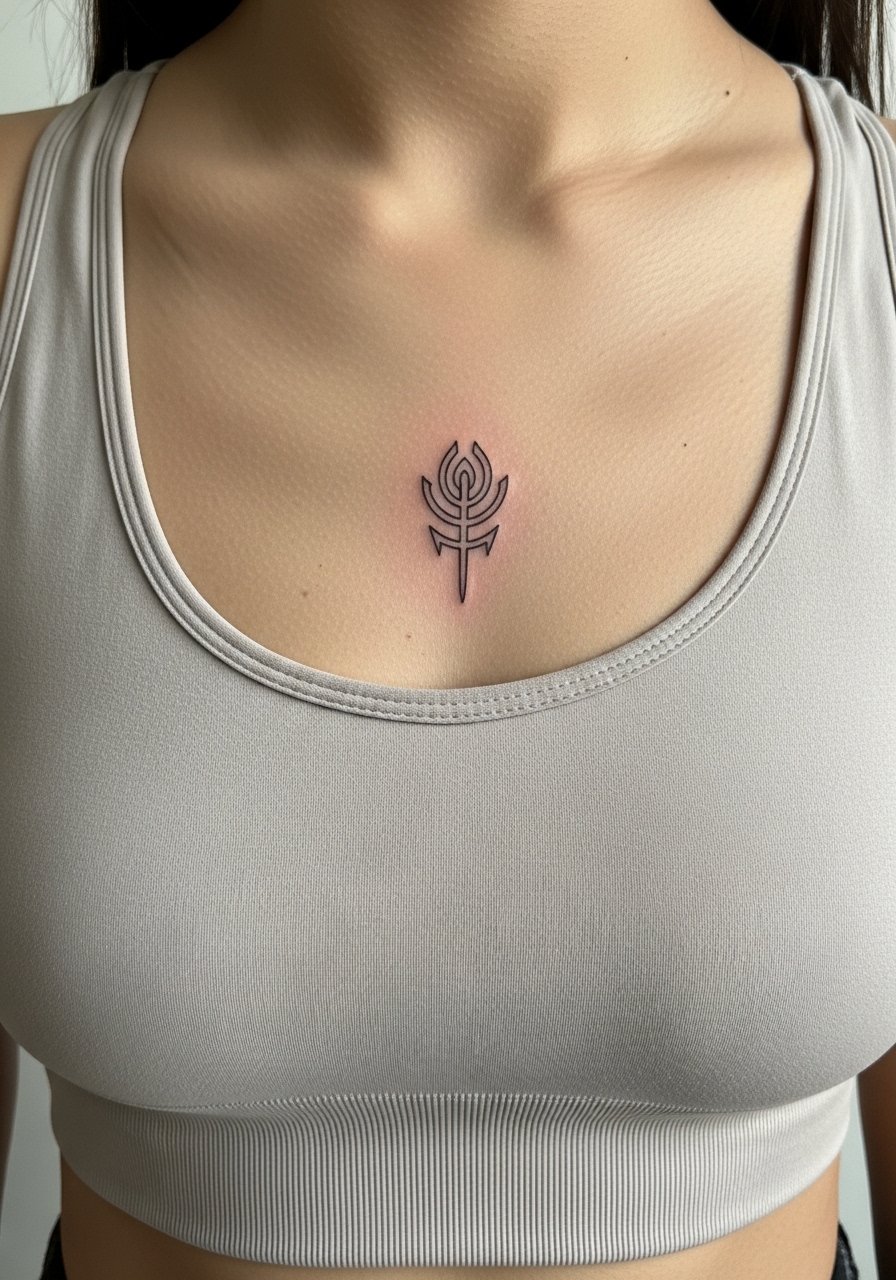
Sternum work needs careful framing because clothing can rub the area during healing. The wrong move is placing dense marks where straps land. Ask for a layout that sits just above or below typical fabric lines. Sessions can be intense but short. For the session, wear a fitted sports bra you can remove easily. Many clients prefer a bandeau for the first week post-session for minimal friction.
18. Scapula Sigil That Sits Under a Strap
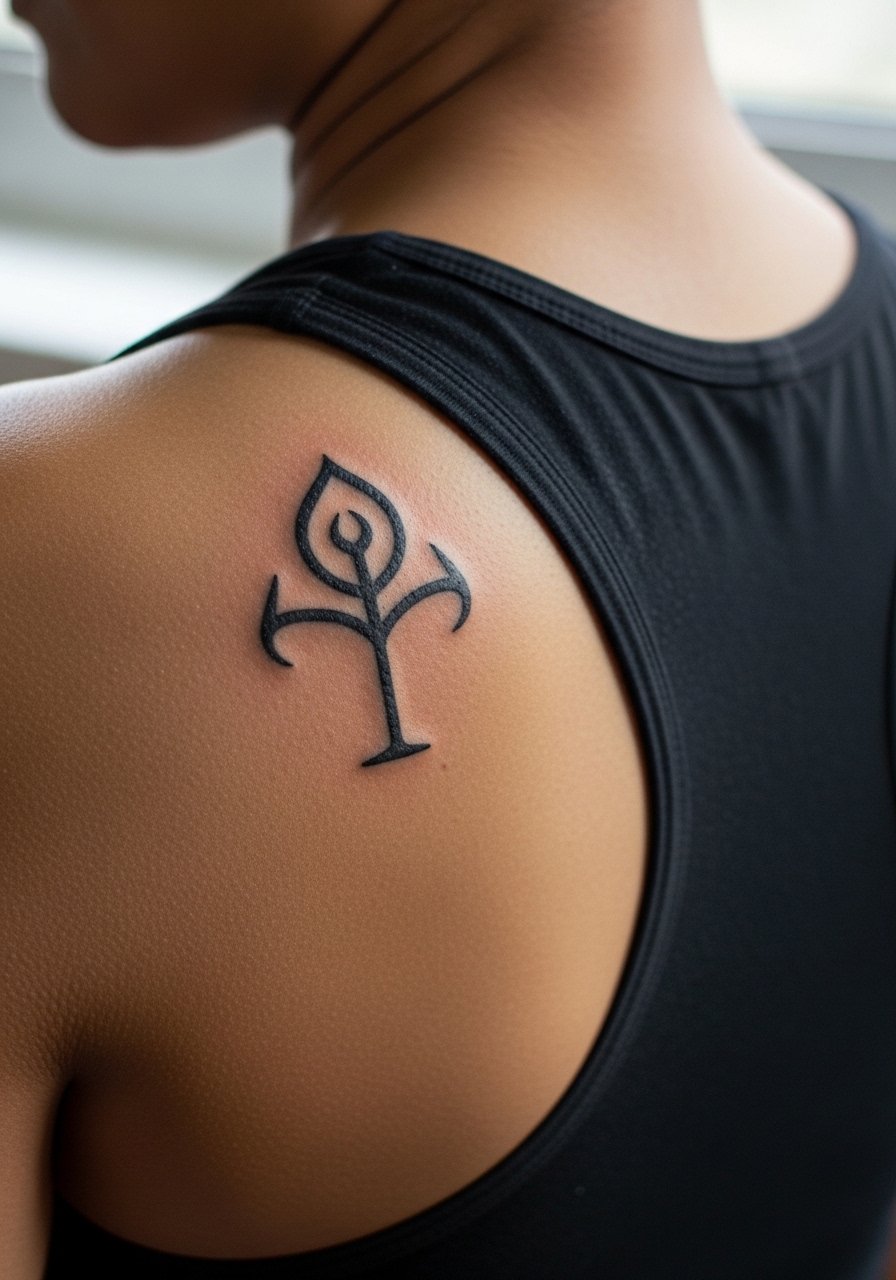
Scapula pieces are forgiving and photograph well under straps. Common mistakes include starting the design too close to the spine where curvature distorts symmetry. Opt for an outward-facing composition that reads when the arm moves. Sessions are comfortable since the area is mostly muscle. For casual reveals, a racerback or asymmetrical top works well.
19. Inner Bicep Micro Sigil That Hides Well
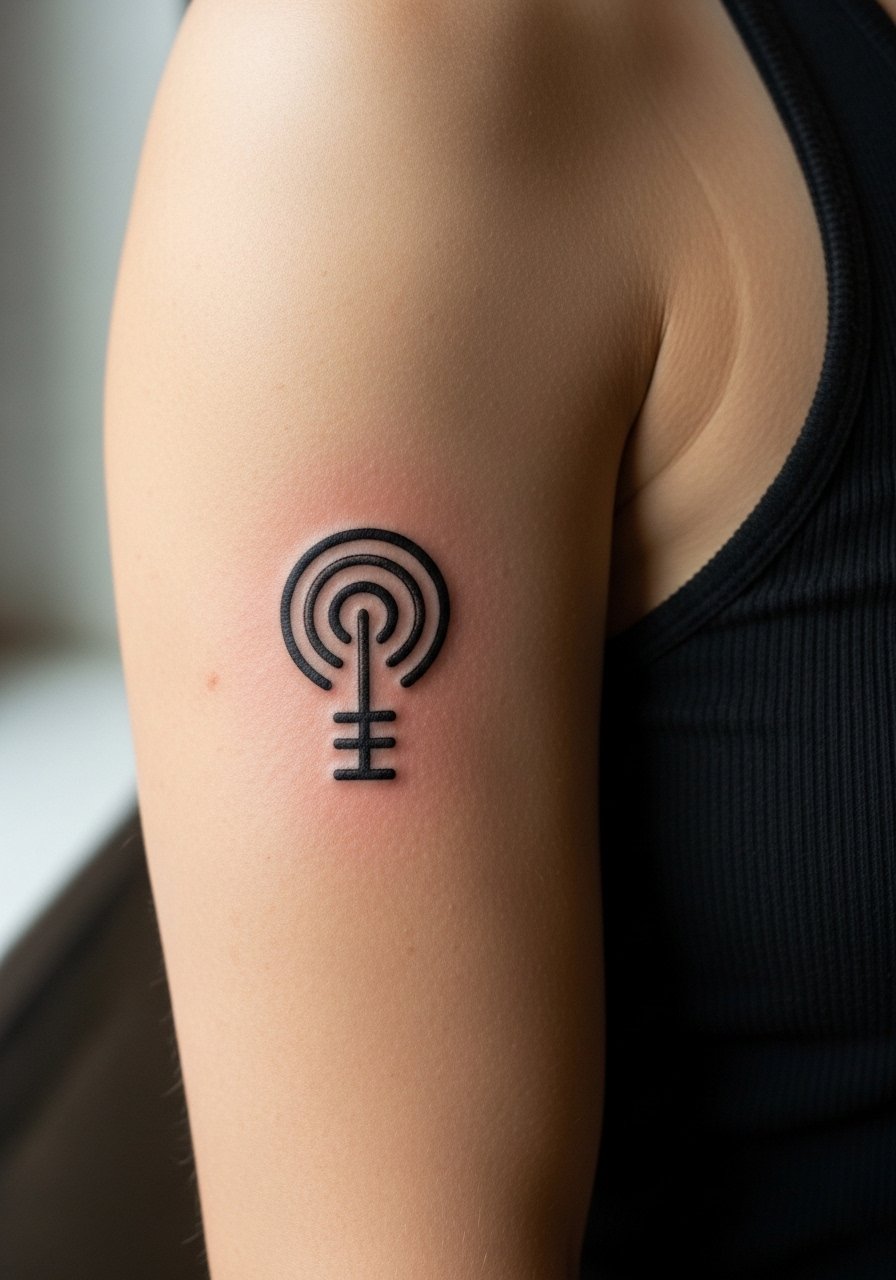
The inner bicep heals discreetly because it avoids constant abrasion, but the skin is softer and needs careful ink depth. A frequent mistake is cramming too much detail into a small round. Ask for slightly bolder primary lines and softer dot work for fills. The session can sting because of nerve clusters. Bring a loose tank for comfort and access.
20. Calf Negative Space Band That Wraps Simply
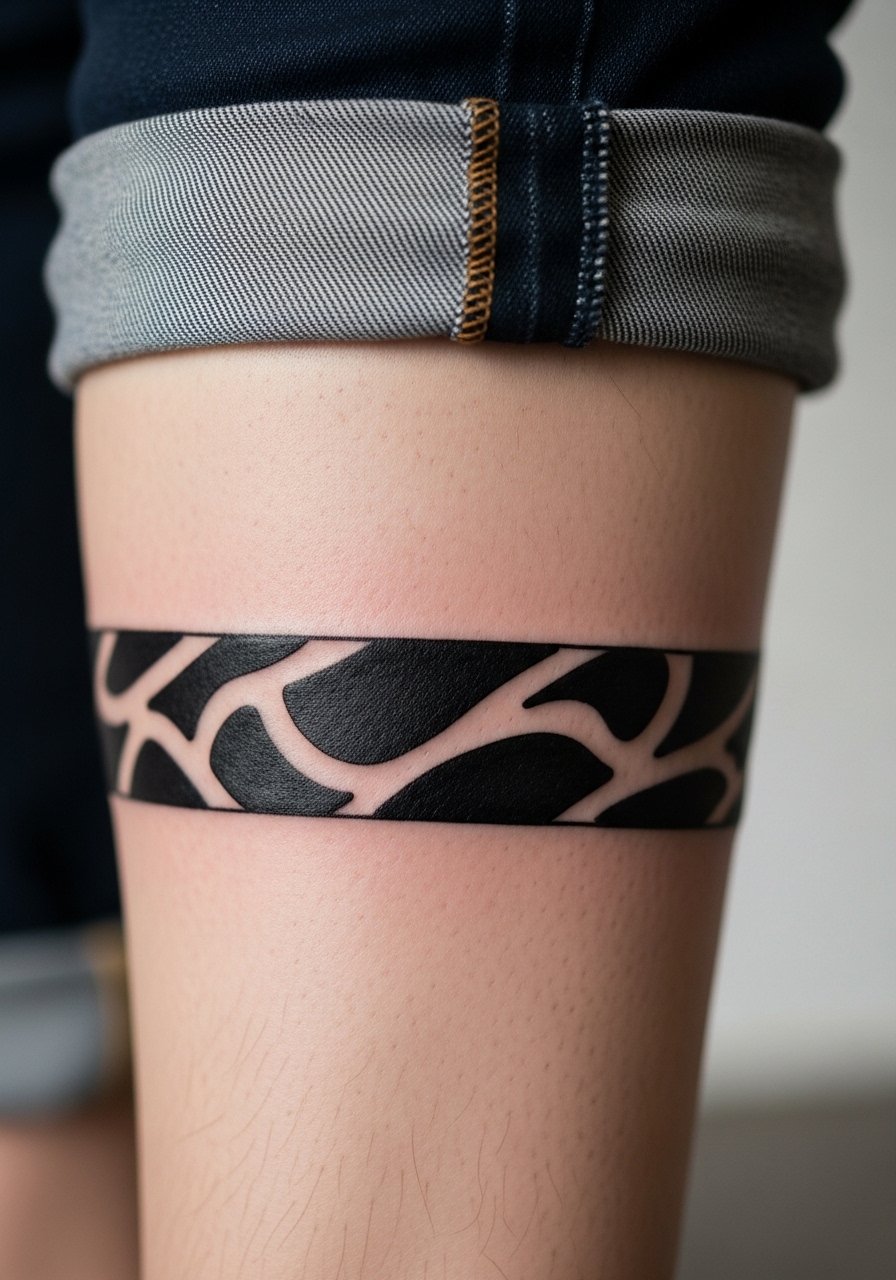
Negative space bands on calves work when they repeat a rhythm that matches stride. The mistake is uneven spacing that becomes obvious in movement. Ask for a mockup of the wrap while standing so the artist can check flow with muscle flex. These pieces heal well and show less wear than lower foot work.
21. Collarbone Corner Sigil with Angular Accent
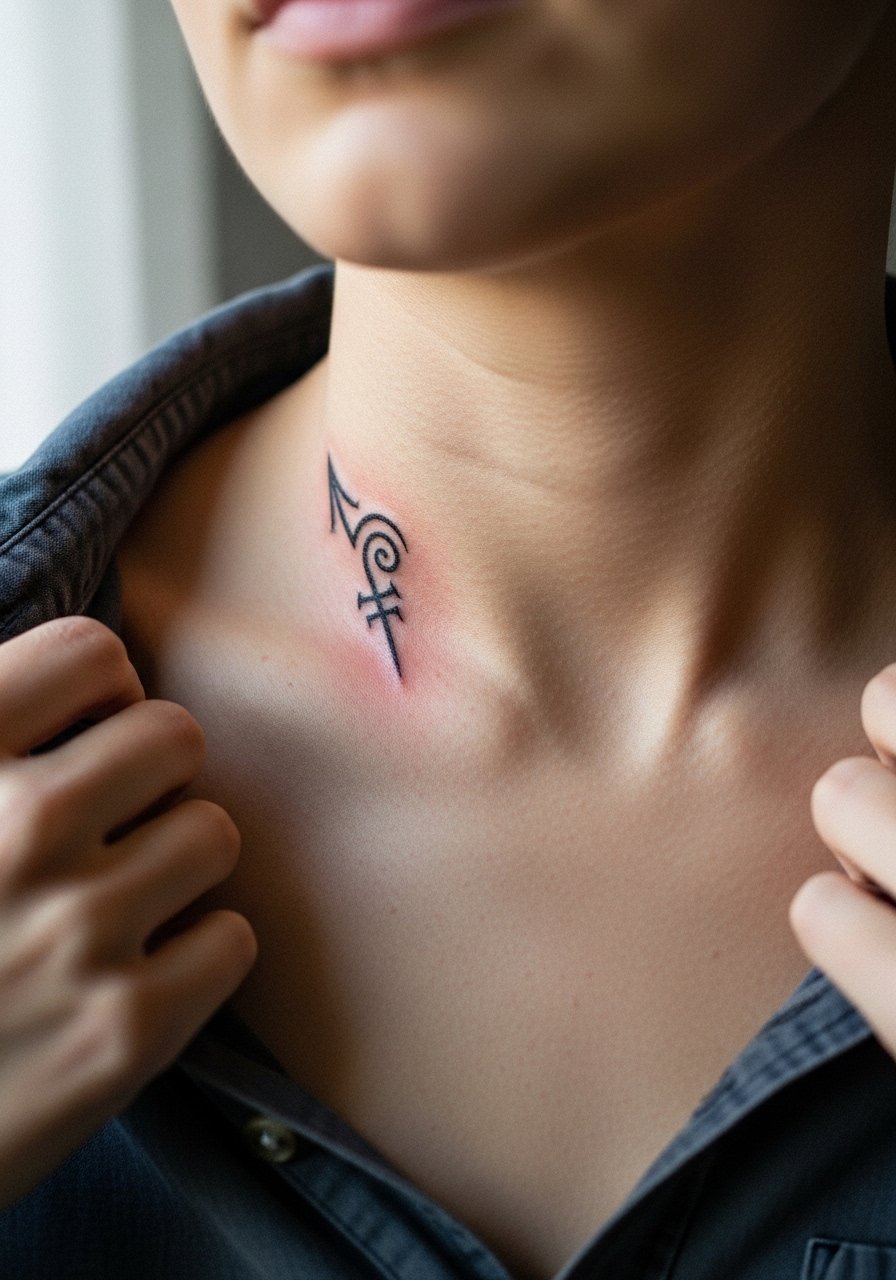
Corner collarbone marks are great for framing necklines, but over-embellishing makes them read cramped. Request clean terminations and mirror spacing with the opposite side if you plan a pair. The session is short and manageable. A minimal chain necklace sits above without competing.
22. Thigh Inner Wrap That Feels Private
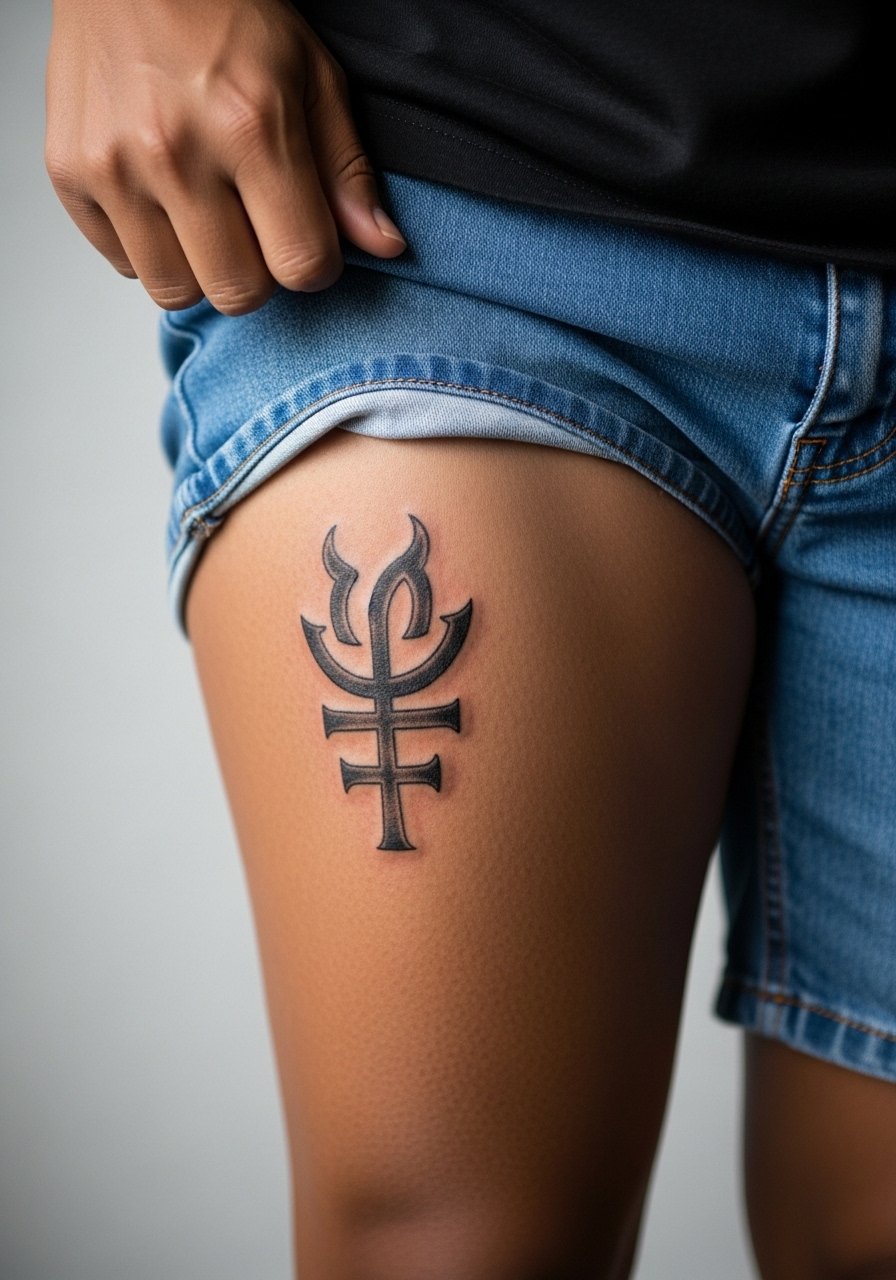
Inner thigh work is intimate and best for private collections. The error is assuming any studio can handle intimate placement comfortably. Seek an artist experienced with inner thigh work and ask about touch-up timelines. Sessions are slower because of sensitivity. Wear shorts you can easily adjust for access and modesty.
23. Ankle Circuit Gem That Pairs With Sandals
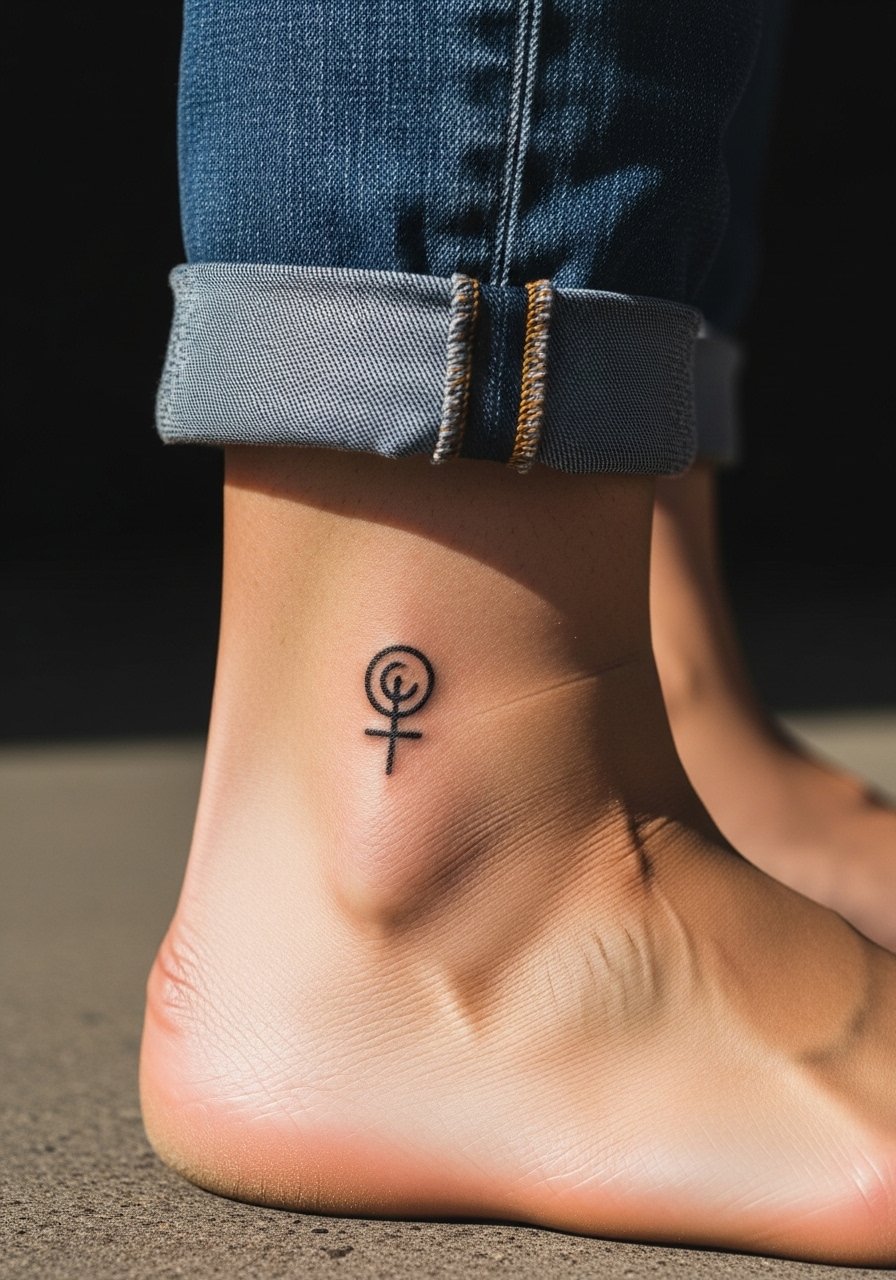
The ankle is a seasonal showcase. Over-detailing is the usual misstep, because fine textures disappear into shoe wear. Keep the circuit tidy and slightly larger than you might on paper. The healing period is longer if you wear closed shoes. Show it off with sandals or cropped trousers that reveal the line.
24. Back-of-Neck Sigil Under a Collar
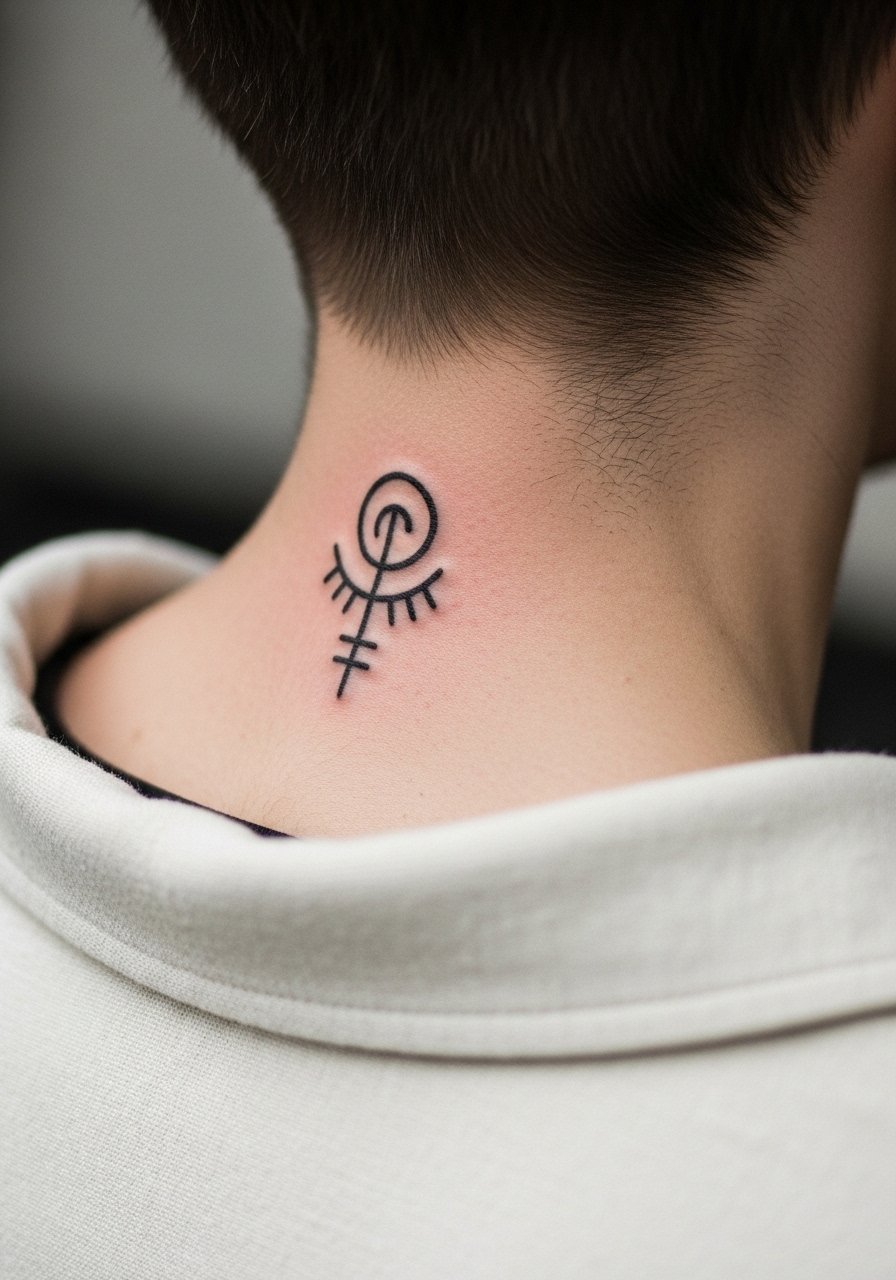
Nape work is subtle and can be mostly hidden under collars. A common mistake is making it too bold so it looks disproportionate when hair is up. Ask for a delicate scale that still reads from a short distance. The session is quick and often heals cleanly if you avoid hair products on the zone for a week.
25. Upper Thigh Sigil That Wraps With Clothing Lines
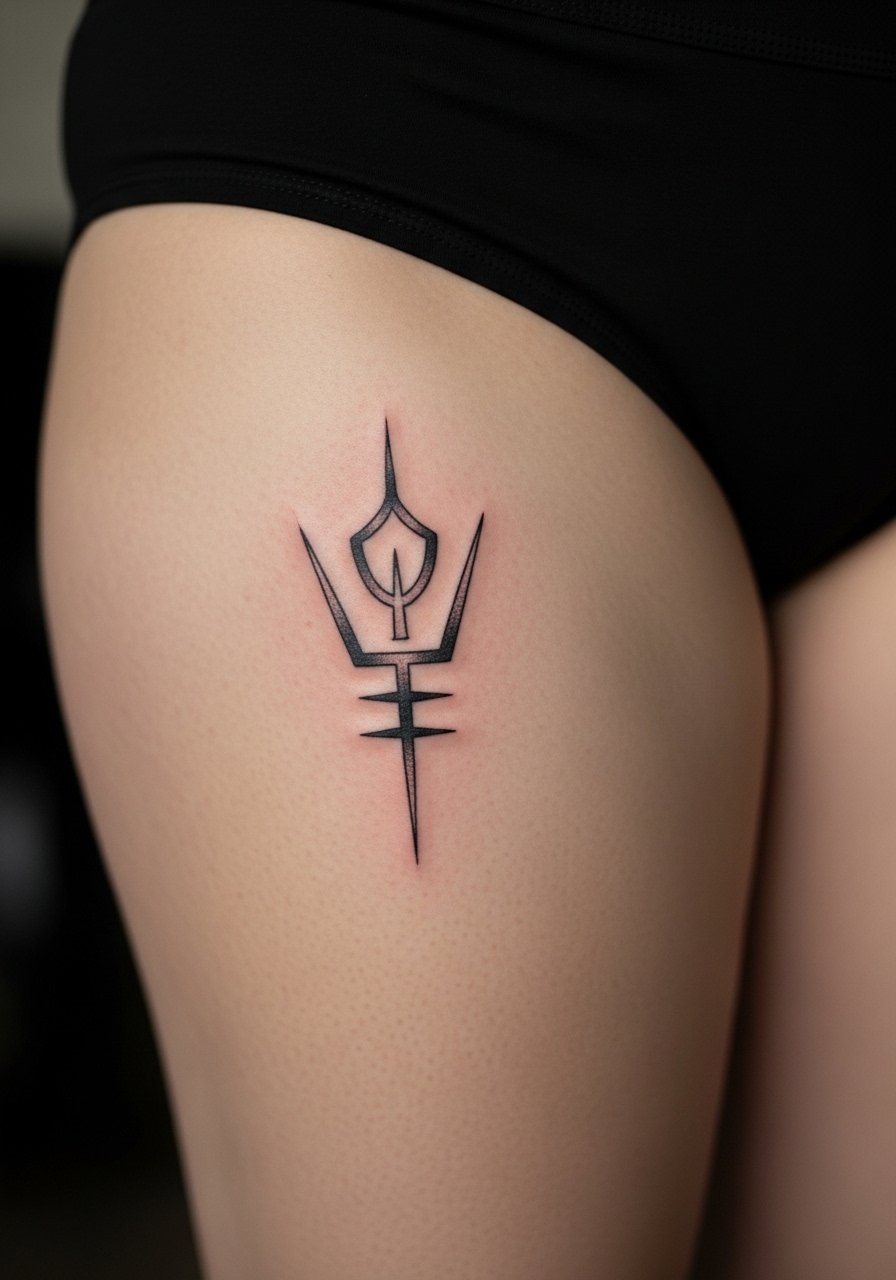
Upper thigh templates should respect waist and hip seam lines. The mistake is extending the design into areas where clothing compresses the ink. Keep the motif placed to avoid waistband pressure. Sessions are comfortable and the area protects the ink well during healing.
26. Outer Forearm Circuit That Reads From Across the Room
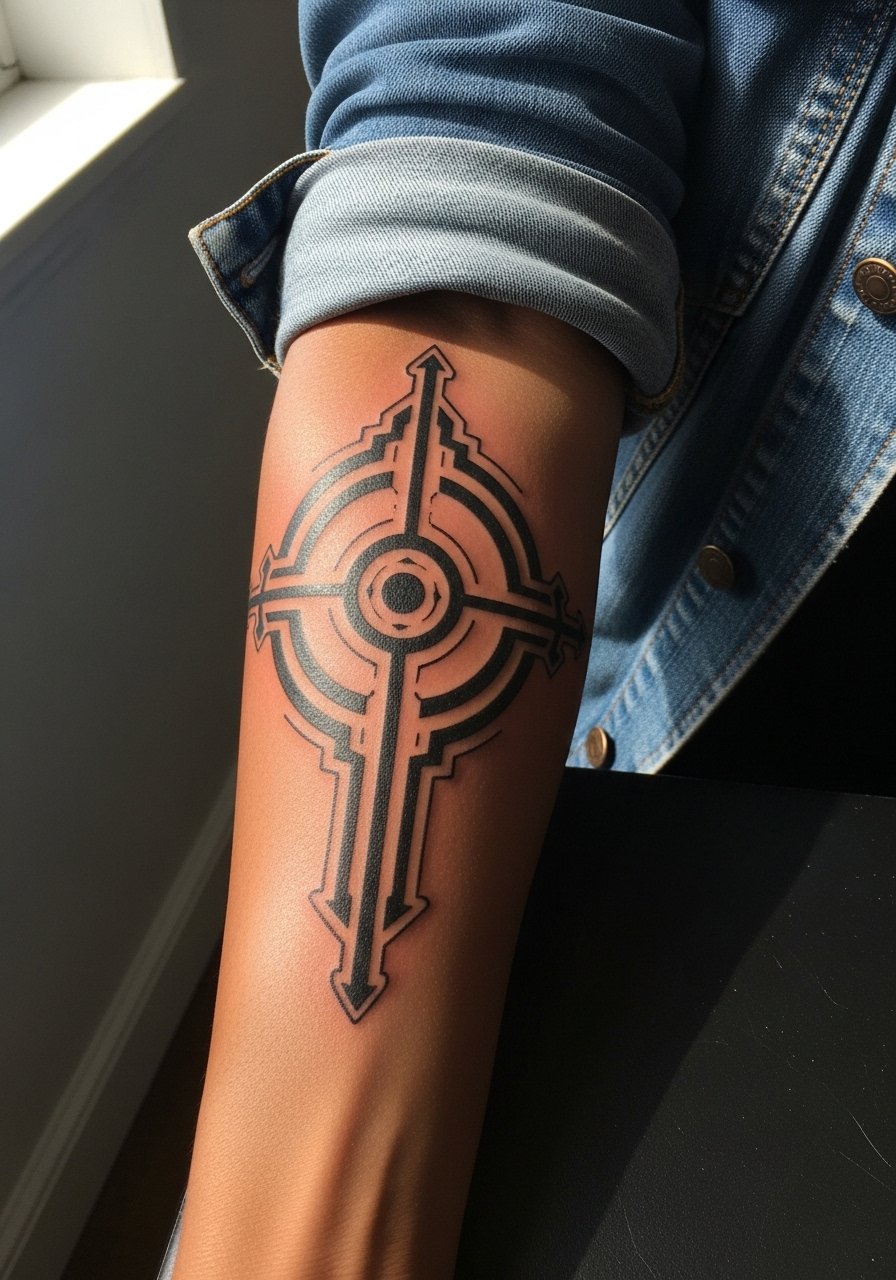
Outer forearm designs can be bolder because they are less exposed to constant friction than the inner wrist. The mistake people make is copying micro-detail illustrations too small. Ask for stronger primary anchors with lighter interior texture. This usually completes in one session. Pair it with a black denim jacket with rolled cuffs to show the circuit without covering it.
27. Wrist Wrap Stack That Ages with Simplicity
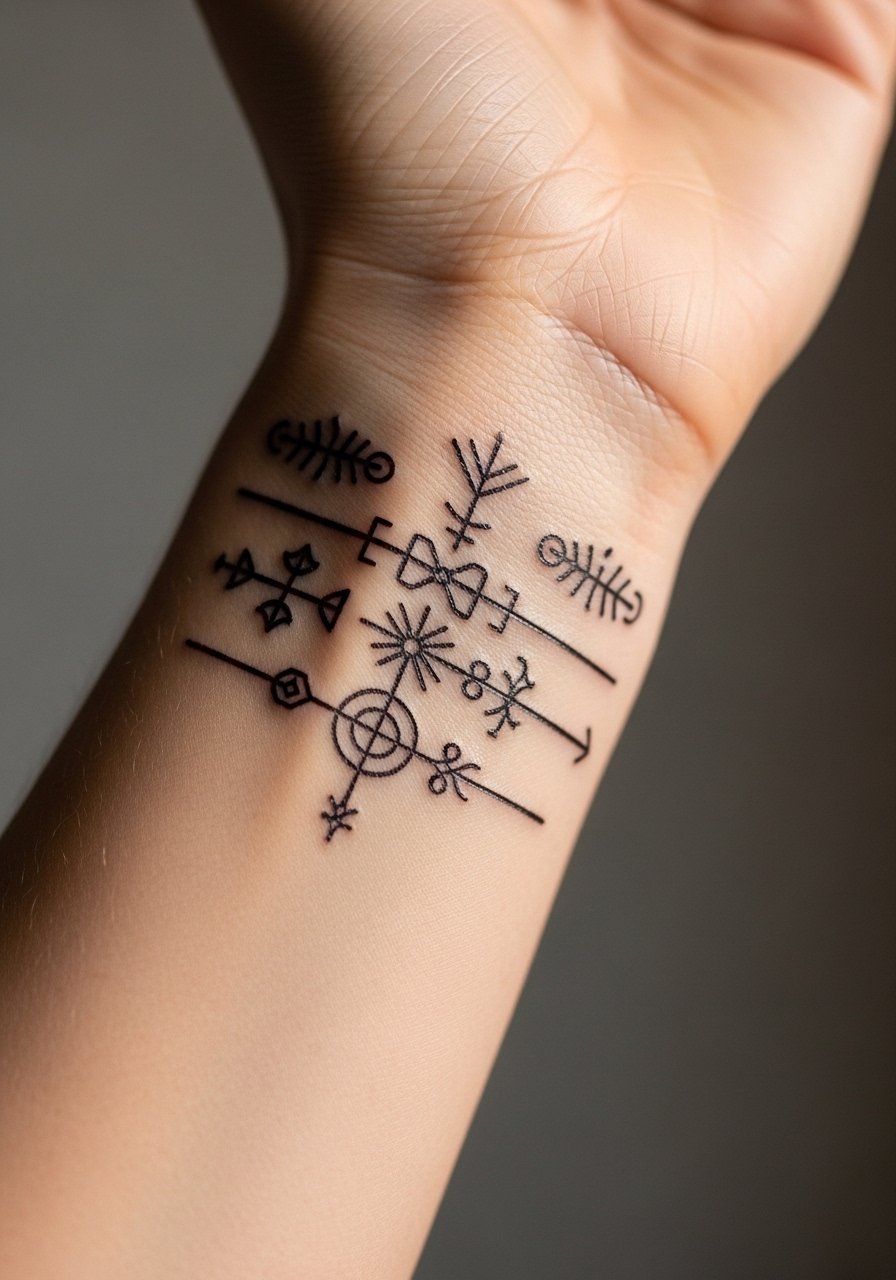
Wrist wraps are a favorite for first-timers because they read small but are highly visible. The common aging issue is crowding too many symbols into a narrow band. Leave breathing room and favor slightly stronger primary strokes so the wrap survives frequent washing. Sessions are short and usually well tolerated. For styling, a minimalist black watch or stackable cuffs on the opposite wrist keeps balance without crowding the tattoo.
Frequently Asked Questions
Q: Will fine line sigils on joints like elbows and knees need touch-ups more often than chest work?
A: Yes, joints see more movement and surface abrasion so thin-line work often requires touch-ups sooner than chest or back pieces. Expect a realistic touch-up window around year two to three for heavy-use joints. Choosing slightly stronger anchor lines and spacing the details helps extend the interval.
Q: Are negative space back shoulder pieces better as bold voids or dense black areas?
A: Artists debate this. One camp favors heavy black areas to anchor the composition. The other camp prefers careful voids to create breath and contrast. The right approach depends on the mockup and how the voids read from arm's length. Ask to see staged previews before you book.
Q: How should I dress for a ribcage session so the artist has clean access and I stay comfortable?
A: Wear a loose button-down you can slide off or a sports bra that allows the side torso to be revealed without full undressing. A cropped hoodie you can lift is also handy. Comfort and access matter more than fashion during the session.
Q: Do hand and wrist sigils affect job prospects more than forearm pieces?
A: Visibility matters. Hand and wrist tattoos are harder to conceal than forearm pieces that can be covered with long sleeves. Consider your industry and future plans before committing to always-visible placements. If obscuring is a concern, place sigils on the inner forearm or upper arm instead.
Q: How do I find artists who actually specialize in cyber sigilism templates?
A: Search style-specific hashtags like #cybersigiltattoo and #blackworktattoo, check local guest-spot listings, and look through tattoo directories. Bring vector stencils or Etsy templates to consultations so you and the artist start from the same page.
