
Fine line trends look flawless in photos, but what actually holds up on skin over time is a different conversation. I see couples pick matching micro pieces for the aesthetic and then wonder why wrists blur faster than expected. This list mixes small, wearable pairing concepts with practical notes on aging, touch-ups, and what to wear the day of the session so your tattoos survive the honeymoon phase and beyond.
1. Minimalist Heart Outlines on the Wrist
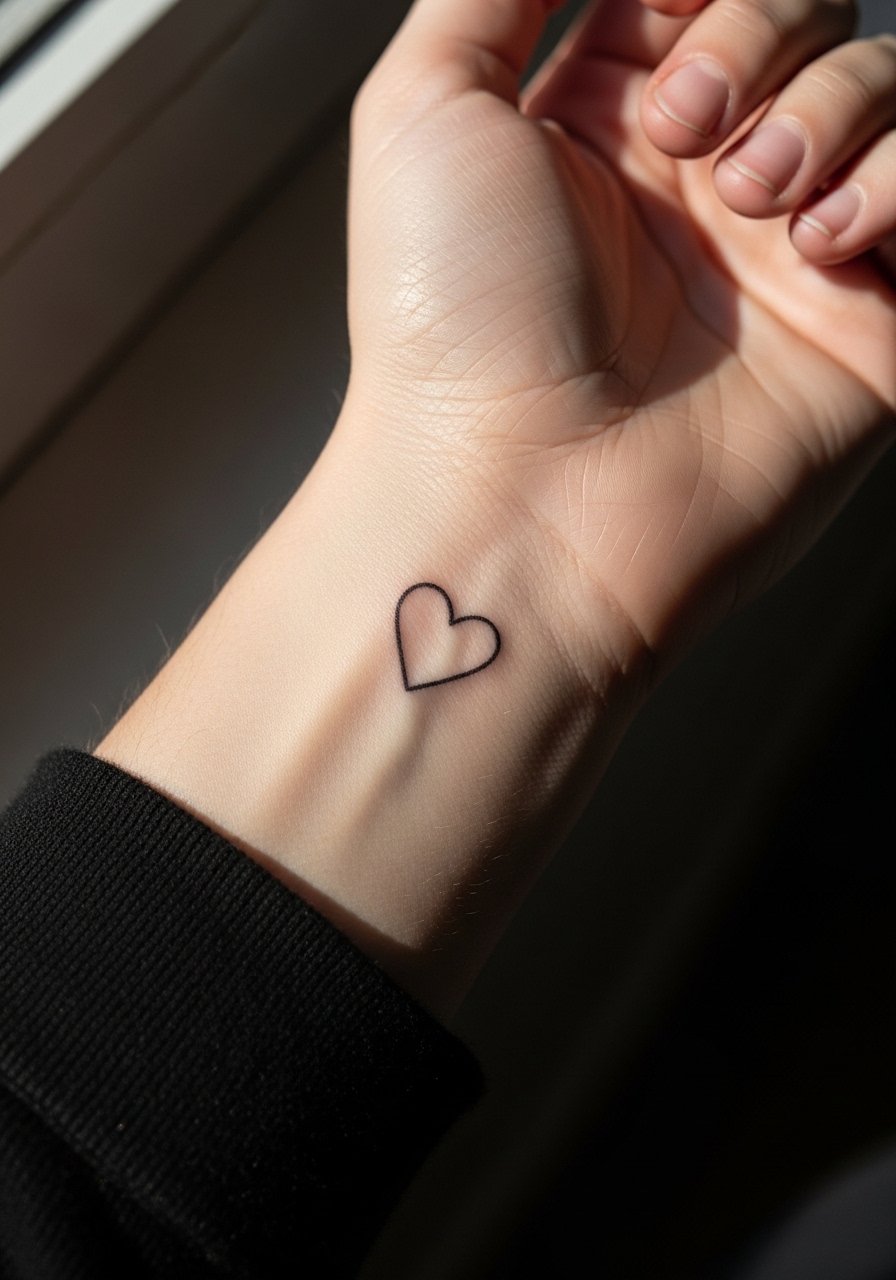
I've seen these on friends and clients because they read small and personal. Fair warning, wrist skin takes a lot of rubbing from watches and sleeves so ask your artist for slightly bolder linework than your phone reference. The session feels quick, usually a single short appointment, but the wrist risks blowout more than the forearm. For showing it off, stacked dainty bracelets balance the tiny heart without crowding it. Try a thin gold chain bracelet opposite the tattoo. For the appointment, sleeveless tops make access simple and keep the area unstressed.
2. Sun and Moon Halves on Collarbones
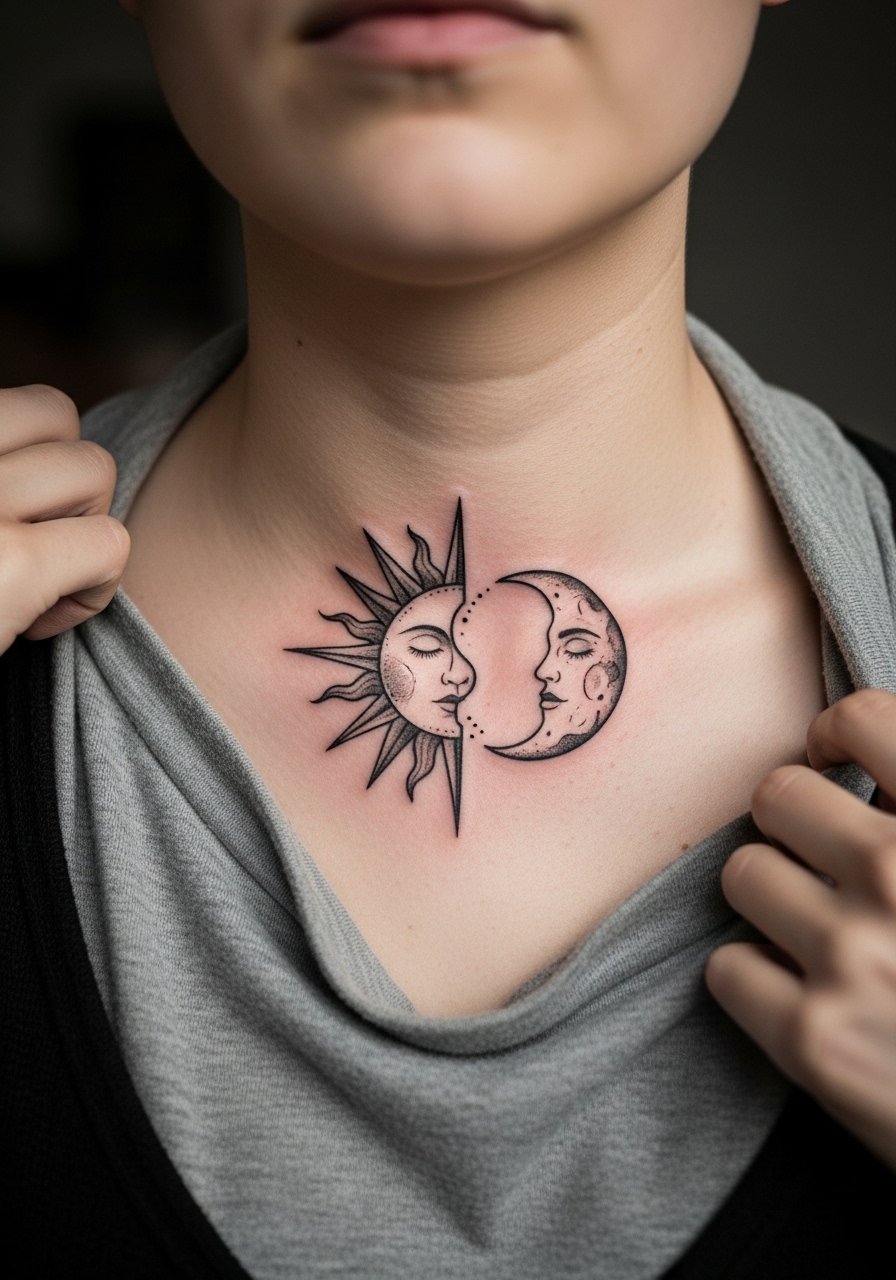
Collarbones read elegant and photograph well. One camp of artists says small geometric pieces in this spot age cleanly if spaced for skin movement. The opposing camp worries that shallow linework blurs near the bone. Both sides have a point. My practical take is to ask for slightly heavier linework on the sun half and soft stipple shading on the moon to let the two age differently. Session pain is low to moderate because the bone is shallow. Show it off with an off shoulder blouse and layer delicate necklaces just above the ink.
3. Wave Line on the Forearm
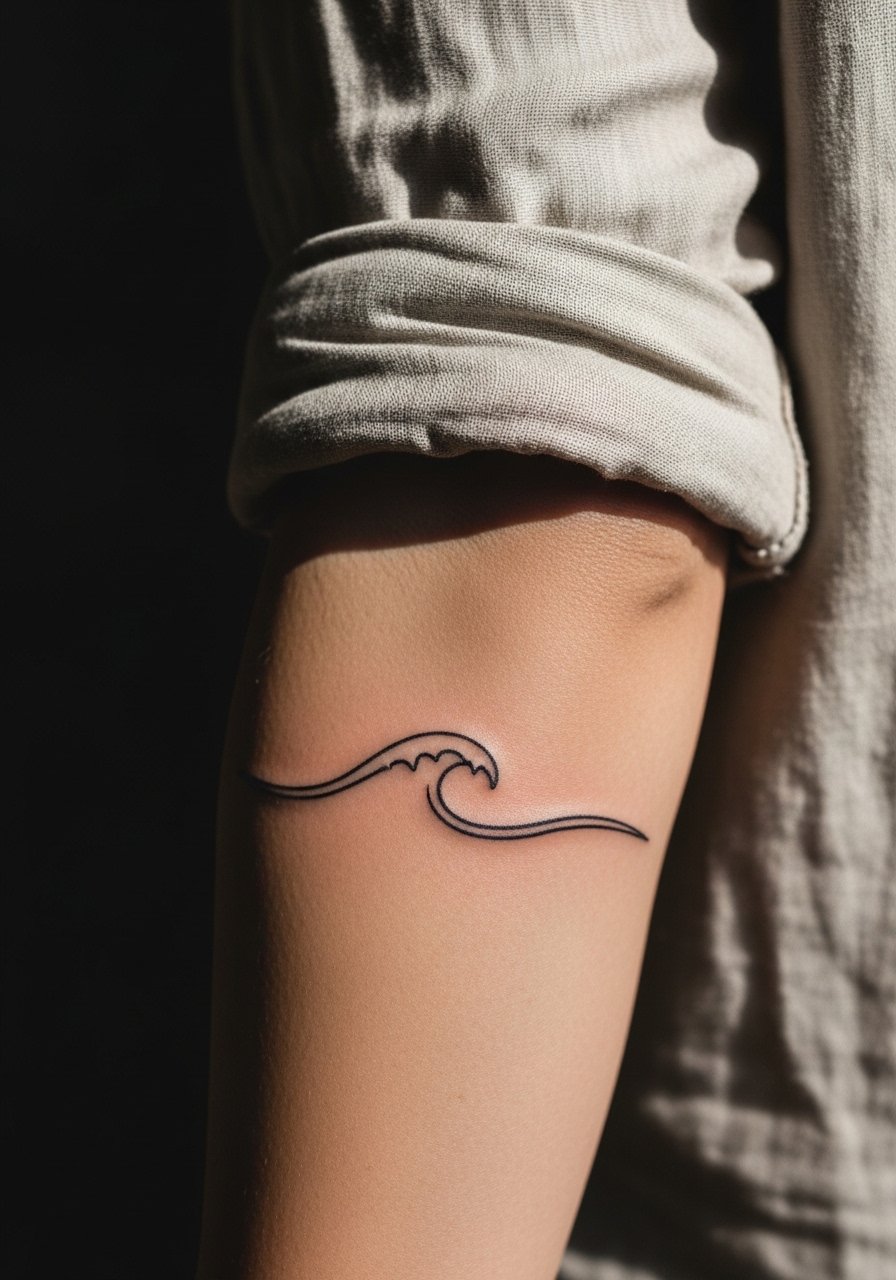
There is a practical reason couples pick waves. Forearm placement handles fine line better than the wrist and the shape can be scaled without crowding. The main mistake is going too dense with curls in a very small piece. Tell your artist you want open spacing and clear linework so the design keeps its flow at two and five years healed. Session time is short and pain is moderate. Pair the finished ink with a linen rolled cuff shirt for casual show-off looks and easier access during the appointment.
4. Origami Crane on the Inner Arm
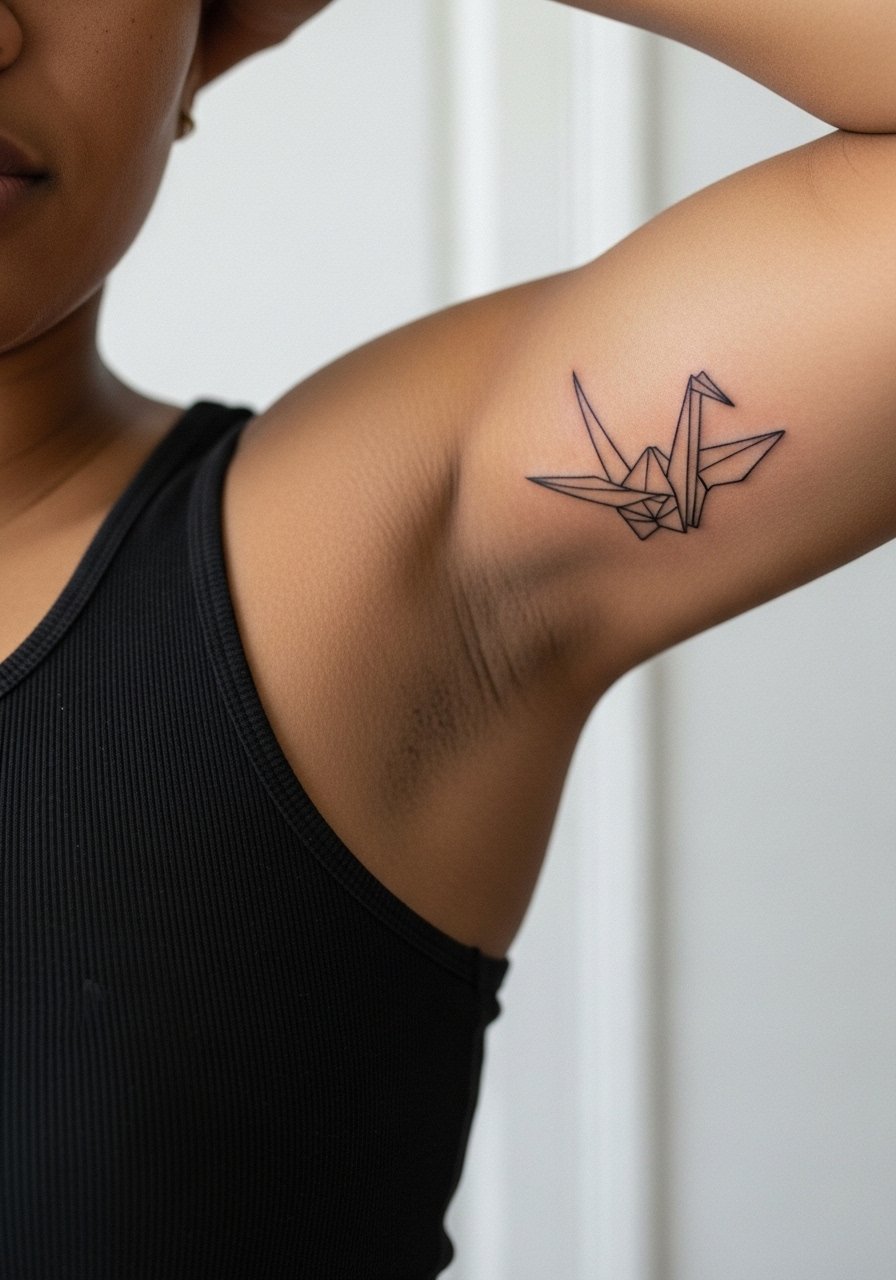
Inner arm pieces can be surprisingly durable when placed away from friction zones. Expect a moderate to high pain level because the area is sensitive, and plan for a single longer session or two short ones for crisp folds. A common error is requesting ultra-fine single-thread lines that the skin simply does not hold in that zone. During consultation, show a fold reference and ask for a mix of thin and slightly heavier linework so the crane retains shape as it heals. For session wear, bring a sleeveless tank that you can push up without tugging.
5. Infinity Twist on the Ankle
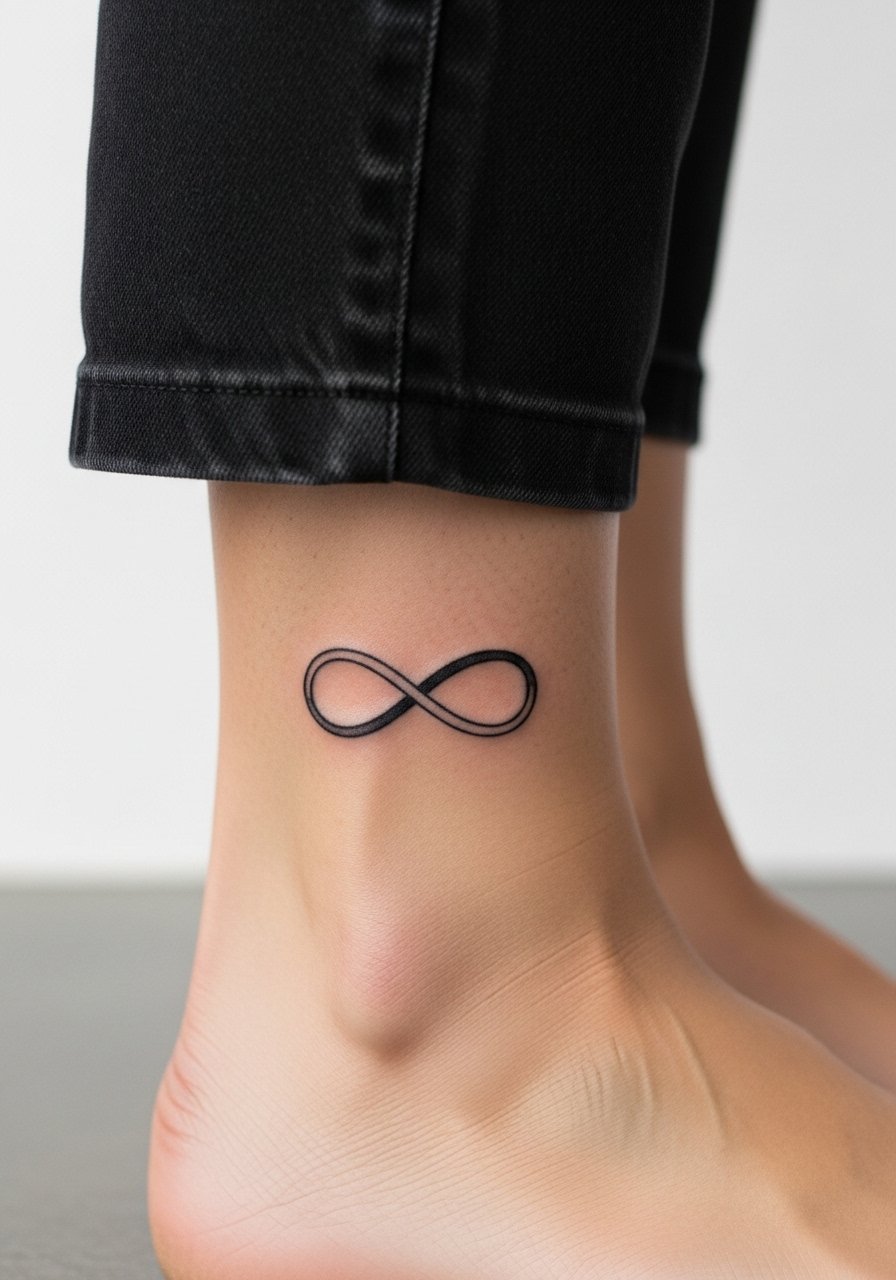
Ankle tattoos get a lot of sun and friction from shoes. The ankle can be a great spot for a tiny infinity twist but expect fading if you wear boots daily. The tattoo session is short but the area is bony and can sting. A common mistake is tiny, hairline loops that open up into blurred shapes after a year. Ask your artist for slightly denser linework in the loops and a touch-up plan. Show-off outfits like cropped straight leg pants or strappy sandals make the piece visible without overexposure.
6. Puzzle Piece Halves on the Ribcage and Thigh

Rib tattoos are a commitment because the skin shifts and pain is higher. Artists are split on fine line on ribs. One camp warns that the stretch will blur dense linework within two years. The other camp says careful depth and spacing can keep details sharp. My suggestion is to scale the puzzle so each tab has breathing room. Pair the rib half with a complementary thigh piece that sits on the outer thigh. For session wear, a loose sports bra or button-up you can open makes access painless. Expect a touch-up timeline at year two to three if you want crisp edges.
Studio Day Picks
The rib, collarbone, ankle, and inner arm pieces above each bring a different prep need. Pack items that help with access and comfort for those specific placements.
- Stencil transfer paper kit. Lets you preview the linework on skin before committing, especially useful for the puzzle and geometric styles in ideas above.
- Topical numbing cream. Applied per the product instructions before the session takes the edge off bony spots like the ankle or ribs.
- Thin protective film roll. Keeps wrist and finger pieces clean during the first week of constant hand washing and friction.
- Fragrance-free gentle body wash. Cleanses healing areas without irritating the linework that fine line styles depend on.
- Aquaphor healing ointment. A thin layer for the earliest days locks in moisture for delicate pieces without clogging channels, which helps fine line holds.
7. Watercolor Heart on the Upper Arm
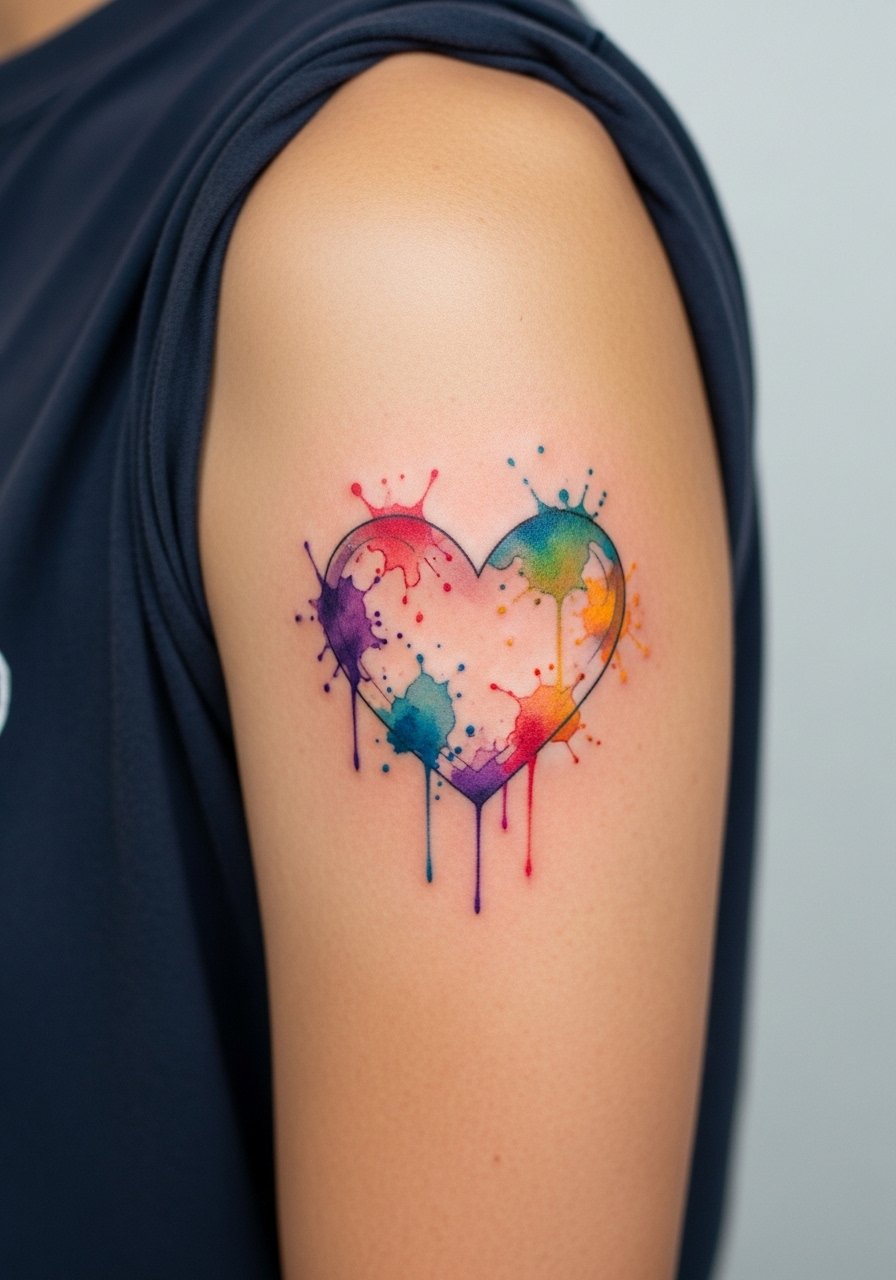
Watercolor brings color and emotional motion, but it ages differently than saturated blackwork. Artists debate color longevity. One camp says the softer edges of watercolor will always need refresh work. The other camp argues that stronger base saturation and careful placement keep color vivid longer. If you choose watercolor, request stronger saturation near the center and lighter washes outward. Expect two sessions for layered color. Pair this with an open-back dress or a simple racerback tank for summer wear. Keep sun exposure in check to avoid premature fading.
8. Lock and Key on the Hands and Wrist
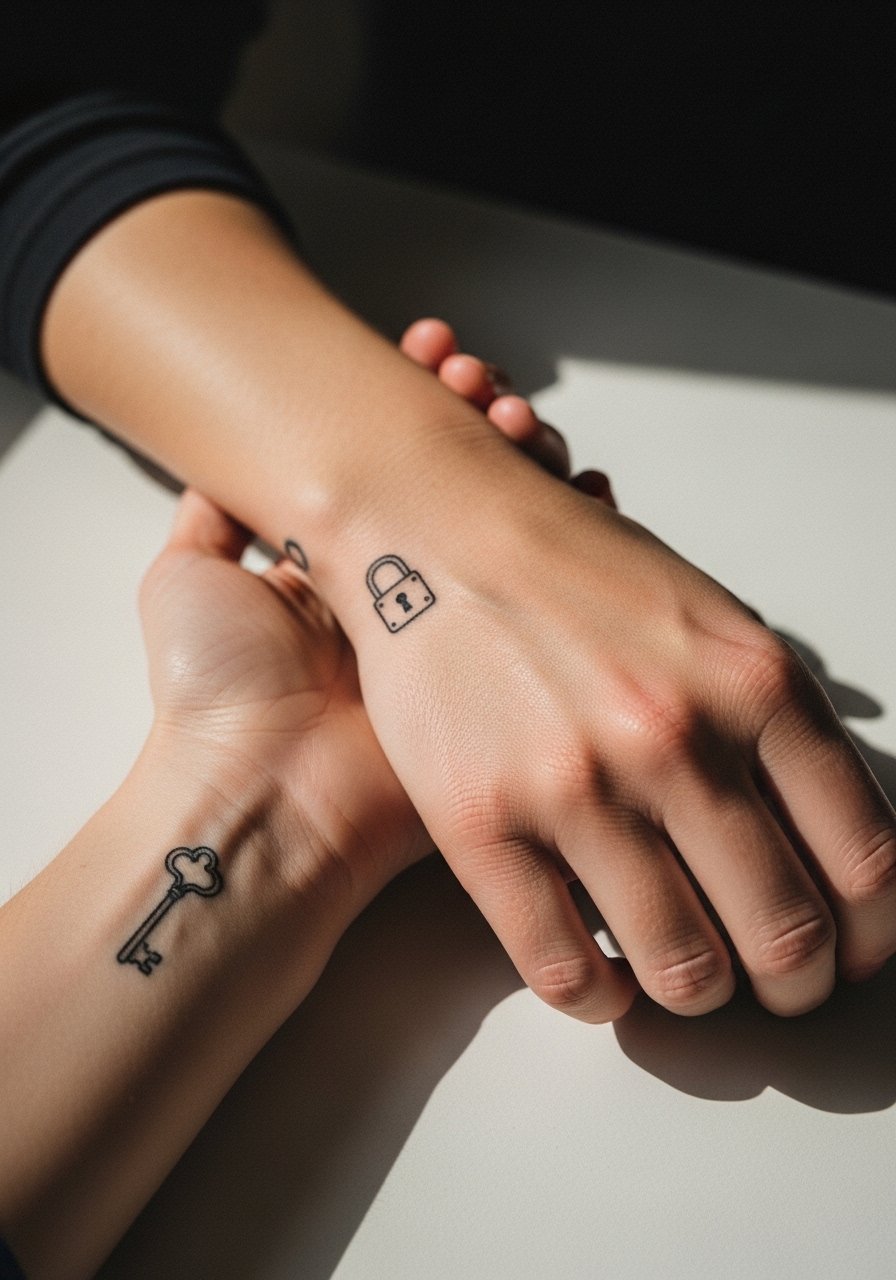
Hand and wrist combos read intimate and literal. Hands are one of the highest-friction zones. The trade-off is visibility versus longevity. If you want a lock and a key, accept that hands may need more frequent touch-ups because skin there is thin and constantly washed. Ask your artist to keep shapes bold enough to handle wear. Session pain on the hand is higher. For showing it off, wear a minimalist wrist jewelry piece on the opposite wrist to balance attention without crowding the ink.
9. Geometric Complement on the Calf
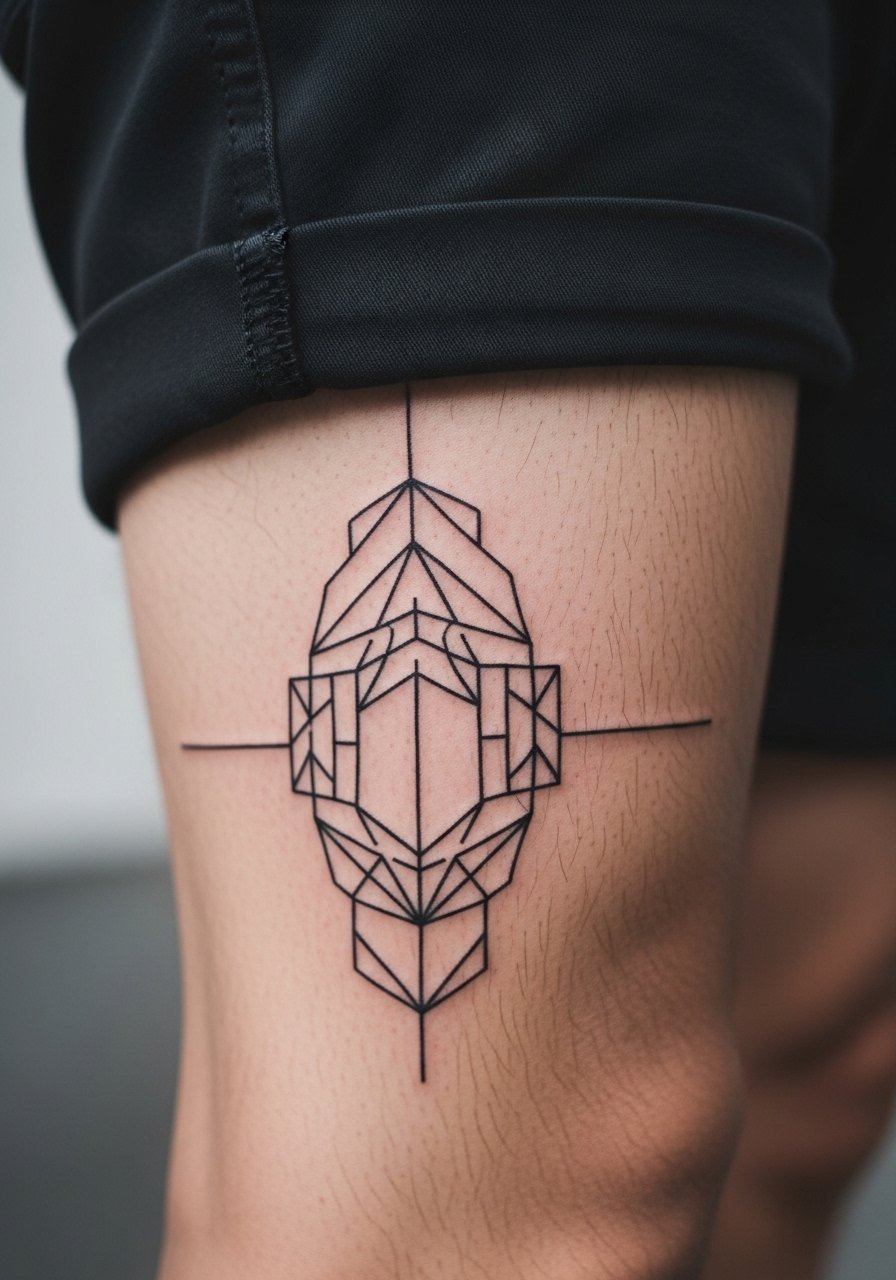
Calf placement takes well to geometric patterns because the canvas is broad and stable. The most common mistake is cramming too many intersecting lines into a small area. Ask for clear spacing and a mockup that scales to the calf circumference. Pain is moderate and sessions run longer for complex repeats. This design ages well if the lines have breathing room. Pair with high-cut shorts or a side-slit skirt when you want the geometry on display. Bring loose shorts for the session so the artist can access the whole surface.
10. Broken Heart Halves on Fingers
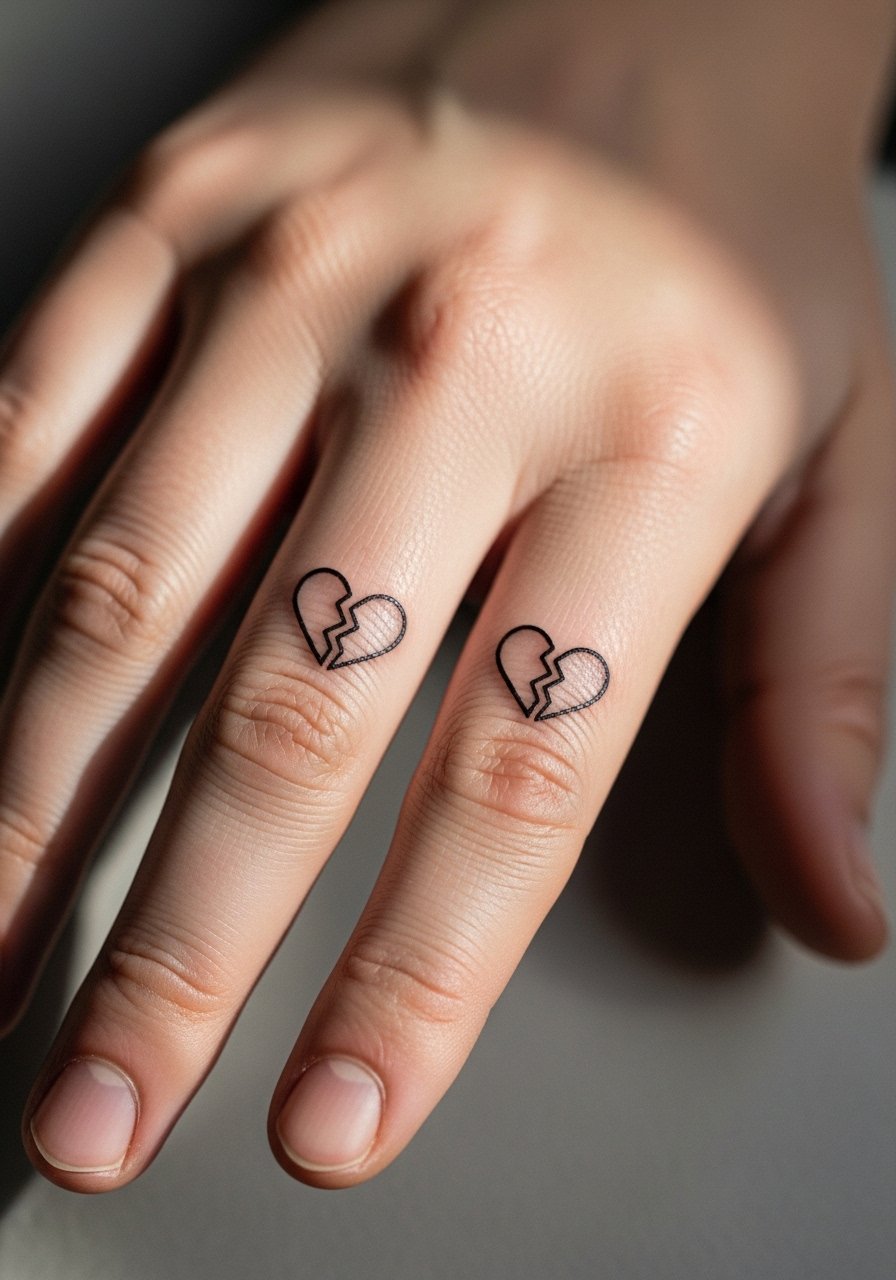
Finger tattoos are tiny and quick but they face constant washing and friction. The main error is expecting hairline precision to last. For broken-heart halves, ask the artist to plan for line thickness that survives hand use. Sessions are short, and touch-ups are often needed by year one or two. If career considerations matter, remember fingers remain visible. For appointment ease, wear a loose button-up shirt so you can roll sleeves without tugging the healing skin.
11. Tiny Script Quote on the Inner Wrist
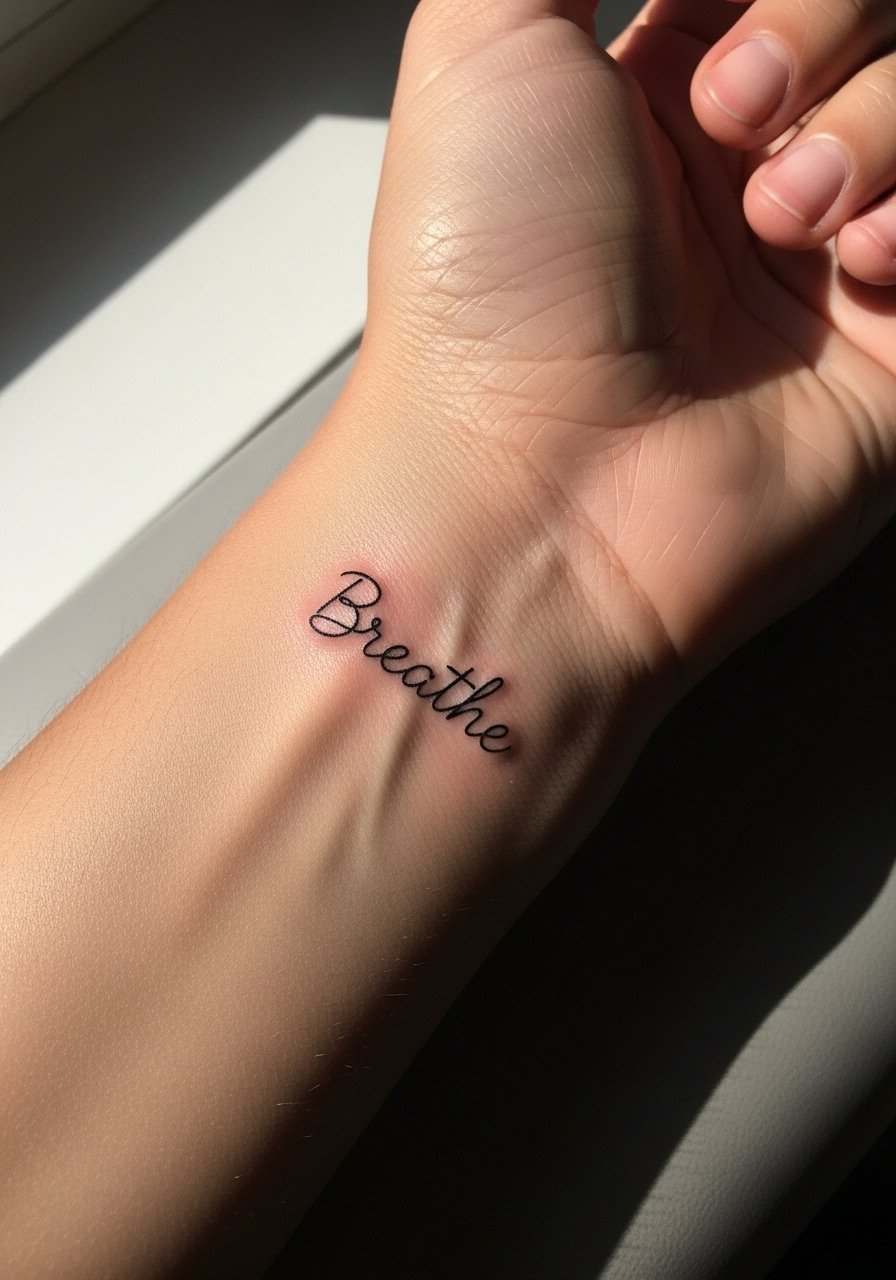
Script can be very personal, but small lettering is unforgiving. Tell your artist the exact font size and spacing you want and request a stencil preview on the skin before they start. Expect a single short session for clean black ink. The inner wrist suffers from both sun and motion, so expect a touch-up at year two for tiny fonts. Pair the piece with a thin chain pendant necklace that sits above the script without crowding it. During the session, a sleeveless top makes access simple.
12. Anatomical Heart on the Shoulder Blade
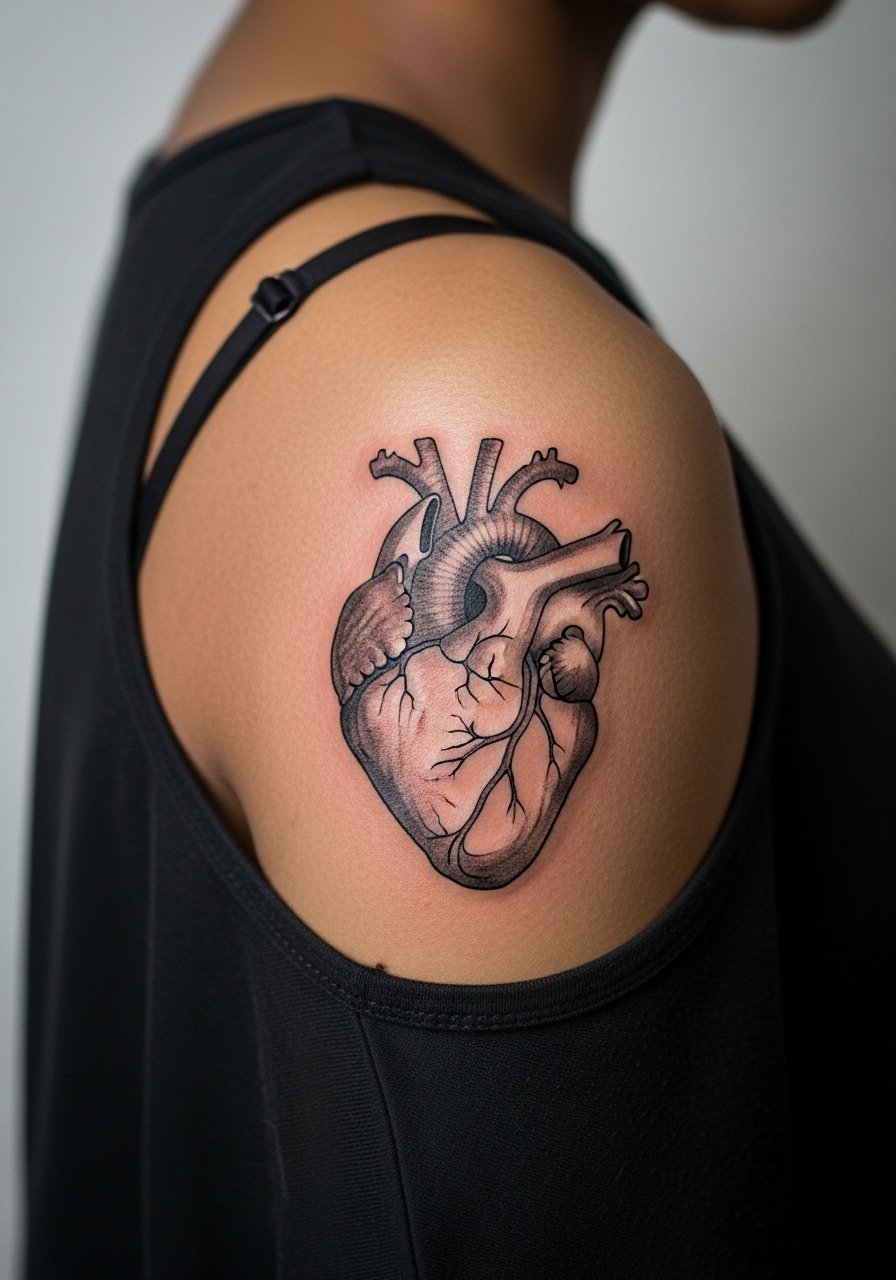
A shoulder blade gives space for detail and tends to age well because the canvas does not stretch excessively. The common mistake is asking for micro-realism too small. Make sure the heart has room for shaded areas and stipple work. Sessions may run longer for detail and often need at least two sittings. For evenings out, a backless halter top frames the artwork without competing with it. If you plan a matching split image across backs, discuss symmetry and spacing with your artist to accommodate posture changes over time.
13. Tiny Constellation on the Ankle
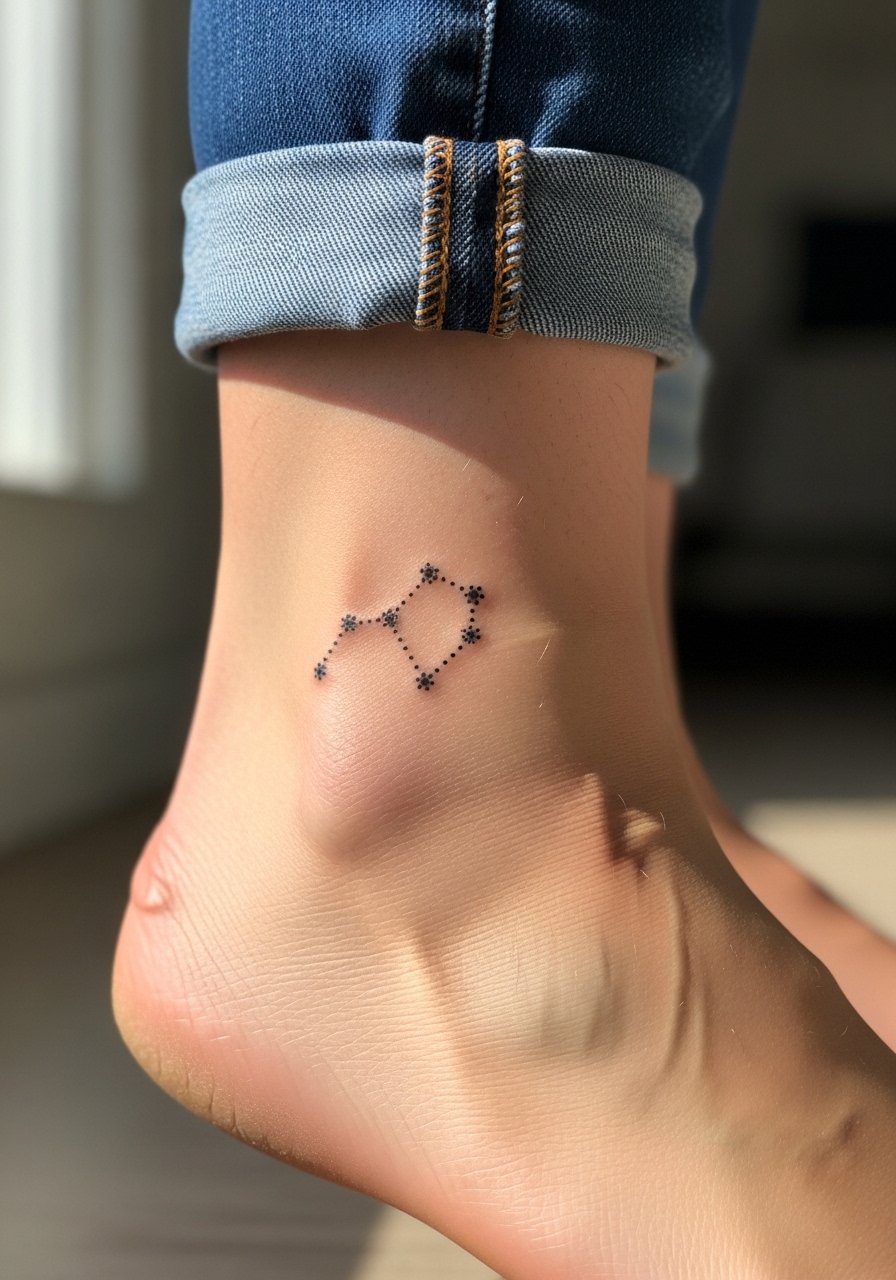
Dot work and stipple shading translate well in tiny constellation pieces if the dots are given spacing. The ankle is exposed to shoes and socks, so the biggest mistake is starting too close to footwear seams. Request an elevated placement on the outer ankle and ask for slightly bolder dots so the pattern keeps negative space as it ages. Sessions are quick but can sting near bone. Show it off with strappy flat sandals or cropped pants that stop above the ankle.
14. Tree and Roots Split on Backs

Large split pieces like tree and roots create a meaningful complete image when partners align. Expect multiple sessions and a higher cost per session because of shading and scale. The usual error is mismatched scale so the halves do not align when standing together. Ask for a shared reference photo and a symmetry check that accounts for spine curvature. Healed shading on the back tends to hold well. For show-off wear, a backless dress or halter top will display the matching halves and the negative space between them.
15. Origami Swan on the Shoulder
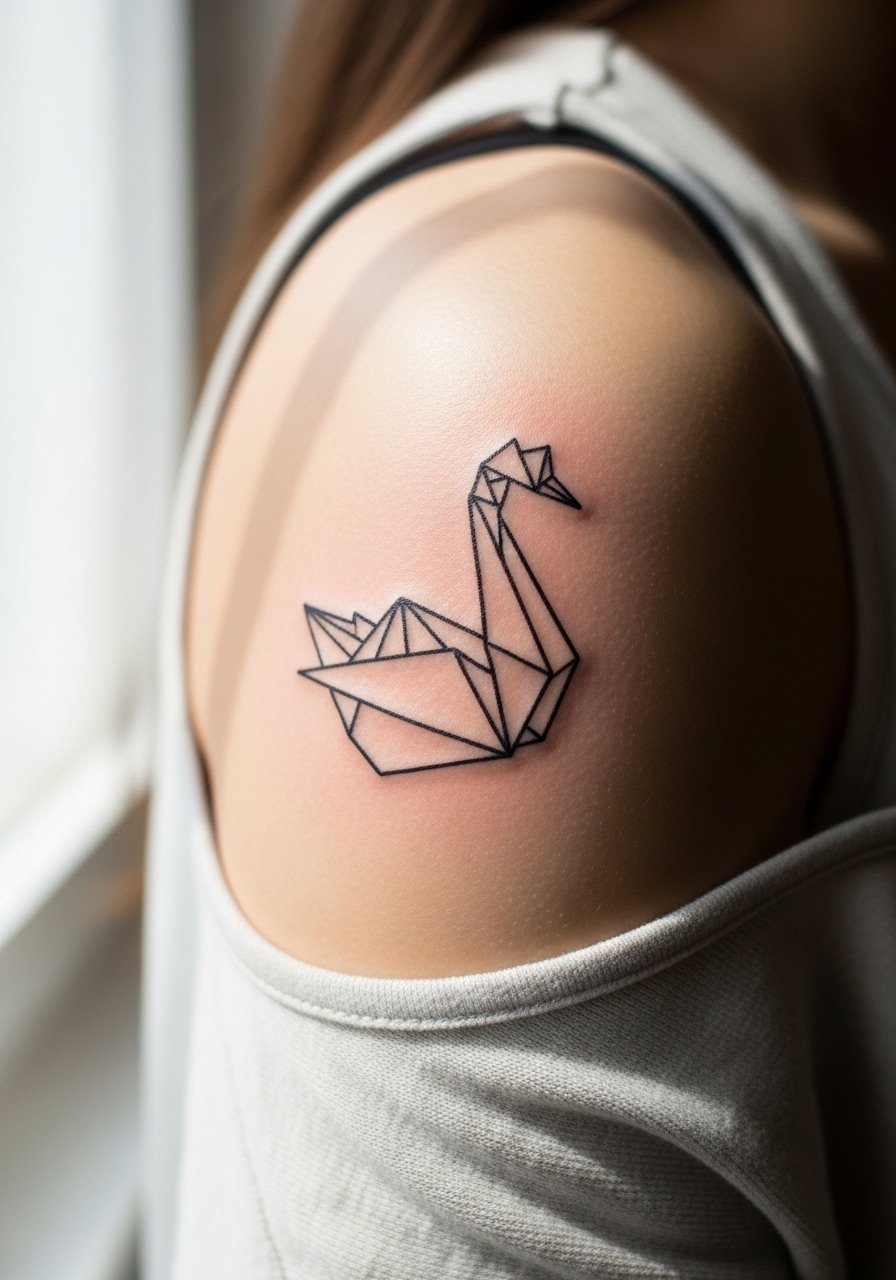
Shoulder placement gives motion to the origami shape when the arm moves. The common mistake is shrinking the design to the size used on the wrist or ankle. On the shoulder, scale up and keep folds clear. Anticipate a one-session piece for a small swan and moderate pain. For the session wear, a loose tank top allows the artist easy access and keeps the area relaxed. For styling, a thin bangle on the opposite arm balances the visual weight.
16. Matching Coordinates on the Collarbone and Wrist
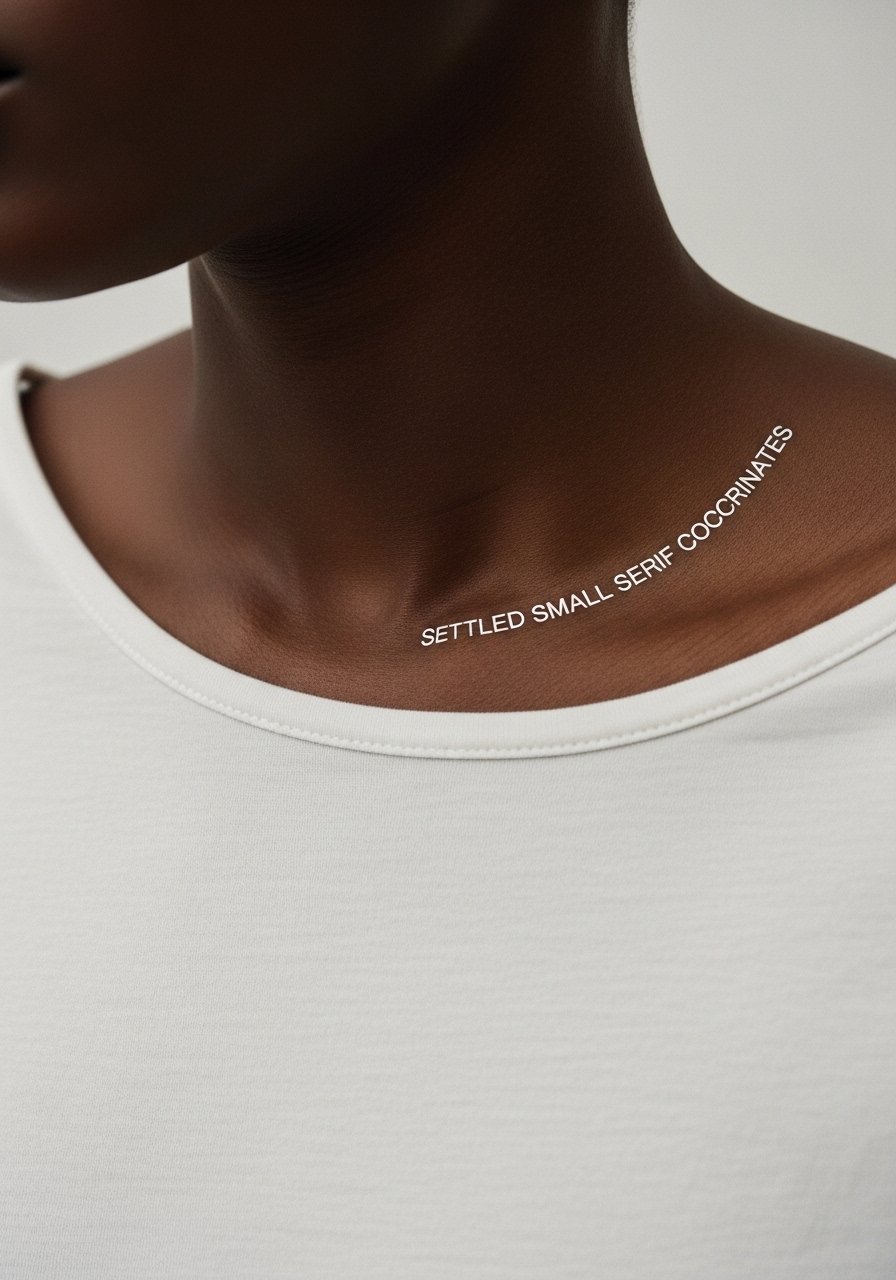
When script or numbers appear, specify the exact text in your reference so the stencil is correct. Coordinates read crisp when done at readable size. The collarbone number placement needs slightly larger type than the wrist to remain legible after healing. The session for both placements is short. Pair the collarbone text with layered necklaces that sit above the line, such as a delicate layered necklace. Ask your artist for a preview stencil so you can check alignment before any needles touch skin.
17. Wave and Mountain Pair for Adventure Couples
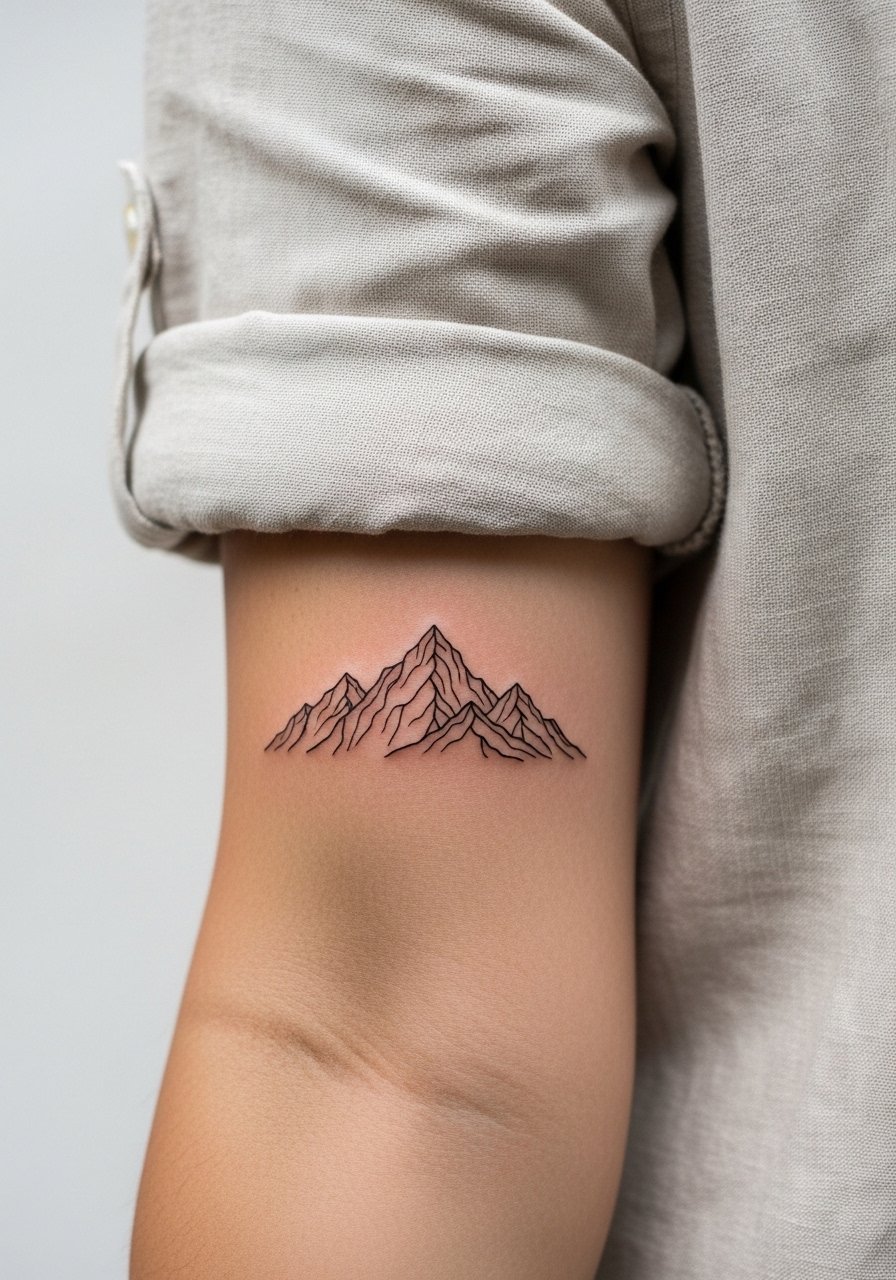
Adventure motifs like a wave for one partner and a mountain for the other balance visual language and lifestyle. The error is over-detailing in a tiny forearm piece. Keep linework simple and avoid dense shading that blurs over time. The forearm handles fine line well but plan for a touch-up at year three if you want crisp edges. During the session, a loose button-down shirt rolled to the elbow gives the artist comfortable access and keeps you warm between passes.
18. Geometric Lock and Key on the Thigh
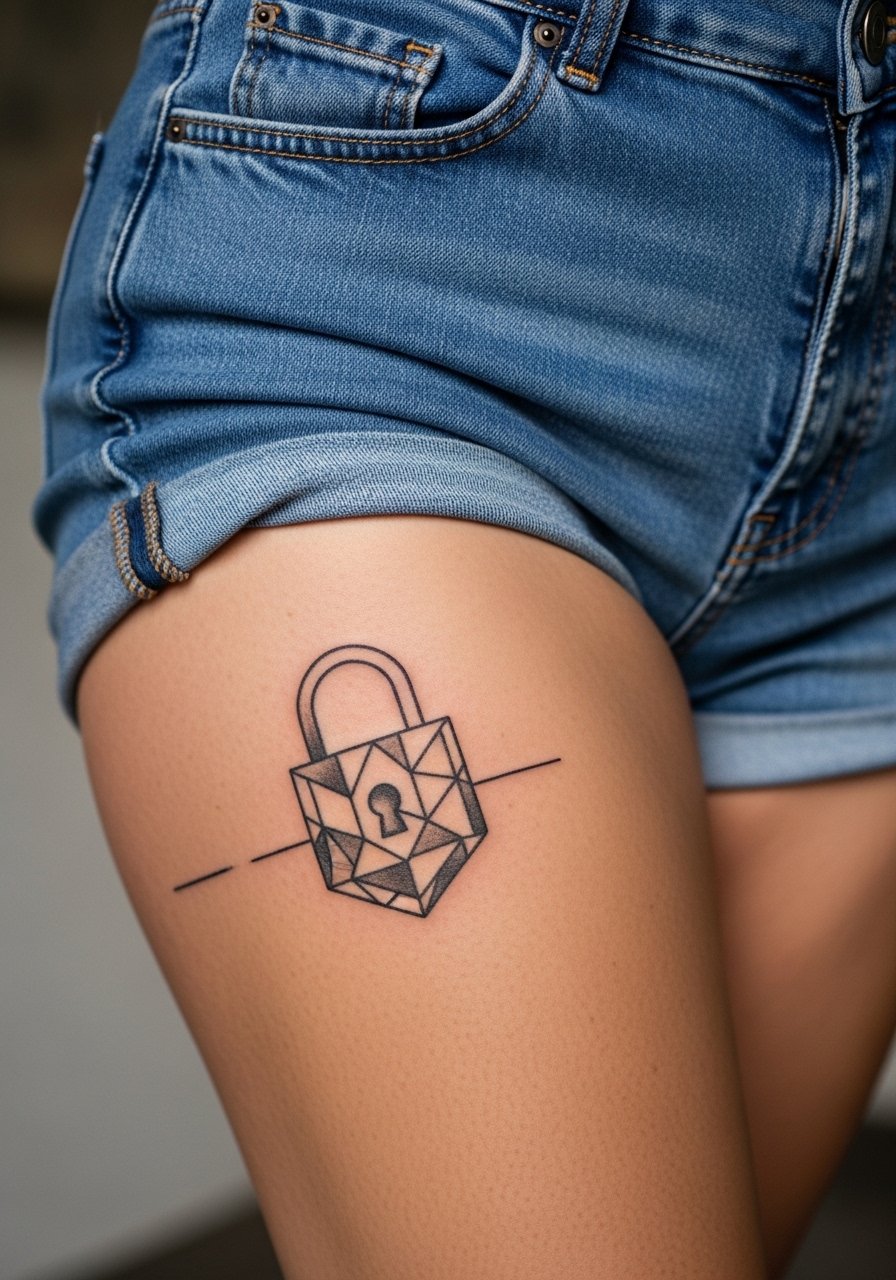
Thigh placements are forgiving for scale and detail. A lock and key with geometric edges needs spacing so lines do not merge as the skin moves. The session is moderate on pain and can be done in one longer appointment for medium pieces. For showing it off, high-cut shorts or a side-slit skirt work well. Try a high cut shorts look for summer. During the session, loose shorts or a skirt that you can hike up easily keeps the area accessible and comfortable.
19. Small Botanical on the Inner Thigh
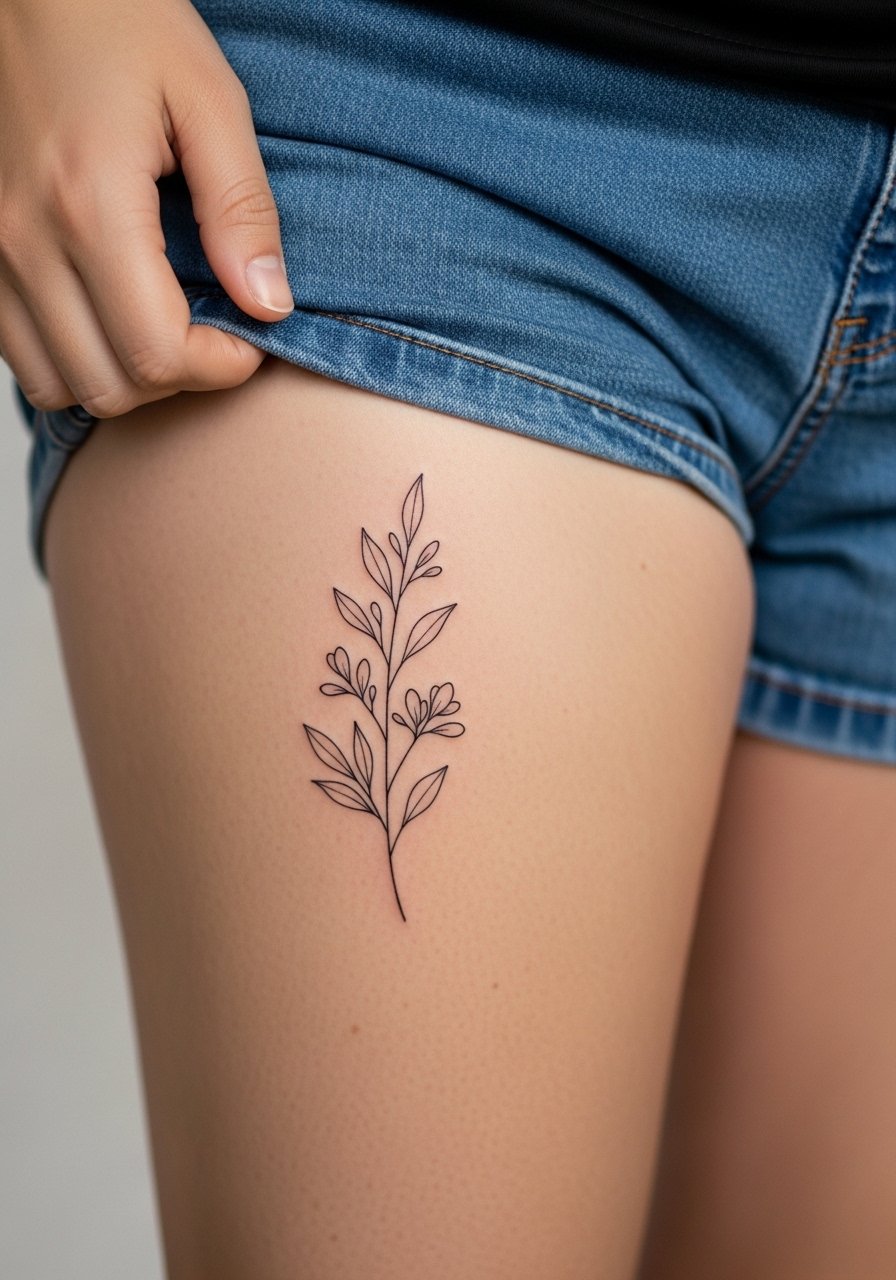
Inner thigh pieces are intimate and require careful artist selection. Expect higher sensitivity during the session and a need for specialized hygiene practices. The common mistake is selecting flash designed for outer limbs and shrinking it into a patch that will not read on the inner thigh. Ask for a bespoke layout that follows the thigh curve. For session wear, bring loose shorts that can be shifted without rubbing the area, as a loose drawstring linen pant alternative.
20. Tiny Semicolon Matching on the Collarbone
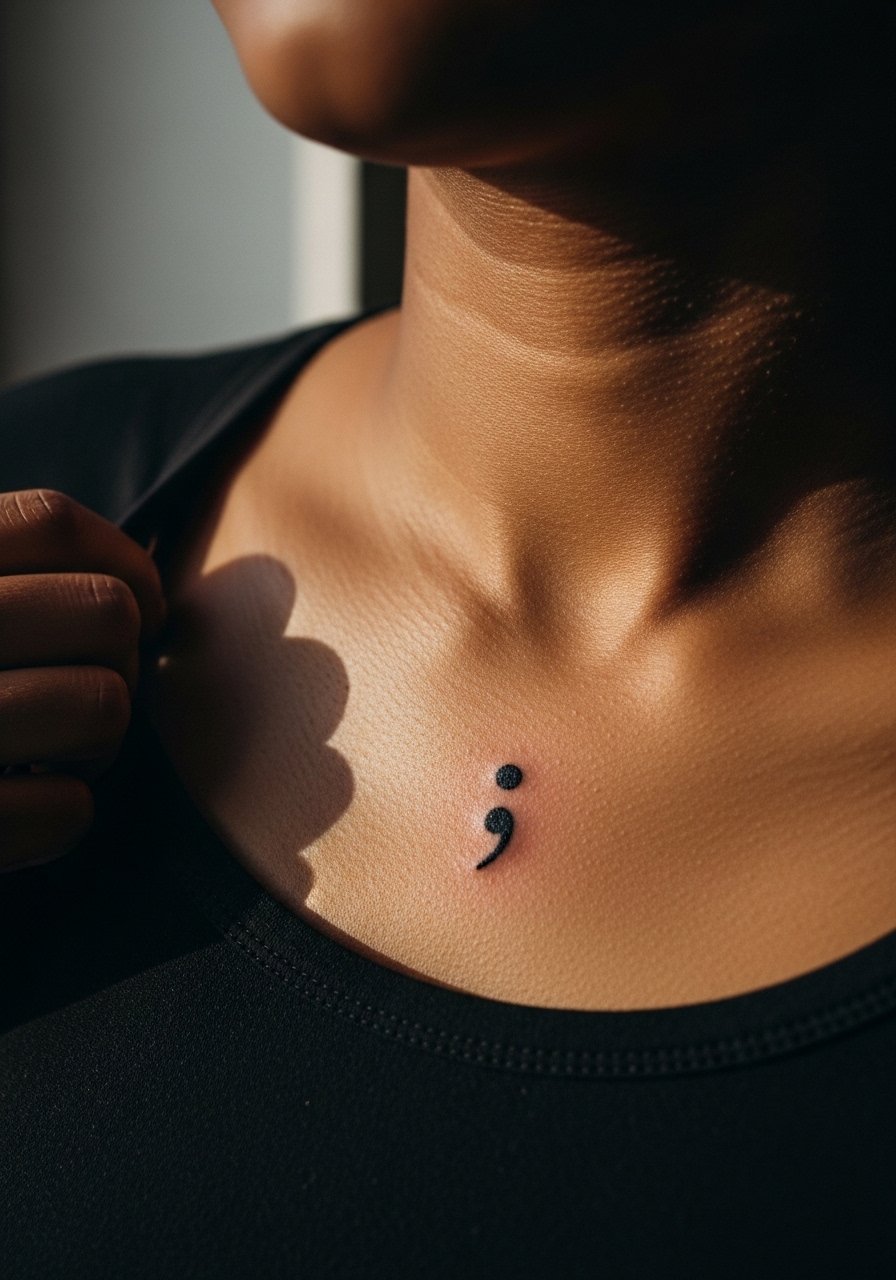
Small punctuation marks like semicolons carry literal and personal significance. Keep them slightly larger than you think you need so they maintain shape over time. The area near the collarbone is visible and photos well. The session is quick. For show-off styling, layer a thin chain pendant necklace above the punctuation so the eye rests on the collarbone without covering the mark. Ask your artist to preview the placement while you stand naturally.
21. Matching Micro-Realism Eyes on the Back of the Arm
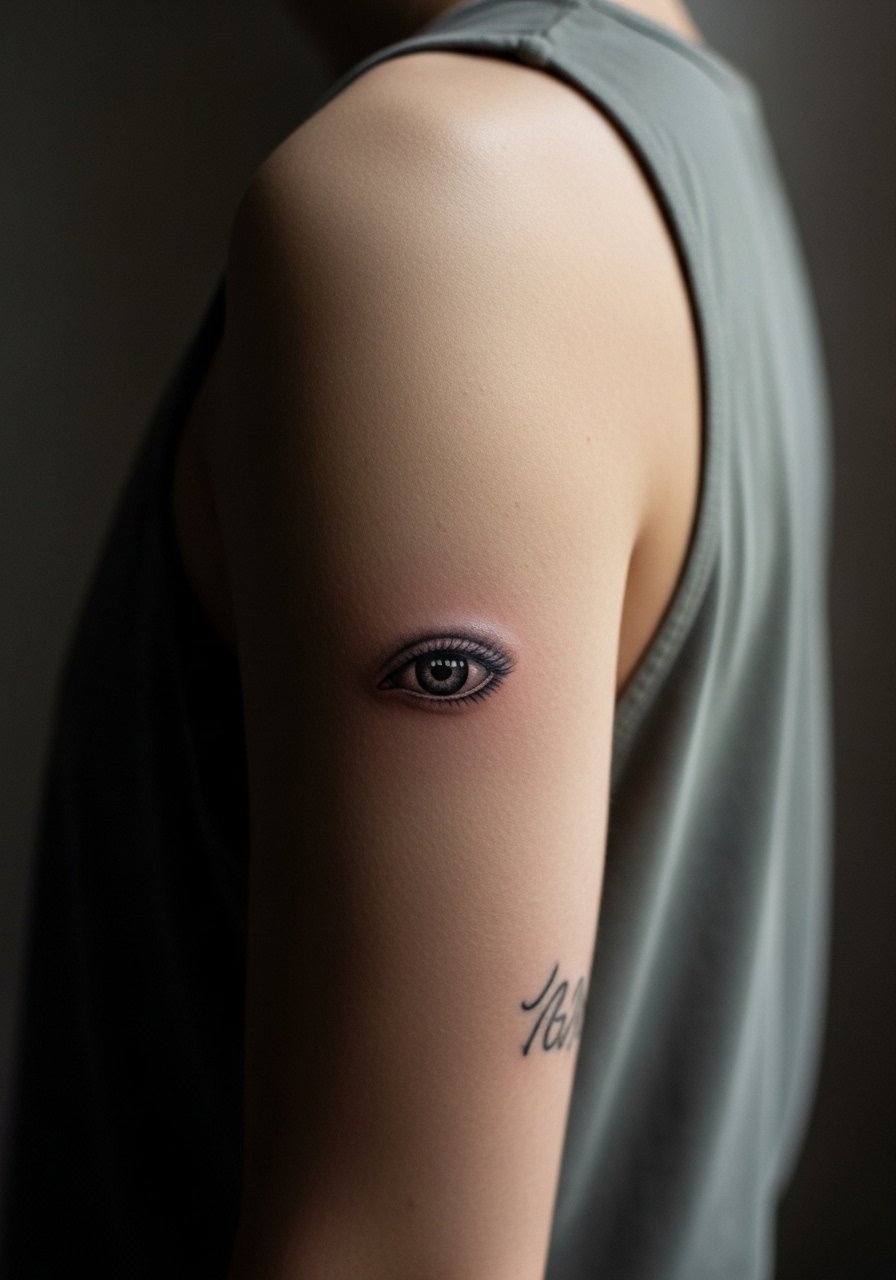
Micro-realism in a small area demands scale and shading that suit the arm canvas. The frequent mistake is cramming too much tiny detail into a two-inch space. Ask for simplified contrast and clear highlights so the eye reads even after a couple of years. Sessions can run longer for realism because of layered shading. For the session wear, a sleeveless fitted tank keeps the shoulder relaxed and accessible.
Frequently Asked Questions
Q: How much does a minimalist couple tattoo usually cost, and what affects the price?
A: Prices vary by studio and region, but what matters most is size, line density, and session time. Tiny wrist or finger pieces are quick and cheaper in a single session. Larger splits like back or thigh halves need multiple sittings and therefore more studio time. Expect to discuss session breakdown rather than an exact number when you book.
Q: Will watercolor-style couple tattoos need different maintenance than black line pieces?
A: Yes, watercolor fades differently because it relies on softer washes and less saturation. It often needs a stronger initial saturation at the center and sun protection afterward. Plan for possible color refreshes at year two to three if you want vivid tones. Keep daily sunscreen in mind once healed.
Q: Are there placements couples should avoid if they want longevity without frequent touch-ups?
A: High-friction zones like fingers, hands, and inner thighs will usually ask for more touch-ups. Collarbone, forearm, calf, and shoulder blade tend to hold linework and shading better over time. If longevity is the priority, scale up fine details and choose less abrasive spots.
Q: Artists disagree on fine line on the ribs. How do I pick who to trust?
A: Artists split into two camps. One group says the ribs will blur thin lines in a couple of years. The other group argues that with correct depth and spacing, fine line can settle well. Ask for healed photos of rib work from your artist and a clear touch-up plan before booking. Seeing healed examples is the best tiebreaker.
Q: What should couples wear to the appointment for different placements?
A: For wrists and forearms, bring sleeveless or loose button-down shirts you can roll. For collarbone or chest pieces, wide-neck shirts or sports bras that reveal only the tattoo zone work best. For ribs or thigh pieces, loose shorts or a sports bra that can be shifted keeps access simple and preserves comfort.
