
Fine line florals are everywhere on saved boards and short videos, and they look incredible fresh. The reality is that what looks crisp at appointment can soften fast if placement, line weight, or skin tone are not part of the plan. Read on for 21 tiny, simple flower tattoo ideas with how they age, what to ask your artist, and showing tips that actually help you live with the ink.
1. Single-Line Outline Rose on the Wrist
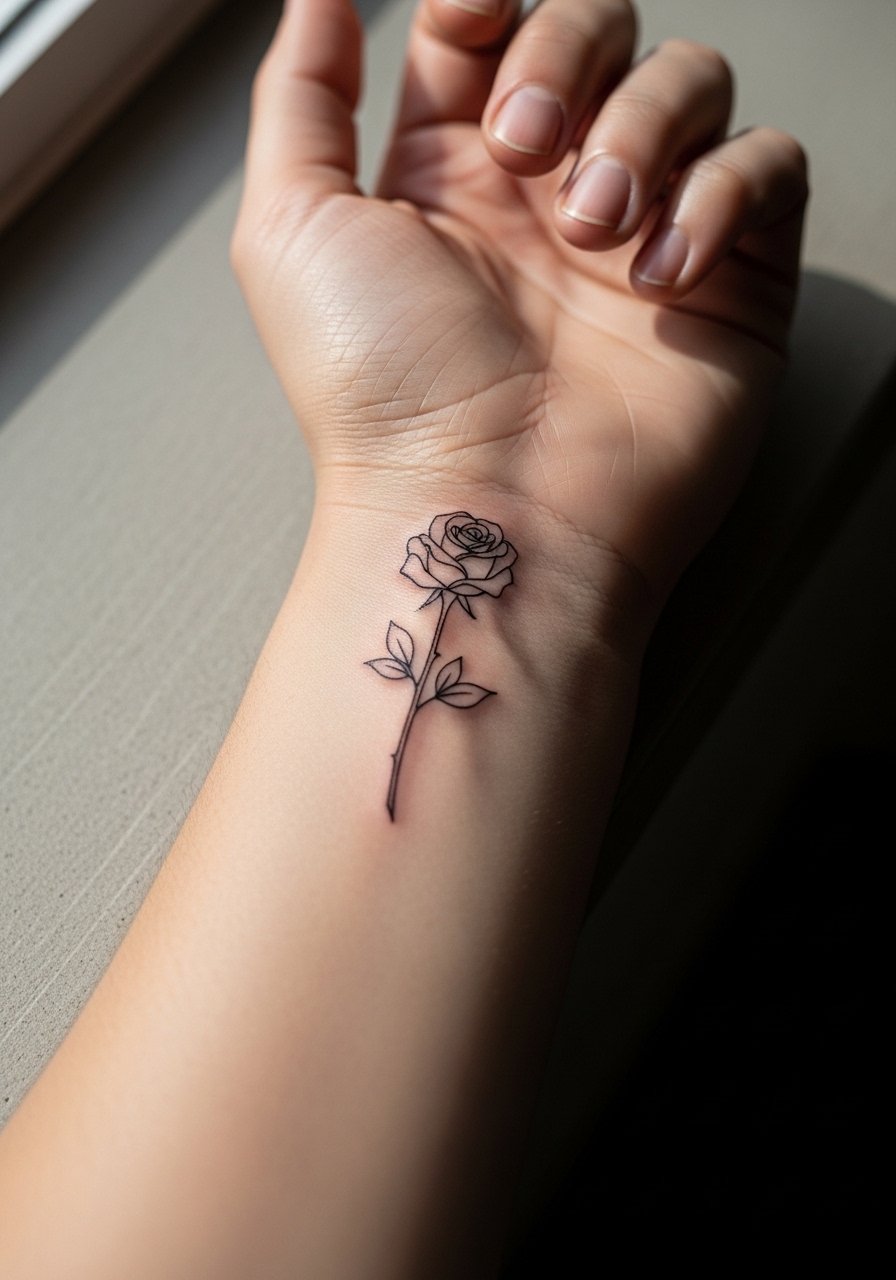
Personal observation lead: I've seen this small rose live on wrists for years and still read as a clear emblem of love without dominating the arm. Pain is low to moderate, session time is usually under 30 minutes, and it is best for first-timers who want a compact design. The biggest mistake is asking for ultra-fine single pixels that vanish under movement. Ask your artist for a slightly heavier line weight so the rose keeps its silhouette at six months and through touch-ups at year two. For showing it off, pair the piece with a thin silver cuff bracelet, and for the session wear a sleeveless tank top so the artist has clean access.
2. Fine Line Daisy Chain Around the Ankle
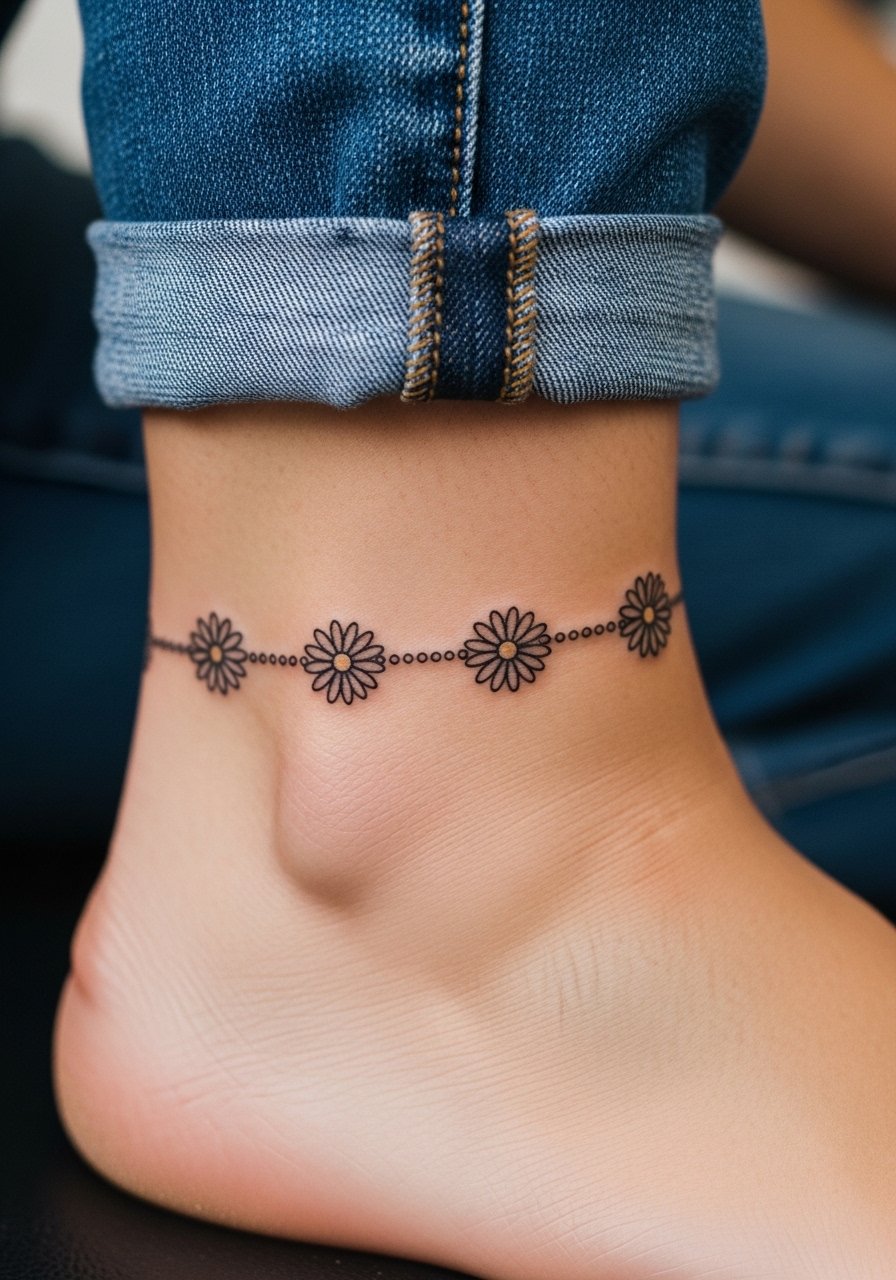
Pain warning lead: The ankle is one of those spots that feels sharp but short. Expect a 30 to 60 minute session, and the design suits people who like seasonal reveal on sandals. A common version that ages poorly is a chain drawn too tight to the bone where the skin and friction wear the lines fast. Tell your artist to leave tiny gaps between flowers and to use slightly denser linework around the outer petals. For outfits, the piece pops with strappy ankle sandals or cropped straight jeans. During the session wear loose pants you can roll up easily.
3. Watercolor Lavender Sprig on the Collarbone
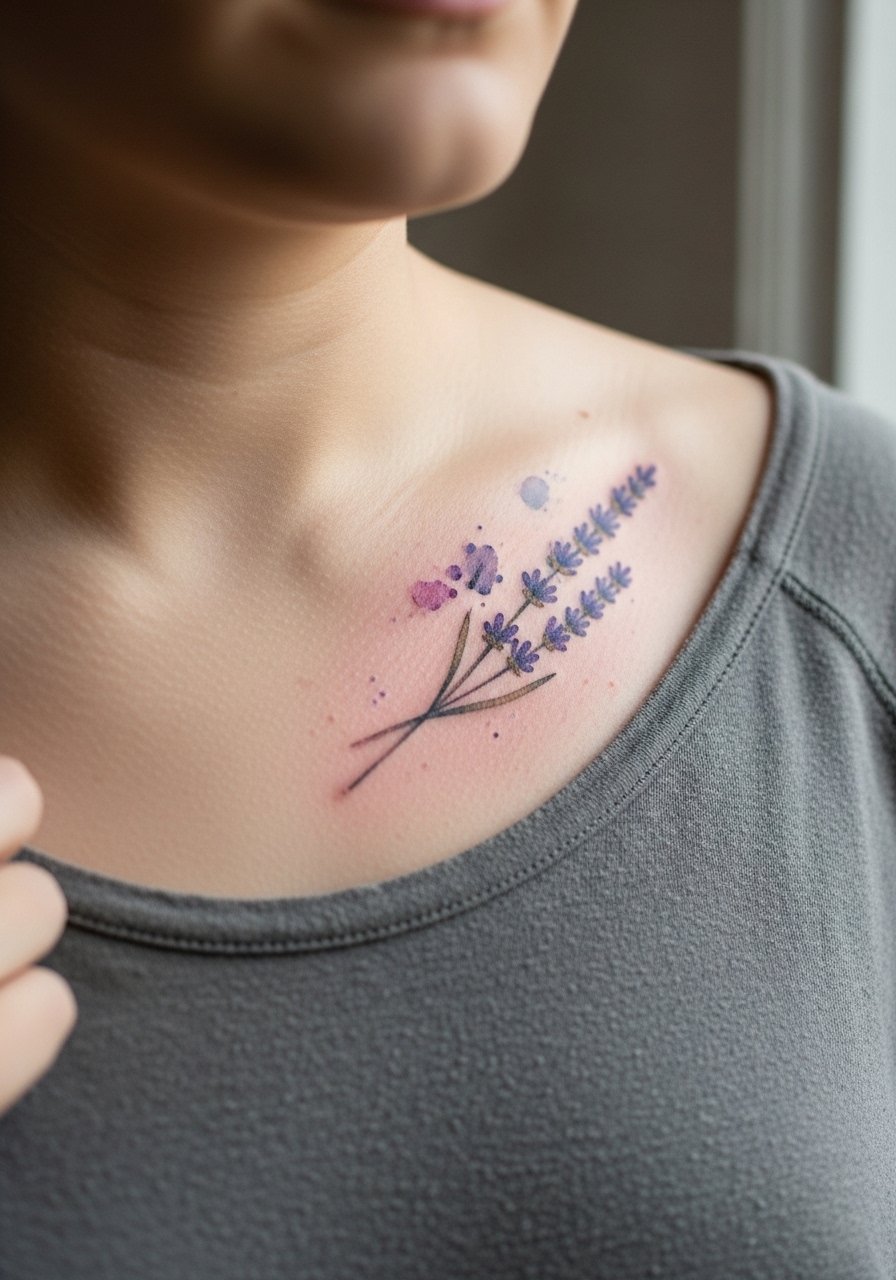
Aging and healing lead: Watercolor washes look like paint at first and then gently fade into soft washes over two to five years. For collarbone placement, pain ranges from mild to moderate and sessions often run 45 to 90 minutes. The version that holds best uses defined outlines with internal watercolor fills rather than loose only-wash application. Tell your artist you want purple and muted blue washes with a black anchor line for longevity. For showing it off, choose an off shoulder blouse in soft pastels. For the appointment bring a strapless bra or a wide-neck top.
4. Neo-Traditional Poppy Bouquet on the Inner Forearm
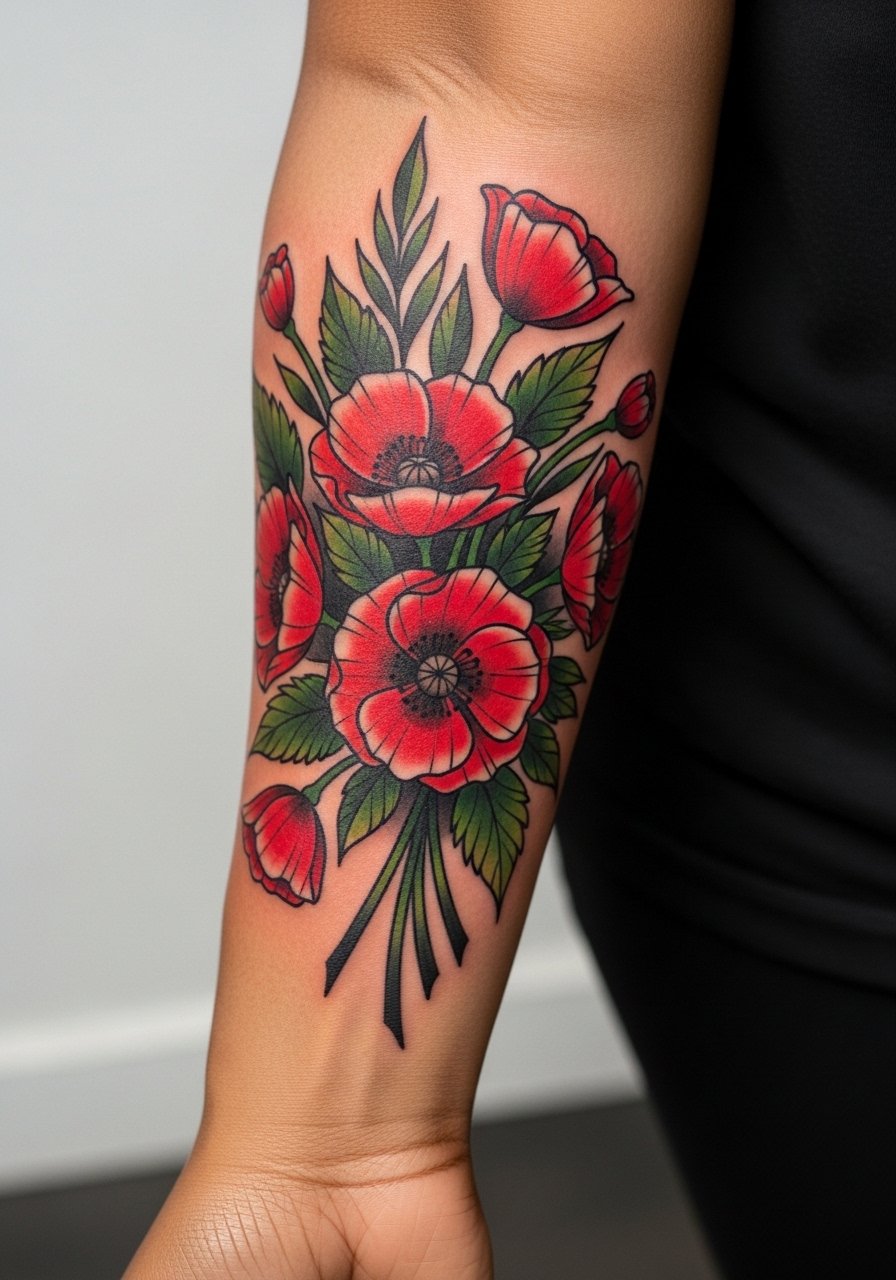
Visual impact lead: Bold lines and saturated reds make neo-traditional poppies read from a distance and age into confident saturation. Expect a two to three hour session for a compact bouquet. A common mistake is asking for tiny blobs of color without enough black outline; color then migrates and loses definition. During consultation specify heavy black outlines and solid color saturation, which greatly reduces ghosting. This placement pairs well with rolled-up linen shirts, so consider a linen button down shirt for showing it off. The inner forearm is lower pain and easy to access for touch-ups.
5. Blackwork Lotus Mandala on the Shoulder Blade
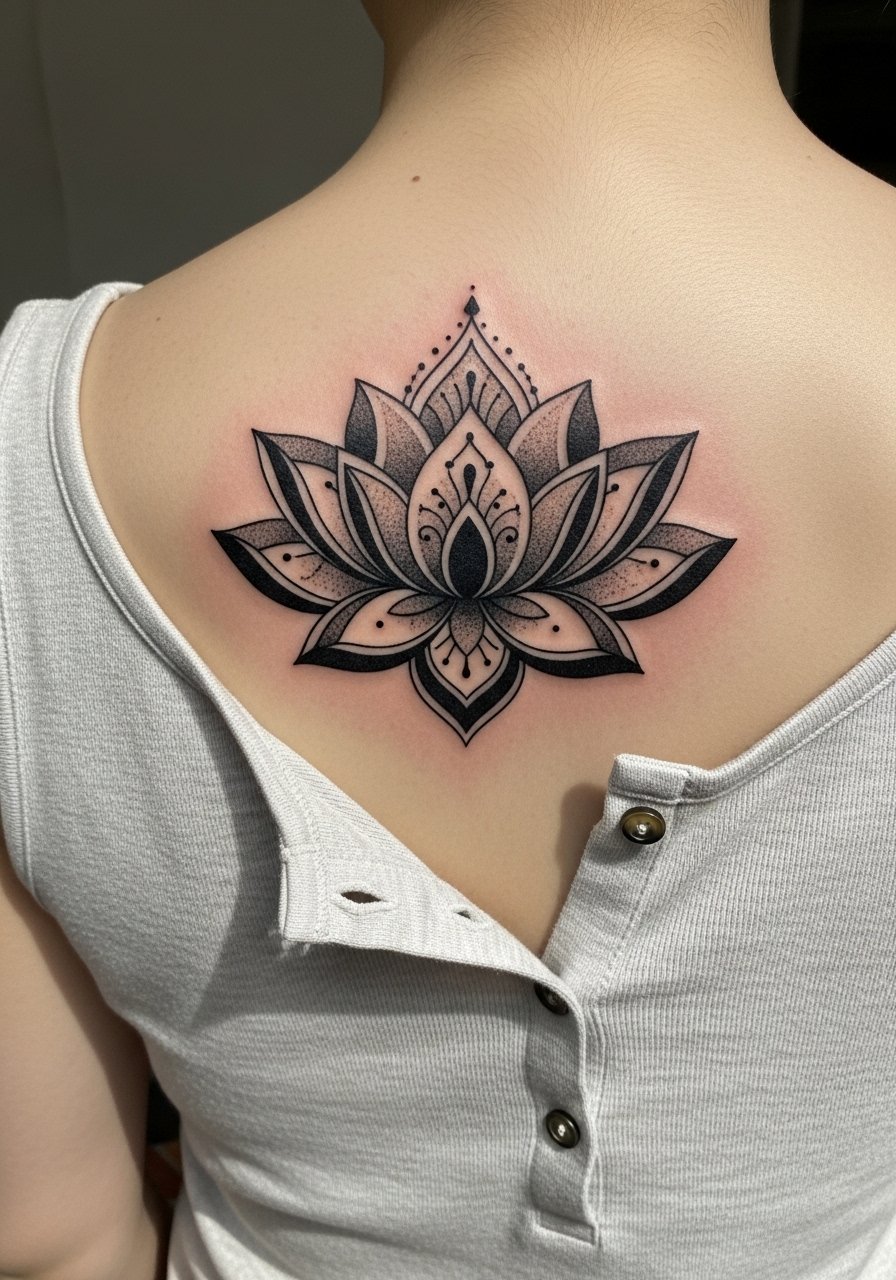
Mistake lead: The shoulder blade handles bold blackwork well because the skin is stable and there is room for negative space. Sessions run longer, often split into two visits for larger mandalas. The usual error is packing too many tiny concentric rings; tight density can merge over time. Tell the artist you want clear spacing and stipple shading for texture. Pair this design with sleeveless tank tops or backless dresses to let the symmetry show. If you plan pregnancy or weight changes, mention that up front since the shoulder blade tends to shift less than the belly.
6. Micro-Realism Cherry Blossom on the Ribcage
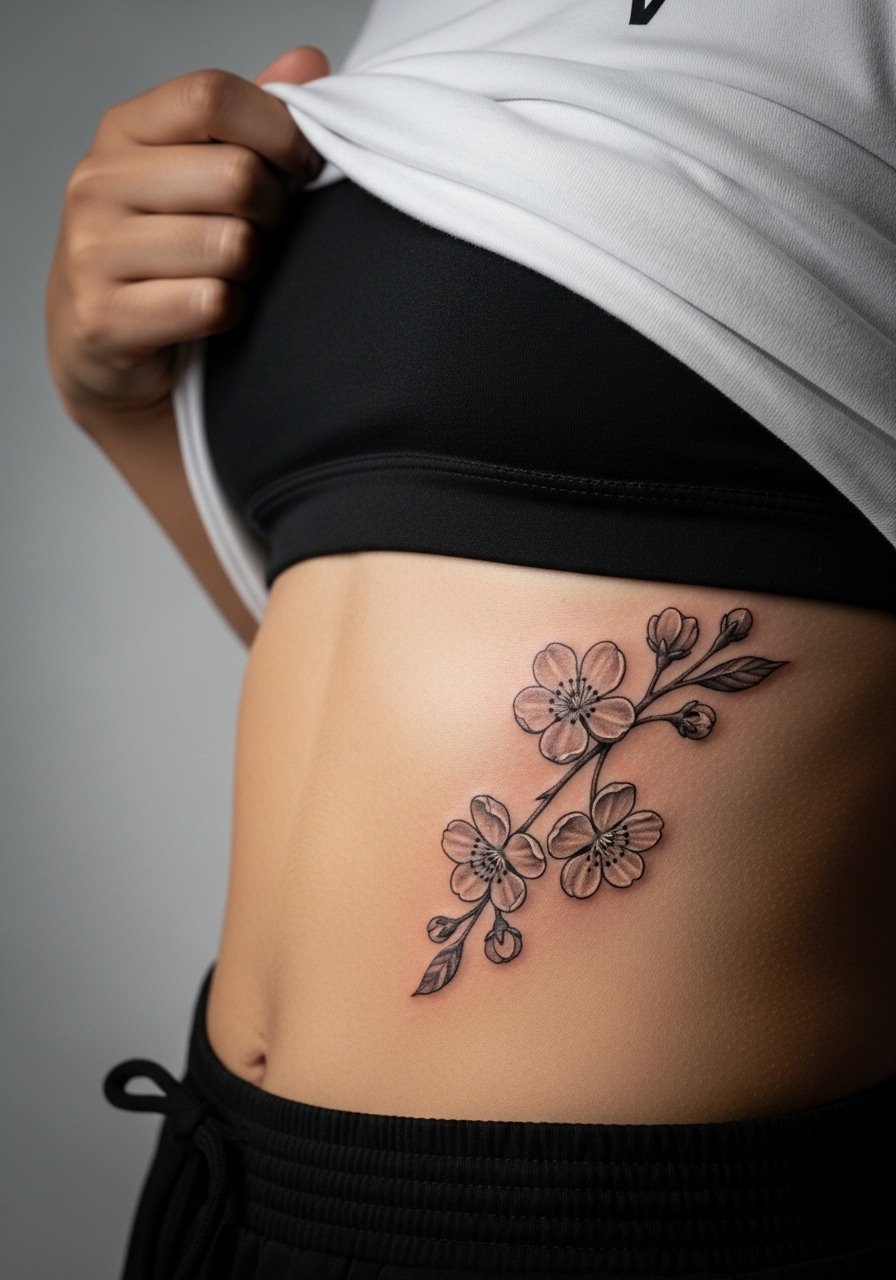
Consultation lead: Fair warning, the ribcage rates higher on pain charts and sessions can be interrupted for comfort. Micro-realism thrives here because the long, flat plane lets delicate petals read clearly when done at the right scale. The controversy around fine line on ribs is alive here. One camp says the skin stretch and breathing make fine line blur in two years. The other camp argues that with correct needle depth and spacing it settles fine. Ask your artist how they handle depth on rib work and budget for a touch-up at year two. For the session wear a cropped top or sports bra that exposes only the area.
Studio Day Picks
The small wrist and forearm pieces above heal differently from the rib and shoulder work, so a few focused items smooth the session and first week.
-
Stencil transfer paper kit. Lets you preview the line placement on skin before the needle starts, which matters for tiny wrist roses and ankle chains.
-
Topical numbing cream. Applied about 45 minutes before can reduce the sting on ribs and inner forearm without changing how the ink sits.
-
Thin protective film roll. Helps finger and ankle tattoos survive early friction from shoes and typing.
-
Fragrance free gentle body wash. Cleanses healing areas without irritating the fine line ink the first week.
-
Aquaphor healing ointment. A thin layer for the initial days keeps fine line work from drying out and cracking while still allowing the skin to breathe.
7. Ignorant Style Sunflower on the Calf
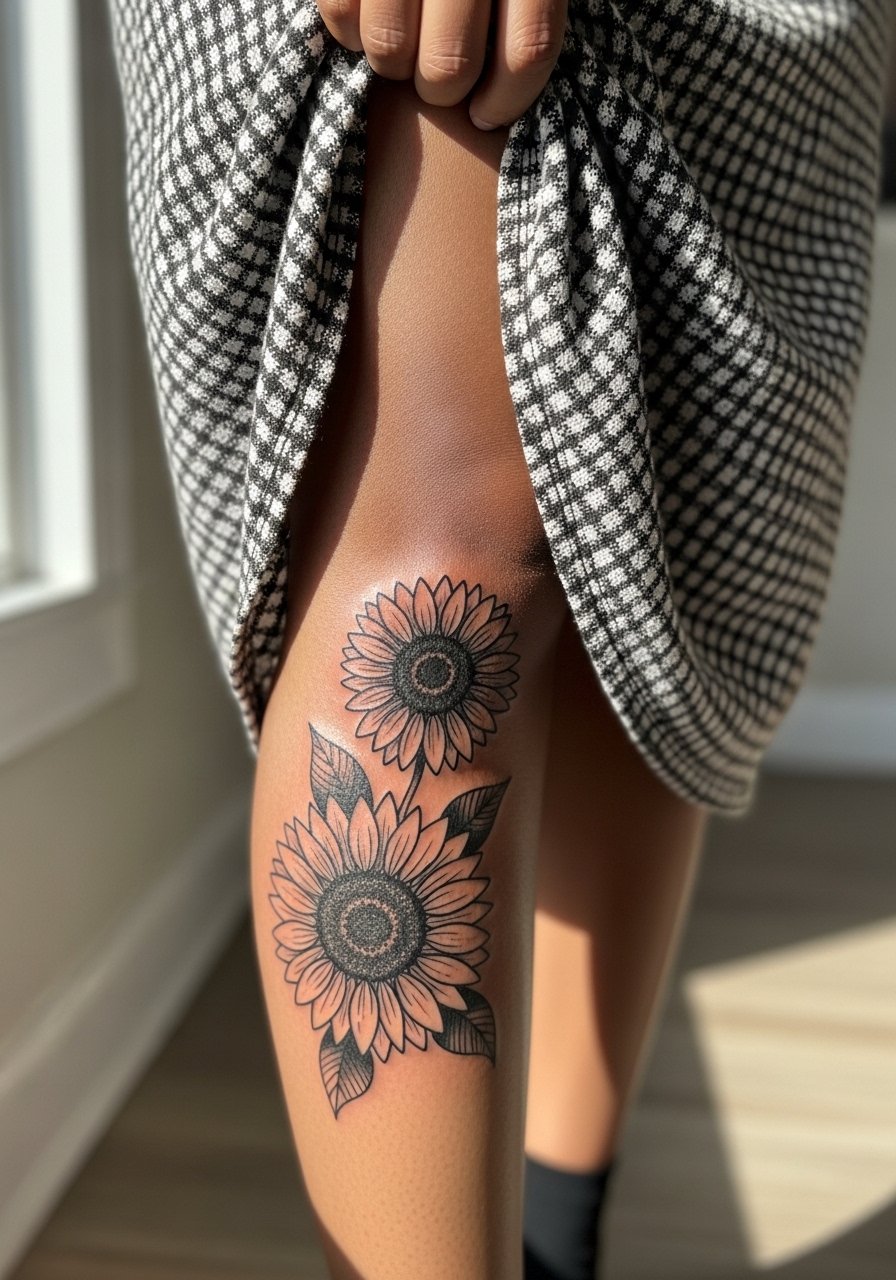
Mistake lead: Ignorant style celebrates chunky, naive lines and that works particularly well on the calf where scale is forgiving. Sessions can be quick, often under an hour, and pain is usually mild. A common error is shrinking the design down too small, which loses the naive charm. If you want it to age into the same feel, ask for thicker black linework and avoid tiny interior detail. For show-off outfits try a midi skirt flowy or slim joggers rolled at the hem. Calf pieces handle summer wear but need sun protection while healing.
8. Ornamental Vine of Forget-Me-Nots Wrapping the Thigh
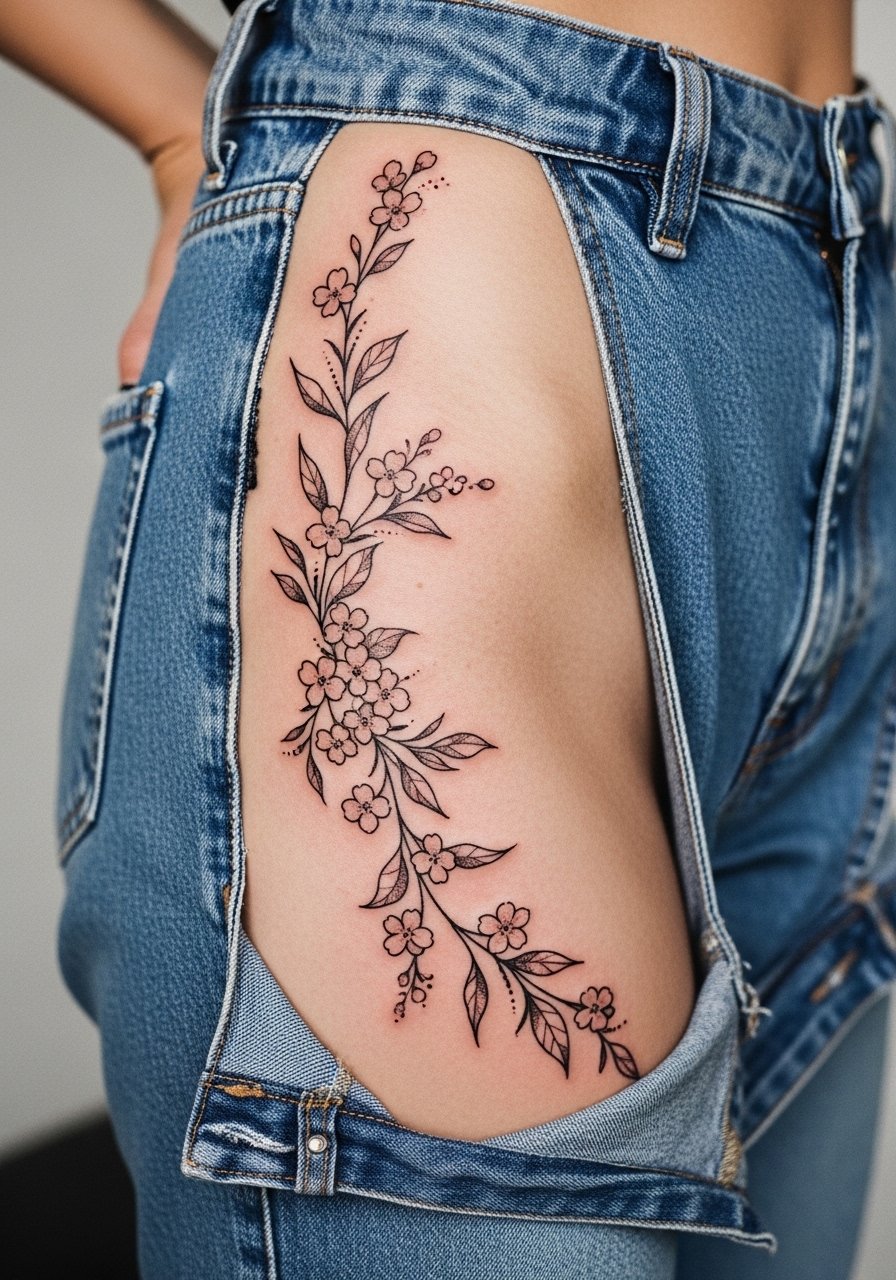
Consultation lead: Thigh work gives room for elongated, ornamental motifs and is forgiving with subtle weight changes. Sessions vary from one to three hours depending on length. A mistake people make is asking for ultra-dense geometry that loses clarity when the thigh rests against clothing. Ask your artist to space dot fillers and to plan a wrap that accounts for leg movement. For the session wear high-waisted shorts or loose pants so the area is easy to access. For evenings the vine pairs well with a skirt slit or high-cut swim bottom.
9. Traditional American Peony on the Upper Arm
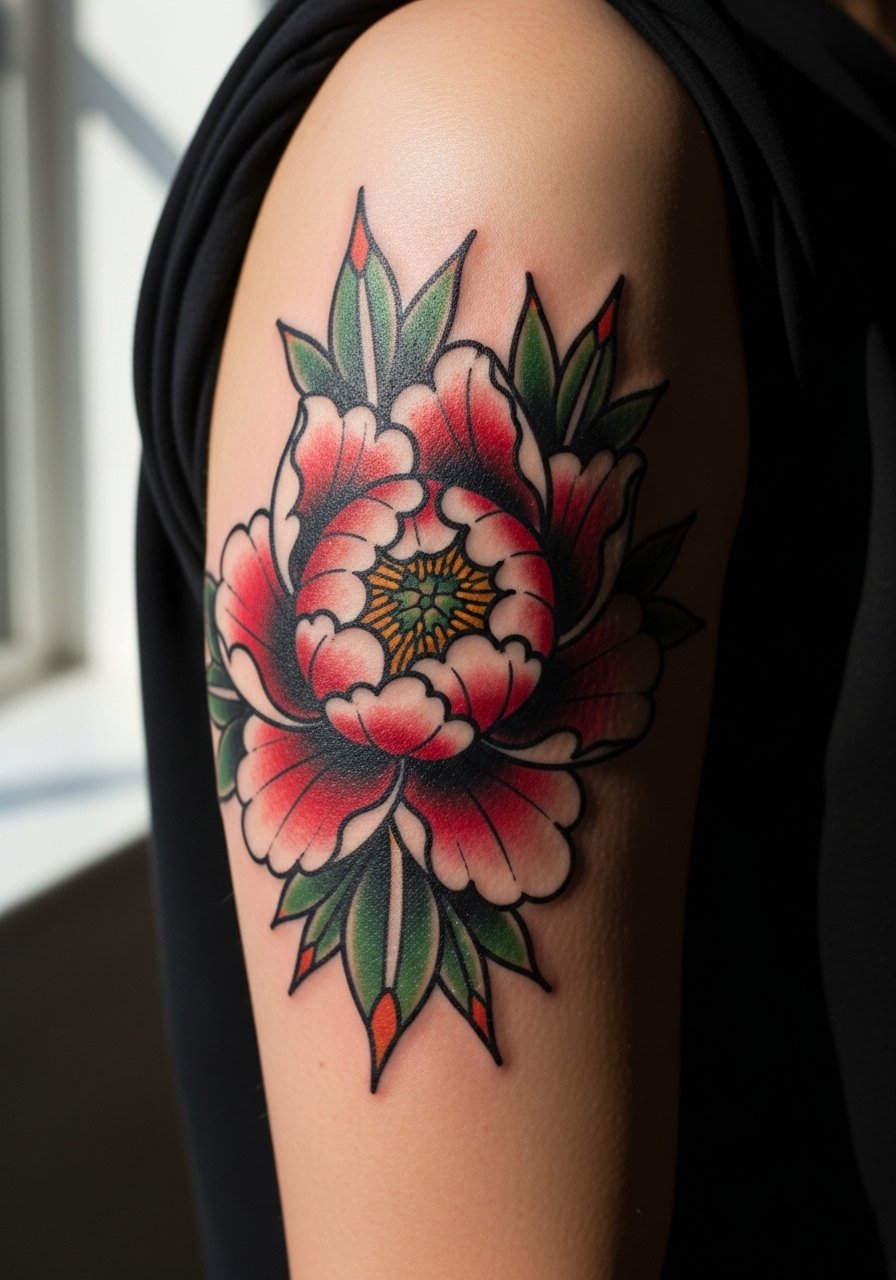
Visual impact lead: Traditional peonies use heavy outlines and saturated color which hold up especially well on the outer upper arm. Sessions are moderate in length and usually split if size increases. The common mistake is using too many tiny petals and weak outlines that fade into a muddy wash. Tell your artist to emphasize bold black contours and saturated pink fills with green leaves. For showing it off, a short-sleeve or rolled-up sleeve shirt frames the floral nicely. Upper arm pieces are good if you want something classic that ages predictably.
10. Minimalist Single Petal on the Finger

Mistake lead: Fingers are tempting for micro pieces because they are visible, but they also blur faster due to constant use and washing. Session time is short, ten to twenty minutes, and pain is sharp but brief. The mistake is asking for ultra-fine detail on the pad side; instead pick the finger side and request slightly thicker dot work for durability. Expect touch-ups more often than other placements. Pair with a thin chain pendant necklace for balance during dressier looks. For the appointment skip heavy hand lotion that could interfere with stencil adhesion.
11. Micro Daisy Cluster on the Inner Bicep

Personal observation lead: I've noticed inner bicep micro clusters look soft and private in the first year and then settle into a subtle signature that peeks out with sleeve rolls. Pain is moderate and sessions run 30 to 60 minutes depending on density. A pitfall is over-confining the cluster to a tiny 1 inch circle which can merge; asking for airy spacing keeps the petals distinct for longer. For the session wear a sleeveless shirt so the artist has unobstructed access. Inner biceps can be a quieter choice for people balancing professional visibility.
12. Tiny Forget-Me-Not on the Behind-the-Ear Area
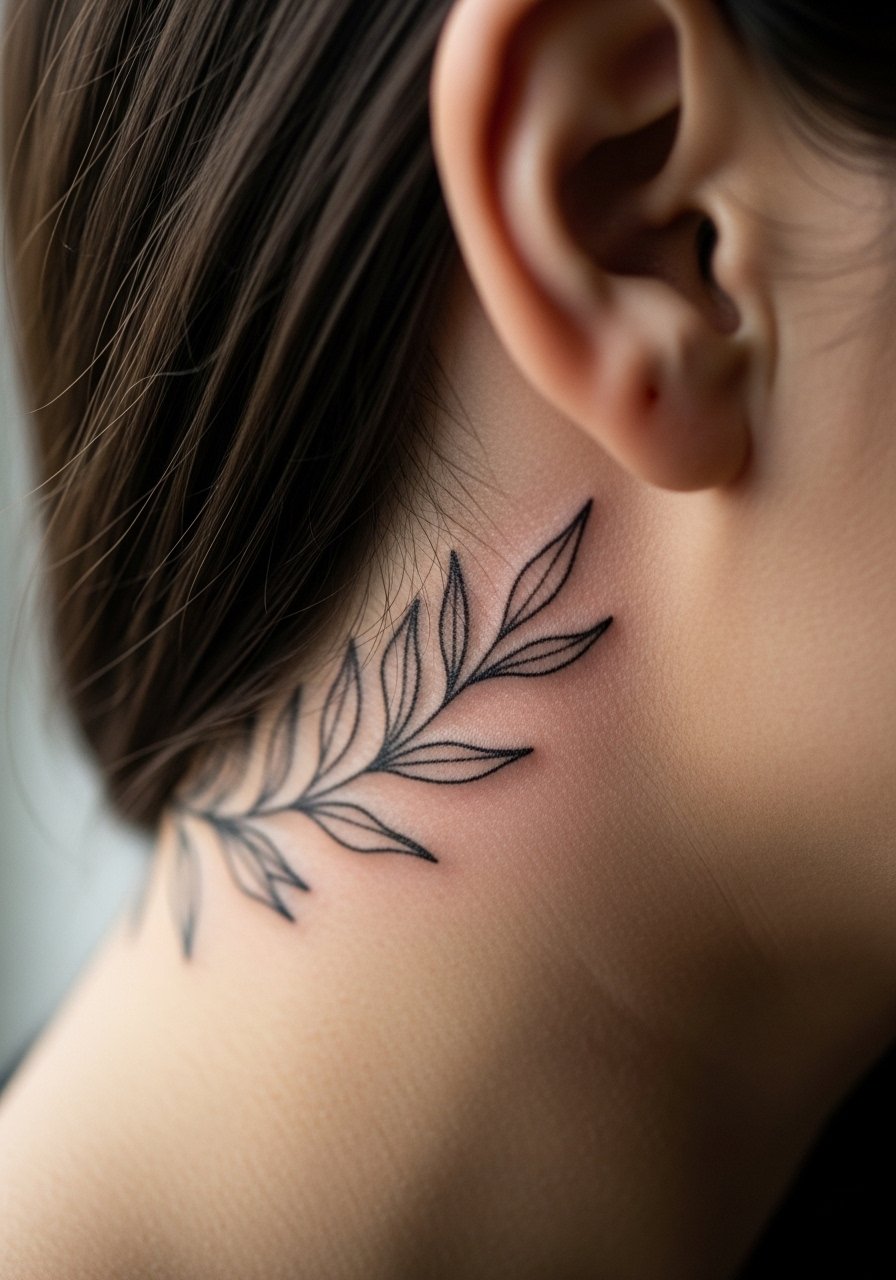
Consultation lead: Behind-the-ear placements need precise stenciling and gentle touch because the area is small and moves with hair. Sessions are brief but exacting. Since hair can obscure the work, ask your artist for a clear, slightly bolder outline so petals read in photos and from a short distance. For the appointment keep hair up and bring a hair clip so the artist can expose the area fully. Consider how often you wear your hair down if you want this to be a peekaboo statement.
13. Tiny Botanical Sternum Accent

Pain warning lead: Sternum work is higher on pain charts and often done in short bursts. Micro botanical accents read delicate at first and may need a touch-up if you favor very fine lines. Artists split into two camps about fine line at the sternum. One side points to the movement and claims lines blur quickly. The other side points to careful spacing and says the area can hold small work when healed. Discuss depth and spacing with your artist and plan for a follow-up session. For the session wear a fitted sports bra or bandeau to allow access without exposing more than the area.
14. Petite Wildflower Band on the Inner Forearm

Consultation lead: Inner forearm is low pain and shows linework well. A wildflower band works as a modular piece you can expand into a sleeve later. Tell your artist you want consistent spacing for future additions, and avoid cramming tiny filler that would block future connectors. Sessions for a small band take 30 to 60 minutes. For showing it off roll up a loose button-down shirt to elbow length and add a delicate chain necklace to draw the eye upward. Inner forearm ages gently under normal sun care.
15. Pinhead Poppy Behind the Knee

Visual impact lead: Back of the knee is a playful spot that shows with skirts or shorts and hides well with pants. Sessions are brief but expect some stinging because skin folds move during placement. The common mistake is placing too close to the crease where constant bending can blur lines; a slightly offset placement gives the design room to breathe. Wear shorts or loose pants for the appointment so the area is easy to access. For nights out the tattoo peeks under breezy hems.
16. Single Petal on the Side of the Thumb
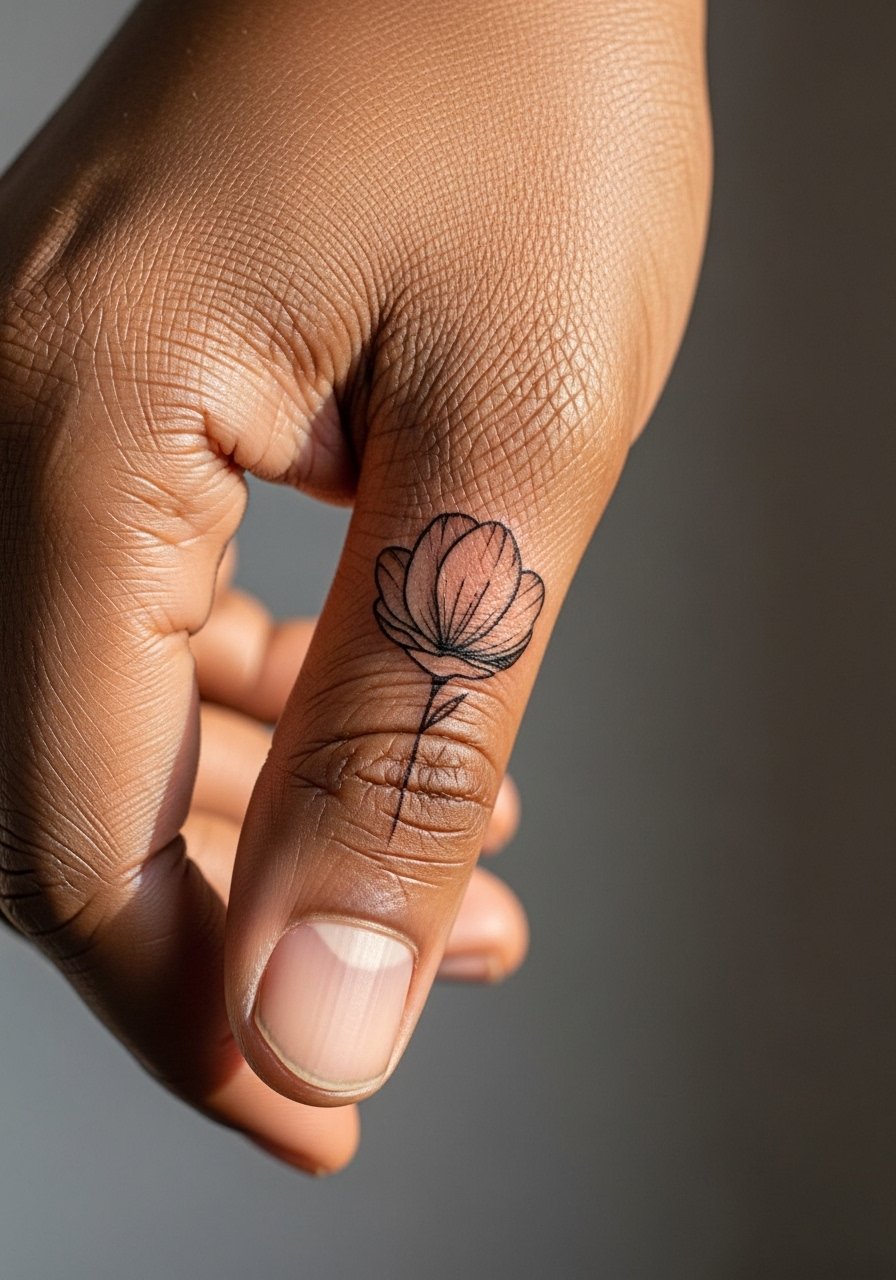
Mistake lead: Thumb-side placement is extremely exposed to washing and friction which accelerates fading. Sessions are quick, but touch-ups are likely around year one. Request bolder dot work or tiny black anchors so the petal keeps its shape under daily use. For the session avoid heavy creams on your hands and plan to limit direct water exposure in the first 48 hours. A small pendant on a chain won't compete visually with a thumb-side accent.
17. Micro Realistic Single Blossom on the Hip
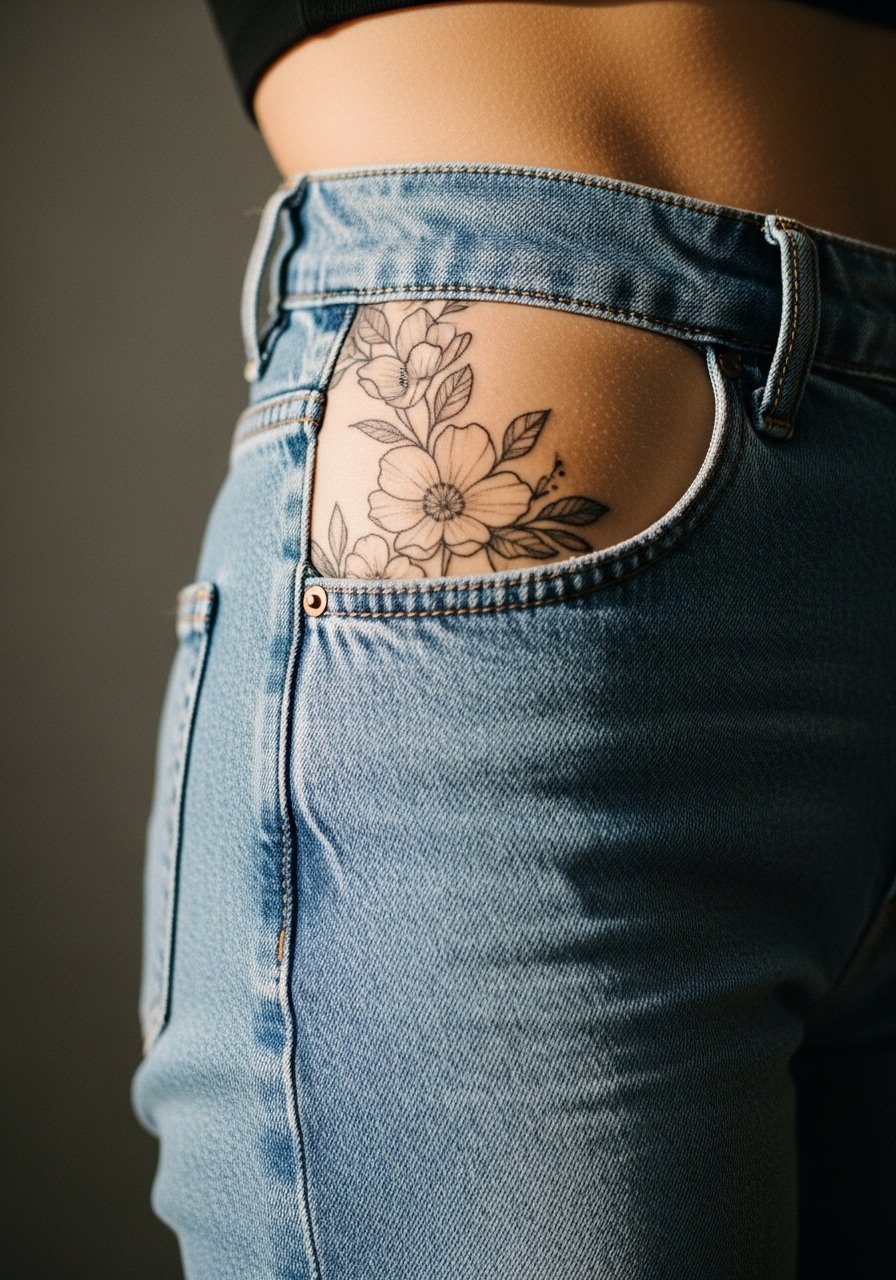
Personal observation lead: Hip placements are ideal if you want a private small blossom that occasionally shows with swimwear. Sessions are moderate and the area can tolerate micro shading well. A mistake is placing the bloom too low where waistbands rub; ask for a map during consultation so you avoid friction zones. For the appointment wear high-waisted bottoms or a skirt that can shift slightly without exposing more than the tattooed area. Hip pieces are a good pick if you want a design that ages quietly.
18. Tiny Linework Bouquet on the Upper Back Near the Shoulder
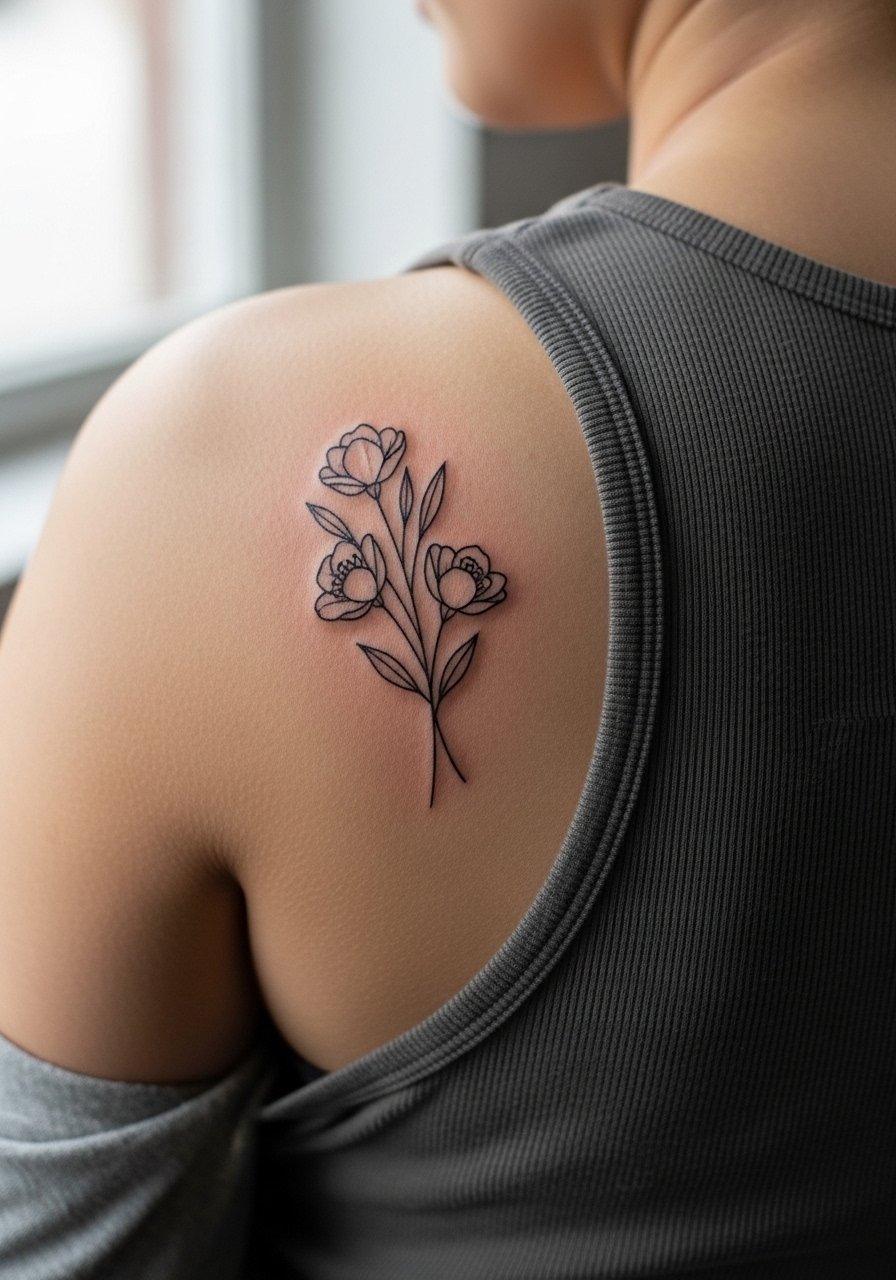
Consultation lead: Upper back pieces sit on a broad canvas and handle fine line motifs if sized correctly. Sessions are comfortable and access is easy with a loose button-down worn backwards or a tank. Avoid compressing the bouquet into an inch square; the visual needs breathing room. For showing it off pick back-exposed tops or a backless dress to let the lines read. Upper back tattoos are less likely to suffer from daily abrasion than ankle or finger placements.
19. Tiny Cluster of Micro Peonies on the Calf Outer Side

Visual impact lead: The outer calf accepts small clusters with pleasing movement when you walk. Pain is low and sessions are typically under an hour for compact work. A common mistake is placing micro peonies too close to sock lines. Ask your artist to map placement against your typical shoe and sock choices. For show-off styling, a midi skirt flowy or rolled joggers lets the cluster appear without competing elements.
20. Minimal Stem and Two Petals on the Collar of the Ankle
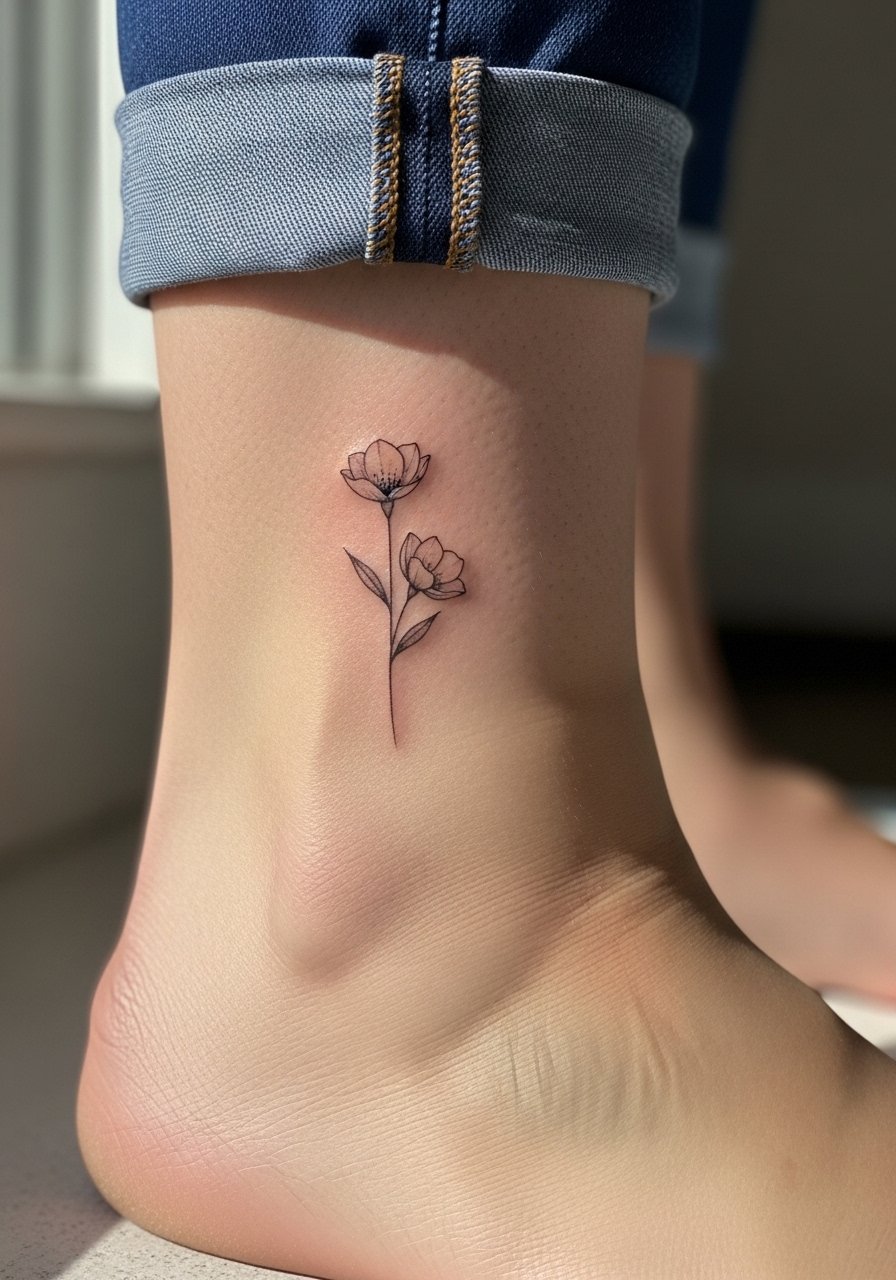
Mistake lead: The collar of the ankle is visible but also very prone to rubbing from shoes and socks. The session is quick and pain moderate. The frequent error is placing fine lines where straps or shoes rest. During the consult, show the artist the shoes you wear most and choose a spot just above known rubbing zones. For summer footwear use strappy ankle sandals to show the piece without pressure.
21. Tiny Single Petal Near the Collarbone Center
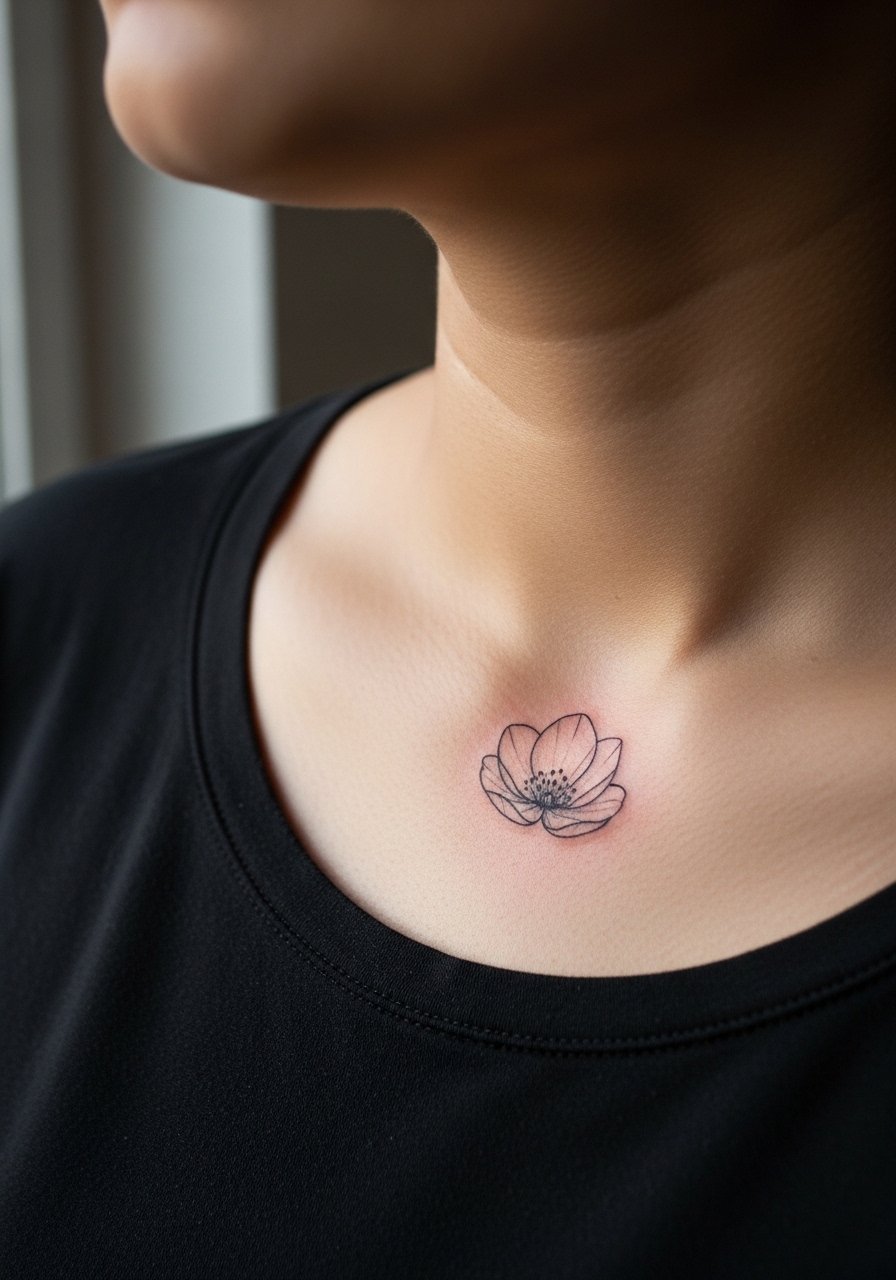
Consultation lead: A single petal at the collarbone reads like a single punctuation mark and suits people who prefer understatement. Pain is mild and sessions are short. The common mistake is asking for an extremely thin stroke without a tiny anchor dot; that can vanish visually on textured skin. Ask for a small filled point at the petal base so the silhouette reads at photographs and in two years. For showing it off, choose an off shoulder blouse or wide-neck tee.
Frequently Asked Questions
Q: How long before a fine line wrist rose needs a touch-up?
A: It depends on your skin type and sun exposure, but expect a touch-up around year two to three if you wear a lot of sun or have oily skin. Choosing slightly heavier linework and doing periodic SPF on the area stretches the interval between touch-ups.
Q: Will watercolor collarbone pieces bleed into bruiselike smears over time?
A: Watercolor washes can soften and fade more than solid black outlines, so ask for a thin anchor outline or subtle dot work inside the wash to keep shape. Extra touch-ups and careful sun protection keep the color lively longer.
Q: Are finger and thumb placements worth it if they need touch-ups more often?
A: They are worth it if you want high visibility and are prepared for maintenance. Fingers and thumbs take more friction and washing, so plan touch-ups and accept that longevity is shorter than forearm or upper arm work.
Q: How should I describe dark skin visibility concerns in a consultation?
A: Say you want strong contrast and ask the artist to show healed examples on similar skin tones. Request slightly bolder linework or blackwork accents so subtle petals remain visible in photos and in person.
Q: Do tiny ribcage or sternum tattoos require special artists?
A: Yes. Because those placements can be painful and tricky for fine line work, look for artists who post healed photos of small work on ribs and sternum. Use discovery tags like #FineLineFlower and local filters on booking apps to find someone with relevant healed examples.
