
Fine line trends look great on a feed, but what holds up on melanin-rich skin is rarely the same thing that gets the most likes. Bold blackwork, deep reds, and packed shading tend to keep their contrast longer. I pulled together 21 dark skin tattoo ideas with practical notes on how they age, what to ask for at consultation, and wardrobe tips so the work reads exactly the way you want after the first year and beyond.
1. Bold Blackwork Mandala on Outer Forearm
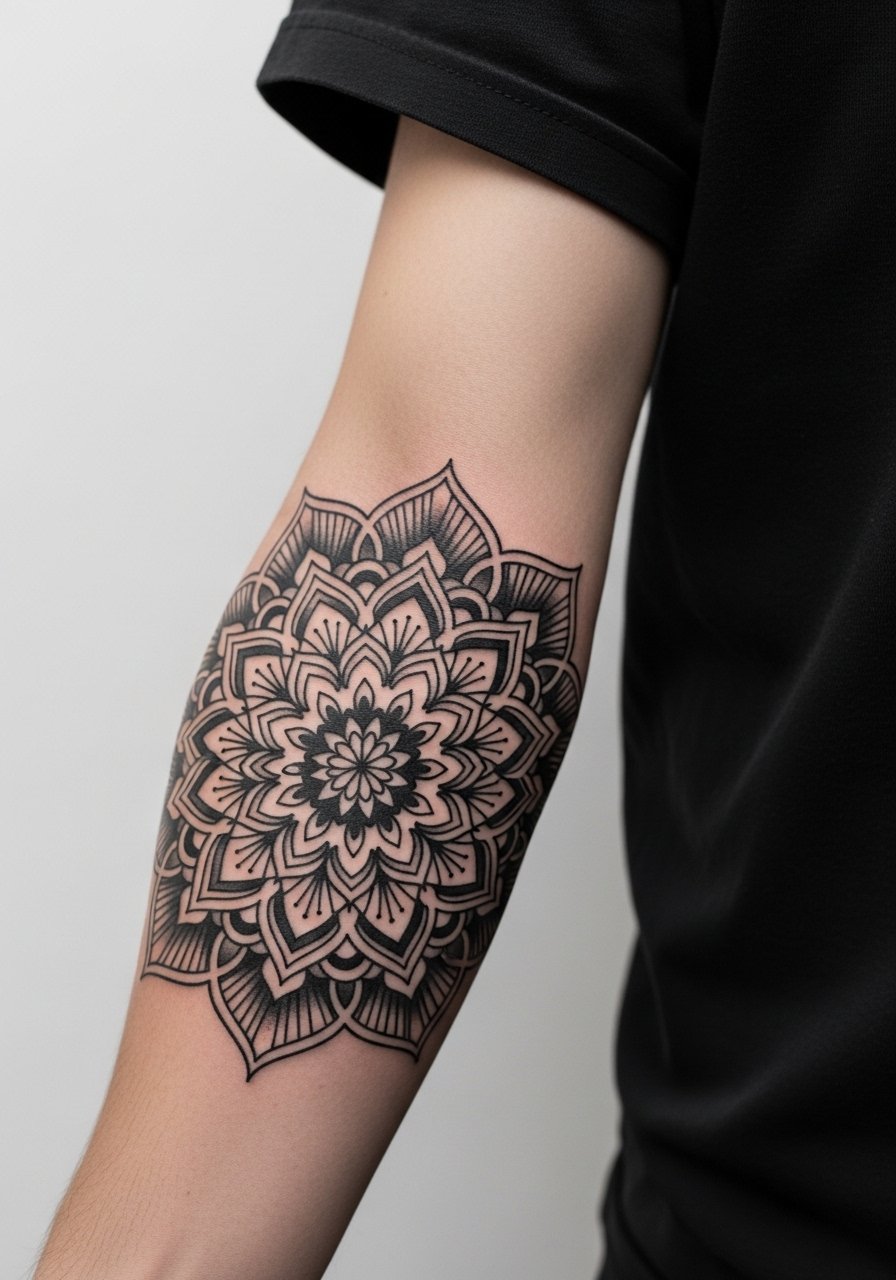
I've seen mandalas on forearms last five years with readable geometry when artists use 4–6 millimeter line thickness and intentional negative space. Fair warning, the biggest mistake is shrinking the motif to fit a wrist template. In consultation ask for room between concentric lines and for packed black fills rather than hairlines in dense areas. Expect a moderate pain level and a two-session timeline for larger pieces. For showing it off, rolled sleeves or a rolled sleeve black tee frame the forearm without drawing attention away. Blowout risk is low with bold linework, but touch-ups at year three are common for edge crispness.
2. Neo-Traditional Floral with Deep Red Accents on Thigh
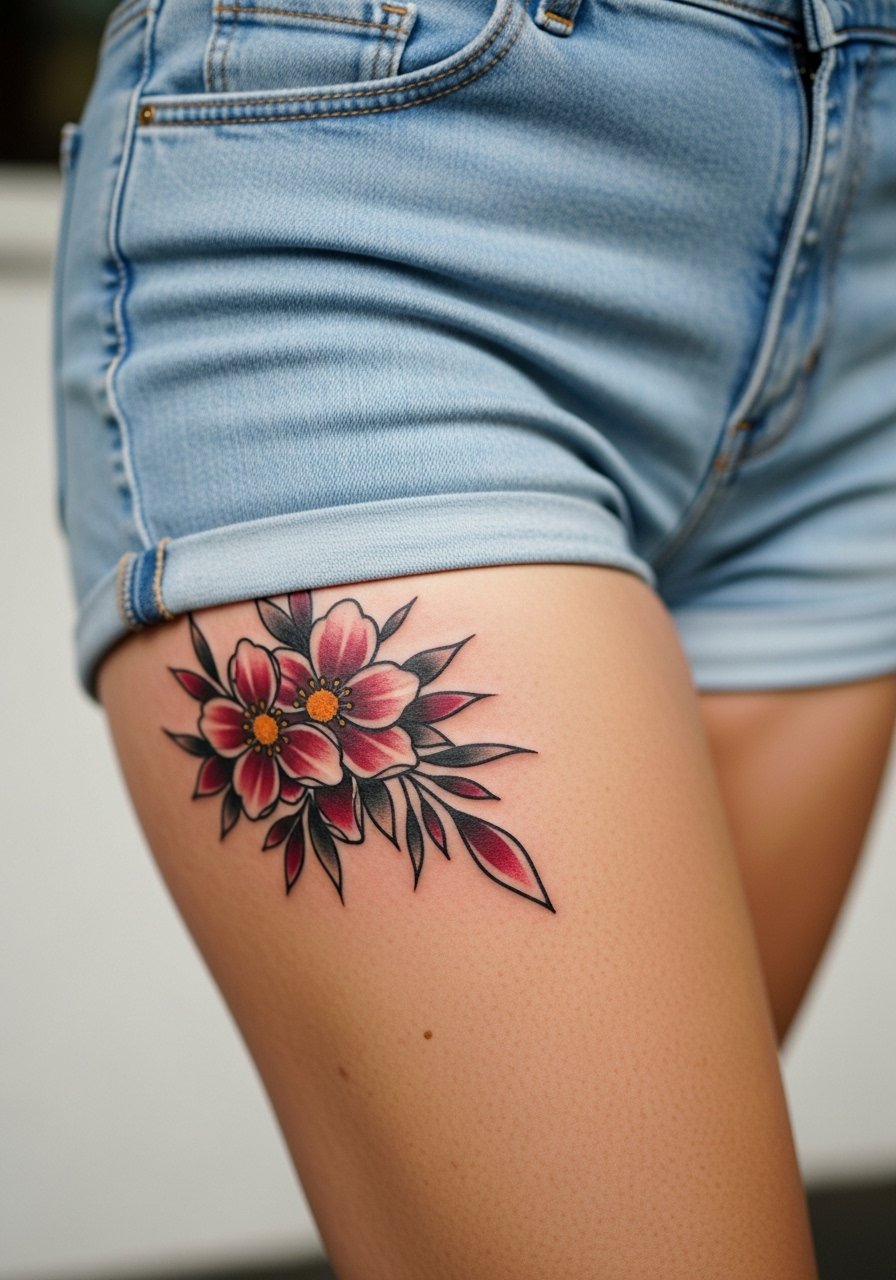
Most thigh florals age well because the area is low-friction and holds saturation. The common mistake is asking for pastel fills that vanish against melanin. Tell your artist you want deep red and muted greens packed boldly and ask how they plan to layer color. Session wear matters here, so come in loose joggers or a high waist denim shorts you can pull up without rubbing the fresh ink. Expect medium pain and about two to three sessions for a 4×6 inch piece. Plan for a touch-up at year two for color refresh if you spend time in sun.
3. Micro-Realism Portrait on Upper Shoulder
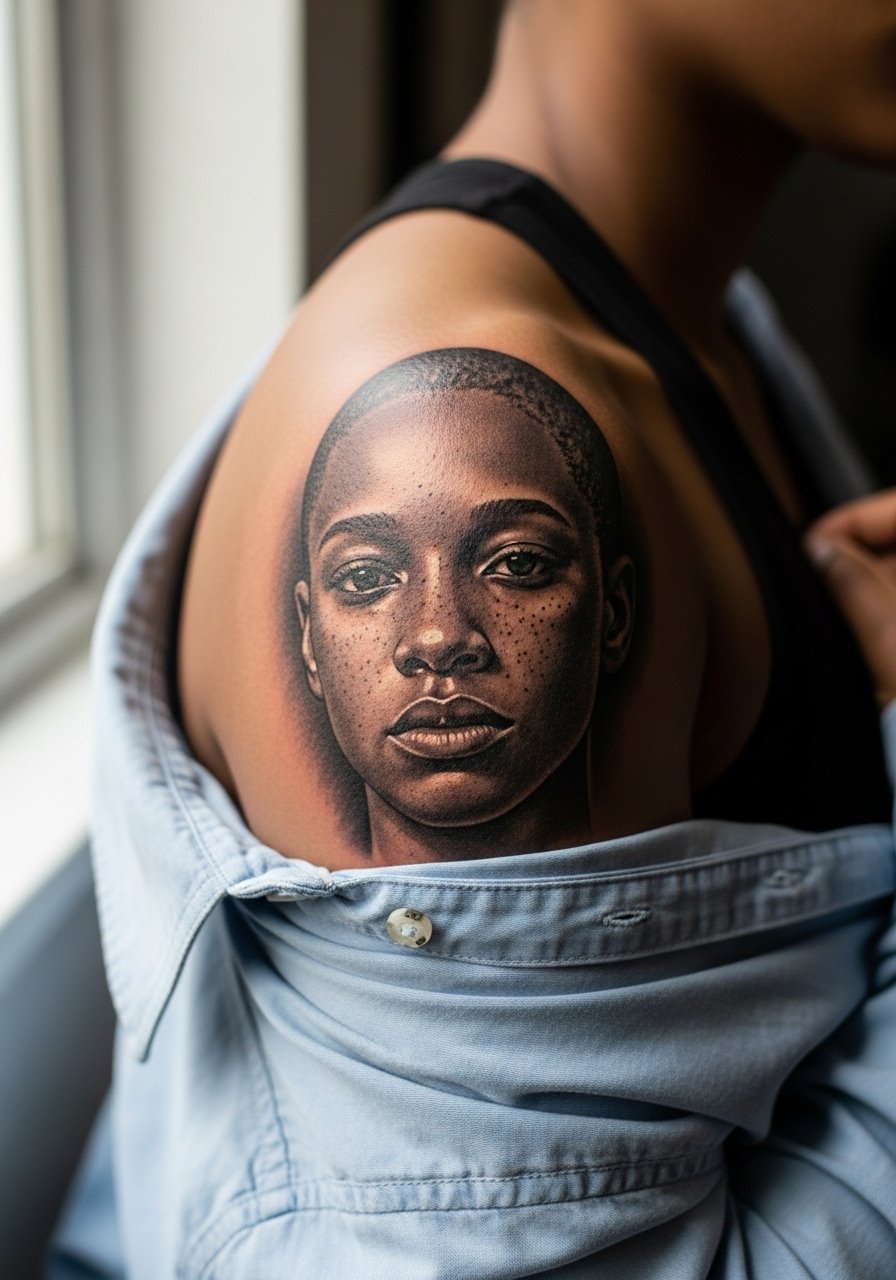
Portraits can read well on darker skin when shading is layered rather than relying on faint highlights. The frequent error is overfinesse in the reference that lacks bold anchors. In consultation bring healed photos that match your skin tone and ask the artist to discuss contrast points for eyes and hair. The shoulder is forgiving and allows longer sessions, but expect four to six sessions for larger micro-realism work. For the session, wear a loose button-down shirt so the artist can access the shoulder without you being uncomfortable. Touch-up windows at year two to three are normal for facial detail.
4. Ornamental Geometric Sleeve Starter on Outer Bicep
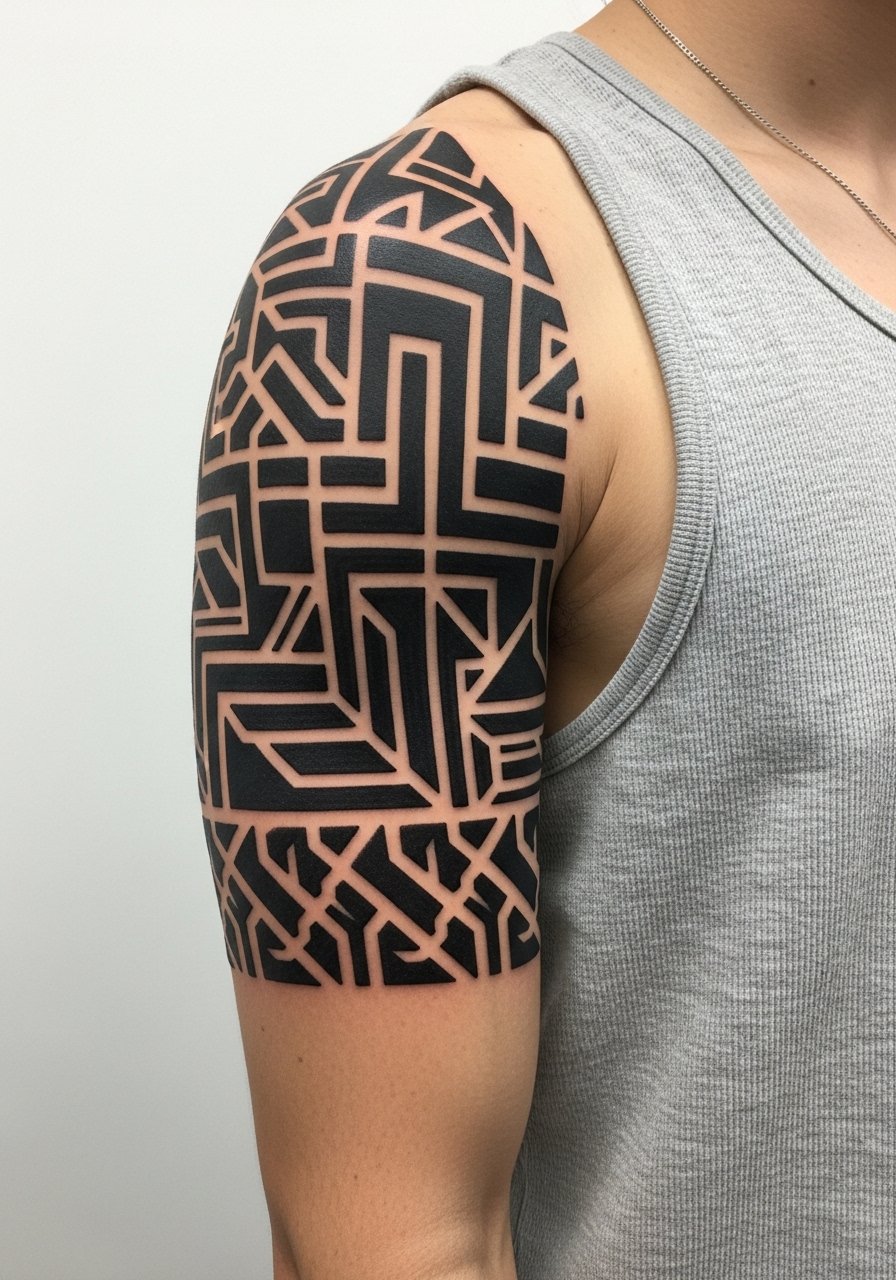
If you want a modular sleeve, begin with an outer bicep ornamental that leaves breathing room for later additions. The mistake is attempting a fully packed sleeve in a single session that forces tiny lines into tight areas. Tell the artist you want expansible negative space and thick anchors so future panels can match. Pain is mild to medium and most people start with a two-hour block. For showing progression, short-sleeve tanks keep the upper arm visible and pair well with a sleeveless fitness tank when the piece is fresh. Expect touch-ups after expansion sessions to harmonize linework.
5. Traditional Rose with Green Leaves on Calf
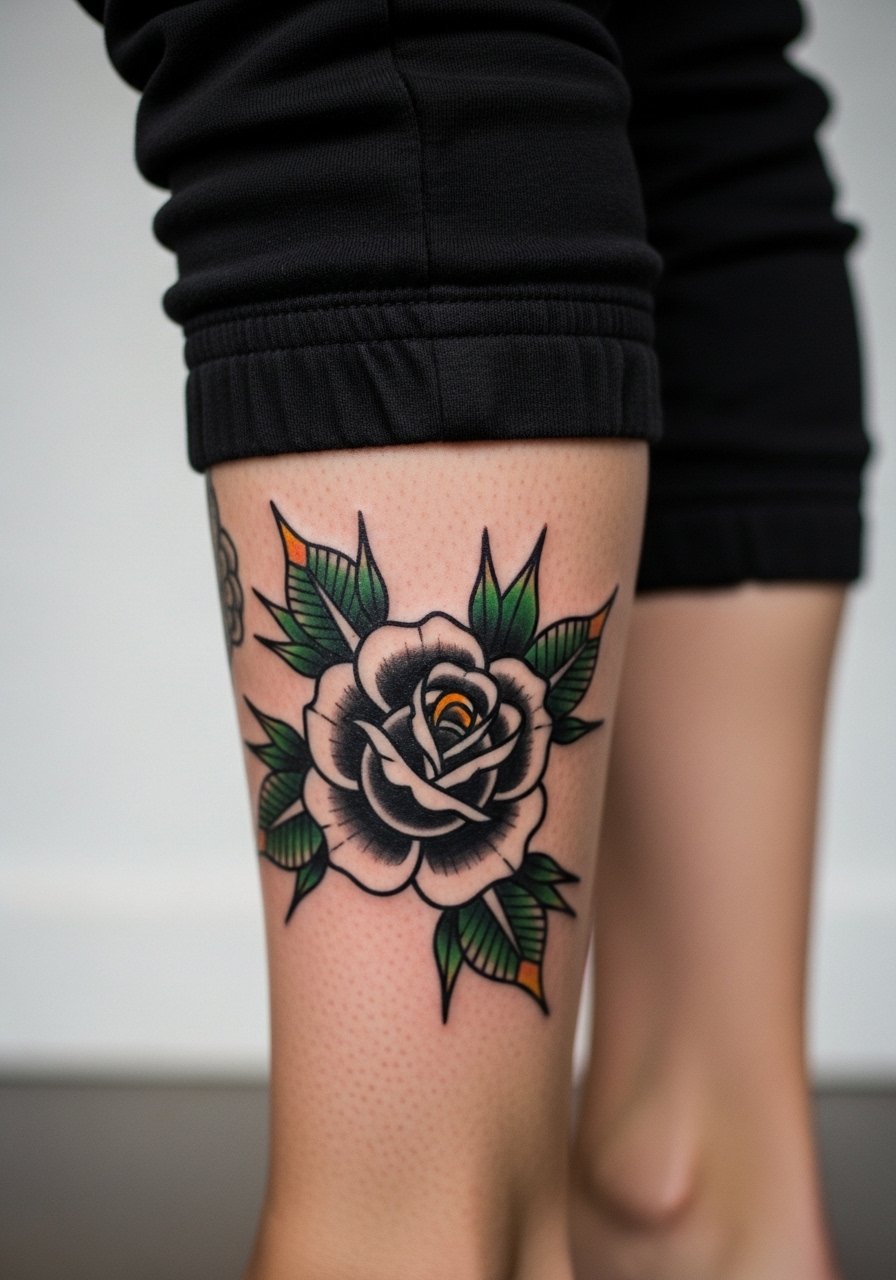
Calf placement keeps traditional roses visible and low-risk for rubbing. A common version that ages poorly uses thin outlines and weak saturation. Ask your artist for bold outlines and deep green packing in leaf areas. Calf sessions are comfortable for most and often finish in two sessions. When you want to show it off, cropped joggers or cropped jogger pants expose the work without competition. Plan for a color refresh at year three if you get heavy sun exposure.
6. Black and Gray Realism Landscape on Ribcage
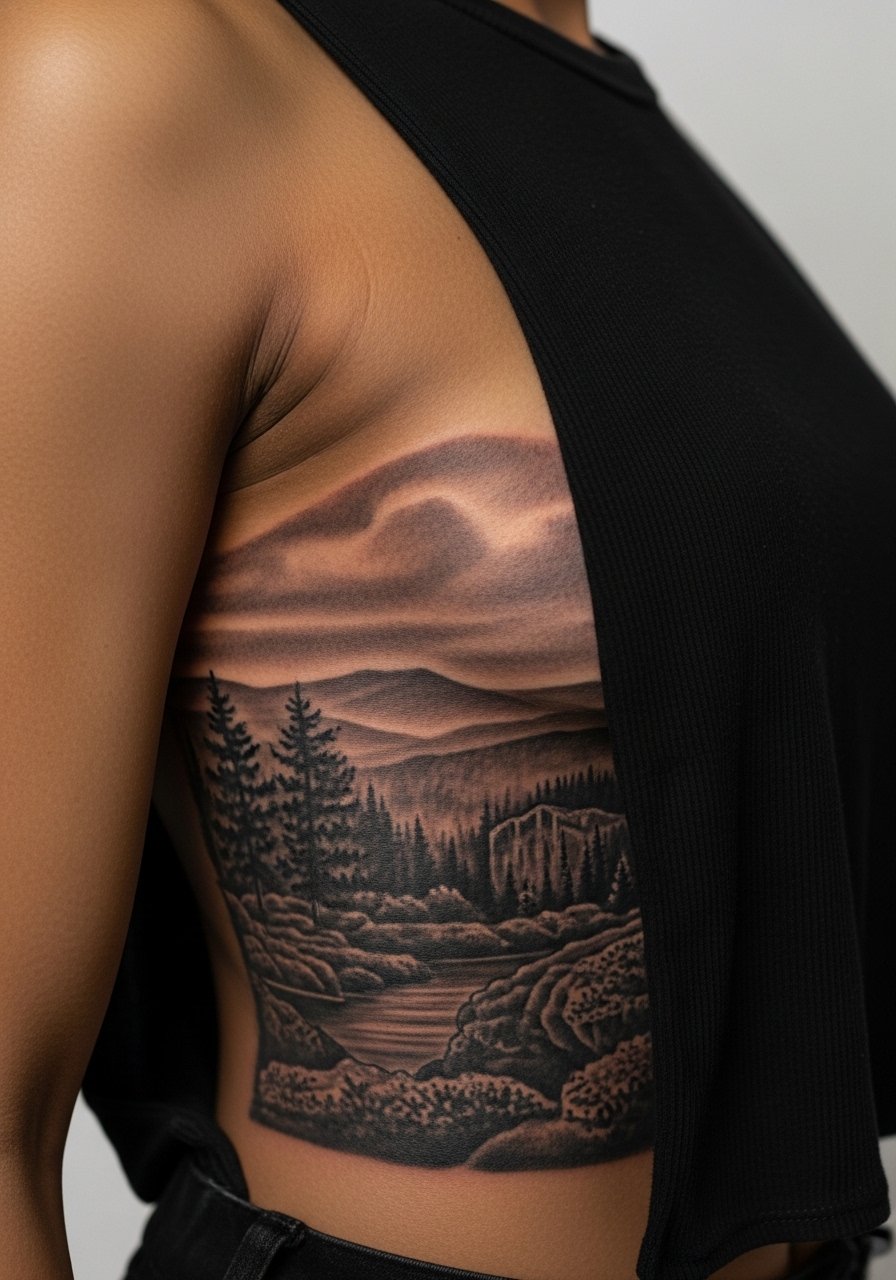
Fair warning, the ribcage is one of the higher pain placements, often rated a 7 out of 10, but it also hides well under clothing. Realism here works when the artist leans into contrast and avoids micro-fine stippling that blurs with breath and stretch. During consultation ask how the design will read with the torso's natural curves and for recommendations about size so details have room. Sessions run longer and you should expect at least three sessions for an 8-inch vertical landscape. For healing, avoid tight clothing over the area during the first week.
Studio Day Picks
The rib, calf, shoulder, thigh, bicep, and forearm pieces above ask for different prep and protective choices, so a few well chosen items smooth the session and the first week.
-
Stencil transfer paper kit. Lets you preview how linework lands on curved areas like the bicep and ribcage before the needle touches skin.
-
Topical numbing cream. Applied per instructions 30 to 45 minutes before long sessions eases rib and shoulder sensitivity without changing ink saturation.
-
Thin protective film roll. Useful for calf and thigh pieces that rub against sweat or seams during the first days.
-
Fragrance-free gentle body wash. Cleanses healing areas near the rib and shoulder without irritating packed shading.
-
Aquaphor healing ointment. Thin layers in the first 48 hours help keep linework moist on forearm and calf pieces where crisp edges matter.
7. Ignorant Style Script on Inner Wrist
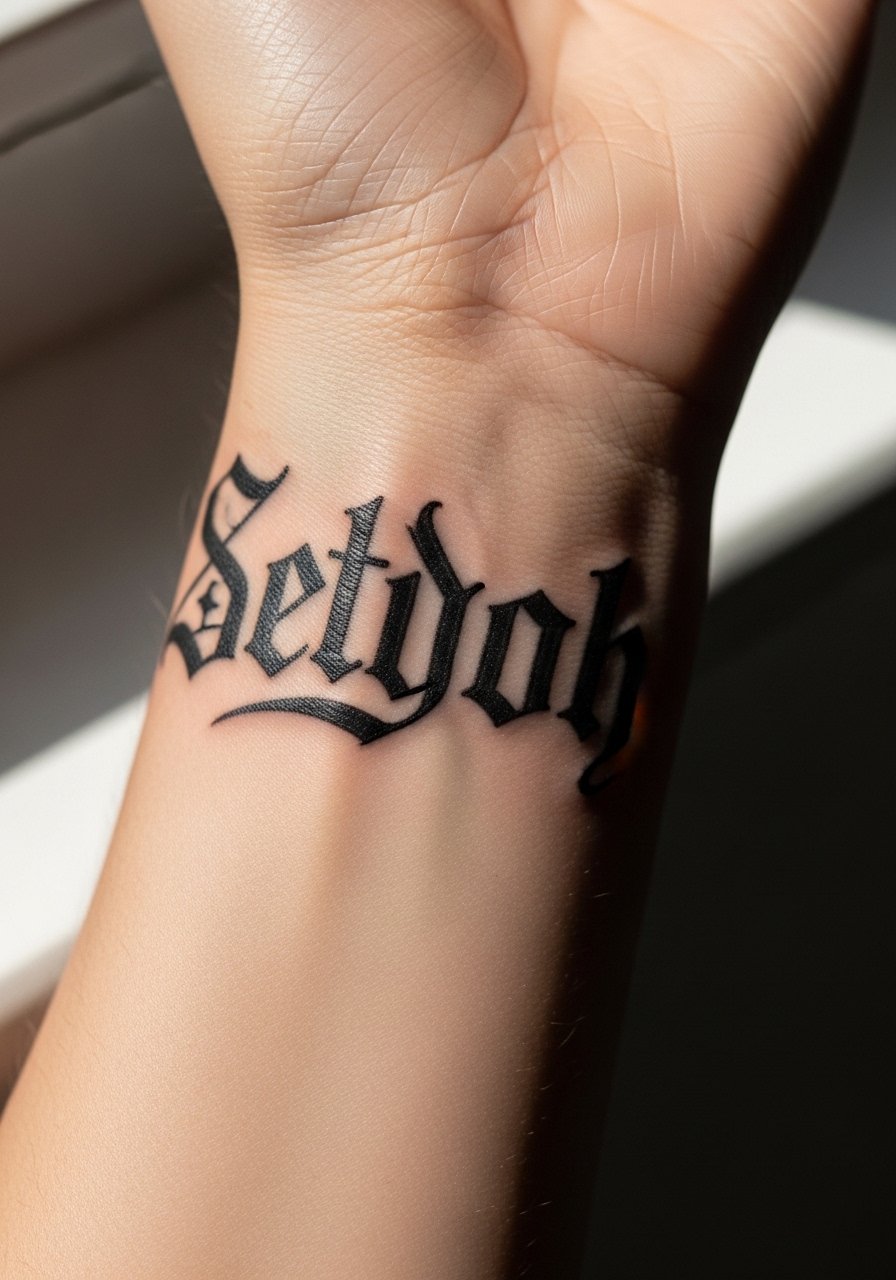
Wrist script can be deceptively durable when the lettering is intentionally thick. The most common failure is requesting tiny cursive that blurs into a smudge within a year. Ask for increased lineweight and to see healed wrist work in similar complexions. The session is short and the pain is low for most people. For showing it off, pair the opposite wrist with a thin leather cuff bracelet to balance attention without stacking over the fresh tattoo. Expect touch-ups at year two for edge redefinition.
8. Watercolor Abstract Bird on Collarbone
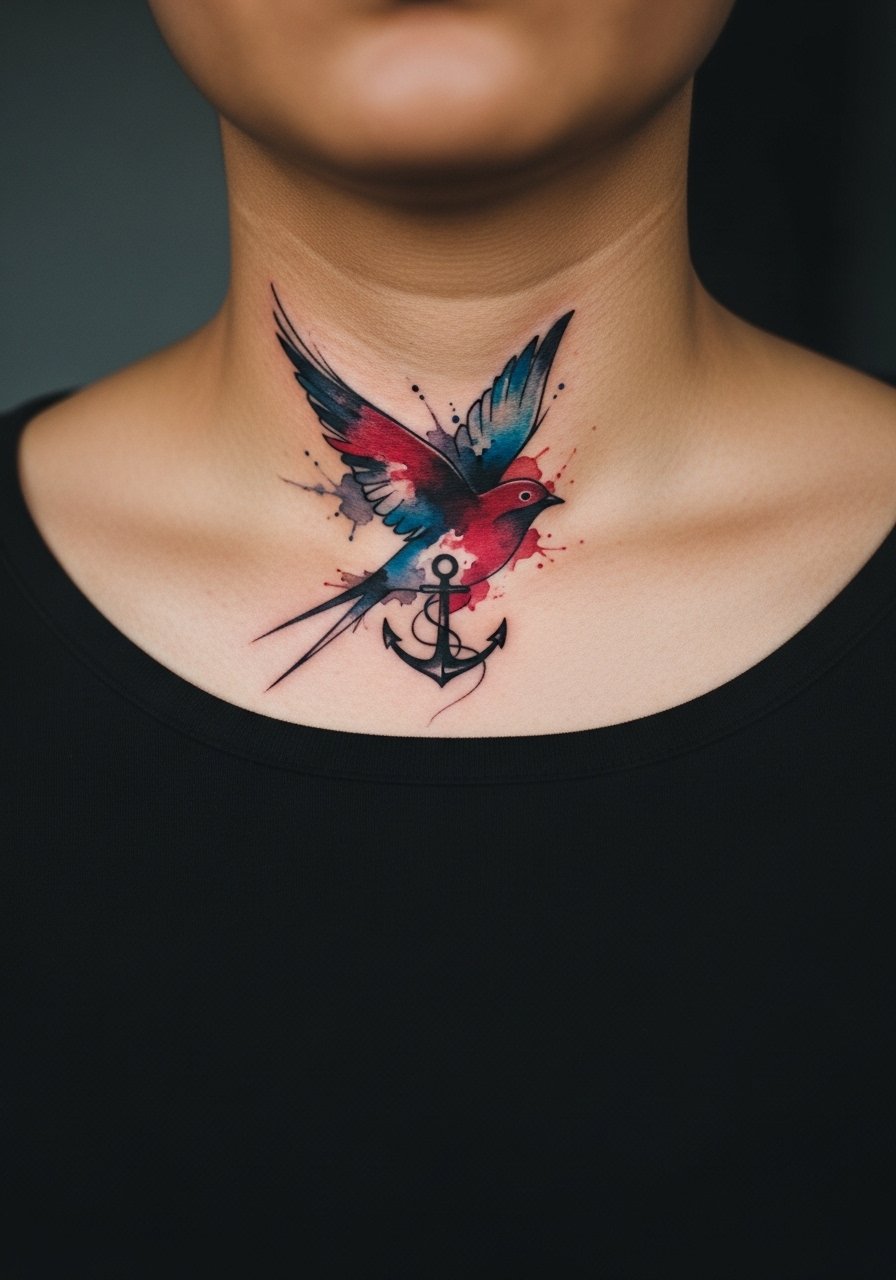
Watercolor pieces on collarbone are showpieces, but they need black anchors so color has contrast against darker skin. The mistake is relying on pale washes with no black support. Ask your artist to include black or deep navy line anchors and to use deep reds and blues rather than pastels. For the session wear a strapless tube top or wide-neck shirt so the collarbone is accessible. Controversy exists around aftercare films versus dry healing for collarbone work. One camp prefers protective film for reduced scabbing and cleaner early healing. The other favors dry healing to let pigment settle without trapped moisture. Ask how your artist approaches color saturation on melanin-rich skin.
9. Fine Line Sacred Geometry on Ankle
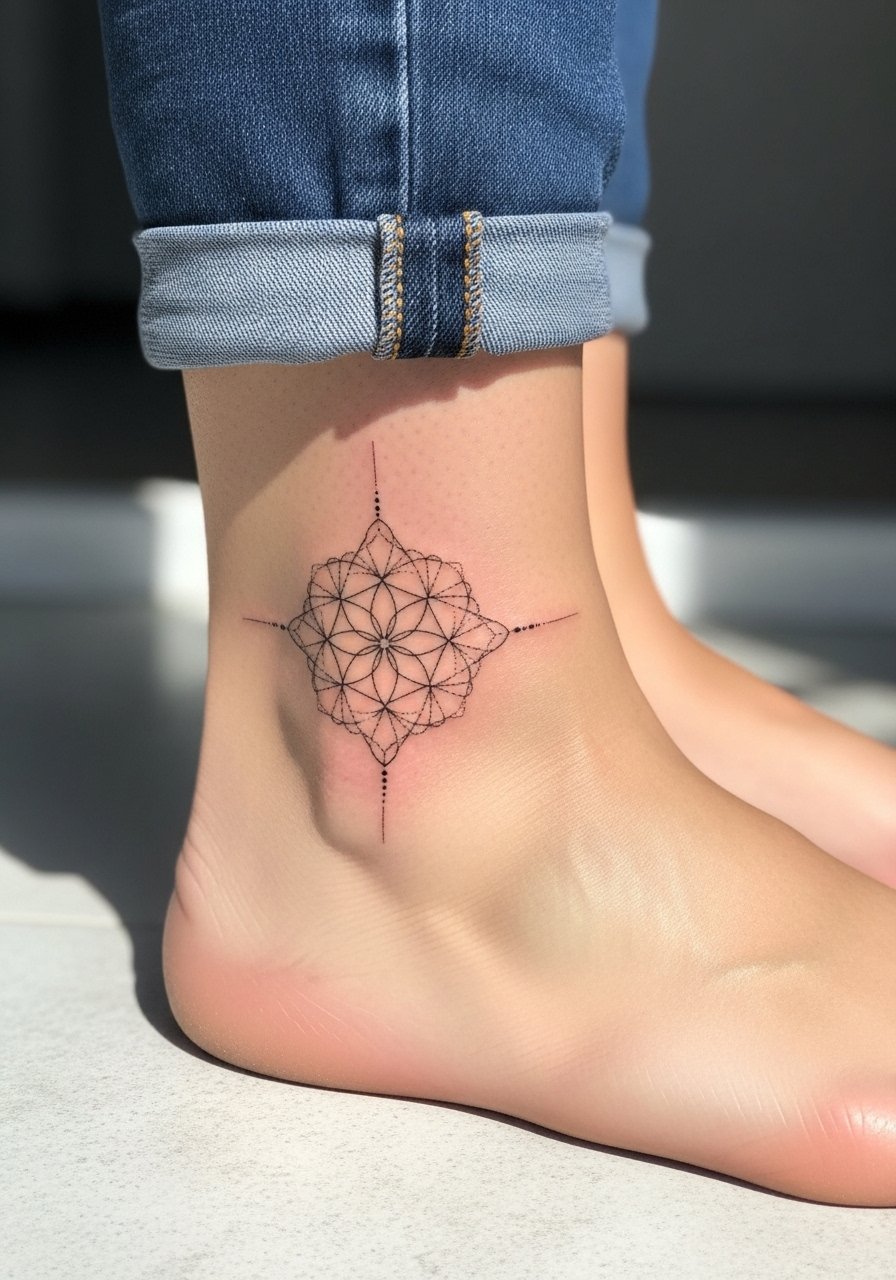
Fine line on an ankle can look delicate and wearable, but remember that small geometry needs slightly bolder packing on darker skin to retain crispness. Artists split on this approach. One camp says fine line will blur too quickly on high-melanin skin. The other says careful needle depth and slightly enlarged spacing keep geometry readable. Ask your artist which camp they are in and to show healed ankle examples on similar tones. For showing off, a pair of cropped straight pants or barefoot sandals highlights the ankle without crowding the design. Expect a touch-up at year two to reframe tiny nodes.
10. Blackwork Tribal Armband on Upper Arm
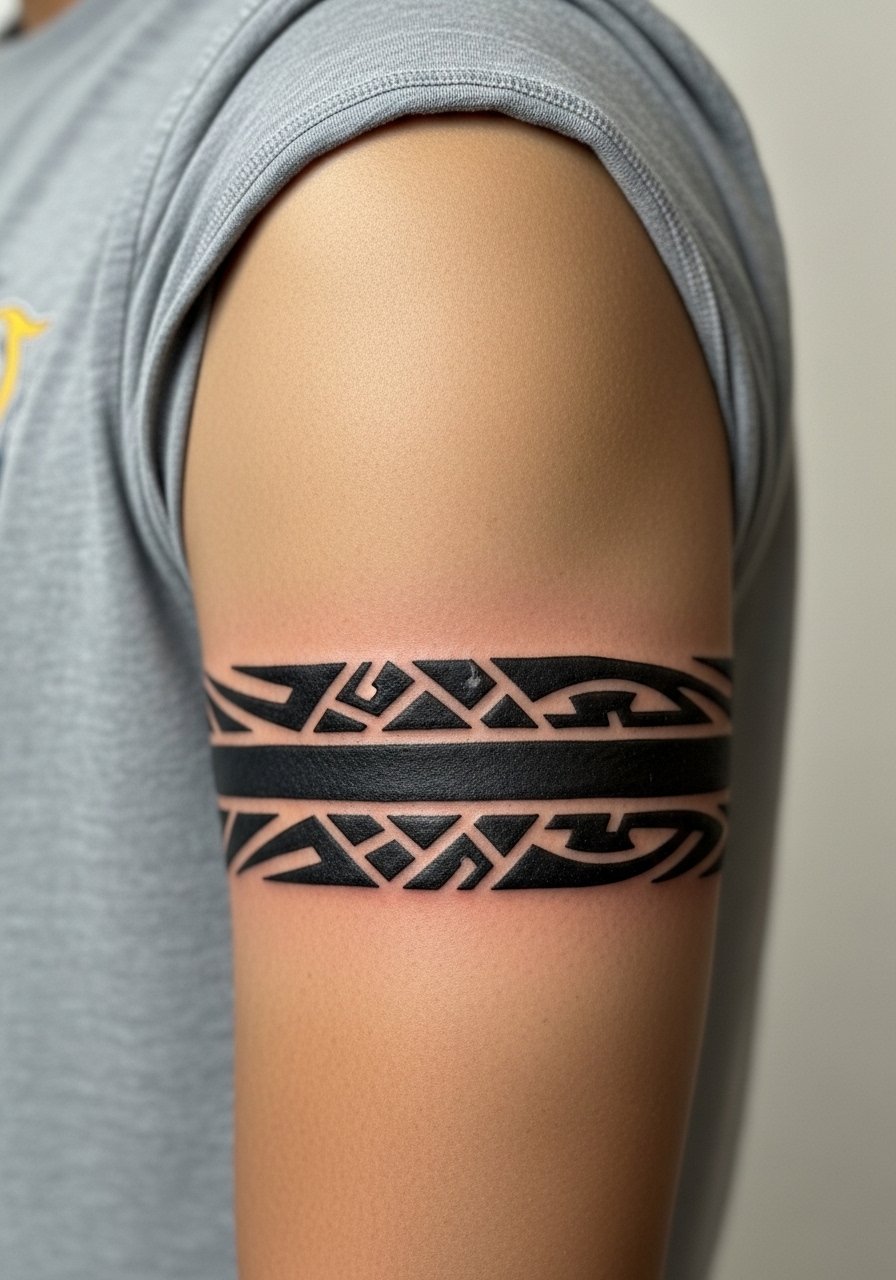
Armband pieces are resilient when they lean on solid fills and clean edges. The common regret is overly intricate negative spacing that ceases to read after a couple of years. Tell your artist you want bold anchors and clear gaps so the motif breathes. Pain is mild on the upper arm and sessions are usually short. For casual display, a rolled sleeve black tee or sleeveless top makes the band visible. Solid blackwork can be touched up for saturation if it softens over time.
11. Neo-Traditional Skull with Purple Shading on Upper Back
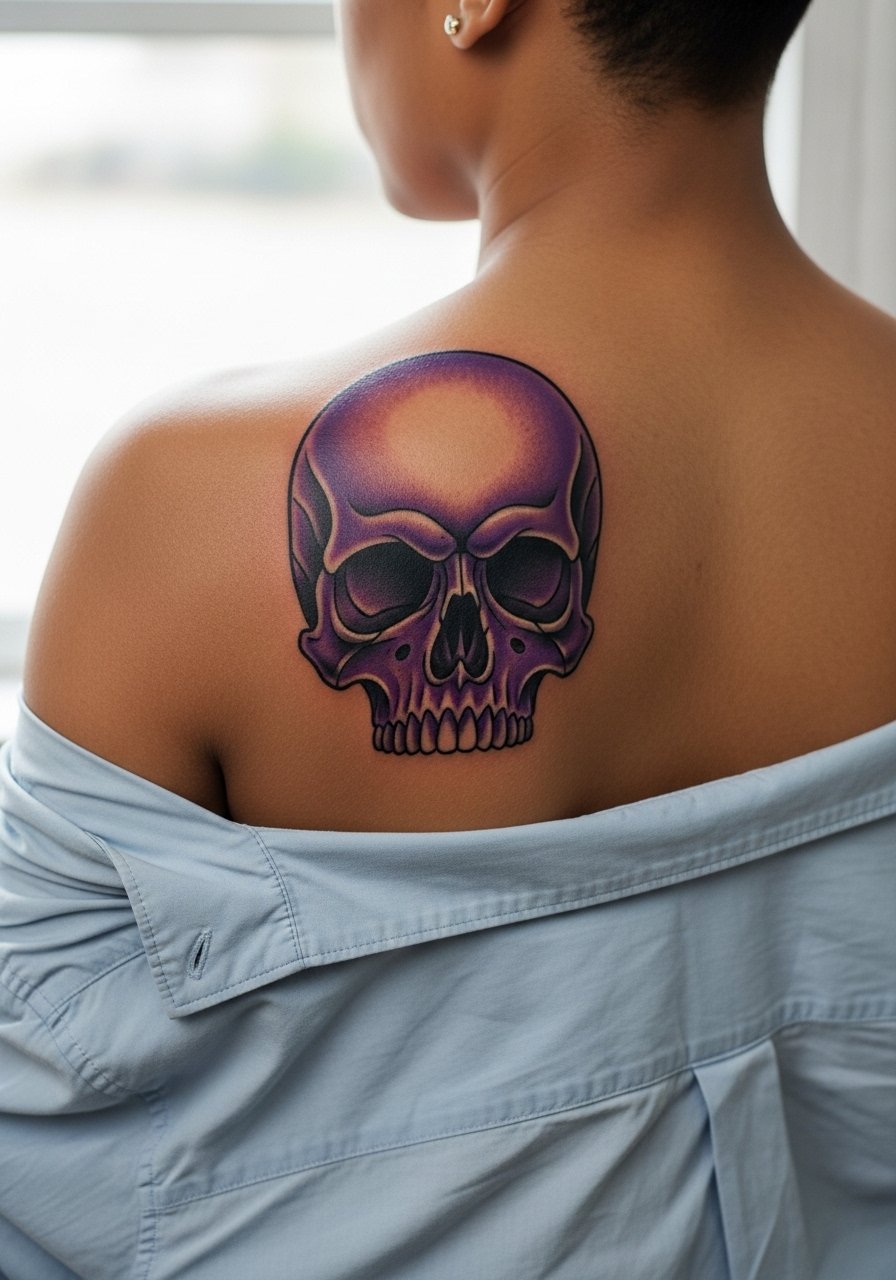
Large upper-back pieces like skull motifs survive well because the area is low-friction and less sun-exposed when clothed. A mistake is relying on light lavender or pinks that vanish. Ask for saturated purple shading layered over strong black anchors. Sessions are long and may require four appointments. For the session, a loose button-down shirt that you can slide aside helps the artist reach the upper back without discomfort. Plan for a color refresh at year three if you wear low-back clothing frequently.
12. Black and Gray Minimalist Moon Phases on Side Neck
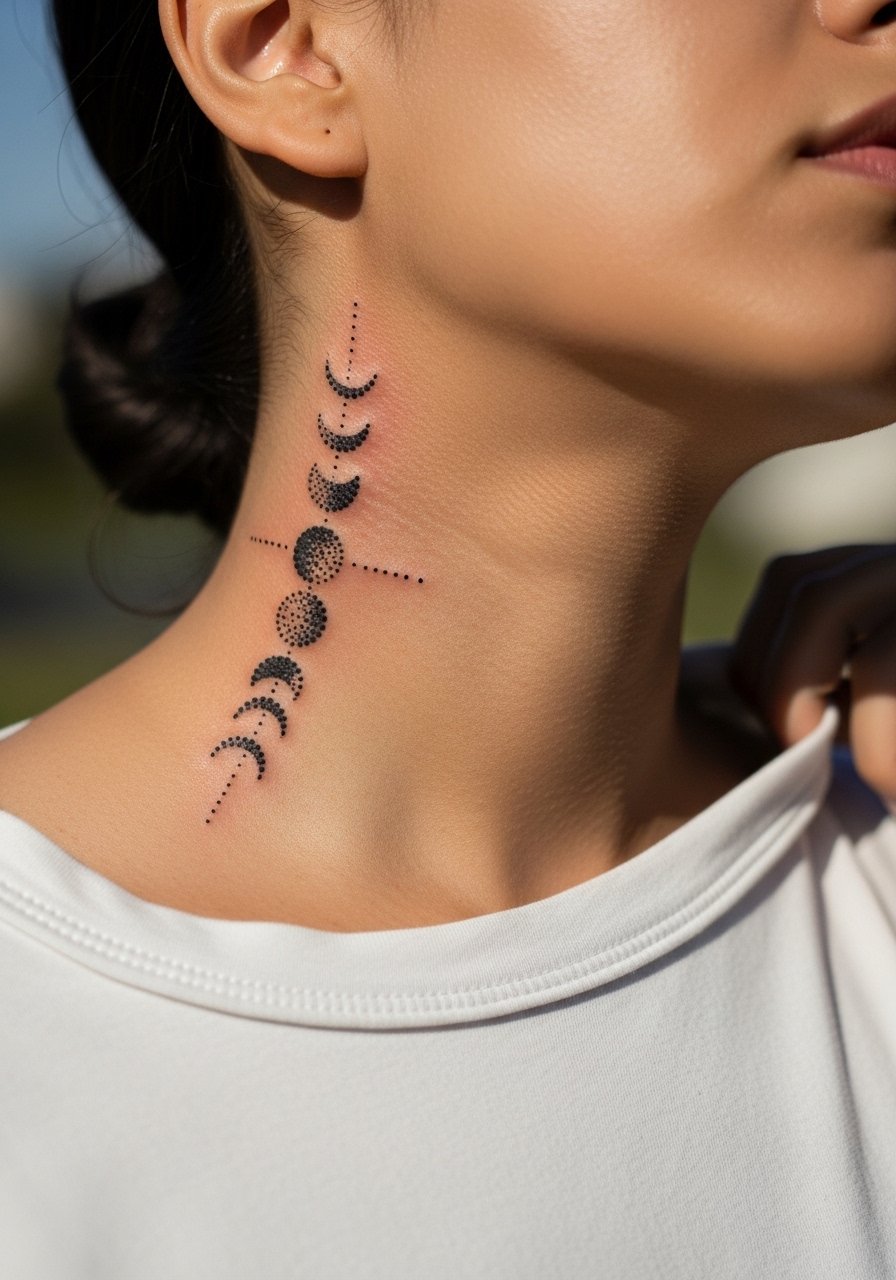
Neck placements read small when framed correctly, but the skin there is thin and mobile. Many owners choose slightly larger dots than they originally planned to avoid merging over time. If you want this linear moon set, tell the artist you want clean dot spacing and to plan for touch-ups because the neck sees a lot of sun and friction from collars. Pain is higher than on forearm, and sessions are usually single, short visits. For showing off, pair with wide-neck shirts to keep the line visible. Hand your artist reference photos of healed neck work on similar skin.
13. Ornamental Henna-Inspired Knuckles
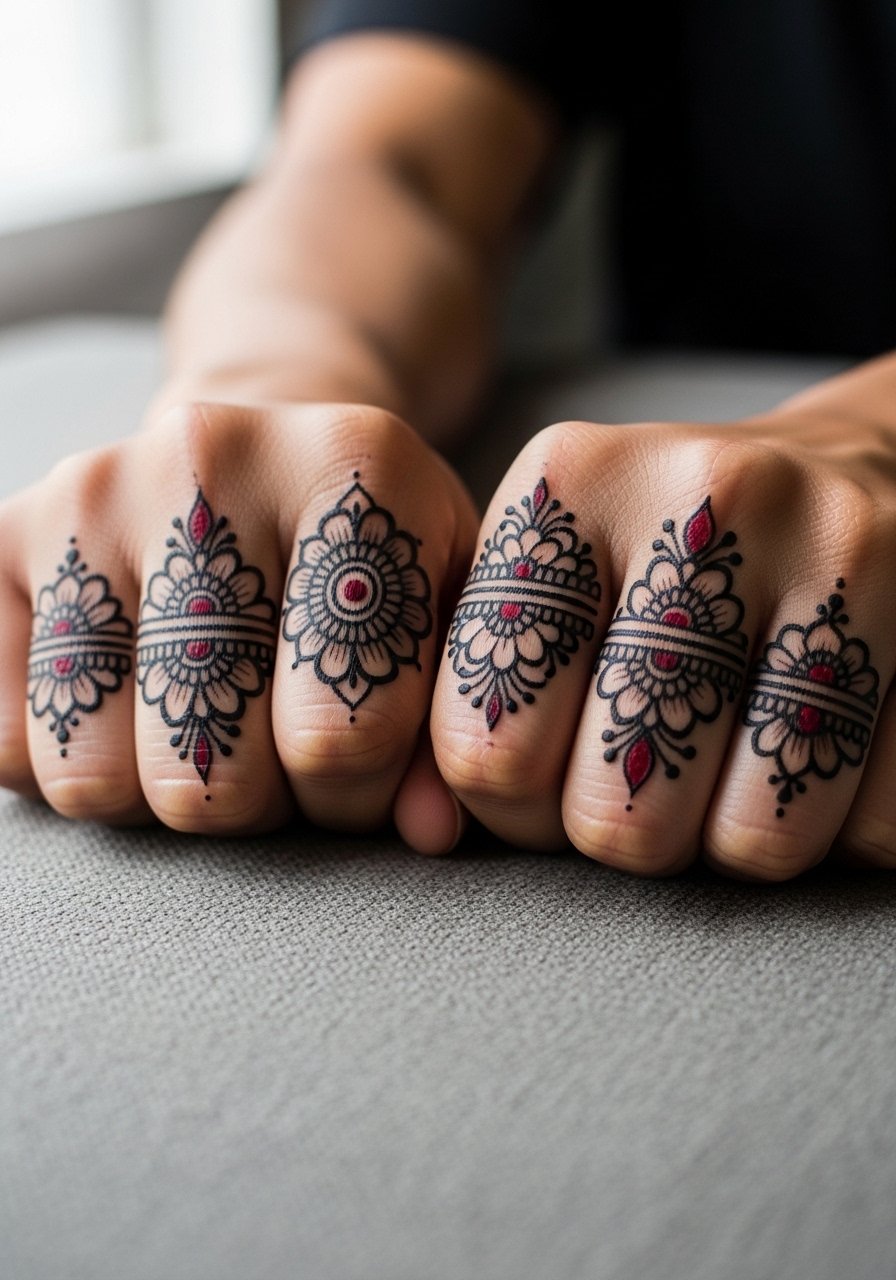
Knuckle work is bold and visible, but it faces heavy wash and abrasion. The error is using very thin filigree that disappears with daily hand use. Ask for reinforced outlines and consider spacing the motifs so they do not compress across knuckle folds. Expect higher touch-up frequency, often within one to two years. Hand placements sometimes affect employment in conservative fields, so weigh placement against career considerations. Sessions are short but the healing window requires patience with hand washing. No aftercare links here, those are in the product block above.
14. Micro-Realism Landscape on Side Ribcage
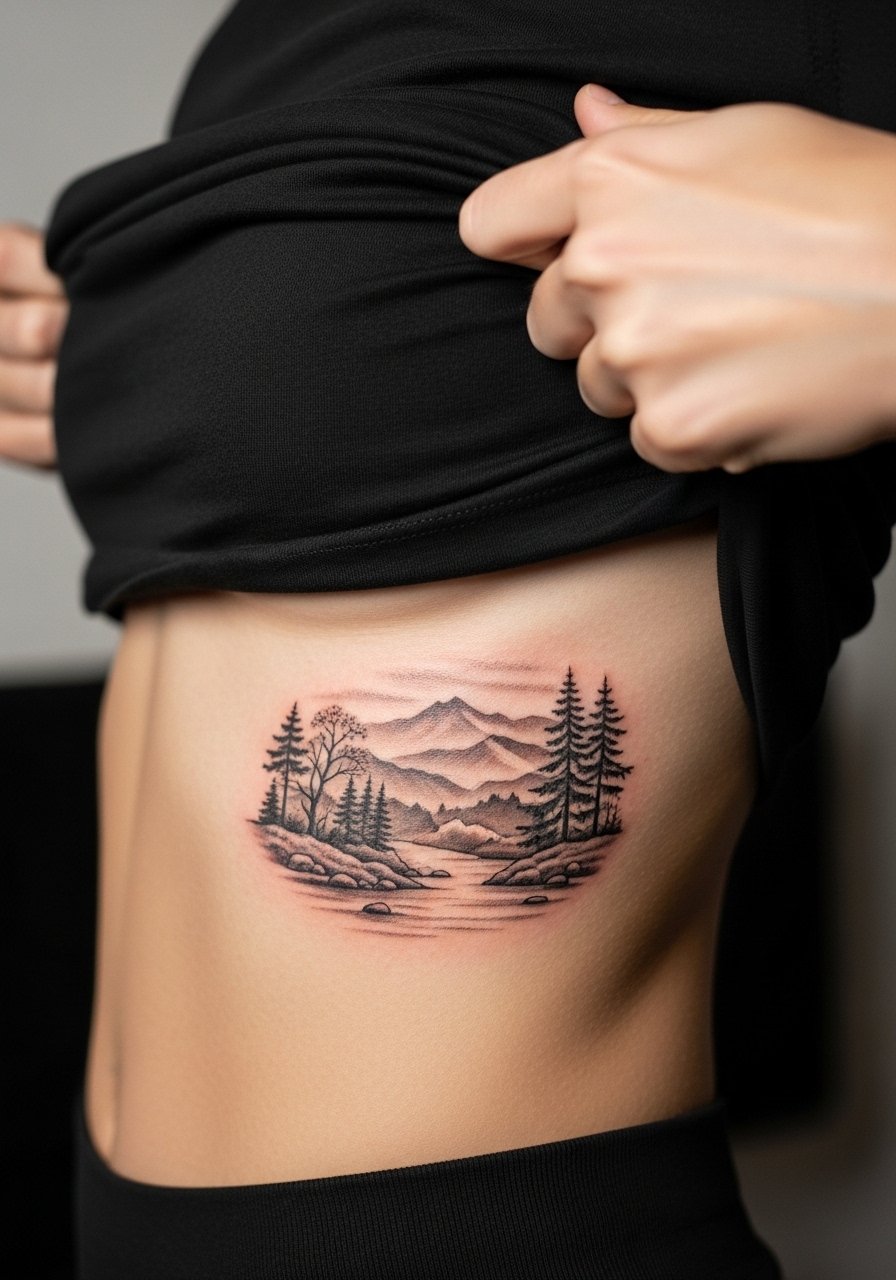
Rib micro-realism can produce incredible texture, but watch sizing and contrast decisions. The common mistake is compressing fine elements into a narrow vertical strip that breathes with movement and blurs. Ask your artist for contrast anchors and to plan for slightly larger detailing. Pain is high and sessions are long, so numbing discussion may come up. Expect touch-ups at year two for crispness in shaded gradients. For session comfort, wear a cropped top you can pull to the side so the artist has clear access.
15. Minimalist Dotwork Crescent on Inner Bicep
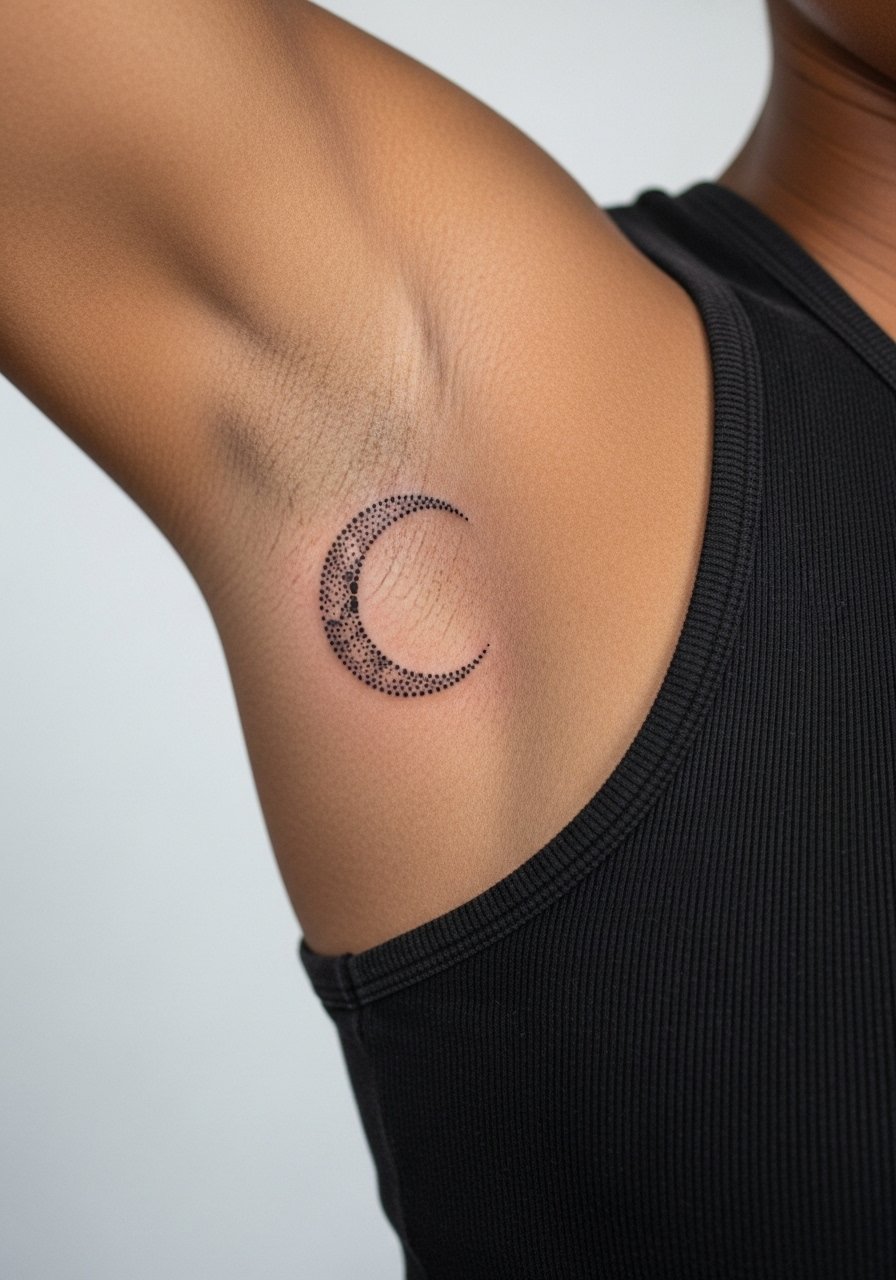
Inner bicep work sees less sun but more stretch when the arm moves. A classic error is using too-fine dots that shears with skin movement. Request slightly denser dot packing and ask the artist about whip shading techniques that create texture without thin lines. Pain is moderate and the session is comfortable for most. For session wear, a loose tank top gives the artist access while keeping you covered. Touch-ups are occasional for dot clarity.
16. Subtle Blackwork Spine Line for Open-Back Dresses
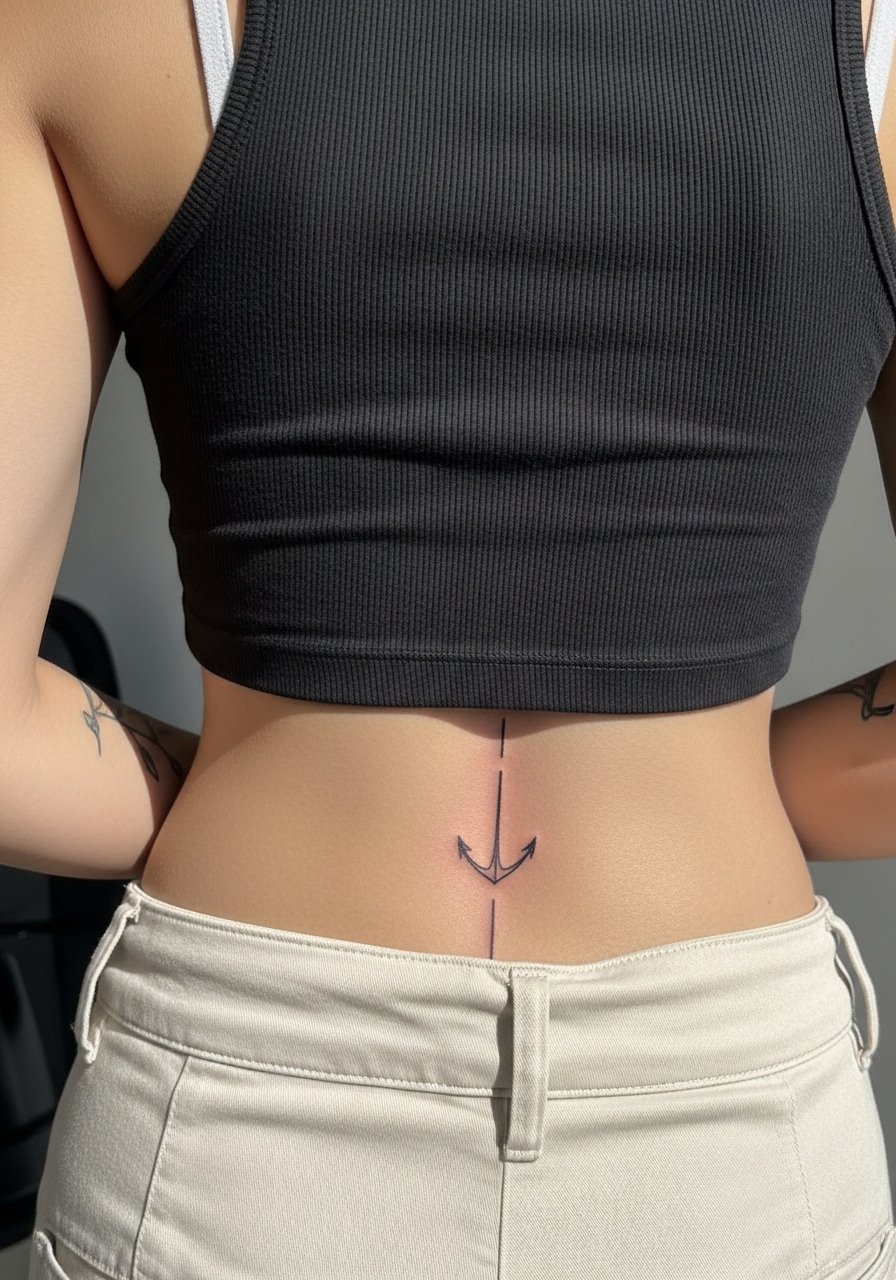
Lower back lines pair naturally with open-back dresses, but the lower back can shift with movement. The mistake is too many tiny details that blur. Ask for a clean vertical anchor line and consider how it will center with clothing waistlines. Pain is moderate and sessions are usually short. For showing it off, a tank top and high waisted jeans combo can frame the work without exposing more than intended. Plan for a touch-up if the pigment softens near the belt area.
17. UV Blacklight Accents That Pop After Dark
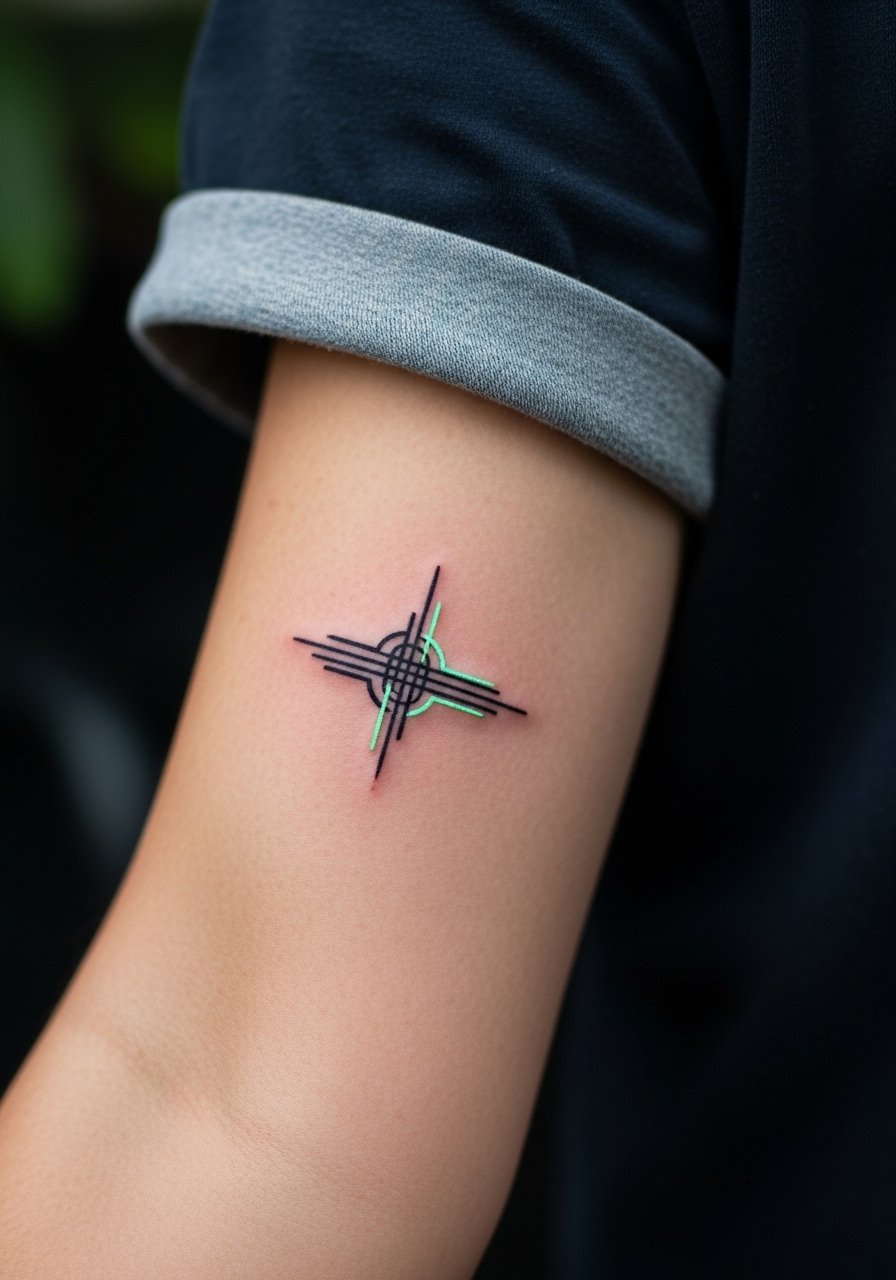
UV blacklight ink gives a hidden layer that glows under club or event lighting and stays subtle in daylight. The downside is that UV pigments behave differently and can fade faster or require specialized inks. If you are curious, ask your artist about their experience with UV pigments and whether they have healed photos on darker skin. Sessions are comparable to standard color pieces and pain levels match the placement. For showing it off, normal short sleeves keep the black line visible while the UV stays a bonus under specific lights.
18. Patchwork Black and Gray Sleeve Starter on Outer Arm
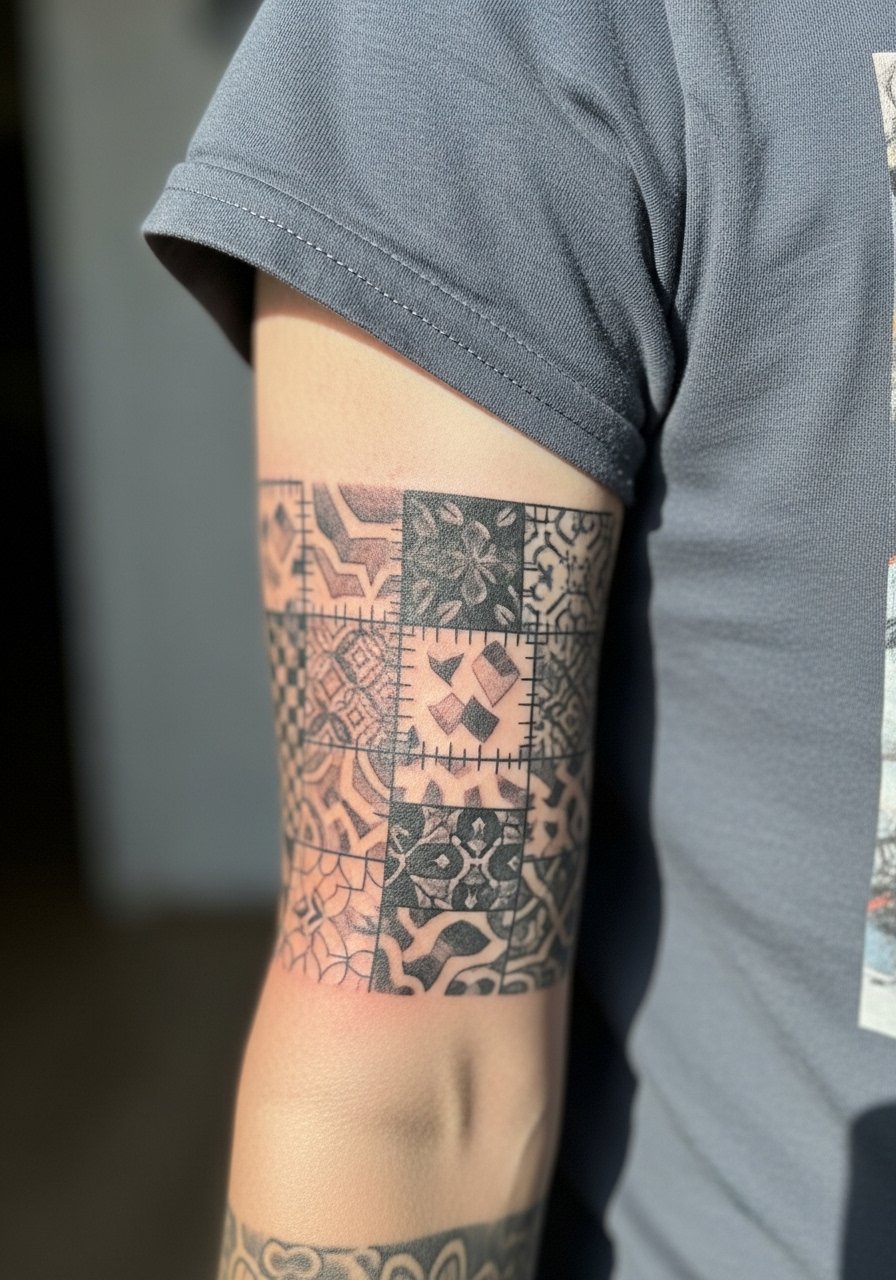
Patchwork sleeves work well as budget-friendly modular projects because you build panels over time. The common mistake is mismatched anchors that fight for dominance. Ask for a tonal key the artist will use across sessions so each panel reads cohesive when added. Expect multiple sessions and touch-ups to harmonize patches after a year. For session comfort, a short sleeve tee is ideal. This approach lets you budget while keeping the sleeve visually consistent.
19. Tiny Minimalist Symbol on the Side of the Neck
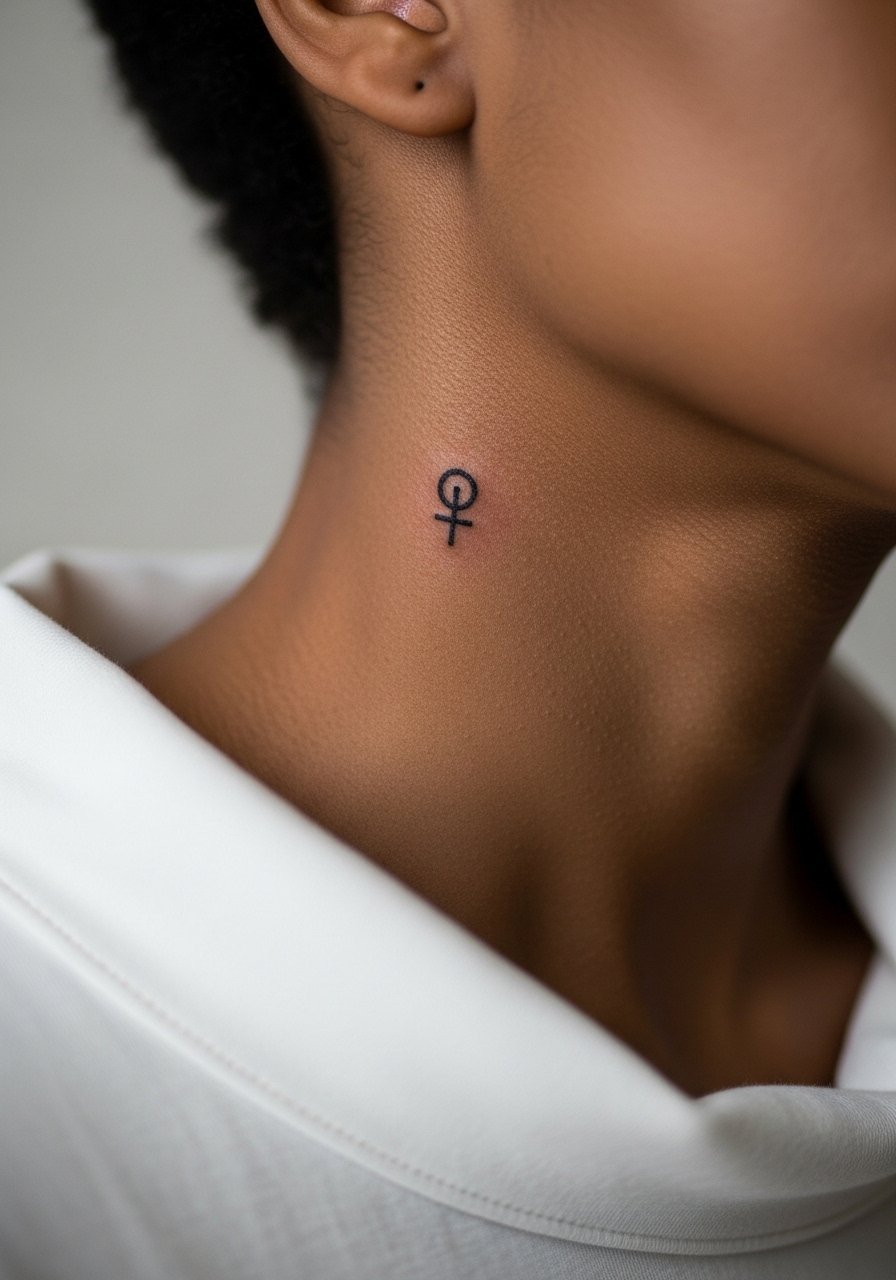
Small neck symbols are intimate statements that require careful scaling. Too small and the mark can lose definition quickly. Ask for slightly increased scale and to see healed neck examples on similar complexions. Pain is higher than on limb placements and aftercare needs attention because of sun exposure and collars. For display, wide-neck shirts keep the line visible without constant irritation. Expect a touch-up in the first two years for crispness.
20. Geometric Mandala with Modular Lines for Future Sleeve Work
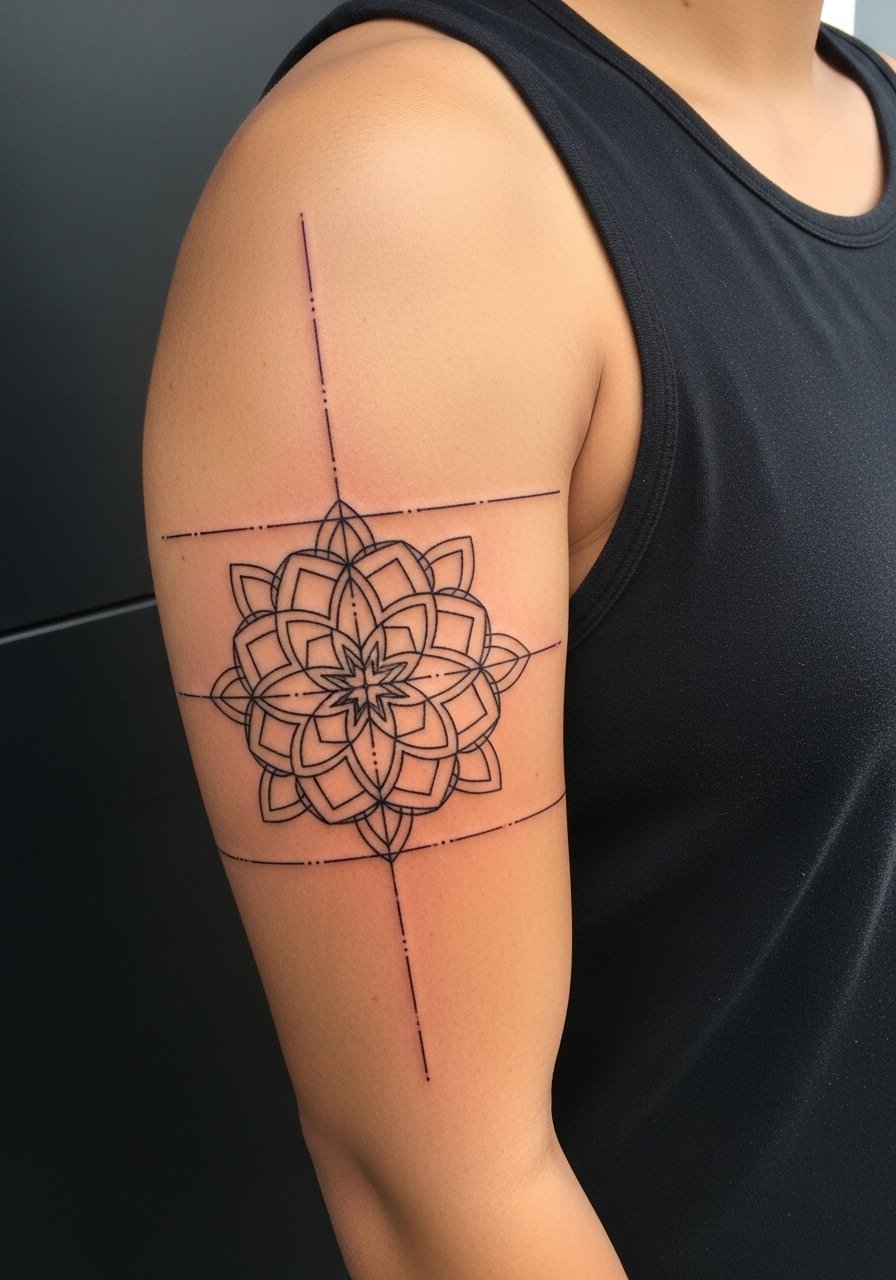
Designing mandalas with built-in paths for future panels prevents composition clashes later. The frequent error is creating a piece that has no rhythm for expansion. In your consult ask how the artist plans to leave connection points and which edges should be softened. Sessions are medium length and the design ages well if lines are slightly boldened. For the session, a sleeveless tank gives the artist full access. Expect touch-ups as you add neighboring panels.
21. Ankle Constellation Cluster That Survives Socks and Shoes
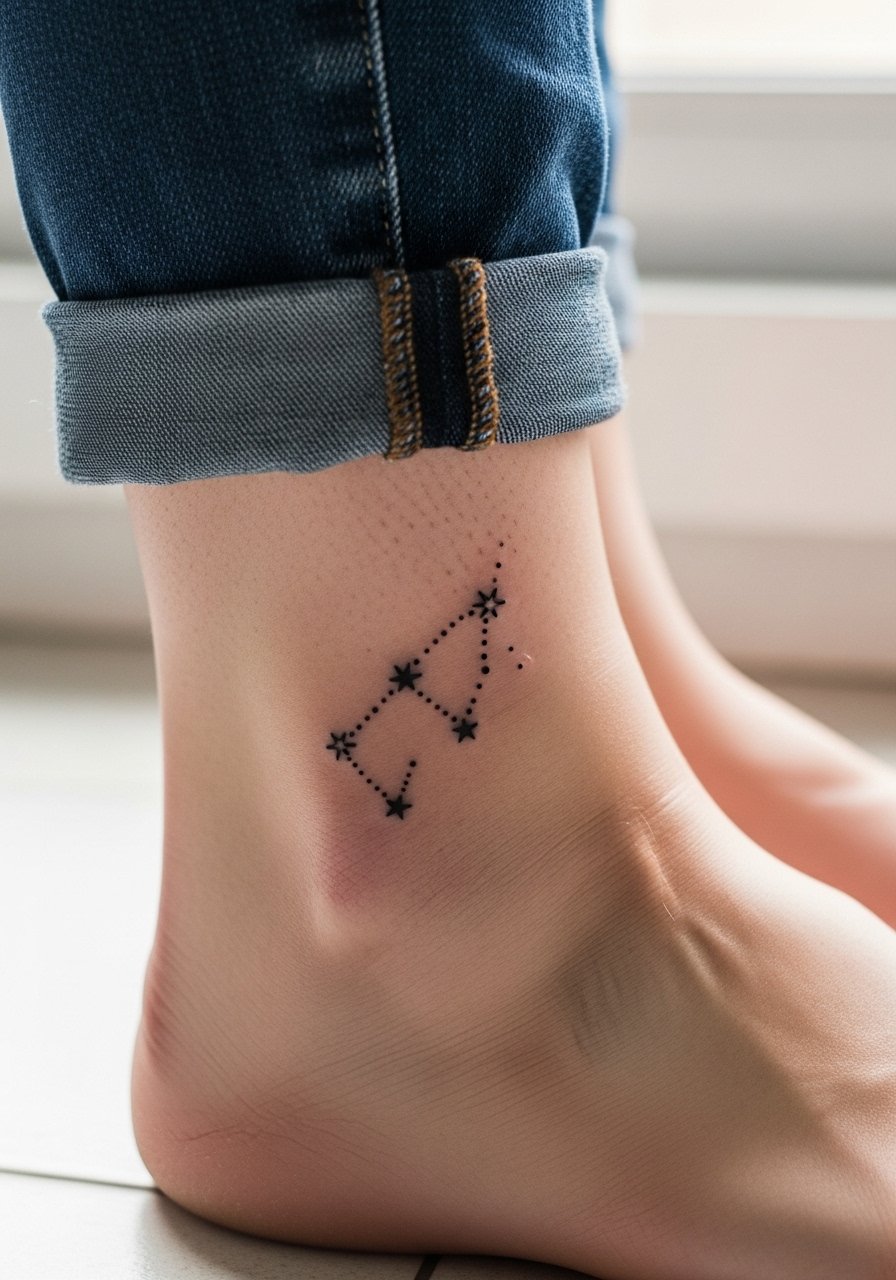
Ankle constellations must account for daily friction from socks and shoes. The typical mistake is choosing pinprick dots that vanish. Ask for slightly bolder dots and spaced stars so the cluster keeps its shape. Pain is low and sessions are brief. For showing it off, pair with rolled jeans or sandals so the ankle is visible. Expect a touch-up at year two for dot redefinition.
Frequently Asked Questions
Q: Will fine line tattoos blur faster on darker skin here than on lighter skin?
A: It depends on placement and lineweight. From what I have seen, ultra-fine lines can lose crispness faster on melanin-rich skin unless the artist recommends slightly bolder packing and gives the lines breathing room. Ask to see healed examples on similar skin and expect possible touch-ups at year two to three.
Q: How should I prepare for a ribcage realism session to make the pain manageable?
A: Short answer, plan for breaks and bring comfortable clothing. Numbing creams are a common option for long rib sessions but ask your artist whether they accept numbing. Also hydrate well, sleep the night before, and wear a cropped top that you can adjust so the artist has clear access.
Q: Are there wardrobe items that help show off forearm and collarbone tattoos without hiding them?
A: Yes. Rolled sleeve tees and sleeveless tanks frame forearms, and wide-neck or strapless tops keep collarbone work visible. For example a rolled sleeve black tee or a wide-neck blouse will keep attention on the tattoo without competing with bold prints.
Q: Should I expect a different aftercare routine for watercolor versus blackwork pieces?
A: The basics are the same, but watercolor and color-packed pieces often need extra sun vigilance to preserve saturation. Protective films and fragrance-free cleansers work for both styles, but the color pieces benefit from more diligent sunscreen once healed.
Q: How do I find artists who have healed dark skin portfolios without relying on vague promises?
A: Use discovery paths that surface healed work. Search hashtags like #tattoosondarkskin and #blackworkdarkskin on social platforms, try the Tattoodo app for guest spots, and check community forums where people share healed photos. Ask for healed images from the artist of work on similar complexions before booking.
