
Fine line marigold work is trending for a reason, but what looks delicate on a screen does not always hold up the same on skin. Placement, spacing, and needle depth matter more than a filtered photo. This list focuses on abstract takes that keep the marigold’s warm silhouette while avoiding common pitfalls, so you can pick a piece that looks intentional at six months and still reads clear at five years.
1. Inner Forearm Marigold Cluster with Dot Work

I've seen this placement hold up best when the blooms have breathing room. Pain is mild to moderate, and a single session of 60 to 90 minutes usually covers a small cluster. Tell your artist to use stipple shading around the petals rather than dense wash to preserve negative space. A common mistake is packing too many tiny details that blur into each other by year three. Expect softening at six months, more noticeable diffusion by year two, and a likely touch-up around year four to refresh linework. For showing it off, roll sleeves or wear a loose linen button-down that frames the forearm without competing for attention.
2. Tiny Wrist Marigold Band, Minimal Negative Space

Fair warning, the wrist is sensitive and prone to friction. Sessions are short, typically 30 to 45 minutes, but the area needs careful spacing or the petals will bleed into a blur. Ask for slightly bolder linework at the outer edges and lighter internal dot work to keep definition. A common error is asking for ultra-thin lines around the wrist. That version often needs touch-ups at year two because of daily washing and bracelet wear. For the appointment, wear a racerback tank so the artist can position the wrist comfortably and you can keep sleeves rolled afterwards.
3. Collarbone Marigold Crescent with Negative Space

There's something about collarbone placement that reads refined from a distance. Pain here is moderate and sessions run 45 to 90 minutes depending on size. The design works best when petals are paired with open negative space that mirrors the collarbone line. Many people request dense shading across the collarbone, which can drag into the area and age unevenly. At six months the contrast should still be clear, at two years expect gentle fading in highlights, and by five years plan for a tastefully targeted touch-up if you want crisp edges. This piece looks great with open-neck tops and a thin chain, try a thin chain pendant necklace that sits above the petals.
4. Ankle Single Stem with Geometric Accent

There's a visual impact to tiny ankle work that reads like jewelry. Pain is low to moderate and sessions are usually 30 to 60 minutes. Ask for the geometric accent to be set slightly away from the stem so the shapes do not merge as the ink settles. The typical mistake is placing too many shapes tightly around the ankle, which the skin and constant friction from socks and shoes will soften quickly. Expect the design to still look crisp at six months if spaced, but plan on a touch-up at year two for the thinner geometry lines. This piece pairs with low-top sneakers or ankle-wrap sandals that let the stem peek out.
5. Ribcage Abstract Marigold Wash with Space

Artists split on whether very fine line holds on ribs. One camp argues skin stretch and movement blur lines within a couple years. The other camp says careful depth and spacing keep lines intact. My take is to ask for more spacing and stipple shading instead of dense wash. Pain here is high and sessions can take 90 to 180 minutes, sometimes split. A frequent error is insisting on tiny detailed petals in the densest area. That choice often becomes smudged as the skin relaxes. Expect strong contrast at six months, some softening by two years, and likely a touch-up at three to four years if you want the original crispness. For session comfort, wear a zip-up hoodie you can pull aside without getting cold.
6. Inner Bicep Marigold with Whip Shading

When you sit down with the artist for inner bicep work, mention whip shading for the petals to keep the transition soft. Pain ranges from moderate to high because the skin is thin; session time is often 60 to 120 minutes. A common mistake is packing heavy saturation into the inner bicep, then discovering the edges blur within a year. For longevity, leave more negative space and choose stipple or whip shading. The touch-up timeline tends to be at year three for fine details. Wear a loose tank top so the artist can access the area easily and you can move without rubbing the fresh tattoo.
Studio Day Picks
The pieces above include the wrist, forearm, collarbone, ankle, ribs, and inner bicep, so I picked a small kit that smooths the session and the first week.
-
Stencil transfer paper kit. Lets you preview placement on skin so the marigold curve sits where you expect, which is crucial for collarbone and forearm pieces.
-
Topical numbing cream. Apply as directed before high-pain areas like the ribs or inner bicep to ease the first hour without affecting linework.
-
Thin protective film roll. Useful for wrist and ankle tattoos that face friction from clothing and shoes during the initial healing window.
-
Fragrance-free body wash. Gentle cleansing helps preserve delicate linework on forearms and collarbones while you shower.
-
Aquaphor healing ointment. A thin layer in the first days locks in moisture for fine line work without suffocating the skin.
7. Shoulder Blade Marigold with Negative Field

Personal observation: shoulder blade pieces tend to age gracefully when given open areas. Pain is low to moderate and sessions run 60 to 90 minutes. Tell your artist to pull the marigold petals away from the spine and neck with white space so the shape keeps clarity. A mistake I see is asking for very tight clusters that look muddled when the shoulder moves. At six months the negative field still reads, at two years small dots may soften, and touch-ups are rare unless you want to restore contrast. For evenings out, pair this with an open-back dress so the design sits like a pendant.
8. Calf Marigold Ribbon with Stipple Depth

Visual impact lead applies here because the calf reads from across a room. Pain is moderate and sessions often last 60 to 120 minutes. Ask for stipple shading behind the petals to create depth without heavy saturation. The common mistake is insisting on full saturation across the calf, which can age unevenly where clothing rubs. At six months lines should be clean, at two years the stippling fades but keeps form, and touch-ups may be needed at year three for the ribbon edges. Show it off with cropped trousers or a midi skirt.
9. Behind-the-Ear Accent Marigold

Mistake lead: the biggest error with behind-the-ear pieces is expecting the detail to last untouched in an area with hair and constant movement. Sessions are brief, usually 20 to 40 minutes, but the skin there is thin and touch-ups are common. Ask the artist to avoid ultra-small petals and to position the main shape slightly lower below the hairline for longevity. Expect fading from shampoos and styling products by year two. Note that this area needs an artist comfortable with hairline work because framing and placement matter more than complexity.
10. Upper Arm Cuff of Marigolds with Bold Outline

Personal observation: bold outlines on the upper arm age well, often better than ultra-fine versions. Pain is mild and sessions are 45 to 90 minutes for a cuff. Tell your artist to keep the outer line weight slightly heavier while keeping the inner details airy. The common mistake is requesting ultra-fine internal details only. Those details may blur against heavier outer lines and need touch-ups by year three. This cuff pairs with rolled sleeves or a short-sleeve linen shirt that frames the band.
11. Sternum Marigold Halo, Subtle Stippling

Aging/healing lead: Sternum tattoos take work to age evenly because the skin moves with breathing. Pain is high and sessions may be split. Ask for stipple shading that gently fades outward rather than heavy washes that sit in the creases. A common error is too-dense central saturation, which shows early age lines and patchy fading. Expect good definition at six months, with gradual softening by two years. Choose an artist experienced with chest anatomy because little adjustments in placement change how the halo reads when you move.
12. Calf-to-Ankle Leaning Marigold Vine

Consultation lead: when you book this multi-zone piece, bring two reference shots showing how the vine should curve as the leg flexes. Pain varies because it crosses zones; total session time often hits two hours. The common mistake is mapping the vine too straight, which looks stiff when you walk. Tell your artist to follow muscle flow and to avoid tiny offshoots near the ankle where shoes will rub. You will notice subtle softening at two years and likely a targeted touch-up at three to keep the ankle details crisp. Pair with cropped trousers or strappy sandals to let the curve show.
13. Micro-Marigold Finger Accent

Mistake lead: fingers are notorious for speedy fading because of constant washing and movement. Pain is low to moderate and sessions are short, around 15 to 30 minutes, but touch-ups are expected. Request slightly bolder outlines rather than hair-thin lines, and accept that yearly touch-ups are common if you want it to remain readable. The common version that ages poorly uses ultra-fine internal dots, which turn into smudges fast. If your lifestyle involves heavy hand use, consider placement on the side of the finger rather than the pad to slow fading.
14. Thigh High Marigold Panel with Open Petals

Visual impact lead: thigh panels let you work larger and avoid compressing detail. Pain is moderate and sessions can be 90 to 180 minutes. Tell your artist to leave open petals and avoid tiny lines near the stretch-prone areas to prevent blur. A common mistake is packing the panel edge-to-edge without breathing room, which ages into a single block of tone. With space, the piece should still read clearly at two years and probably needs only occasional touch-ups. For the appointment wear loose shorts or a wrap skirt so the artist can access the upper thigh without discomfort.
15. Ankle Chain of Mini-Marigolds

Pain warning lead: ankles handle small work poorly because of rubbing from footwear. Sessions are short but you should expect seasonal fading where shoes contact the skin. Ask for slightly heavier outer lines on the chain so individual blooms still read after friction. The usual mistake is wanting utterly hairline work that disappears after a year. Practice conservative density and plan for touch-ups at year two. Style-wise, sandals and cropped pants highlight the chain nicely.
16. Back of Neck Abstract Marigold Script Mix

Consultation lead: for neck work bring exact script you want since image generators and artists need precise text. Pain is moderate and sessions are typically 45 to 90 minutes. The mistake I see is tiny script squeezed into the marigold mass. Ask to separate the lettering with negative space so both elements remain legible as they age. Expect some softening at two years and a likely touch-up then. Keep in mind workplace visibility may affect your choice.
17. Side Torso Marigold Wave with Dot Work

Aging/healing lead: side torso designs shift with breaths and movement. Pain can be high and sessions may run long. Choose dot work instead of block fills to create texture without risking patchy fade. People often request continuous solid fills that age unevenly across stretch lines. At six months the dot work looks tactile, at two years it softens gracefully, and touch-ups are sporadic. For the session wear a supportive cropped top so the artist can reach the area easily.
18. Shoulder Cap Marigold with Bold Petal Edges

Personal observation: shoulder caps are forgiving because the skin is less mobile than ribs. Pain is mild and sessions are often 45 to 90 minutes. Ask for bolder petal edges to keep the silhouette readable from a distance while allowing subtle interior stippling. A common mistake is over-detailing the interior, which eats into the outline over time. Expect long-term durability and infrequent touch-ups. This placement frames sleeveless tops well, try an open-back tank to show the cap.
19. Hand Surface Marigold Accent

Controversy lead: hand tattoos split opinion because one camp accepts frequent touch-ups as normal and another warns about workplace implications and fast fading. Pain is low to moderate and sessions are short. A frequent error is expecting fine, detailed petals to stay crisp; the hands are among the fastest to soften from daily washing. If you choose this spot, plan for maintenance and consider bolder, pared-back shapes that read even as they age. Also think about how visible you want the piece to be in professional contexts.
20. Scapula Marigold with Layered Petals

Visual impact lead: layered petals here can create a sense of motion without crowding. Pain is mild to moderate and sessions are typically 60 to 120 minutes. Ask your artist to stagger layers with negative gaps to avoid merging when the tattoo settles. A common mistake is stacking petals directly on top of one another, which collapses into a blur over a few years. This spot is low-friction and usually needs fewer touch-ups. Pair with open-back tops to let the scapula breathe.
21. Lower Back Marigold with Fine Line Connectors

Mistake lead: dense connectors on lower back pieces can create a single dark patch over time. Pain is moderate and sessions take 60 to 120 minutes depending on coverage. Recommend thin, purposeful connectors between blooms rather than a lattice of cross-hatching. The area usually keeps shape longer than hands or ribs, but plan for a touch-up at year three if you want to restore crispness. For showing it off, low-rise waistlines or backless tops frame the design.
22. Inner Thigh Marigold with Soft Wash

Pain warning lead: inner thigh pieces can be intense for some people. Sessions are often split and last 90 minutes or more. The wrong move is asking for heavy saturation near the groin where skin rubs and sweats. I recommend a soft wash with stippling to keep the petals readable without dense fill. Expect good clarity at six months, with gradual softening by two years. Wear loose shorts to the session so the artist can access the area without pinching.
23. Upper Chest Marigold Spray

Personal observation: chest sprays read well when they follow the clavicle and avoid the sternum valley. Pain is moderate to high and sessions usually last 60 to 120 minutes. Tell your artist to angle the spray so the petals fall toward the arm rather than across the sternum. Common mistakes include centering heavy work over the sternum, which ages unevenly. Expect softening at two years and a targeted touch-up if you want to sharpen the spray effect. This piece looks stylish with a wide-neck blouse.
24. Outer Thigh Marigold Slice

Consultation lead: outer thigh allows for bold shapes that avoid the friction zones. Pain is moderate and sessions usually fall in the 60 to 120 minute range. A common mistake is placing small elements where jeans will constantly rub. Ask for the main slice to sit higher up the outer thigh away from seams. Aging tends to be forgiving here, with touch-ups mostly cosmetic. For the appointment wear high-waisted pants you can shift easily.
25. Chest Pocket Marigold, Petite and Centered
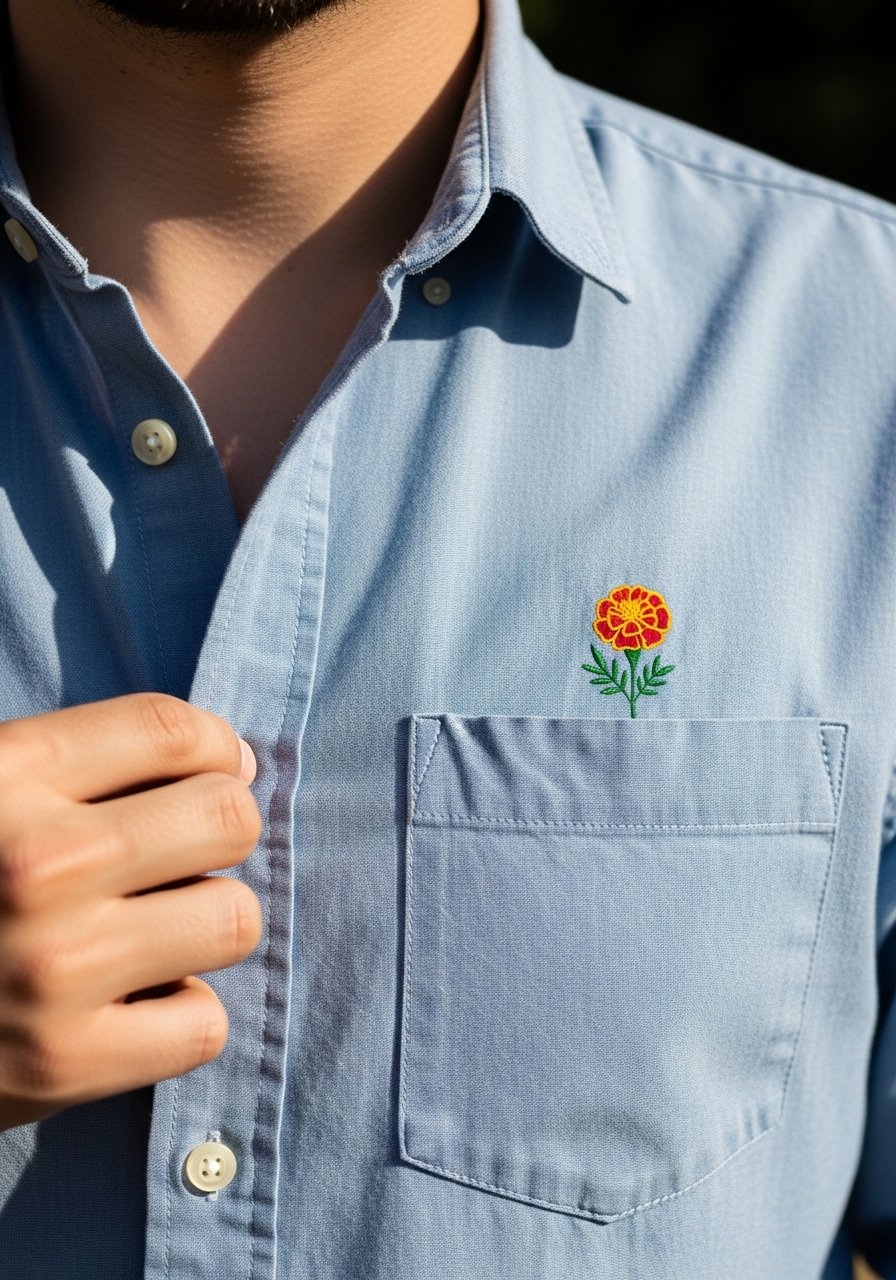
Mistake lead: tiny chest pieces get lost under fabric friction unless placed with care. Pain is moderate and sessions are short, often under an hour. Tell your artist to place the marigold a few centimeters away from the seam line of shirts so it avoids constant rubbing. Many people ask for minuscule details that blur; keep the motif slightly bold at the edge for durability. The piece will need touch-ups less frequently than a finger tattoo but still occasionally.
26. Upper Arm Portrait-Adjacent Marigold Accent

Personal observation: marigold accents beside portrait work should be simple so they do not compete. Pain is mild and sessions are often incremental depending on the portrait. Ask for clean linework and minimal internal detail so the flower complements rather than competes with facial features. The common mistake is overworking the accent, which steals focus. Aging is usually in step with the portrait, and touch-ups are scheduled when the main piece needs them.
27. Collarbone-to-Shoulder Marigold Sweep

Visual impact lead: a sweep that crosses collarbone to shoulder reads dynamic when spaced correctly. Pain is moderate and session time is typically 60 to 120 minutes. The mistake is packing the sweep with tiny details that flatten as skin shifts. Tell the artist to space petals and use stipple shading for depth. At two years the flow should still read, and touch-ups are usually cosmetic. Pair this with off-shoulder tops to display the curve.
Frequently Asked Questions
Q: Will fine line abstract marigold tattoos on the ribs need touch-ups sooner than those on the shoulder?
A: It depends on placement and spacing. Ribs move with breathing and often show softening sooner, so many people need touch-ups around year three. Shoulders tend to hold linework longer, so touch-ups are less frequent. Ask your artist about spacing and shading techniques that slow the need for a refresh.
Q: How should I prepare clothing-wise for a sternum or ribcage marigold session?
A: Wear items you can easily pull aside without exposing more than the tattoo area. For sternum, a fitted sports bra works well. For ribs, a cropped top that lifts is usually best. Comfortable clothing that does not rub the area right after the session helps the initial heal.
Q: Do marigold designs in stipple or dot work age better than full wash styles on the thigh?
A: From what I have seen, stipple and dot work on the thigh soften more gracefully because there is less block saturation to go patchy. Full wash can look lush fresh but may need more touch-up attention over time. If longevity is a priority, ask for stippling or spaced washes.
Q: Are hand or finger marigold accents worth it if I use my hands a lot at work?
A: Expect faster fading and more frequent touch-ups with heavy hand use. If you want the look but need lower maintenance, consider shifting to the outer finger side or onto the wrist where friction is less constant. Be honest with your artist about daily wear so they can advise on line weight.
Q: How much should I discuss placement adjustments with my artist for a collarbone-to-shoulder sweep?
A: Discuss it thoroughly. Bring clothing references and try the stencil in different poses if possible. Small shifts in placement change how the sweep follows the muscle and bone, so ask the artist to show the stencil while you move your arm to confirm the final flow.
Q: Can I combine script and marigold on the neck and still keep both legible over time?
A: Yes, but separate them with negative space and avoid ultra-fine script squeezed into petal areas. Exact text needs to be shared in the consultation so spacing is planned. Expect some softening and plan for a touch-up at two to three years if you want both elements to stay crisp.
