
Fine lines and heavy blackwork both look great on saved boards, but what holds up matters more than the likes you score the day you post. Trends push people toward tiny, detailed aces and oversized spade back pieces in equal measure. Pick a version that fits your skin, your wardrobe, and how you want the design to age, and the pieces below make that choice easier.
1. Tiny Micro Ace on the Finger
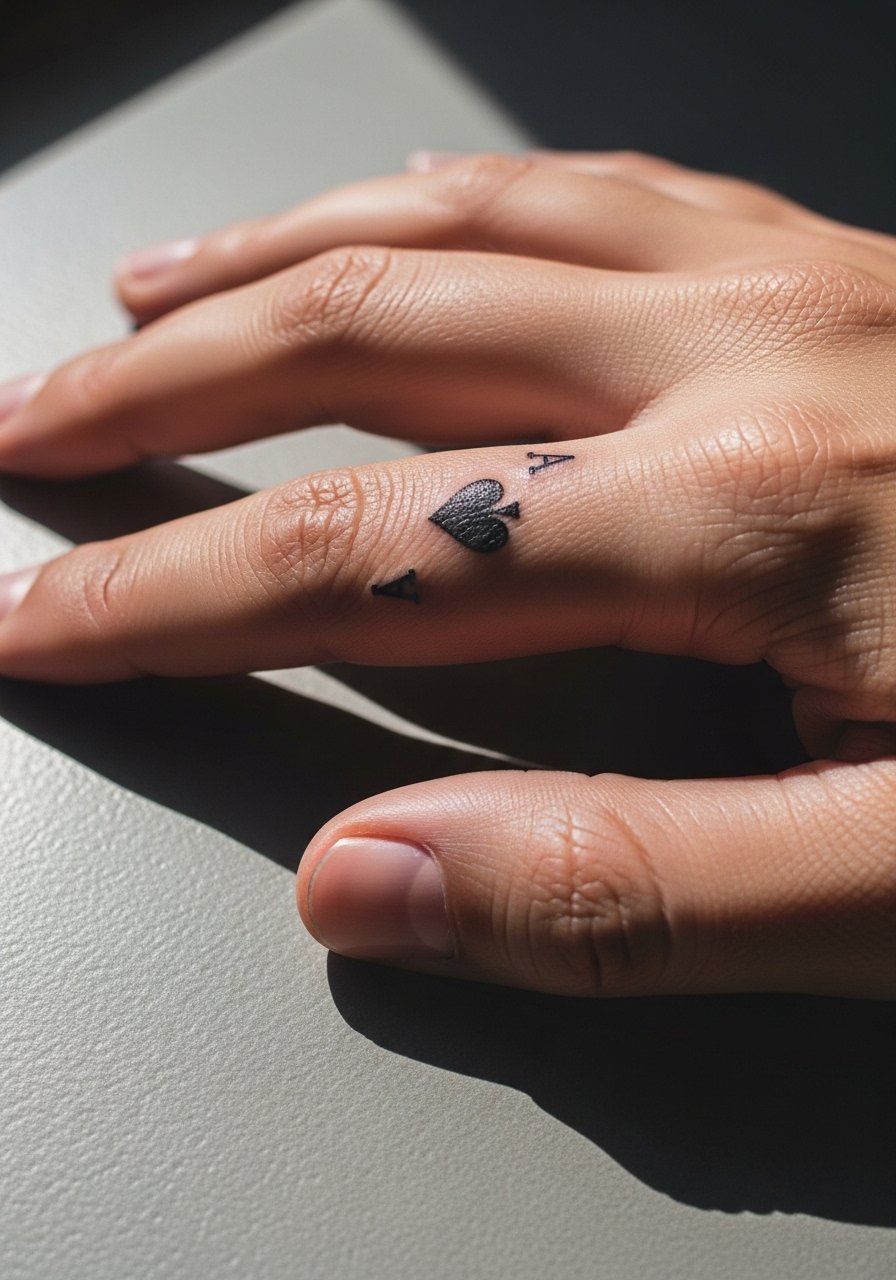
A tiny ace on the finger reads like a secret emblem. Fair warning, fingers sit in a high-friction zone so the session is quick but the touch-up timeline is sooner than for larger limbs. Ask your artist for slightly bolder linework and fewer ultra-thin lines so the shape keeps definition after frequent hand washing. A common mistake is requesting ultra-fine detail meant for forearms then placing it on a finger. For the session wear, roll sleeves or pick a loose button-down shirt you can pull aside without stretching the hand area. Expect touch-ups around year one for most people.
2. Bold Blackwork Ace on Outer Forearm
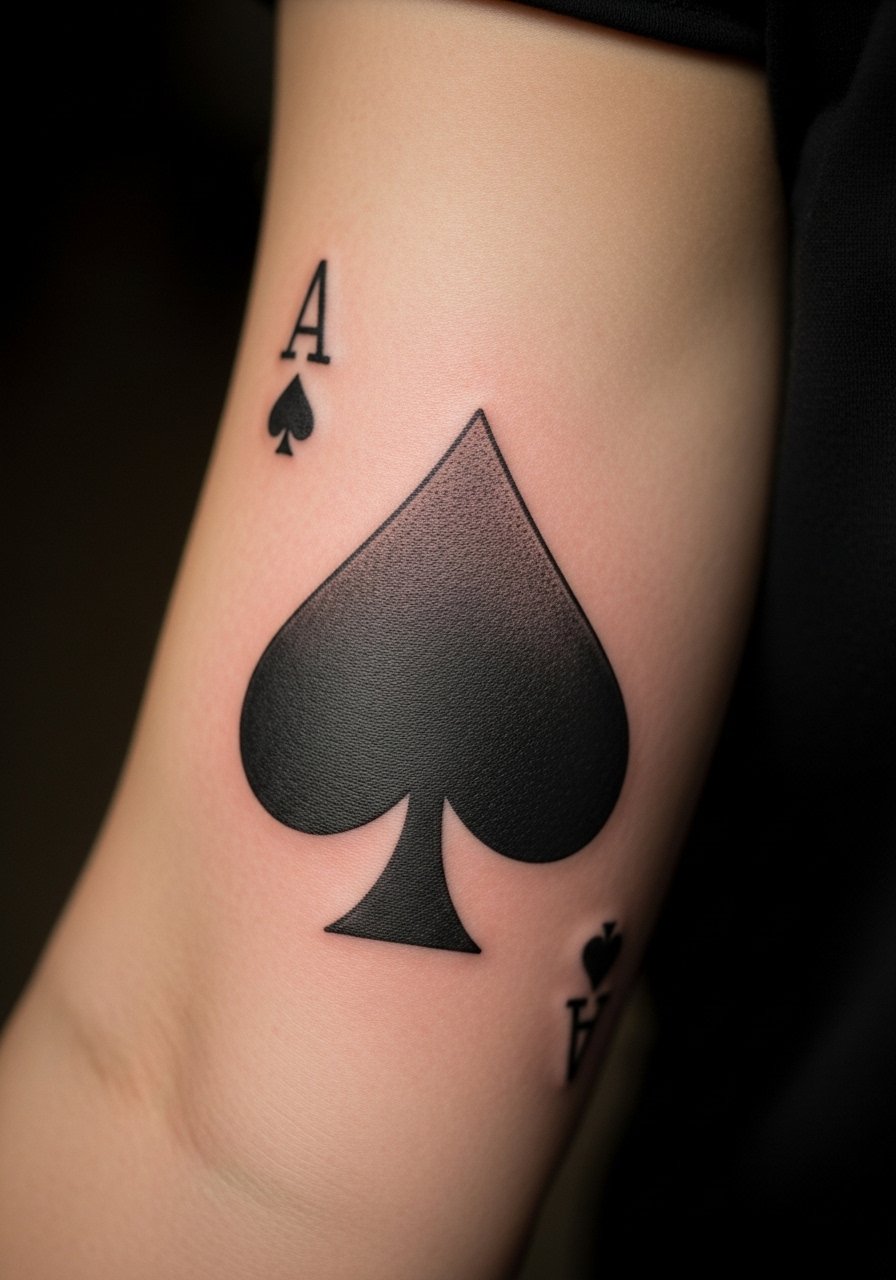
This version favors saturation and bold linework that ages into a readable silhouette. I recommend it if you want a design that still reads at year five without frequent touch-ups. During consultation, ask for strong outlines and deep saturation rather than tiny internal details. The session feels moderate, not gentle, because saturation takes time and the artist will go over areas to lock pigment in. Avoid the common request to shrink a full blackwork piece into micro scale, which raises blowout risk. Pairing this with a rolled-up linen shirt frames the arm cleanly when you want to show it off.
3. Ace with Crown on the Bicep
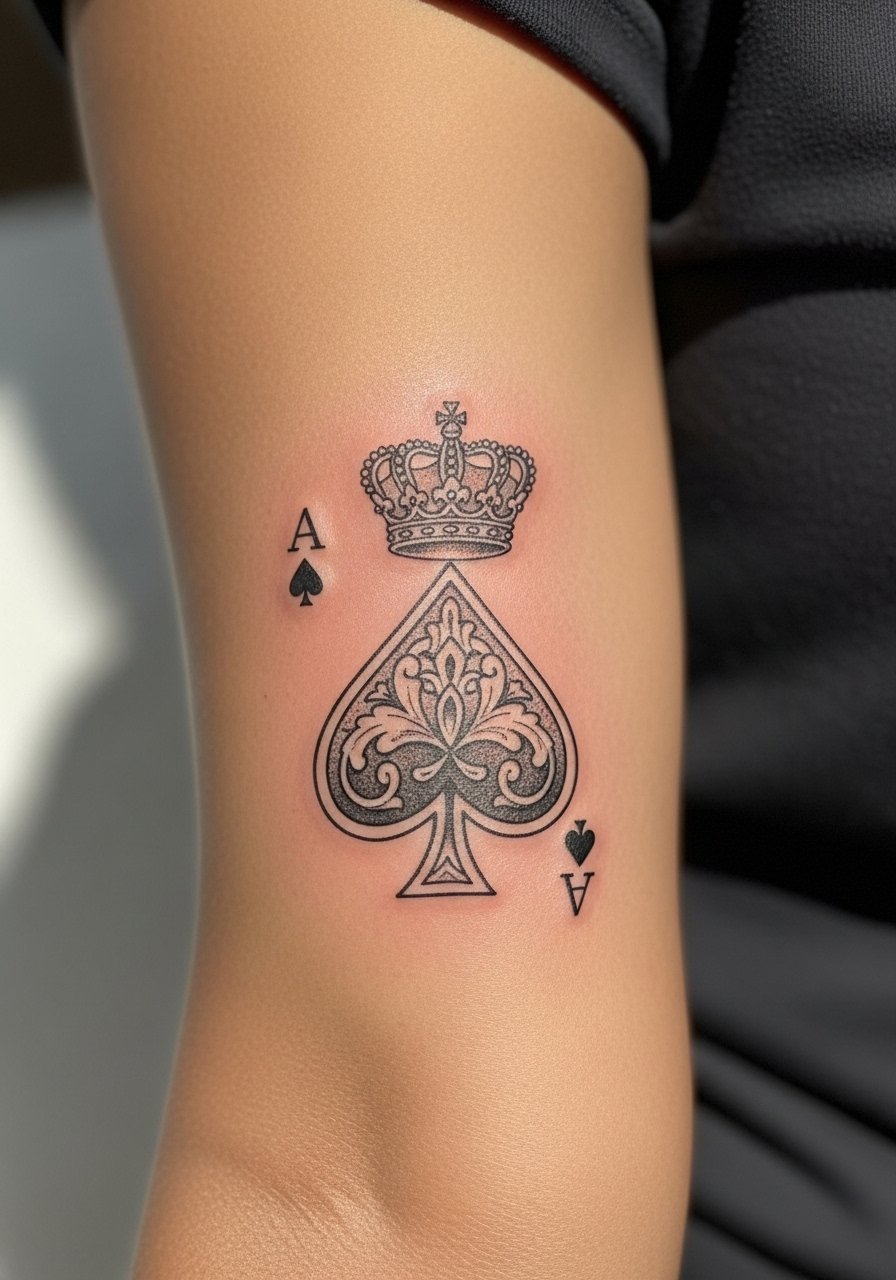
An ace crowned for a subtle regal nod works well on the bicep because there is room for proportion without crowding. I usually tell people to bring reference showing the exact crown height they want so the balance between spade and crown reads correct in the flesh. Session time is moderate and the bicep hurts less than ribs. A mistake is packing too much tiny detail into the crown, which softens over time. For showing it off, a loose tank top gives clean access to the bicep and keeps the composition visible without competing with necklaces.
4. Ace with Rose on the Collarbone
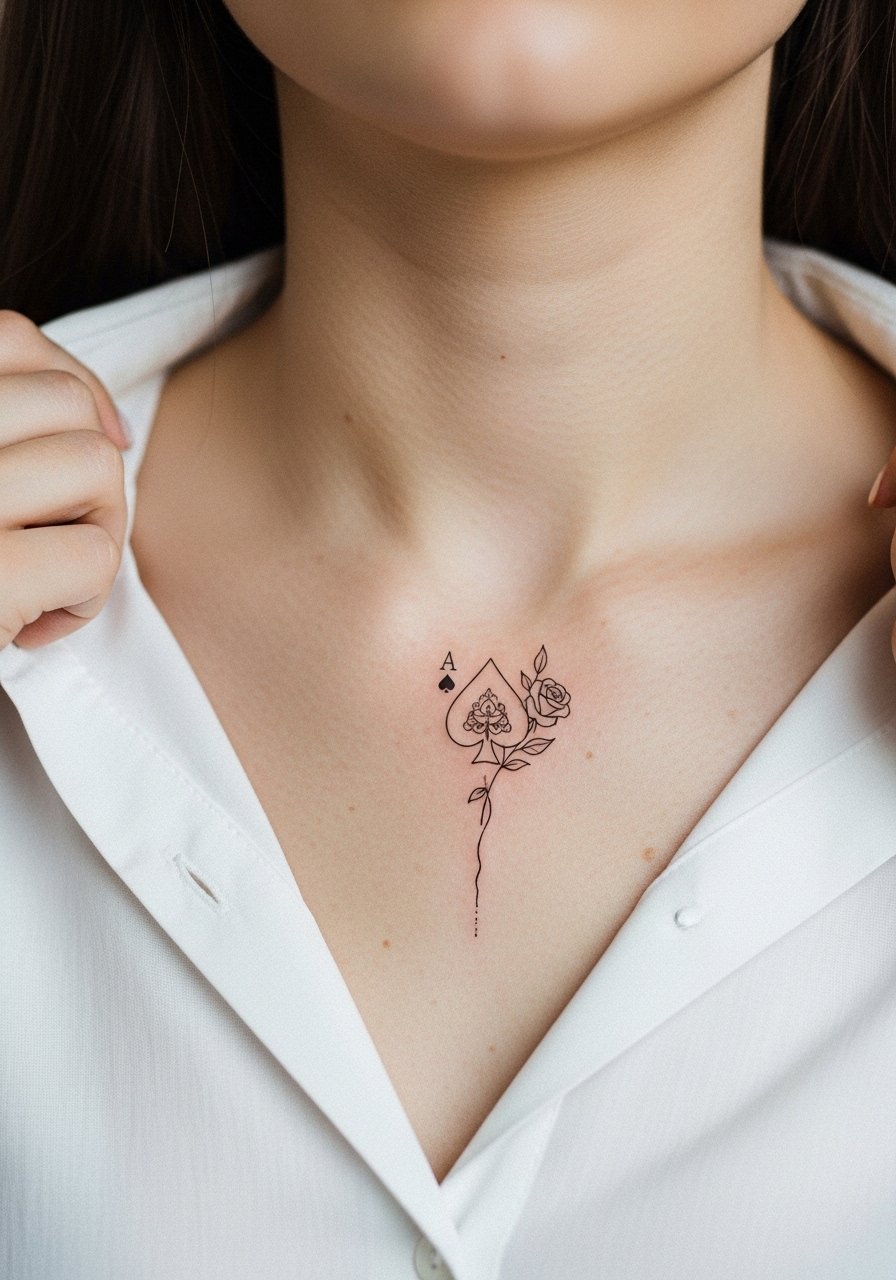
This placement reads intimate but still visible. The collarbone skin moves with breathing and clothing, so ask your artist to space petals and linework to avoid tight clusters that blur. The session feels sensitive because the bone is close to the surface, but most people tolerate it without numbing. A common version that ages poorly uses stipple shading too densely near the collarbone, which can cloud over time. For outfits, open-neck silhouettes like a wide-neck shirt or a thin chain pendant let the piece show without overwhelming the neckline. Think about jewelry placement so the pendant does not sit directly on the tattoo.
5. Small Ankle Ace with Negative Space
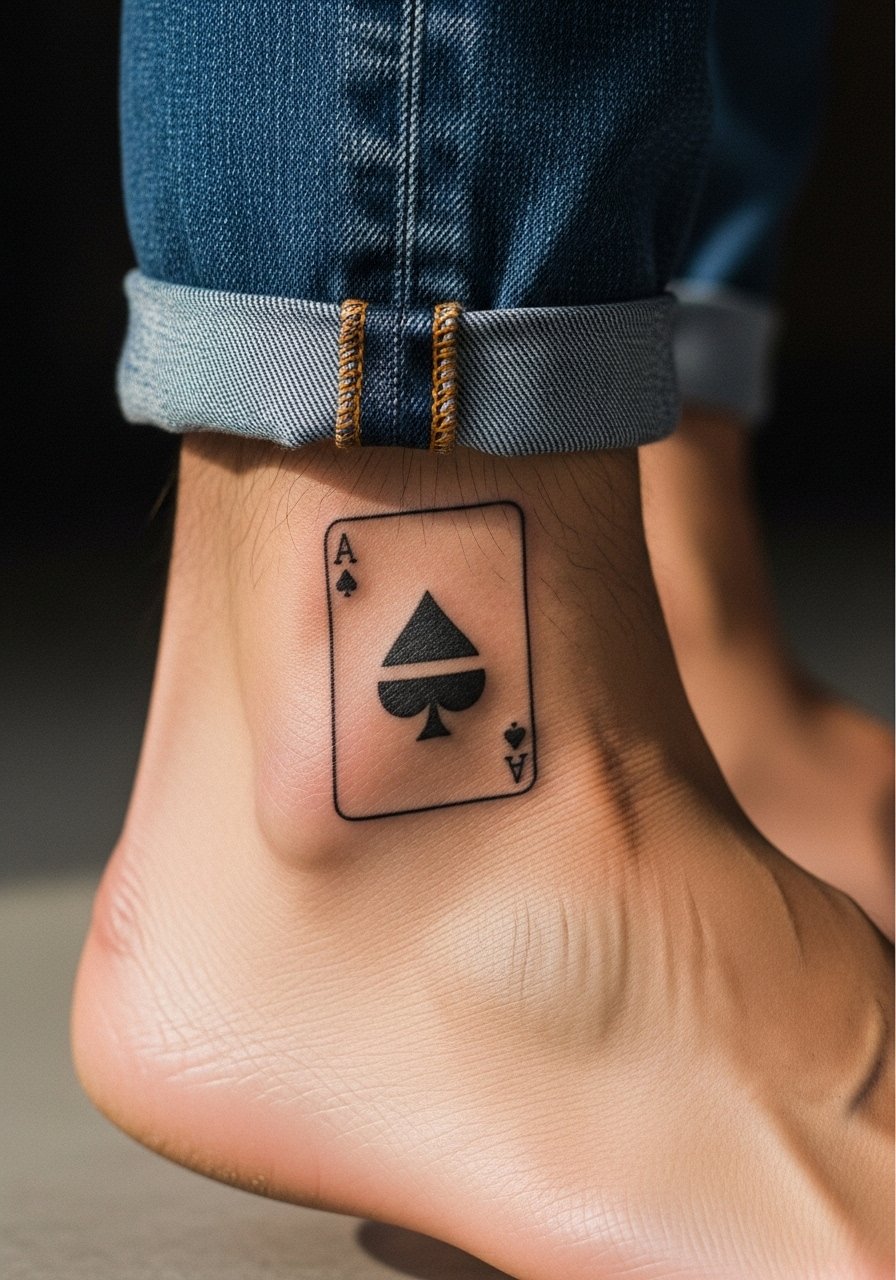
An ankle ace is low-key but visible in summer. The low surface area and footwear friction mean the first year is most important for lock-in. I advise asking your artist to keep the negative space clear and avoid micro-detail inside the spade. The session is short but expect sensitivity near the bone. A frequent mistake is making the negative space too intricate, which fills in with wear. For show-off looks, pair it with sandals or delicate anklets that draw the eye without rubbing the ink. Plan to protect the area during long walks or tight shoes in the first month.
6. Ribcage Ace with Script
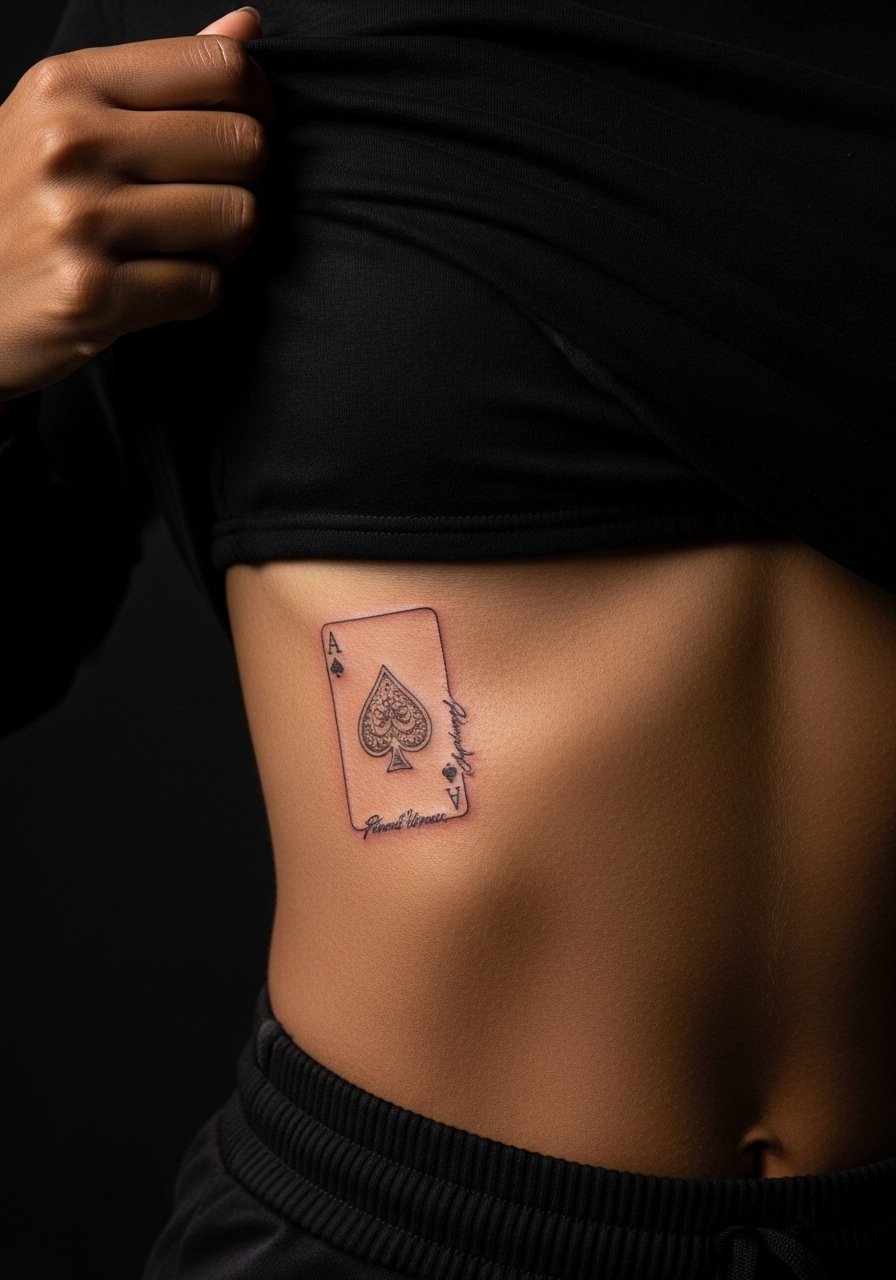
Fine line on ribs divides opinion openly. One camp says the skin there stretches and breathes too much, so thin lines blur within two years. The other camp argues that with correct needle depth, spacing, and experienced hand, fine line settles well even on the ribcage. Ask the artist which camp they fall into and show examples of healed ribs in similar scale. The session is one of the more painful experiences, so plan for breaks and a longer appointment. Wear a cropped athletic top you can lift without fuss during the session. Expect a touch-up window around year two depending on your skin and sun exposure.
Studio Day Picks
The upper-arm and ribcage pieces above need slightly different prep from the wrist and ankle work, so these picks aim to smooth session day and the first week.
-
Stencil transfer paper kit. Lets you preview the exact placement and line weight directly on skin before the needle hits, which matters for the crown and collarbone layouts above.
-
Thin protective film roll for tattoos. Useful for ankle and finger placements to protect from friction during the initial healing window.
-
Fragrance-free gentle body wash. Cleans the area without stripping pigment, helpful for the collarbone and ribcage work when showering.
-
Topical numbing cream kit. Applied per instructions before long sessions on ribs or large forearm saturation to reduce discomfort and make longer saturation passes more manageable.
-
Aquaphor healing ointment. A thin layer in the first few days helps lock in moisture for fine line pieces without suffocating the needle channels.
7. Micro-Realism Ace with Portrait Accent on Upper Arm
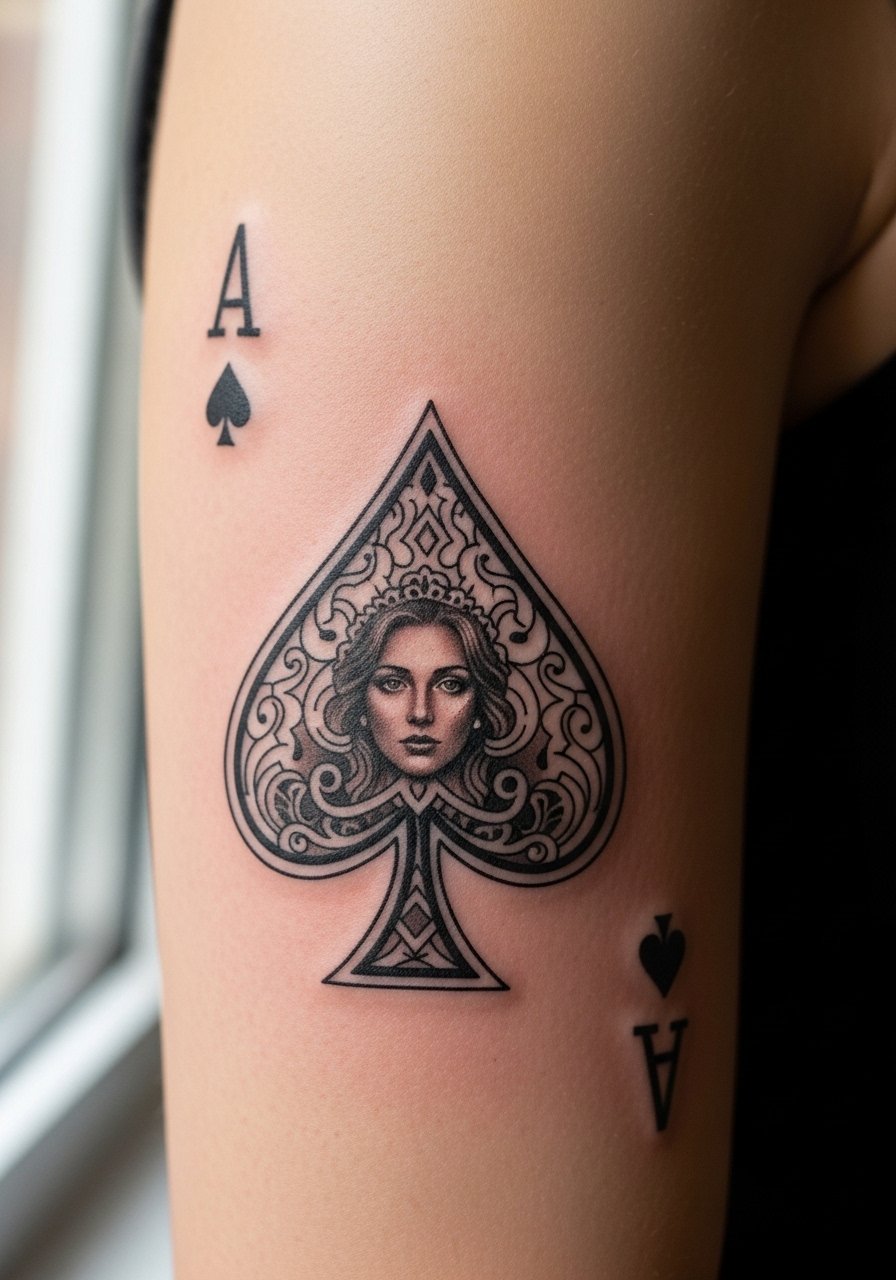
Merging a tiny portrait with an ace needs scale discipline. I tell clients to bring a high-resolution reference and to accept that microscopic facial detail will simplify in healing. The session can be lengthy because micro-realism requires slow, precise passes. A common mistake is demanding photo-level detail at too-small a size. For showing off, a short-sleeve cotton tee frames the piece well and keeps attention on the portrait without covering it. Expect touch-ups at year two for faces in small compositions.
8. Watercolor Ace with Soft Blooming Colors on Shoulder
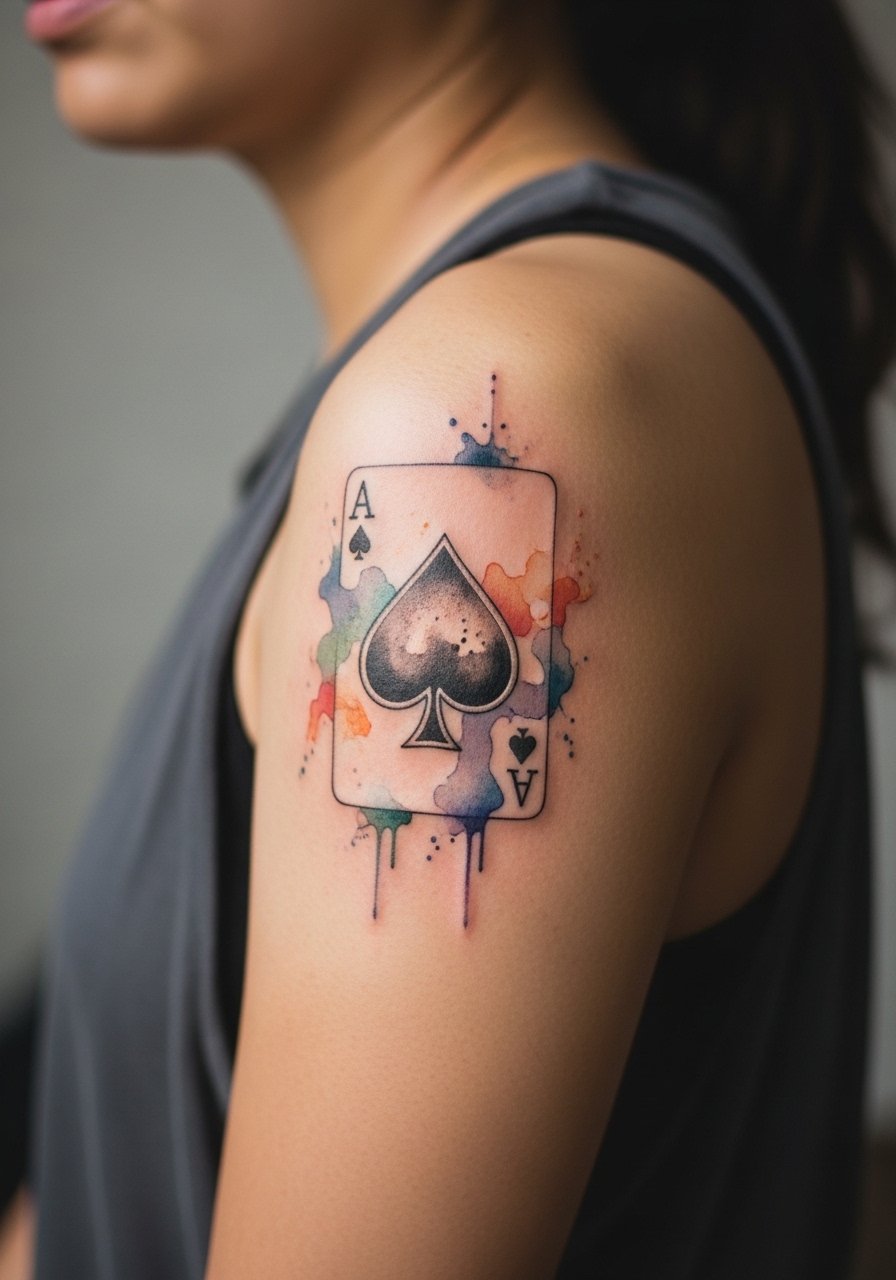
Watercolor finishes look painterly but require maintenance. The debate here is transparency versus saturation. One camp prefers subtle washes that read like skin tone layers. The other favors deeper pigments to prevent early fading. If you want the painterly effect, ask for a compromise with slightly stronger anchors around the spade. The shoulder tolerates color well and hurts moderately. For the session, wear a loose tank top you can move without rubbing the area. Watercolor pieces typically need touch-ups earlier than bold blackwork, especially on high-sun areas.
9. Dotwork Ace Mandala on the Back of the Neck
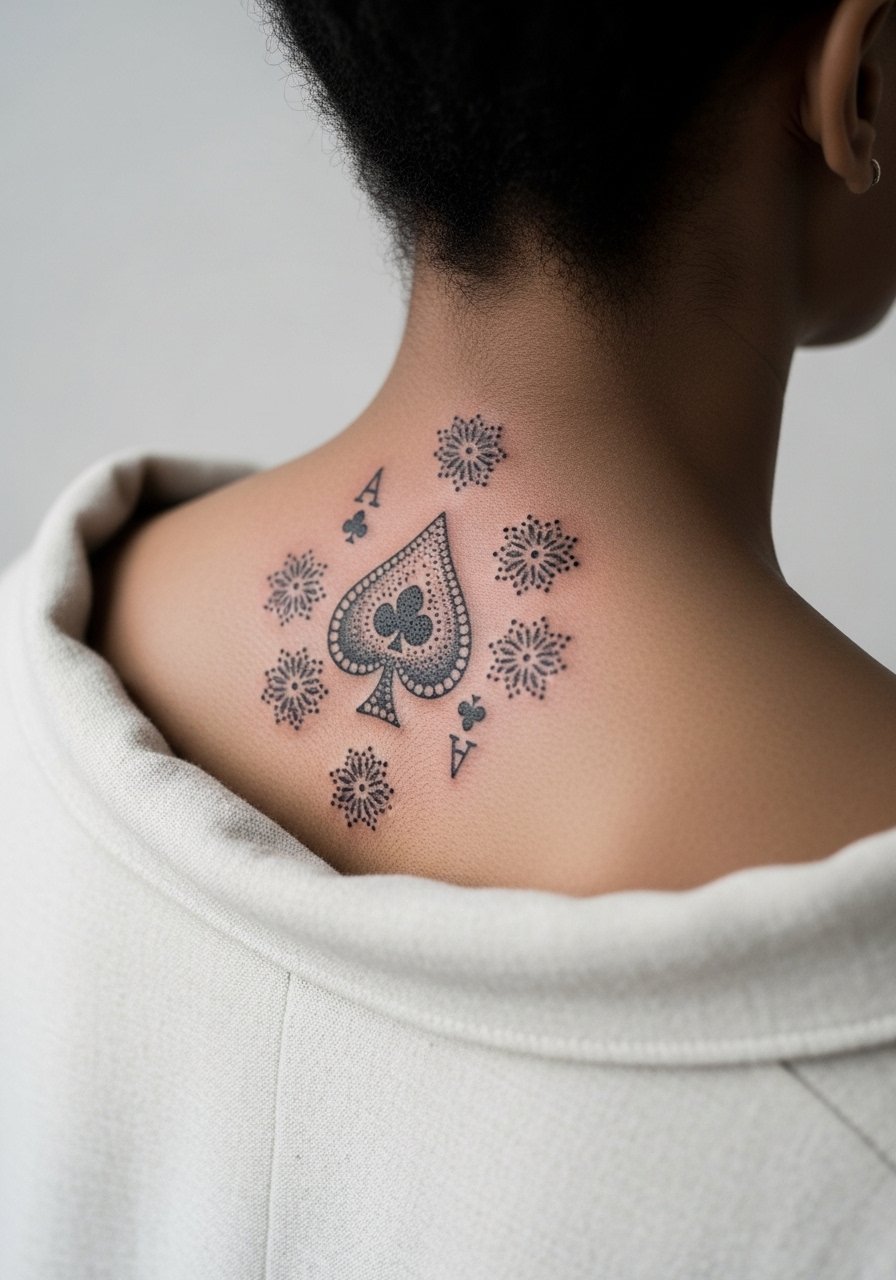
Dotwork plays to controlled repetition and aged textures well. The back of the neck is visible but discreet, so spacing is key to avoid dense shading that later pools. I advise asking for wider dot spacing near curves so the pattern breathes. The session feels stinging for short bursts and tolerable overall. A pitfall is over-compressing dots to achieve darkness, which blurs in two to three years. For showing it off, a wide-neck shirt pulled to one side keeps the nape visible without exposing too much.
10. Traditional Ace with Banner on the Upper Chest
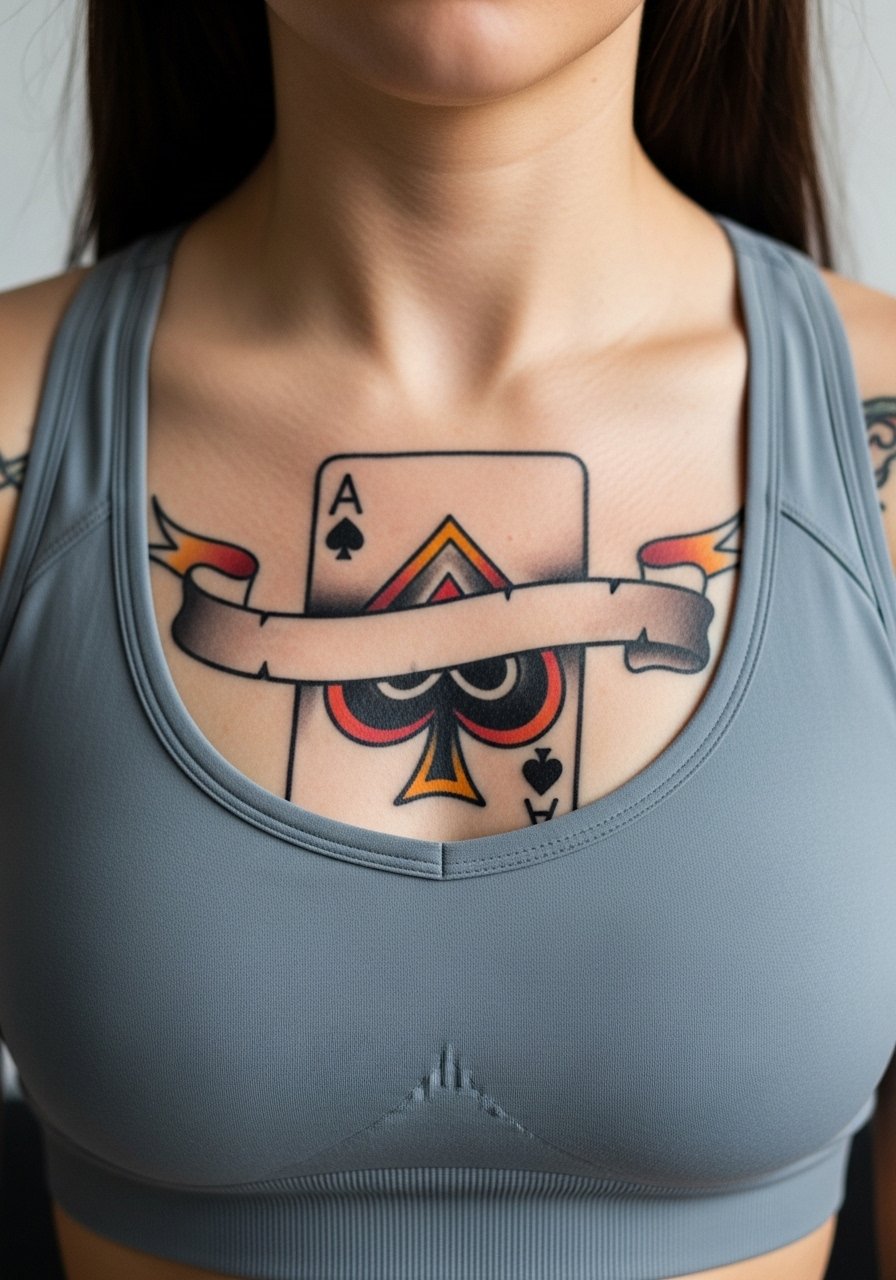
Traditional applications age predictably thanks to heavy outlines and saturation. The sternum and upper chest pack visual weight, so a banner helps anchor text or dates visually. The session is sensitive near the sternum, so plan for breaks and breathing control. A mistake is requesting tiny text inside the banner; keep lettering bold and spaced. For the session, a fitted sports bra with a low neckline gives the artist clean access while keeping you comfortable. Traditional pieces often need fewer early touch-ups than fine-line work.
11. Geometric Negative-Space Ace on the Calf
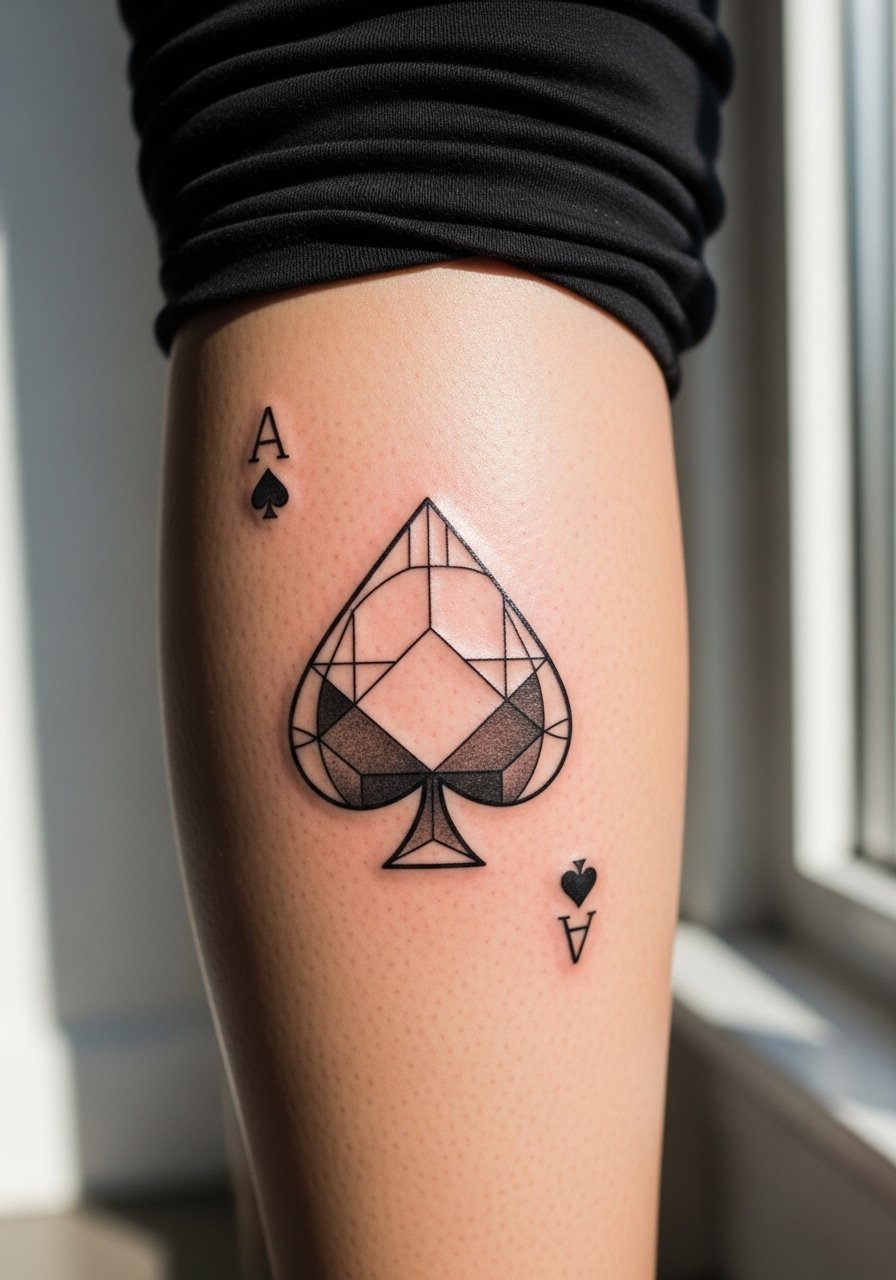
Calf placements suit geometry because there is room to breathe. Negative-space techniques keep the silhouette readable from a distance. I recommend asking for clear spacing and a test stencil to verify curvature on the calf muscle. Sessions are tolerable and allow for longer passes. One common mistake is compressing geometry to fit a smaller calf, which makes the angles look off when the leg moves. Pair with rolled-up pants or loose drawstring linen pants to show it during warm months without rubbing the area.
12. Small Ace Behind the Ear with Hairline Framing
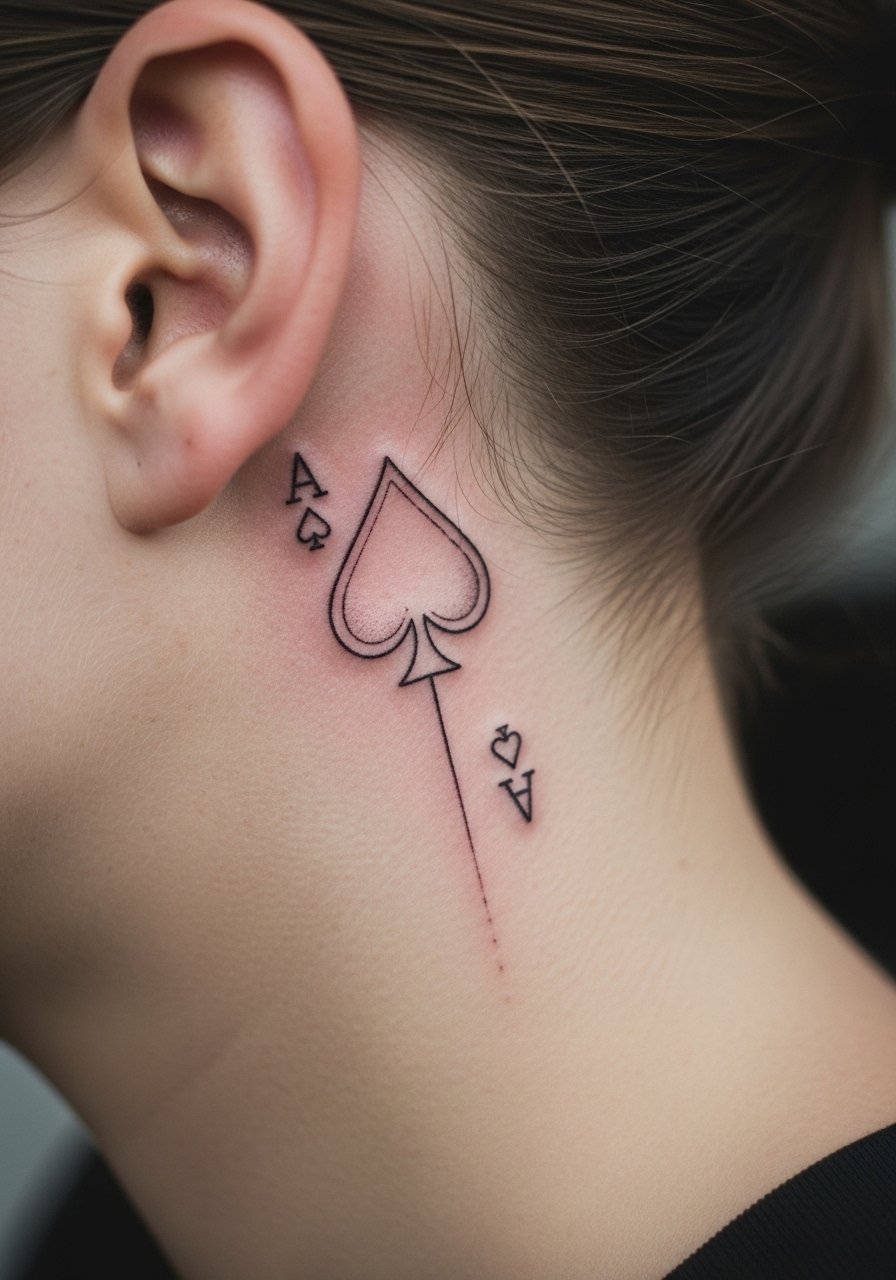
Behind-the-ear placements are tiny and intimate. Because the area sits under hair, the design often fades slower from sun but faster from oils and shampoo. Ask for a simple silhouette rather than internal ornamentation. The session is quick but sensitive. A frequent mistake is asking for too much interior detail, which becomes indistinct once healed. Note the proximity to hairlines when styling. For session comfort, pull hair back and wear a wide-neck shirt so the artist has clear access without moving your hair repeatedly.
13. Sleeve Accent Ace with Floral Fillers

Using the ace as a focal accent in a sleeve creates a narrative piece that grows with you. I tell clients to plan negative space pathways so the ace remains the center point as new work is added. The sessions are staged over multiple visits. A mistake is letting filler overwhelm the focal ace, which dilutes the visual hierarchy. For casual display, roll sleeves or wear a short-sleeve cotton tee so the ace sits naturally when you want it seen. Expect gradual touch-ups as the sleeve ages and pieces interact.
14. Tiny Ace on the Thumb
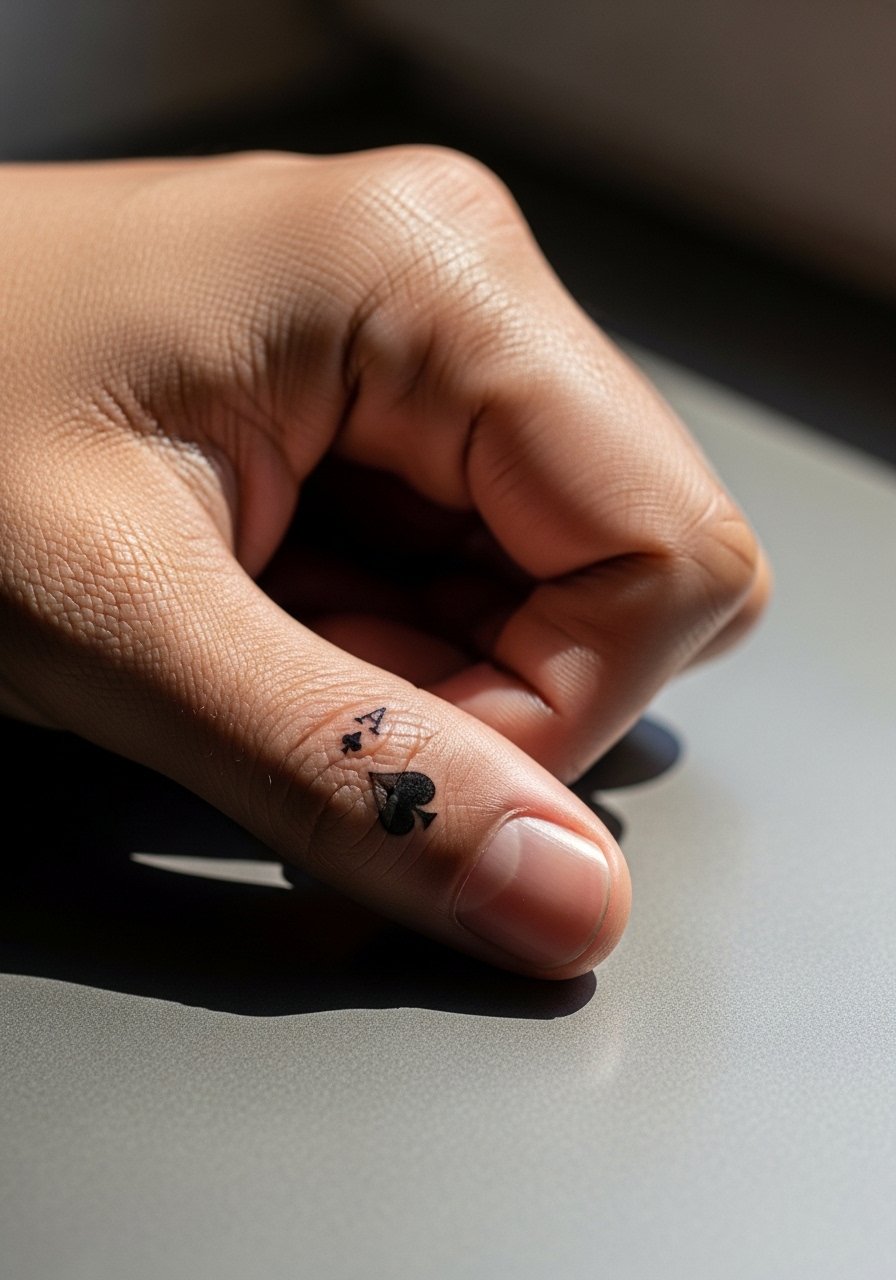
Thumb tattoos sit in one of the highest-wear zones on the body. The skin there regenerates quickly and is exposed often to friction, so expect a higher touch-up need. Ask for bolder, simplified shapes and accept that crisp corners may soften. The session is brief but awkward because of hand positioning. A common mistake is choosing ultra-fine art for that spot. For session comfort, wear a loose button-down shirt so you can roll a sleeve without tight cuffs digging into the wrist.
15. Negative-Space Ace on the Shoulder Blade

Shoulder blade placements sit well under clothing and reveal themselves on demand. Negative-space designs here breathe with movement, so plan the stencil for shoulder rotation. The session is moderate in discomfort and allows larger templates. People sometimes compress the design to fit smaller shirts which ruins the flow. For show-off looks, an open-back dress or tank displays the piece without forcing exposure. Shoulder blade ink tends to age steadily with less sun exposure than arms.
16. Minimal Collarbone Ace in Fine Line
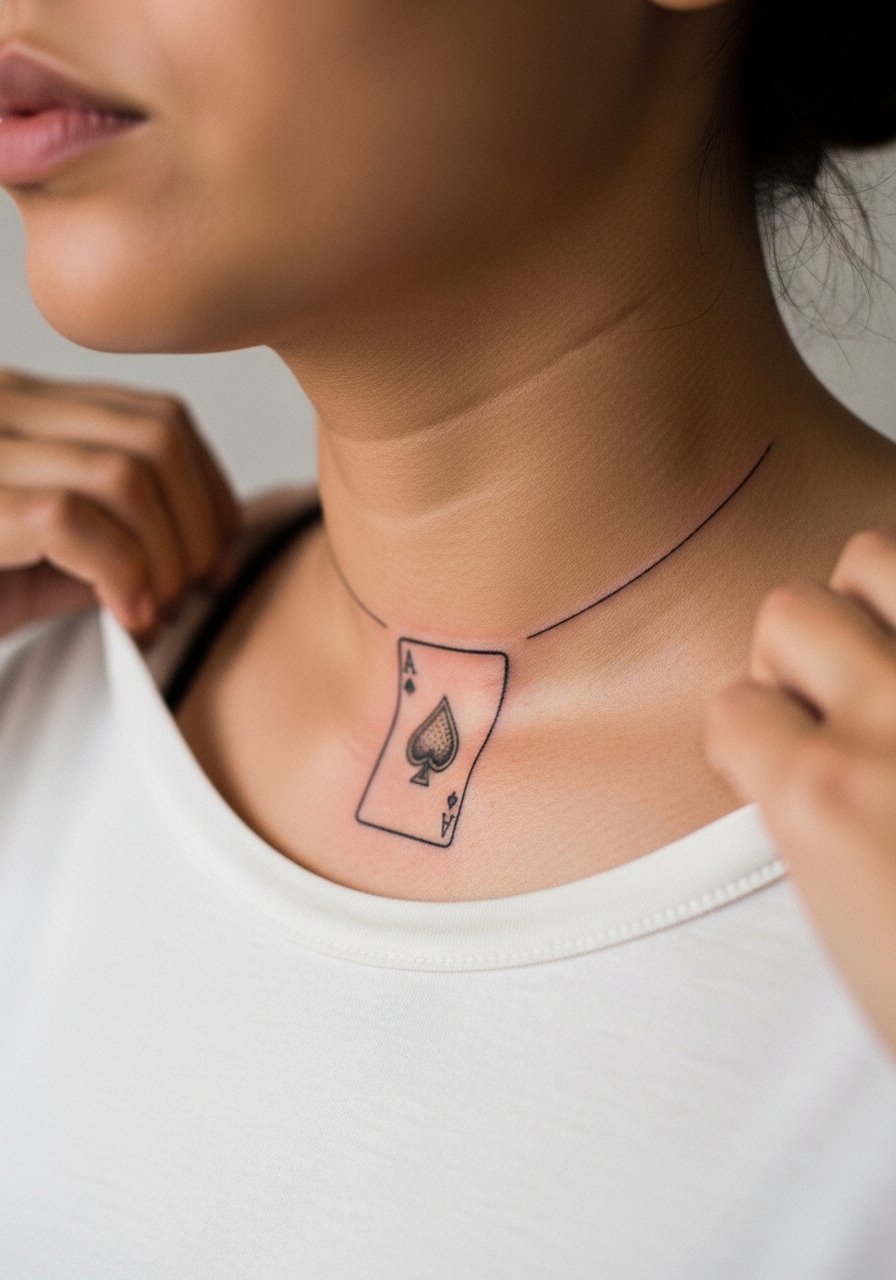
A collarbone ace in fine line reads delicate but requires spacing to avoid blurring where skin tenses. I suggest thicker delicate lines rather than hairline micro strokes so the piece keeps shape. Sessions are sensitive. A typical mistake is adding too much shading right under the bone which fills in. For jewelry pairing, a thin chain pendant necklace sits above the script or design without crowding, but avoid pendants that rest directly on top of fresh ink.
17. Sternum Ace with Decorative Chains
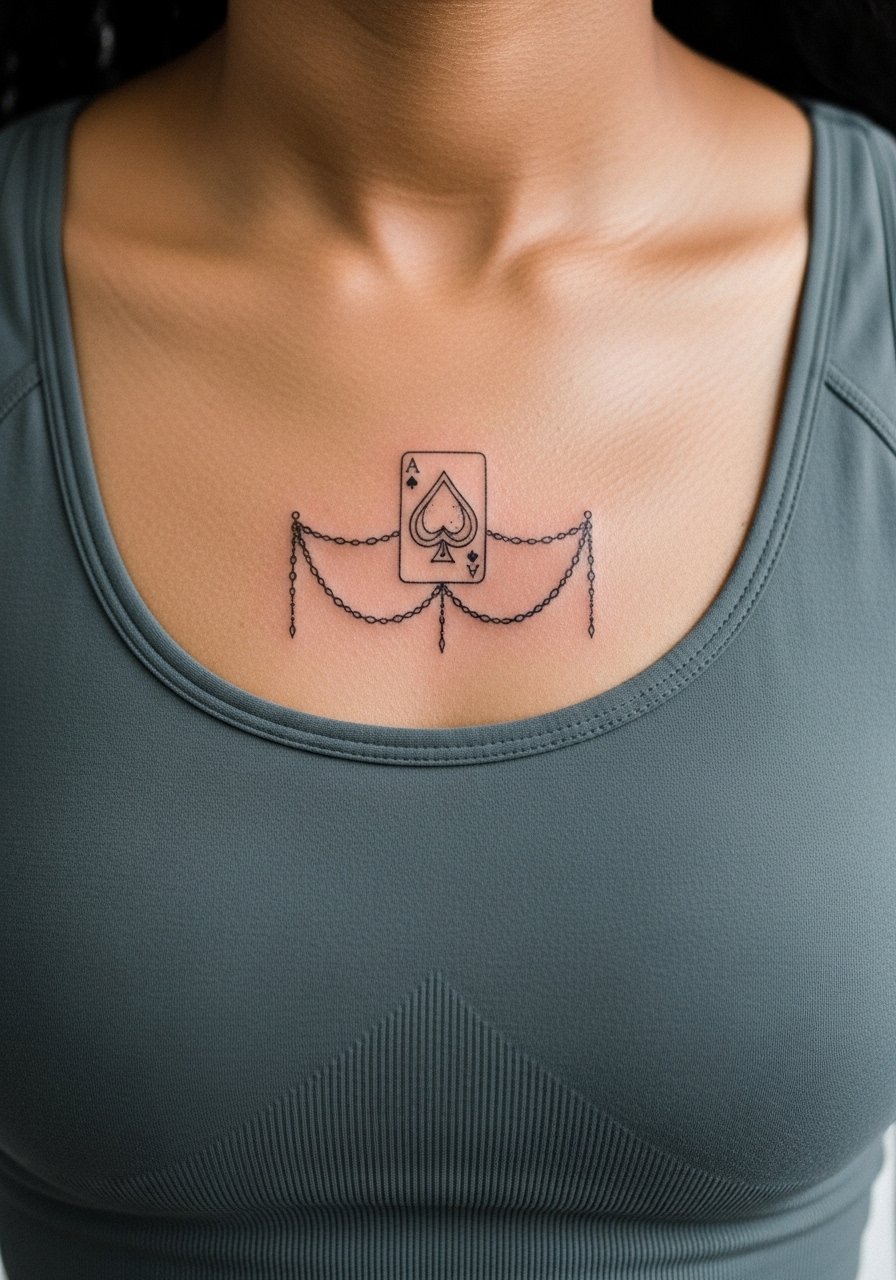
Sternum pieces look striking when centered and symmetric. The sternum area is sensitive so most artists stage this work in shorter passes and may recommend breaks. One mistake is asking for tiny chain links too close to each other, which can blur into an indistinct band. For the session, wear a strapless or fitted sports bra to make access easy without stripping. Sternum tattoos often need touch-ups to maintain crisp chain links over time.
18. Hip Ace with Floral Cascade
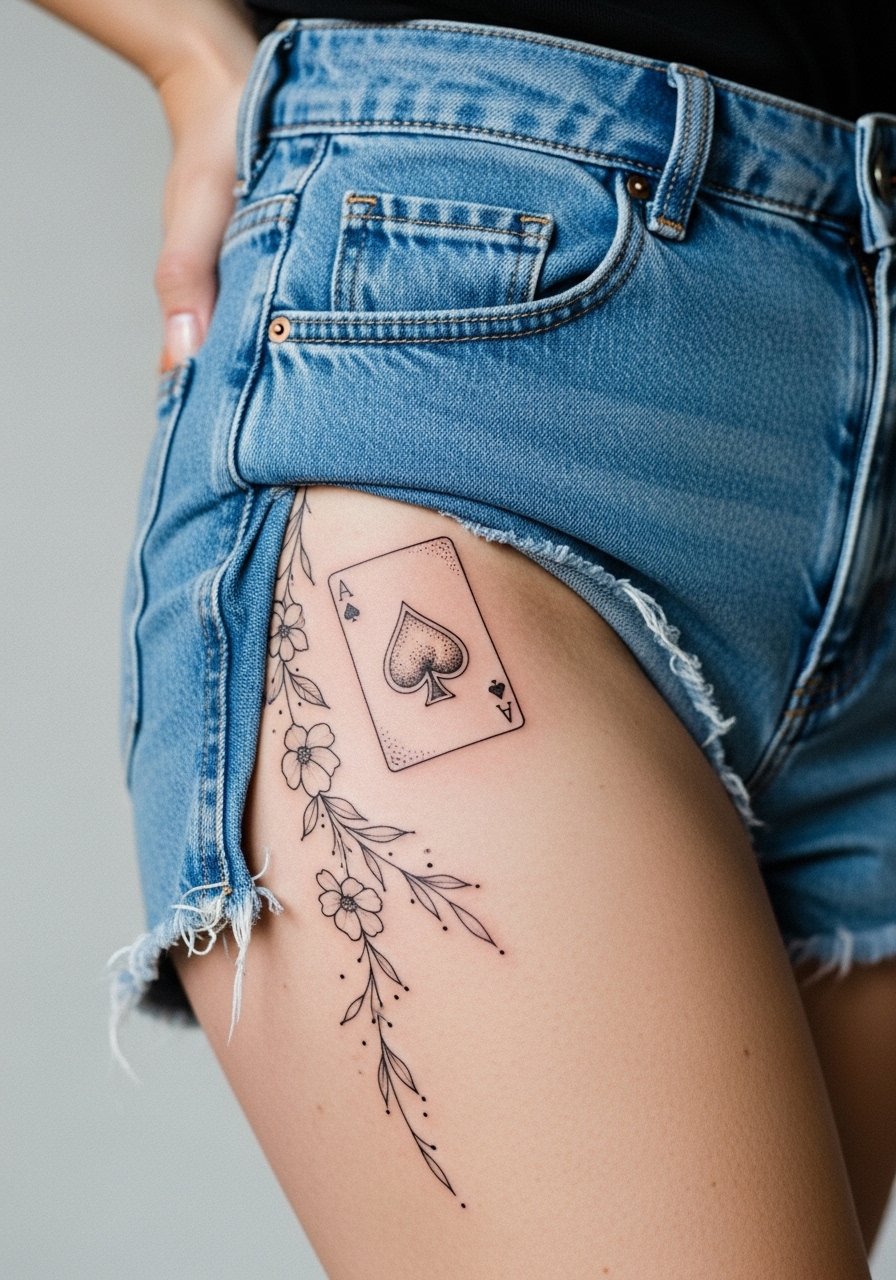
Hip and upper-thigh areas hide nicely under clothes and tolerate slightly denser detail. I recommend planning for how clothing will sit during healing, because waistbands can rub. A common mistake is placing a lower hip piece too close to tight waistbands. For session comfort and access, wear high-waisted shorts or jeans you can pull slightly down during the appointment. The area heals with low sun exposure, which helps color retention.
19. Inner Bicep Micro Ace
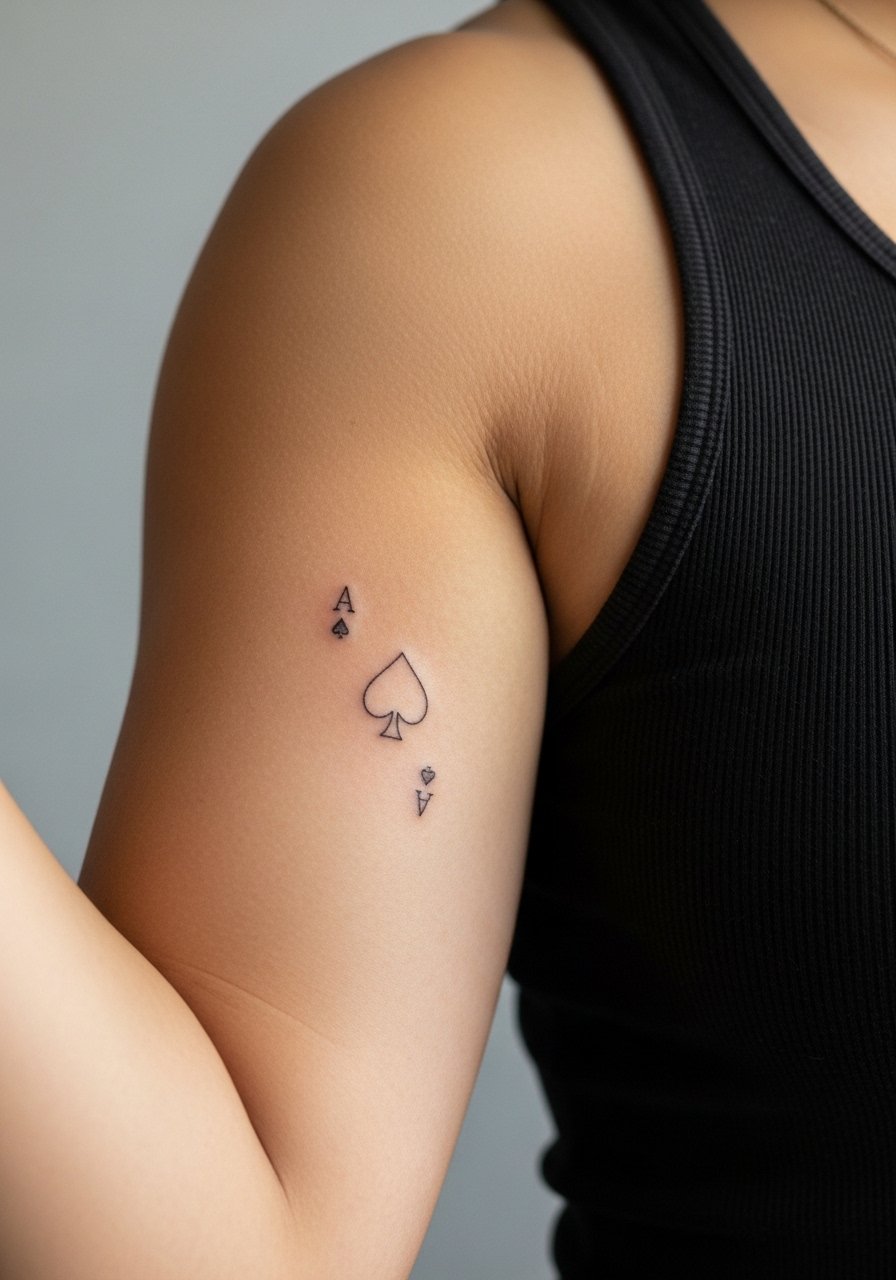
Inner bicep tattoos are intimate and age differently because the skin is softer. Expect the session to feel tender, especially during long shading passes. I usually recommend slightly heavier linework for inner arm pieces to counter softness that appears after healing. The common error is overcrowding the small zone with ornate detail. For session wear, a loose tank top allows the artist to work without compressing the area. Touch-ups at year two are common for detailed inner-arm work.
20. Hand-Edge Ace with Subtle Fill

Hand tattoos are controversial for practical reasons. One camp argues that hand and finger ink is a core form of self-expression and part of visible identity. The other camp warns these placements affect some job prospects and age faster due to constant use and washing. Name both sides to weigh the choice. If you proceed, pick simplified shapes and accept a likely touch-up cycle every year or two. During the session, the area is sharp and brief. For comfort bring a loose button-down shirt that lets the artist position your arm without digging cuffs into the wrist.
21. Bold Back-Center Ace with Ornamental Frame
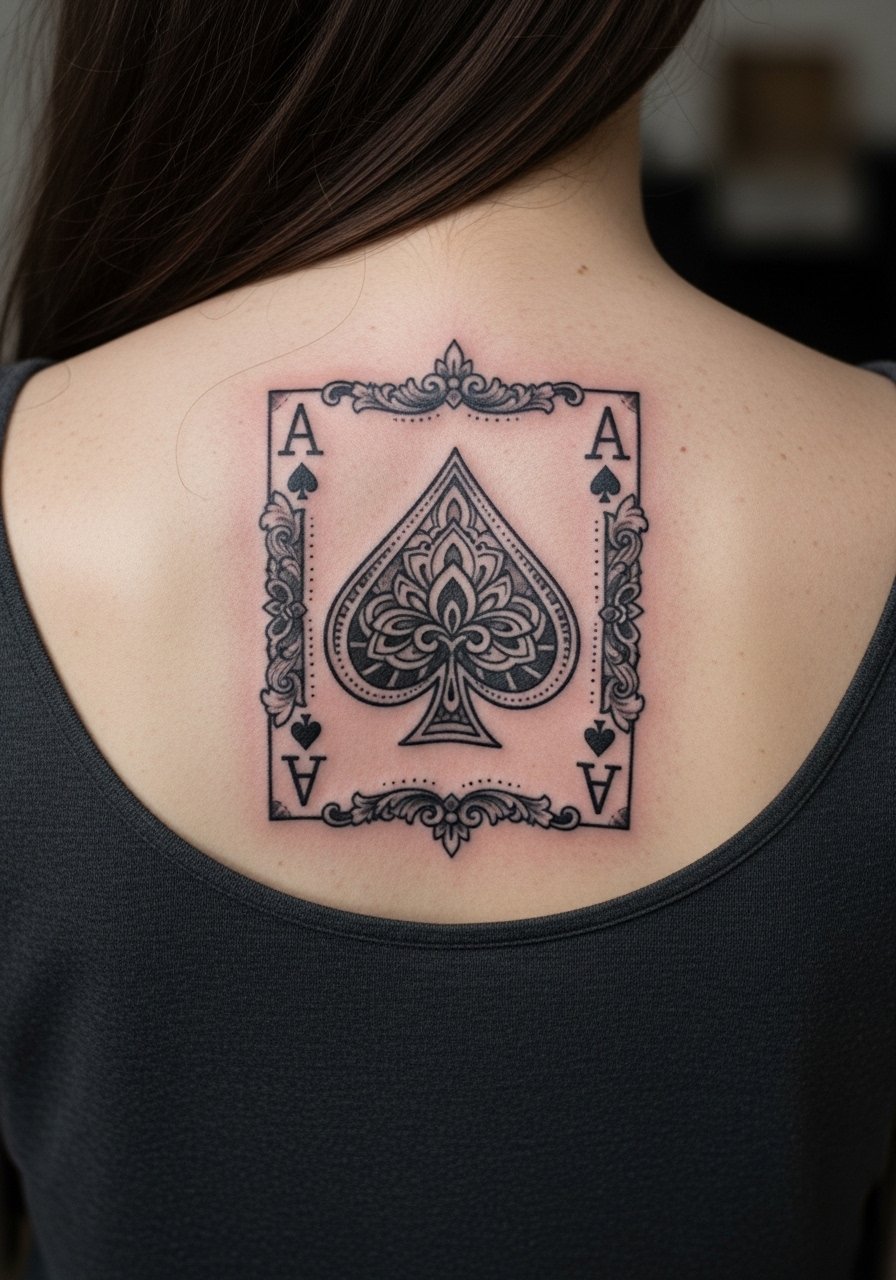
A centered upper-back ace makes a statement and gives space for ornamentation that will hold up because of lower sun exposure and thicker skin. I advise blocking the design into clear sections so future additions do not obscure the central spade. Sessions may be longer but less painful than ribs. A common mistake is overfilling small ornamental areas around the spade, which can merge over time. For showing off, an open-back top reveals the piece without full exposure. Long-term maintenance is generally lower than for hands or feet.
Frequently Asked Questions
Q: Will a fine line ace of spades fade faster than a bold blackwork ace?
A: From what I have seen, fine line pieces typically need touch-ups sooner because thinner lines soften with skin movement and sun exposure. Bold blackwork holds shape longer, but it also needs care to avoid saturation loss. Pick the style based on how much maintenance you want to do.
Q: How should I dress to make a ribcage ace session more bearable?
A: Wear a cropped athletic top or a loose button-front shirt you can lift without exposing more skin than necessary. Layers that move easily let the artist access the area and keep you comfortable during breaks.
Q: Are hand and finger aces a bad idea for work?
A: Opinions split. Some people accept visible hand ink as part of their identity. Others avoid it because certain employers still have strict policies. If your industry matters, consider placements that cover easily or go for areas that are visible only on demand.
Q: How long until my small ankle or finger ace needs a touch-up?
A: Expect the highest touch-up probability in the first one to two years for high-friction spots like fingers and ankles. The exact timeline depends on your daily routines, sun exposure, and how well the stencil and line weight were planned for that placement.
Q: Can a crowned ace or ornate chest piece be adapted if I gain or lose weight?
A: Yes, but planning helps. Ask your artist to keep critical lines away from areas that stretch with body changes. Using slightly more spacing and avoiding ultra-dense detail near folds makes the design more forgiving over time.
