
Fine line work and thick black saturation are both trending in saved boards, yet they behave very differently once healed. The pieces that still read crisp after three to five years usually matched style to placement and skin tone from the start. If you want cardiac anatomy motifs that look deliberate at year five, plan sizing, spacing, and clothing choices before you sit down. The first idea below shows the kind of forearm piece that translates best in real life.
1. Fine-Line Ventricular Wrist Piece
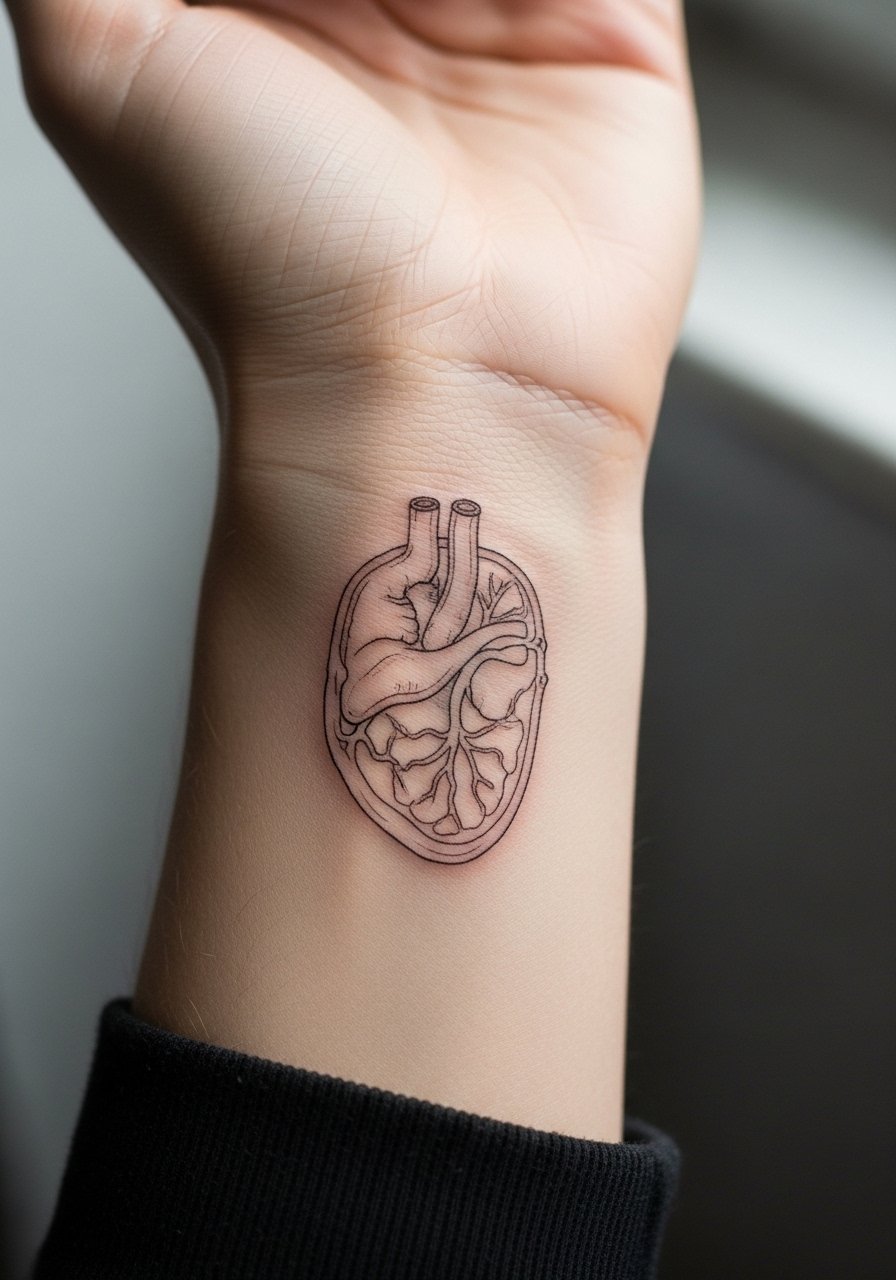
I've seen delicate ventricle outlines on wrists that look like elegant jewelry when done with slightly heavier linework than the photo reference. Fair warning, the wrist is a high-motion zone and fine line there can fade into a softer look by year two. Tell your artist you want slightly more spacing between veins and ask for subtle contrast rather than whisper-thin strokes. Pain is low to moderate and the session often fits into a single short appointment. For showing it off, pair the piece with a slim leather watch on the opposite wrist so the linework reads like an intentional accessory.
2. Neo-Traditional Heart Wrapped in Thorned Roses, Outer Forearm
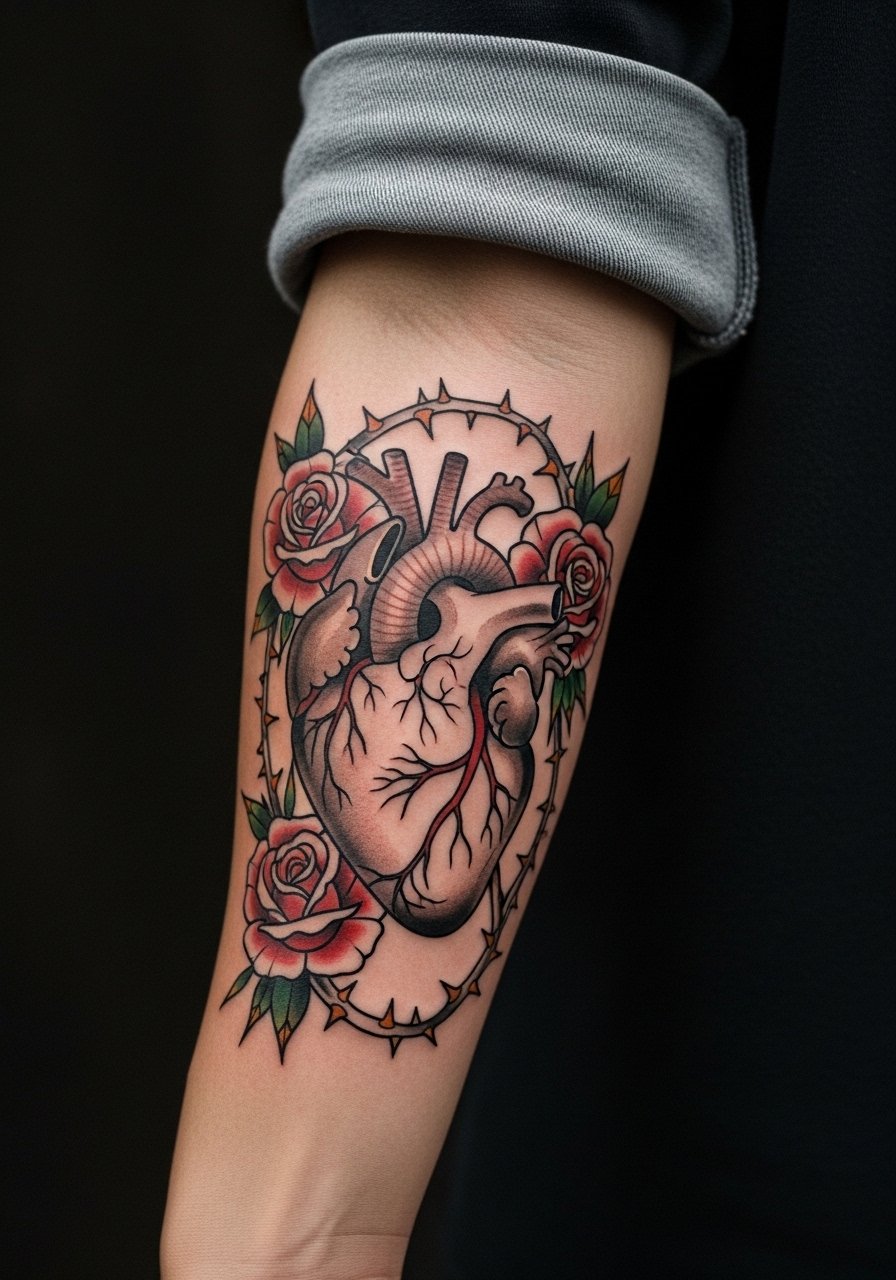
This version leans into bold outlines and color accents, which helps the piece age more predictably than ultra-fine realism. Expect two sessions for full saturation and shading. In consultation, specify that the roses receive the brightest color while the central cardiac anatomy remains in black and gray so the symbolism stays legible as colors soften. A common mistake is asking for too small a rose, which muddies with time. For daytime wear, rolled cuffs and a chambray button shirt frame the outer forearm without competing with the piece.
3. Blackwork Heart with Geometric Overlays, Upper Arm
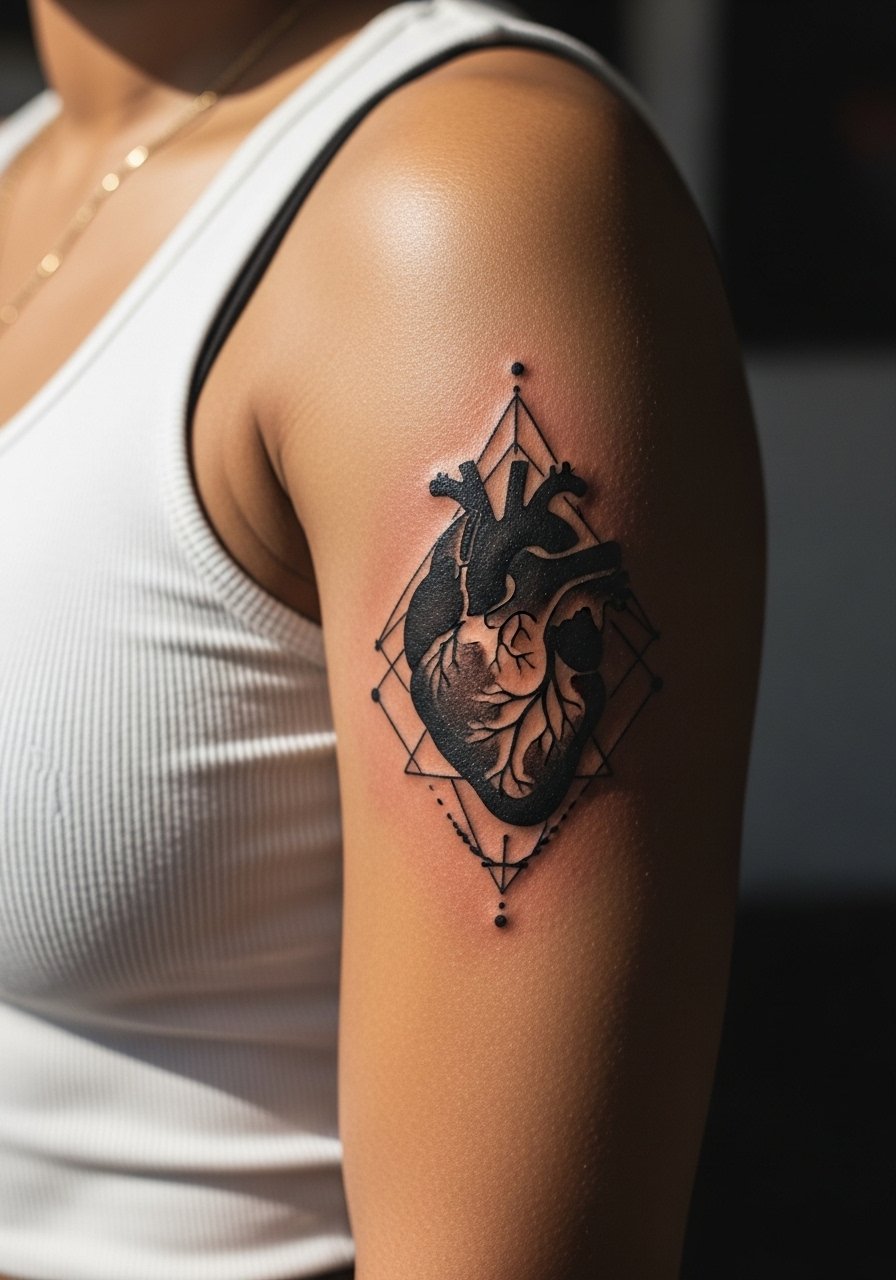
Blackwork is forgiving on darker skin tones because saturation reads clearly for years. This upper-arm option uses heavy fill to create contrast and geometric negative space to prevent the block of black from looking flat. Expect two to three sessions and moderate discomfort under the machine. A real mistake is placing too many tiny geometric details inside an all-black field. For sessions and daily wear, a sleeveless muscle tank keeps the area accessible while letting the piece read as a bold arm statement.
4. Minimal Outline Collarbone Accent with Subtle Veins
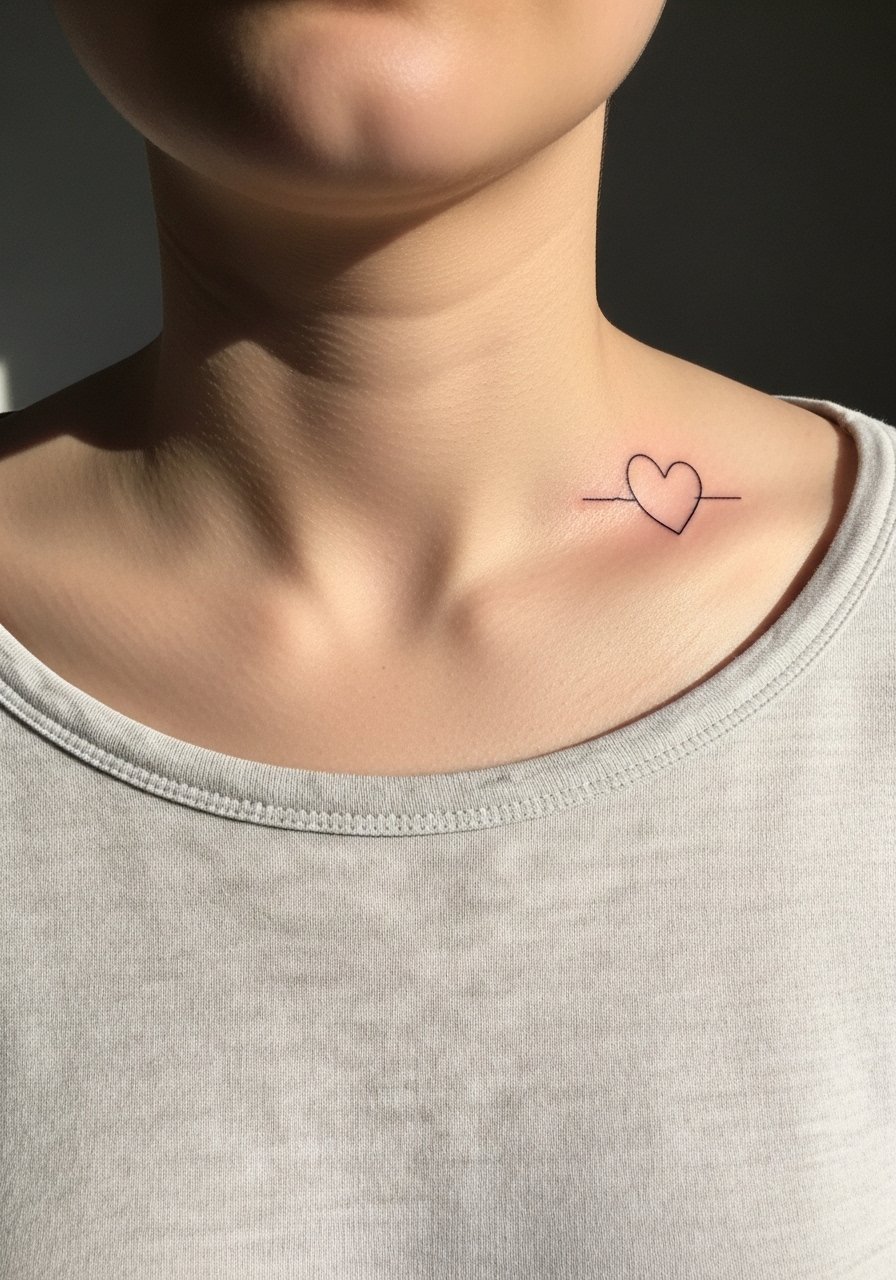
Collarbone placements demand careful sizing because the area moves a lot with breathing and posture. The minimalist outline reads delicate at first, but thin lines placed too close to the bone can blur or fade into faint marks. When you consult, ask for slightly increased line weight over the reference and for the veins to carry tiny open spaces so they do not merge later. Expect a short, single-session appointment and a moderate pain level. For showing it off, an off shoulder blouse highlights the collarbone without overshadowing the piece.
5. Watercolor Cardiac Burst on Ribcage
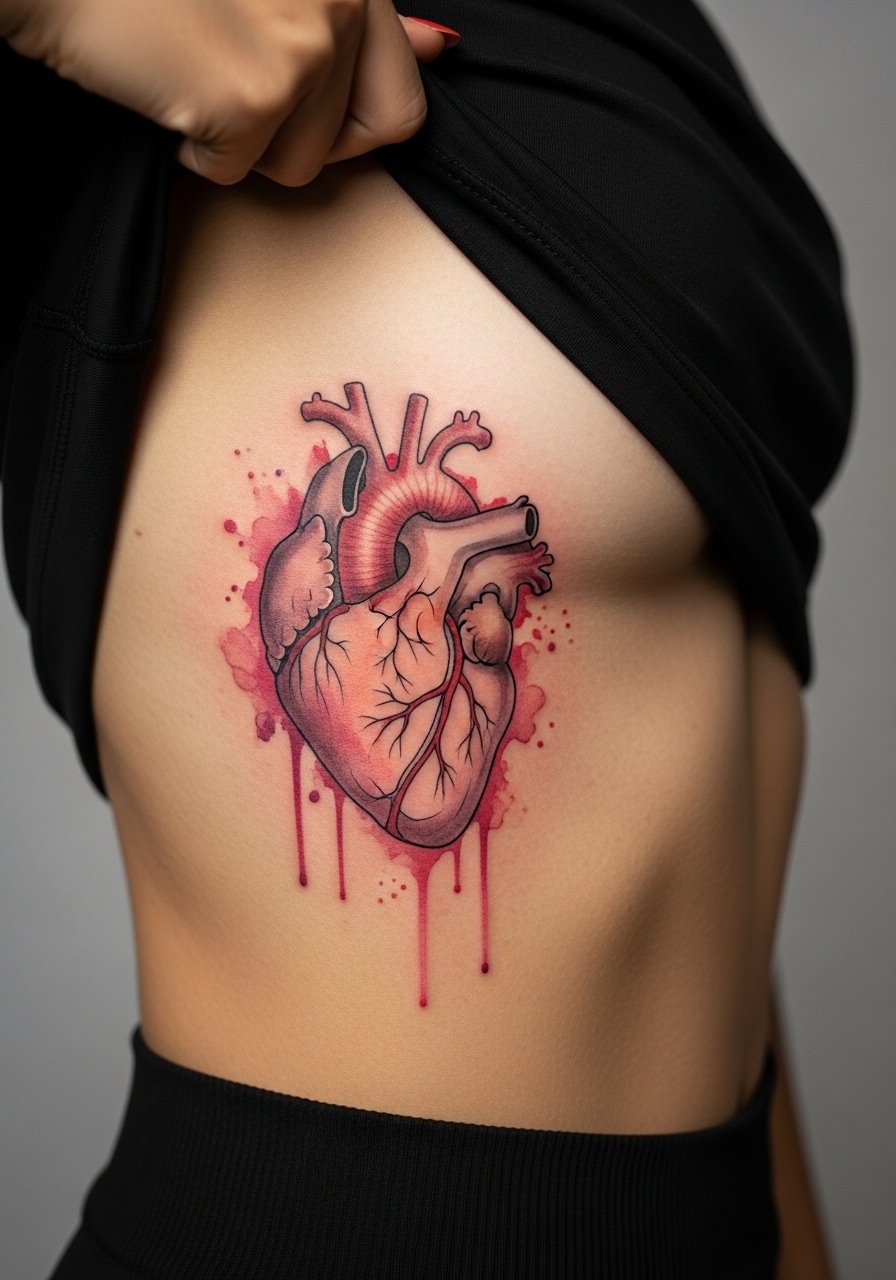
Ribcage sessions are painful for many people, often rated six to eight out of ten. That discomfort is part of the trade-off for a wide canvas that lets watercolor flow away from the outline. The aging risk here is color fading into patchy gray if sun protection is lax. A common mistake is asking for super-saturated gradients without budgeting for a second session to refresh color. If you want this look but worry about pain, discuss numbing options and break the work into two sittings. For the session, wear a strapless crop top so the artist can access the side torso cleanly.
6. Micro-Realism Aortic Arch, Inner Bicep
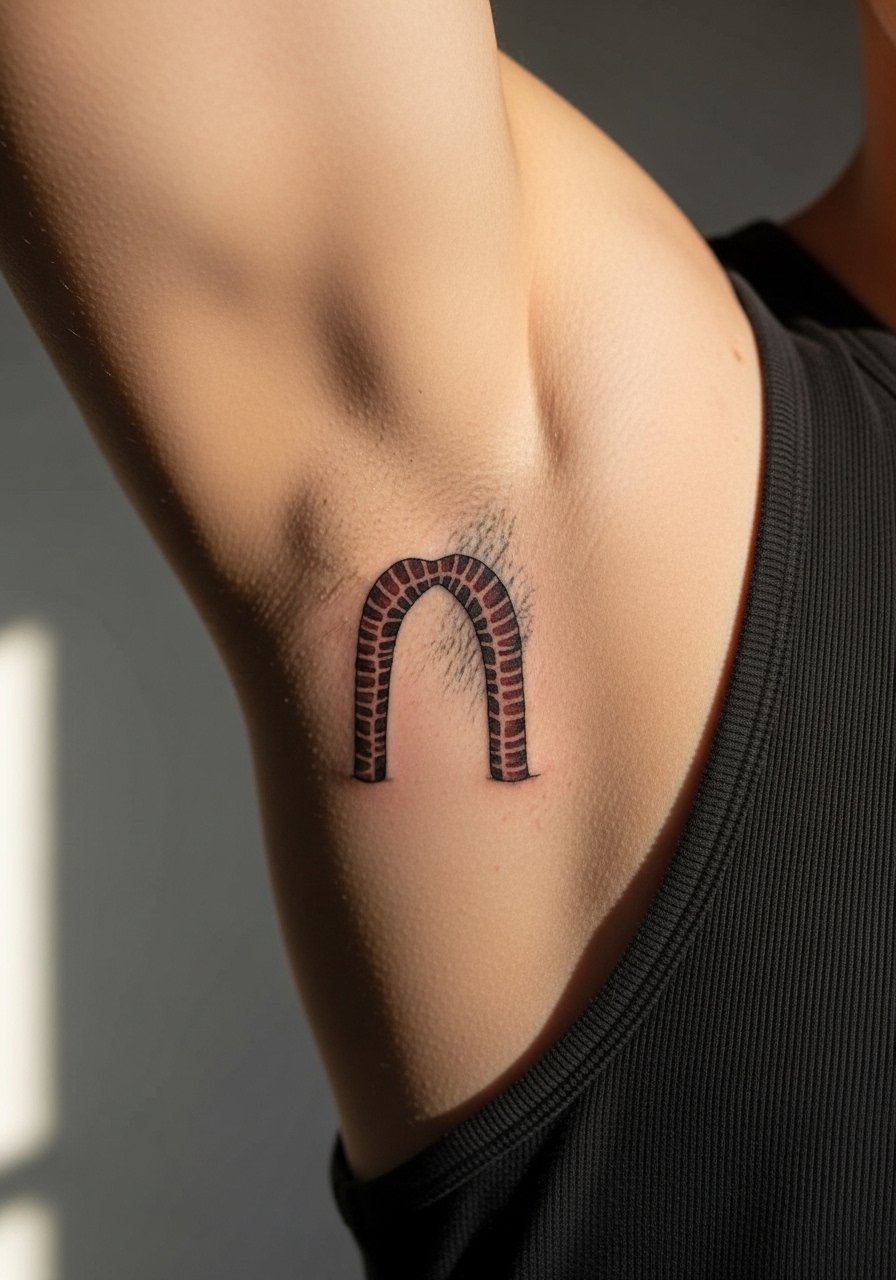
Micro-realism demands precision and time. Three short sessions are common for pulsed grayscale detail like valves and the aortic arch. The inner bicep is a forgiving surface for detail, but it is also an area that can blur if the lines are drawn too shallow. A common mistake is asking for extremely tiny valves without allowing the artist to enlarge slightly for long-term clarity. The session feels tender when the arm is stretched, and touch-ups may be needed at year two or three. For showing and session ease, a loose button-down shirt you can pull aside gives the artist clear access.
Studio Day Picks
These first six pieces include a mix of wrist, forearm, ribcage, and inner-arm sessions, so a few targeted items smooth the appointment and early healing.
-
Stencil transfer paper kit. Lets you preview exact placement and lineweight on skin before the needle touches down, especially useful for the wrist and collarbone pieces above.
-
Topical numbing cream. Applied 45 minutes before can make long ribcage or inner-bicep sessions far more manageable without dulling fine detail.
-
Thin protective film roll. Keeps delicate wrist and finger work clean during the first week when friction from daily tasks is highest.
-
Fragrance-free gentle body wash. Cleanses healing areas like the ribcage without irritating the pigments that fine line pieces depend on.
-
Aquaphor healing ointment. A thin layer during the first days helps protect fine line work without clogging needle channels.
7. Black and Gray Muscular Fibers on Upper Back
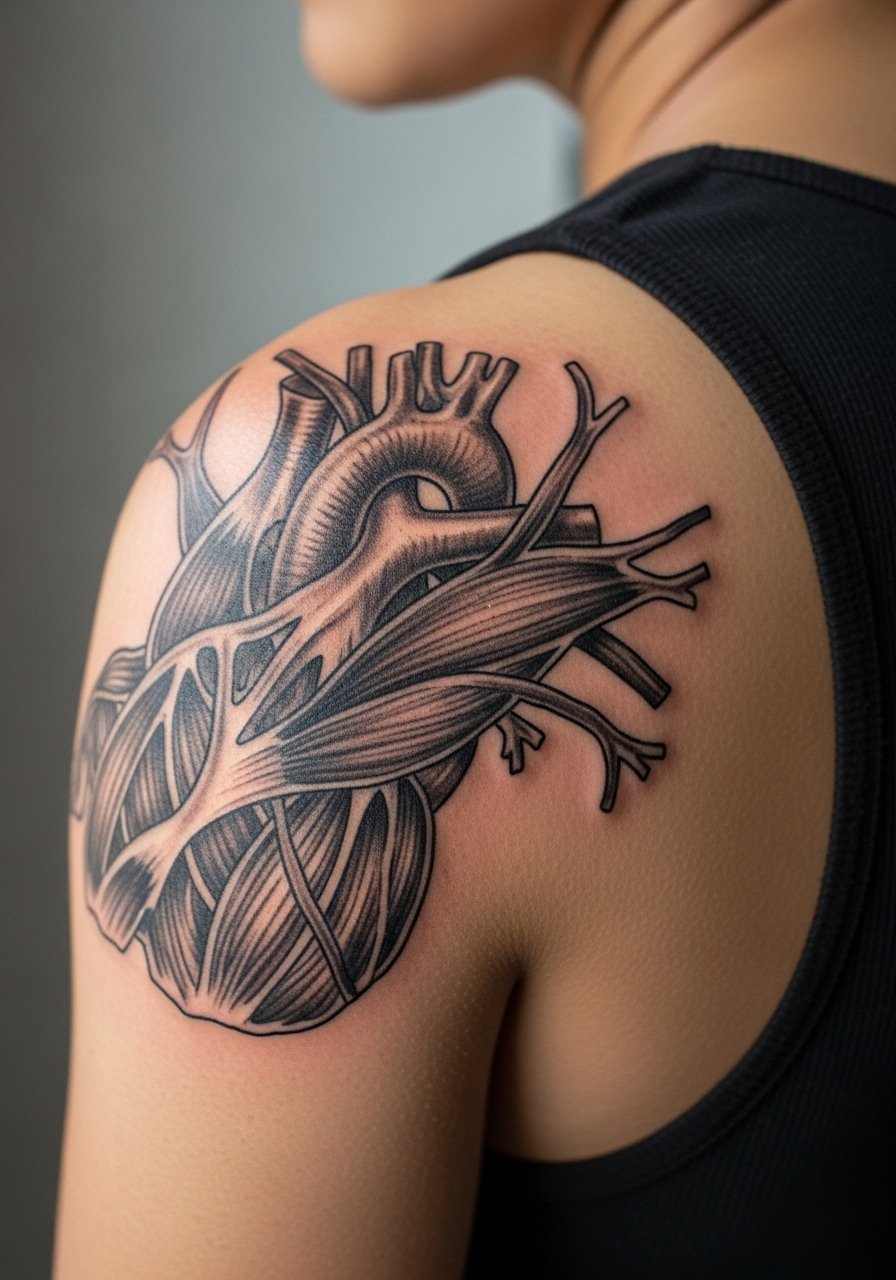
A shoulder-blade canvas lets artists build layered muscle fibers with deep gradients. Expect two sessions for a 4-5 inch piece. A mistake I see often is asking for too much tiny stipple in dense areas, which can merge into gray in a few years. For longevity, have your artist focus on contrast and broad texture rather than minute texture everywhere. This placement is easy to show with an open-back top and the session is less painful than ribs. For evening wear, a backless halter top frames the area without distraction.
8. Ornamental Dotwork Mandala Framing the Cardiac Figure, Shoulder Blade
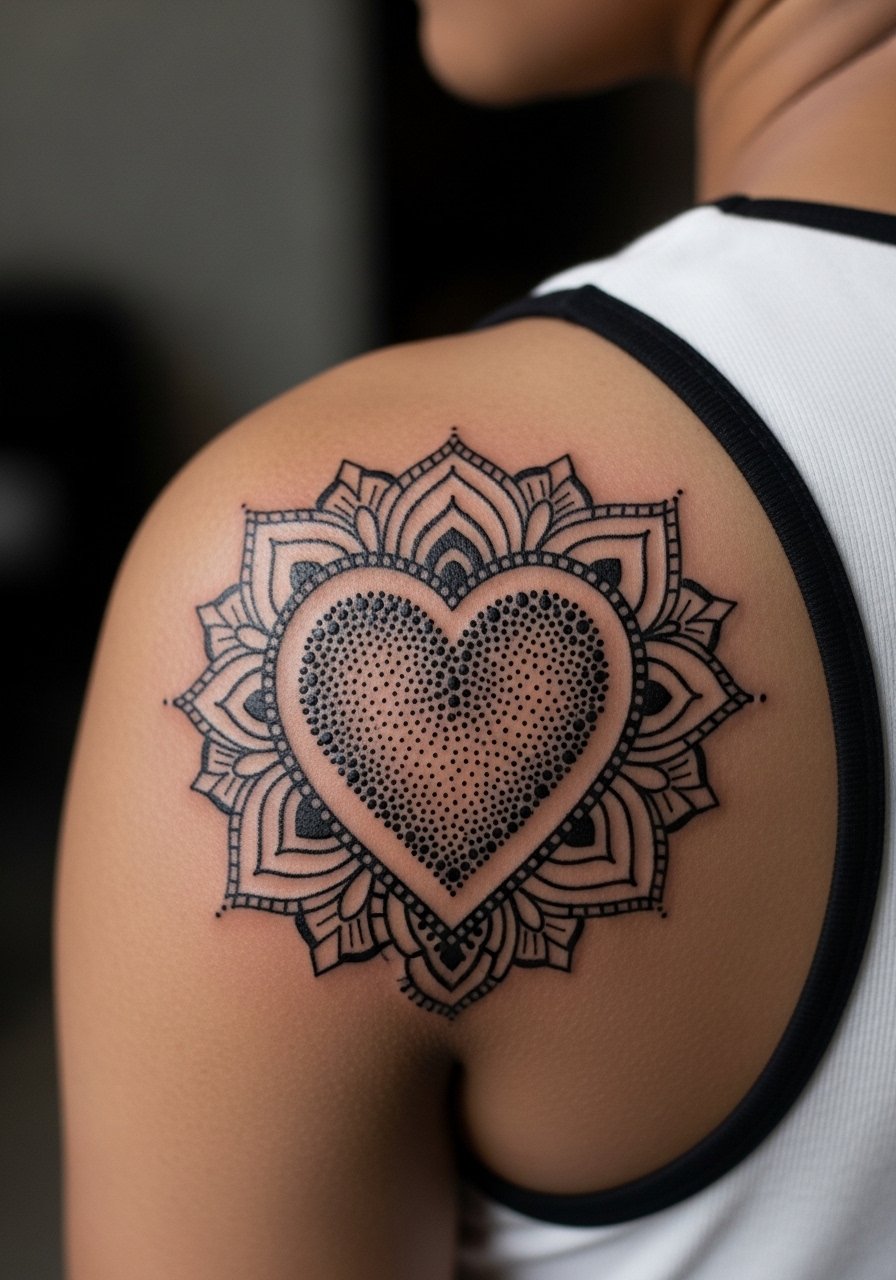
Dotwork and mandala framing add spiritual depth and create breathing room around the cardiac anatomy, which helps the central motif stay legible. Dotwork relies on spacing and predictable dot size. The common error is packing dots too tightly in the center, which creates a blocked look with time. Two sessions are typical for a 4-5 inch composition. If the dots read too faint on darker skin, ask the artist to increase saturation slightly. For session wear, a loose tank is best and a minimalist back chain works well for show-off moments.
9. Traditional Dagger Pierced Heart, Calf Placement
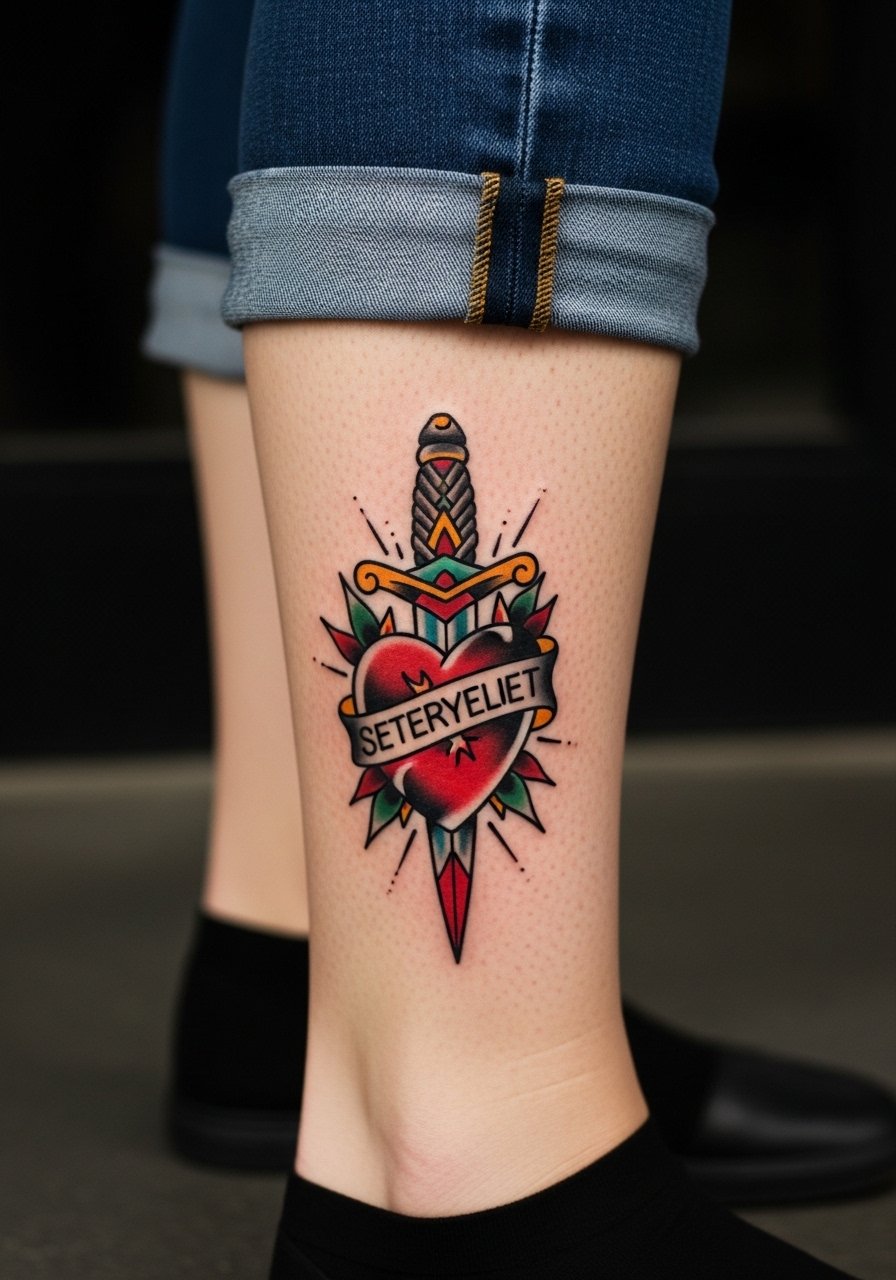
Traditional saturation and thick outlines age predictably on the calf because weight and sun exposure are moderate. This single-session option makes a bold statement and usually hurts less than rib work. The main mistake is shrinking a classic flash down too small, which loses the bold silhouette that gives it longevity. For daily looks, rolled slim jeans or a midi skirt paired with ankle boots peek at the calf without hiding it.
10. Ignorant-Style Sketchy Thigh Piece
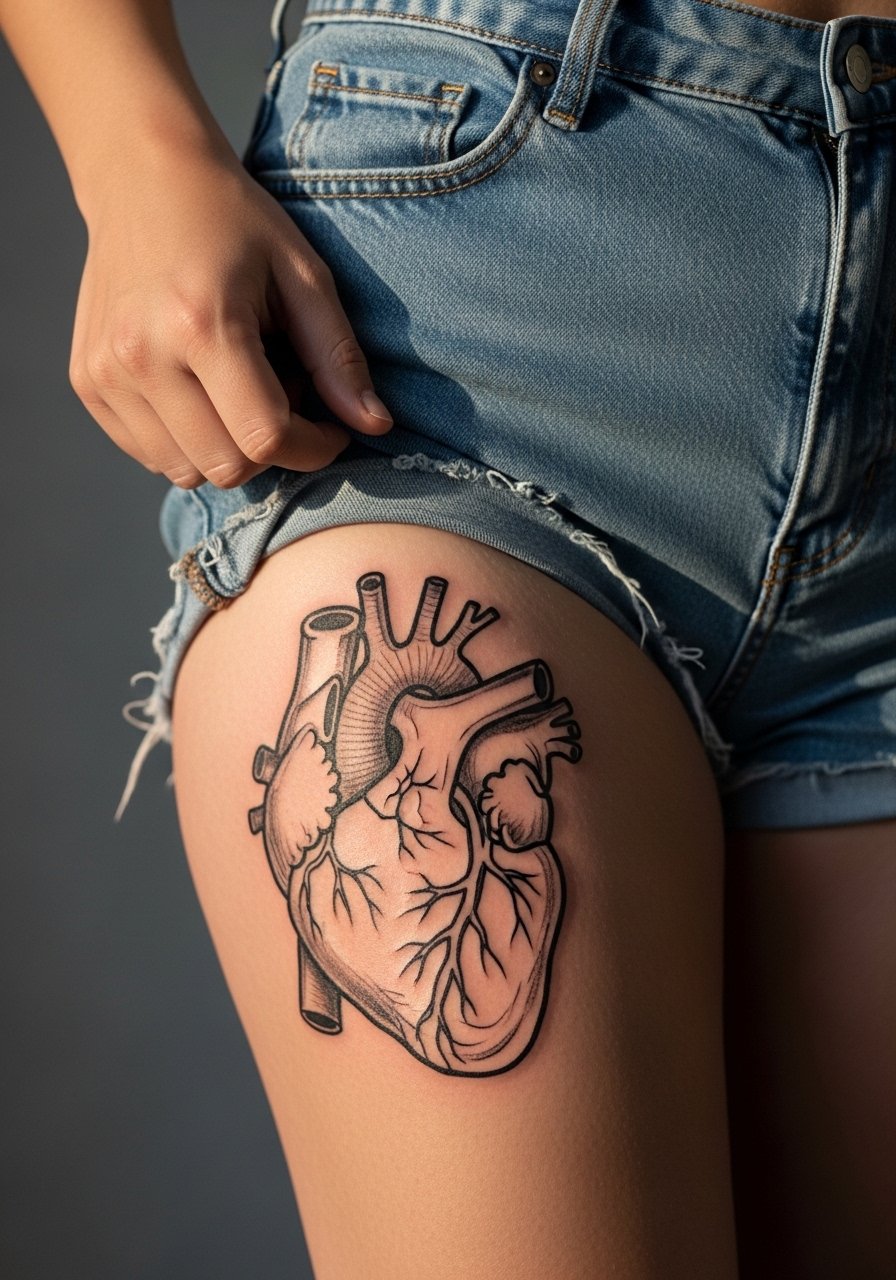
Thigh placements let artists go large and rough, which complements the ignorant style's raw textures. Expect two sessions for heavy blackwork and shading. The biggest mistake is trying to compress sketchy textures into a small, dense area; they need room. Thighs are forgiving with weight fluctuations but still avoid overly tight clothing during healing. For showing it off, high waist denim shorts or a slit dress frames the area nicely.
11. Fine-Line ECG Integration at the Ankle
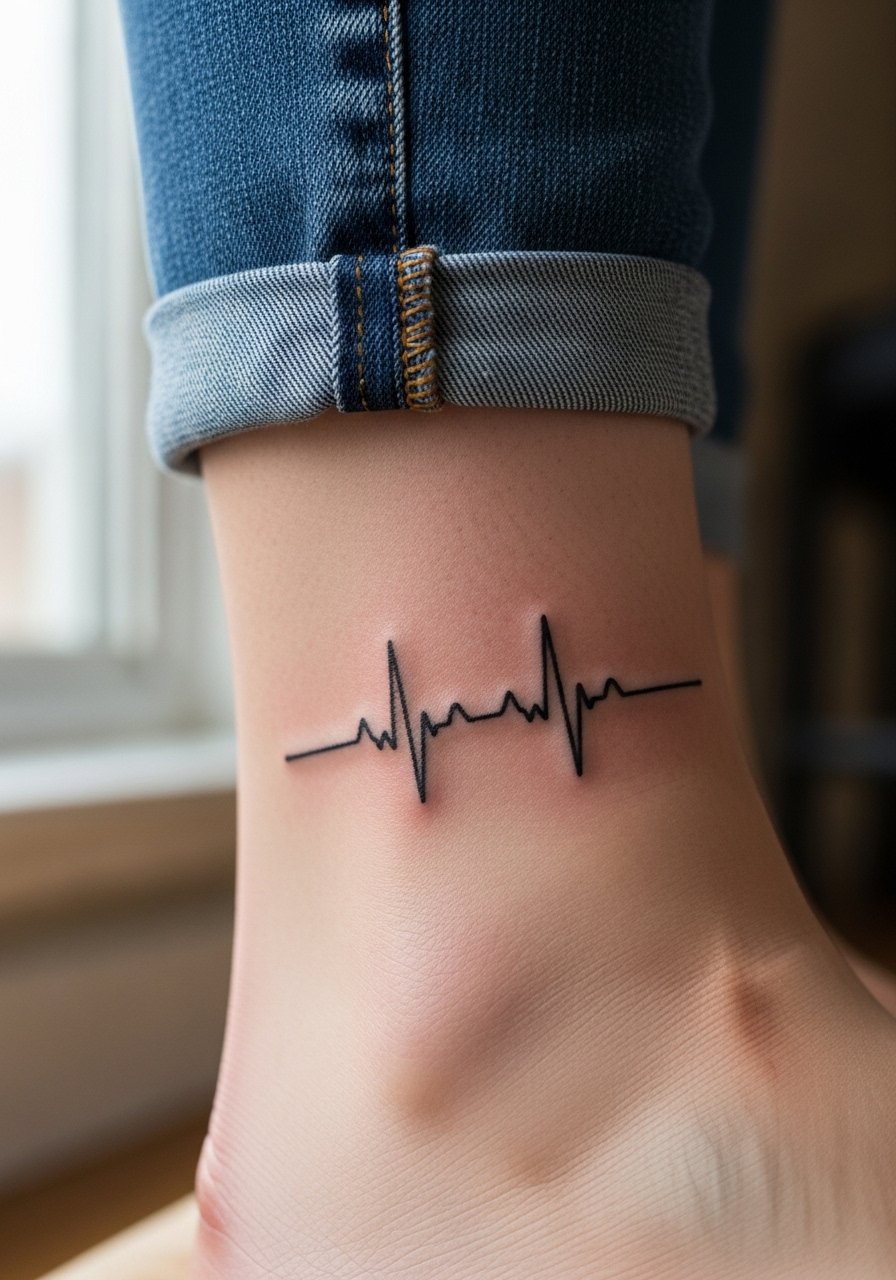
The ankle is low-visibility and high-friction, which makes fine line ECG pieces a delicate choice. Expect a single short session and plan for a touch-up at year two. A common mistake is placing the ECG too close to bone where the line loses saturation quickly. Ask for slightly bolder linework in the ECG segments and avoid wrapping too tightly around the ankle. For casual wear, roll your jeans and pair with simple sandals to highlight the piece.
12. Floral Veins Neo-Traditional, Inner Thigh
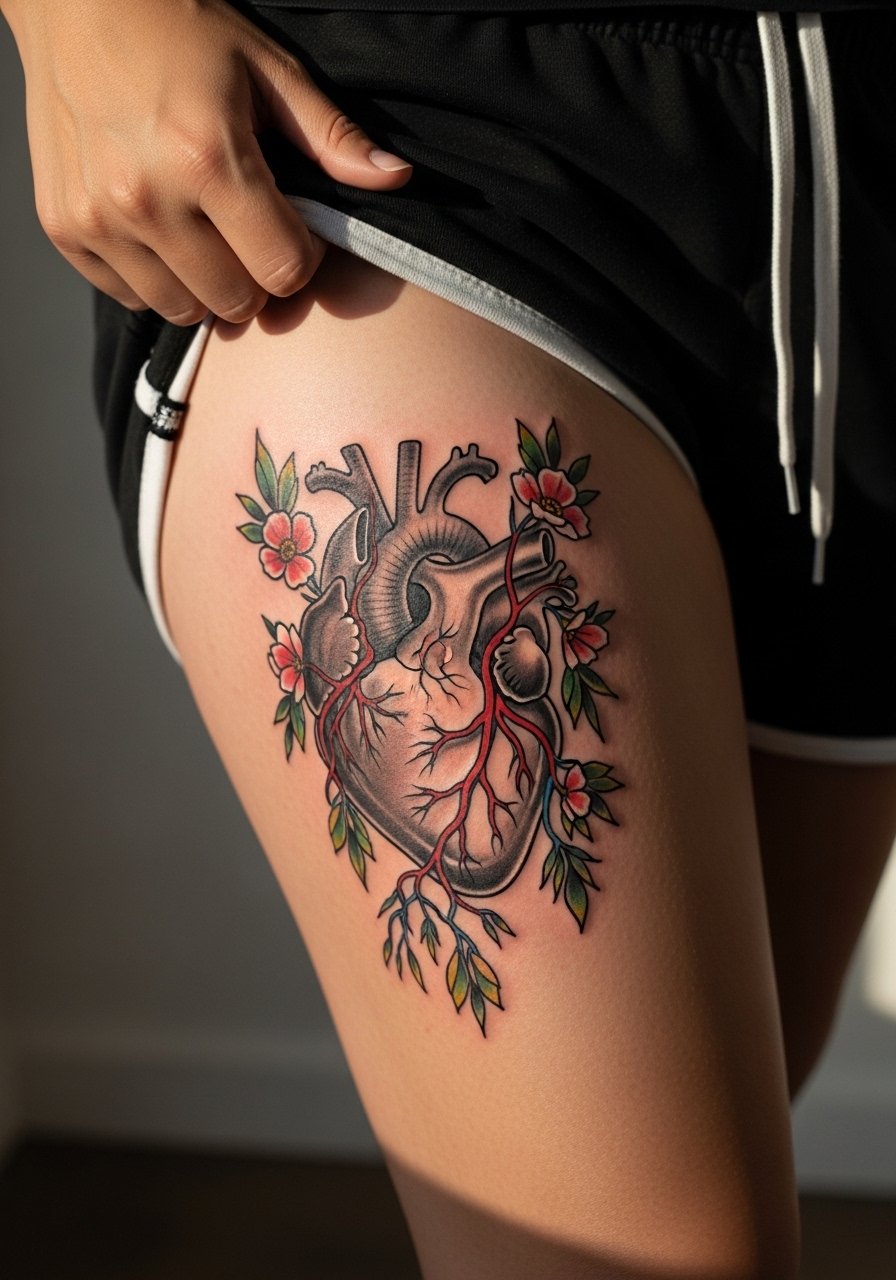
Inner-thigh pieces are intimate and heal differently because of friction and moisture. For this neo-traditional mix, budget two sessions so color veins can be layered. The common error is placing too much bright color flush to areas that rub from clothing; that speeds fading. Ask your artist for placement slightly toward the outer thigh to balance visibility and longevity. Session wear should be loose shorts, which also makes aftercare easier.
13. Micro-Realism Valves for Medical Tributes, Sternum Area
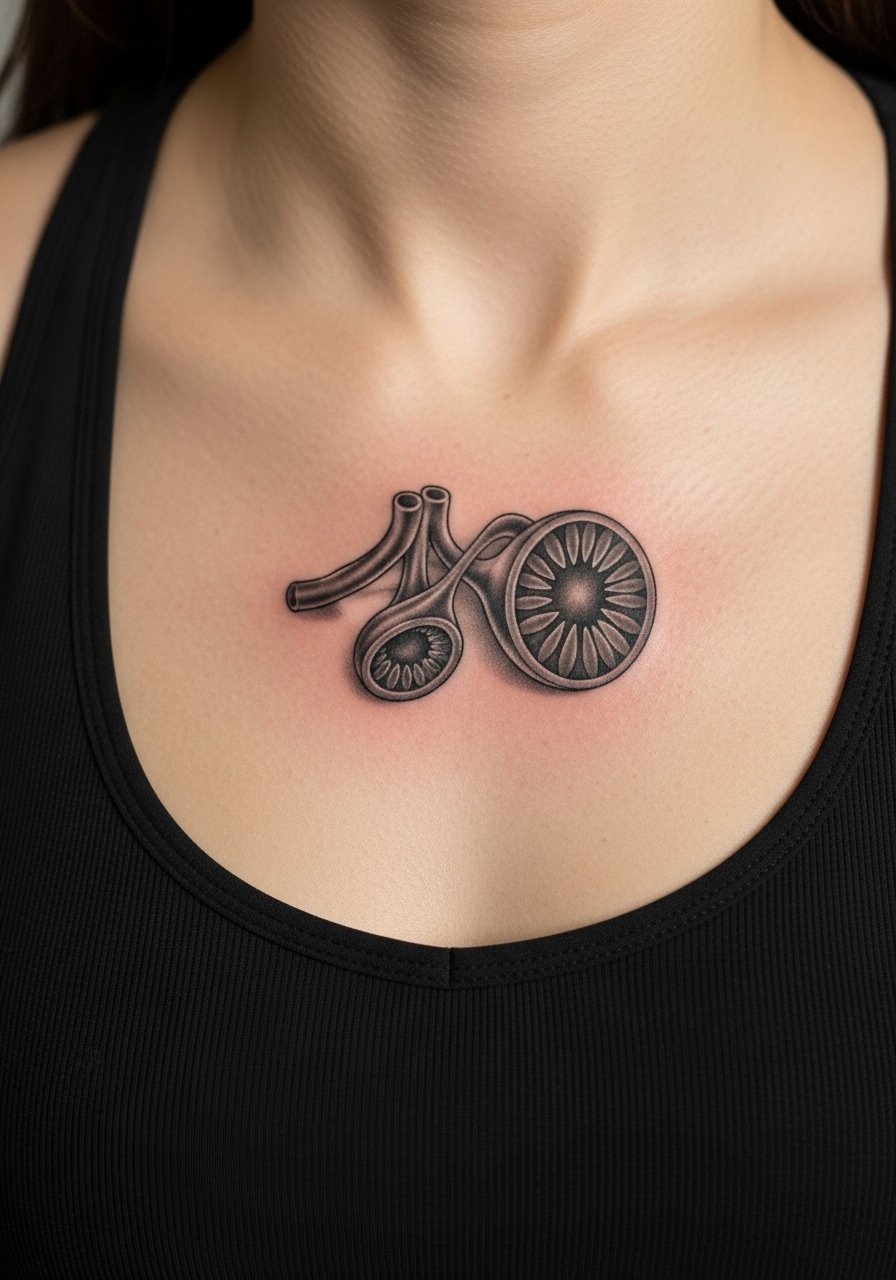
Sternum micro-realism is a high-commitment choice that often honors medical stories. The pain is intense and the area moves with breathing. Artists split on whether fine detail holds up centrally on the sternum. One camp says the movement causes blur within a few years. The other says with correct needle depth and spacing it will settle fine. Ask the artist directly which side they fall on and plan for 2-3 sessions. For sessions, a fitted sports bra keeps the area accessible without excessive exposure.
14. Circuit Veins, Subtle Cyberpunk Accent on Forearm
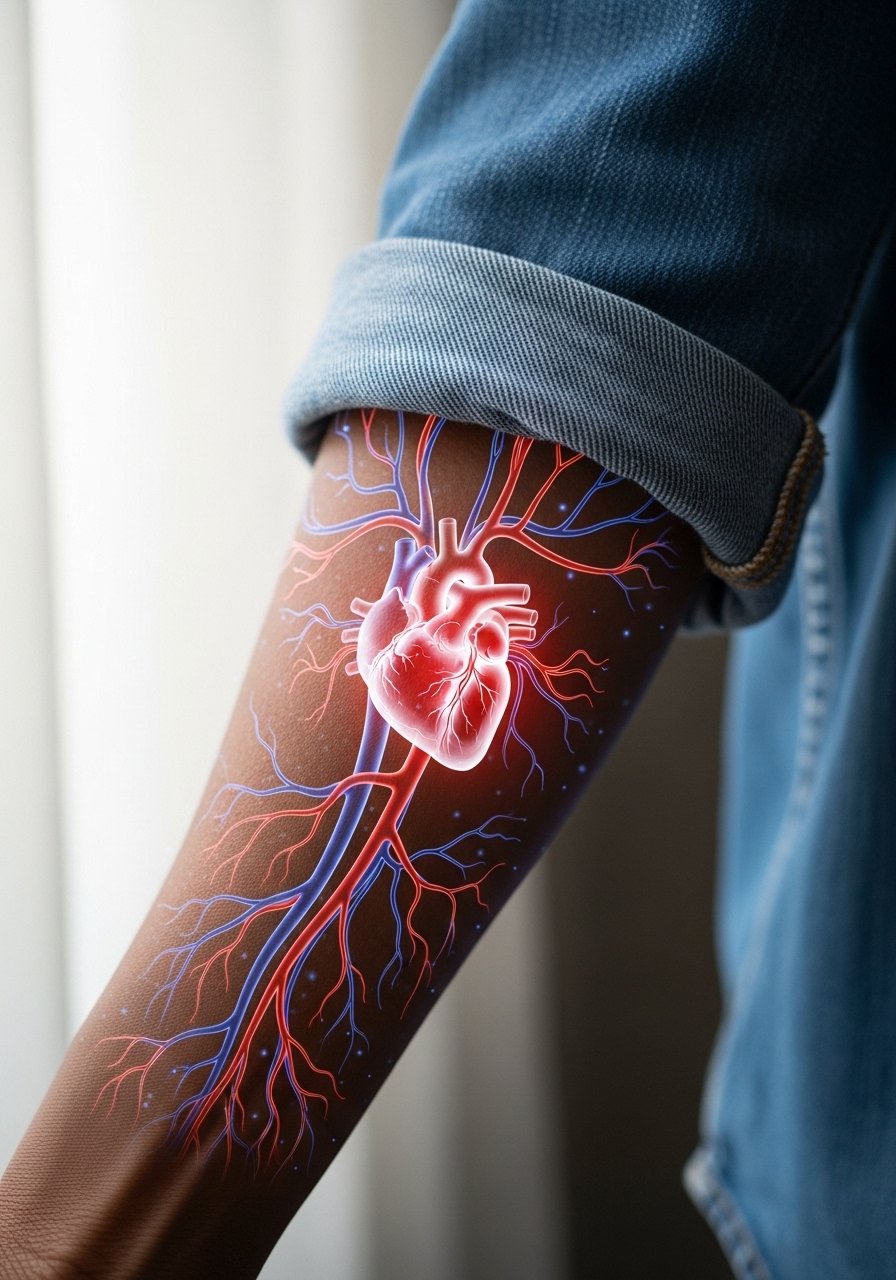
Pairing cardiac veins with circuitry adds a modern, tech-forward edge that remains unique but readable. The risk is over-detailing the circuits so they disappear into the veins. During consultation, request that the circuits read as sparse overlays with negative space rather than dense engraving. This style works well on the forearm because of the linear canvas. For showing it off, rolled cuffs and a thin silver chain bracelet balance the piece like subtle jewelry.
15. Small Minimal Valve Outline on Finger Joint
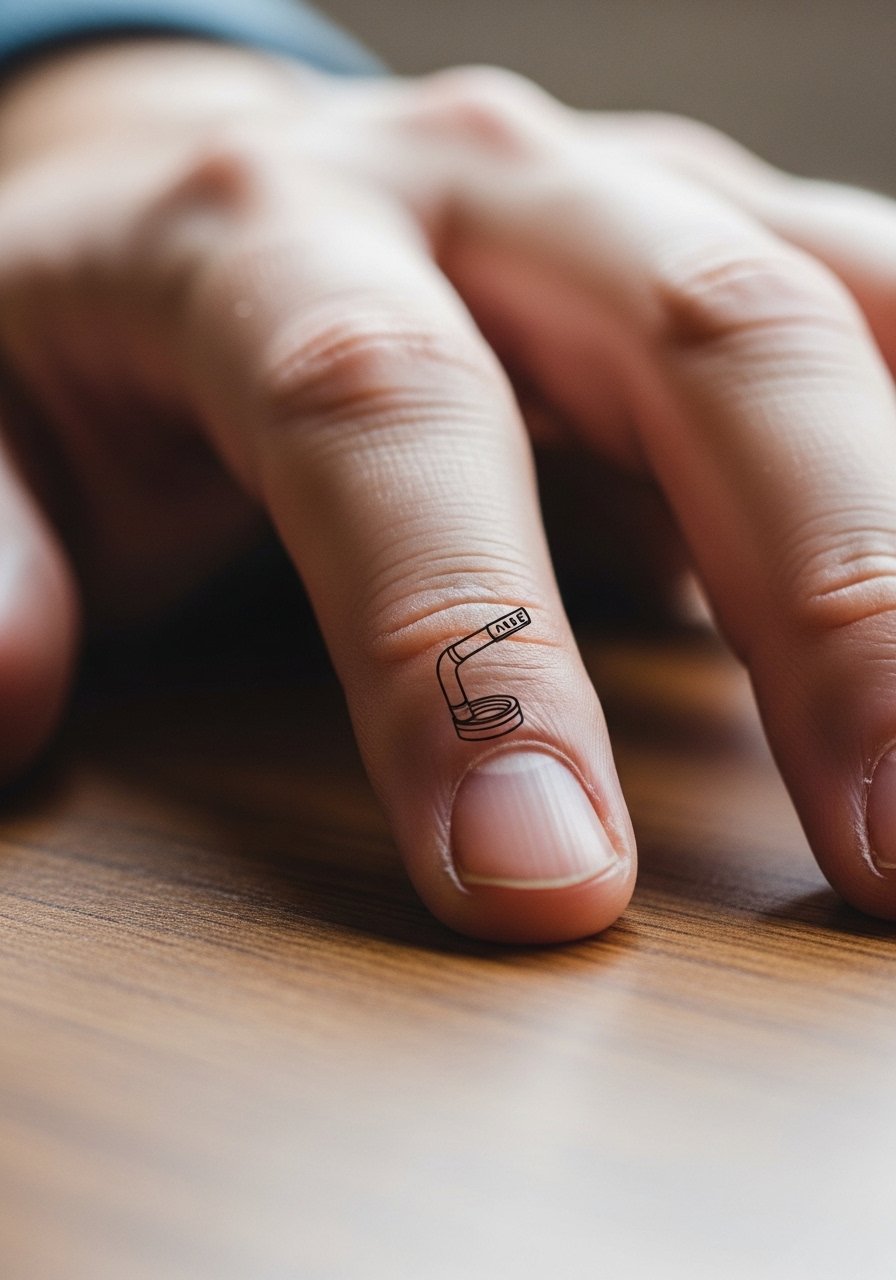
Finger joint placements are high visibility and high maintenance. Expect frequent touch-ups because the skin there sheds and flexes constantly. The real mistake is pushing for tiny perfect detail that the joint will erase in months. If you want constant visibility, accept the maintenance cycle and plan small, slightly bolder lines. During the appointment, leave rings off and wear a loose top; a thin leather cuff is a good showing option when you want to highlight the hand.
16. Black-and-Gray Back Piece with Realistic Myocardium
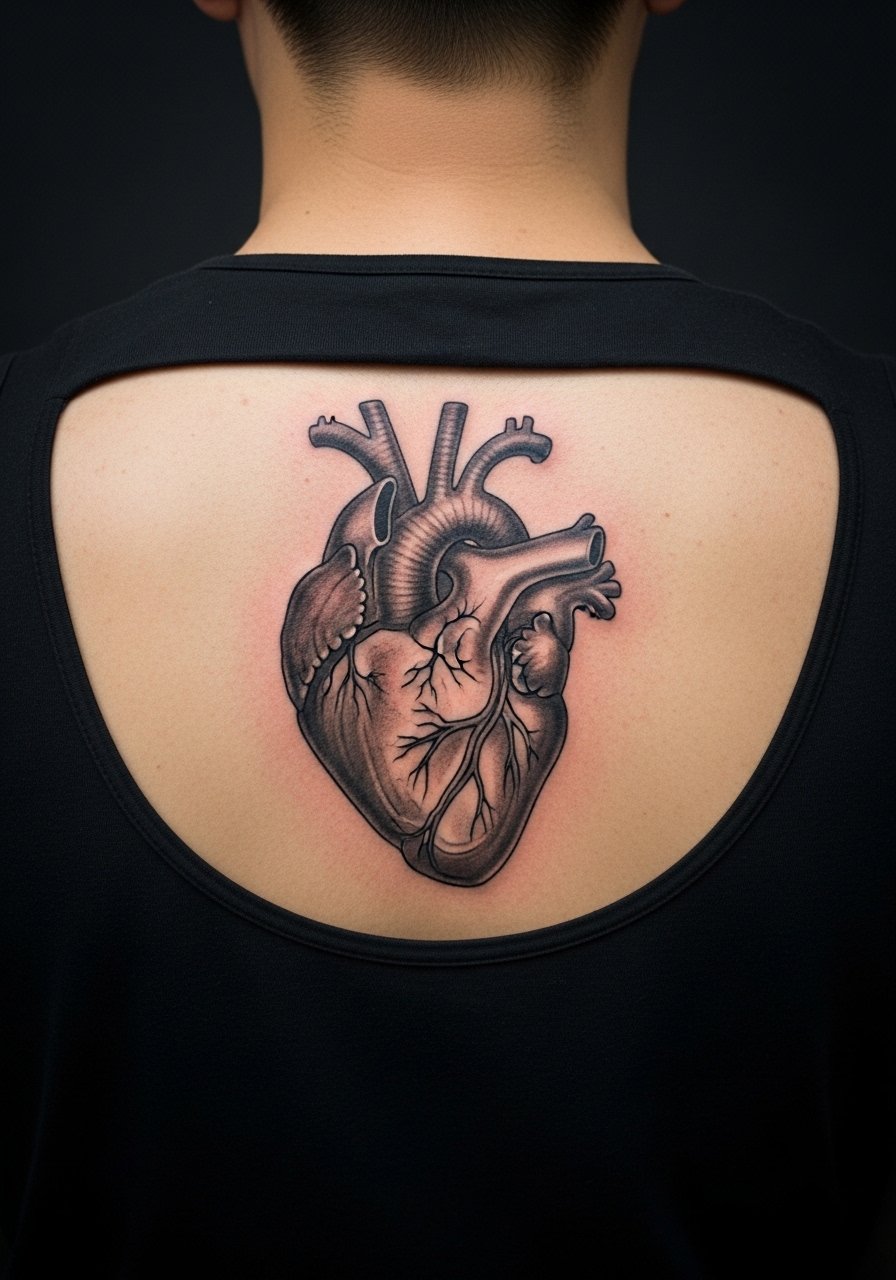
A back canvas lets you expand realism and muscle striations. Plan for three to four sessions and discuss how the piece will flow with the shoulder blades. A mistake is compressing too much micro-detail near the spine where skin texture varies. For longevity, ask for broader tonal shifts and intentional negative space. The session is long but less painful than rib work because of the thicker tissue. Open-back tops make this a showpiece for evenings out.
17. Ornamental Cage with Dotwork, Chest near Collarbone
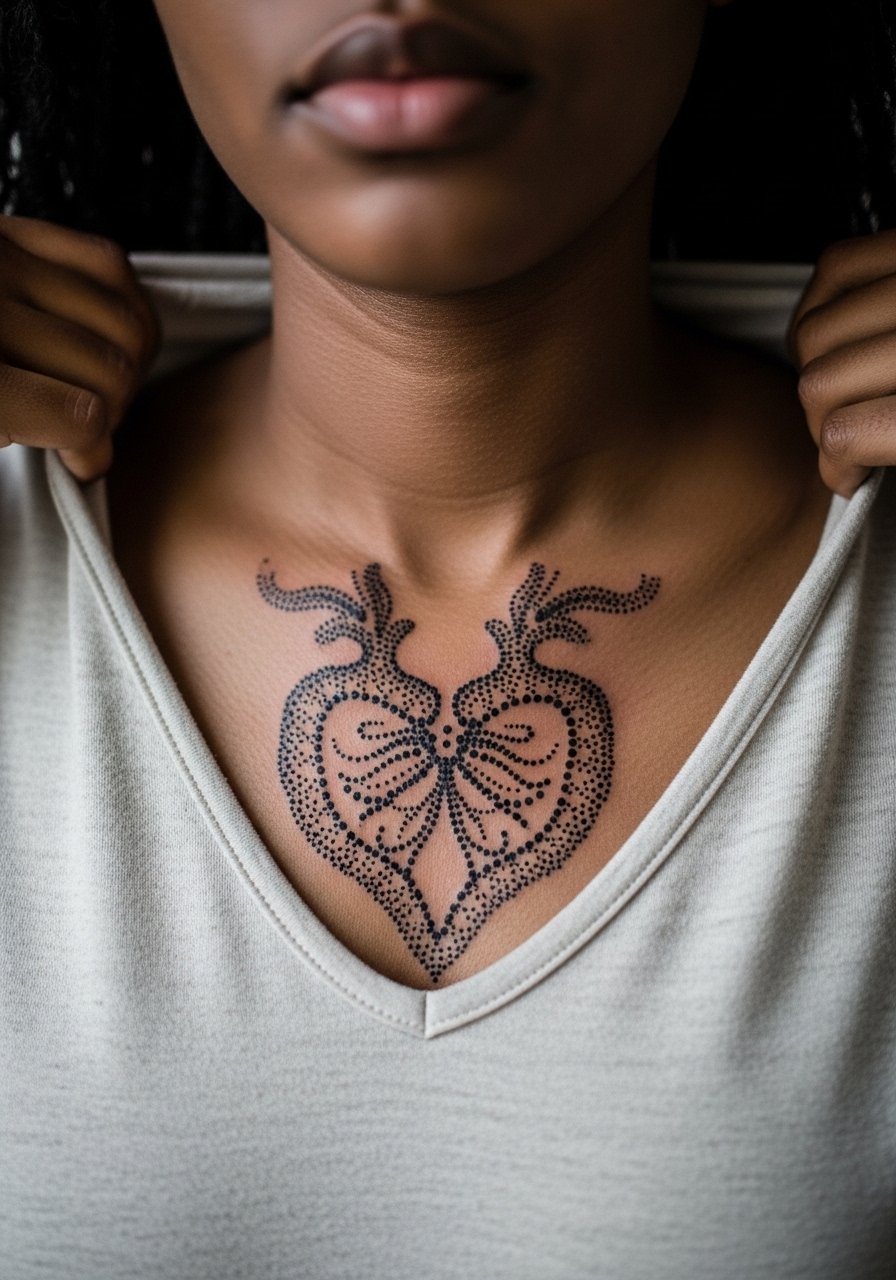
Chest placements near the collarbone need compositional breathing room. Dotwork creates texture without heavy saturation, but too-dense stippling near bone blurs over time. The common mistake is asking for ultra-dense dot fields close to the collarbone. Scale up the mandala and let the heart sit slightly lower for better longevity. Pain varies by person, but many rate collarbone as moderately painful. Pair with a delicate chain necklace in photos to keep the focus above the piece.
18. Memorial Date Embedded in Aortic Sketch, Ribcage
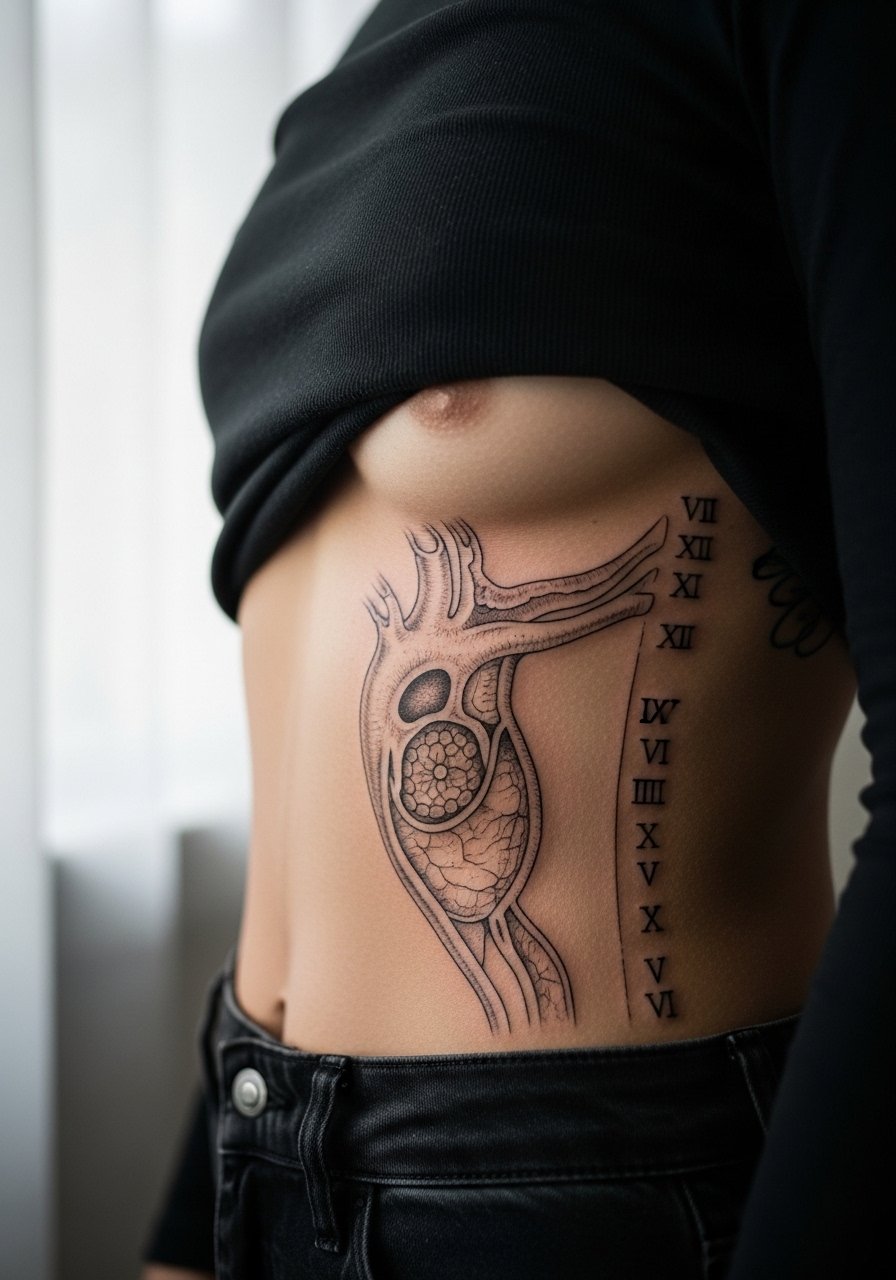
Embedding a date into a ribcage anatomical sketch makes a personal memorial that sits close to the heart both visually and emotionally. Because ribs move and the skin is thin, plan for slightly bolder numerals than you might expect so they read at distance. A common error is choosing ornate numerals that blur. For sessions, break the work into manageable sittings and consider numbing if needed. After healing, choose open tops to reveal the placement selectively.
19. Vein Map from an Ultrasound Overlay, Inner Forearm
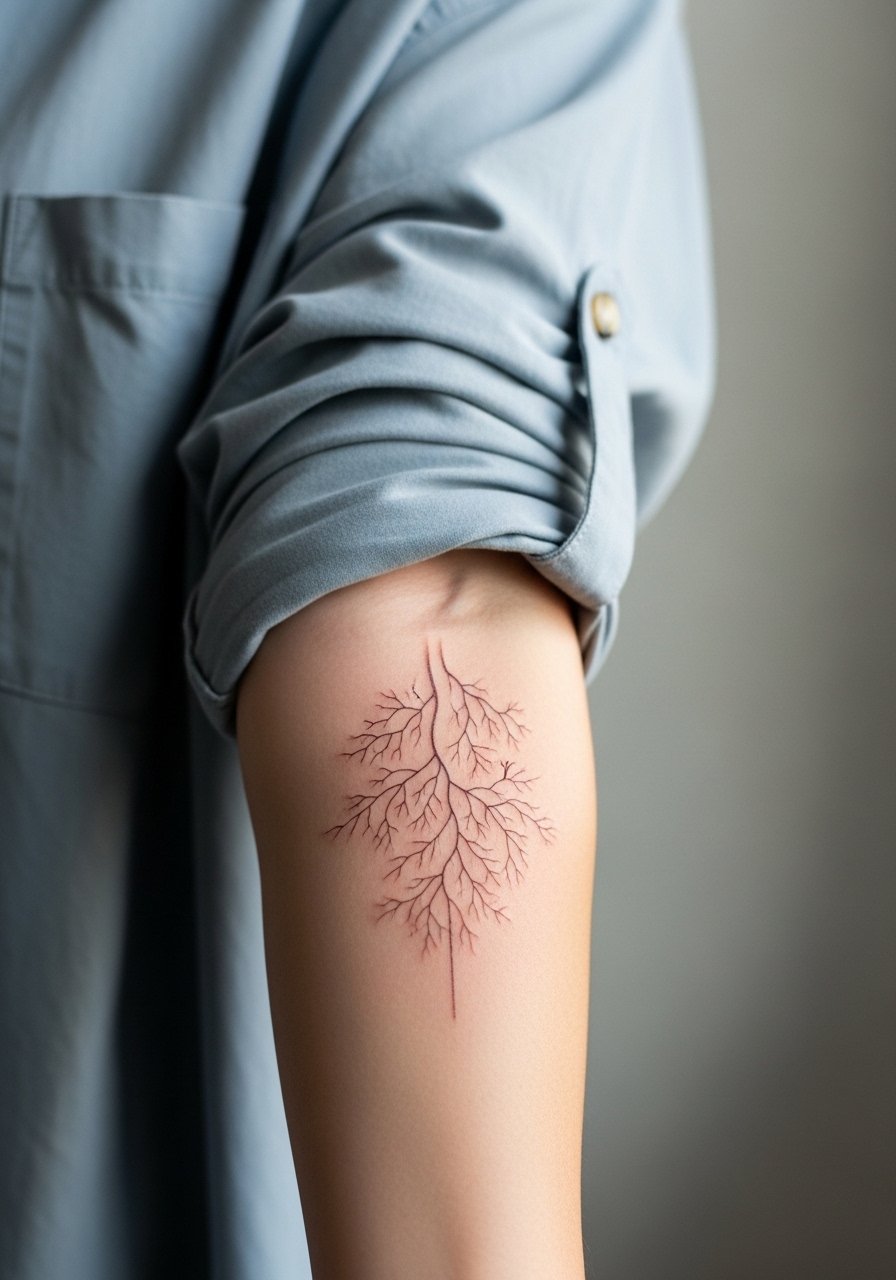
Customizing a piece using your own ultrasound or vein map gives a layer of personal specificity that stock designs lack. The challenge is translating medical imaging into clear linework that reads on skin. Ask the artist to simplify complex imaging into bold, readable contours. This style is ideal for the inner forearm and usually completes in a single session if kept to 1-2 inches. For showing it off, roll a chambray button shirt sleeve so the mapped anatomy looks intentional rather than accidental.
20. Tiny Cardiac Outline Behind the Ear, Subtle Placement
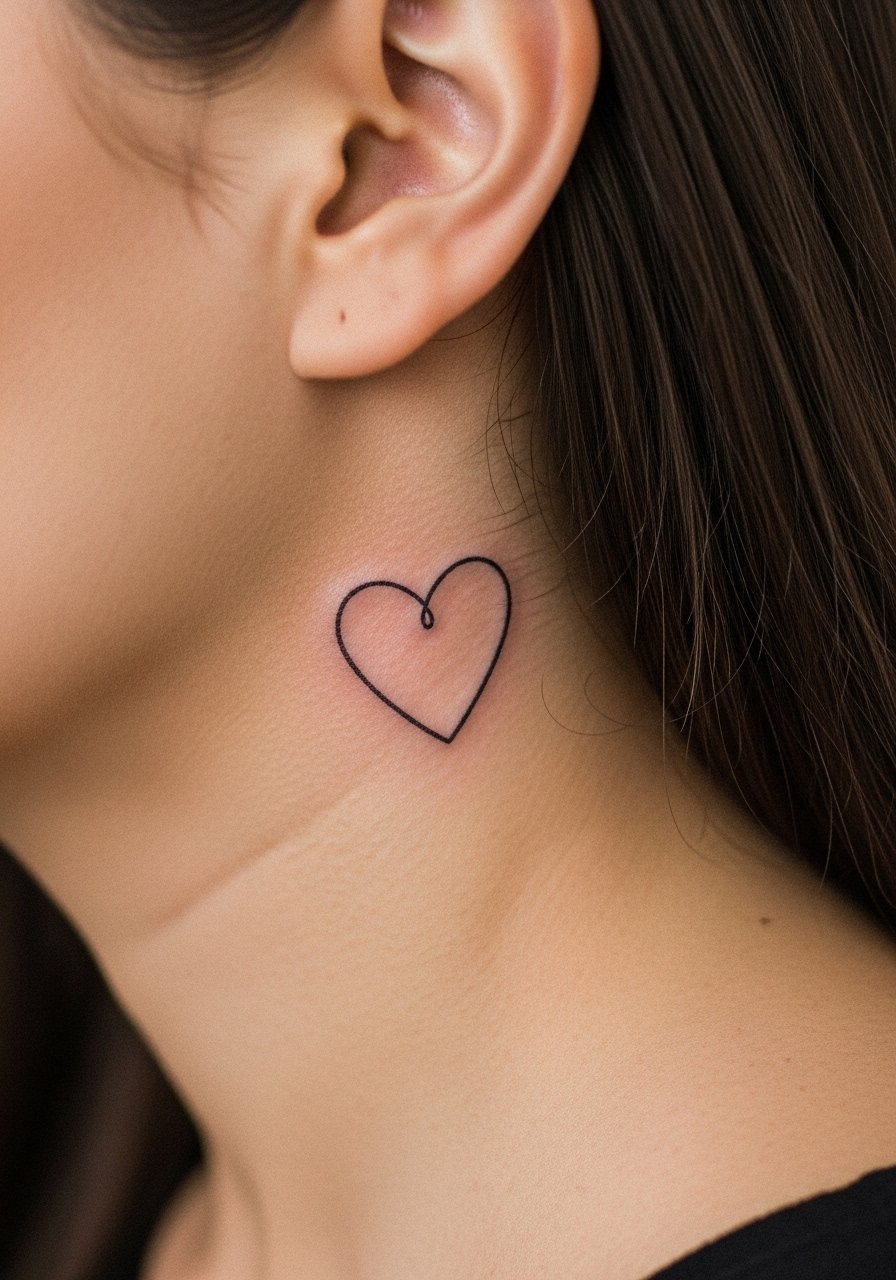
Behind-the-ear placements read as whispers and risk being missed in photos. The area requires a precise stencil because you do not want the image to end up on the ear itself. A common mistake is asking for too much detail in such a small, awkward spot. Pain is low, healing is quick, and you will need to consider hairlines during sessions so the artist has clear access. For subtle showing, tuck hair back or wear small hoops.
21. Bold Silhouette with Floral Embroidery, Calf
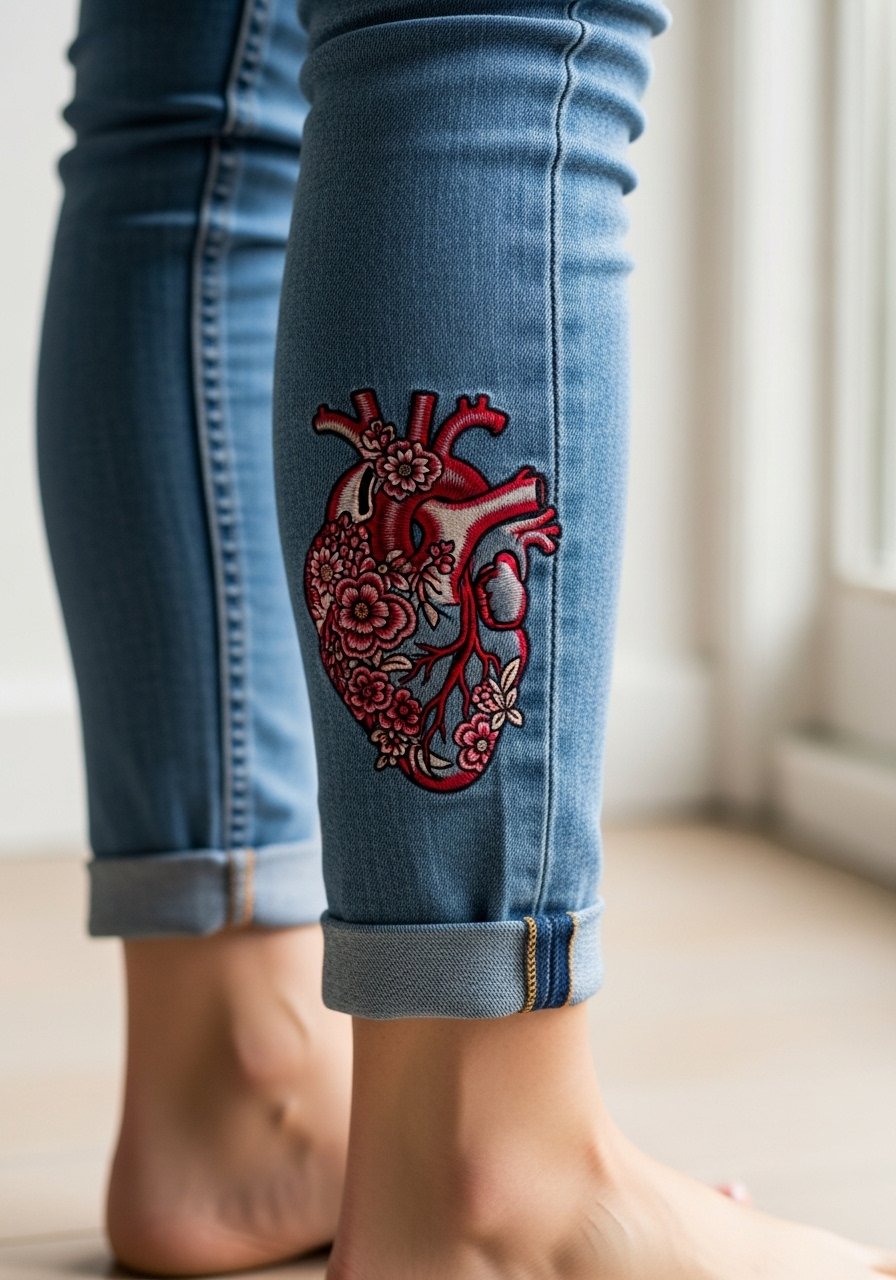
Calf pieces survive movement and sun exposure well, which makes them ideal for bold silhouettes paired with decorative elements. One session usually suffices for a mid-sized calf piece. Avoid shrinking embroidered details too small, which will blur. For show-off moments, cuff your jeans or choose a midi skirt and ankle boots so the calf reads as a design element.
22. ECG and Minimal Valve Combo, Ankle
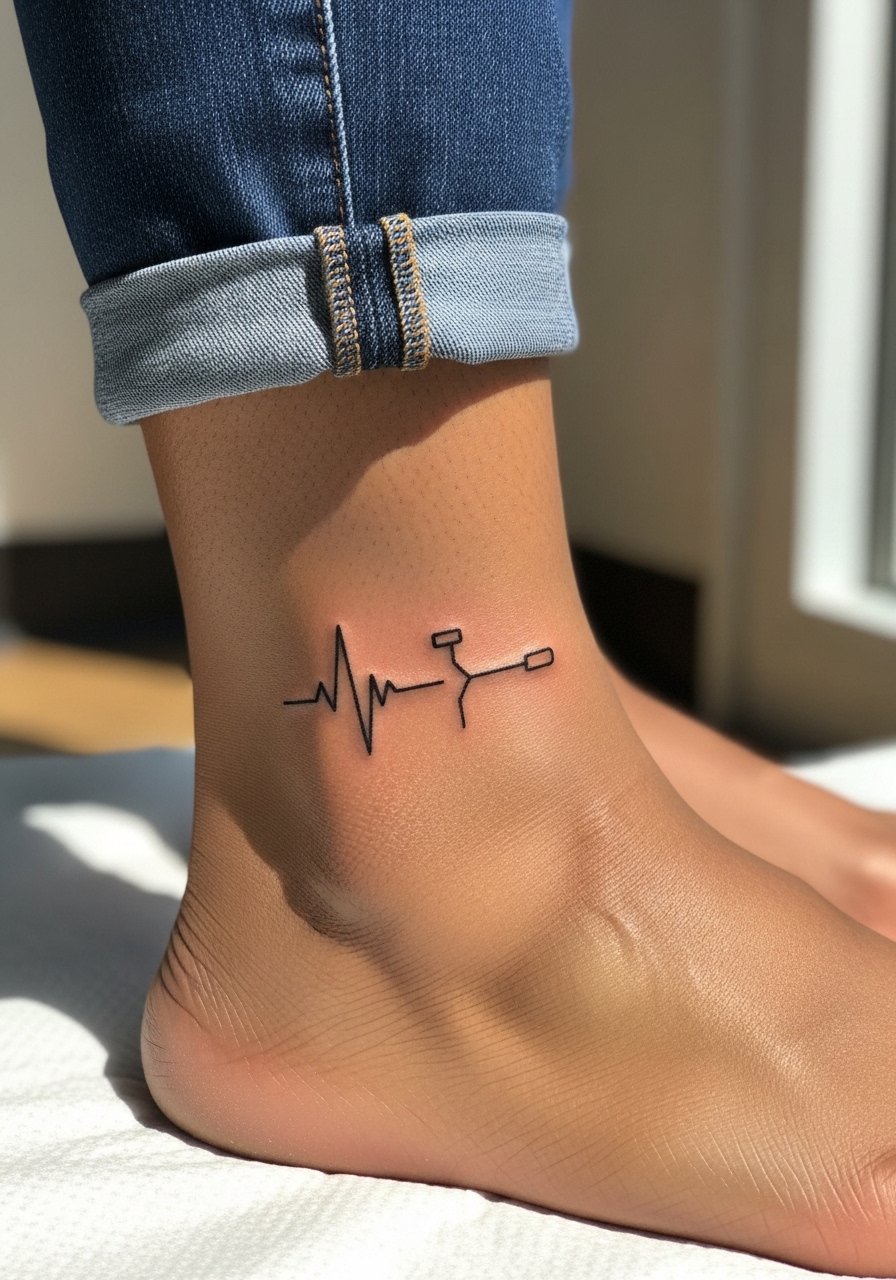
Ankle work is subtle and prone to fading from socks and shoes. For ECG-integrated designs, increase the line weight slightly so the rhythm remains visible despite friction. A common mistake is wrapping the design too tightly around the bone where color doesn't hold. The session is short but plan for a touch-up at year two. Roll your jeans and wear sandals while healing to avoid pressure on the area.
23. Blackwork Anatomy Sleeve Starter, Upper Arm Wrap
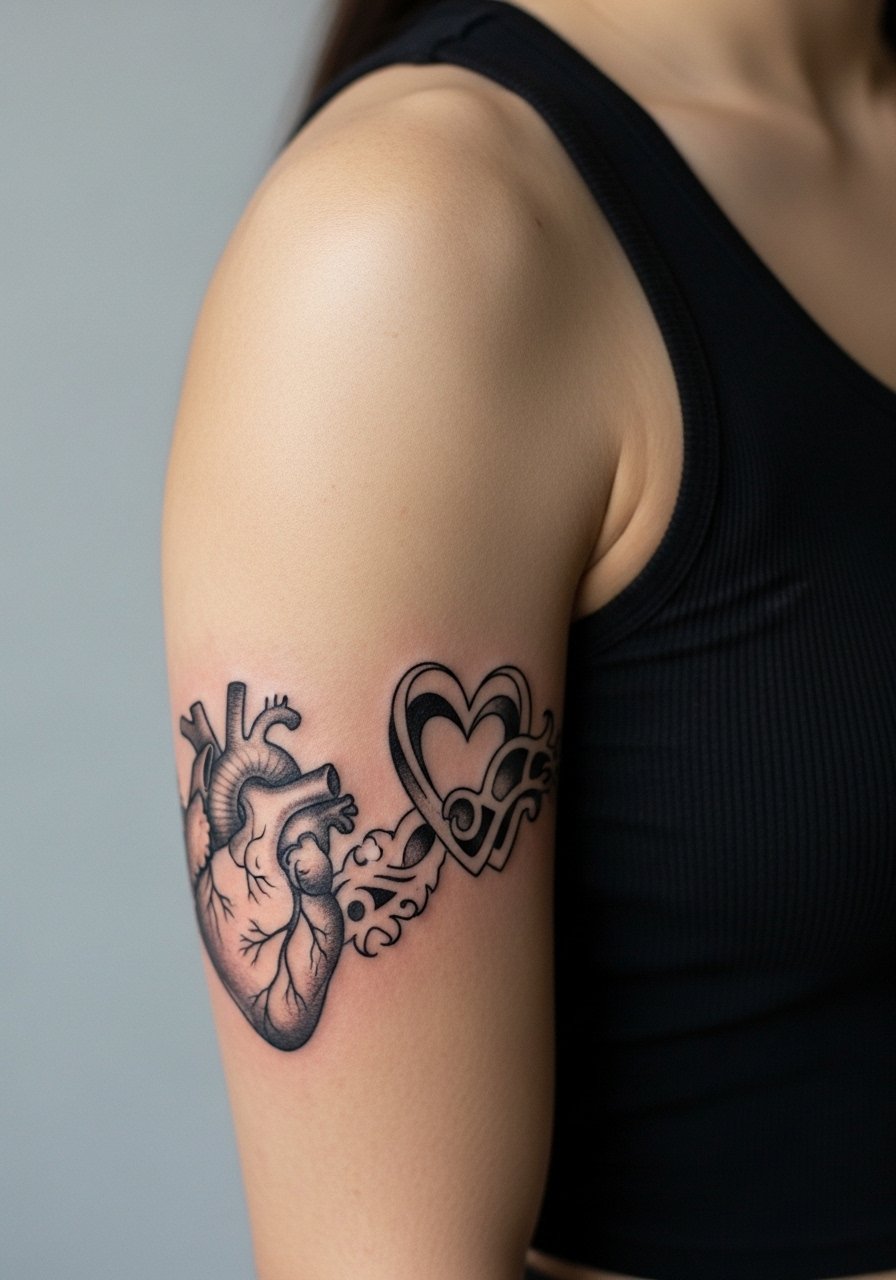
If you are starting a blackwork sleeve, placing cardiac motifs as negative-space focal points keeps the composition coherent as you add pieces. Expect 2-3 sessions and steady saturation checks. A real mistake is starting with very thin negative-space details that get lost when the rest of the arm fills in. For sessions and display, a fitted tank shows the arm flow and balances the bold work with a bold arm cuff accessory when you want an edgier look.
24. Watercolor Bleed into Gray on Sternum Band
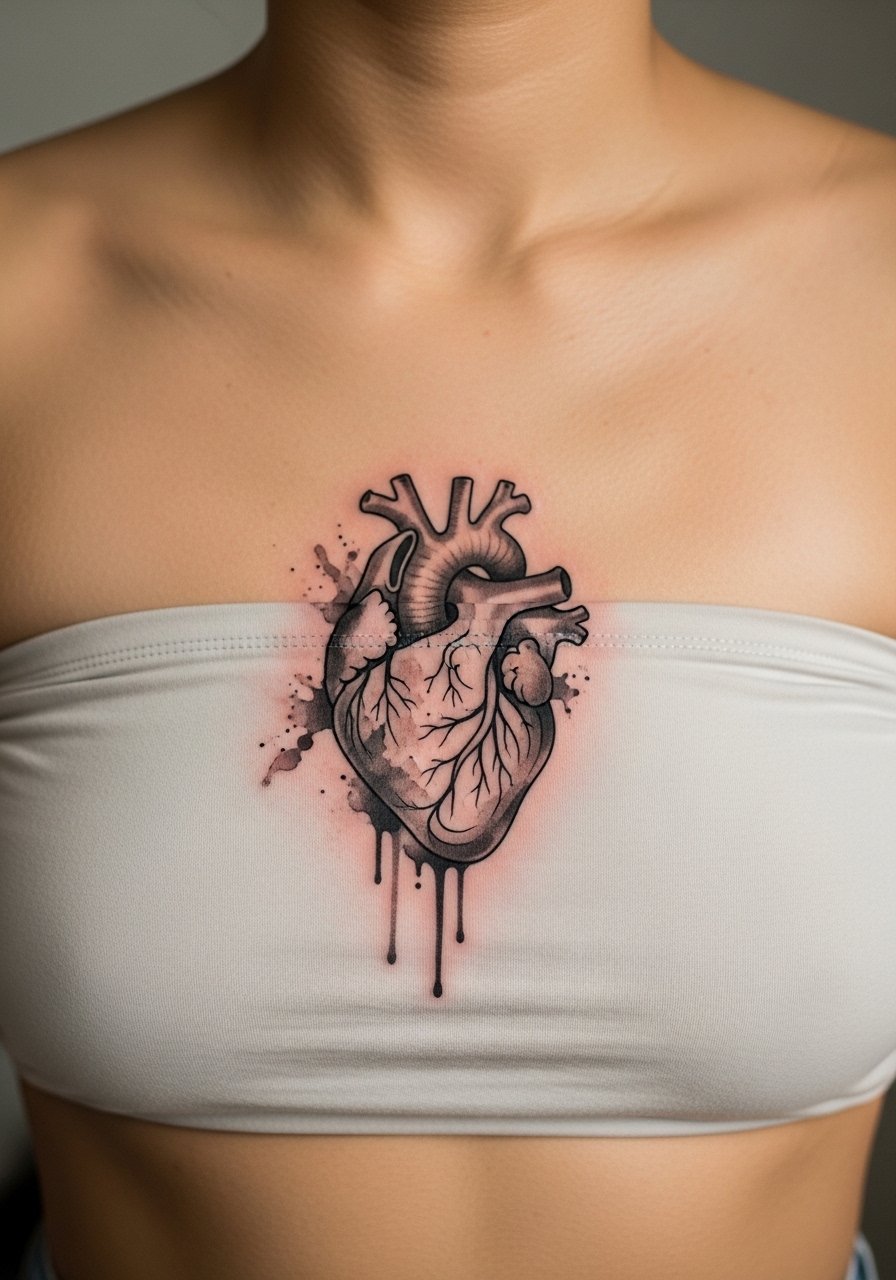
Watercolor sternum pieces have a poetic quality but they demand strict sun care in the first year to avoid uneven fading. One session may be enough for a small band, but heavier saturation will need a top-up. The mistake is choosing overly bright gradients without planning for sun protection. For sessions, wear a bandeau or sports bra so the artist can work without full exposure. After healing, pairing with low-cut tops makes the band a quiet centerpiece.
25. Ornamental Micro Dot Heart on the Lower Back

Lower-back pieces age well when composed with clear negative space and dotwork that avoids over-density. The common error is trying to pack too many fine dots into a small area, which leaves a gray block later. For a clear ornamental piece, ask for spaced stippling and a slightly larger scale. A tank top with high-waisted bottoms shows off the placement without full back exposure.
26. Chest-to-Shoulder Connector with Floral Veins
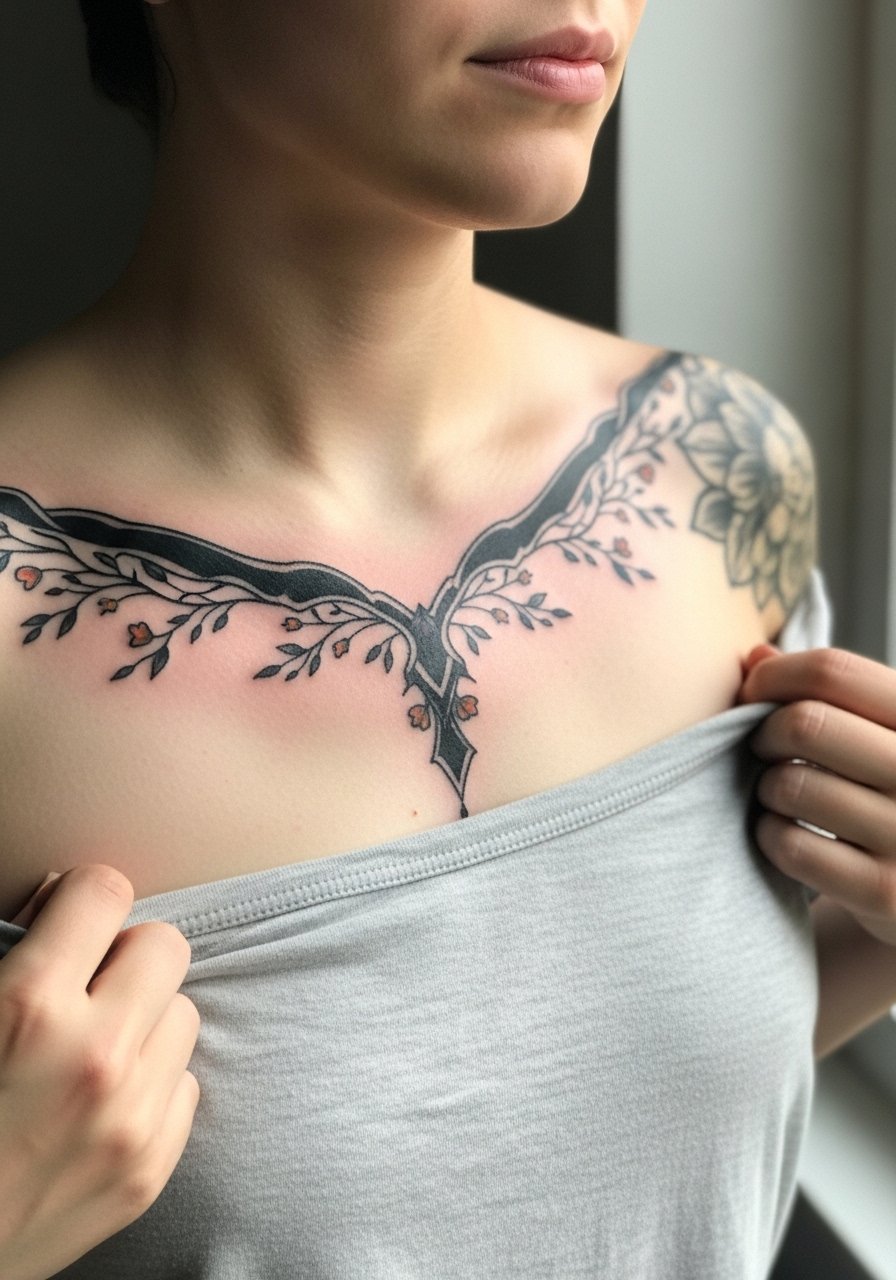
Connector pieces use body flow to make anatomy read as motion. The tricky part is matching the shoulder's movement with chest expansion so lines do not migrate in odd directions after healing. A mistake is anchoring too much detail right over the shoulder joint. For sessions, a button-down you can pull aside provides the artist access while keeping exposure minimal. For show-off styling, an open-back blouse or wide-neck tee displays the flow elegantly.
27. Small Micro Valve on the Inner Wrist, Subtle and Personal
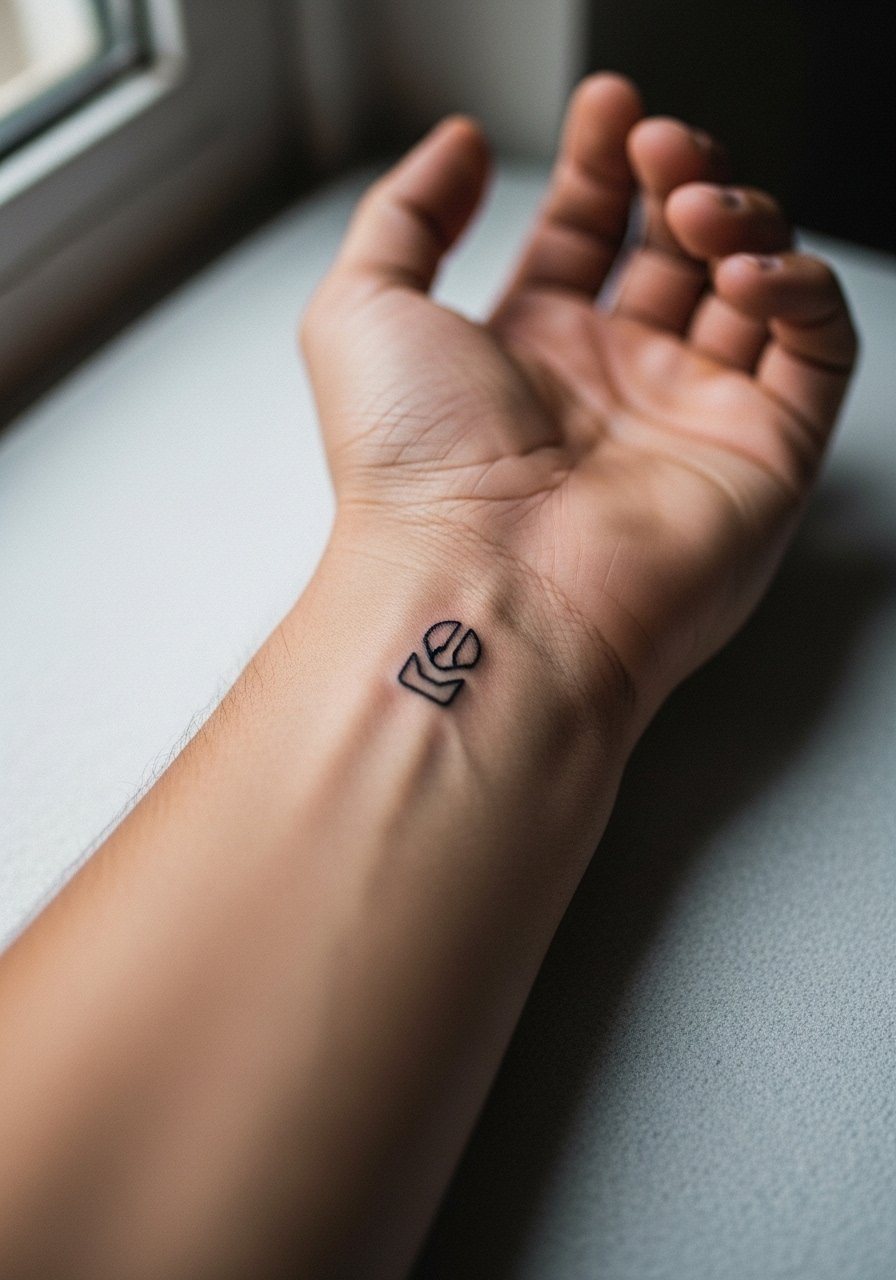
Tiny inner-wrist valves are discreet and meaningful. Because the skin there is thin and moves a lot, expect touch-ups sooner than with forearm pieces. Avoid requesting ultra-tiny ornamental work that requires ultra-fine needles; those lines rarely hold for long. The session is short and the pain is low to moderate. For the appointment, wear a sleeveless tank so the artist can access the wrist without obstruction.
Frequently Asked Questions
Q: Will fine-line cardiac pieces on the wrist fade faster than blackwork options?
A: Fine line on wrists tends to soften sooner because of constant motion and handwashing. Blackwork and saturated neo-traditional options generally hold their silhouette longer. If you want a fine look with better longevity, ask for slightly heavier lineweight and plan for a touch-up at year two.
Q: How should I decide between watercolor and black-and-gray for a ribcage piece?
A: Watercolor gives an emotional wash but needs strict sun protection and sometimes a refresher session. Black-and-gray ages into contrast more predictably. If you prefer color, accept the maintenance trade-off and schedule a second session to reinforce saturation after initial healing.
Q: Are finger joint and ankle placements worth the upkeep?
A: They can be if you accept that both spots often need touch-ups every one to three years. Finger joints face constant friction and ankle sees a lot of pressure from footwear. If low maintenance matters, choose thicker lines or move the motif slightly away from the joint.
Q: How do I find healed examples on skin tones like mine?
A: Search hashtags and directories rather than a single feed. Try hashtag searches and platforms focused on client photos and healed galleries. Seeing healed work on a similar tone is the best gauge for expected contrast and saturation.
Q: What should I wear to a sternum or ribcage session to make things easier?
A: Wear a fitted sports bra or a cropped top you can lift slightly so the artist has access without full exposure. That keeps everything professional and helps you stay comfortable during a longer session.
