
Sitting in the chair with the stencil across your knuckles is the moment most people realize how visible a hand band really is. The skin on the hand moves constantly, so what looks crisp under studio lights can soften faster than forearm work. Expect a few follow-up questions during consultation and a realistic touch-up plan. Start with these band ideas and learn what to ask before the needle touches skin.
1. Minimalist Ring Band on the Finger
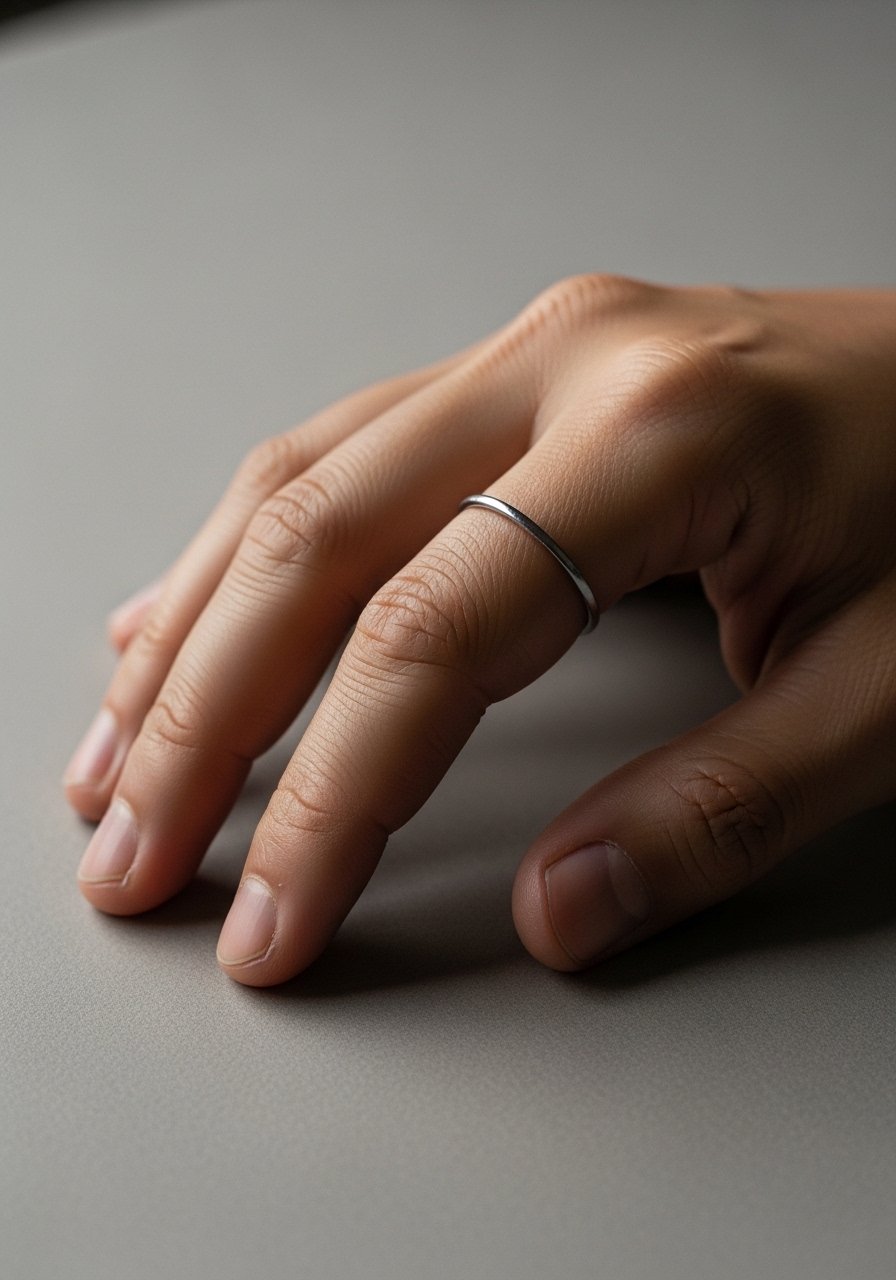
This tiny ring-style band reads best when kept simple. Tell your artist you want a slightly heavier line weight than the thinnest flash pieces so it holds for two to three years before a touch-up. Common mistakes include asking for overly delicate single-needle lines that blur with frequent washing and ring friction. Session feels like quick, sharp ticks along the finger and usually takes under 20 minutes. Blowout risk is higher here because the skin is thin and moves a lot. For showing it off, stacked dainty bracelets frame the band well and keep the eye on the finger, pair with a dainty chain bracelet for balance.
2. Knuckle Chain-Link Band
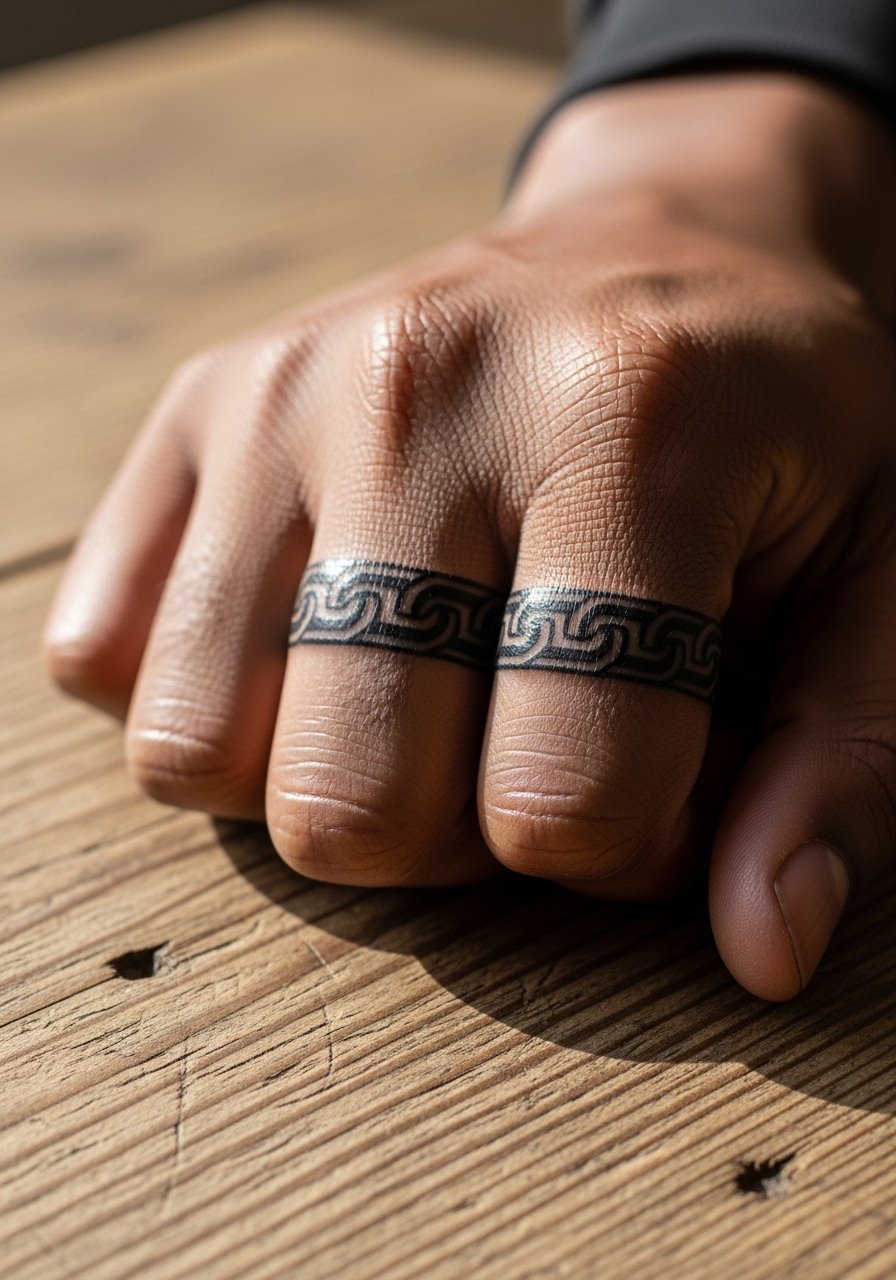
A chain-link motif across the fingers creates a graphic look that still reads well as it ages. Tell your artist to keep links slightly open rather than fully closed so the negative space survives when lines soften. The biggest mistake is compressing too many links into a narrow span which leads to merging after a few years. Expect a 30-45 minute session with intermittent breaks for the sensitive knuckle area. Pain spikes across knuckles are common. For outfits, short-sleeve shirts or a rolled-sleeve linen shirt frame the hands without competing for attention.
3. Celtic Knot Micro Band
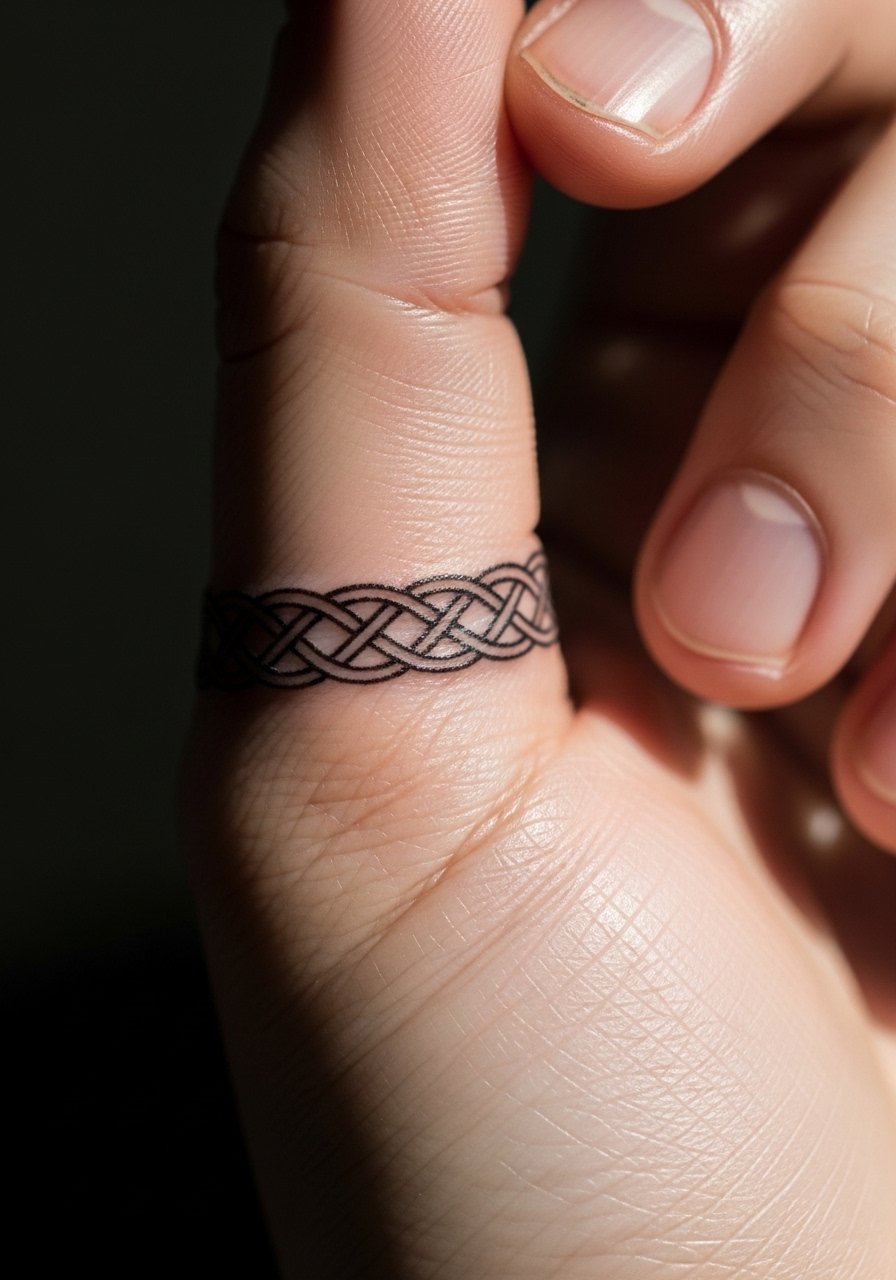
This woven knot plays well on the outer hand where there is a bit more flat surface. Ask your artist to space the knotwork slightly wider than a printed reference so each loop keeps definition as the piece heals. A common version that ages poorly is trying to cram a full knot pattern into a very narrow band. The session is meticulous and takes longer than a simple ring, often 45-75 minutes. Expect touch-ups around year two for small tightening. Hand placements are more exposed to friction, so consider it if you are prepared for maintenance.
4. Negative Space Chevron Band
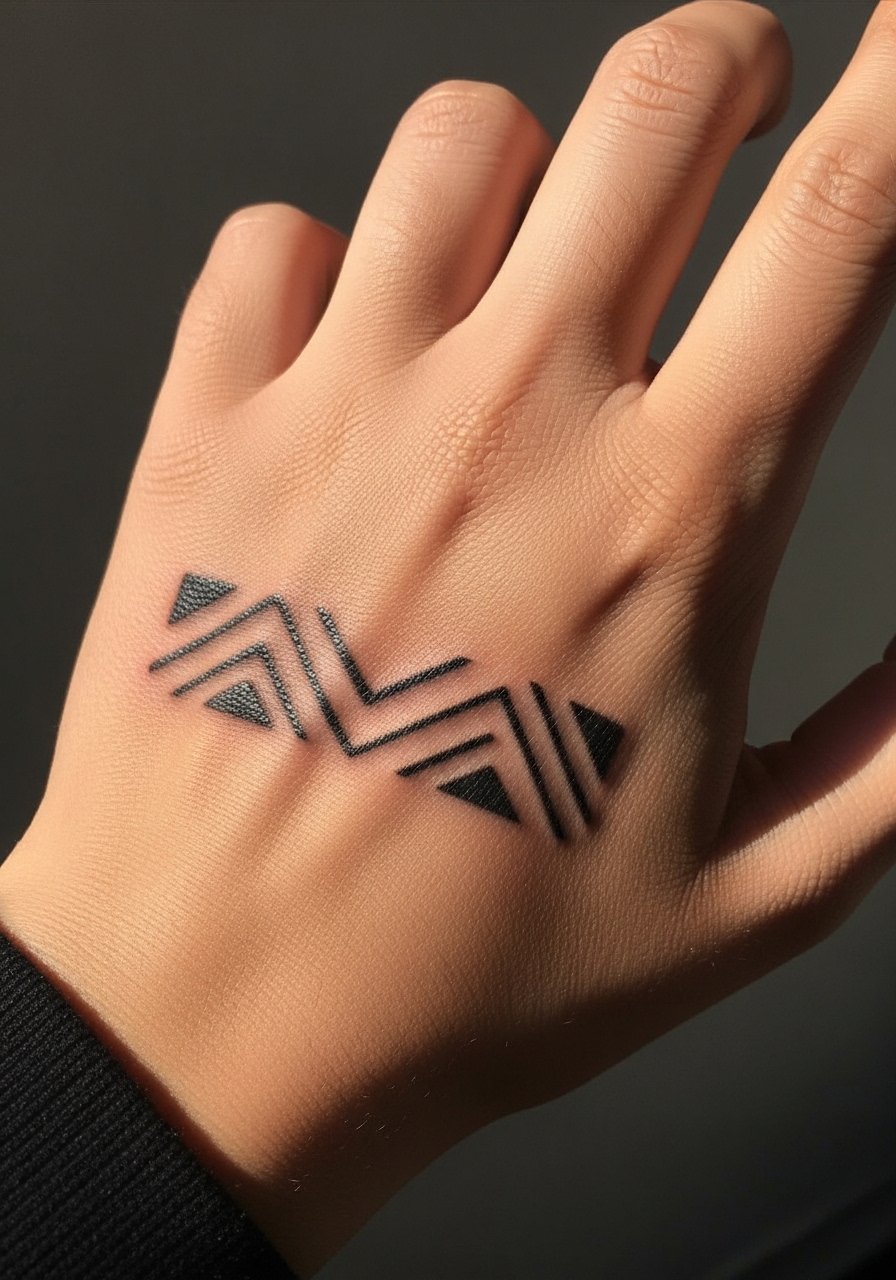
Negative space work uses skin as part of the design and it can age well if given room. Tell the artist you want solid black chevrons separated by generous gaps to prevent the dark areas from spreading into the voids. The mistake people make is asking for thin gaps that disappear once the ink settles. Pain on the back of the hand is moderate. This piece shows best with cropped sleeve shirts or a loose button-down shirt rolled up to the elbow.
5. Stippled Dot-Work Band
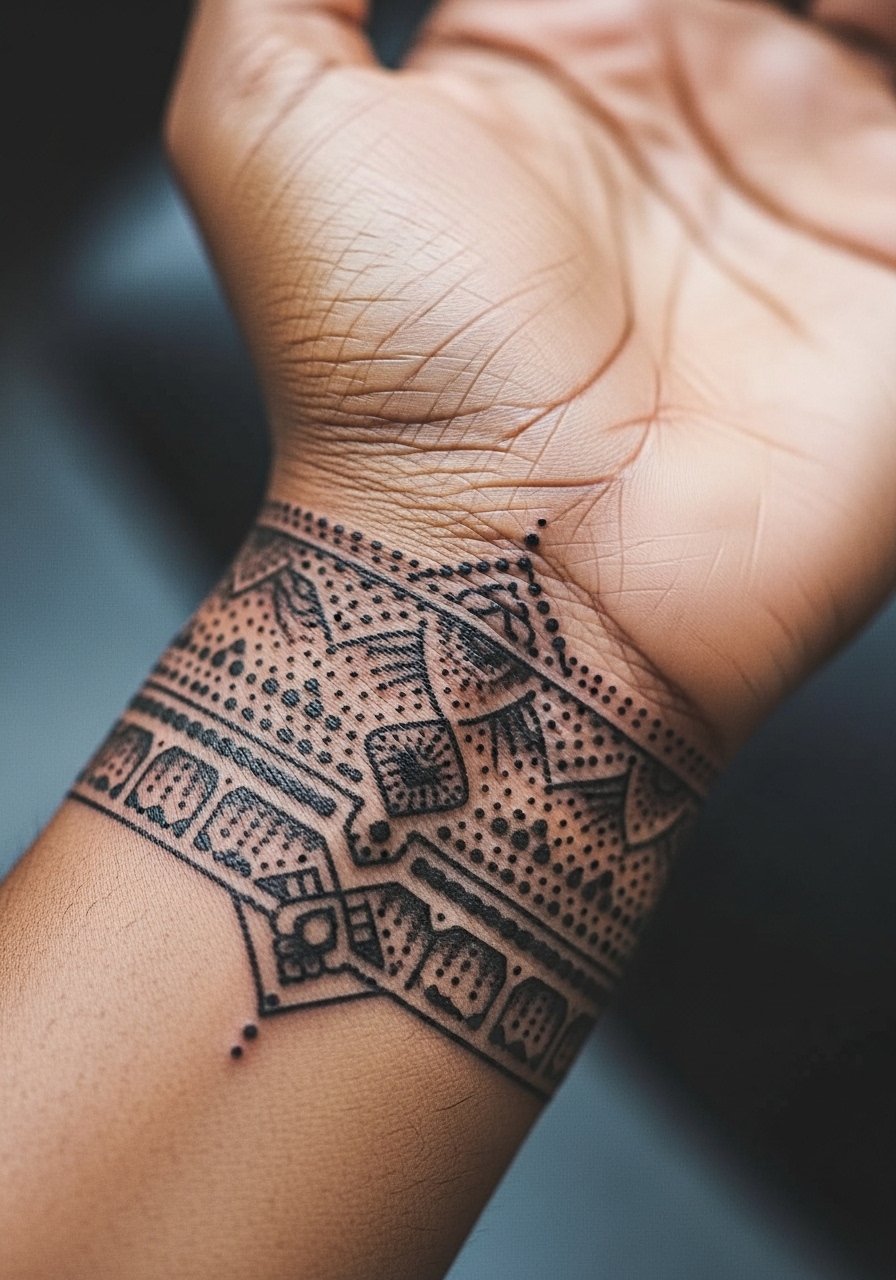
Dot-work or stipple shading reads as texture instead of solid fill. For longevity ask for a slightly denser stipple than the reference so the pattern keeps contrast at six months and beyond. A common error is over-layering dots into a near-solid fill which blurs into gray over time. Sessions are steady and can be longer because the artist builds texture slowly. Expect touch-up around year three depending on sun exposure. Pair it with a simple leather cuff or a thin leather bracelet when you want a rugged complement.
6. Script Band Along the Thumb
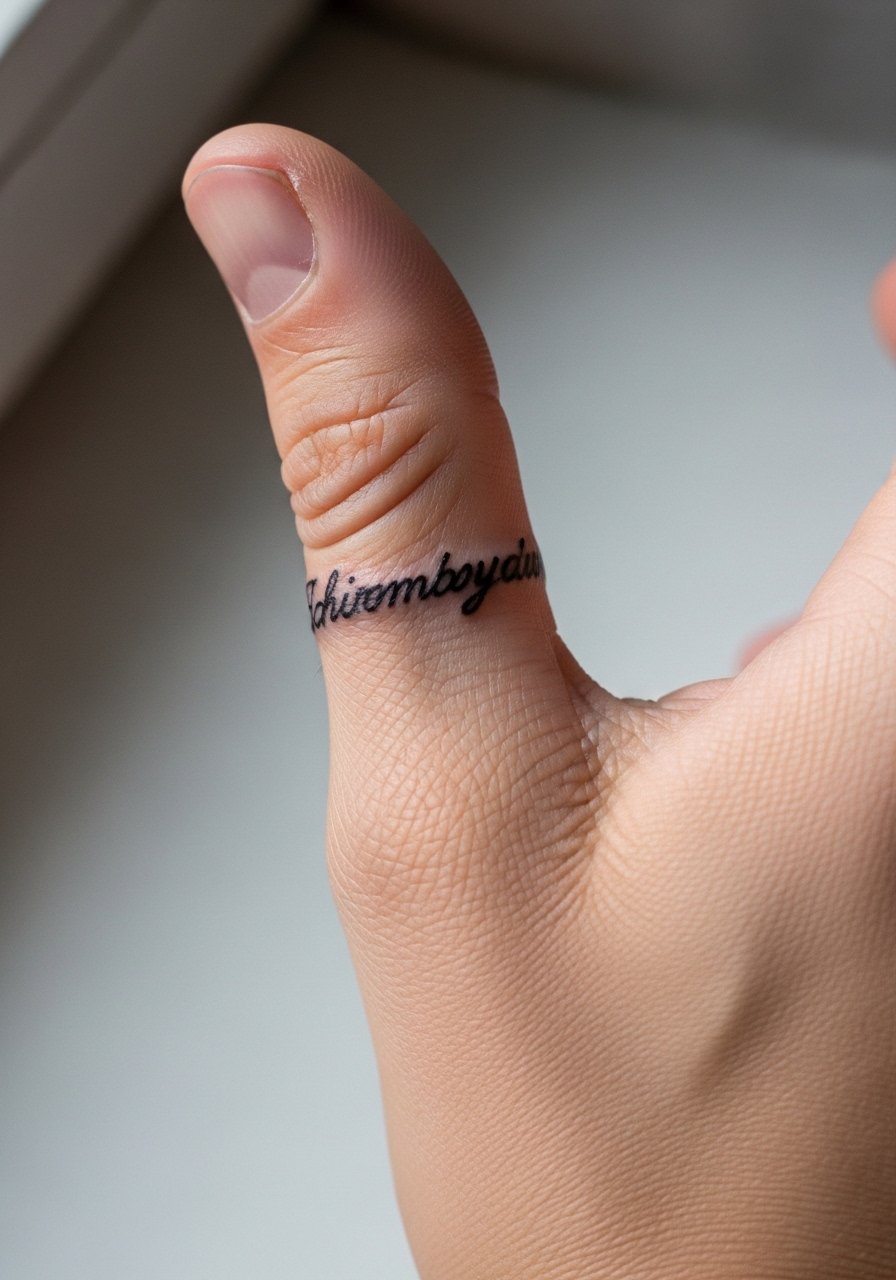
A single-word script wrapping the thumb base can feel personal and subtle. Tell your artist the exact font size you want and ask for a stencil preview wrapped around the digit. The most common mistake is picking cursive that looks good flat but warps when wrapped around a curved surface. Fine script on the hand splits artists into two camps. One camp warns it blurs quickly due to skin movement. The other camp says with correct spacing and needle depth it can settle fine. Ask your artist which side they fall on. For session comfort, wear a stretchy thumb-friendly glove to keep the area dry if needed.
Pre-Session Essentials
The wrist and knuckle pieces above heal differently from larger arm work. A few small items smooth out the session and the first week.
-
Stencil transfer paper kit. Lets you preview how a repeated band pattern wraps around the hand before committing, which matters for the knuckle and thumb styles above.
-
Topical numbing cream. Applied 30 to 45 minutes before can ease the sharper ticks on fingers and knuckles without changing the artist's linework.
-
Thin protective film roll. Useful for covering low-profile hand bands during the first 48 hours when friction from gloves or typing can irritate the area.
-
Fragrance-free gentle body wash. Cleanses the healing hand without stripping or irritating the delicate lines that fine script or dot-work rely on.
-
Aquaphor healing ointment. A thin layer in the first two days locks in moisture for detailed work without clogging the needle channels.
7. Rope Texture Mini Band
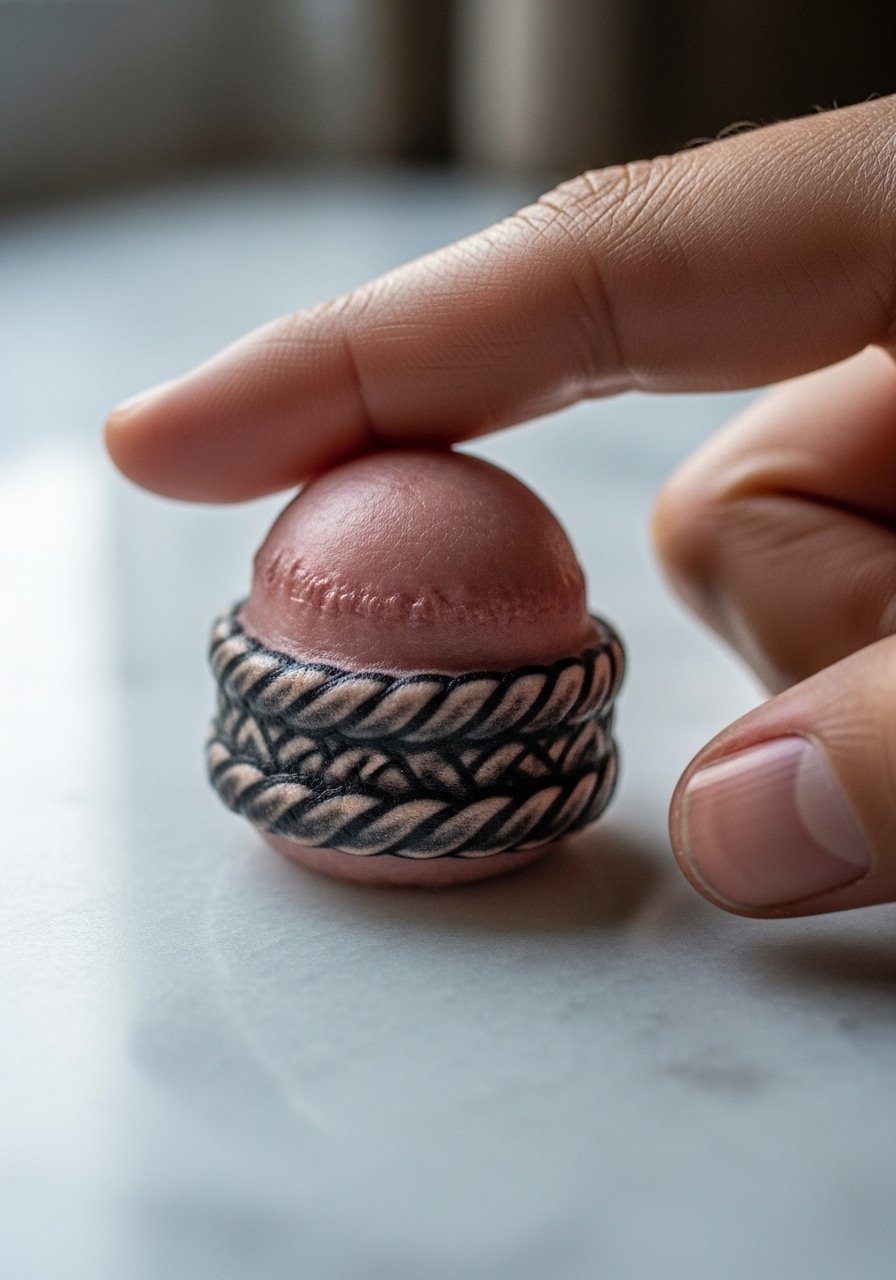
Rope texture mimics braided cords and reads as tactile without needing color. Ask for slightly broken highlights inside the rope so the form keeps separation as the ink settles. The common mistake is flattening the texture into a solid line which then looks like a smudge. The session is focused and can be under 30 minutes if you keep the design one repeat. For showing off, a slim stackable ring set worn on neighboring fingers complements the tactile look.
8. Blackout Band Accent
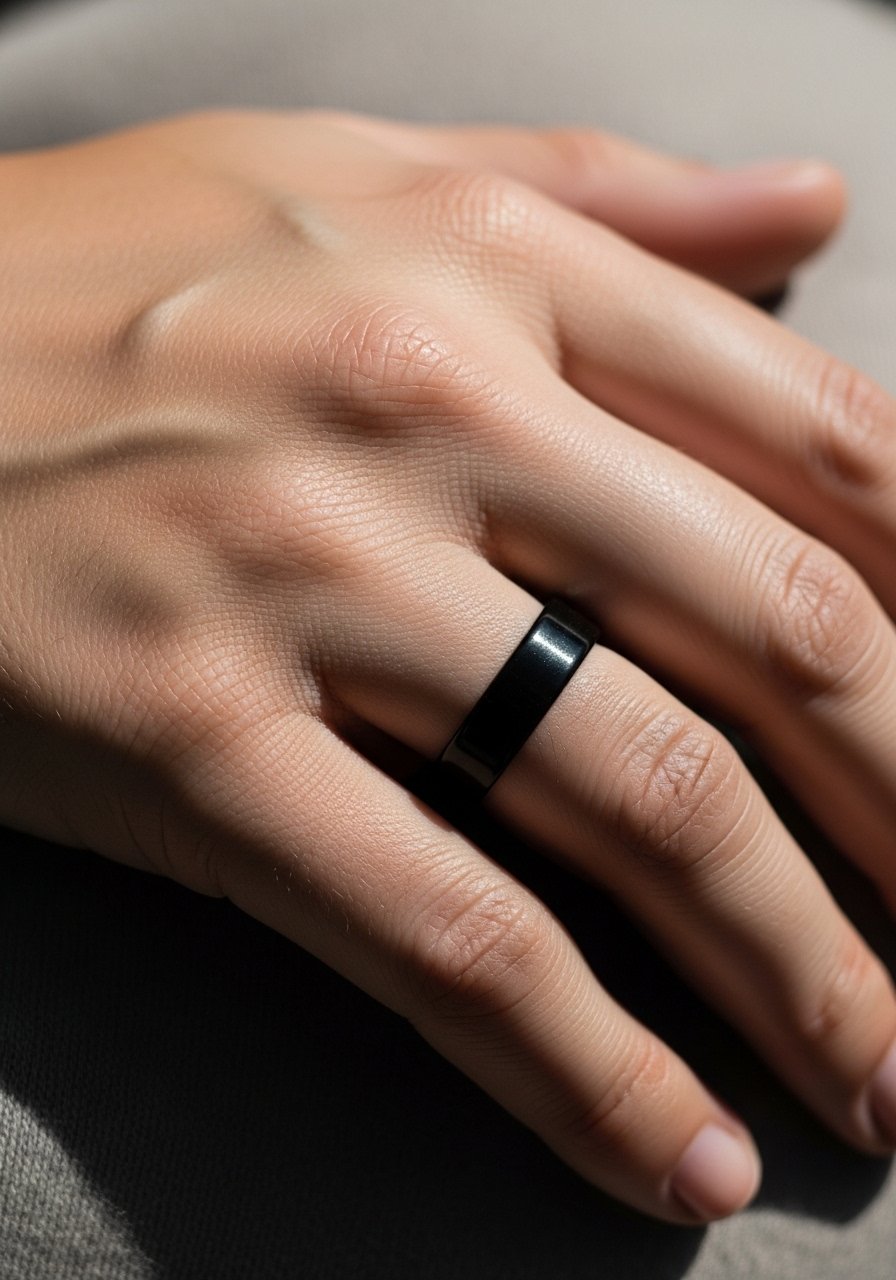
Blackout bands are bold and demand maintenance. Ask for a gradual edge transition rather than razor-sharp borders which age poorly on the hand. A real mistake is expecting blackout to be low-maintenance. The saturation feels heavy under the needle and sessions can sting. Expect a longer initial session and periodic touch-ups to keep edges crisp. This style is for someone comfortable with a dramatic look and the upkeep it requires.
9. Beadwork and Mala Band
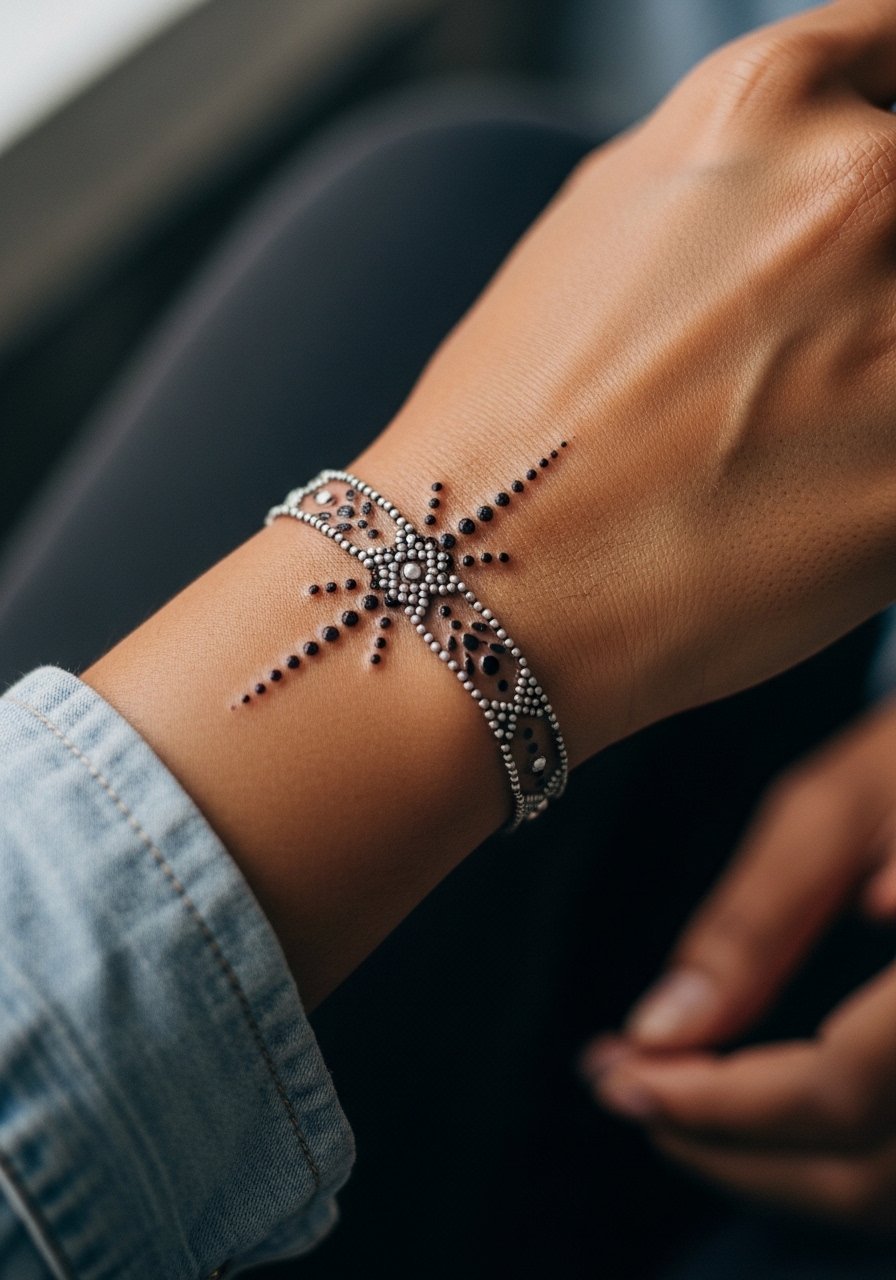
A beadwork band uses small dots to mimic beads on a string. Tell the artist you want slight spacing between beads to prevent the dots from merging into a gray band. The common version that fails uses tiny crowded beads that merge within a year. The session is patient work and can take 45 minutes to layer the beads. For evenings or summer wear, a thin beaded bracelet layers well with the tattoo for a tactile pairing.
10. Barbed Wire Fine Band
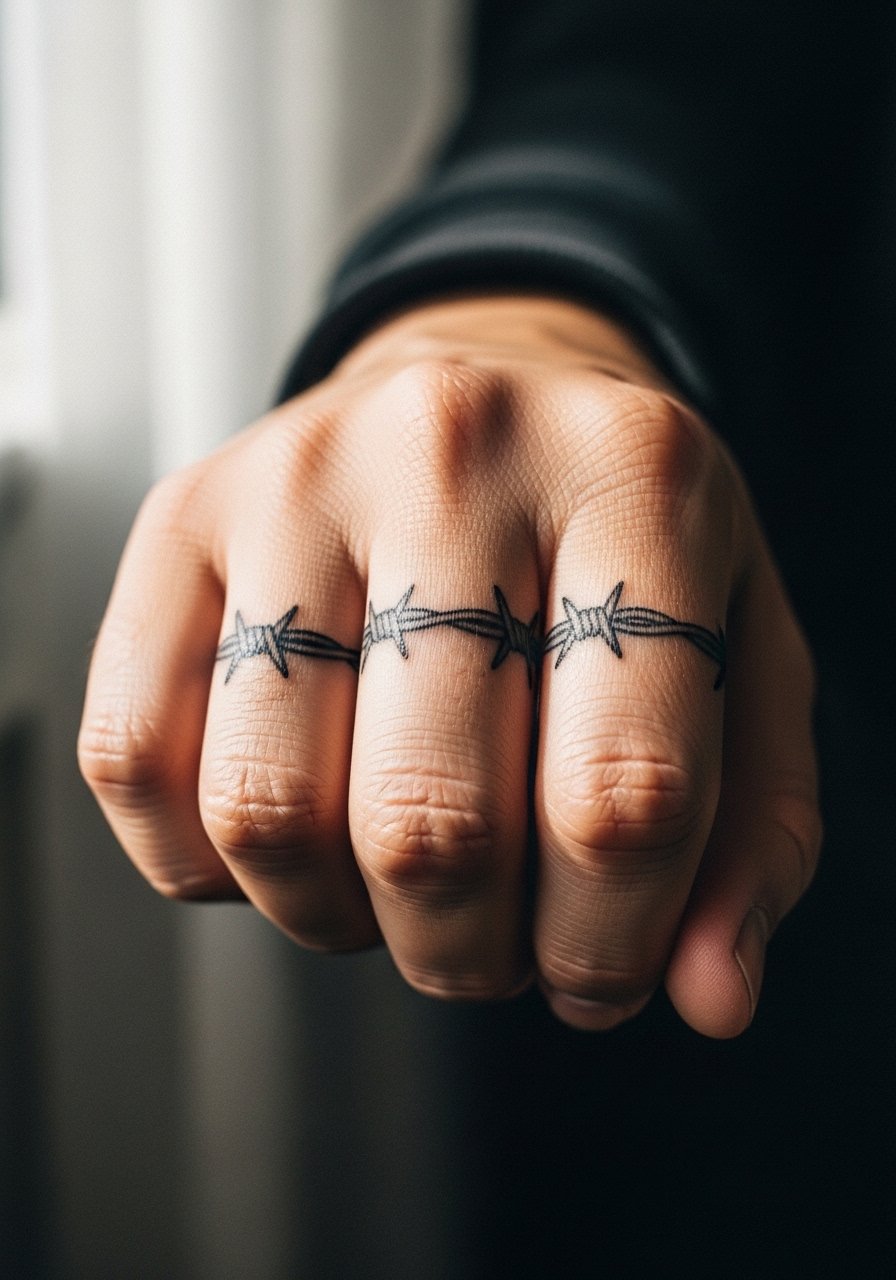
Barbed wire is crisp when spaced properly. Request that the artist avoid tiny barbs and instead use slightly larger, well-spaced barbs that maintain silhouette over time. The usual mistake is compressing too many barbs into a narrow space which leads to loss of detail as the skin settles. Pain across knuckles is sharp and sessions are short but intense. This design pairs with a minimalist watch or a thin cuff bracelet when you want to keep the focus on the motif.
11. Micro-Realism Feather Band
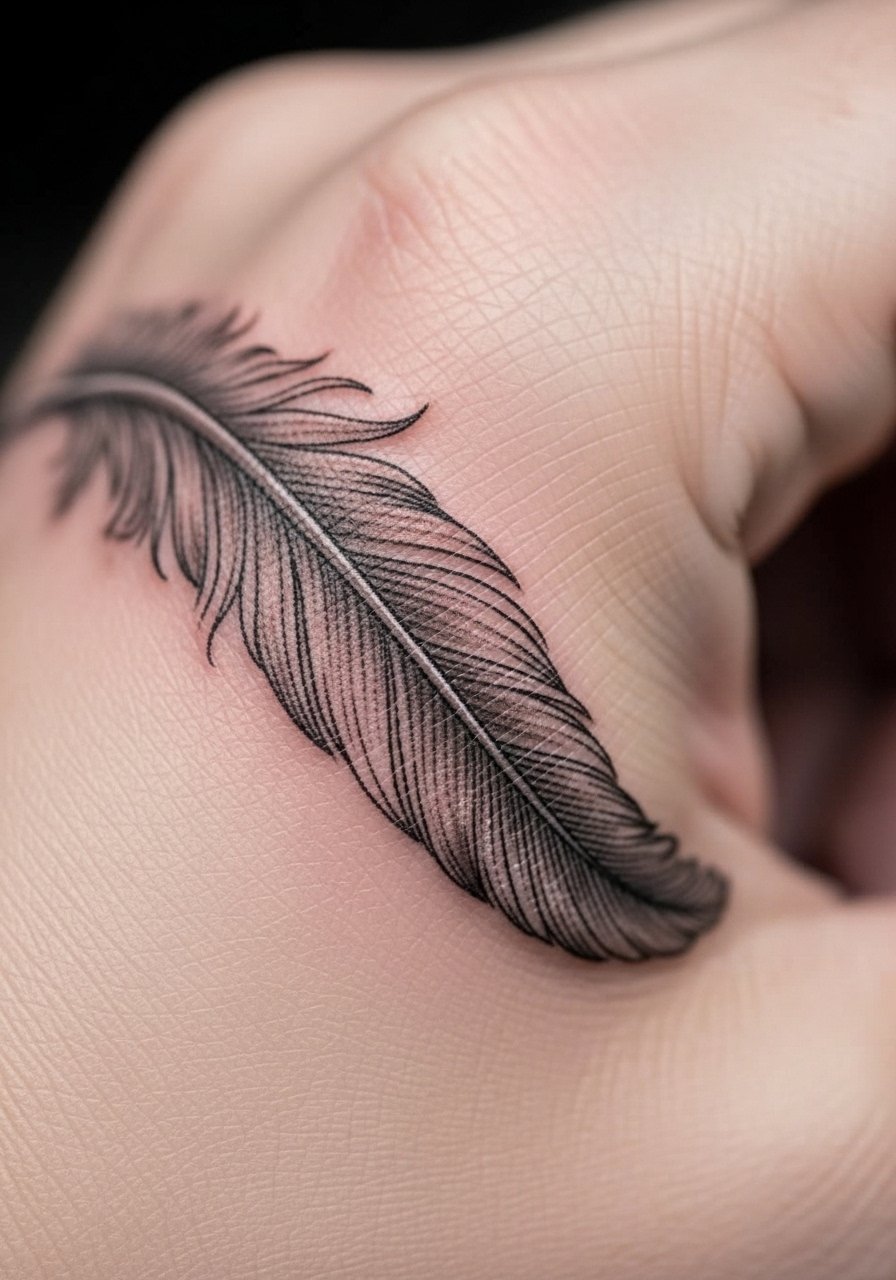
Micro-realism on the hand needs breathing room. Tell the artist to avoid over-detailing the feather barbs close together. The mistake is squeezing too much fine detail into a small band which blurs as it heals. Sessions are slower because of the detailing. Expect a touch-up at year two for definition. For showing the delicate shading, wear a minimalist gold ring set that complements without overpowering the feather.
12. Wave Motif Wrap Band
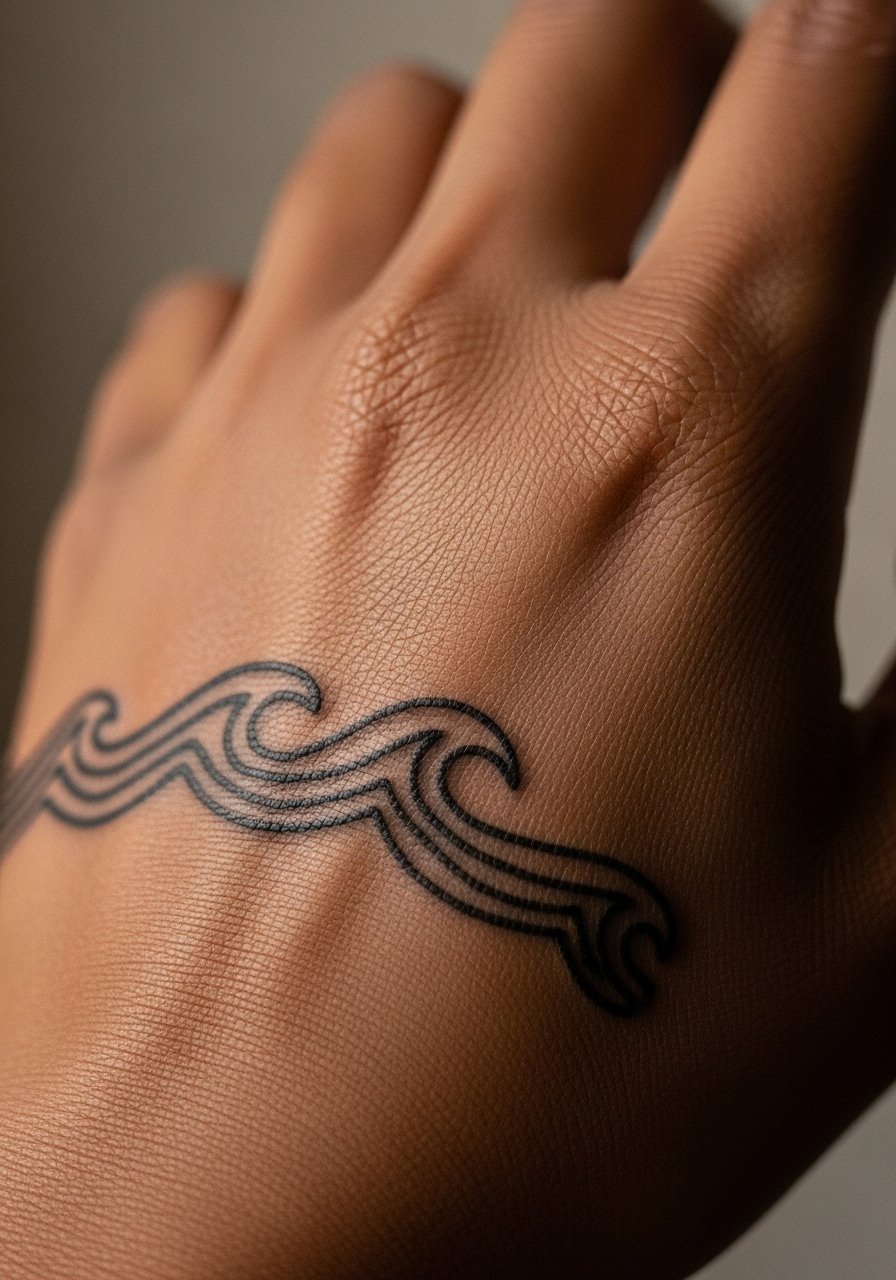
A repeating wave line can read modern and light. Ask for slightly thicker crest lines with open troughs so motion remains visible as the skin moves. The mistake is drawing the waves too tight which causes loss of rhythm after a year. This session is quick and fairly manageable pain-wise. Expect minimal touch-up if you avoid heavy sun exposure.
13. Morse Code Dot-Dash Band
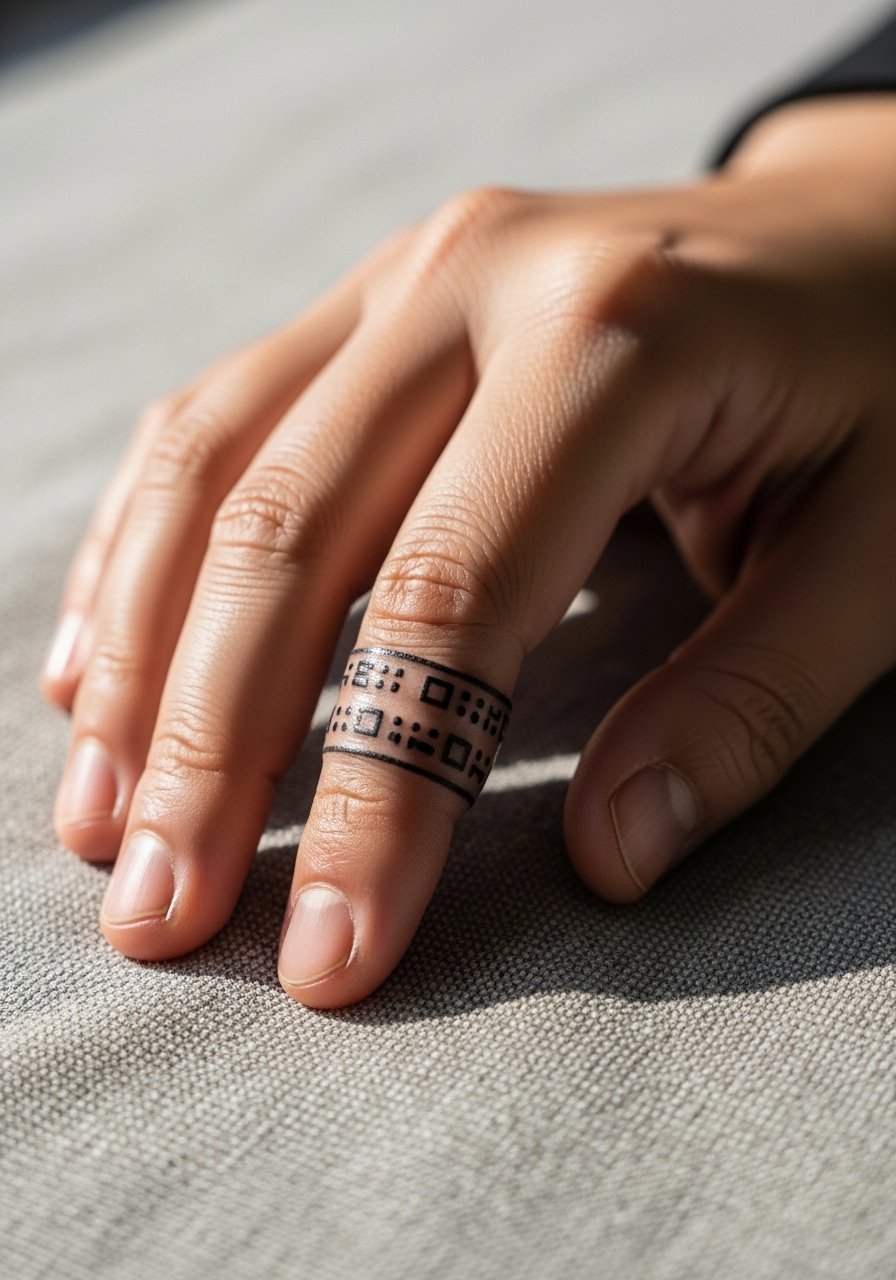
Morse code bands are discreet and personal. Bring the exact letter sequence you want and ask the artist to map it wrapped around the finger before tattooing. Text in image prompts needs precision, so confirm the exact dots and dashes with your artist. The common mistake is miscounting spaces which changes the message. Sessions are short but precise. Pair with thin stacking rings or a simple signet ring to echo the coded motif.
14. Floral Garland Mini Band
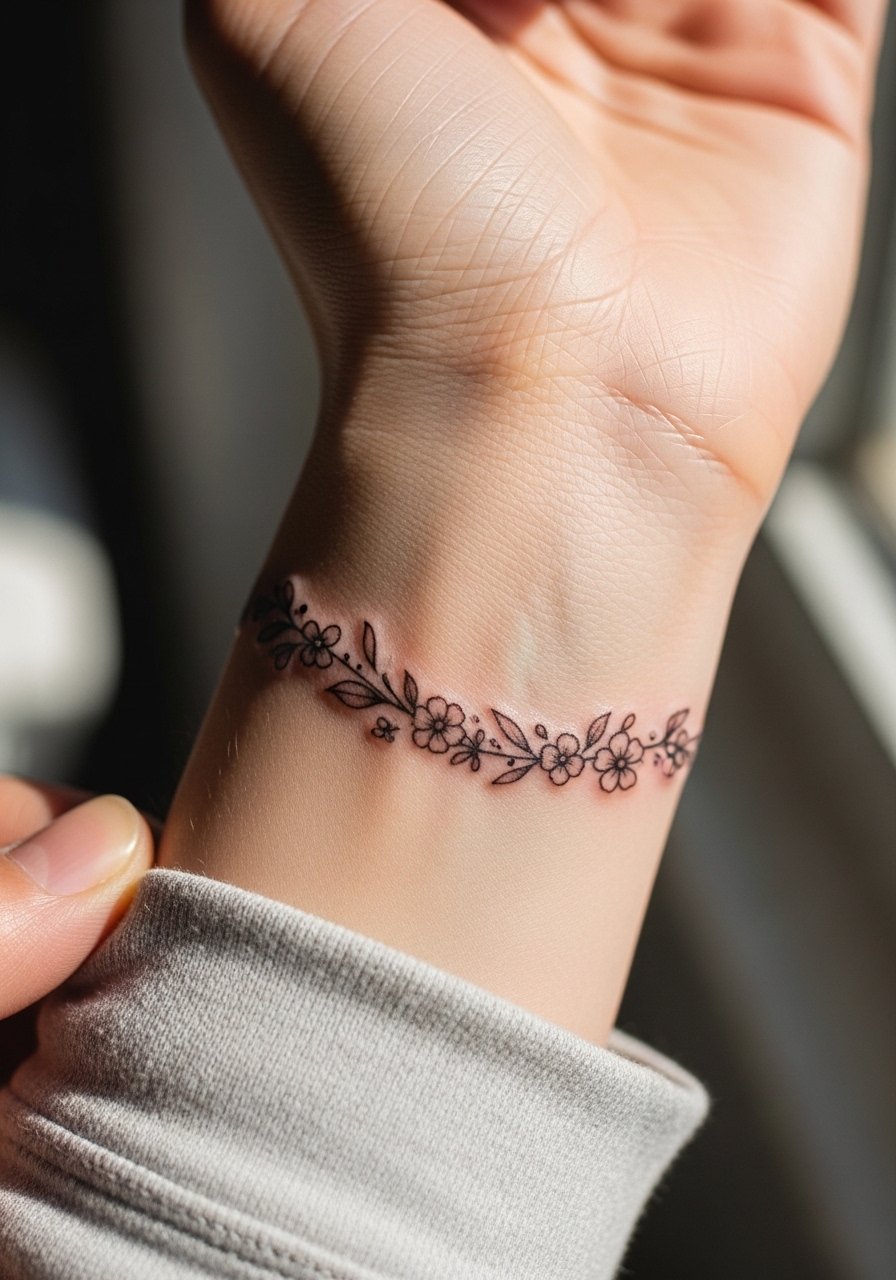
A ring of tiny flowers reads soft while still graphic. Request slightly larger petals and consistent negative space between motifs. The mistake most people make is insisting on ultra-small florals that lose petal definition fast. This placement is visible with short sleeves, so plan outfits accordingly. For show-off pairing try a rolled-sleeve linen top to reveal the garland.
15. Geometric Split Band
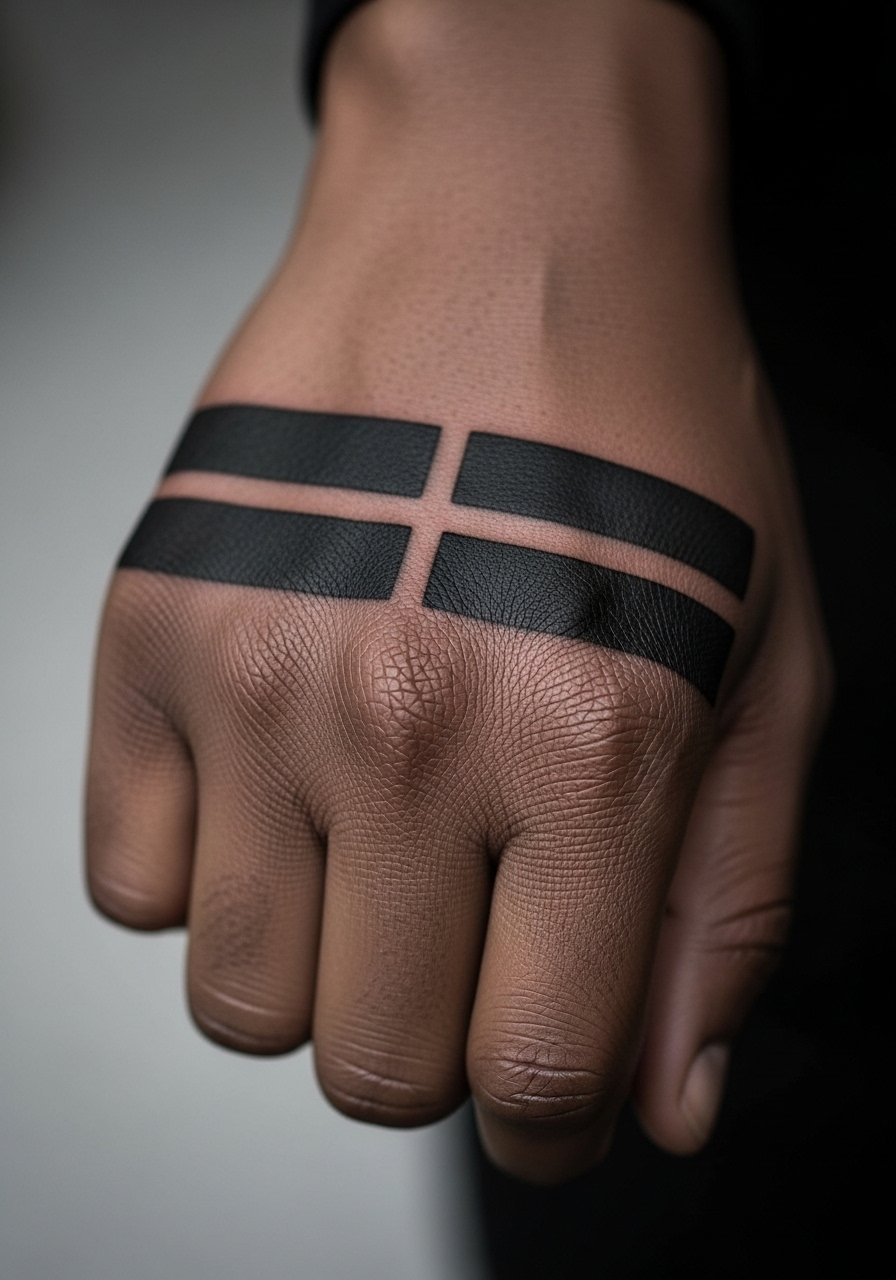
Split bands use a deliberate gap to create contrast. Tell the artist you want measurable spacing in millimeters so the split remains visible long term. A frequent mistake is making the gap too narrow, which results in the two halves merging. The session is technical and benefits from patience. For a clean aesthetic, wear a minimalist watch with a thin strap that keeps attention on the geometric lines.
16. Tiny Mandala Cuff
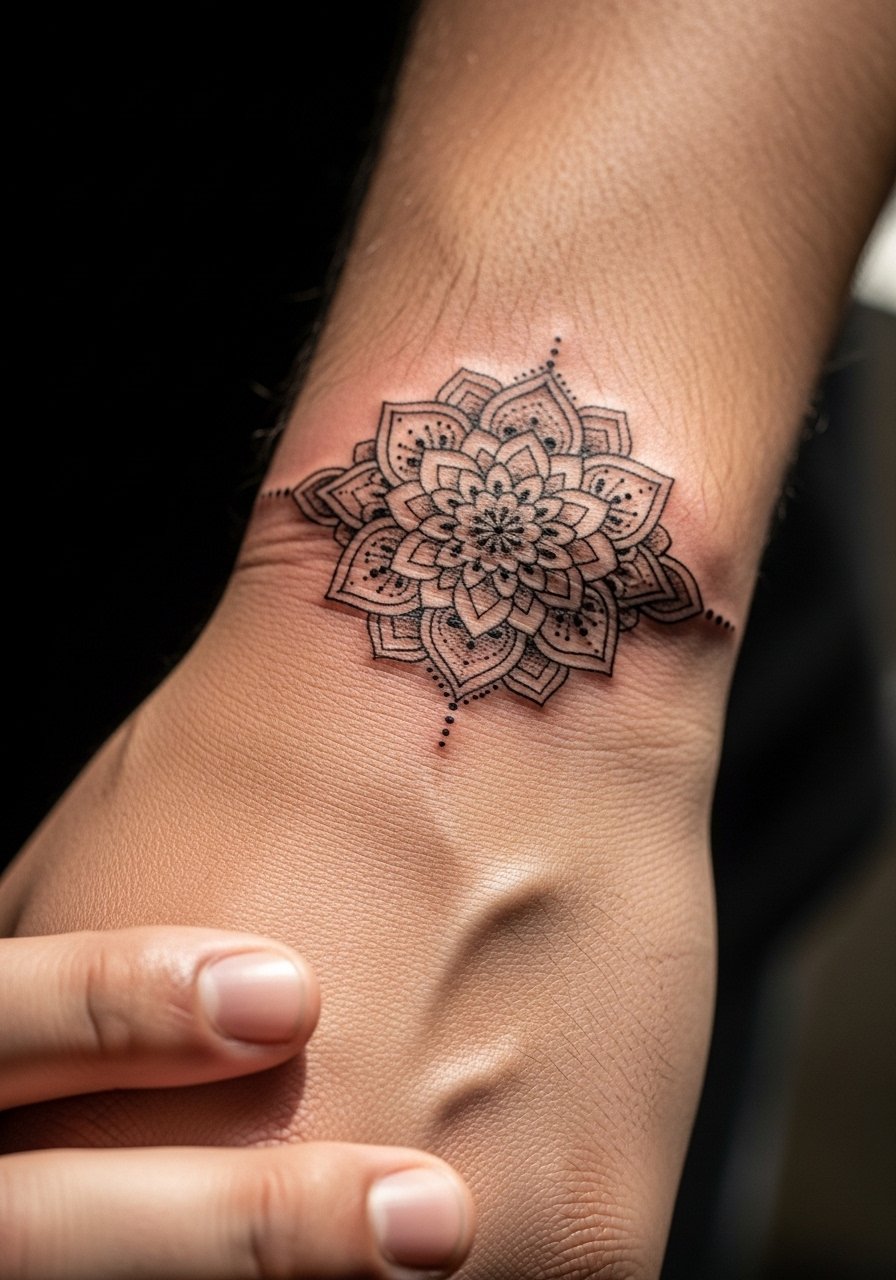
Mandala motifs need spacing to hold detail. Ask for a scaled-down mandala with simplified center and broader petal spacing so shadow areas do not collapse. The mistake is asking for a full detailed mandala the size of a thimble. Sessions can be longer because of circular symmetry work. If the mandala crosses onto wrist skin, expect touch-ups in three to five years depending on exposure.
17. Tiny Anchor Nautical Band
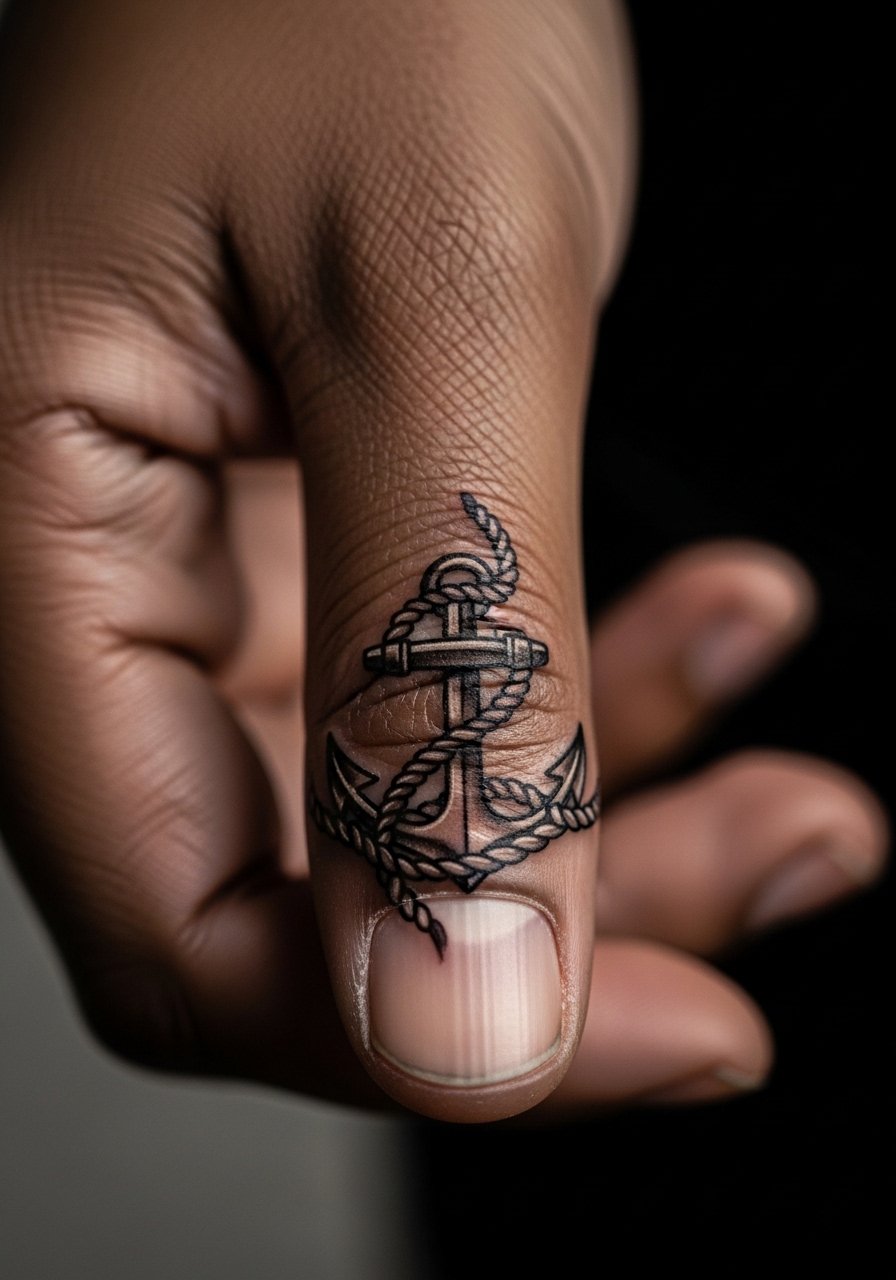
Nautical motifs like anchors read well in compact bands. Be explicit about scale and negative space and ask for slightly bolder anchor outlines to avoid early softening. A common mistake is tiny anchors that become blobs with time. Session time is short. For a maritime look, pair with a thin nautical rope bracelet to mirror the design.
18. Oxidized Metal Texture Band
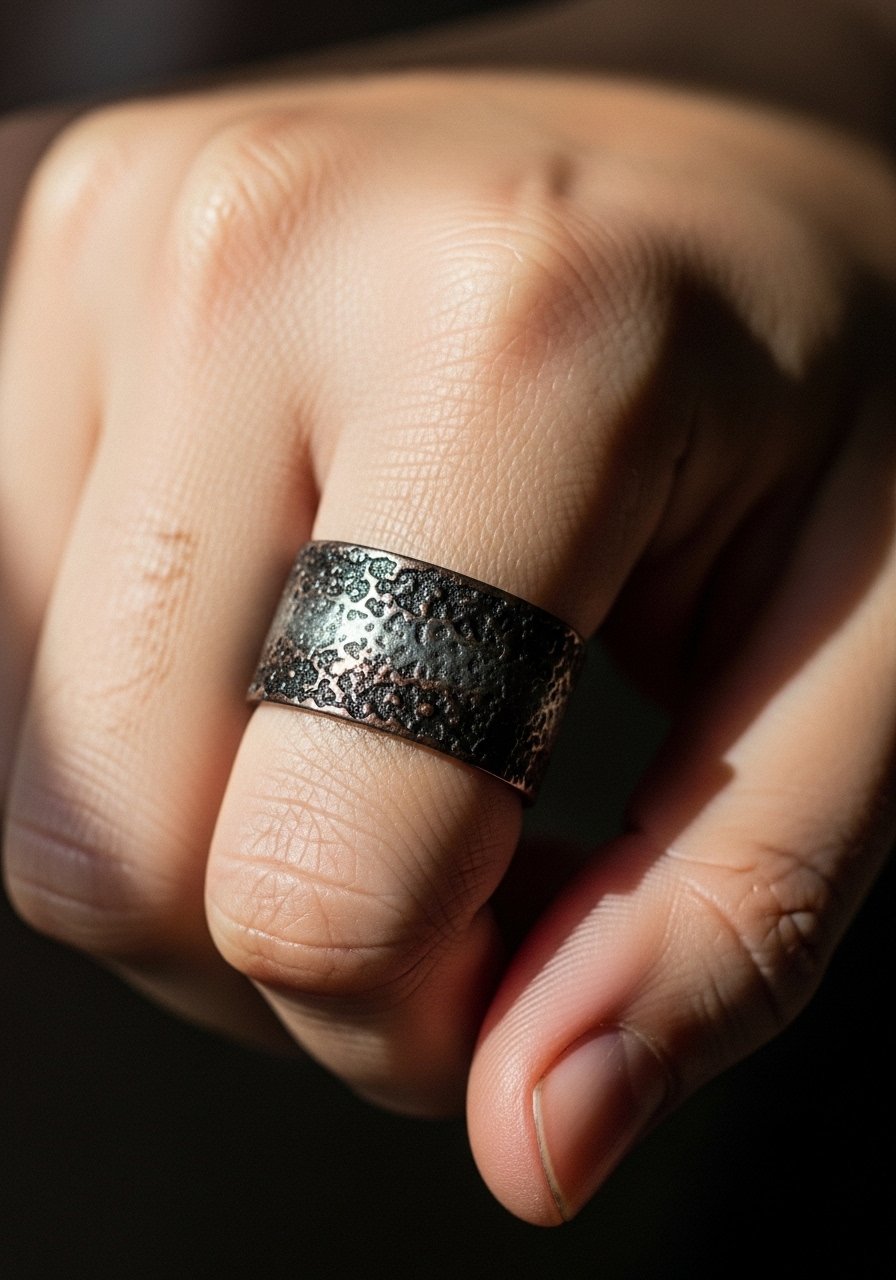
Texture tattoos that imitate metal patina rely on subtle shading. Ask for stipple and light whip shading rather than heavy fill so the texture reads as worn metal not flat gray. The frequent mistake is over-inking the texture which ages into a muddy tone. Sessions take longer to layer texture. This type of band pairs well with stacked minimalist rings.
19. Tiny Zodiac Glyph Band
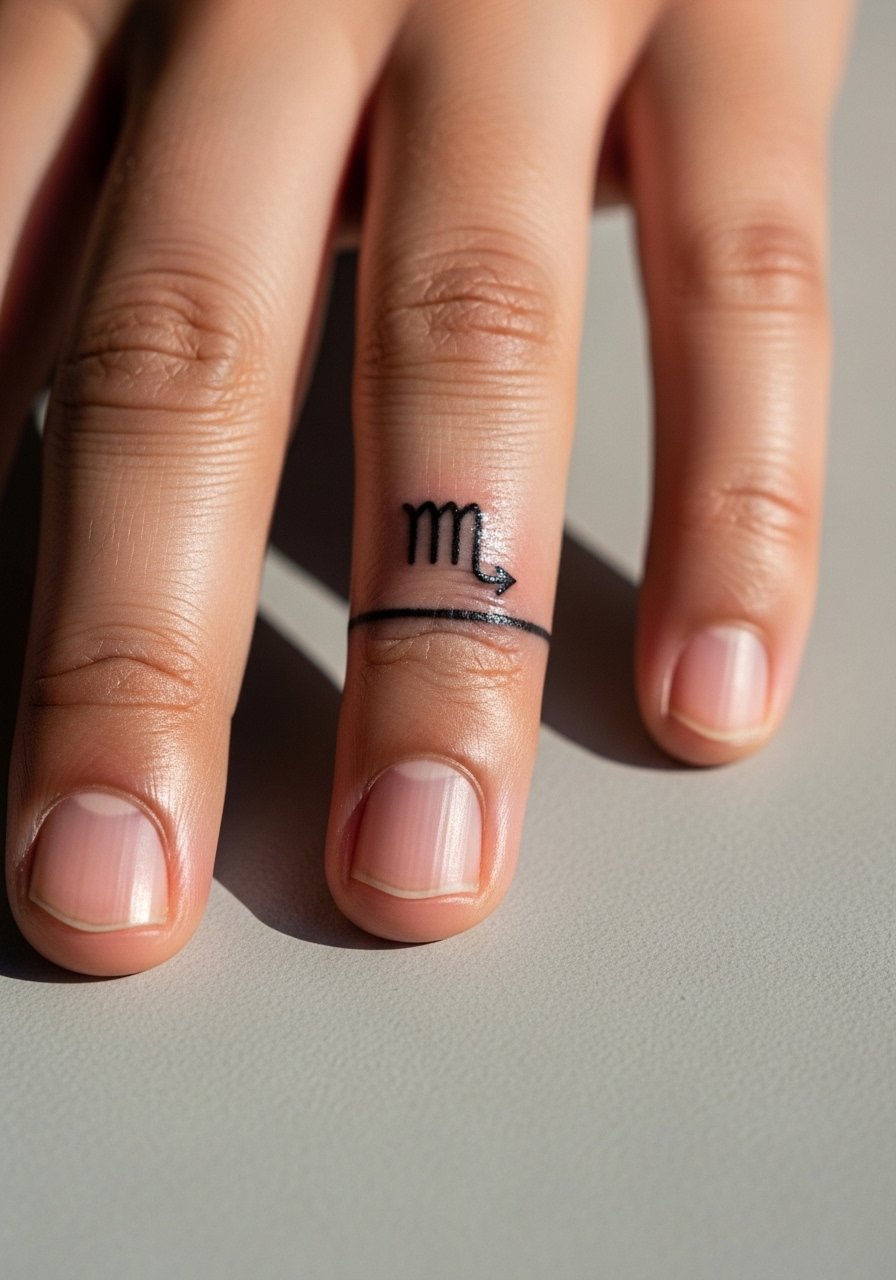
A glyph band is a compact way to carry a symbol. Provide the exact glyph or coordinates so the stencil matches your intent. The main mistake is mismatched glyph style to finger scale. Sessions are short. For discrete show-off wear a thin chain bracelet or roll sleeves to the forearm.
20. Sunburst Halo Around Knuckle
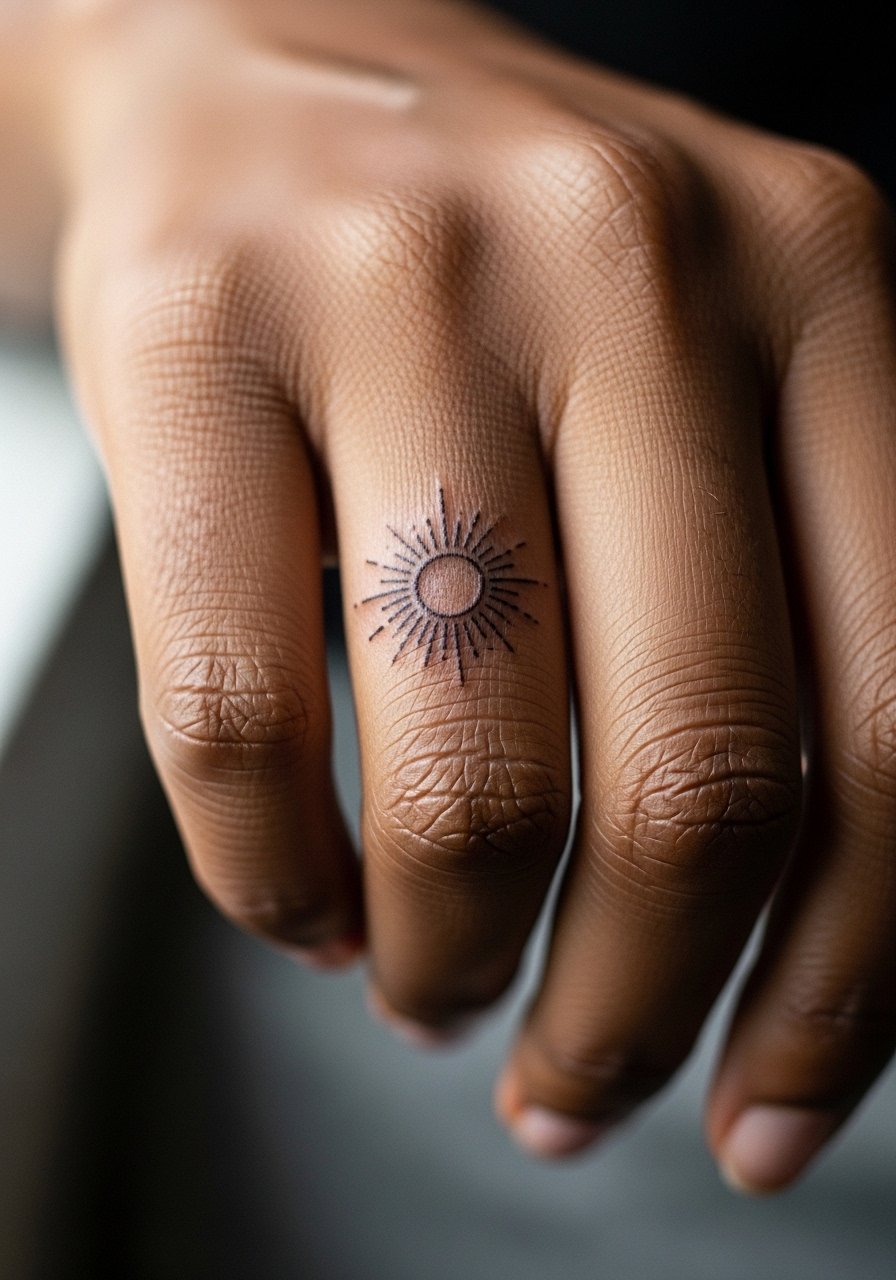
A sunburst halo uses short rays to suggest light. Tell your artist to stagger ray lengths and leave small breathing gaps so rays do not merge. The mistake is drawing too many rays closely packed. Sessions are quick and the pain is sharp but brief. This element shows with cropped sleeves and bracelets.
21. Coordinated Couple Bands
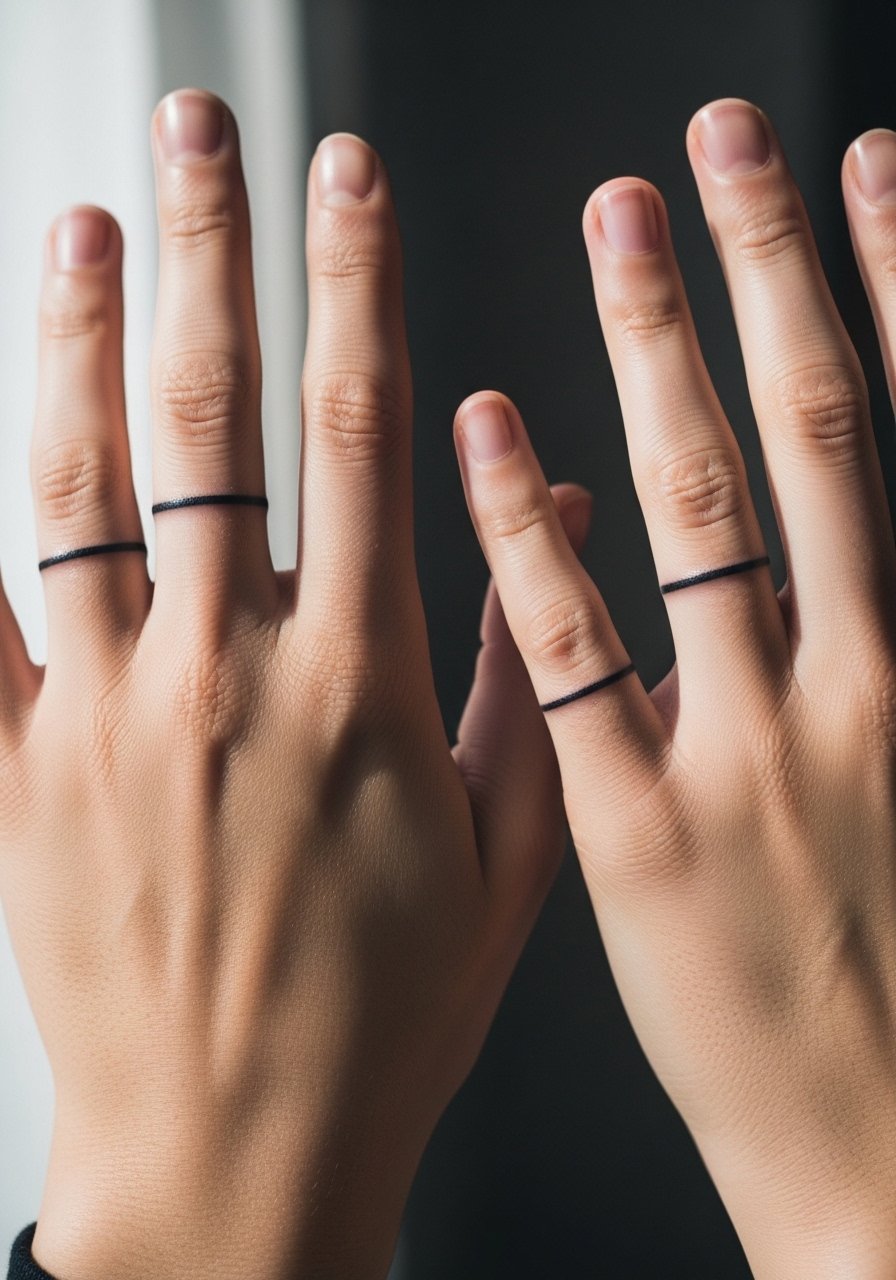
Matching bands for partners are meaningful and practical. Agree on exact scale, placement, and how the design will look when hands are together and apart. A common mistake is choosing a design that reads differently when offset by finger size. Sessions are typically quick for each person but plan for two separate appointments if skin types differ. If you plan to show them off, simple matching ring sets complete the look.
Frequently Asked Questions
Q: How often will hand band tattoos need touch-ups compared with forearm work?
A: Hand bands generally need touch-ups sooner because the skin moves and sees more wear. Expect the first touch-up around year two to three for fine line work and possibly more frequent tweaks for tiny scripts or knuckle designs. UV exposure and frequent washing speed fading, so plan accordingly.
Q: Are there band styles I should avoid if I work in a conservative job?
A: Yes. Highly visible knuckle bands and bold blackout bands are more likely to affect first impressions in conservative workplaces. If you want privacy, choose inner hand placements that sit near the wrist or a small finger ring band that can be covered by a ring or sleeve. A discreet placement and scale are practical compromises.
Q: Do different hand skin tones affect design choices for saturation or spacing?
A: They do. On darker tones heavier saturation and slightly thicker lines help maintain contrast, while on very light skin finer gradations can read well. Tell your artist your skin tone during consultation and ask for a healed reference photo on similar skin when possible.
Q: Will fine line bands on fingers always blur faster than bold bands?
A: Generally fine line work on fingers blurs faster because of constant motion and thin skin. Some artists push back and say proper depth and spacing can make fine lines last. The practical approach is to favor slightly bolder line weight for fingers or accept a touch-up plan.
Q: What should I wear to a hand band tattoo session for comfort and access?
A: Wear clothing that makes it easy to rest your arm comfortably, like a loose button-down shirt with sleeves you can roll up. Avoid anything that will press on the hand afterward. If you sweat easily, bring a thin microfiber towel to keep the area dry.
