
The rush of sitting down for a Western-inspired piece is half adrenaline and half tiny decisions that show up years later. Fine line hats that read crisp today can blur, and heavily saturated traditional cups hold up differently than watercolor washes. Pick a direction now and plan for how it will age, what you will wear to show it off, and what to ask during the consult before the stencil ever touches skin.
1. Traditional Cowboy Hat with Lasso Band on the Forearm
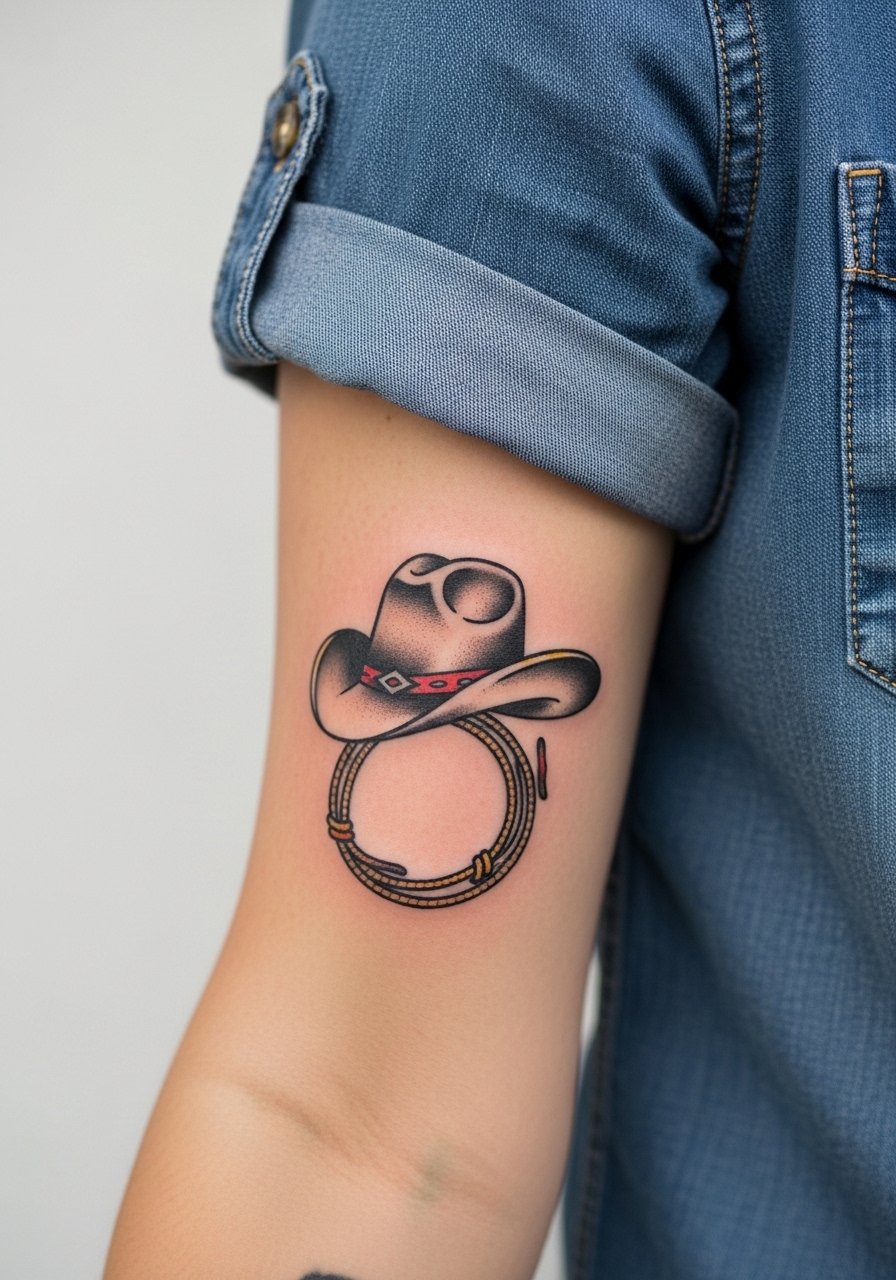
I see this version on people who want classic Western iconography that still reads from a distance. Ask for bold linework and solid saturation so the hat ages into a clear silhouette at year five. A common mistake is requesting tiny decorative details inside the brim which clog and blur over time. For the session expect low to moderate pain and a single one-hour block for a 4-5 inch piece. For showing it off, try a rolled sleeve chambray shirt and a leather cuff bracelet men on the opposite arm so the forearm reads like a framed panel.
2. Black and Gray Realistic Tilted Stetson on the Shoulder
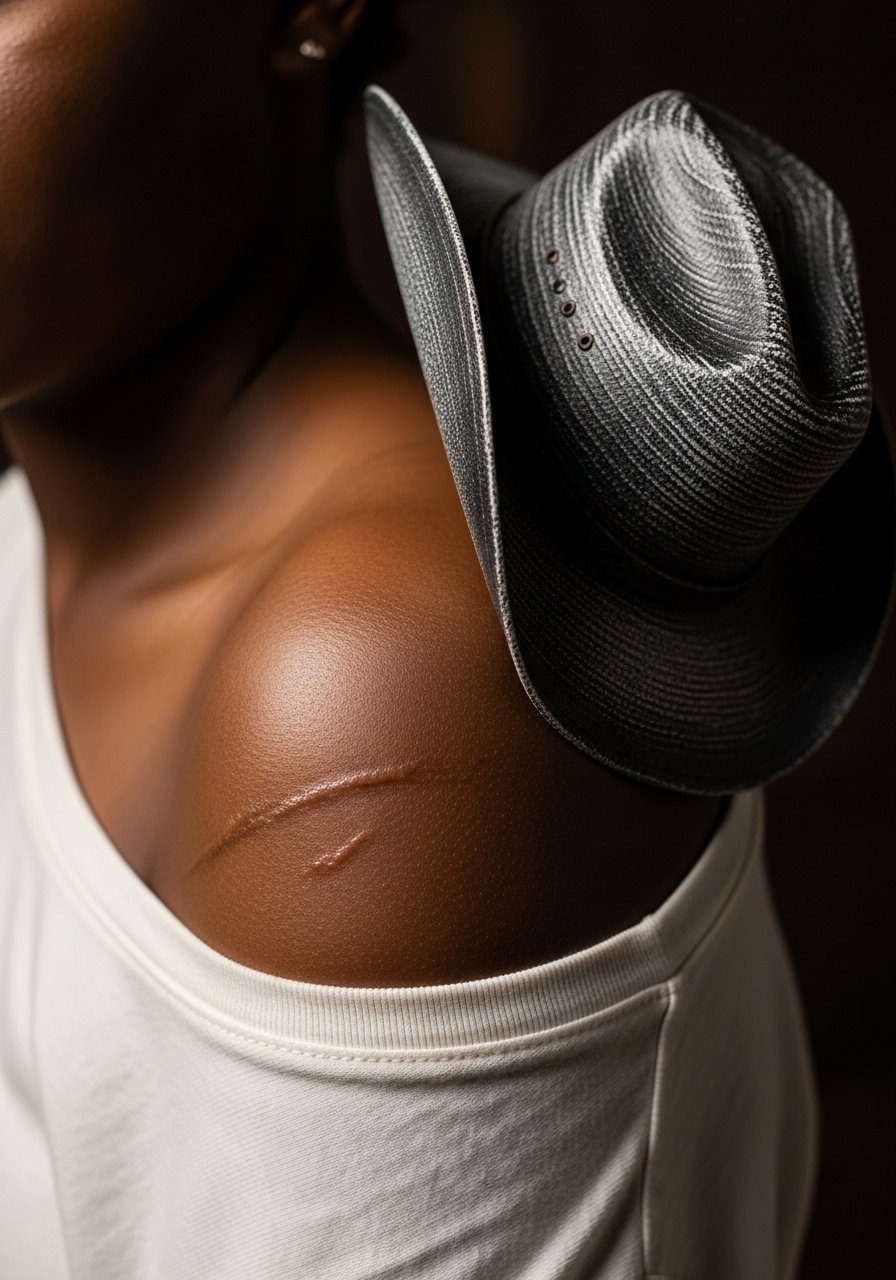
This style thrives when you want texture and age in the leather rendered through stipple shading and soft gradients. Tell your artist you want visible grain and light edge wear rather than photo-copy detail so the piece holds without turning muddy. Shoulder placements are lower pain and sit nicely under clothing. Expect two shorter sessions for a five-inch realistic piece. For display, pair with an off shoulder cotton tee and a thin chain necklace men to draw the eye across the collarbone and shoulder.
3. Minimalist Outline Cowboy Hat on the Wrist
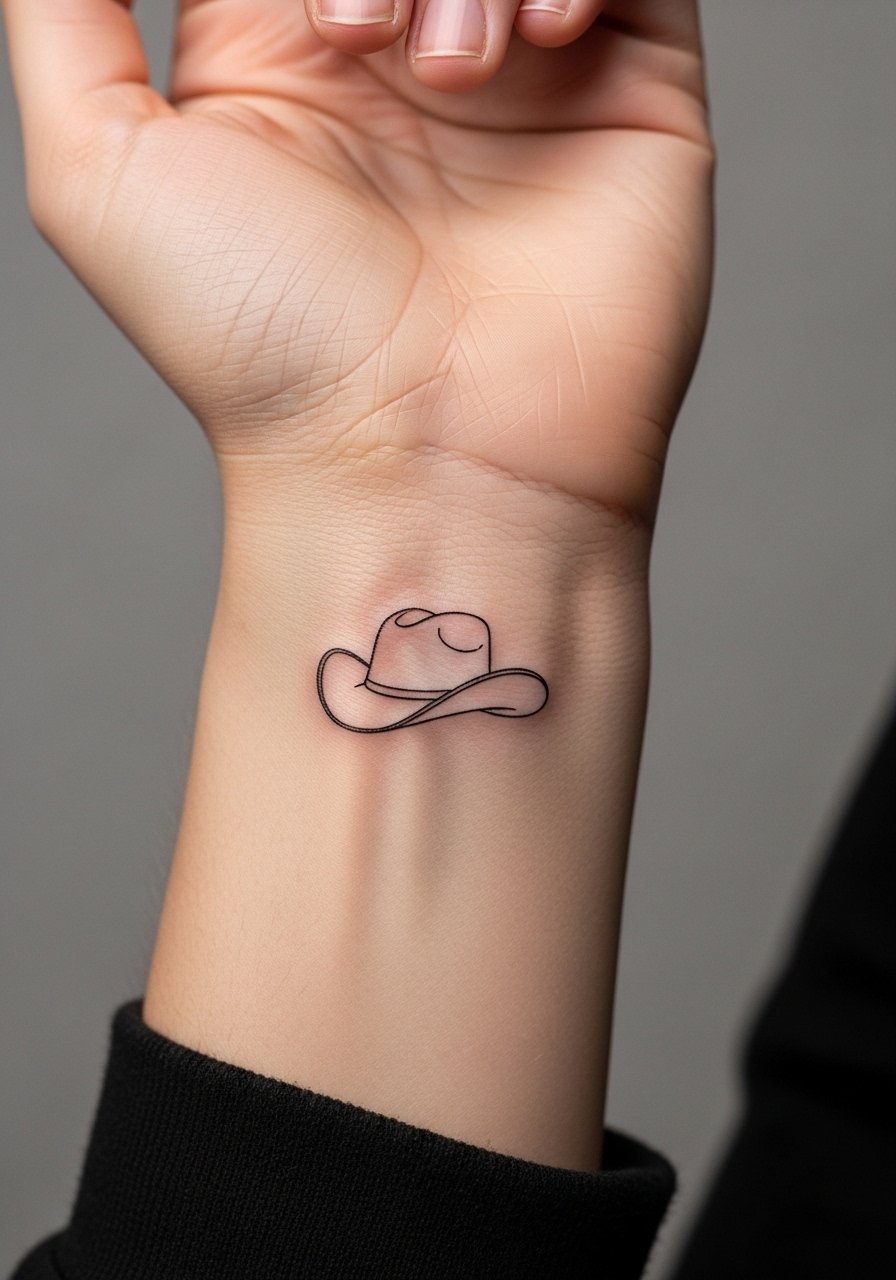
Minimalist wrist pieces appeal to first-timers who want the motif without commitment. The biggest mistake is scaling it too small. Tiny single-line hats can disappear into daily wear by year two. Ask for slightly heavier lineweight and a clear negative space brim so touch-ups are straightforward. Wrist tattoos need careful aftercare because of washing and friction. The session is short and sharp. For showing it off, wear a slim leather watch on the opposite wrist and keep cuffs rolled in a linen rolled cuff shirt.
4. Neo-Traditional Cowboy Hat with Horse Silhouette on the Outer Thigh
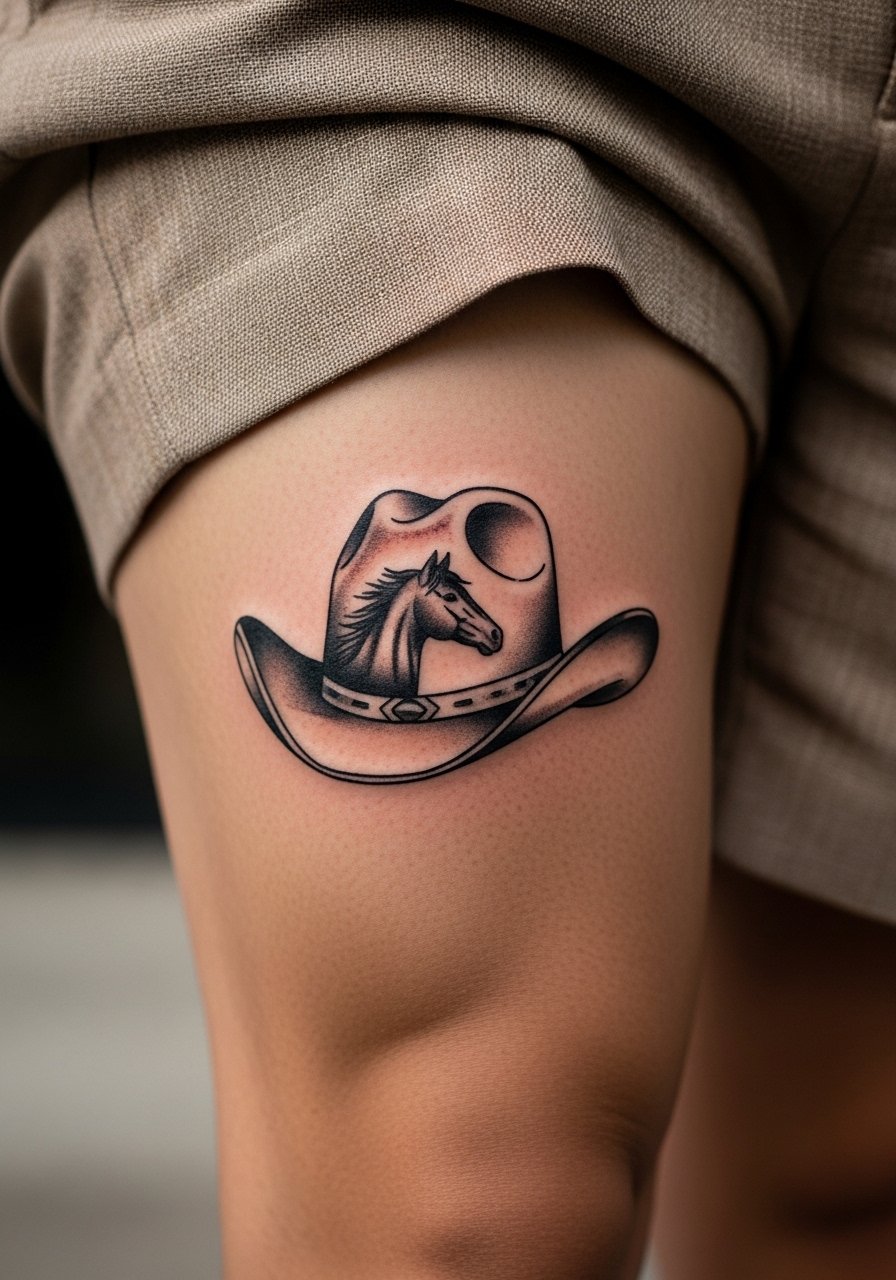
This blends bold outlines with modern color pops against a dark base. For a six-inch thigh piece ask for saturated fills and a clear silhouette of the horse so it reads at a glance. Thigh placements hide well during healing but need loose clothing the session day. The session feel is forgiving because of muscle padding, and the design scales well into larger leg work. Show it off with tailored athletic shorts or rolled chinos when you want it visible.
5. Fine Line Cowboy Hat with Stars on the Inner Forearm
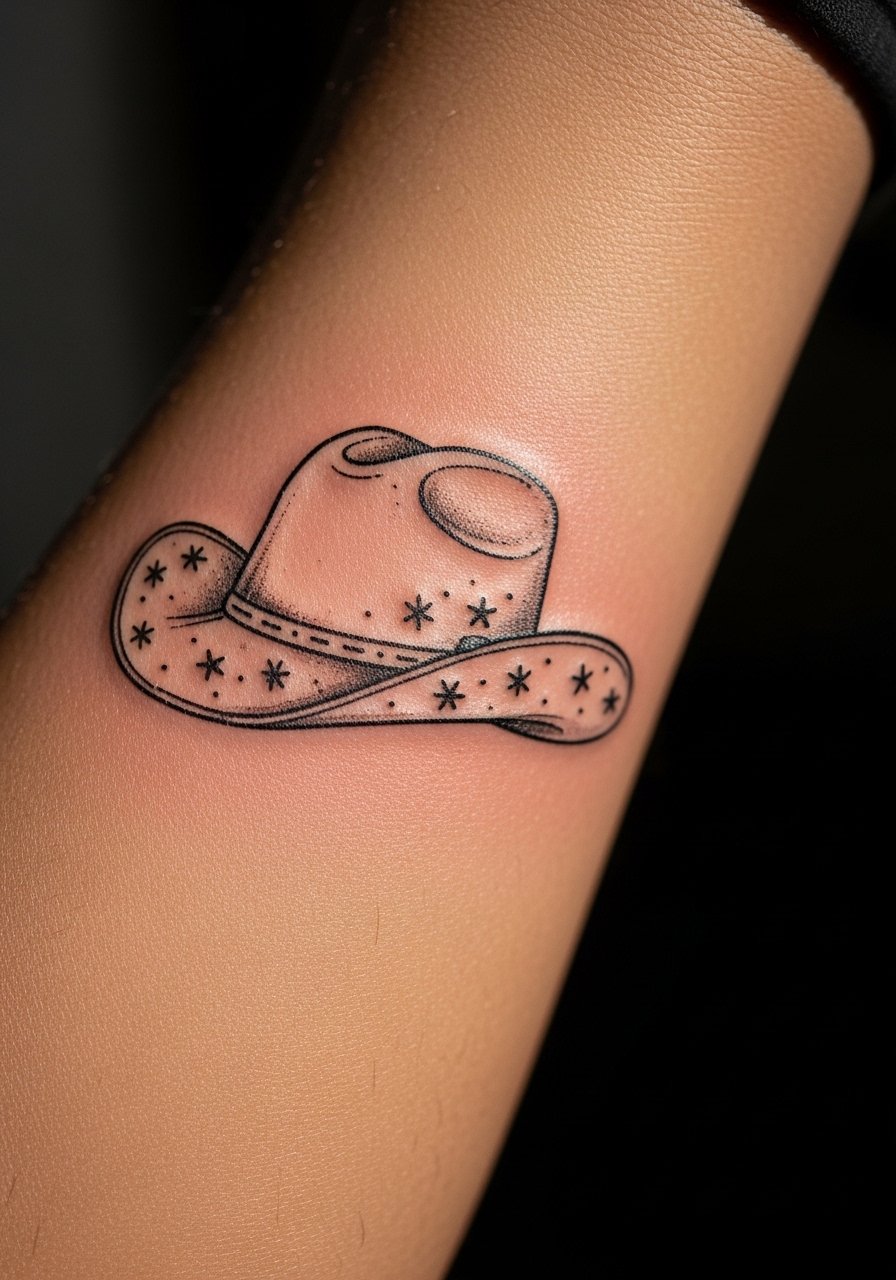
Fine line at the inner forearm reads intimate and delicate, but there is blowout risk if the artist goes too deep. Ask for slightly spaced star elements and stipple shading rather than compact crosshatching. Younger skin and flatter areas help these lines settle. Expect a one-session job but plan for a touch-up at year two to keep the tiny stars crisp. For session wear and display, a rolled sleeve chambray shirt makes rolling the sleeve effortless and frames the inner forearm.
6. Watercolor Cowboy Hat Splash on the Collarbone
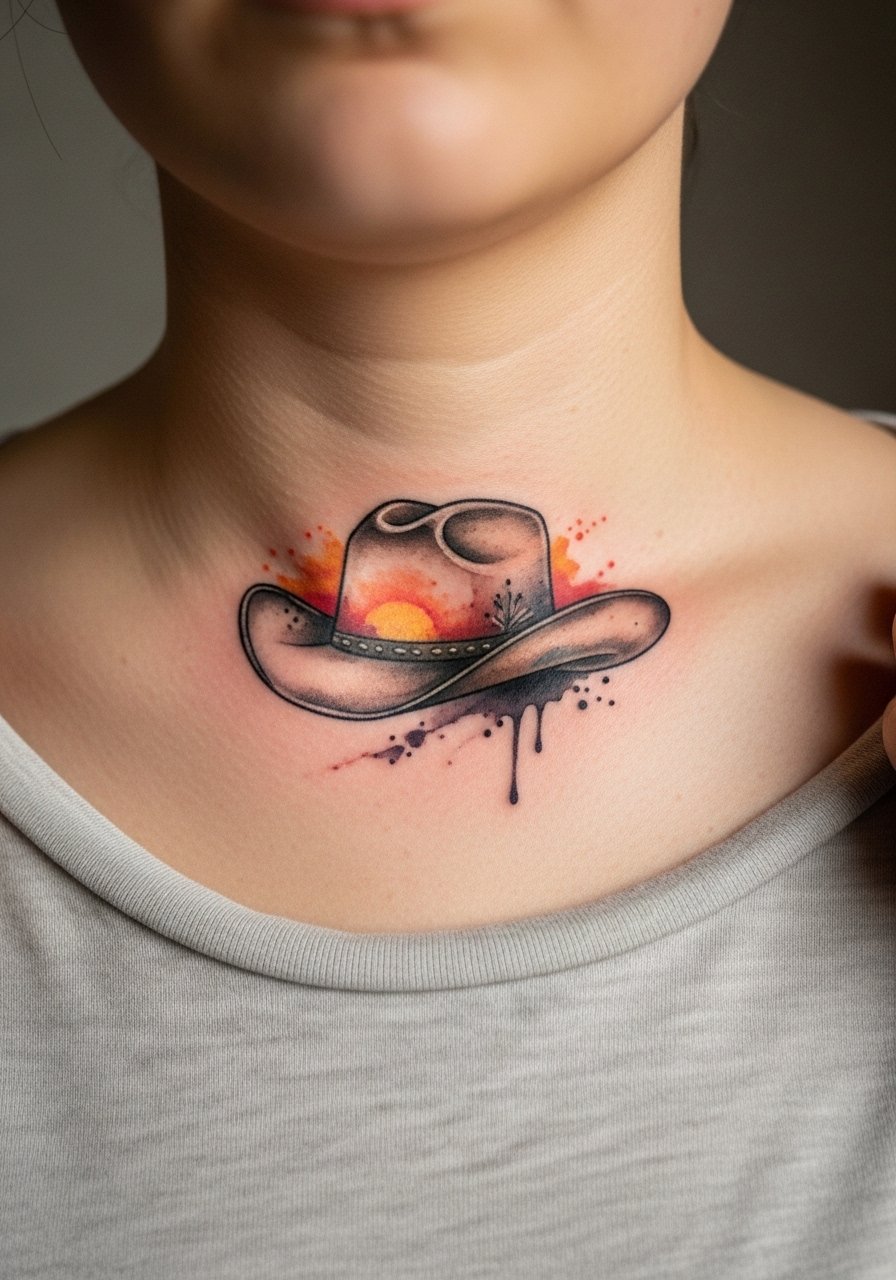
Watercolor offers a softer, painterly option that reads casual and artistic. The caveat is color fade. Ask your artist to anchor washes with subtle black linework so the shape lasts even as pigments soften. Collarbone pieces are visible and sensitive. Sessions can be two hours depending on color layering. For showing it off pick a v neck henley shirt or a low cut tank top to frame the collarbone without competing prints.
Studio Day Picks
The small forearm and wrist pieces above heal differently from the larger thigh and shoulder work, and a few studio-day items smooth out the session and the first week.
-
Stencil transfer paper kit. Lets you preview how the hat will sit on curved forearms and thighs before the needle arrives.
-
Topical numbing cream. Useful for collarbone or inner forearm sessions where sensitivity spikes without affecting linework when used correctly.
-
Thin protective film roll. Keeps wrist and finger pieces cleaner during the first week of constant hand use.
-
Fragrance free gentle body wash. Cleans healing skin without irritating the fine line work many small hat designs rely on.
-
Aquaphor healing ointment. A thin layer in the first 48 hours helps keep delicate lines from drying into flaky crusts that pull at the needles' channels.
7. Traditional Hat with Boots and Spurs Combo on the Upper Arm
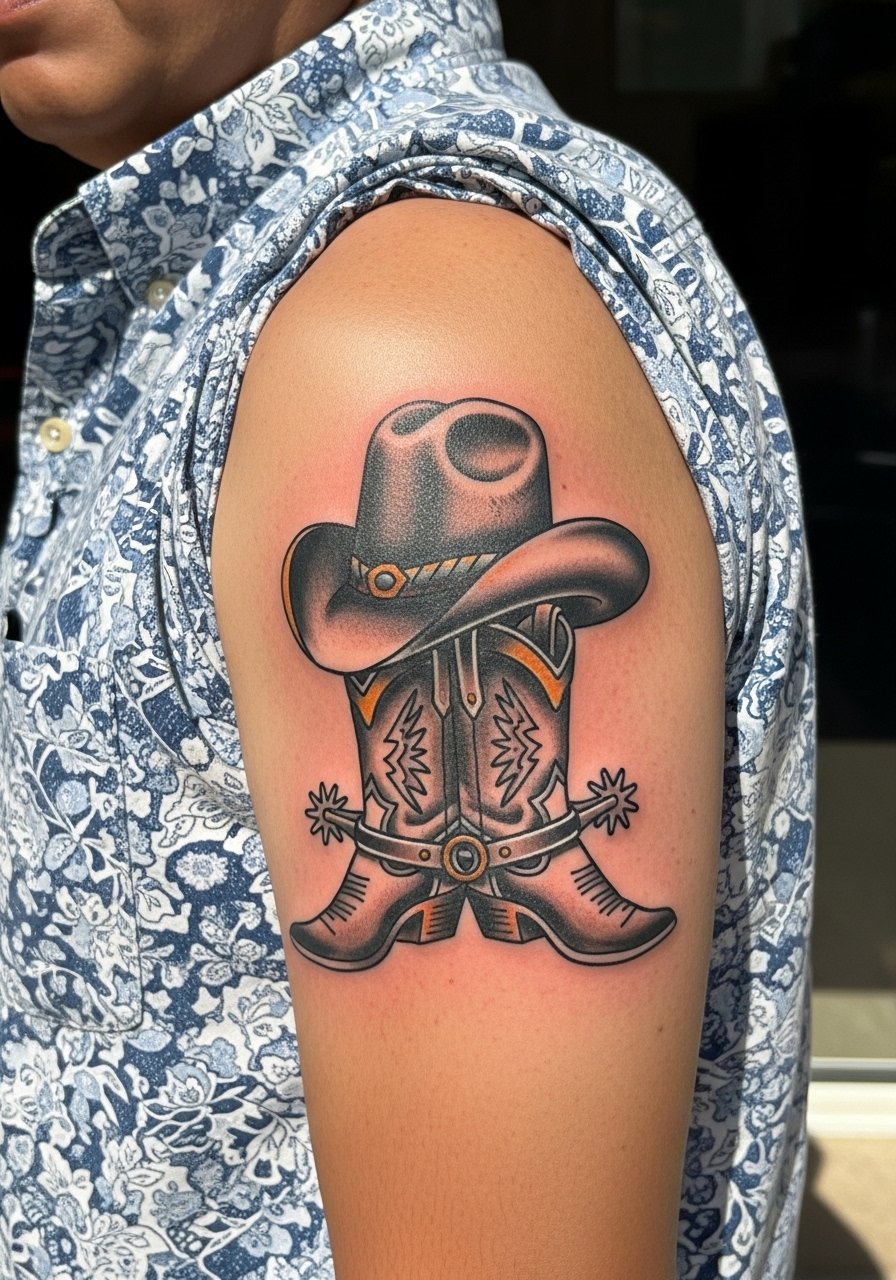
A stacked composition reads like a badge of lifestyle. Upper arm skin takes saturation well and ages into a bold panel. The usual misstep is crowding too many small elements into a vertical piece. Request clear negative space between the hat and the boots so each element keeps separation over time. Expect one to two sessions depending on size and color. Pair it with a loose button-down shirt on session day so the artist can roll the sleeve without crushing fresh ink.
8. Blackwork Cowboy Hat with Rope Texture on the Chest
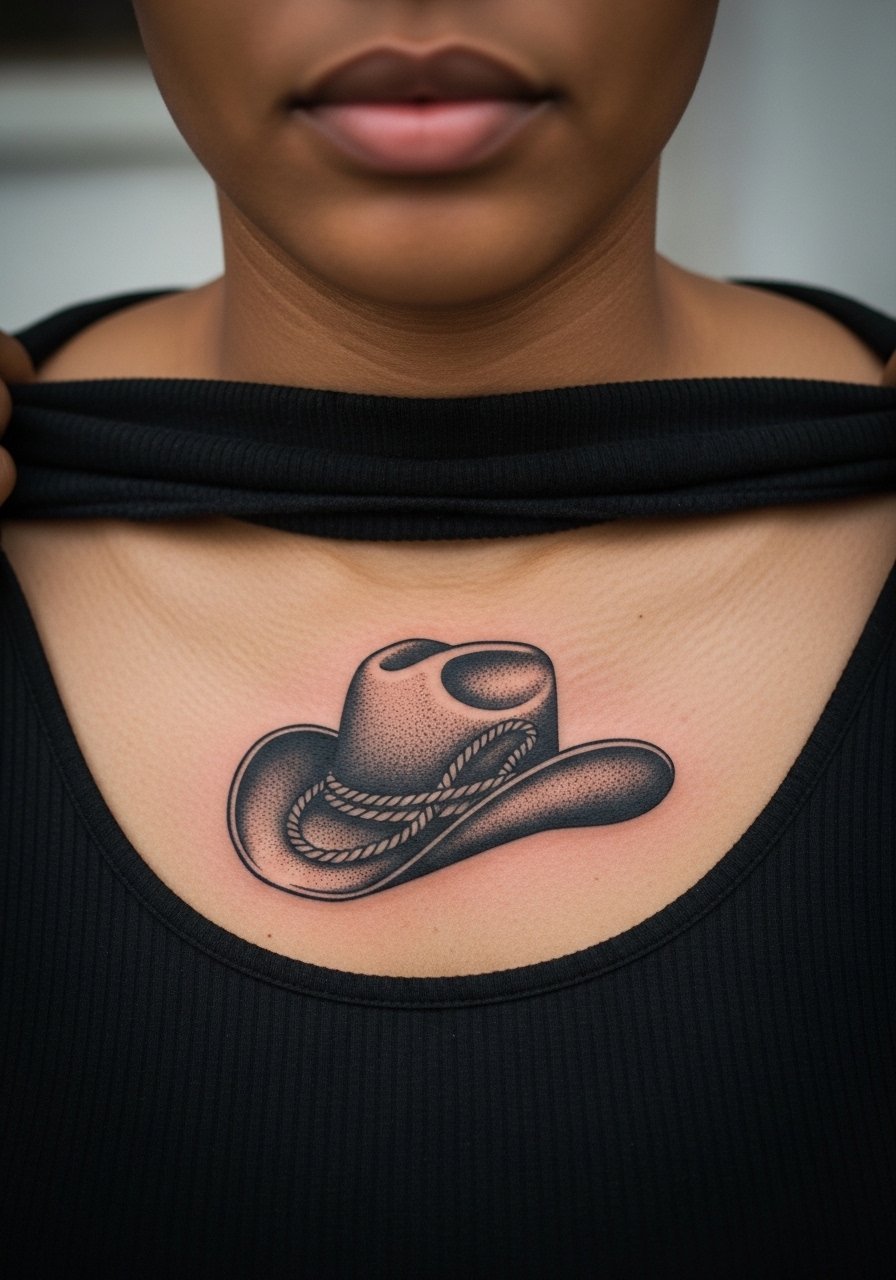
Solid blackwork makes a statement and holds up well through years of sun exposure. On the chest the heavy fills sit bold and dramatic. Tell your artist you want crisp rope texture rather than blended shading so the knot details stay sharp. Chest sessions can be intense because of rib flexing and breathing. Expect two sessions for larger fills and plan for sun protection once healed. For session comfort, wear a wide-neck shirt you can easily pull aside.
9. Ignorant Style Chunky Cowboy Hat on the Calf
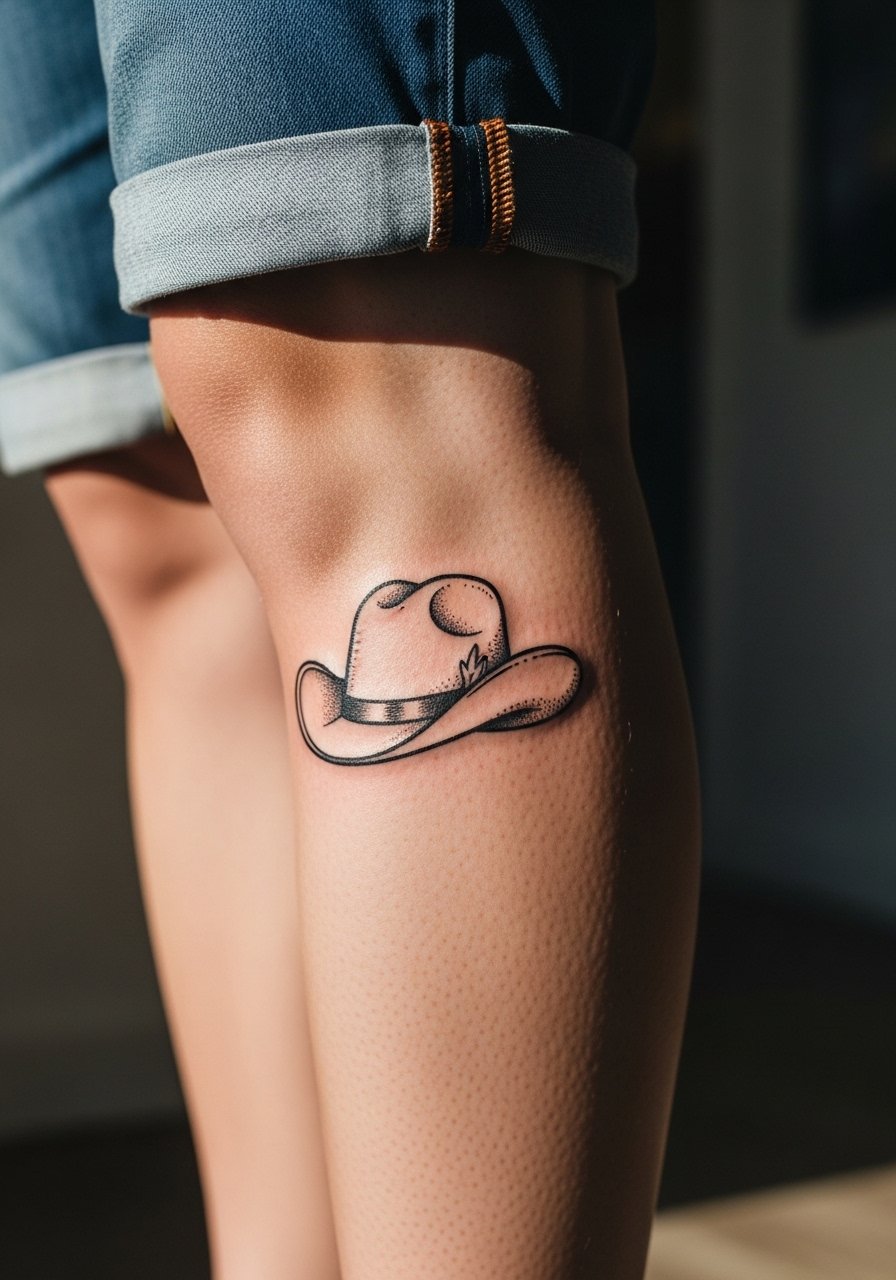
Ignorant style thrives on thick, naive strokes and a playful attitude. Calf placement gives enough canvas for a chunky hat that reads from a distance. The common error is asking for extra fine detail inside the naive shapes which defeats the style. Expect a quick, one-session piece with low to moderate pain. For showing it off, roll chinos or grab a pair of rolled cuff chinos and low-profile boots to echo the Western vibe.
10. Ornamental Cowboy Hat with Vines on the Ribcage
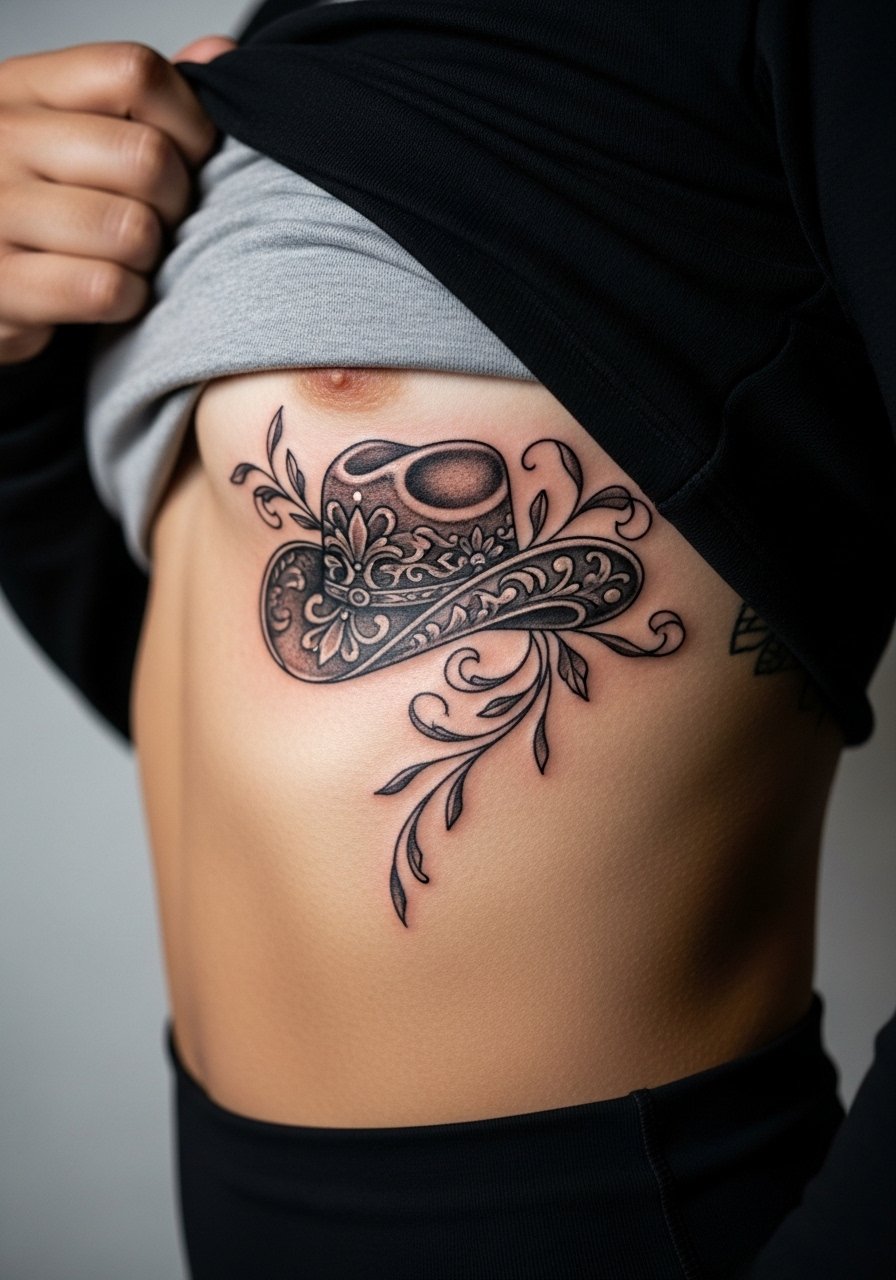
Ribcage work offers a long, sculptural plane for ornamental patterns but it hurts more than most placements. Artists split on fine line on ribs. One camp warns skin stretch makes lines blur within two years. The other camp argues that with proper depth and spacing fine line can settle fine on ribs. Ask your artist which approach they take and expect a stronger spacing plan if longevity matters. For sessions, wear a cropped top you can lift so access is easy. Plan for a two to three session timeline.
11. Micro-Realism Tilted Stetson on the Side of the Neck
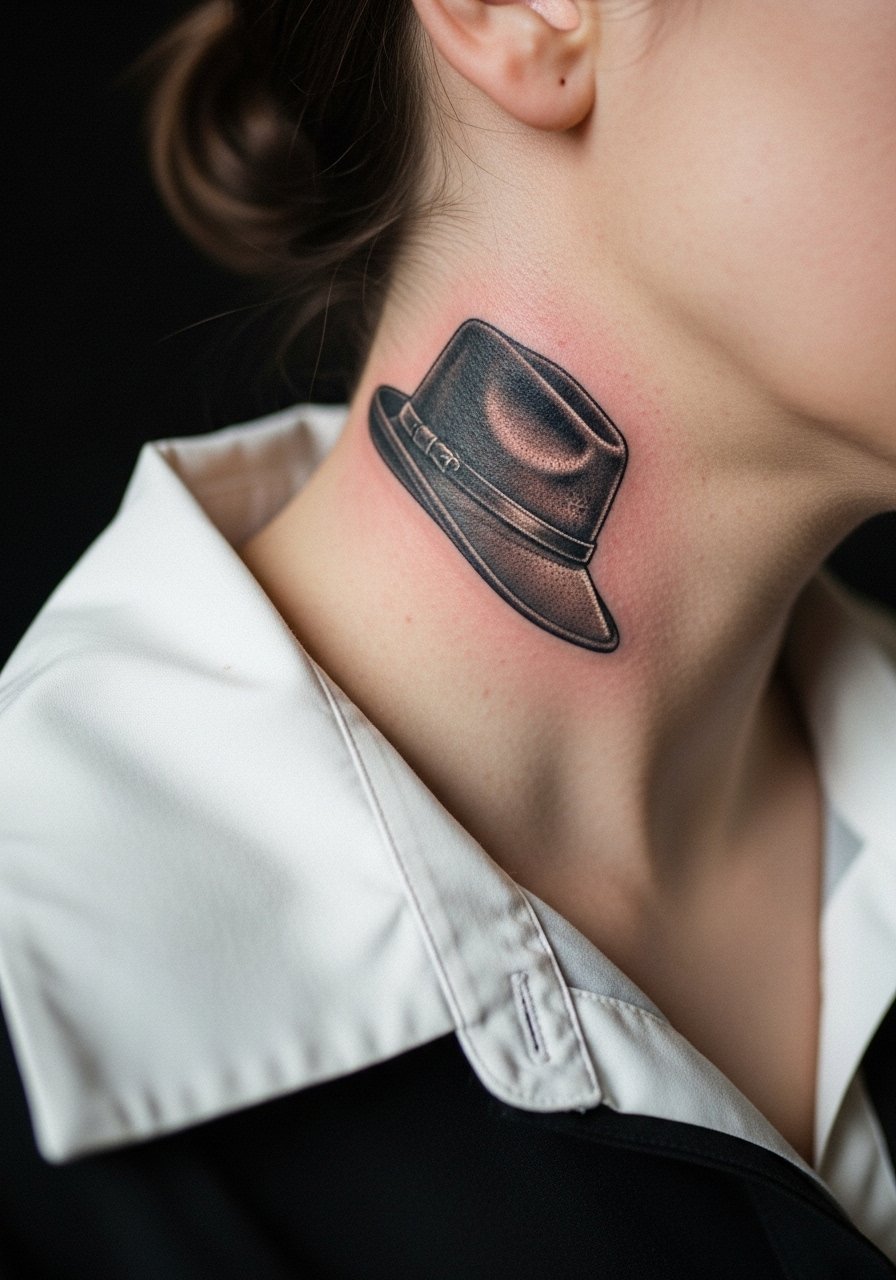
A micro-realism neck piece reads intimate and detailed but is exposed and sensitive. Small leather creases and shadow anchors need extra precision so the hat does not blur into a single smudge. The session feels sharp and you will need to consider career visibility. Touch-ups are common at year two for tiny details. On the day, a wide-neck shirt that can be shifted keeps the area accessible without full exposure.
12. Patchwork Cowboy Hat Embedded in a Sleeve Narrative
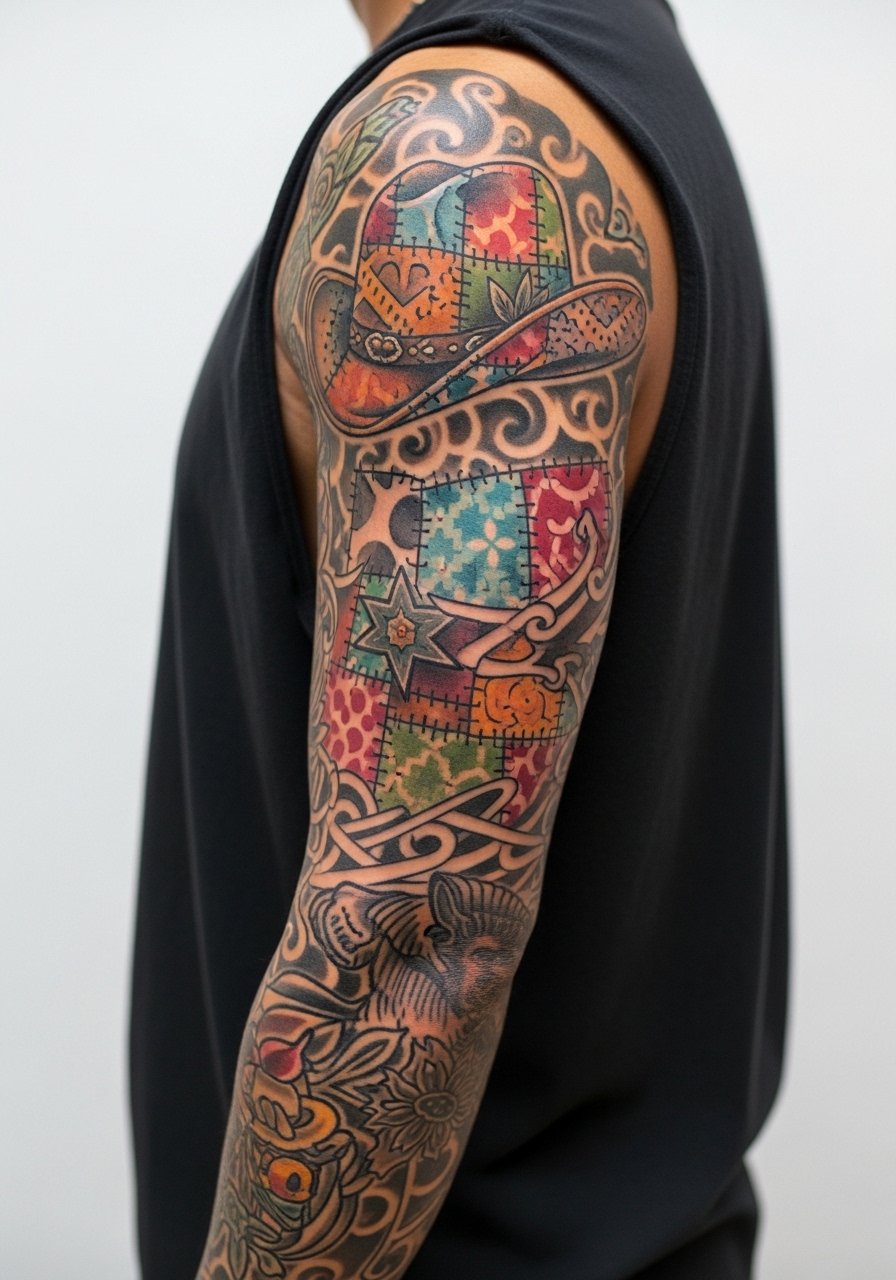
Use this when you want the hat to anchor a larger story. Sleeve builds let you add horseshoes, roses, and map fragments. The mistake is treating the hat as an isolated flash instead of designing how it connects to neighboring panels. Expect multiple sessions spread across months and plan the narrative with the artist. Sleeve work ages predictably when planned around muscle contours. For long sessions bring layered shirts you can easily remove when cold.
13. Abstract Geometric Cowboy Hat with Breaks on the Upper Thigh
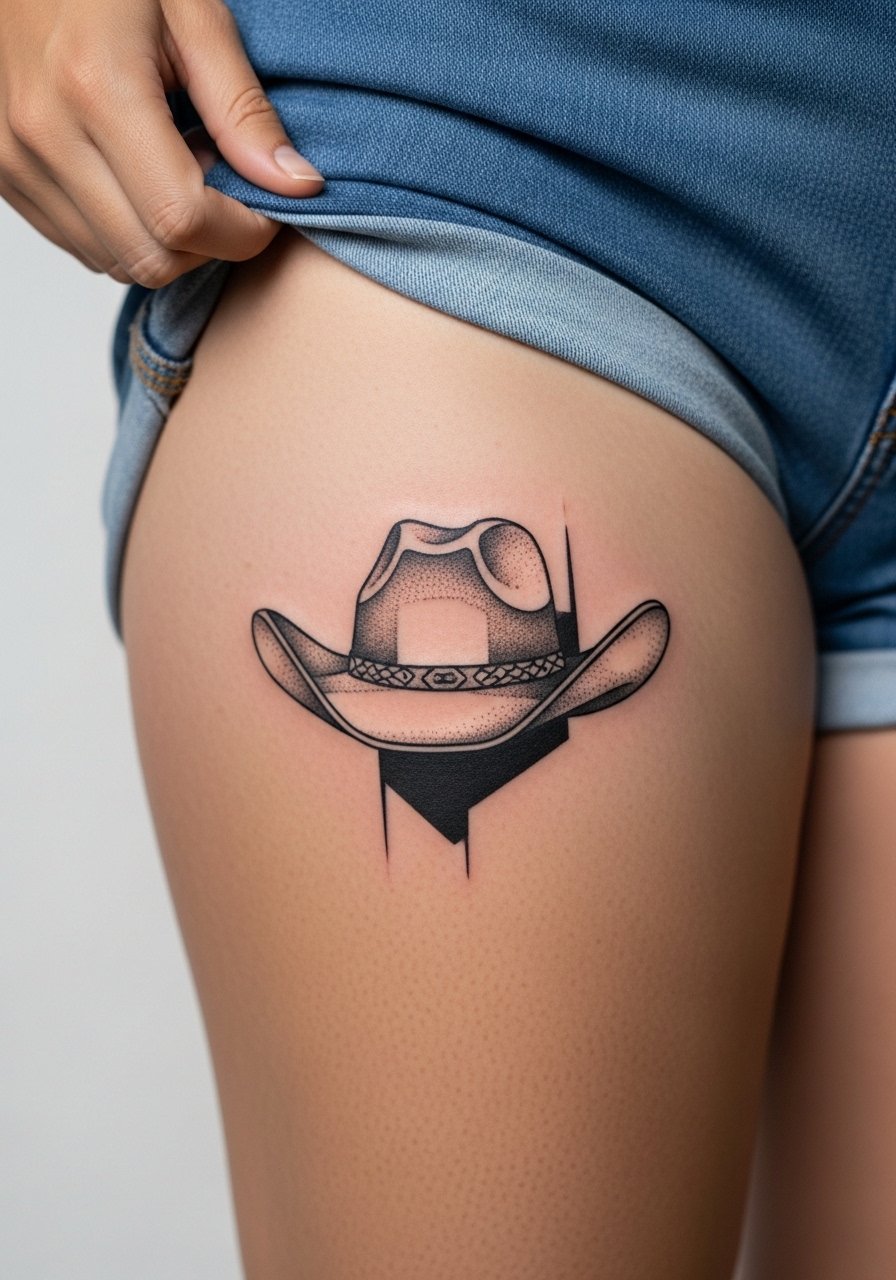
This is one of the under-covered ideas that turns the hat into modern art. Geometric breaks help the design age by leaving breathing room between lines. Tell your artist you want intentional gaps and negative space rather than tiny filler shapes. Thigh location keeps detail safer from stretch and sun exposure. For the session wear loose shorts you can shift easily and consider longer sessions spread over multiple sittings.
14. Small Cowboy Hat Tattoo Behind the Ear Neckline
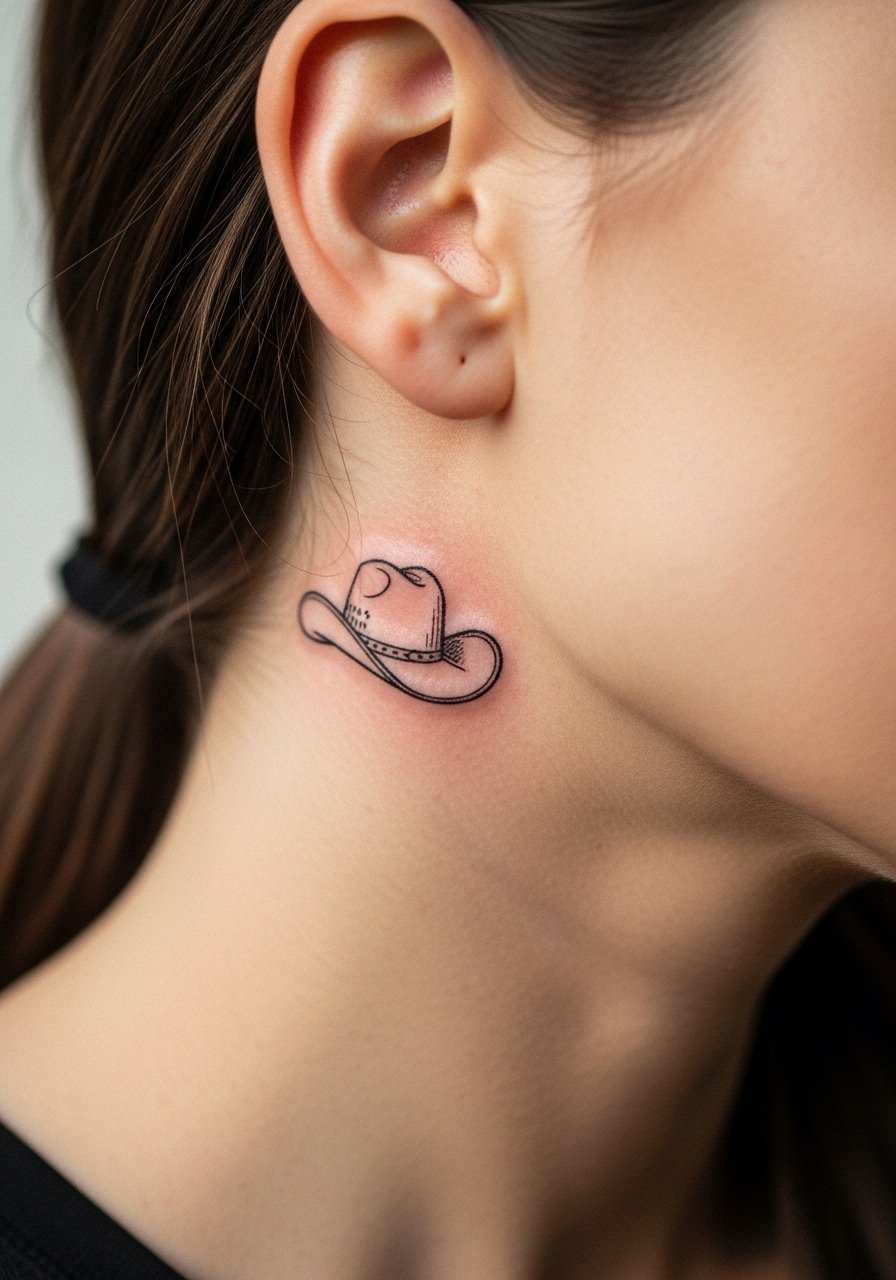
A tiny hat behind the ear reads like a private nod. Keep it as a bold outline with minimal interior detail to prevent the area blur. Pain is brief but noticeable. This placement requires precise stencil placement because of curved skin. For session wear, keep hair up and bring a wide-neck shirt so the artist can access the area without full hair removal.
15. Cowboy Hat with Engraved Brim Script on the Chest
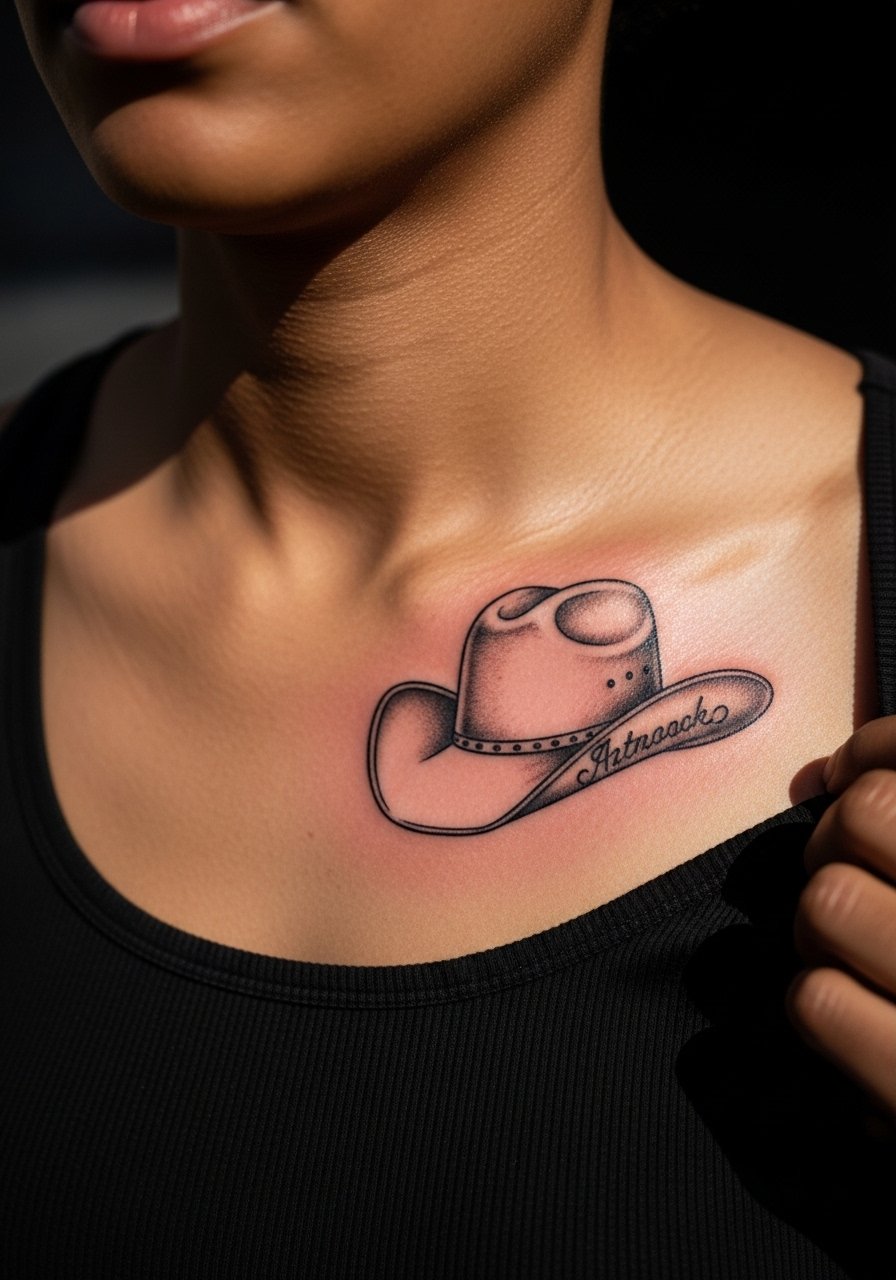
Personal engravings on the brim are a subtle way to carry a name or date. Keep lettering compact and bold enough to read at short distance. Tiny scripts can blur if placed on soft or moving skin so chest near the collarbone is preferable because it stays flatter. Sessions are moderate. When you plan the piece, show examples of exact lettering and ask for a stencil preview. For display, a tank top or wide-neck shirt frames it well.
16. Blackwork Rope-Textured Hat Spanning the Sternum
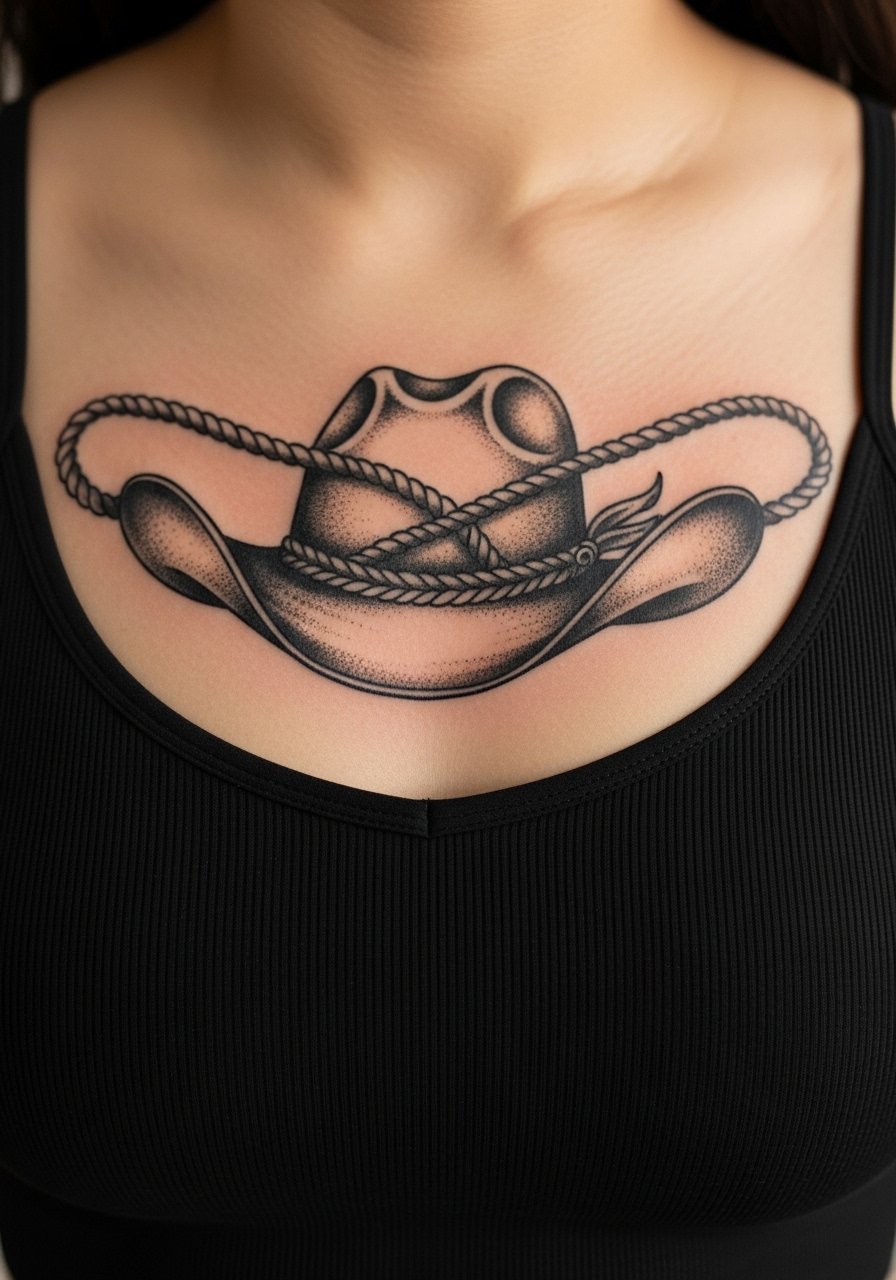
Sternum work with heavy black fills looks graphic and modern. The sternum area stretches and breathes so the knot and rope texture should be bold to avoid softening into indistinct fill. Sessions are intense and short breaks help. Expect darkness to remain rich if you avoid sun. Wear a fitted sports bra to the session so the artist can access the area without full exposure.
17. Tiny Micro Hat on the Finger Edge
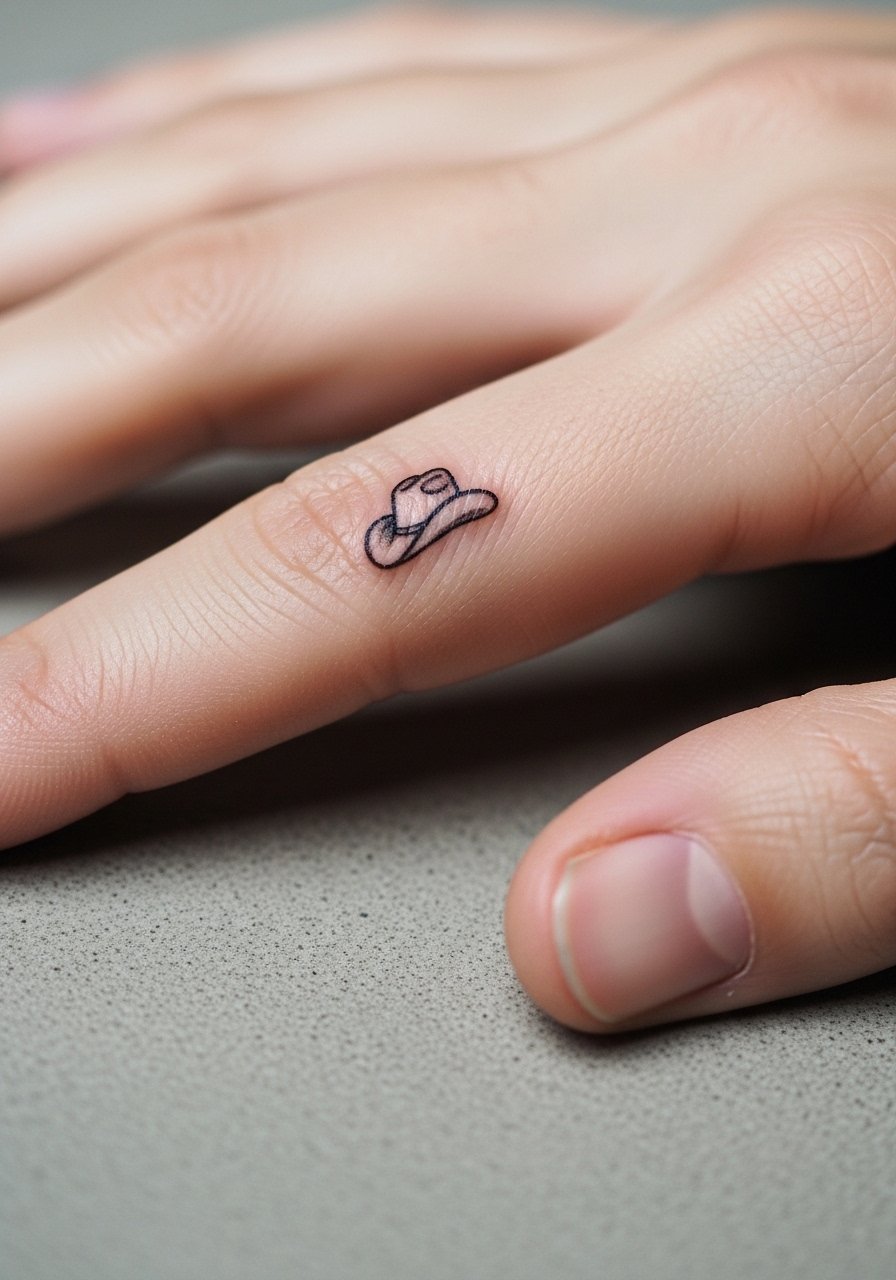
Finger tattoos are convenient and visible but fade fast because of constant hand washing and skin turnover. The safest approach is a slightly thicker outline and accepting touch-ups at year one to two. The session is quick but can sting more than expected. For the session keep the area bare and minimize jewelry in the healing week. Consider it a badge with maintenance rather than a no-care piece.
18. Ornamental Hat with Vines on the Lower Back
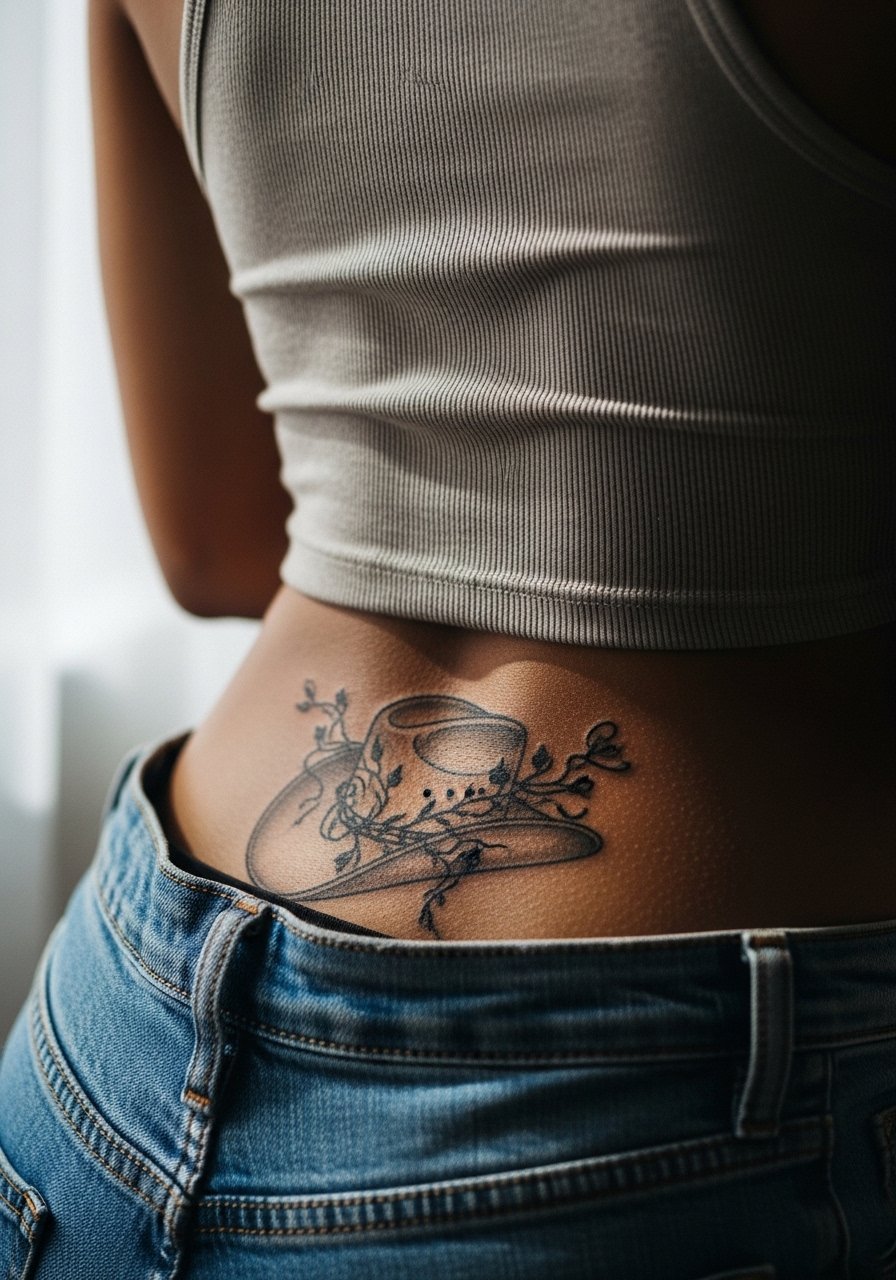
Lower back placement gives horizontal space for ornamental flourishes and vines. The main misstep is over-detailing because the lower back moves with posture and can blur small elements. Ask for bolder vine anchors and lighter filler shading. Sessions are moderate and the area is easy to hide while healing. Wear a tank top and high-waisted jeans that can be shifted for access.
19. Micro-Realism Leather Crease Hat on the Hand
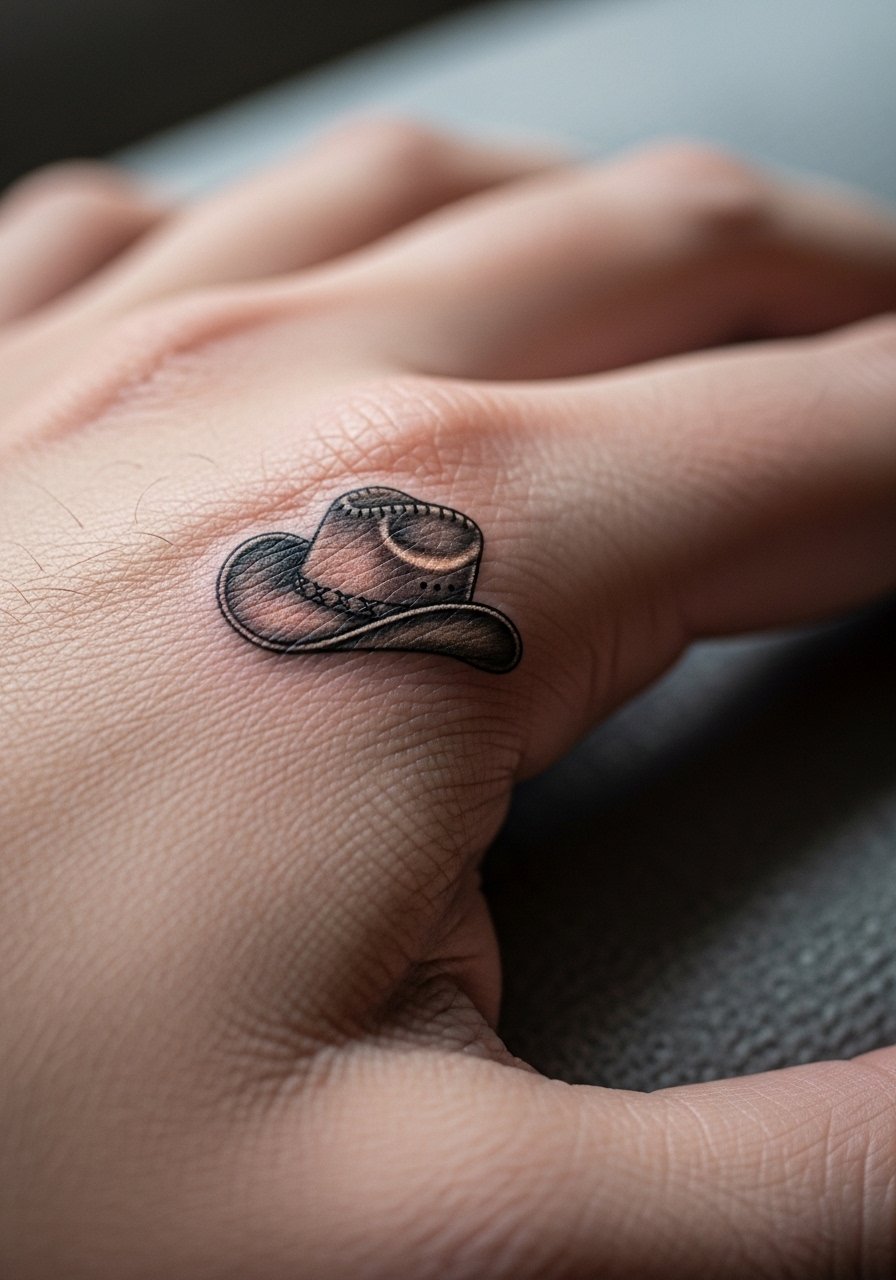
Hand tattoos face high friction and exposure. Micro-realism is possible if you accept rapid fading and yearly touch-ups. Ask for shading that reads at a slight remove rather than hyper-detailed creases that the skin will smooth out. Sessions are short but aftercare matters because of hand use. Keep in mind many shops treat hands as higher maintenance pieces.
20. Patchwork Sleeve Hat as a Collectible Centerpiece
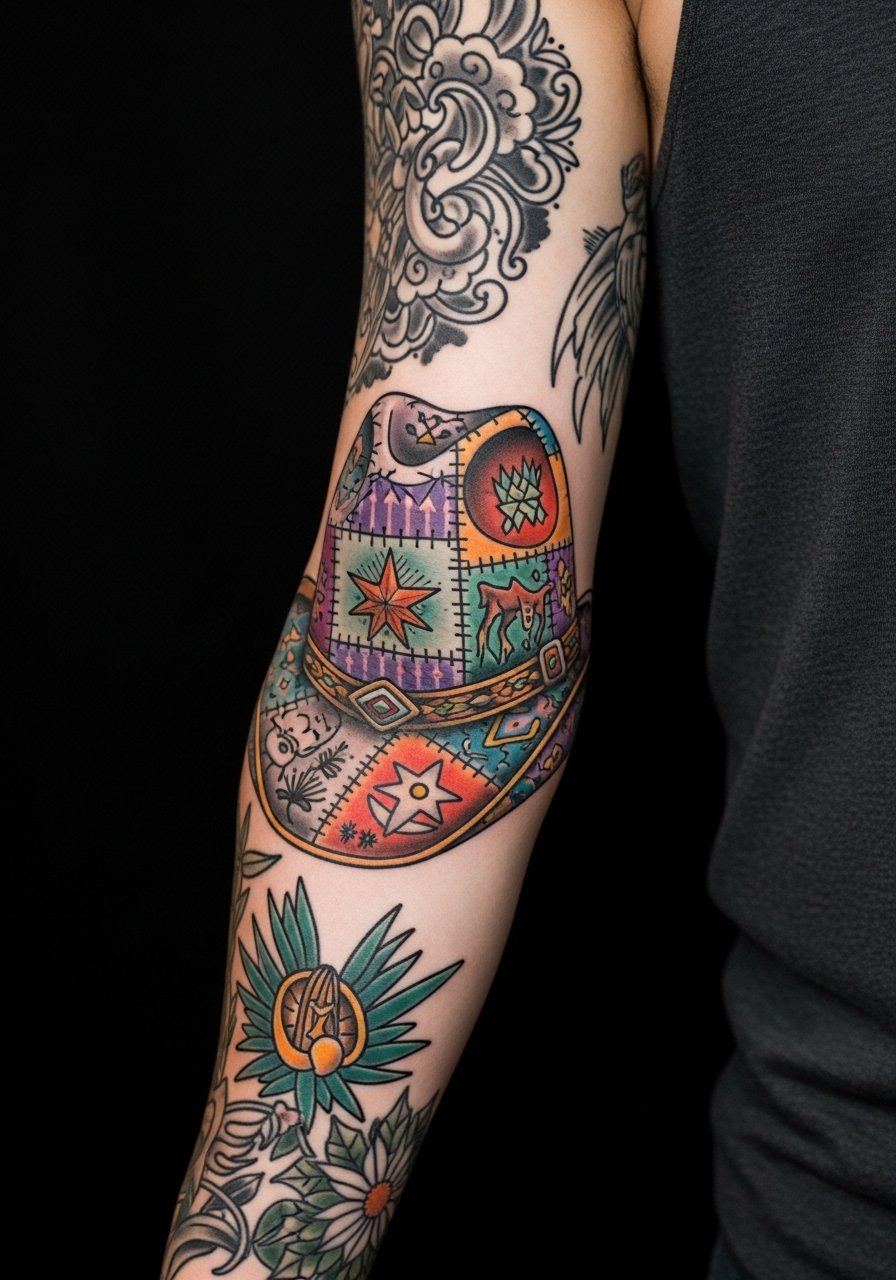
Using the hat as the focal point in a collector sleeve is for people planning long-term narratives. Map out where the hat will sit relative to elbows and the wrist to avoid distortion. A common mistake is adding too many tiny motifs that later compete with the focal hat. Expect a multi-visit build and coordinate color palettes with the artist so saturation ages uniformly. Bring layered shirts for comfort across long sessions.
21. Watercolor Sunset Hat on the Ankle
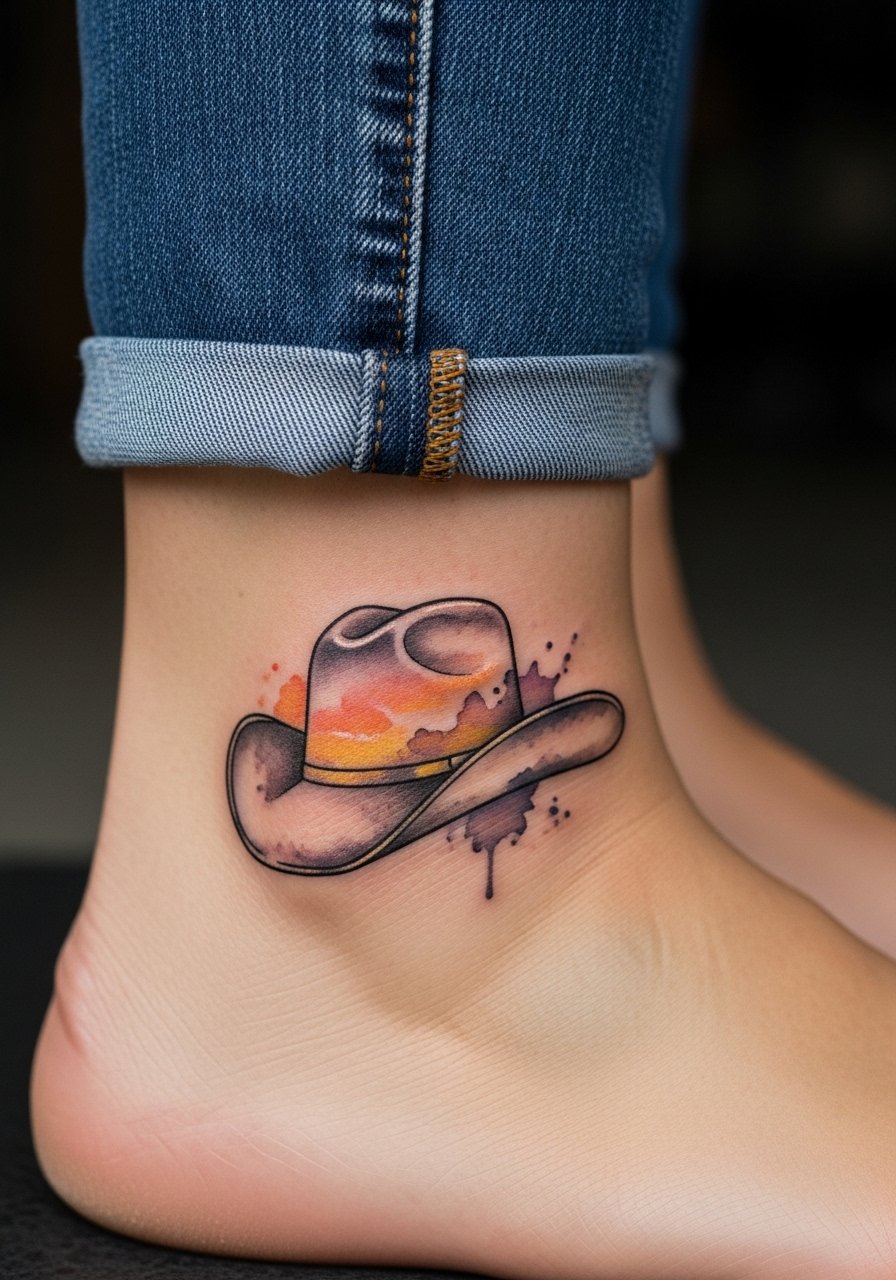
Ankle watercolor reads delicate and informal. The downside is pigment fade from shoes and socks. Ask that the wash be anchored with a fine black outline so shape holds as colors soften. Sessions are short but plan for extra touch-ups if you wear closed footwear regularly. For showing it off roll jeans or wear sandals when you want it visible.
22. Cowboy Hat Silhouette with Negative Space on the Calf Outer
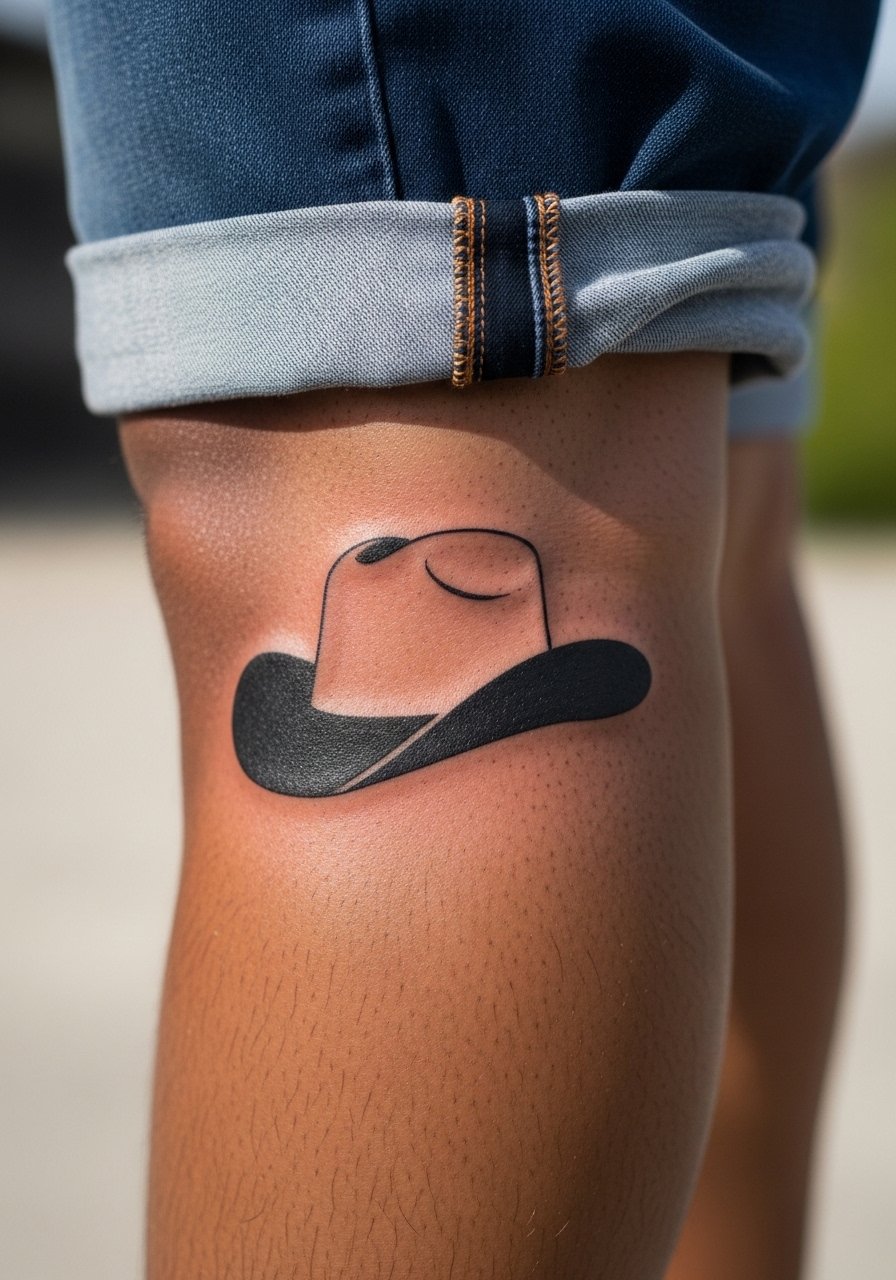
Negative space silhouettes age well because they avoid dense small linework. Calf placement protects the edges from constant abrasion. Tell your artist you want a clear halo of negative skin around the brim to prevent the silhouette from bleeding into surrounding fills. Sessions are quick and comfortable. Pair with cowboy boot low styles when you want an intentional Western look.
23. Fine Line Hat with Subtle Stippling on the Inner Bicep
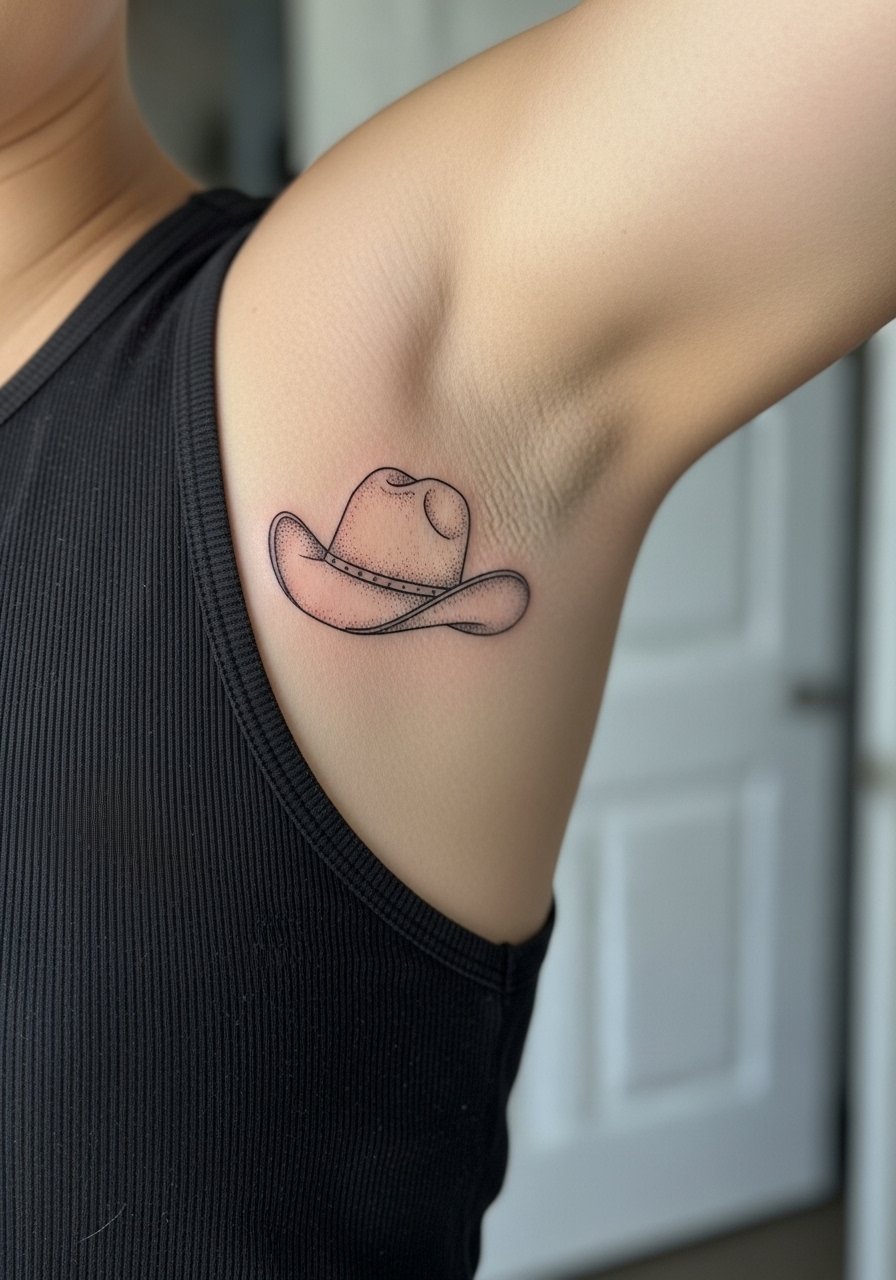
Inner bicep offers an intimate vertical plane but can be problematic if the design is too dense. Stipple shading keeps depth without heavy saturation. Artists disagree on fine line on softer inner surfaces. If you choose this, ask for spacing and stipple rather than packed crosshatch. The session can be uncomfortable due to sensitivity. On the day wear a loose tank so the artist can reach the inner arm easily.
24. Cowboy Hat with Horse Branding Motif on the Thigh
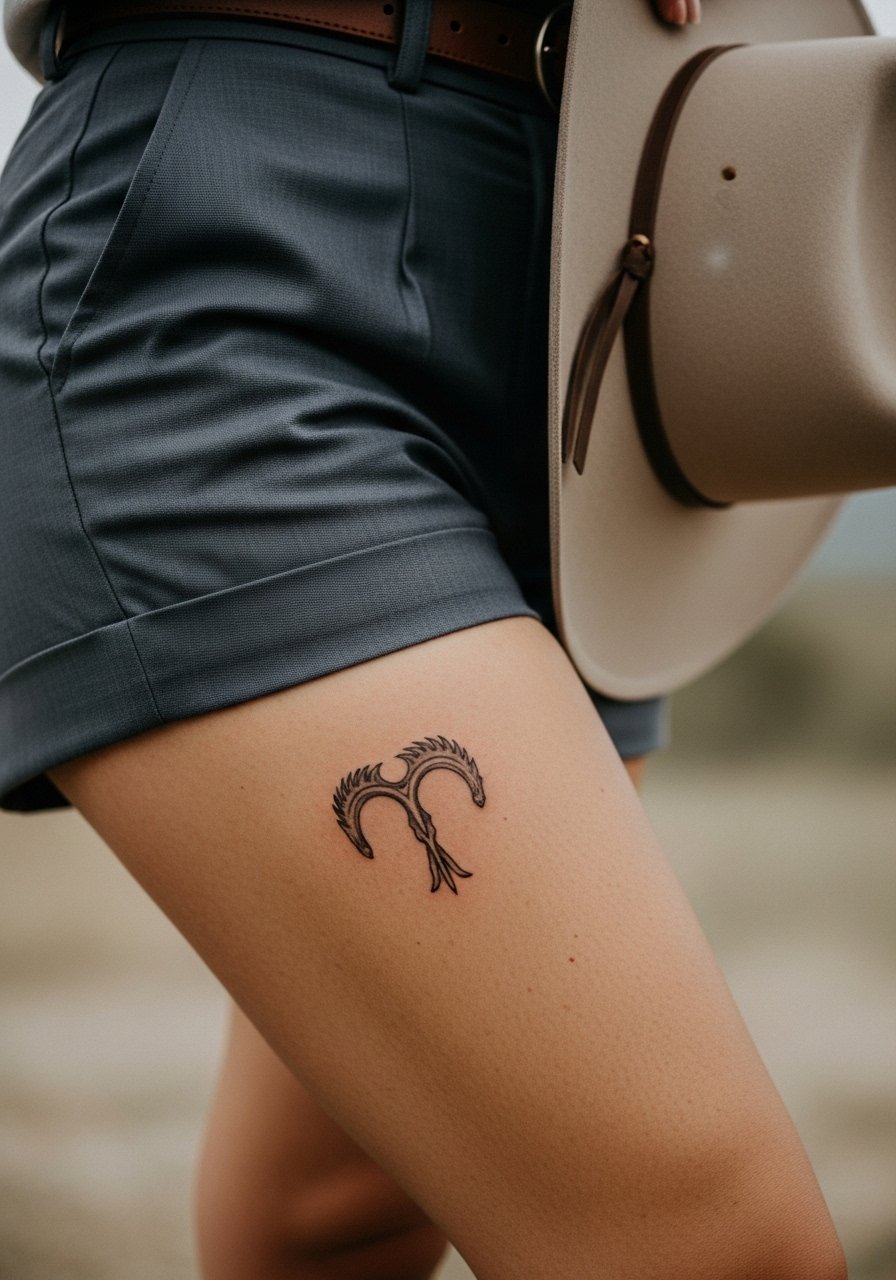
Combining hat and branding elements gives a rustic emblem feel. Thigh provides muscle padding that preserves detail. The mistake is cramming fine branding marks at tiny scales. Ask for a clear, legible brand and slightly bolder edges. Sessions are comfortable with easy positioning. Pair with tailored athletic shorts when you want it visible.
25. Small Minimalist Hat on the Ankle Inner Side
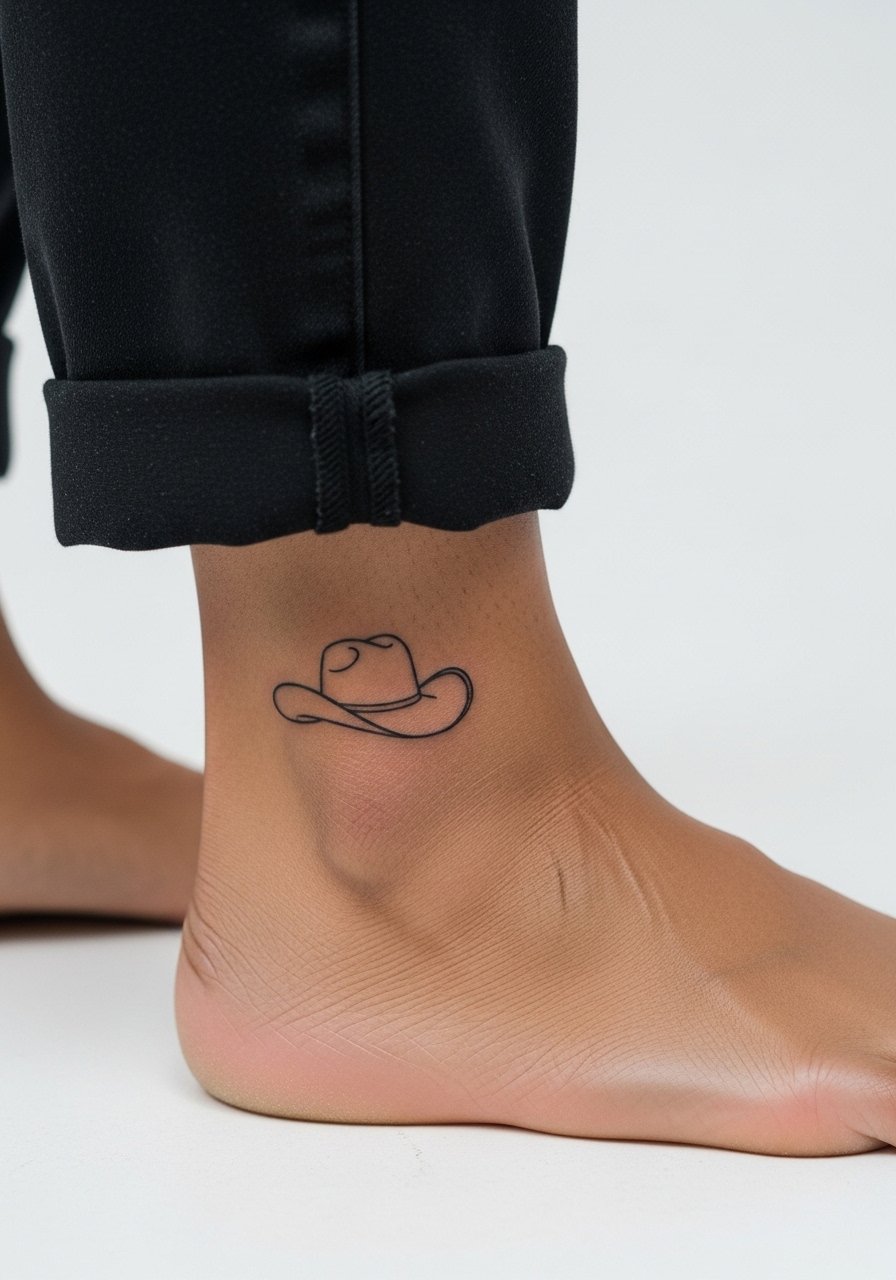
Inner ankle tattoos handle small graphics well if you accept maintenance. The area rubs against shoes and socks so go with slightly thicker lines. A common mistake is expecting finger-like permanence. Keep expectations for touch-ups and schedule a follow-up at the one-year mark. For the session wear pants you can roll and sandals to avoid pressure on fresh ink.
26. Abstract Modern Cowboy Hat with Geometric Breaks on the Outer Forearm
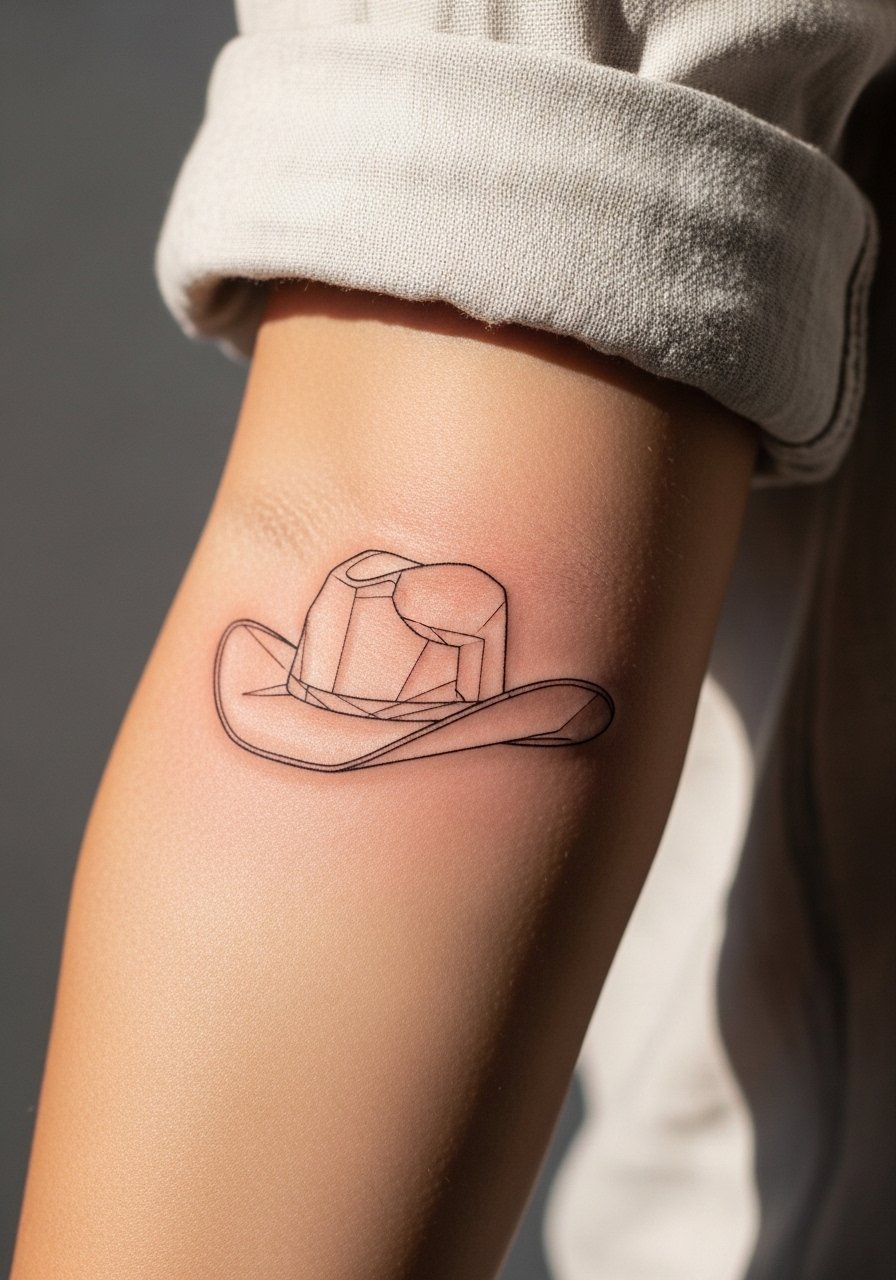
This modern take turns the hat into a motif that pairs with contemporary arm tattoos. Leave breathing room between lines and avoid high-density hatching which ages poorly. The outer forearm is forgiving and shows detail well. One session can deliver a clean result for a three to four inch piece. Style it casually with a linen rolled cuff shirt for an easy display.
27. Guest Spot Scaled Hat as a Travel Tattoo on the Calf
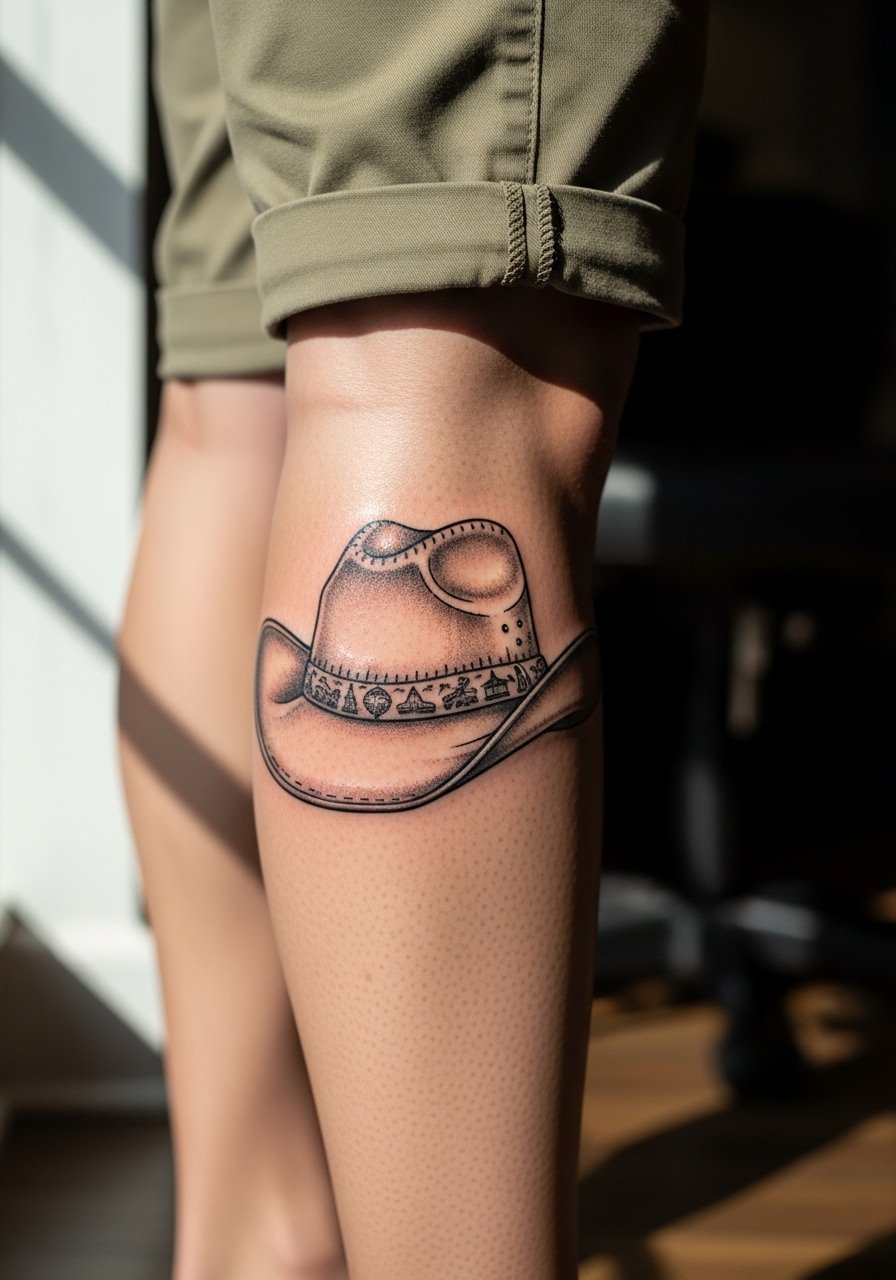
Planning a hat as a guest spot piece means designing for portability and matching someone else’s sleeve or body art later. Scale the design so it can slot into bigger compositions without reworking major lines. A common mistake is asking for region-specific motifs that clash with future color palettes. Calf placement is ideal for travel tattoos because it is easy to dress and hides well for flights. Bring reference images and clarify proportion expectations with the guest artist during consult.
Frequently Asked Questions
Q: How much does a traditional cowboy hat tattoo typically cost and how many sessions will I need?
A: Pricing varies a lot by size, style, and studio quality. Small minimalist wrist hats are usually a single short session. Realistic or sleeve-integrated hats can take multiple sessions. From what I have seen, plan session counts based on complexity rather than exact dollar figures and ask your artist during consultation for a time estimate.
Q: Will a fine line cowboy hat blur faster on ribs or forearm?
A: The ribs and forearm behave differently. Ribs move with breathing and stretch more which can accelerate blurring in dense fine line work. The forearm generally keeps lines steadier. If you want fine line on ribs, ask your artist about spacing and depth because opinions split on whether it holds long term.
Q: What should I wear to a thigh or collarbone tattoo session?
A: For thigh work wear loose shorts or gym shorts that can be shifted. For collarbone pick a wide-neck shirt or a tank you can pull aside. A simple low cut tank top works well for collarbone sessions and keeps the area accessible.
Q: How often will I need touch-ups for watercolor versus blackwork hat designs?
A: Watercolor styles typically need touch-ups earlier because pigments diffuse and fade with sun exposure. Solid blackwork holds longer. Expect watercolor updates sooner if you wear a lot of sun or friction on the placement. Ask your artist about a recommended touch-up timeline for your skin type.
Q: Are there visibility or career concerns with neck, hand, or face cowboy hat tattoos?
A: Yes, those placements are very visible and can affect professional settings differently depending on the industry. If you have career concerns, consider locations you can hide while still enjoying the design. Discuss placement visibility honestly with your artist so you can plan accordingly.
