
Fine line florals are everywhere online, but what actually holds up after a couple of summers of sun and boots is a different story. Some November blooms keep crisp petal edges for years, while others soften into a shadow. Below are 27 November flower designs that balance the fresh look you want with realistic aging, placement advice, and styling tips so you can pick one that still reads like you at year three.
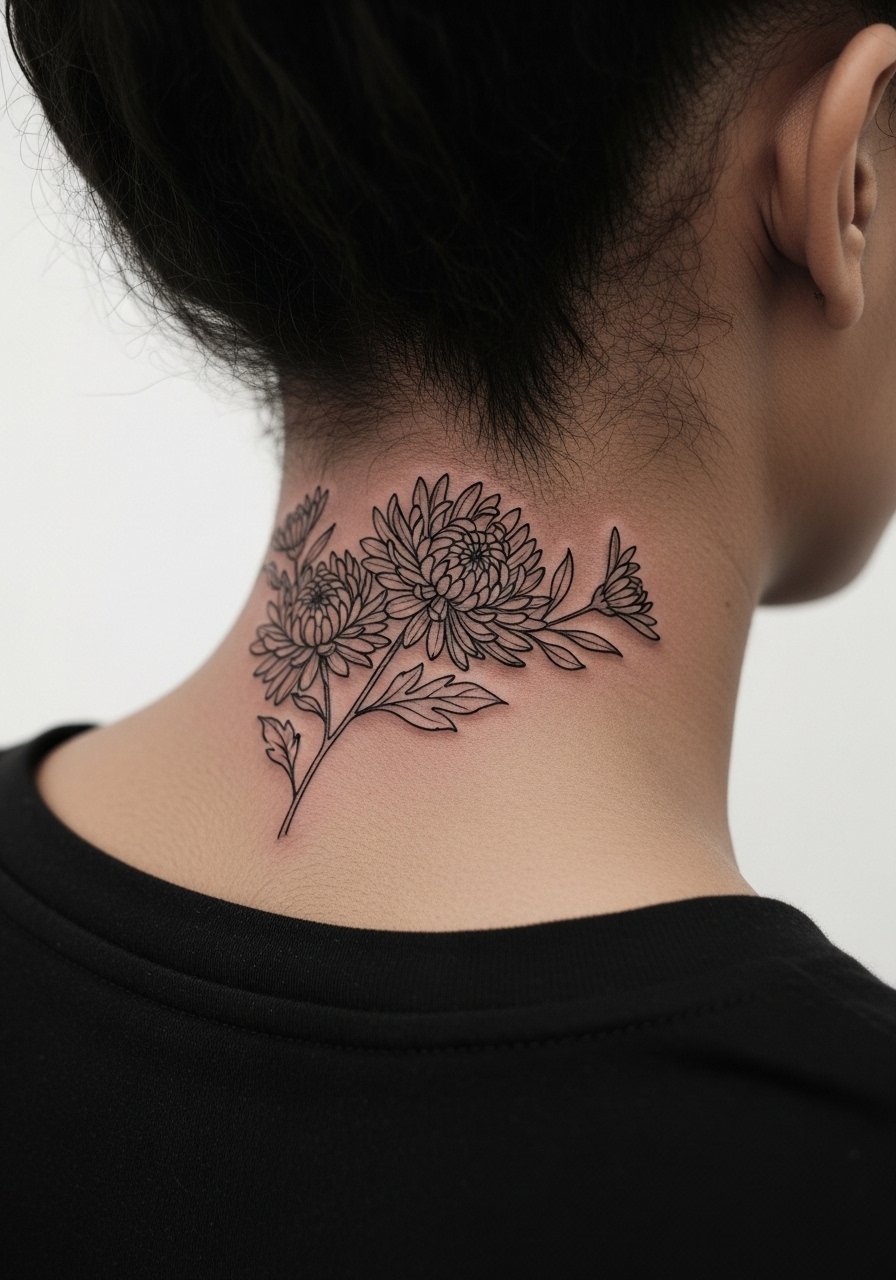
1. Fine Line Peony and Chrysanthemum Wrap on the Wrist
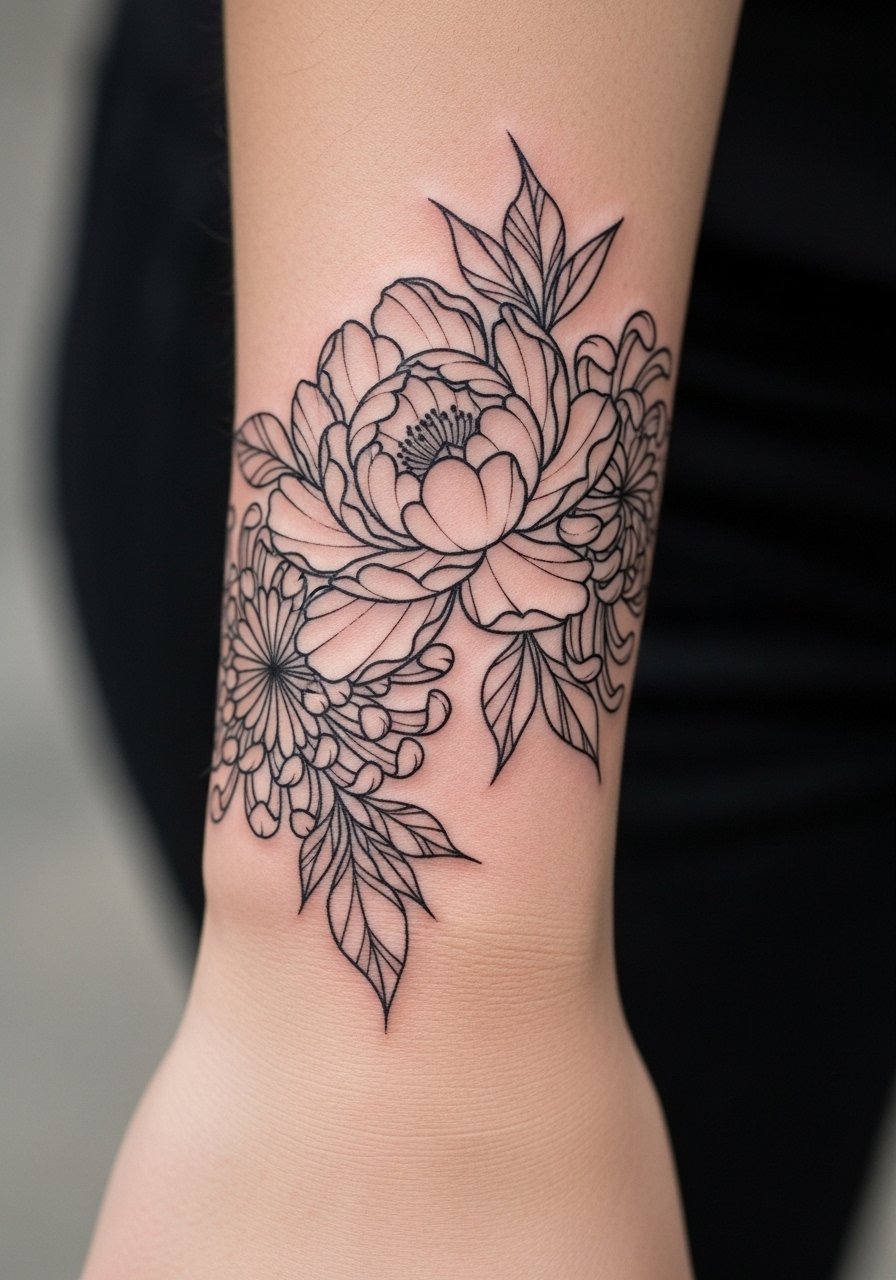
I see this wrap a lot for people who want a compact November bloom that curves with movement. Tell your artist you want single-needle 1RL outlines with slightly increased spacing between petals so lines do not merge as the skin ages. Common mistake is asking for ultra-thin lines too close together, which can blur by year two. Expect a medium pain level for the wrist and plan a 45–90 minute session. For the session wear a sleeveless tank so the artist has clear access and you stay comfortable. Touch-up at 6–8 weeks tightens any softened edges.
2. Minimalist Chrysanthemum Outline on the Collarbone
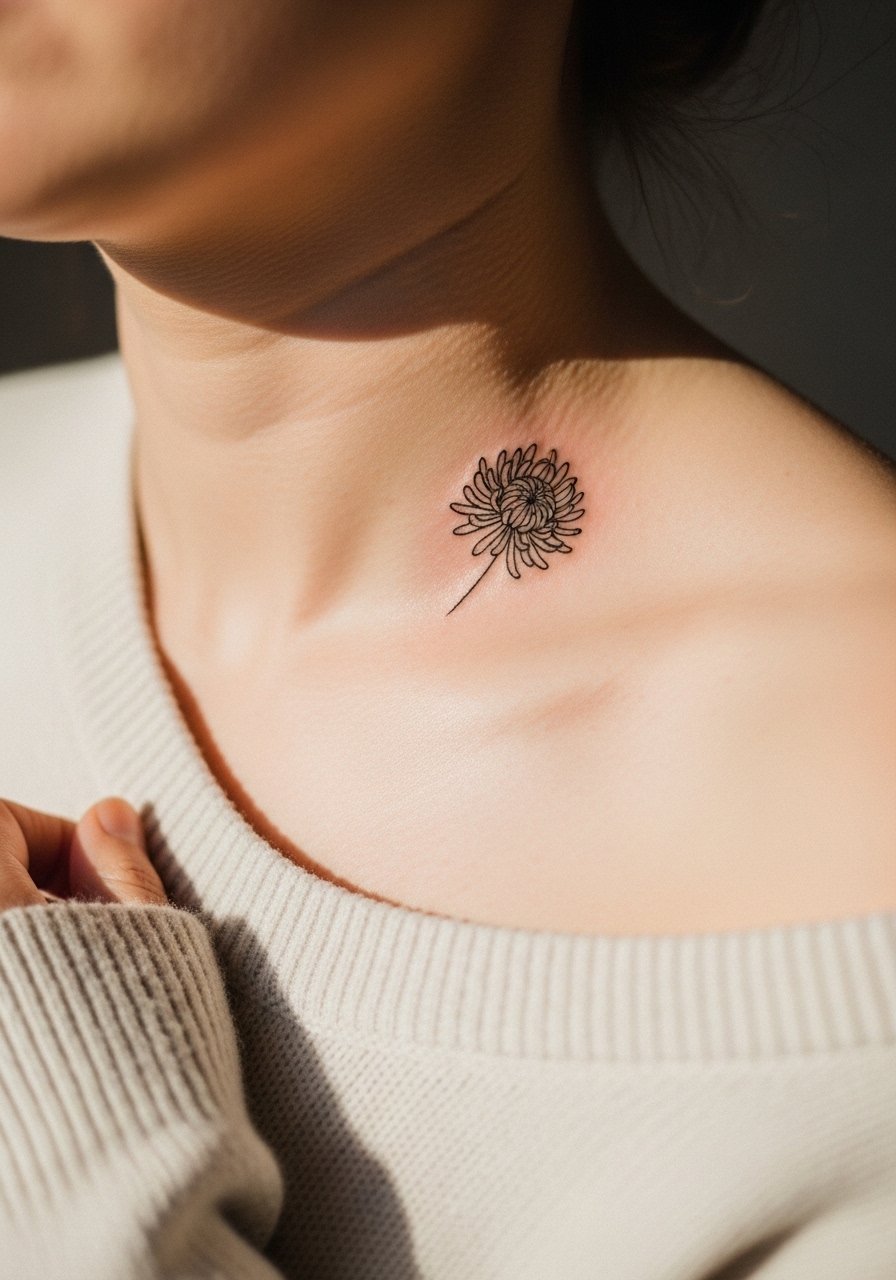
Collarbone placements read elegant with a small chrysanthemum outline because the flat plane helps lines settle. For first-timers, ask for a slightly heavier outline than the thinnest possible needle to keep contrast on camera. Pain is low to medium and most artists finish micro collarbone pieces under an hour. Avoid asking for extremely tiny interior detail, which is the usual aging trap here. Pairing advice for showing it off includes an off-shoulder sweater in cream or V-neck blouses. If you plan for a memorial variation, add a tiny date in Roman numerals and confirm the exact script with the stencil.
3. Watercolor Peony Bloom on the Inner Forearm
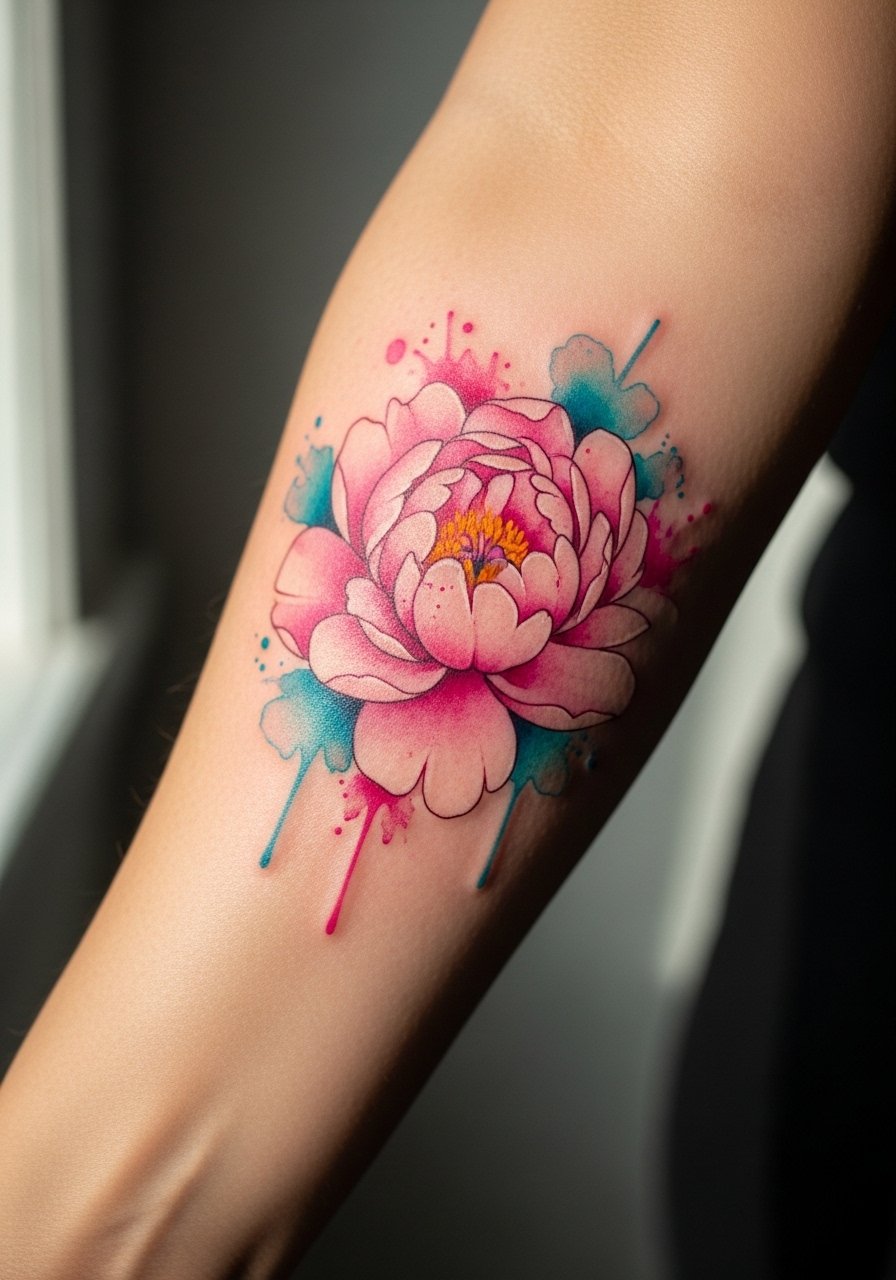
Watercolor peonies look ethereal fresh, but they require a different longevity mindset than black ink. If you want this style, ask for strategic black anchors at the base of petals so the design keeps shape as pigment fades. Inner forearm heals well and is low friction, so expect good color retention if you avoid heavy sun. The session runs about 1–2 hours depending on saturation. A common mistake is asking for full saturation across the whole bloom, which can end up muddy over time. For outfit pairing, roll your sleeves and show it off with a linen button-down when you want a soft editorial look.
4. Neo-Traditional Chrysanthemum with Geometric Frame on the Shoulder
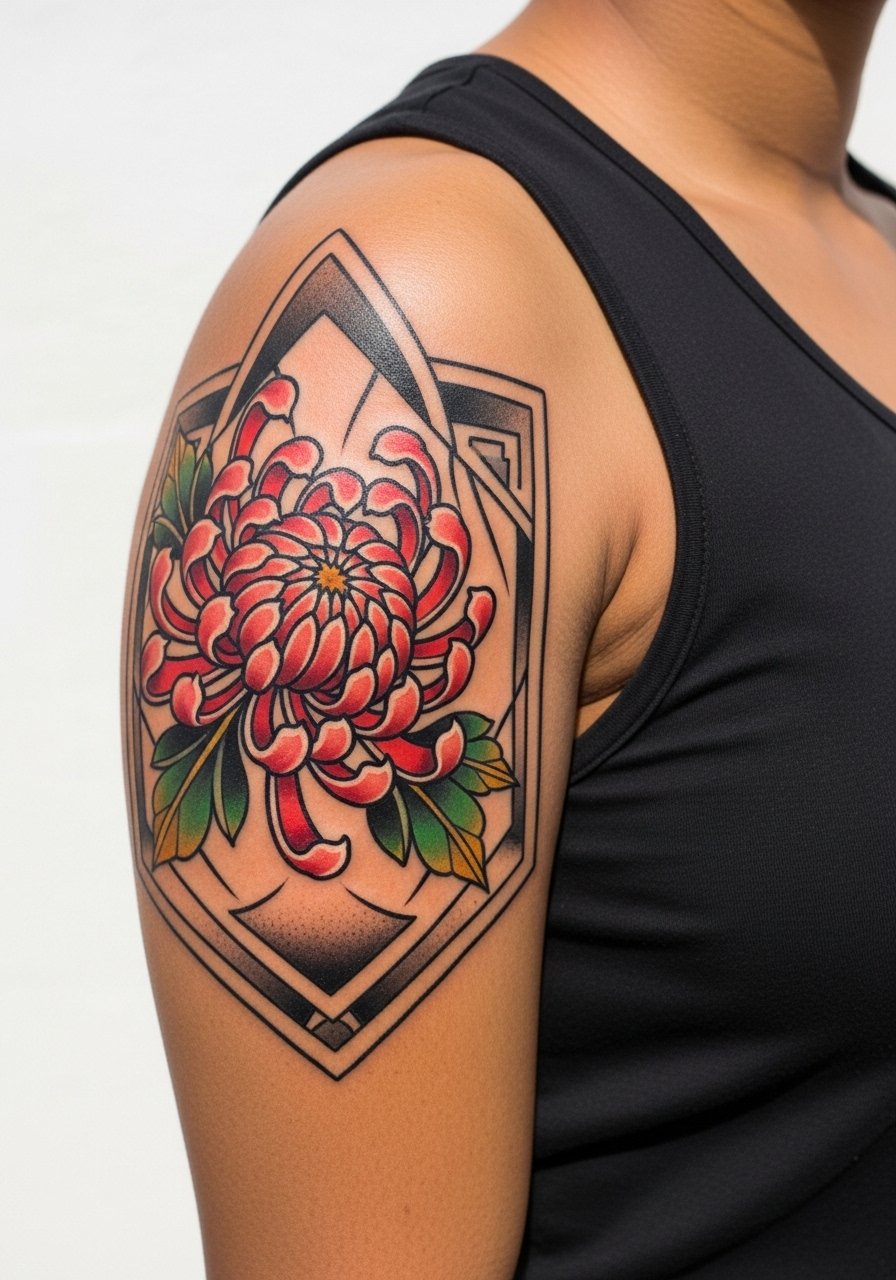
The shoulder is forgiving for neo-traditional pieces because the skin there tolerates saturation and bold linework. Ask for slightly larger petal shapes and negative space in the geometric elements so the pattern ages without merging. This is a medium-pain placement and usually needs two sessions for color and shading. A common issue is cramming too many small shapes into the frame. For session comfort, wear a sleeveless tank so the artist has full access. Over the years the color will soften but the bold outlines keep the design readable.
5. Blackwork Peony Mandala on the Upper Arm

Blackwork mandalas are a strong option if you want a November bloom that stays graphic. The density of black protects the pattern from early fading, though tiny stippling needs breathing room to avoid blowout. This placement is low pain and usually done in 2–3 sessions for full saturation and detail. The most common mistake is pushing too much microstipple into tight circles, which can merge after a few years. Pair with a navy fitted tank for summer show-off. If you are looking for a piece that reads from across a room, blackwork is the safer choice over watercolor for long-term clarity.
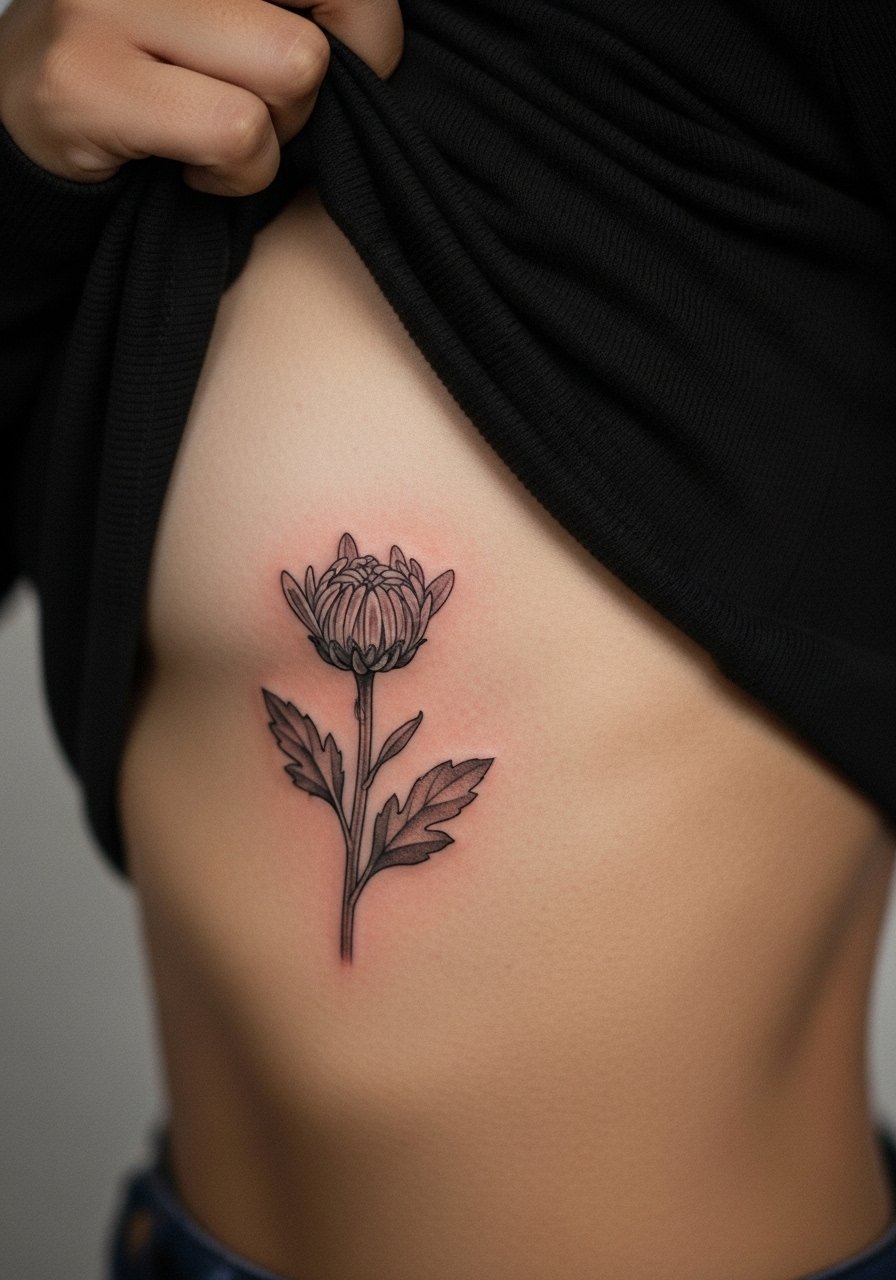
6. Micro-Realism Chrysanthemum Bud on the Ribcage
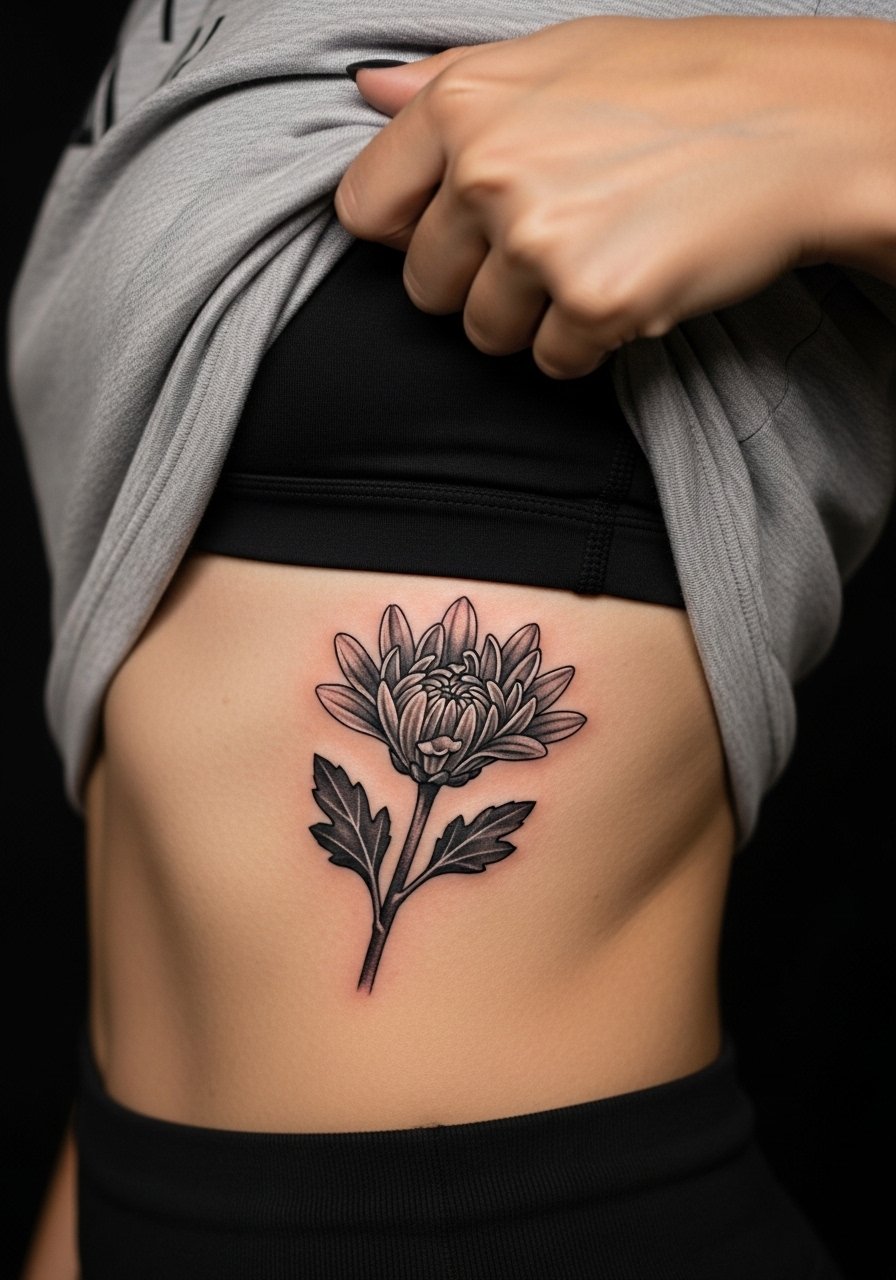
Fair warning, the ribcage rates high on pain scales, but it is a great spot for micro-realism buds that sit flush with the body contour. Ask for deeper spacing between hairs of shading so the tiny tones do not merge as the skin moves. The usual mistake is expecting very fine hairline detail to last exactly the same way it looked at session end. A single-session micro rib piece can take 60–90 minutes, and booking a touch-up at 6–8 weeks is standard. For the session, wear a crop top or sports bra so the artist can work without tugging clothing. Note that artists split on whether fine line works on ribs. One camp says stretch and breath here blur lines quickly. The other camp says correct depth and spacing settle fine. Ask where your chosen artist stands.
Studio Day Picks
These first six placements include wrists, forearms, shoulders, and ribs, so a few practical items make the session and first week easier.
-
CeraVe Healing Ointment. A lightweight, non-greasy ointment some clients prefer for keeping fine line work from looking shiny while still providing moisture in the first days.
-
Australian Gold Aftercare Spray. Spray bottles reduce touching during rinses and help ankle or ribcage areas stay clean when showers are awkward.
-
Shea and Calendula Balm from small makers. A gentler balm alternative that some people with reactive skin have switched to after allergic reactions to thicker balms.
-
Balm Tattoo breathable balm. Used by some guest artists for blackwork pieces where a breathable finish helps saturation settle without excess shine.
-
Tattoo Goo ointment. A thinner option than heavy petroleum for those worried about clogged channels on very fine single-needle detail.
7. Fine Line Peony Stem Down the Spine
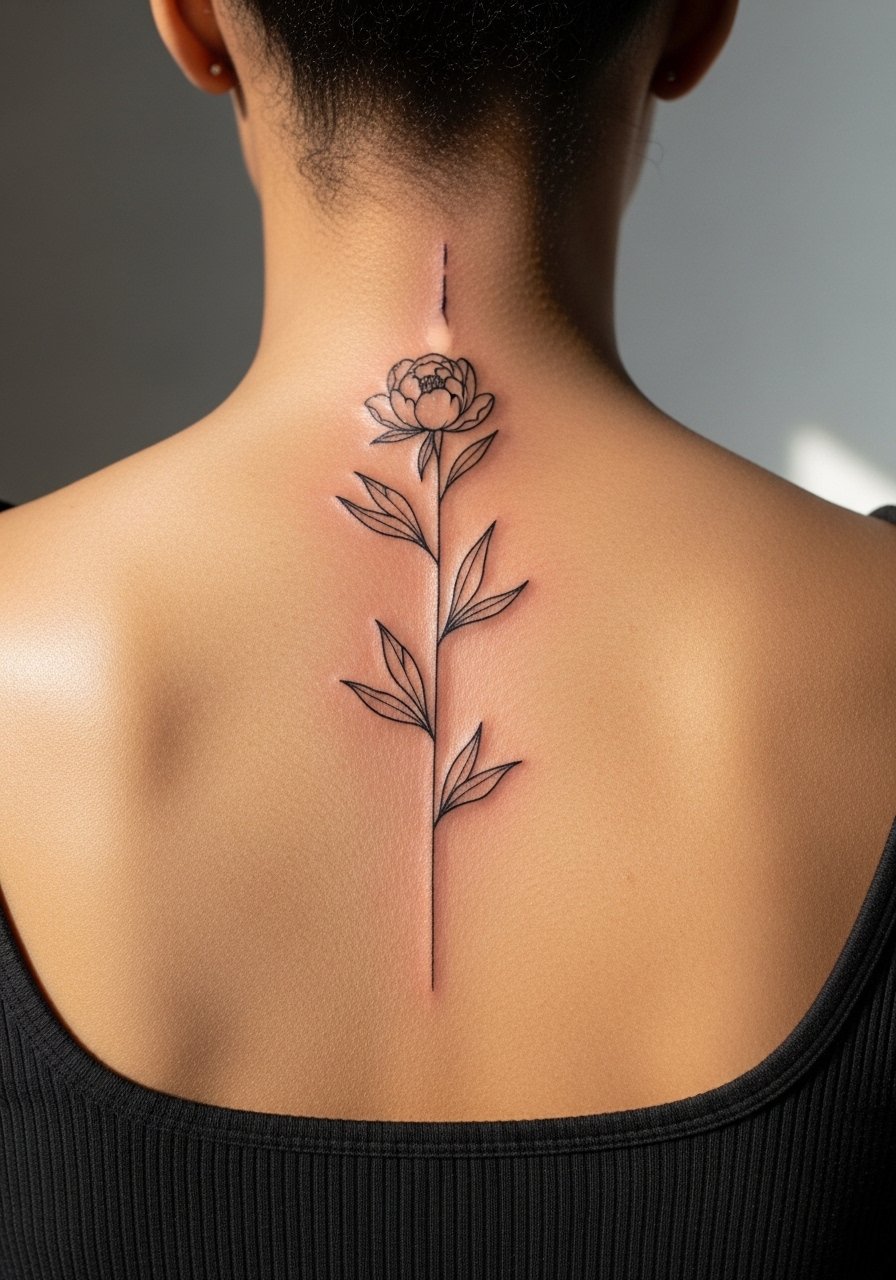
Spine pieces have strong visual flow when done as single stems. I recommend asking for slightly heavier main stems with thinner secondary veins so the core reads at a glance and smaller veins can soften without losing shape. The spine is medium pain and sessions vary by length. A frequent error is packing too many small details into the stem, which becomes a blur after stretching or weight changes. For showing it off, open-back dresses or halter tops frame the vertical line well. If you lift weights regularly, consider how muscle gain might change how the stem sits over time.
8. Ornamental Chrysanthemum Frame Around an Ankle

Ankle wraps look great in summer but remember boots and socks can irritate healing. Ask the artist for slightly bolder outer edges so the frame keeps contrast under friction. The ankle is low to medium pain and most small wraps are done in a single session. The usual mistake is wanting ultra-thin filigree that the shoe wear will soften fast. For show-off pairings try strappy heeled sandals or cropped straight-leg jeans. If you live in a cold climate and plan to wear boots during healing, factor that into the timing.
9. Ignorant Style Peony Burst on the Calf

Ignorant style gives a hand-poked and imperfect edge to peonies that reads casual and youthful. The calf tolerates small clusters well and is a low-pain placement for most people. Tell your artist you want intentional wobble in the line quality rather than accidental shaky lines. A common mistake is asking for too much tiny detail inside the burst, which clashes with the style's charm. Pair with rolled jeans or midi dresses with slits for summer visibility. Session time is usually under an hour and touch-up is rarely needed if linework was intentionally bold.
10. Traditional Peony Full Bloom on the Outer Forearm
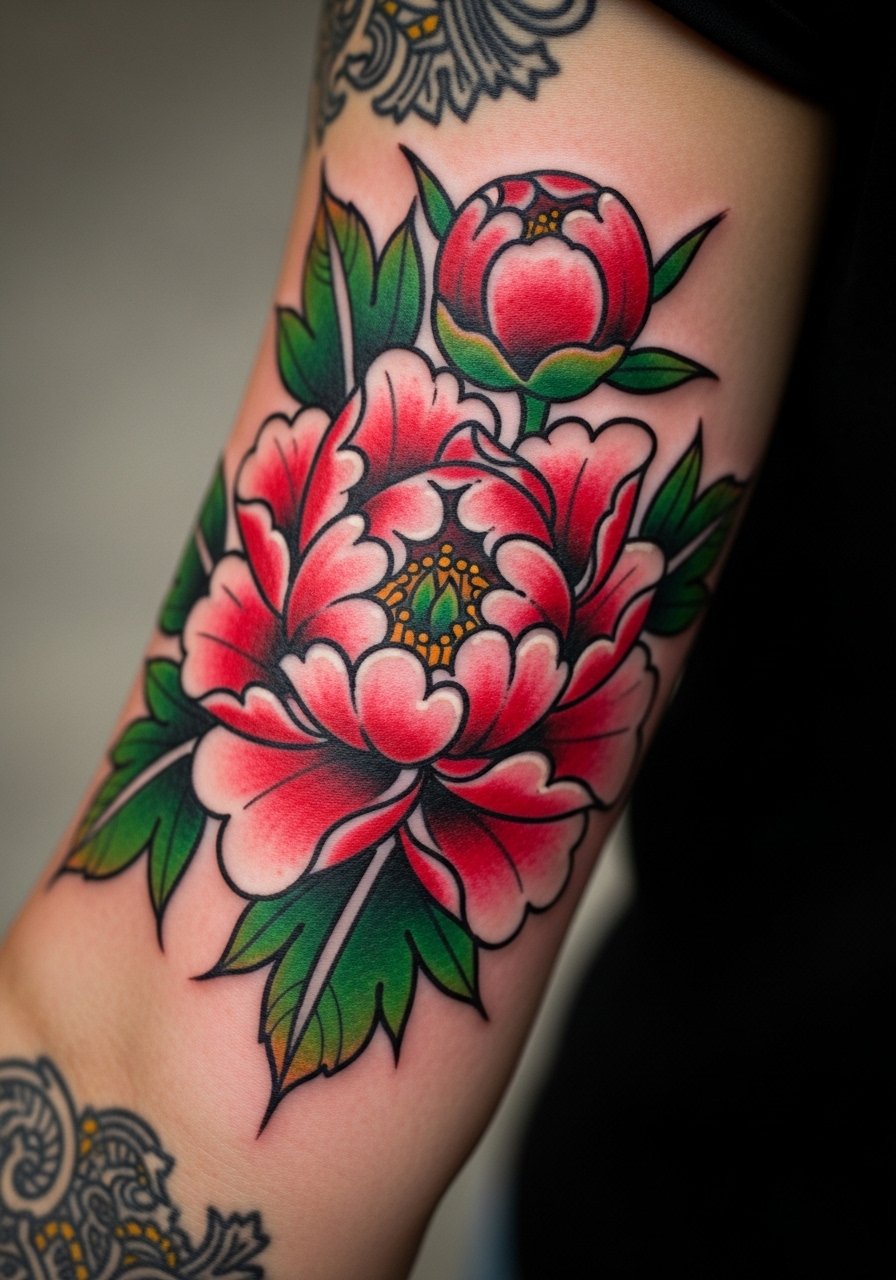
Traditional peonies use bold outlines and saturated color, which is why they age well on forearms. If you want longevity, ask your artist for classic block shading rather than ultra-fine gradients. The outer forearm is low pain and typically requires two sessions for full color if you want deep saturation. The main mistake is requesting too many small color blends that will muddle over time. For a simple show-off look pair with a rolled linen button-down and let sleeve rolls frame the piece nicely.
11. Micro Peony Cluster Behind the Ear
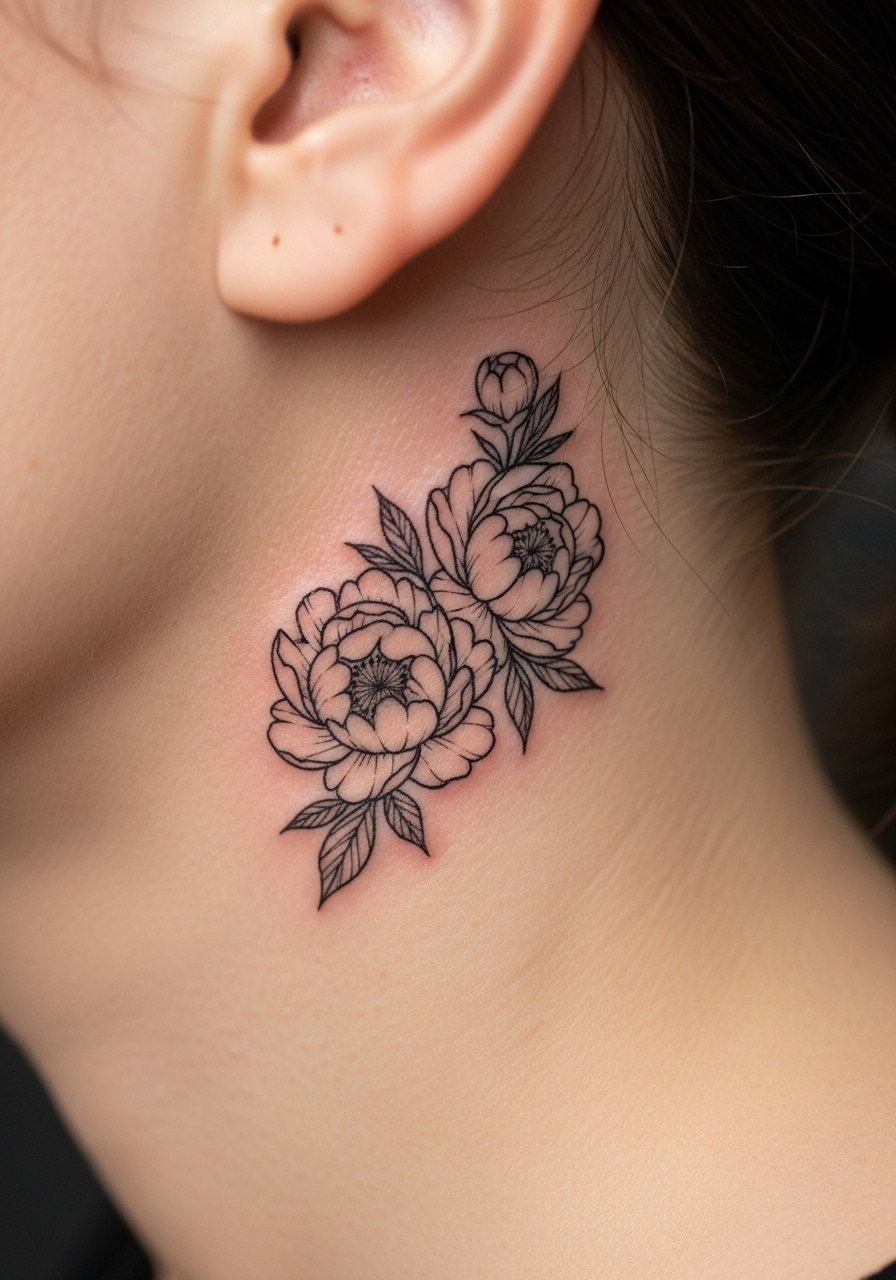
Behind-the-ear micro clusters are subtle and great if you want a hidden November bloom. Because the area is delicate, ask for slightly heavier primary outlines to keep contrast once the hair rubs against the skin. The usual mistake is pushing for too many internal lines at micro scale. This area is low pain and often done in under 45 minutes. Remember to rotate how your hair sits around the spot so it does not constantly rub the tattoo during healing. A small choker or thin chain necklace can frame the area without covering it.
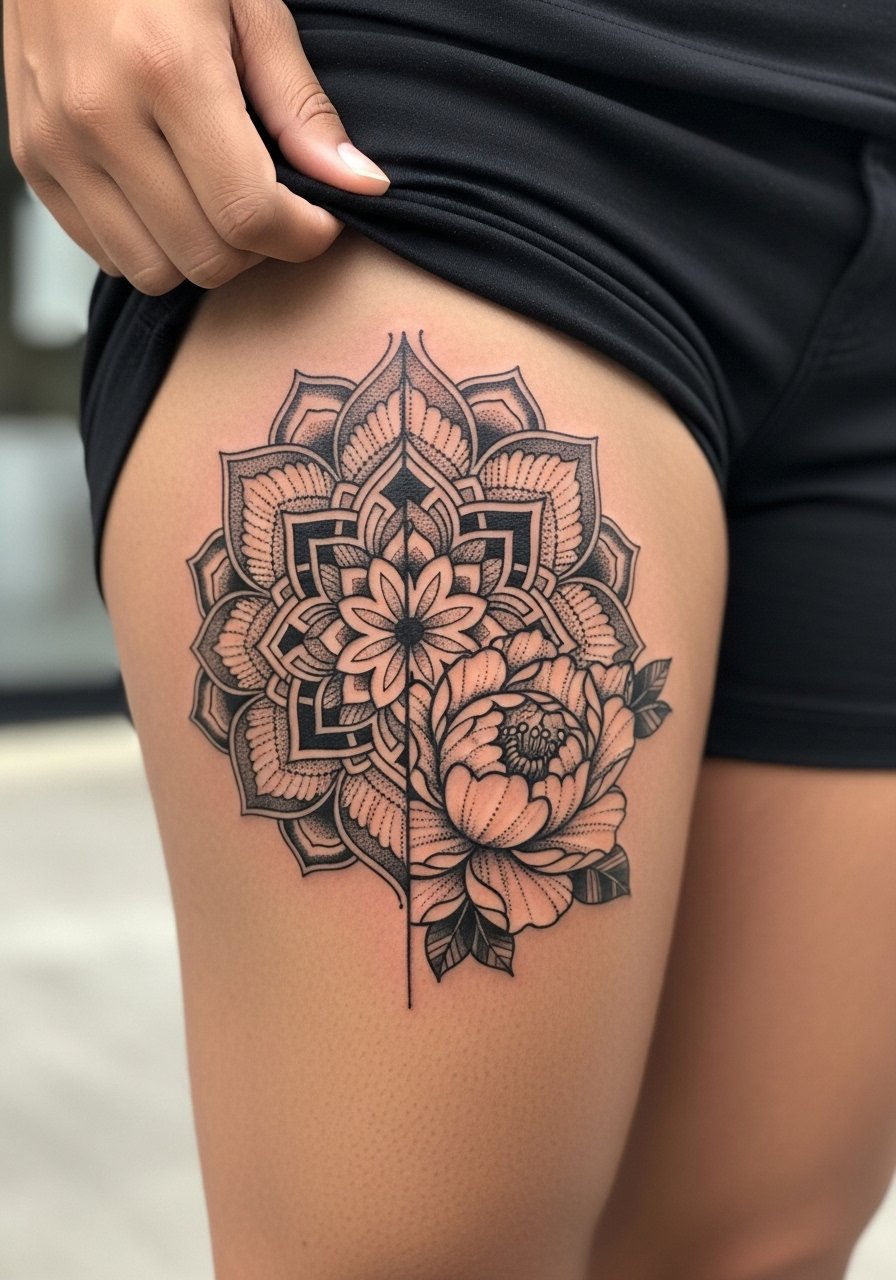
12. Peony-Chrysanthemum Hybrid with Topaz Dots on the Thigh
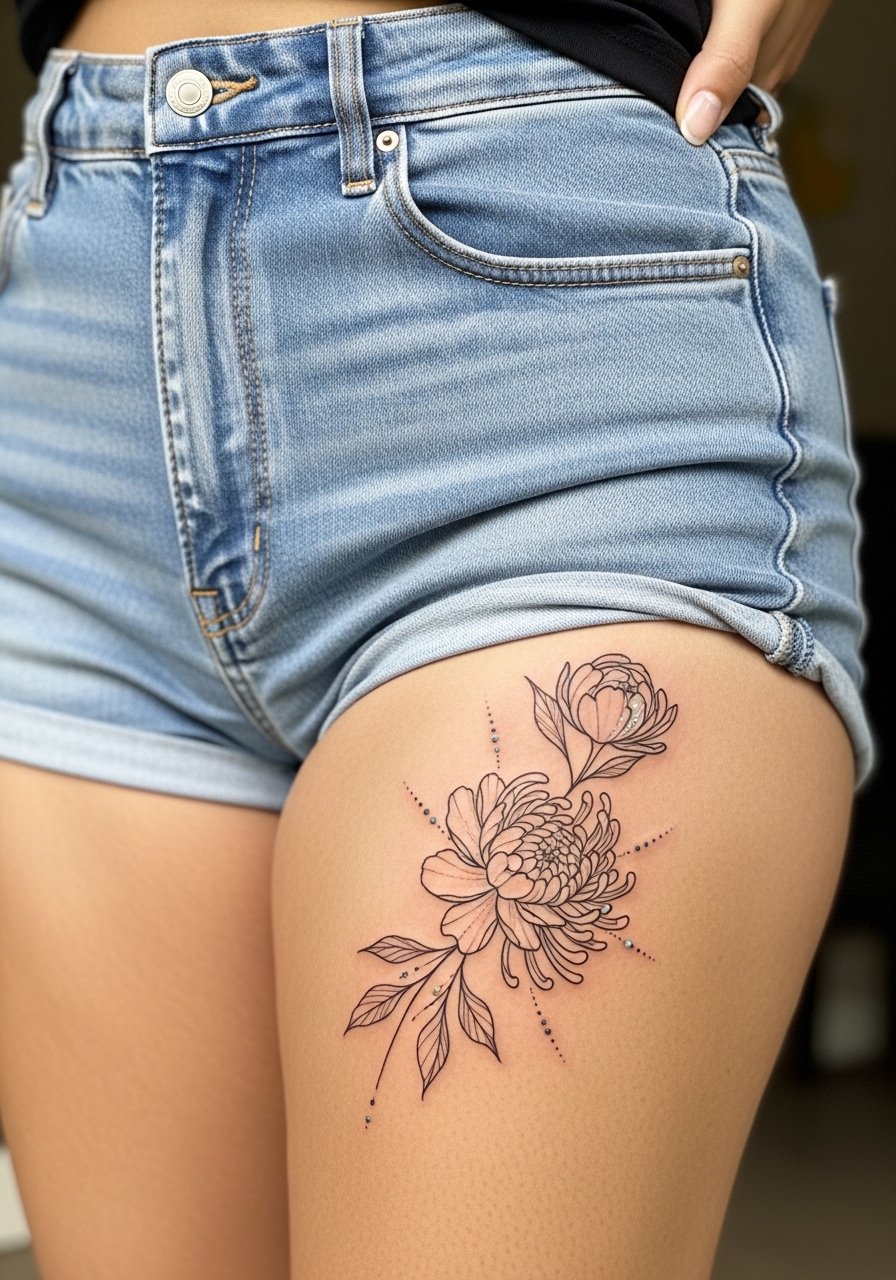
This hybrid is one of those under-covered ideas that gives a unique identity to a November bloom. Ask your artist to use tiny topaz-colored dots as accent points rather than full color fills so the color ages more gracefully. The thigh is forgiving for detail and a good pick if you expect body changes, but avoid placing heavy detail across areas that stretch with muscle gain. Session time is typically under two hours. For showing off, reach for high-waisted shorts or asymmetrical skirts that let the piece peek out when you move.
13. Curved Stem Knuckle Wrap for High-Movement Areas
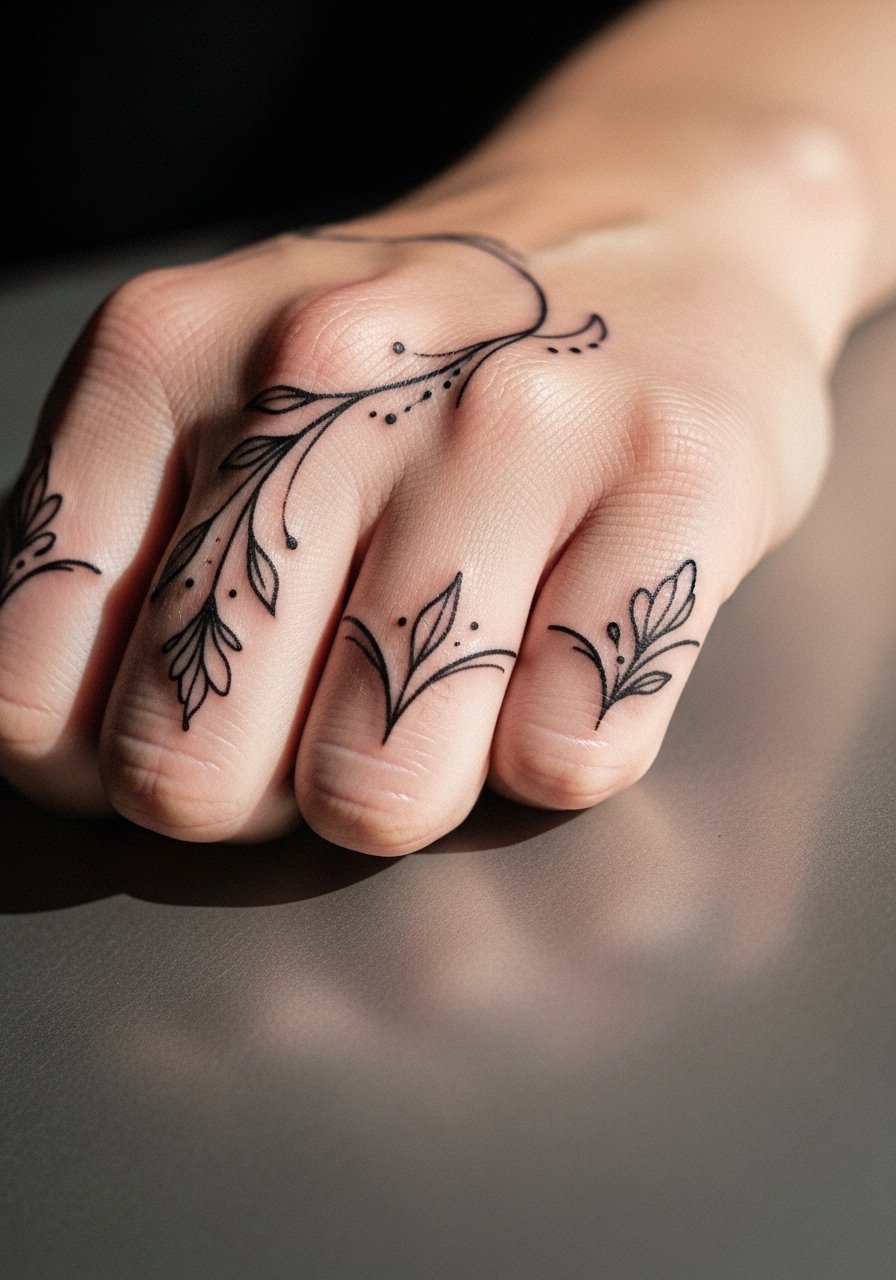
Knuckle wraps are visible and they see a lot of wear, so keep the design bold and slightly larger than micro scale. The biggest mistake is insisting on ultra-fine detail across knuckles where daily motion and washing will soften lines quickly. Expect higher touch-up needs and plan for short, bold strokes rather than tiny filigree. Pain is higher on knuckles and sessions are done in short passes. For session comfort, bring gloves and keep hands warm between passes. Consider whether your job requires very clean hand appearance before committing.
14. Dry Ice Crystal Accents Around a Flower for Frosted Detail
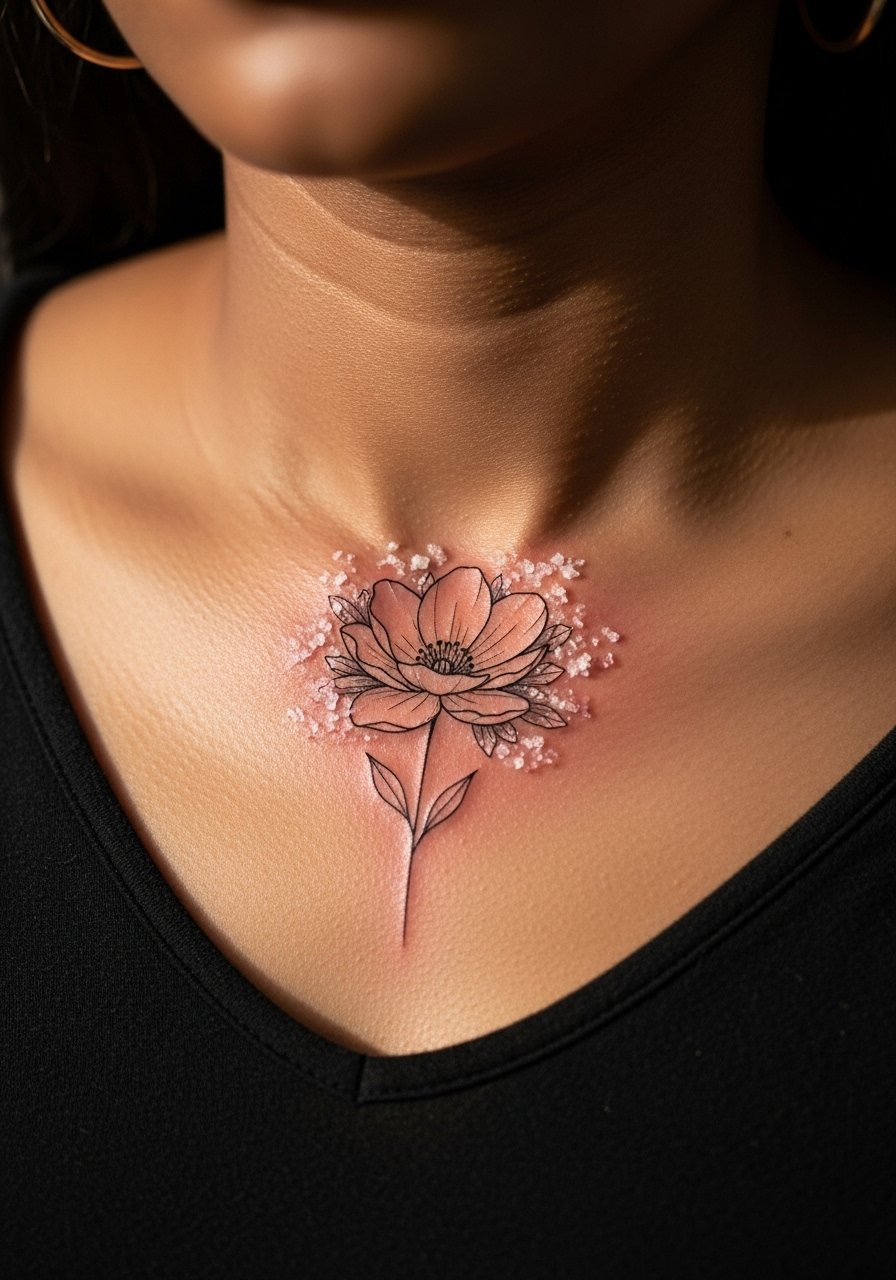
Adding dry ice crystal accents invokes November frost around a bloom while keeping the floral center readable. Tell your artist you want the crystals as negative-space marks with sparse stippling so they do not merge into the petals over time. The design requires careful spacing to avoid blurring, which is the common mistake. This effect works well on forearms or upper chest. Session time varies by size. If placed near the collarbone, pair it with a v-neck silk blouse for evenings out.
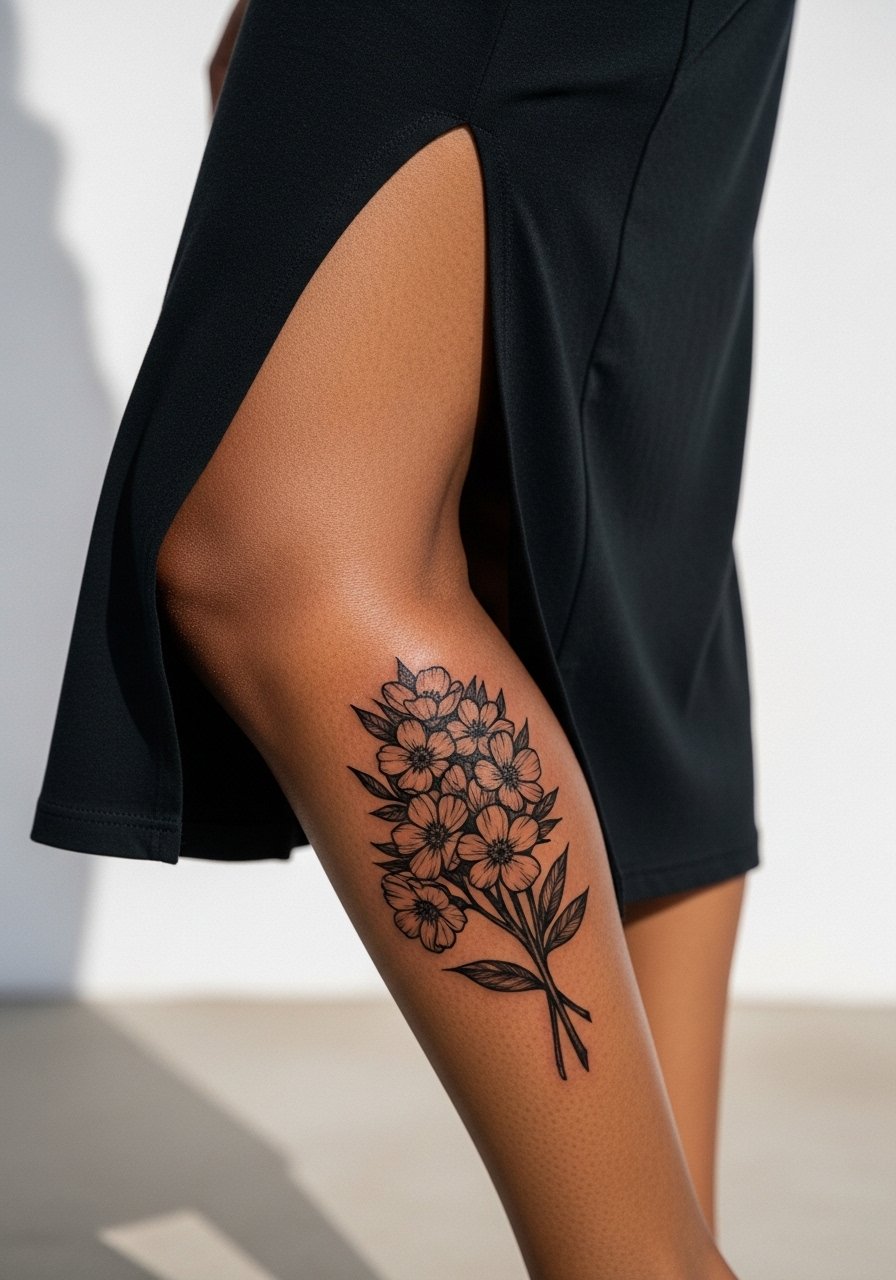
15. Thigh Asymmetrical Stem for Body-Positive Curves
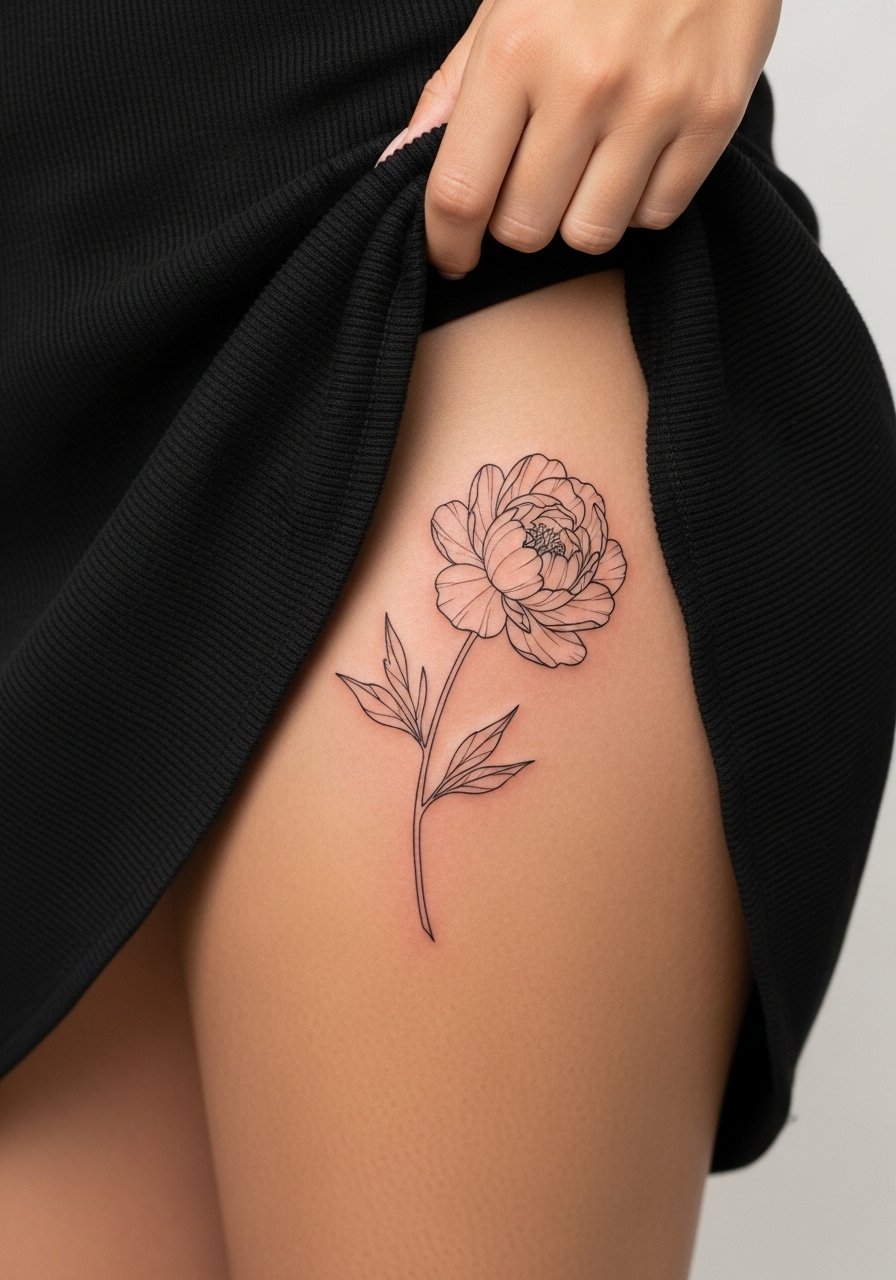
Asymmetrical thigh pieces are a strong choice if you want a design that moves with your curves. I recommend placing the stem along natural shadow lines and avoiding horizontal bands that stretch with weight change. The main mistake is centering a thin vertical line across an area that will later stretch. Thigh sessions are comfortable and let artists use longer strokes, so session time is usually under two hours. For show-off styling pick asymmetrical skirts or high-waisted shorts that reveal the art when you sit or walk.
16. Botanical Fine Line Cluster Behind the Ear Nape
A nape cluster reads intimate and works well with hair up. Ask the artist for slightly bolder outer petals and lighter inner detail so the design keeps its silhouette if some interior lines soften. A common misstep is requesting too many micro interior strokes in such a small zone. Pain is low and session time brief. For showing off wear a high ponytail or a wide-neck top that frames the area. If you work in an environment with a strict dress code, consider how often you will have hair up versus down.
17. Black and Gray Peony with Stipple Shading on the Upper Back
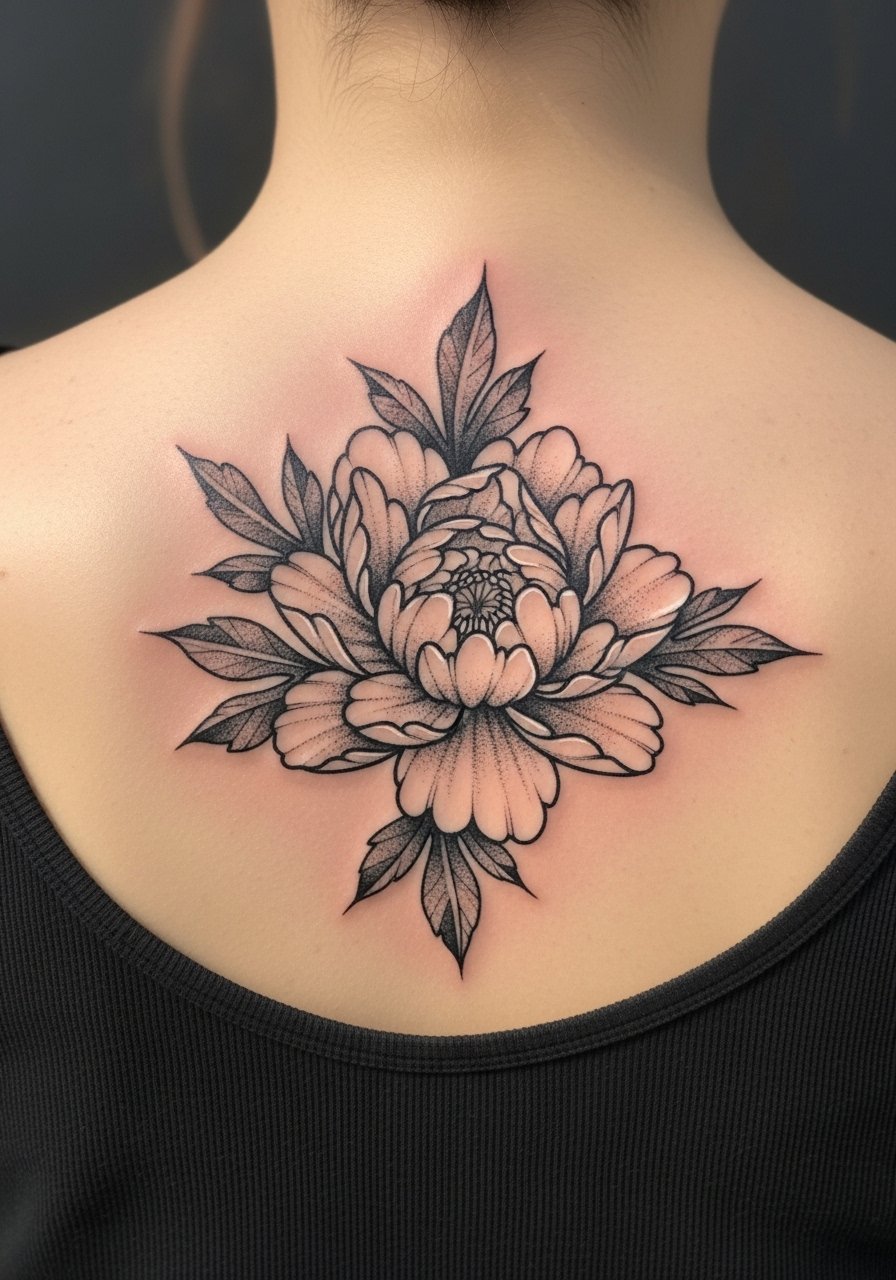
Upper back pieces give room for stipple and dot work to breathe. For longevity, ask your artist to scale dot spacing so stippling does not pack into a solid gray over time. The upper back is low pain and tolerates multi-session work well. A common mistake is compressing stipple too tightly in small medallions. For session wear bring a loose tank top you can pull aside as needed. This placement lets you add memorial elements later without crowding the main bloom.
18. Micro-Realism Bud on the Ribcage, Side Variation
The ribcage is ideal for small realistic buds if you can handle a higher pain level. Tell your artist you prefer softer contrast with a defined silhouette to keep the bud readable as subtle gradients fade. The mistake many make is expecting identical micro shading across different skin tones without test patches. Single-session work may be enough, but touch-ups at 6–8 weeks help sharpen edges. For session comfort pick a loose sports bra or crop top and time the appointment when you can rest well after.
19. Single Needle Peony Stem on the Inner Bicep
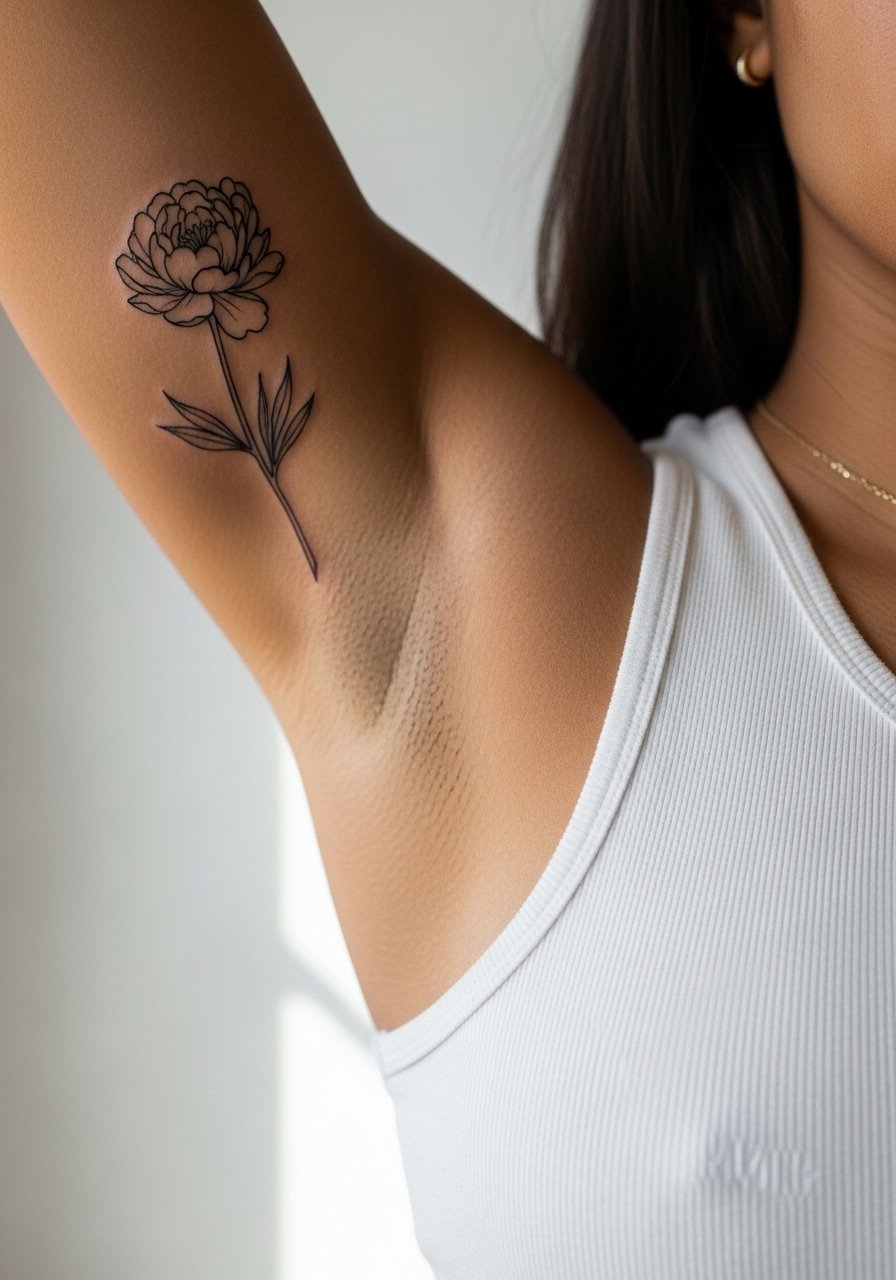
Inner bicep pieces are intimate and they show well with single-needle stems if the artist spaces the lines thoughtfully. The inner bicep can be a higher-risk area for blowout if needles are placed too deeply. Ask your artist about their approach to depth and shading so you avoid that common error. Pain is medium and sessions are short. For the session wear a tank top you can move the strap out of the way. If you work out often, consider that friction from gym clothes may affect early healing.
20. Small Peony Bloom Near the Ankle with Hidden Initial Frame
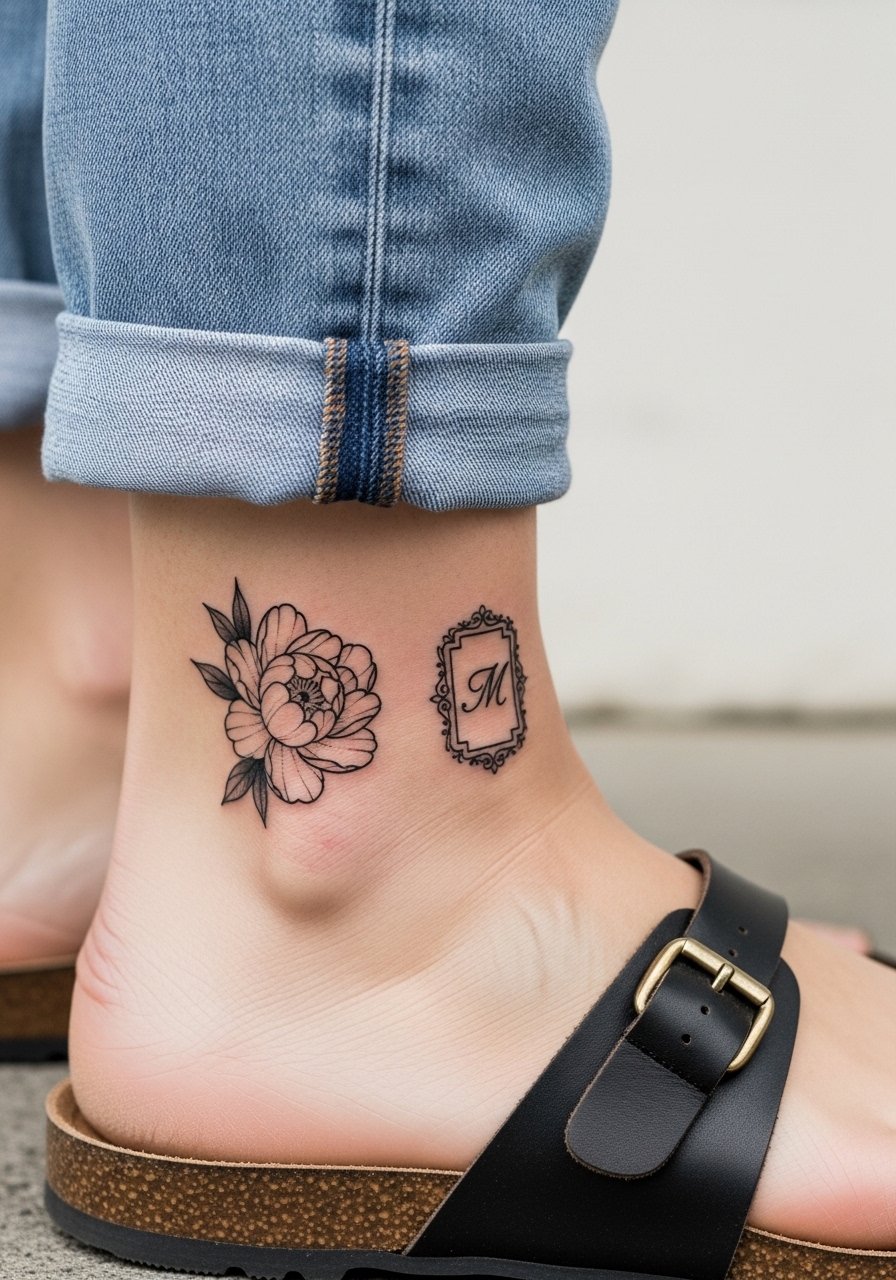
Ankle pieces with a tiny frame give you a spot for initials or dates without making them the obvious focus. Keep the frame open and slightly thicker on the outer edge so it survives boot or sock friction. The ankle is low to medium pain and most small peony blooms finish in one session. A typical mistake is asking for ultra-fine filigree that friction will soften. For styling pair with cropped straight-leg jeans or delicate sandals for summer reveals.
21. Botanical Chain Around the Wrist with Negative Space
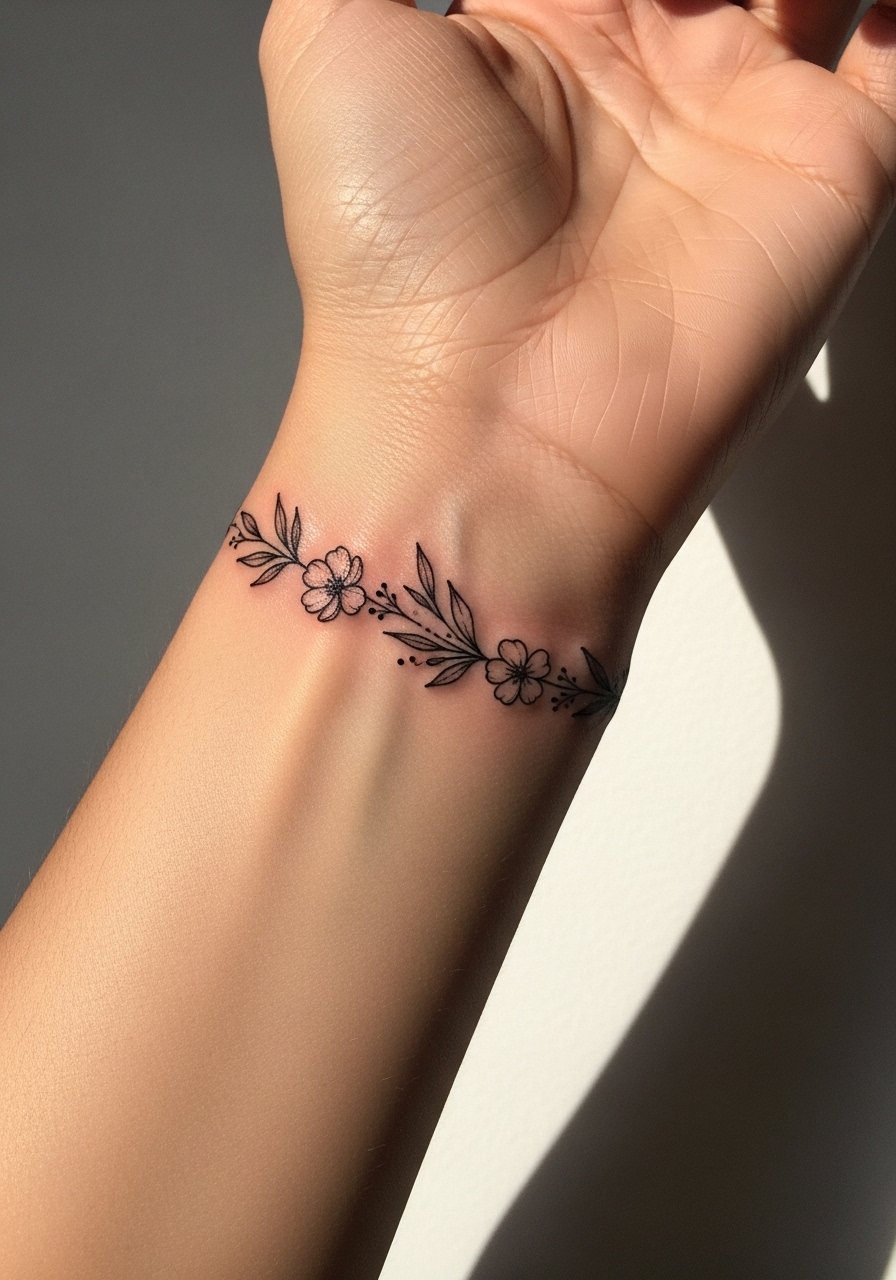
A wrist chain that uses negative space can age gracefully if you avoid packing detail into the segments. Ask for moderate spacing and slightly stronger outer lines so the chain keeps its form when interior strokes soften. Wrist pain is medium and sessions are usually short. The common error is trying to cram initials and dates into each link, which becomes illegible after a couple of years. For showing it off stack with a thin gold chain bracelet on the opposite wrist so the tattoo reads as part of an outfit.
22. Calf Cluster in Ignorant Style for High Visibility
Calf placements are forgiving and ideal for playful ignorant style clusters that want to read bold and raw. Ask for intentional wobble in the main outlines and avoid tiny internal shading. The calf is low pain and session times tend to be under an hour. Common mistakes include asking for too much internal detail that conflicts with the uninhibited visual. Pair with a midi dress with side slit for summers when you want visibility without heavy commitment.
23. Ornamental Frame as a Memorial Around an Ankle Date
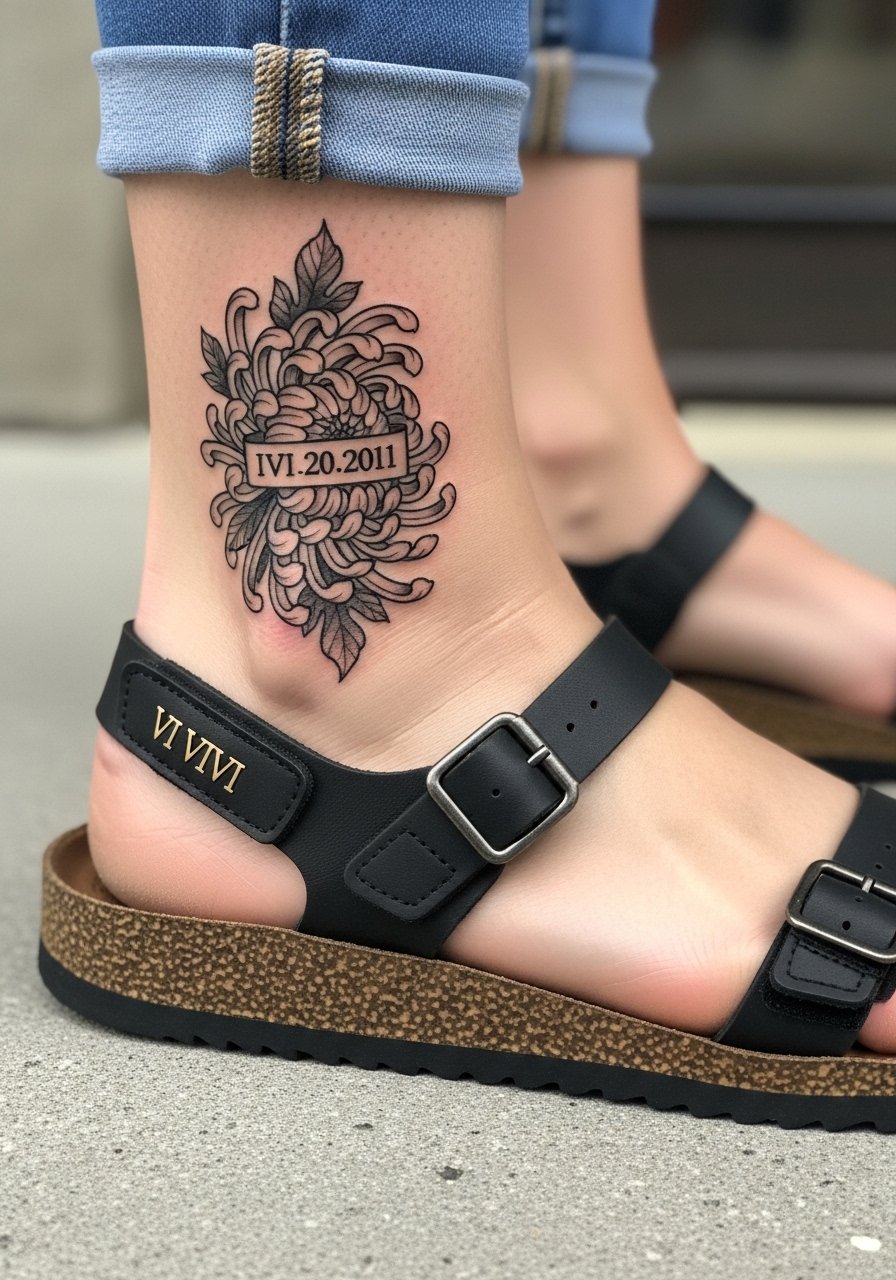
Frames around dates work well when you avoid tight filigree that can fill in. Tell your artist you want the date in clear Roman numerals with slightly thicker surround lines. The ankle is a friction zone so schedule the session when you can wear open shoes for a week. The main error is selecting overly ornate frames at tiny scale. For showing it off try cropped jeans or strappy sandals. If this is a memorial piece consider spacing that allows a small flower or leaf to be added later without crowding the numerals.
24. Blackwork Mandala-Peony Hybrid on the Upper Thigh
Upper thigh placements let you marry mandala geometry and peony forms in a way that stays legible. Ask your artist for broader negative space between mandala rings so dot work does not blend into solid blocks over time. Thigh sessions are low pain for most and can be done over two sittings if needed. The common mistake is tight concentric dots that age into grays. For show-off styling pick high-waisted shorts or swim bottoms when you want to reveal the piece.
25. Minimalist Single-Petal Accent Behind the Ear
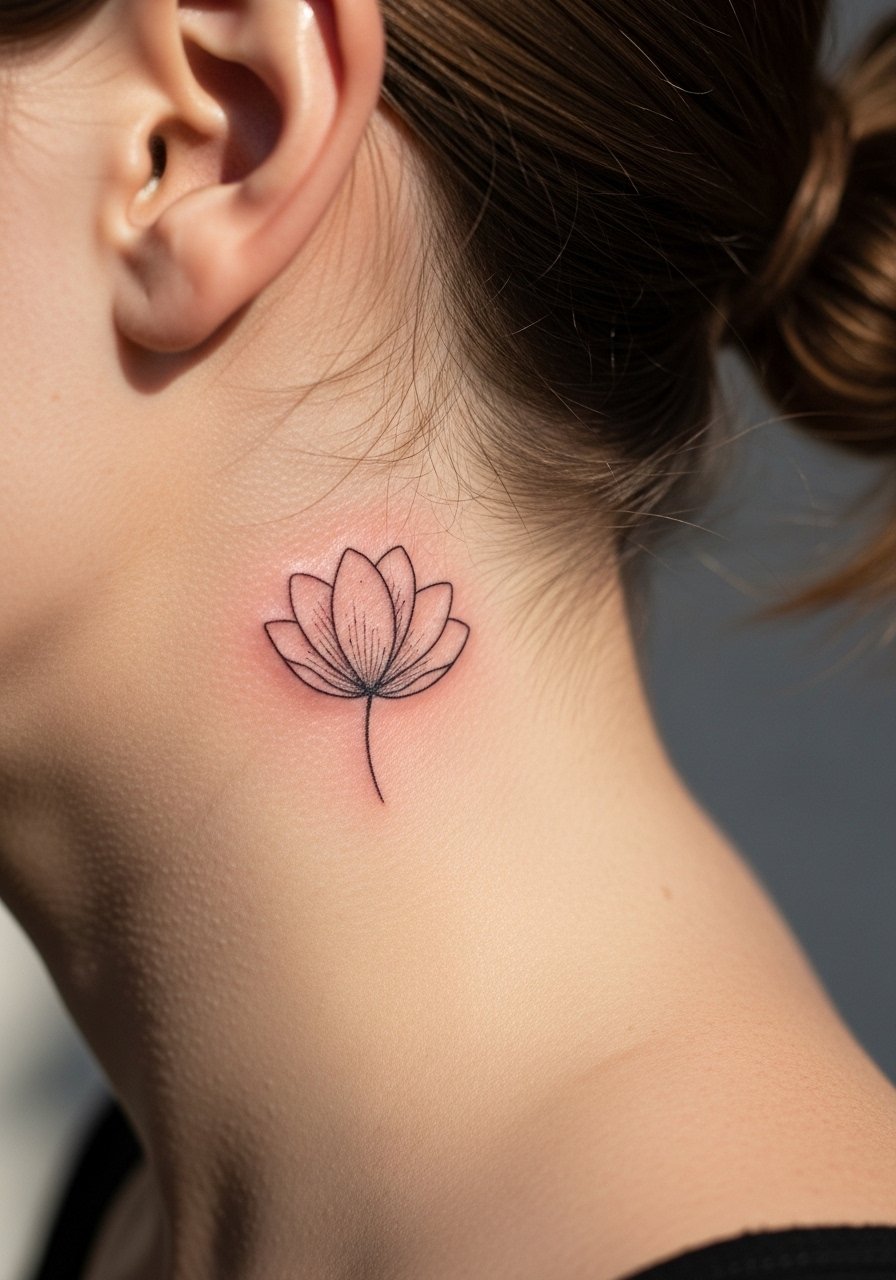
A single-petal mark behind the ear is a quiet way to honor November blooms without a full tattoo commitment. Keep the petal slightly thicker than the thinnest single-needle line so the mark does not vanish in photos on darker skin. This area is low pain and quick to do. The main mistake is asking for micro hatch shading in such a small space. Wear your hair up to show it off or let it peek from a loose bun. If you plan a cluster later, leave some open skin for connecting elements.
26. Spine Base Peony with Subtle Geometric Anchor
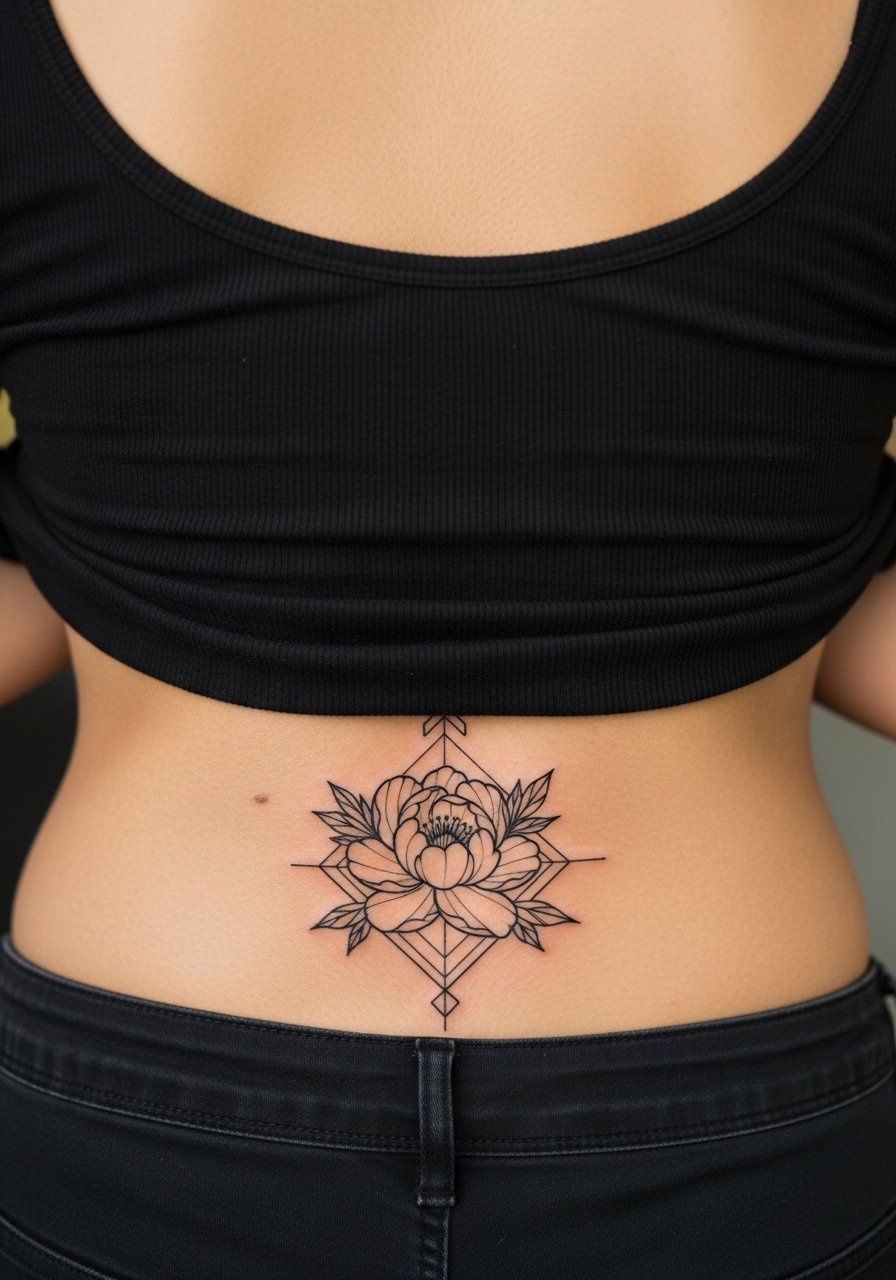
Lower spine pieces pair well with a geometric anchor because the contrast helps the bloom maintain a silhouette as lines soften. Ask for negative-space anchors and avoid cramming micro filigree into the center. The area is medium pain and usually done in one session if modest in size. A frequent error is centering a huge amount of detail where clothing will constantly rub during healing. For showing off choose low-back tops or swimsuits that intentionally reveal the base of the spine.
27. Micro-Realism Chrysanthemum Bud on the Rib, Frost Accent
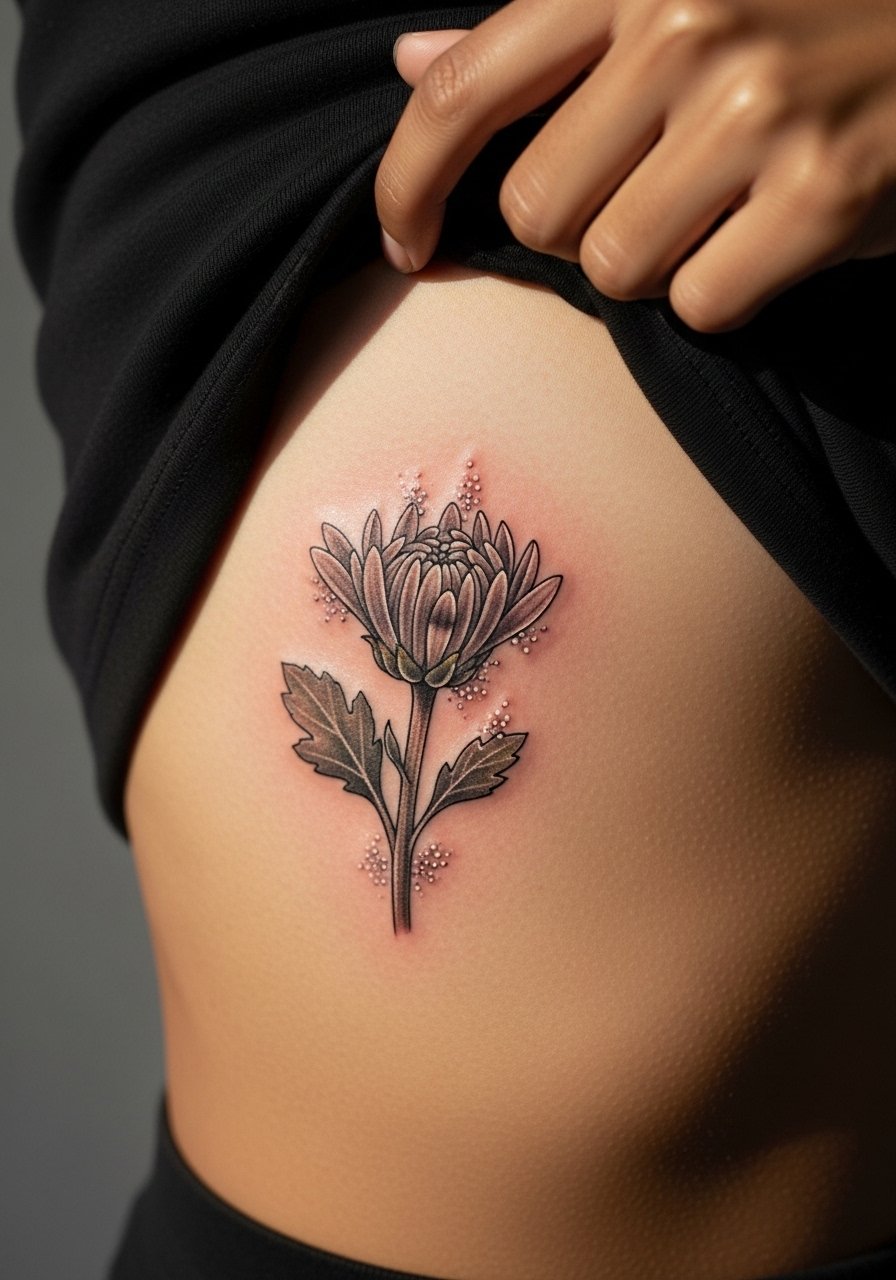
This final rib placement combines the dry ice frost accent idea with a micro-realism bud for a subtle November nod. Because ribs move a lot, ask for slightly simplified inner shading and a reinforced outer contour so the bud keeps shape as you breathe and move. The rib is high on pain but offers a beautiful canvas for intimate work. A common mistake is insisting on dense micro shading that will blur with skin motion. For the session wear a loose crop top so the artist has access without exposing more than the area needed. Book a touch-up at 6–8 weeks to restore any softened highlights.
Frequently Asked Questions
Q: Will a fine line November bloom fade faster on darker skin tones?
A: From what I have seen, ultra-thin single-needle lines can lose contrast faster on darker tones. The practical fix is to request slightly bolder primary outlines or selective black anchors so the design keeps shape. Ask your artist to show healed examples on similar skin tones during consultation.
Q: Are watercolor peonies worth it if I want the tattoo to look good in five years?
A: Watercolor can still look great long term if the artist includes dark anchor points and leaves breathing room between color patches. Expect more gradual softening than with blackwork, and plan for a potential touch-up after a year if you want vivid color restored.
Q: How should I time an ankle or rib tattoo if I wear boots or have a busy gym schedule?
A: For ankles, avoid getting ink before you need to wear closed boots daily. Boots and socks create friction and moisture that complicates healing. For ribs, pick a time when you can rest and avoid heavy upper body strain for a week. If you lift frequently, consider scheduling around deload weeks.
Q: Is Saniderm or dry healing better for fine line wrist pieces?
A: Artists split into two camps. One side favors protective films for cleanliness and less scabbing. The other side prefers dry healing, arguing that ointments and films can over-moisturize fine lines and risk ink loss. The right choice depends on your activity levels and your artist's recommendation based on how they tattoo.
Q: How many touch-ups should I budget for with micro-realism or single-needle peonies?
A: Plan for at least one touch-up at 6–8 weeks for most micro or single-needle work. After that, many people need minor refreshers every couple of years depending on sun exposure, placement, and skin changes. A clear upfront conversation about expected touch-ups keeps surprises low.
