
Fine line dotwork is trending hard on feeds, and the pieces that still read sharp after three years are often the ones that respected placement and spacing up front. Too many guys pick a tiny, dense mandala for the inner forearm and then wonder why the dots merge after a year. Below are front arm ideas that think past the fresh photo and plan for how the work actually heals.
1. Inner Forearm Mandala in Stipple Shading

I recommend this when you want a centered, meditative piece that reads well both up close and from arm distance. Tell your artist you want breathing room between the concentric rings and lighter stipple toward the edges so the pattern does not pack into a blur as it heals. Most mistakes come from shrinking the mandala to fit a wrist band idea. Pain on the inner forearm is moderate and sessions run one to two hours depending on size. Over time the center dots hold more saturation and the outer stipple softens, so expect a touch-up at year three for dense centers. For showing it off, roll up a short-sleeve linen shirt that frames the inner forearm without crowding the design.
2. Geometric Chevron Stack on Front Bicep
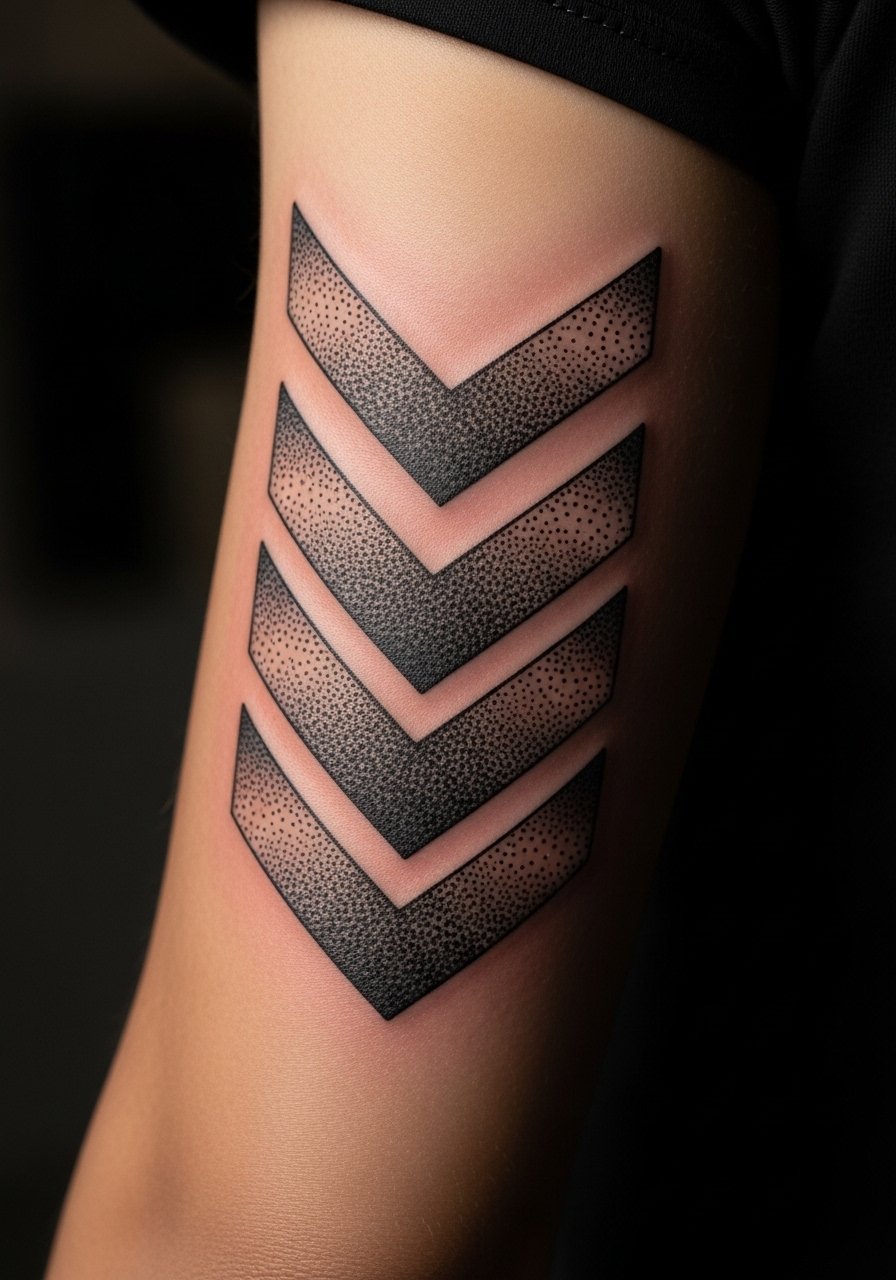
This vertical stack reads well on men who want something bold but not full sleeve. In consultation, ask for slightly heavier anchor lines with dot fills inside each chevron to preserve the pattern as it settles. A common mistake is making the chevrons too narrow which increases blowout risk near the inner crease. Expect moderate pain and a two-hour session for a medium piece. At six months the dots will look crisp, and at two years the negative spaces start to soften unless the artist spaces dots deliberately. For evenings when you want it visible, pair the piece with a sleeveless tank that lifts the arm line and keeps attention on the front bicep.
3. Tiny Constellation Row Along the Wrist
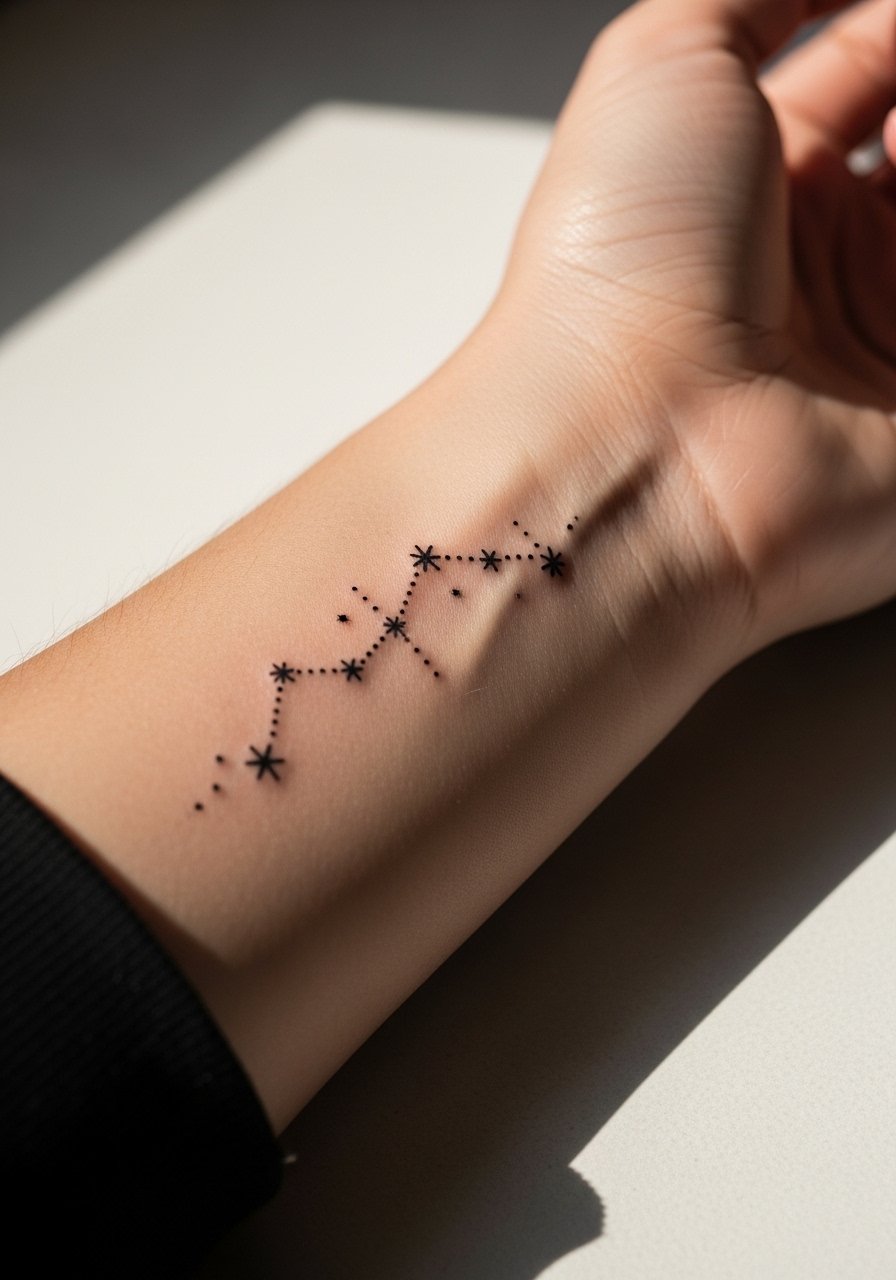
For guys who want subtle dotwork that still reads intentional, this string of tiny constellations works well. The biggest mistake is crowding too many stars into a small wrist area. Ask for slightly more spacing and a mix of single-dot stars and small clusters so the pattern keeps clarity as it fades. Wrist work is higher on the sensitivity scale and can take under an hour for a neat row. Expect the smallest dots to lose crispness faster than mid-sized dots, so plan on a light touch-up at year two if you want sharp points. Show it off with a minimalist watch that leaves the wrist visible without rubbing the ink.
4. Stippled Arrow Running Along the Forearm
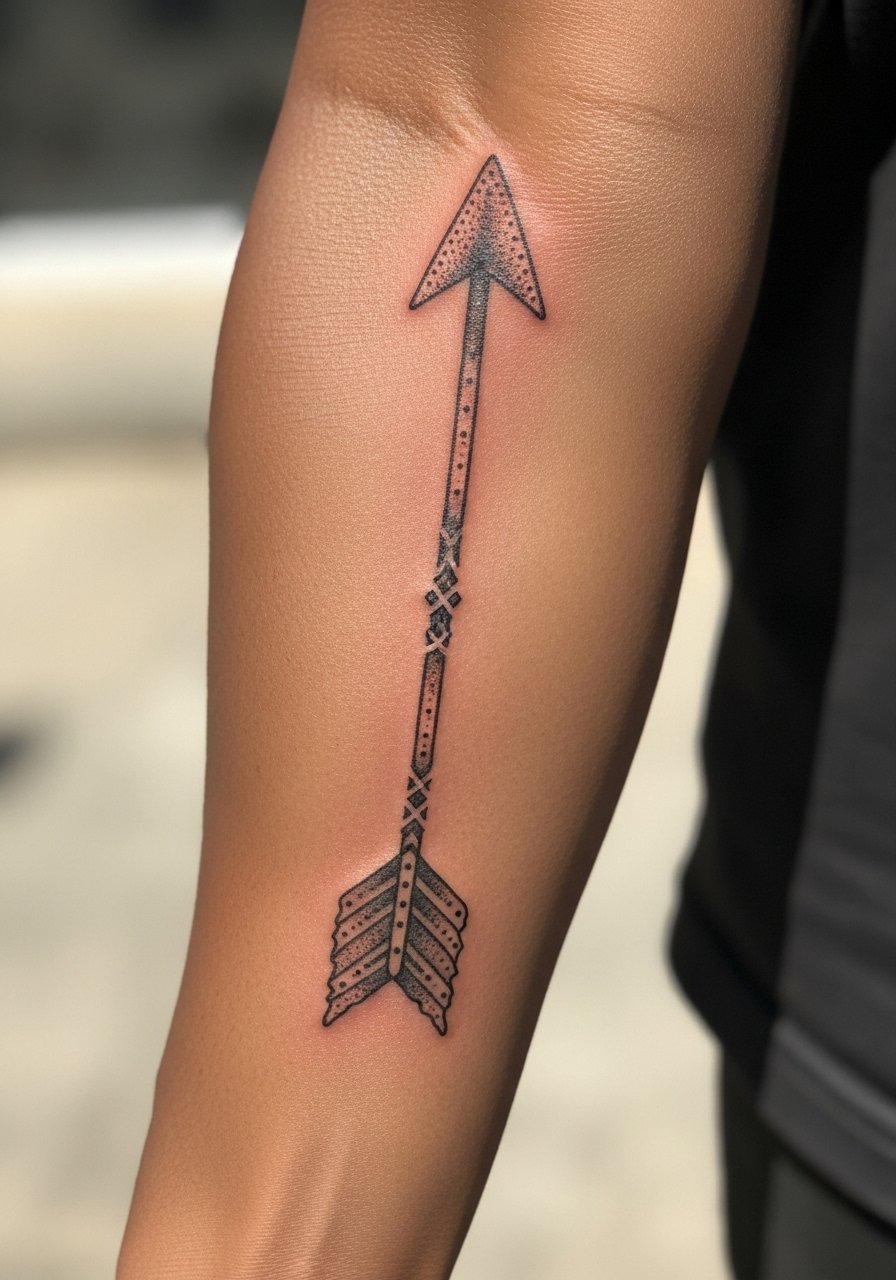
There is debate about long, thin dotwork on forearms. One camp worries that linear dotwork can merge along stretch lines within a couple of years. The other camp says properly spaced stipple with a stronger outline settles fine. Name the debate in your consult and ask where your artist stands. This design is great for directional pieces that sit with muscle flow. Expect mild to moderate pain and a one to two hour session. A common mistake is a shaft that is too thin across wrist creases, which invites blowout. Over time the fletching stipple will look softer while the shaft keeps form if spaced well. During the session wear a loose button-down shirt you can pull aside for clean access.
5. Front Arm Portrait Dotwork Patch
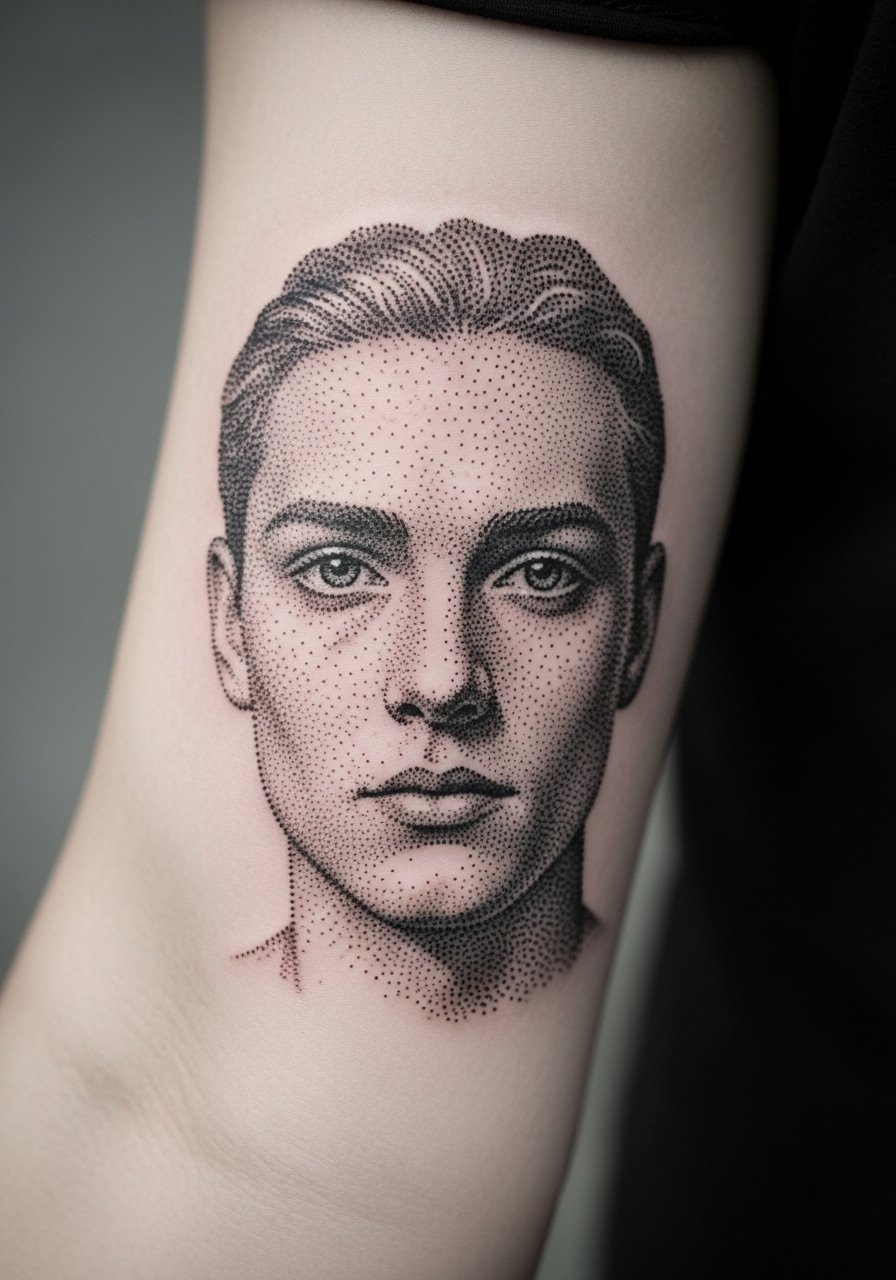
Dotwork portraiture on the front arm can be striking but it depends on scale. I usually recommend a larger patch so facial features have room. In consultation, bring multiple reference photos and ask the artist to map out where shadow versus dot density will sit. The common error is packing too many tiny dots into cheek areas which blur sooner than intended. This piece often runs multiple sessions for shading control. At six months the contrast is strong, at two years the midtones soften. If you want it visible on casual days, pair with a short sleeve oxford that lets the patch sit center on the forearm.
6. Chain-Link Dot Band Around the Forearm
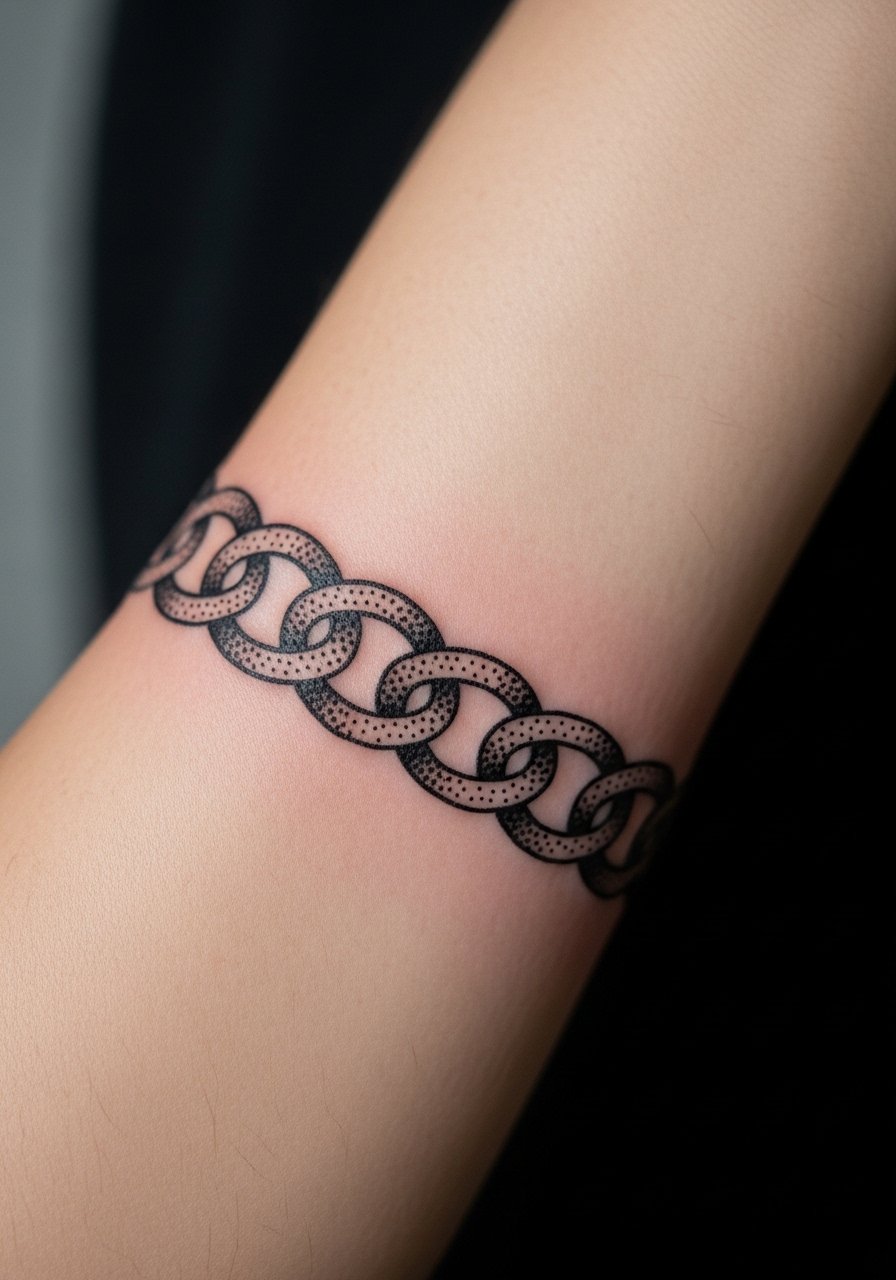
This band reads modern and holds up if the links are sized for skin movement. Tell your artist you want extra spacing on the inner forearm side where the skin creases more. The mistake I see most is undersized links that merge within a year. Pain is low to moderate and a standard band takes under two hours. Expect the outer links to keep their dot integrity longer than inner ones. For showing it off, rolled sleeves or a linen button shirt look clean and let the band sit as a clear accent.
Studio Day Picks
The front arm ideas above include wrist bands, inner forearm pieces, and portrait patches, and each placement asks for different prep and healing considerations.
-
Stencil transfer paper kit. Lets you check placement and symmetry on the skin before the needle touches the arm, which helps avoid repositioning mid-session for bands and mandalas.
-
Topical numbing cream. Applied as instructed before a wrist or inner forearm session to reduce sharp sting without affecting linework quality.
-
Thin protective film roll. Useful for wrist and forearm wraps during the first days when clothing friction is highest.
-
Fragrance-free body wash. Gentle cleansing helps preserve tight dotwork during showers without stripping needed moisture.
-
Aquaphor healing ointment. A thin initial layer supports the first 48 hours for fine dotwork on the forearm without clogging.
7. Minimalist Wave Along the Outer Forearm
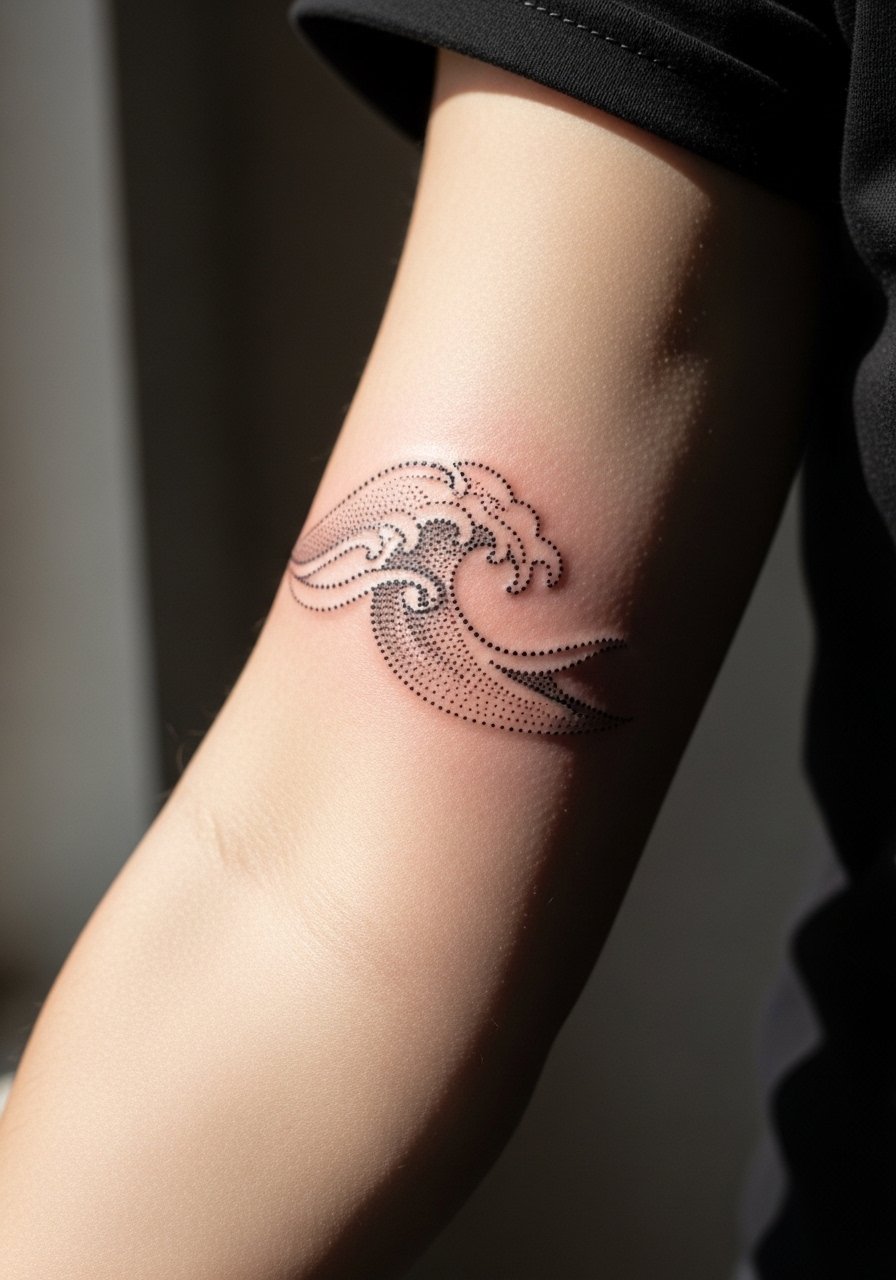
This minimalist wave sits well for people who surf or just like coastal references. In your consult ask for a gradient of dot density instead of solid fills so the motion reads as movement when healed. The error to avoid is filling the crest too densely which can flatten with skin movement. Expect low to moderate pain and sessions under an hour for a small piece. At two years the gradient will soften, which can be part of the aesthetic if you plan accordingly. For casual days pair the design with a rolled-sleeve tee that shows the wave without distractions.
8. Linear Scripture in Tiny Dot Type Along the Inner Wrist
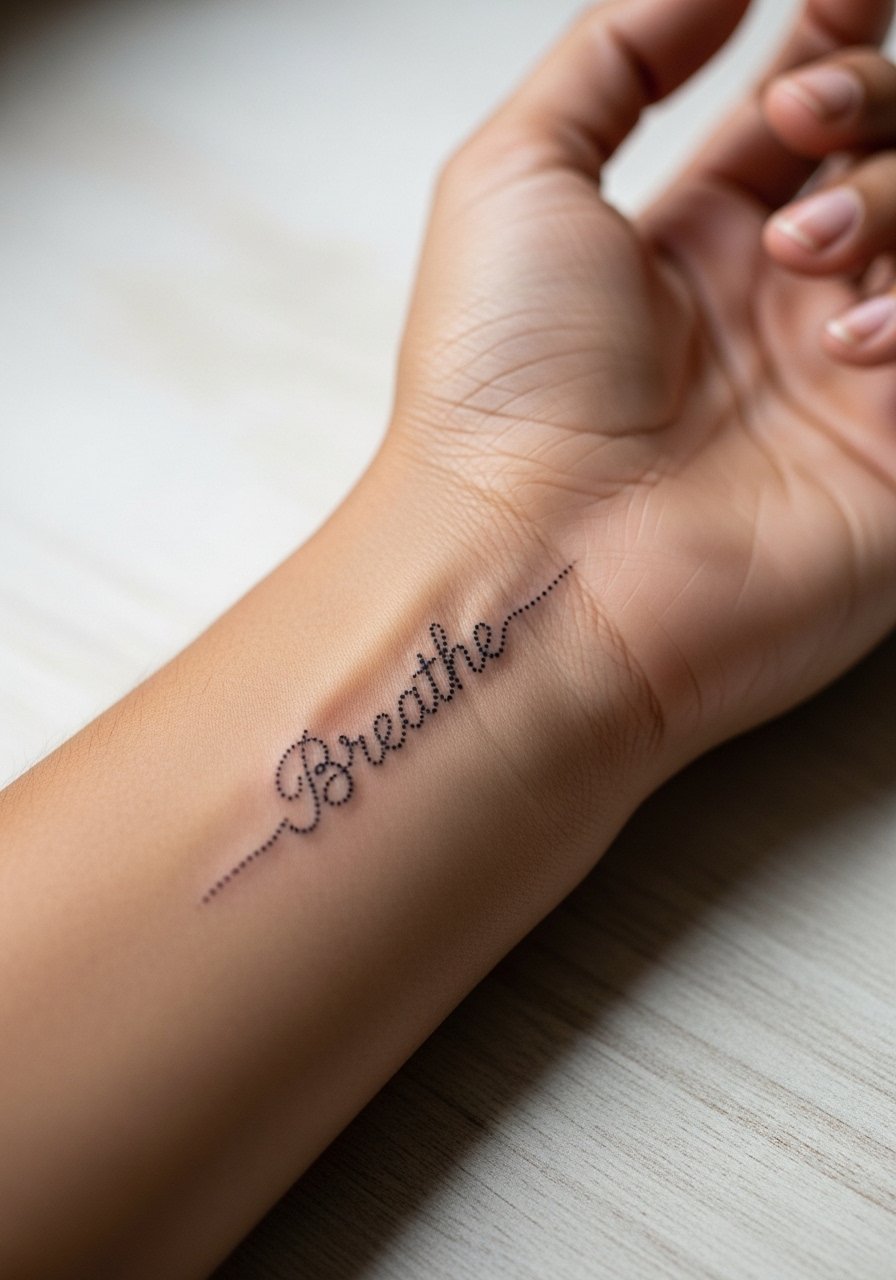
Text in dotwork can be elegant but requires exact spacing. Use short words or a date in Roman numerals and ask for test transfers at different sizes. The usual mistake is choosing long phrases that compress into unreadable dots. Inner wrist sensitivity is higher and the session is brief but sharp. Over years, the smallest dots that form letters soften first. If this placement matters for work, think about visibility as a factor. For showing it off, a thin chain bracelet sits above the script without crowding the lettering.
9. Front Arm Compass with Stipple Shadows
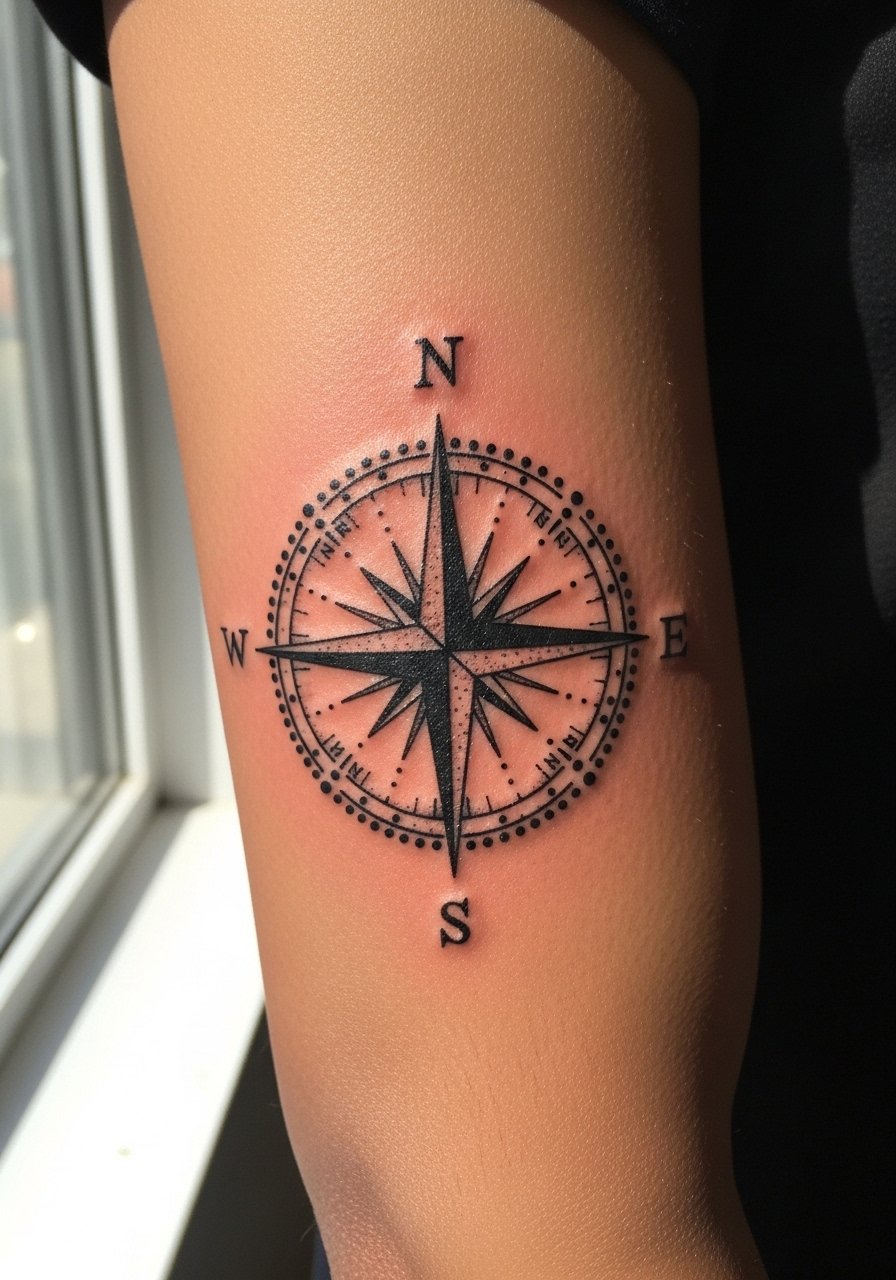
Compasses scale well on the front arm and read as travel-ready pieces. Tell your artist to prioritize a clear up point and use stipple for shadow to avoid heavy solid blacks that age into spots. A common error is placing the compass too close to the elbow crease which invites distortion. Expect a moderate session and some extra time to map cardinal points. At two years expect softer shadows but a maintained central point if negative space is respected. For session access, wear a buttoned short sleeve you can pull aside.
10. Floral Linework with Dot Shading Near the Wrist
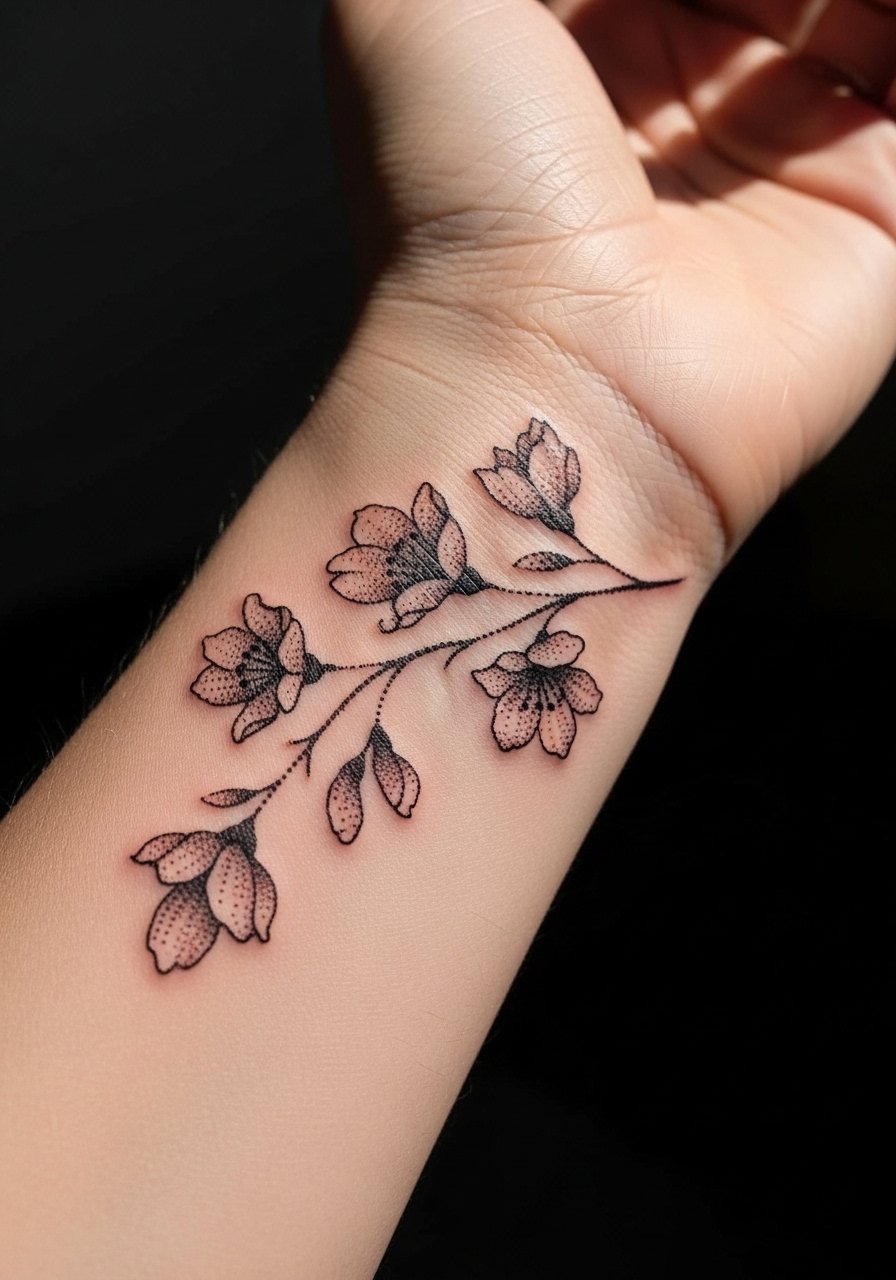
Botanical dotwork looks modern when petals are suggested with stipple instead of heavy outlines. Ask for slightly larger petal gaps so the piece breathes and avoids patching over time. The common mistake is over-detailing small petals for wrist placement. Pain is moderate and the session is usually under two hours. Watch for faster softening in the outer petal stipple by year three. For evenings out try a rolled cuff and a leather bracelet to frame the wrist without crowding the floral negative space.
11. Dotwork Geometric Sleeve Panel on the Front Arm

This panel approach gives the look of a sleeve while staying contained. In your consult request modular sections that can expand later. The biggest mistake is a continuous dense pattern across joints which ages poorly. Forearm flesh moves with muscle, so spaced dot runs hold better than tightly packed lattices. Sessions are longer, often split into two appointments. Aftercare and sun protection will keep dot contrast longer. For daytime outfits, a rolled sleeve chambray shirt complements the geometry without competing.
12. Micro-Realism Animal Eye in Dotwork

There is a split in opinion about micro-realism in dotwork. One camp warns that tiny stipple details in an eye compress into a smudge under skin tension. The other camp believes careful dot size variation and spacing preserves detail. Ask the artist which approach they favor and request a slightly larger canvas for eyes. This piece feels more tactile as the needles shade, so expect moderate pain over a longer session. At two years the iris detail is the most likely part to need a touch-up. For appointment comfort wear a breathable cotton tee that lets the artist access the mid forearm.
13. Negative Space Arrow Cluster Near the Elbow
Negative space in dotwork can help preserve clarity over time if the skin shifts. For elbow-adjacent work, ask your artist to anchor arrows away from the crease itself. The mistake is centering fine dots on the crease which invites early blurring. Expect higher sensitivity near the elbow and a session that might pause for comfort. At six months the negative shapes read strong, and at two years the dot fields will soften but the voids remain readable. For showing it off wear a short sleeve roll so the cluster sits in plain sight without bunching fabric.
14. Interlocking Hexagons Running Down the Arm

Hex patterns look technical and sit well along the arm axis. Ask for alternate rows of heavier and lighter stipple so the pattern breathes as it heals. The typical mistake is uniform density across the entire column which leads to visually flat aging. Sessions vary with size but expect a multi-hour slot for a bold column. Over time the lighter rows will fade first, which can be an intentional aged look if planned. For casual visibility pair with a short sleeve henley.
15. Optical Dotwork Band That Wraps the Forearm
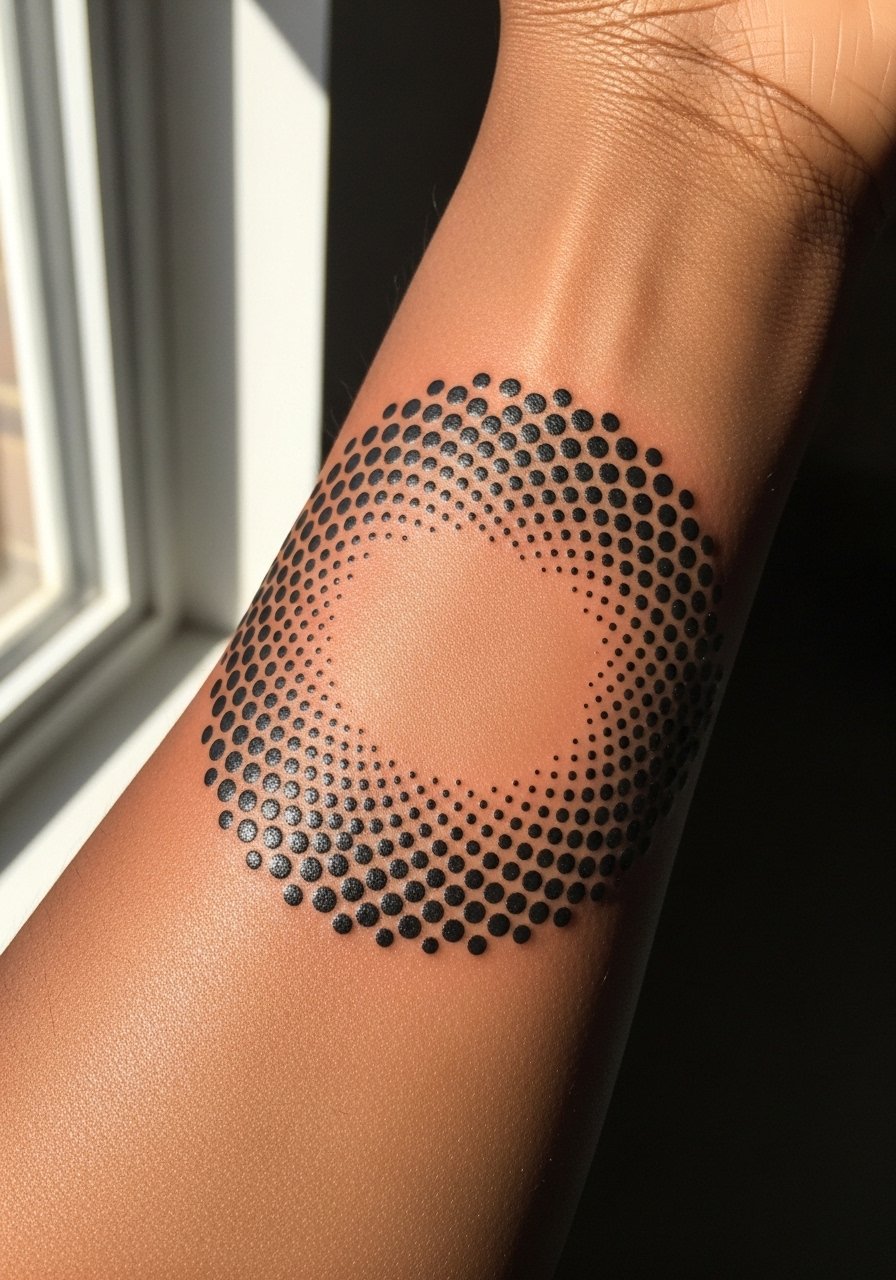
Illusion bands require careful spacing to keep perspective as the skin moves. Ask your artist to proof the wrap with a stencil and view it from both sides of the arm before starting. The common error is mismatch at the seam which breaks the illusion. Pain is mild to moderate and sessions are usually under two hours. Expect the illusion to soften over years but the central gradient will offer visual depth if dot spacing is intentional. For dressier looks, a rolled cuff blazer sleeve frames the band without covering it.
16. Botanical Vine Climbing Toward the Elbow
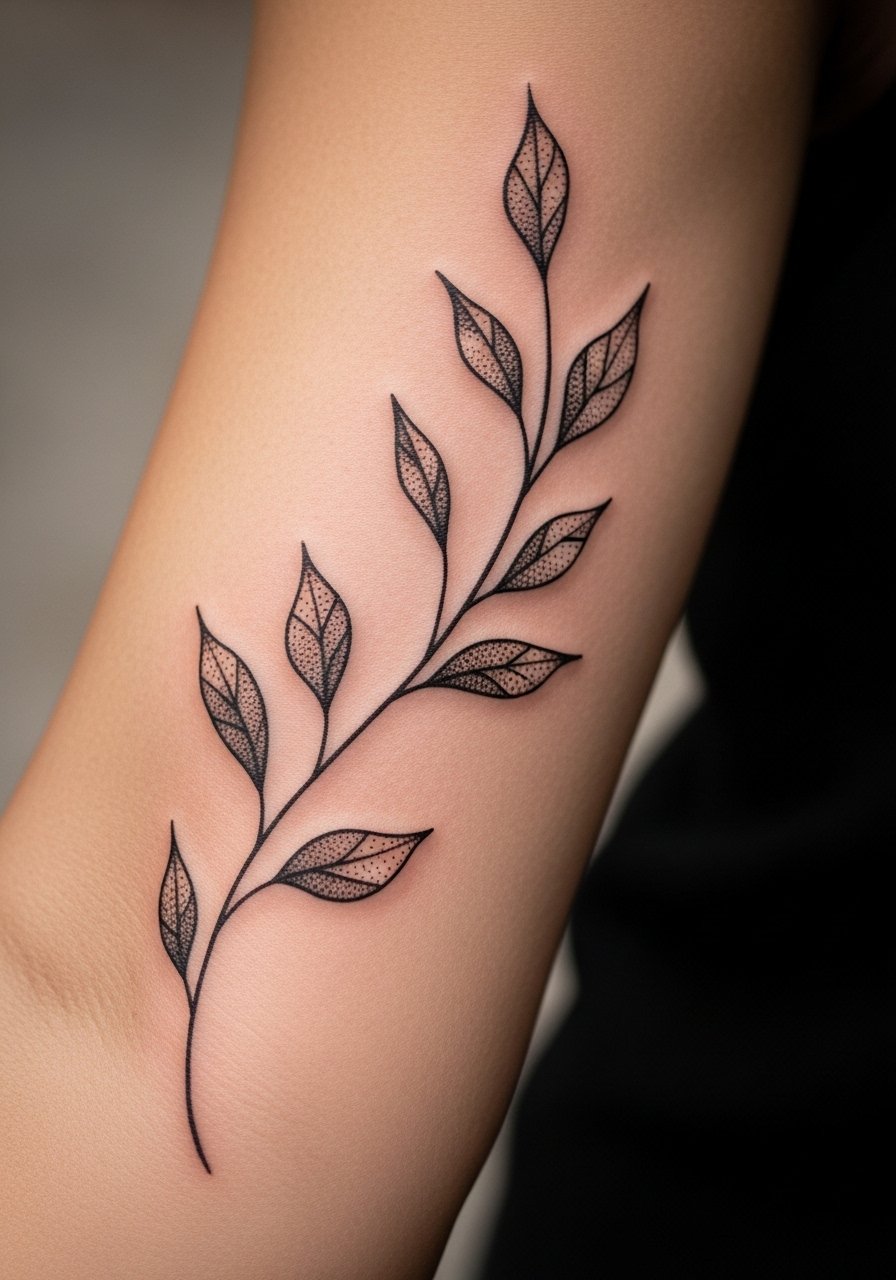
Vines read organic and flow with muscle. In consult ask the artist to follow the arm's natural line so the vine flows when you move. The typical mistake is rigid placement that fights muscle shape and ages oddly. Pain is moderate and sessions depend on length. Shading will soften at two years, so plan spacing to retain leaf outlines. For the session wear a loose short sleeve shirt so the artist can access the lower arm without restriction.
17. Small Dotwork Skull Near the Wrist
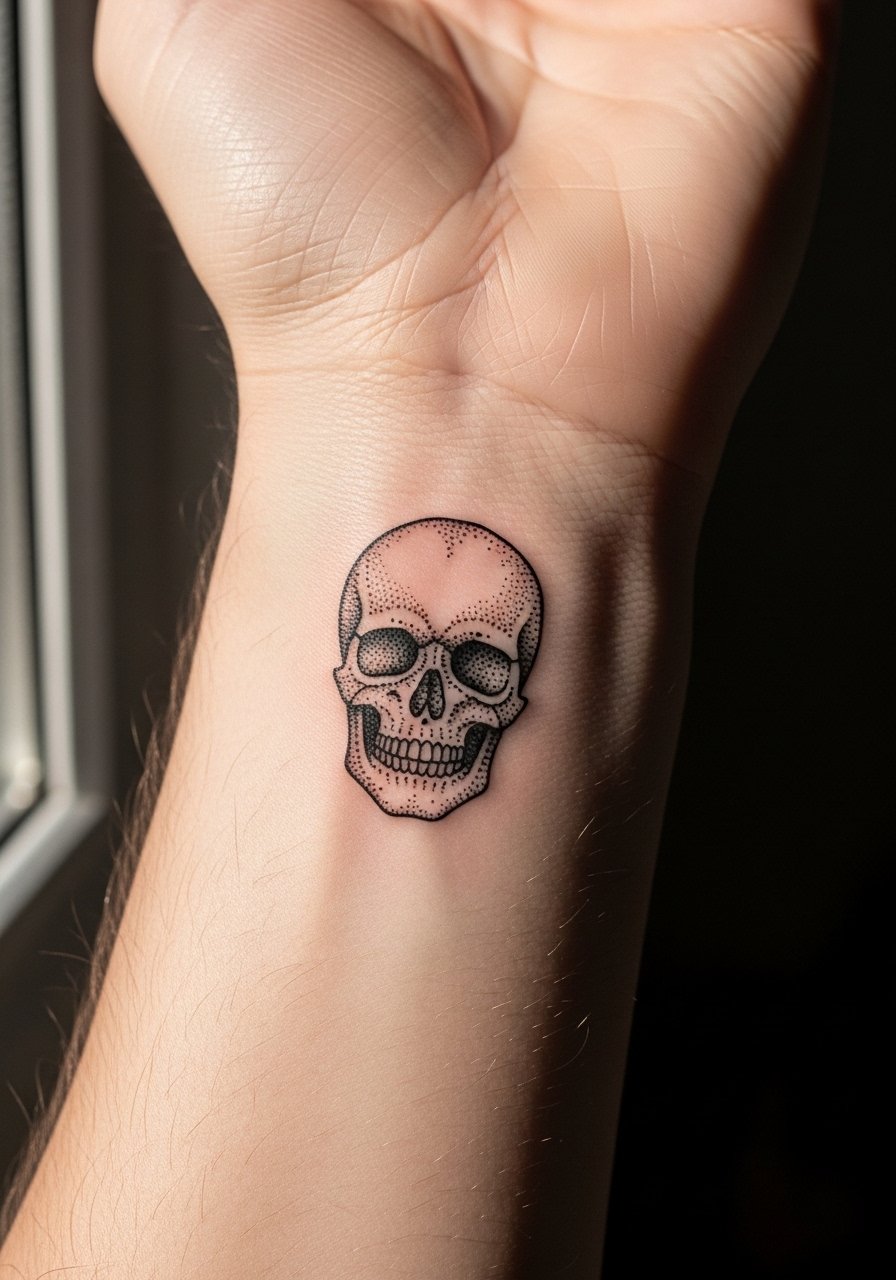
Skulls can be heavy visually if too dense for the wrist. Go for a simplified silhouette with stipple for depth instead of black fills. A common mistake is packing dark stipple into cheek areas which can age into a blob. Wrist placement is sensitive and often needs a careful short session. Over years the lighter stipple in the skull lids will fade faster than the darker anchors. Pair with a woven cuff bracelet that sits below the skull so the art remains unobstructed.
18. Scripted Coordinate Line in Dot Typeface

Coordinates in dotwork are graphic and personal. Use short numeric strings and request a test transfer to confirm legibility. The big mistake is long sentences in dot lettering that compress. Forearm sensitivity is moderate and the session is quick. Expect the small dots in numerals to blur sooner than larger markers. For casual display, pair the piece with a rolled sleeve denim shirt.
19. Radiating Sunburst with Dotted Rays
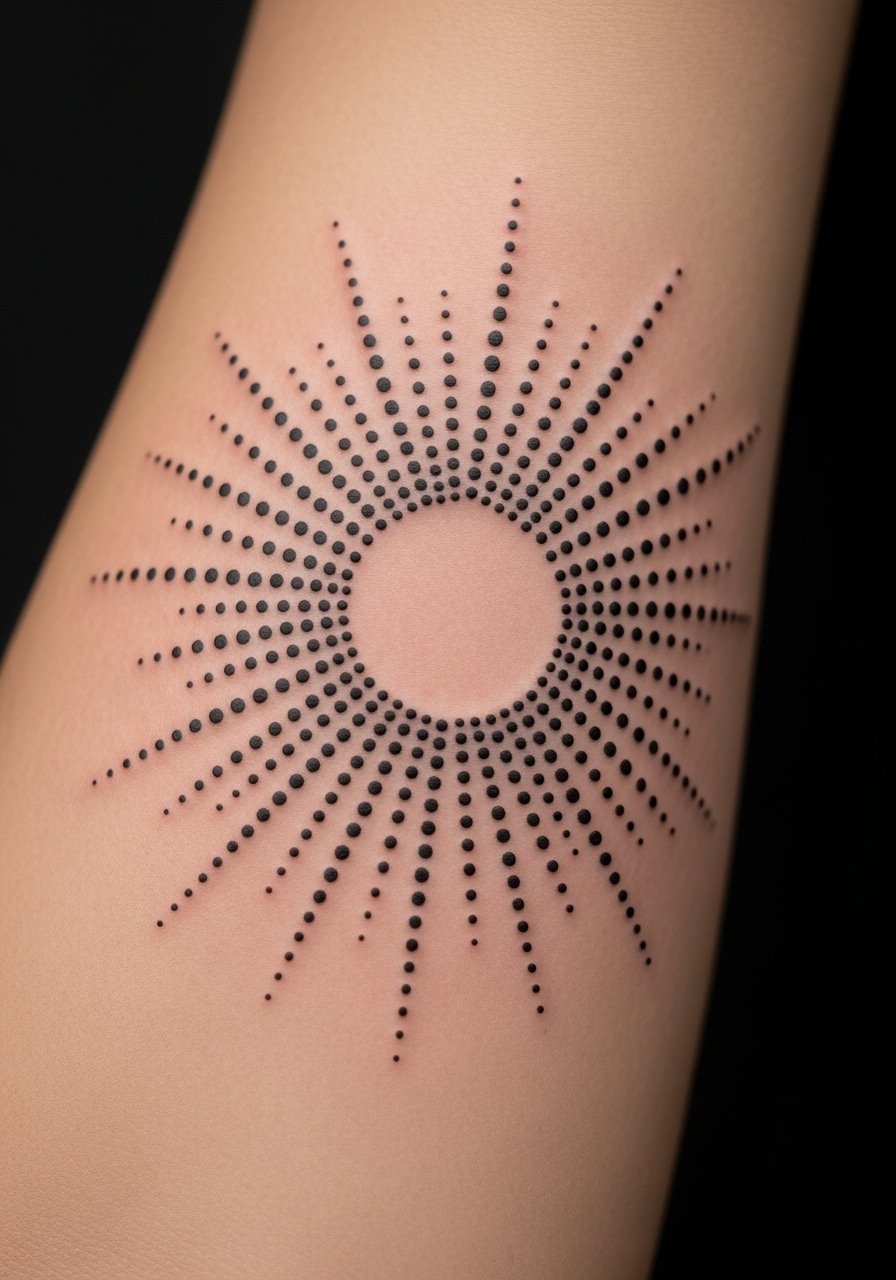
Sunbursts read well on the front arm as focal points. Ask for a bold negative center and tapered dot rays so the design keeps contrast as it ages. A mistake I see is too many thin rays which merge over time. Sessions vary but most sunbursts take under two hours. Over years the outer rays will blur first which can be softened into the design on purpose. For nights out try a short sleeve linen shirt that lets the sunburst show without glare.
20. Small Architectural Line Study in Dotwork

Architectural pieces translate well into dotwork when you keep scale readable. Bring clear reference shots and ask the artist to prioritize negative space around structural lines. The error is compressing details into a tiny rectangle which reduces long-term clarity. This piece can run longer depending on detail and takes moderate pain. Expect the shaded recesses to soften faster than outlines, so plan touch-ups at year three. For showing it off wear a short sleeve oxford that frames the forearm without covering the study.
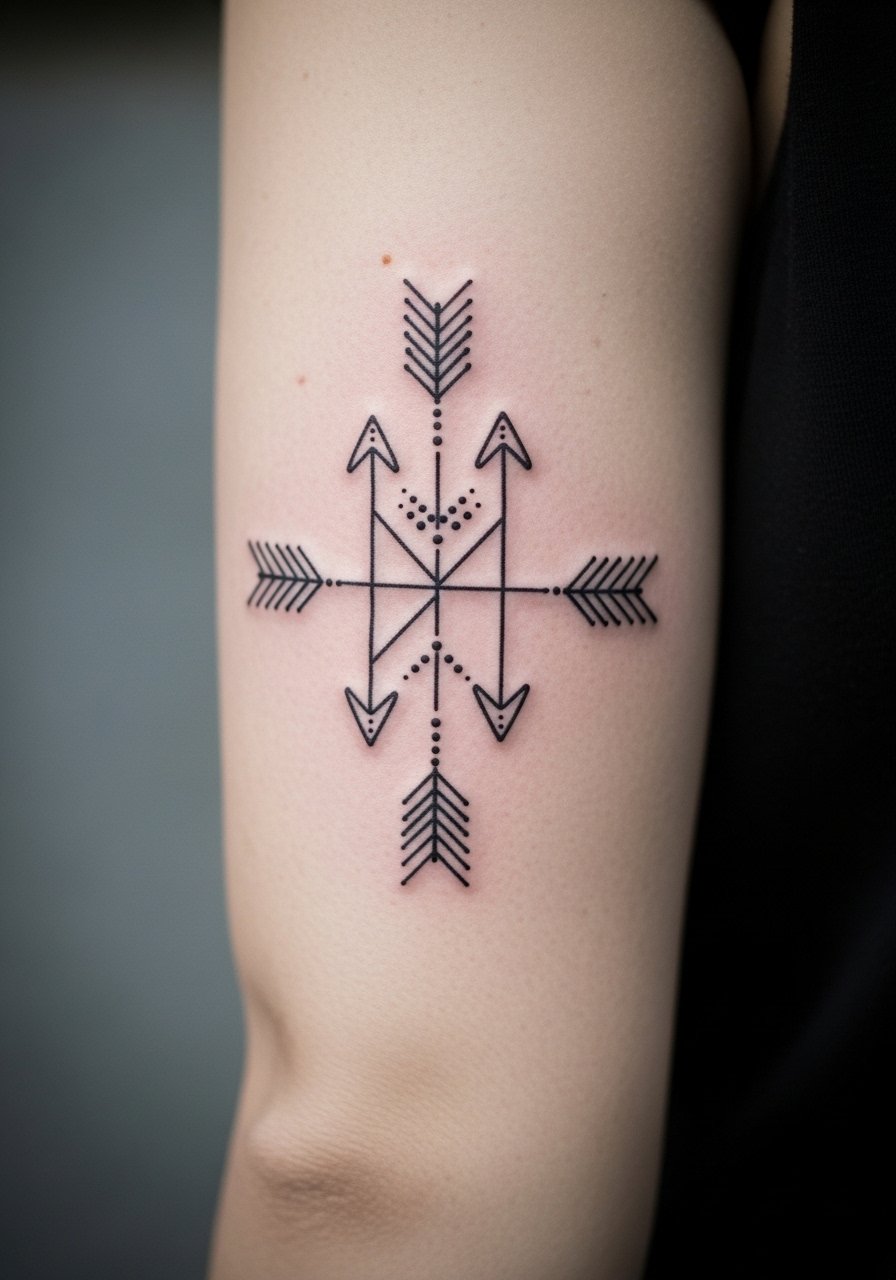
21. Minimalist Arrow Quartet Pointing Up the Arm

An arrow quartet is a compact way to make a directional statement without a large commitment. Ask for varied dot weight in each arrow so they age with dimensionality. The common mistake is identical thin arrows which can look like a smudge line down the arm over time. Pain is low to moderate and sessions are short. At two years expect the thinnest dots to need touch-ups if you want crisp edges. For a neat daily look pair with a minimalist leather strap watch that lets the arrows sit alongside a low-profile accessory.
Frequently Asked Questions
Q: Will dotwork on the inner forearm blur faster than on the outer forearm?
A: It depends on dot spacing and skin type. From what I have seen, dense stipple placed too close to inner forearm creases tends to soften sooner. Ask for more negative space and slightly larger dots on the inner side, and plan for a possible touch-up at year two or three if you want maintained contrast.
Q: How long should I plan for a dotwork patch versus a sleeve panel?
A: Small patches like wrists or single motifs often finish in under two hours. Panels and sections that approach sleeve scale usually need multiple three to four hour sessions. Discuss session length with the artist during booking so you can arrange rest and clothing that gives full access like a loose button-down.
Q: Are there styling tricks that keep dotwork visible while I dress for work?
A: Yes. Roll sleeves or choose short sleeve shirts in neutral tones to frame the forearm without distracting patterns. A minimalist watch or thin bracelets can complement dotwork without rubbing the fresh area, and lightweight linens keep the arm visible without tight cuffs.
Q: Do dotwork portraits need special aftercare compared with geometric dotwork?
A: Not really different in product needs, but portraits often use more subtle midtones so they benefit from careful sun avoidance and a touch-up window noted by your artist. Follow the shop instructions and expect the midtones to be the first area you might refresh after a couple of years.
Q: What should I ask during a consultation to avoid a dotwork piece that ages into a blur?
A: Ask the artist how they plan dot spacing, where negative space will sit, and whether they suggest enlarging any fine elements for longevity. Also ask to see healed work in similar placement so you can judge how their stipple holds up on real skin.
