
Fine dotwork Scooby Doo pieces are trending on saved boards, but they do not all age the same. The small stipple dots that look crisp in photos can merge on fingers and wrists unless the design has breathing room. These 17 dotwork Scooby Doo ideas balance character detail with durable spacing, plus practical notes on placement, pain, and what to ask in consults so your homage still reads clean after a few years.
1. Tiny Scooby Face on the Inner Forearm
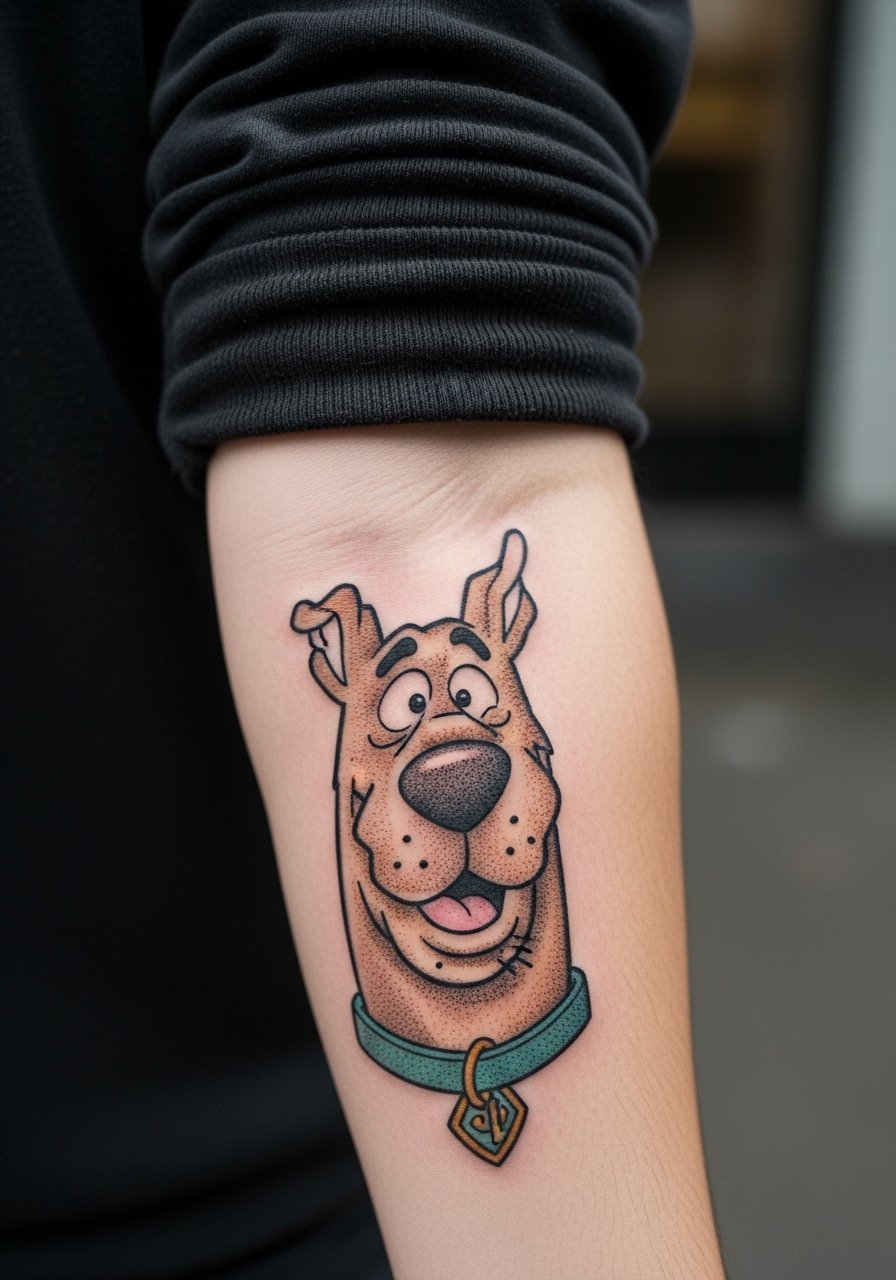
I recommend this for first-time Scooby pieces because the inner forearm offers flat skin and predictable aging. Tell your artist you want airy negative space around the muzzle and collar so stipple clusters do not merge over time. Pain is mild to moderate and a single short session usually covers it. A common mistake is compressing detail into a postage-stamp size. Expect the stippling to soften at six months, then again at two years, with a likely touch-up window around year three for crisp contrast. For showing it off, roll sleeves or wear a linen short-sleeve shirt that frames the forearm without covering the piece.
2. Minimalist Scooby Collar on the Wrist

Fair warning, wrist skin moves a lot and is prone to minor blowout. This design works best slightly larger than people expect so the dots have room. During the consult, ask for slightly heavier linework around the collar tag and lighter stipple inside so the silhouette stays readable. The session is quick but sensitive. Expect the first six months to show crisp detail and then gradual softening; fingers and wrists often need touch-ups sooner than forearms. Pair this with a thin chain bracelet to draw attention without rubbing the tattoo.
3. Scooby Silhouette Ribbon on the Ankle

Ankle pieces face friction from shoes and socks. I suggest a compact silhouette with denser dots near the base and open fields above. Tell the artist you want the darkest areas away from high-friction zones. Pain sits in the mid-range for ankles and sessions can be interrupted by discomfort. Mistakes happen when artists place too much micro-shading where shoes will rub. Healed at six months the piece should still read well if protected from constant abrasion. For evenings out, pair the piece with ankle strap sandals that show off the outer ankle without pressure.
4. Scooby Portrait Medallion on the Collarbone

The collarbone sits between visible and delicate. I like a medallion layout because circular negative space reduces line crowding. During consults, ask for the darkest stipple to be centered and for the outer ring to have softer dots. Pain on the collarbone is moderate and sessions may need breaks. One common error is over-detailing the muzzle, which ages into a blur. Expect the piece to look crisp at six months and slightly softer by two years, with a touch-up possible after that. Wear wide-neck tops to show the medallion without stretching the skin.
5. Full Scooby Bust on the Upper Arm

This placement favors saturation and detail because the upper arm holds ink well. I recommend asking for a mix of stipple and bold outline so the character reads at distance. Sessions feel steady and tolerable. A mistake is trying to cram portrait-level detail into a small upper-arm patch. At two years the heavier areas stay defined and the stipple softens slightly, often without needing a touch-up until year four. For session day wear, a loose button-down shirt lets the artist access the area without you getting chilled.
6. Linear Scooby Comic Strip on the Side Rib

Artists split on ribs for dense dotwork. One camp argues skin stretch and motion blur lines within two years. The other camp says with proper spacing and needle depth it settles fine. I include both sides because honesty helps you plan. If you want a rib comic, request larger panels and generous negative space between them. Pain is high on the ribs and sessions may be broken up. Common mistakes include packing too many panels into a narrow rib span. Expect visible softening at two years and plan a touch-up if you want panel contrast restored.
Studio Day Picks
The forearm and upper arm pieces above respond well to a few studio-day items that make sessions smoother and the first week easier.
-
Stencil transfer paper kit. Lets you preview dot spacing on the skin, which is handy for the medallion and bust ideas above.
-
Topical numbing cream. Applied per instructions before a rib session takes the edge off when working through panels.
-
Thin protective film roll. Useful for wrist and ankle pieces to reduce friction while the initial surface heals.
-
Fragrance-free gentle body wash. Cleans healing skin without irritating the fine stipple in small designs.
-
Aquaphor healing ointment. Apply a thin layer in the first days to lock in moisture for delicate dotwork but use sparingly so pores breathe.
7. Scooby Pawprint Stack on the Side of the Hand

Hand tattoos interact with daily tasks and can fade faster. I suggest slightly larger pawprints with denser outer dots and open centers to keep the shape intact. Tell your artist you want the darkest dots away from knuckles and creases. Pain is sharp but brief. The main mistake is under-sizing on a high-use area. Expect accelerated softening at one to two years and likely touch-ups in that window. Hand tattoos can affect certain job environments so think about visibility and career path before booking.
8. Tiny Scooby Tag on a Finger

Finger skin is unforgiving. I only recommend simplified tag shapes with bold outer dots and minimal interior detail. During consult, ask for slightly heavier outline to prevent bleeding. Pain is high for fingers and sessions need precision. The common error is adding intricate facial features that blur within months. Touch-ups may be needed as soon as one year. For showing off a fine finger piece, a minimalist ring sits nearby without covering the ink.
9. Scooby Silhouette on the Calf
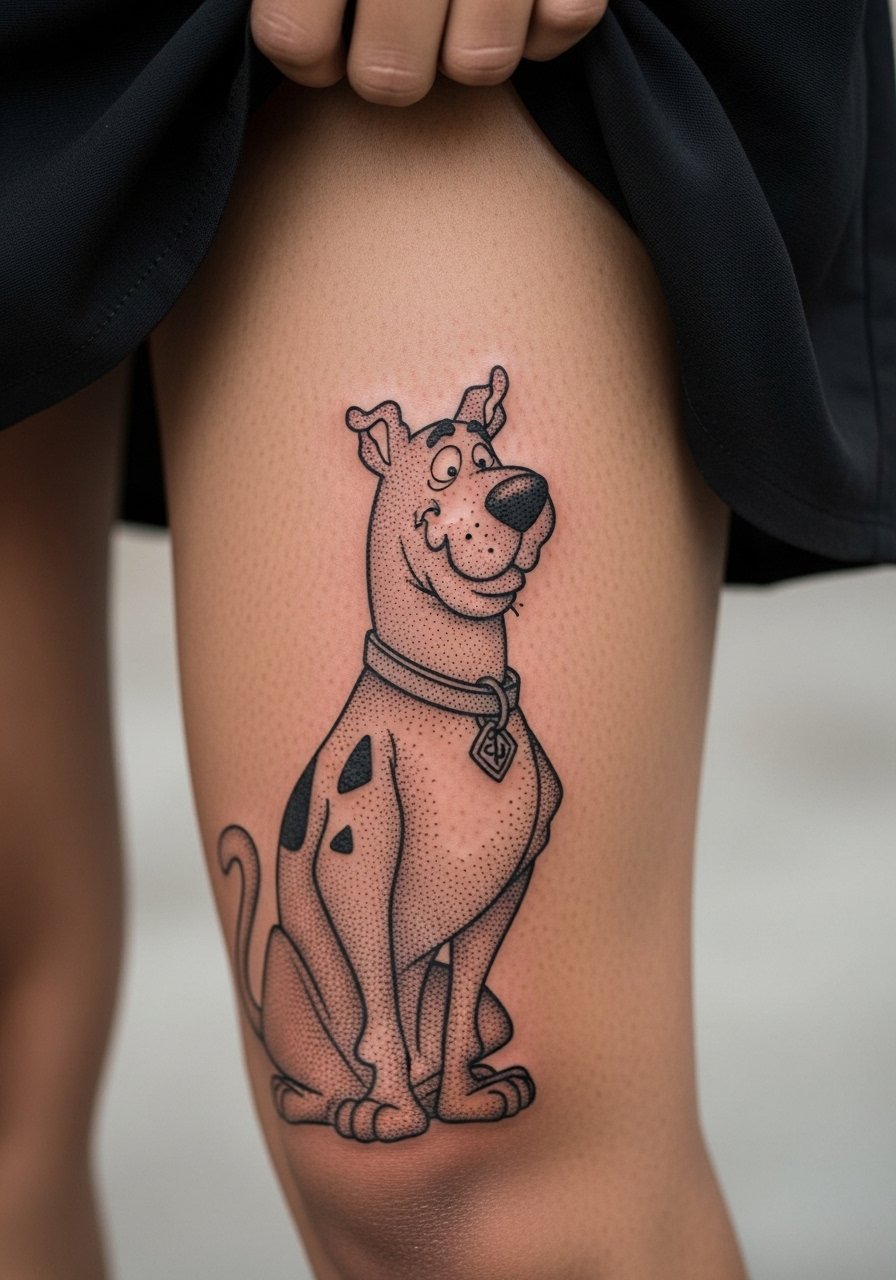
The calf takes saturation well and tolerates larger dotwork, which is ideal for a silhouette or mid-sized portrait. I recommend asking for a gradient of stipple density so the character reads against varied clothing. Sessions are moderate in pain and often done in one long sitting. Mistakes include over-detailing the muzzle where viewing distance reduces effect. Heals predictably and often needs touch-ups later than wrist pieces. For showing it off, pair with midi skirts or boots that keep attention on the calf canvas.
10. Scooby Script Accent Along the Rib Side

Script over ribs is sensitive to stretching and breathing. I favor slightly bolder script letters with speckled dot shading behind them rather than inside them. Tell the artist to test the size on the skin while you breathe. Pain is high and sessions may pause. Common mistakes are choosing ultra-thin script that blurs into a line. Expect the script to mellow at two years and discuss touch-up timing if you want crisp lettering long term. A discovery route to find artists who manage rib script well is scanning convention portfolios and community hashtags.
11. Scooby Emblem Behind the Ear

Behind-the-ear pieces must be small and simple because of thin skin and curvature. I recommend a compact emblem with concentrated dots at the center and clear negative space around it. Pain is moderate and sessions are short. A common mistake is asking for dense shading that the spot cannot hold. Healed results look subtle and may need touch-ups sooner than arm work. If career visibility matters, remember this area can peek out depending on hairstyle.
12. Scooby Badge Over the Sternum

Sternum work needs an artist experienced with central chest contours. I advise a badge layout with symmetrical stipple radiating outward to avoid heavy clustering on sensitive skin. Pain is high in the sternum and sessions commonly require breaks. The mistake is packing too much micro-detail into the central chest where movement distorts it. Healing at six months looks good, but expect some softening by two years and plan a touch-up if symmetry fades. For the session, a strapless or sports bra helps with access.
13. Scooby Linework Spine Piece

Spine pieces look dramatic and work well with stacked dot gradients that follow the vertebra line. I suggest spacing each dot cluster to accommodate skin movement and avoid over-saturation near the spine. Pain levels are variable and can be intense near vertebrae. A common error is running too many tight details along a long vertical stretch. Healed at one year the piece usually holds well if initially spaced correctly. Wear open-back tops or halters to show the vertical flow when you want to reveal it.
14. Scooby Half-Sleeve Cluster on the Shoulder

Shoulder clusters age nicely because the canvas is broad. I favor a design that places the densest stipple away from the joint crease and uses negative space to define Scooby's features. Sessions feel steady and approachable. Mistakes include wrapping too much detail into the inner shoulder where friction from clothing can dull stipple. At two to four years the area often needs fewer touch-ups than hands and wrists. For session day, a loose tank top gives the artist full access and keeps you comfortable.
15. Micro Scooby on the Hip Edge

Hip tattoos are intimate and often stretch with body changes. I recommend tiny, bold silhouettes that avoid linework hugging the very edge where clothing rubs. Pain ranges moderate and sessions can be short. A common mistake is choosing elongated designs that distort with clothing. Healing at six months is usually stable, but friction zones may need touch-ups at year two. For the appointment, high-waisted bottoms you can lower a little are the easiest.
16. Scooby Mini on the Lower Back

Lower back tattoos sit in a spot that stretches less during daily motion but can shift with major weight changes. A compact portrait with clean outer dots keeps the silhouette readable. Sessions are moderate and often comfortable. The mistake is stretching the design too wide across the lower back. Healed at two years the piece often needs minimal maintenance if initially spaced correctly. For revealing looks, open-back dresses frame the area without tugging on the skin.
17. Stylized Scooby Badge on the Chest Side

Designs that use pop-culture characters split the community into two camps. One camp prefers literal, licensed likenesses that match cartoons exactly. The other camp favors personal reinterpretations or homages that borrow motifs without copying. I advise deciding which camp you align with and telling your artist upfront. Chest skin moves with breathing and shoulder motion, so ask for slightly larger motifs and clear negative space. Pain ranges moderate. Expect the chest to age similarly to the collarbone and plan touch-ups if saturation softens.
Frequently Asked Questions
Q: Will a dotwork Scooby Doo tattoo on my fingers hold up, or should I pick a different placement?
A: Finger skin sheds and moves a lot, so dotwork tends to soften faster there. If you want long-term crispness pick slightly larger symbols or move to the side of the hand or wrist where the skin is more stable. If you do choose fingers, expect a likely touch-up within a year and keep the design simple.
Q: How should I describe "dotwork" during a consult so the artist avoids over-detailing in small Scooby pieces?
A: Say you want stipple shading with deliberate negative space and request to see a test stencil on the skin at full size. Ask the artist to point out where dots will be densest and where they will leave breathing room, especially around facial features.
Q: Are character tattoos like Scooby Doo risky for copyright or social concerns?
A: Some shops avoid direct trademarked likenesses, while others accept them as custom or flash work. The two camps are those who will reproduce exact likenesses and those who prefer stylized homages to avoid licensing issues. Discuss this with the studio and consider a personalized interpretation if you want wider acceptance.
Q: What should I wear to a ribcage or sternum dotwork session to stay comfortable and give the artist access?
A: Wear a cropped athletic top or a fitted sports bra you can lift slightly so only the tattoo area is exposed. That keeps you comfortable and gives the artist a clean field without unnecessary exposure. A similar option is a zip-front hoodie you can unzip during the session.
Q: How do dotwork pieces age differently across skin tones and how should that affect my placement choice?
A: Dotwork reads differently depending on contrast. On darker skin tones, aim for slightly heavier dot clusters and clear negative space to maintain silhouette. On lighter tones you can use more subtle stippling. In my experience, spacing and contrast choices during the consult matter more than the skin tone itself, so bring reference photos and discuss visibility across time.
