
Fine line tattoos are dominating feeds, but what looks flawless on day one often needs a plan to age well. Bold blackwork and considered placement usually outlast trendier color fades, and the trick is choosing the right technique for your skin and lifestyle. Below are 27 edgy harry potter tattoo ideas with placement, aging notes, styling tips, and what to say in your consultation so your ink still reads sharp years from now.
1. Deathly Hallows Blackwork on the Wrist
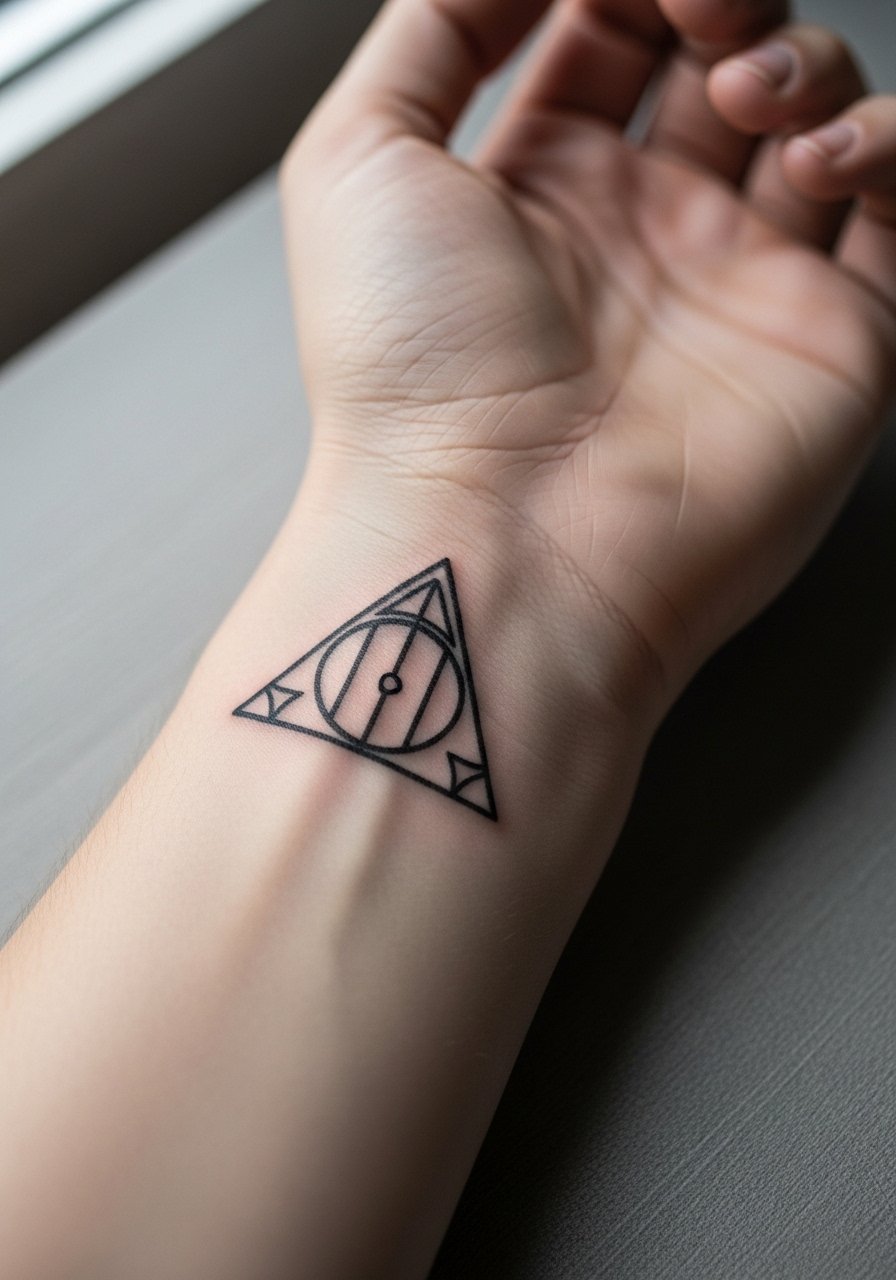
Start with a personal observation: I see Deathly Hallows wrist pieces last when lineweight is slightly heavier than the reference image. Ask your artist for a clean outline with a tiny bit of weight so the three elements stay distinct as the skin ages. Fair warning, wrists face high friction from watches and bracelets, so expect a touch-up around year two to three. For the session wear a short-sleeve tee. To show it off pair the finished piece with a thin leather cuff bracelet that sits on the opposite wrist and keeps focus on the symbol.
2. Snape "Always" Script on the Collarbone
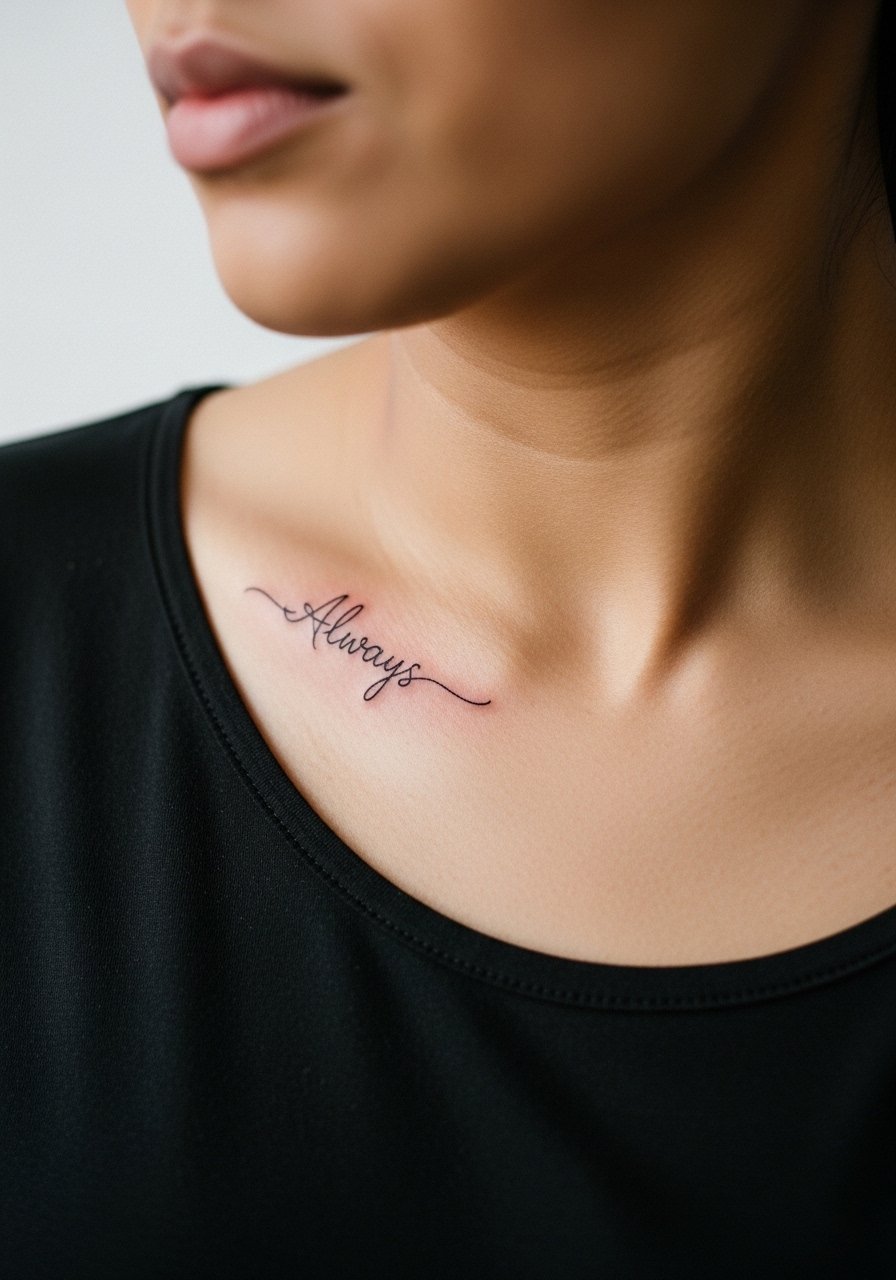
Most people ask for the smallest, daintiest script they can find. The controversy here is clear. One camp swears fine line is elegant and ages like a whisper. The other camp says thin scripts on the collarbone blur and need touch-ups sooner. The middle ground is slightly bolder single-line script with open letter spacing. Tell your artist you want true single-needle feel but with line depth that avoids feathering. Session pain is moderate because of bone proximity. For outfits pick an off shoulder black tee when you want people to see the script without glare.
3. Bellatrix Dagger Neo-Traditional on Outer Forearm
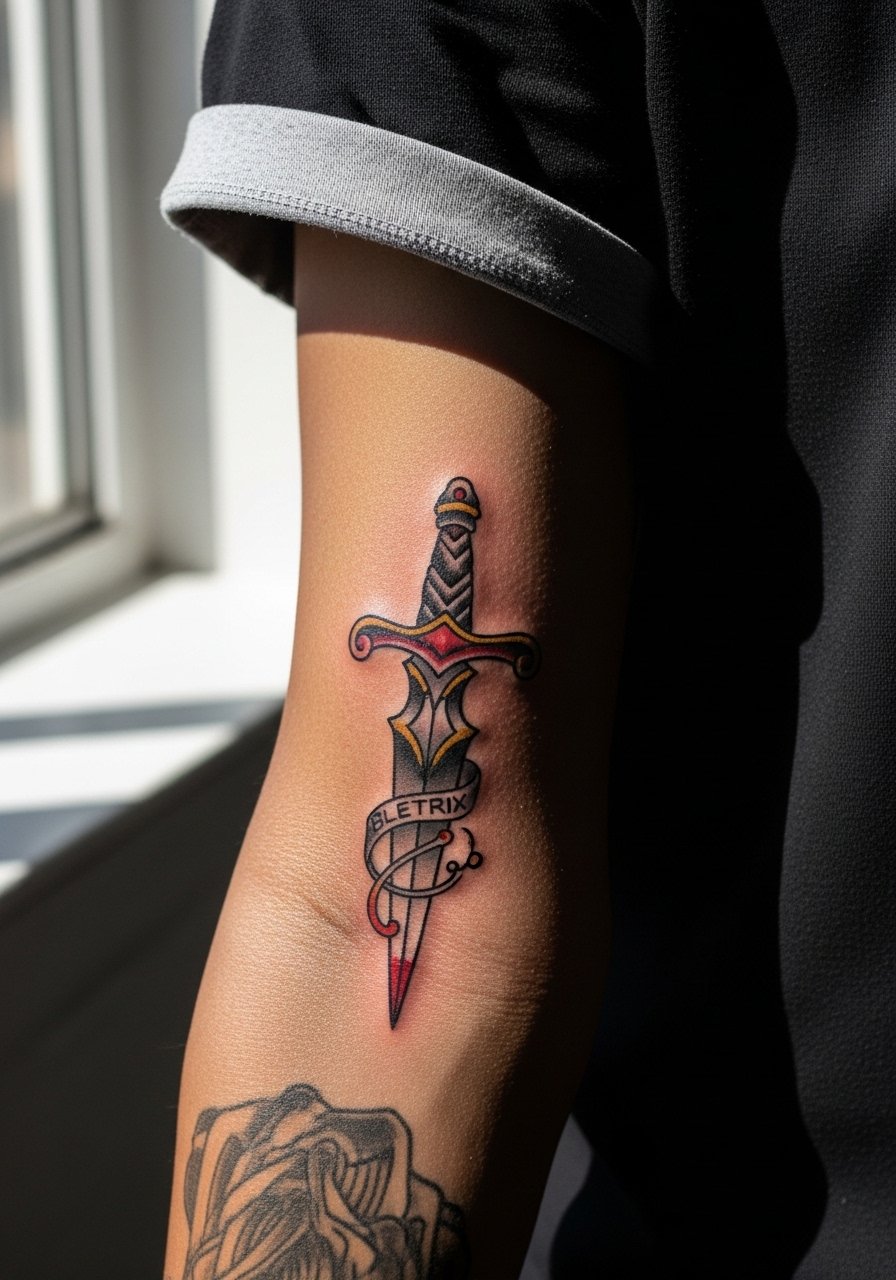
Visual impact lead: bold neo-traditional lines and strategic red accents make this villainous dagger read from across a room. Tell your artist to add stipple shading around the blade and a dripping ink effect for an extra edge. The outer forearm tolerates saturation well, so this ages into a moody piece instead of a bruise. Mistake to avoid is requesting tiny lettering or micro details inside the blade, those wash out. During the session wear a loose short-sleeve button-up so the artist can roll your sleeve. Pair finished ink with a fitted leather jacket whose sleeves you can push up for urban styling.
4. Thestral Silhouette on the Ankle
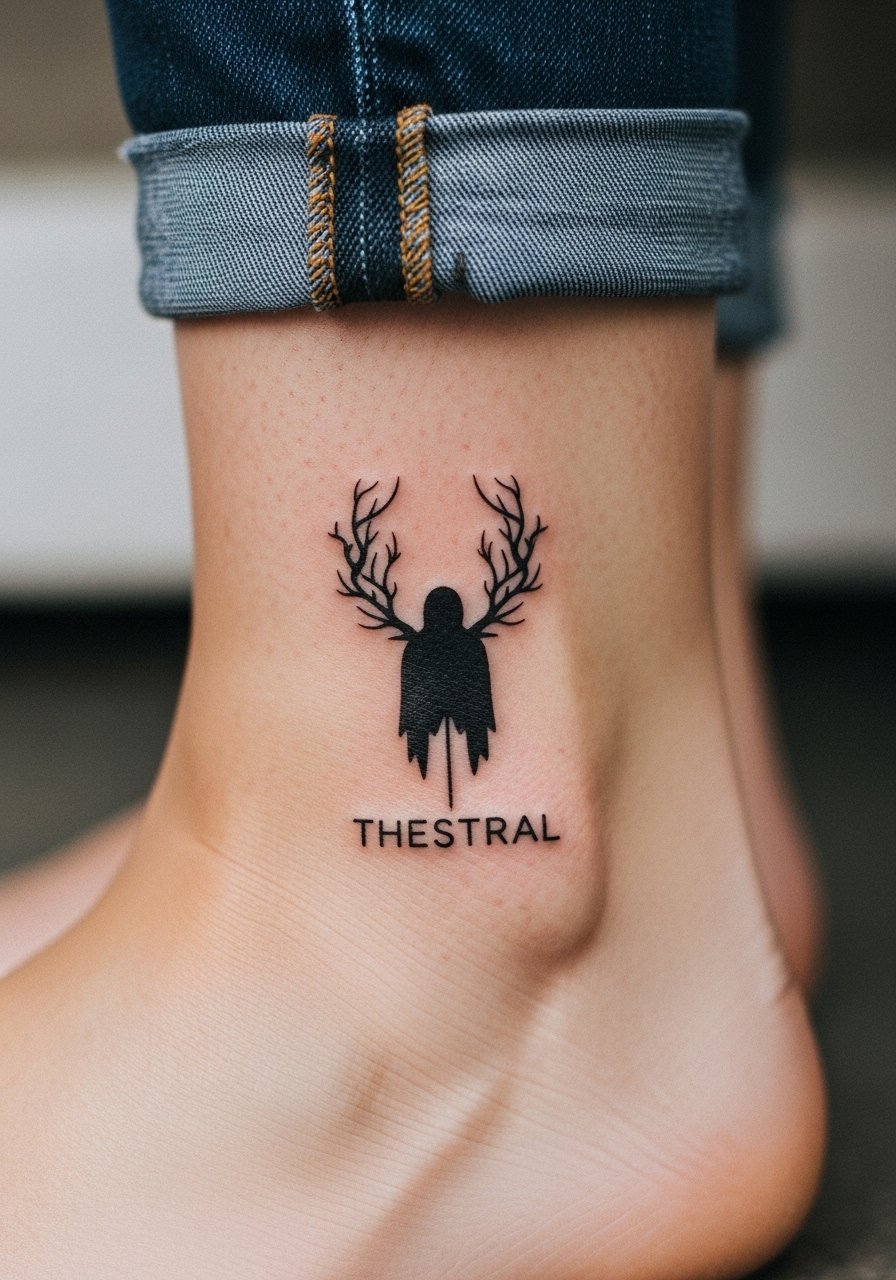
Aging lead: ankle tattoos face lots of friction from socks and shoes, so pick clean silhouettes over tiny filigree. The Thestral silhouette works because it reads as a single shape, not a cluster of thin lines that can blur. Pain is low to moderate for most people. Ask for slightly heavier contour lines and place it on the lateral ankle rather than the bone to reduce swelling. For showing it off wear cropped straight leg jeans or sandals in summer. Expect a touch-up if the area rubs a lot from regular shoe wear.
5. Lightning Scar with Gothic Flourishes on the Temple
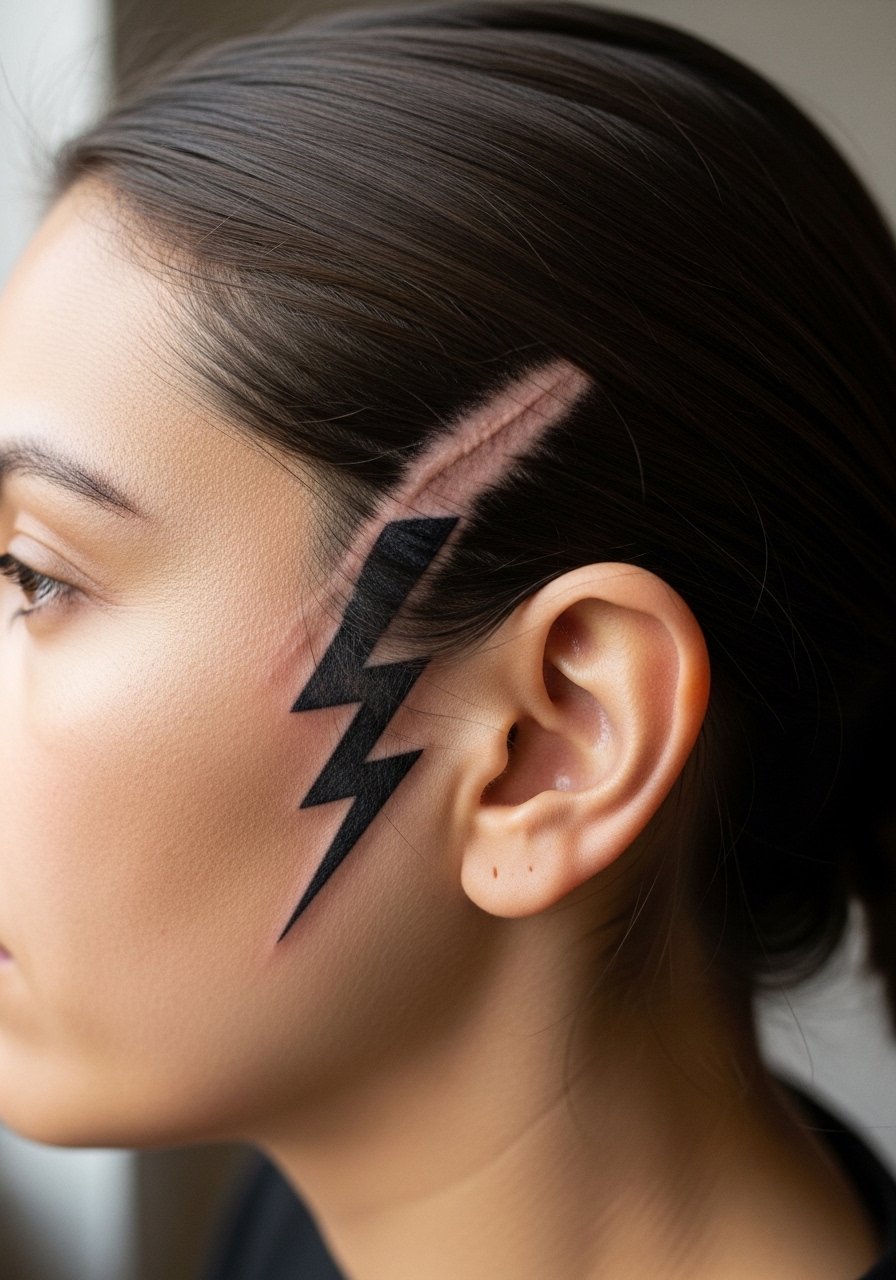
Mistake lead: people often ask for ultra-thin lightning and then regret the lack of presence on textured skin. For a temple placement, the trick is to use ornamental flourishes that frame the scar so it reads as intentional art rather than a faint mark. This is a sensitive spot for pain, expect sharp discomfort but a quick session. Keep the design small, under an inch, and talk to your artist about spacing so lines do not merge over time. For appointment day wear hair pulled back and a lightweight top you can remove if needed.
6. Phoenix Feather Watercolor Bleed on the Upper Arm
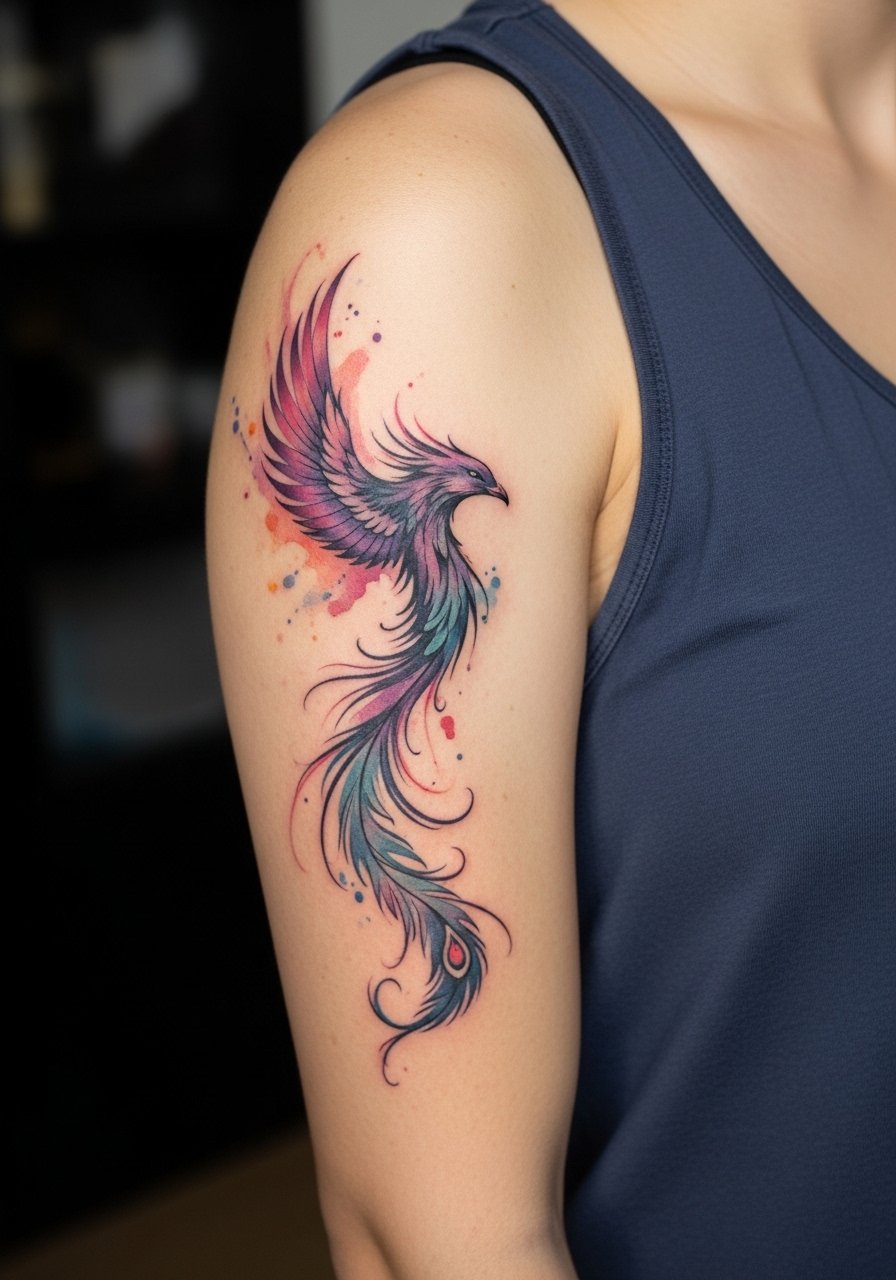
Consultation lead: ask your artist how they balance color saturation with a black and gray base for longevity. The color-versus-gray controversy splits into two camps. One group champions bright watercolor for regeneration symbolism and visual pop. The other group recommends a black and gray base with color accents so the piece adapts better as trends shift and pigment fades. If you want both, request a saturated core with lightly feathered color edges so retouching is simpler. For sessions wear a loose fit tank top so the shoulder is fully accessible.
Studio Day Picks
The small wrist and collarbone pieces above heal differently from larger, saturated work, so a few pre-session items make the chair day smoother.
-
Stencil transfer paper kit. Lets you preview exact placement on the skin, which matters for tiny scripts and wrist symbols.
-
Topical numbing cream. Applied per instructions before the session eases the sting on sensitive zones like ribs and temples.
-
Thin protective film roll. Keeps wrist and finger pieces clean during the first week of constant hand washing.
-
Fragrance-free body wash. Gentle cleansing during showers protects fine line work while it heals.
-
Aquaphor healing ointment. Thin application in the first days helps maintain moisture for crisp healed linework.
7. Hogwarts Crest Distressed Patch on the Thigh
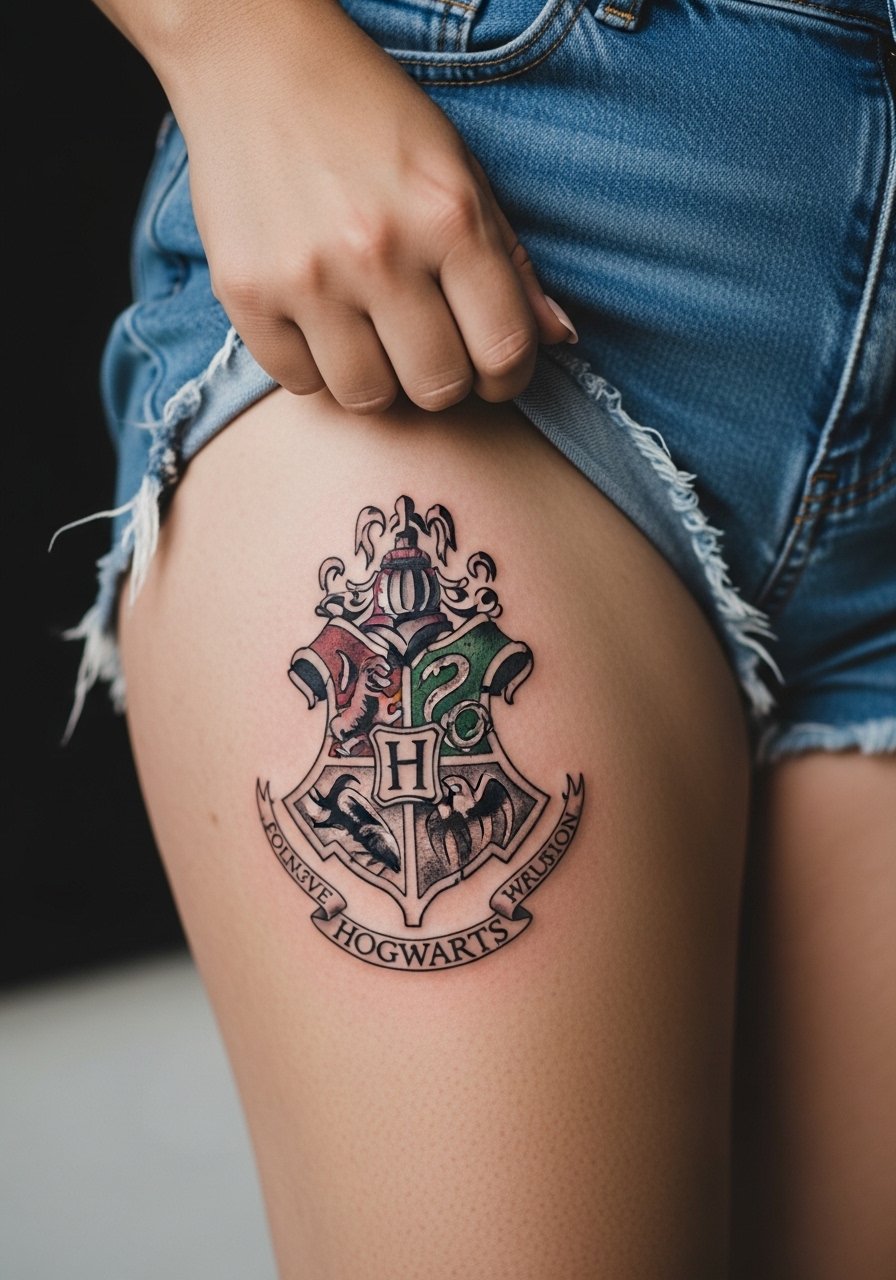
Personal observation lead: large crest pieces that lean into distressed texture age better than overworked color crests. For thigh placement choose a 4 to 6 inch size so details breathe. The thigh takes saturation well and pain is moderate. During consultation, ask for patch-like edges and battle-scarred shading rather than crisp heraldry. Session wear a pair of loose shorts or a skirt so the artist can access the area without pressure. For show-off wear slim joggers or a skirt, the contrast makes the crest feel like a worn badge.
8. Expecto Patronum Spell Scroll on the Inner Bicep
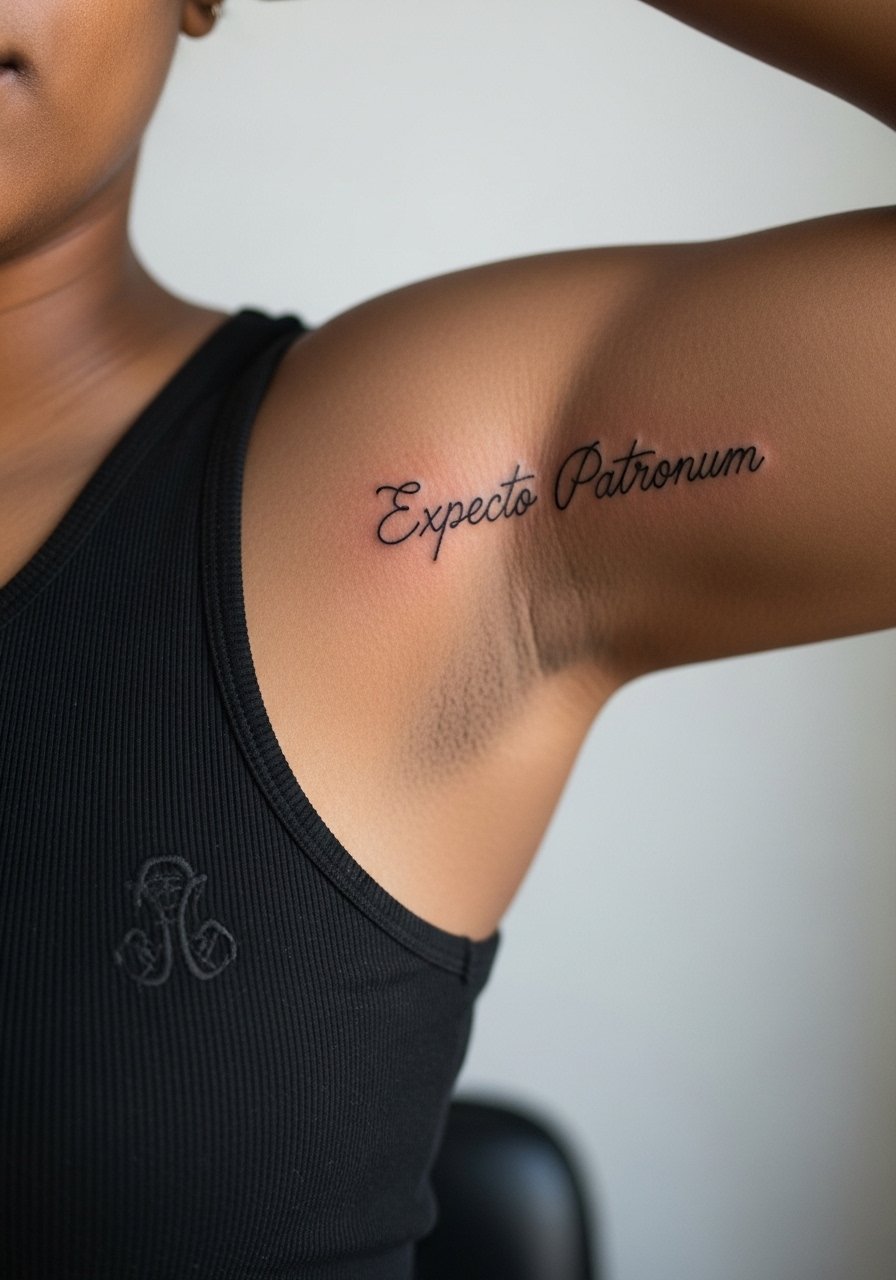
Consultation lead: inner bicep skin moves a lot, so spacing in script matters more than you think. Tell your artist to keep letters open and a touch bolder than a micro script so the phrase keeps clarity as the area shifts. The inner bicep is a moderate to high pain zone. Plan for a single-session piece around three inches tall. For the appointment wear a sleeveless tank top you can raise without constriction. If you want to find portfolios, search tattoodo and the hashtag #DarkHPInk.
9. Dementor Cloak Micro-Realism on the Back
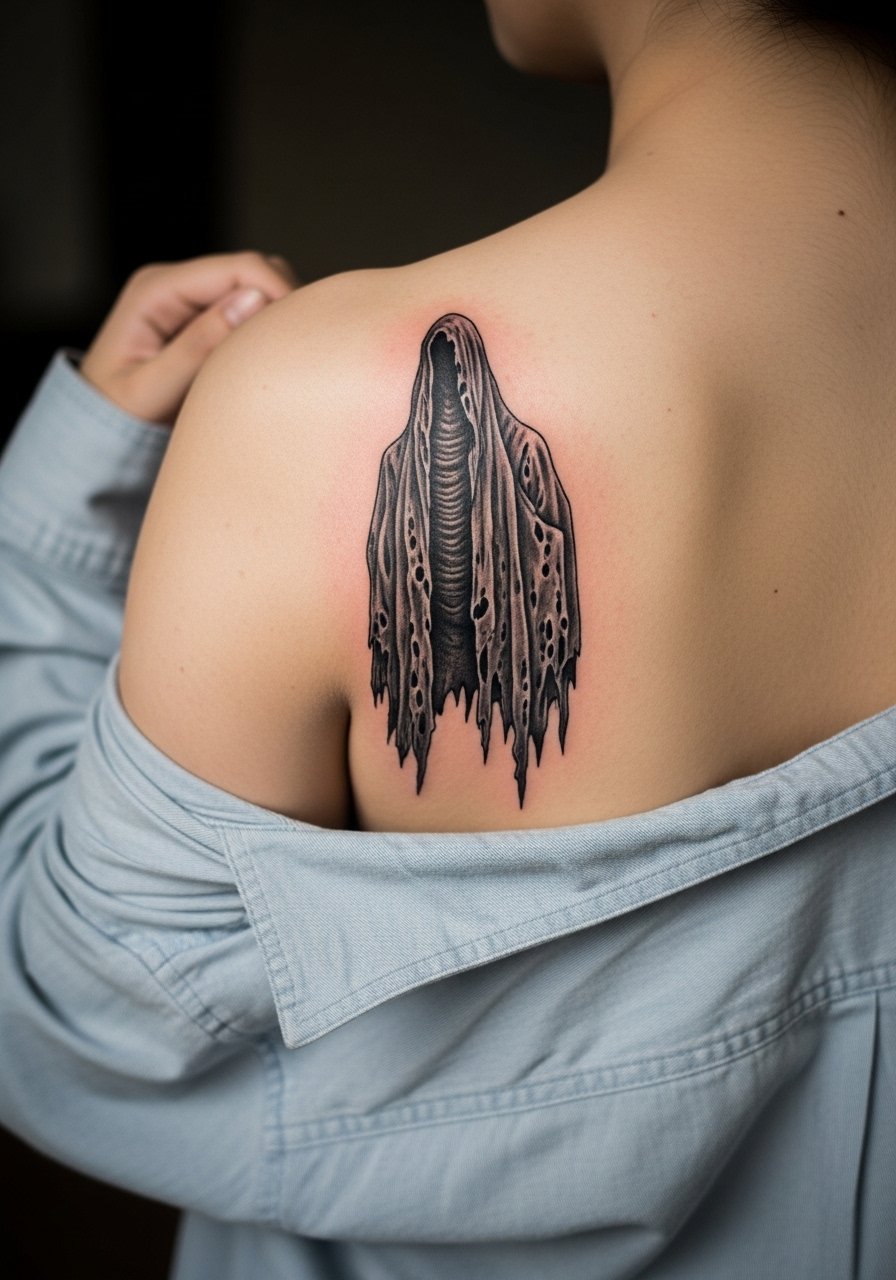
Pain warning lead: back pieces can be long sessions and the scapula area can hurt in bursts as the needle crosses bone. Micro-realism demands layered black and gray with subtle negative space to capture the cloak. A common mistake is shrinking the reference too much. Keep this six-inch scale or larger for the details to survive healing. Ask your artist about session pacing and expect multiple sessions for depth. For showing it off wear strappy tank tops that frame the back.
10. Elder Wand Fractured Outline on the Knuckles
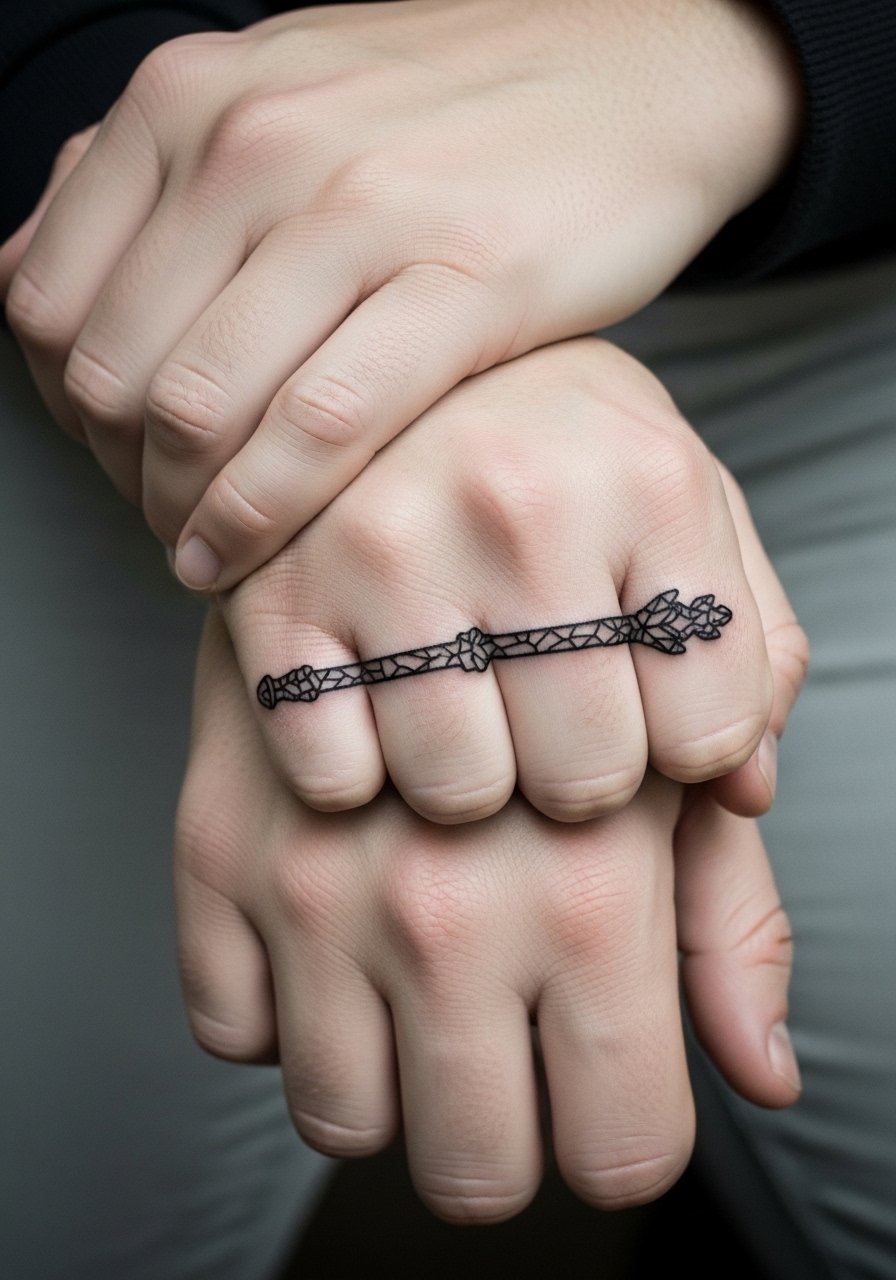
Mistake lead: knuckle tattoos face a lot of distortion and fading from daily use. The fractured outline concept benefits from bold segments rather than intricate filigree. Tell your artist to plan for negative spacing between fragments so each shard reads even if slight blur occurs. Pain is high and healing requires extra care because of washing and flexing. Expect to schedule touch-ups at six months to a year. Hand tattoos can affect certain workplaces, so consider that before booking.
11. Polyjuice Potion Vial Shatter on the Forearm

Visual impact lead: forearm placement lets color and texture show without too much friction. For the shatter effect ask for gritty glass shards and a subtle green gradient rather than full watercolor. The forearm tolerates color, but small green specks may require a light touch to avoid muddying over time. During the session wear a short-sleeve shirt you can roll up. For discovery search #EdgyHarryPotterTattoo and forearm portfolios on Instagram to see healed examples.
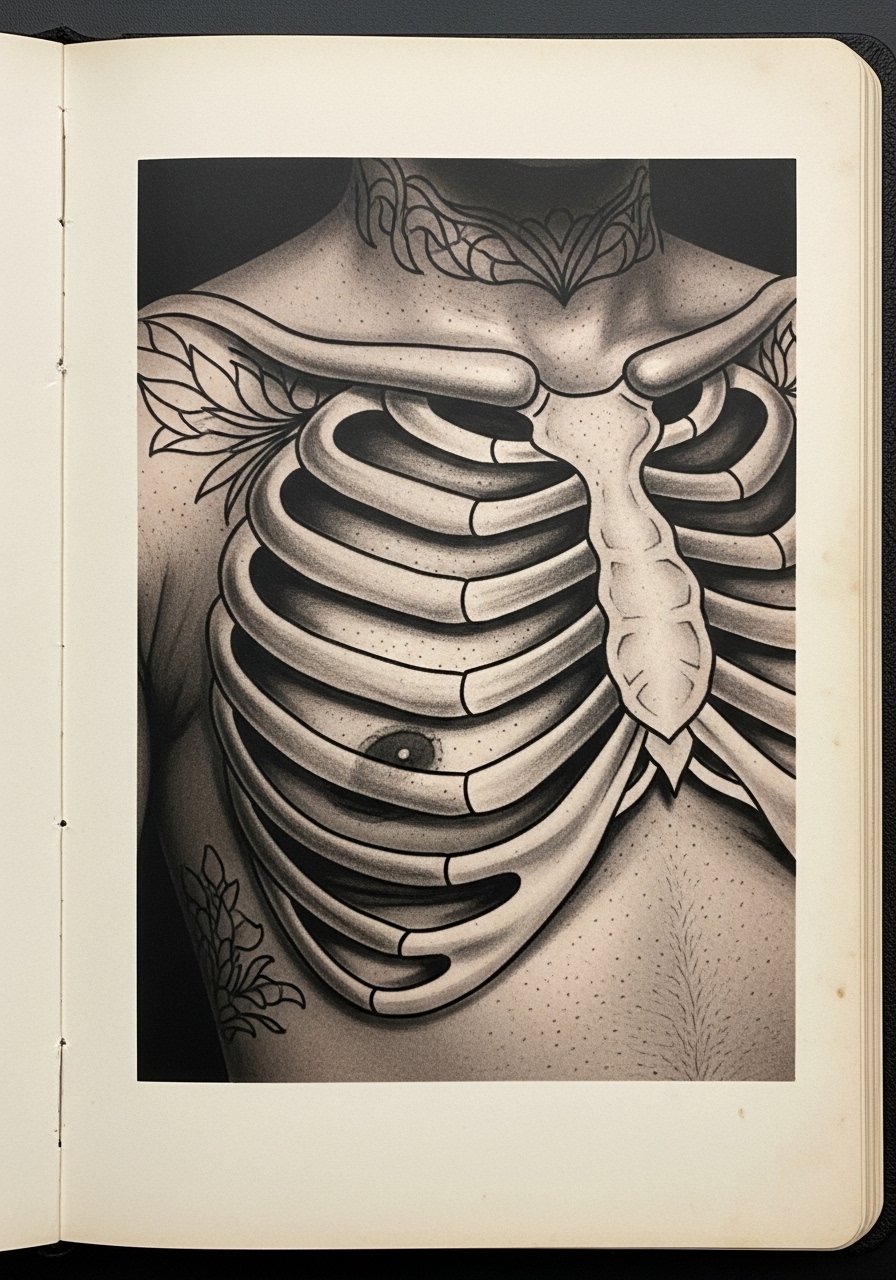
12. Basilisk Fang Ignorant Scribble on the Ribcage
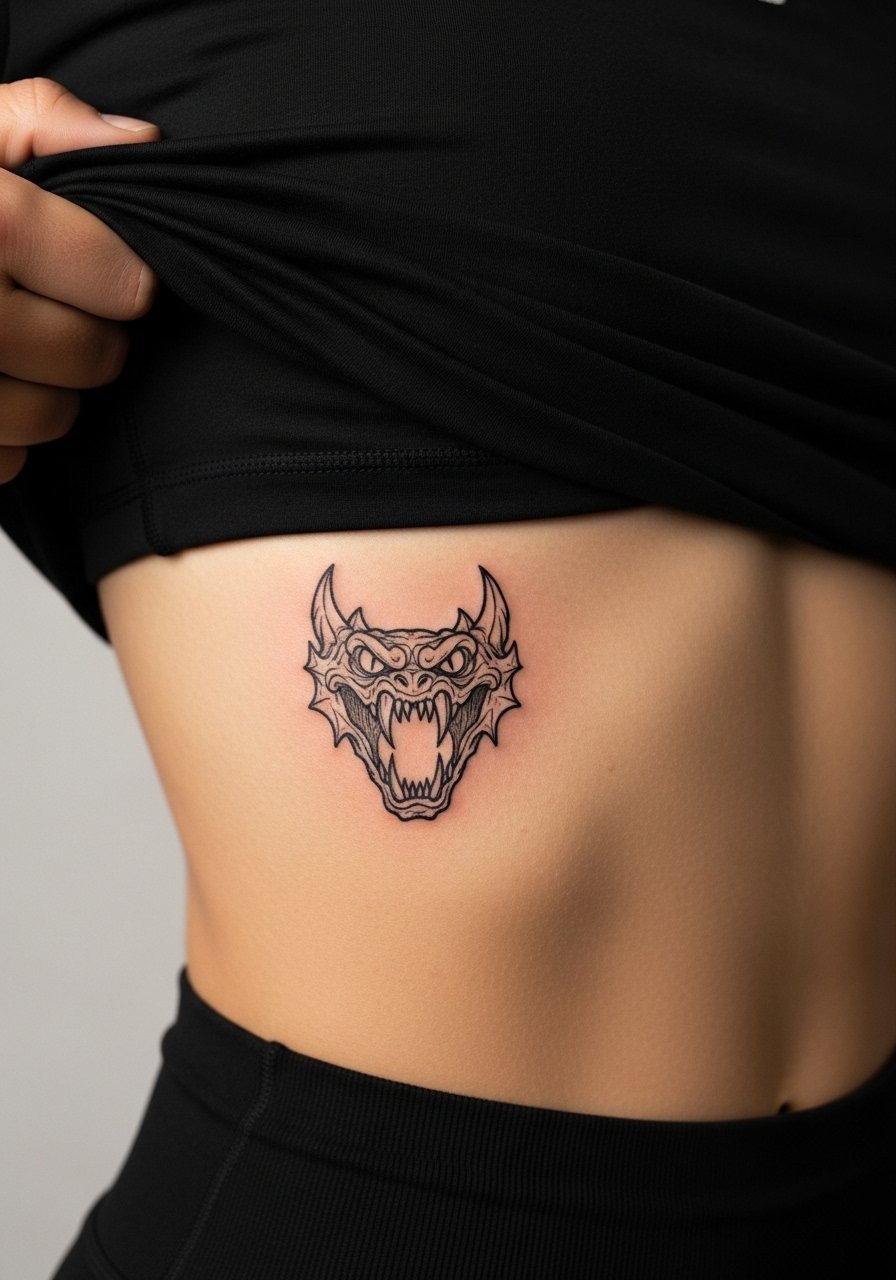
Pain warning lead: ribs are among the highest pain zones, so mentally prepare for a sharp, intermittent burn. Ignorant style benefits here because raw, heavy black shapes read as intent rather than delicate lines that would fail. The biggest mistake is asking for too much fine detail on ribs. If you want transformation symbolism placed intimate on the torso, confirm numbing options and break the session into short passes. For session wear a cropped top so the artist can access the area without tugging.
13. Horcrux Shard Embedded Script on the Sternum

Consultation lead: sternum pieces need careful planning around the body curve and fabric lines. Tell your artist to map the design with the sports bra edge to ensure visibility when you wear low necklines. Pain is high and the session can be intense. Many pick a slightly larger scale to keep the embedded script legible after healing. For appointment day wear a fitted sports bra that you can open easily if needed.
14. Fractured Mirror of Erised on the Calf

Visual impact lead: calf pieces hold up well under repeated movement and can take texture without early blur. The mirrored shard effect looks great with weathered shading and negative space. A common mistake is crowding the shard with tiny figures, which wash out. Ask for a three to four inch scale and plan a two-session approach for depth. During the session wear loose pants you can pull down slightly to expose the lower leg. For showing it off slim joggers in neutral tones frame the tattoo without competing.
15. Dark Mark Slash on the Forearm

Mistake lead: making the mark too literal turns it into costume art. The edgy route is to abstract the mark into a slash with textured fill so it reads like a statement piece. Forearm work ages predictably well when the lines have moderate weight. If you plan visibility, discuss touch-up timelines with your artist because high-exposure areas fade faster. For sessions wear a loose tank top so the forearm is free and the artist can work without fabric interference.
16. Time-Turner Broken Gear Cluster on the Inner Wrist
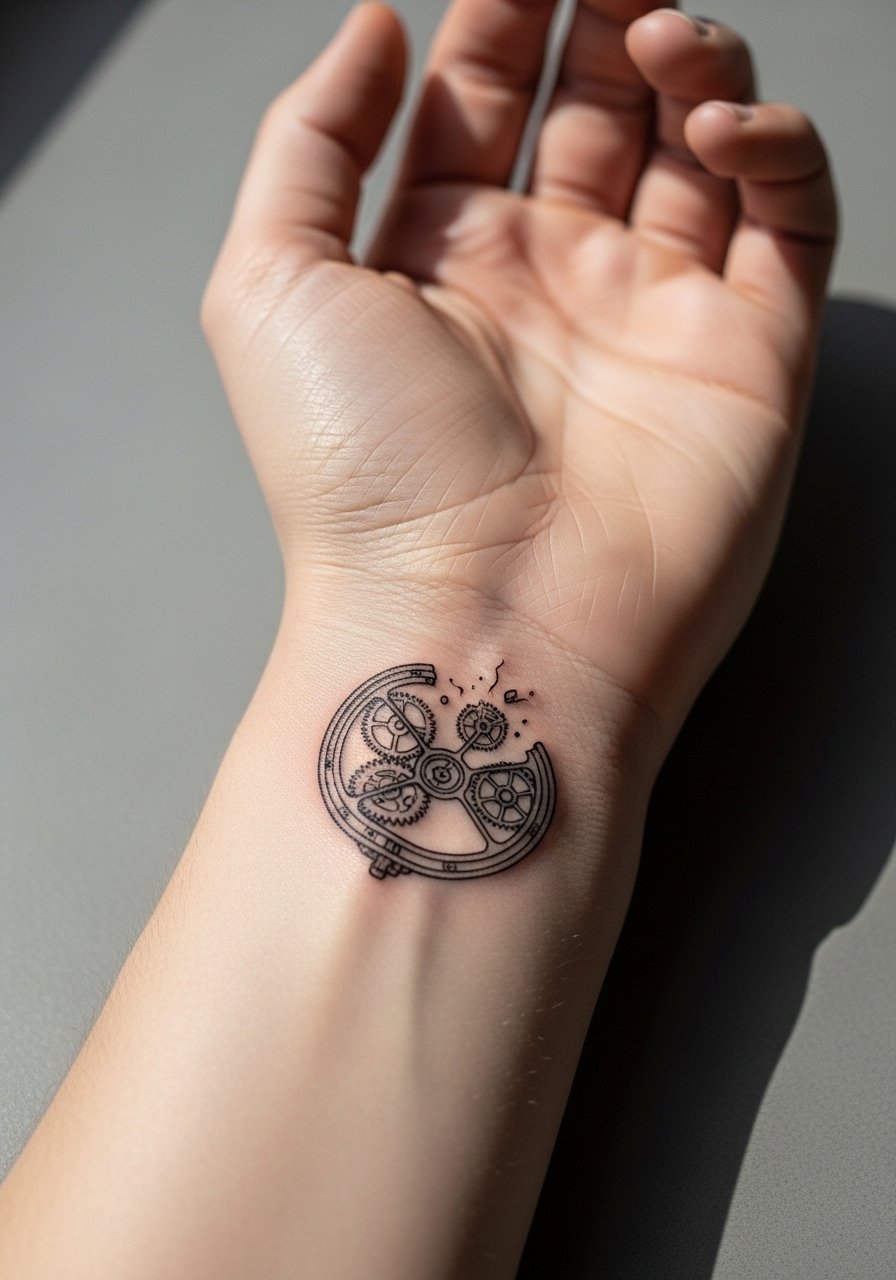
Consultation lead: wrists are unforgiving for extremely dense detail. Ask for a simplified gear cluster with negative space separating cogs so the piece reads even when minor blur occurs. Pain is low to moderate. Request a thin blackwork outline with minimal fine shading for longevity. For appointment day wear short sleeves and remove jewelry. To show it off use stacked dainty bracelets or a thin chain pendant necklace that does not compete with wrist jewelry.
17. Patronus Animal in Micro-Realism on the Shoulder
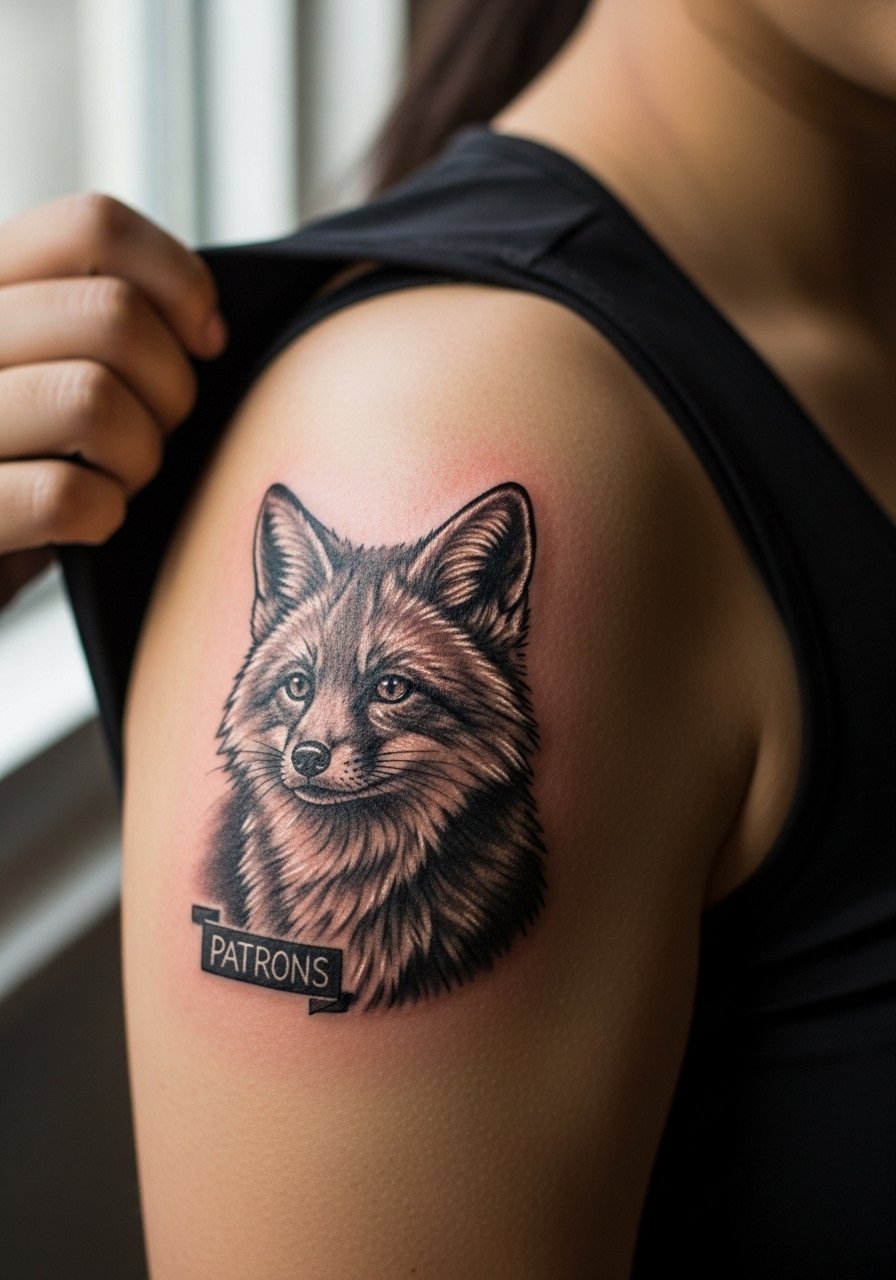
Personal observation lead: shoulder pieces hold micro-realism better than hands because the canvas is steady and moves less. Ask for a single focal point with soft negative space around it so the animal feels luminous. The session is comfortable for most people and can be completed in one to two passes depending on size. For the appointment wear a loose tank top. For show-off looks a slightly open-back or strappy top frames the Patronus without distraction.
18. Gryffindor Sword Fragment on the Calf
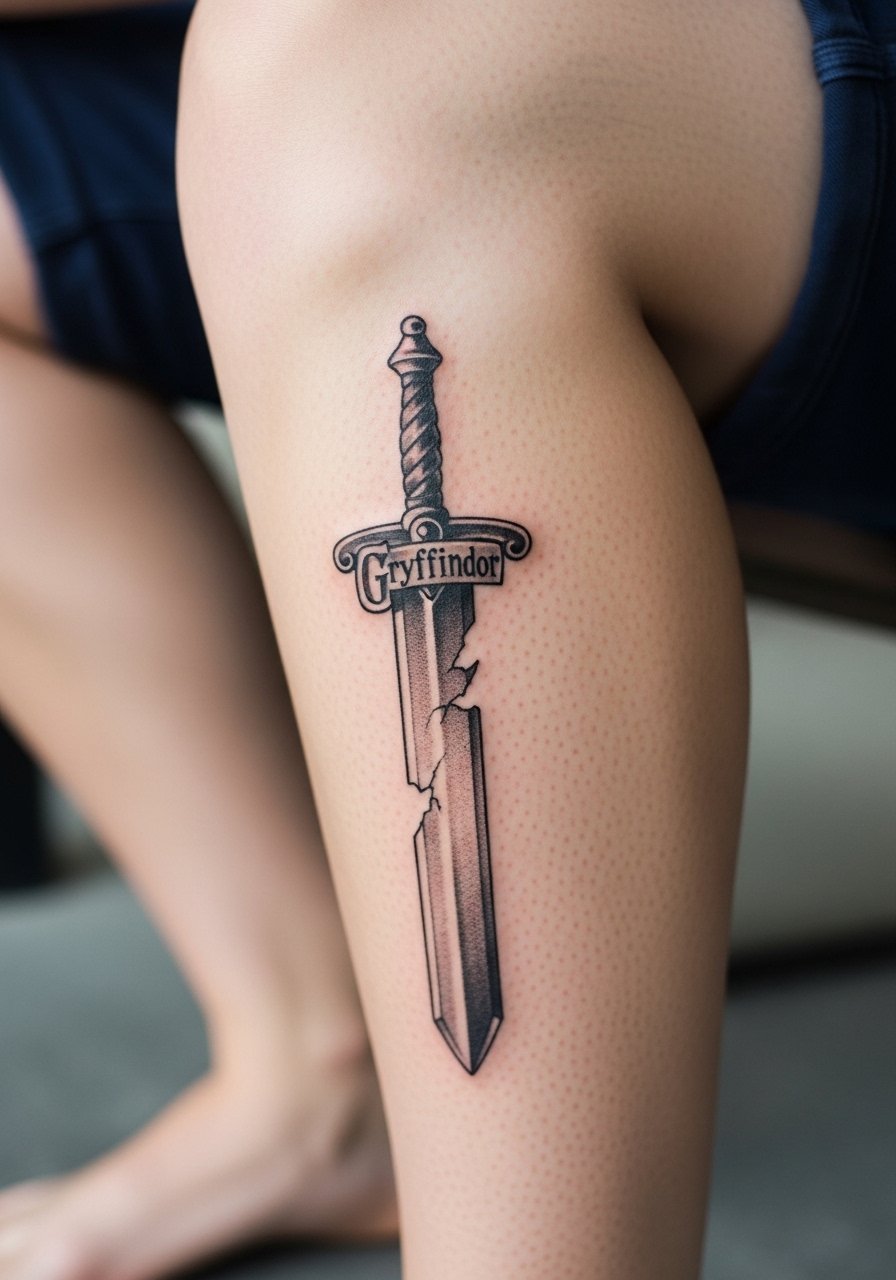
Visual impact lead: a fragment of the sword reads like a relic and keeps house pride without full crest clutter. Calf placement lets you go bold with texture and edge chipping that age into a lived-in look. Avoid tiny filigree on the blade, it fades. During the session wear shorts and anticipate a single longer sitting. For casual styling pair with rolled chinos or athletic socks pulled low.
19. Riddle's Diary with Stain Detail on the Ribcage
Mistake lead: wanting every word legible on a curved surface causes legibility loss. If you want text, select a short phrase or a single word and scale it up enough to survive healing. Rib pieces are painful and session length can be limited. Discuss pacing and whether you want staged sessions for depth. For the session wear a cropped athletic top so the artist can access the area cleanly.
20. Golden Snitch Anatomical Sketch on the Forearm
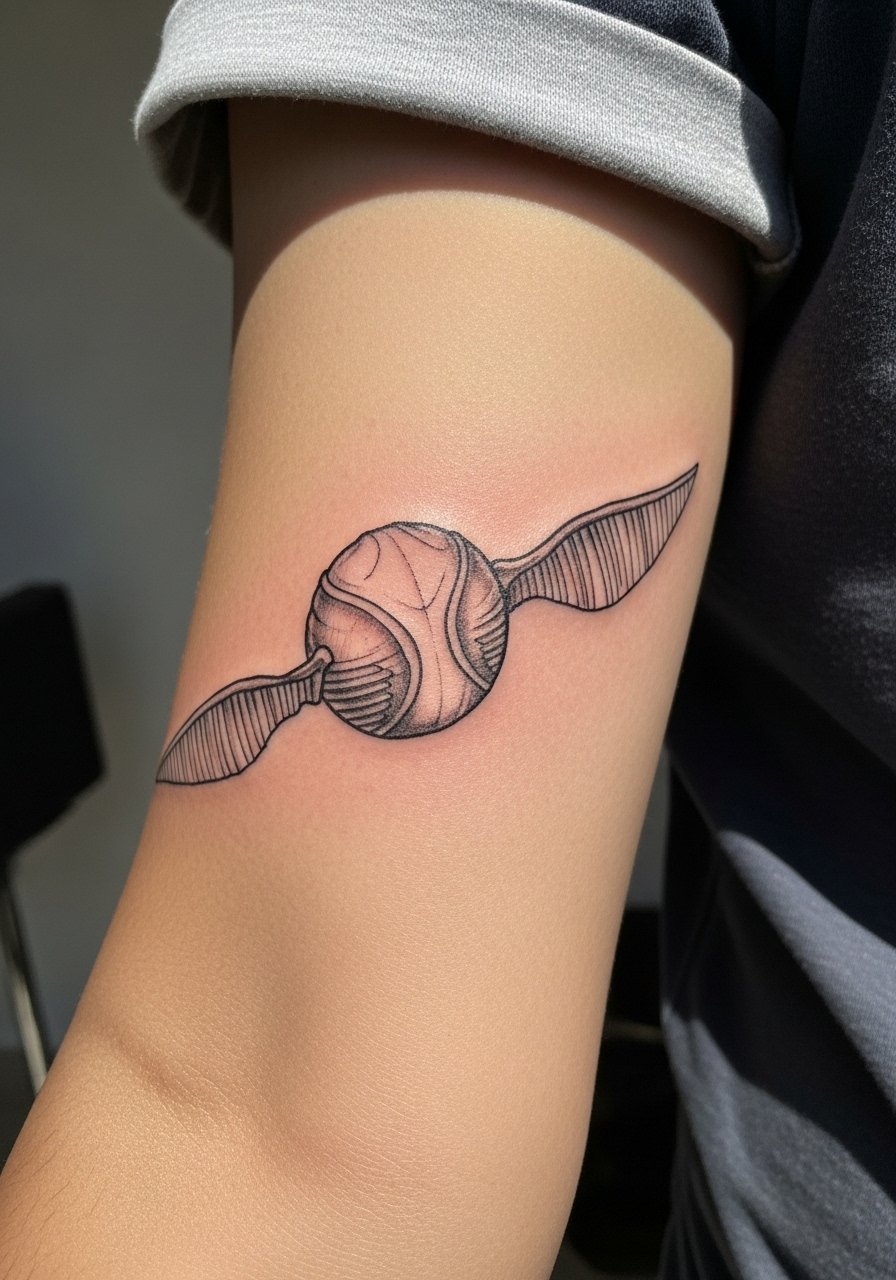
Visual impact lead: schematic, almost scientific renderings read as edgy and clever. The forearm handles linear work well if the drawing has space between hatch lines. A common mistake is over-detailing the wings. Ask your artist to prioritize clear contour and light hatch shading. Session feels manageable and healing is predictable. For showing it off roll up sleeves or wear short-sleeve shirts and consider a simple watch to balance the composition.
21. Slytherin Serpent Twist on the Ankle

Mistake lead: tiny scales and excessive coil count on ankle designs get lost fast. The twist motif should be a single clean curve with a forked tongue accent. Pain is low to moderate. Ask your artist for a one-inch to two-inch scale and slightly denser contour so the silhouette stays sharp. For show-off wear cropped jeans or sandals to make the snake visible.
22. Patronus Constellation on the Back of the Neck
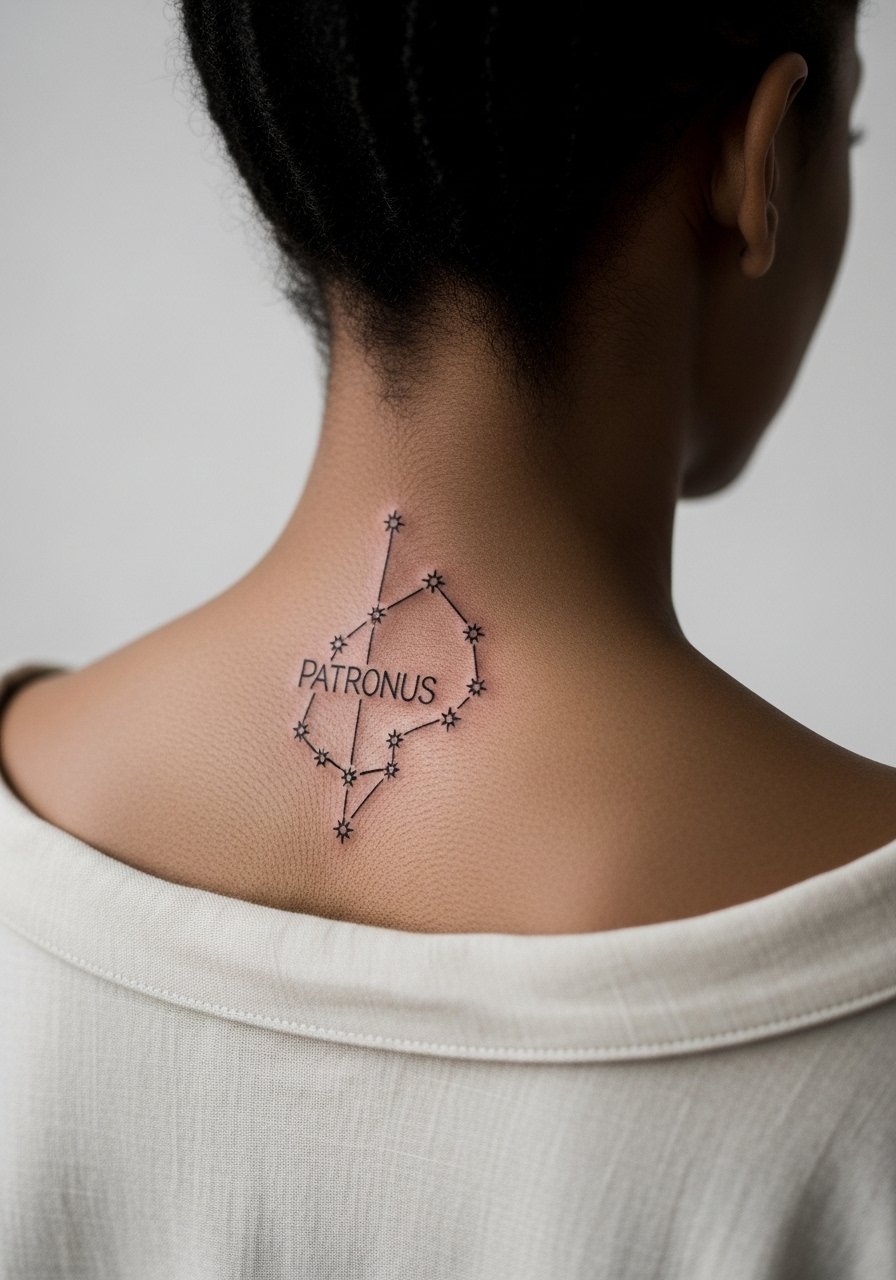
Consultation lead: small constellations on the neck need clear spacing between dots and connector lines. The back of the neck moves and gets sun, so plan for annual sunscreen to protect the piece. Pain is moderate. For the session wear a wide-neck shirt you can adjust. A good discovery path for this style is searching platform portfolios and using location filters to find neck-friendly portfolios.
23. Azkaban Bar Shadows on the Upper Arm
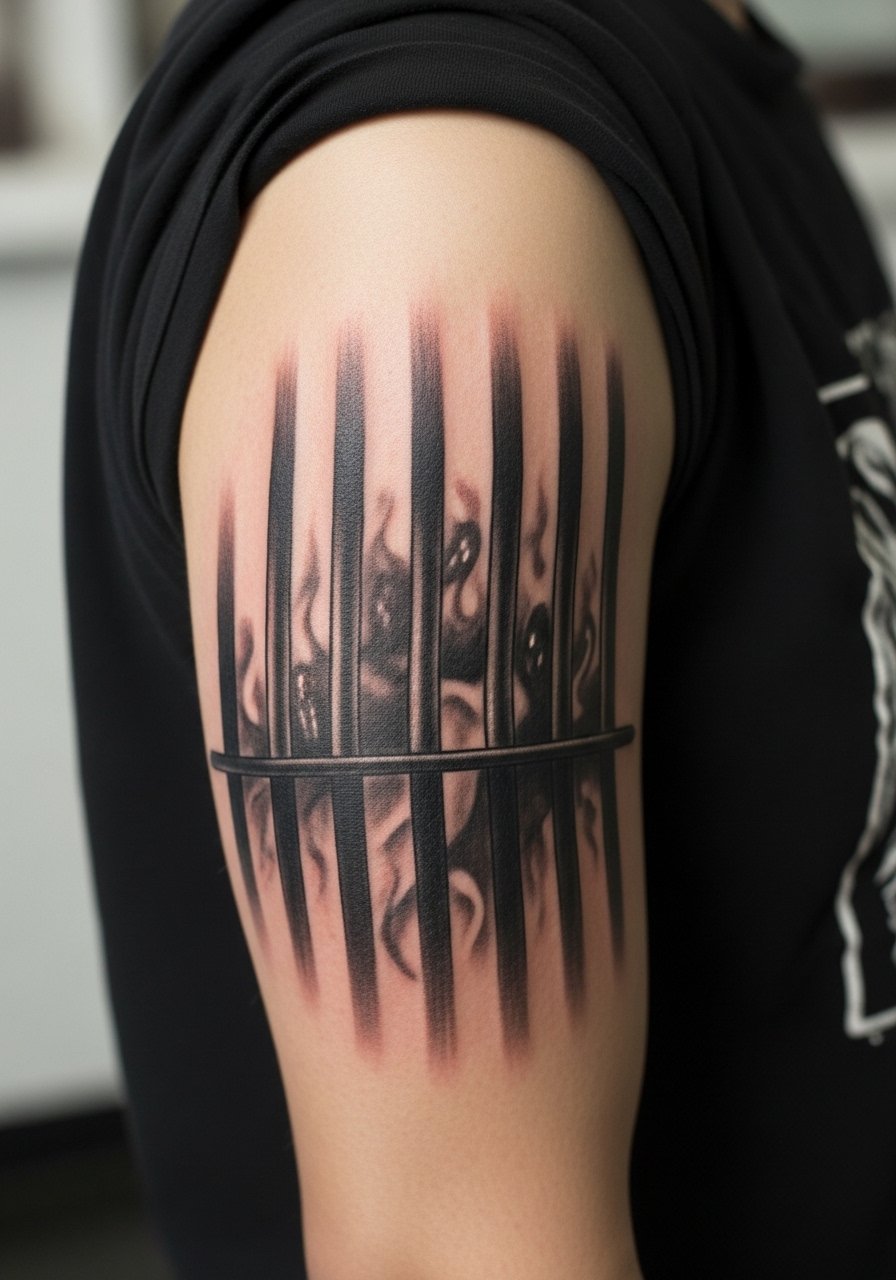
Visual impact lead: bands of bar shadows read like a statement without literal bars, and the outer upper arm holds shading well. Request soft whip shading and a few hard edges to anchor the design. The session is comfortable and the result grows richer as healing settles. Avoid stacking too many narrow bands. For the session wear a loose short-sleeve shirt.
24. Mirror Fragment with Negative Space on the Thigh
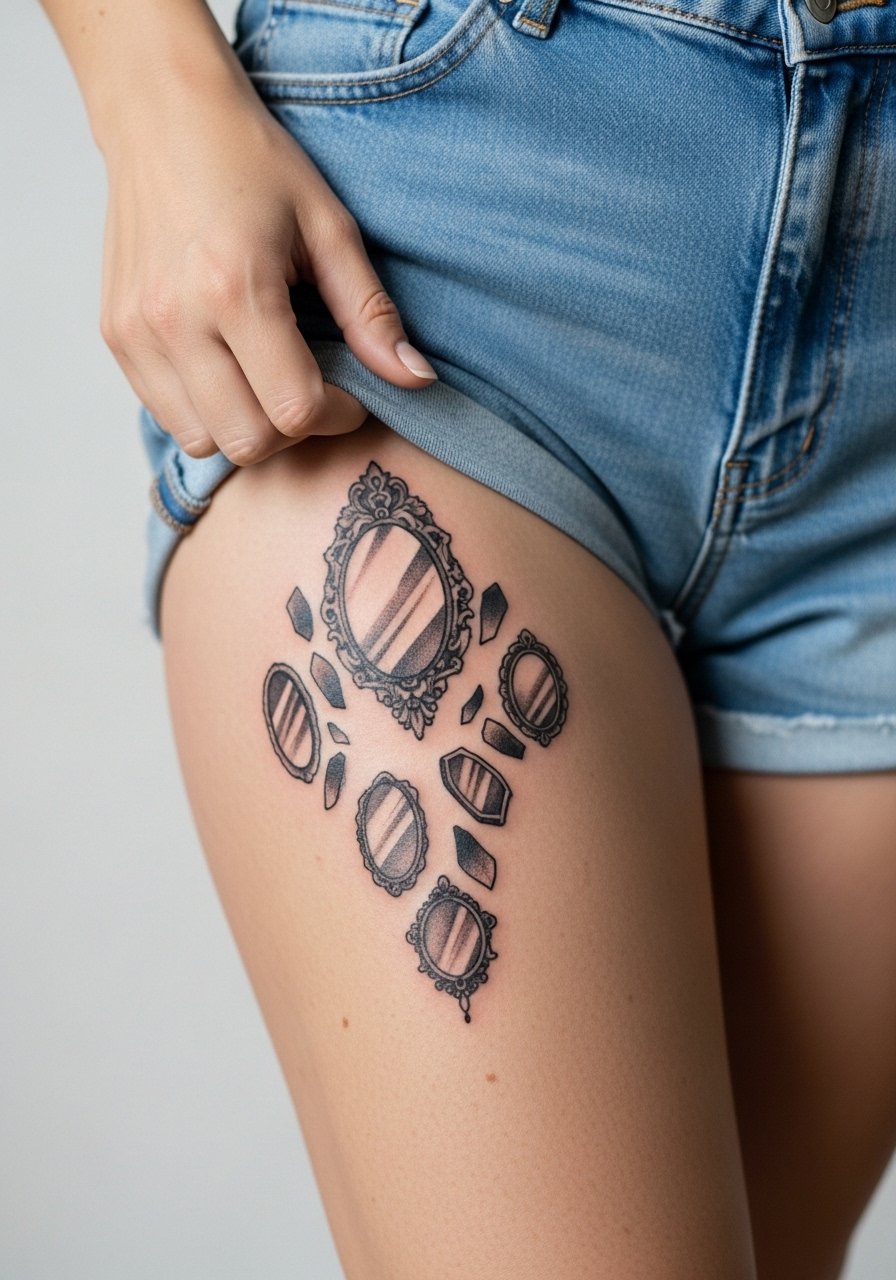
Consultation lead: inner thigh placement needs a gentle scale so the mirror fragment does not get compressed when sitting. The biggest mistake is choosing thin interior detail. Ask for bold borders and airy interior negative space. Pain can be moderate to high depending on tissue sensitivity. For the appointment wear shorts you can shift slightly to expose the area without stretching.
25. Polyjuice Mask Half-Face on the Forearm
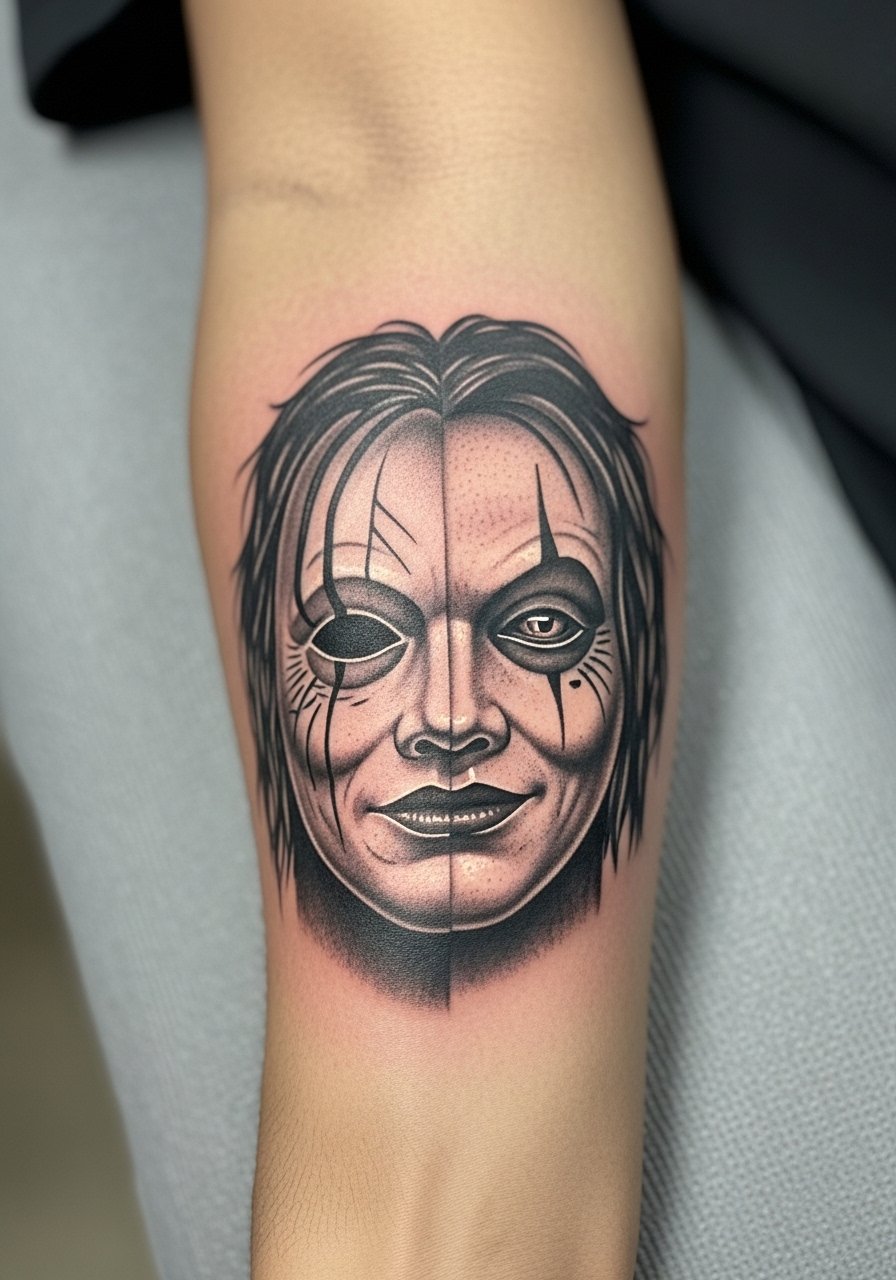
Mistake lead: half-face realism needs size to avoid grotesque blur. Keep the piece at least four inches long so features settle into recognizable shapes after healing. Forearm is forgiving for realism but expect a longer session. For the appointment wear short sleeves. Pair the finished piece with rolled-up leather jacket sleeves to match the rebellious tone.
26. Marauder’s Map Footprint Trail on the Foot
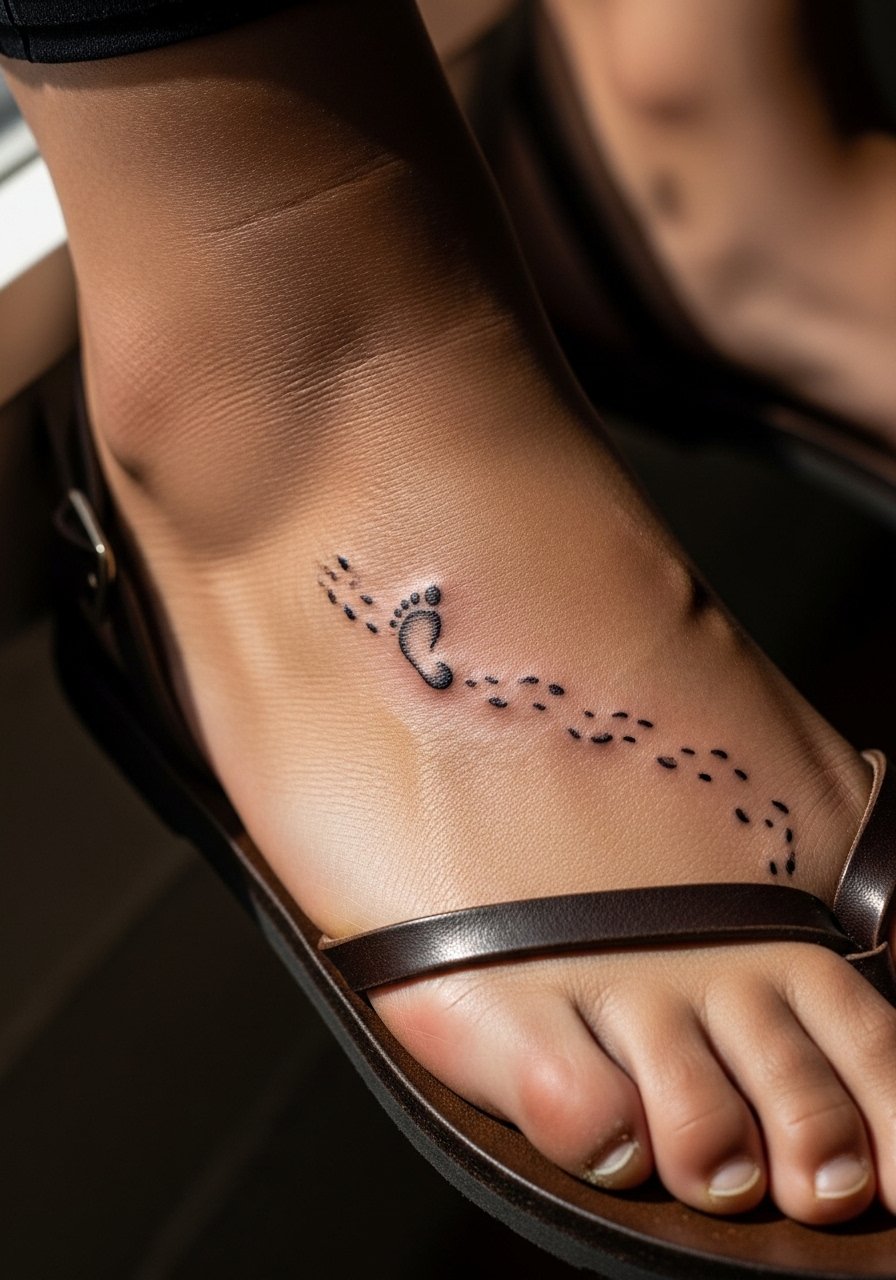
Personal observation lead: top-of-foot tattoos face lots of friction from shoes and sun, so simple single-stroke prints survive best. Pain is moderate to high for foot work and healing requires avoiding tight shoes. Ask for slightly thicker prints with minimal interior shading. For the session wear sandals and bring loose footwear for aftercare. Summer visibility is easy with sandals and cropped pants.
27. Platform 9 3/4 Barcode on the Forearm
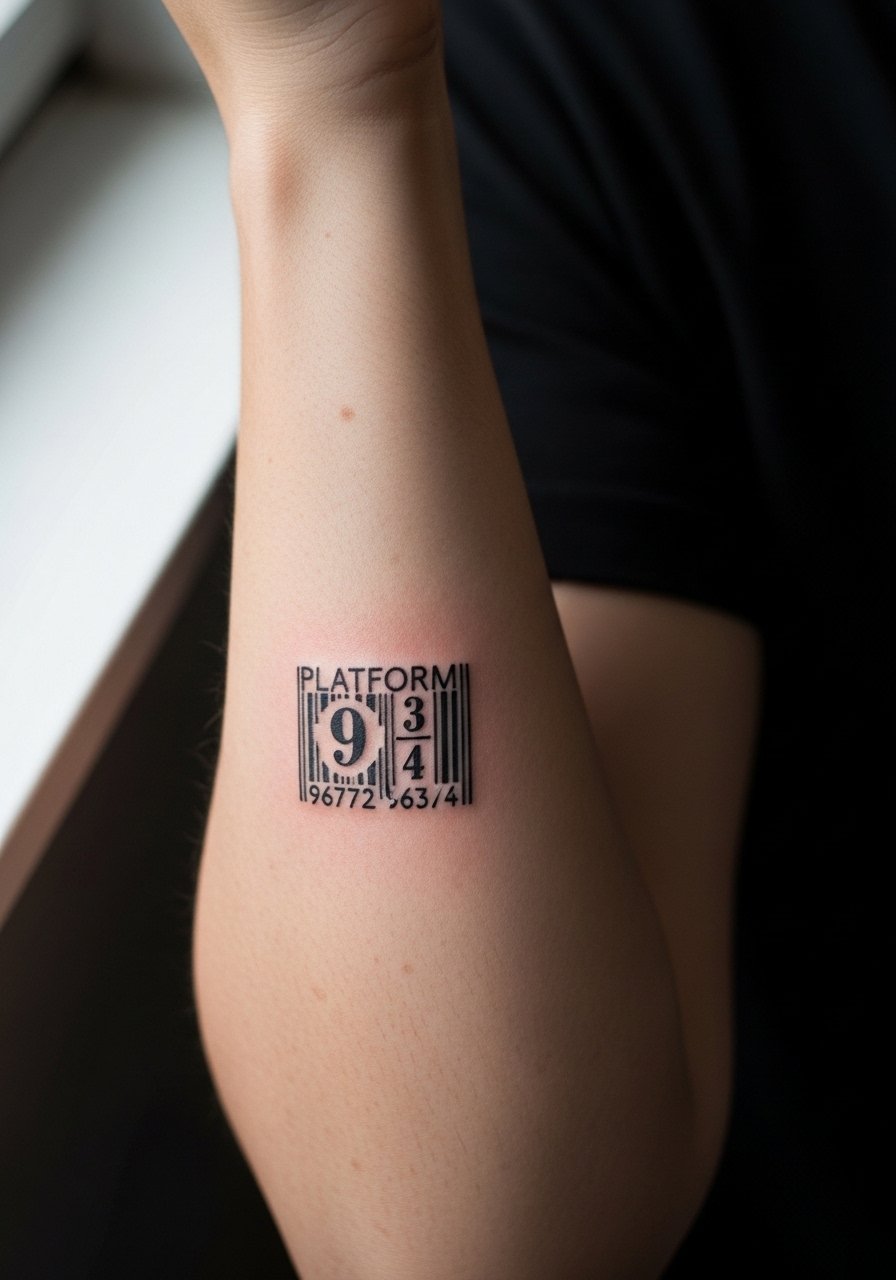
Consultation lead: barcode lines need absolute parallelism and spacing to avoid moiré as the skin moves. Tell your artist you want crisp straight lines with a small block of numerals in a monospace style. Forearm healing is reliable, but fingers and wrist intersections can blur. For the session wear a short-sleeve shirt and consider a light protective film for the first 24 hours to reduce scabbing on the inner arm.
Frequently Asked Questions
Q: Will fine line script like "Always" blur faster on darker skin tones?
A: It depends on ink contrast and depth. On medium to dark skin tones, slightly heavier line weight and open letter spacing help retain legibility. Ask your artist about testing a small patch or doing a thin-but-deep stroke rather than the faintest single-needle line.
Q: How do I pick between colorful phoenix options and a black and gray base?
A: Two camps exist. One favors bright watercolor for immediate visual pop and symbolism. The other favors black and gray cores with color accents for better longevity. If you love color but worry about aging, ask for a grayscale underpainting with restrained color highlights so refreshes are simpler.
Q: Are wrist and finger tattoos worth it if I want low maintenance?
A: Wrist and finger pieces are high maintenance because of constant hand washing and sun exposure. Choose heavier contours and plan a touch-up at six to twelve months if you want crisp lines beyond year one.
Q: What should I wear to a ribcage or sternum session to stay comfortable?
A: Wear a fitted sports bra or a cropped top you can shift easily. Loose, breathable fabrics make breaks and repositioning easier during long sessions. Bring a lightweight hoodie to stay warm between passes.
Q: Where can I find edgy Potter-themed portfolios without naming artists directly?
A: Try searching hashtags like #EdgyHarryPotterTattoo and #DarkHPInk, use location filters on TikTok and Instagram, and browse Tattoodo portfolios for specific keywords like "Deathly Hallows blackwork" or "Bellatrix dagger neo-traditional." Reddit tattoo threads can also point to healed examples in different skin tones.
