
The fine line trend on saving boards looks effortless, but the reality is more complicated. Some of the most liked feminine Hannya mask tattoos age into soft ghosts while others keep crisp linework for years. This guide lays out 21 different ways to reinterpret the Hannya for women, with placement choices, realistic healing notes, and wardrobe tips that make the design read the way you want at month six and year three.
1. Fine Line Hannya on Inner Forearm
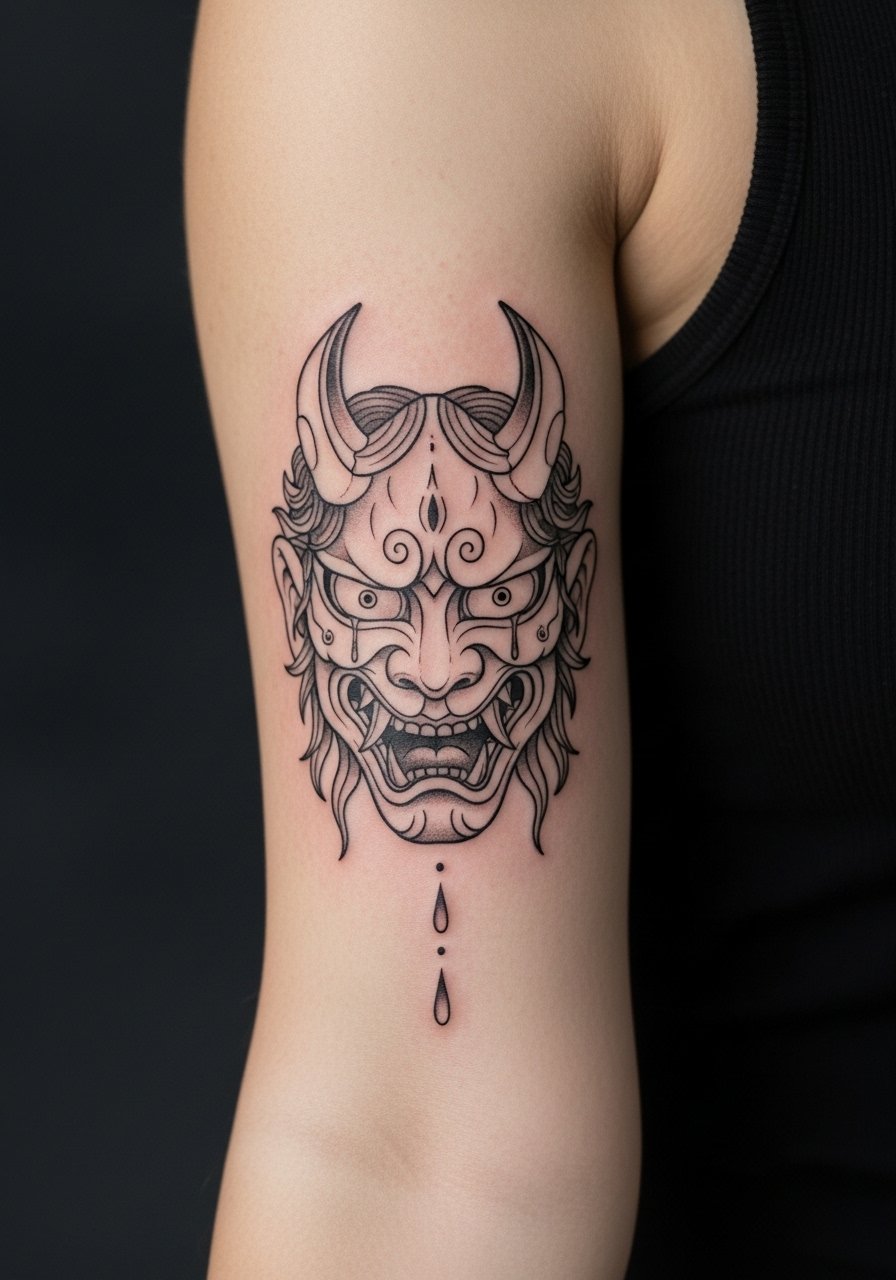
I recommend this for first-timers who want the Hannya motif without heavy saturation. Bring references that show exact line weight and ask the artist to space dense areas a bit wider so the stipple shading can breathe. Expect a low pain session, roughly 1 hour, and plan on a touch-up around year two if you spend a lot of time in the sun. Common mistakes are asking for single-needle density in tiny areas and then wondering why lines fade into a smudge. For showing it off, pair with a rolled cuff blouse worn with sleeves pushed up so the forearm sits exposed in office and casual looks.
2. Neo-Traditional Hannya on Outer Forearm
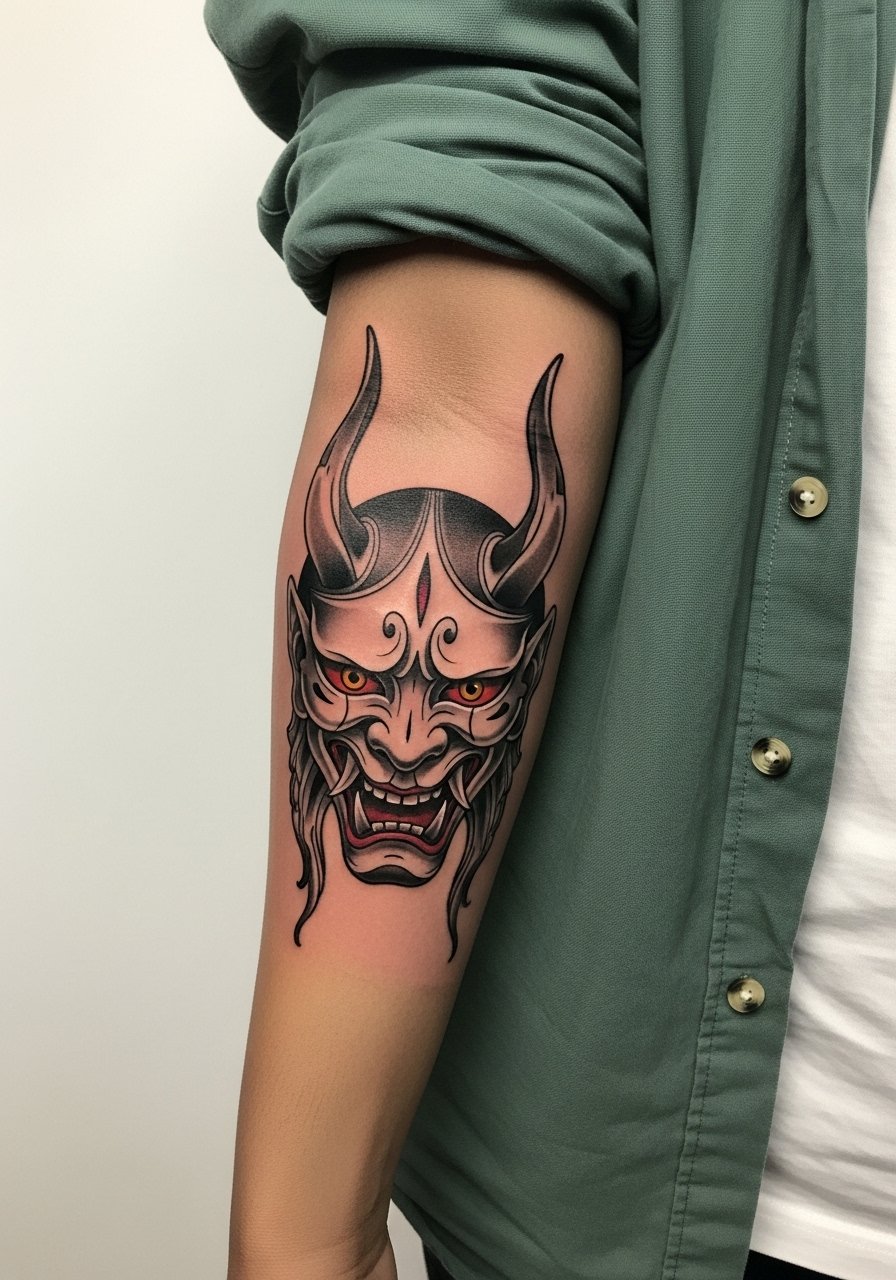
There is a reason neo-traditional works well on forearms. Bold outlines and saturated fills hold up against abrasion and sunlight better than thin work. Ask your artist to map horn flow with your muscle movement so the design doesn't warp when you flex. Sessions usually split into two one-and-a-half-hour blocks for an 8-inch piece. The larger lineweight reduces blowout risk compared with hair-thin treatments. During the appointment, wear a loose button-up or sleeveless top so the artist can access the whole forearm without fabric dragging. Post-heal, rolled sleeves and simple bracelets keep attention on the red lips and flowing horns.
3. Minimalist Hannya Ankle Silhouette
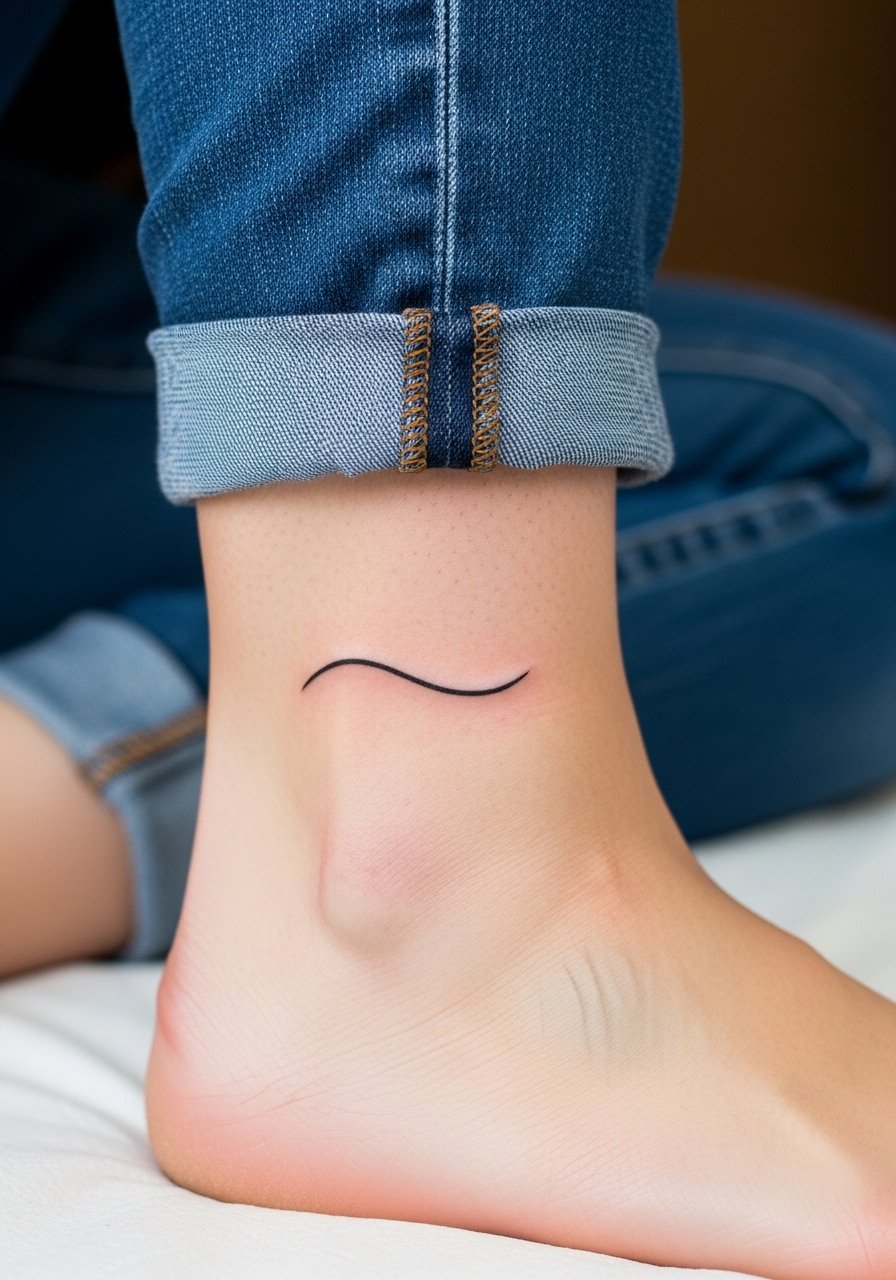
This small, three-inch silhouette fits people who want a discreet emblem with low session time and minimal pain. The main risk is placement friction from shoes and socks during the first two weeks. Ask for slightly bolder lineweight than your reference so the tiny curve still reads after a year of wear. Typical session time is under an hour and touch-ups are common around year two for those who favor sandals and barefoot styles. Show it off with strappy ankle sandals or cropped jeans that stop just above the design.
4. Blackwork Hannya on the Upper Chest Near the Collarbone

A collarbone placement gives the Hannya room to breathe and photographs well at night. This is a good pick for darker skin tones because high-contrast blackwork reads clearly without depending on color saturation. Sessions run longer, often three hours, because of dense shading. Expect some sensitivity when needles pass over bone, but the visual payoff is high. Artists split on hydration vs dry healing for blackwork, so bring the topic up in consultation and ask how they handle saturation. Pair this look with a strapless midi dress or a thin choker that frames the linework without covering it.
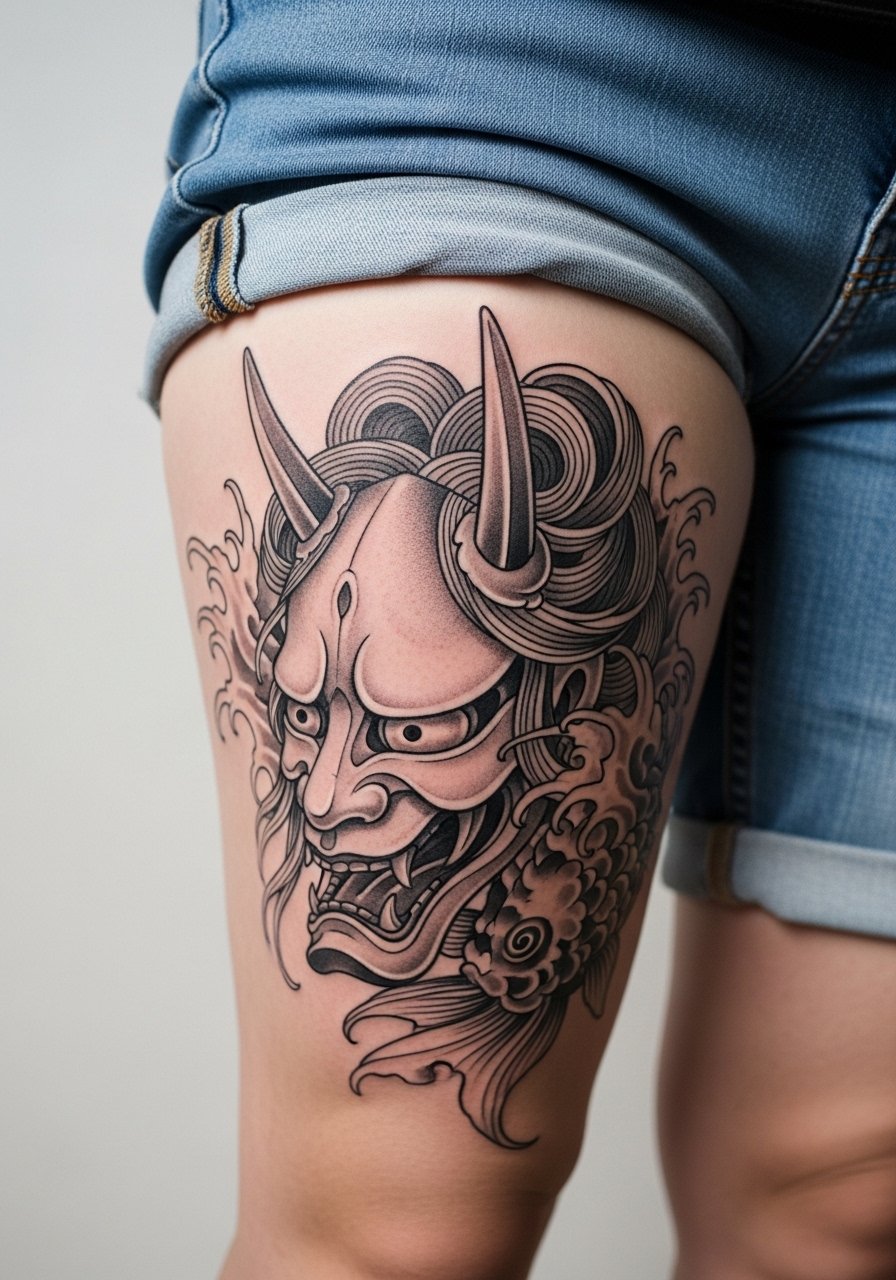
5. Watercolor Hannya Splash on the Thigh
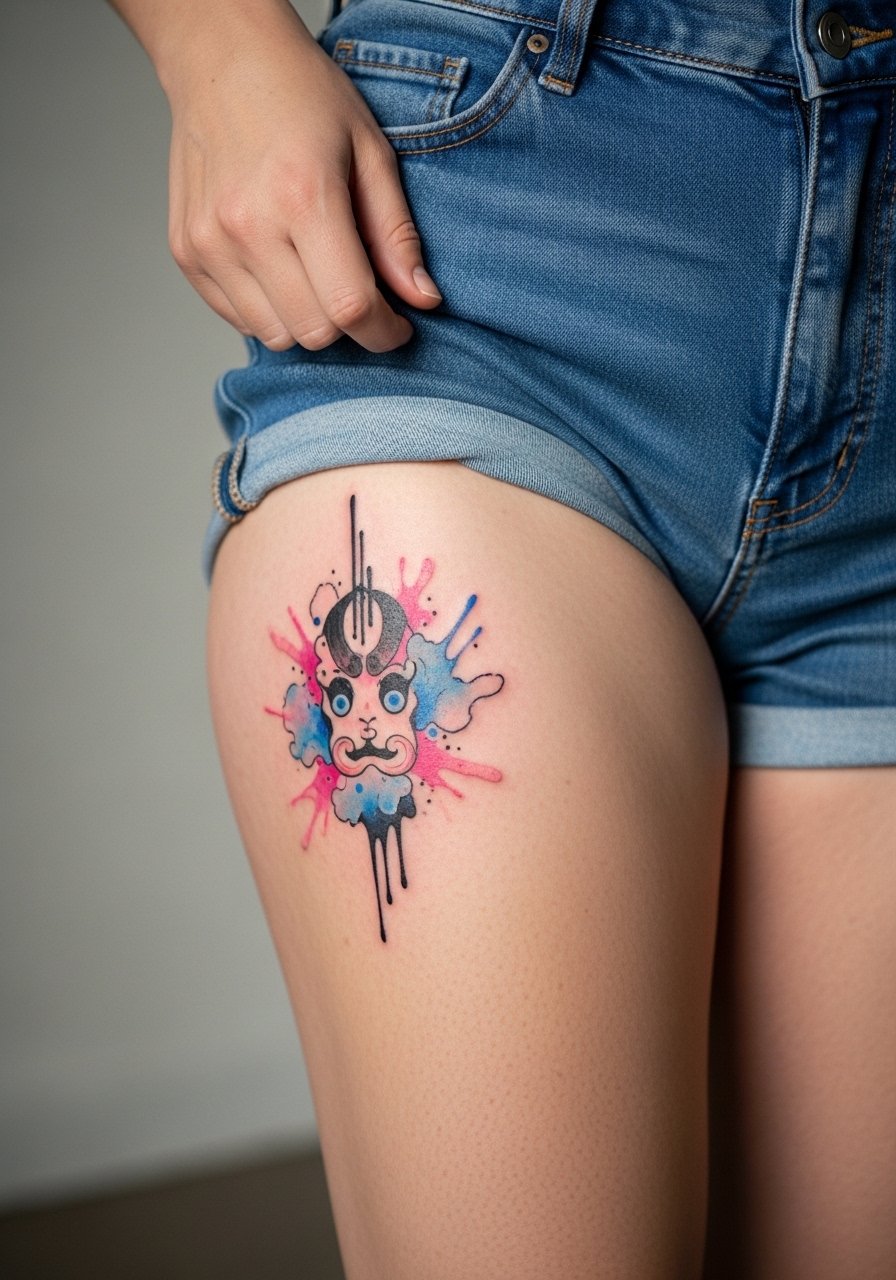
Watercolor techniques give the Hannya a softer emotional tone but they age differently than black-and-gray. Expect brighter photogenic results in the first 12 months followed by subtle fading in the washes. Thigh placement handles sessions easily because you can sit or lie comfortably, but summer chub or weight changes can slightly stretch the composition, especially around the mouth and horn curves. When booking, request slightly higher saturation in the color fields so the hues last. For warm weather wear, pair it with high waist shorts or a slit skirt so the design reads at festivals and pool days.
6. Ornamental Framed Hannya on Upper Arm
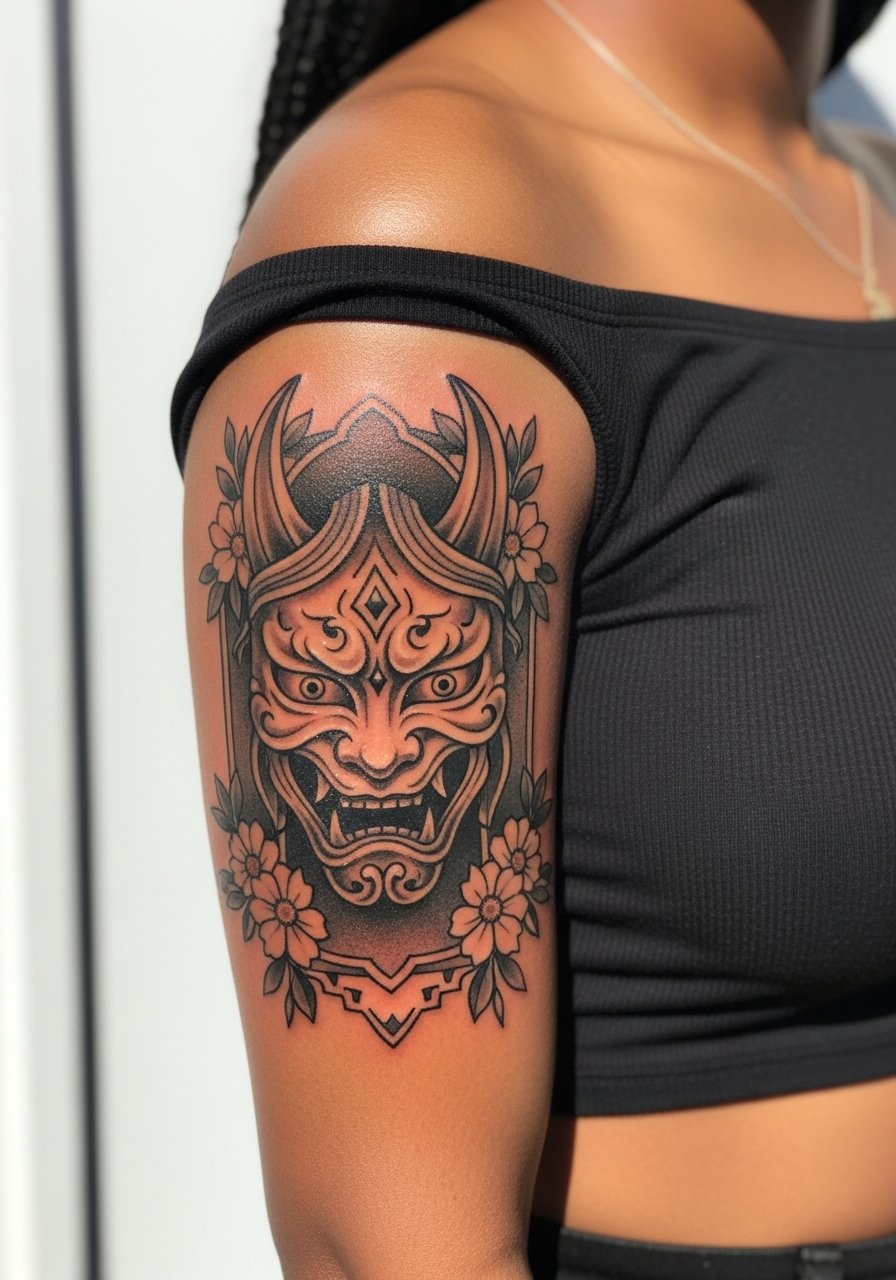
The ornamental frame is a clever way to soften the Hannya image into something jewelry-like. Frames add visual weight and reduce the chance that linework will merge over years. For session planning, a mid-sized upper arm piece is typically two sessions of about 90 minutes each. A frequent error is cramming too many small flowers into the frame which creates dense areas that age poorly. For a daytime wardrobe that highlights this placement, try an off shoulder crop top so the arm sits exposed and the ornamentation reads like a cuff.
Studio Day Picks
The forearm, ankle, and thigh pieces above each need different prep for clean sessions, so a few items smooth chair time and the first week.
-
Tea tree balm by InkSafe. A thinner balm can reduce the greasy buildup that sometimes causes shading to appear muddy on delicate thigh watercolor blends.
-
Australian Bush Balm. Less sticky than heavier ointments, it helps ankle work avoid rubbing issues under sandals and socks.
-
Japanese rice bran lotion. Used lightly in the itch phase, it soothes symbolic pieces that need gentle moisture without clogging.
-
H2Ocean saline spray. A light spritz works well for tiny wrist and finger designs that need cleaning without over-saturating the area.
-
Hustle Butter Deluxe. A thinner alternative to heavy ointments that many artists recommend for color retention on pieces with lots of saturated reds.
7. Micro-Realism Hannya on the Shoulder Blade
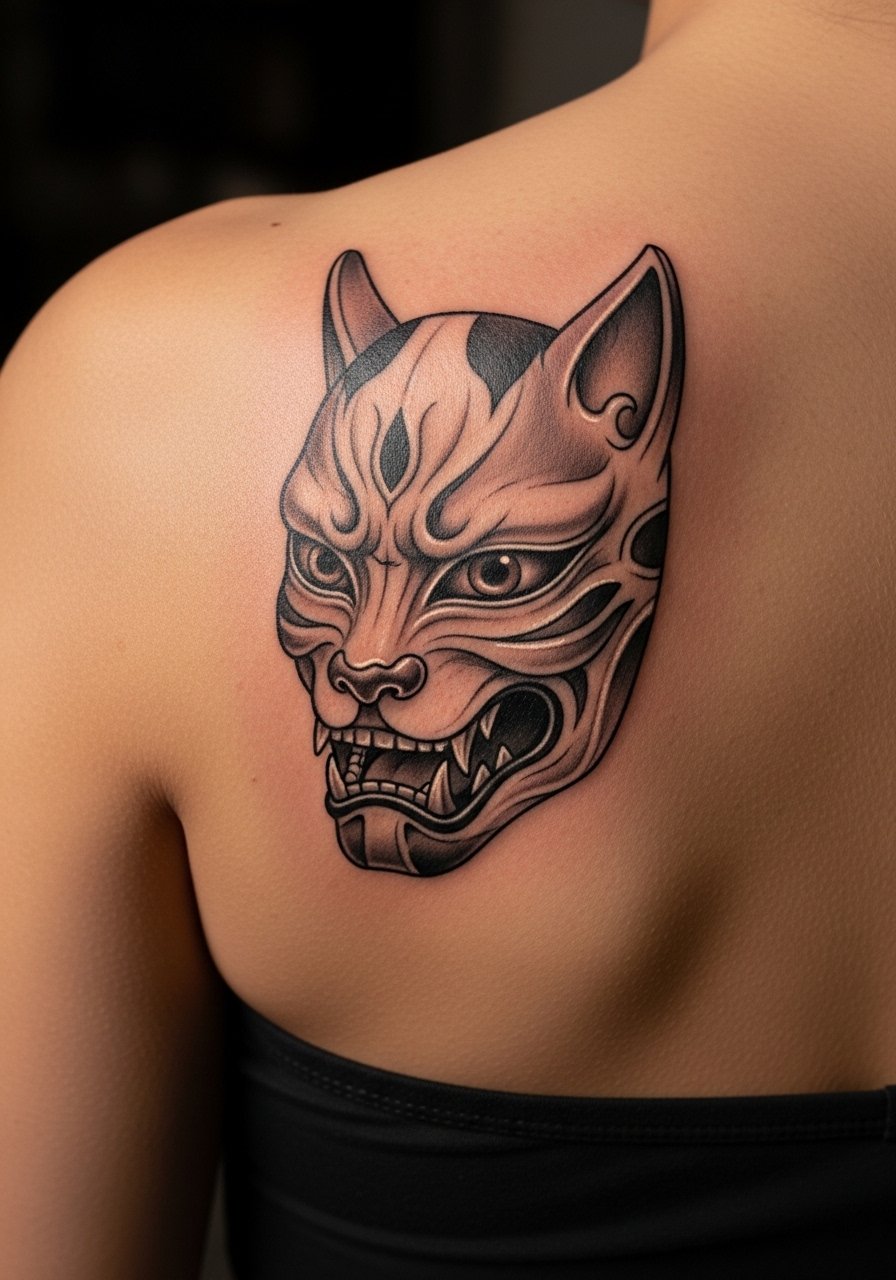
Micro-realism demands exacting stipple and dot work for subtle expression. This is the one that reads hyper-feminine up close, but it requires multiple sessions and long hours under the needle. Pain is moderate because the area has flesh but also thin spots. Bring reference photos showing exactly where you want the shadow planes and ask the artist about touch-up timelines; detail tends to soften over five years. For session wear, a strapless bra and a button-down you can pull aside will keep the area accessible. If you value lifelike detail, this is the kind of piece that rewards patient sits and scheduled touch-ups.
8. Traditional Japanese Hannya Across the Back
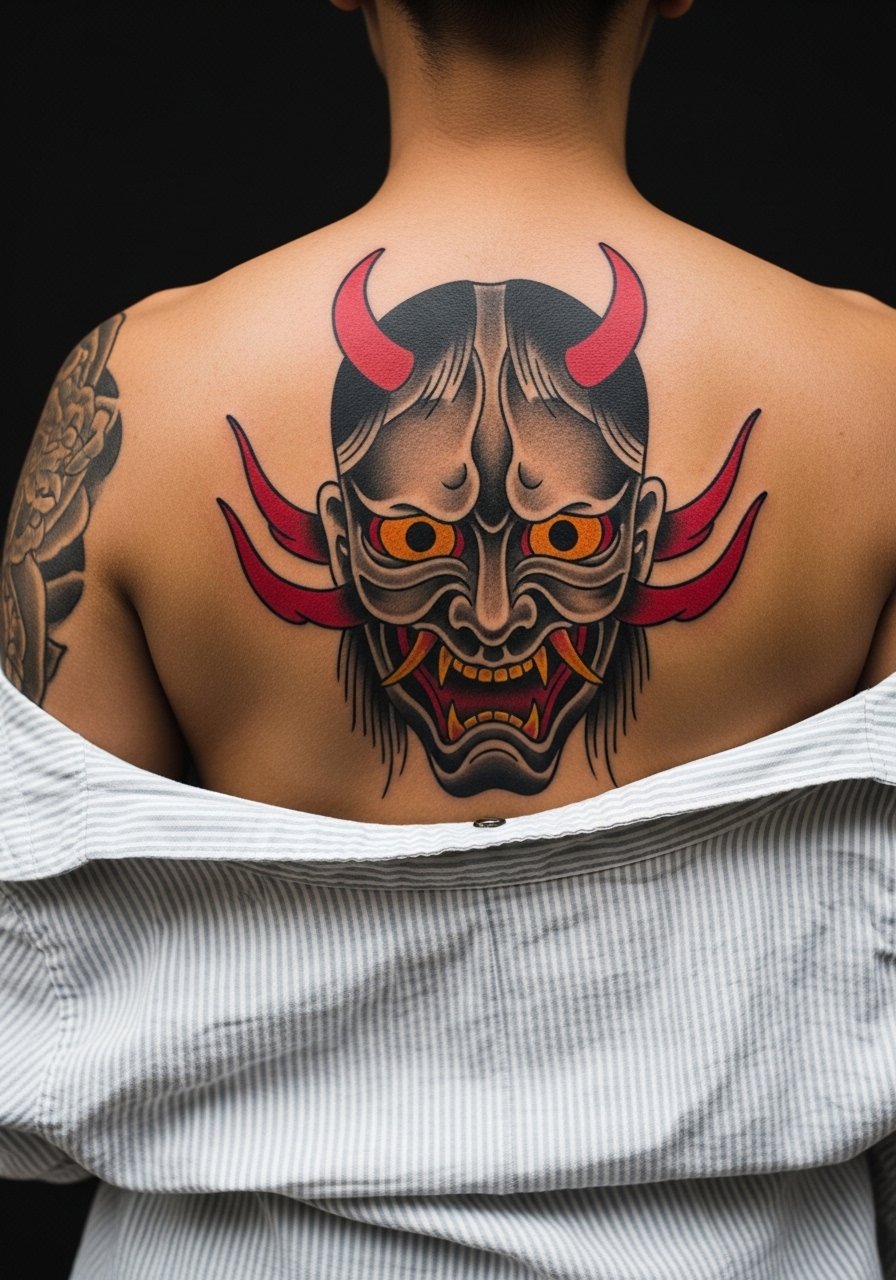
Big traditional Hannya work follows authentic Noh theater aesthetics and ages into a strong visual presence because of heavy outlines and full saturation. Sessions are extended and often spread across multiple visits. The trade-off is time and commitment, but the payoff is durability. A key mistake is copying period-correct elements without adapting scale to modern clothing silhouettes. For cultural respect, acknowledge the Japanese theater roots and avoid direct religious iconography unless you have guidance on contextual use. Back pieces also fare well for cover-ups and larger narrative compositions.
9. Ignorant Style Hannya on the Calf
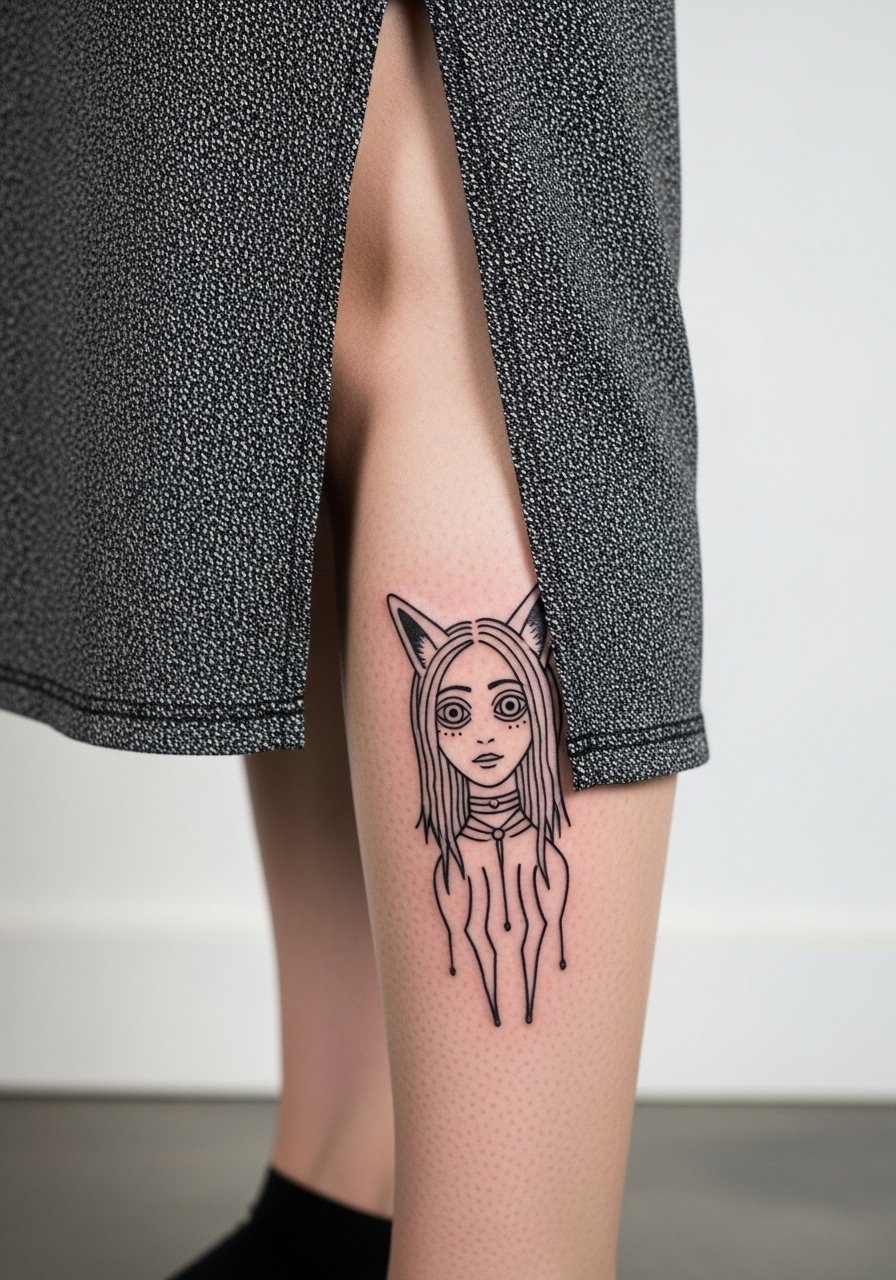
The ignorant style is playful and intentionally raw, which makes it forgiving for small alignment issues. Calf placement holds up because the area sees less daily sun and the skin is less prone to abrasion than ankles. Session time is usually under two hours for a five-inch piece. Common mistakes include asking for precise symmetry in a style where wobble is part of the look. For outfits, midi skirts with a side slit or rolled joggers keep the design visible and let the naive linework interact with movement. This is a low-maintenance option if you want character over polish.
10. Split-Face Hannya on the Ribs for Duality
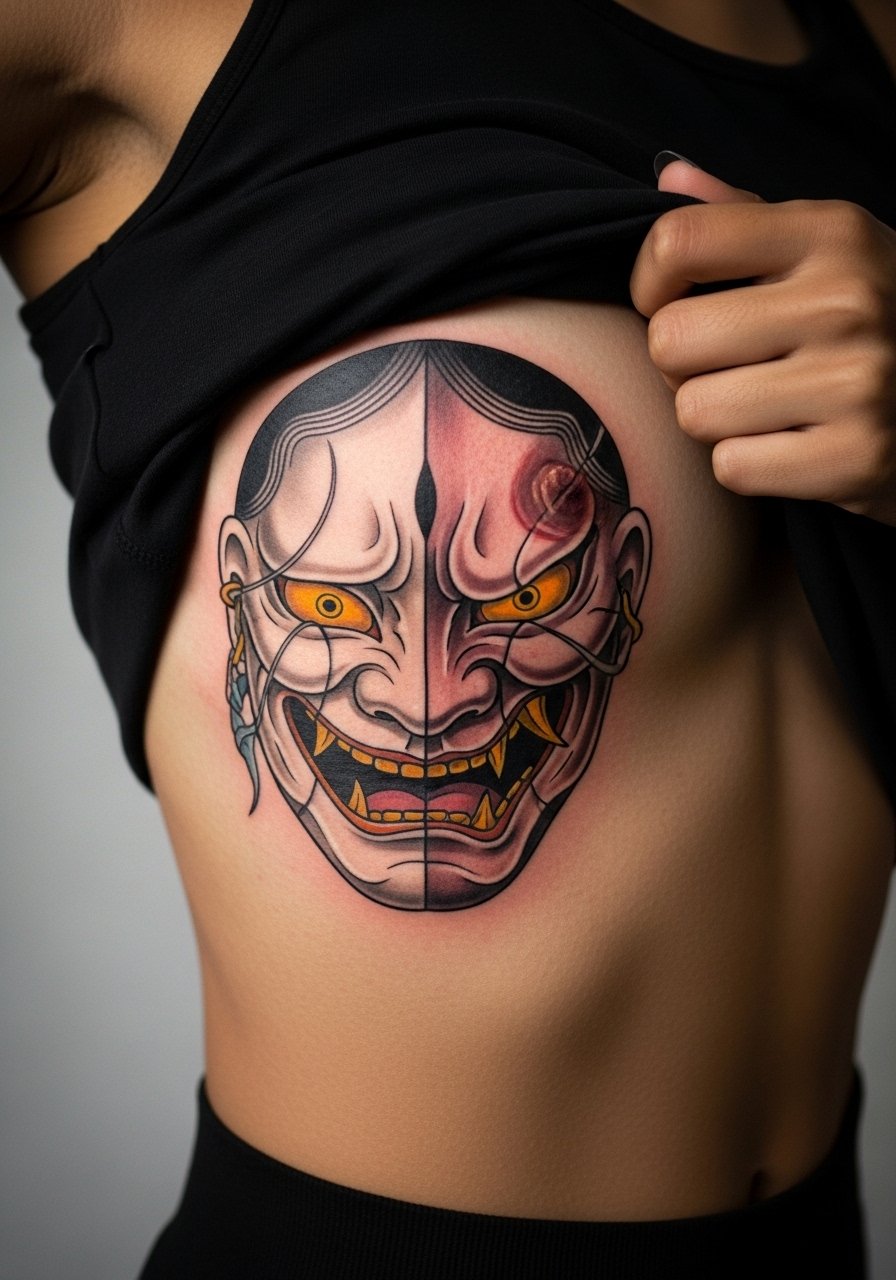
This ribs piece reads like a compact narrative, but rib sessions are commonly rated as a 7 out of 10 on pain charts. Artists split on whether fine line works there. One camp says rib skin stretches and moves too much and that single-needle work blurs within two years. The other camp argues that with the right needle depth and spacing, fine line can settle cleanly. If you prefer the delicate half-face, insist on extra spacing and smaller blocks of shading to reduce merging. Wear a crop top or sports bra to the session so the artist can work with clear access, and plan for short breaks during long sits.
11. Micro Hannya on the Collarbone Edge
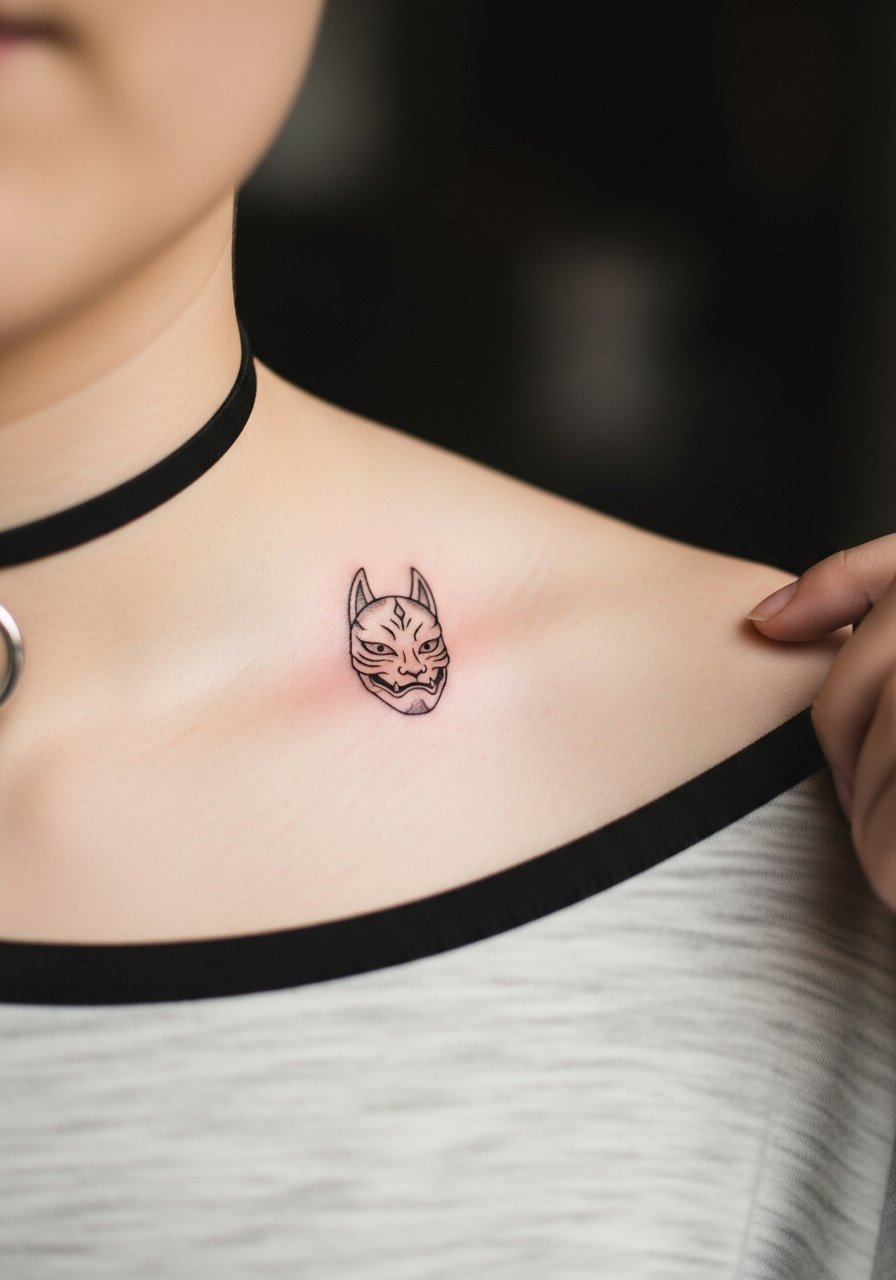
A micro Hannya positioned exactly on the collarbone edge is subtle and low-commitment. The key is to scale the mask so the expression still reads when the shoulder moves. Expect a 30- to 60-minute session and understand that collagen in that area may cause softening of tiny dots over time. A thin choker or minimalist necklace frames the piece without covering it. If you travel or often wear certain work blouses, test the placement with a temporary stencil before committing.
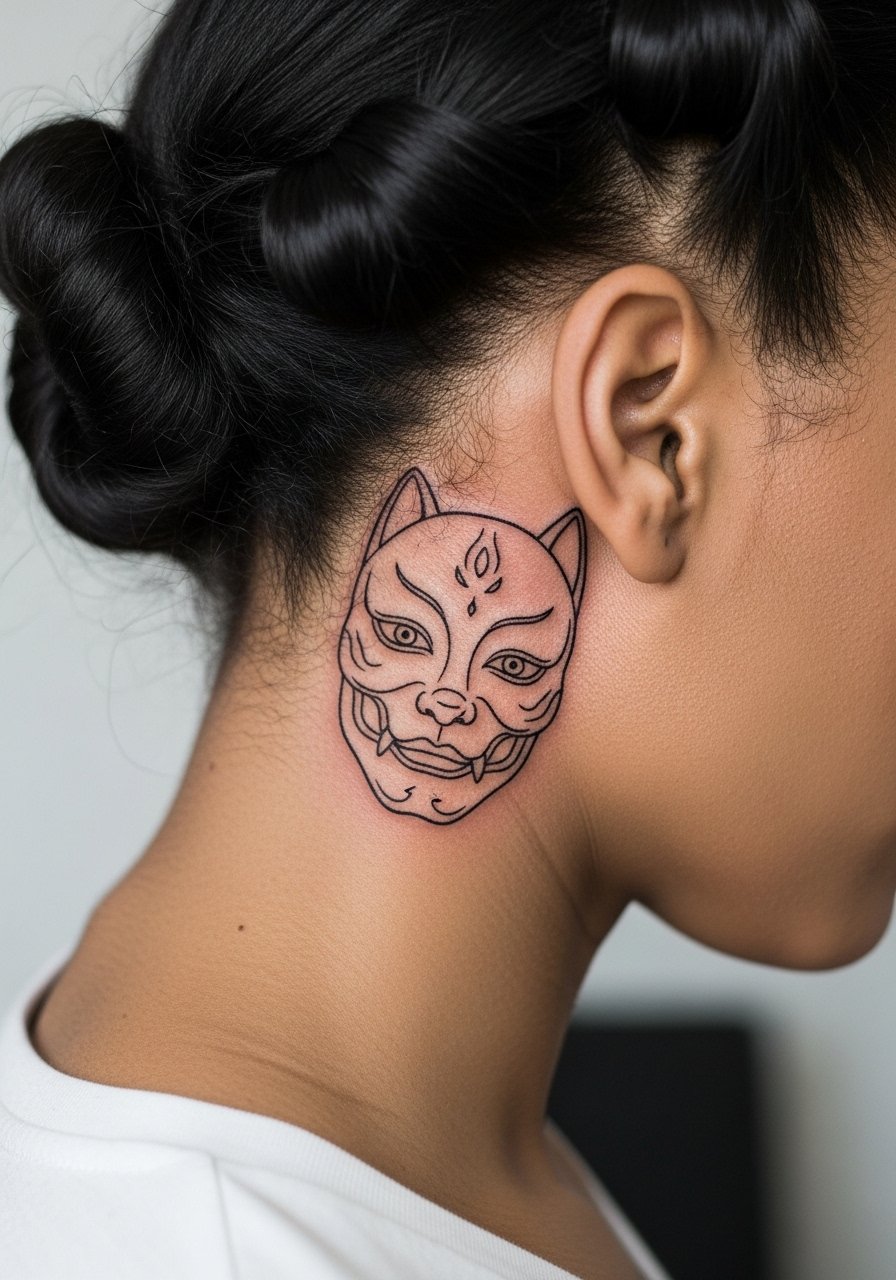
12. Hidden Reveal Hannya Under the Hairline on the Neck
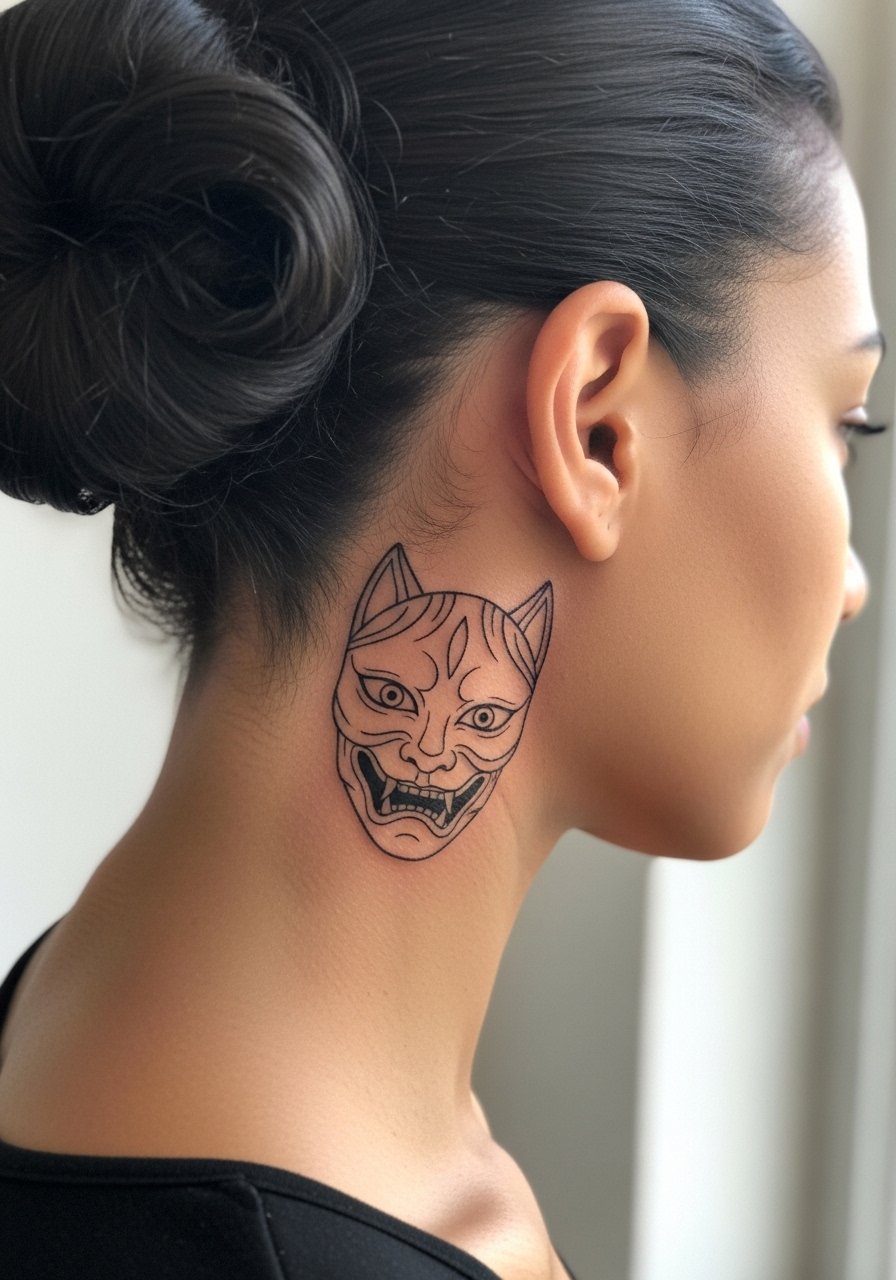
This hidden placement plays well for people who want to show the tattoo only sometimes. The trick is to discuss visibility during consultation because hair and collars change how much of the piece is revealed. Expect a quick session, but keep in mind the neck has thinner skin, so touch-ups are not unusual. For session wear, put your hair up so the artist can check stencil placement accurately. Be mindful that certain conservative workplaces may react to visible neck ink, so plan placement with career considerations in mind.
13. Hannya with Koi-Scale Negative Space on the Hip
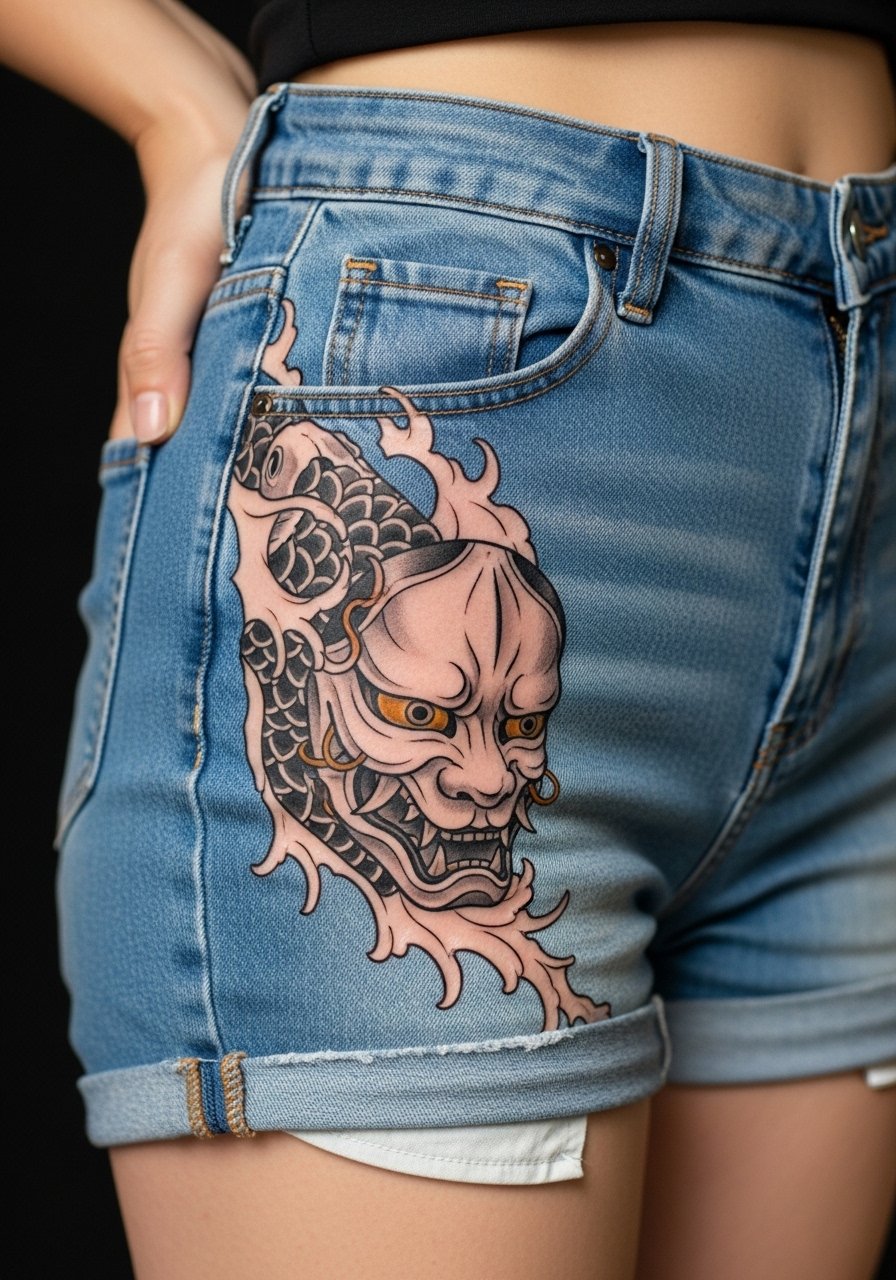
Using negative space with koi scales helps the design follow the curve of the hip and thigh, so flow reads natural when you walk. Hip work is comfortable to sit for but watch for friction from waistbands while healing. The common error is hugging the scale pattern too tightly to the mask so everything blurs into one texture after six months. Ask for clear spacing and slightly bolder anchors near the horn bases. For showing it off, high-waisted shorts or a slit skirt highlight the negative space pattern without exposing too much.
14. Tiny Wrist Hannya in Minimalist Linework
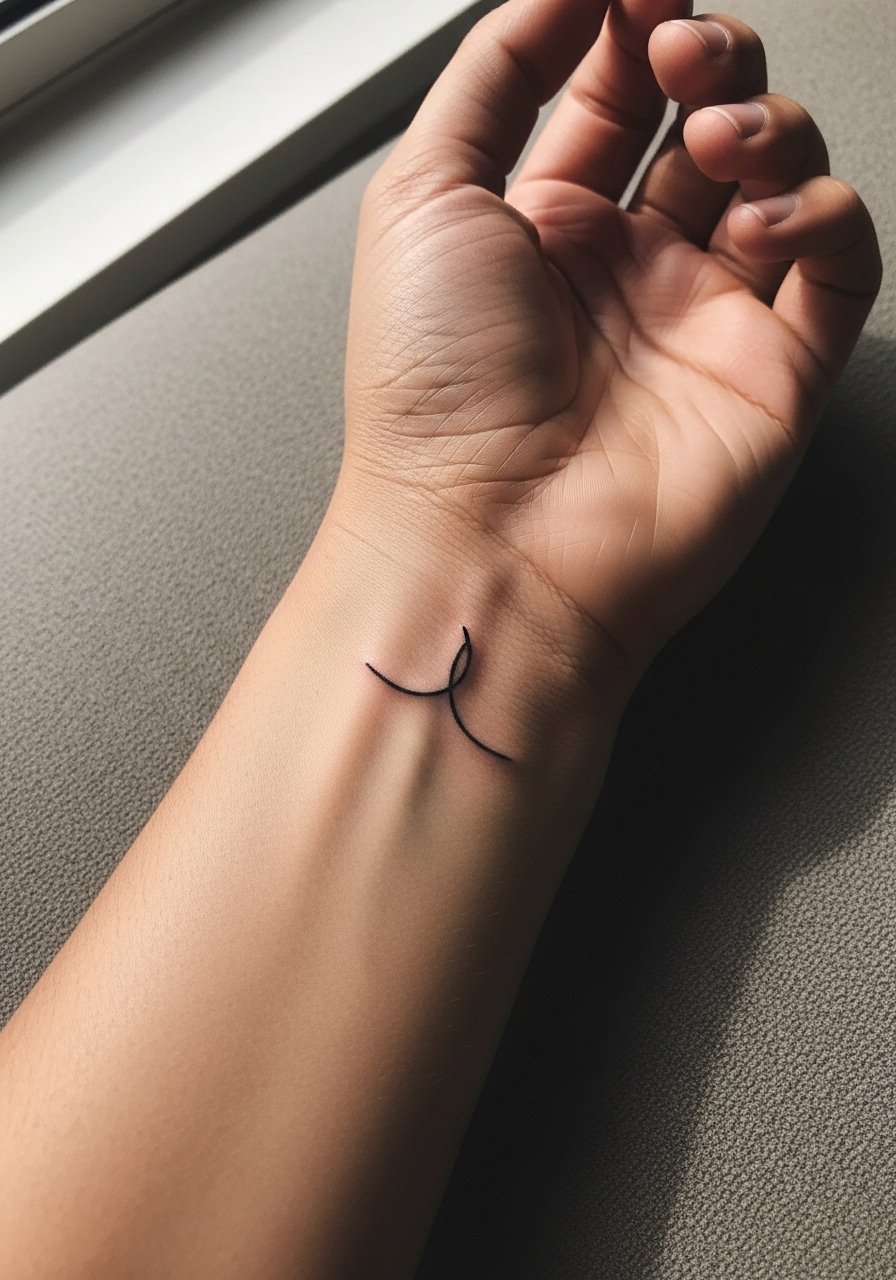
Wrist pieces photograph well but face a unique fade and friction profile. The fine line versus bold line debate is loud here. One camp likes single-needle wrists for their clean fresh look. The other camp warns that hands and wrists tend to blur in two years and recommend at least a slightly bolder outline. If you want a minimalist approach, insist on a conservative lineweight and plan a touch-up at year one. To style, stack on the opposite wrist or use a dainty chain bracelet on the non-tattooed side so the wrist reads intentionally curated.
15. Geometric Horns Hannya on the Sternum
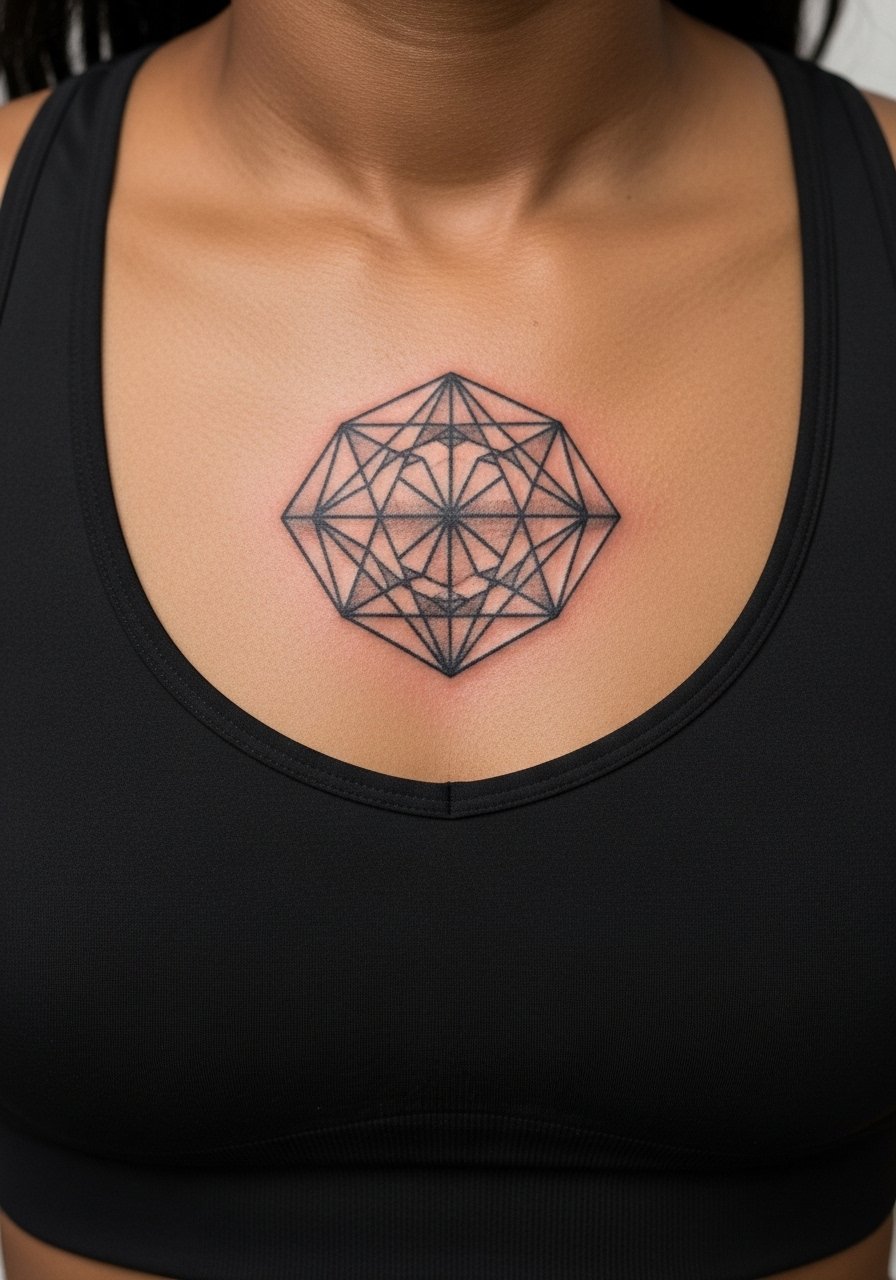
Sternum work is striking but requires a focused session and specific clothing for access. The sternum area can be more painful and tends to need spaced sessions for heavy shading. Artists sometimes debate numbing cream for this area. If you opt for it, ask how it affects sensation and ink uptake because opinions vary. For showing off the piece, a bandeau or fitted sports bra keeps the linework visible and framed. Plan for modest post-session soreness and wear clothing that will not rub the area for the first week.
16. Hip-Thigh Hannya Flow with Koi Integration
Pairing the Hannya with koi-scale negative space is ideal for curving parts of the leg because it uses the body shape to push the composition. Thigh sessions are comfortable and heat or sweat can affect early healing, so wear loose joggers or a skirt to the appointment. A typical session is two hours for a medium-sized piece and touch-ups are less common if the shading is well-saturated. For summer styling, high-waisted shorts or a slit maxi skirt let the flow show with minimal effort.
17. Inner Bicep Micro Hannya with Subtle Texture
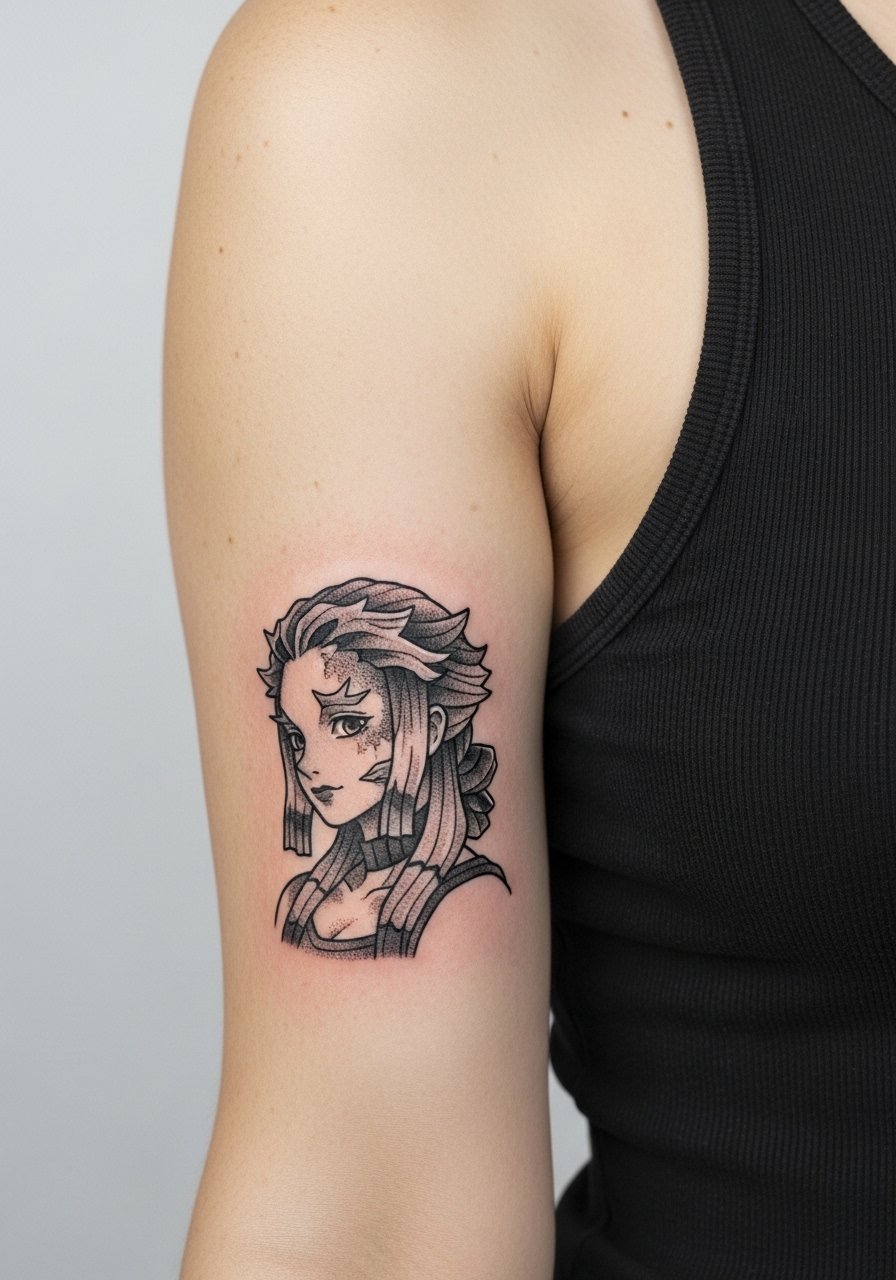
The inner bicep hides well and gives micro-realism pieces shelter from constant UV exposure, which helps detail last. Pain is moderate because the area is sensitive when the arm is raised. Small mistakes include underestimating how much the area moves when you flex, which can warp expressions over time. For session wear, a loose tank top gives the artist access and keeps fabric from brushing the work. Expect a couple of months for final settling, and consider a planned touch-up if you want the fine stipple to stay vivid.
18. Behind-the-Hairline Neck Hannya Reveal
Placing a Hannya behind the hairline creates a fun hidden reveal for updos and ponytails. The area is thin and mobile, so precise stencil placement matters. Expect a fast session and localized tenderness for a few days. If you plan to work in conservative settings, discuss visibility options with the artist so you can position it below the hairline or slightly higher depending on your hairstyle. An updo or half-up style shows the piece selectively while average collars keep it private.
19. Thigh Watercolor Hannya with Fishnet Overlay
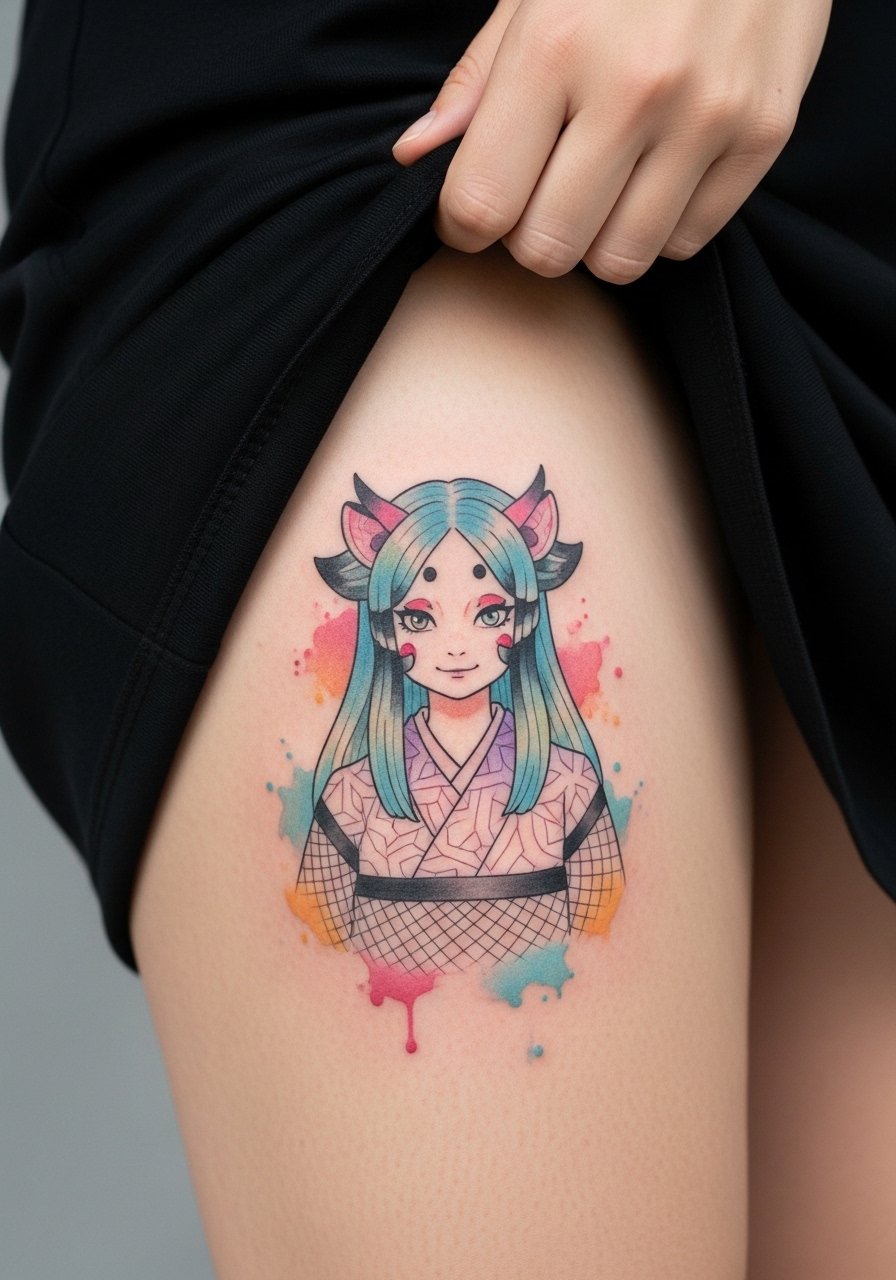
Adding a textured overlay like fishnet in your wardrobe can make watercolor thighs read more intentional. Watercolor fades differently across body oils and friction zones, so the thigh is one of the better places for longer-lasting washes. Session time for a five-inch watercolor piece is often around two hours. A common misstep is choosing a palette that lacks contrast; ask for a darker outline anchor if you want the washes to remain legible in photos. For show-off looks, pair with summer shorts or a slit skirt so the colors appear against bare skin.
20. Calf Traditional Hannya with Red Accents
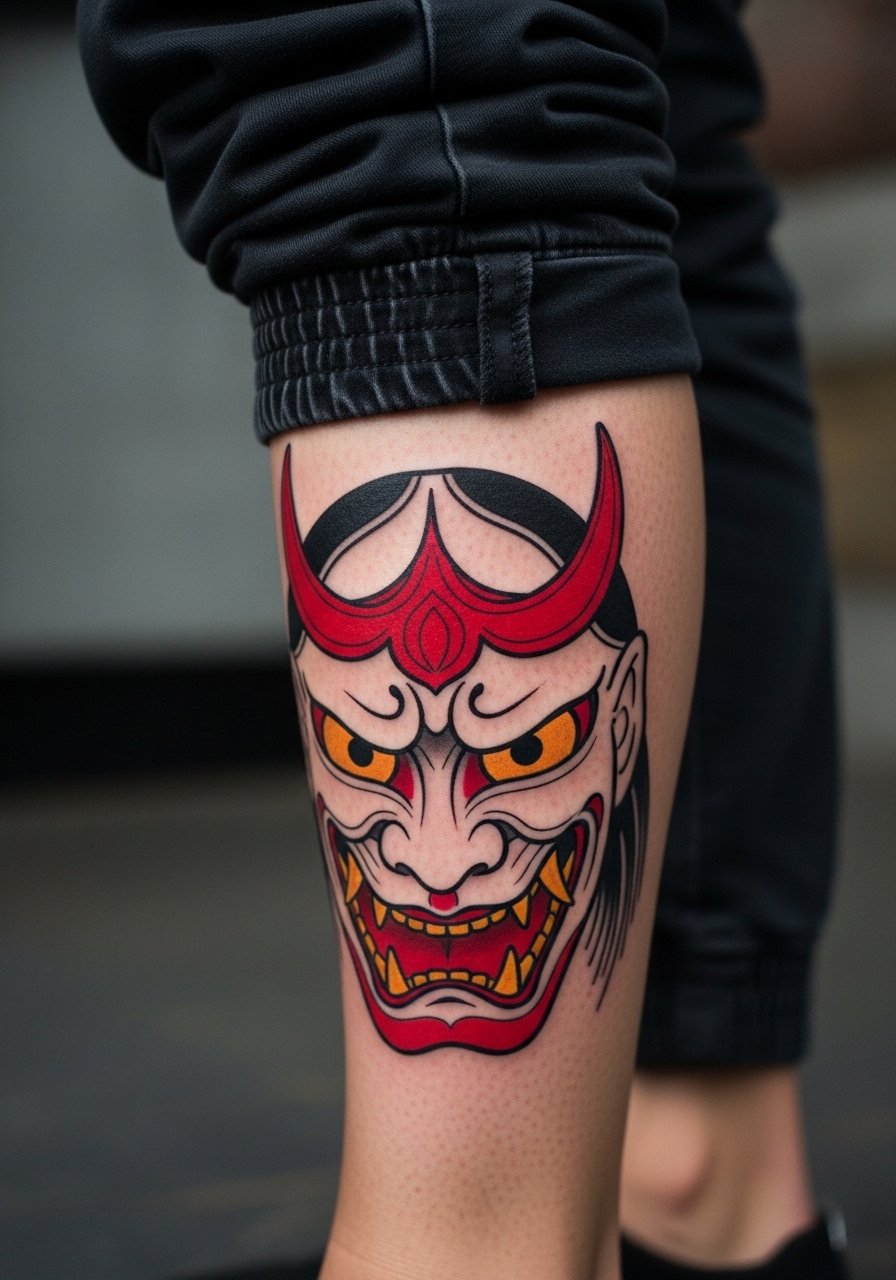
The calf gives you a long vertical canvas that reads well in motion. Traditional palettes with red accents age predictably because the outlines carry the weight and the color becomes a highlight rather than the main legibility factor. Sessions are comfortable and often finish in one to two sittings depending on size. Avoid crowding the horns with tiny details that lose clarity after healing. For casual wear, midi skirts with a side slit or rolled joggers let the red accents pop against movement.
21. Lower Back Fine Line Hannya with Floral Border
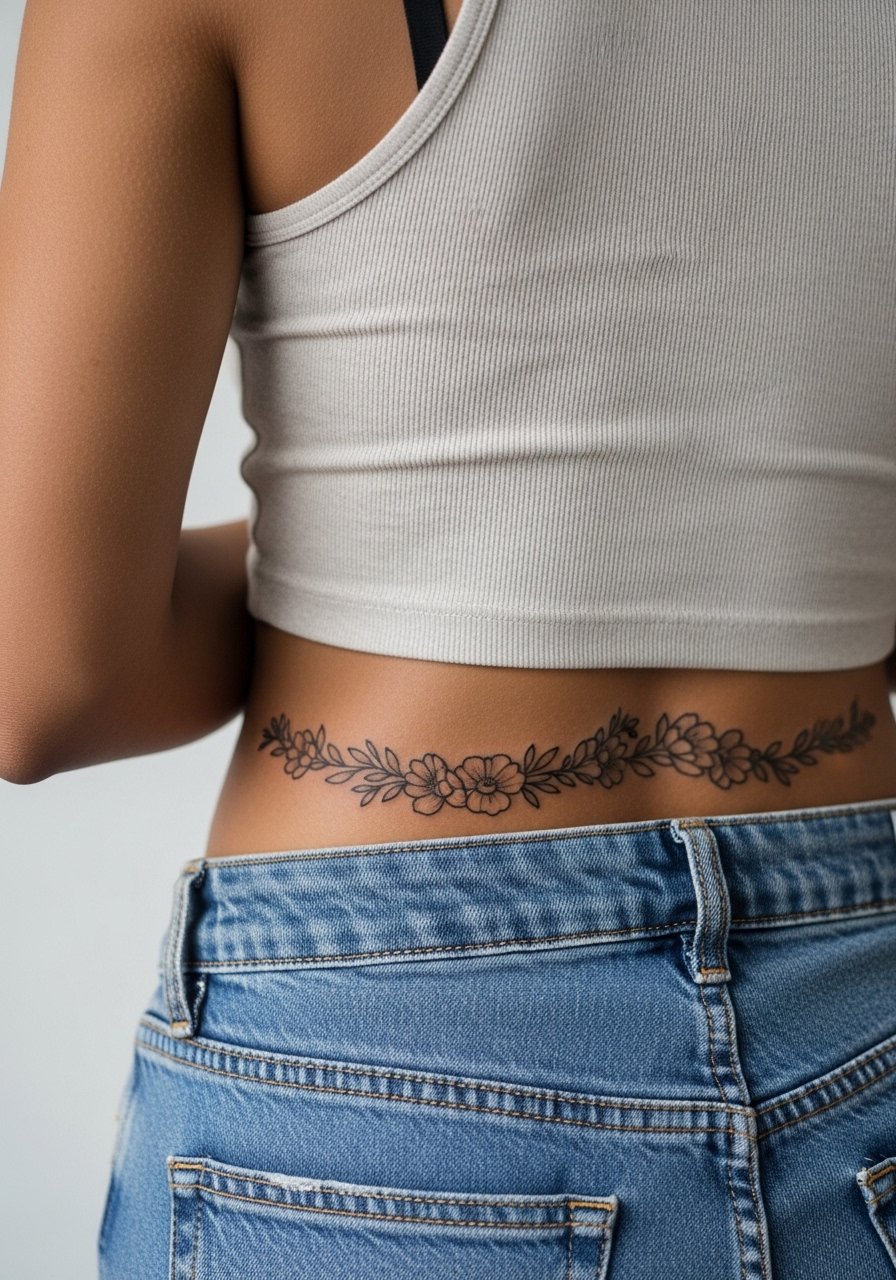
Lower back placement offers a wide canvas for combining fine line masks with floral framing. Healing is straightforward if clothing avoids rubbing the site, but be mindful of seat friction in the first two weeks. A typical session for a medium lower back piece is around two hours. People sometimes underestimate how much clothing waistband pressure affects early scabbing, so choose bottoms you can loosen for a few days. This spot pairs casually with cropped tanks and high-waisted bottoms so you can control how much of the art you reveal.
Frequently Asked Questions
Q: Will a fine line Hannya on my wrist blur faster than a bolder version?
A: It can, especially if you live in a sunny climate or wear jewelry that constantly rubs the area. Fine single-needle work depends on both placement and line spacing. If you want a minimal look that lasts longer, ask for a slightly heavier anchor line and plan for a touch-up at year one or two.
Q: How do I choose between watercolor and black-and-gray for a thigh Hannya?
A: Thighs tolerate watercolor better than hands and wrists because they avoid daily sun and friction. Black-and-gray will always age more predictably for high-contrast photos and long-term clarity. Consider how often you wear shorts and how much sun exposure the area gets, and ask your artist about saturation strategies for the style you prefer.
Q: What should I bring up in consultation about the rib split-face Hannya?
A: Bring clear references that show scale and the exact emotional read you want for each half-face. Ask the artist where they stand on fine line versus bold line for ribs because the community is split on what holds up. Also ask about session length and planned breaks since ribs are a sensitive spot.
Q: Are there wardrobe choices that help a newly healed collarbone Hannya look better?
A: Yes. Strapless or wide-neck shapes and thin chokers frame collarbone tattoos well. If you want options for work and nights out, a thin choker necklace or an open-button shirt gives you control over visibility while keeping the piece elegantly displayed.
Q: How do skin tone and blackwork interact for a Hannya on darker skin?
A: High-contrast blackwork tends to photograph and read better on medium to dark skin because saturation and silhouette carry the design. Lighter color washes can lose vibrancy, so ask your artist to focus on strong outlines and contrast rather than relying solely on pastel fills.
Q: Is it risky to place a Hannya on the hip if I plan to change weight?
A: Weight shifts can change how curves sit and that affects any adjacent composition. Hip and thigh placements are forgiving to modest changes but large fluctuations can warp elements like horn curves or mouth placement. If you expect body changes, ask the artist to design with flow lines that can flex with the area rather than rigid symmetry.
Q: What discovery pathways should I use to find artists who specialize in feminine Hannya styles?
A: Search hashtags like #FeminineHannya and #NeoTradHannya on social platforms, look for guest spot announcements on TikTok, and use directories that let you filter by Japanese or Hannya specializations. Conversations on community forums often point to guest spots and conventions where you can book a slot with a specialist.
