
Fine line barbed wire tattoos look effortless on a saved board, but the minute you sit in the chair you start balancing line weight, placement, and how the design will weather sun and movement. The trick is choosing a version that flatters your skin type and your day-to-day life, then telling your artist exactly what to preserve. Read on for 21 concrete designs, what to ask for at consultation, and how each one actually ages.
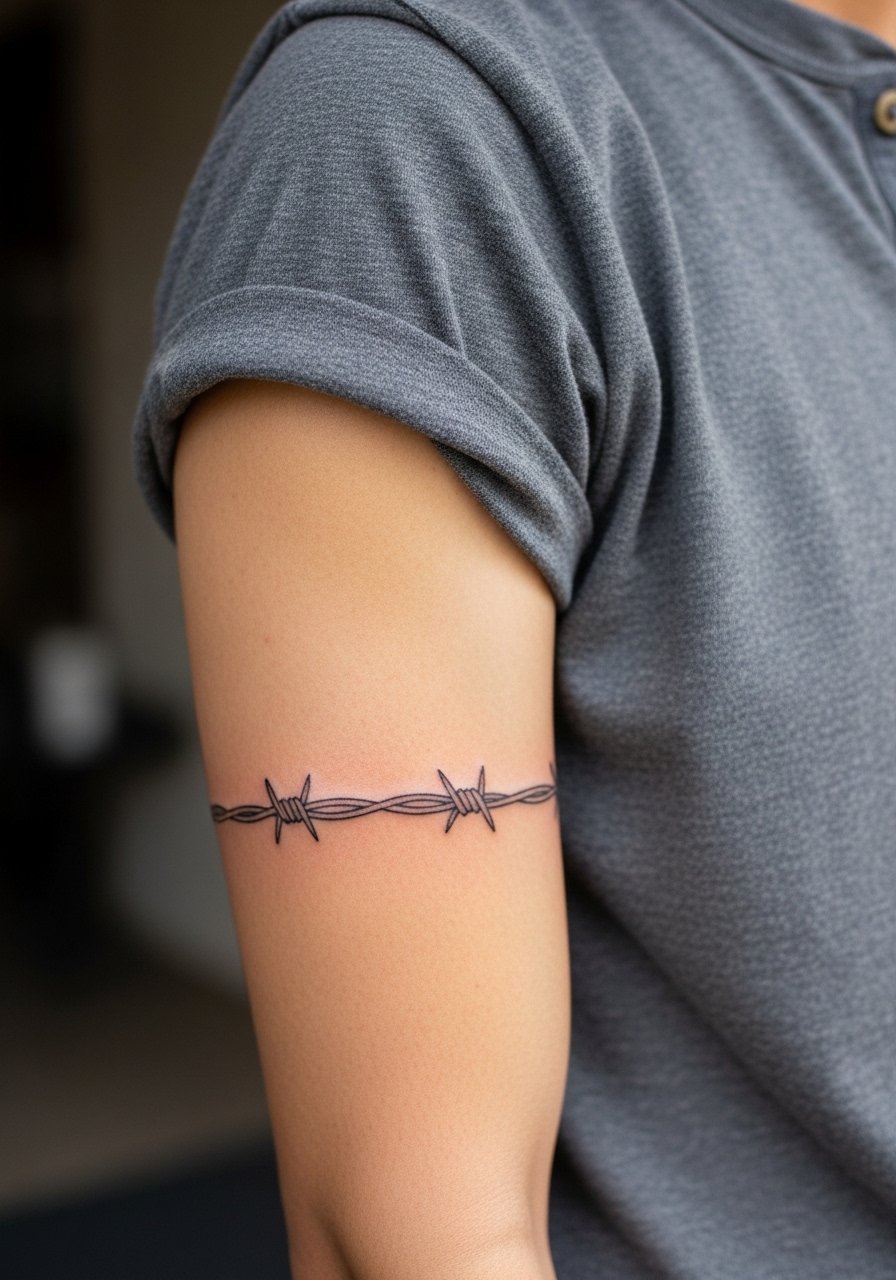
1. Fine Line Barbed Wire Armband
I've seen this one hold up best when placed on the outer forearm rather than the inner arm. Ask for single-needle linework with 1.5 to 2 inch band spacing so the barbs have breathing room. Fair warning, forearm armbands can look wavy after body changes, so discuss skin movement with your artist during the consult. Pain is low to medium and a single session is common. At six months the lines should still look crisp if you avoid heavy sun exposure. By two to five years expect softening and a likely touch-up around year two to three. For showing it off, pair it with a rolled cuff chambray shirt and a slim gold bangle on the opposite arm so the band reads clearly.
2. Minimalist Single-Strand Wrist Wrap
When someone asks for the smallest wrist wire, I suggest the inner wrist only if they accept yearly touch-ups. The biggest mistake with tiny wrist wraps is going too thin and too close to the vein line. Tell your artist you want slightly thicker single-needle strokes and clean spacing between barbs to prevent early blur. Expect higher fade risk because wrists see sun, friction, and frequent washing. Session time is short and pain is low to medium. For the appointment wear a sleeveless blouse or loose tee so the wrist is easy to access. After a year the band may need a touch-up, especially if you spend summers outdoors without SPF.

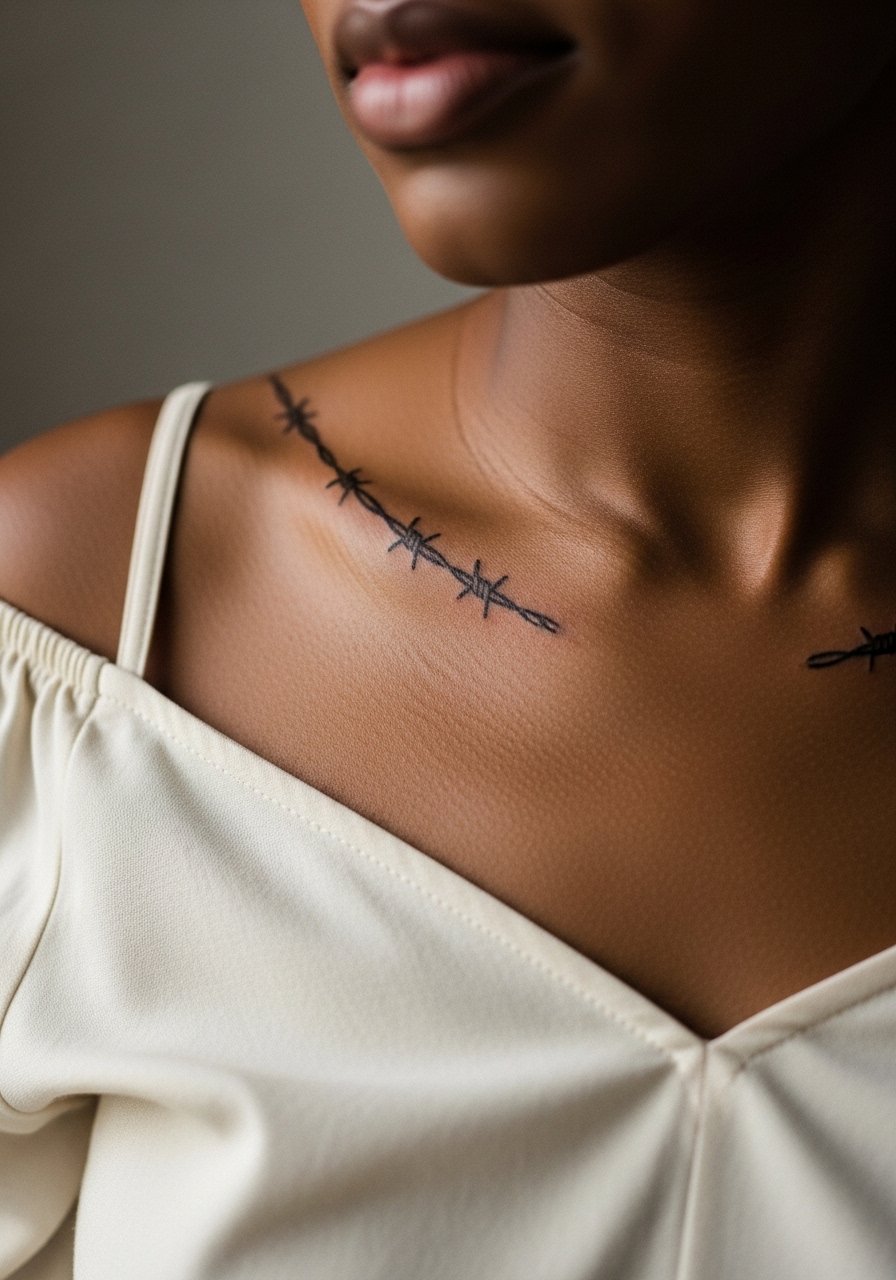
3. Heart Encirclement Over Collarbone
If you want toughness with a romantic edge, choose the collarbone version that sits just above the bone. Most artists will advise wider spacing and subtle gray shading so the heart reads well in photos. The collarbone area moves less than ribs so fine line shading tends to last longer here. Tell your artist you want the wire to sit lightly on the bone, not pressed into the hollow, and to mock up the stencil while you stand to check how it falls in clothes. Pain is medium and sessions may run longer for shading. For evenings pair the piece with an off shoulder blouse so the wire frames the neckline without competing.

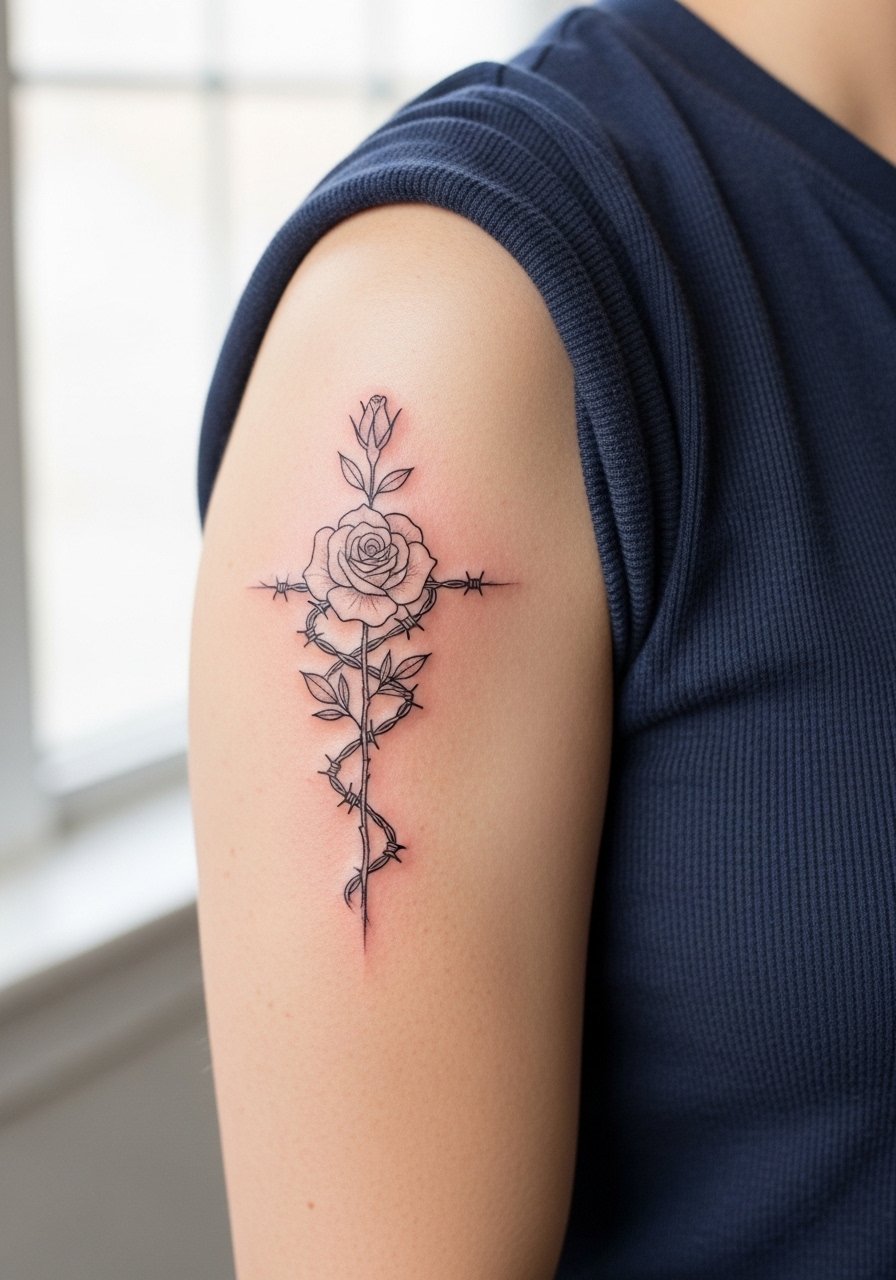
4. Rose Hybrid Along the Outer Shoulder
A rose woven through a barbed wire line softens the motif while keeping the single-needle aesthetic. Consultation lead here matters. Bring reference photos that show the exact bar spacing you want and ask for stipple shading in the petals instead of heavy gray wash. Shoulder placement moves with shirts but it is less friction-prone than a bicep wrap, so longevity is generally good. Session time can stretch if the floral detail is tight. Pair it with a fitted henley shirt rolled to the elbow to show the outer arm without blocking the art. A common mistake is asking for tiny petals that merge after healing, so go slightly larger than initial instincts.
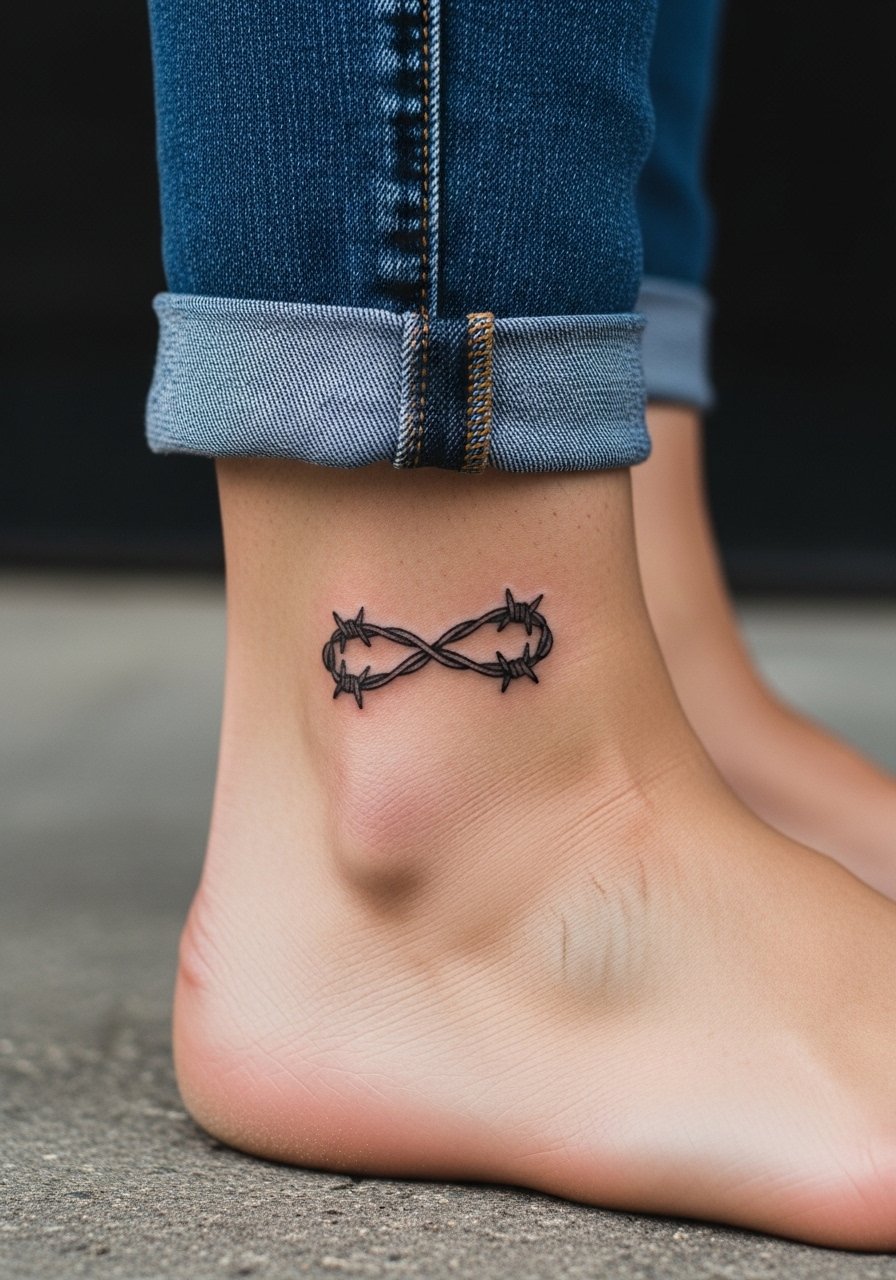
5. Infinity Loop Ankle or Finger Band
This thin line wire into an infinity loop works well as an ankle wrap or a micro finger band. If you pick finger placement expect higher fade because of daily hand use. For a finger band ask for a slightly heavier single-needle pass and minimal negative space clutter so the loop reads from multiple angles. Pain on the finger is low to medium and sessions are quick. Ankle versions show nicely with cropped jeans and sandals, so consider a cropped straight jeans look for summer. Touch-ups are common at year one for finger bands, but ankle bands often hold better if placed just above the bone.
6. Spine Column: Vertical Wire Stack
Fair warning, the spine is its own conversation. Artists split on whether super-fine single-needle columns hold on the spine. One camp says skin stretch and movement blur lines fast. The other camp says correct depth and spacing make vertical wires settle well. Ask your artist where they land on that debate and request slightly more spacing between barbs for long-term clarity. Pain is medium to high depending on the area. Expect 2 to 3 sessions if the column is long. For showing it off in the evening pick a backless halter top so the spine column gets the visual stage it deserves. A common mistake is asking for tightly packed barbs down the whole back which looks muddy once healed.

Before You Book
The wrist, finger and spine pieces above demand different prep and a slightly different healing plan, so a few targeted items make the session and the first week much smoother.
-
Tattoo Goo balm. Lightweight balm that users report doesn't leave a heavy shine, helpful for small wrist and finger work where residue shows in photos.
-
Unchained Ink Lotion. Thin, fast-absorbing lotion many find useful during summer armband heals to manage sweat without clogging.
-
Revert Derm salve. Tea tree formulation that some folks with darker skin use to calm itching while keeping the linework visible.
-
Frida Balm tattoo aftercare. Small-batch balm that absorbs quickly and avoids glossy residue on micro finger pieces.
-
Hustle Butter Deluxe. A common switch-after-day-three option for people who want a thinner ointment that does not sit heavy on fine needle channels.
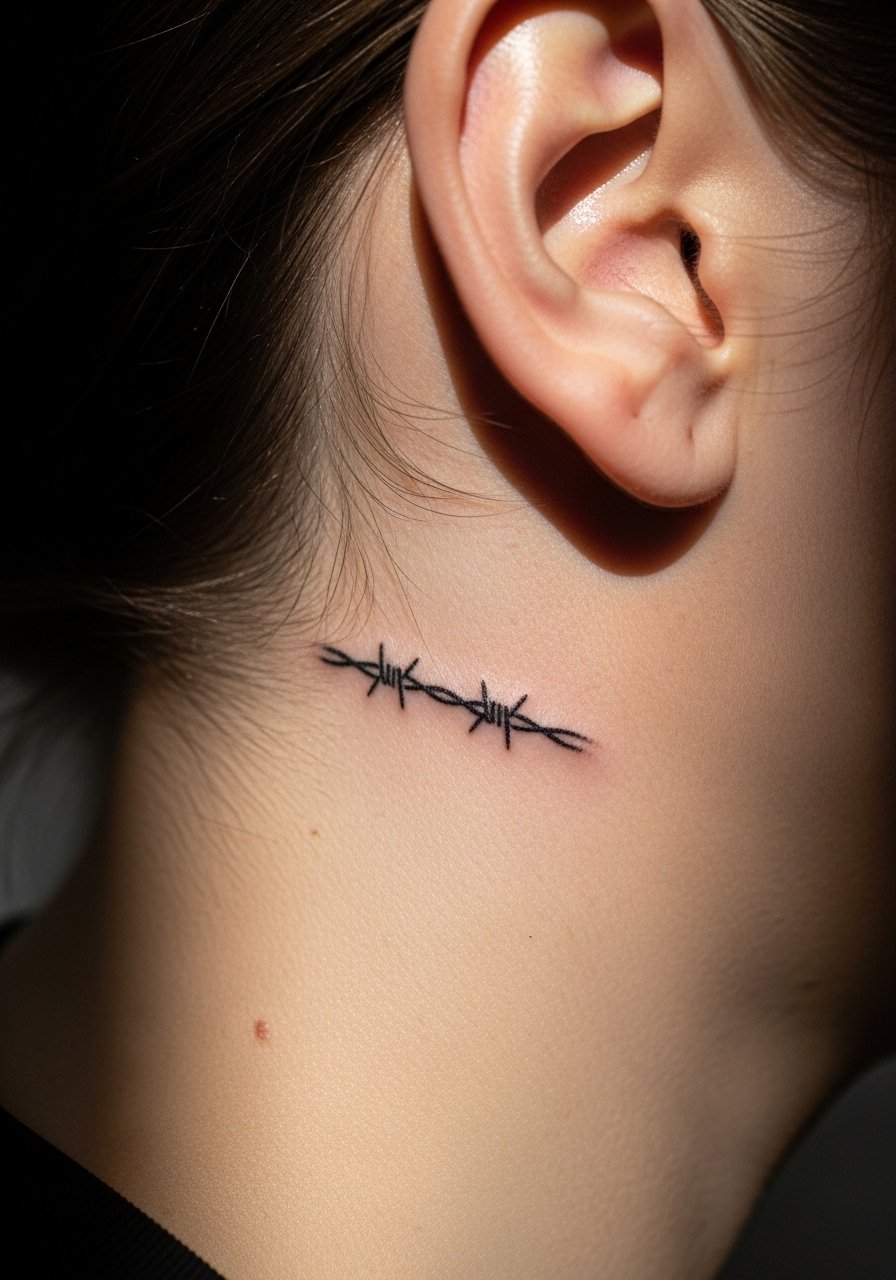
7. Micro Ear Outline Behind the Hairline
Micro placements behind the ear are ultra-discreet and ideal for collectors adding one small accent. For safety note, specify the area as "on the skin just behind the ear, below the hairline on the neck" so the stencil reads correctly. Tell the artist you want the single strand to curve with the head shape and not crowd the hairline. Session time is short and pain is low. Visibility is low in photos unless you pull hair back, which some people like. If you plan to show it off at a concert try a half-up hairstyle. This placement needs an artist comfortable with tiny, precise passes and may require a touch-up at year one because of skin texture and hairline oils.
8. Raven Fusion on the Outer Forearm
Combine a single-line barbed wire with a small raven silhouette for a moody, graphic feel. When you bring references, show healed examples so the artist balances the blackwork of the bird with the airy wire. The outer forearm reads well from across a room so scale matters. Expect medium pain and two sessions if the raven needs solid fill. A common mistake is over-detailing the bird at micro scale which can merge in two years. For a casual look pair the piece with a canvas minimalist watch opposite the art to avoid crowding. Ask for a healed mockup during consultation so you see how the bird and wire interact on skin.

9. Subtle Choker Over the Collarbone
Festival season favorites often go for a thin wire that reads like jewelry across the upper chest. Because collarbone placement needs modest coverage in photos, ask for a thin band with small, evenly spaced barbs and minimal shading. Pain is low to medium and sessions are brief. For show-off outfits pick an off shoulder blouse in cream or black and layer small necklaces above the band to create deliberate framing. A common aging issue is sun exposure on the chest during summer, so plan for touch-ups at year two if you love festival wear.
10. Wave Pattern: Calf or Rib
Wavy barbed wire mimics ocean motion and looks dynamic when placed on the calf or along the ribs. If you pick the ribs be aware artists are split on fine line there. One camp says the ribs shift too much and blur the work fast. The other camp says correct depth and spacing prevents merging. Talk through that with whoever will do your session. Calf placement is lower friction and often ages better. Rib sessions are medium to high pain and can take two sittings for longer runs. For summer show-off wear cropped midi skirts and sandals. The mistake to avoid is packing too many waves into a short span which collapses into indistinct shading when healed.

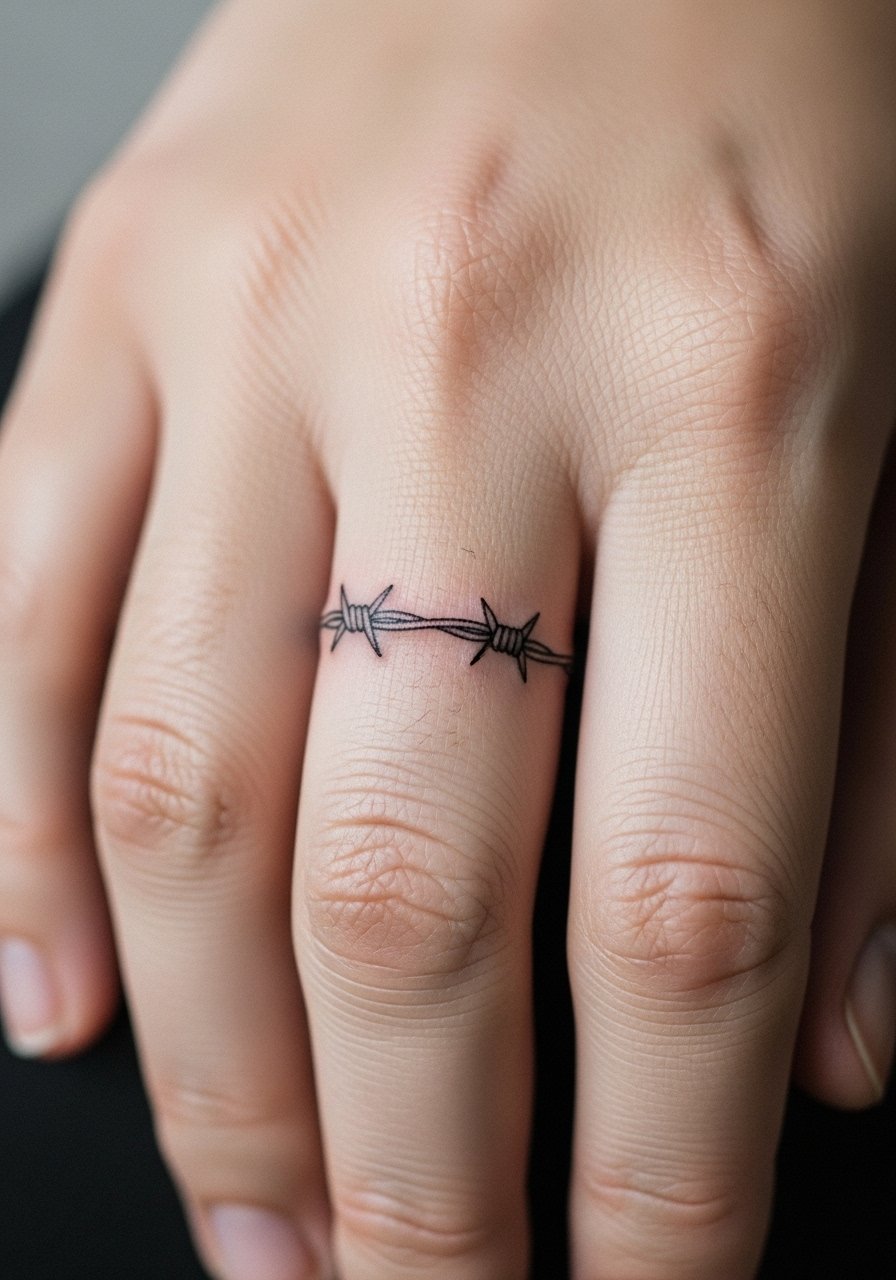
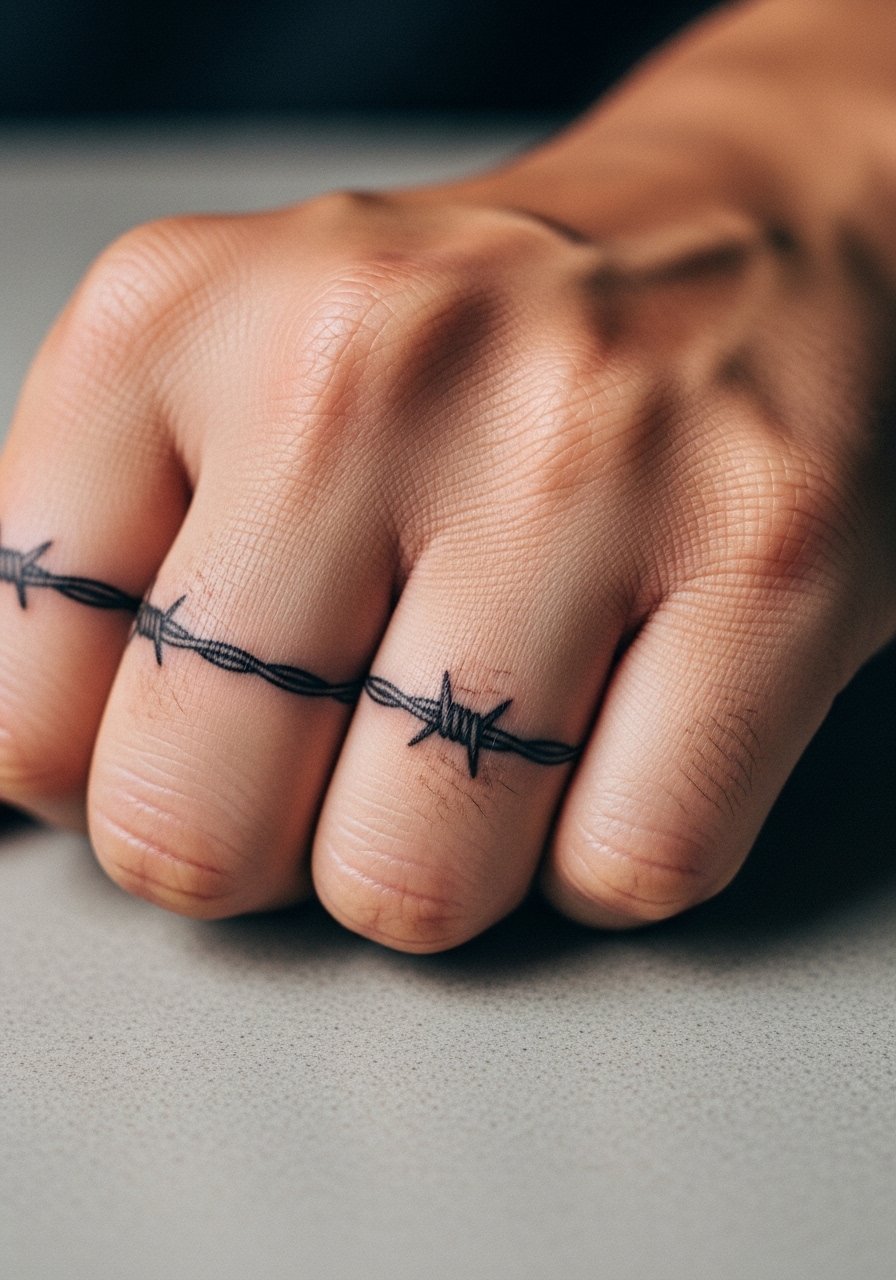
11. Dainty Finger Band With Tiny Barbs
Finger bands are fast and symbolic, but they ask for a thicker single-needle pass than larger pieces so the line survives soap, keys, and rings. Tell your artist you want a micro band with one consistent depth across the ring to avoid early gaps. Pain is low and sessions are short. Expect a likely touch-up at year one. For styling pair it with a thin stackable ring on the adjacent finger so the tattoo functions like jewelry without being crowded. A common error is overcomplicating the barb detail which blurs faster on the hands.
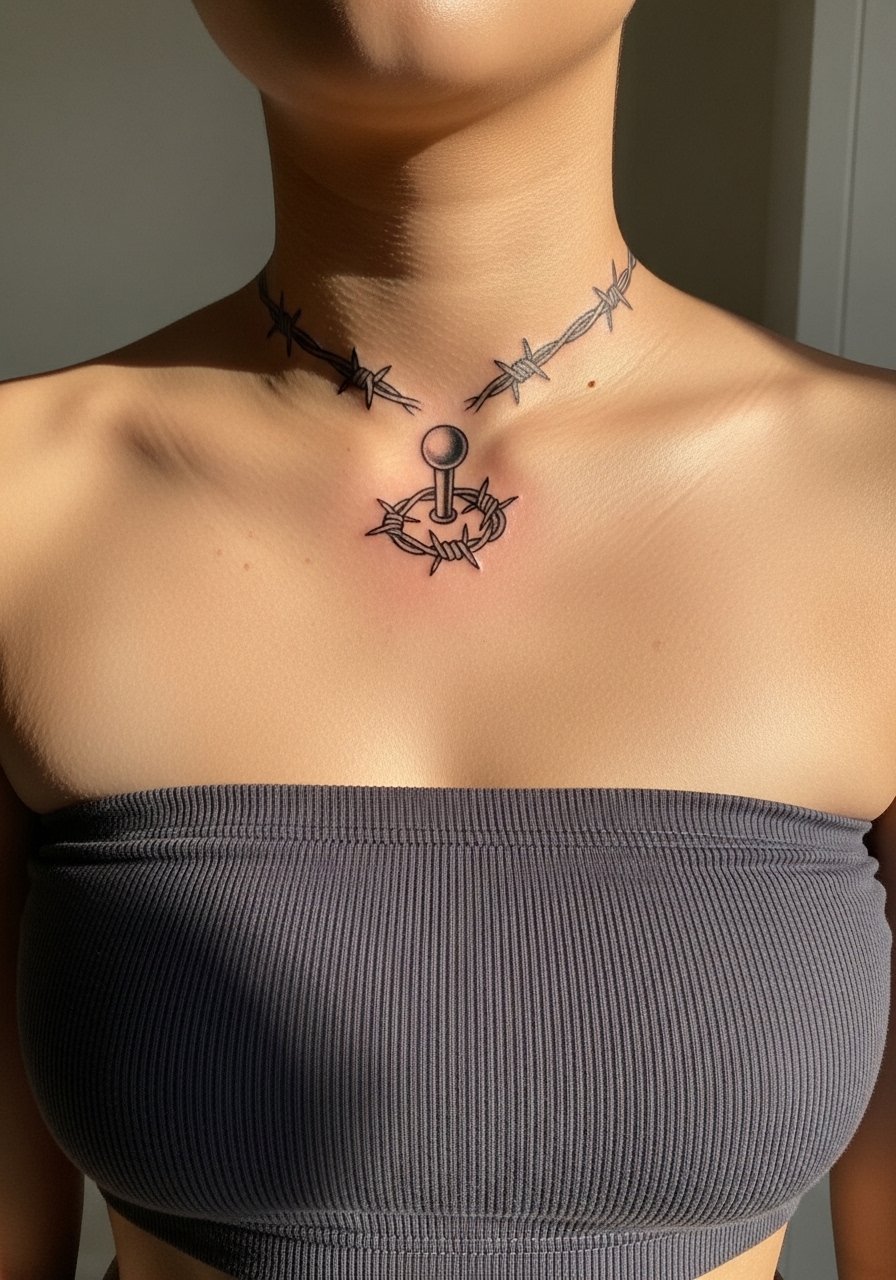
12. Optical Illusion Piercing Wrap on the Collarbone
This is one of the under-covered ideas that mimics a fake piercing using barbed wire ink around a small dot or stud motif. It reads like jewelry without metal and photographs beautifully if placed near the collarbone. Ask your artist for a subtle shadowing trick so the "pierce" appears slightly raised, not flat. Pain is low to medium and the session is short. For session wear choose a strapless crop top so the artist can position the stencil precisely. This idea requires a careful healed mockup so the optical trick survives post-heal lighting.
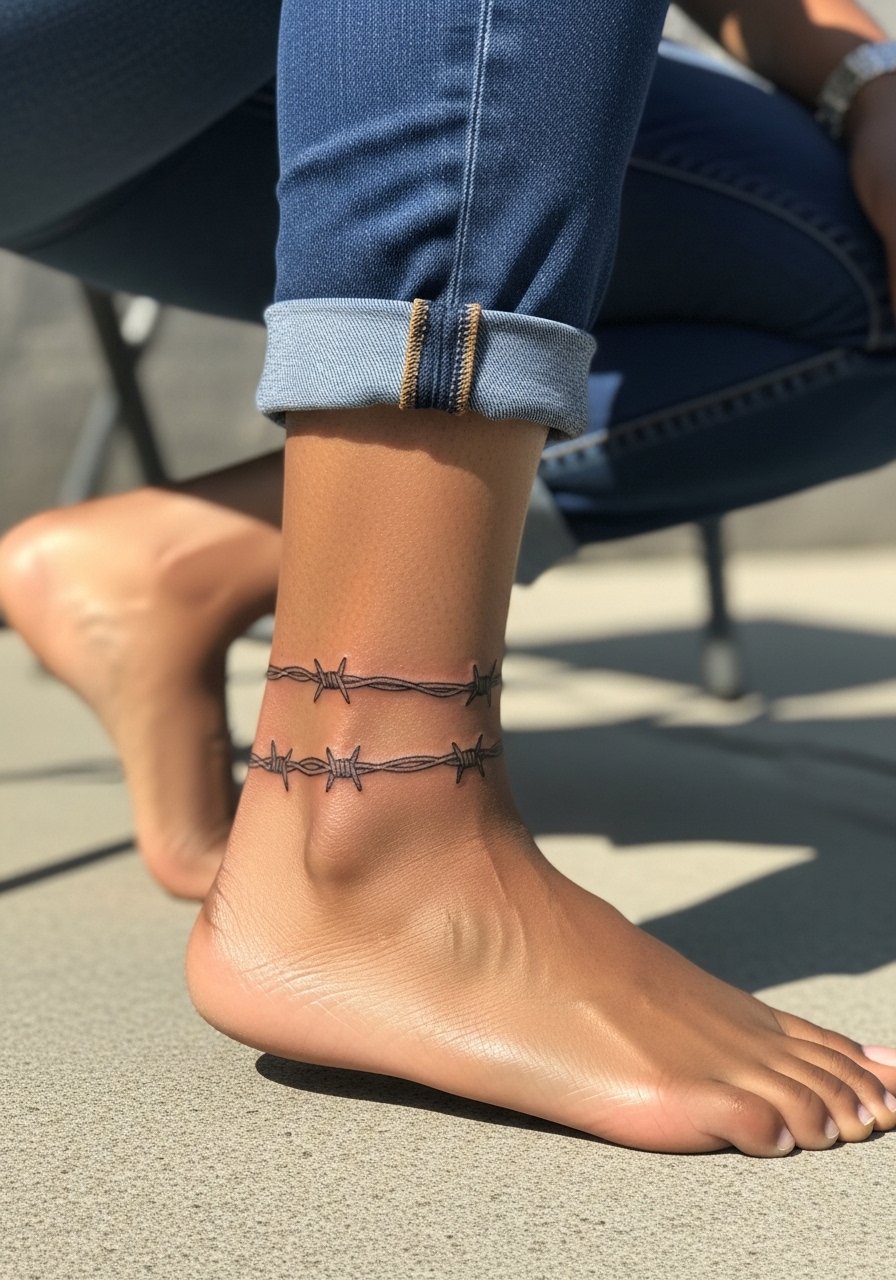
13. Chain-Link Jewelry Ankle Blend
A barbed wire rendered like a delicate chain link works as an ankle band that plays with accessories. Ask for slightly rounded barb knots and light negative space between links so it does not read like a solid band. The ankle tolerates single-needle work well and pain is low to medium. Session wear should be loose joggers or shorts so you can remove shoes easily and keep the area free during the session. A common mistake is asking for tiny, repeated links that merge; instead go for cleaner spacing and fewer repeats for longevity.
14. Knuckle Wire Letters Set
Knuckle placements amplify the attitude of barbed wire when placed across letters or small glyphs. The big caveat is aging. Knuckles face constant abrasion and fine line details fade fast. If you must, ask for bolder single passes and leave larger gaps in letterforms so the design keeps definition. Pain is higher and sessions can be short but intense. Many people choose thicker line weights here to reduce early blur. Hand placements can affect work options in some careers, so weigh that before booking. A common mistake is tiny script with barbs inside letters which becomes unreadable after healing.
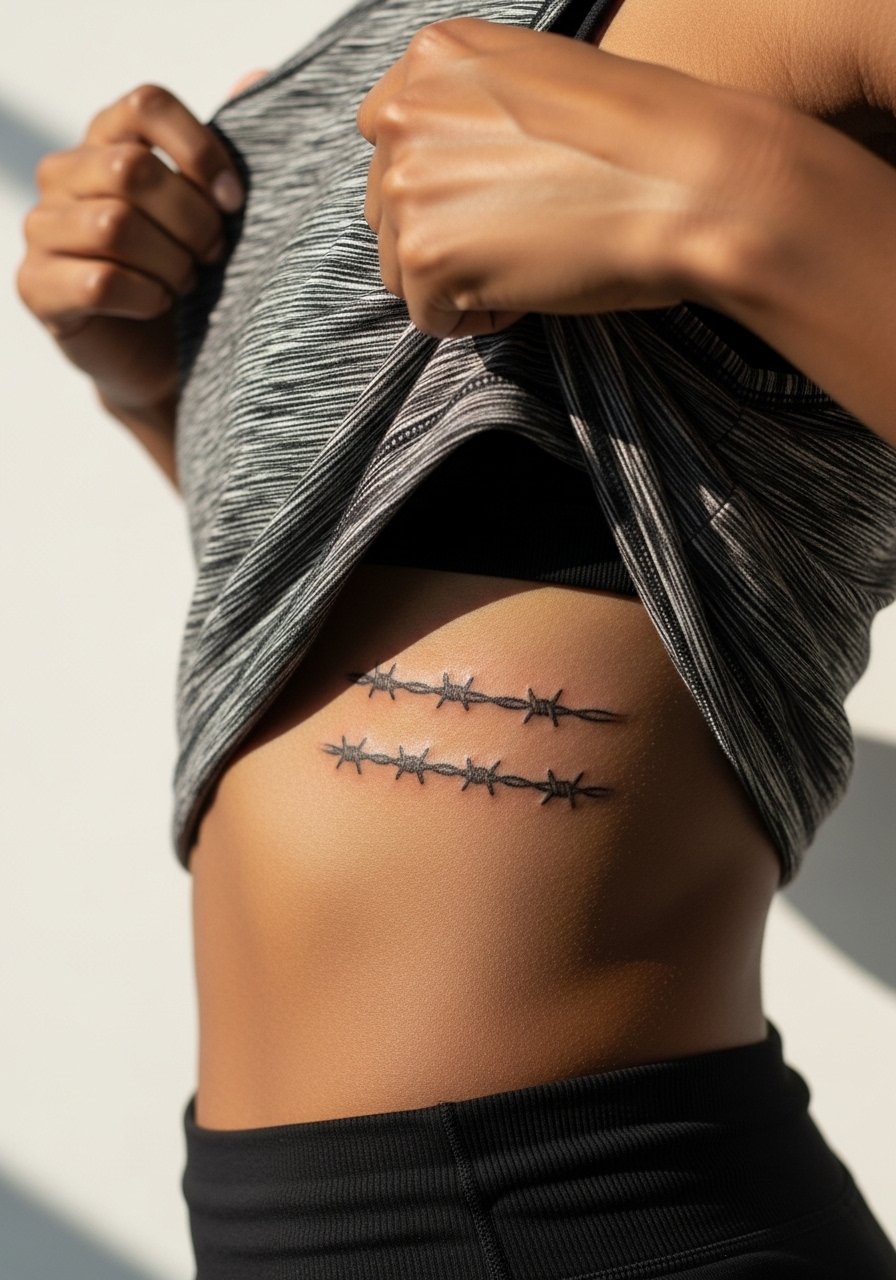
15. Ribcage Armband for a Curved Flow
Rib armbands that follow the torso curve look striking when proportioned to breath and movement. The controversy around fine line on ribs applies strongly here. One group says rib skin stretches and causes blur within two years. The other group argues correct needle depth and spacing make the ribs suitable for fine work. Bring this up in consultation and ask to see healed rib examples in the artist's portfolio. Pain is high and sessions often require breaks. For the appointment wear a cropped top or lifted shirt so the artist can place the stencil precisely. Avoid the mistake of packing too many tiny barbs into one curved band or they will merge.
16. Inner Bicep Micro Knot
An inner bicep knot of barbed wire makes a subtle statement hidden in sleeve folds. Ask the artist to raise the line weight slightly from the single-needle norm because inner arm skin can be soft and cause ink spread. Session feel is medium and the arm may be tender for a few days. For the appointment wear a tank top with arm holes that let the artist work without pinching. A common error is choosing too detailed a knot which flattens after healing. Expect a touch-up at six to twelve months for tiny inner-arm work.
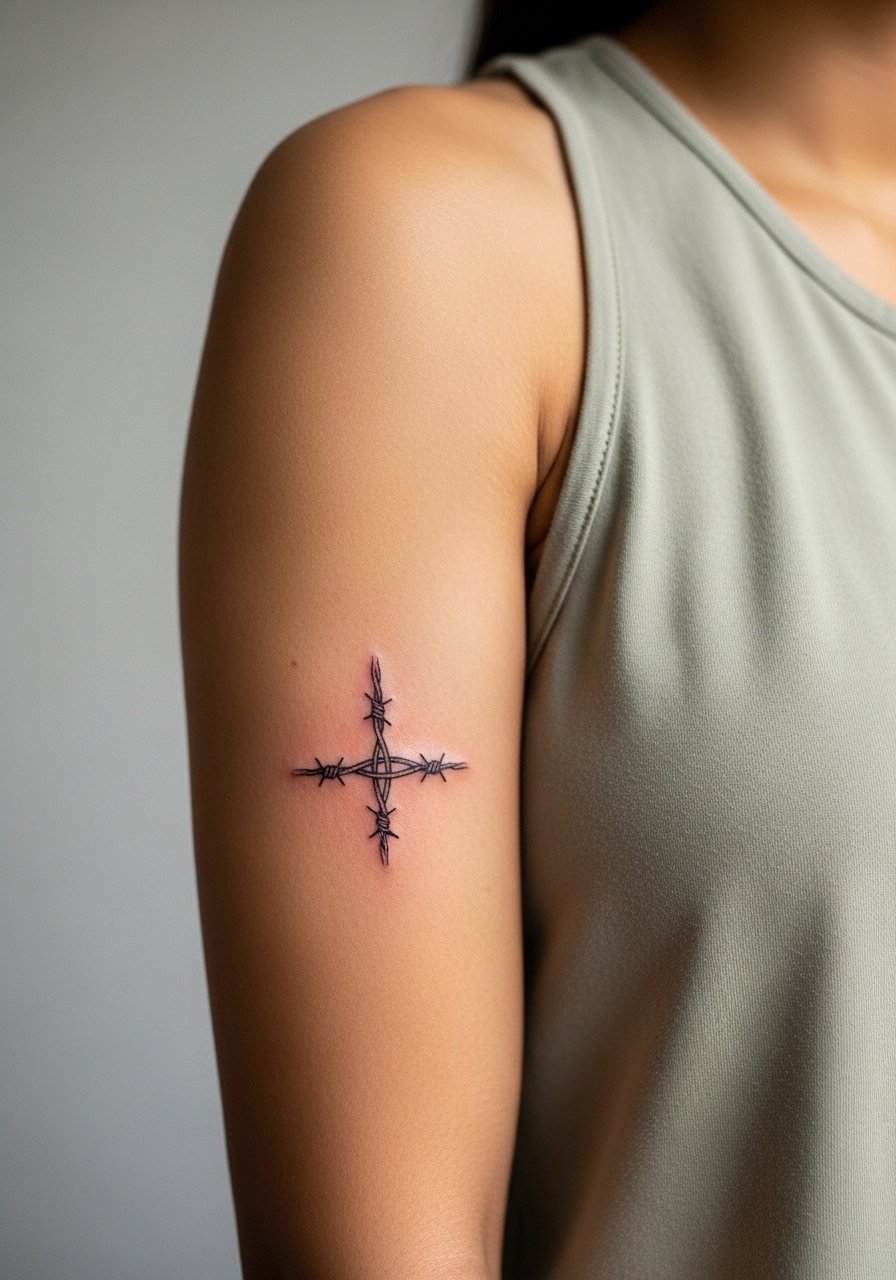
17. Arrow Fusion: Wire Meets Minimalist Symbol
Pairing an arrow with barbed wire is one of the most trend-resistant minimalist hybrids. The visual impact lead for this one is scale and spacing. Keep the arrow thin and the wire slightly thicker so the two elements do not compete. Ask for a healed mockup to confirm the arrow head aligns with the wire's barbs. Placement works on the forearm or collarbone and pain is low to medium. Session time is short. For casual styling the forearm piece pairs well with a loose fit tank top that lets you roll a sleeve and show the design. Avoid the mistake of crowding an arrow tip into the barbs, which visually muddies both elements.

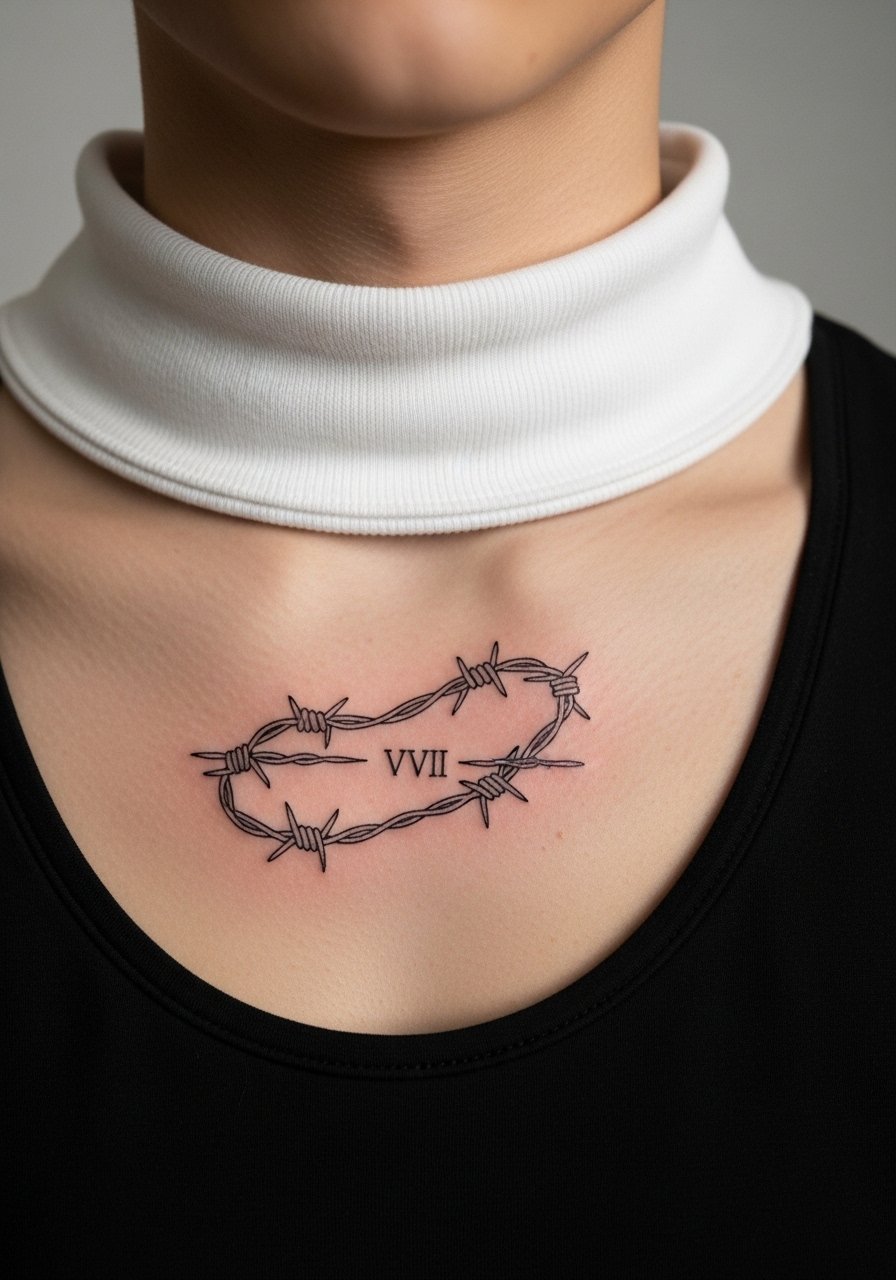
18. Memorial Wrap: Dates or Small Portrait Accent
Memorial wraps that incorporate dates or tiny portrait accents need careful scale choices. When a tattoo includes visible text be exact about the script in the stencil so the healed result is legible. Ask for slightly larger numerals or bolder micro script than you think you need. Placement around the chest or shoulder tends to last better than hands or fingers. Sessions can be longer because lettering needs precision. A common mistake is asking for too-small type which blurs with time. For discovery pathways search hashtags like #finelinebarbedwire and check guest spots on apps to find healed examples in portfolios before booking.
19. Thigh Botanical with Subtle Stipple Shading
A thigh piece gives room to combine barbed wire with botanical elements and stipple shading that preserves contrast on darker tones. Darker skin sometimes needs slightly thicker fine lines and light stipple for the petals so the wire does not disappear in photos. Tell your artist you want healed examples on a range of skin tones and ask for visual mockups. Thigh sessions are medium pain and can be scheduled in two parts for bigger pieces. For showing it off, high-waisted shorts or a midi skirt in olive will frame the work nicely. Avoid tiny petal clusters that blur; instead pick fewer, stronger elements.

20. Tiny Constellation Ankle Accent
Use a short barbed wire segment as the spine for a tiny constellation or star motif on the ankle. The visual lead matters here. Keep the constellation airy and the barbs spaced so the small stars do not overwhelm the line. Pain is low and sessions are quick. For wardrobe pairings cropped pants or sandals and a midi skirt so the ankle becomes a deliberate focal point. During the session wear easy shoes so the artist can reach the area without pressure. A common mistake is clustering stars too tightly around the barbed wire which turns the piece into a blotch in photos.

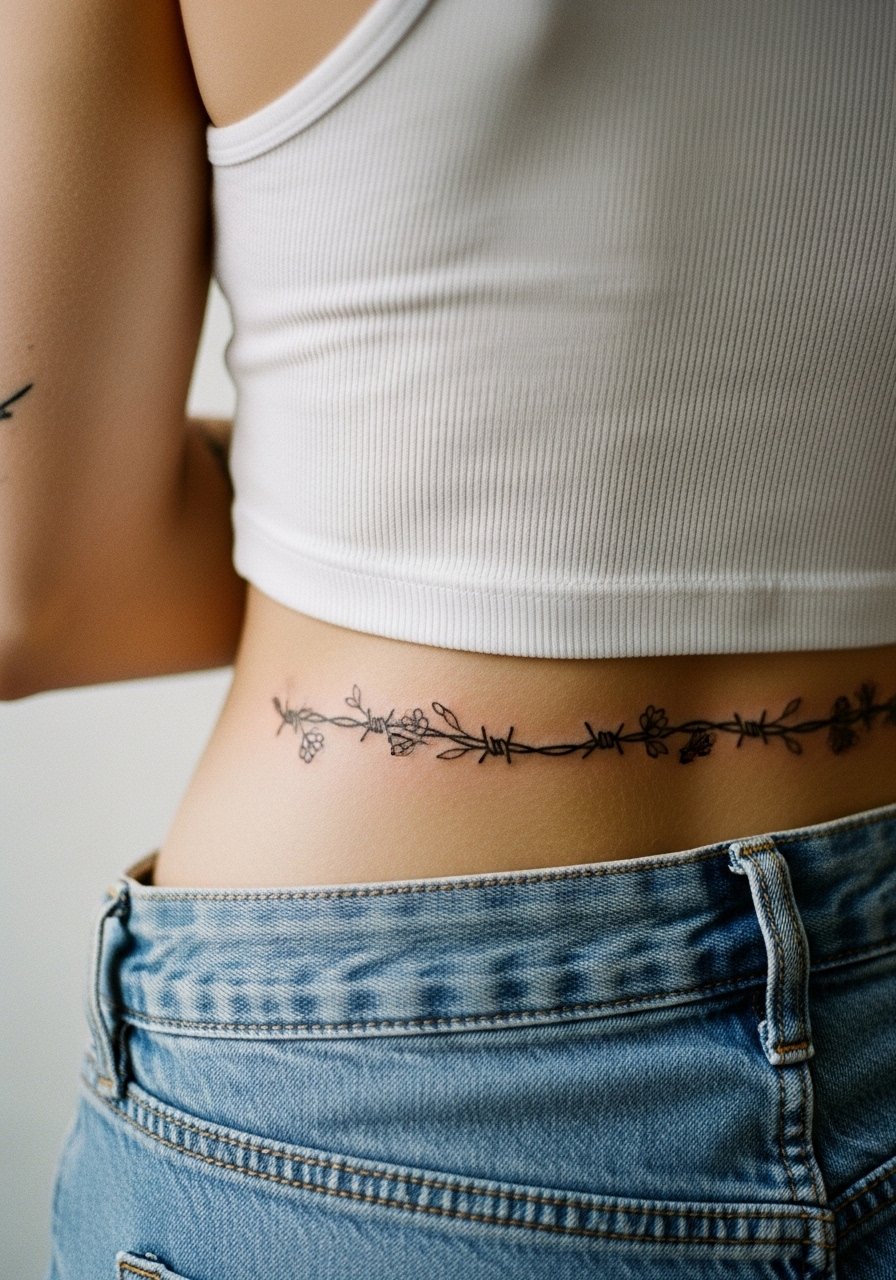
21. Lower Back Floral Wire
The lower back allows a horizontal, slightly curved barbed wire that threads through floral shapes. Sensitive placement rules apply. Show up in a tank top or with high-waisted jeans so the artist only sees a narrow area and no full back exposure. Ask for slightly bolder single-needle passes and stipple shading to keep the petals visible over time. Pain is low to medium and the piece can be shown with low-rise or high-waisted evening looks. A common mistake is maximal detail in a thin lower-back strip which becomes indistinct after healing. For evenings choose a low back dress to let the piece breathe.
Frequently Asked Questions
Q: Will a fine line barbed wire on my wrist blur within a year?
A: It depends on your routine. Wrists see sun, washing, and friction. I've noticed wrist pieces with slightly heavier single-needle passes and wider barb spacing hold better. Expect a touch-up around year one to two for most wrist bands.
Q: Are ribs a bad spot for fine line barbed wire because of stretch and movement?
A: Artists are split. One camp says ribs shift and blur thin work fast. The other camp says spacing and depth can keep lines crisp. Ask to see healed rib examples from the exact artist and request wider spacing if you want longevity.
Q: How do fine line wires read on darker skin tones, and what should I ask for in consultation?
A: On darker skin a slightly thicker single-needle pass and light stipple shading will help visibility in photos. Ask your artist for healed examples on similar skin tones and for a test flash in a low-profile area if you want to preview results.
Q: How should I dress to a session for a collarbone, shoulder, or thigh wire?
A: For collarbone wear a strapless crop top or wide-neck shirt you can pull aside. For shoulder bring a button-down or tank. For thigh choose loose shorts so the leg is easy to expose.
Q: Do finger and knuckle barbed wire tattoos require different aftercare than forearm pieces?
A: The aftercare window is similar but the risk profile differs. Hands and fingers face more abrasion and washing. Expect earlier touch-ups and avoid heavy manual work in the first two weeks to limit fade. The protective and moisturizing choices you make in week one have outsized effects on these micro placements.
