
Sitting in the chair with the stencil aligned over the collarbone is the moment most people realize how visible this placement will be every time they wear a wide-neck top or necklace. The collarbone catches light and movement, which amplifies both delicate linework and small flaws. Read on for 27 tiny collarbone ideas that balance longevity, pain, and how you actually want them to look when you pull on a shirt the morning after.
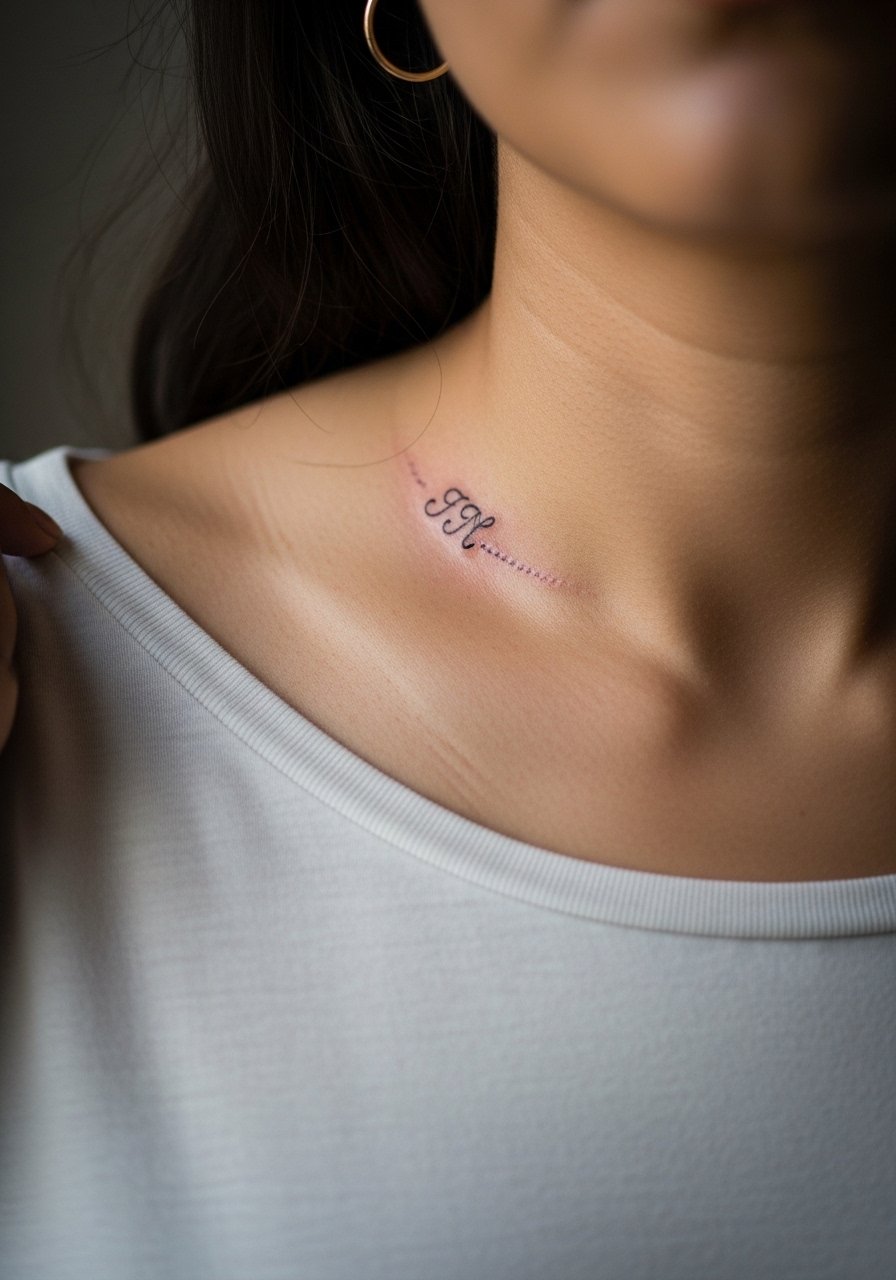
1. Minimal Script Along the Collarbone
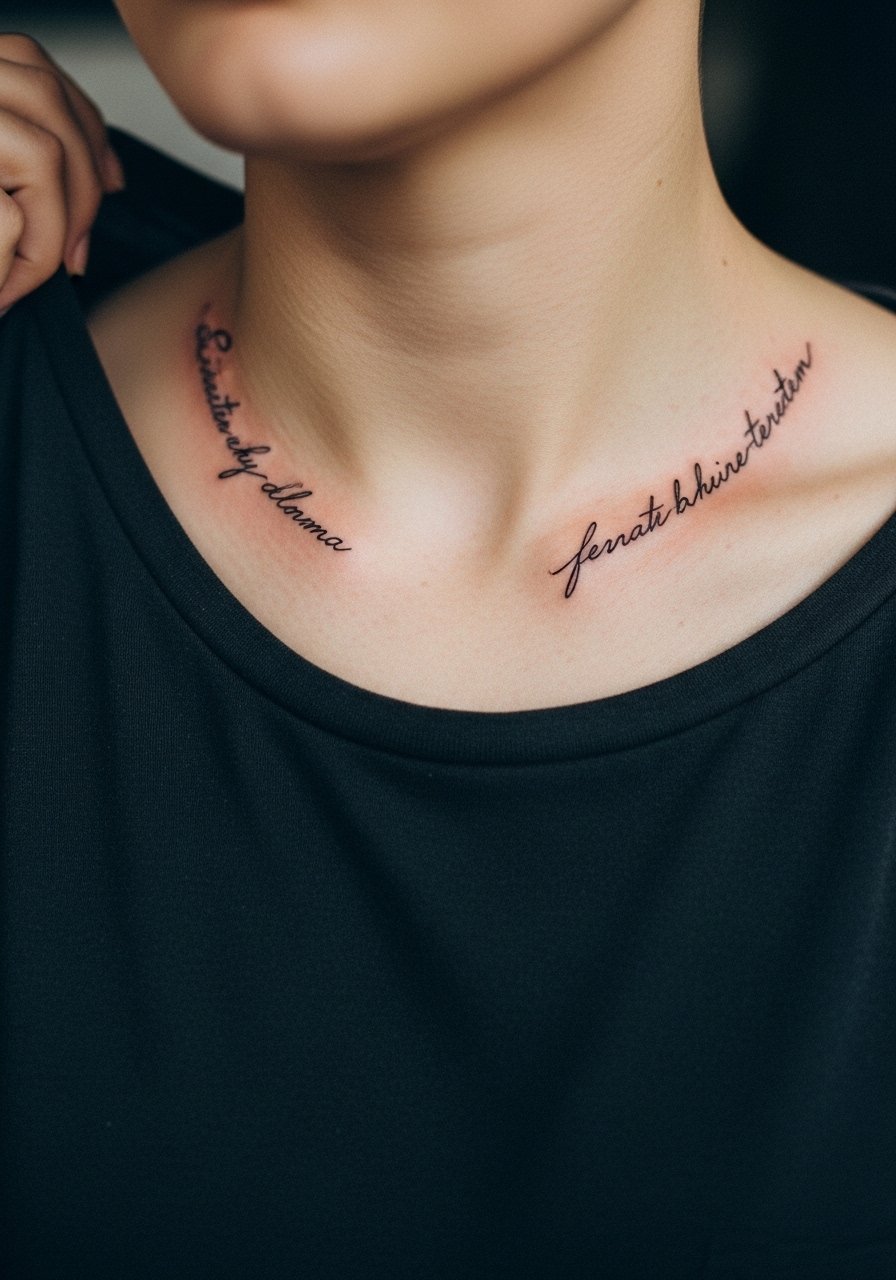
Sitting slightly above the clavicle, a thin script feels personal and reads well with shoulder movement. Fair warning, very thin single-needle script on the collarbone can fade into faint hairlines by year three if the strokes are too narrow. Ask your artist for slightly heavier linework than the photo reference so it holds as the skin stretches. For showing it off, a thin chain pendant necklace sits above the text without competing. Expect a short session and moderate sensitivity because the bone sits close to the surface.
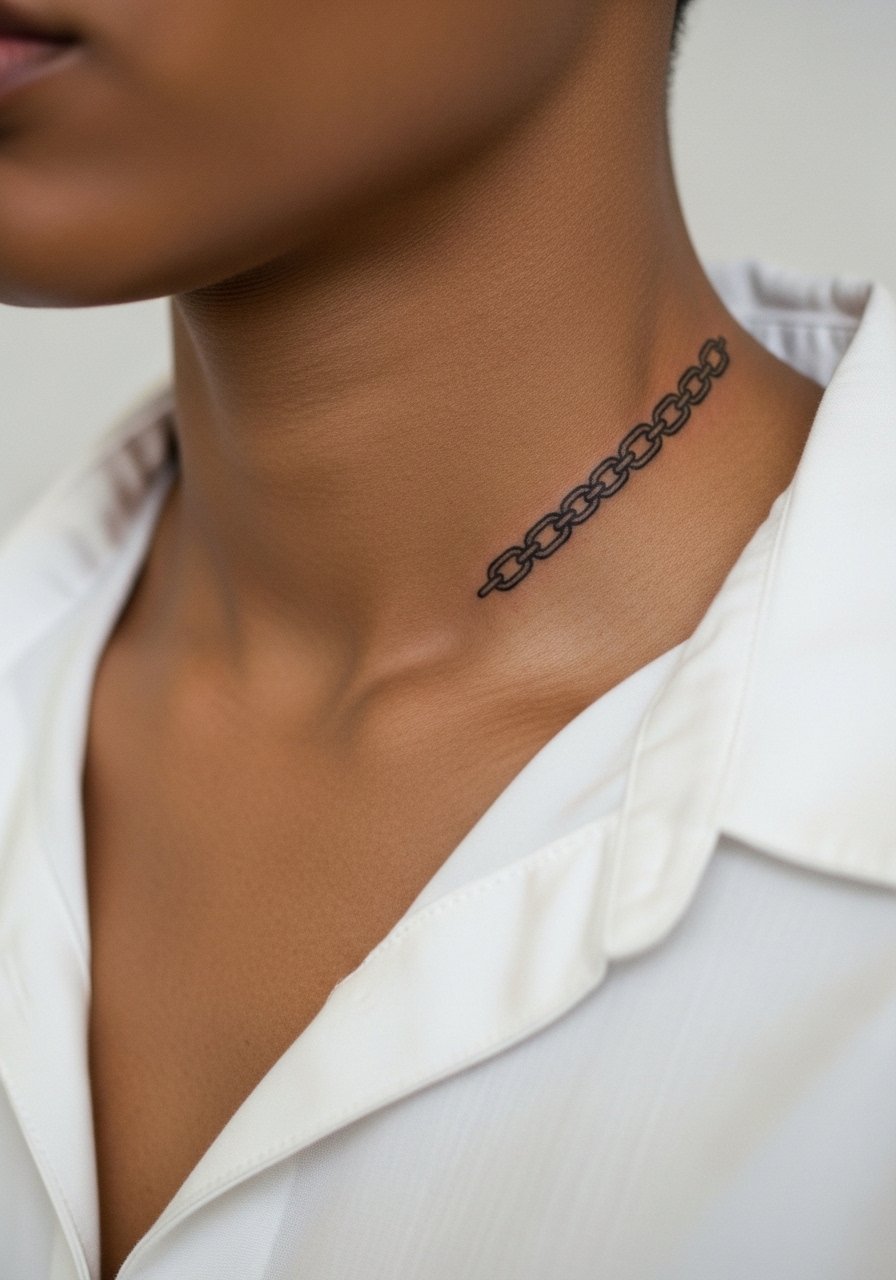
2. Tiny Anchor Offset on the Lateral Clavicle
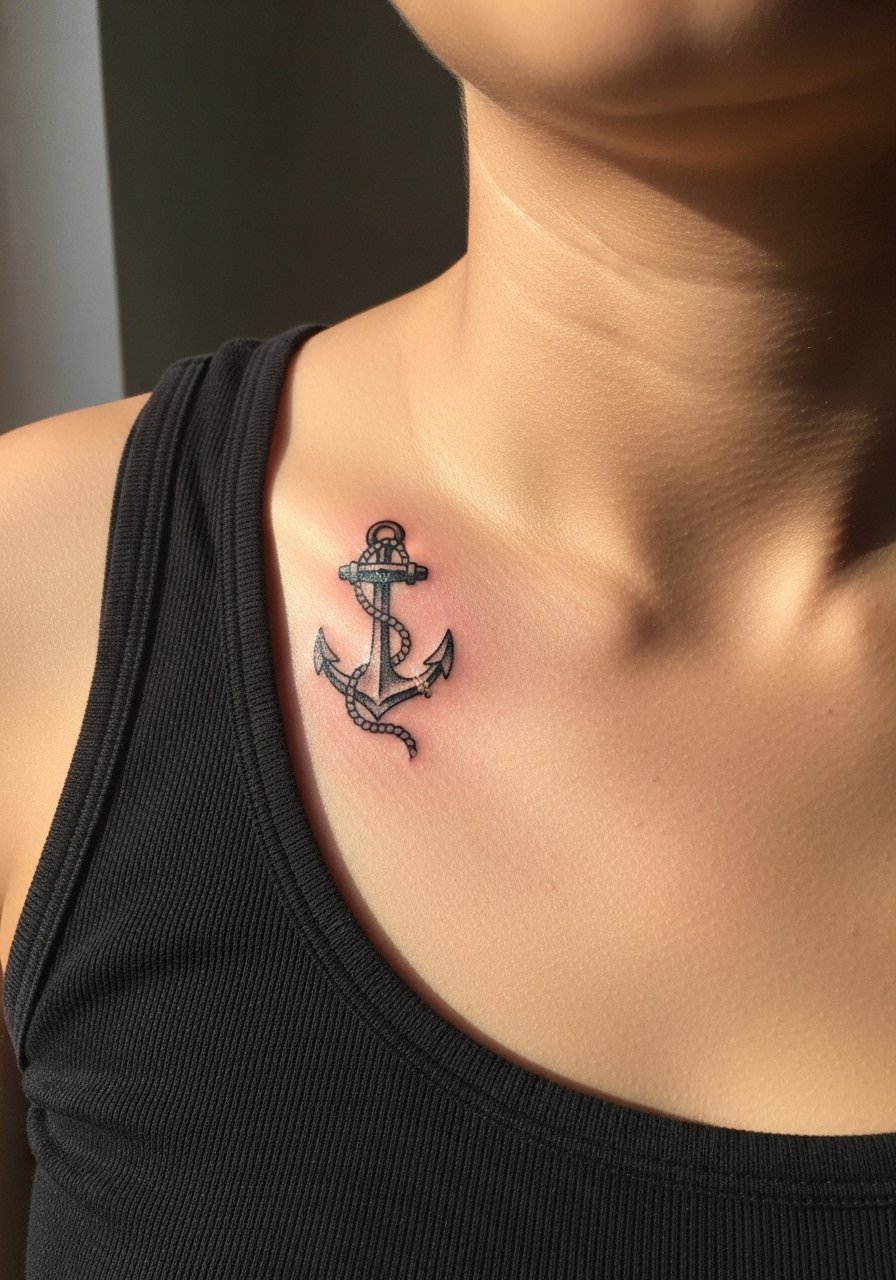
I've seen this placement make a big visual statement while staying discreet. The anchor does best with solid linework and a small amount of saturation to avoid early fading. Tell your artist you want clean edges and a modest fill rather than soft shading that will blur against the bone over time. For the session, wear a wide-neck tank so the artist has clear access. Pain is moderate because the clavicle is thin under the skin, and touch-ups may be realistic at year three for crisp edges.
3. Micro-Realism Bee Above the Collarbone

Micro-realism looks delicate on the collarbone but carries risk. The controversy is clear. One camp says micro-detail on thin skin loses clarity quickly because the needle deposits sit shallow. The other camp argues precision and slight spacing preserve form. Ask about needle grouping and spacing in consultation so detail sits in the skin, not on top of it. For styling, a delicate pendant necklace frames the motif without overwhelming it. Expect a focused, slightly longer session than a simple line piece.
4. Single Dot Constellation Row

This subtler route uses dot work to suggest a constellation rather than literal stars. A common mistake is clustering dots too close. The collarbone needs tiny gaps so dots do not merge as the skin settles. Tell your artist you want clear negative space between dots and minimal surrounding shading. For outfits, a v-neck linen blouse complements the horizontal line and lets the dots show when you lean forward. Pain is moderate and the session is short.
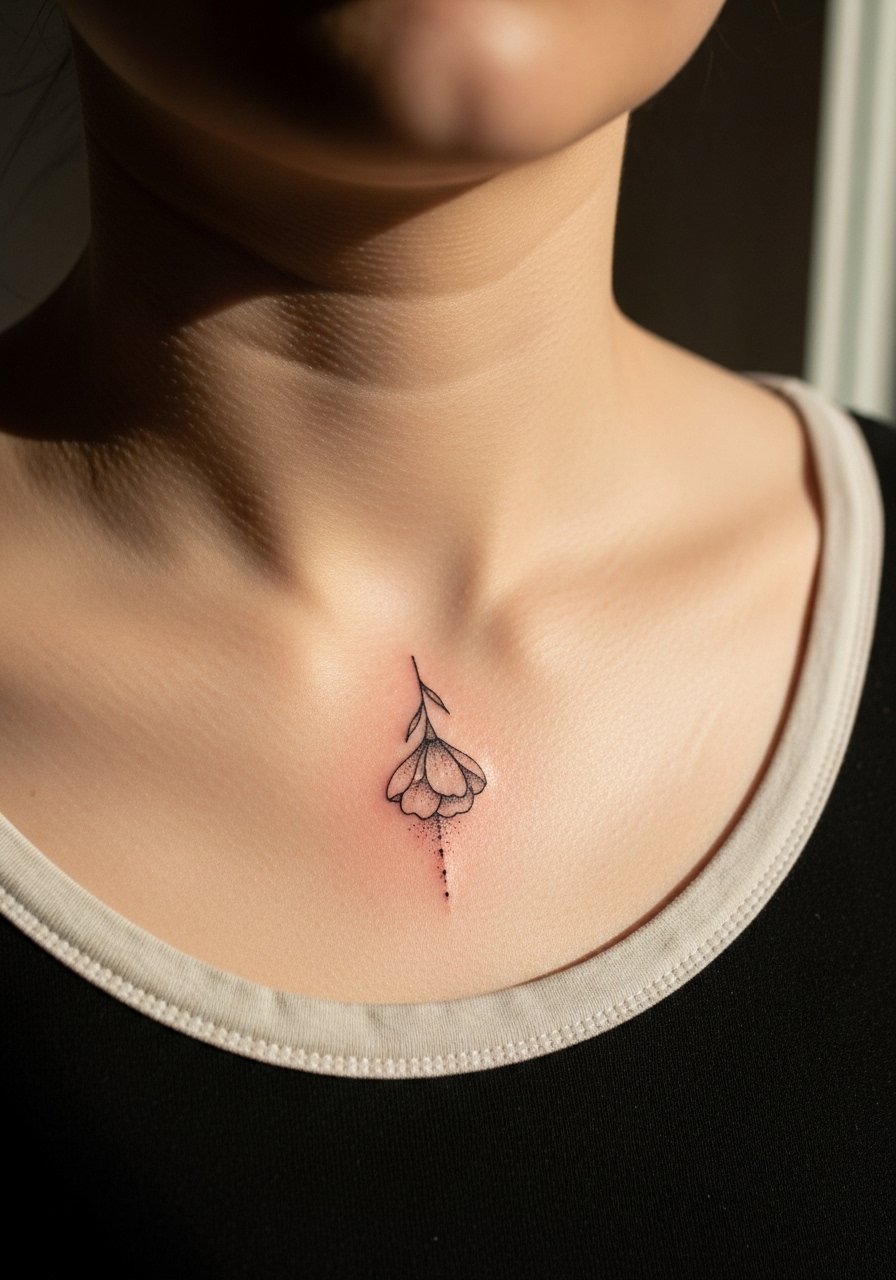
5. Small Floral Sprig Nestled in the Hollow
There is a reason florals are popular here. A tiny sprig follows the bone naturally and flows with clothing. The trick is to avoid ultra-fine leaf veins that soften into a blur at two to three years. Ask for slightly open spacing in the leaves and a touch of stipple shading for dimension. For showing it off, a racerback tank or an open-collar shirt frames the sprig. Expect a gentle but stinging session near the bone with a likely touch-up window at year three.
6. Minimal Geometric Dot Cluster Centered on the Clavicle

The clustered-dot geometry reads modern without being busy. A visual impact lead: it sits small but reads from across a room because of contrast. The common version that ages poorly uses too many tiny dots in a compact area. Go for fewer, larger dots with spacing. For the session, wear a loose button-down shirt so the artist can shift fabric without rubbing the fresh tattoo. Pain is moderate and the session time is short.
Chair Day Prep
The tiny placement and bone proximity of the first six ideas mean small adjustments make the chair day and week after easier.
-
Stencil transfer paper kit. Lets you preview placement and curve along the collarbone before the needle hits skin, which matters for asymmetrical designs.
-
Topical numbing cream. Applied per directions before a sensitive collarbone session eases the sting without changing how the artist works.
-
Thin protective film roll. Holds delicate linework in place during the first days when necklaces and clothing might rub the area.
-
Fragrance-free gentle body wash. Cleanses the collarbone zone without stripping moisture that fine linework needs to heal.
-
Aquaphor healing ointment. A thin layer helps lock in moisture for tight linework during the initial healing window.
7. Tiny Roman Numerals Along the Bone

When you want a date but not a headline, tiny Roman numerals are discreet and graphic. Consultation lead: specify exact font weight and spacing so the numerals do not run together as they settle. Text in image prompts must be exact for clarity, so bring the exact characters you want. Pair with a thin chain pendant placed just above for balance. Expect a short, mildly sensitive session and potential touch-up in two to three years if lines soften.
8. Small Wave Line Following the Collarbone Curve

Visual impact lead: a tiny wave reads dynamic because it moves with the shoulder. The mistake people make is asking for a hairline weight that disappears. Ask for a slightly stronger single-line and discuss consistent lineweight during consultation. For casual outfits, a low-cut linen blouse highlights the curve. Pain is mild to moderate and session time is brief.
9. Tiny Heart Edge-Of-Collarbone
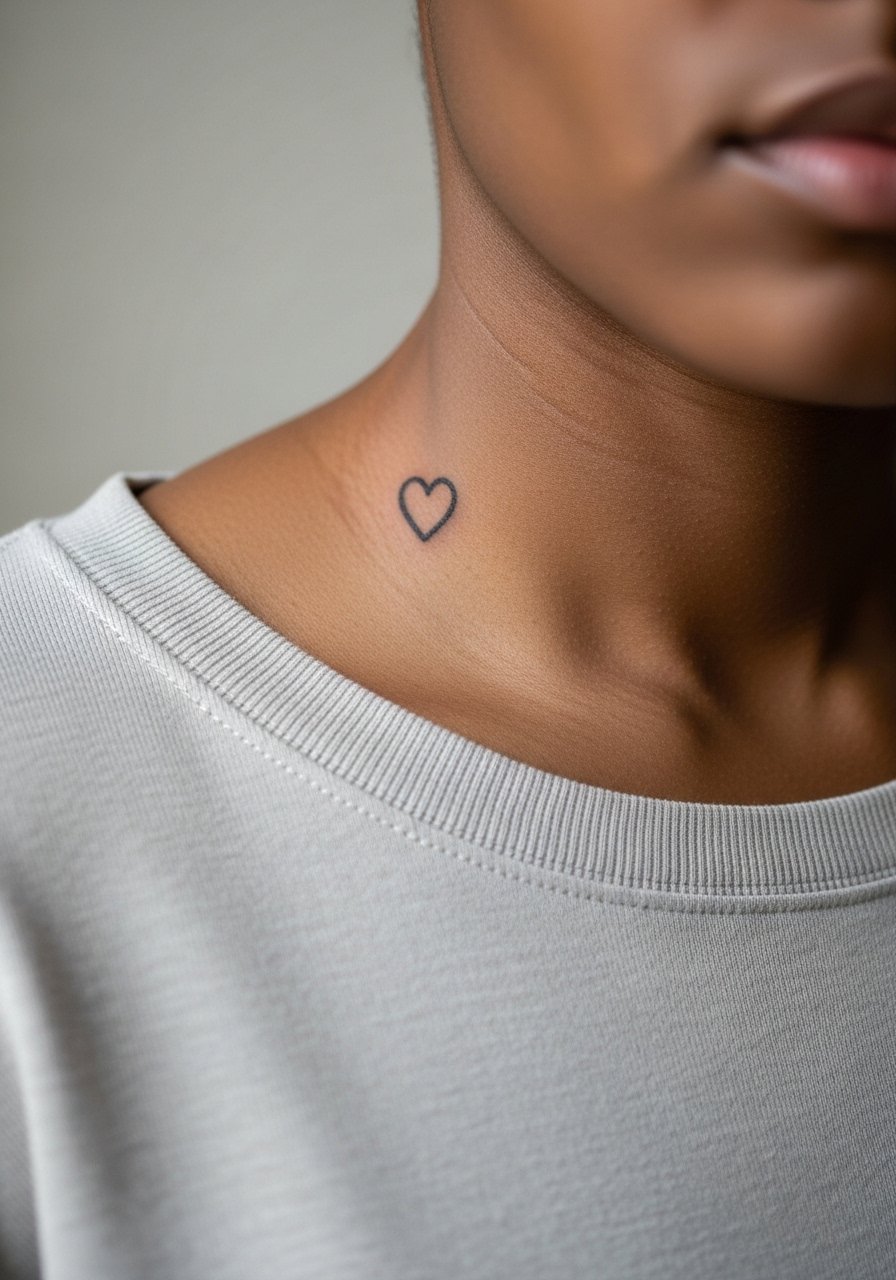
Personal observation lead: tiny hearts at the collarbone edge age well when done with slightly bolder outlines. The common aging issue is overly thin outlines that fade into faint smudges. Tell your artist you prefer a small, clean outline with a touch of saturation. For showing it off, a crew neck t-shirt with a lower neckline works well. The session is quick and sensitivity is moderate because of the nearby bone.
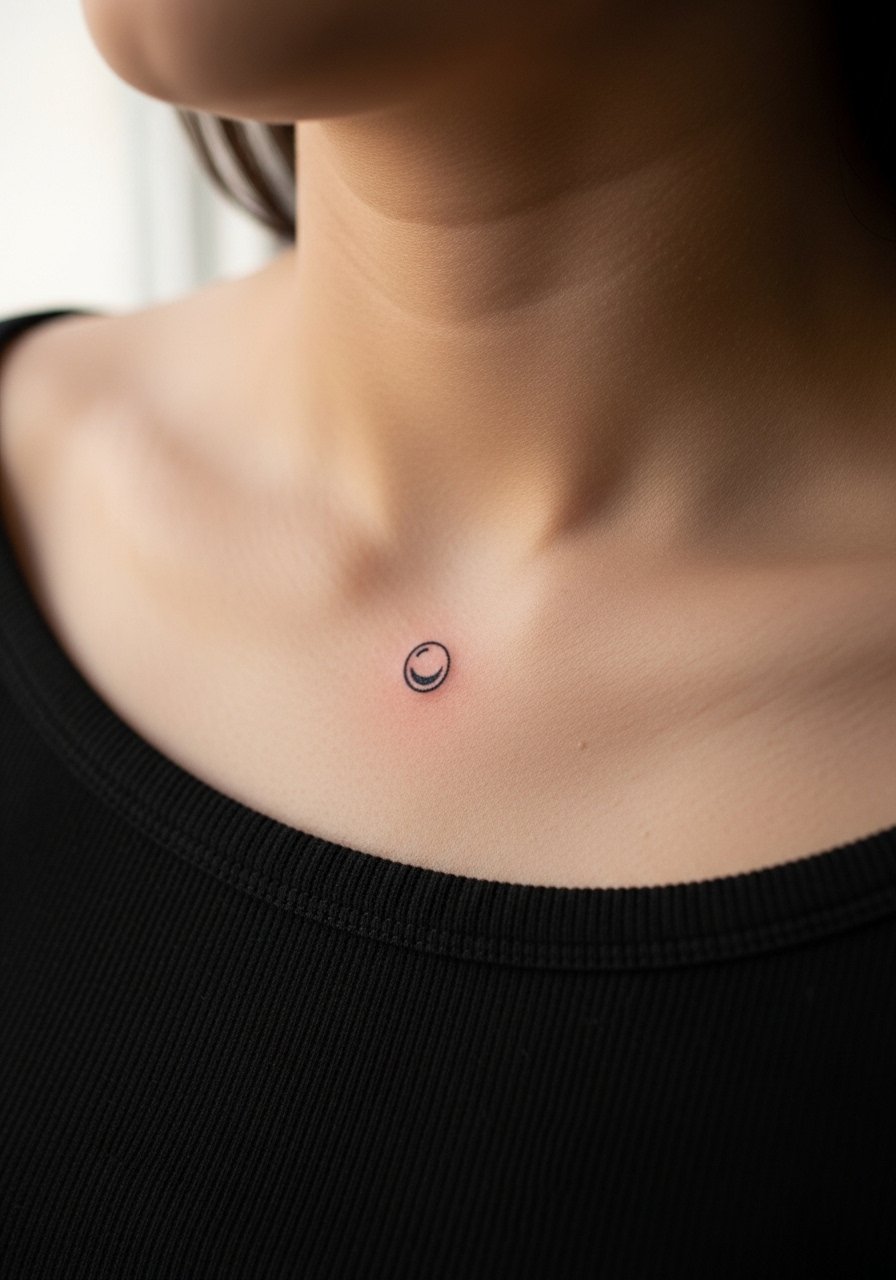
10. Mini Crescent Moon Nestled Above the Clavicle

Aging/healing lead: moons with filled black age predictably well, but crescent linework can soften. The safer version uses a moderate line weight or slight stipple inside for longevity. In consultation, ask for consistent curvature and a reference indicating line thickness. Pair with a delicate choker that sits above the crescent for an intentional layered look. Expect a quick session and low blowout risk with proper technique.
11. Tiny Arrow Pointing Toward the Heart

Mistake lead: arrows often look weak when too thin. Go for a balanced shaft size and a defined arrowhead so the symbol reads at a glance. In consultation, bring reference for the head and tail proportions. For session day, a v-neck tee allows artist access and keeps you comfortable. Pain is moderate and touch-up at year three is realistic for crisp geometry.
12. Tiny Anchor Chain Link Cluster
Consultation lead: when multiple small connected elements sit close to bone, spacing prevents future merging. Tell your artist you want a little extra kerning between links. For showing off, a delicate layered necklace set complements the linear feel without crowding the area. The session is slightly longer than a single motif and sensitivity is moderate.
13. Tiny Morse Code Line for a Secret Word
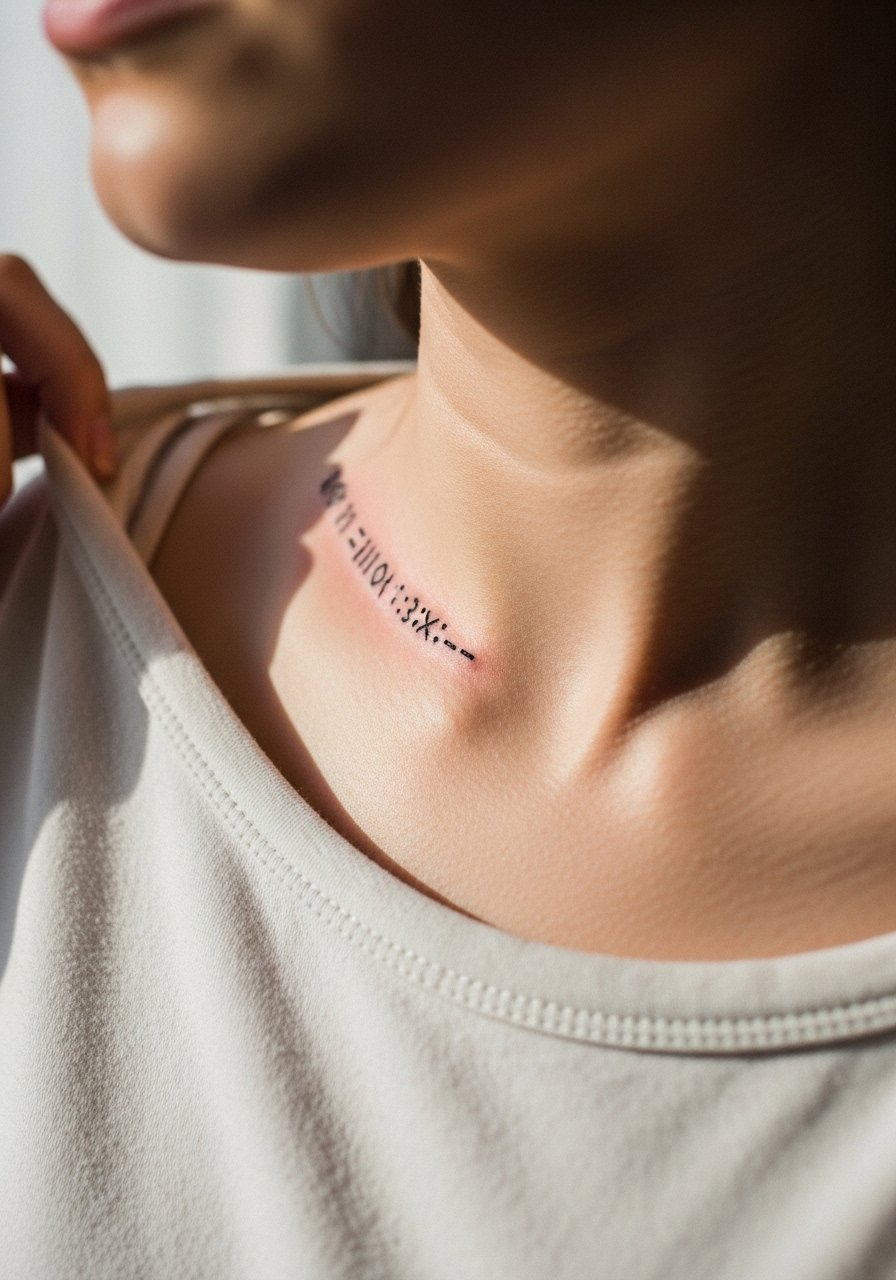
Personal observation lead: morse code reads as a minimalist, private message. The main pitfall is inconsistent spacing between dots and dashes which makes the sequence look cluttered. Ask your artist to map exact spacing on skin before inking. Pair with a crew-neck tee cut slightly lower so the line peeks out intentionally. Expect low session pain and a short appointment.
14. Tiny Floral Wreath Cuffing the Clavicle
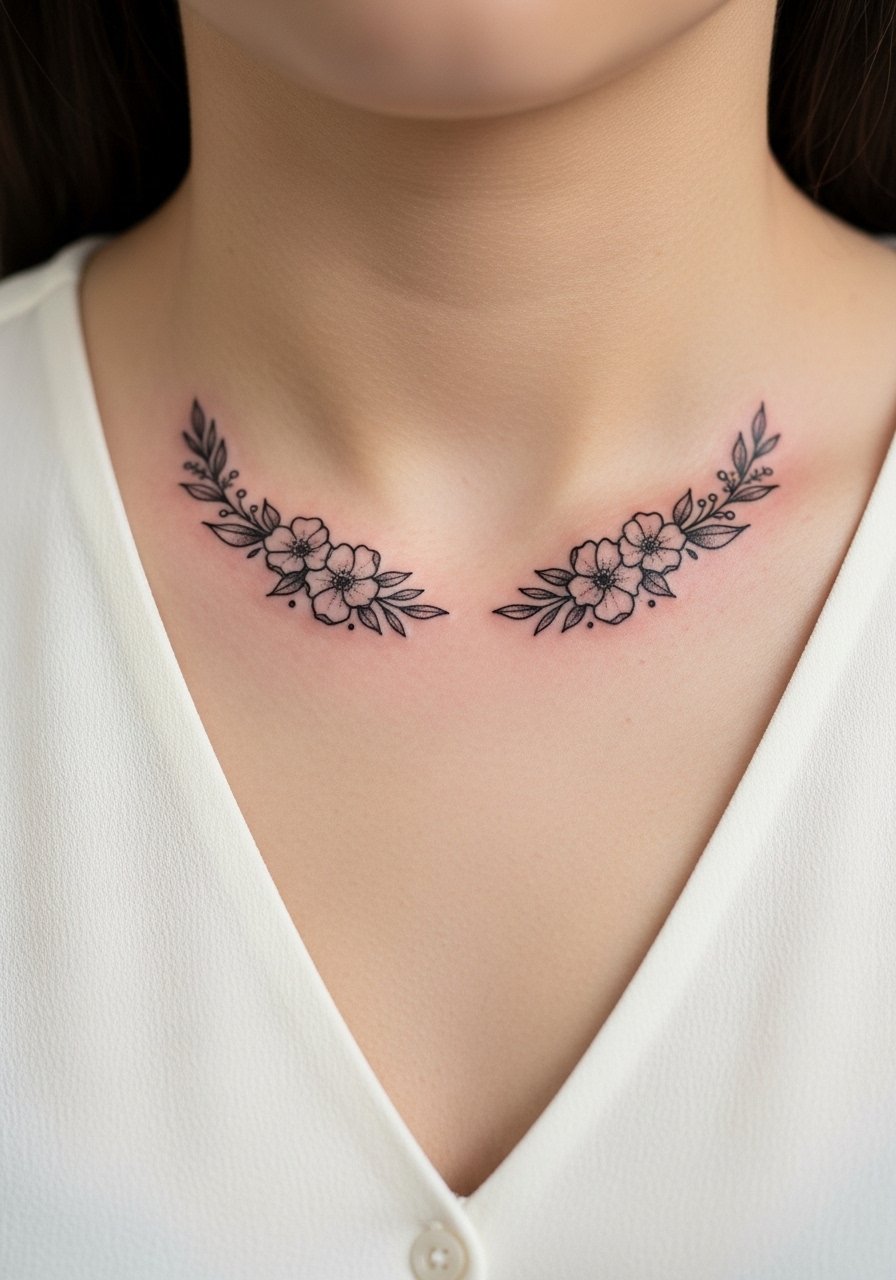
Visual impact lead: a tiny wreath uses negative space to read like jewelry. A common error is packing too many petals into a tiny circle. Request simplified petals and subtle stipple shading so the wreath keeps form as it ages. For wardrobe pairing, an open-back midi dress shows the wreath when your hair is up. Session length is moderate and sensitivity varies across the bone curve.
15. Tiny Compass Point on the Collarbone Peak
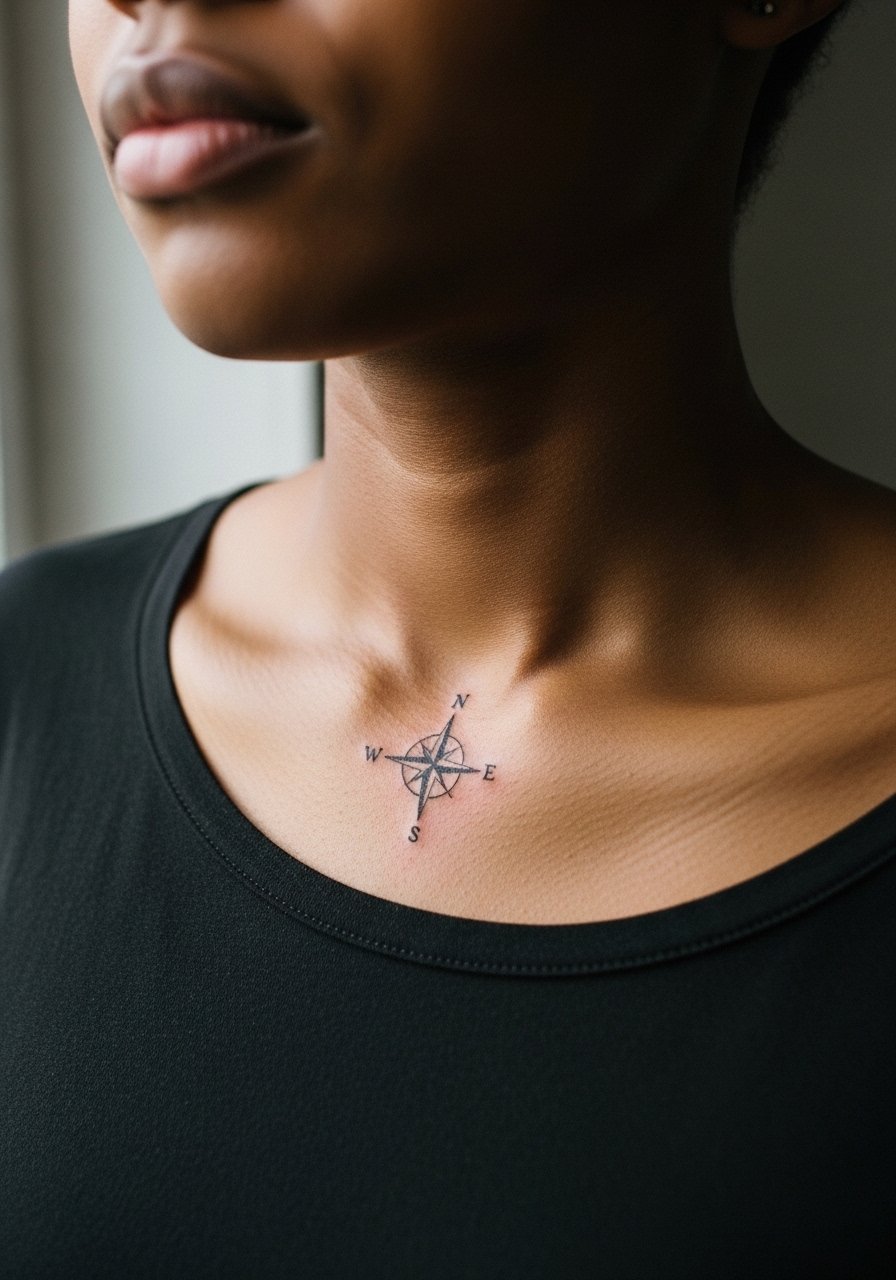
Pain warning lead: the center of the collarbone can feel sharp during inking because there's little cushion. The design benefits from stripped-back geometry rather than tiny ornate details that blur. In consultation, ask for clear cardinal lines and a small dot for center. For showing it off, a button-down shirt worn open frames the motif. Expect a focused short session and realistic touch-up needs at year three.
16. Single Tiny Pearl Outline Near the Clavicle
Consultation lead: pearls look elegant when executed as a single small circle with a gentle shadow dot. Avoid faint, hairline circles which fade quickly on the collarbone. For outfits, a boat neck sweater exposes just the right amount of skin. The session is brief and pain is moderate due to bone proximity.
17. Tiny Scripted Word Offset from the Bone

Mistake lead: unreadable micro-script often comes from mismatched spacing or cultural phrases used without context. If the word has cultural origin, consider a slight variation to show respect. In consultation, bring font samples and the exact text. For styling, a delicate layered necklace sits above the script for a polished look. Expect mild sensitivity and a short appointment.
18. Tiny Lightning Bolt Along the Collarbone Edge
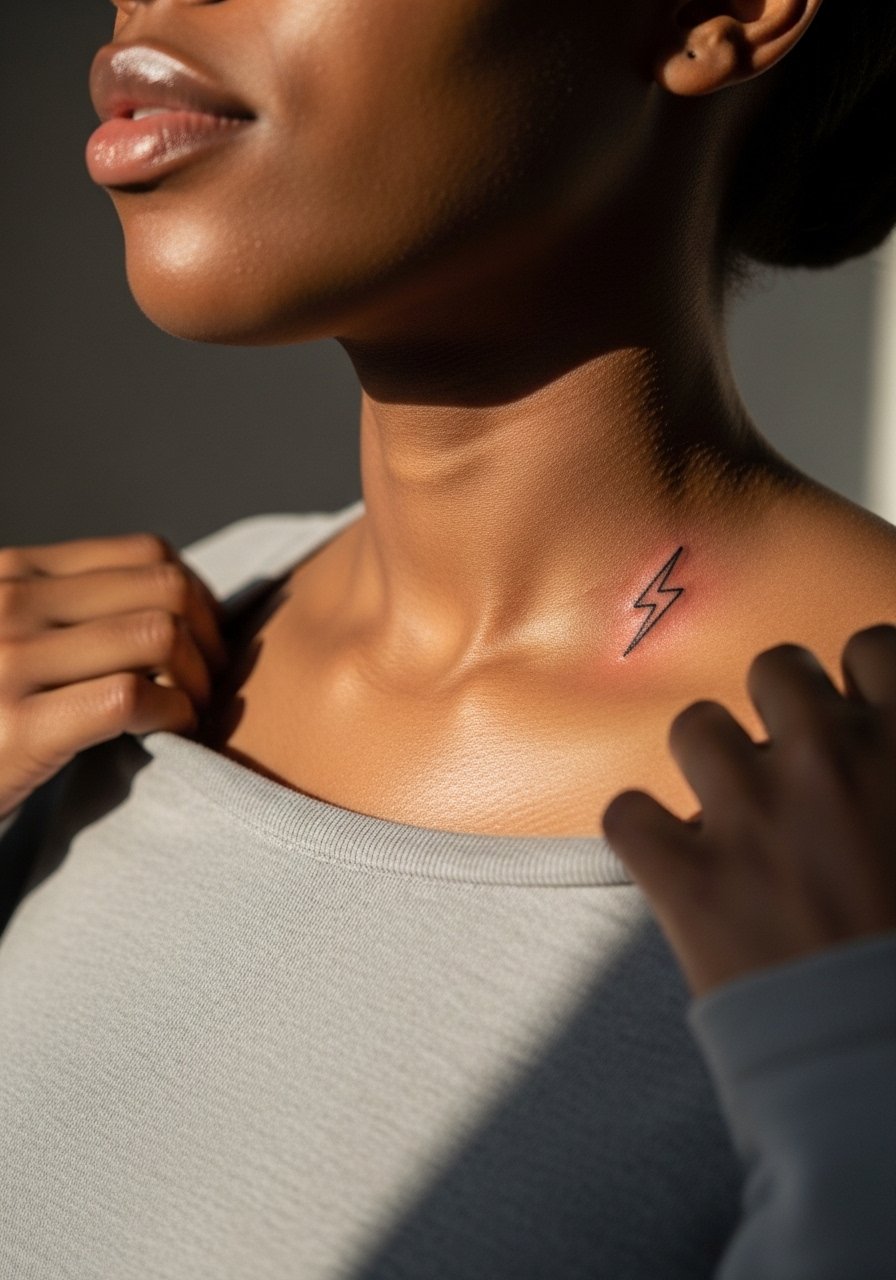
Visual impact lead: small angular motifs like lightning bolts benefit from crisp, consistent line weight. A common error is sketchy lines that blur. Ask for a defined shaft and sharp angles to keep it legible over time. A slim leather choker can balance the edgy vibe. The session is quick and pain is moderate near the bone.
19. Tiny Keyhole Whispered into the Clavicle Groove

Personal observation lead: keyholes read intimate and secretive when scaled to the collarbone. Artists often advise slightly bolder outlines for small black negative space to avoid the hole filling in visually. For a refined finish, pair with a minimalist pendant necklace that sits above the mark. Expect a short session and moderate discomfort.
20. Tiny Anchor with Wave Accent

Consultation lead: combining symbols is tasteful when each element has space. The common mistake is crowding two motifs in a tiny footprint. Tell your artist you want clear separation and a simplified wave stroke. For showing it off, a striped Breton top channels a nautical theme. Sensation is moderate and session time is short to moderate.
21. Tiny Lock and Mini Key Pair Flanking the Collarbone
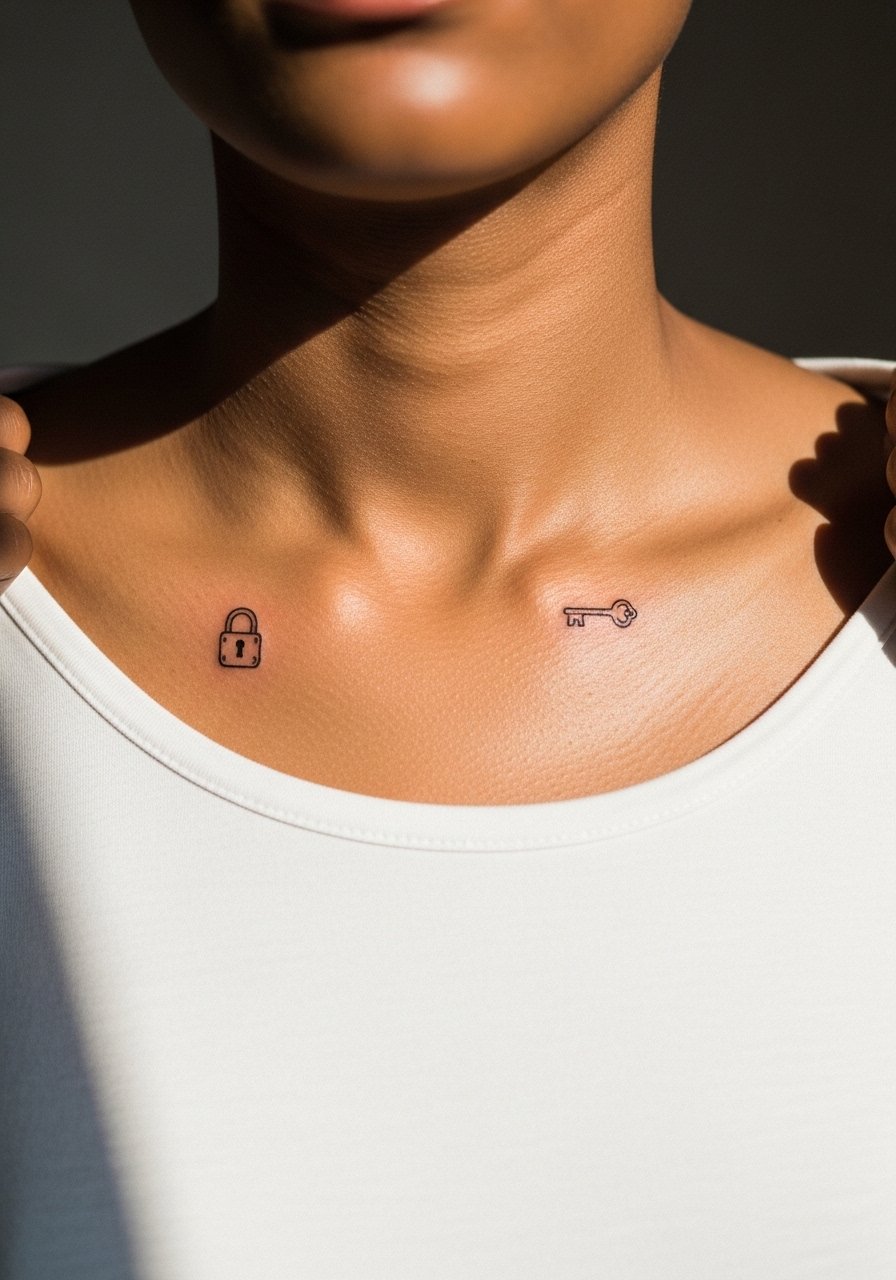
Controversy lead: tiny paired motifs spark debate about symmetry and placement. One camp favors precise mirroring across the chest, while another prefers offset, organic placement. Both are valid. Ask your artist to show the stencil in multiple positions before inking. Pair with a layered necklace set that echoes the pairing. Sessions are brief and pain is moderate.
22. Tiny Laurel Leaf Garland Along the Curve
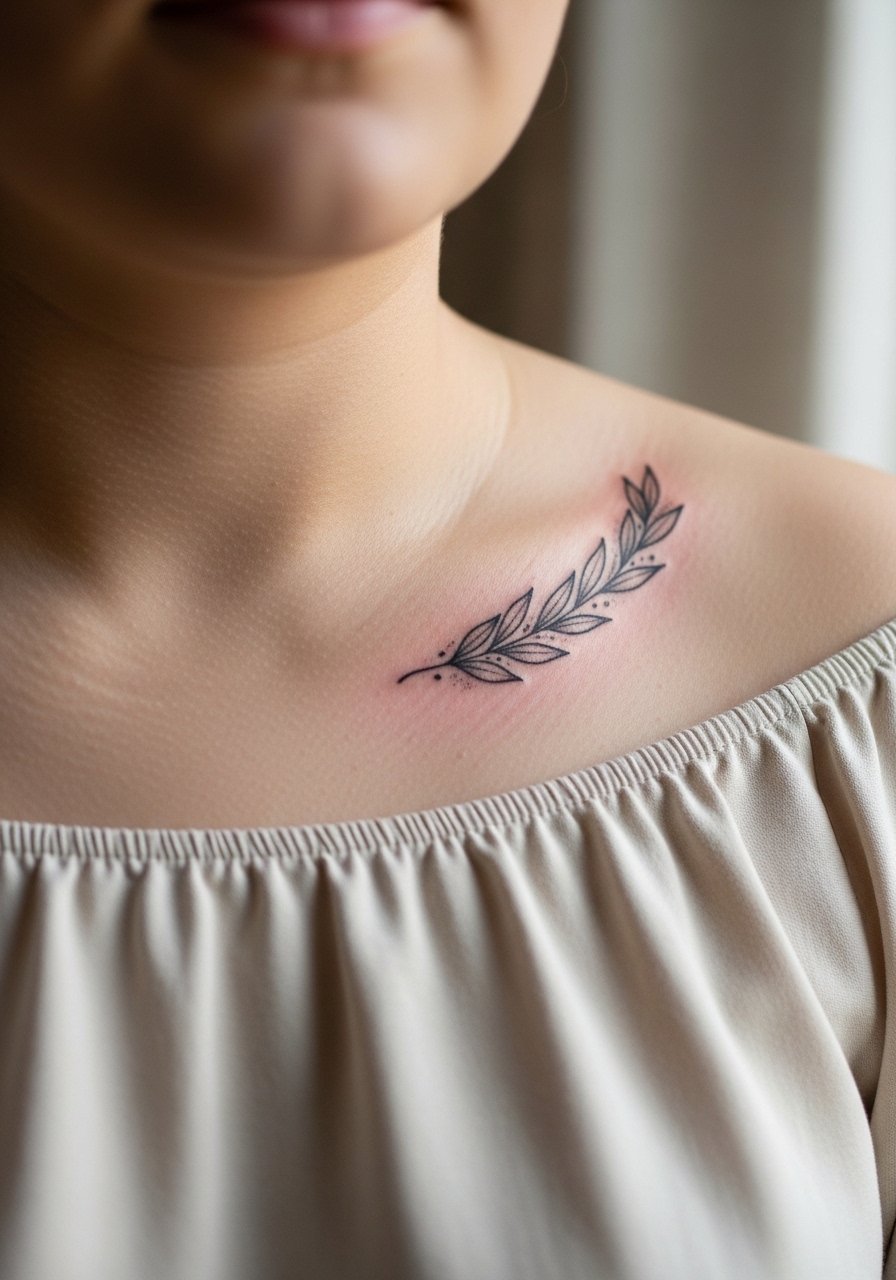
Aging/healing lead: leaf patterns with light stippling retain depth better than flat single lines that fade. The mistake is over-detailing veins in tiny leaves. Ask for simplified shapes and soft stipple support. For wardrobe, a wrap top highlights the curve elegantly. Expect a moderate-length session and minimal blowout risk with good technique.
23. Tiny Script Initials Carved Along the Bone
Mistake lead: overlapping loops in initials cause blurring later. Pick a clean, airy script and show the artist exact letter spacing you want. Discovery pathways like local directories and community hashtags help you find artists who do refined cursive well. Pair with a delicate bar necklace so the initials sit in context. Session is short and discomfort is mild to moderate.
24. Tiny Paper Plane in Flight Over the Clavicle

Visual impact lead: a tilted plane reads motion even when tiny. The biggest mistake is making the folds too detailed, which can blur. Ask for a clear outline with minimal interior lines. For showing off, a linen button-down worn open gives a relaxed frame. The session is brief and the pain is moderate by the bone.
25. Tiny Floral Single Petal Drop
Personal observation lead: single petals are quiet and age well when done with slight internal shading. A common error is using pure single-needle hairlines that disappear. Request a small amount of stipple or shadow to anchor the petal. Pair with a simple pendant necklace that sits higher. This is a quick session with mild to moderate sensitivity.
26. Tiny Coordinate Set Under the Collarbone

Consultation lead: text accuracy matters here. The image prompt rules require exact text, so bring the coordinates formatted how you want them. The main mistake is making the numbers too tiny for long-term legibility. Ask for a slightly larger type and crisp spacing. For showing off, a slim necklace layers well without covering the numbers. Session is short and sensitivity moderate.
27. Tiny Crescent with Dot Accent at the Sternoclavicular Notch

Styling lead: when a design sits close to the central collarbone notch, slight asymmetry reads intentional. The risk is placing motifs too close to where necklaces sit, causing rubbing. Ask for placement tests with a necklace in the consult. For show-off pairing, a thin chain pendant necklace worn deliberately above the crescent creates a layered look. Expect a short session with sharp but brief discomfort near the bone.
Frequently Asked Questions
Q: How much does collarbone placement hurt compared with an arm tattoo?
A: Collarbone placement typically rates higher on common pain scales because the skin sits over bone with little cushioning. Arm tattoos over muscle or fat feel milder. Pain is short in duration for tiny pieces and tends to be a sharp, localized sensation rather than a prolonged ache. Numbing creams are an option for very nervous clients but discuss use with your artist ahead of time.
Q: Will fine line script on the collarbone blur faster than a bolder design?
A: From what I've seen, ultra-fine single-needle script can soften faster than bolder linework on the collarbone. The recommended approach is slightly increased lineweight and deliberate spacing. If you want a delicate look that lasts, ask your artist to show a heavier reference that still reads as fine but has a bit more saturation.
Q: What should I wear to the appointment for a collarbone tattoo?
A: Wear something with a wide neckline, like a wide-neck tank or a button-down you can pull aside. That makes access simple and keeps fabric from rubbing the fresh tattoo when you leave. Bring a zip-up hoodie to stay warm in the studio if needed.
Q: How visible should the stencil be during consultation to avoid placement regret?
A: Always insist on seeing the stencil in multiple positions, both standing and sitting. The collarbone curve and how fabric falls change perception. I recommend asking for photos with the stencil in place and trying on similar clothing so you can visualize how it will appear in everyday outfits.
Q: If I want a symmetrical pair across the collarbone, what should I ask my artist?
A: Ask your artist to pin the stencil and photograph the placement from multiple angles before inking. Clear symmetry is possible, but small shifts in body posture cause asymmetry to read more easily here. Request a mirrored template and a final approval photo so both of you agree on balance.
Q: Do jewelry and necklaces affect healing for collarbone tattoos?
A: Yes, frequent rubbing from necklaces in the first two weeks increases irritation. If you wear jewelry daily, plan a placement slightly off the necklace path or keep your necklaces out of rotation while the area heals. Lightweight pieces that sit above the design minimize contact and speed healing.
Q: How soon will I need a touch-up on delicate collarbone pieces?
A: Touch-up timelines vary by skin type and sun exposure. For fine-line work on the collarbone, many people realistically expect a touch-up in two to four years. Designs with modest saturation and spacing often push that window further. Keep sun protection and minimal friction to extend the time between touch-ups.
