
Fine line pieces are everywhere on feeds, but ribs expose two hard truths. The placement hurts more than charts let on when you breathe, quick weight shifts can warp thin work, and flash pricing for ribs jumped this year. If you want edgy rib flash that survives real life, these 17 designs favor size, line weight, and contour-aware stencils so you get something that still looks clean after the first touch-up.
1. Fine line rose with thorny vine wrapping ribs
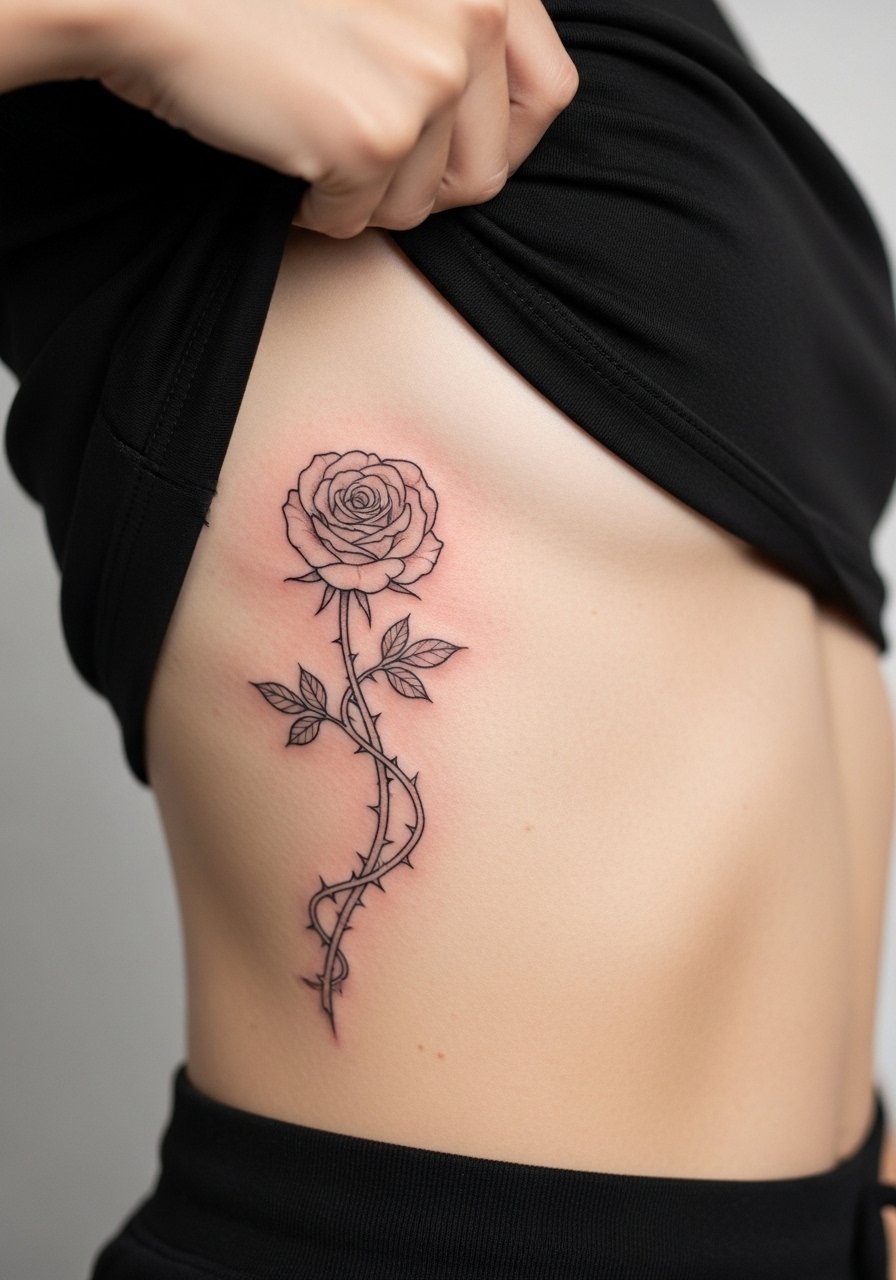
Ribs are widely rated as one of the more painful spots, so shrink this rose to about 3 to 4 inches and you cut session time and breathing pain. Ask your artist for slightly heavier linework near the vine base and a one-needle tail for the petals so the piece keeps contrast as the skin stretches. A common mistake is asking for ultra-fine single-needle everywhere. That looks dreamy fresh and then fades into thin, patchy lines by year two. Expect a touch-up at year two for thin areas. For showing it off, pair the side curve with a linen crop top and high-waisted pants so the flower sits framed on the torso.
2. Minimalist dagger piercing heart on lower ribs
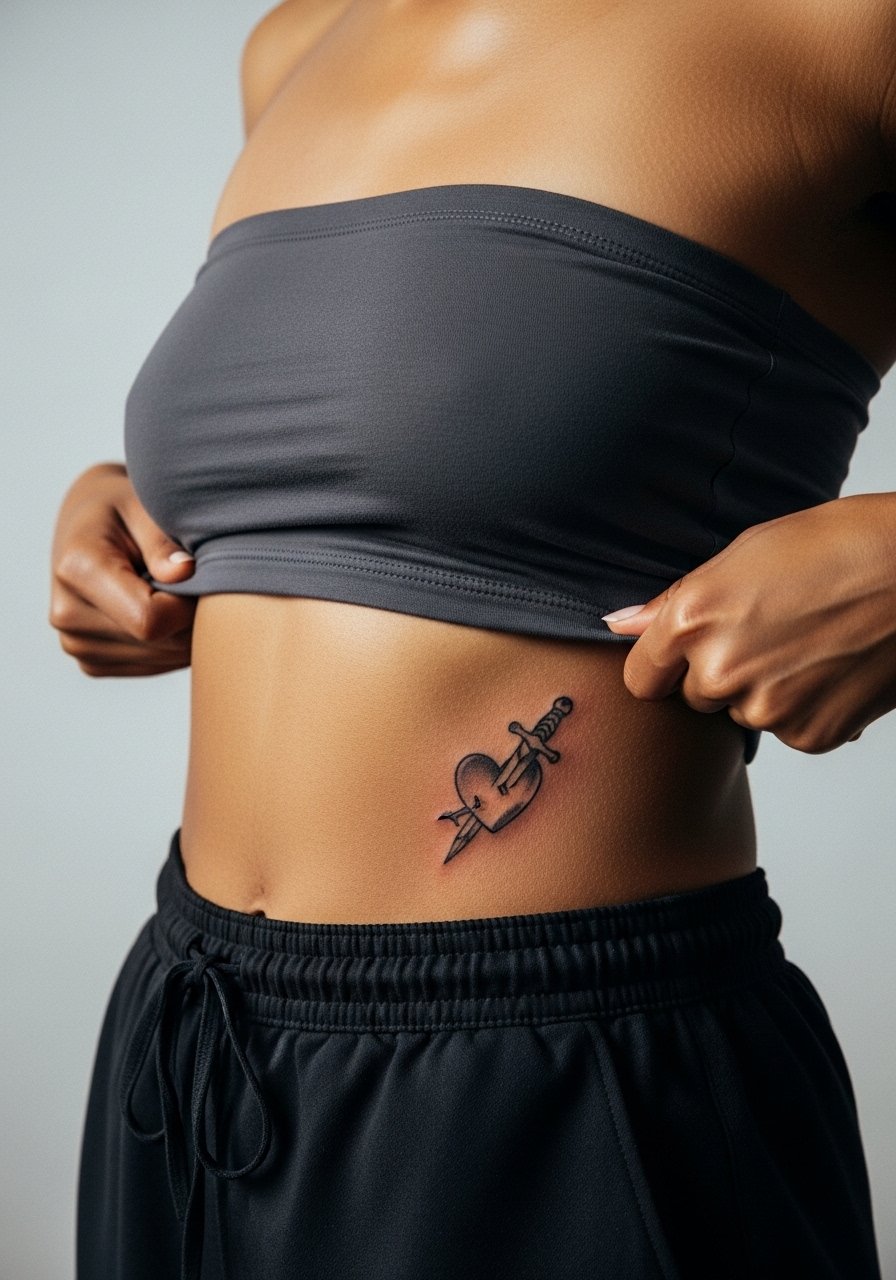
Lower ribs hide easily under clothing so keep the dagger 2 to 3 inches for a quick, one-session flash. The session feels sharp on entry strokes because the needle crosses thin tissue, so breathe slowly and take outline breaks. Tell your artist you want denser black near the dagger head to avoid early fade in high-movement zones. The debate over fine line here matters. One camp says single-needle keeps the icon delicate. The other camp says thicker outline resists blur on ribs. Ask which approach they recommend for your skin tone. For set outfits, a strapless bralette hides it on workdays and reveals it on nights out.
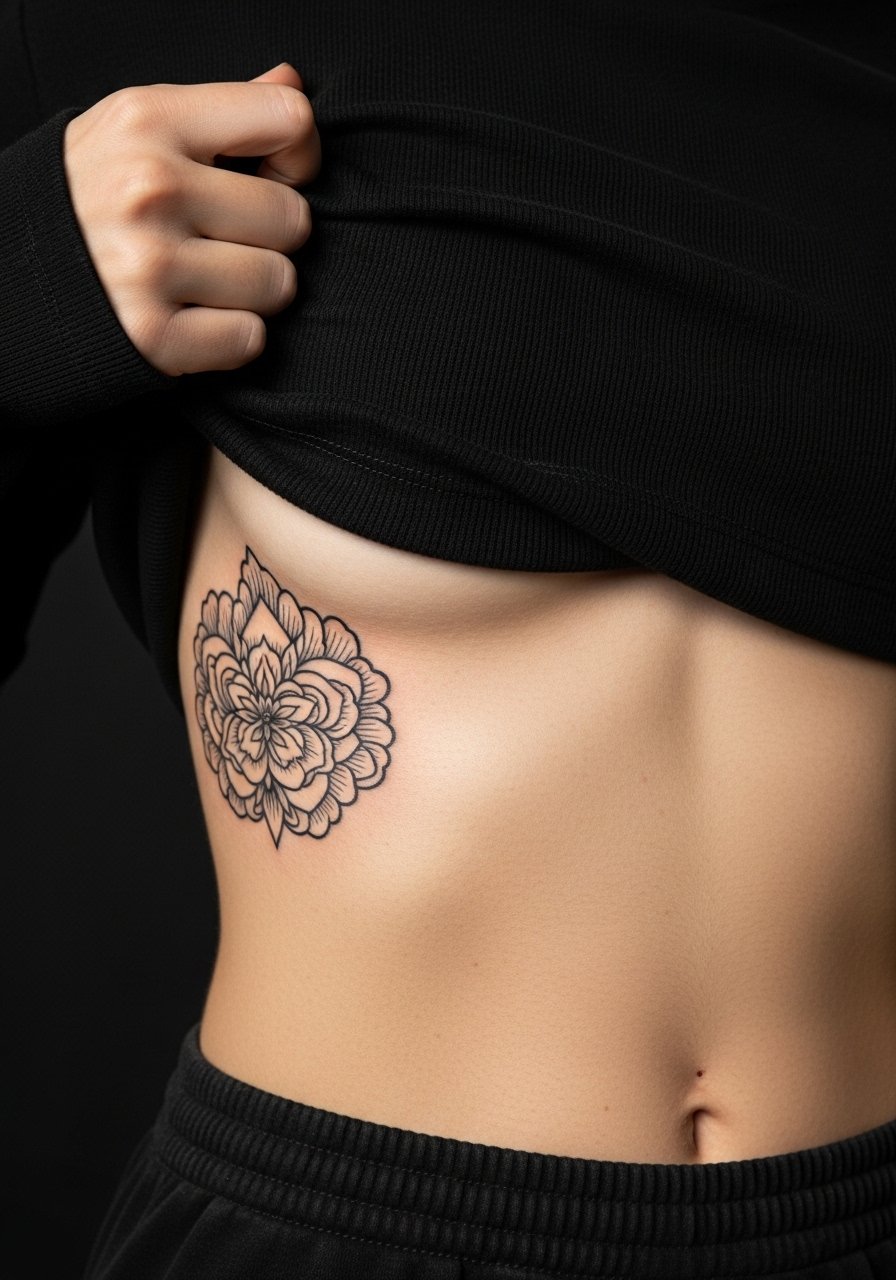
3. Blackwork geometric mandala across upper ribs
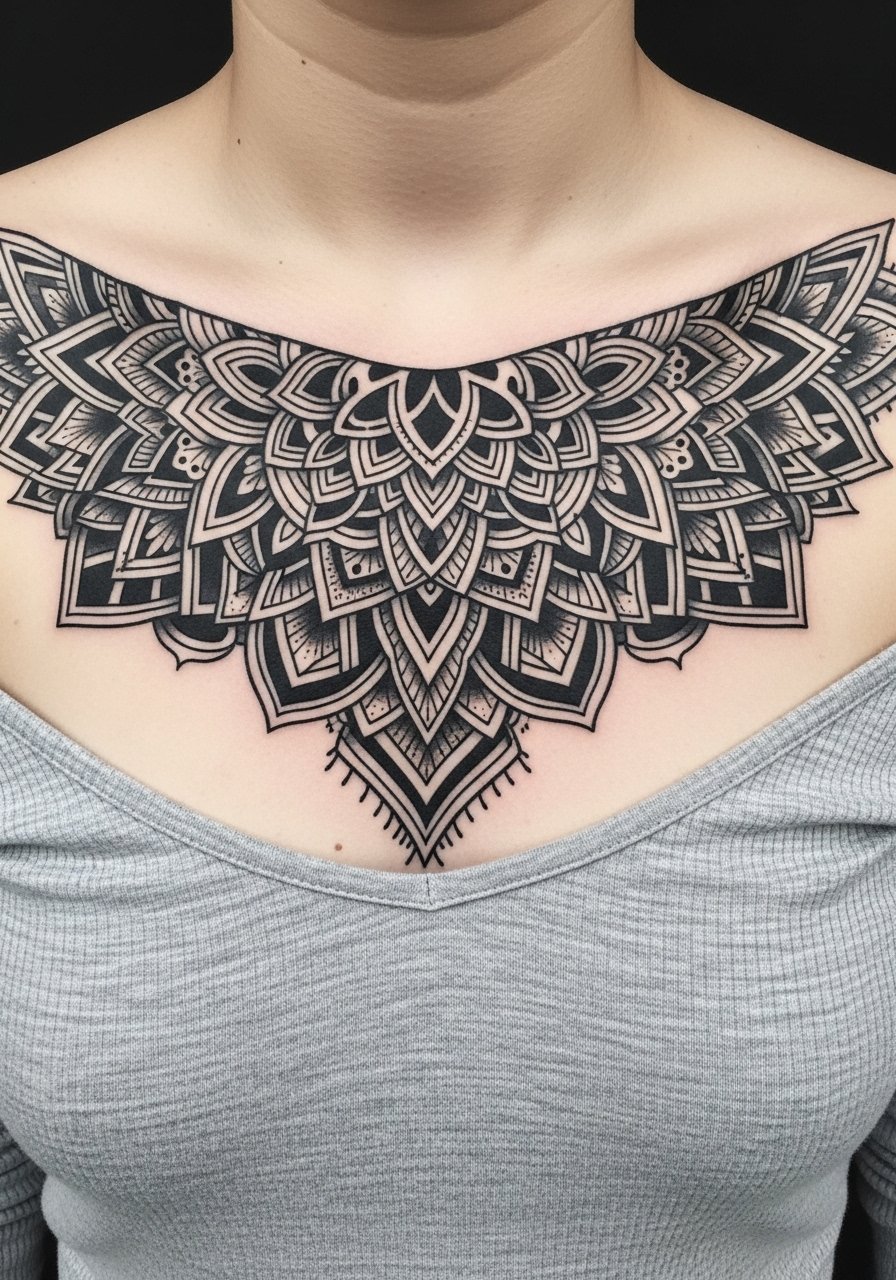
Mandala geometry reads optical pop on the curved torso when it has breathing room between elements. The worst version is a mandala crammed too small. Tight geometry on ribs merges into shaded blobs after a couple years. Ask for increased spacing between petals and stipple shading instead of dense black fills in the tight areas. Blackwork ages better here than watercolor because saturation resists sweat and movement. Session time runs longer than a simple line tattoo, plan on two shorter sittings rather than one marathon. Off-shoulder tops in solid colors make the pattern stand out, try an off shoulder top for contrast when you show it off.
4. Neo-traditional swallow in flight over ribs
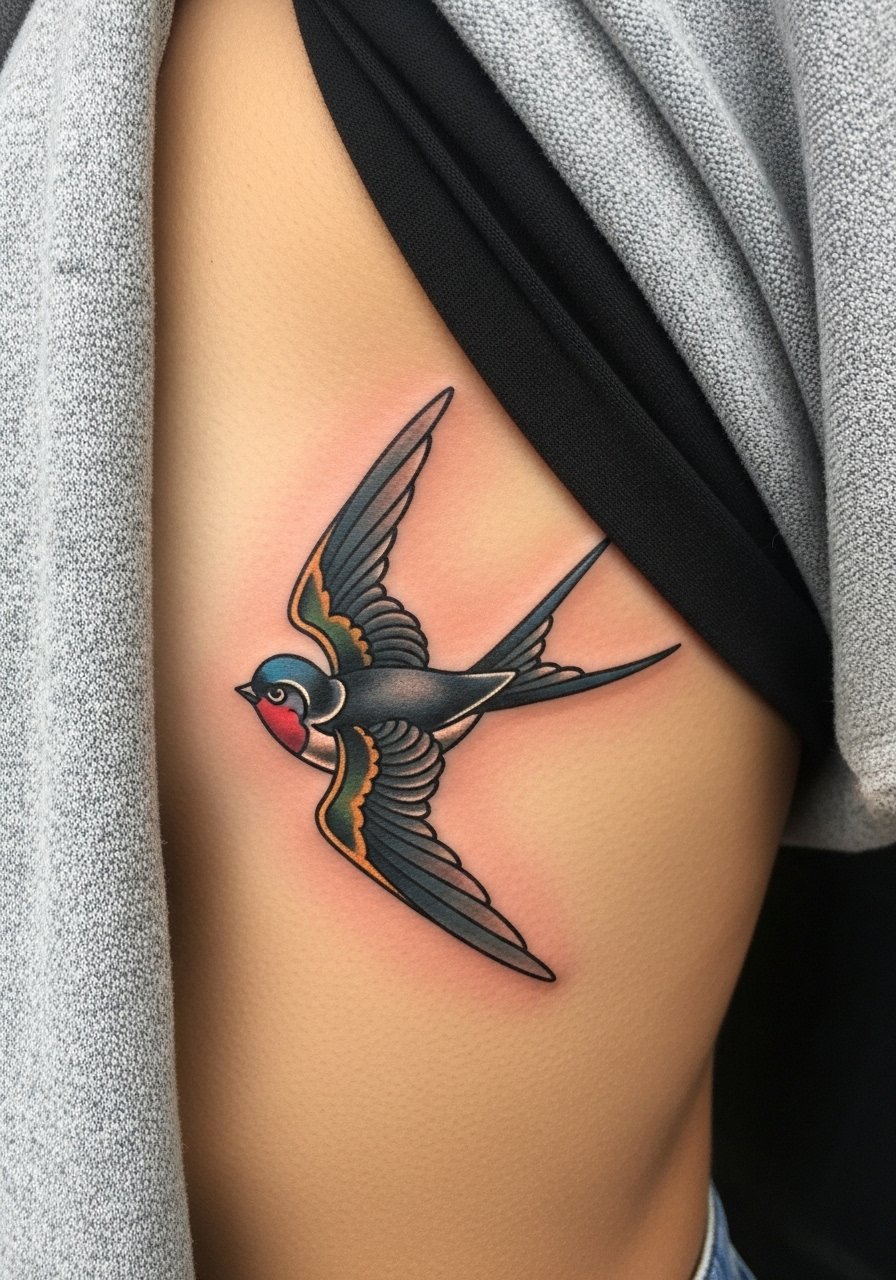
Neo-traditional line weight and saturated color age well on ribs because the outlines hold while color softens into texture. When you consult, bring movement references so the swallow’s wing follows the rib curve and reads like motion when you breathe. A frequent mistake is flattening the bird to fit a photo reference. The version that reads best is pre-warped to the torso, not pasted onto it. The session is stinging on and off as the artist fills color near bone, but it usually finishes in one to two sittings. For evenings, pair the bird with a wrap dress or a side-slit skirt so it shows in motion.
5. Micro-realism cherry blossom branch on ribs

Micro-realism demands stable skin and tiny needles, so plan this for two shorter sessions rather than one long day. The mistake is requesting hyper-detail in a single pass. That tends to overload the skin and causes patchy settle. Tell the artist you want subtle dot shading and shallow passes for petals so the branch keeps crisp negative space after six months. On ribs, micro-realism flattens if the person gains or loses significant weight, so keep size under 4 inches for better longevity. Fitted white tanks frame the branch well for day looks. Wear a white fitted tank to highlight the small blossoms.
6. Ornamental dotwork wave pattern hugging ribs
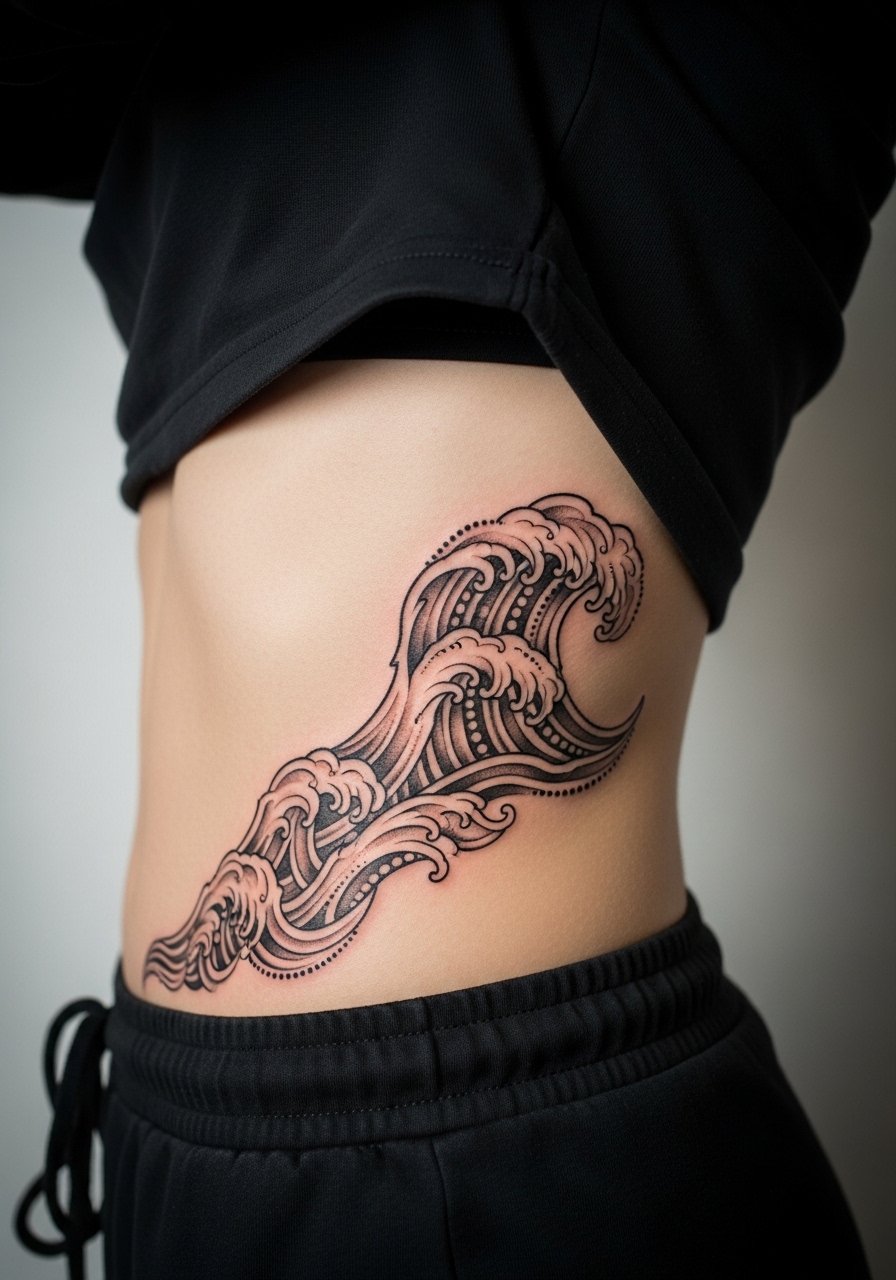
Dotwork uses stippling to create texture that plays with motion, and ribs can accentuate that visual effect. The common error is putting too many dots into a tight band. Overly dense dotwork can blend into a patch over time. Ask for varied dot spacing and a few solid black anchor points to keep the pattern readable at two and five years. Dotwork sessions are slow because each area gets many tiny passes. Expect a two-session plan and avoid high-sweat activities in week one. This design is more about texture than color, so it survives photos better on medium to darker skin tones.
Studio Day Picks
These first six rib ideas lean on size and spacing, so a few prep items smooth the session and the first week.
-
Indie shea-jojoba tattoo balm. A non-petroleum balm that users find less greasy in folds, helpful when ribs sweat during warm sessions.
-
Cetraben cream. Thinner texture than thick ointments, it keeps folds from trapping moisture while still protecting fresh linework on side torso pieces.
-
Australian tea tree aftercare spray. A light antiseptic spray some people use on sweaty locations to reduce irritation during the first few days.
-
Indie mushroom extract ointment. An alternative topical that some forum users credit with faster settling on tricky spots like ribs.
-
Aquaphor healing ointment. A thin layer in the first 48 hours can protect delicate linework while you keep pressure off the area during sleep.
7. Traditional anchor with rope on lower ribs

Traditional work benefits from bold outlines on the hip-rib junction because thicker lines resist blowout and wash. A common error is scaling the anchor too small. Small anchors lose the rope detail as the skin moves. Tell your artist you want saturated color with a clean outline and ask for photos of healed anchors on similar skin tones. The session is usually a single focused block and tolerable if you manage breathing between runs. For casual looks, low-rise jeans and cropped hoodies peek the anchor at the waistline. Try low rise jeans for the same peek-a-boo effect.
8. Watercolor galaxy fading into ribs
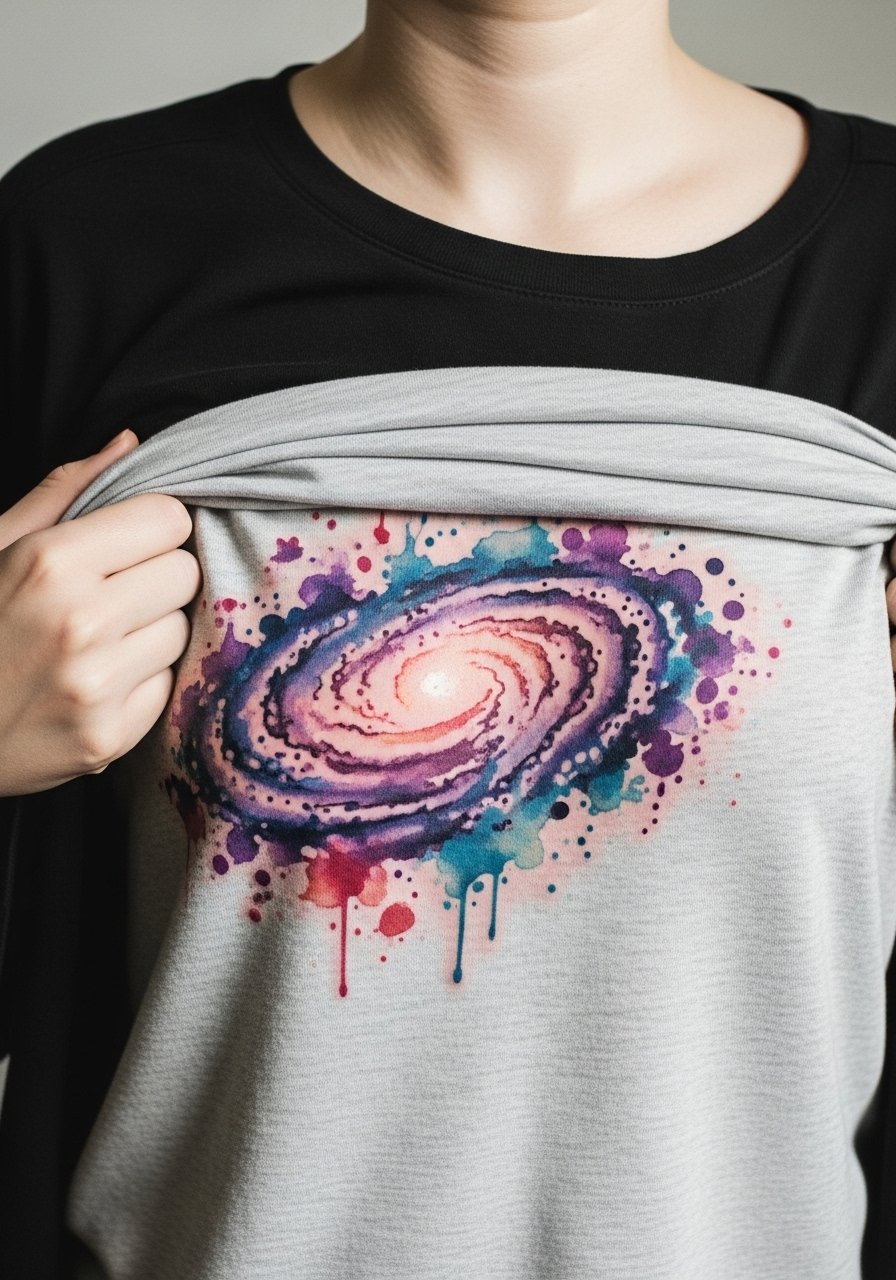
Watercolor looks stunning fresh but is the most controversial on ribs. Many artists avoid heavy watercolor here because movement and sweat can cause the colors to blur early. If you still want this effect, request anchoring outlines or soft stipple shading to hold pigment. The version that ages poorly is pure wash with no structure. Plan on a two-session strategy and expect more frequent touch-ups than blackwork. For wear during the session, bring a loose top that you can easily lift and pull aside for access.
9. Ignorant style skull with flowers on ribs
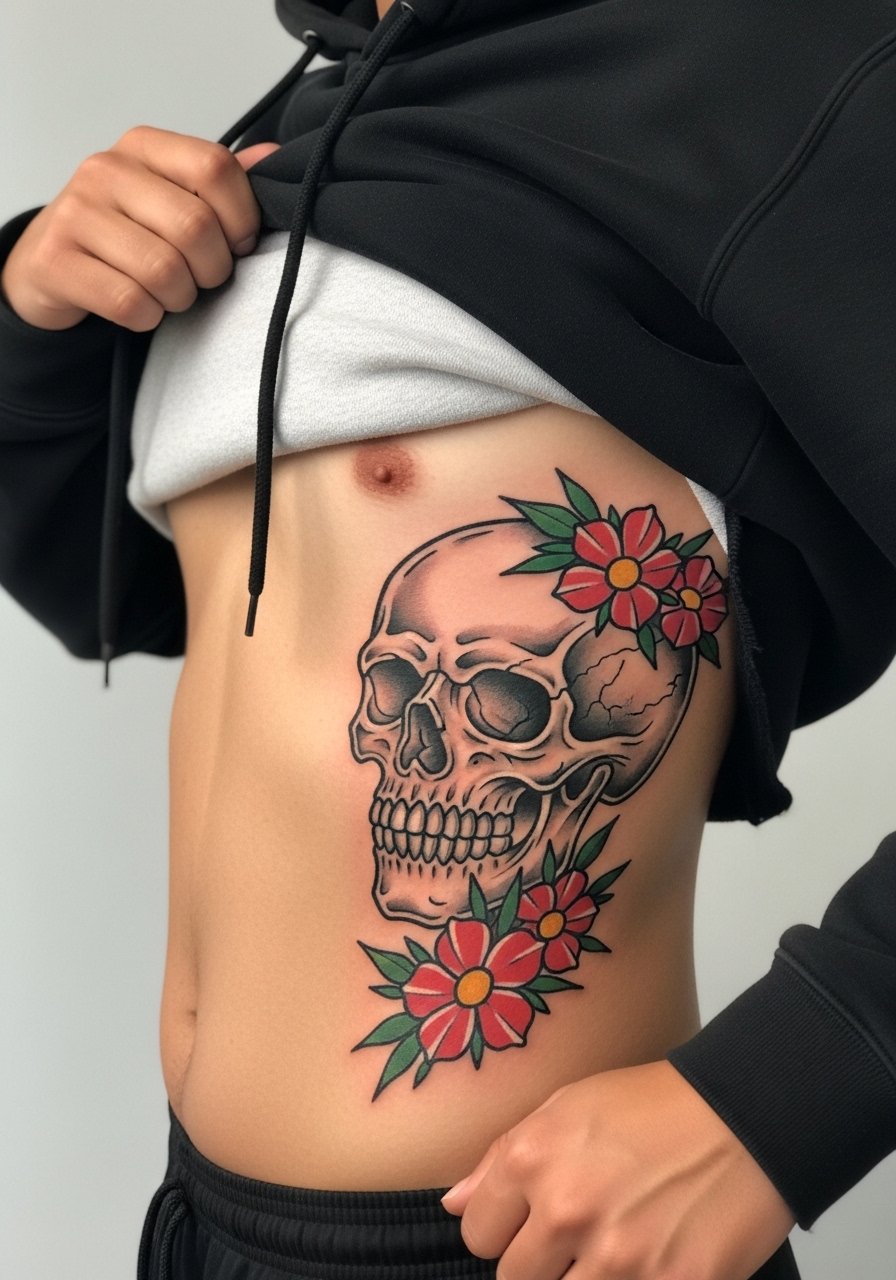
Ignorant style uses thick, deliberate lines and bold color hits which play well on moving surfaces like ribs. The piece usually heals into a graphic textured look rather than a photo-realistic one. A frequent mistake is asking for too much micro-detail inside the skull, which loses clarity when the body moves. Tell your artist to prioritize strong outline and selective color pockets so the skull keeps character at six months and two years. This style tolerates sweating and movement better than micro-realism. For casual wear, a cropped hoodie frames the side while still letting you conceal the tattoo when you need to.
10. Fine line script quote curving along ribs
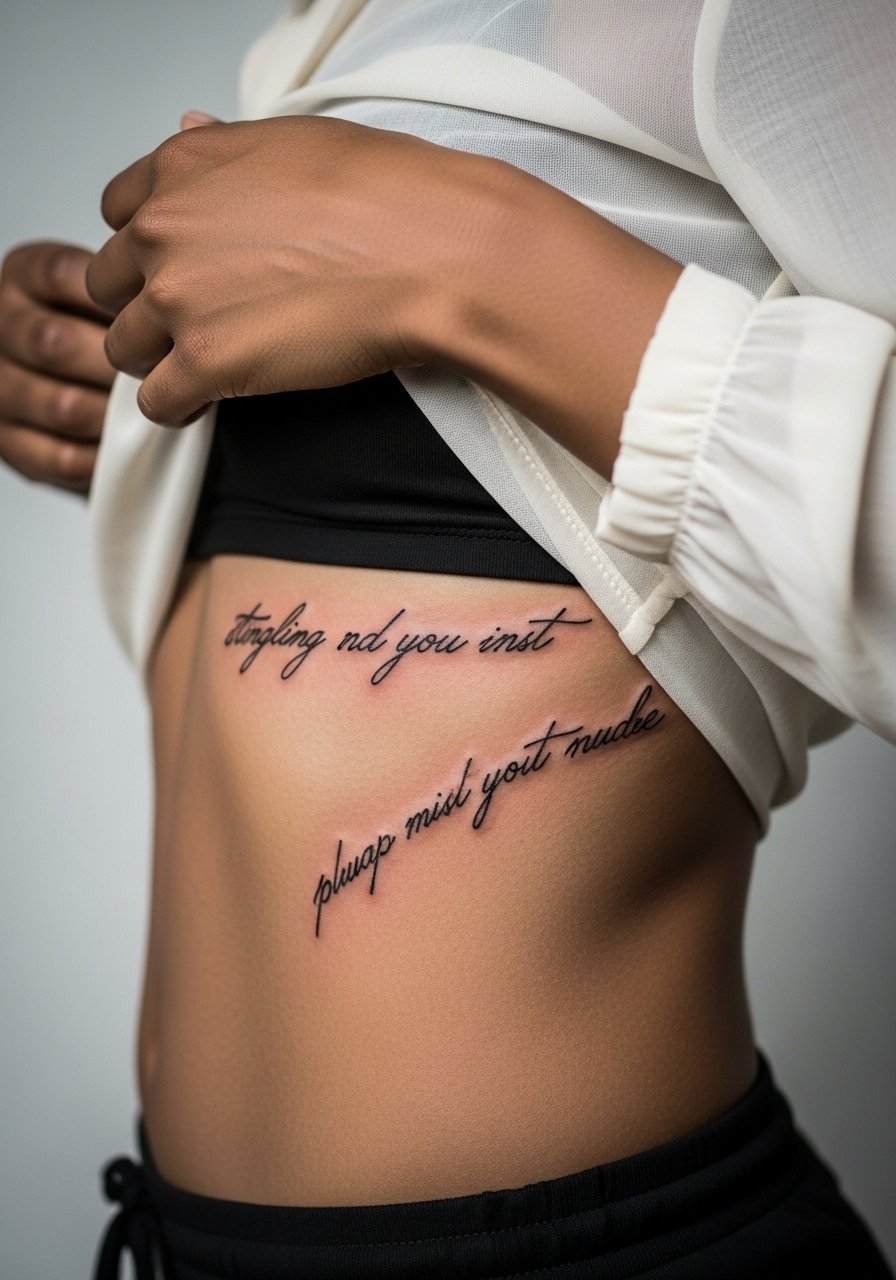
Script on ribs is elegant but fragile. The big mistake is picking a tiny, dense font. Tiny letters merge into a smudge as the skin stretches. Ask for wider letter spacing, a slightly heavier main stroke, and a reference with similar line weight to the one you want. The artist will explain where letters might distort with breath. Expect touch-up around year two for single-needle scripts. For reveal looks, a sheer blouse or strapless layering keeps the typework readable without competing patterns.
11. Rib flash scaled for breathing

This idea plays with motion. The stencil is designed so lines expand and retract with your breath, which keeps the image readable in both states. The common error is using a static reference that ignores torso dynamics. In consultation, ask the artist to test a mock stencil while you inhale and exhale so they can warp the lines for real movement. These designs are best kept under 5 inches to limit session pain and allow faster healing. Expect to reheal a bit as the ink settles in the folds, and plan on a touch-up if the motion causes early softening.
12. Curved flash stencils pre-warped for rib topology

A lot of rib distortion comes from straight stencils placed on a curve. The fix is pre-warped flash stencils that the artist traces directly onto your skin while you breathe. The mistake is assuming flat references will translate cleanly. If your artist offers pre-warped stencils, ask to see how they alter reference pieces for rib topology. This approach reduces the chance of later distortion and blowout. Session time is the same but the risk of needing a corrective touch-up drops. It is a small upfront step that pays off over five years.
13. Ribcage-negative space tattoos leaving bone outlines blank
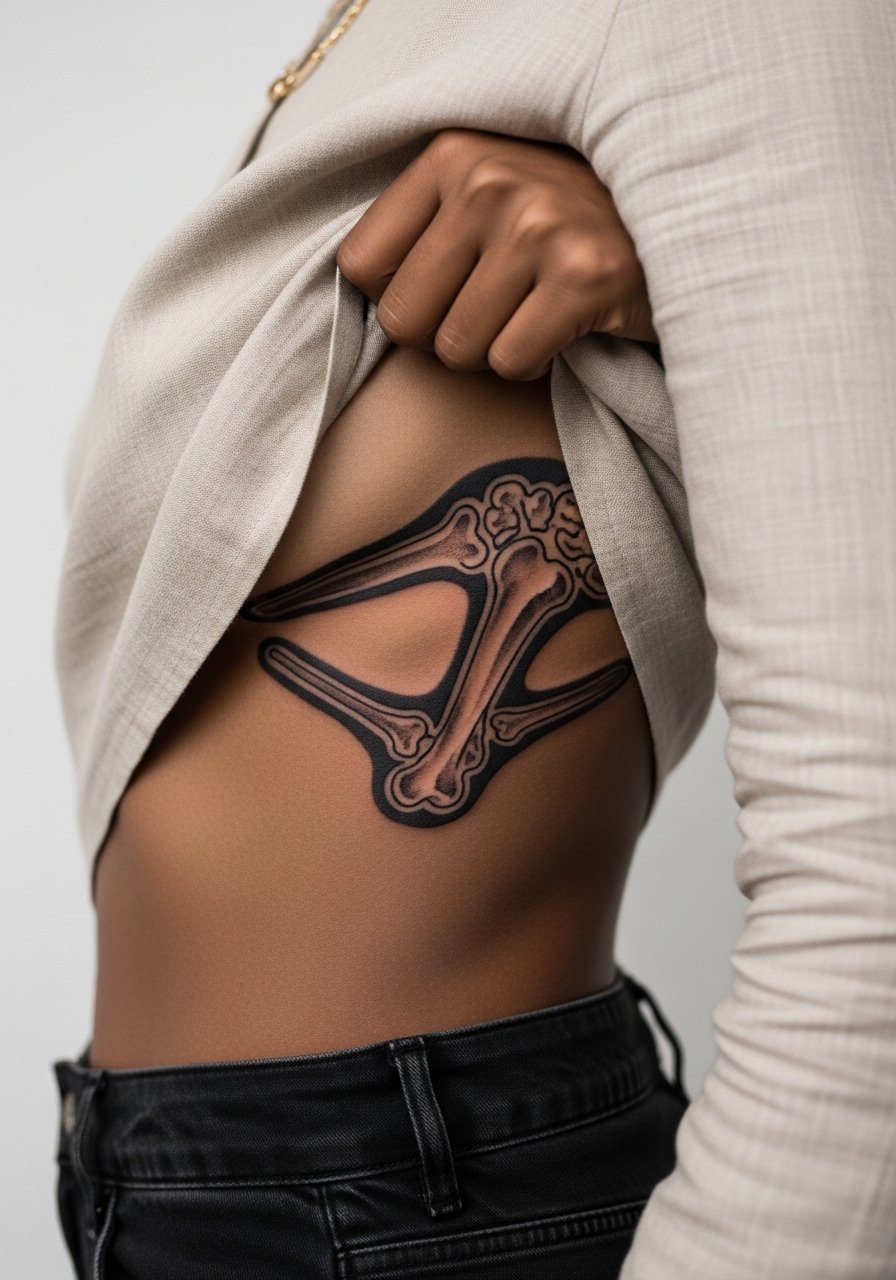
Negative space can be a clever way to work with ribs because it uses the skin as part of the design. The most common mistake is overcomplicating the negative shapes. Keep the blank bone outlines simple and let the surrounding black or dotwork hold the image. The piece ages well because there are fewer tiny lines to blur. Ask your artist for mockups on your torso so you can see how the empty shapes read when you move. For outfits, high-waisted wide-leg pants and a linen crop top complement the clean voids. Try high waisted wide leg pants for an easy frame.
14. Hybrid flash: bold outline with fine line fill
This hybrid is a longevity play. A bold outline protects the piece from blowout while fine line interior work keeps the look delicate up close. The error to avoid is making the inner lines so faint they disappear against the bold frame. Tell the artist you want measurable contrast between outline and fill and ask for healed photos of similar hybrids. The session mixes both quick outline passes and slower needlework inside the frame, so expect varied sensations and a two-part attention span from the artist. This is one of my go-to recommendations for people who love fineline aesthetics but worry about the ribs.
15. Micro flash under 3 inches hidden under bras
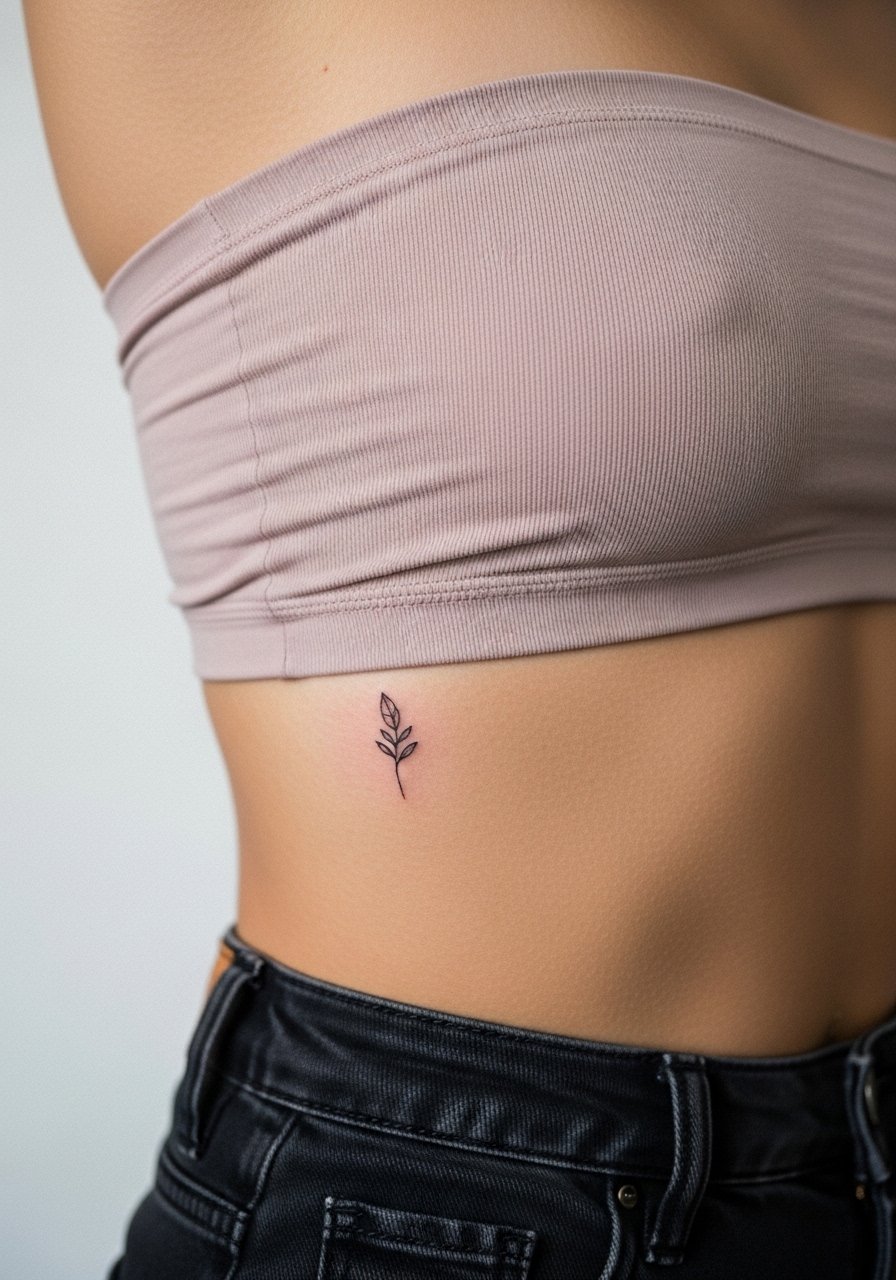
Small rib flash is trending for first-timers who want something private and fast. The big advantage is short session time and easier healing. The pitfall is picking single-needle detail that cannot survive friction from bras. Opt for slightly heavier strokes and negative space to keep the tiny piece readable. These usually finish in one short session and might need a touch-up at year one depending on friction from clothing. If you want concealment or reveal, pair with a strapless bralette so the piece stays hidden during work days and appears at leisure.
16. Stipple-shaded crescent moon hugging ribs
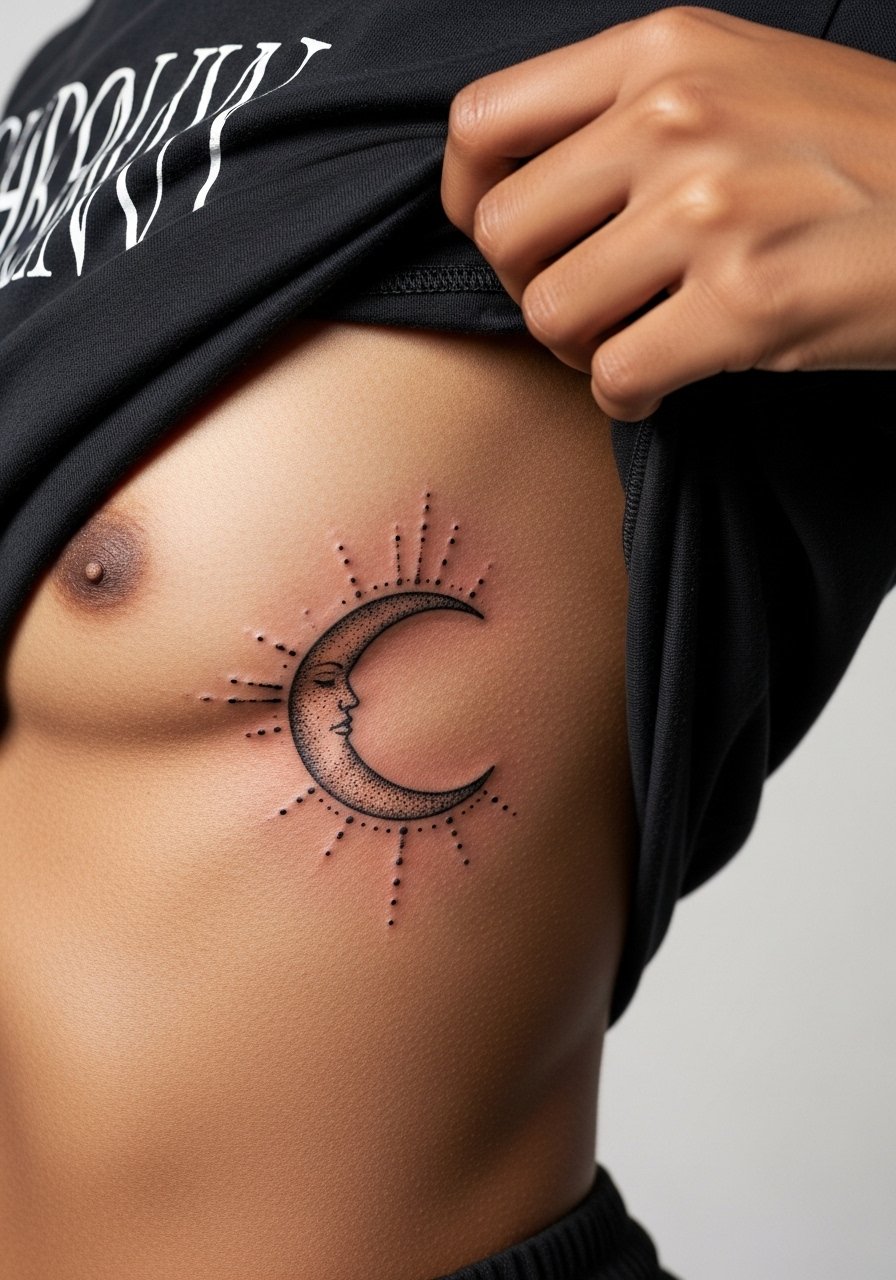
A crescent moon done with stipple shading uses dot work to create soft gradients that move with the rib curve. The wrong approach is solid fills pressed into tight curves. Dot work breathes with motion and reduces blowout risk if the artist spaces dots well. Tell your artist you want graduated dot spacing and avoid dense black fills in the curve. Stipple sessions are methodical and can take longer per inch than simple lines. Expect the texture to settle beautifully at six months if the first week avoids heavy sweat.
17. Scaled mandala spacing to avoid torso smears

This mandala variation is about negative breathing room between rays and petals. The common mistake is compressing details to fit a reference. Instead, scale outward and add more whitespace so the pattern reads even when the torso flexes. Artists split over fine detail on ribs. One camp says tight fine work blurs quickly. The other camp insists that correct needle depth and spacing keeps detail intact. Ask the artist where they land on that debate and request healed photos of similarly scaled pieces. A halter neck tank frames the top edge for evenings without competing with the pattern.
Frequently Asked Questions
Q: How bad will rib pain be for these flash pieces, and are smaller designs significantly easier?
A: Ribs are higher on most pain scales compared with arm or thigh locations, especially near the bone. Smaller pieces under 4 inches cut session length and breathing discomfort noticeably. Breathing slow and steady during outlines helps. For first-timers pick micro flash under 3 inches or plan short sessions with breaks.
Q: If I gain or lose weight, which of these rib styles holds up best?
A: Bold outline work and blackwork geometric pieces handle weight shifts better because they rely on saturation and spacing rather than tiny single-needle strokes. Fine line and micro-realism are more likely to show waves after big changes. If you expect fluctuation, ask for slightly heavier line weight and more negative space in the design.
Q: Does Saniderm or dry healing work better for ribs with lots of sweat and folds?
A: Practitioners are split. One camp favors Saniderm because it keeps the area protected and reduces rubbing from clothing. The other camp favors dry healing to avoid trapped moisture and infection risk in folds. I recommend checking how your studio manages sweaty zones and planning breathable clothing for the first week so either method can be used safely.
Q: How soon will fine line ribs need a touch-up compared with blackwork?
A: Expect fine line ribs to often need touch-ups by year two or three, especially in high-motion spots. Blackwork and hybrid styles commonly hold longer and can go four to five years before obvious thinning. Touch-ups depend on skin type, sun exposure, and friction from clothes.
Q: What should I wear to my rib session to make access easy and healing less irritated?
A: Loose, liftable tops work best. A loose tank sports bra or a button-down you can slide aside gives clean access without tight waistbands. Bring layers so you can stay warm between passes without rubbing the fresh ink.
Q: Are there rib designs I should avoid if I have darker skin that tends to photo-fade?
A: On darker tones, prioritize solid blackwork and bolder outlines rather than ultra-fine single-needle detail. Heavy saturation and clear negative space read better in photos and resist early blurring. Ask to see healed photos on similar tones before booking.
Q: Where can I find flash sheets and artists who do rib flash without custom pricing?
A: Search Etsy for printable rib flash sets and use local community threads and the Booksy app to filter for artists who list "ribs" in their flash or walk-in offerings. Bring a printed flash so the artist can quote a flash rate rather than a custom piece price.
