
The best first tattoos are the ones that still look intentional five years in, not just the ones that rack up likes the day they heal. Fine line trends photograph beautifully, but longevity often comes down to spacing, placement, and simple composition choices you can control in a consultation. Below are geometric-first ideas that balance fresh impact with sensible aging, plus what to tell your artist and what to wear to the appointment.
1. Fine Line Triangle on the Inner Forearm

I’ve seen this one become a visual anchor for people who want a first piece that reads clean as it ages. Ask your artist for slightly heavier lineweight than you think you need, and request a 6mm minimum base so the edges do not blur into a hairline in two years. Expect low to moderate pain and a one-hour session. Common mistakes include asking for the triangle too small, which guarantees early softening. For showing it off, roll up a loose button-down shirt so the forearm sits visible without looking staged. Plan a touch-up conversation around year two if you want crisp corners long term.
2. Minimal Dotwork Mandala on the Wrist
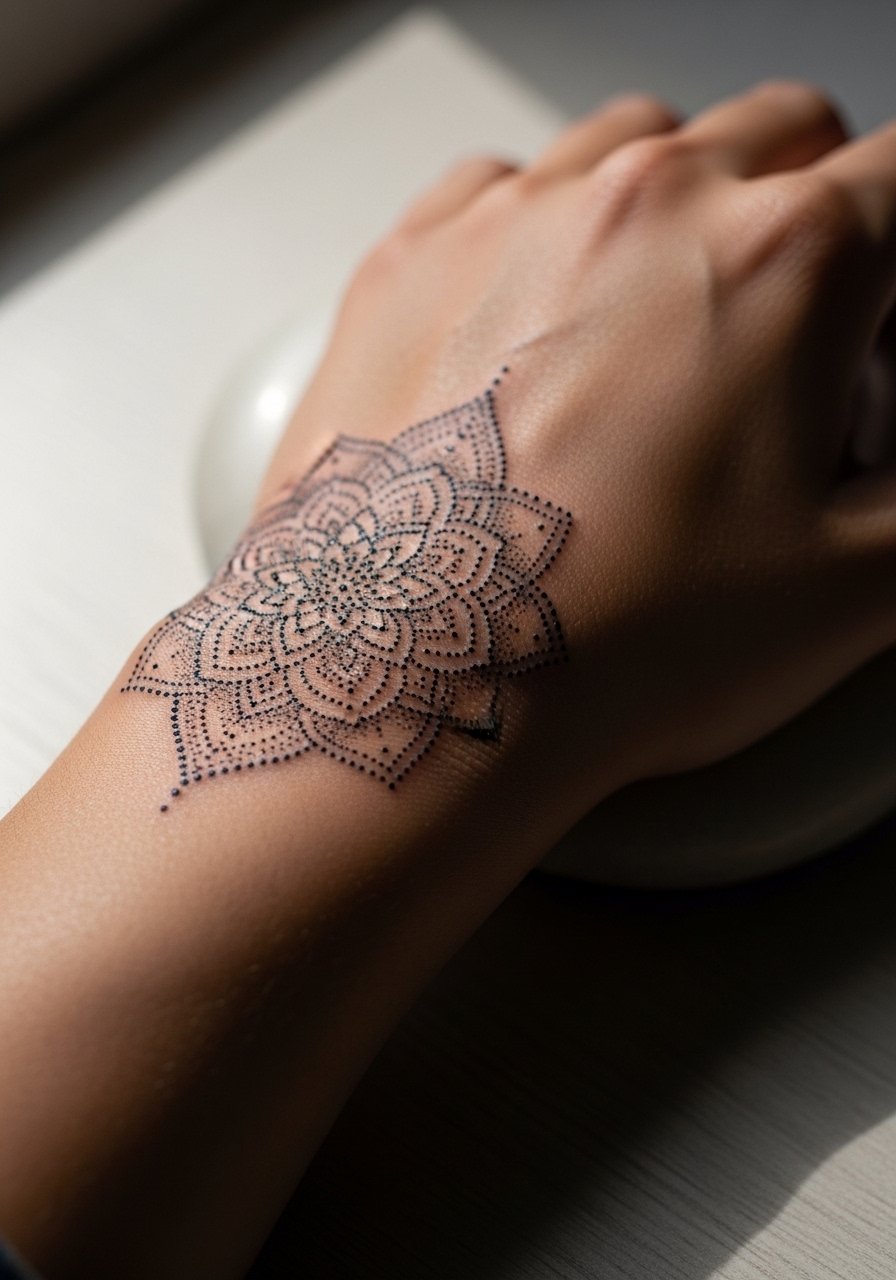
Fair warning, the wrist is a friction zone. The mandala looks perfect at first but tiny dots can merge where the skin flexes. When you consult, ask for slightly more spacing between stipples and a light outer line to anchor the design. Sessions are short, often under an hour, but expect a touch-up at year one or two for tightly stippled pieces. For showing it off, a stacked dainty bracelets look intentional without covering the work. One practical tip is to avoid very tight watches in the first month, since repeated rubbing accelerates softening.
3. Geometric Fox Head on the Upper Arm
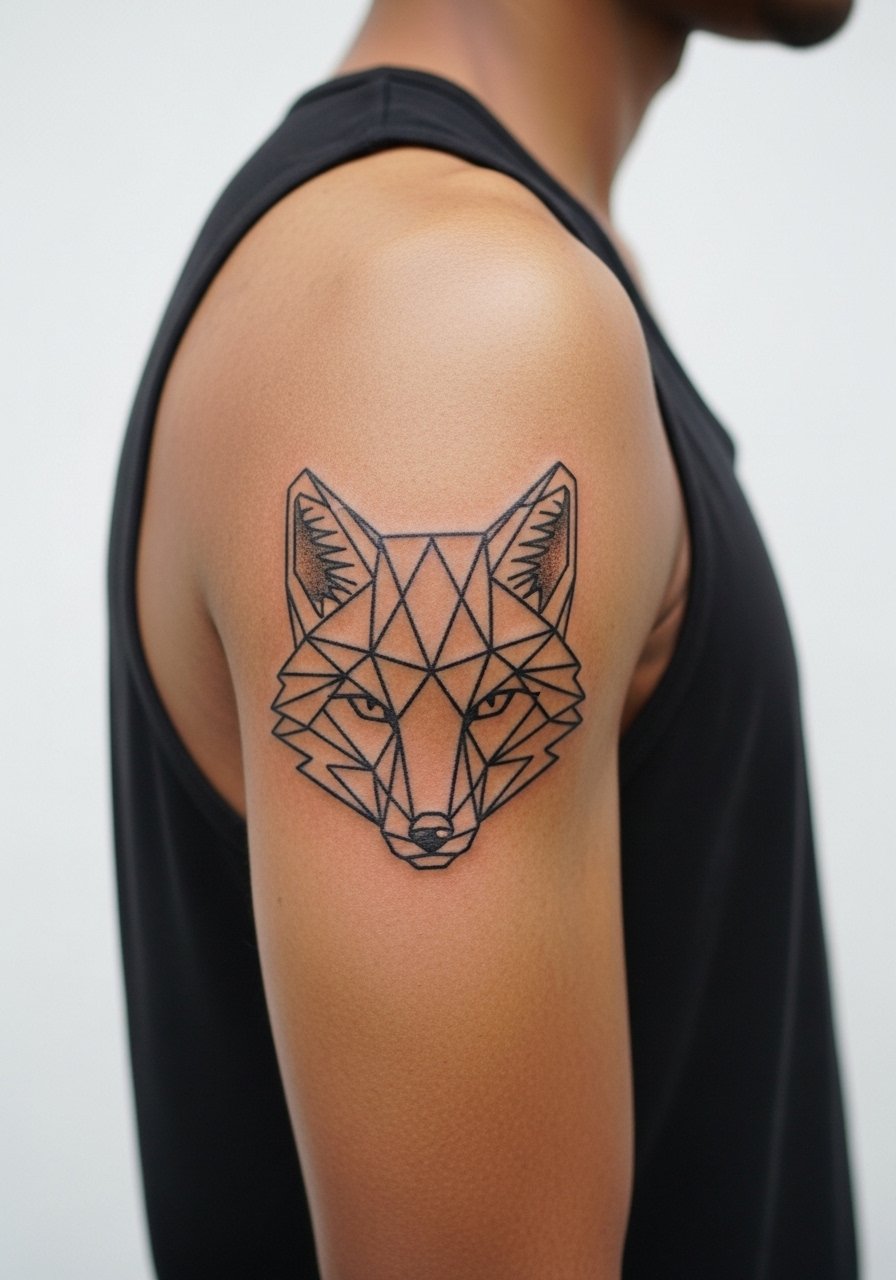
When people want an animal but prefer geometry, this design simplifies anatomy into facets and planes. Tell your artist you want contrast between bold outline facets and lighter internal linework, so the silhouette reads from a distance. The upper arm tolerates saturation well, and pain is moderate. A common mistake is over-detailing the face for the size, which leads to muddiness after healing. This placement pairs with summer tanks during the showing-off months, and for the session wear a racerback tank so the artist has unobstructed access.
4. Constellation Band Around the Finger

There is something about tiny geometric stars and connecting lines that reads intimate and deliberate. Fingers age differently than the rest of the body, so bring up placement over the joint versus the base of the finger in the consult. The session is short but expect faster fading and a likely touch-up at year one. A frequent mistake is asking for too many tiny dots in tight formation. For jewelry pairing, thin stackable rings keep attention on the band without overcrowding the finger. Avoid the expectation that finger tattoos are forever unchanged, they need maintenance.
5. Minimalist Circular Calf Piece

There's a pleasant visual payoff with a simple circle on the calf where the curve of the muscle complements the shape. Tell the artist to map the circle while you stand and flex, so the placement sits true when you move. Pain is moderate and session time is usually under an hour. The most common mistake is putting it too low where shoe friction blurs the lower edge. For the session, wear loose drawstring linen pants so you can roll the leg without pressure on the tattoo. Expect minimal touch-up needs unless the circle sits in a high-friction zone.
6. Sternum Sacred Geometry Mandala
When people choose sternum sacred geometry they often want a central piece with symmetry. Artists split into two camps on this placement. One camp warns that the sternum and underbust shift with movement and tight clothing, which can blur dense mandalas quickly. The other camp says with correct spacing and slightly bolder outline the design settles and stays readable. Ask your artist which approach they favor, and request a mockup that accounts for how your chest moves. Session time can be longer because of careful mapping, and packing a comfortable sports bra for the ride home makes recovery easier. For the appointment, a fitted sports bra or bandeau that you can pull down slightly keeps access private and straightforward.
Studio Day Picks
The sternum, wrist, and calf pieces above require different prep and a few thoughtful items make the session and the first week smoother.
-
Stencil transfer paper kit. Lets you and the artist preview placement on the skin, which is helpful for symmetrical mandalas and triangle work.
-
Topical numbing cream. Applied as directed before a sensitive sternum or rib session it can reduce edge pain without interfering with linework.
-
Thin protective film roll. Useful for finger and wrist pieces during the first days when washing and typing cause friction.
-
Fragrance-free body wash. Gentle cleansing helps prevent irritation of dotwork mandalas and calf pieces that sit under clothing.
-
Aquaphor healing ointment. A thin layer in the first 48 hours controls dryness for fine line work without suffocating the needle channels.
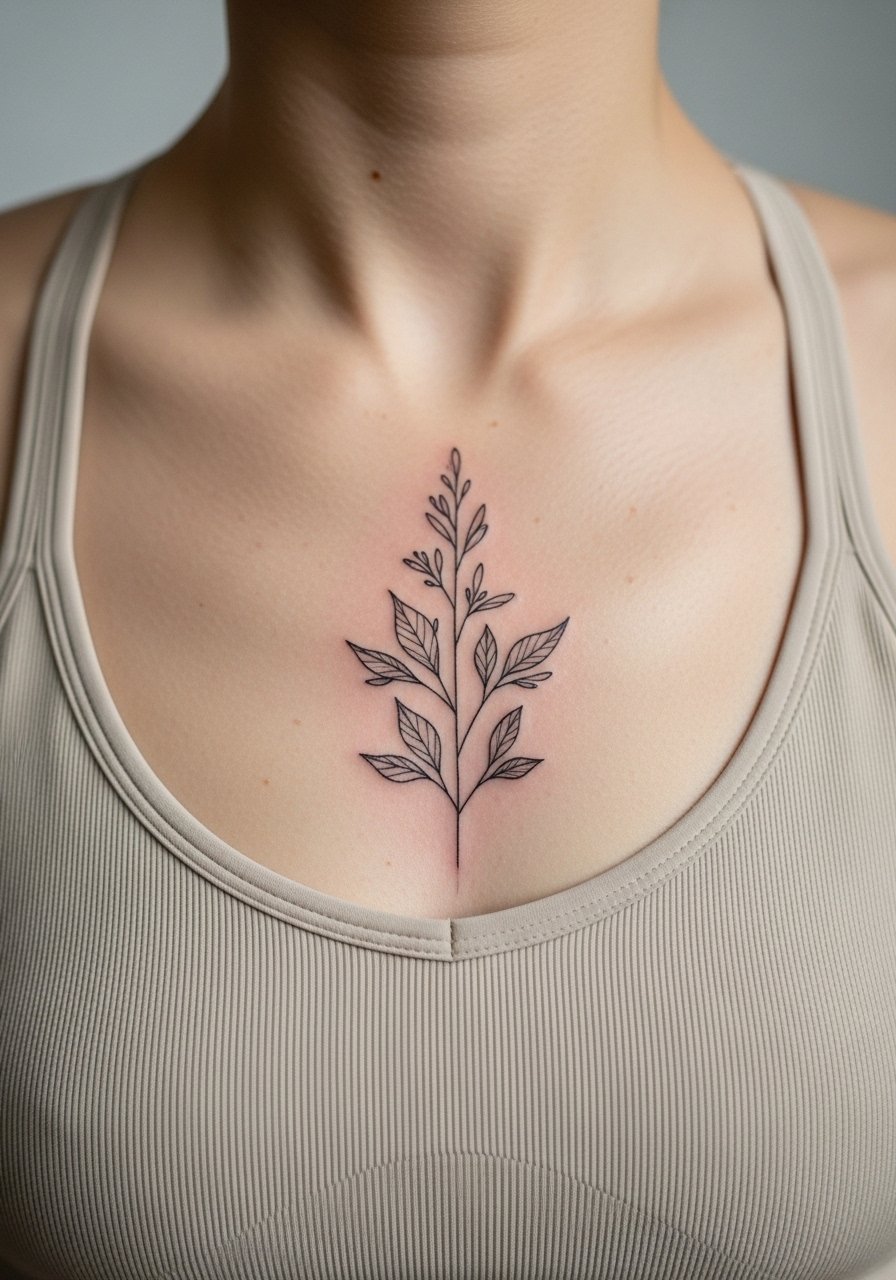
7. Micro Triangle Chain Along the Collarbone

This linear chain plays with negative space and suits someone who wants discreet geometry that peeks out from clothing. When you sit with the artist, show the exact spacing you prefer and ask for a slightly varied scale so the chain reads organic. Expect modest pain and a short session. The main mistake is making the triangles too small, which leads to merging after healing. For showing it off, a thin chain pendant necklace draws the eye along the collarbone without competing. Plan a year-two check if you want untouched crispness.
8. Ribcage Fibonacci Spiral

Artists are split on whether dense fine line on ribs is a good first tattoo. One camp argues the thin skin and chest movement blur tiny connected lines within a couple of years. The other camp counters that with appropriate spacing and slightly stronger anchors the spiral holds. Be explicit about scale in consultation and ask the artist to show a stencil while you breathe and twist so it sits correctly. Pain on the ribs is higher than most other places and sessions can stretch longer if shading is required. A frequent error is requesting a spiral that is too dense for the ribcage. If you plan to show this off, wear a cropped top on the session day so the artist can access the area cleanly.
9. Geometric Mountain Range on the Outer Bicep

There is visual clarity when angular ranges align with the muscle flow of the bicep. Tell the artist you want the peaks to read from a few feet away, so include bold outer facets and lighter internal lines. Pain is moderate and sessions usually land under two hours for a single piece. Mistakes happen when people ask for tiny, over-detailed slopes that flatten with time. For casual layers, a rolled up linen shirt frames the design without crowding it. Consider a small touch-up window after the first year if you want the peak lines to stay crisp.
10. Stipple Shaded Compass on the Ankle
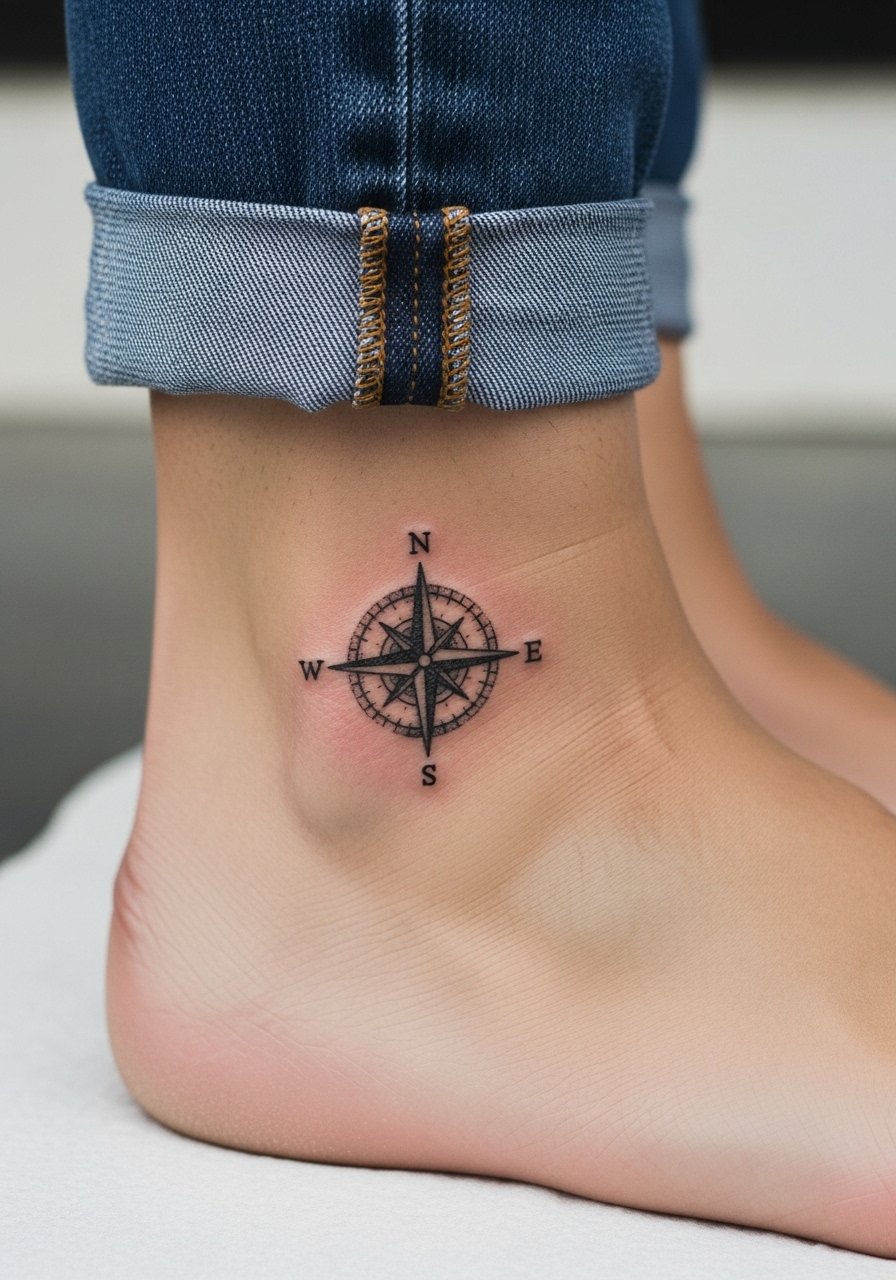
The ankle is a classic spot for directional motifs and stipple shading adds depth without heavy lines. In your consult, ask for more open stippling near the edges so the shading does not seal into a single tone after healing. Pain is moderate and sessions are fairly quick. A common mistake is placing the compass too close to where shoes rub. For visibility, sandals or rolled jeans work best while it heals. Expect a touch-up at year one if the outer points sit in a high-friction area from footwear.
11. Geometric Wolf Head on the Thigh
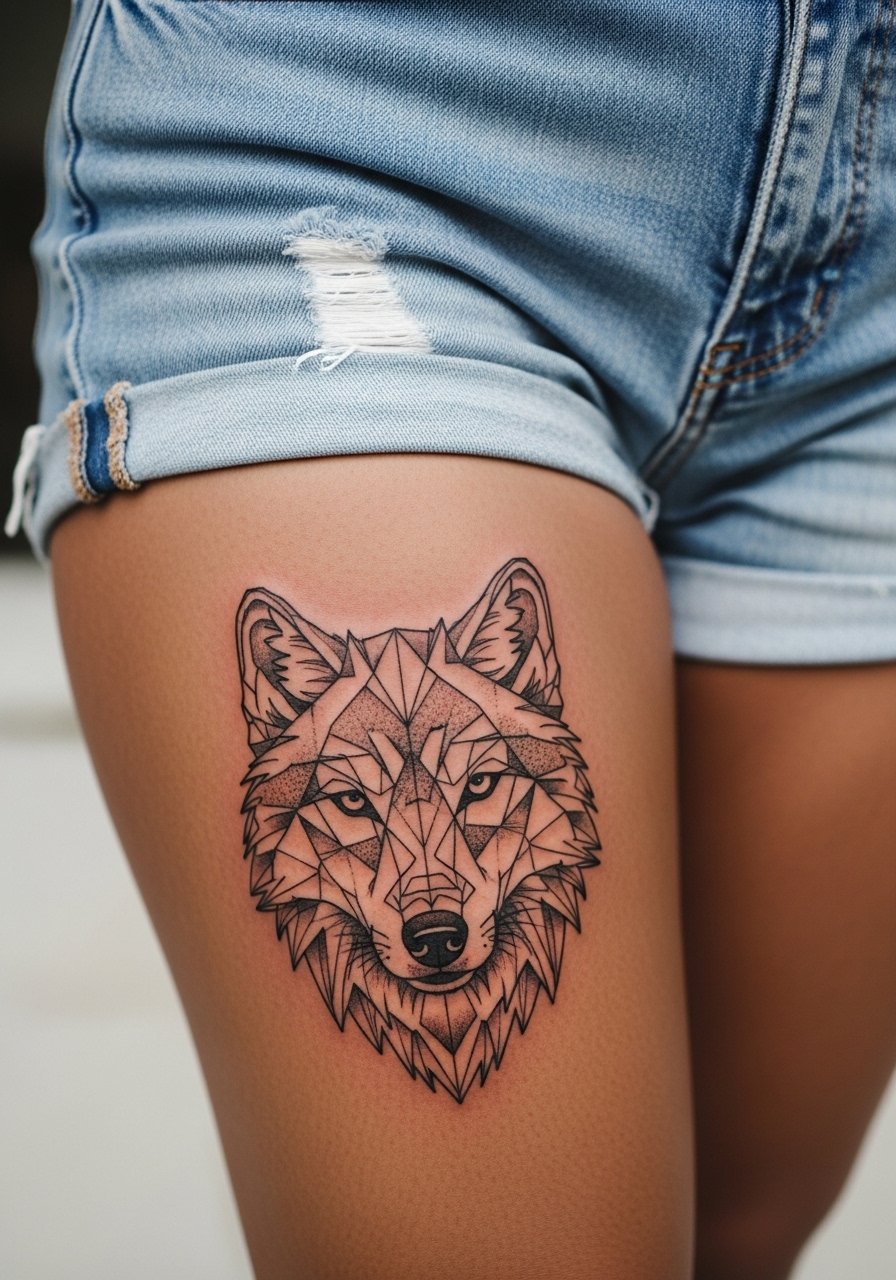
For fuller animal pieces, the thigh gives room for facets and negative space to breathe. Tell your artist whether you want the design to read aggressive from a distance or delicate up close, and choose lineweight accordingly. Thigh sessions are tolerable for most people and can be completed in one visit for a medium-sized piece. People often try to cram too much facial detail into the surface, which makes the work age poorly. When showing it off pick high-waisted shorts or skirts like high waisted shorts that reveal the placement without awkward cuts. Touch-ups are typically minimal if the initial saturation is even.
12. Hexagonal Honeycomb Shoulder Cap
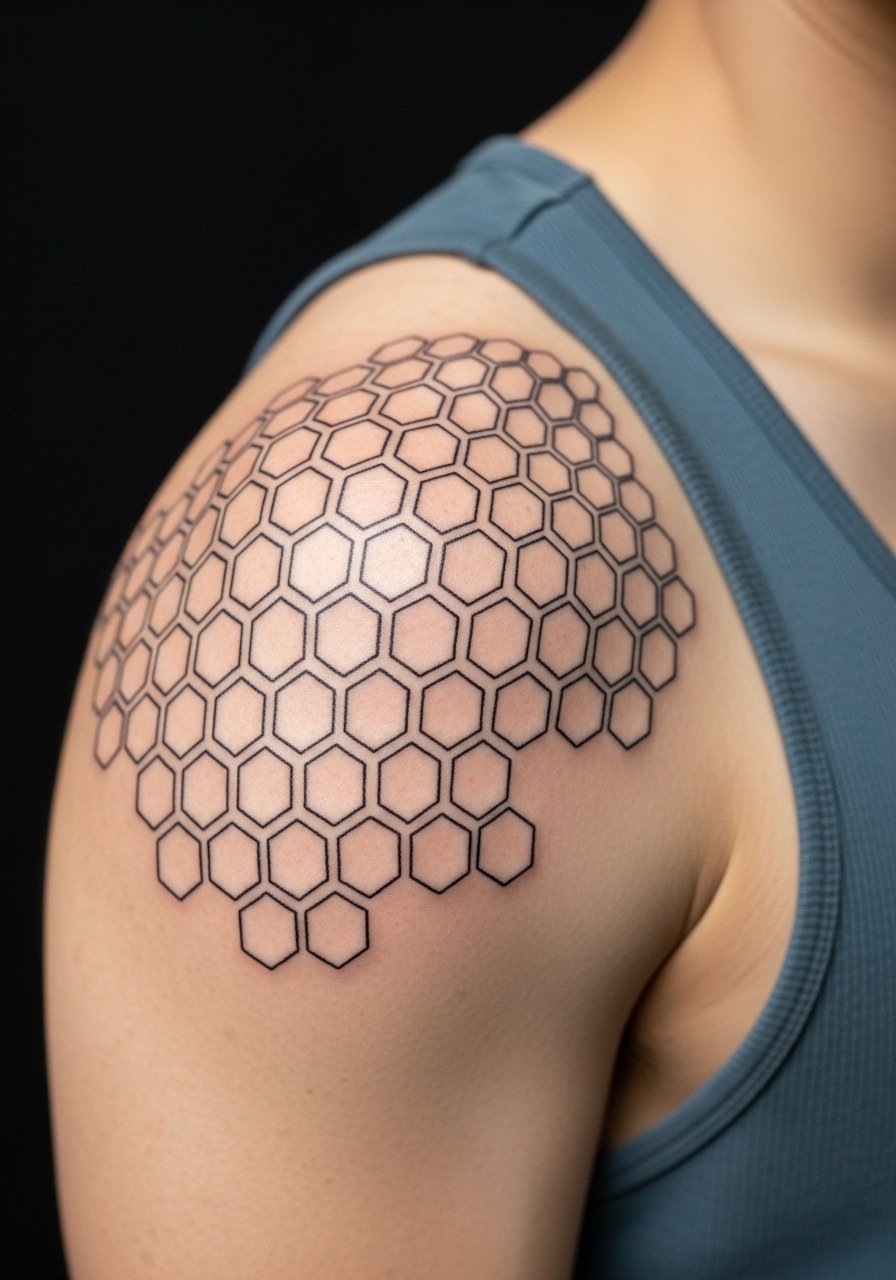
There is a modern feel to tessellated hexagons that also scales easily into a sleeve later. When booking, say you want a balance of filled and open hexes so the pattern breathes on curved shoulder skin. Sessions are moderate in length and pain is typically manageable. A typical mistake is tiling hexes without respecting the muscle contours, which creates odd optical shifts as you move. For the session wear a tank top you do not mind pulling aside. This area tolerates saturation well, so touch-ups are mainly about alignment, not pigment loss.
13. Interlocking Lines on the Back of the Neck

This is a discreet spot that shows when you wear your hair up. Ask the artist for slightly bolder anchors because the neck sees frequent sun and friction. Sessions are short. A common error is choosing ultra-fine line without considering the sun exposure that necks get. If career considerations matter, remember this spot is visible when hair is up. For a subtle frame, a wide-neck shirt works well to show it off while keeping things professional. Expect a touch-up in year two if you spend a lot of time outdoors.
14. Tiny Geometric Sun Behind the Ear

Behind-the-ear pieces read intimate and they are easy to hide with hair. For safety, specify "on the skin behind the ear, below the hairline on the neck" so the artist positions it on the neck skin rather than on the ear itself. Sessions are brief and pain low to moderate. The typical mistake is over-detailing a tiny area. Since exposure to shampoo and water is frequent here, keep aftercare instructions tight. Consider how you will wear your hair while it heals. This placement ages differently depending on hair oils and product use, so mention your daily routine during the consult.
15. Geometric Arrow on the Side Wrist
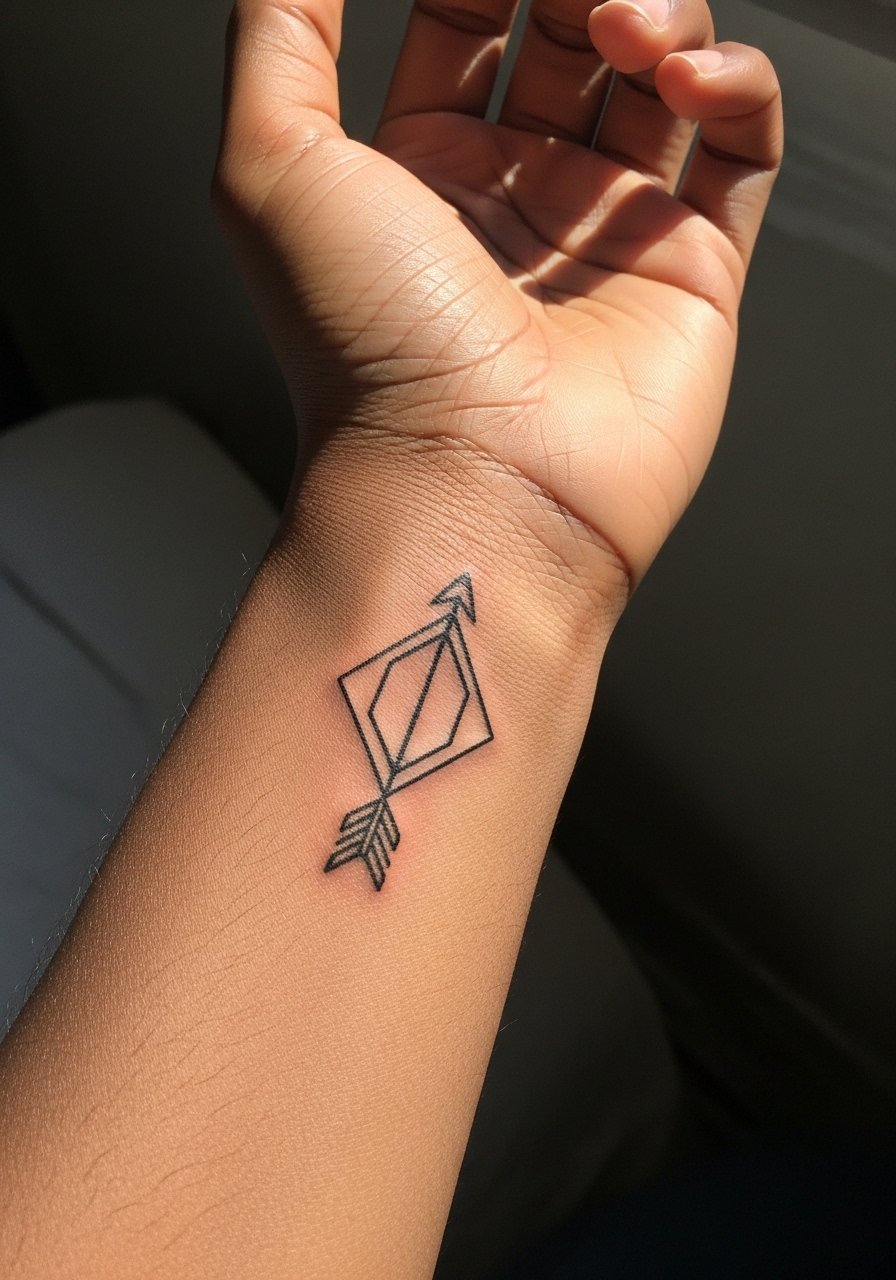
There's a clean directional energy to an angular arrow on the wrist, and it pairs well with daily wristwear. Tell your artist whether you prefer the arrowhead to be filled or open, since filled areas hold longer. Session time is short and pain is moderate. The biggest mistake is placing the shaft too close to the palm where washing accelerates wear. For styling, stack it with a dainty bracelets set that frames the wrist without obscuring the arrow. Plan a small touch-up at year one if you use the hands heavily.
16. Concentric Squares on the Upper Back
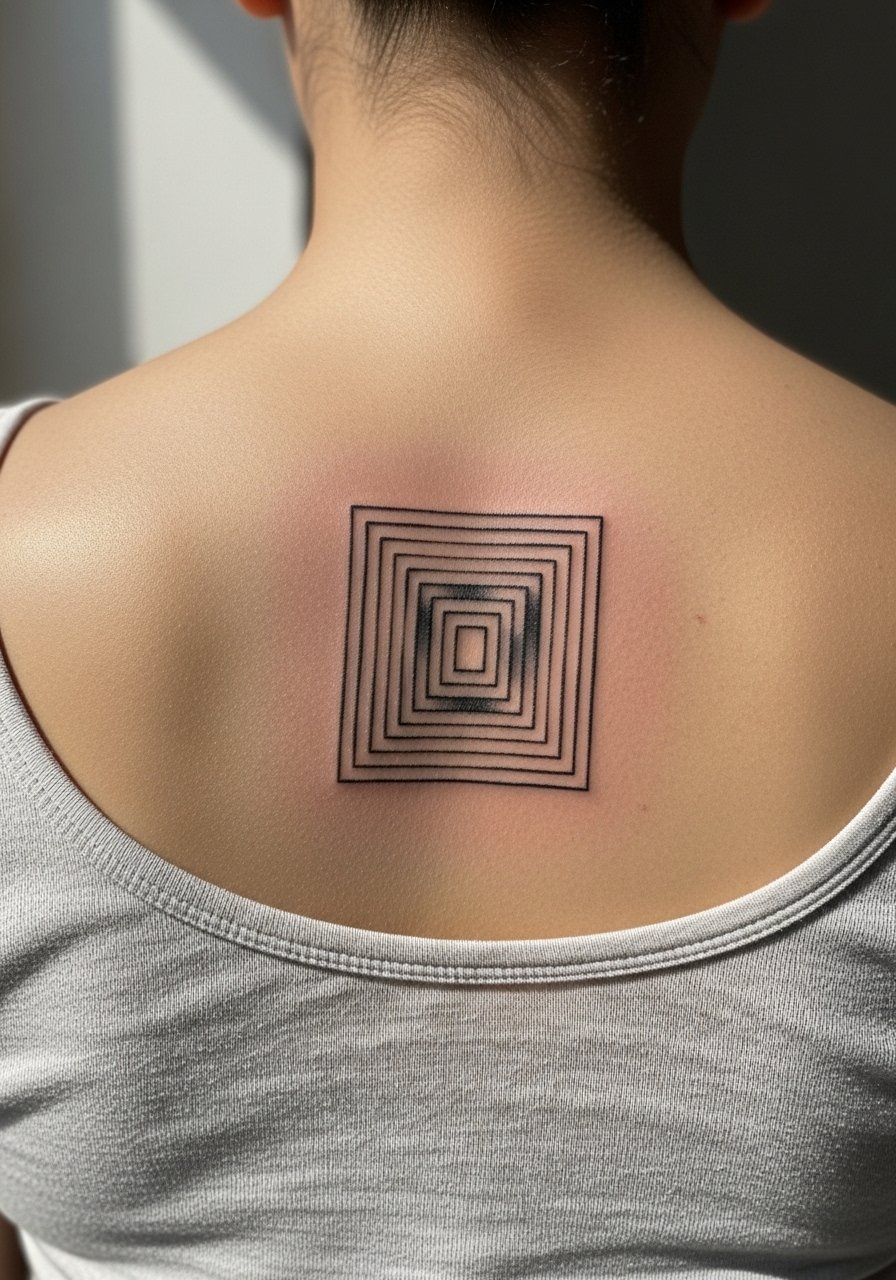
Concentric squares use symmetry to make a quiet statement that scales easily. When you meet the artist, have them place a stencil while you mimic posture so the lines center with your shoulders. The upper back is forgiving and tolerates dense work, but heavy shading can trap heat during healing. People sometimes pick a size so small that the inner squares blur quickly. For showing it off, open-back tops work best, and for the session wear a button-down you can easily remove. Touch-ups are usually only required where movement stresses the center point.
17. Dot Work Moon Phases Along the Spine

Spine placements deliver drama but demand spacing discipline because the skin flexes. Ask for increased spacing between moon phases and slightly stronger anchors on the edges so the sequence reads at a glance. Sessions can be longer depending on length, and pain ranges from moderate to high in the central spine. A common error is compressing the phases too tightly. For an evening reveal, an open-back midi dress frames the run beautifully while keeping most of the back covered. Plan a touch-up conversation in the consult, especially for the central phase.
18. Minimalist Geometric Band on the Calf
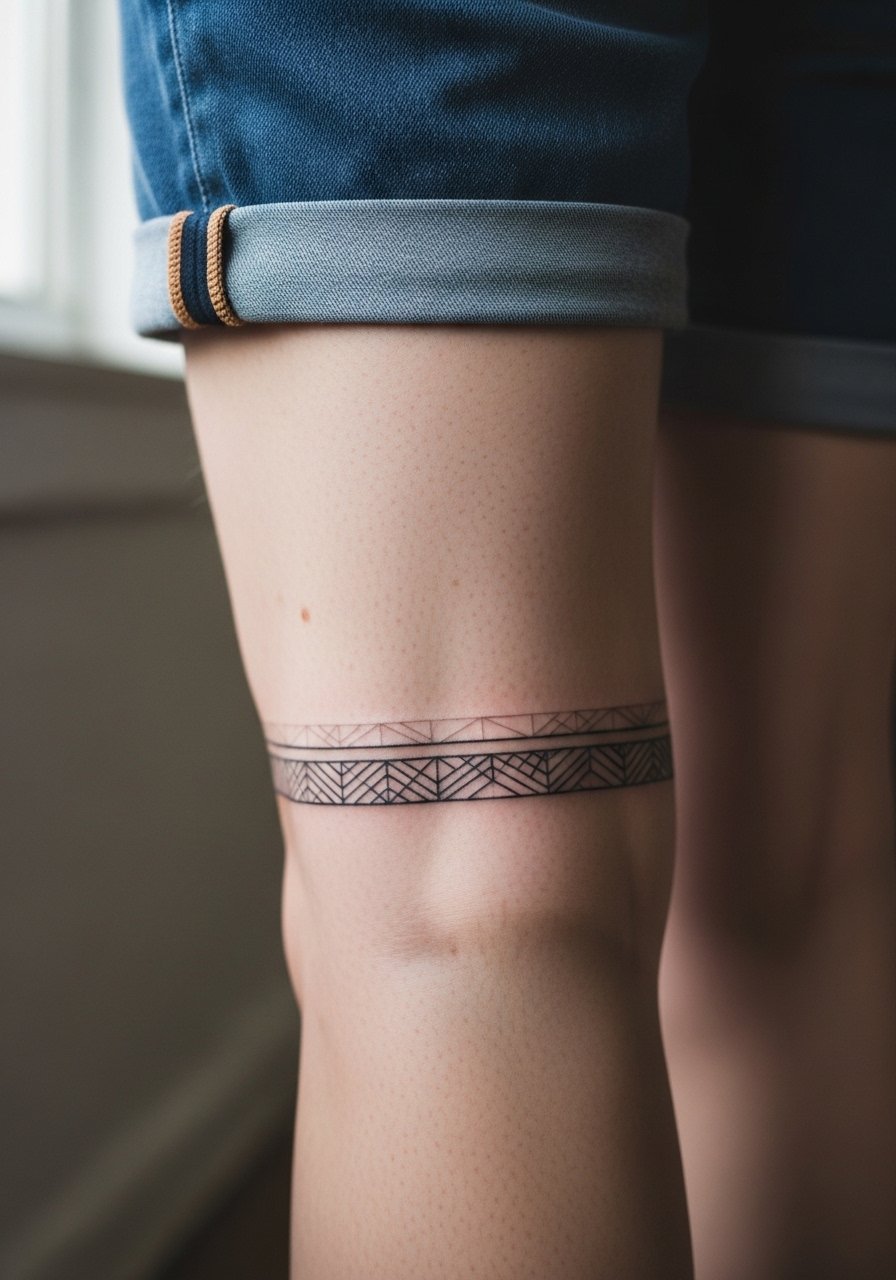
A single band of interlocking geometry around the calf reads modern and wearable. Ask the artist to stencil the band while standing so the line sits level when you walk. Pain is moderate and sessions are short. The main mistake is choosing a band so thin that movement creates joins that look irregular after healing. For casual wear, shorts that show the mid-calf work well. Expect minimal touch-up if the initial application maintains even saturation.
19. Sacred Geometry Palm-Sized Near the Chest Edge

A palm-sized sacred geometry element on the upper chest sits at the intersection of visible and private. During the consult, favor spacing and a modest outer line so the pattern resists early merging under clothing. Pain is moderate. People often pick an overly dense pattern for this spot and then notice blurring after months of shirt friction. For evening wear, a v neck blouse reveals the piece without compromising the neckline. Schedule a touch-up conversation for one to two years out if you want long-term sharpness.
20. Isometric Cube on the Knuckle

Knuckle tattoos face constant hand use and frequent washing. When you ask for a cube here, request slightly bolder anchor points and accept the likelihood of multiple touch-ups. Sessions are quick, but fading is faster than on the forearm. The usual mistake is underestimating how often the area rubs against surfaces. For jewelry, keep rings minimal during the healing window so they do not press on fresh ink. Expect a touch-up at six to twelve months if you type, cook, or otherwise wear your hands down hard.
21. Mandala Elbow Wrap
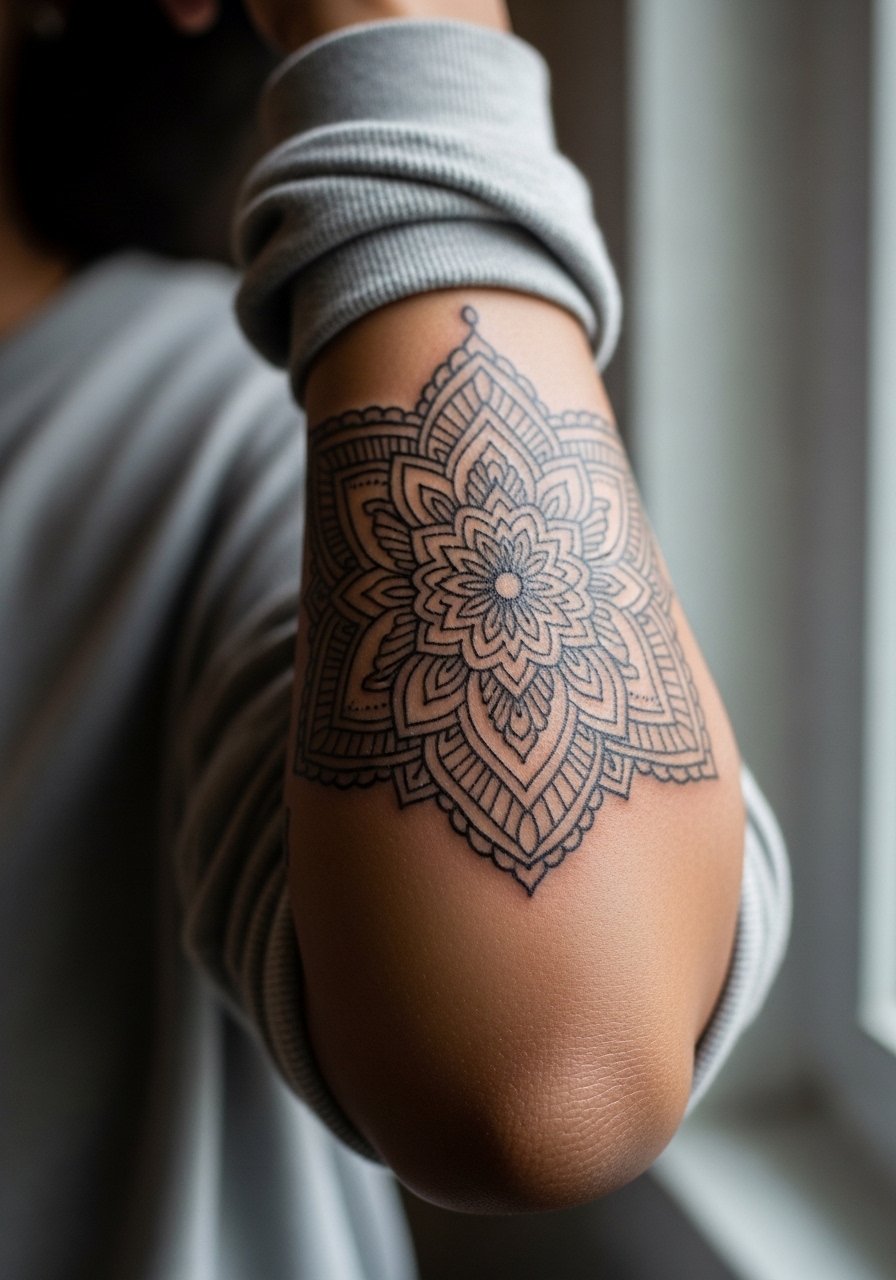
Elbow wraps look striking but the skin here moves and creases a lot. Ask the artist to design around the crease and to use thicker outer lines with softer inner stippling so the pattern reads even when you bend. Pain is higher at the joint and sessions can require repositioning. A common error is putting overly fine detail directly on the crease. For the session, wear a loose long sleeve you can pull up easily. Plan for a touch-up window at around a year, especially along the crease where pigment tends to migrate.
Frequently Asked Questions
Q: Will a fine line geometric tattoo on the ribs blur faster than one on the forearm?
A: It depends on scale and spacing. Ribs have thinner, more mobile skin so tight fine lines and dense detail tend to soften sooner. If you want ribs, ask for slightly heavier anchors and more breathing room between elements, and plan for a possible touch-up at year two.
Q: How should I dress for a sternum or upper chest session to make access easy and discreet?
A: Wear a fitted sports bra or a bandeau you can pull down slightly so the artist has a clear field without full exposure. A loose button-down over that layer works for travel to and from the studio if you prefer more coverage.
Q: Do finger and knuckle geometric tattoos require different aftercare than forearm pieces?
A: The care steps are similar, but expect more frequent touch-ups for hands because of washing and friction. Keep the area protected during the first week and avoid tight rings until the ink seals, then reassess with your artist at month three.
Q: Are there geometric styles I should avoid as a first tattoo if I want low maintenance?
A: Very dense dotwork and extremely fine micro-detail on high-motion zones like the ribs, fingers, and knuckles often demand maintenance. For a first piece pick balanced spacing and simple anchors that read as they age.
Q: How much does placement affect how often I will need a touch-up?
A: Placement is one of the biggest factors. High-friction and high-movement areas need touch-ups sooner than protected zones. Forearms and upper back are forgiving, while hands, ribs, and feet require more upkeep.
Q: Can I combine a geometric piece with a symbolic motif and still have it age well?
A: Yes, as long as the symbolic elements have room to breathe and you work with your artist on scale. Ask for a mockup that shows the piece at a slightly larger size than you expect so the lines do not crowd after healing.
