
Fine line sand dollar tattoos are everywhere on saved boards right now, and the ones that still look crisp after a few years tend to have deliberate spacing and simple geometry rather than tiny, overworked detail. If you want a geometric sand dollar that reads clean on skin and moves with you, these 21 ideas show placement, what to ask for in consultation, and wardrobe choices that actually help the design age well.
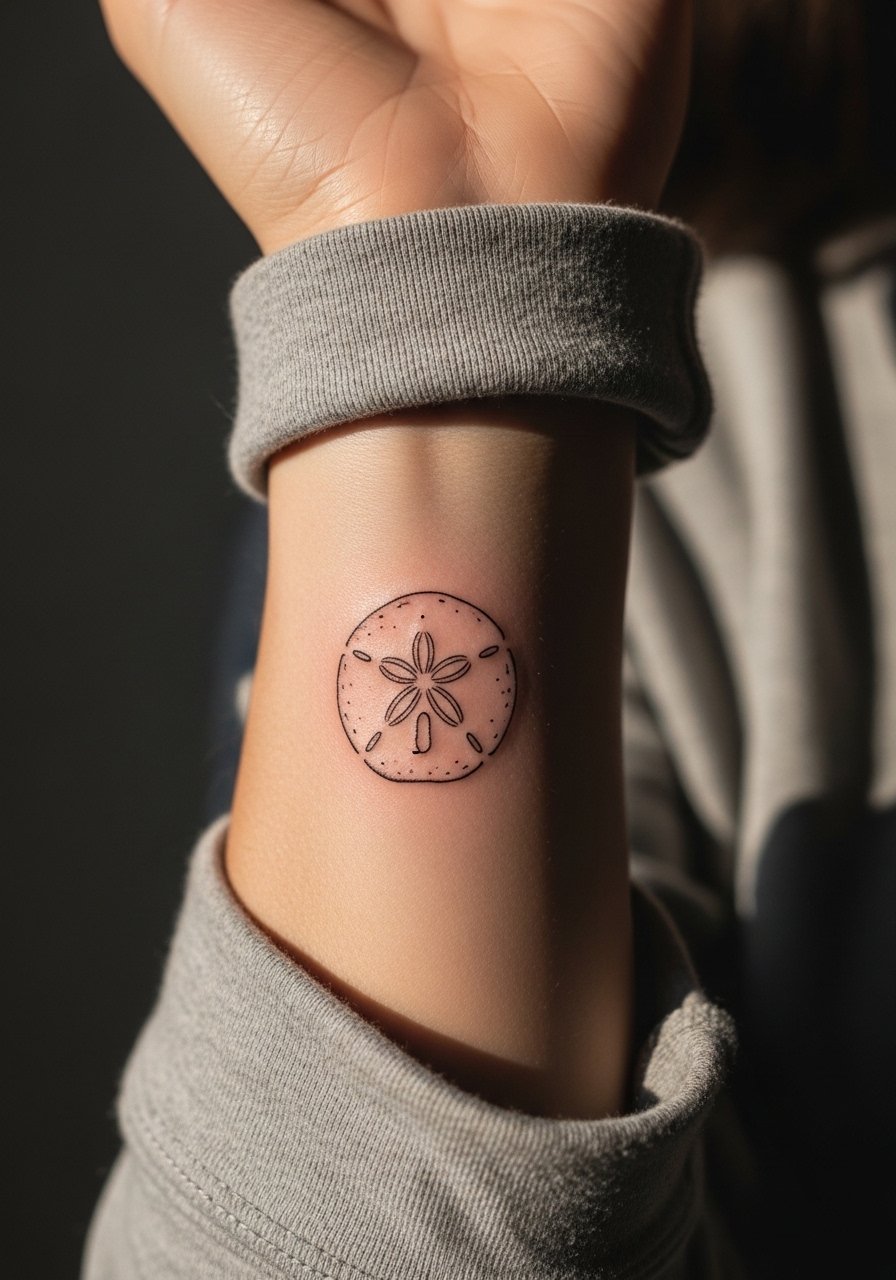
1. Minimalist Geometric Sand Dollar on Inner Wrist
This small, minimal sand dollar uses a steady fine line with room between each radial slit so the piece keeps its identity as it heals and softens. I recommend asking your artist for slightly bolder linework than a micro tattooist would use for script, because the inner wrist sees constant movement and light abrasion. Expect a quick session, low pain, and a touch-up at year two if you like super-crisp edges. For the appointment wear a loose button-down shirt so the sleeve can be rolled without pulling at the wrist. Common mistake is requesting the design too tiny; give each slit 2 to 3 millimeters of breathing room.
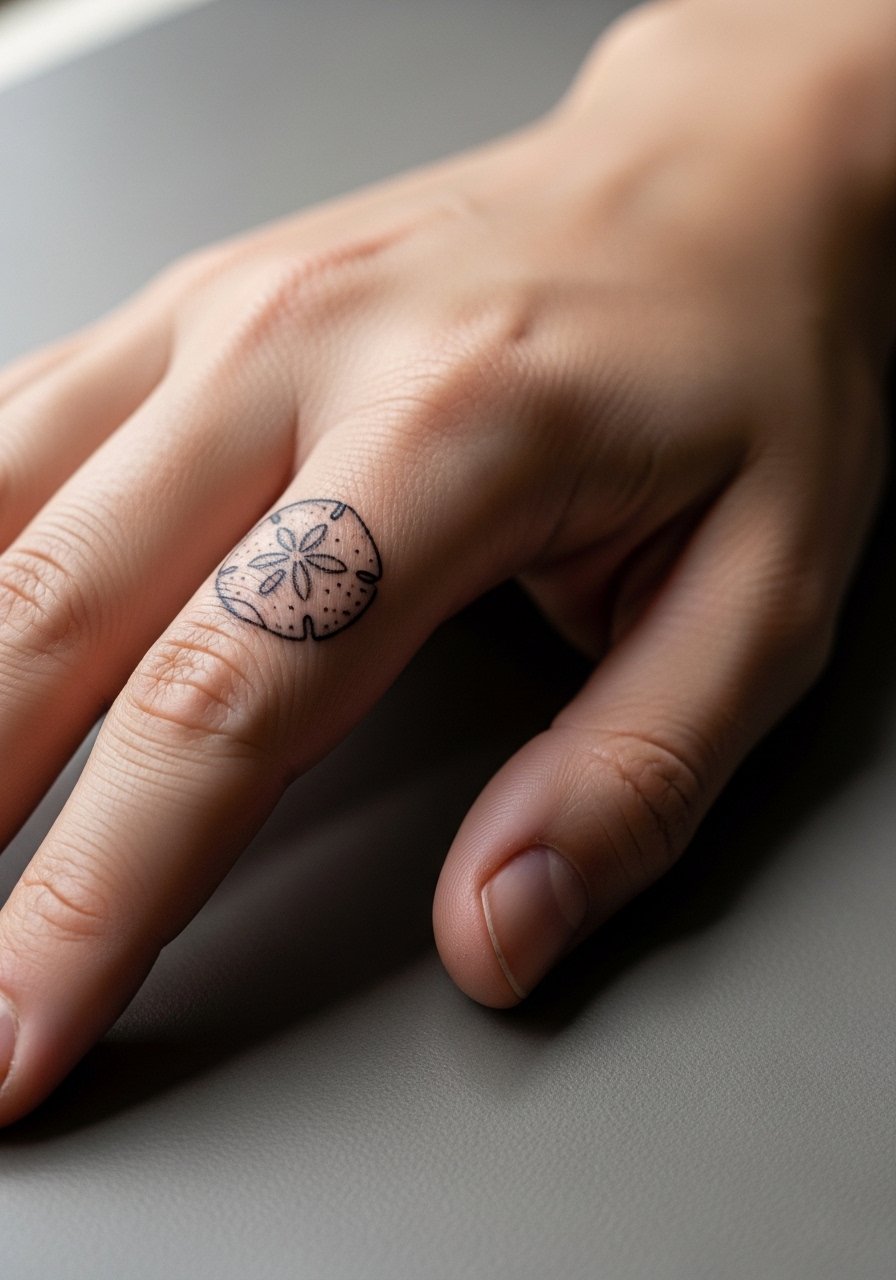
2. Tiny Geometric Sand Dollar on the Side Finger
Finger placements demand a different conversation. The skin is thin and mobile, so tell your artist you want reinforced linework with slightly increased spacing between elements to slow migration. Pain is high for the finger and touch-ups are common within 1 to 3 years. For the session wear a short-sleeve tee so the arm is free without extra fabric rubbing the fresh ink. Expect a 20 to 40 minute chair time and plan for a thin protective film during the first nights to reduce friction from typing and washing.
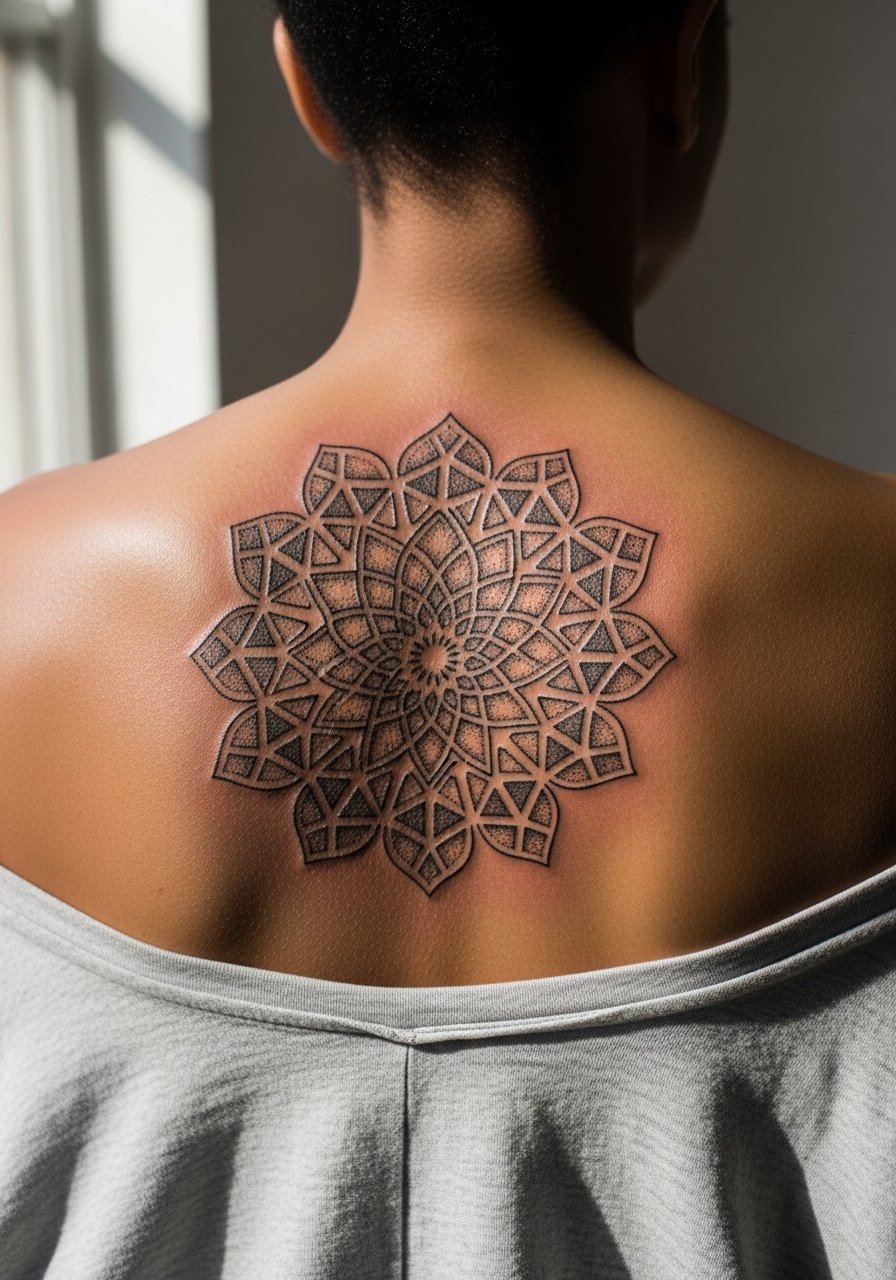
3. Sand Dollar Mandala on Upper Back
A mandala interpretation places the sand dollar at the center of concentric geometry and uses stipple shading to keep the texture readable over time. This placement gives artists room for scale so the dots and negative space age more predictably than cramped detail. Tell your artist you want a custom stencil that keeps the central holes open and symmetrical. Session-wise, expect moderate pain and a longer appointment if paired with shoulder pieces. For booking, look for artists via convention guest lists or local shop directories rather than a single viral post, and bring images that demonstrate spacing rather than density.
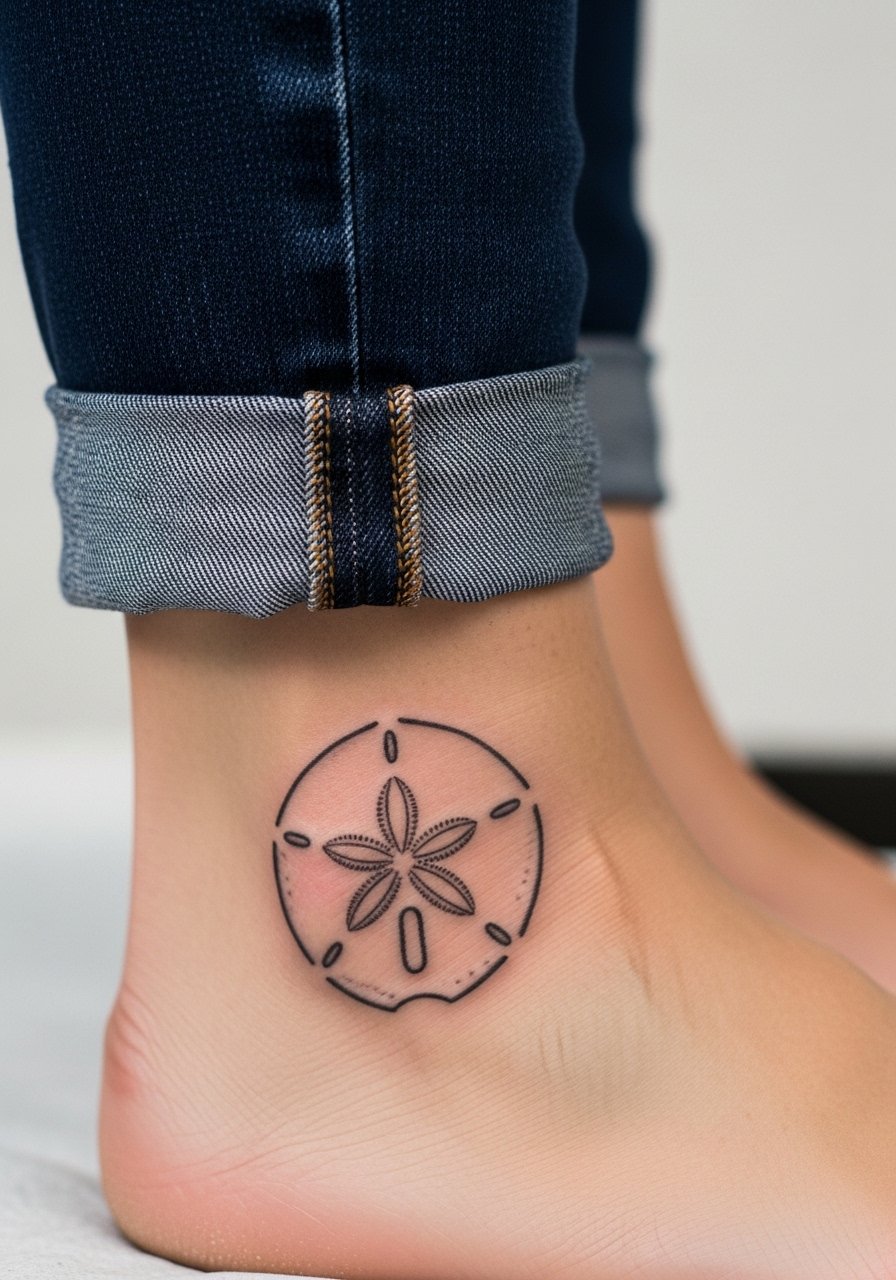
4. Negative Space Sand Dollar on Ankle
Negative space work reads sharply on the ankle when the surrounding geometry frames the sand dollar instead of filling it. I usually recommend a slightly larger diameter for ankle pieces because footwear and socks cause constant rubbing. During consultation ask for protective spacing and a shallow fill technique so the negative zones stay clear. Pain is low to moderate and session time is short. For showing this off try a pair of jeans rolled up at the hem or slip-on sandals that expose the ankle line. A common mistake is placing too close to the bone where blowout risk increases.
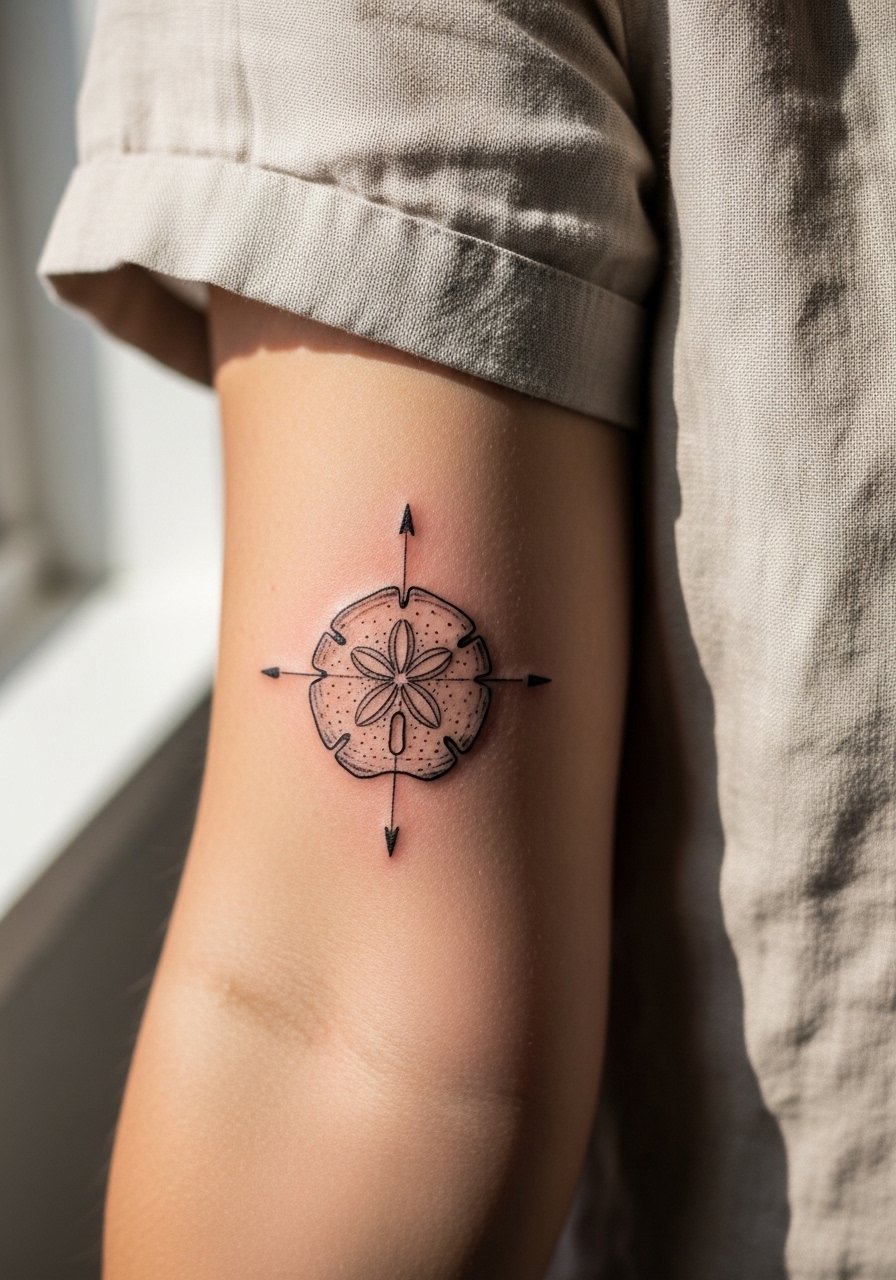
5. Sand Dollar with Compass Lines on Outer Forearm
Putting a sand dollar next to compass lines creates a wearable motif that reads well at arm distance. The outer forearm tolerates moderate detail, so you can pair clean linework with small dot work without losing clarity. Mention to your artist that you want the compass arms slightly thicker than the radial slits to anchor the composition visually as it ages. Pain is mild and sessions are usually under two hours. For casual show-off styling, roll sleeves or wear a linen short-sleeve shirt so the forearm sits exposed without pulling at the edges.
6. Blackwork Geometric Sand Dollar on Calf
Calf placements tolerate heavier saturation and bold blackwork, which is useful if you want the sand dollar to have graphic weight from a distance. The larger canvas lets you introduce blocky geometry and controlled negative space that resists early blurring. Pain is moderate and sessions run longer when adding dense fills. A typical mistake is overcomplicating the interior pattern, which turns muddy after a few years. For this one, ask your artist about contrast between solid fills and open slits to maintain clarity. The calf is lower-friction than ankle, so touch-ups are less frequent.

Studio Day Picks
The forearm, wrist, and ankle pieces above face different friction and exposure concerns, so a few targeted items make the session and first week easier.
-
Stencil transfer paper kit. Lets you preview line placement on the exact skin area, which is crucial for small geometric work like the wrist and finger pieces above.
-
Thin protective film roll. Keeps high-motion spots like fingers and ankles cleaner during the first 72 hours of healing.
-
Fragrance free gentle body wash. Cleans healing tattoos without stripping oils from fine line work on the forearm and calf.
-
Topical numbing cream. Useful for clients worried about wrist and rib sensitivity when those placements come up in consultation.
-
Aquaphor healing ointment. Thin layer application helps retain moisture in tight linework zones during the initial days without clogging needle channels.
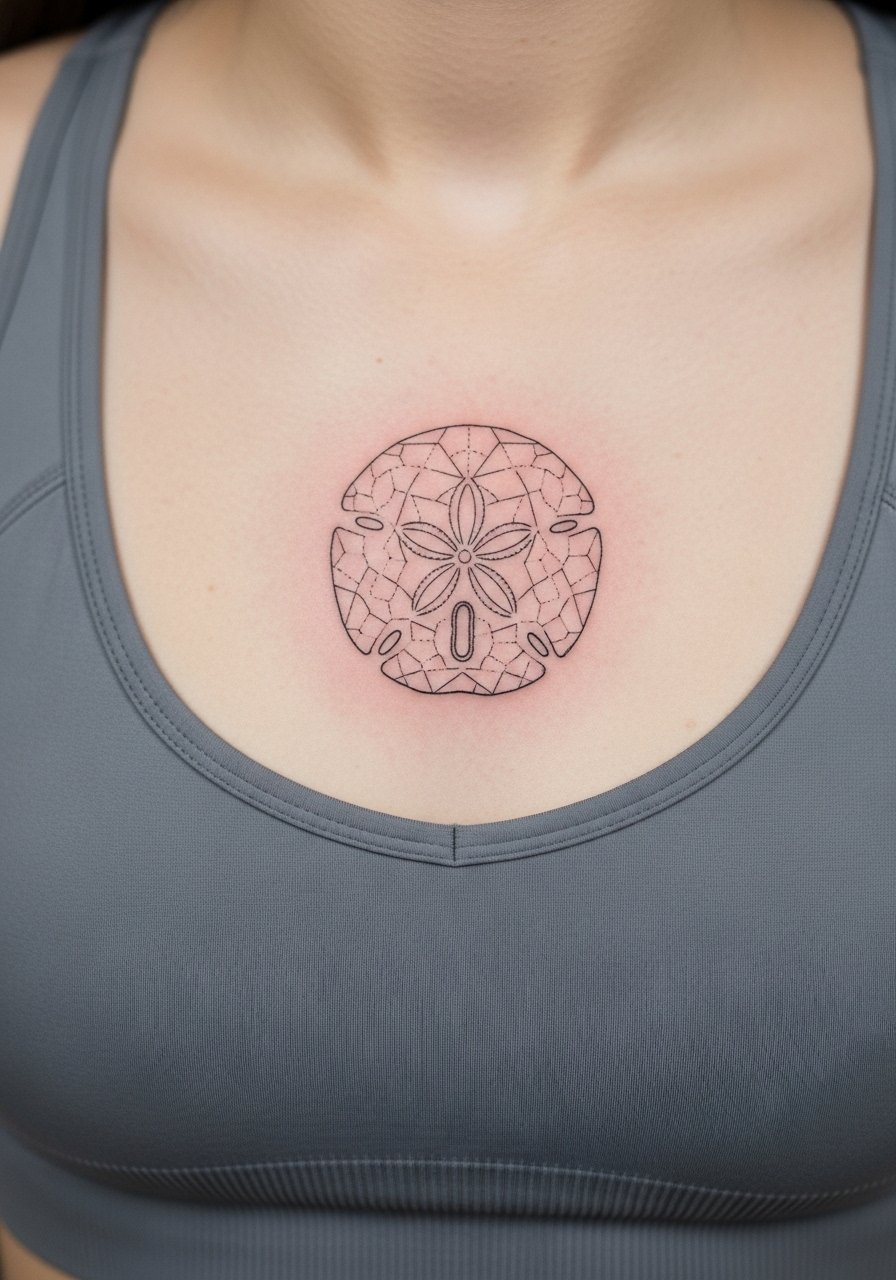
7. Fine Line Sand Dollar Sternum
Sternum work can look extremely delicate but the skin here moves with breathing and clothing, so spacing is key. Artists are split on fine line in this area. One camp says the stretch and movement blur the thinnest lines within two years. The other camp argues that with intentionally deeper, consistent depth and slightly wider spacing, fine line can settle nicely on the sternum. Ask where your artist stands and request a test stencil to check scale with your chest movement. Session pain is higher and booking often requires longer time. For the appointment wear a fitted sports bra or bandeau so the artist accesses the sternum cleanly.
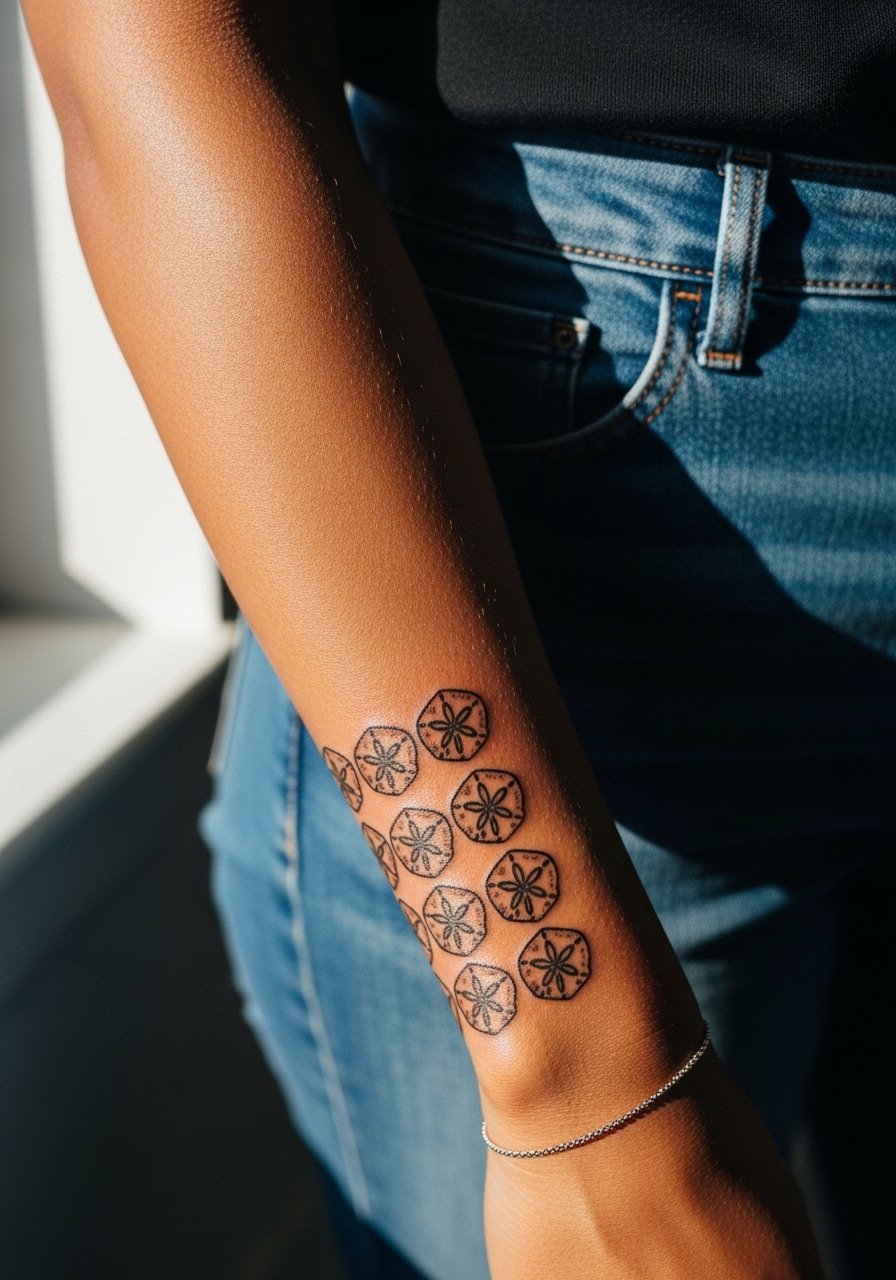
8. Sand Dollar Sleeve Motif along the Forearm
Using repeating geometric sand dollars as a sleeve motif ties a larger composition together while keeping each element readable. I suggest alternating scale so the eyes get resting points and the density never becomes a single mass. In consultation ask for a mapping session where the artist traces each element on your arm so spacing and flow can be tested before inking. Expect multiple sessions and touch-ups depending on sun exposure. For final styling, rolled sleeves and a minimalist chain bracelet complement the forearm without crowding the linework. Watch for cluster packing that leads to early blurring.
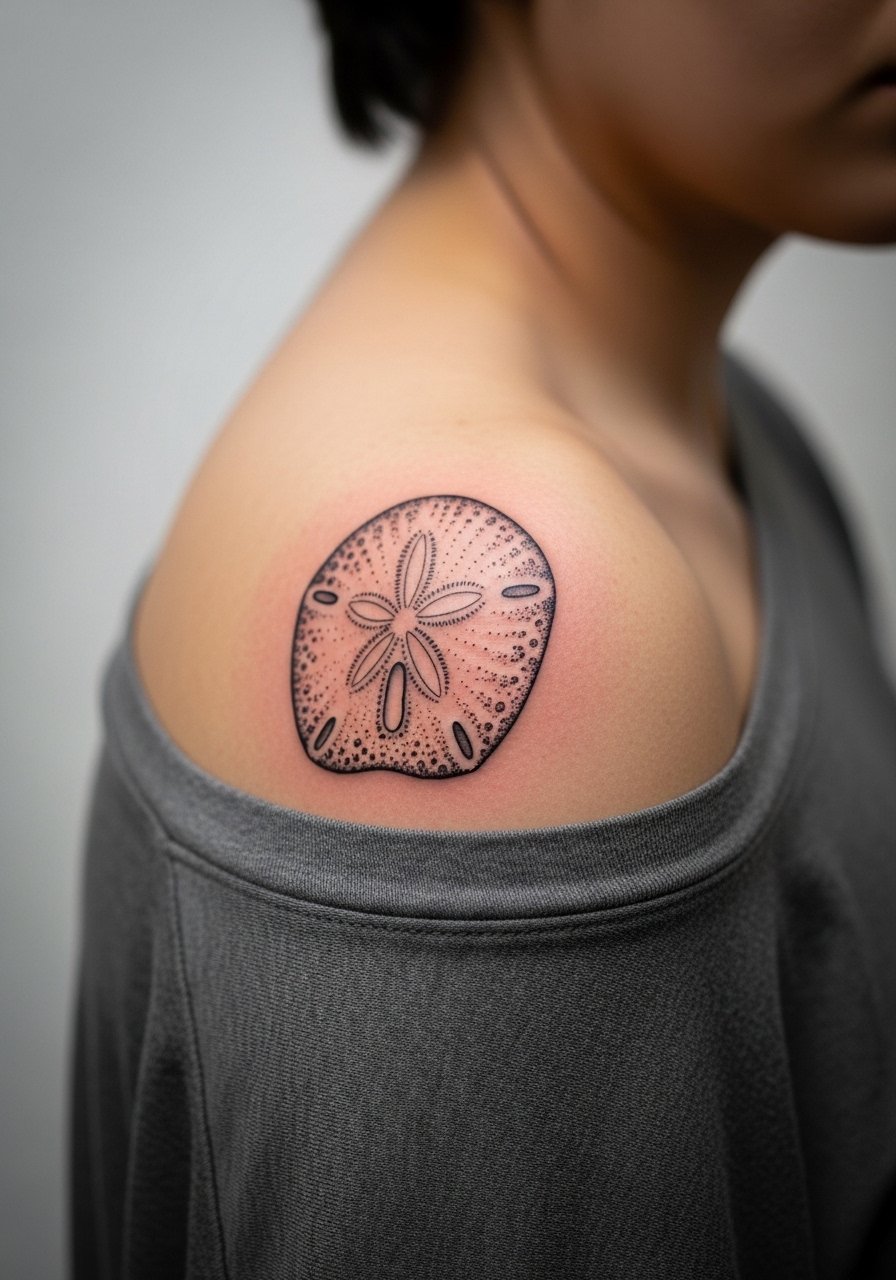
9. Micro-Realism Sand Dollar on Shoulder Blade
The shoulder blade is forgiving for micro-realism because the skin is stable and you can scale detail up slightly. For a realistic texture use tight stipple shading and minimal saturated fill inside the radial slits to preserve separation over time. Tell your artist you want reference photos that show wear, not staged flash, so scale is grounded in how the piece will be viewed on a moving body. Pain is mild and session time is moderate. Wear a button-down you can pull aside during the session. This placement also pairs with open-back tops for evenings out.
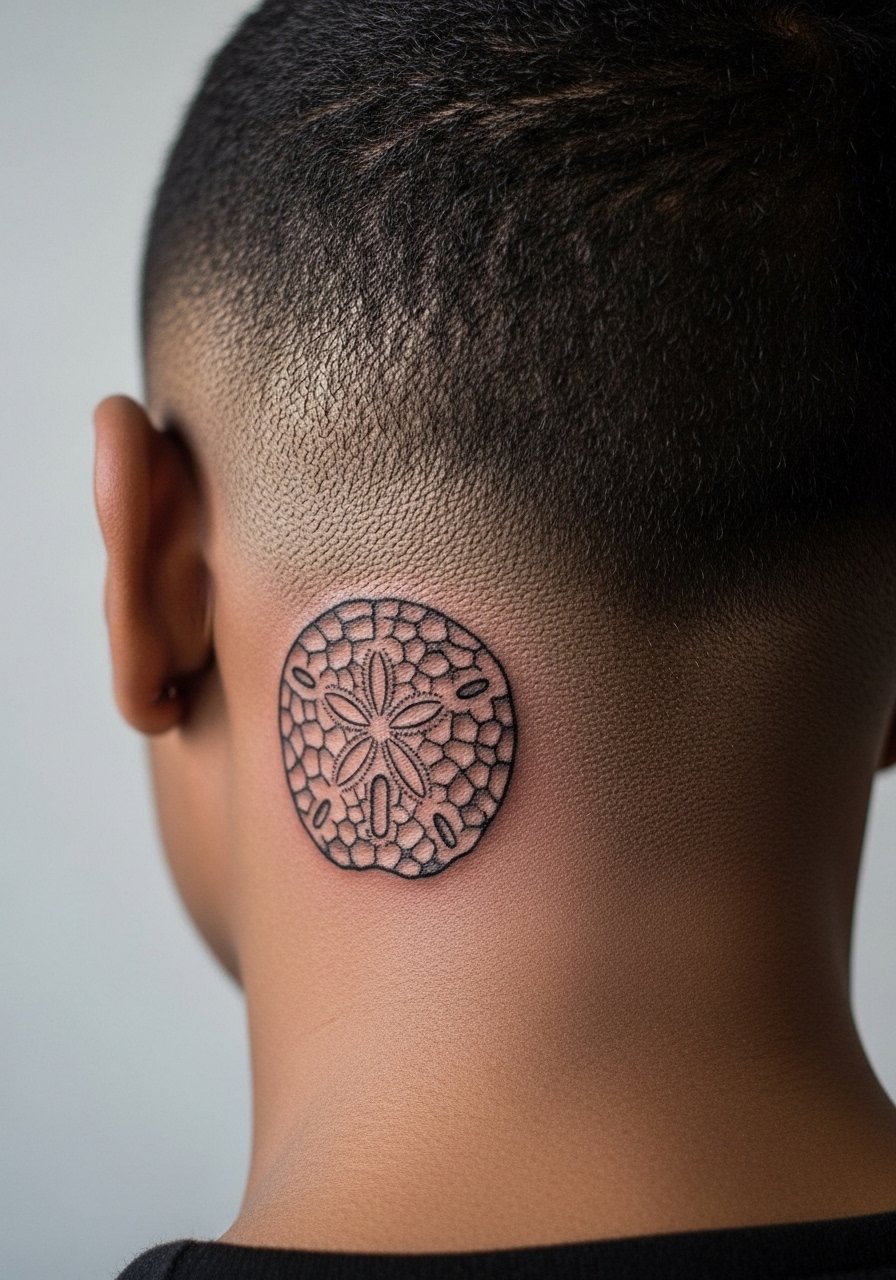
10. Sand Dollar Behind the Ear
Behind-the-ear placements are subtle and need a careful scale check. Describe the piece as on the skin behind the ear, below the hairline on the neck so the artist frames it correctly. The space favors tiny geometry but the real risk is over-detail which gets lost. Expect moderate pain and pretty quick sessions. For the appointment keep hair clipped back and wear a top with a wide neck. Hand a stylist reference like a thin chain pendant necklace to show how jewelry will sit near the piece. Consider how visible it will be with your usual hairstyle.
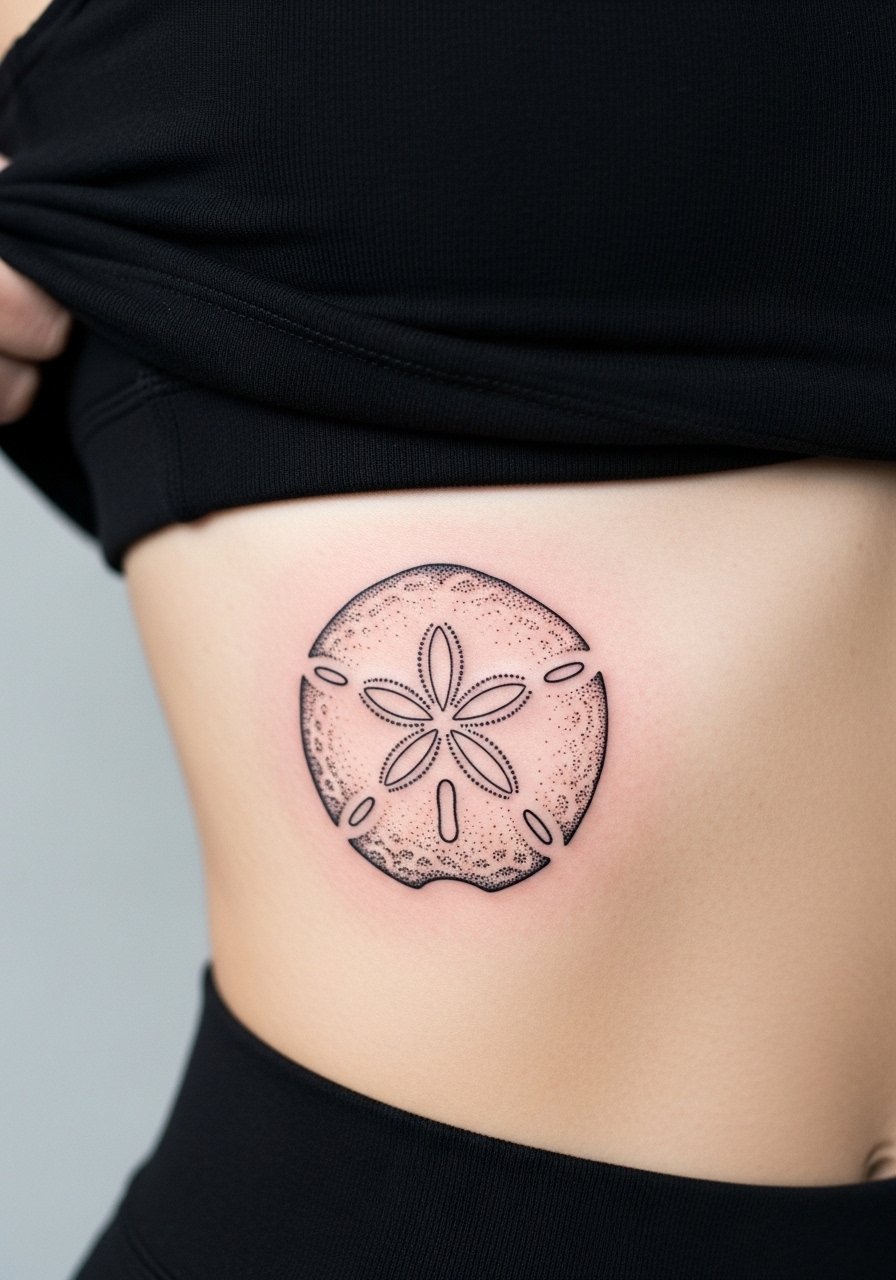
11. Stipple Shaded Sand Dollar on Ribcage
Ribcage tattoos are notorious for movement and painful sessions. The controversy around fine line on ribs appears again here. One side believes the stretch of the flank causes lines to merge within a couple of years. The other side insists that with correct needle depth and larger spacing, the ribs hold fine. If you choose ribs, ask for a scale increase and stipple shading to keep contrast while avoiding dense blacks that can pool. Sessions are longer and pain will be higher. For the appointment wear a cropped top or shirt lifted slightly to expose only the ribcage area. Expect at least one touch-up in the first two years.
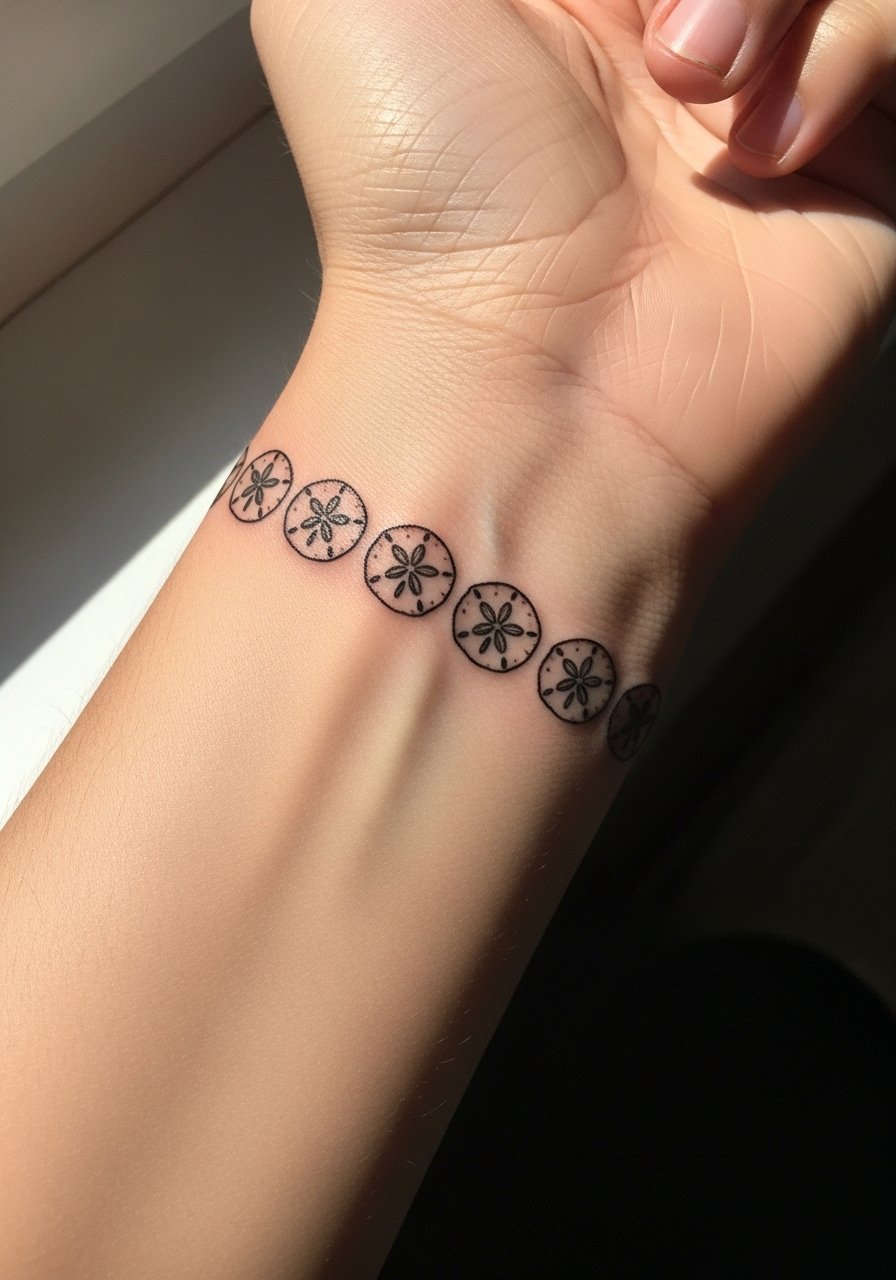
12. Tattoo Band of Sand Dollars around the Wrist
A repeating band around the wrist works when each sand dollar has minimal interior detail and clear gaps between units. The wrist takes constant sunlight and friction, so plan for bolder linework and slightly larger scale than your saved images suggest. Tell your artist you want consistent spacing to avoid overlap as the piece ages. Session time is short but expect a yearly touch-up if you expose the wrist often. For everyday styling pair the band with a minimalist watch or thin stacked bracelets that do not lay across the ink. Avoid wrapping too tightly during the first week.
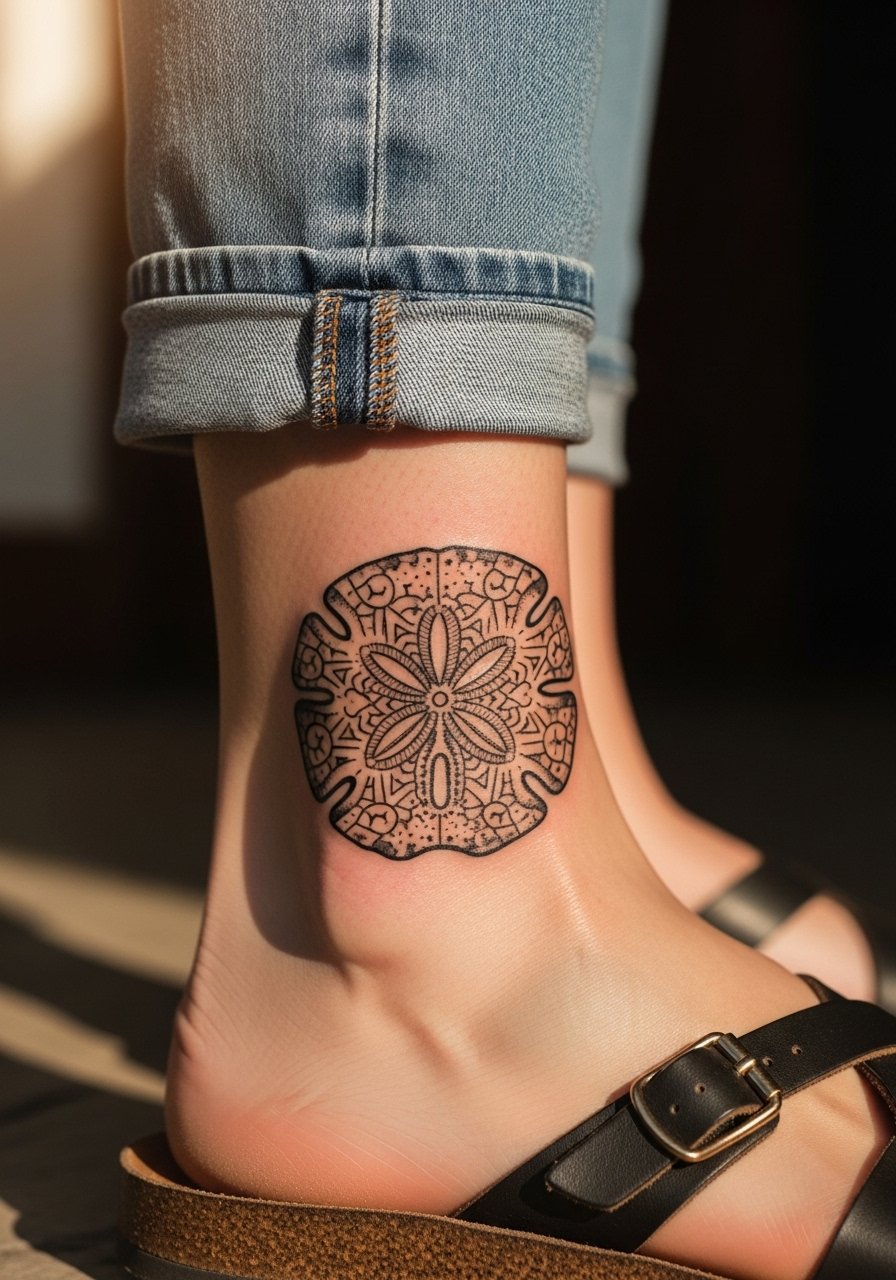
13. Geometric Sand Dollar Ankle Wrap
A wrap design that follows the ankle curve can be delicate or bold depending on line weight. The ankle area reacts poorly to tiny internal detail because shoes and socks create friction. I advise broader slits and stronger outer linework so the motif remains legible. For the session, wear pants you can easily roll up and a pair of slip-on sandals to avoid pressure on the area afterward. Pain is variable close to bone. The design reads well with cropped trousers and summer footwear.
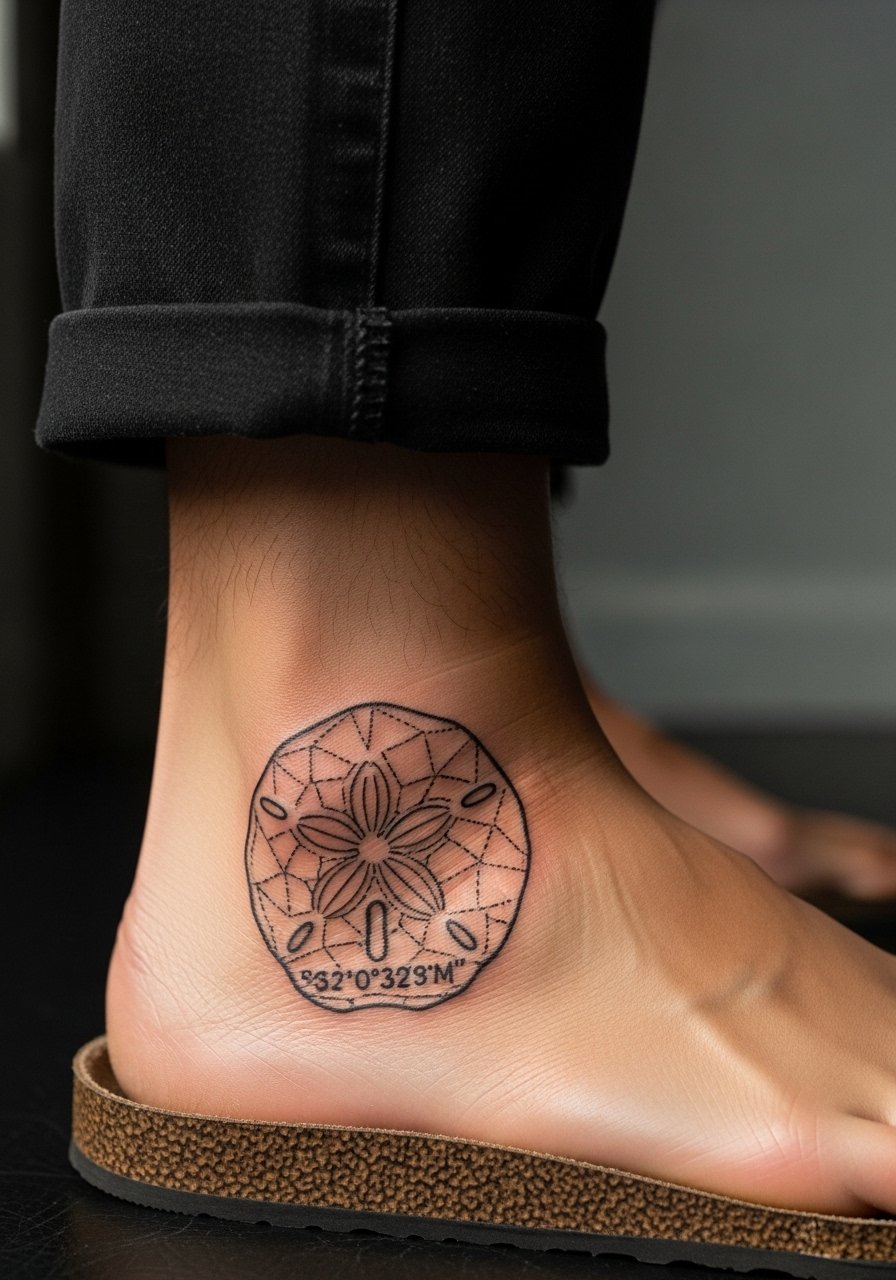
14. Sand Dollar with Nautical Coordinates on Side of Foot
Ankle and foot placements see heavy wear, but pairing the sand dollar with coordinates gives a personal anchor that still works if minor blurring occurs. Ask your artist to render the numerals in a slightly condensed, monospace-style font so they remain readable as the skin ages. Foot tattoos need care for footwear friction and usually require touch-ups at year two. For the appointment wear roomy shoes or sandals and a pair of loose drawstring linen pants so leg fabric does not press on the area after inking. Keep the script small but bold enough to avoid early loss of definition.
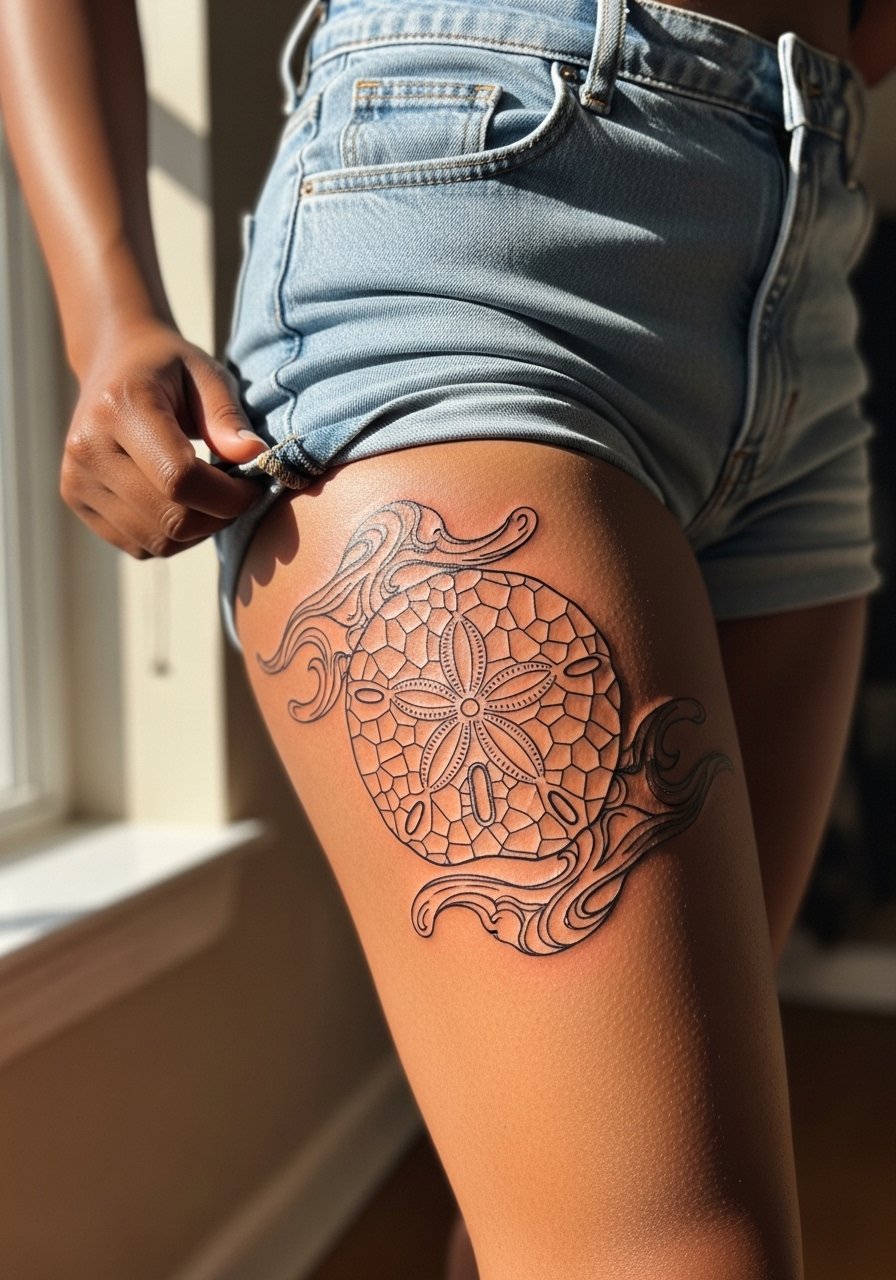
15. Sand Dollar and Wave Motif on Outer Thigh
The outer thigh is forgiving and great for combining a geometric sand dollar with organic wave lines. Scale up the sand dollar so the waves act as a frame rather than competing texture. I suggest stipple shading for the waves and clear negative space around the central shape to keep it readable. Pain is low to moderate and session times are longer for larger compositions. For the session wear high-waisted shorts or a wrap skirt so the artist can access the thigh without full exposure. This placement ages well with minimal sun exposure.
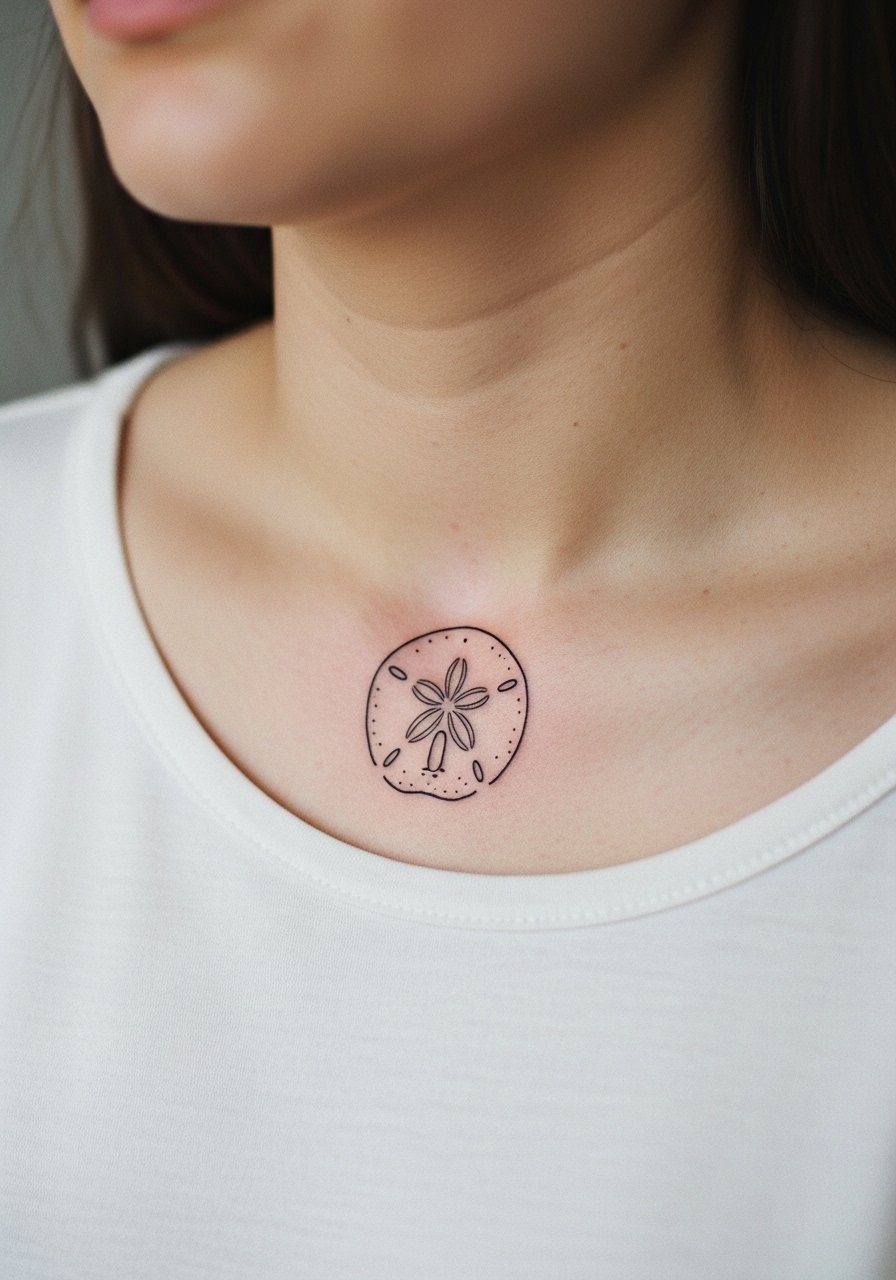
16. Minimalist Sand Dollar Collarbone Accent
A small geometric sand dollar near the collarbone reads elegant if positioned just off the bone. The collarbone area sees clothing contact, so ask for a slightly elevated outer line to prevent the design from softening into the shirt seam. Pain is moderate and sessions are quick. For showing it off with evening wear try an open-back midi dress or a wide-neck top that rests just below the tattoo. A common mistake is placing the piece directly on the bone where blowout risk increases.
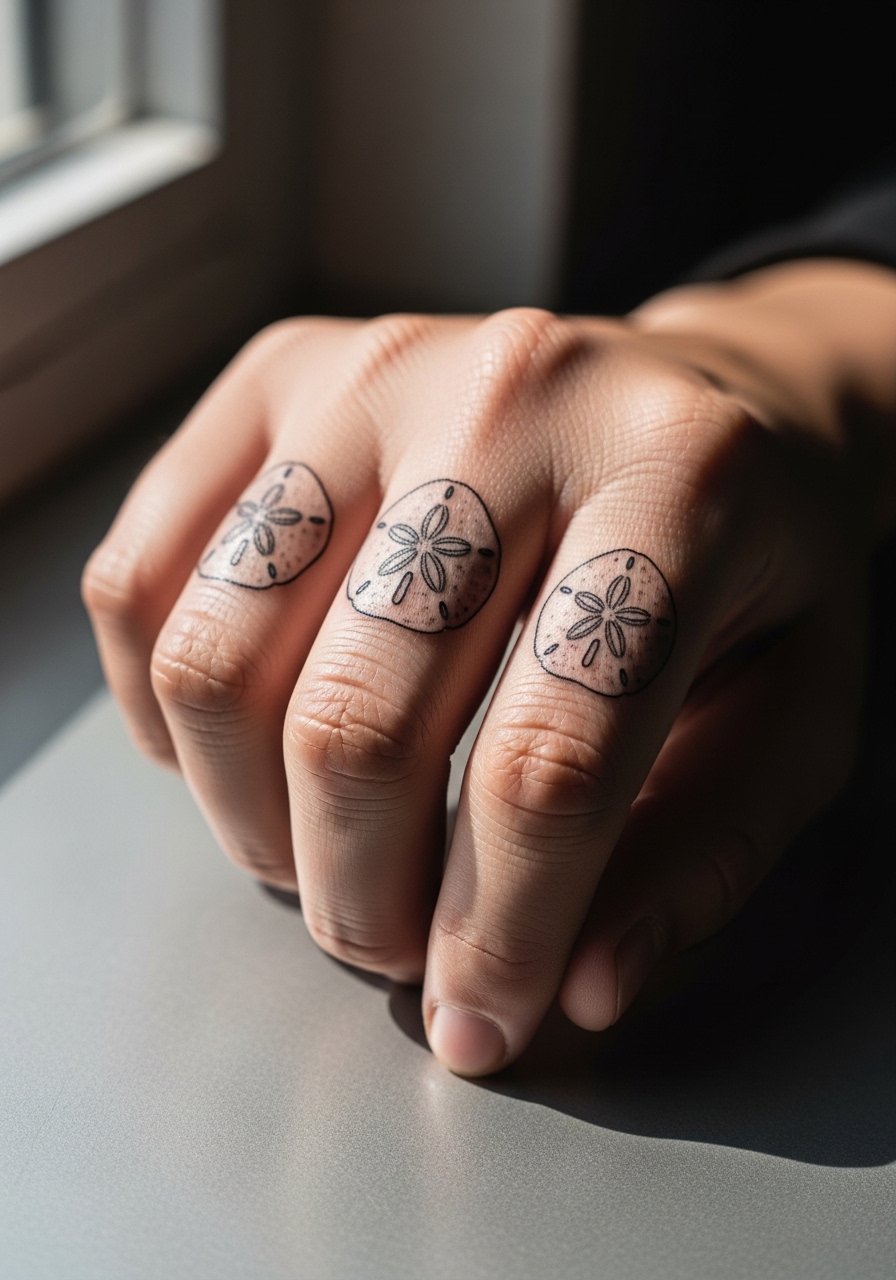
17. Geometric Sand Dollar Cluster on Finger Tops
A small cluster across the tops of fingers can form a banded aesthetic when each sand dollar keeps simple open centers. Fingers see heavy handwashing and abrasion so protective film and regular touch-ups are realistic expectations. Tell your artist you want the cluster spaced over three fingers with negative space between motifs to avoid merging. Session time is short and pain high. For showing it off avoid chunky rings that sit over the top and choose thin stacking bands or a thin chain ring to complement the design.
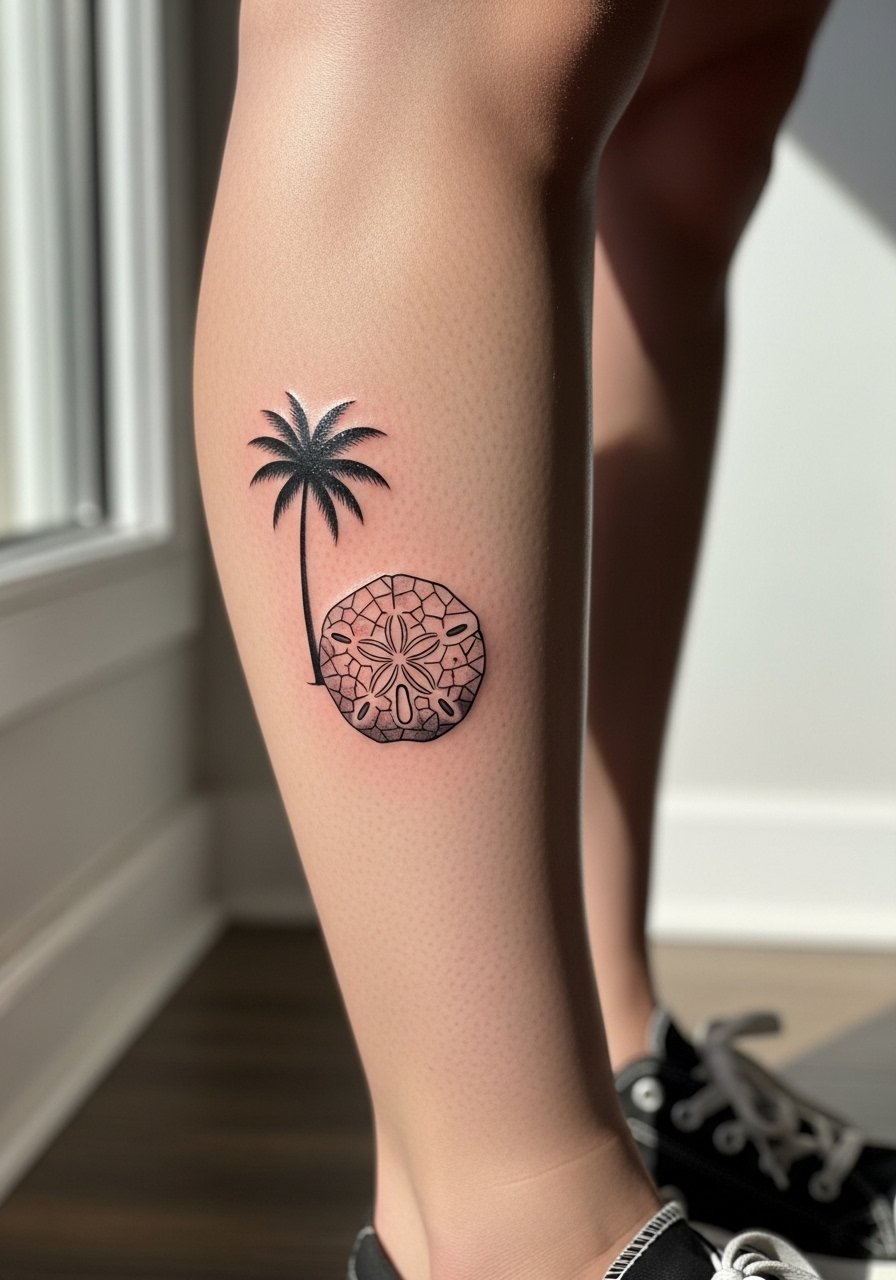
18. Sand Dollar and Palm Tree Calf Scene
Combine a bold sand dollar with simple palm-silhouette lines for a small scene on the calf. The larger area allows midtone shading and solid black anchors that keep the composition readable at a distance. In consultation, ask for silhouette elements rather than micro detail so the scene remains coherent as the skin ages. Session is moderate in pain and takes longer when adding shading. For casual styling pair it with rolled shorts or a canvas sneaker and a cropped tee to show the calf line without overexposure.
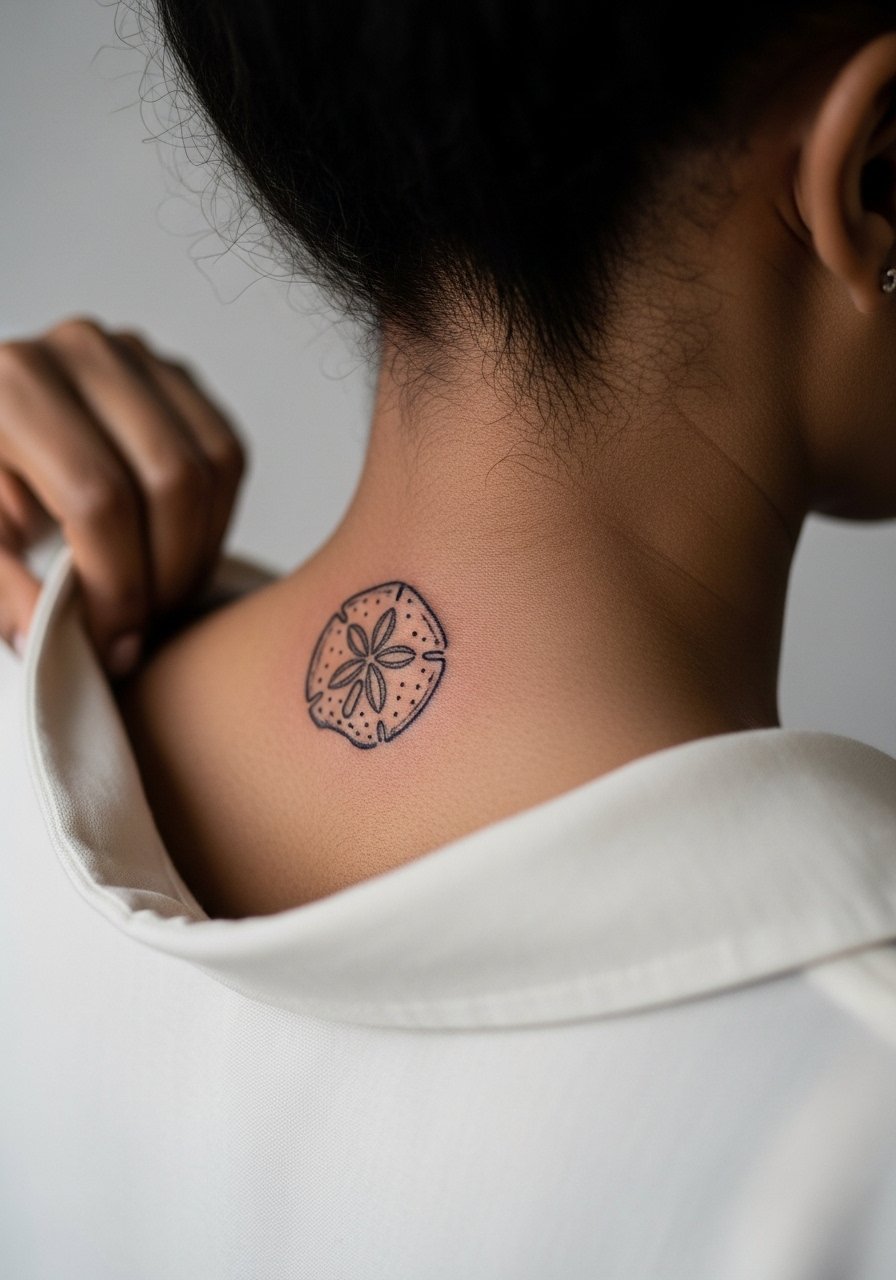
19. Small Sand Dollar at Nape of the Neck
A tidy sand dollar at the back of the neck works with short hair or updos. Describe it as on the back of the neck framed by a wide-neck shirt so the artist places it below the hairline. The area is relatively low friction and heals predictably if you avoid tight collars. Sessions are quick and pain is mild. For styling, a low bun or cropped jacket keeps it visible. If you often wear high collars consider whether the tattoo will rub. Ask the artist to show the stencil while you move your head to confirm placement.
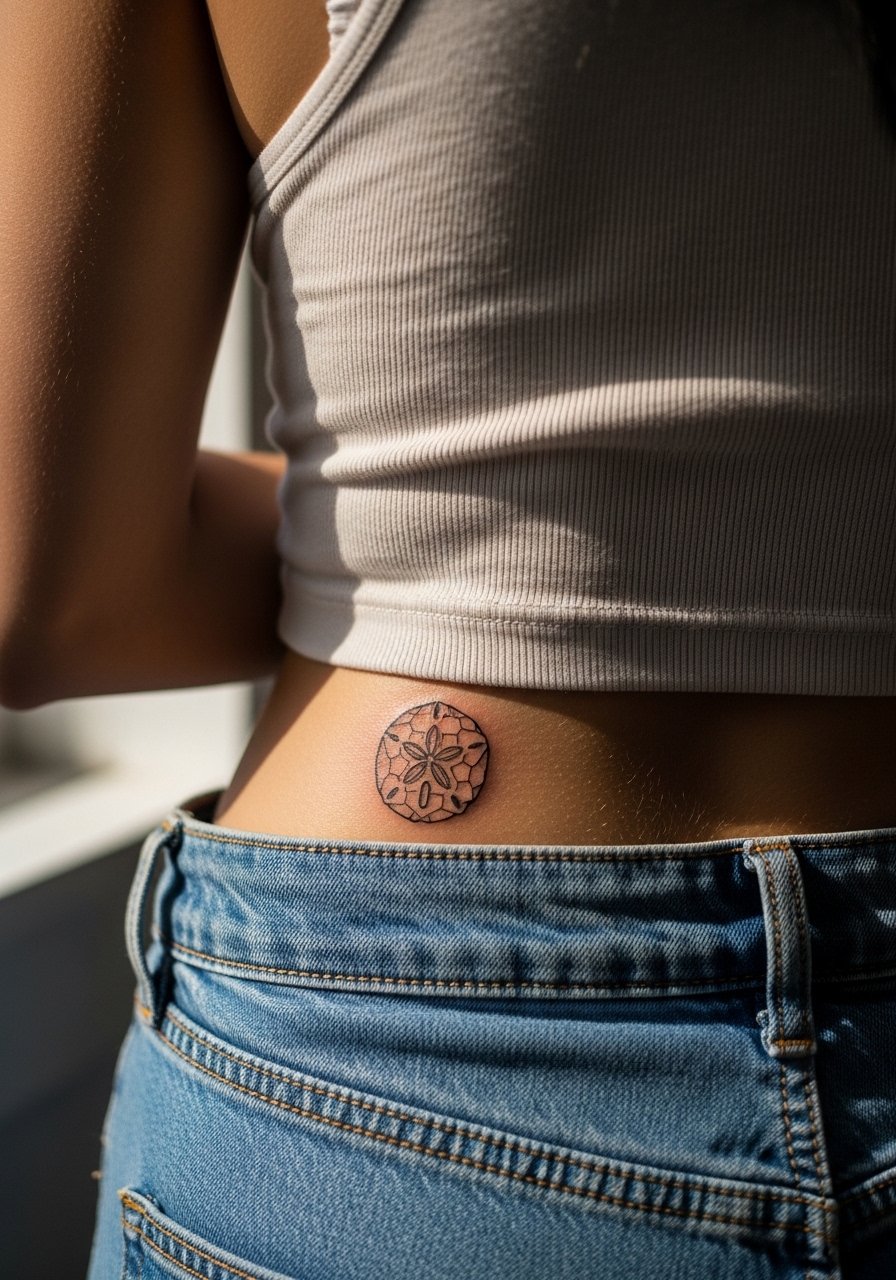
20. Tiny Sand Dollar on Lower Back
Lower back placements still feel classic for circular motifs. Use a slightly larger scale and stronger outer ring so the sand dollar holds up against waistband friction. During consultation request mapping with your usual jeans and belt to see where the tattoo will sit relative to waistlines. Pain is moderate and sessions are typically short. For the appointment wear high-waisted pants you can lower slightly to expose the zone without full torso exposure. Keep in mind how swimwear and low-rise cuts will reveal the design over years.
21. Abstract Geometric Sand Dollar Connector on Upper Arm
Use an abstract connector to link a sand dollar to existing upper-arm pieces so the composition reads cohesive from every angle. The upper arm tolerates a range of line weights, so ask for a connector that uses negative space bars and spot black for contrast rather than dense, busy detail. Pain is low and sessions can be split across appointments if you are building a half-sleeve. For everyday wear, a rolled sleeve or a loose tank top frames the area without covering the lines. Avoid packing the connector too tightly against adjacent tattoos.

Frequently Asked Questions
Q: How small can a geometric sand dollar be before it loses definition?
A: In my experience, anything smaller than about 2.5 centimeters across risks losing the negative slits as the skin settles. Ask your artist to show a stencil at scale on your skin and increase the spacing between slits if you want a tiny piece. If you need to hide it for work, place it where collars or sleeves naturally cover it.
Q: Will a fine line sand dollar on the ribs or sternum blur faster than on the forearm?
A: Yes, those chest-adjacent areas experience more stretch and movement so the thinnest lines are more likely to soften sooner. Some artists argue proper needle depth and spacing fixes that, while others prefer bolder linework there. Discuss both viewpoints in the consultation and ask for a larger stencil test if you are unsure.
Q: What should I wear to the studio for a sternum or rib sand dollar session?
A: Wear a fitted sports bra or a cropped top that the artist can lift just enough to access the area without exposing other skin. That keeps you comfortable and the coverage appropriate. For back or shoulder sessions a loose button-down works well.
Q: How often should I expect touch-ups for finger, wrist, and ankle geometric sand dollars?
A: From what I have seen, finger and ankle pieces commonly need touch-ups within one to three years because of friction and sun exposure. Wrist pieces often need a minor refresh at year two if you wear bracelets that rub the area. Plan on periodic maintenance rather than a single permanent result.
Q: Where do I find an artist who understands geometric work and sand dollar motifs?
A: Use local shop directories, convention guest lists, specific geometry tattoo hashtags, and community threads on Reddit to see portfolios and read client notes. Look for artists who show healed photos in portfolios and who discuss spacing and longevity in their process rather than just fresh images.
