
Fine line Ghostface trends look effortless online, but they do not age the same everywhere. Small wrist or ankle masks that read sharp in studio light can soften under daily friction faster than people expect. Finding an artist who keeps the horror vibe without making it cartoonish, budgeting for touch-ups, and choosing a placement that moves the least are the three things to settle before the needle goes down. Start with a small, well-placed option and the list below will give you specific directions to get it right.
1. Minimalist Mask Outline on the Wrist
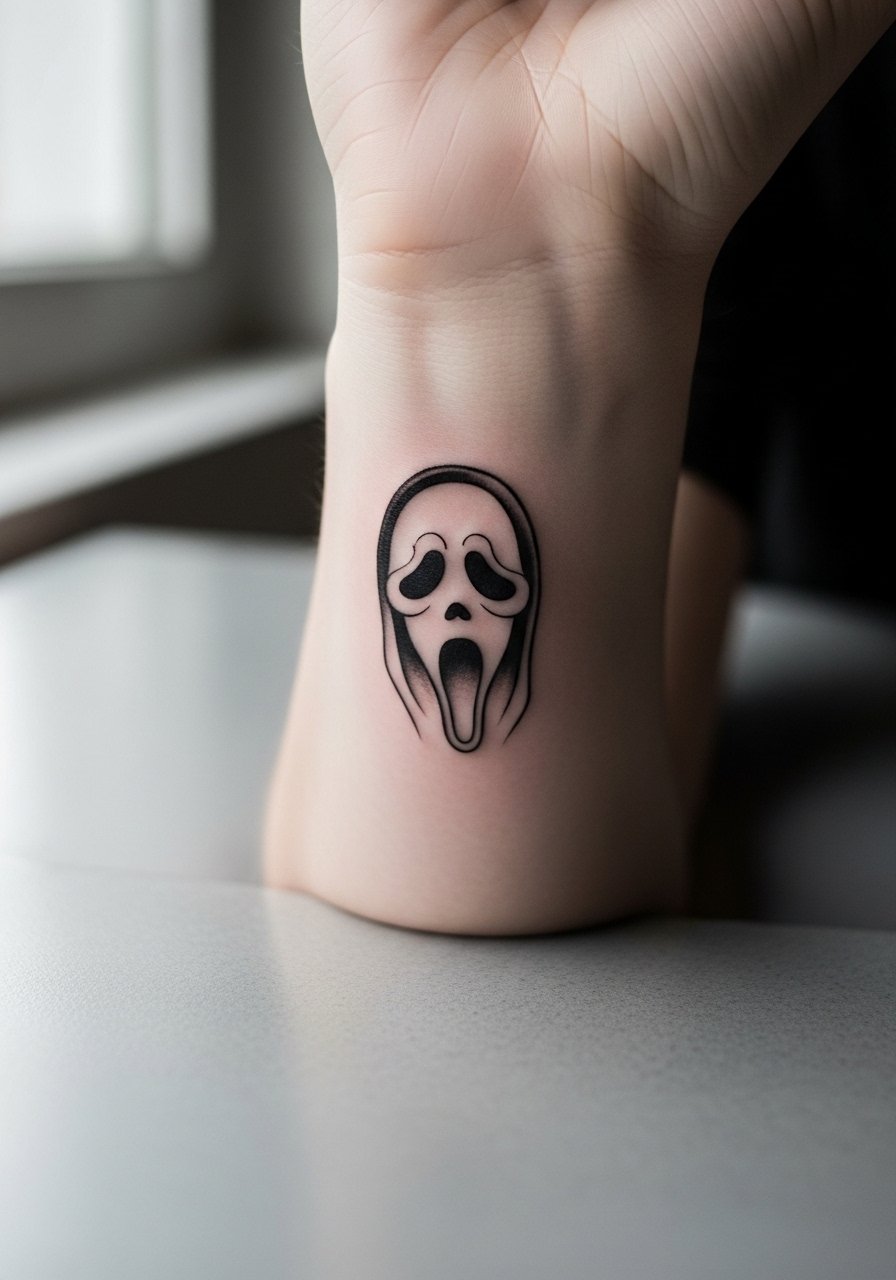
Styling lead. This tiny outline reads secretive and sharp if it sits on the inside or outer wrist. Ask your artist to keep the lineweight consistent and slightly thicker than the absolute thinnest line they can pull so the contour does not merge in a year. Fair warning about blowout on the wrist because the skin there sees constant motion and rubbing. For the appointment wear a sleeveless black tank so the artist has clear access. Expect a touch-up at year two if you live in a high-friction job.
2. Ghostface Mask with Blood Splatters on the Forearm
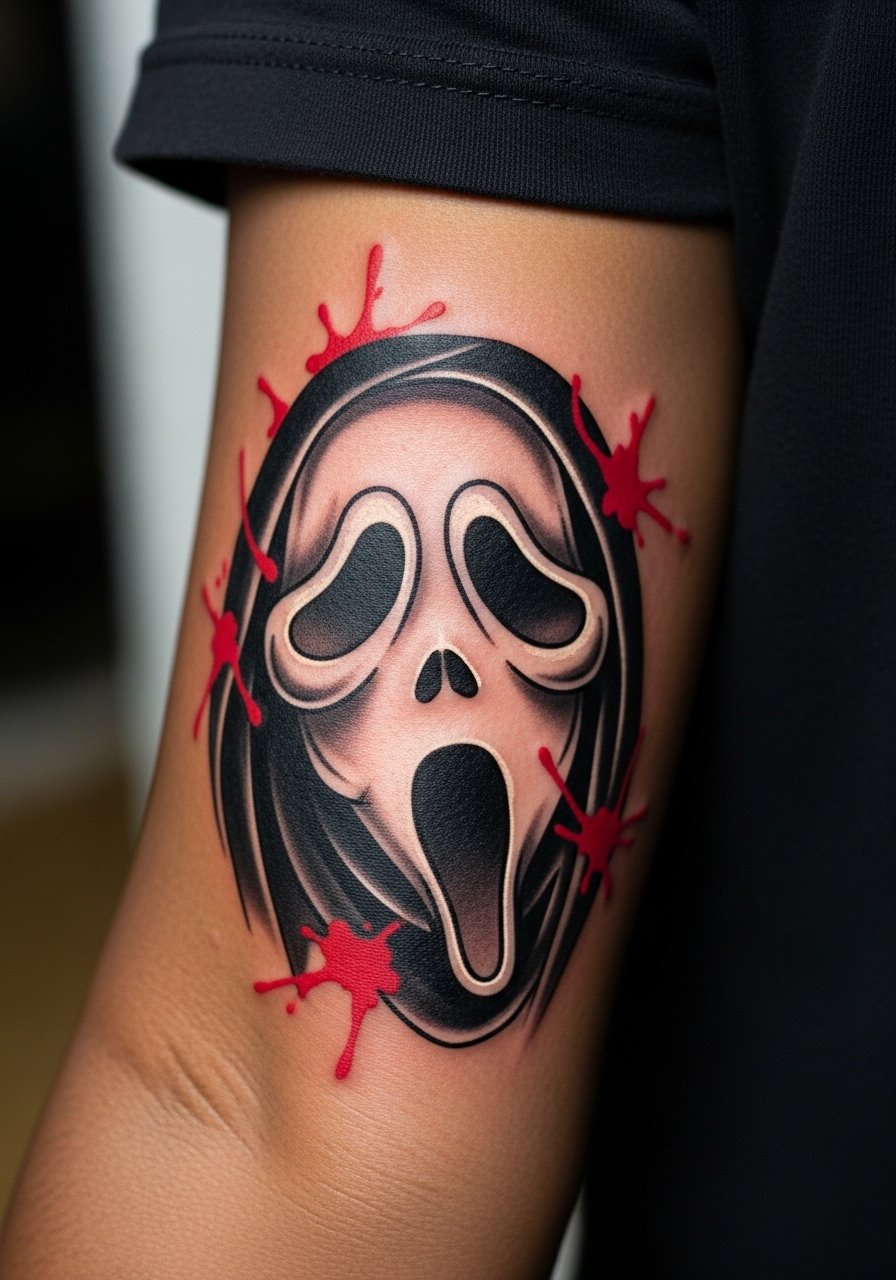
Visual impact lead. A forearm canvas lets blood accents breathe without looking cramped, and the red provides contrast to the black mask. Tell your artist you want the reds to sit shallow enough that they read like stains not blobs, and ask for saturation notes so you can plan sessions. A common mistake is packing too many tiny droplets close to the mask, which ages into a muddy patch. Expect one to two sessions for a medium piece and light tenderness along the forearm while it heals.
3. Knife Silhouette on the Inner Bicep
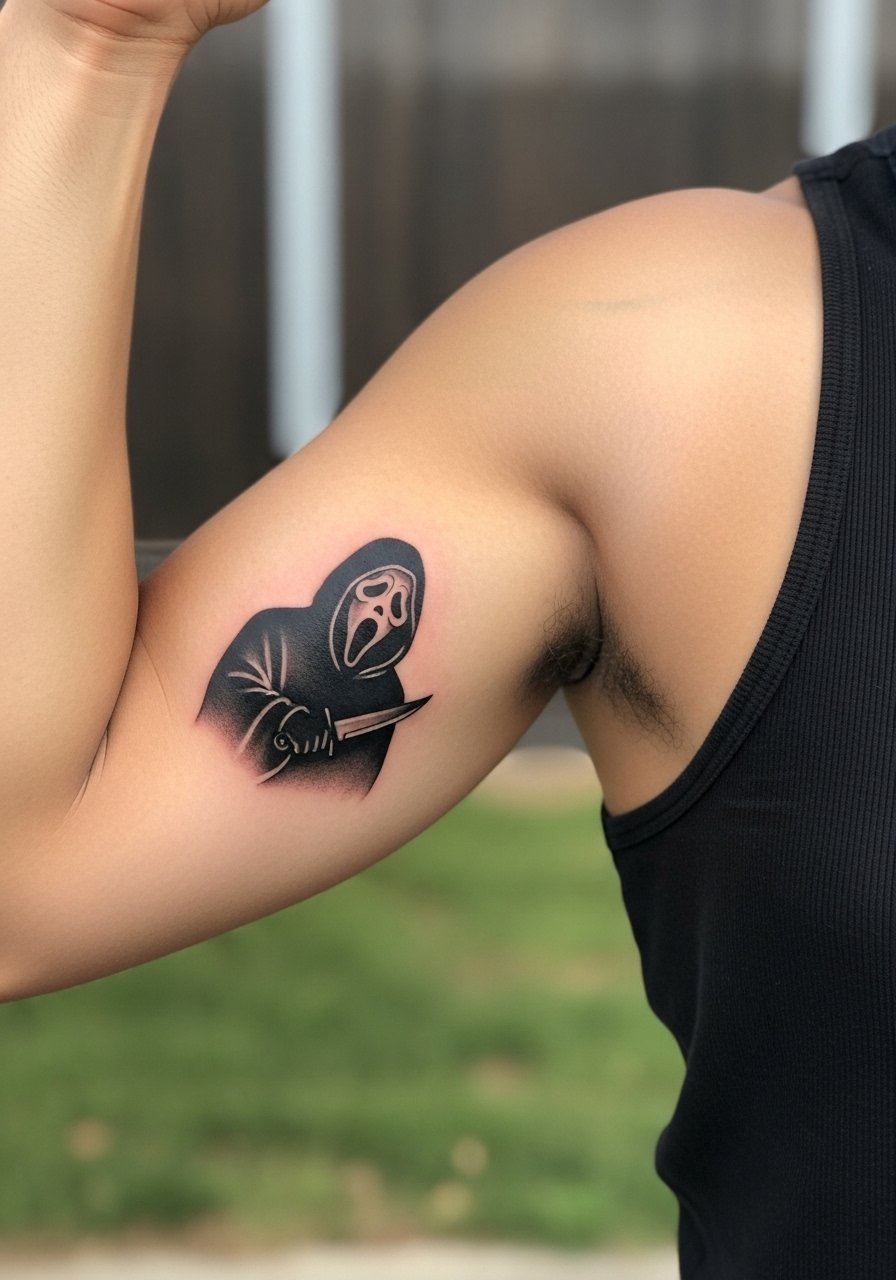
Consultation lead. The inner bicep is forgiving for vertical silhouettes because the skin there stretches less than the outer arm when flexed. During the consult say you want bold blackwork with a clean negative-space knife edge so the silhouette reads at a distance. The inner bicep can sting more during longer sessions, and the skin texture may need a touch-up at year three if you gain or lose significant muscle. For showing the finished piece try an olive green tank top that frames the arm without competing with the blackwork.
4. Fine Line Profile Along the Collarbone
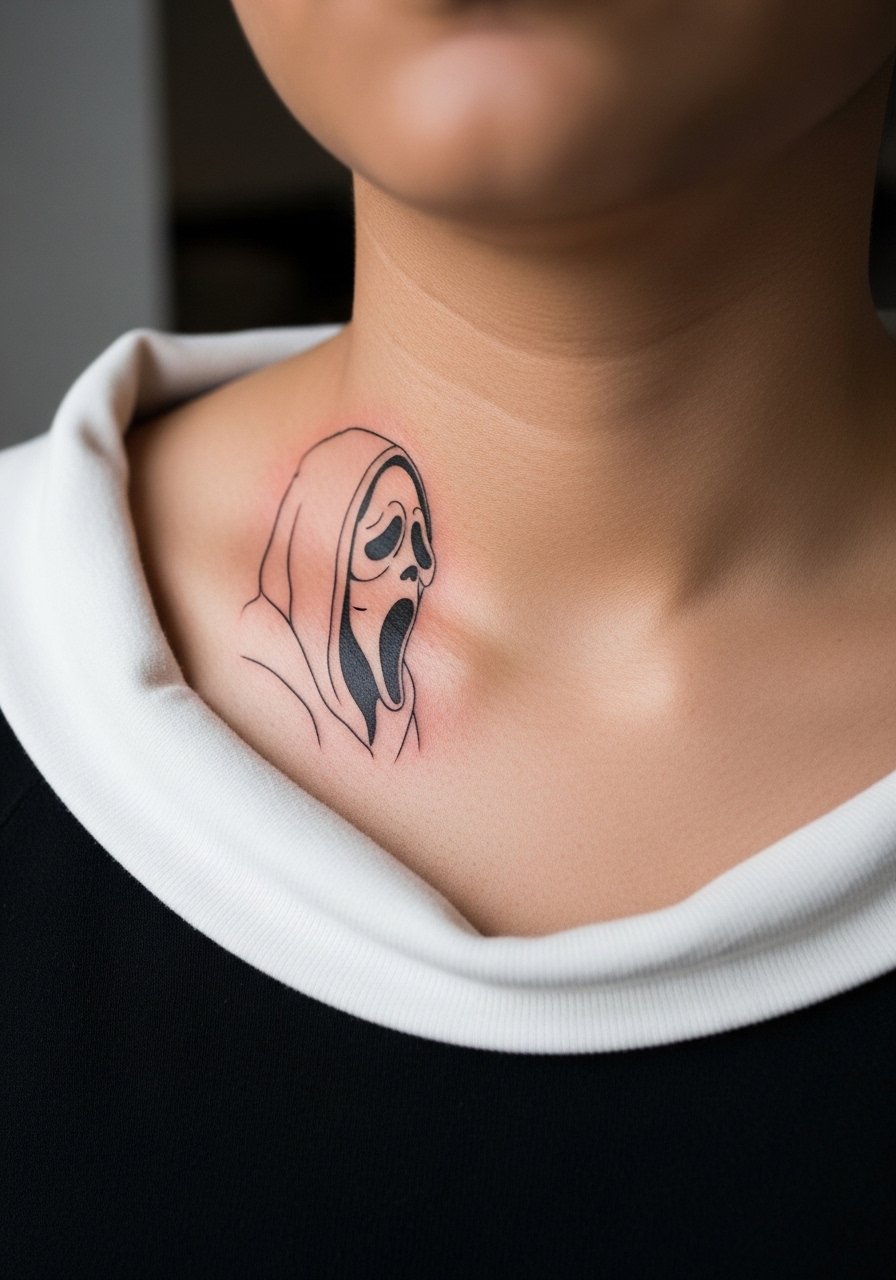
Aging lead. Fine line on the collarbone looks delicate and cinematic at first. The risk is doing it too tiny. Most fine line work that starts featherlight will need touch-ups sooner than denser lineweights. A useful instruction for your artist is to space facial contours slightly and keep the hairlines open so the profile breathes as skin ages. For the session wear a loose button down shirt you can pull aside to give clear access without discomfort. Expect minimal swelling but avoid necklaces that rub the area for the first week.
5. Full-Color Mask with Horror Quote on the Shoulder
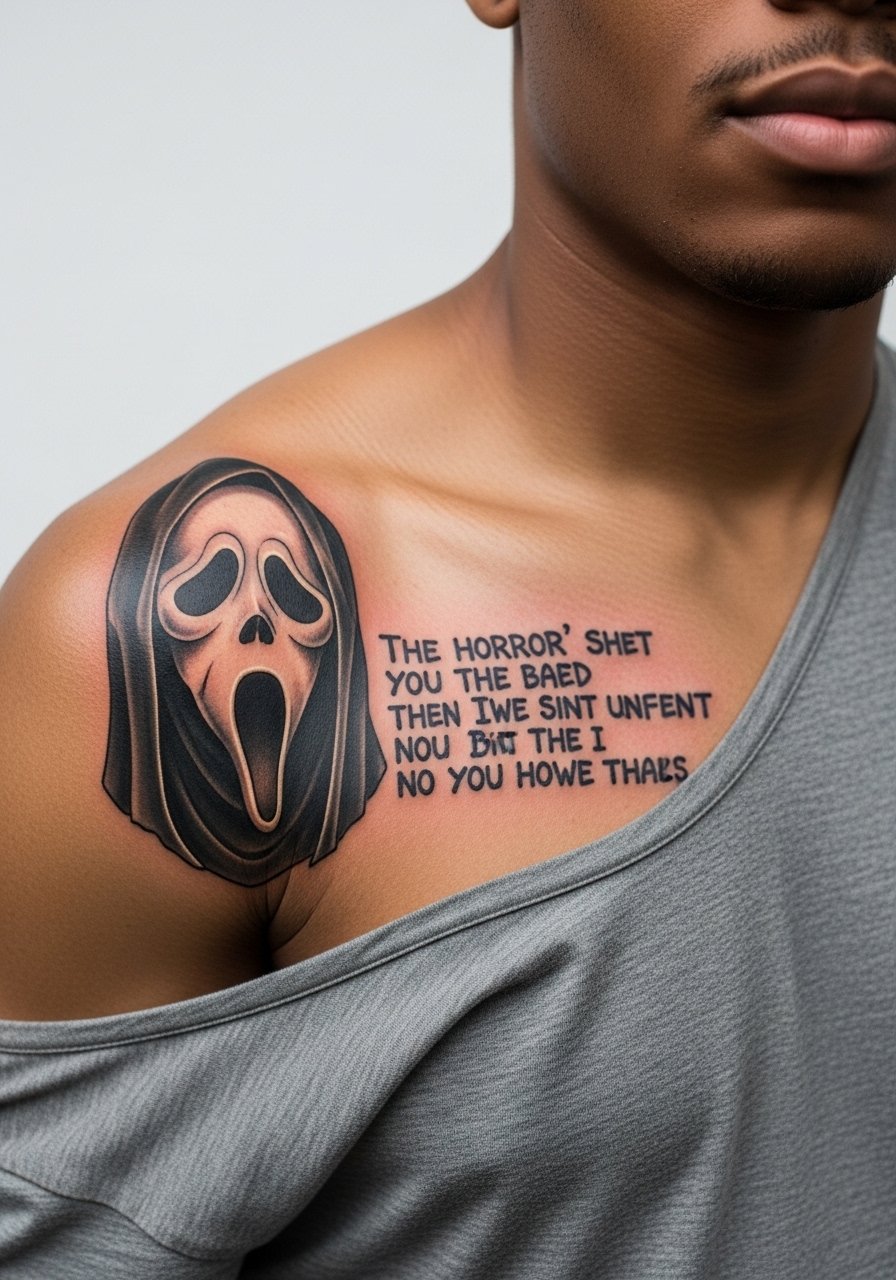
Mistake lead. People often ask for maximum color in a single sitting and then regret how heavy the saturation feels on small shoulders. One camp prefers full-color for the emotion and franchise nod. The other camp favors black and gray for longevity and simplicity. Name both camps to your artist and ask which approach they prefer for your skin tone and lifestyle. For showing it off pick a muscle tee navy with an open arm that complements the color palette. Shoulder pieces usually need two sessions if they include text and detailed shading.
6. Tiny Minimal Mask on the Ankle
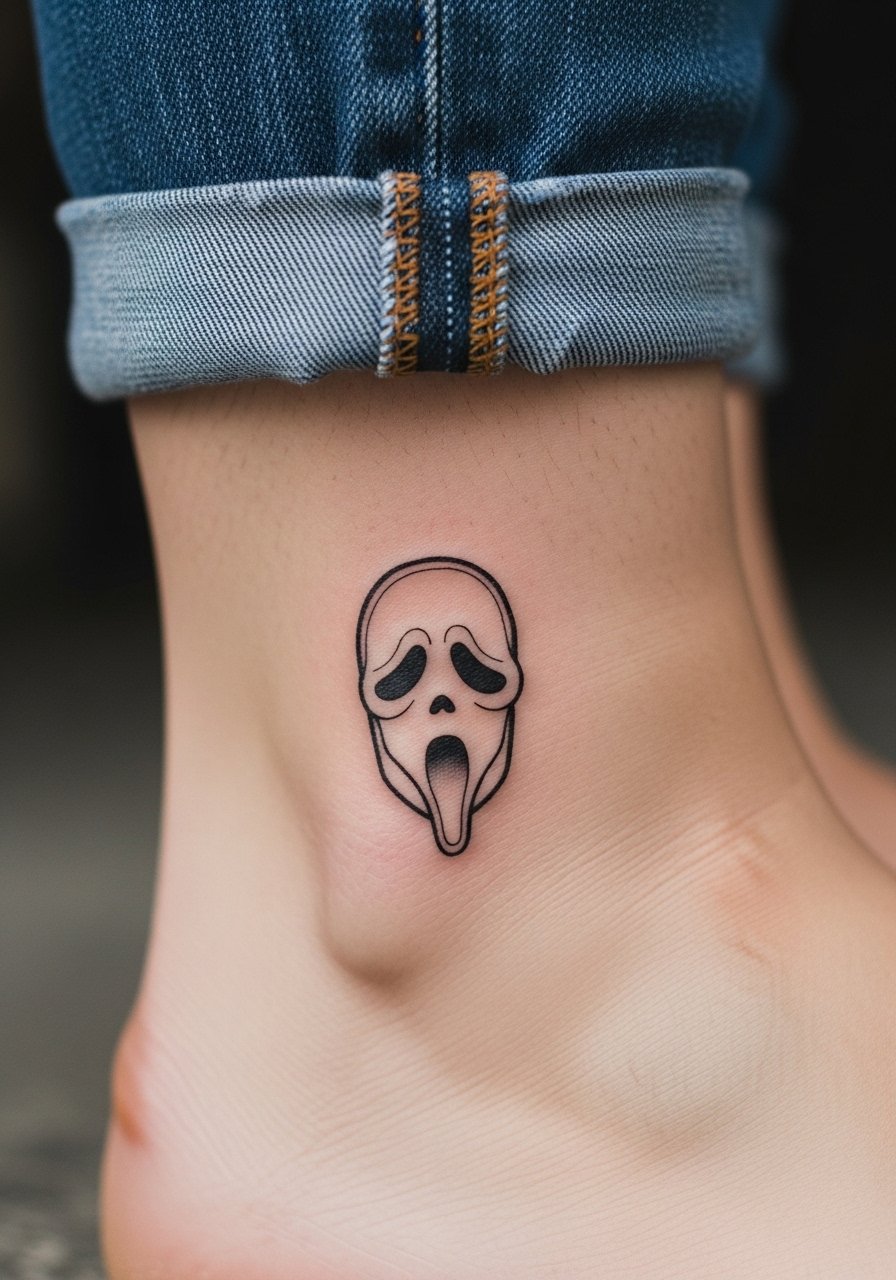
Personal observation lead. Ankle placements are perfect for hidden thrill tattoos that show up only when you want them to. The trade-off is friction from shoes and socks during healing because the area lives in constant contact. Tell your artist to avoid ultra-fine detail and to place the mask slightly higher on the ankle bone to reduce rubbing. Session day wear like shorts or rolled pants makes the area easy to access. Expect to baby the area in the first week and to plan a possible touch-up if you wear the same shoes daily.
7. Negative-Space Blackwork Panel on the Outer Forearm
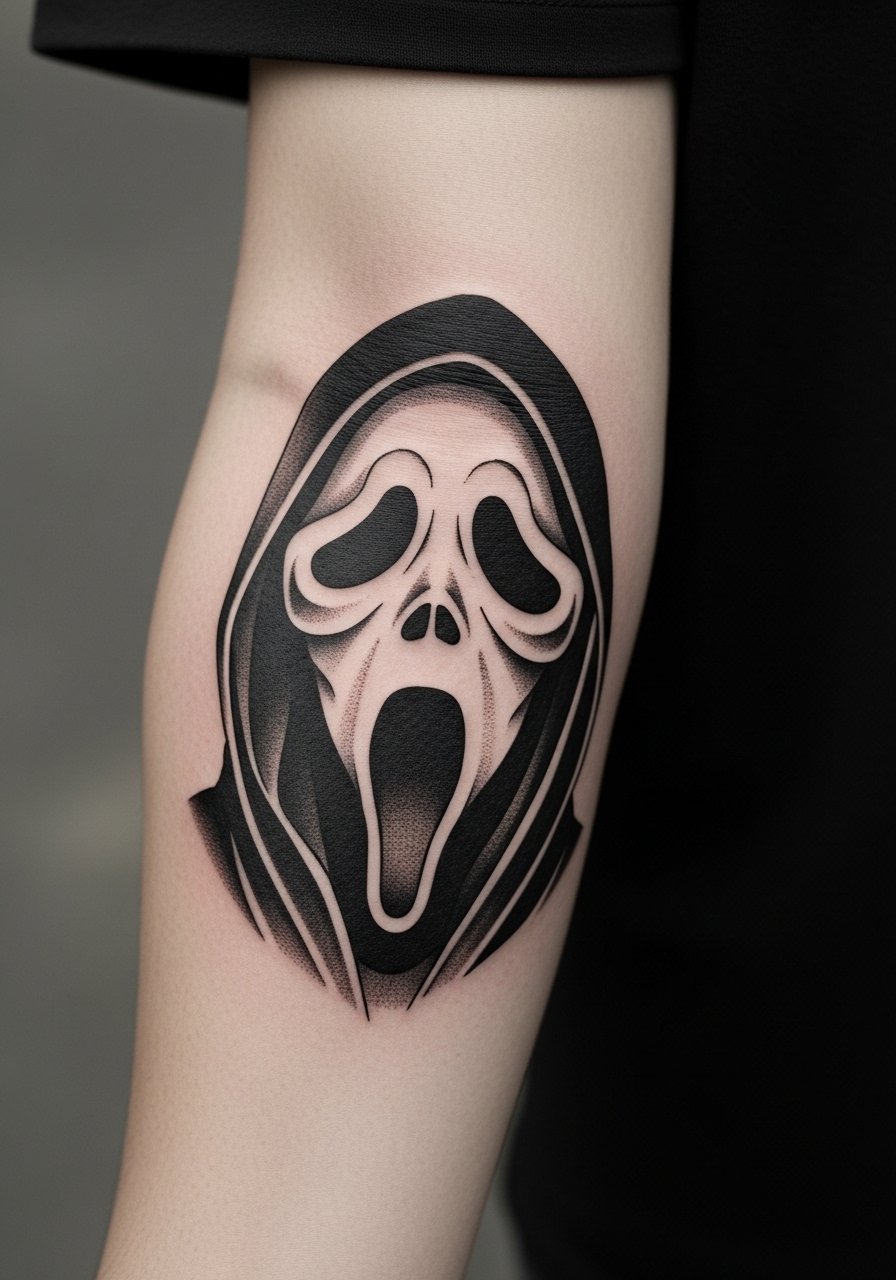
Mistake lead. Negative-space blackwork reads bold and cleans up backgrounds in a sleeve. The common error is packing too many tiny negative details that vanish after a year. Tell your artist you want broad black fields with a few open areas so the face stays legible as saturation softens. For session comfort wear a loose short sleeve button up men you can pull aside without tugging the stencil. Blackwork tends to age well if saturation is even, but heavy black areas can feel tight during healing.
8. Script-Wrapped Ghostface on the Ribcage
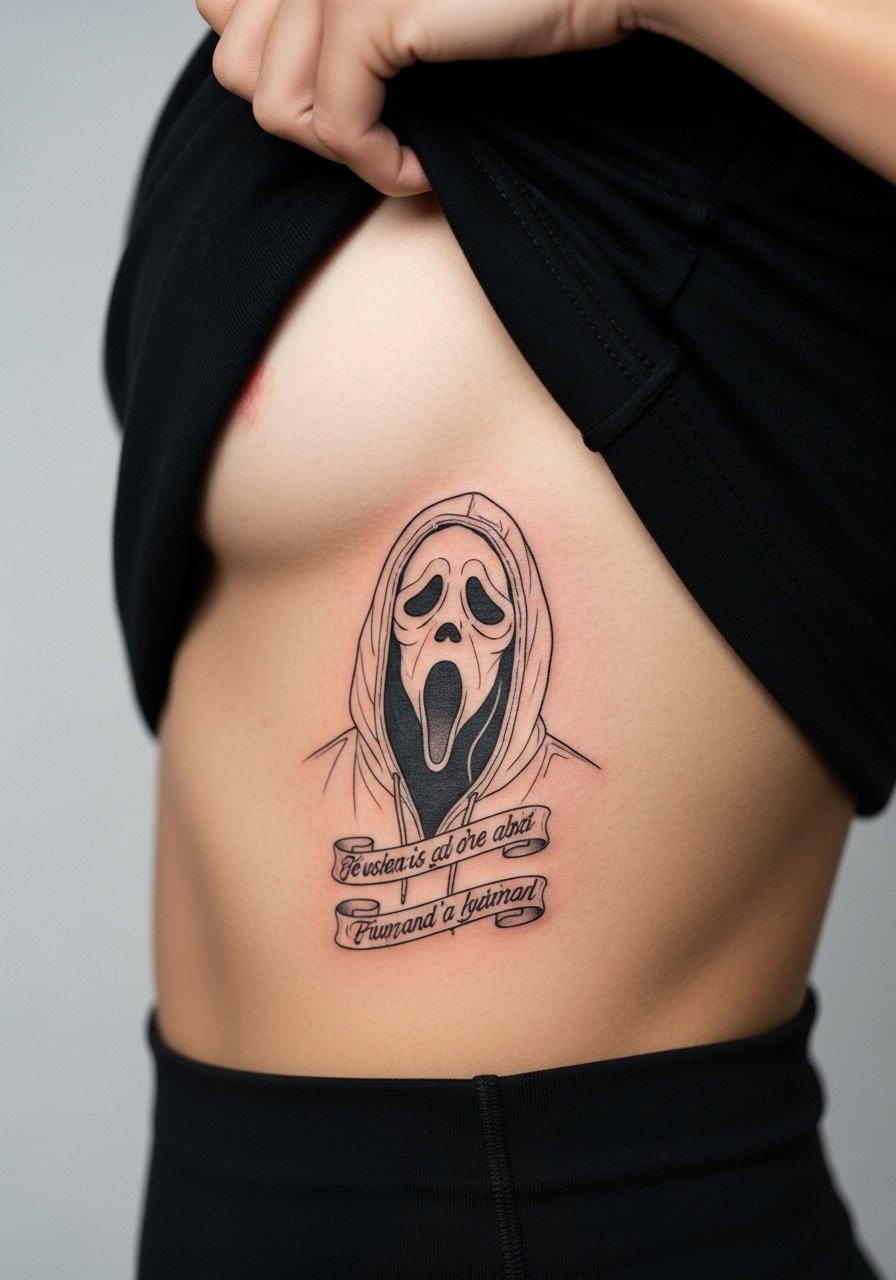
Pain warning lead. Ribs are a higher pain zone but offer great curvature for script that follows the mask. Artists split on whether fine line holds on ribs. One group argues the stretch blurs lines within two years. The other says that with proper needle depth and spacing, fine line can settle well. Name both camps and ask your artist where they land during the consult. Wear a strapless bra or loose button-down so the artist has clean access. Expect more soreness and a slower first-week recovery.
9. Half-Profile Dotwork Near the Collarbone
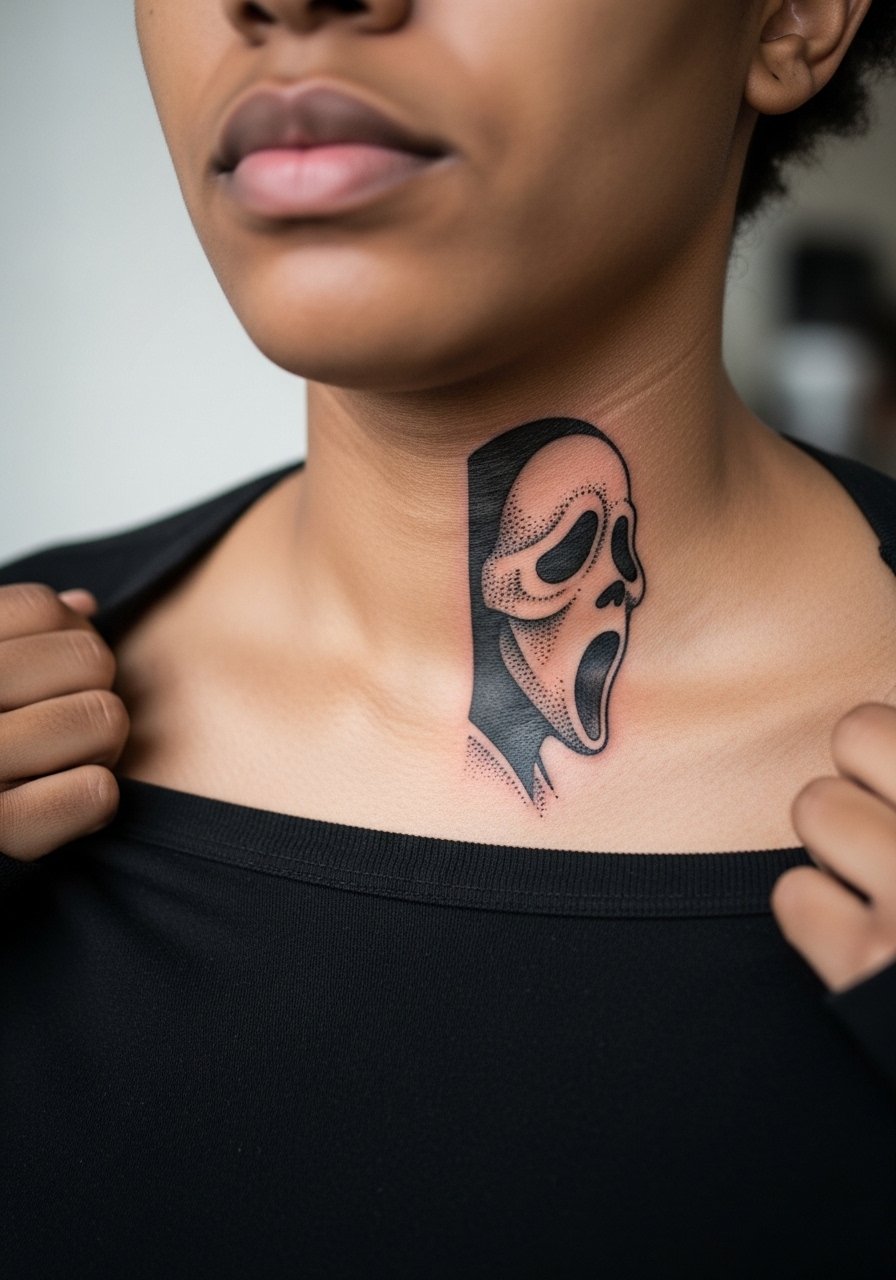
Consultation lead. Dotwork lets you get texture without heavy lines, which is useful near the collarbone where skin and bone meet. Tell your artist you want stipple shading for the cheek area and to avoid tight cross-hatching that can merge. A common version that ages poorly is over-dense dot clusters. Keep the spacing airy and expect a subtle softening at year two that still reads as texture. For sessions wear a off shoulder crop top black so the area is easily adjusted without exposing more than necessary.
10. Micro Mask on the Inner Forearm
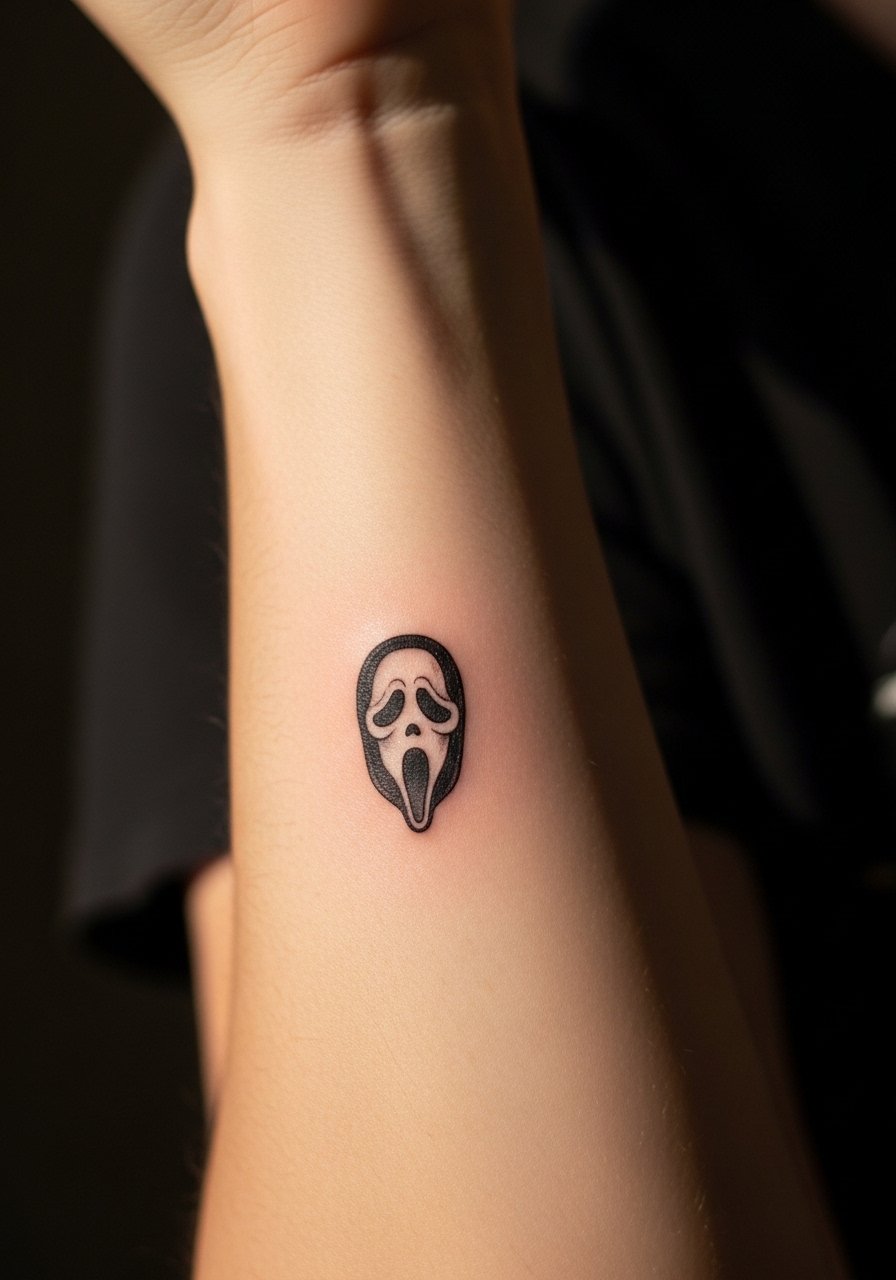
Personal observation lead. The inner forearm is a forgiving spot for micro work that still reads when you turn your arm. The biggest mistake is asking for micro detail that needs magnification to appreciate. Tell your artist you want a small but readable mask two to three inches across and ask them to draw the stencil at that exact size. Expect light soreness and straightforward healing with low blowout risk, but plan a touch-up if lines drift over the first year.
11. Ankle Chain with Tiny Mask Accent
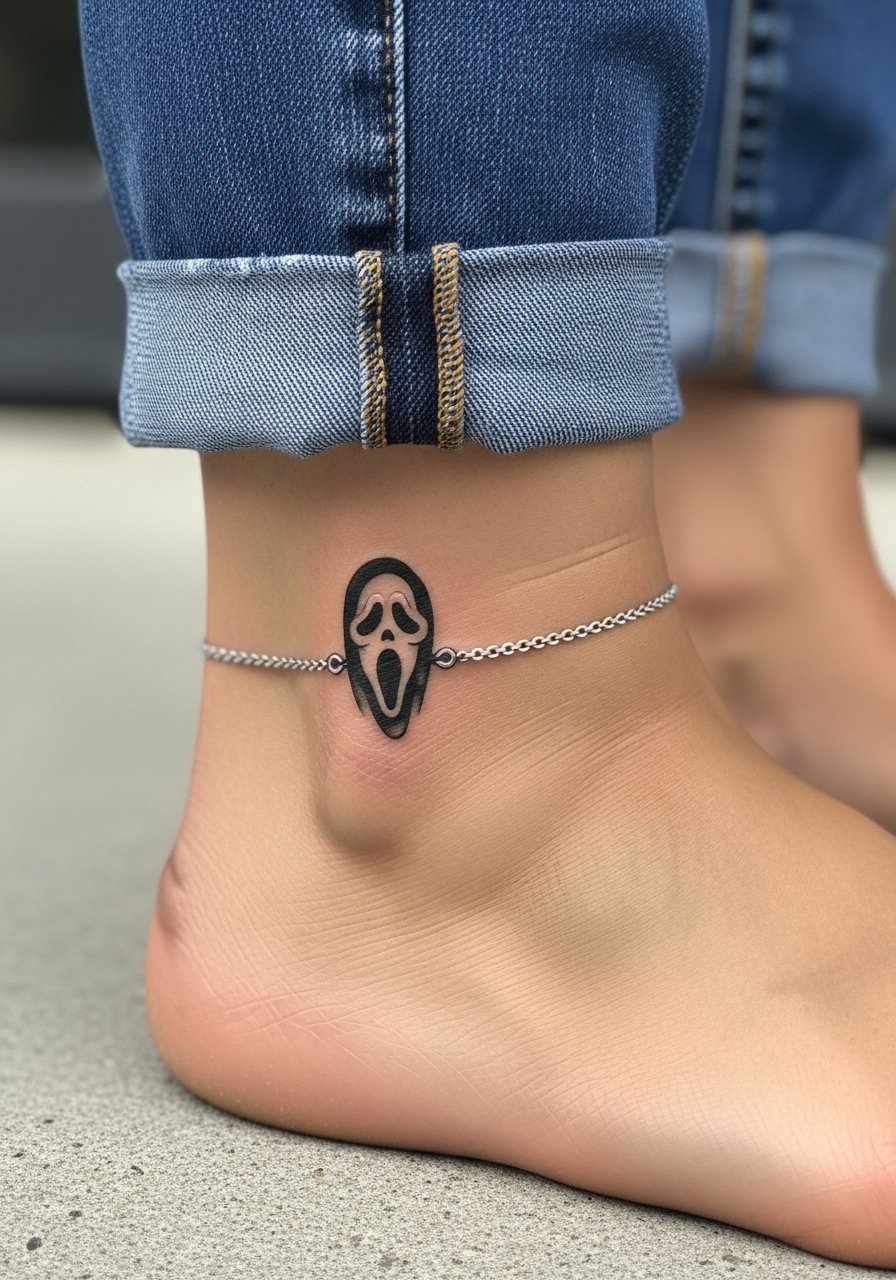
Styling lead. A tiny mask worked into a chain or anklet motif is a subtle way to keep the horror reference private. Ask for slightly bolder chain links than on a jewelry stencil so the lines do not sink under the skin texture. For the session wear cropped joggers black so the artist can access the ankle without forcing your leg position. Ankle chain ideas usually heal cleanly but avoid tight socks for the first week.
12. Micro Ghostface on the Side of the Hand
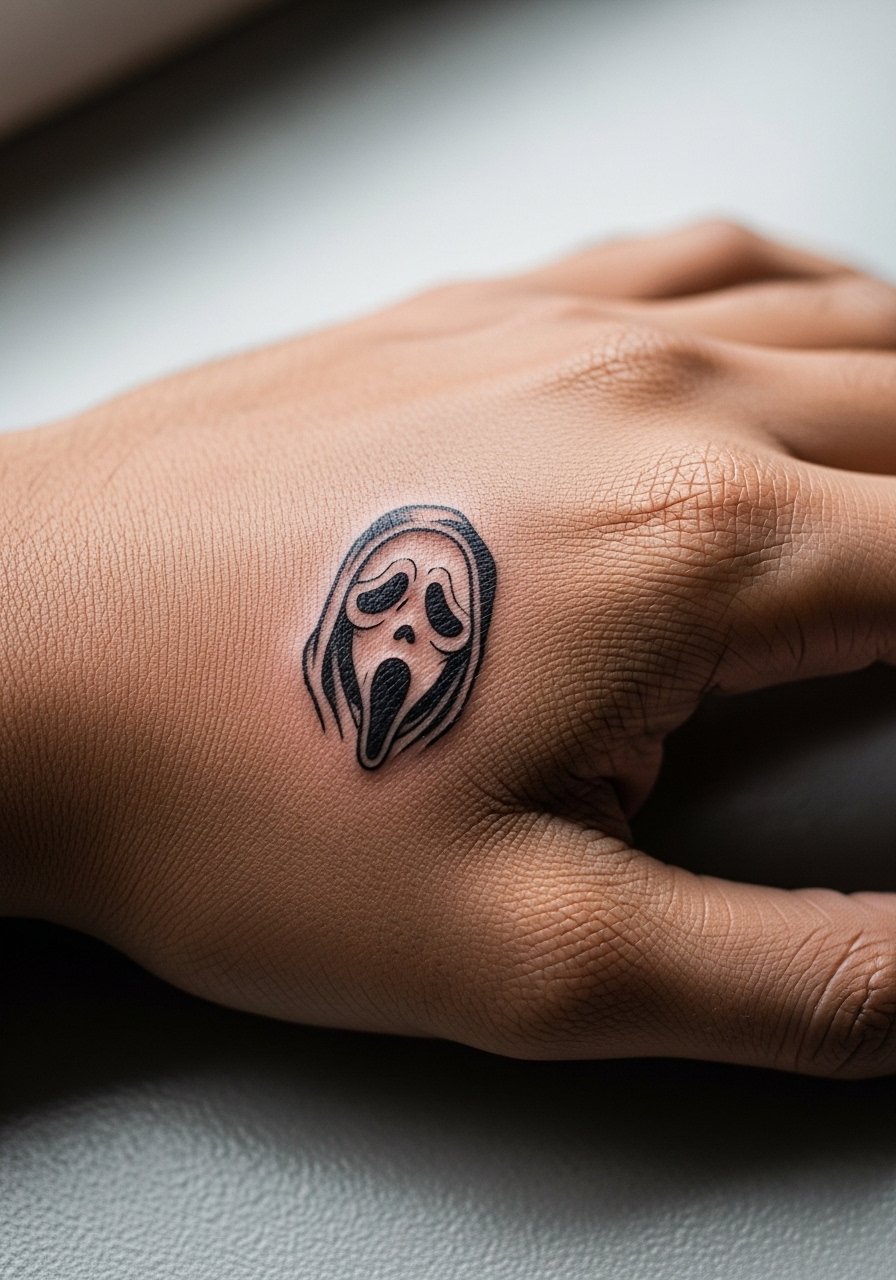
Mistake lead. Hand tattoos are highly visible and see continuous washing and friction. The real mistake is expecting micro linework to last like forearm pieces. Tell your artist you accept that hand tattoos often need more frequent touch-ups and to use slightly heavier linework. Expect faster fading and possible softening into the skin within two years depending on your job and washing habits. Think about career implications before committing.
13. Stipple-Shaded Inner Bicep Portrait Mask
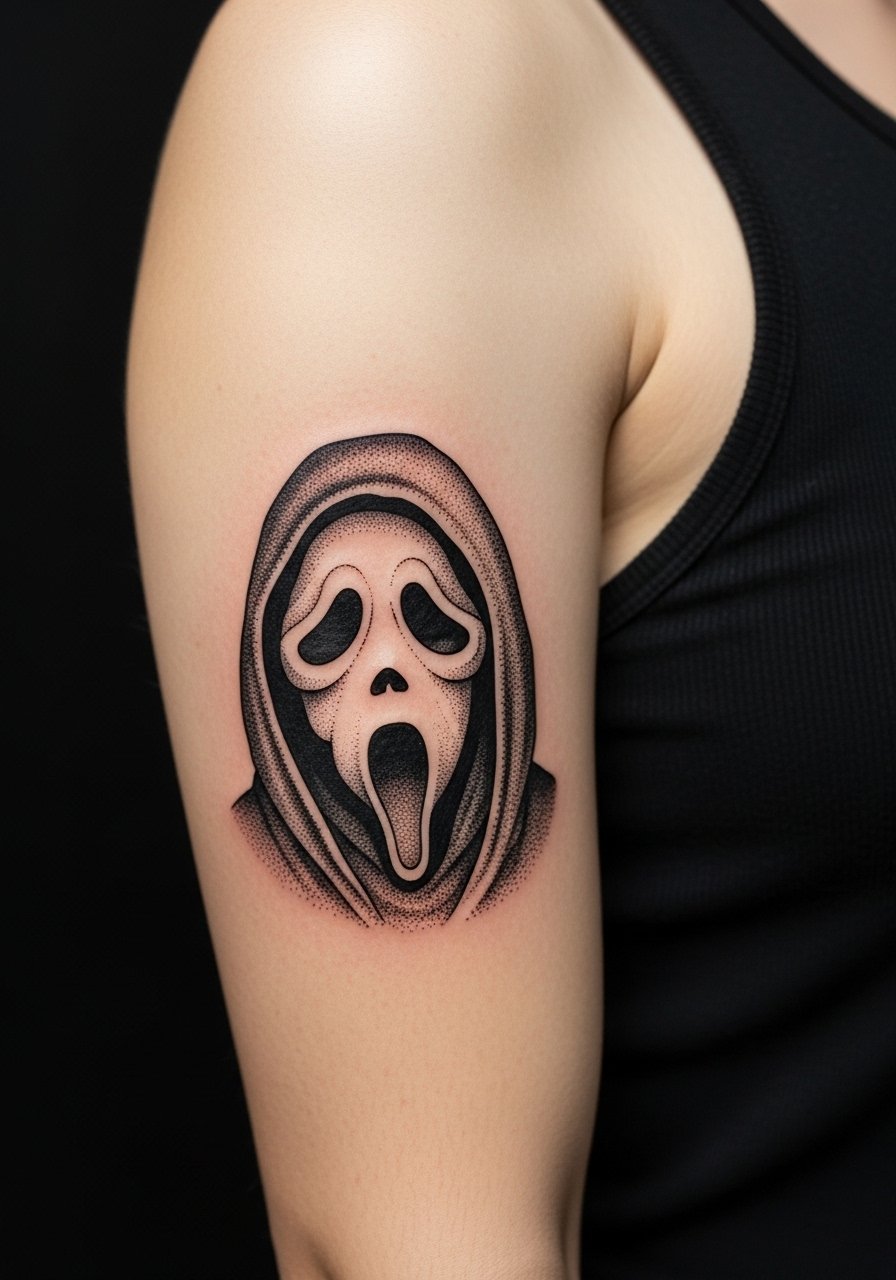
Aging lead. Stipple shading arrests a portrait look without the blocky feel of solid fill. It ages calmly because the dots blur into a textured field rather than a solid patch. During consult say you want a portrait that favors dot work over continuous shading to avoid heavy saturation. Inner bicep work feels tender in longer sessions, and touch-up at year three is common if muscle mass changes. For the session wear a fitted tank arm cutouts so the artist can position the arm easily.
14. Hip Peeking Mask in High-Waisted Frame
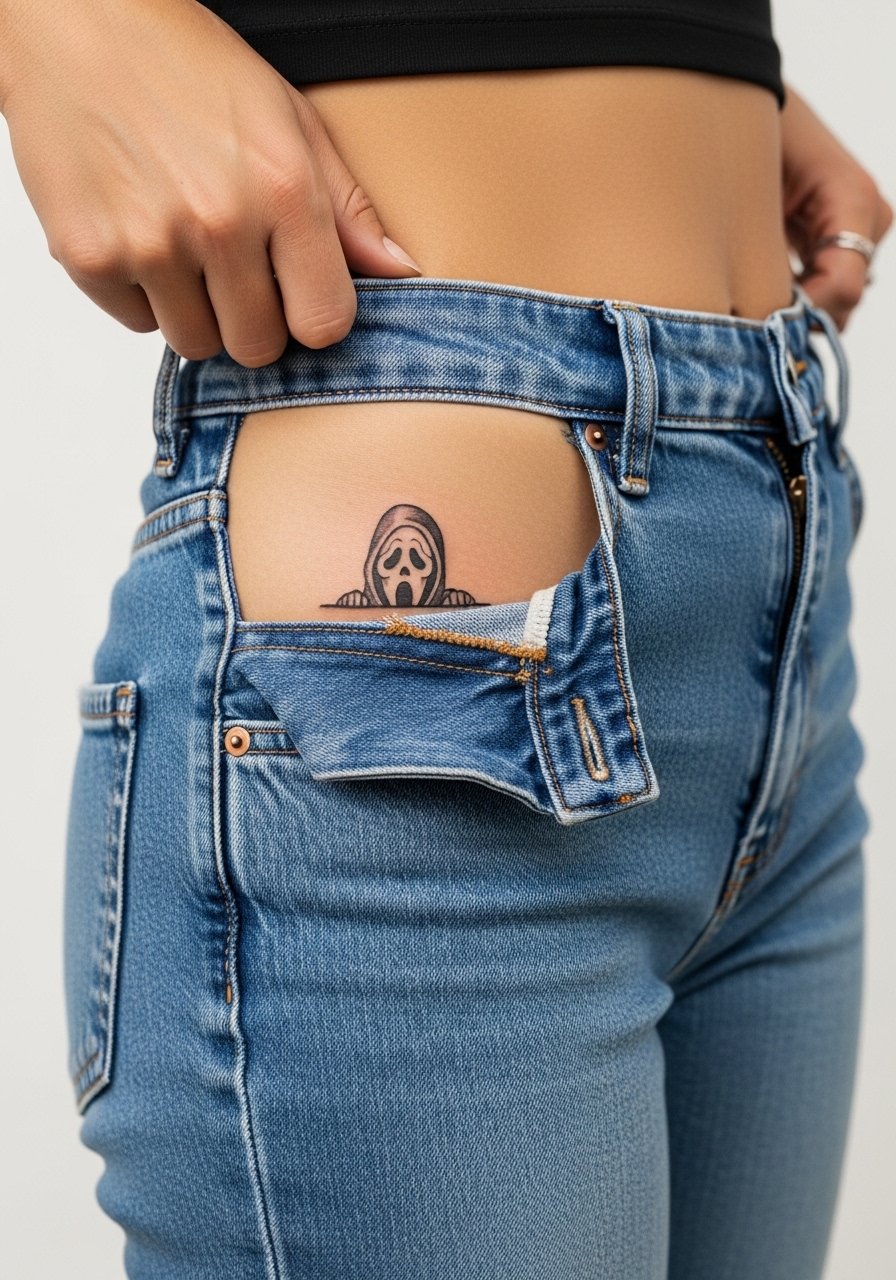
Visual impact lead. A hip placement gives the design a private reveal that plays with clothing choices. The mistake is sprawling detail over a curved area without factoring gait and fabric. For the appointment pick bottoms that you can lower slightly so the artist sees only the tattoo zone. Hip pieces usually heal well but expect swelling along the line where skin meets fabric and plan clothing that avoids direct friction for two weeks.
15. Forearm Panel Accent in a Half Sleeve
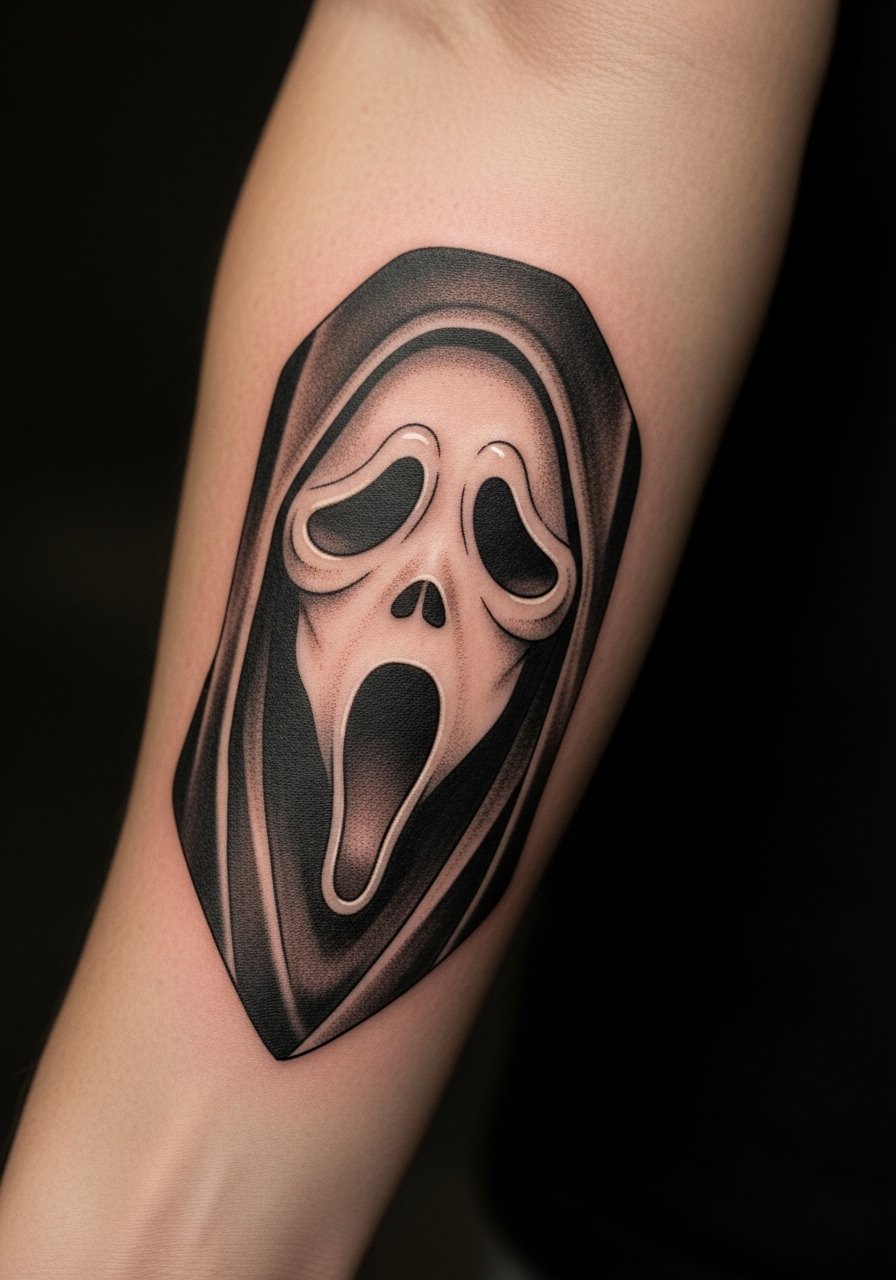
Personal observation lead. Panels work when the face is clued into negative space and surrounding textures like stipple or linework hold back the visual weight. The consultation should include reference panels showing how you want the face to read at arms length. For the session wear a charcoal henley shirt with sleeves you can roll to avoid smudging the stencil. Half-sleeves that mix blackwork and color can need follow-ups where the elements meet.
16. Sternum Script and Mask Combo
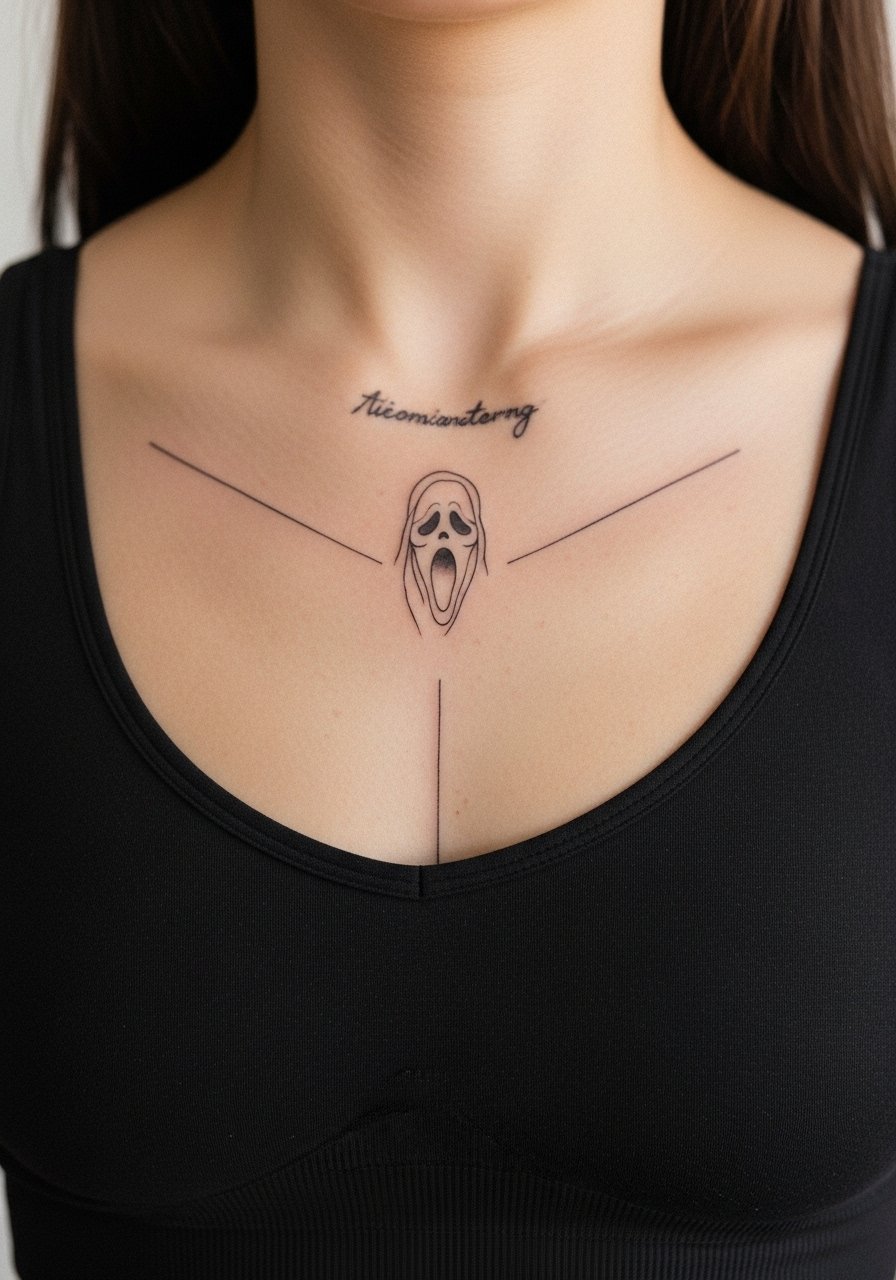
Pain warning lead. Sternum placements are intimate and demand precise placement because the area moves with breathing. Artists split on whether large text or dense detail works well here. One camp keeps text minimal to avoid stretch issues. The other camp will do denser compositions if spacing is generous. Name both approaches and decide which fits your tolerance. For session wear a fitted sports bra or bandeau to keep the area accessible. Expect soreness and a careful first week with low-impact clothing.
17. Linear Collarbone Mask with Quote Wrap
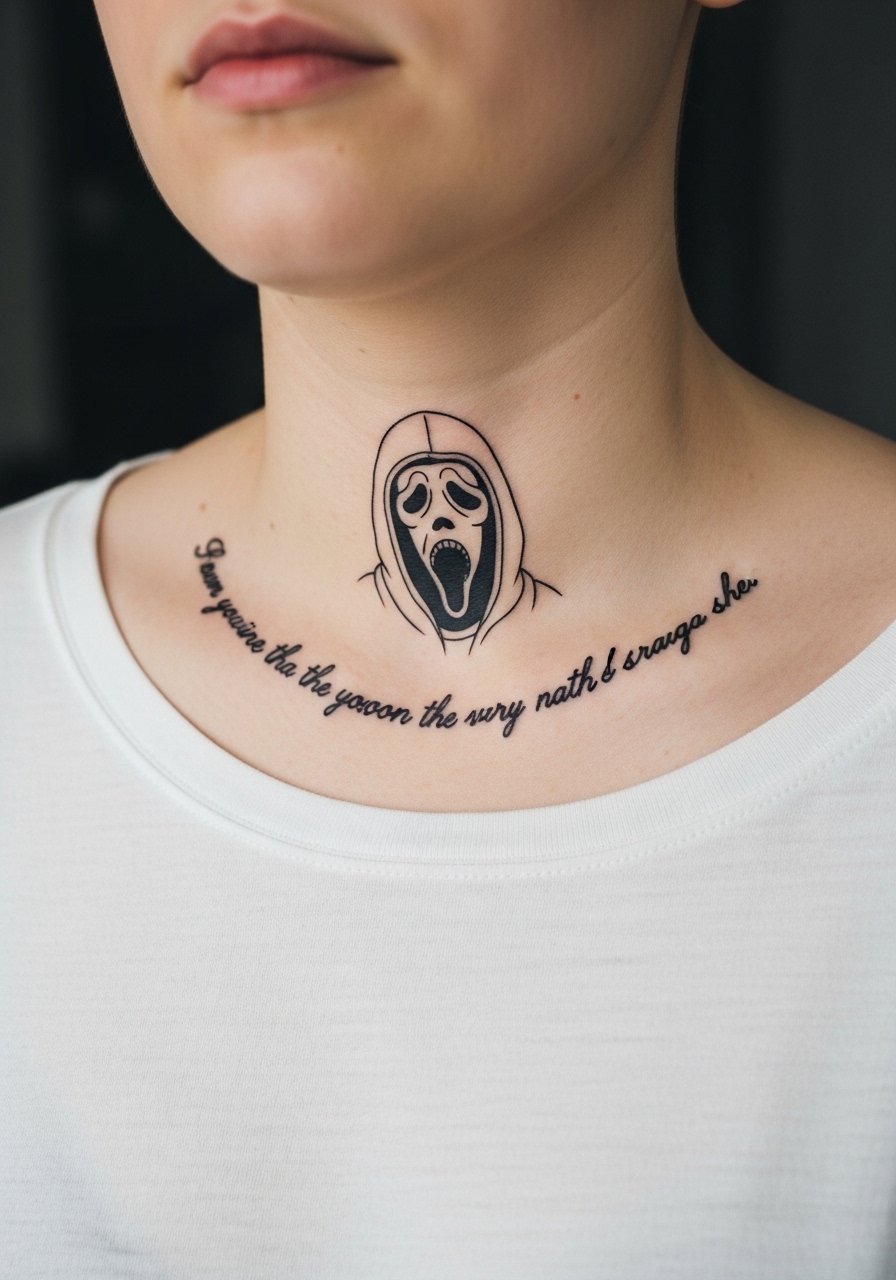
Consultation lead. A linear mask paired with a short quote can frame the collarbone elegantly if the text follows the bone line. During consult, show the exact wording and have the artist write the script on skin so you can check flow. The common mistake is crowded lettering that competes with the mask. For the session wear a matte v neck tank you can ease aside without exposing more than necessary. Expect gentle swelling and plan jewelry choices accordingly.
18. Lower Back Banner Mask
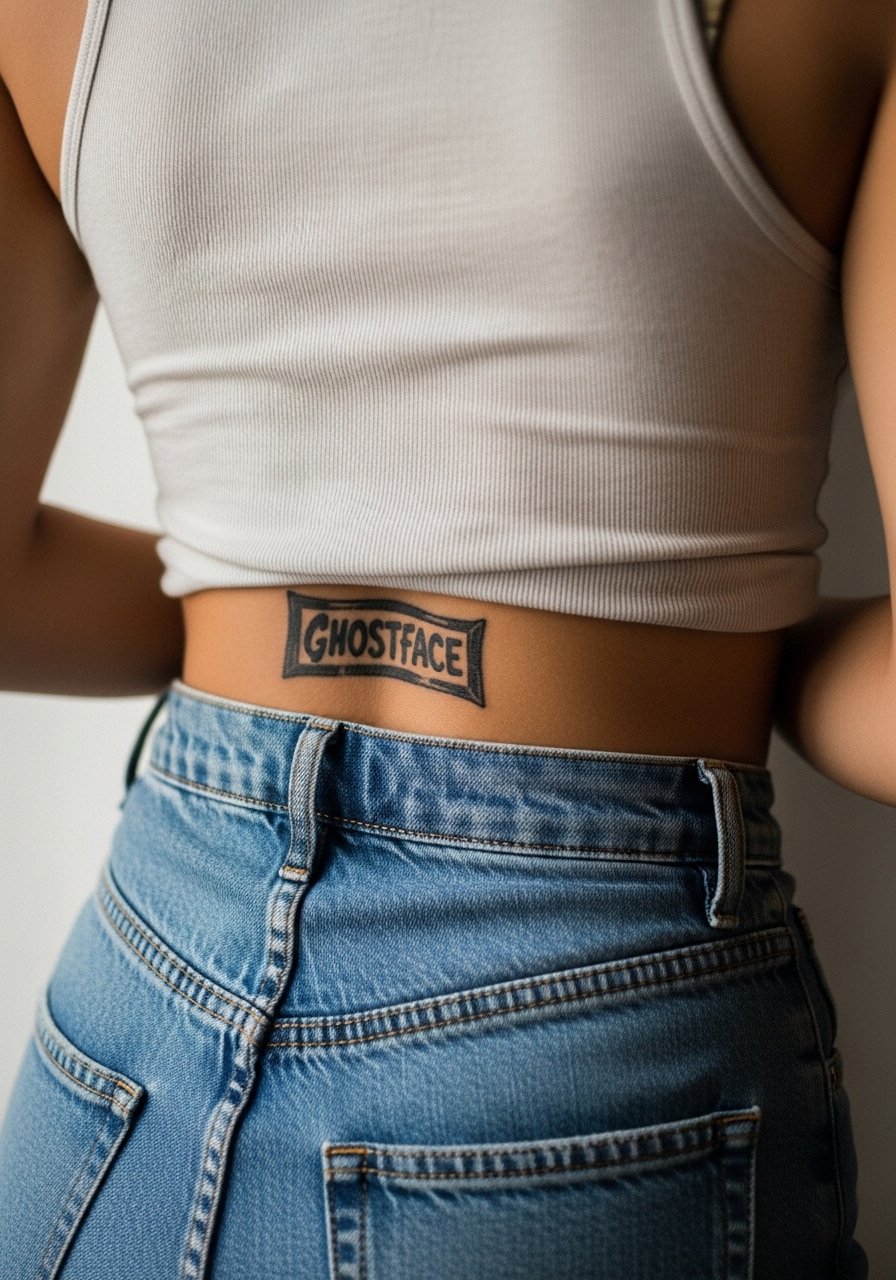
Visual impact lead. Lower back placements give more room for banners and text around the mask, and movement is moderate compared to ribs. The common error is pushing a design too low where clothing friction will eat at edges. Ask for the stencil placed slightly higher to avoid waistband rubbing. For the session pick low-rise pants you can lower slightly so the artist can access the area without full exposure. Healing is straightforward if you avoid tight belts.
19. Tiny Ankle Mask That Peeks Over Socks
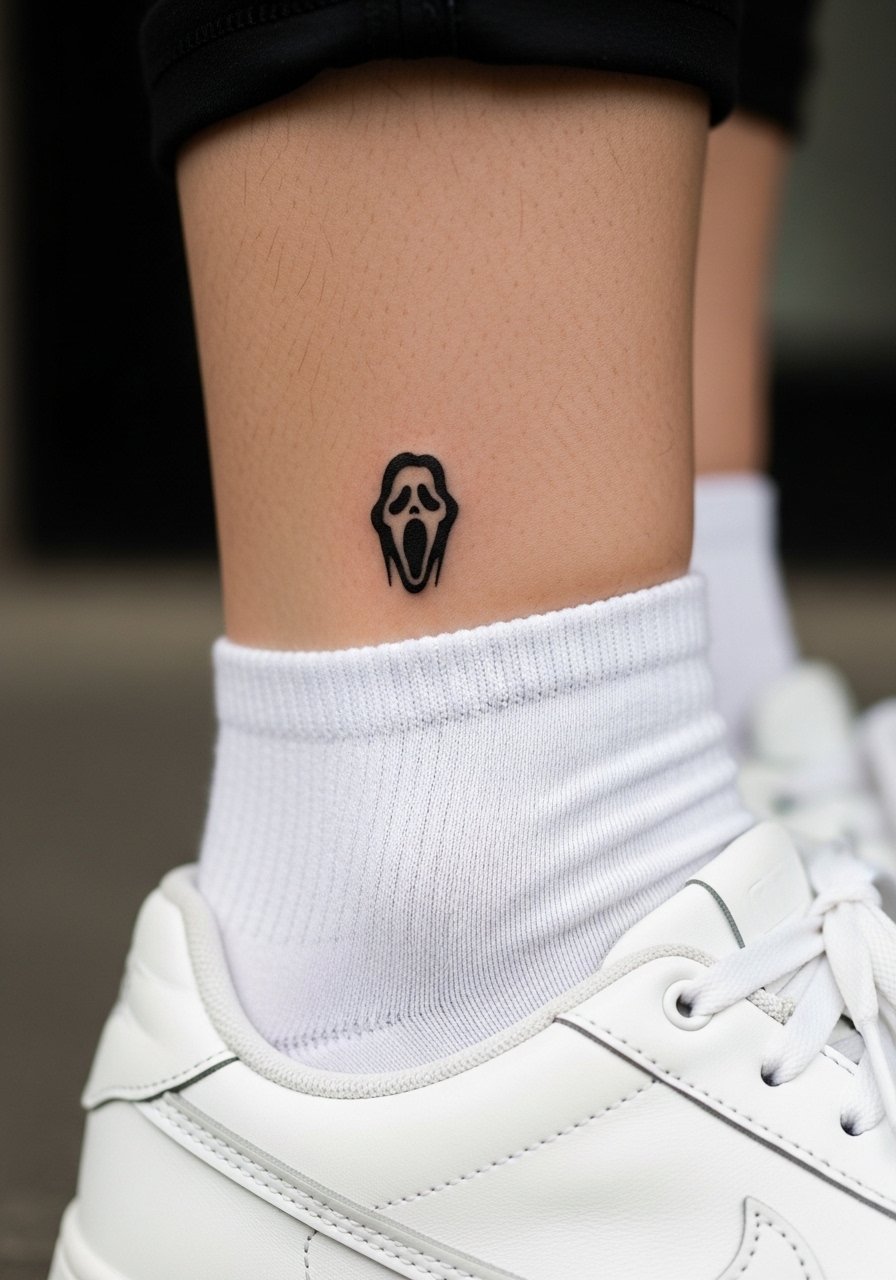
Styling lead. A tiny mask positioned so it peeks over your sock line creates a playful reveal in summer shoes. Tell your artist exactly where the sock line sits on the ankle while standing so the tattoo does not sit directly under fabric. For the session wear shoes and socks you can remove and a pair of low cut crew socks to test placement. Expect first-week care focused on keeping the area dry and free of abrasion.
20. Upper Back Paneled Ghostface
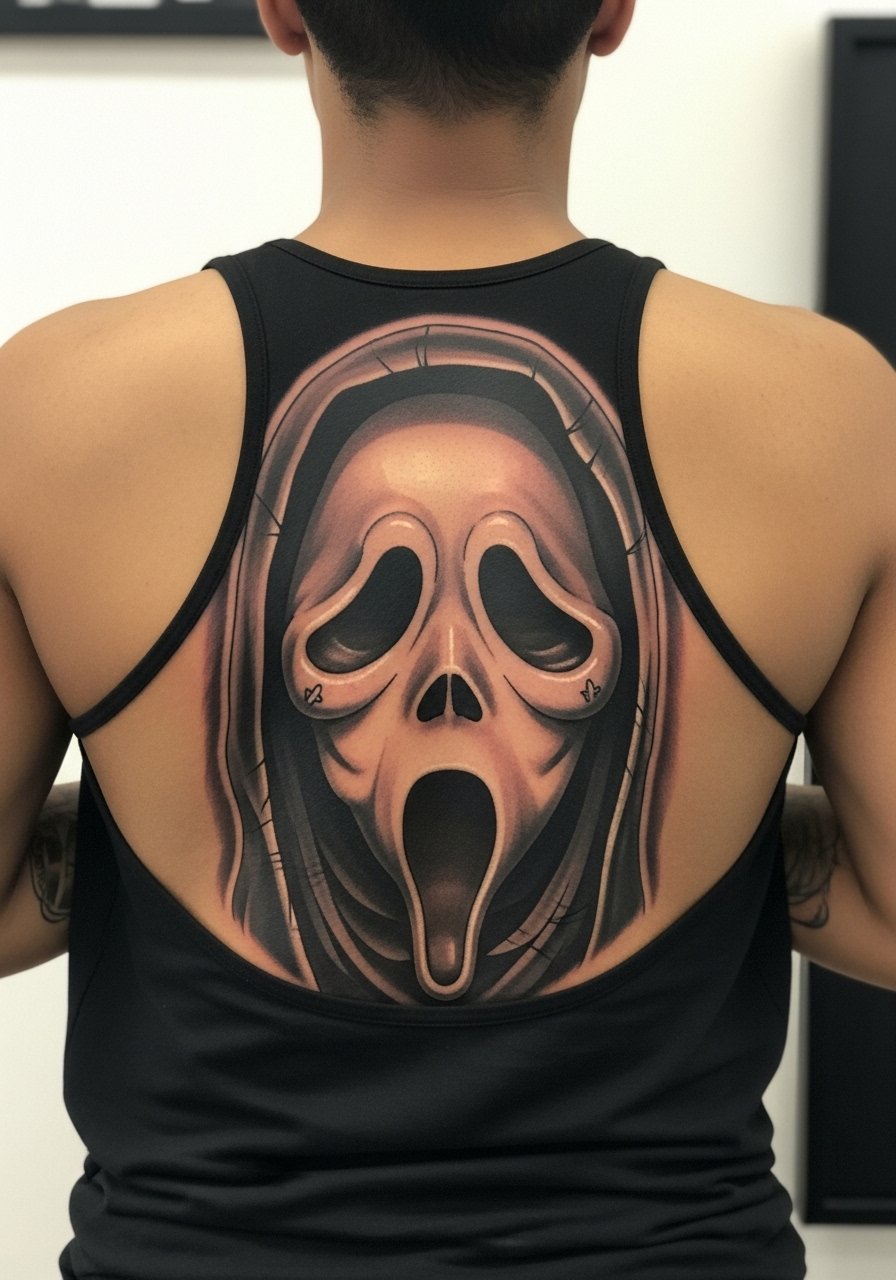
Visual impact lead. The upper back absorbs larger, more cinematic pieces that let the design breathe. The common version that ages poorly is trying to miniaturize a large composition into a small patch. Ask the artist for a mockup scaled to your back so you can see how elements read across the shoulder blades. For session comfort wear an open-back or strap-adjustable top so the artist can reach the area without you being uncomfortable. Large panels often need staged sessions.
21. Matching Couple Peeks on the Shoulder
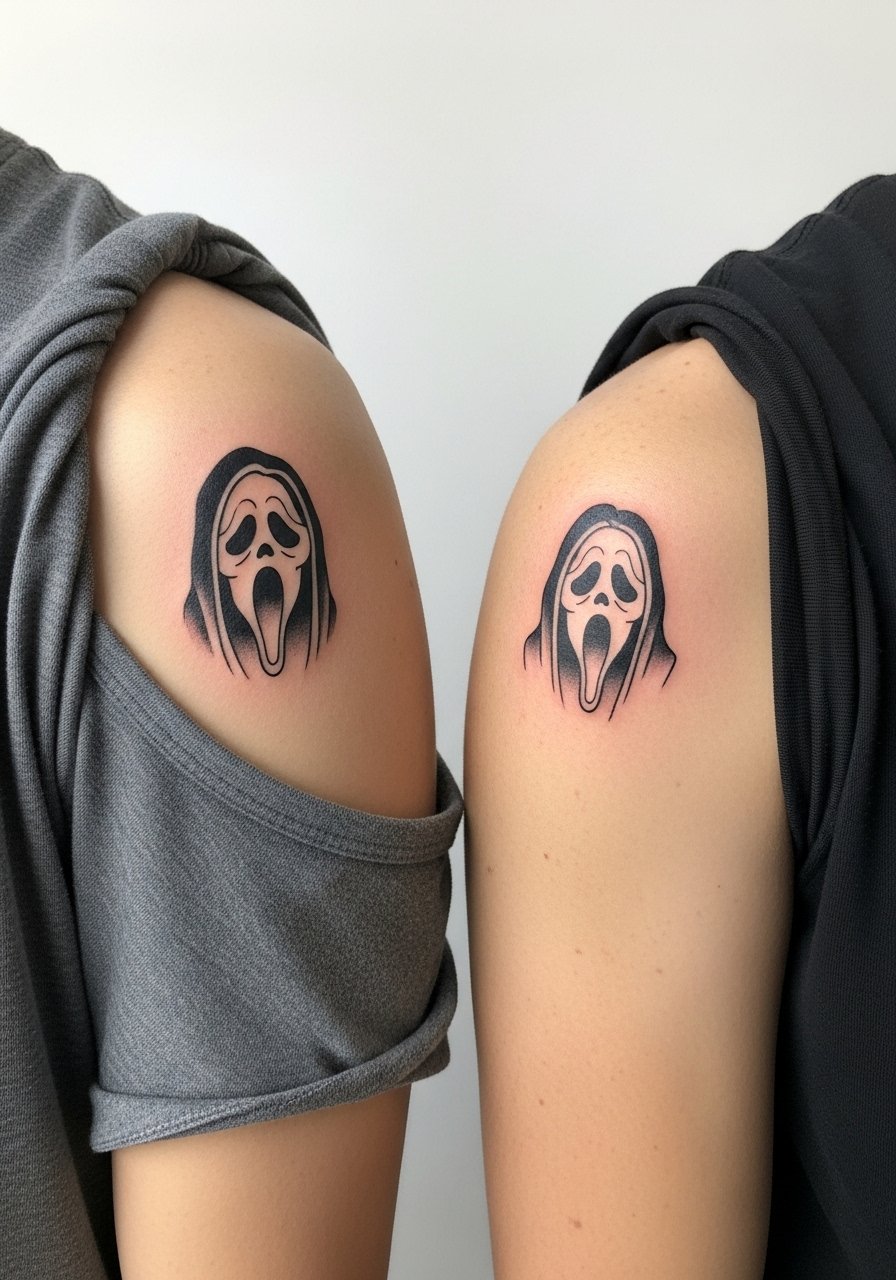
Styling lead. Matching shoulder pieces work well because they are visible together and private apart. During the consult decide size consistency and whether one mask faces the other for a mirrored effect. The mistake is mismatched scale that looks off when you stand side by side. For show-off wear a sleeveless hoodie men or muscle tee so the pieces read in casual photos. Expect a single session each for small matching motifs and plan touch-ups independently.
Studio Day Picks
The wrist, forearm, collarbone, inner bicep, and ankle ideas above need slightly different prep and first-week supplies.
-
Stencil transfer paper kit. Lets you preview stencil placement on skin, which matters for collarbone and rib placements where curvature changes how the design reads.
-
Topical numbing cream. Applied before the session it can ease the initial sting on the ribs and sternum without affecting linework when used as instructed.
-
Thin protective film roll. Keeps ankle and wrist tattoos cleaner through the first few days of friction and showering.
-
Fragrance-free gentle body wash. Gentle cleansers reduce irritation for delicate collarbone and inner arm pieces while the top layers heal.
-
Aquaphor healing ointment. A thin layer in the first days helps lock in moisture for fine line work without clogging the area.
Frequently Asked Questions
Q: How should I weigh color versus black and gray for a Ghostface piece, especially on shoulders or forearms?
A: Both camps are honest about trade-offs. One side prefers full-color for the immediate impact and quote pairing. The other favors black and gray for longevity and easier touch-ups. Tell your artist which you value more, and ask them to show healed examples on similar skin tones. Color usually needs slightly longer sessions and sometimes a follow-up session for saturation.
Q: Will a tiny Ghostface on the wrist or ankle need more touch-ups than a forearm piece?
A: Yes, wrists and ankles see more friction and washing, so they tend to need touch-ups sooner than forearm work. I suggest planning for a possible touch-up around year two for fine line wrist pieces and keeping footwear or sock choices in mind during the first week to avoid unnecessary wear.
Q: How do I find artists who get the horror vibe without making it cartoonish?
A: Use style-specific hashtags like #ghostfacetattoo and review full healed photos in portfolios, not just fresh shots. Look for artists who post progression and healed images. Ask for stencil previews and ask about how they handle facial expression with minimal lines. If an artist shrink-wraps the face into a stylized emoji look, keep looking.
Q: What should I wear to a studio appointment for a collarbone or sternum Ghostface design?
A: Wear a wide-neck shirt for collarbone and a fitted sports bra or bandeau for sternum so the artist has targeted access without full exposure. A simple option is a loose button down shirt you can slide aside easily during the session.
Q: Are there placements I should avoid if I want the design to age cleanly over five years?
A: Avoid ultra-dense fine line on high-friction zones like the side of the hand, fingers, and very low ankles. Ribs, collarbone, and inner biceps can hold fine line if sized correctly, but expect touch-ups when skin stretches or your lifestyle changes. Bigger, bolder blackwork tends to age more consistently across the board.
