
Fine line sweet pea tattoos keep popping up on saved boards, but the trend-versus-reality gap is real. The pieces that still read crisp after three years are usually the ones with room in the composition and deliberate spacing between stems. If you want an illustrative sweet pea that ages well, think about placement, line weight, and how you plan to show it off. The ideas below start with small, session-friendly placements and scale up to sleeves and chest work, so you can pick what fits your life and wardrobe.
1. Single Stem on the Inner Wrist
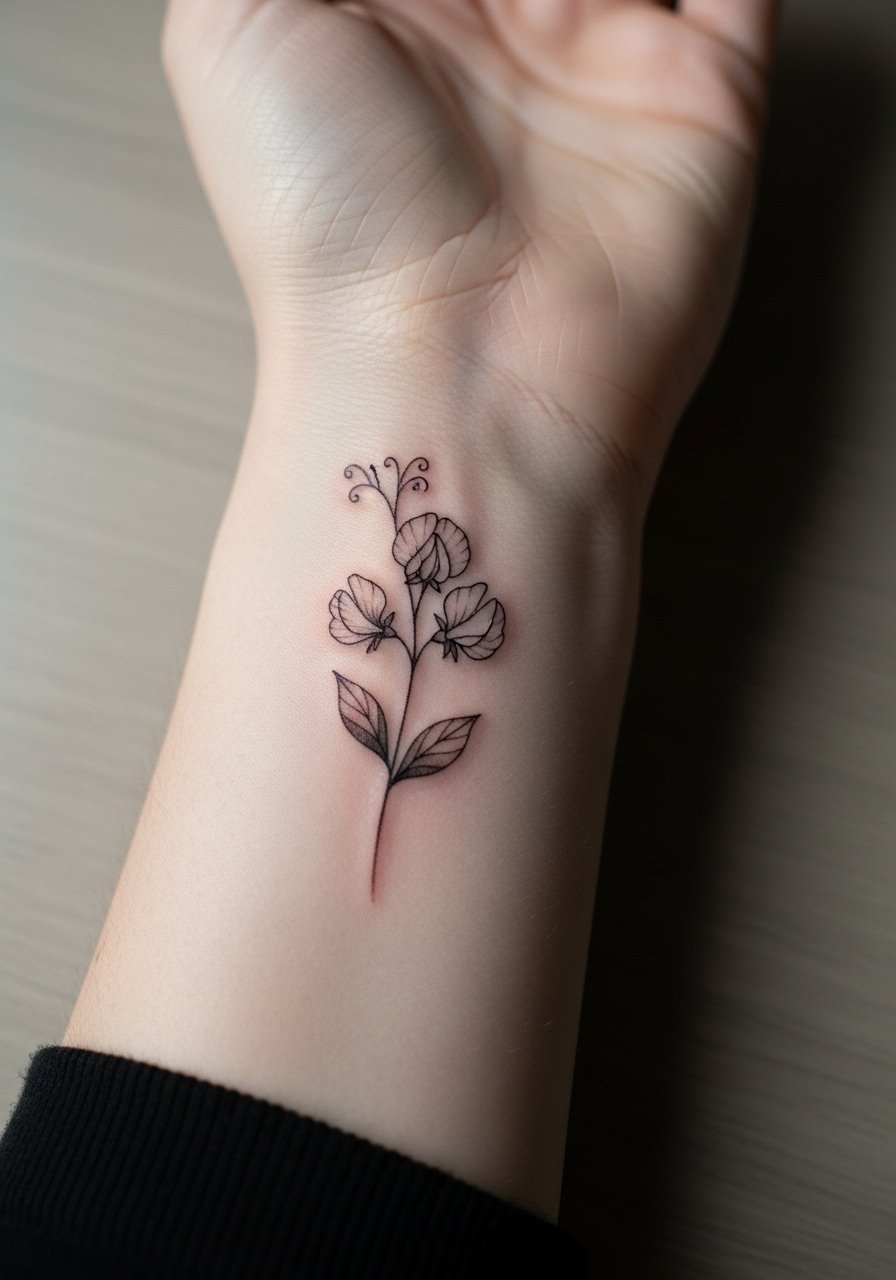
This is the most approachable sweet pea piece. I recommend a slightly heavier outline than the pure micro-line trend so the stem and petals keep shape at year two. Tell your artist you want a clean contour with stipple shading rather than soft watercolor fills. Expect a short session and low downtime, but be honest about daily hand washing and friction from bracelets. Common mistake is asking for ultra-thin lines on the wrist and then being surprised when they soften. For showing it off, roll sleeves or wear a thin chain bracelet that frames the wrist without crowding the linework.
2. Tiny Finger Wrap
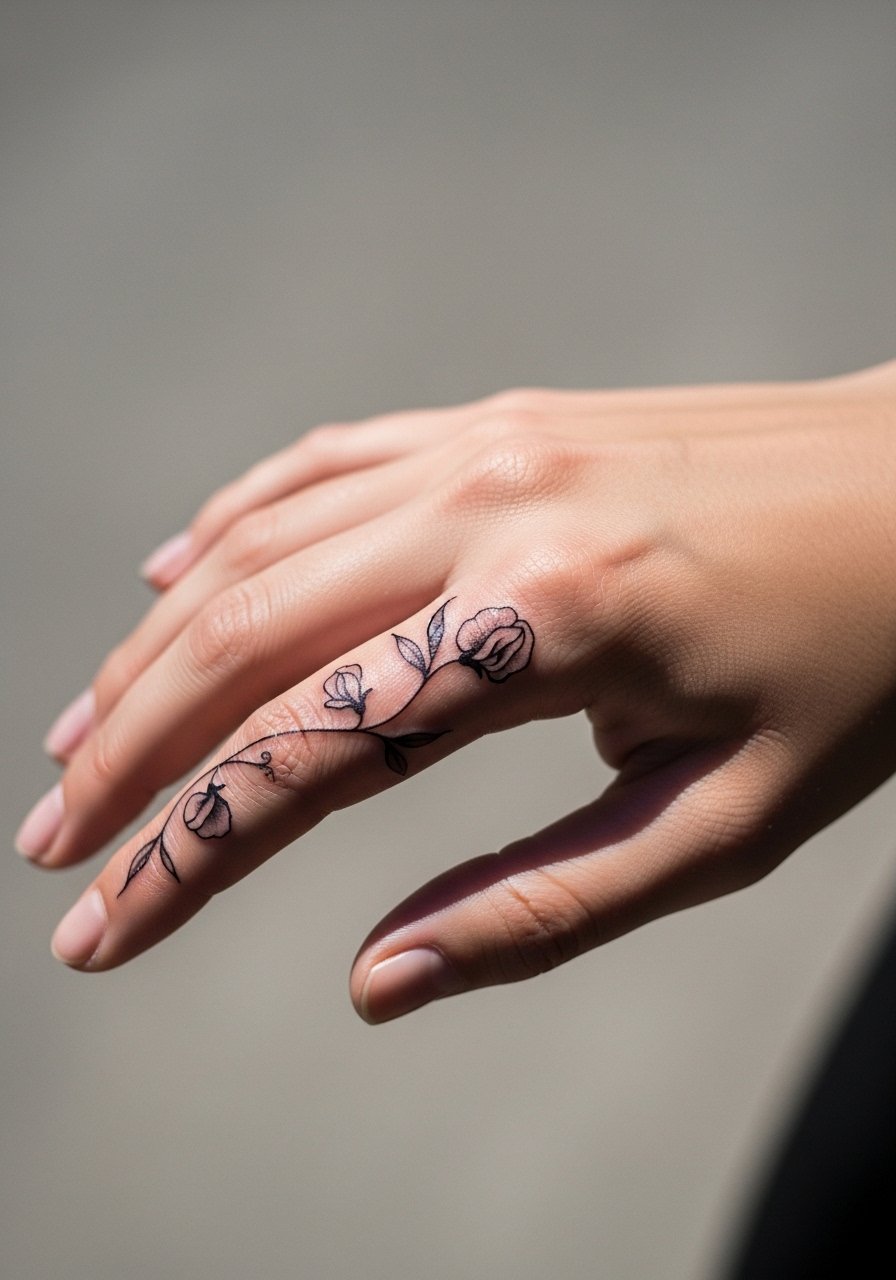
Finger placements feel delicate but age fast. Fair warning, fingers get constant hand washing and friction, so expect touch-ups sooner than for larger areas. When you consult your artist, ask for slightly bolder stems and minimal petal detail so the motif reads at a glance. The session is short and surprisingly sharp in pain because the skin sits over bone. A mistake people make is requesting minute petal texture that blurs within months. For outfits, delicate rings or a minimalist stacking ring set keep attention on the wrap without covering the ink.
3. Forearm Bouquet with Negative Space
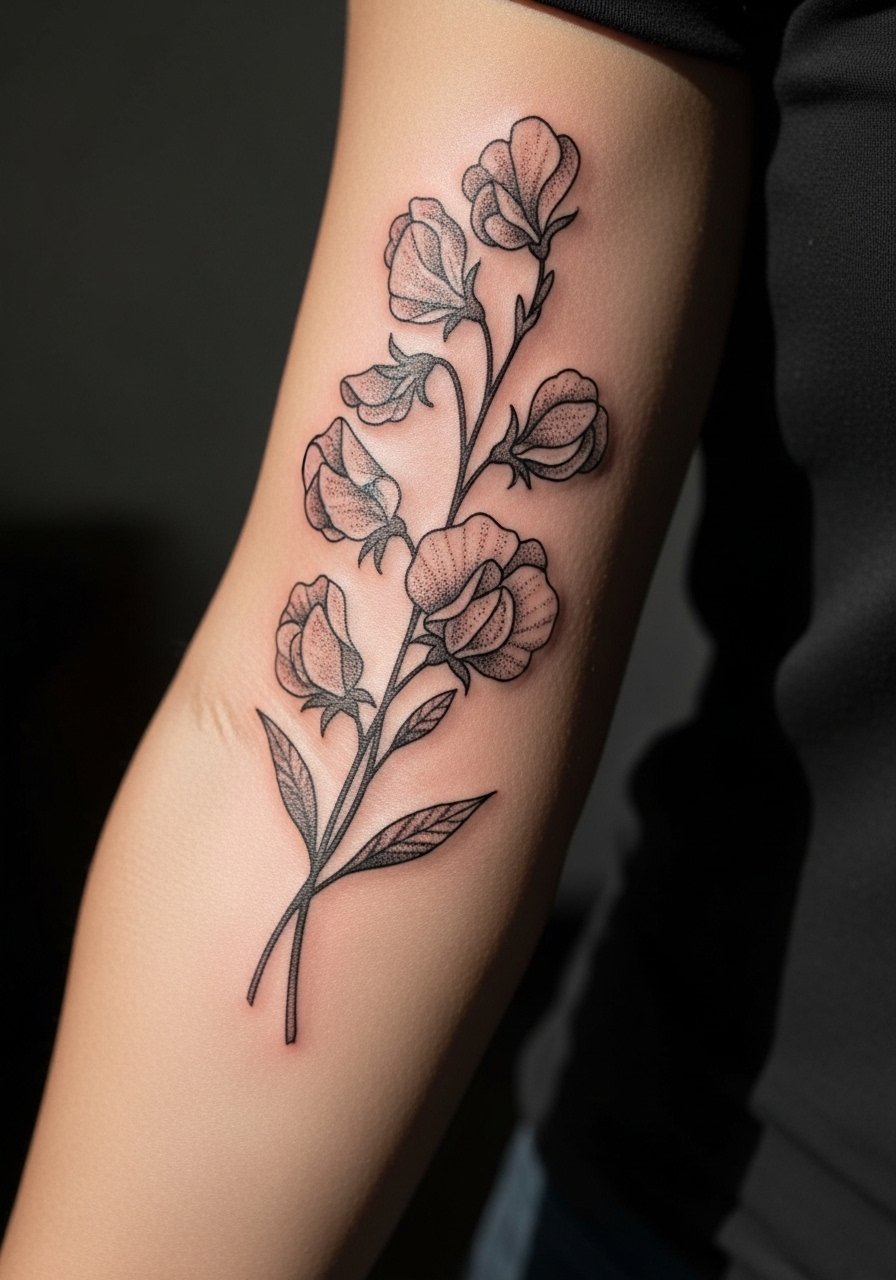
A forearm bouquet gives room for composition and detail. I've seen versions that age well when artists use a mix of linework and stipple shading to avoid over-saturation. Tell your artist to plan for intentional gaps between blooms so the piece breathes over time. The session feels moderate and you can usually finish in one longer visit. Common blowout risk comes from packing too many micro details into a small area. Pairing this with rolled sleeves or a rolled linen shirt shows the bouquet without competing with bright patterns. Expect a touch-up at year two for edge crispness.
4. Collarbone Cluster with Script Accent
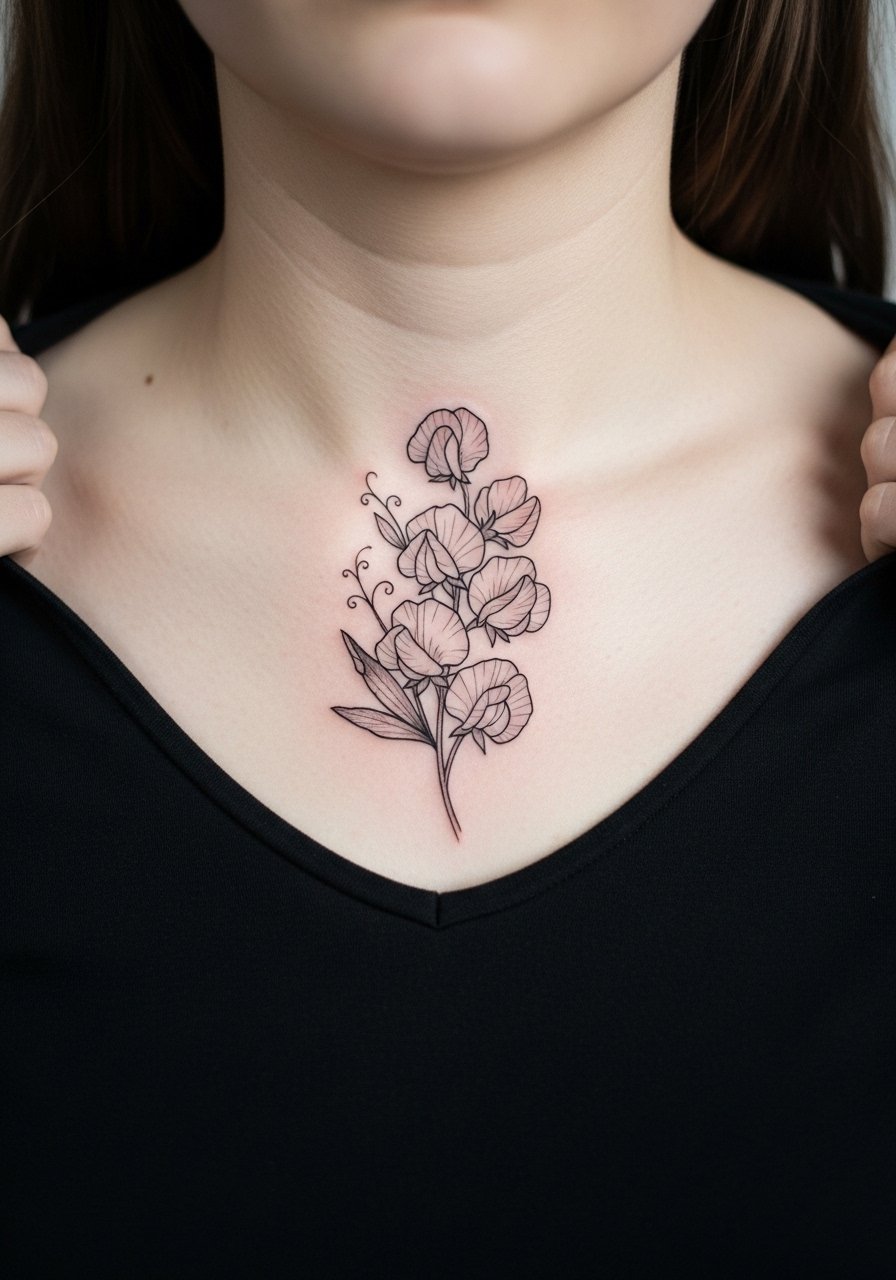
Collarbones are a great place for delicate botanical work that peeks out under open necklines. The skin there is thin so artists split into two camps on fine line durability. One camp says ultra-fine linework blurs within a couple of years. The other camp argues that with correct depth and spacing it holds fine. Ask your artist where they stand and show examples that match their portfolio. For session day wear, slip on a wide-neck shirt you can pull aside easily. Avoid asking for tiny lettering right on top of petals. Expect mild soreness and day-two sensitivity with collarbone work.
5. Ankle Garland
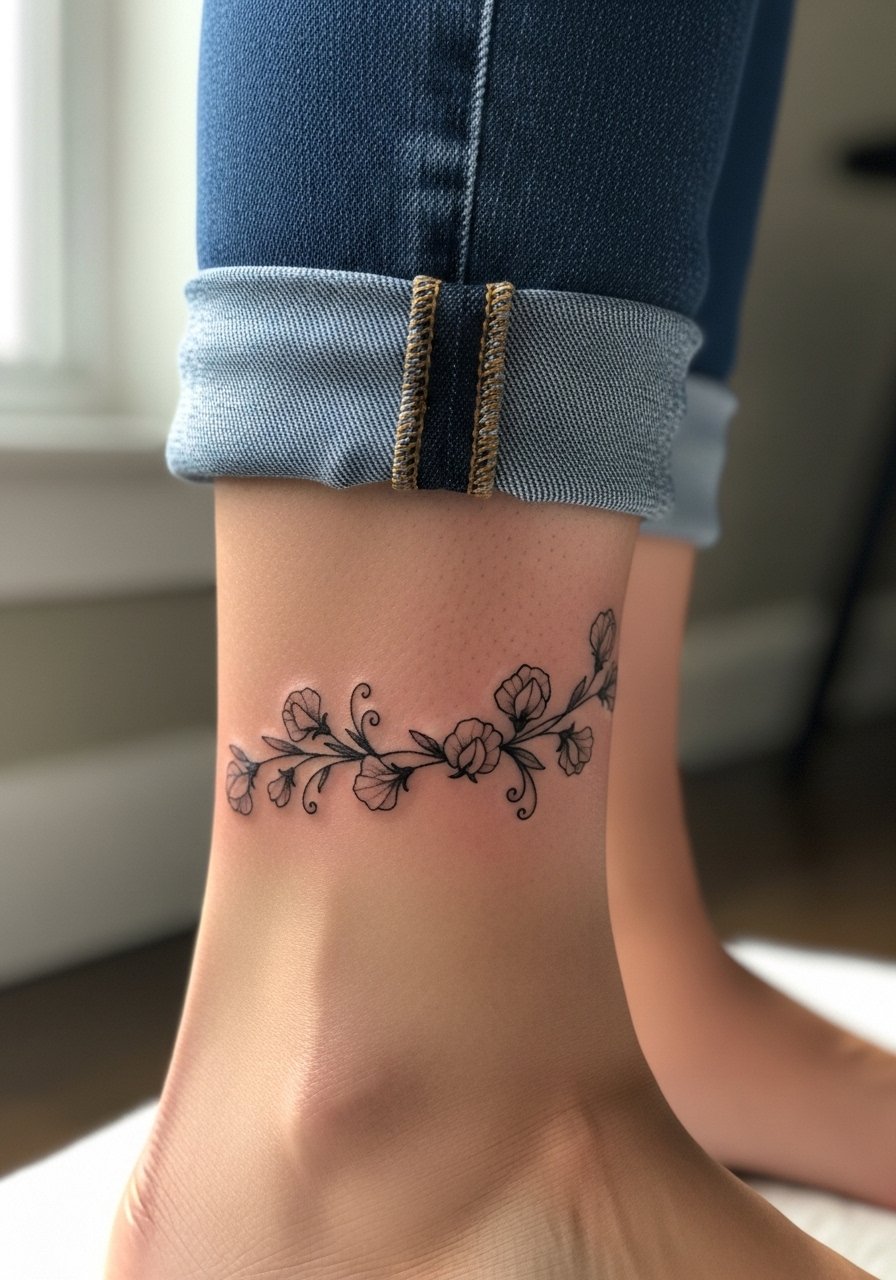
Ankle work reads very feminine with an illustrative vine. The biggest issue is friction from socks and shoes during the first week, so plan footwear around the session. Ask your artist for slightly stronger stems and minimal interior shading so the garland keeps silhouette as it settles. A common mistake is insisting on tiny, intricate petals that disappear under boot friction. For showing off, low-cut shoes and cropped trousers or a pair of sandals highlight the garland without rubbing it. Expect a touch-up at year two if you wear boots often.
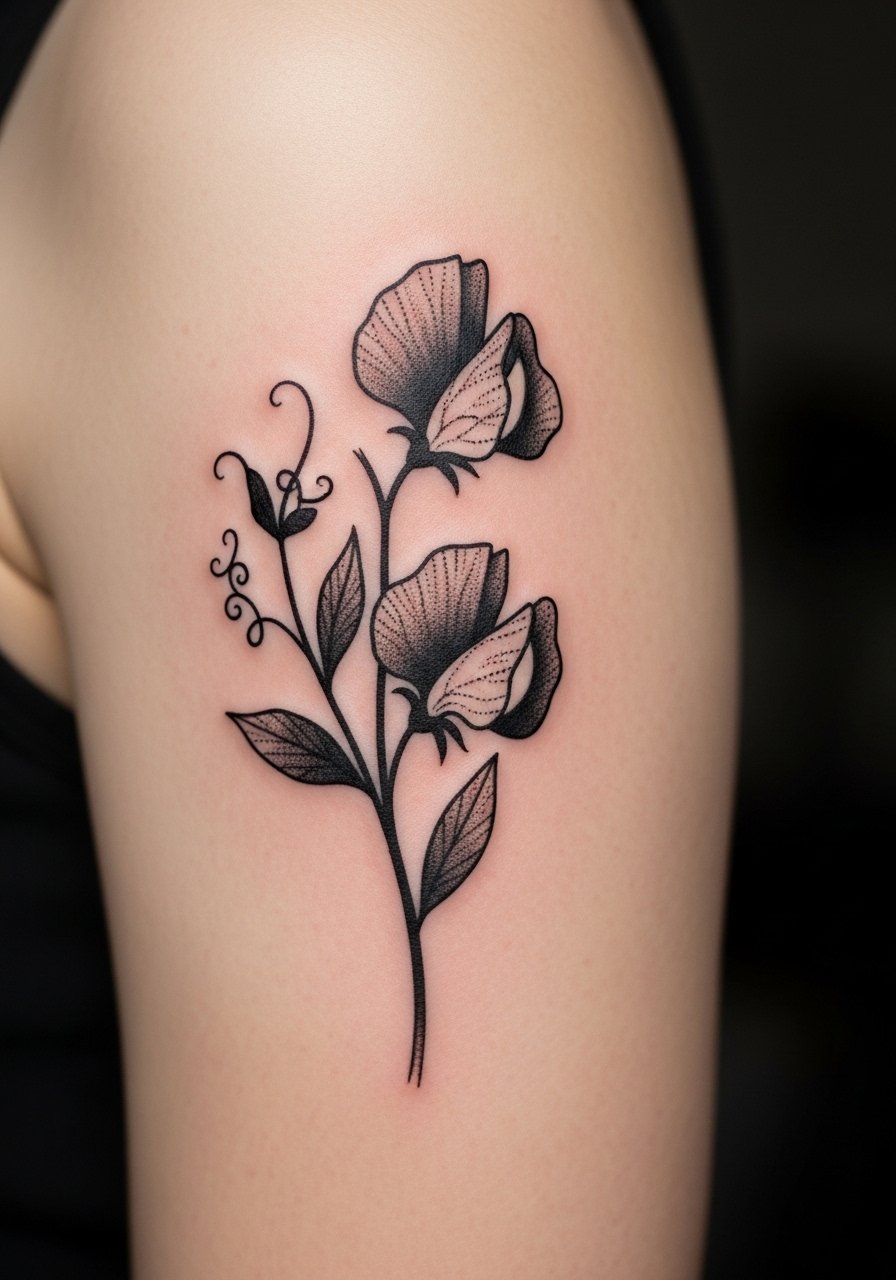
6. Shoulder Cap Bouquet
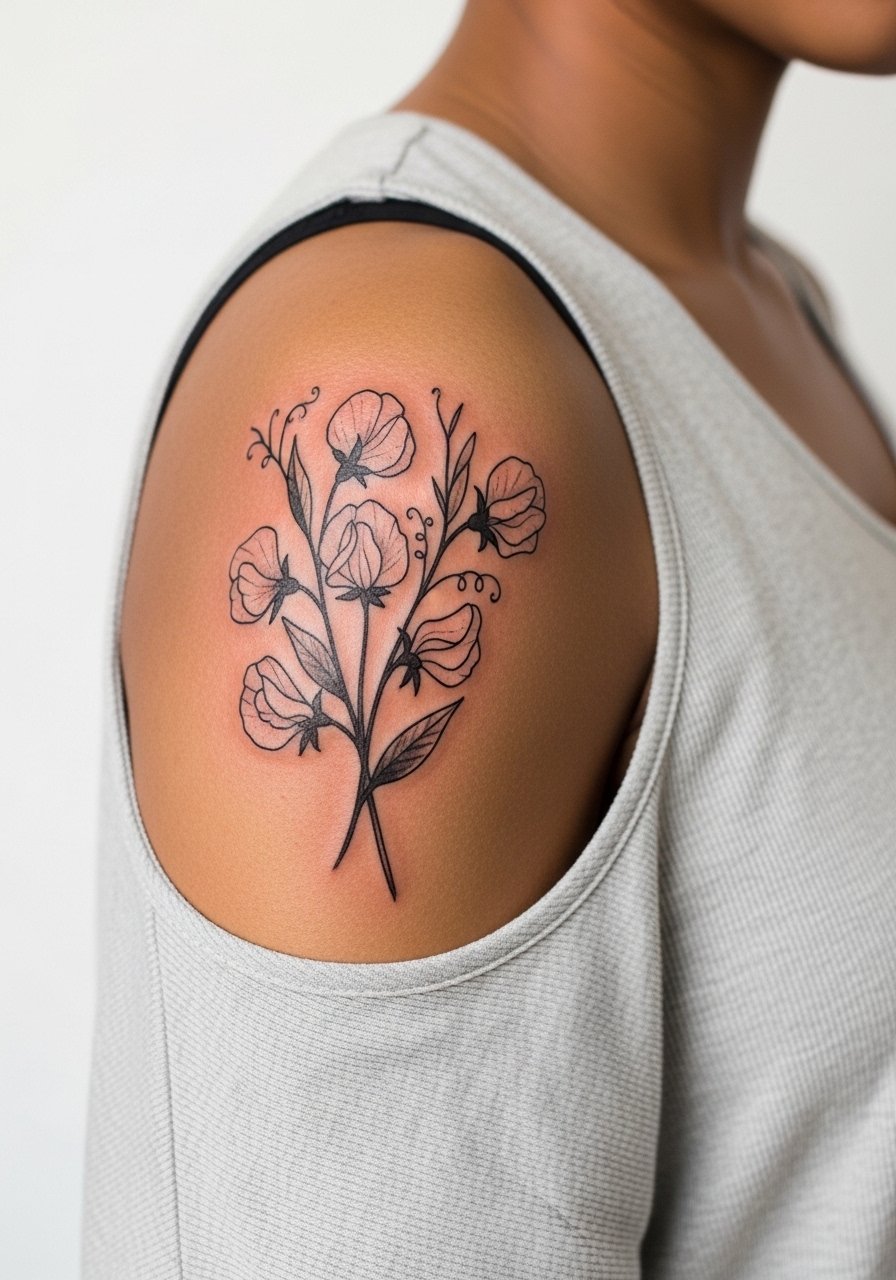
Shoulder caps give a rounded surface to build an illustrative composition. Pain is low to moderate and sessions can be short if you keep the piece tight. Tell your artist you want defined linework with medium saturation so the color stays readable at five years. The mistake is packing too much tiny detail into the curve, which can blur when the arm moves. This placement pairs well with sleeveless tops or a loose tank top for warm months. If you plan a larger piece later, plan the shoulder cap with future expansion in mind.
Studio Day Picks
These first shoulder, ankle, and wrist ideas ask for different prep, so a few targeted items make the session and early healing smoother.
-
Stencil transfer paper kit. Lets you preview placement precisely on curved areas like the shoulder cap and ankle before the needle touches skin.
-
Thin protective film roll. Useful for small wrist and ankle pieces during the first 24 hours of movement and shoe friction.
-
Silicone scar delay strips. Keeps pressure even over the first week and helps fine line edges settle without excess scab adhesion.
-
Fragrance-free gentle body wash. Cleanses delicate linework on ankles and wrists without stripping pigment or irritating skin.
-
Aquaphor healing ointment. A thin layer in the immediate healing window helps keep humidity consistent for tight linework on small placements.
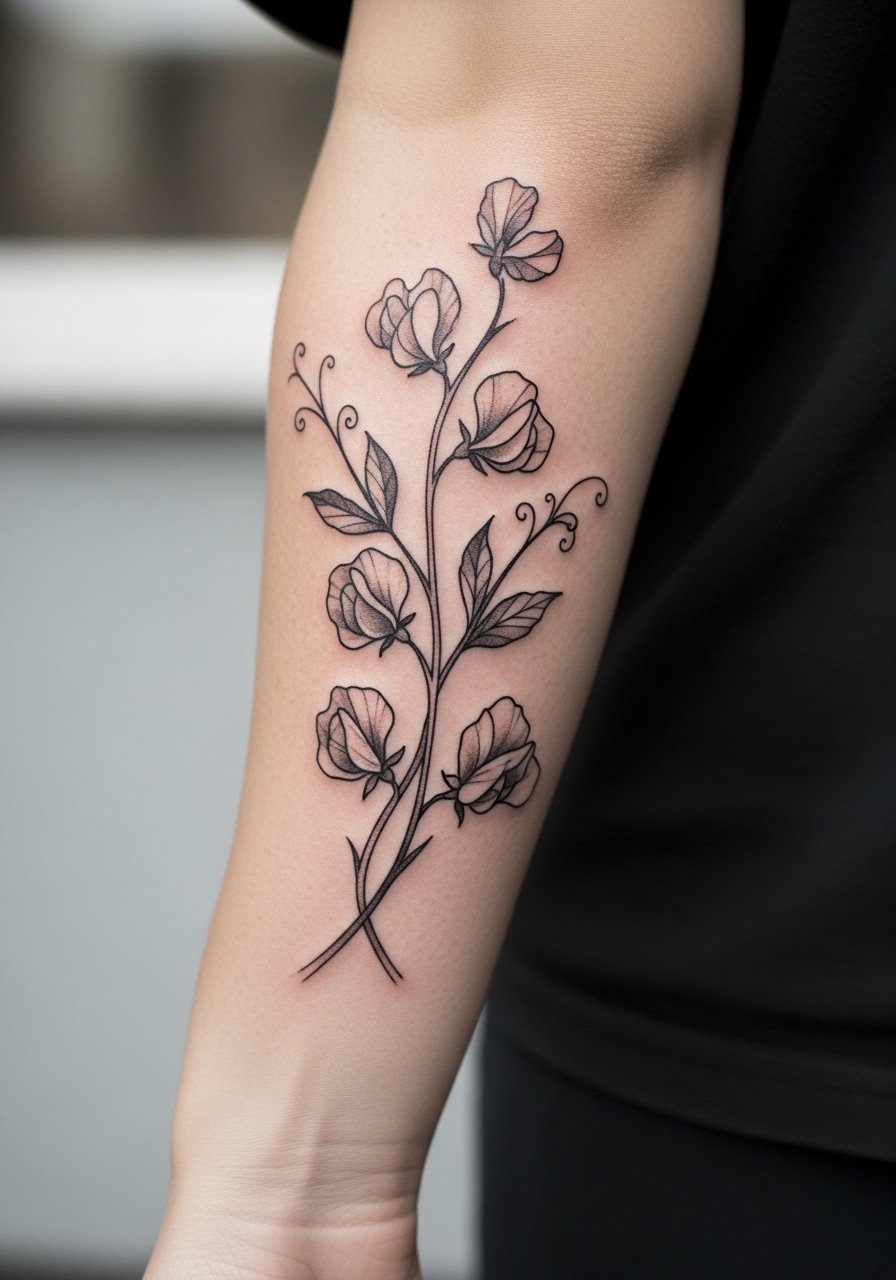
7. Inner Forearm Botanical Panel

Inner forearms are ideal for elongated sweet pea stems and narrative compositions. I tell clients to think about how the piece looks when the arm is relaxed and when extended. Ask for moderate line weight and selective stipple shading to keep the petals readable at two to five years. The session is comfortable for most people with moderate pain. A mistake is cramming several flower types into the panel and losing identity. For daytime wear, roll up sleeves or try a button-down shirt with the cuff rolled to frame the artwork without hiding it.
8. Small Ribcage Vine

Ribcage placements are beautiful and painful. Artists split into two camps on fine line here. One group warns that stretch and breathing make lines blur sooner. The other group says correct needle depth and spacing hold the detail. If you want this spot, have that conversation explicitly with your artist. The session can be longer and you should plan for pacing and breaks. Avoid requesting ultra-fine cross-hatching over wide curves. For the appointment wear, bring a cropped athletic top you can lift slightly for access. Expect a touch-up window around year two to three.
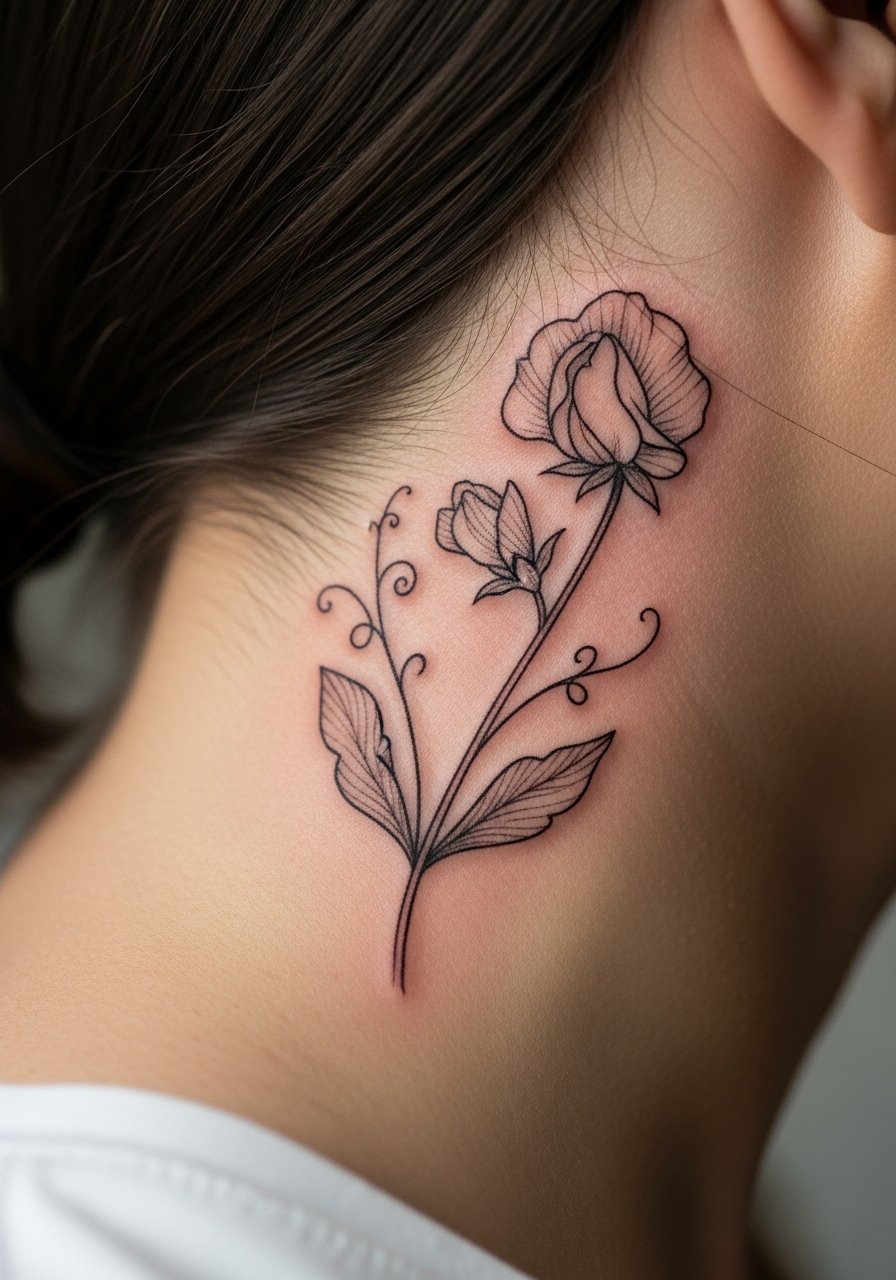
9. Back-of-Neck Sprig

The nape piece reads as a subtle surprise under hair. It has lower sun exposure which helps color longevity, but it sits near thicker skin at the hairline so be clear about exact placement. The session feels short and the pain is moderate. A common mistake is wanting heavy saturation there, which can look like a smudge against hair growth. For showing it off, wear a wide-neck shirt or a loose bun that reveals the sprig. If you work in conservative environments, remember this spot can be hidden easily when needed.
10. Sternum Cluster
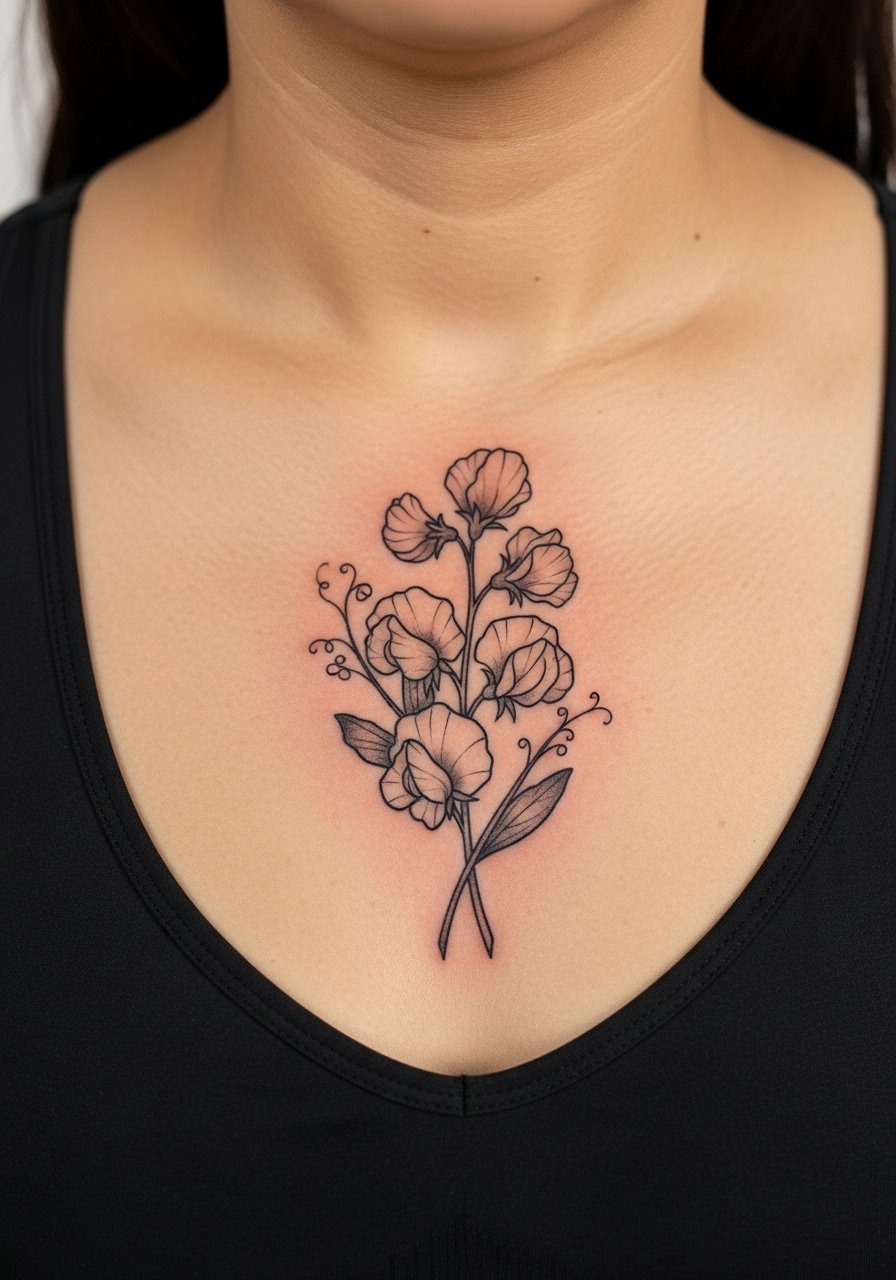
Sternum tattoos sit on sensitive terrain and demand a specialist touch. Many artists prefer to use slightly bolder linework here to prevent early blurring from chest movement. Tell your artist your tolerance for pain and ask to split the session if needed. The mistake is trying to cram heavy background shading into the sternum area. For the session wear, choose a fitted sports bra you can loosen easily. Recovery may feel tender for several days because the area moves with breath and posture. Plan for a mid-year touch-up if you sleep on your front often.
11. Thigh Sprig with Stipple Shading

Upper thigh placements are forgiving and age well due to lower sun exposure. I suggest stipple shading for petals rather than saturated watercolor fills. Tell your artist you want a balance between linework and soft texture so the piece keeps depth without bleeding. The session is lower pain and you can usually finish in one visit. Avoid tight designs that require inch-level detail; the area benefits from breathing space. For the appointment wear high-waisted shorts or a pair of denim shorts so the artist can access the outer thigh without discomfort. Thigh pieces are excellent if you eventually want a half-sleeve of botanicals.
12. Delicate Ear-Behind Sprig
Behind-the-ear tattoos read intimate and understated. Keep the design compact and avoid dense shading because hair growth and natural oils affect pigment. The session is quick but can feel tender on that thin skin. A common mistake is asking for dense color that migrates under the thin dermis. For discovery, look through local shop walk-ins or tattoo convention portfolios rather than large flash sheets. This placement is easy to hide with hair down if you need discretion. Discuss the exact hairline placement carefully so the bloom sits where you expect.
13. Small Chest Pocket

A pocket tattoo near the clavicle or upper chest gives a natural peek when wearing low necklines. The skin varies greatly here so talk to your artist about depth and shadow. I recommend medium saturation and clean linework so petals keep structure at three to five years. Mistakes include overworking background shading which can muddy the motif. For styling, a thin pendant or a chain pendant necklace sits just above the pocket without competing with petals. Expect mild soreness and day-two tenderness.
14. Ankle Tiny Cluster

Tiny clusters above the ankle are charming but vulnerable to friction. Shoes and socks create the main risk to crisp linework. When you book, ask for slightly stronger stems and minimal inner petal texture. The session is quick and pain is low to moderate. A common error is choosing high-detail fills that fade into indistinct marks with daily movement. For showing off, wear cropped pants or a pair of sandals that let the cluster show without rubbing. Plan for a touch-up within a couple of years if you wear closed shoes often.
15. Full Sleeve Concept with Sweet Pea Flow

Sleeves let you repeat and vary sweet pea elements across negative space. When you plan a sleeve, map how stems will move with muscle and joint lines. I advise alternating linework and stipple patches so dense areas do not merge as the skin ages. Sessions are longer and will be spaced across months. A typical mistake is asking for continuous micro-detail without enough breathing space. For wardrobe, sleeveless or rolled-sleeve looks show off the flow. Expect scheduled touch-ups across the first two years as pieces settle into the arm's movement.
16. Calf Garland

Calf tattoos sit on a stable canvas and can hold detail well. I suggest moderate saturation with punchy stem linework to maintain contrast from a distance. Tell your artist you want the garland to wrap without continuous heavy shading. Sessions are usually moderate and healing is straightforward. A mistake is crowding the design against the tendon area where blowout risk rises. For showing off, cropped trousers or skirts pair well. Avoid dense color blocks if you want the delicate sweet pea feel to last.
17. Small Back Centerpiece

A centered upper-back sweet pea becomes a tasteful focal point. Plan for a slightly bolder outline so the design stays evident under shirts and backpacks. The session pain is low and the area is easy to care for. Common mistakes include adding heavy backgrounds that catch on strap movement. For the appointment wear, choose a button-down shirt you can pull aside so the artist has clear access. Backpieces age well with less sun exposure, but keep sunscreen in mind for summer.
18. Micro-Realism Single Bloom on the Thigh

Micro-realism emphasizes petal texture and tiny veins, and the thigh makes a forgiving spot for that detail. I recommend stipple and fine whip shading for depth rather than heavy color packs. Sessions can be longer because of the detail focus. A common mistake is requesting extreme micro detail at small scale, which loses legibility later. For session wear, loose shorts or a wrap skirt gives the artist access without discomfort. The inner thigh is private and ages well if protected from sun.
19. Finger Accent Knot
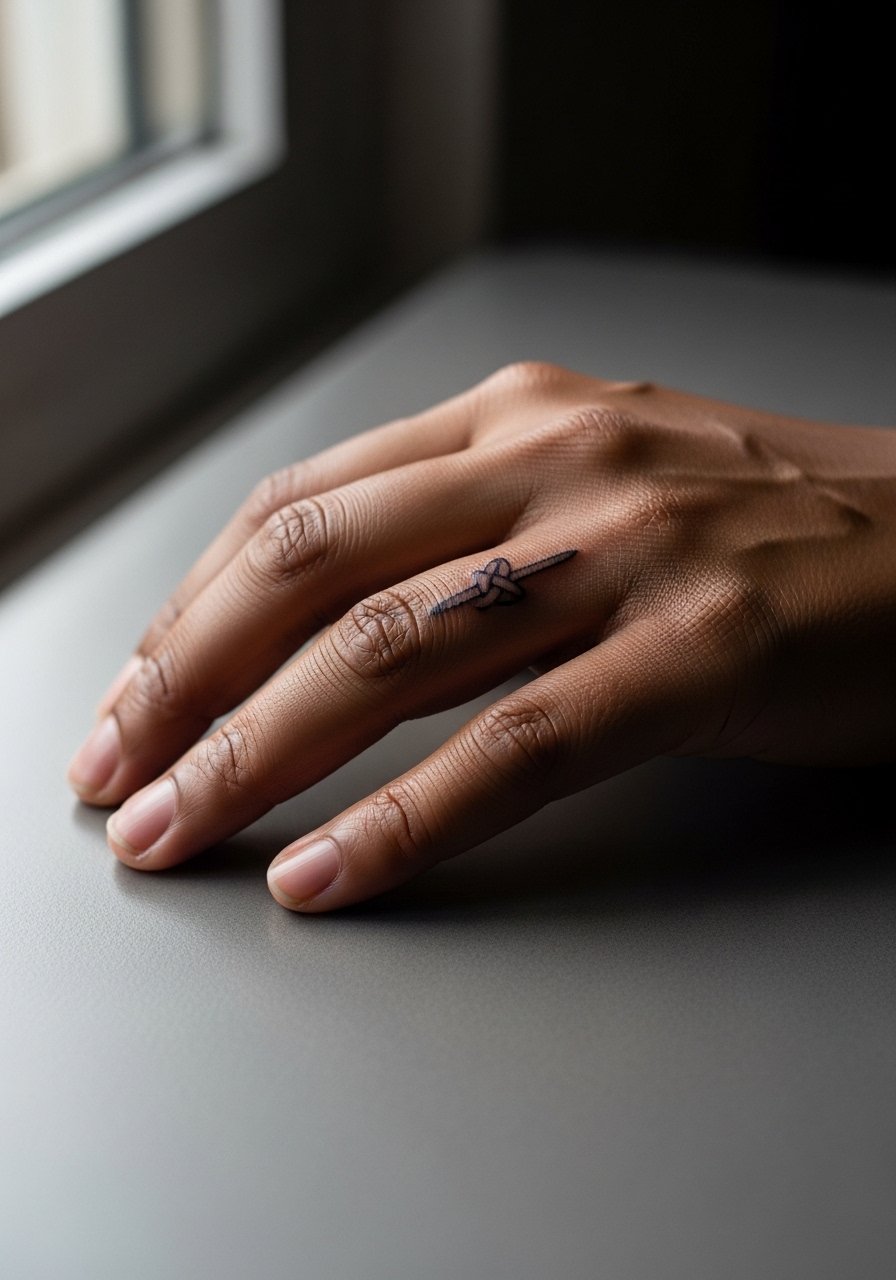
This tiny accent works as a complement to ring tattoos. Expect a quick session but faster fading because fingers take heavy use. I always tell clients to accept the likely need for a touch-up within a year. The common mistake is expecting permanence similar to arm work. For daily wear, keep rings minimal so the knot remains visible and try a minimalist stacking ring set that complements without rubbing. If you need discretion for work, this spot is easy to mask with a standard band.
20. Blackwork Silhouette Bloom
A blackwork silhouette gives the sweet pea motif high contrast and long-term readability. This approach trades petal detail for bold shapes and high saturation, which ages well if healed properly. The session feels like standard color packing and may be shorter than a detailed micro piece. The main mistake is over-packing in shaded edges that can look heavy on smaller placements. For outfits, a simple sleeve roll or a short-sleeve tee frames the silhouette nicely. Blackwork usually needs fewer touch-ups than ultra-fine work.
21. Mini Sleeve of Intertwined Sweet Peas
A mini sleeve gives a narrative arc without committing to a full arm. Plan how stems will travel over joints and where negative space will sit. I recommend alternating bold stems and open petal areas so the piece reads at multiple distances. Sessions will be split across two or three visits. A mistake is over-detailing the wrist portion, which experiences higher blowout risk. For showing off, cuffed sleeves or rolled shirts work well and a minimalist watch can accent the lower arm without covering the art. Expect scheduled touch-ups in the first three years for line crispness.
Frequently Asked Questions
Q: How long do fine line illustrative sweet pea tattoos usually hold up before needing a touch-up?
A: It depends on placement and lifestyle. On hands and fingers you might expect touch-ups around year one, while forearm and calf work often goes two to five years before needing edge refinement. Sun exposure and friction speed up fading, so plan touch-ups accordingly.
Q: Should I pick stipple shading or soft color washes for longevity on a small sweet pea tattoo?
A: Stipple and controlled linework tend to age better on small pieces because they avoid heavy saturation that can blur. Soft color washes look beautiful fresh but often require touch-ups sooner. If you want color, ask for gentle saturation with defined outlines.
Q: Are sweet pea designs safe on the ribcage and sternum considering stretching and movement?
A: Artists are split on this. One camp says fine line on ribs blurs faster because of skin movement. The other says correct depth and spacing make it fine. The right choice depends on your artist's experience with those placements, so ask for their examples and touch-up policy.
Q: What should I wear to a session for a sternum or ribcage sweet pea?
A: Choose easy-access layers like a fitted sports bra or a cropped top that you can lift slightly. For a ribcage session bring a cropped athletic top so the artist has clear access without you being uncomfortable.
Q: Will blackwork sweet pea silhouettes limit future color options if I want to expand the piece later?
A: Blackwork provides strong contrast and does not prevent future color, but planning helps. If you think you may add color later, discuss placement of bold black areas with your artist so they complement future fills rather than block them.
