
Fine line lilies are everywhere online right now, but what actually holds up behind the ear is less obvious. Small choices like line thickness, placement against the hairline, and whether the design spills toward the neck decide if a lily reads crisp at six months or needs a touch-up. Read these 27 tiny lily ideas with real tradeoffs and session notes so you can pick one that heals and shows the way you want.
1. Fine line single-stem lily behind the ear
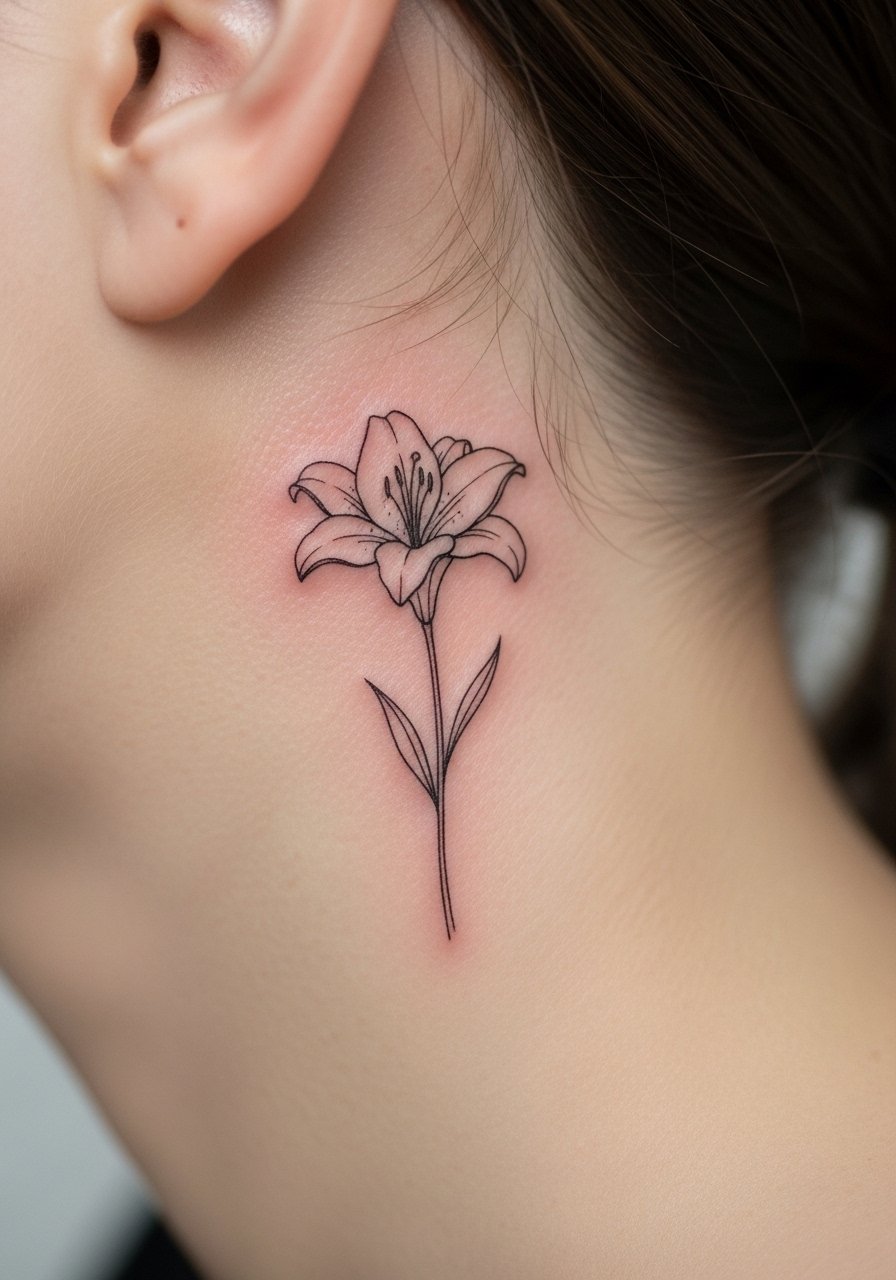
A single-stem fine line lily is what many people picture when they think "tiny ear flower." I recommend asking your artist for a minimum 1.5 millimeter visible line weight so it does not ghost at six months. Expect a short session and a sharp sting near the bone, then soreness that fades in a day. Common mistakes are starting with single-needle hairlines that vanish after normal pillow friction. This version ages better because the stem has breathing room and the petals avoid tight crosshatching. For the appointment wear a loose ponytail holder and a button-up so the artist can move hair cleanly.
2. Watercolor splash lily with pastel petals
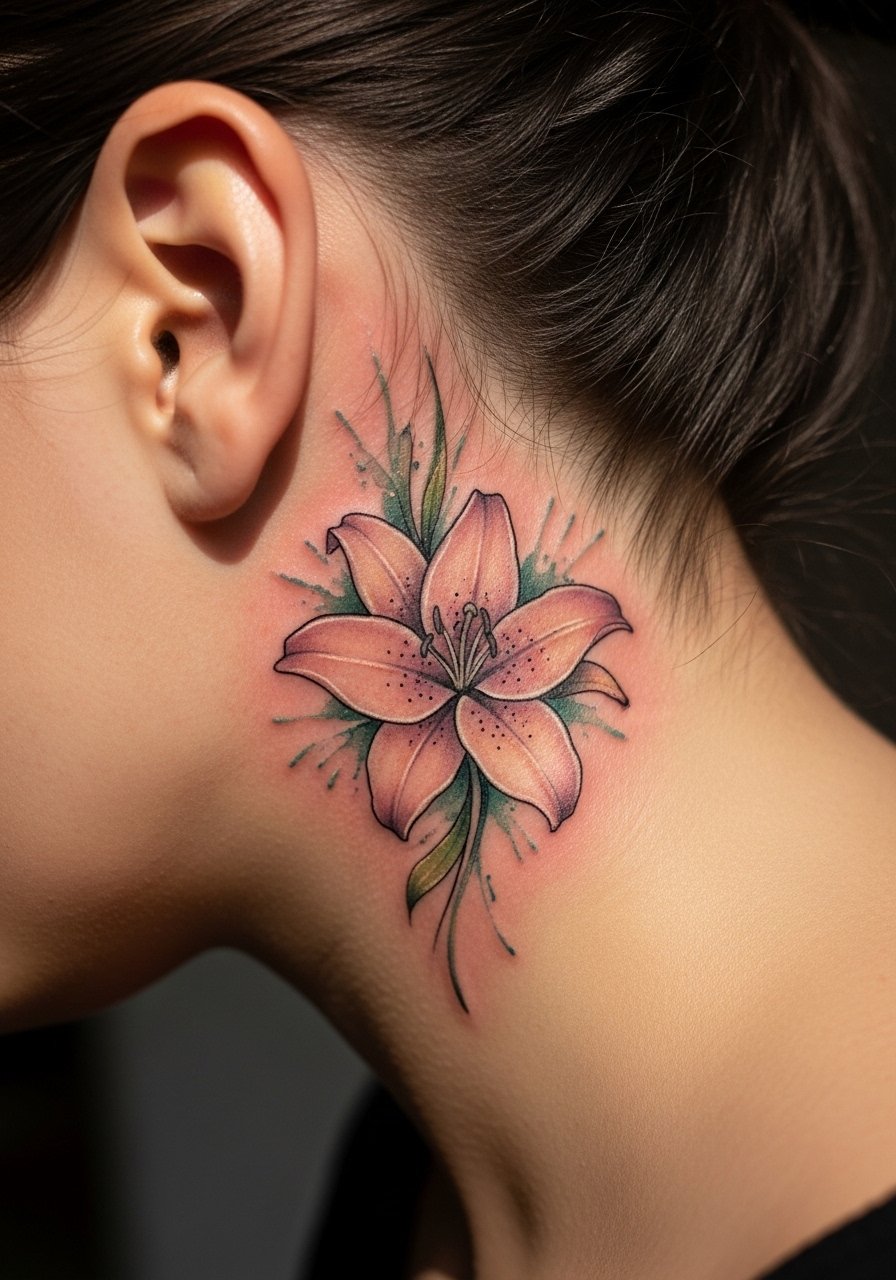
A pastel watercolor lily creates a painterly peek of color behind the ear, ideal if you want the bloom to read like a breath of pigment. Watercolor needs indirect light exposure early to avoid rapid fading, and in humid climates colors can blur faster. Tell your artist you want washed pigment with defined edgework around the petal tips to help retention. The session feels similar to fine line work but with variable needle passes for saturation. Plan a realistic touch-up conversation at booking so you are prepared if the pastels need a bump at the one-year mark.
3. Neo-traditional lily with stem curling to the nape
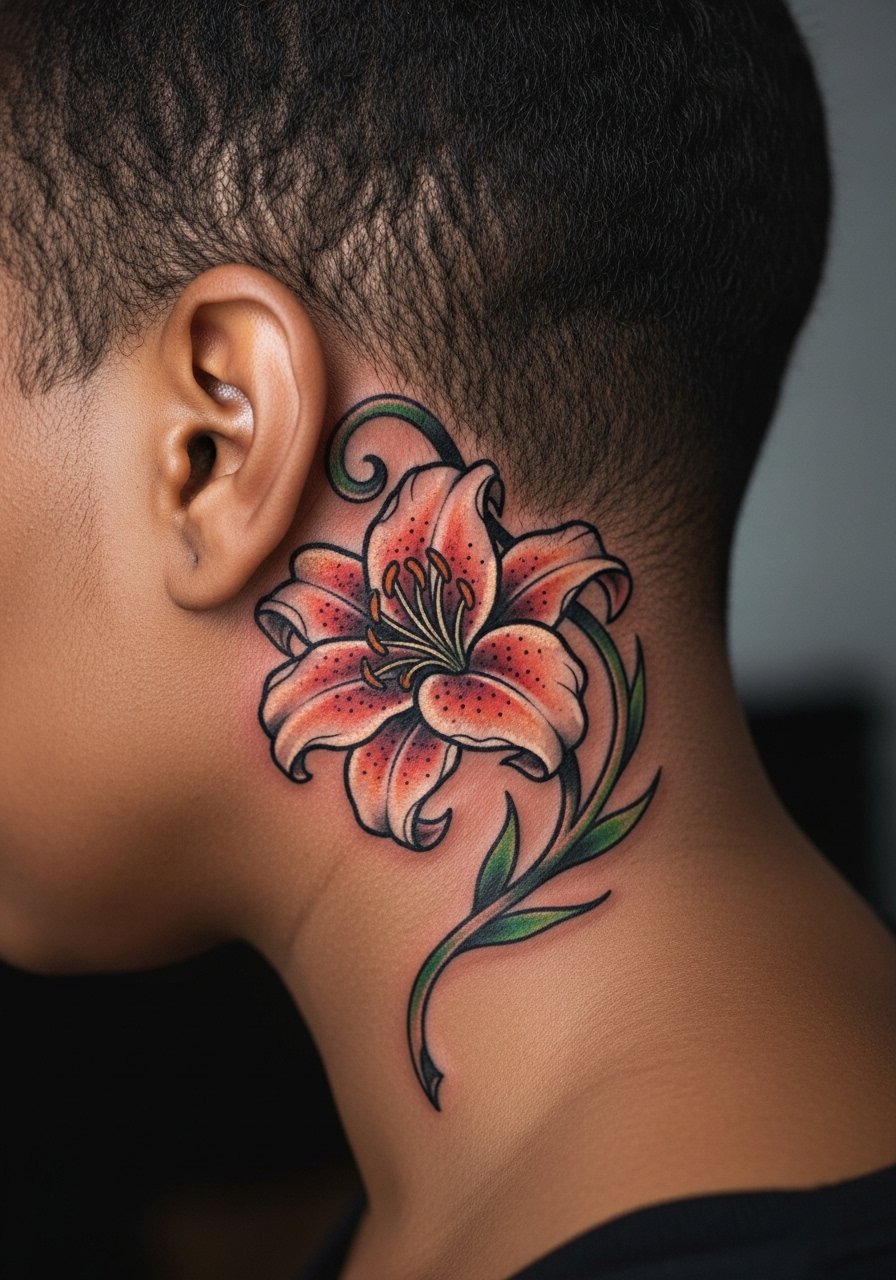
If you want vintage flash energy that actually tells a short visual story, a neo-traditional lily that extends toward the nape works great. It reads larger than a one-inch dot, so plan for a two-session or longer single session depending on saturation. During consultation, ask for bolder outlines at the ear edge so the color reads against hair and skin tone. This placement can be angrier on nerves when it wraps toward the neck. For showing it off pair with an off-shoulder sweater that leaves the opposite collarbone bare.
4. Blackwork geometric lily tucked behind the ear
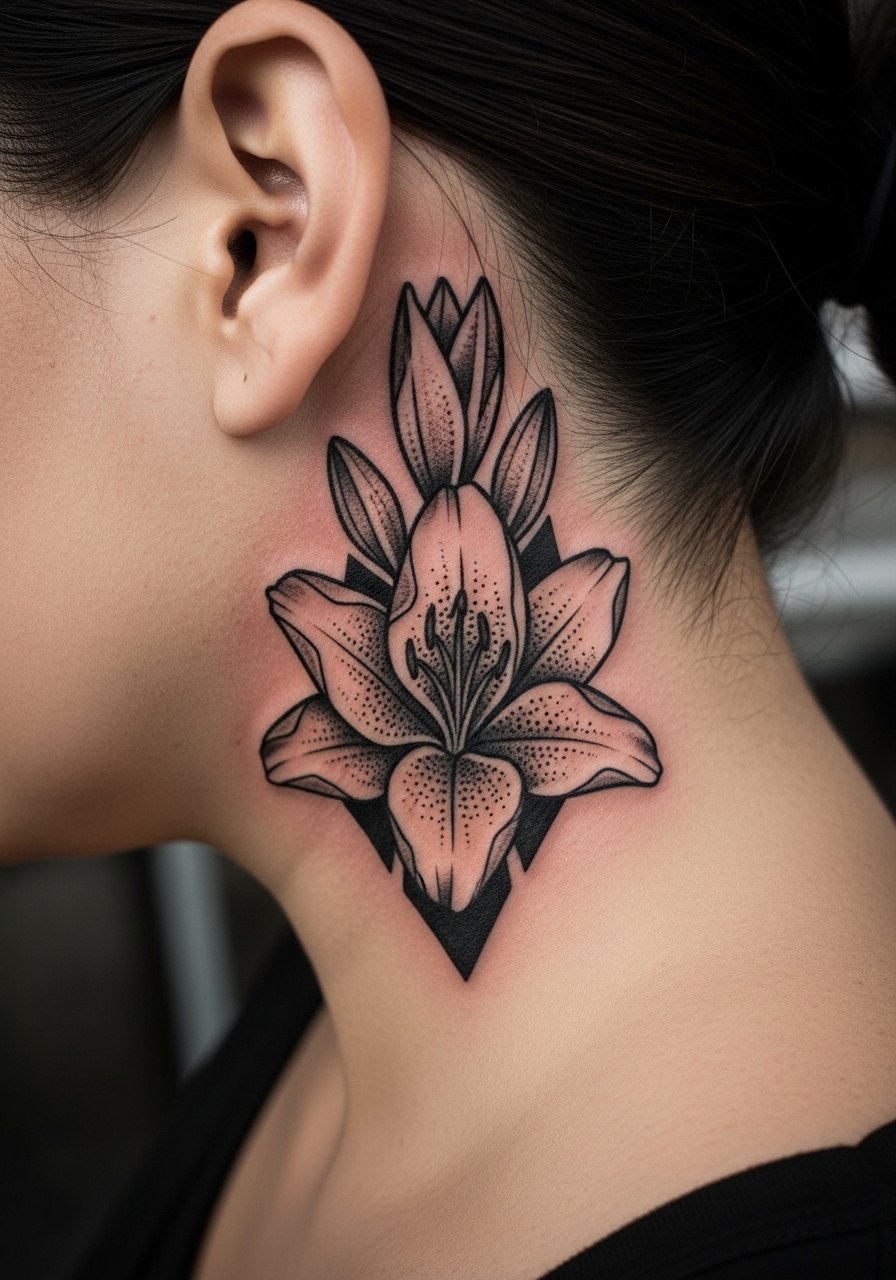
Blackwork brings high contrast that often wins on darker skin tones and in photos without filters. The shape can hug the ear contour for an architectural effect that looks like jewelry. Tell your artist you want block saturation and crisp negative space so the piece does not muddle into shadow as it ages. Sessions are short and punchy, and pain is sharp near the mastoid bone. Pair this with a sleek bob or a cropped leather jacket to amplify the contrast when hair is down.
5. Micro-realism single petal tucked below the hairline
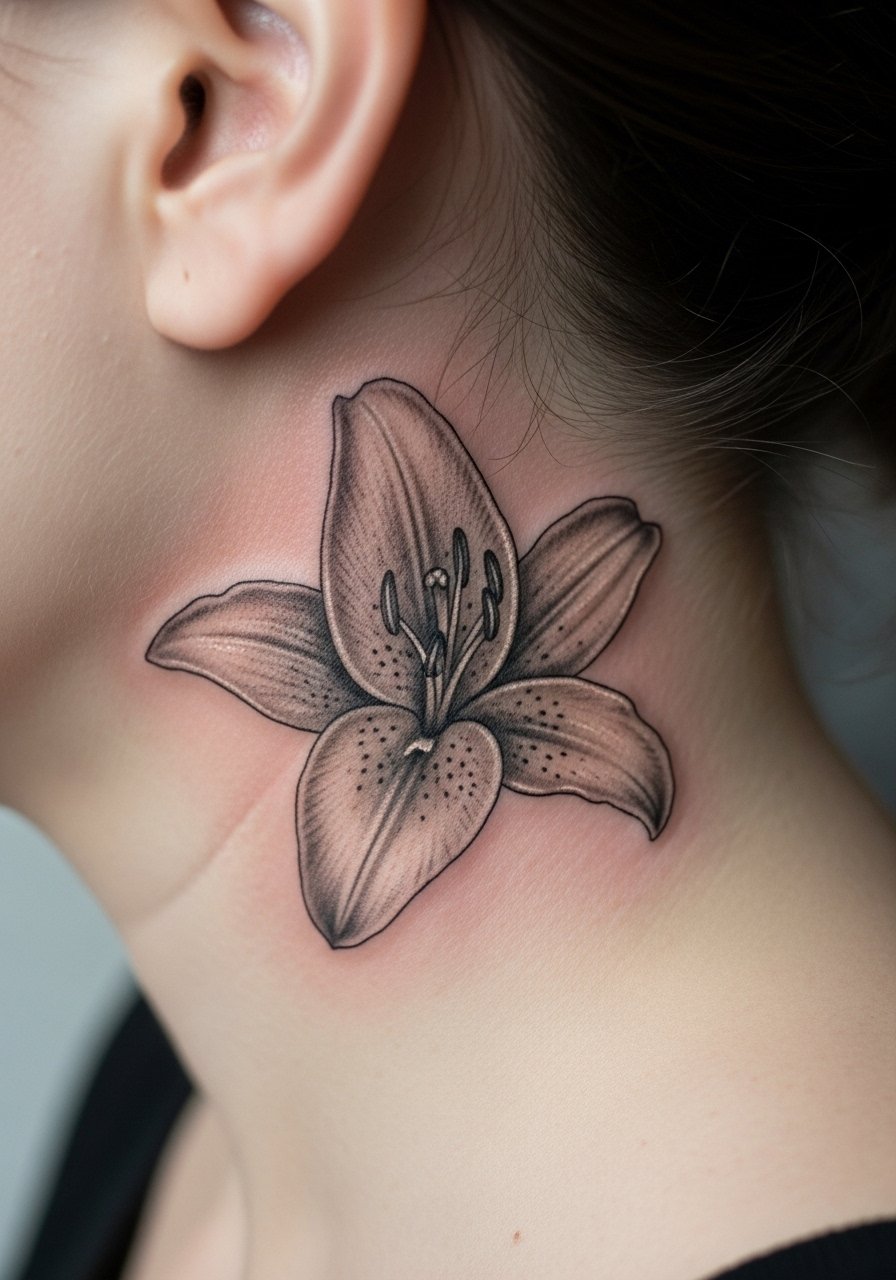
Micro-realism gives the impression of a pressed petal hiding behind your hair. It is detail-heavy and requires an artist who has shown healed micro work on similar skin tones. The risk is blowout if the machine is pushed too deep at that tiny scale. Most clients pay more for the session but get a delicate, textured result that mimics real floral surfaces. This placement feels sharp due to bone proximity and may sting longer than a similar wrist piece. Keep the size under one inch to avoid distortion from hairline shifts as you age.
6. Minimalist bud silhouette near the ear lobe
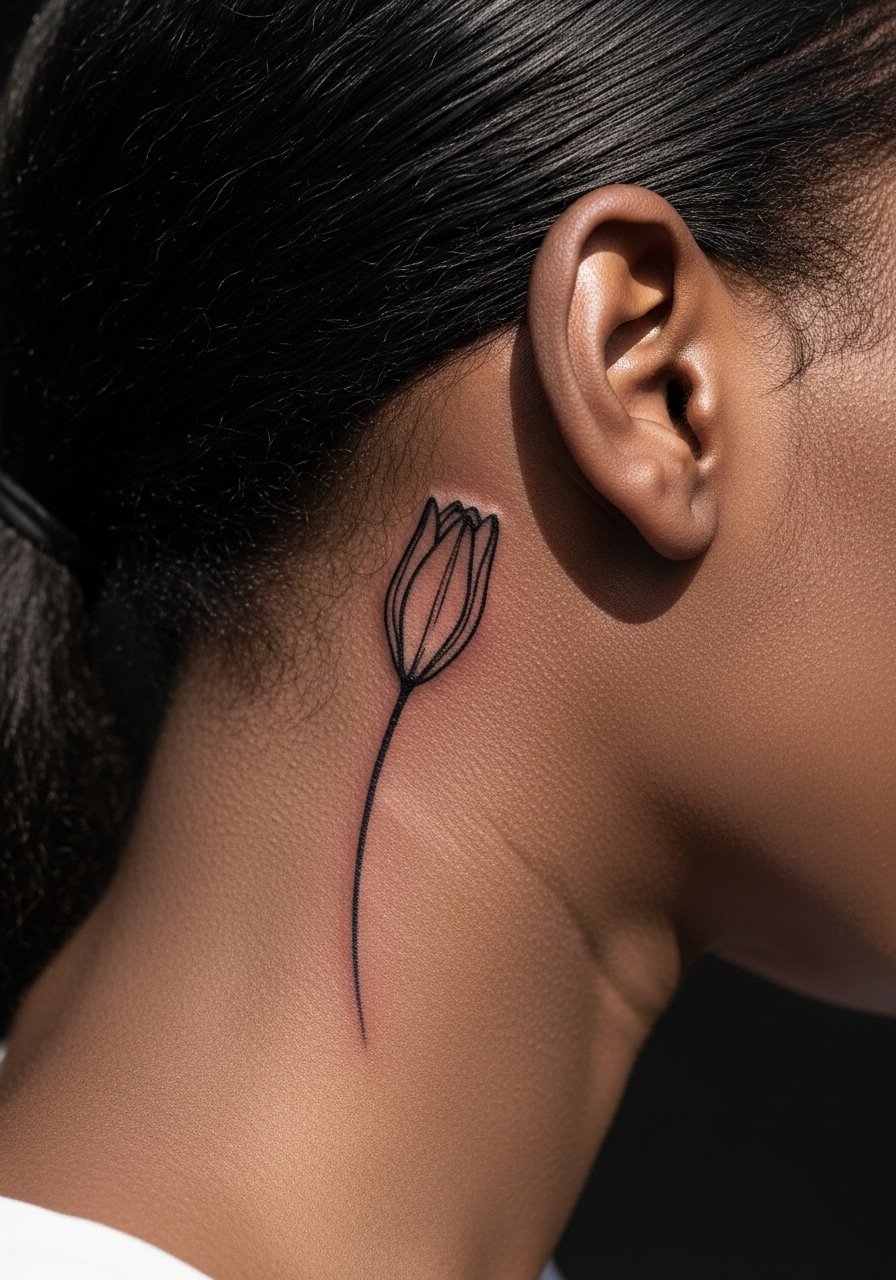
A compact bud silhouette is the easiest pick for first-timers who still want something private. The session is short and tolerable, but the major mistake is going too thin. Thin single-needle silhouettes on this spot tend to ghost faster. Ask for simple negative space and slightly heavier outline so the bud reads clean after a year. For your appointment wear a hair claw clip large so the artist has a clear field and you keep hair oils off the new work.
Pre-Session Essentials
The lilies above include everything from micro-realism to neo-traditional pieces, and the products below help for access, sensitivity, and the first week of healing.
-
CeraVe Healing Ointment. Lightweight moisture that many people prefer for thin ear skin to avoid pore-clogging while the tattoo settles.
-
Australian Gold SPF 30. Matte sunscreen that protects exposed ear spots after the initial heal and helps colors retain contrast.
-
Indie Butter Balm. A thinner balm option that absorbs faster in humid climates where thick butters can trap sweat.
-
Frida Skin Balm. Helpful for short-term bone irritation after an ear session because it soothes without heavy residue.
-
Second Skin protective film. Conforms to curves behind the ear and can reduce early scabbing and friction during sleep.
7. Ornamental lily with dotwork framing the ear
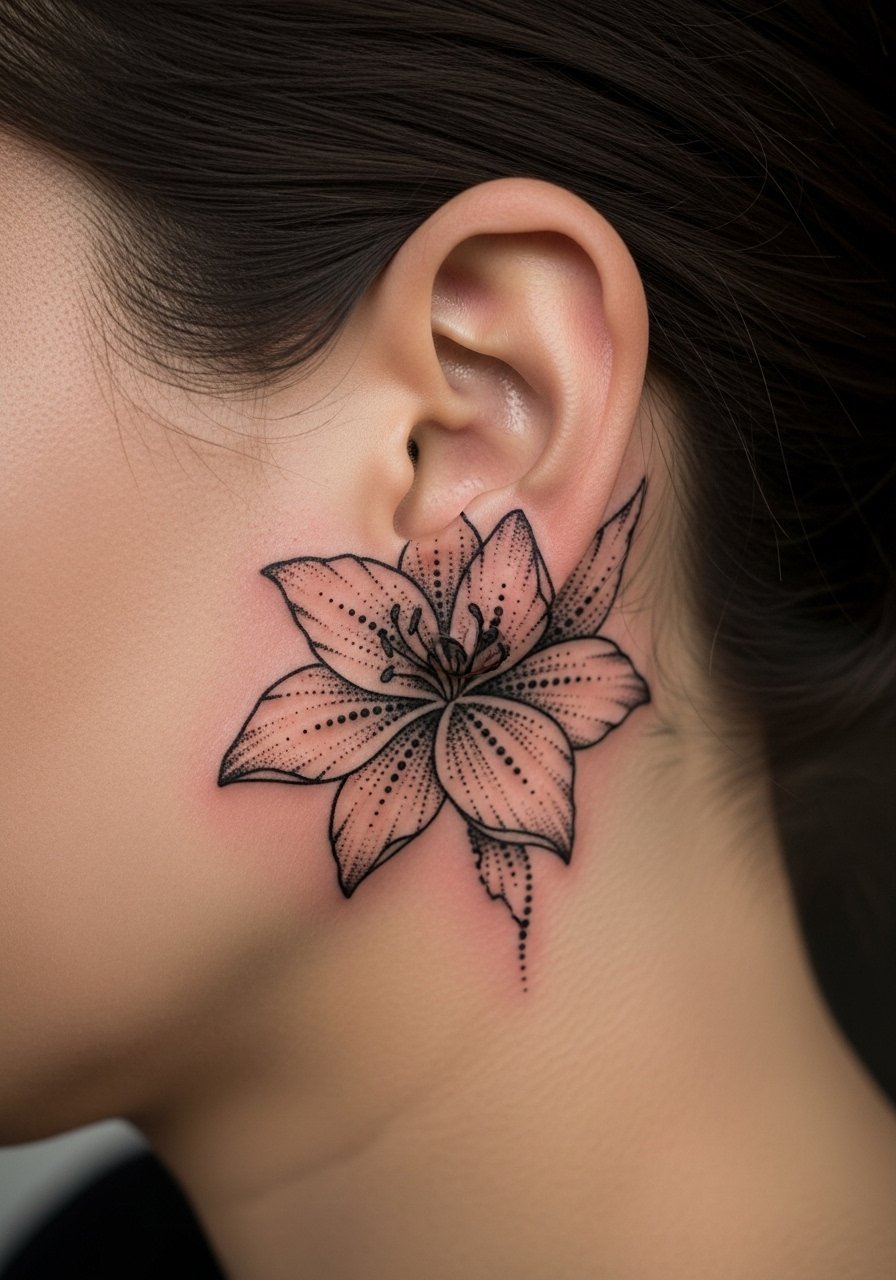
Ornamental lilies use dotwork to create a jewelry-like frame that plays nicely with earrings. These designs need spacing so stipple shading does not fuse into a blur after a year. A common error is packing too many tiny dots close to the ear ridge. During consultation request negative space between dot fields and ask to see healed dotwork examples on similar skin tones. The session can take longer because stippling is time intensive and rhythmical. If you wear hoops, choose low-profile studs during the first two weeks to avoid pressure on the area.
8. Fine line lily with dew drops for realism
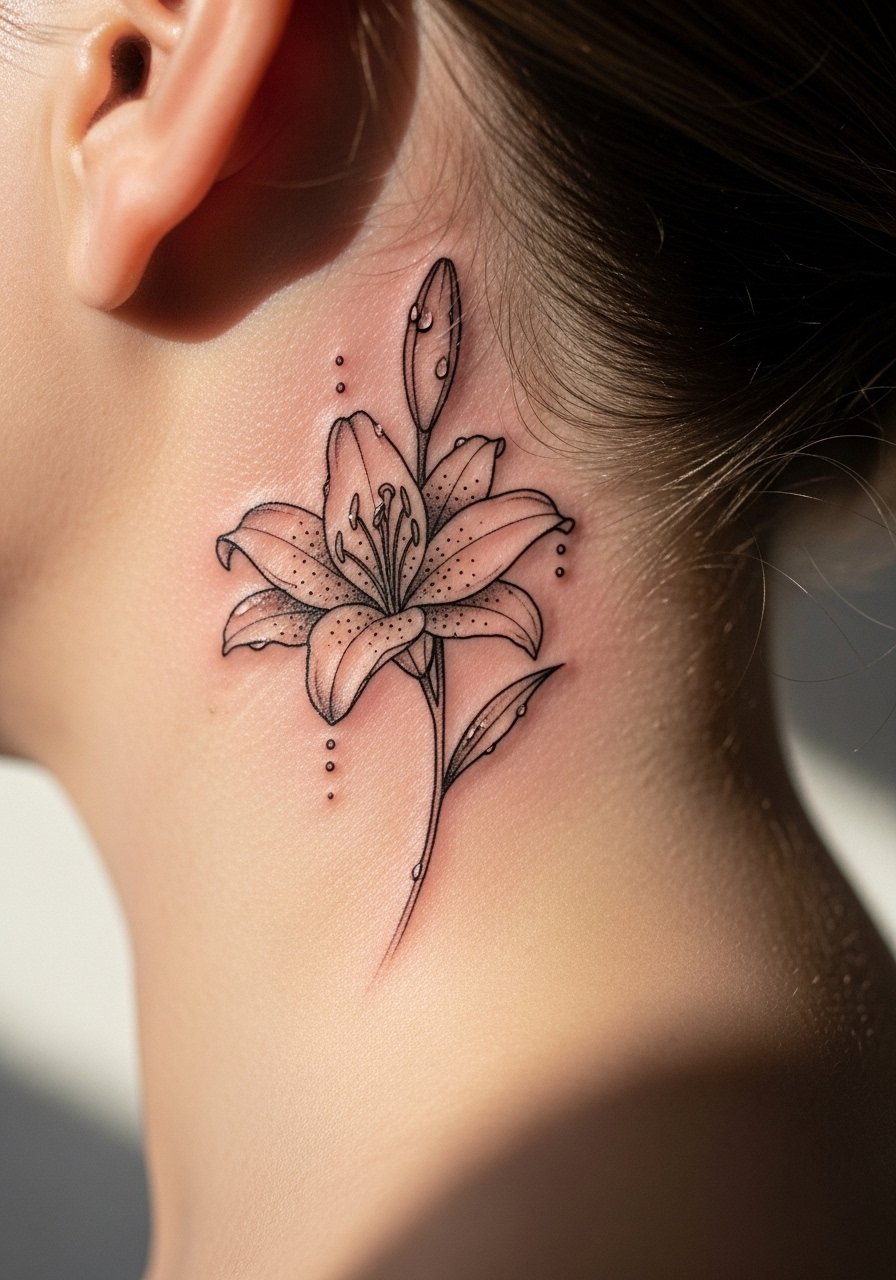
Adding tiny dew drops gives a wink of realism that photographs well when hair is swept up. Ask your artist for single-needle shading only where necessary and for a slightly thicker contour so the drop highlights do not vanish. Expect light sensitivity near the bone and a two-week window where small scabs form. The dew detail helps the piece look like a physical object rather than just linework as it ages. For showing it off, a silk blouse women ivory softens any contrast around the neck.
9. Traditional American lily bloom near the sideburn
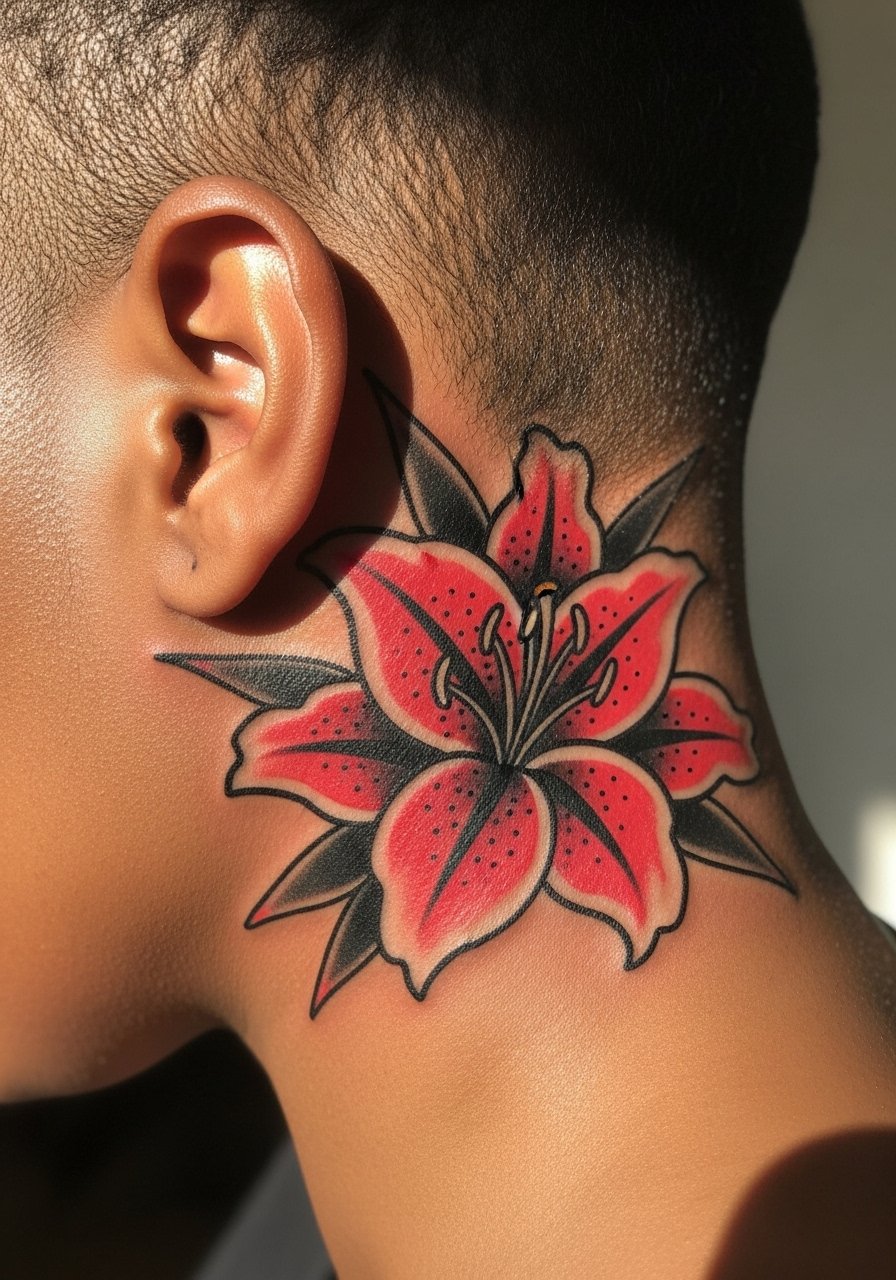
Traditional American lilies use thick black outlines and strong fills to keep a look that survives years of wear. The downside is they read larger, so if you wanted discreet you might regret the visibility with a ponytail. Ask for compact composition and rely on bold outlines rather than heavy shading to keep the skin breathing. This approach tends to age predictably well because saturation and linework defend against blur. The session is louder from machine passes but usually quick. Consider the overall silhouette when matching it to your hairline.
10. Ignorant style sketchy lily with raw lines
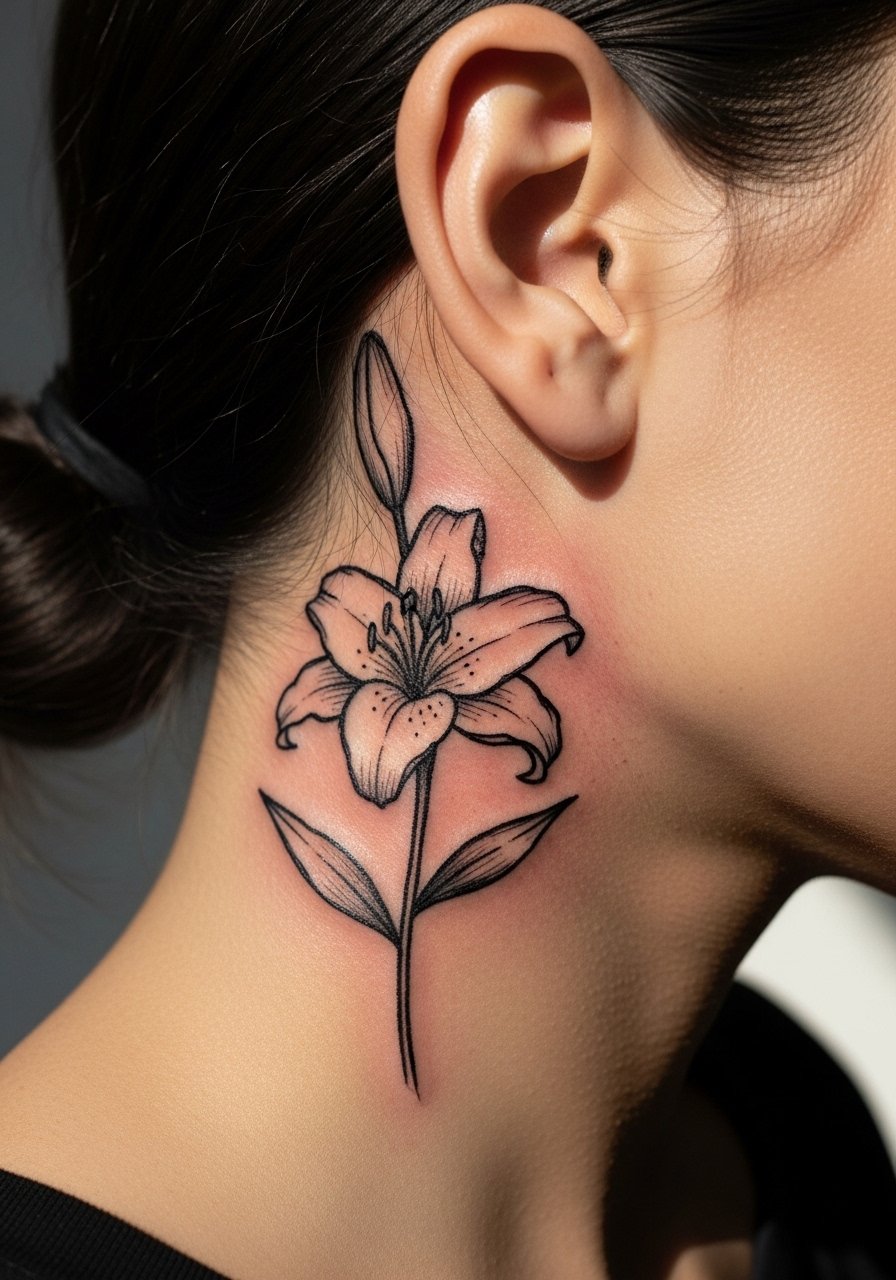
Ignorant style is intentionally rough and hand-drawn, which can be forgiving on tiny behind-ear spots because it leans into irregularity. The main trap is asking for "messy" then ending up with thin ghosting because the stroke weight is too slight. Tell the artist you want visible variation but with anchor lines that will hold. The session feels like quick, confident strokes, and most clients love the raw vibe even as it softens over time. Pair it with a simple hair clip on session day so the shape reads clearly during the stencil check.
11. Black and gray realism lily cluster wrapping slightly toward the nape
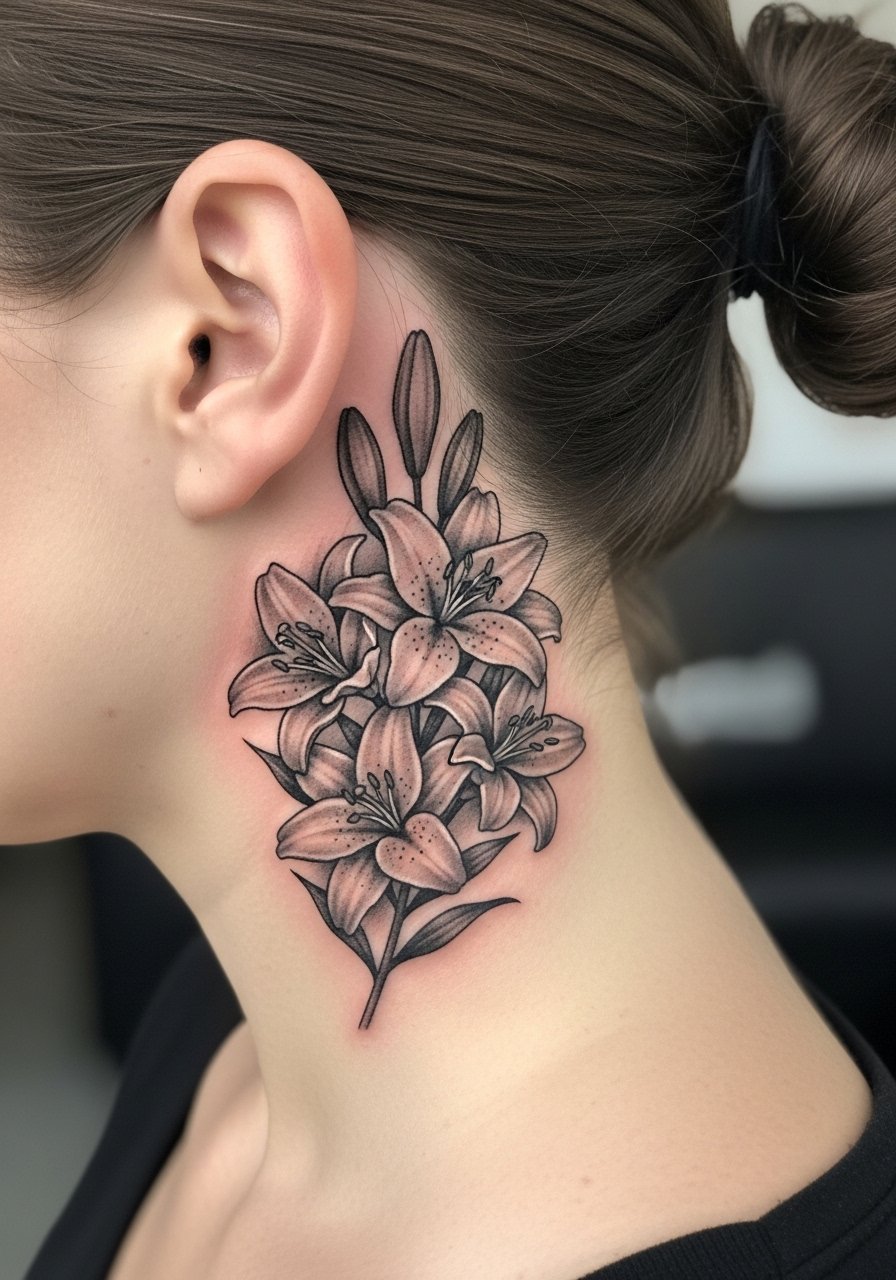
Clusters of realistic lilies create depth but they demand more real estate to avoid merging as they age. On the ear edge, plan for subtle contrast and fewer overlapping petals. If you want a 3D look, ask for midtone separation rather than heavy full-black fills. Sessions will be longer and require more aftercare attention because of shading density. For darker skin tones, request contrast tests so grayscale reads clean in photos.
12. Botanical fine line lily with leaves for anatomy accuracy
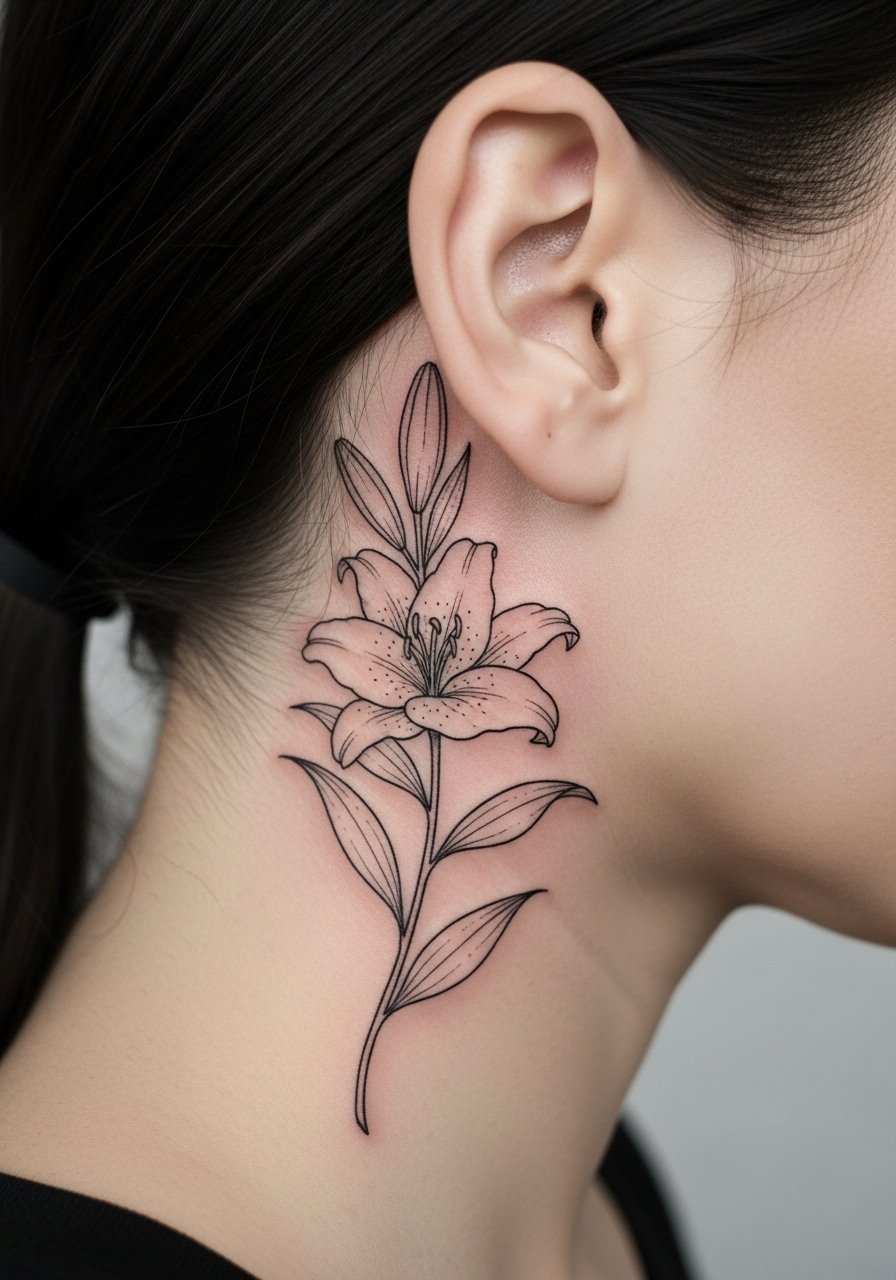
Botanical lilies emphasize leaf structure and realistic vein work, so the artist must know plant anatomy or the result looks off. Ask for subtle stem thickness variation so the leaves do not disappear in a year. The session is precise and the needlework can make the area feel tingly because of shallow strokes. A real mistake is over-detailing the veins; keep it stylized enough to survive touch and night movement. Pair with a minimalist stud earrings look to balance geometry and nature when hair is pulled back.
13. Micro bud with a tiny birthstone dot accent
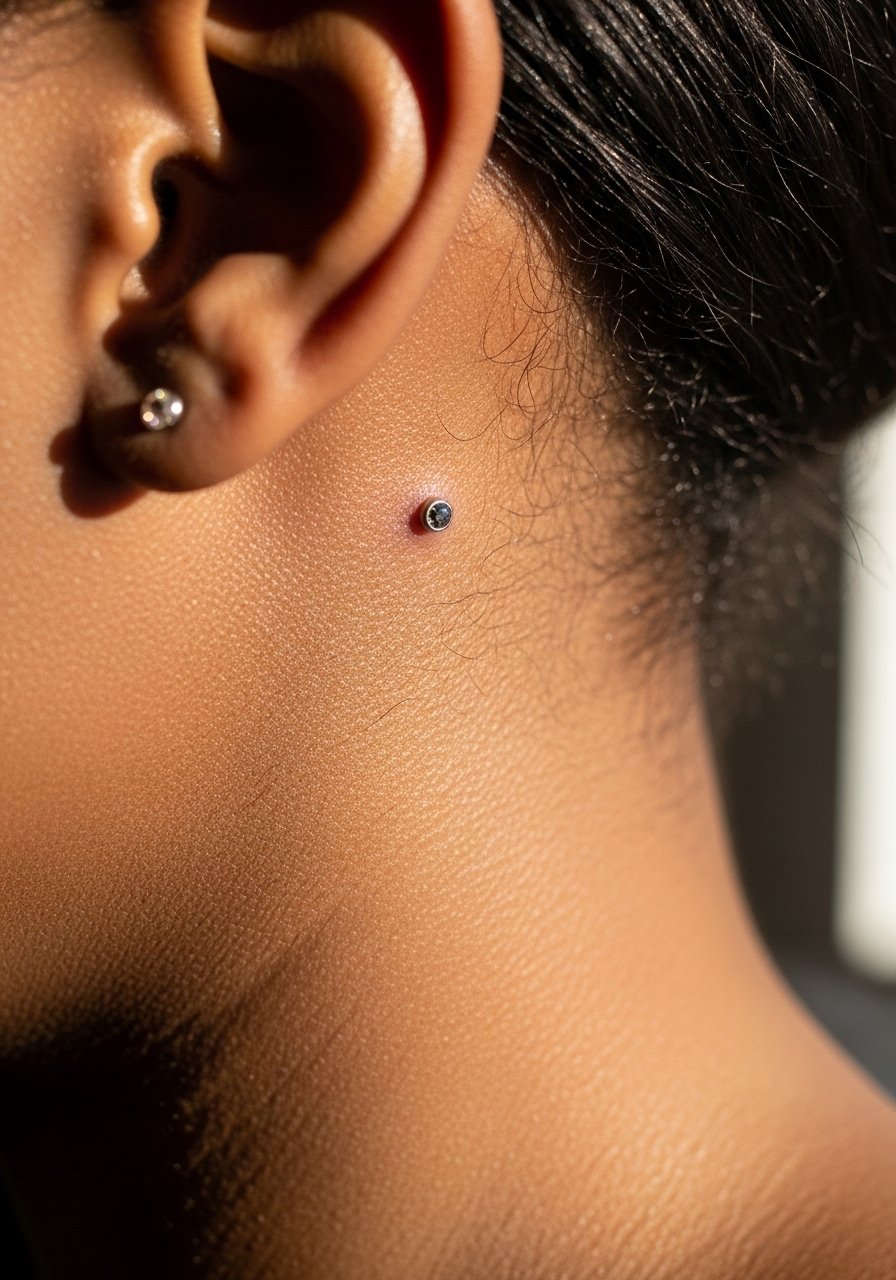
A micro bud plus a tiny colored dot for a birthstone is a personal, low-commitment option. The dot can fade faster than black ink, so ask about pigment choice and realistic expectations for the color. The session is quick but the placement close to bone can sting; numbing is an option if your artist approves. This design ages gracefully if kept under one inch and avoids heavy fills that trap pigment under moving skin. Many people like this paired with everyday hoops once it heals.
14. Asymmetric droop lily mimicking natural blossom tilt
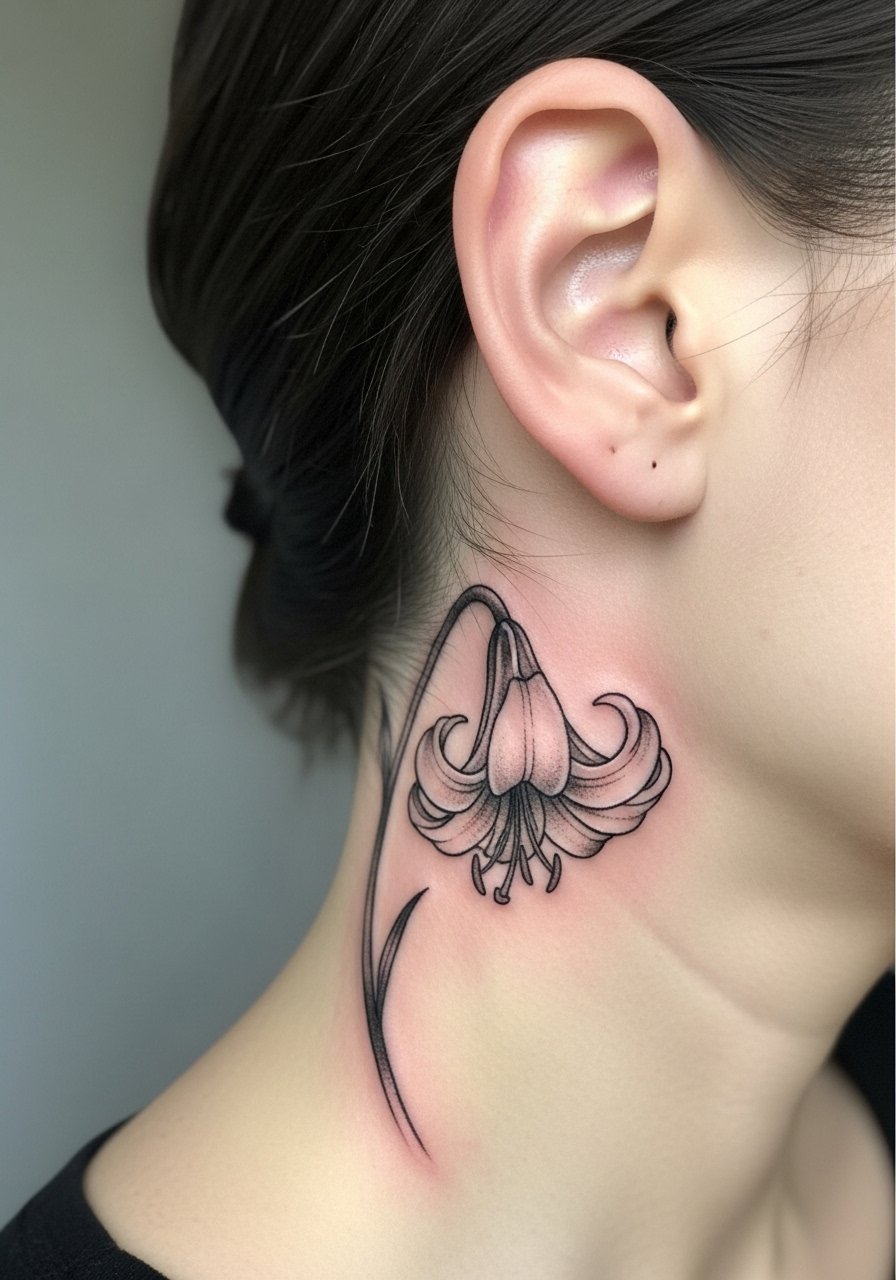
Asymmetry sells realism because real lilies rarely sit perfectly upright. Ask your artist to sketch a droop that reads off the ear contour rather than trying to center everything. This prevents the flower from looking like a sticker as your head moves and skin stretches. The session is similar to fine line but calls for confident freehand adjustments. If you want to show it off, a high ponytail holder during nights out keeps attention on the tilt.
15. Lily design that mimics ear jewelry shadow
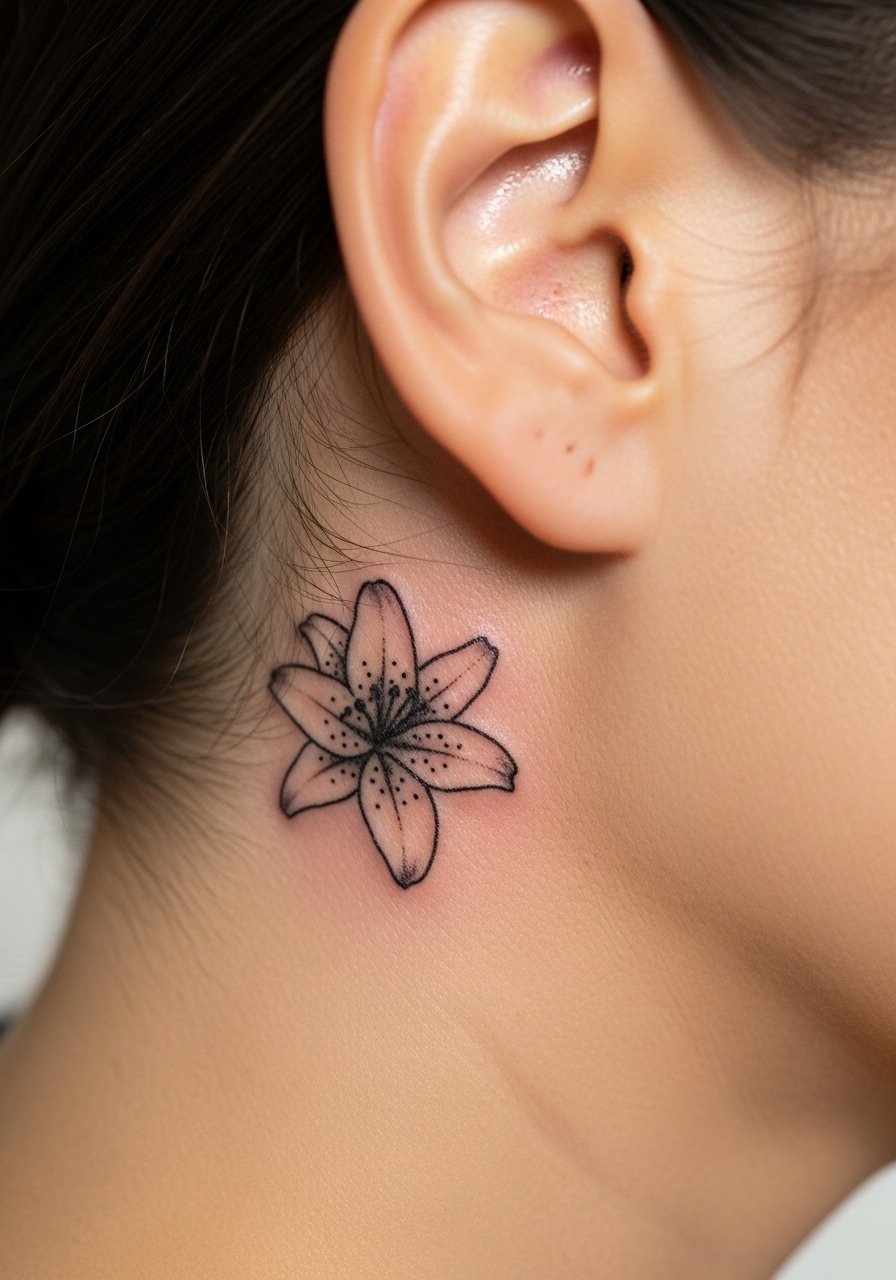
Integrating the design with existing ear jewelry creates illusion depth so the tattoo feels like part of an accessory set. The challenge is mapping where your earrings actually sit and adjusting the stencil. Bring your favorite earrings to the consult so the artist can match shadow direction. The session requires careful stencil placement checks. The result photographs nicely when you wear hoops or studs that echo the tattoo.
16. Dotwork halo lily that frames the mastoid bone
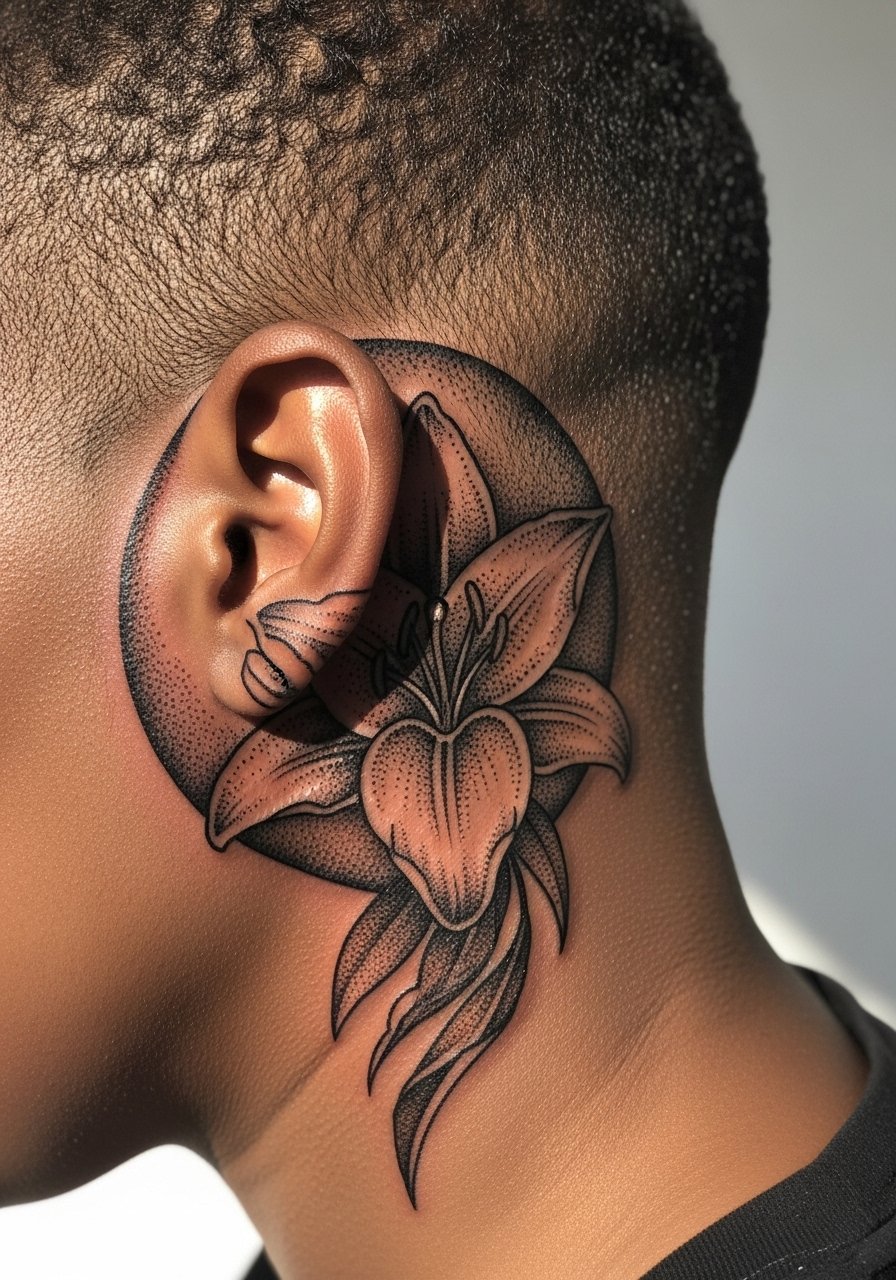
A halo of stipple around a small lily can feel like a micro mandala and makes the area read intentionally ornamental. Dotwork holds if dots are spaced deliberately and not packed into dense bands. The session can be meditative but longer because stippling takes time. It also reduces the need for heavy lines that may blur at this placement. For showing it off, slick bobs or shaved sides accentuate the halo effect and pair well with a stud earrings black aesthetic.
17. Line-and-negative-space lily that uses the ear contour
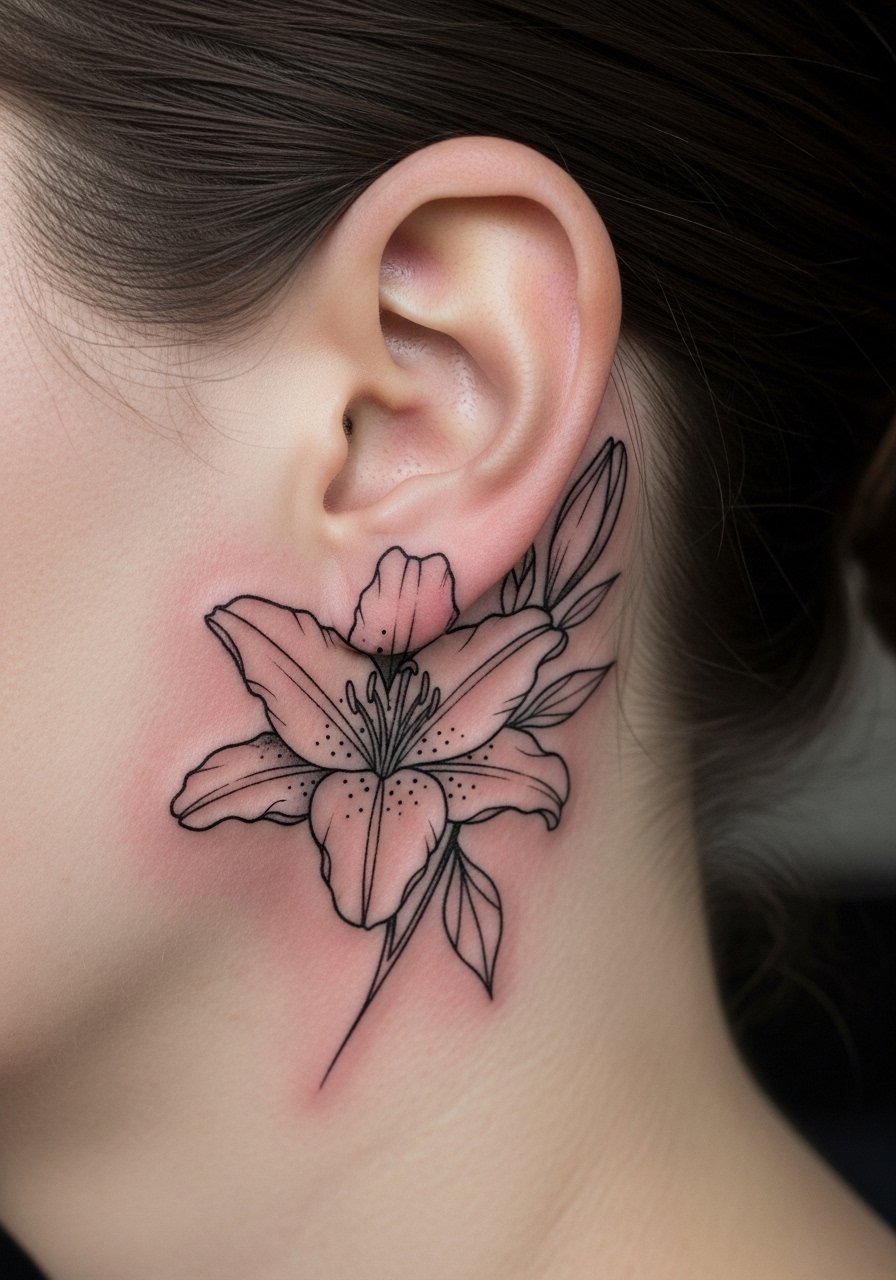
Using negative space that follows the ear curve creates a design that looks integrated rather than stuck on. The key is to avoid too many thin passes near the cartilage where blowouts can show. The session is precise and you should preview the negative space stencil while seated to confirm how it sits with your hairline. This approach keeps the tattoo discreet until you sweep hair away and then reveals a clean silhouette.
18. Tiny lily with dew and subtle stipple shading
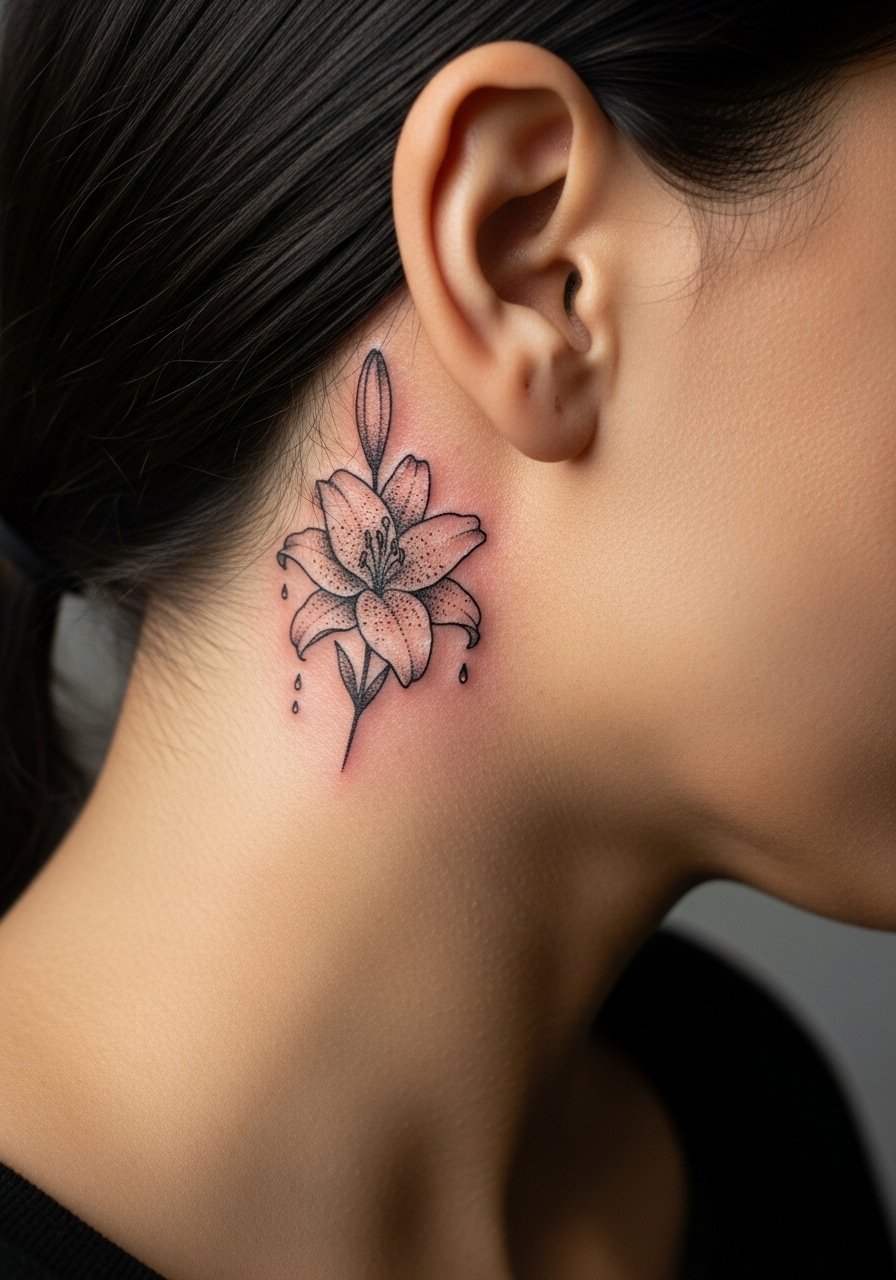
Combining dotwork shading under a dew-adorned lily gives texture without heavy fill. It ages better than packed gray shading because stipple separates tones as it settles. The tradeoff is session time and patience for tiny dots. Many people report uneven peeling if they sleep on their ear during the first week, so plan sleep positioning accordingly. For session day wear a button-down shirt you can pull aside so the artist has clean access without tugging fabric near the hairline.
19. Minimalist stem that peeks from under the hairline
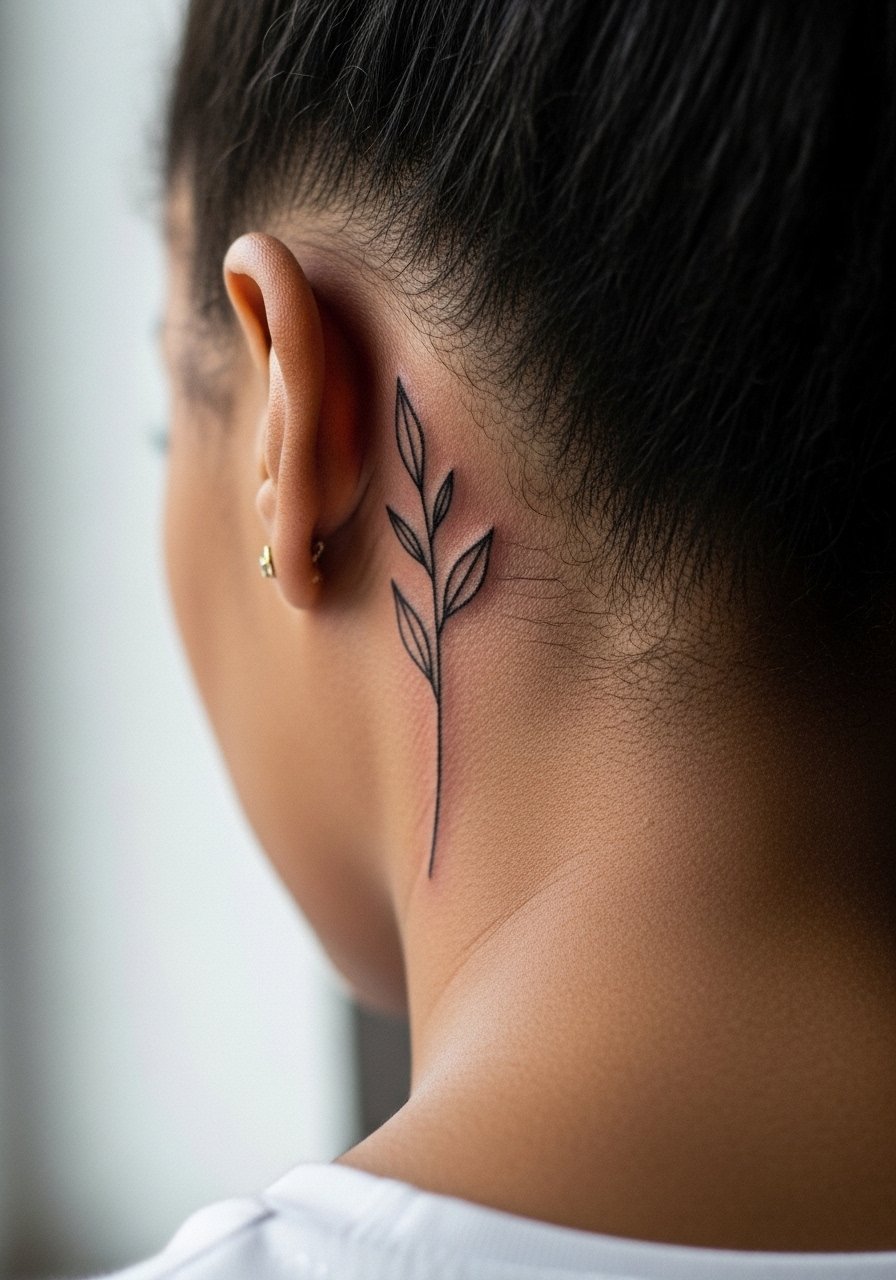
If you want maximal privacy, a stem that literally tucks under your hairline is a great pick. The session is quick and pain low to moderate depending on proximity to bone. The usual mistake is making it too thin. Ask for a slightly bolder contour so the stem remains visible when hair parts. This design is low-maintenance and usually only needs a touch-up if your hairline shifts or you gain weight around the neck.
20. Watercolor edge lily fading into neck tone
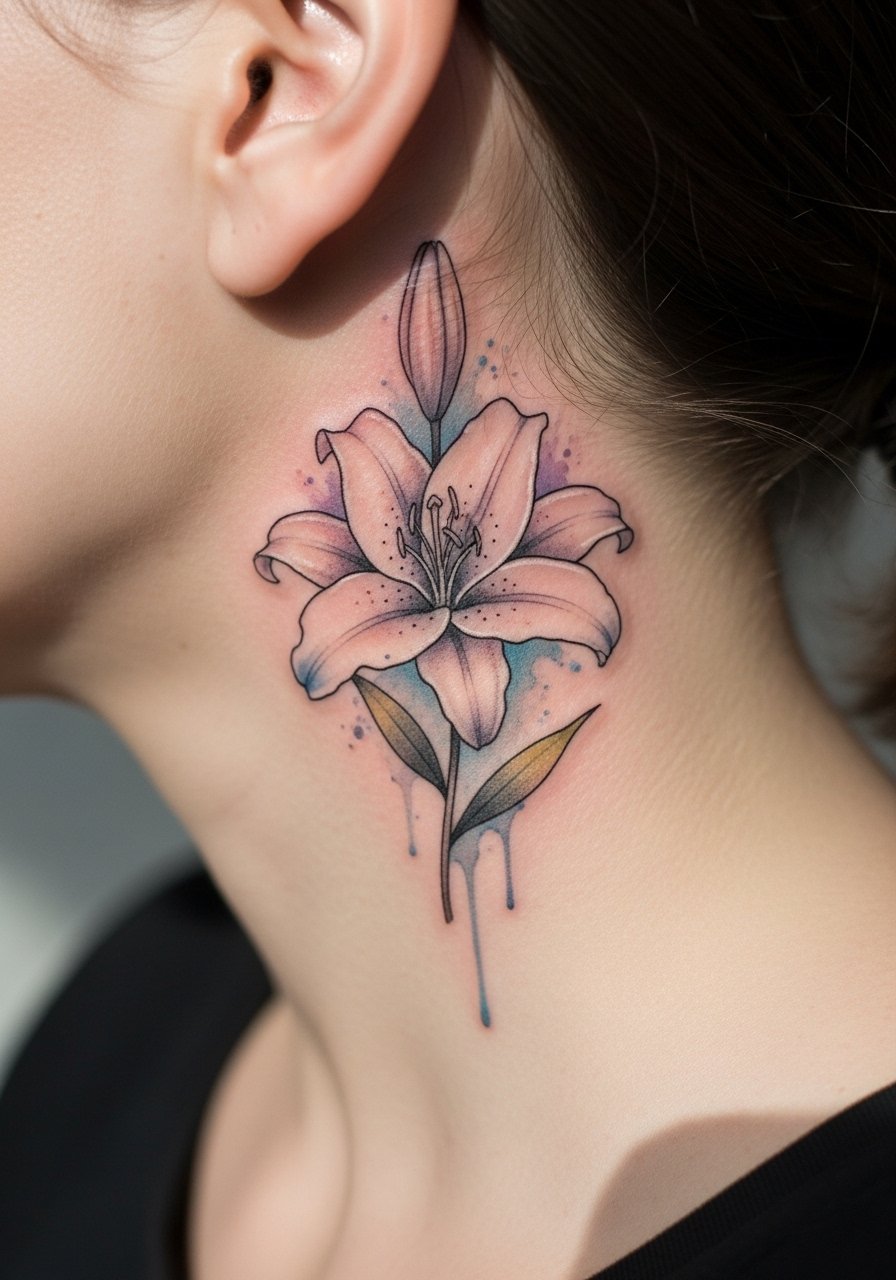
Watercolor edges that blend into the neck can look gorgeous but are the most weather-sensitive option here. One camp of artists uses protective wraps and pigment layering to help colors survive. The opposing camp refuses wraps on thin ear skin and prefers dry healing. Name both camps when you book so you know which approach the artist uses. If you travel to a humid climate during healing, expect more color migration. For evenings out, pair the piece with a wrap dress silk to let the soft colors breathe.
21. Stippled lily cluster that mimics lace
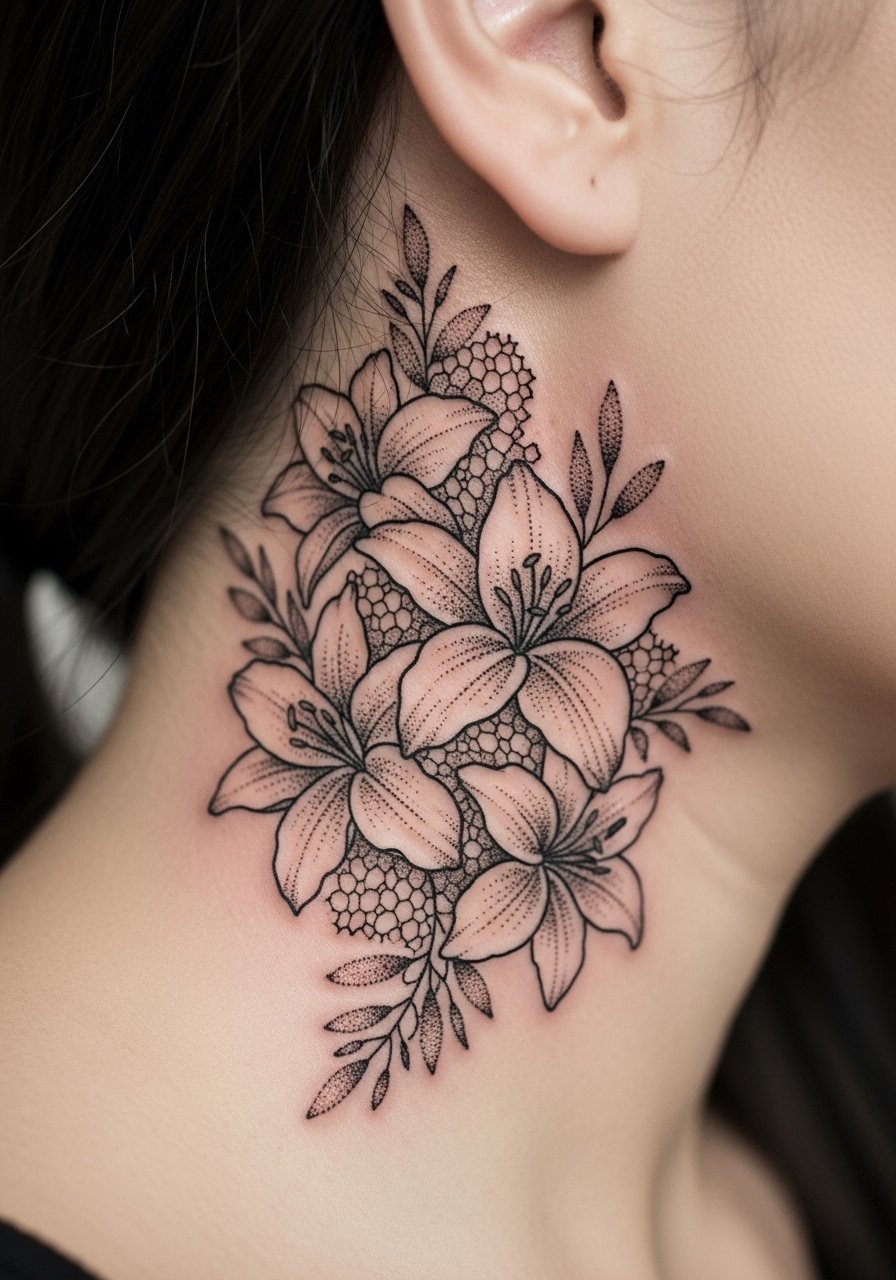
Lace-like stippled clusters read as decorative and can be designed to avoid dense fills that age poorly. The artist should space dots to create airy gaps. Sessions are long and require steady handwork. Expect to discuss touch-up windows during booking because tiny dots can lose contrast in areas of friction. This style photographs beautifully with minimal jewelry so the pattern itself is the focal point.
22. Geometric lily with symmetric negative frames
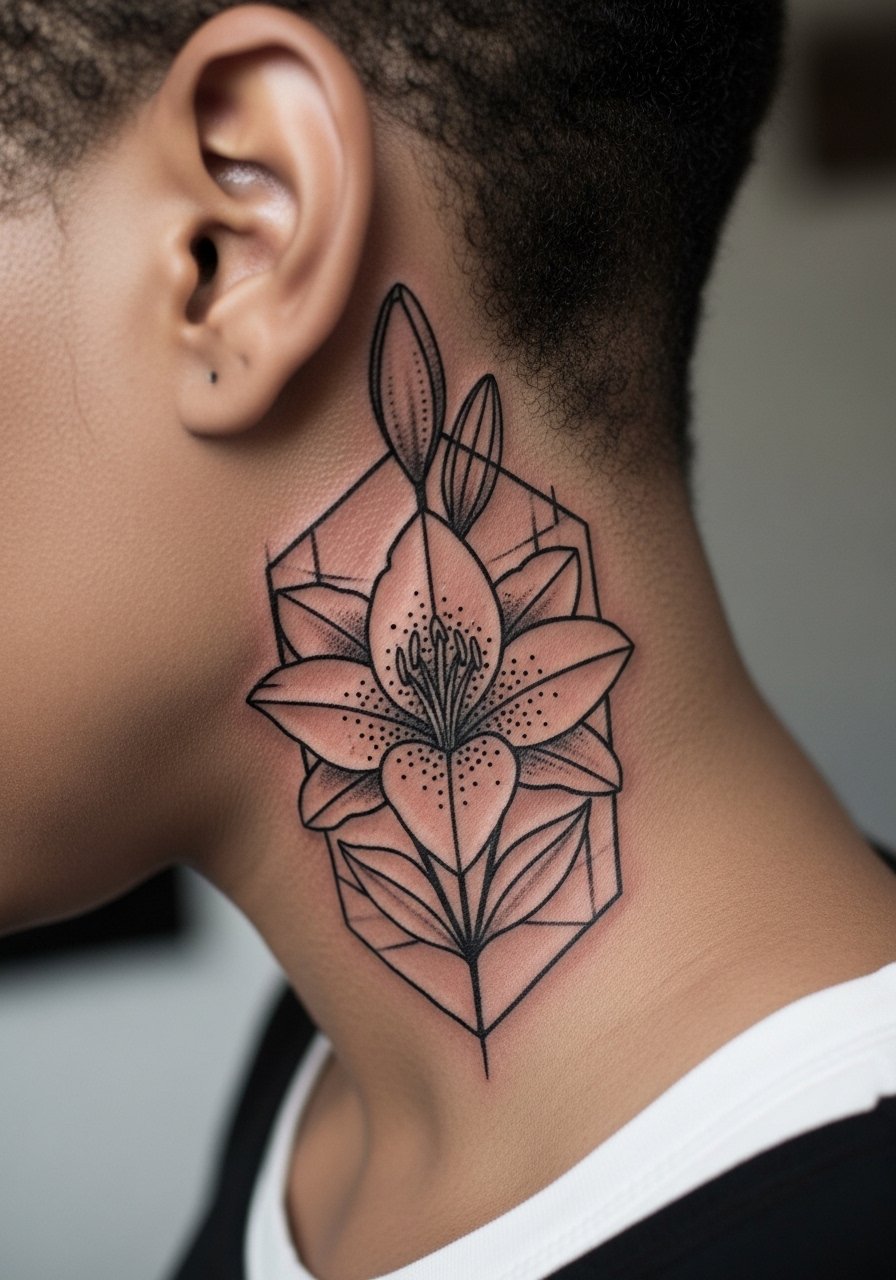
Geometric framing adds an architectural edge that counters floral softness. The trap is going too small. Geometric lines need space to remain crisp, otherwise parallel lines can blur into a band. Tell your artist the exact spacing you want and ask to see healed geometry samples. This session skews quick if the stencil placement is perfect. Pair with a cropped leather jacket when you want a harder contrast.
23. Single petal in micro dot gray wash
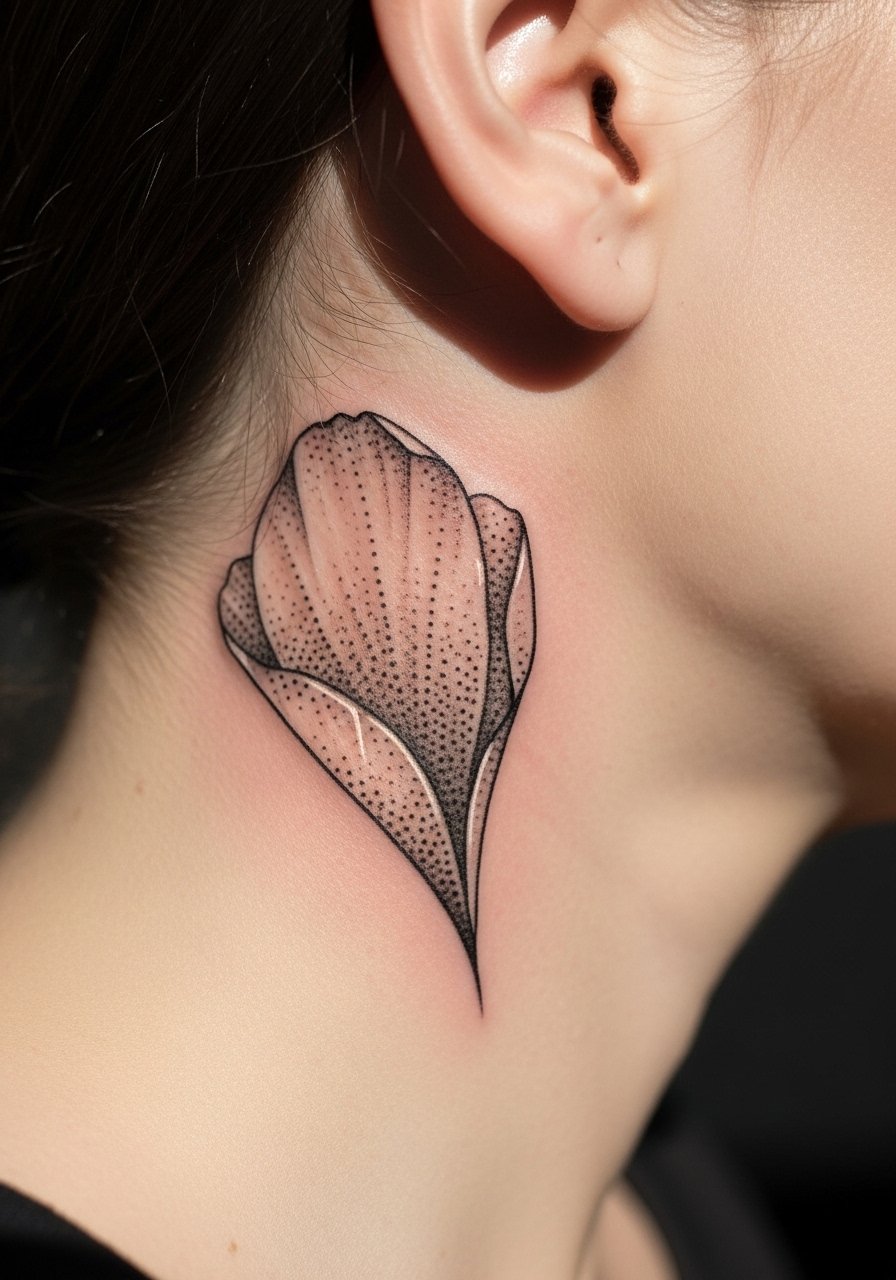
A gray wash petal reads understated and can be a smart choice if you want minimal visibility. The wash must be shallow to avoid over-saturation. Ask the artist about healed examples on similar skin tones, because grays can look muddy without contrast. The session is gentle but precise. Plan a realistic touch-up timeline at booking to keep the tonal balance.
24. Lily bud with tiny script heartbeat on the neck side
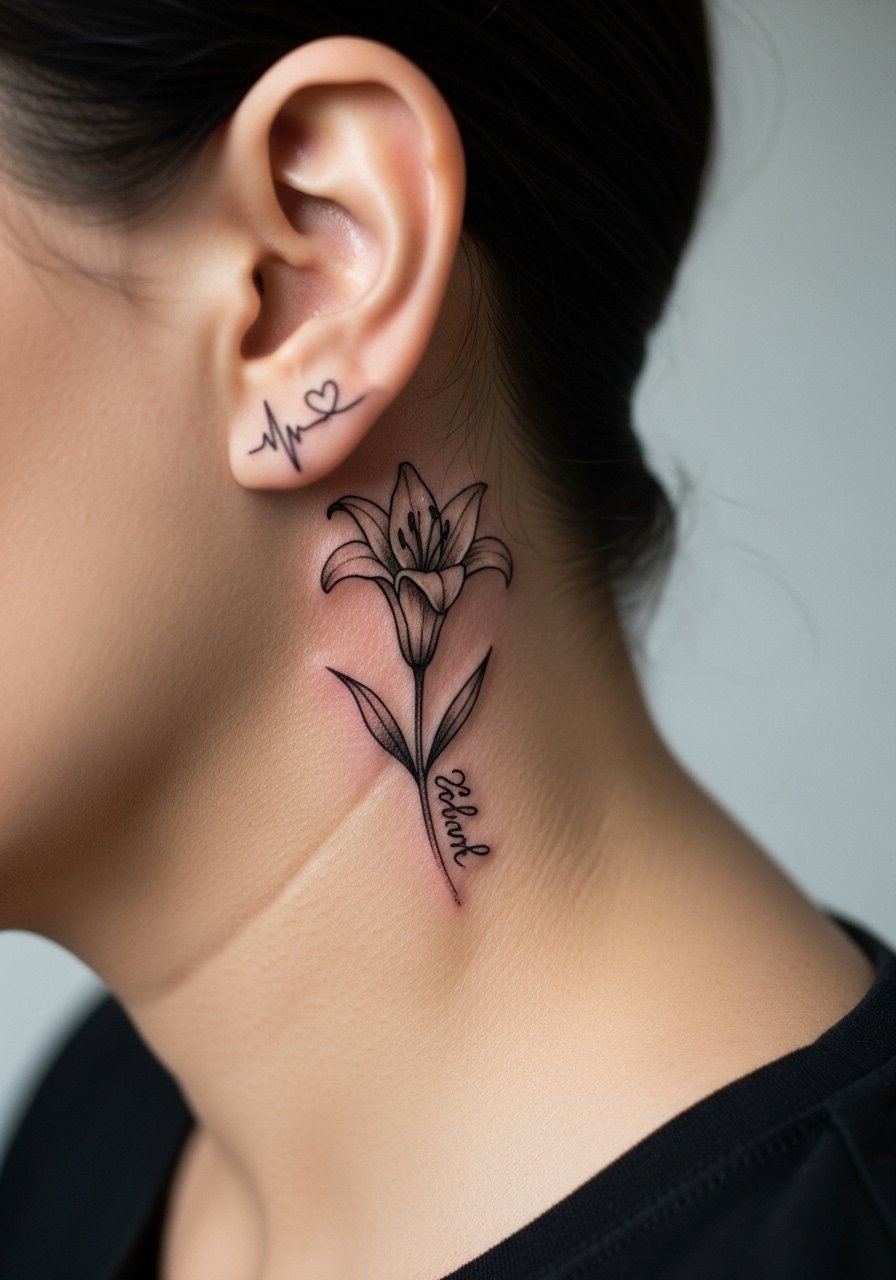
Pairing a micro script heartbeat or single word with a bud adds personal meaning without overwhelming the floral element. Text must be tested at scale to avoid illegibility. The common mistake is squeezing script too close to petals. Ask for spacing and font tests in the stencil phase. For session wear choose a crewneck tee white you can pull to the side so the artist can check placement comfortably.
25. Lily stem that mirrors headphone cables for music lovers
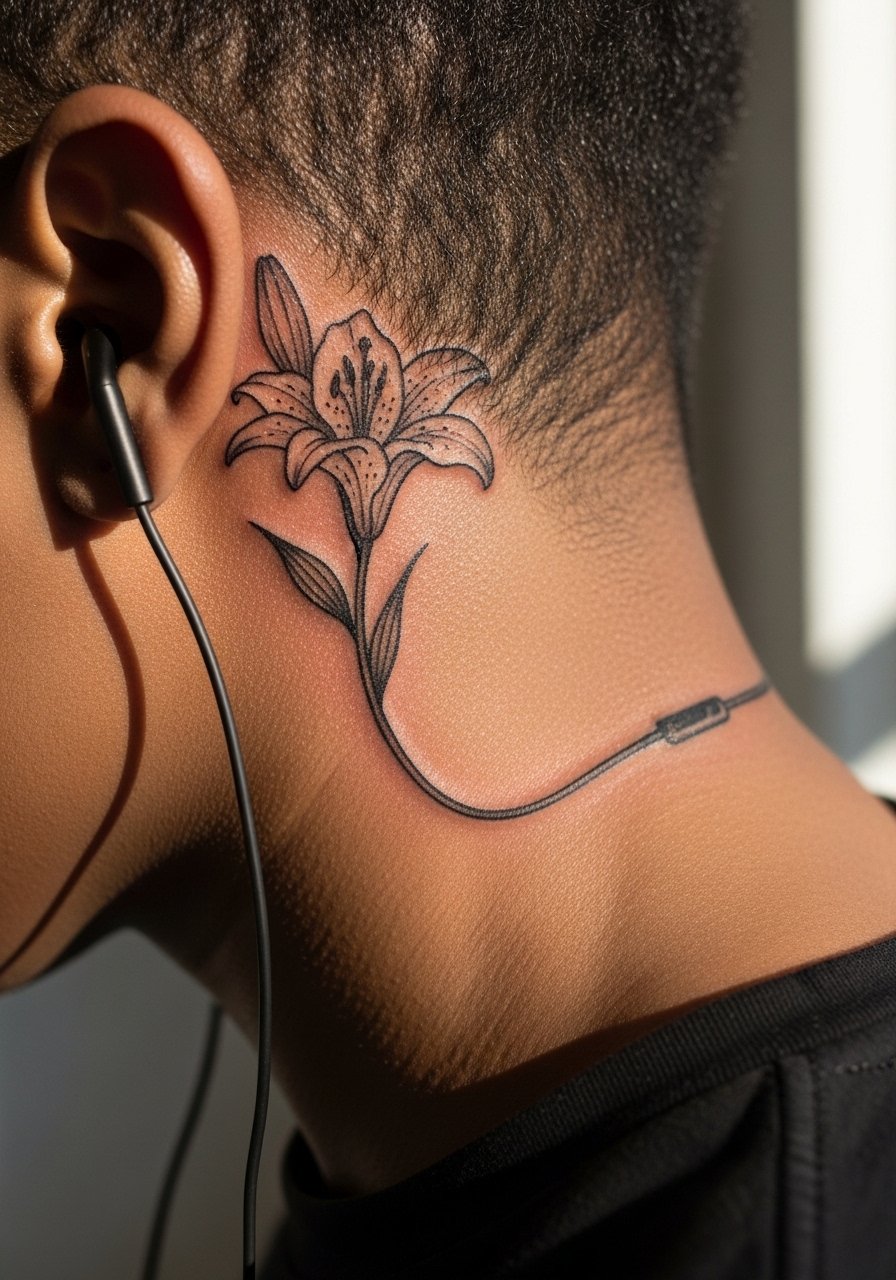
This is a niche but clever option if you wear earbuds or headphones often. The stem can be designed to sit where cables naturally fall, making the tattoo look like an intentional extension of your tech habit. Ask your artist to map the cable path while you wear your usual headphones so the curve sits naturally. The session is short and low on saturation. This design is a conversation starter when visible.
26. Gold-foil accent lily effect in blackwork
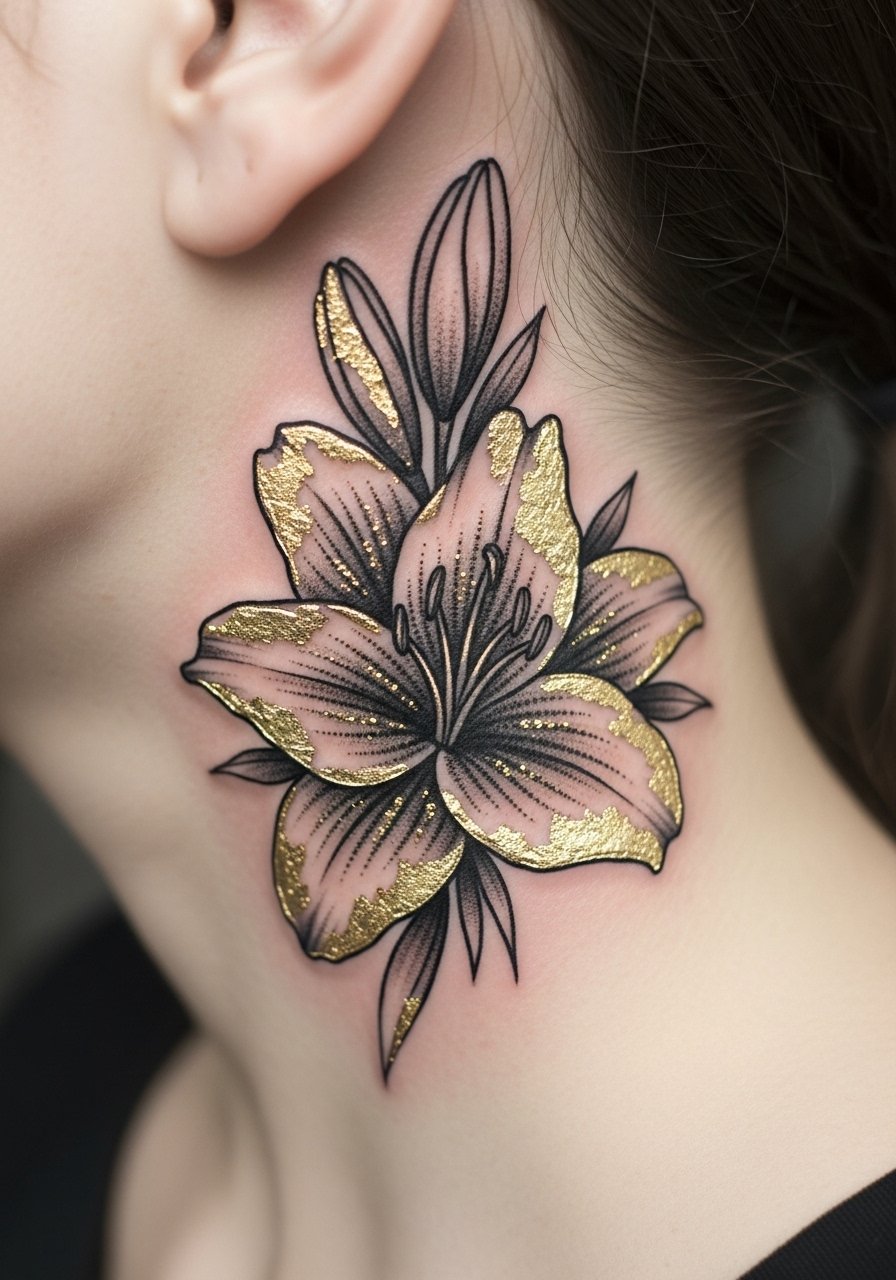
Gold-foil accents simulated with careful color placement can help lilies pop on darker skin tones without relying on heavy white ink. The technique requires subtle placement and conservative pigment choices. The session needs color tests and a clear plan for how the highlights will age. If you have darker skin, request contrast trials from the artist so photos and real life match expectations. For nights out consider minimal necklaces so the gold effect can read on its own.
27. Tiny lily bud behind the ear for repeaters
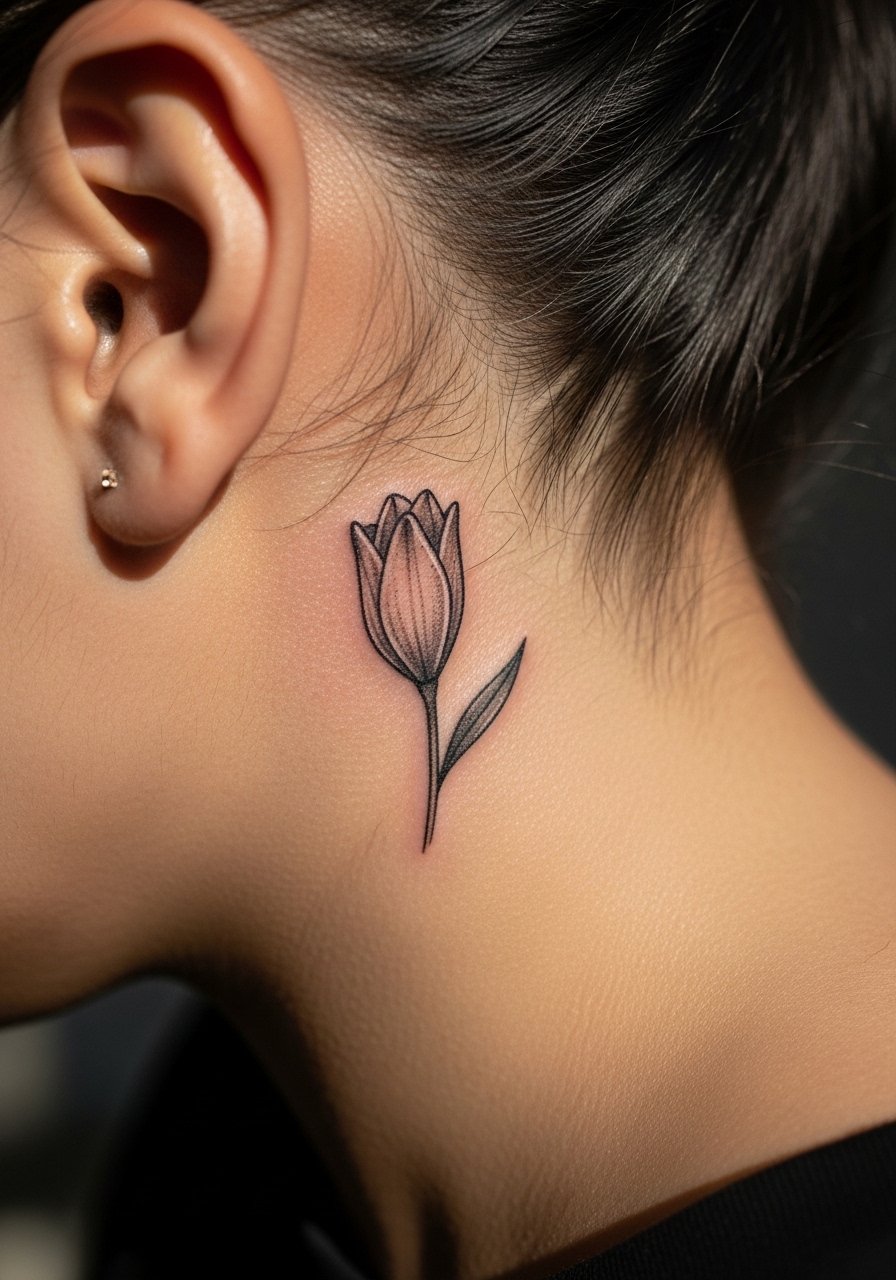
For collectors who already have other micro pieces, a tiny bud behind the ear is a low-risk, high-reward filler spot. The session is very short and often booked as a quick add-on during other appointments. The main mistake is inconsistency in scale across nearby micro pieces. Bring references of your existing work during consultation so the artist can match line weight and spacing. Expect touch-ups every 18 to 24 months for fine hairlines in this zone.
Frequently Asked Questions
Q: Will a fine line lily behind the ear need touch-ups sooner than a bold piece?
A: Yes, fine line work typically needs touch-ups sooner because thinner strokes lose density with friction and pillow contact. From what I have seen, asking for 1.5 millimeter minimum visible contour and scheduling a touch-up chat at booking sets realistic expectations.
Q: Is numbing cream okay for a behind-ear session near bone?
A: Many artists allow topical numbing if you test it first and they approve application timing. Two camps exist on numbing. One says it helps clients tolerate bone-proximal pain without affecting linework. The other worries about altered skin feel during the job. Ask your artist how they handle it and follow their protocol.
Q: Should I pick blackwork or watercolor for longevity behind the ear?
A: Blackwork generally ages better because saturation and contrast survive more years than pastel watercolors. Watercolor has a softer initial look, but it can fade faster in humid conditions. If you want color, consider a black-and-gray base with small color accents so you keep longevity and a hint of tone.
Q: How should I dress for a behind-ear appointment so the artist has access?
A: Wear hair you can easily clip up and a shirt with an open collar or button-down so the artist can move hair and fabric without tugging. A hair claw clip large is handy to have for the chair.
Q: Are there special concerns for darker skin when getting a lily behind the ear?
A: Darker skin needs higher contrast placement and sometimes bolder outlines to keep shapes readable in photos. Ask to see healed examples on similar skin tones and request contrast tests during consultation. Many artists will adapt saturation strategies to suit pigment response on darker skin.
Q: Should I expect different aftercare advice for watercolor versus blackwork on the ear?
A: Aftercare philosophies split into two camps. One camp prefers protective film wraps to reduce scabbing and speed recovery. The other prefers minimal covering and dry healing on thin skin. Your artist will tell you which approach they use. Follow their specific guidance for the style you chose.
