
Fine line marigolds flood feeds, but what stays readable years from now often looks different than the trend photos. Many pieces that are Instagram-perfect at first need touch-ups sooner than owners expect. I compiled 17 marigold concepts that balance on-trend looks with real-world wear, starting with small wrist work you can test before committing to a larger piece.
1. Single-Line Marigold Outline on the Wrist
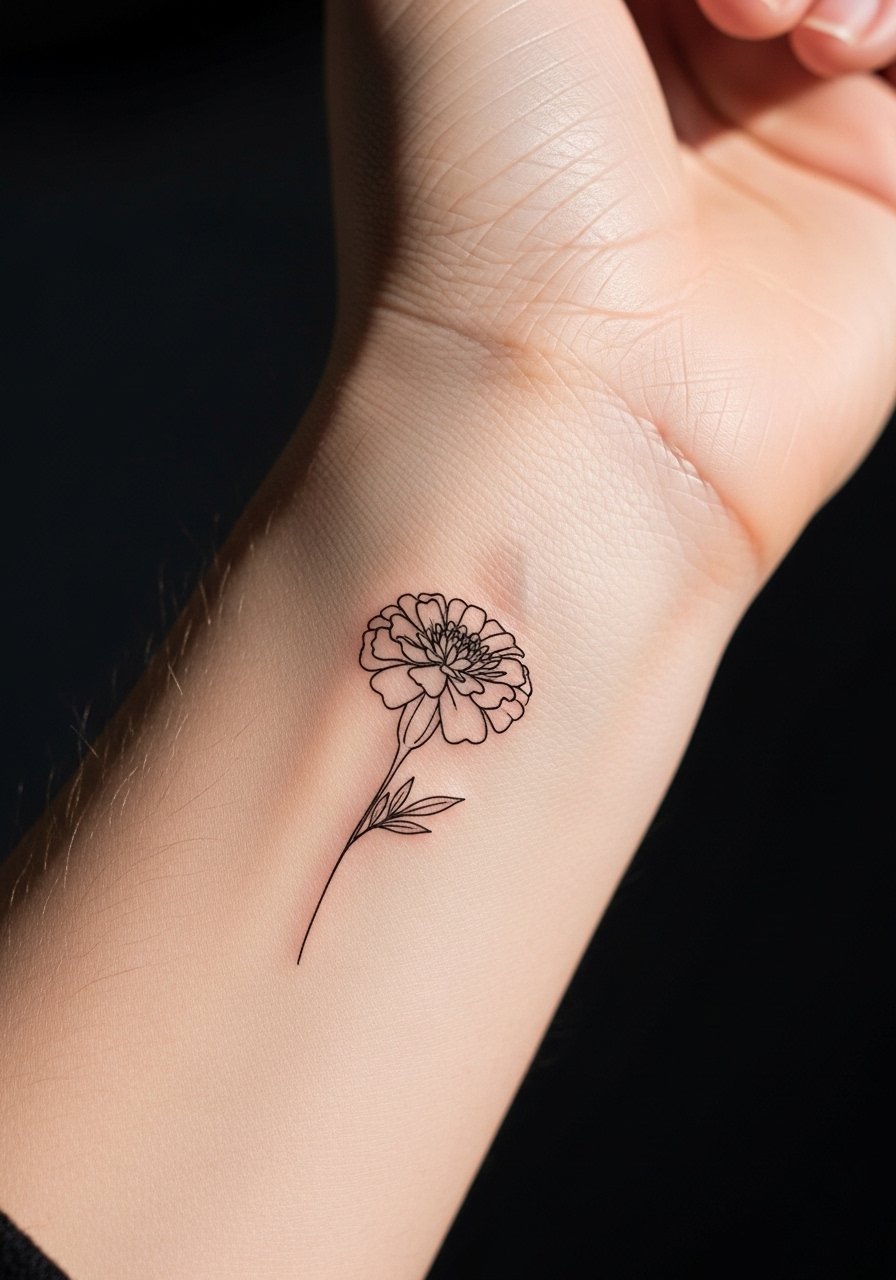
I pick this one for first-timers because the session is short and the linework reads like jewelry. Bring reference photos that show the exact line weight you want and tell the artist you prefer slightly more spacing between petal loops so the lines do not merge later. Expect a quick sting for a few minutes and plan on a single session under an hour. The main mistake is asking for hair-fine lines with no spacing, which increases blowout risk on the wrist. For showing it off, stack a slim gold bangle set on the opposite wrist to balance attention.
2. Layered Marigold Bouquet on the Forearm
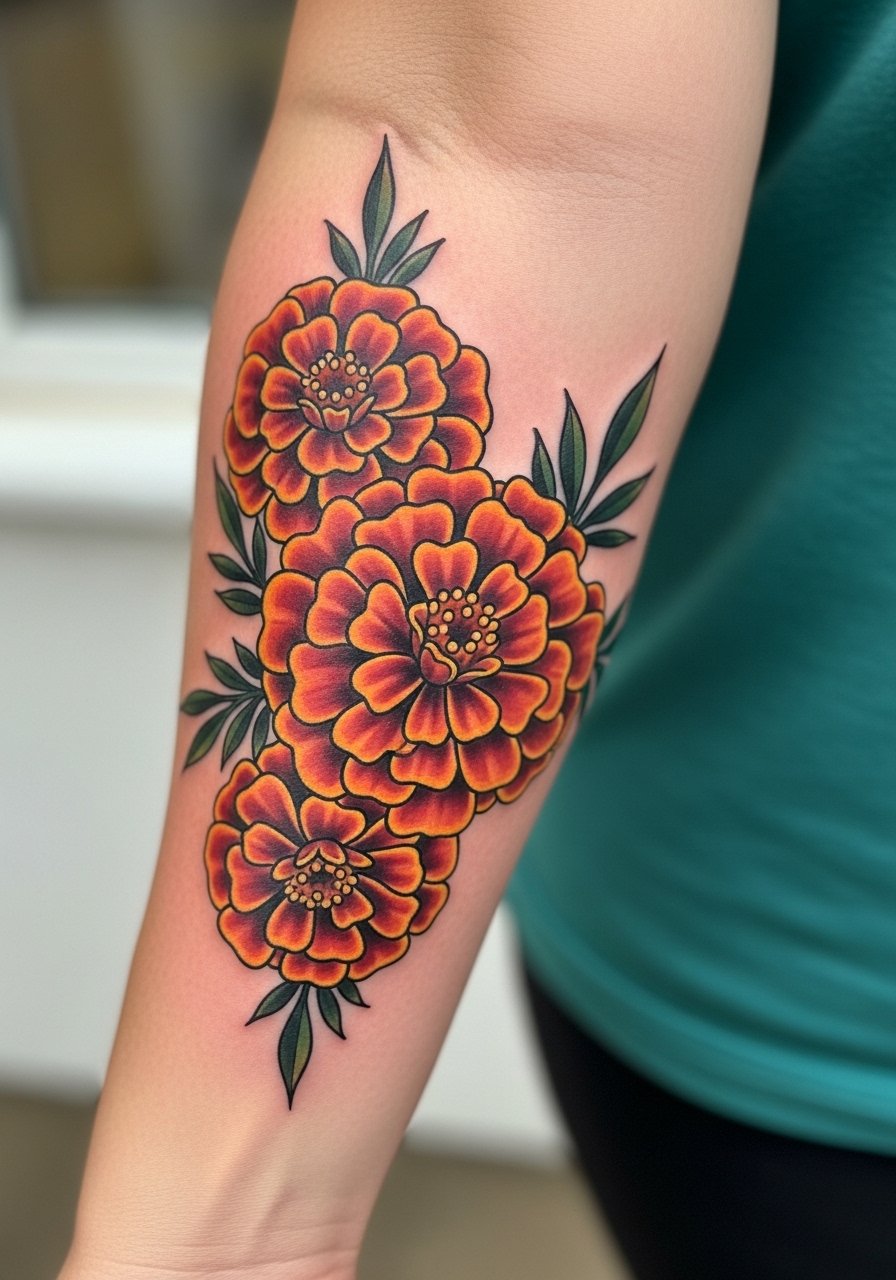
This is the bold color option if you want a piece that reads from across the room. Tell your artist you want petal layers with graduated saturation rather than flat fills, and ask for heavier outlines so the shapes hold as the ink ages. Forearm work feels moderate on the pain chart and usually takes two sessions for full saturation and shading. A common error is packing too many tiny petals into a small forearm tattoo, which makes the image muddle after a few years. For outfits, rolled sleeves like a rolled sleeve chambray shirt in mustard or terracotta complements the gold tones and keeps the arm visible without overexposing the ink.
3. Geometric Marigold Mandala on the Shoulder
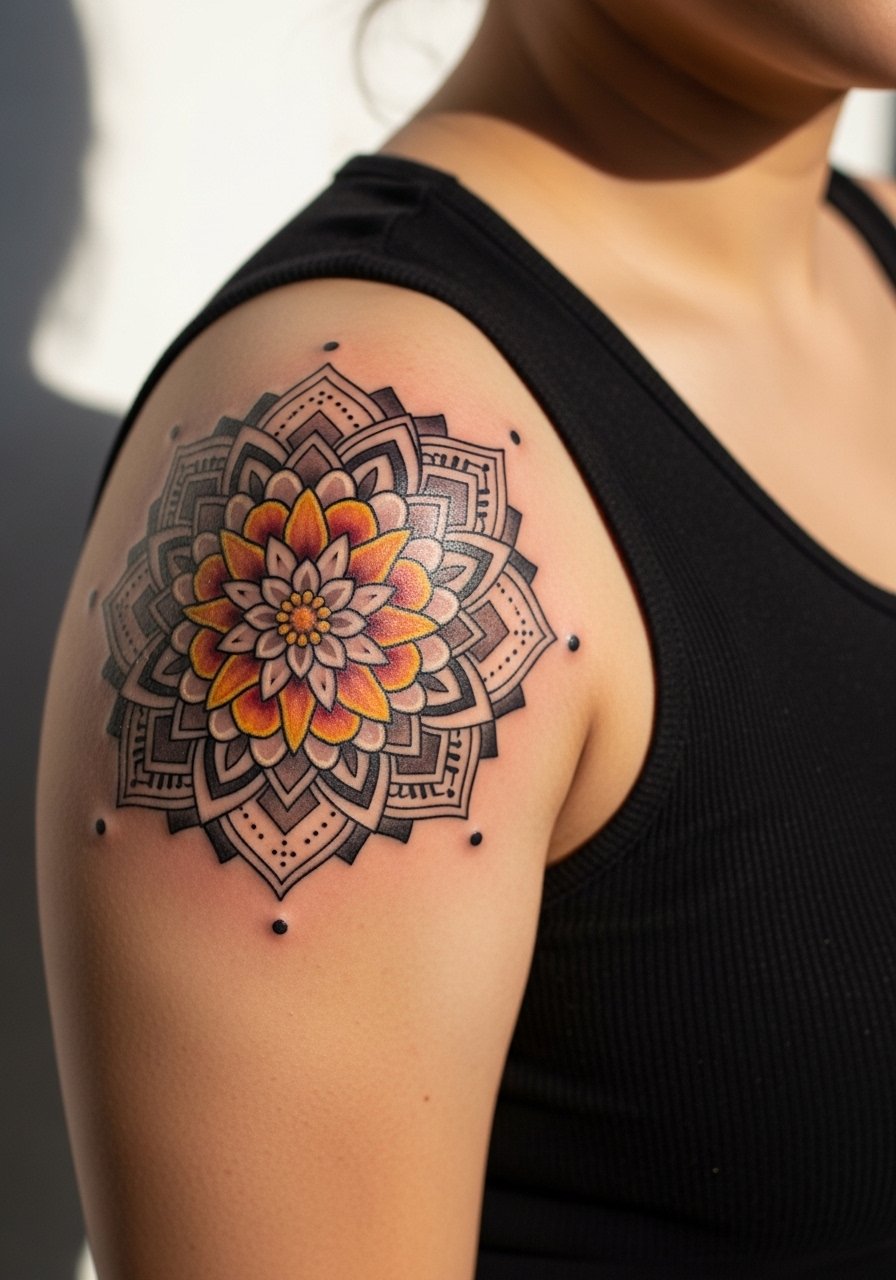
Artists love this when symmetry meets flower form. In consultation, specify the scale of the mandala center and ask for breathing room between linework rings so the geometry does not merge as it heals. Shoulder placement is forgiving because the skin moves less than on the ribs, and most sessions run two to three hours depending on complexity. The classic misstep is compressing a dense mandala into a too-small circle. For the session, wear a sleeveless olive tee or a light kimono jacket so the artist has clear access without you getting chilly.
4. Realistic Marigold Bloom on the Collarbone
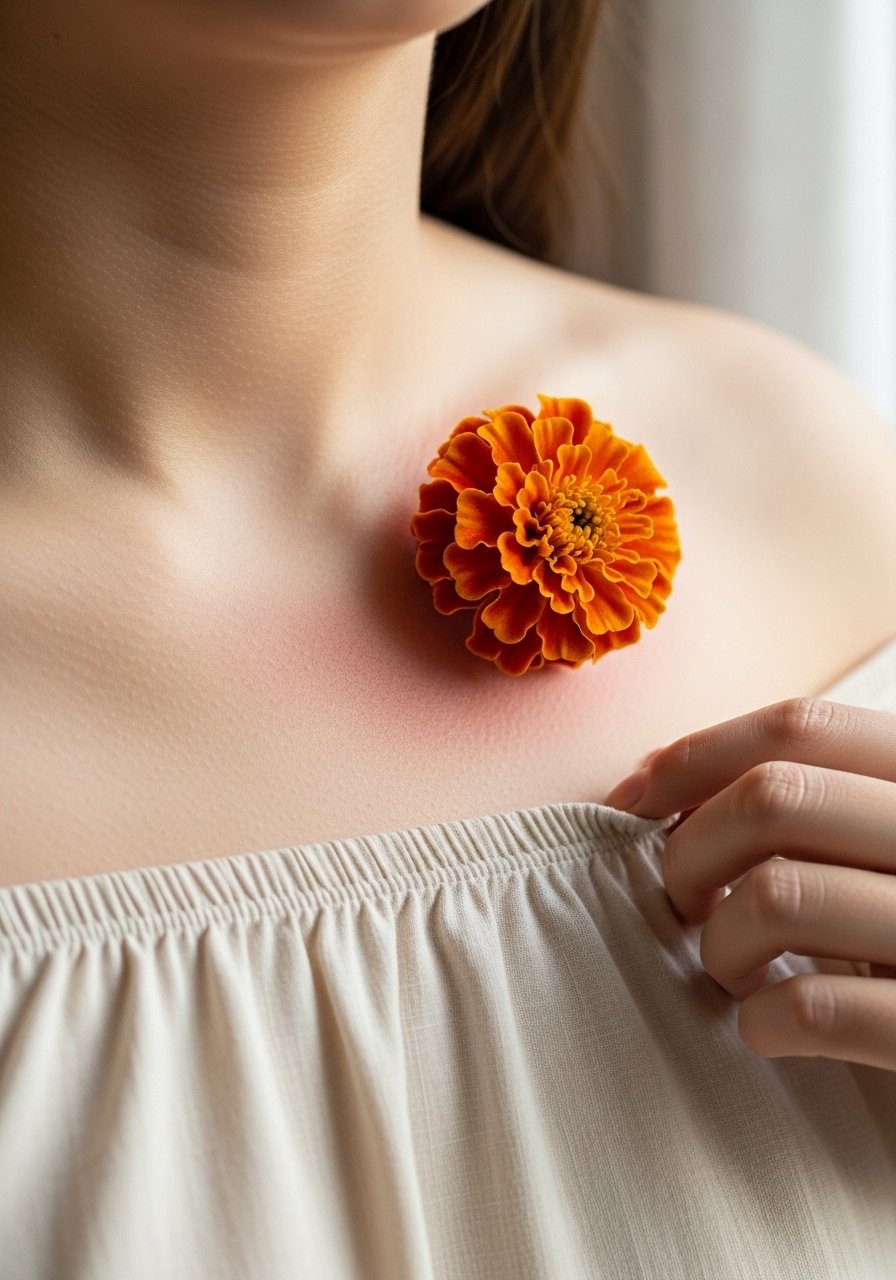
Micro-realism on the collarbone gives soft texture and lifelike petal depth. Bring a close-up photo that shows specular highlights on petals and ask the artist to map light sources the same way. Expect a longer session and some discomfort where bone is shallow. The frequent error is asking for too much tiny detail in a small area, which reads as fuzz after healing. At six months the bloom looks crisp, at two years the highlights soften, and at five years you may see gentle diffusion that still reads as a bloom. Pair this with an off shoulder blouse for evenings out so the placement frames the neckline.
5. Watercolor Marigold Splash on the Inner Thigh
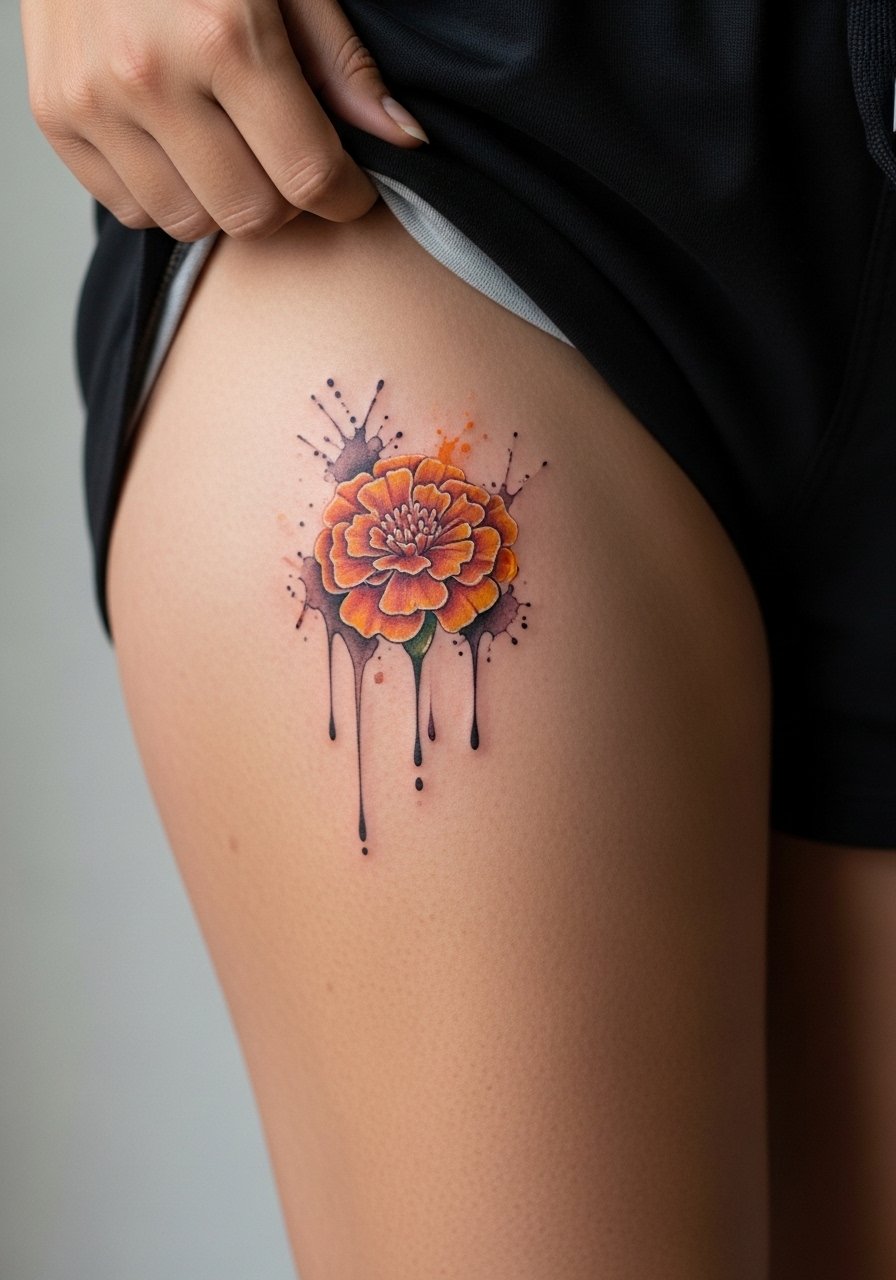
Watercolor captures painterly motion but needs careful placement. Inner thigh work is easy to hide and low on public visibility, which makes it a favorite for expressive splashes. Tell your artist you want concentrated color near the core of the bloom and softer feathered edges instead of full bleed across the skin. Sessions feel less painful than rib work but watch for friction from clothing during healing. Watercolor tends to fade faster than saturated traditional fills, so expect touch-ups at year three or so if you want the same intensity. For the appointment, wear loose gym shorts so the artist can access the area without fabric rubbing afterward.
6. Bold Traditional Marigold on the Calf
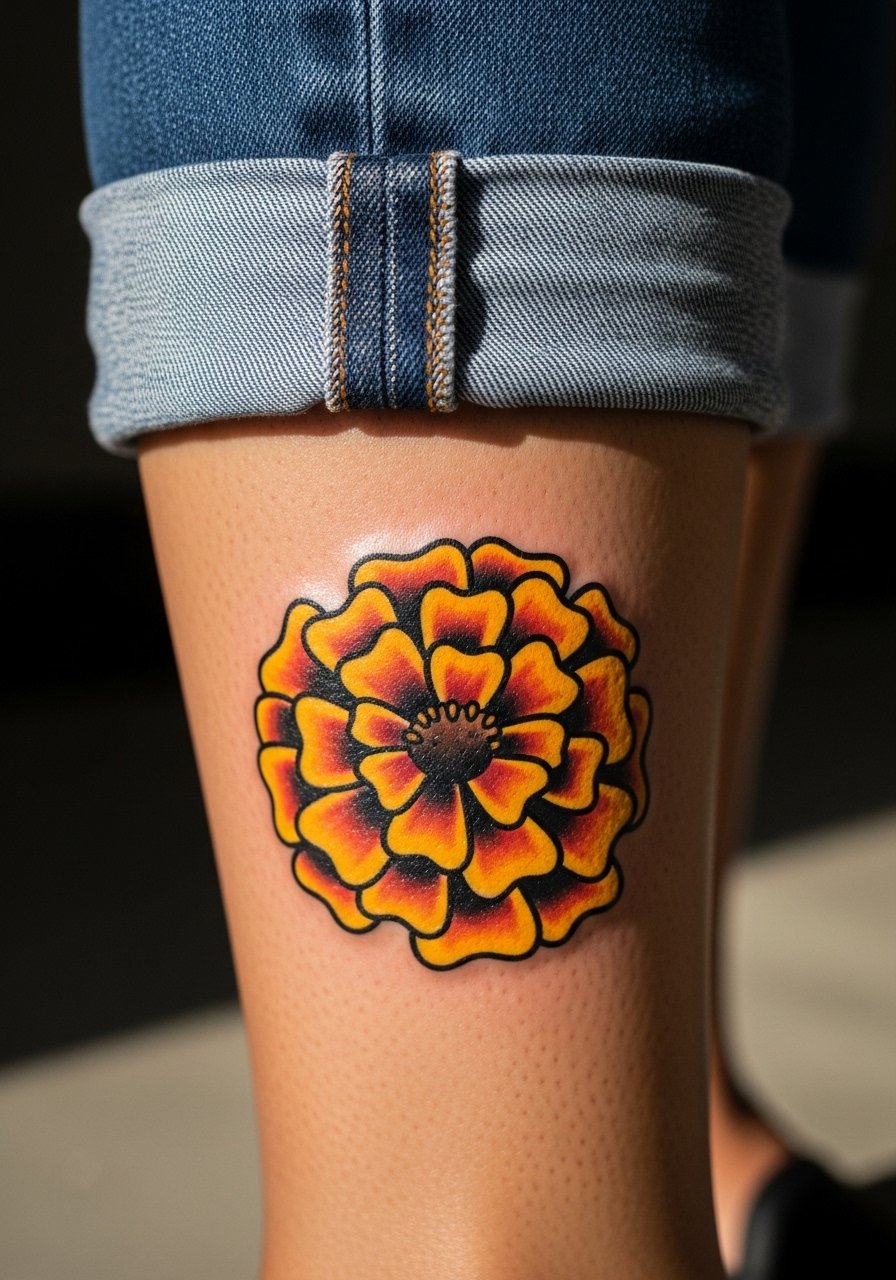
This one ages predictably because thick outlines and heavy saturation resist blurring. Calf pieces tolerate strong color and stand up well to years of wear, and sessions are usually one to two hours. The mistake is letting the artist use weak outlines for a traditional look. If the lines are thin, the image will lose contrast as it ages. For wearing it out, roll up slim-fit chinos or throw on athletic shorts, and consider a rolled ankle chinos look that highlights the ink without overexposing sun-sensitive skin.
Studio Day Picks
The wrist, forearm, collarbone, inner thigh, and calf pieces above each pose different prep and early-healing needs, so a small kit tuned to those areas makes the session and first week smoother.
-
Stencil transfer paper kit. Lets you preview line placement on skin before the needle starts, which matters for tiny wrist and collarbone work.
-
Topical numbing cream. Applied before the appointment it can make the difference for short, sensitive sessions like inner wrist or ribcage lines.
-
Thin protective film roll. Useful for calf or thigh pieces that might rub against clothing in the first 48 hours.
-
Fragrance free gentle body wash. Cleanses healing skin without irritating fine line work you want to preserve.
-
Aquaphor healing ointment. A thin layer during the first few days helps lock in moisture for delicate linework without suffocating the epidermis.
7. Fine Line Marigold Cluster Near the Ankle
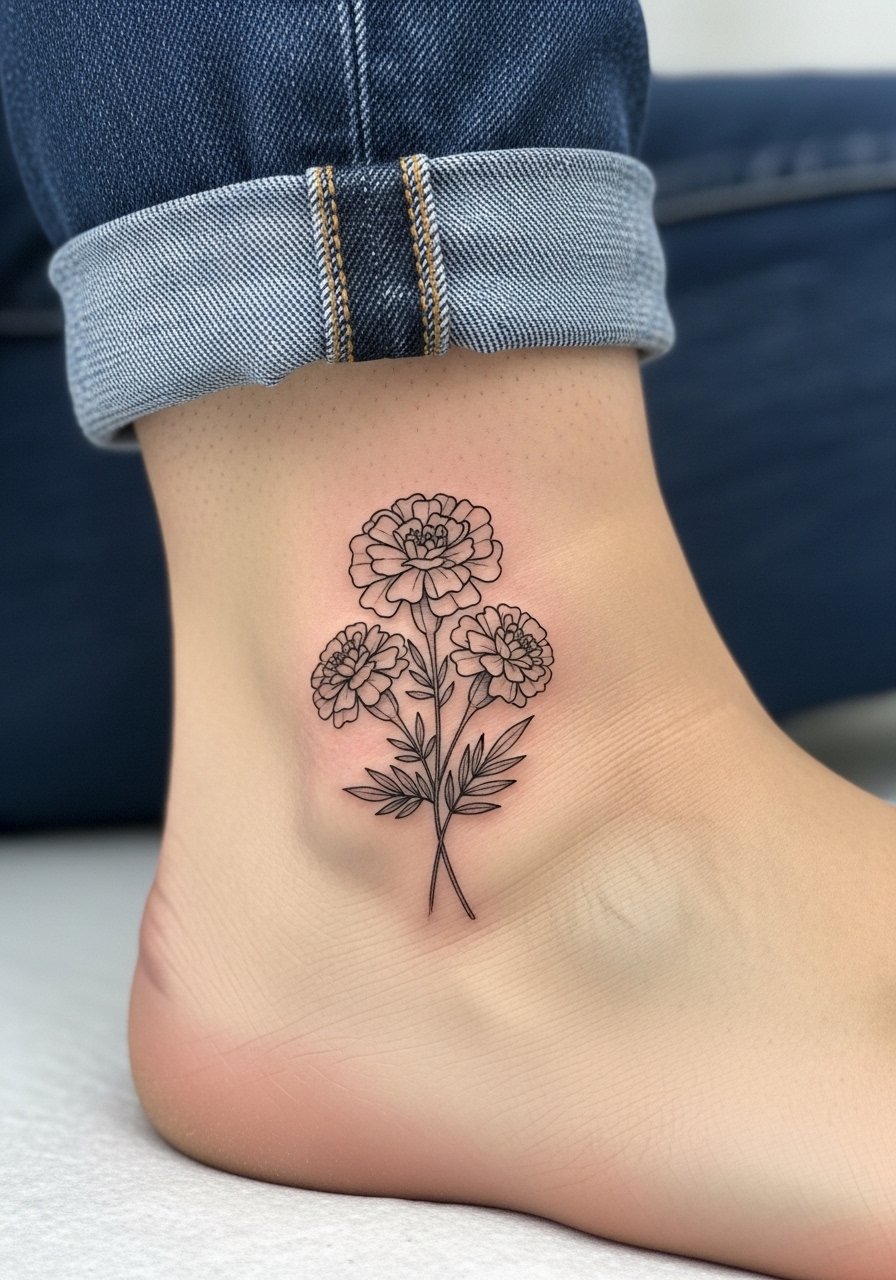
Ankle clusters age gracefully if the lines are spaced and not hair-fine. The ankle sees a lot of movement and friction, so ask for slightly bolder single lines and avoid tiny stems that will break into dashes over time. Sessions are quick but the skin is thin enough to sting more than the forearm. The usual mistake is choosing a tiny cluster with dense stems that slough off into indistinct marks. For summer showing, strappy sandals or cropped straight-leg jeans highlight the design. I like pairing it with strappy flat sandals so the cluster reads like an anklet.
8. Blackwork Marigold with Negative Space Petals on the Upper Arm
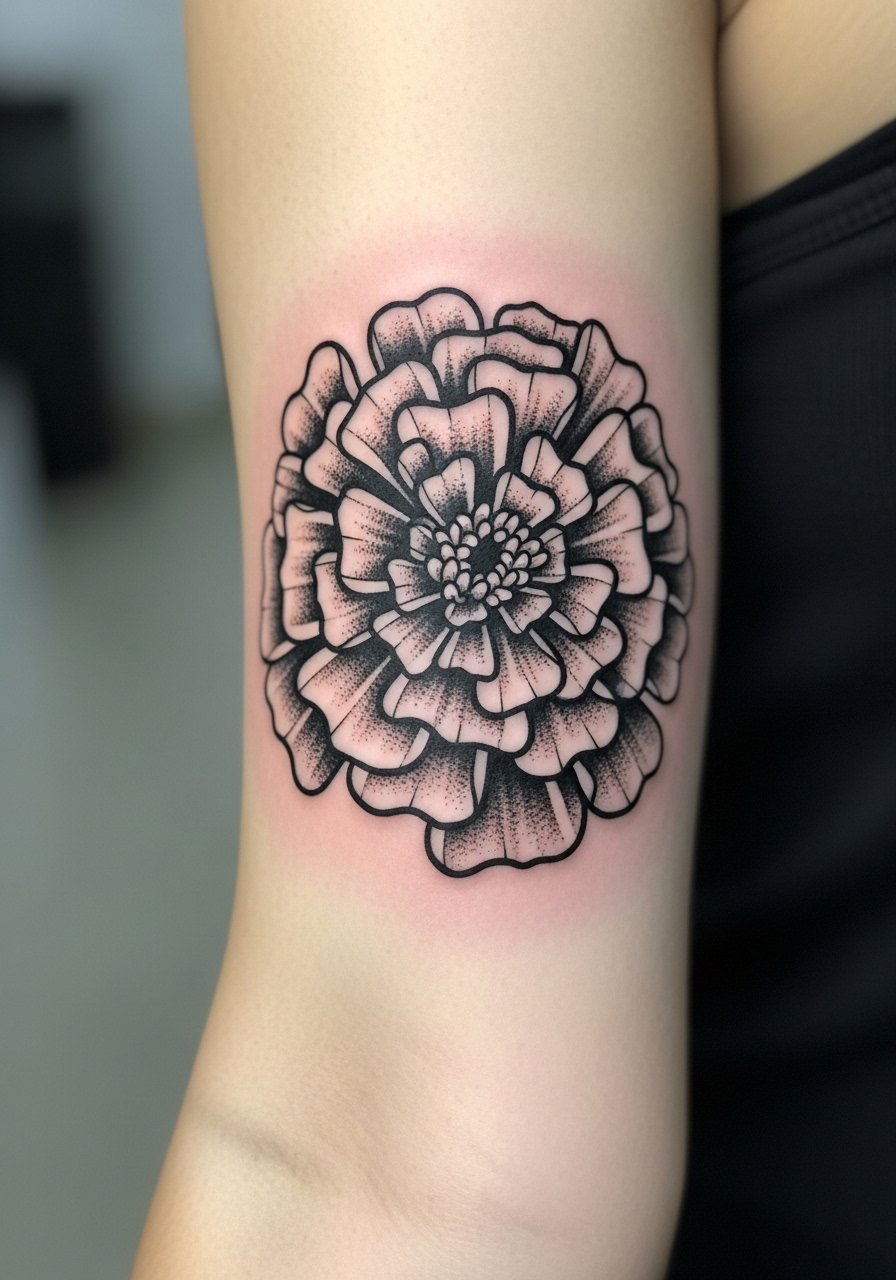
High-contrast blackwork gives a modern edge and holds up well across skin tones. Specify the negative space petals as intentional gaps rather than thin unfilled strokes, and ask the artist to map the black blocks to the arm's natural flow. Upper arm placement tolerates heavier saturation so sessions tend to be two sittings. A frequent misstep is over-detailing inside black fields, which vanishes as the ink either spreads or darkens. This style compresses well into a medium size without losing graphic clarity, and it pairs with simple short sleeves that let the high-contrast silhouette pop.
9. Ignorant-Style Naive Marigold on the Ribcage
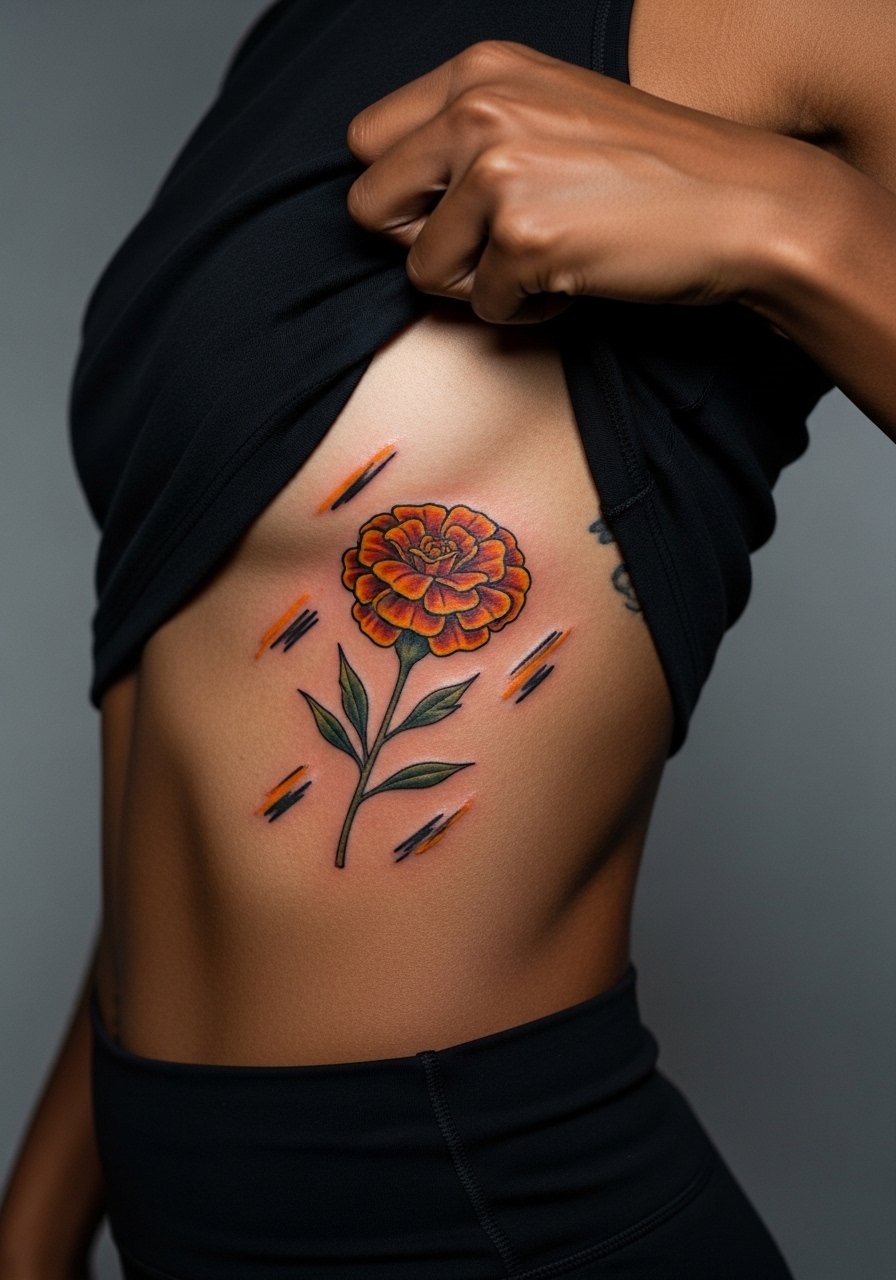
Fair warning about ribcage work. Artists split into two camps on fine line and the ribs. One group says the skin stretch and constant movement blur delicate lines within two years. The other group argues that with appropriate needle depth and spacing, fine line can settle well there. For ignorant-style naive strokes the looser marks actually help because they tolerate slight diffusion better than tight linework. Rib sessions feel intense and can run longer, so plan your session day accordingly. Ask your artist where they come down on ribs and fine details before booking.
10. Neo-Traditional Marigold with Sunburst on the Upper Back
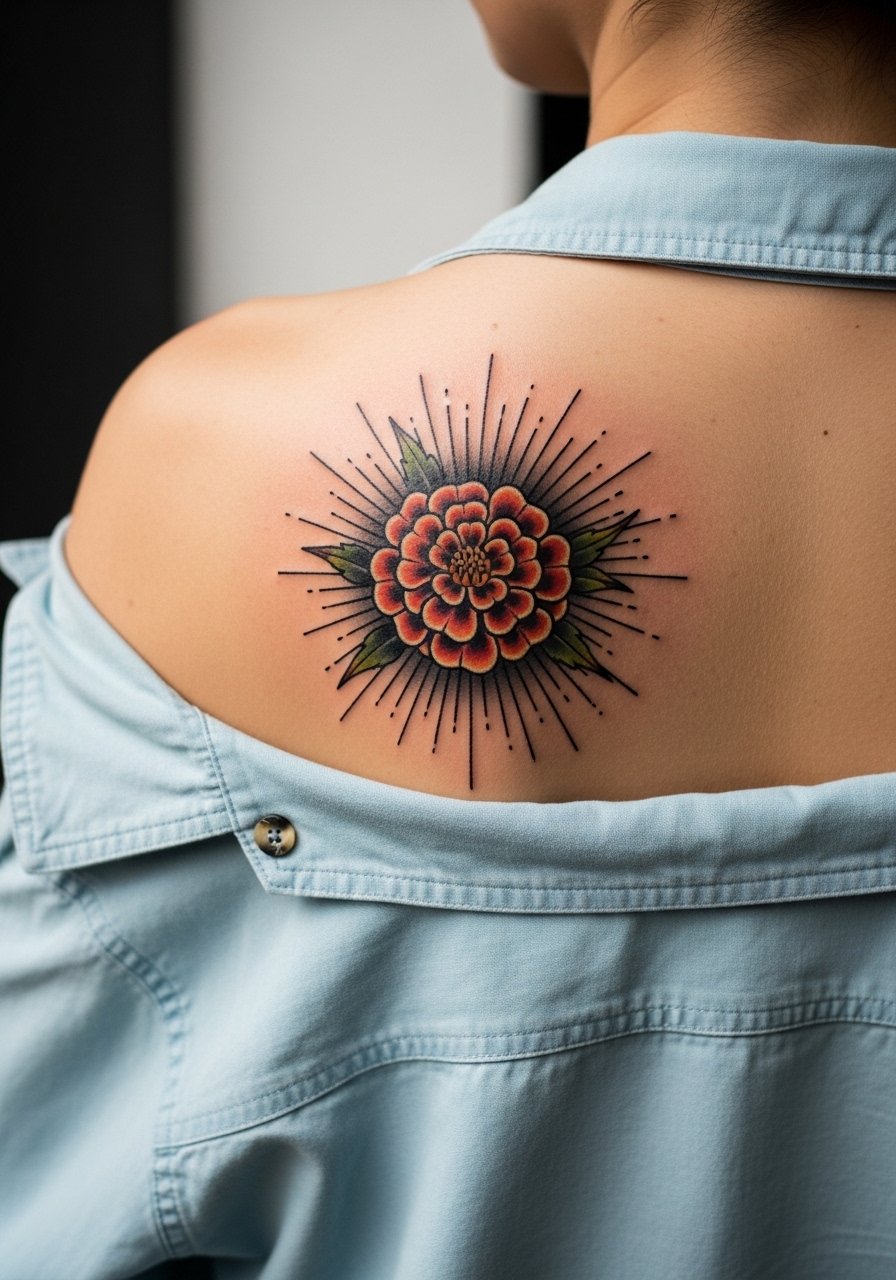
This expansive option reads as a statement and brings solar symbolism into the composition. Tell your artist how much sunburst you want behind the bloom and whether you prefer gold-toned highlights or warm orange fills. Back pieces take multiple sessions and can be demanding on the body, so bring layers and plan breaks. A common mistake is skimping on negative space in the background, which makes the sunburst feel cramped as it ages. For showing it off, loose camp shirts or light kimonos frame the upper back nicely and let the symmetry breathe. Consider a light kimono jacket for transitional weather.
11. Gold-Toned Marigold Paired with a Solar Motif on the Sternum
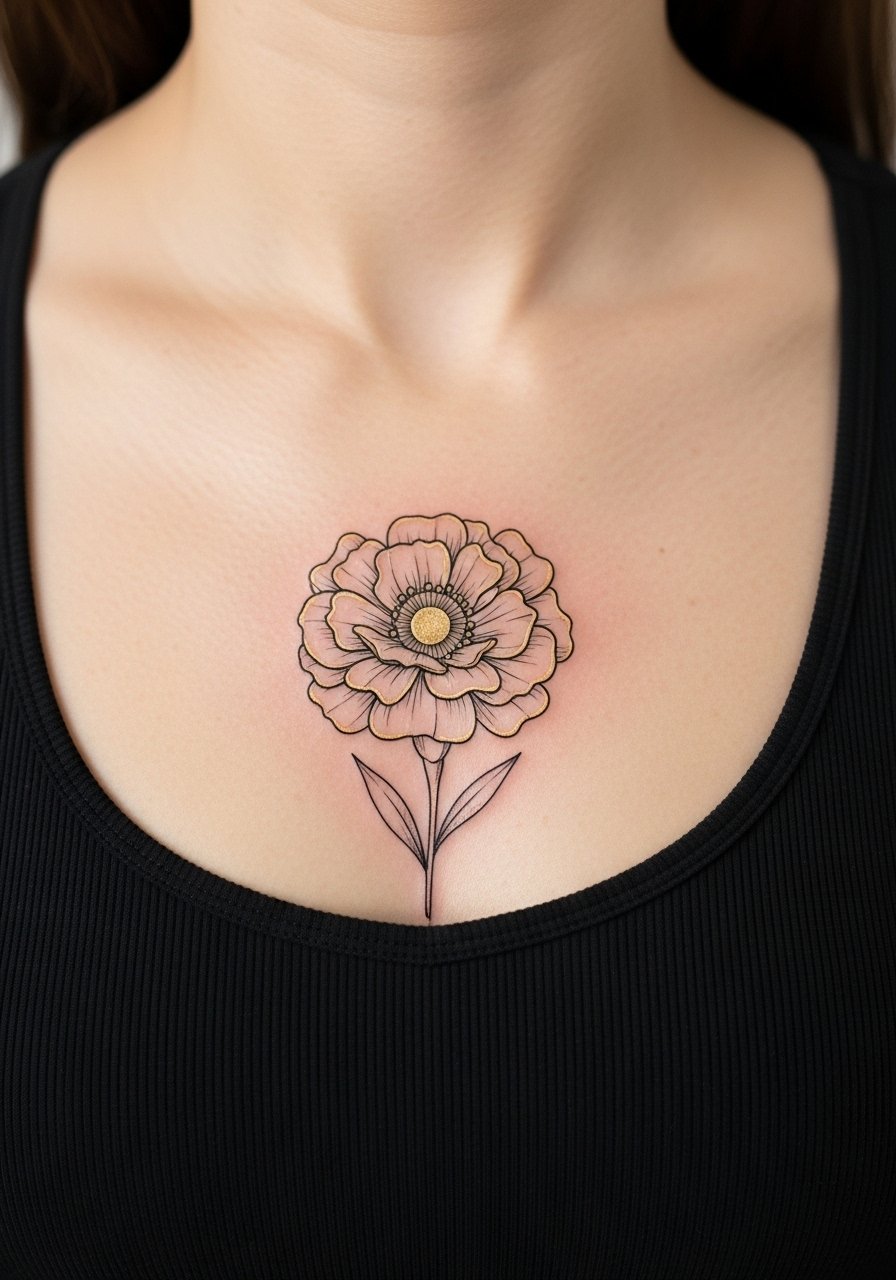
Sternum work is intimate and symbolic, and the gold tones read like jewelry when placed above the sternum. Ask the artist to restrict metallic washes to highlights rather than full fills so the piece does not look flat as it ages. Sternum sessions are sensitive and demand a steady hand for micro-realism or fine color gradients. Many people prefer a fitted top during the appointment so the artist can work with minimal shifting. Consider the career implications and comfort level since chest work is visible in certain outfits. If you want sun symbolism, request subtle rays rather than heavy beams so the image keeps its clarity over time.
12. Delicate Hip Marigold Vine
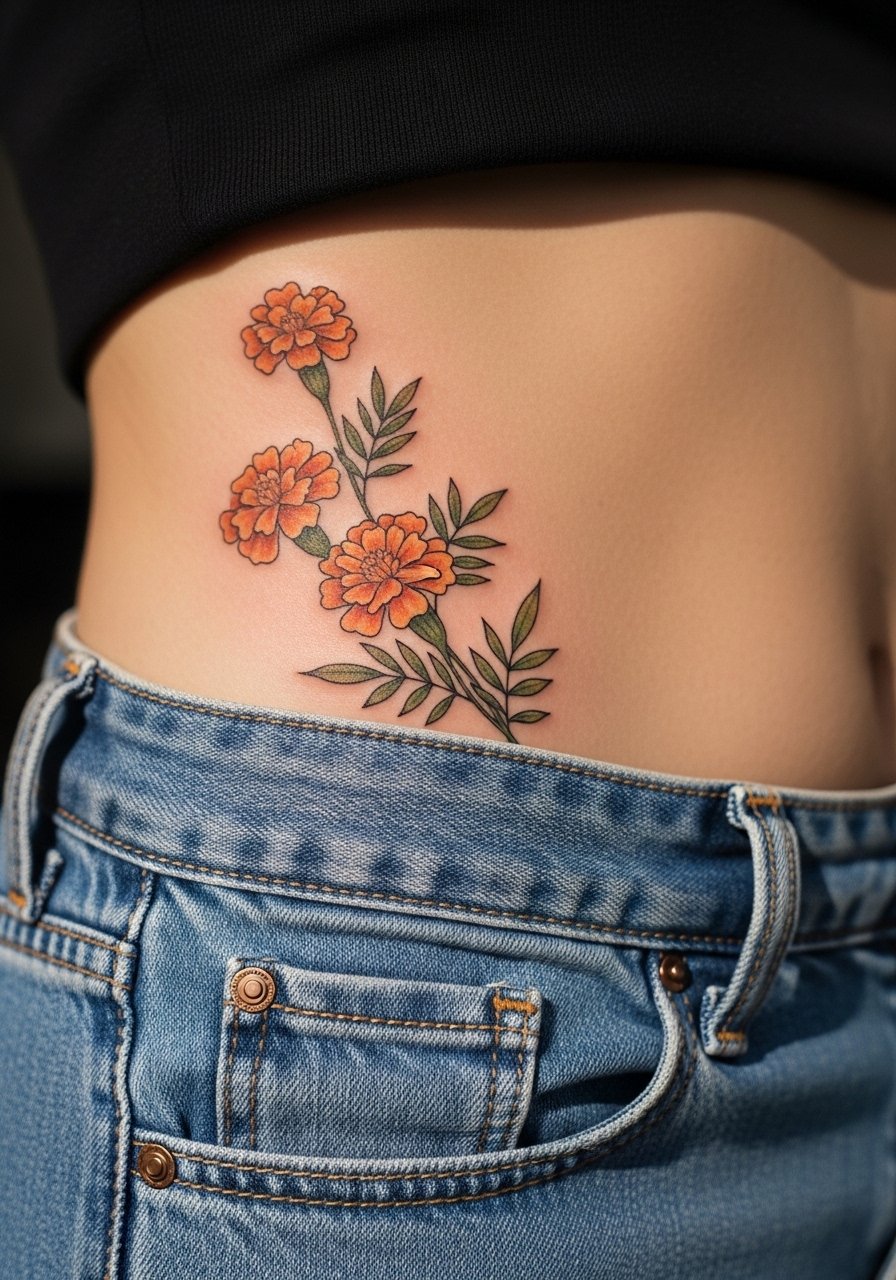
Hip vines let the marigold trail with the body's curves. For longevity, ask the artist to avoid hair-fine stems where the skin creases heavily. Hip tattoos often feel comfortable during the session but expect short standing breaks for repositioning. A typical error is placing too many tiny leaves along the crease, which can break into indistinct spots when the skin stretches. For summer looks, high-waisted shorts or A-line skirts show a peek of the vine. Pair it with high waist shorts to let the curve of the design read as part of your outfit.
13. Inner Bicep Micro-Realism Bud
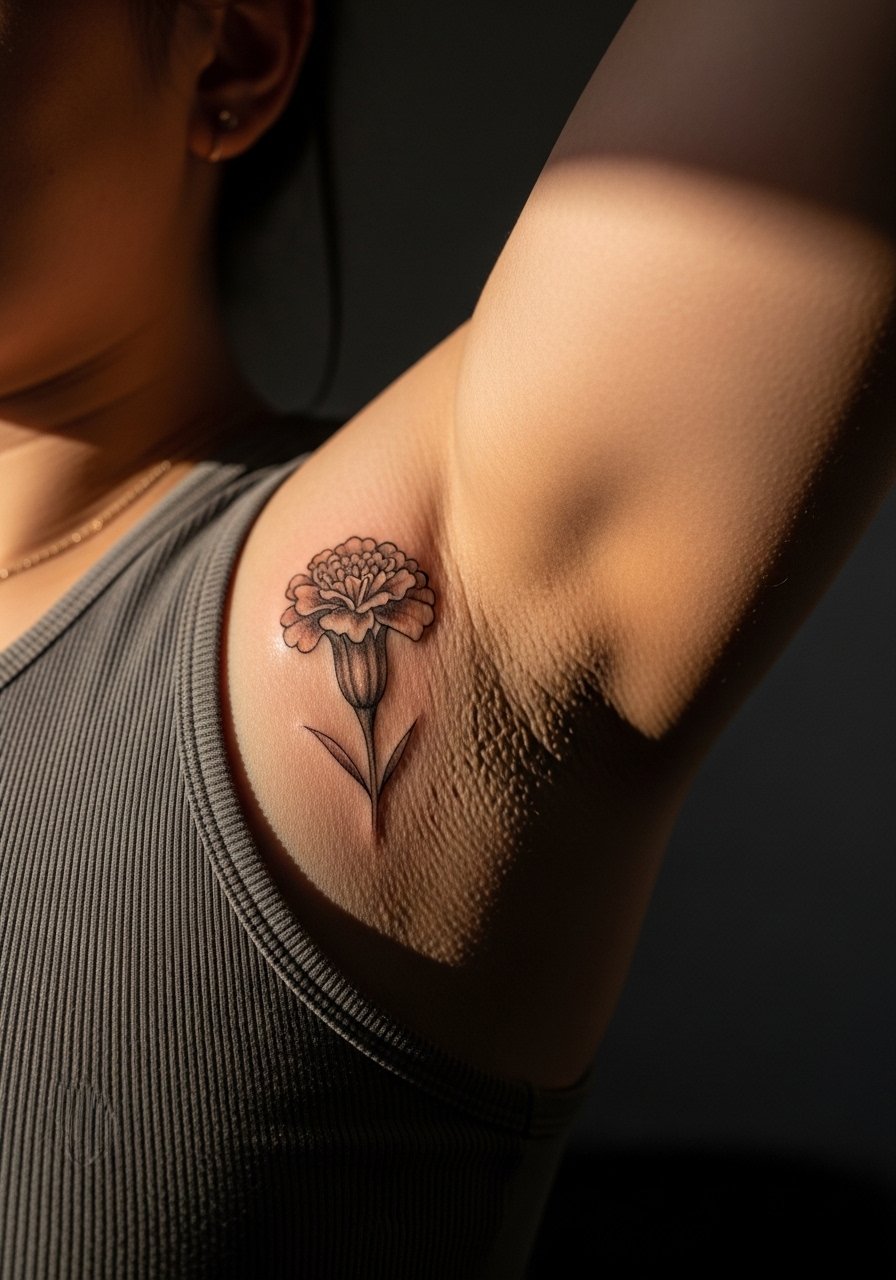
Inner bicep placements are personal and can hold fine detail if spaced correctly. I recommend a slightly larger scale than people expect so stipple shading reads over time. Sessions on the inner bicep feel tender but manageable and usually finish in one medium session. The common mistake is asking for tiny micro-letters or minute dots that vanish as the skin moves. Inner bicep pieces age differently than outer arm work because this zone is less exposed to sun but more prone to stretching with muscle changes. Plan for a possible touch-up at year two if you want the original contrast preserved.
14. Painterly Marigold Splash on the Thigh
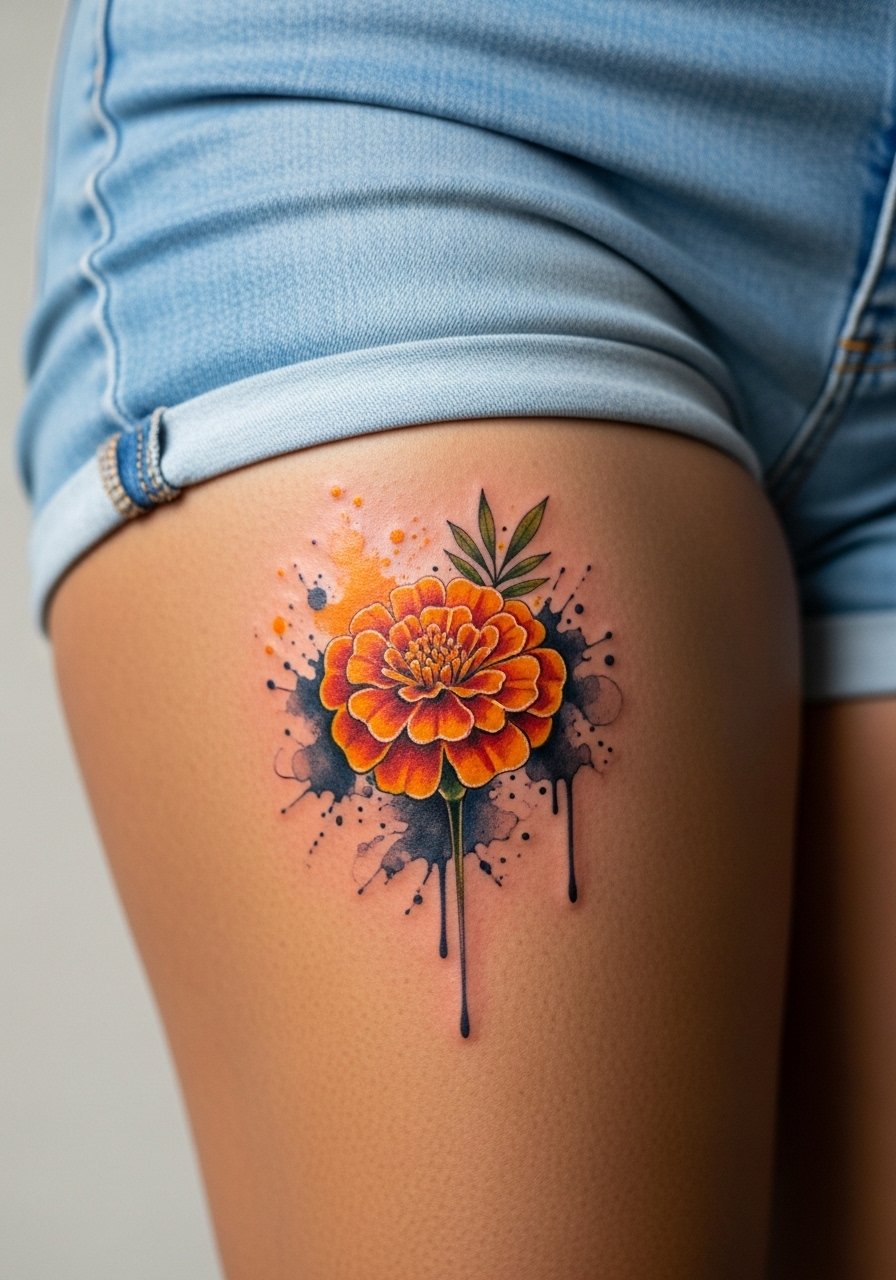
Thigh canvas gives room for sweeping watercolor washes that mimic paint. Speak with your artist about where you want concentrated color and where you prefer soft feathery edges, because wash placement affects how the piece moves with clothing. Thigh sessions are comfortable for many people and often finish in one longer sitting. Watercolor fades faster than saturated color, so plan for a refresh if you want lasting brilliance. For showing the piece in summer, pair it with high waist shorts or A-line skirts that reveal the splash without rubbing the area during recovery.
15. Marigold Chain Across the Lower Back
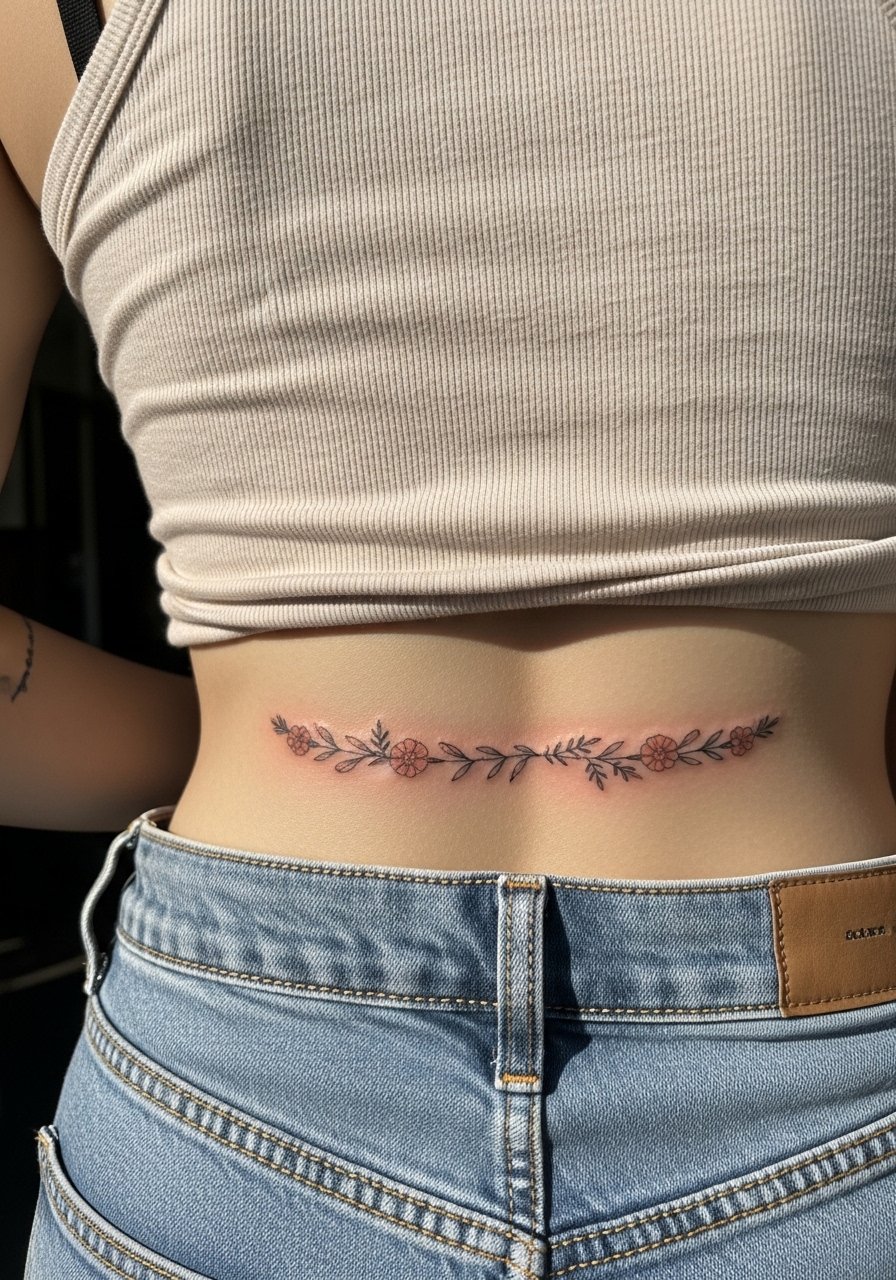
Lower back pieces let you wear the motif like a delicate band. Keep the chain links slightly broader than you think to avoid lines dissolving into thin marks as you sit or bend. Sessions are moderate and usually done in one sitting. The key mistake is centering the chain too low on the curve of the spine, which can distort as posture changes. If you plan to show it off, a low-rise pant with a fitted tank that can be shifted works well. This placement is discreet and ages nicely if protected from sun exposure.
16. Tiny Marigold Accent on a Finger
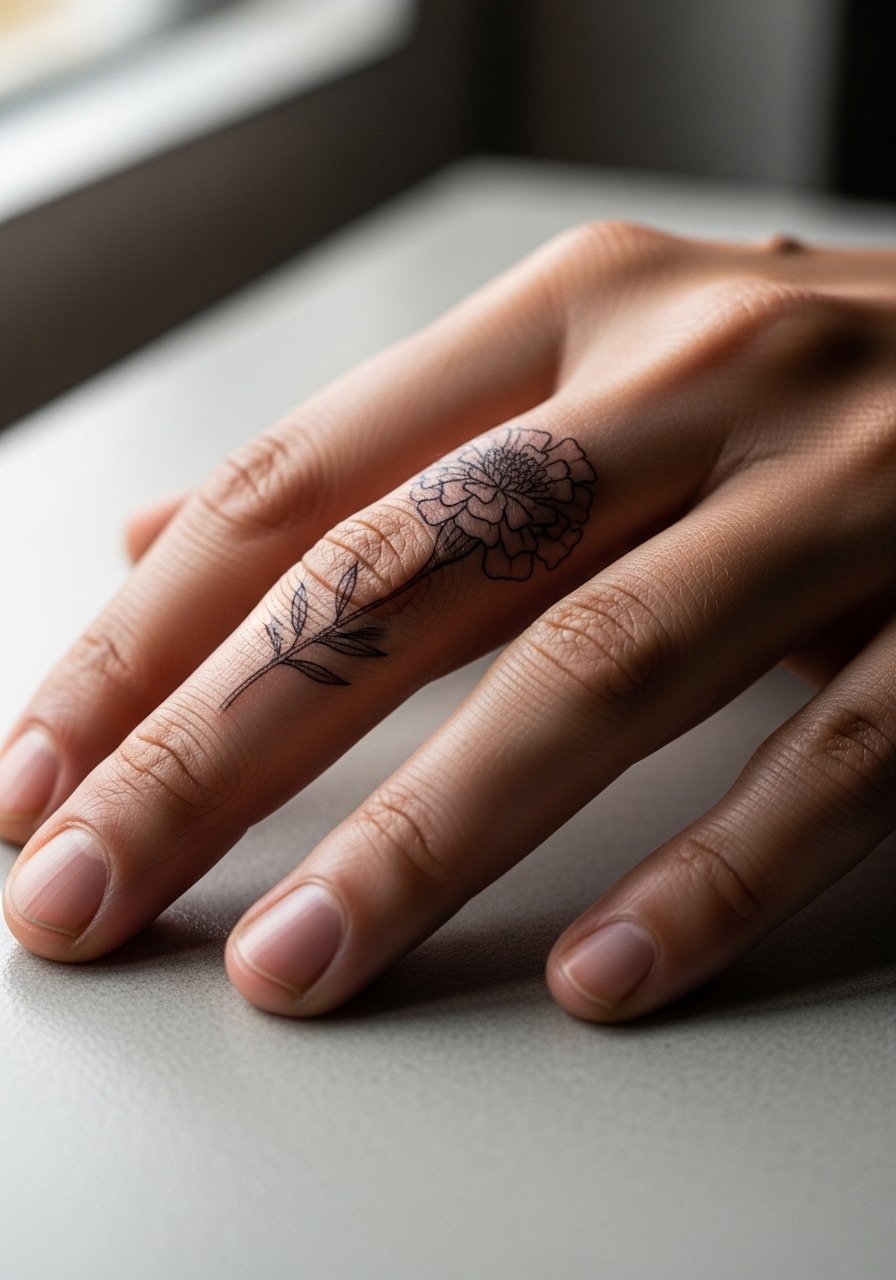
Finger tattoos read like jewelry but come with trade-offs. The skin on fingers regenerates quickly, so expect faster fading and potential for touch-ups. Sessions are short but may feel sharp because nerves are close to the surface. A frequent misstep is choosing extremely thin script or detail on the finger, which disappears faster than people expect. Also consider career context because hand and finger work is still viewed differently in some workplaces. If you go for it, plan on a realistic maintenance schedule and discuss touch-up timing with your artist.
17. Birthday Bouquet: Marigold with Date Script on the Forearm
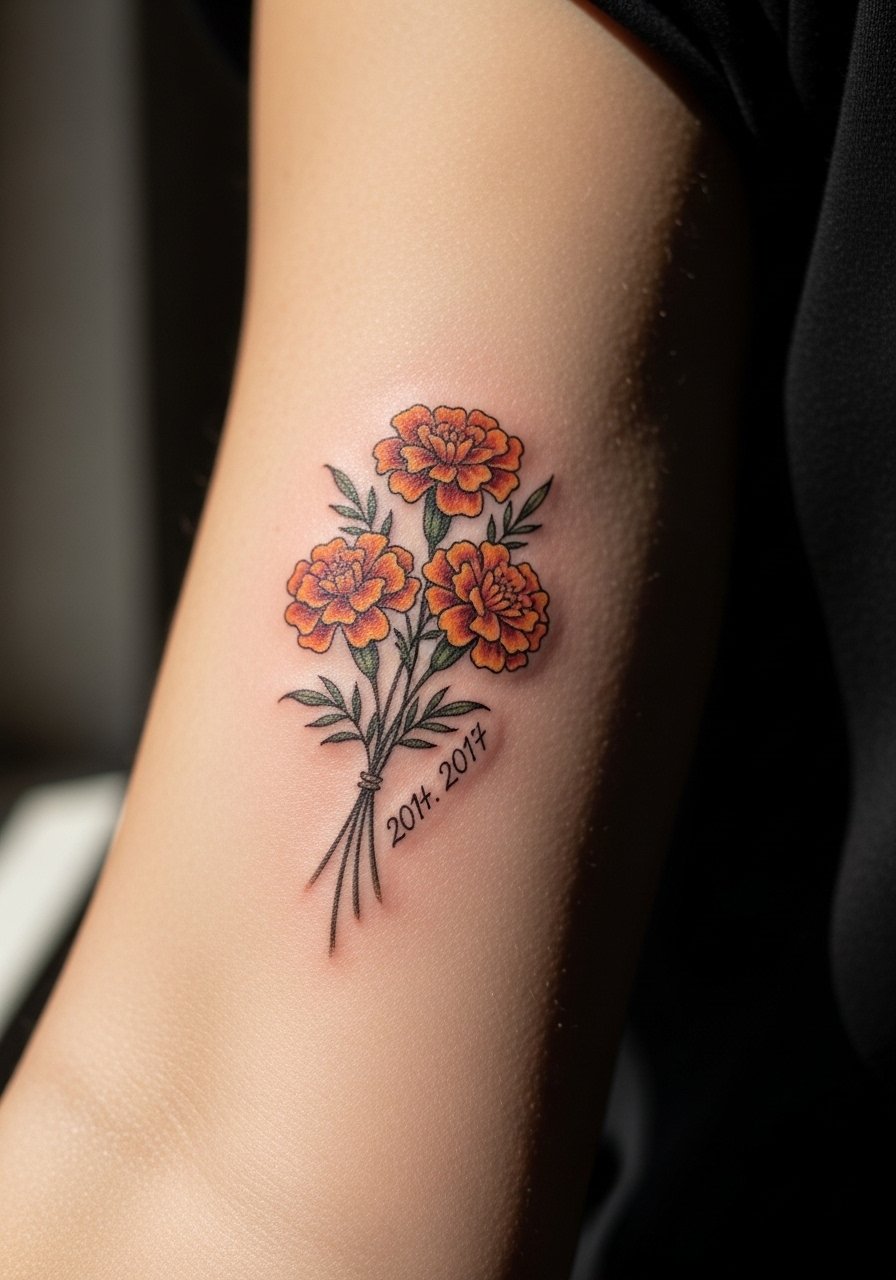
Using marigolds as a birthday flower motif ties the design to a personal milestone and keeps the symbolism direct. Bring exact reference for the script you want because lettering needs the same spacing discipline as petals. I often recommend doing a preliminary stencil or even an AI-generated mockup to see how the bouquet and date sit together on the curve of the forearm. Forearm pieces take one to two sessions depending on shading. For showing it off, rolled sleeves or a chambray shirt make the bouquet read like a bracelet on the arm. Try a rolled sleeve chambray shirt if you prefer casual framing.
Frequently Asked Questions
Q: How does fine line marigold on the wrist age compared with a bold traditional calf piece?
A: From what I've seen, fine line on the wrist softens sooner because the skin there moves and the lines are thin. Bold traditional calf work benefits from thicker outlines and saturation, which keeps contrast longer. Expect touch-ups earlier for wrist fine line and plan the scale and spacing accordingly.
Q: Will a watercolor marigold on the thigh need special aftercare compared with a traditional fill?
A: Watercolor relies on softer washes and less heavy saturation, so protect it from prolonged sun in the first year and avoid tight clothing that rubs the area during the first two weeks. The healing routine is similar to other placements, but watercolor owners often book touch-ups earlier to restore faded washes.
Q: Are there specific things to ask an artist when designing a marigold mandala for the shoulder?
A: Ask them to show you a stencil with the exact ring spacing and line weight you prefer, and discuss how much negative space you want so the mandala does not compress as it ages. Also ask about their experience with stipple shading and how it holds on shoulder skin.
Q: Can I preview a custom marigold composition with AI before booking an appointment?
A: Yes, many people use AI mockups to test scale and placement before settling on a stencil. Use the mockup as a starting point for conversation with your artist rather than a final directive, and bring the image into the consultation so the artist can advise on technical tweaks.
Q: What clothing should I wear to a forearm session to make the process easy and protect the fresh ink afterward?
A: Wear a loose short-sleeve button-up or a rolled sleeve shirt you can move aside without pulling across the forearm. A rolled sleeve chambray shirt works well because it frames the arm and keeps fabric off fresh ink.
