
Fine line third eye tattoos are everywhere on feeds, but what holds up a decade later is not what trends best today. Tiny placement, needle depth, and how you plan to show the piece matter far more than the initial like count. These micro third eye designs favor careful spacing and clear consultation notes, and the first six below set the tone for how to plan placement, line weight, and wardrobe around this symbolic mark.
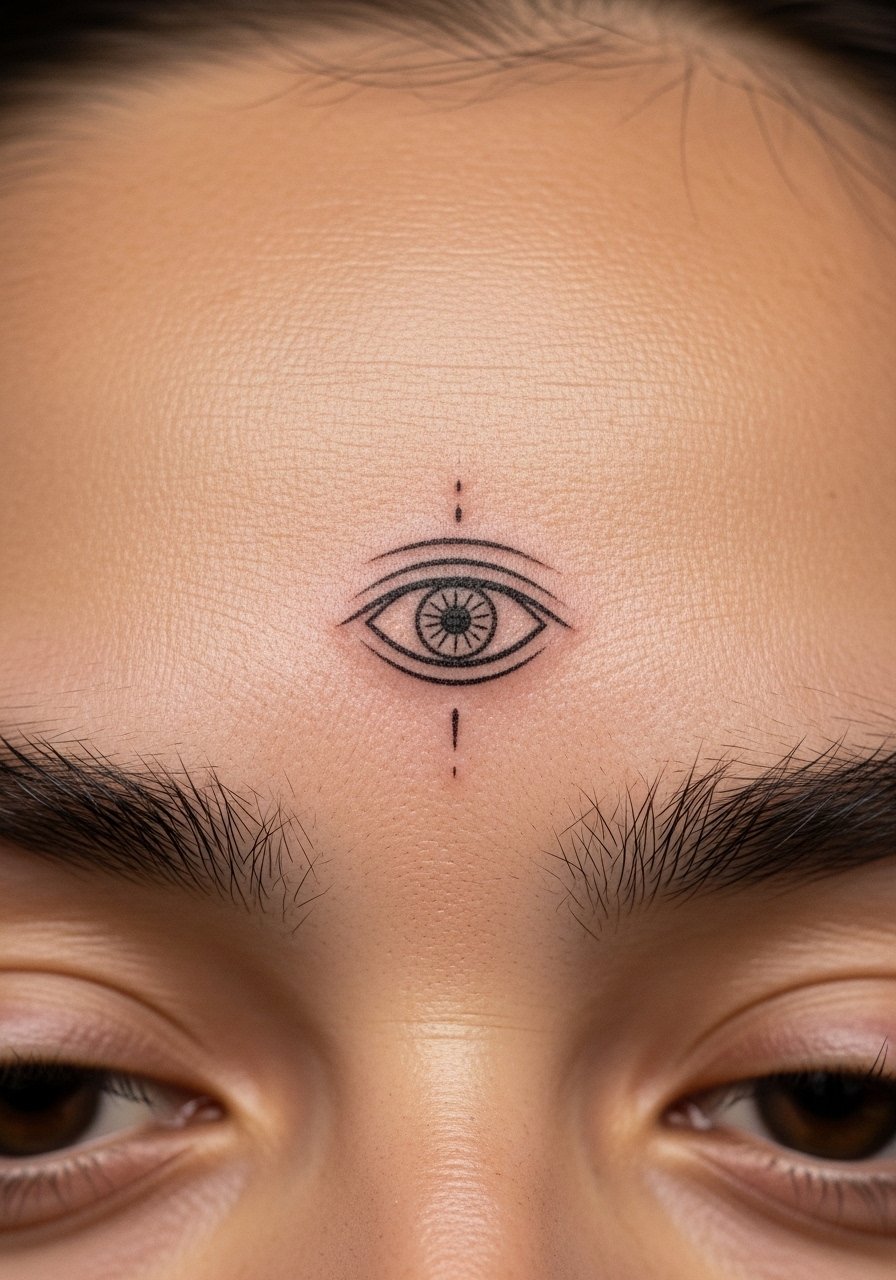
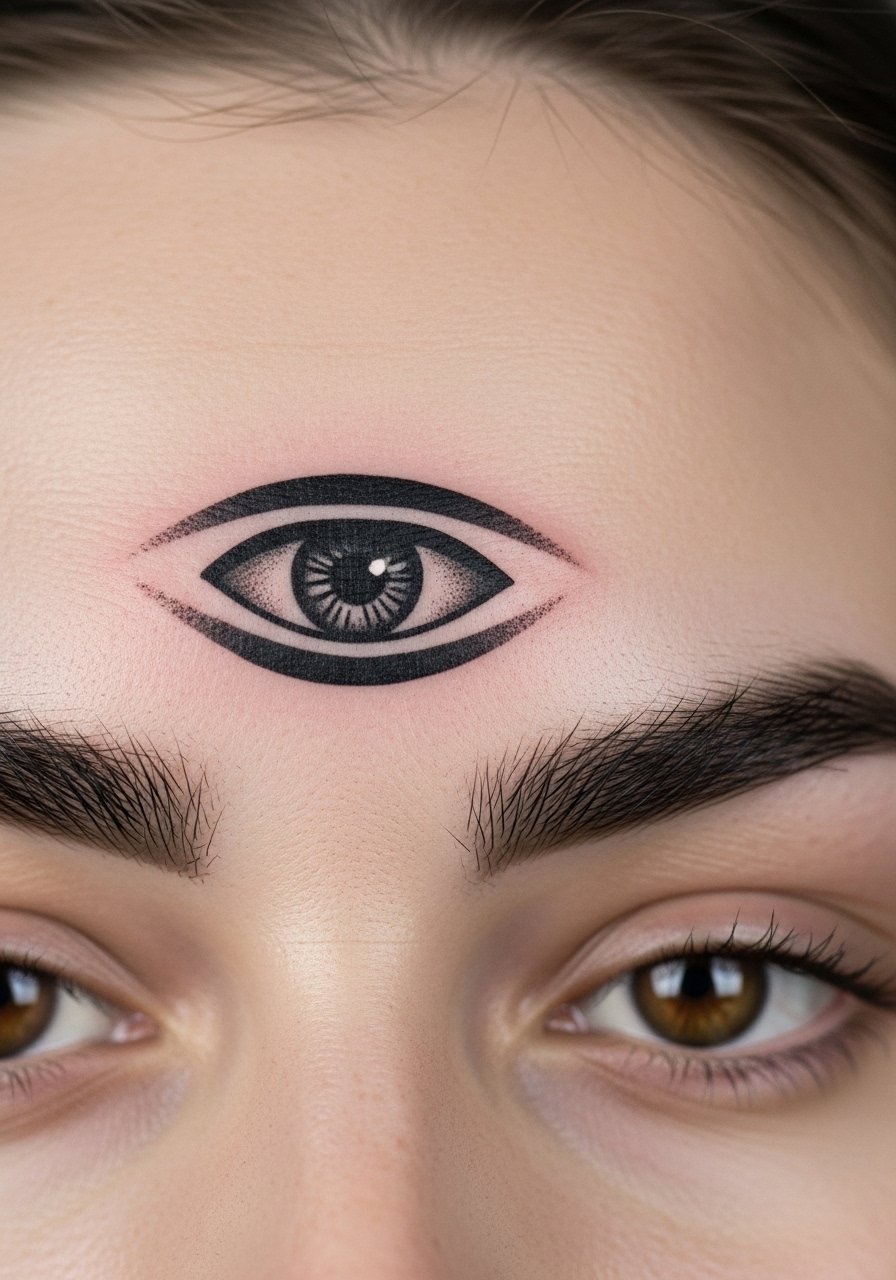
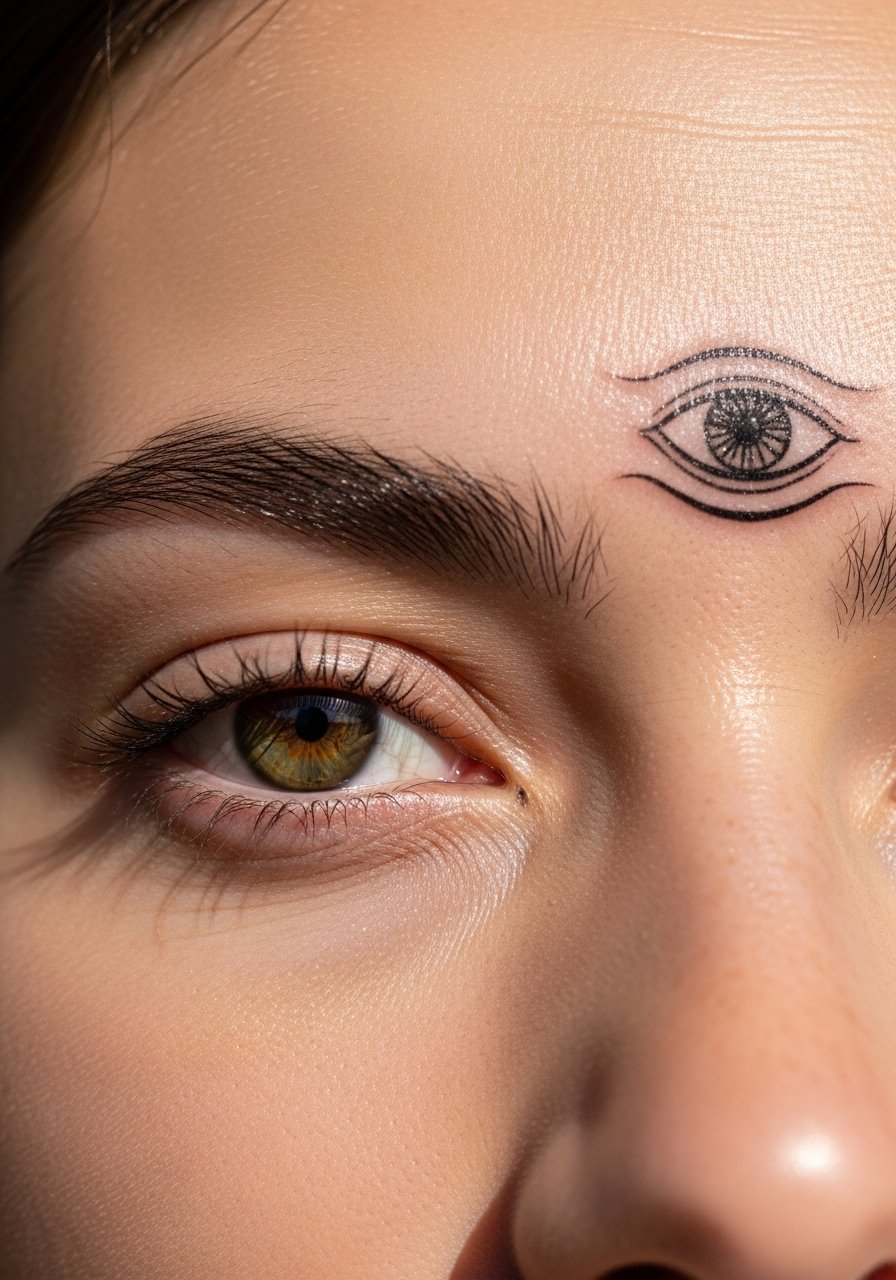
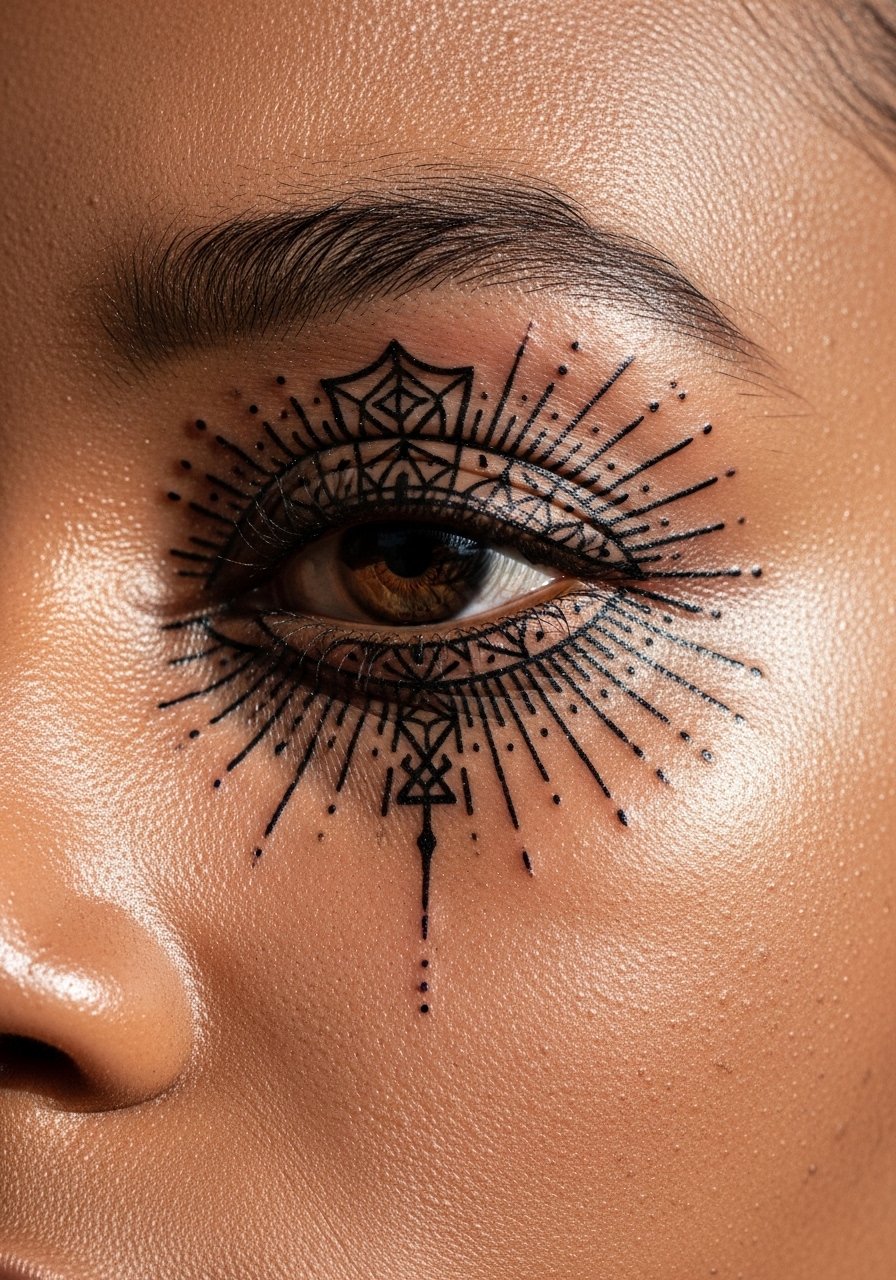
1. Fine Line Third Eye Between the Brows
I’ve seen small third eye pieces placed between the brows age unevenly when the linework is too tight. For this spot ask for slightly bolder lineweight than you think you need, and request crisp negative-space highlights so the iris reads after one to two years. Fair warning, forehead skin stretches with expressions, so expect a touch-up around year three if you live in a sunny climate. Session feels like a 4 out of 10 on most scales, brief but precise. A common mistake is asking for hairline-thin lines that blur into a single hairline within 18 months. Hand the artist a clear stencil showing the exact distance from eyebrow hairs.
2. Dotwork Third Eye on the Temple
Pain warning, the temple is sensitive and the session feels quicker than intense. Dotwork stippling around a tiny third eye gives depth without heavy saturation, and it softens as it heals so the dots should be spaced with breathing room. Tell your artist you want dot spacing no denser than a pencil eraser head across the shaded areas to avoid early merging. This placement shows well with tucked hair or short bangs, so consider a wide-brim hat for sun protection while it heals. Blowout risk is moderate because skin there is thin. Expect a touch-up at year two for contrast.
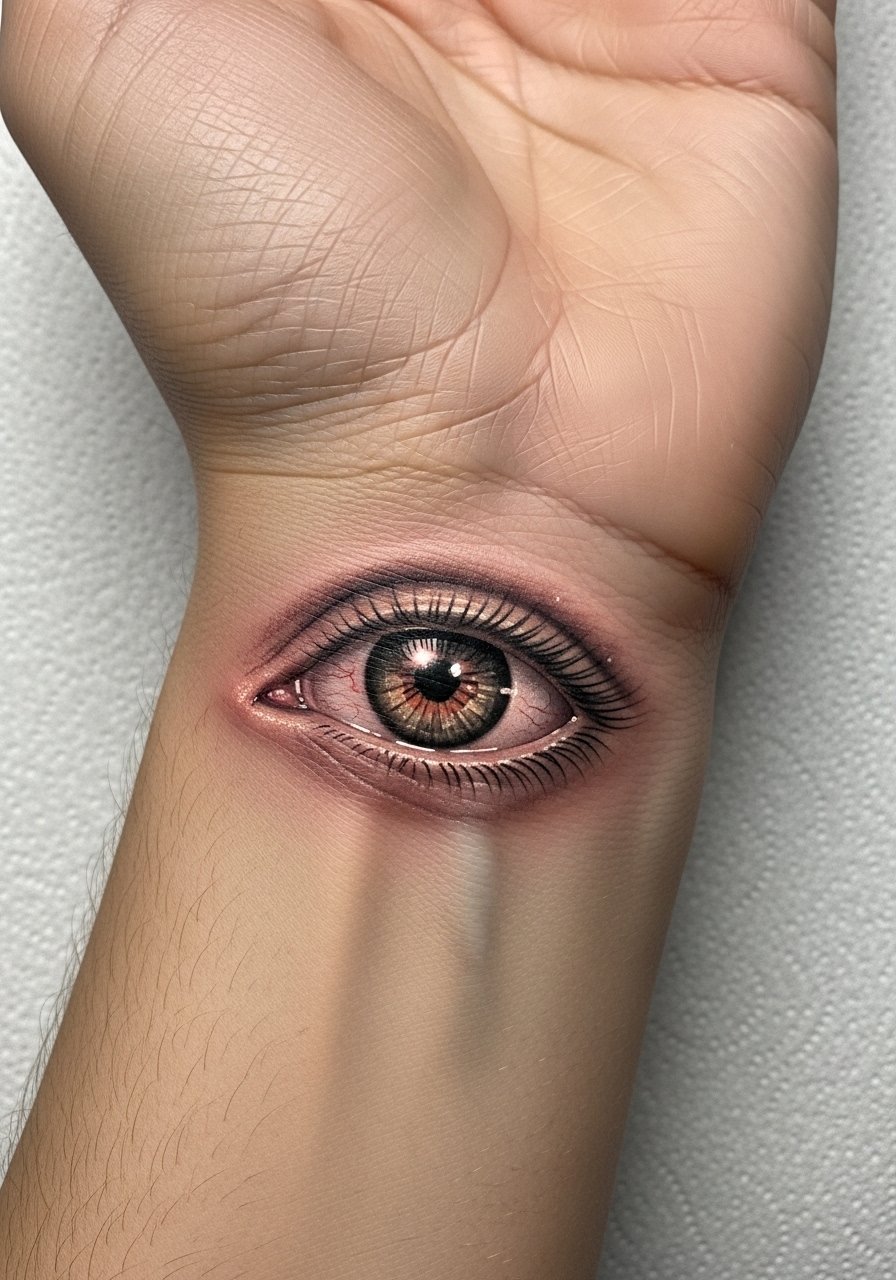
3. Micro-Realism Third Eye on the Inner Wrist
Most micro-realism watches best on flat planes, and the inner wrist offers that while staying visible. Aging note, wrist pieces are exposed to sun and washing, so crisp micro shading will soften at six months and need a color boost by year three. The session feels like a 3 out of 10 and usually wraps in under an hour. The common mistake is placing too near the fold by the thumb where movement blurs detail. For showing it off, pair with a thin chain bracelet so the eye sits between jewelry without crowding. Ask your artist for a slightly raised outer line so the pupil reads after a year.
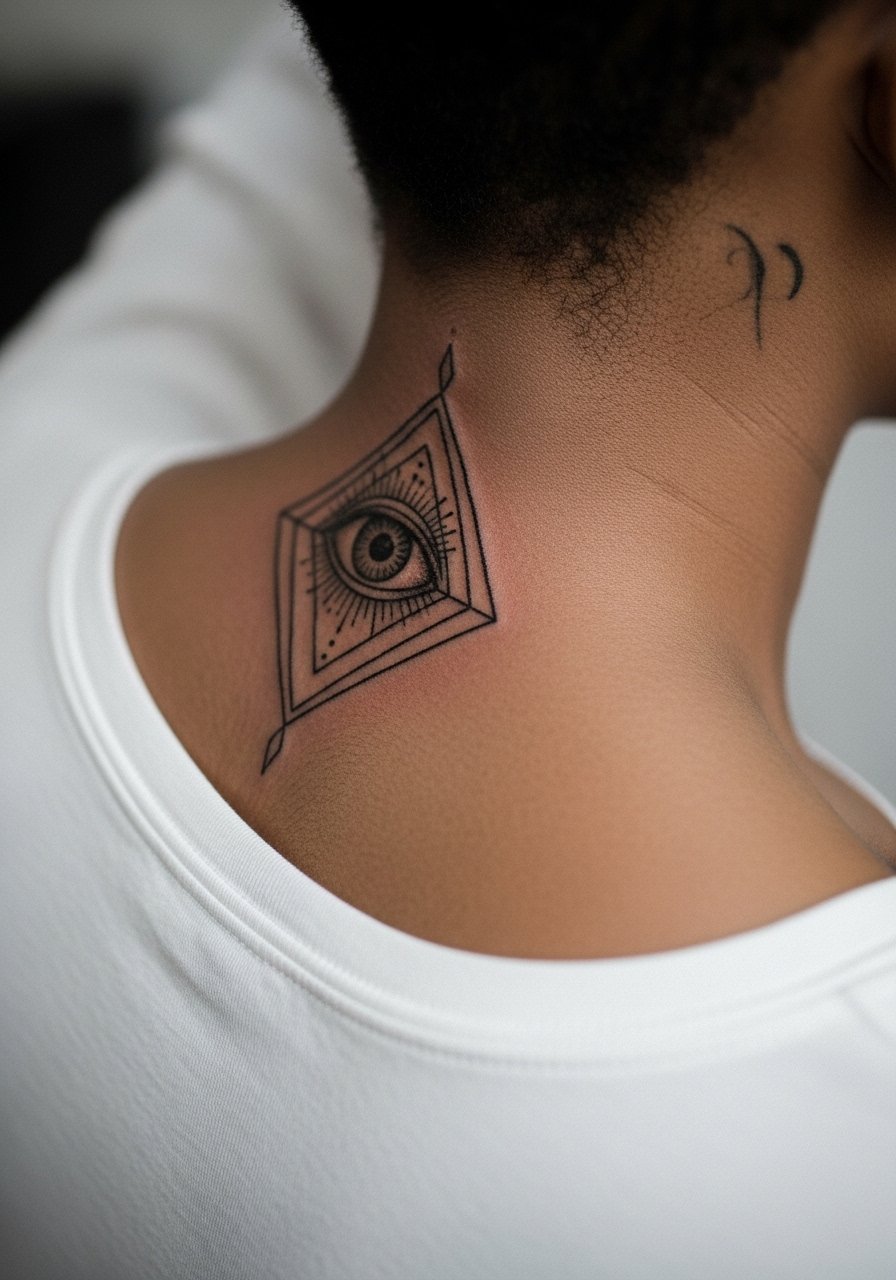
4. Geometric Third Eye on the Nape of the Neck
Aging and placement note, the nape shifts with neck movement but holds geometric work well if you allow spacing between lines. Visual impact is strong when the lines have consistent spacing and your stylist can align the central axis with the spine. For the session wear a wide-neck shirt you can pull aside so the artist has clear access. The pain registers around a 5 out of 10 for most people. Artists split on whether very tight geometry is worth it here. One camp says close spacing reads crisp, the other warns it will blur; ask the artist which side they have the most healed examples for.
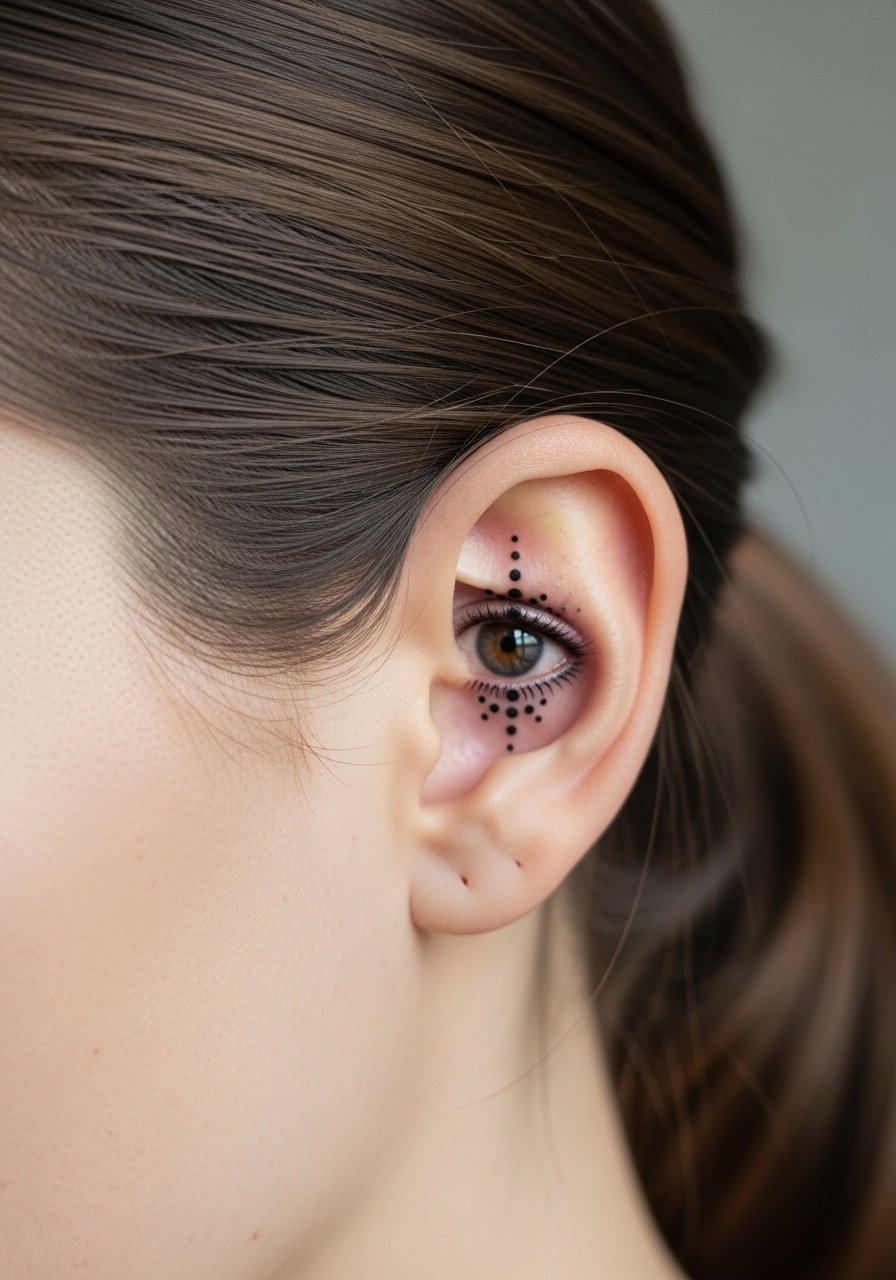
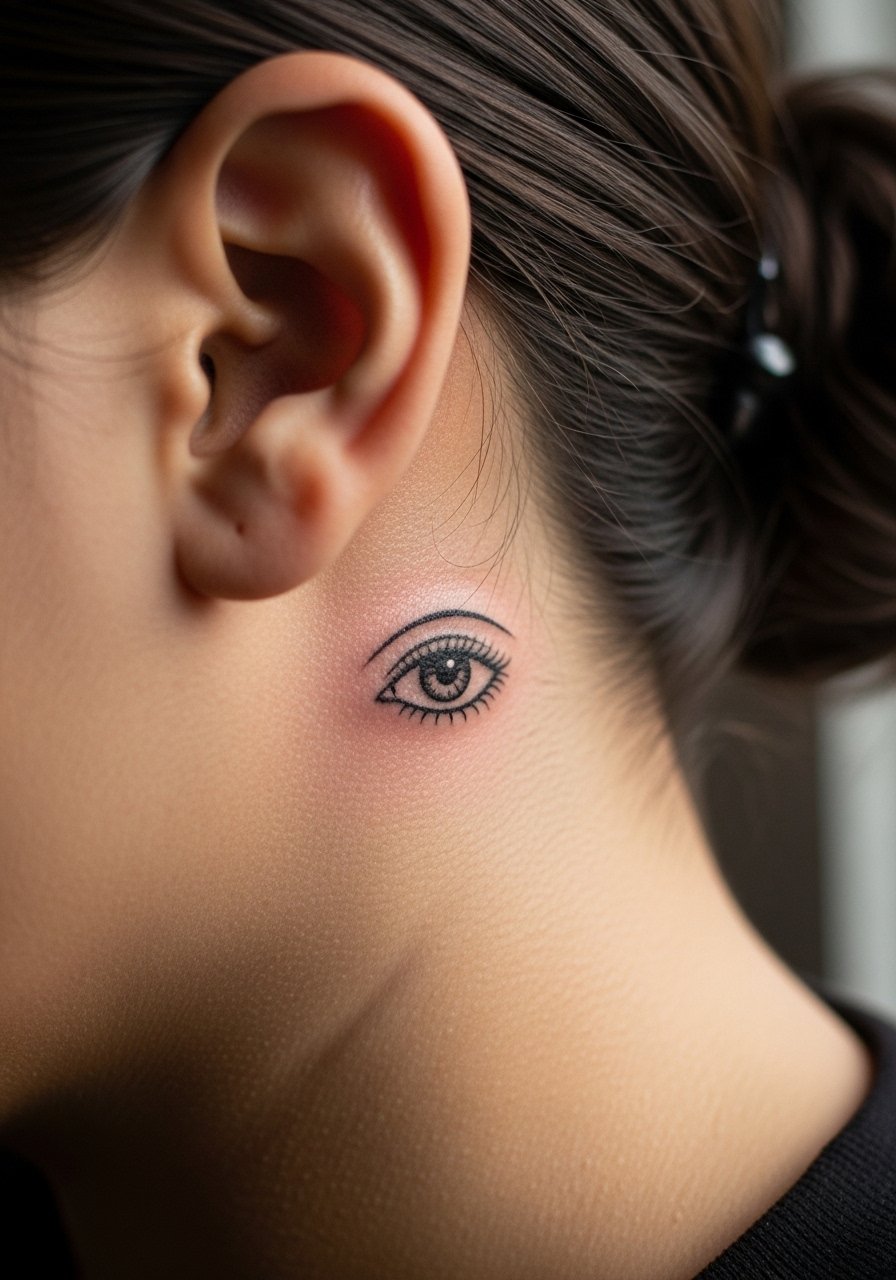
5. Minimalist Third Eye on the Behind-the-Ear Area
Personal observation lead, this tiny placement reads like a secret talisman and ages surprisingly well because hair and natural shadow protect lines. Still, behind-the-ear pieces require a precise stencil and the artist should center it below the hairline on the neck. For booking, note that sessions are quick but require the artist to work around hair, so expect a short break to reposition. If you want to keep it subtle for work, this is a solid choice. Add a small note in consultation that you want no filled black pupil, only linework and a single dot highlight, which holds better on this thin skin.
6. Single-Line Script Eye on the Side of the Forehead
Consultation lead, tell your artist you prefer a script-style iris with a single continuous line and small script accents that echo handwriting. Visual impact from a distance is low, but the close-up texture is rich. Forehead work sees a lot of expression movement so avoid hairline script that can blur into a faint mark. The session time is short, around 30 to 45 minutes, and pain is mild. For the appointment wear a loose button-down shirt so the artist can adjust collar placement without tugging. A common mistake is asking for mirrored symmetry when the skin’s natural asymmetry will make perfect mirroring look staged.
Studio Day Picks
The forehead, temple, wrist, nape, and behind-the-ear pieces above have different access and healing needs, so these items smooth the session and the first week.
-
Stencil transfer paper kit. Lets you preview exact placement on curved areas like the temple and nape so you can refine spacing before the needle touches skin.
-
Topical numbing cream. Applied 30 to 45 minutes before can make tender forehead and behind-the-ear spots more manageable without affecting line clarity.
-
Thin protective film roll. Keeps wrist and nape tattoos clean during the first week when friction and clothing contact are highest.
-
Fragrance-free gentle body wash. Cleans delicate fine line work without stripping the initial scab layer on visible placements.
-
Aquaphor healing ointment. Thin layers in the first three days lock in moisture for micro linework, especially on exposed skin like the forehead and wrist.
7. Traditional Blackwork Third Eye on the Brow Ridge
Controversy lead, blackwork here splits artists into two camps. One group argues heavy saturation creates a bold talisman that holds color decades. The other says dense black ages into a flat blob on expression-prone skin. The middle path is crisp outlines with controlled fill so the eye keeps definition without over-saturating. This placement is a 4 out of 10 on pain and takes about 45 to 75 minutes depending on fill. A real mistake is asking for vintage heavy fill without accounting for forehead movement. In consultation be explicit about whether you want solid block black or negative-space detailing.
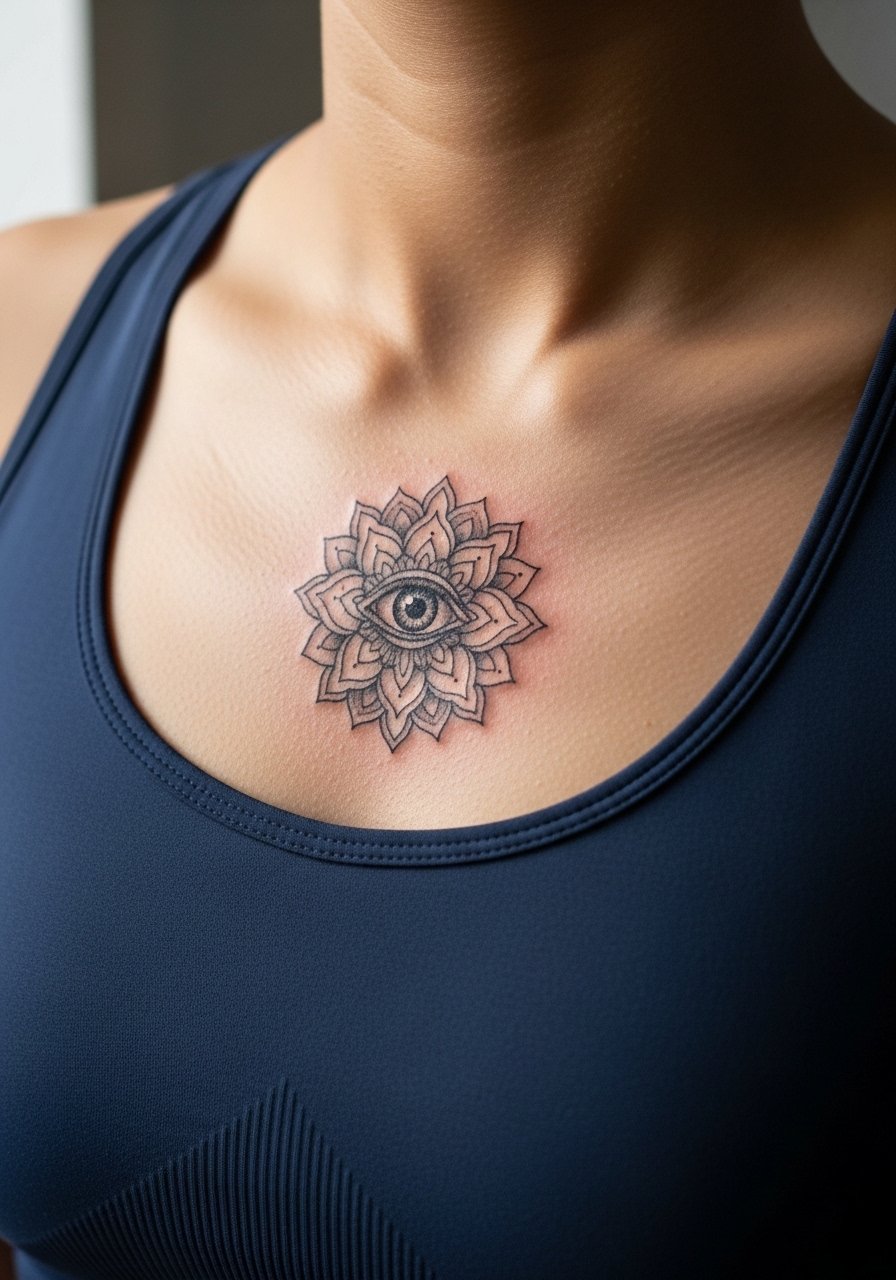
8. Micro-Mandala Third Eye on the Center of the Sternum
Pain warning, sternum work is among the more sensitive placements and the session feels intense in bursts. The mandala framing a micro third eye reads beautifully under low-cut or open-neck clothing. For the appointment wear a fitted sports bra or bandeau so the artist can access the area without tugging. Pair this design with open-back midi dresses for evenings when you want the pattern visible. Expect fading in dense dot work by year two if spacing is too tight. Ask for larger negative-space rings within the mandala so the pattern keeps its shape over time.
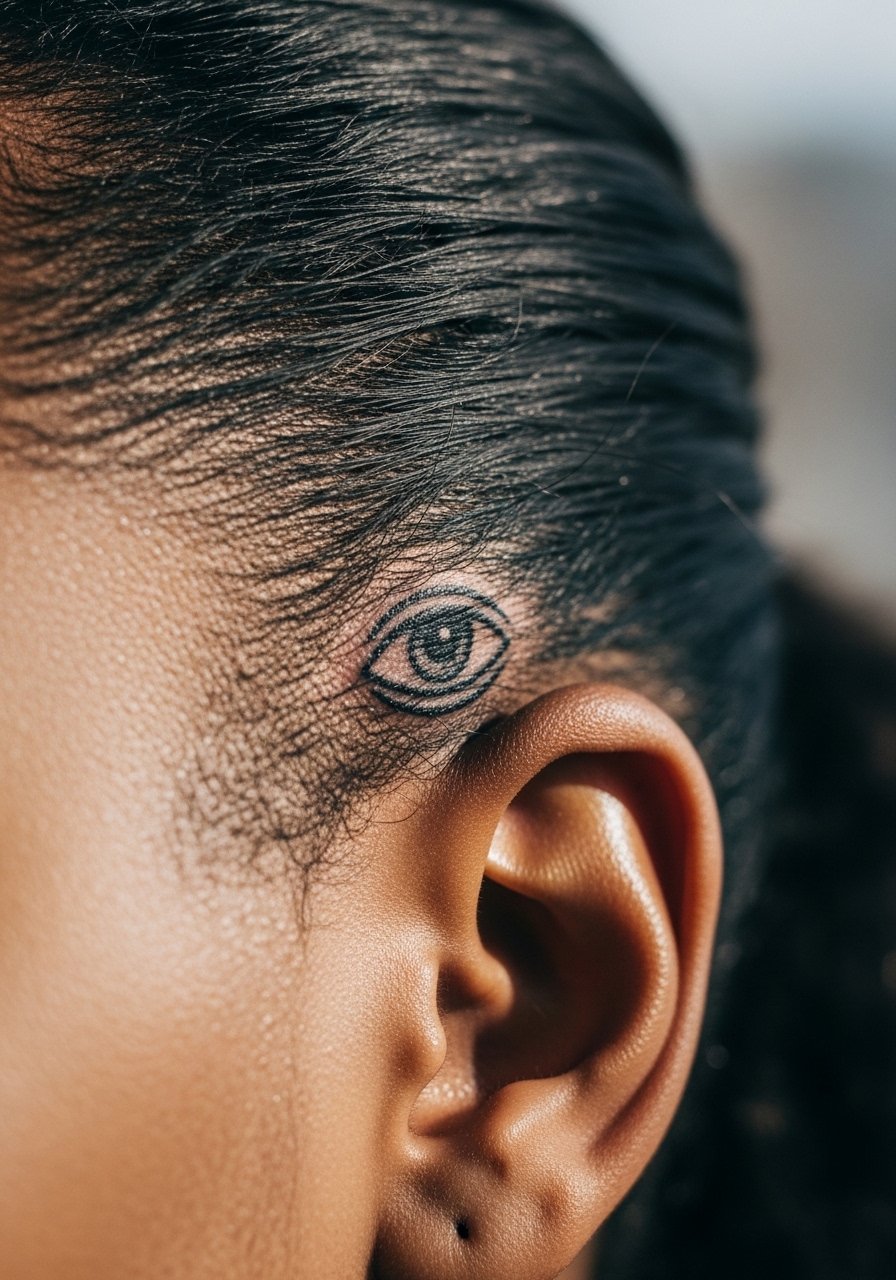
9. Tiny Geometric Third Eye Behind the Ear Lobe Area
Visual impact lead, tucked placements like this are intimate and reward small geometry with long-term legibility. The session is quick and pain is typically mild. The main aging issue is hairline dot work merging if the pattern is overly dense. Ask for clearer spacing between concentric triangles and request a stencil hold check before the artist inks. For work-conscious people this remains discreet. A common mistake is asking for perfectly mirrored geometry on both sides; slight asymmetry reads more natural with head shape.
10. Scripted Third Eye Above the Eyebrow Arch
Mistake lead, placing script too close to eyebrow hairs usually means early softening as hairs and skin move. If you want a scripted iris above the arch, keep lettering minimal and the main strokes slightly thicker so the script reads after a year. The area feels like a 4 out of 10 in pain and most sessions finish in under an hour. For showing it off, a pair of neat, minimal hoops or a thin chain pendant above the browline complements without stealing focus. Tell your artist how close you want the design to sit to natural brow hairs.
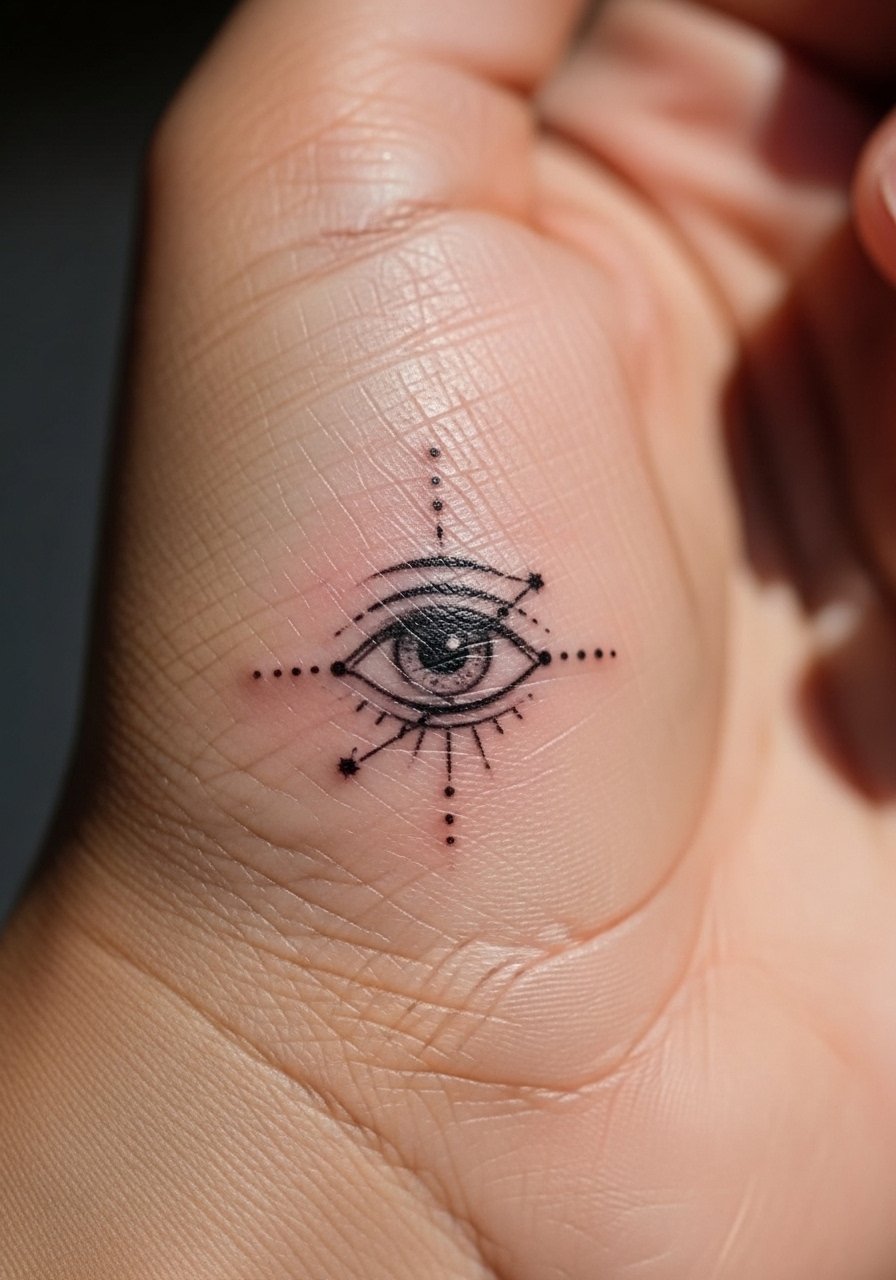
11. Constellation Eye on the Side of the Hand
Personal observation, hand placements read bold at first and then soften faster than arm work because of washing and friction. The hand is a high-touch zone, so plan for annual touch-ups if you want the pupil details tight. Session pain sits around 6 out of 10 for many people. A common mistake is requesting ultra-fine pupils within crowded dots. For the appointment avoid heavy lotion on day of and, for aesthetic balance, pair with a minimalist ring set that frames the design without covering it.
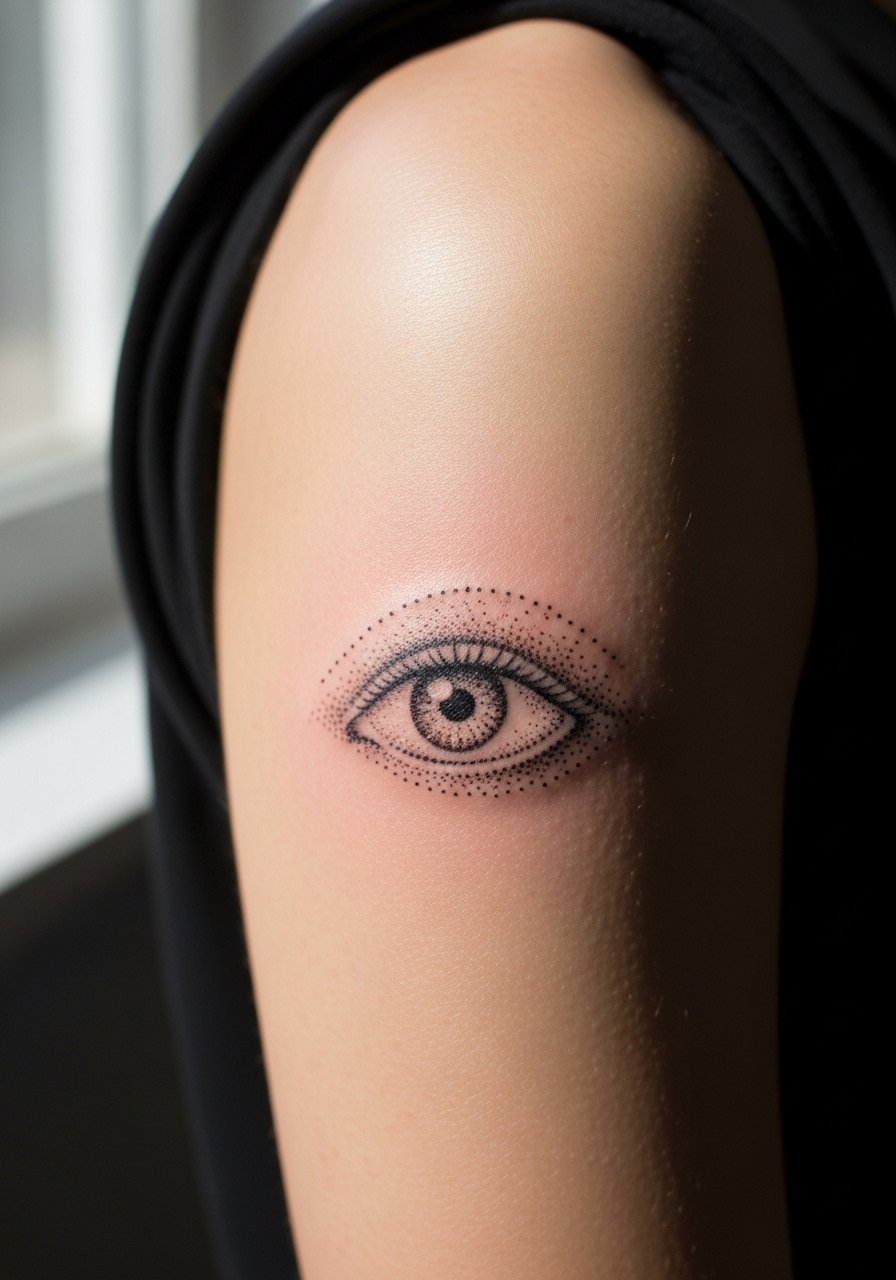
12. Stippled Third Eye on the Upper Arm Near the Shoulder
Aging and healing lead, upper-arm placements have the advantage of slower fading because they see less abrasion and sun. Stipple shading around a third eye yields soft texture that keeps character as it ages. Session time is moderate, usually one to two hours depending on detail, with pain around 4 out of 10. A mistake is compressing dot work into a tiny circle. Ask for a slightly expanded outer ring to preserve negative space. For showing this off, rolled-up sleeves and short-sleeve linen shirts work best, so consider a short-sleeve linen shirt.
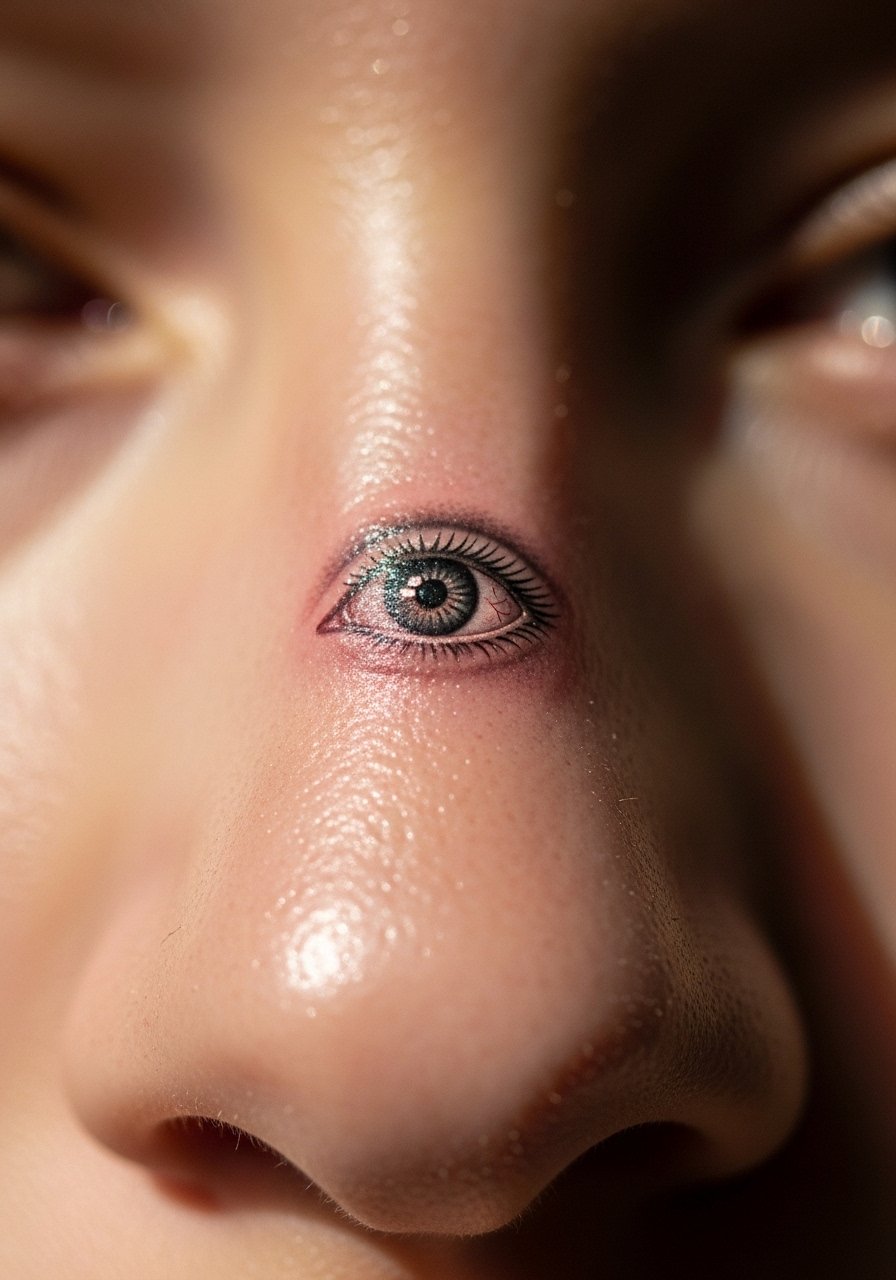
13. Micro-Realism Pupil on the Bridge of the Nose
Pain warning, the bridge is surprisingly sharp feeling but the session is brief. Micro-realism here depends on stable negative space and a crisp central pupil. Expect subtle softening by six months because of skin oils, and plan a light touch-up at year two. A real mistake is asking for under-scale lashes or tiny highlights that vanish as the skin settles. For career-sensitive placements this is noticeable, so weigh visibility accordingly. Ask the artist to show healed portfolio shots of similar bridge placements during consultation.
14. Blackwork Eyelid Motif Near the Temple
Consultation lead, blackwork patterns that sit near the outer eye need careful spacing to avoid migration into lash areas. The session can be twitchy because the face moves with expression, so expect short rests. Bold outlines age sturdily but heavy fill near thin facial skin can flatten detail. Ask for structured outlines with minimal dense fill and request aftercare toenail tips for sleeping positions to avoid rubbing. Pair this with a wide-brim hat while healing to reduce direct sun on facial skin.
15. Tiny Mandorla Eye on the Collarbone
Styling lead, collarbone placement frames jewelry well and pairs naturally with low-neck outfits. The area ages gently if the lines have enough separation from the bone impression. For the session wear a v-neck blouse you can pull aside to expose the collarbone without tugging. Most people rate collarbone sessions a 5 out of 10 on pain. A common mistake is pushing the design too close to the clavicle ridge where movement distorts symmetry. Ask for slight spacing and a softened outer contour.

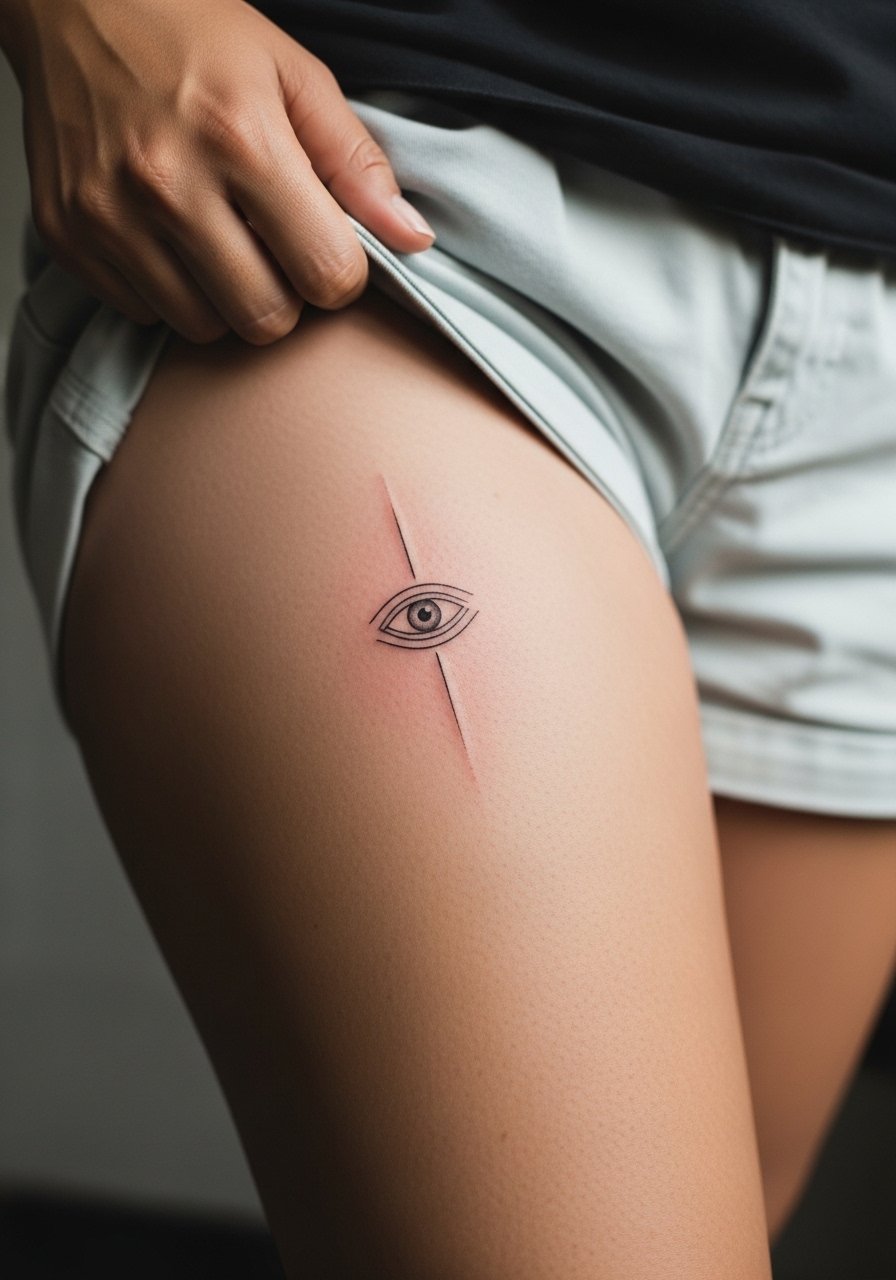
16. Tiny Geometric Eye on the Inner Thigh
Personal observation, inner thigh pieces heal well when you avoid friction from tight clothing during the first month. The session is a 6 out of 10 in pain and may need a second short sitting for crisp dot work. For the appointment wear shorts you can shift, like high-waisted shorts, so the artist can access the area without pressure. The common mistake is choosing dense micro detail that blurs with movement. Plan for spacing and ask for larger dots in the central rings so the design reads clearly as it settles.
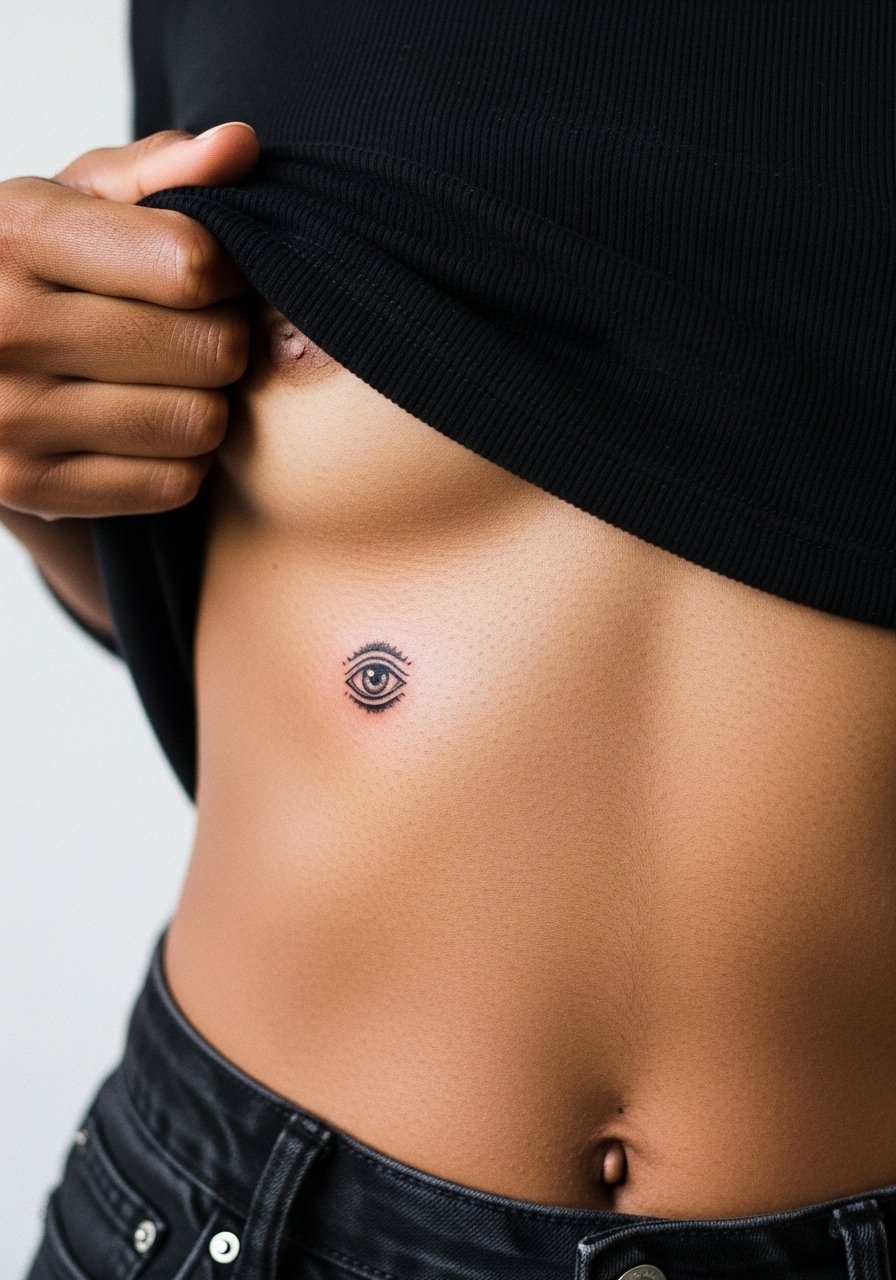
17. Tiny Watercolor Eye Above the Ribcage
Controversy lead, watercolor effects on ribs split opinions. One camp says watercolor looks ethereal and softens beautifully there. The other warns that the ribs move and the bleeding of watercolor can become indistinct over time. If you prefer painterly color, instruct the artist to anchor the design with a thin outline to maintain contrast. Pain here tends to be higher, usually 7 out of 10, and sessions can be longer. Wear a cropped top you can lift slightly for access. Expect touch-ups within two to three years if you want the color vivid.
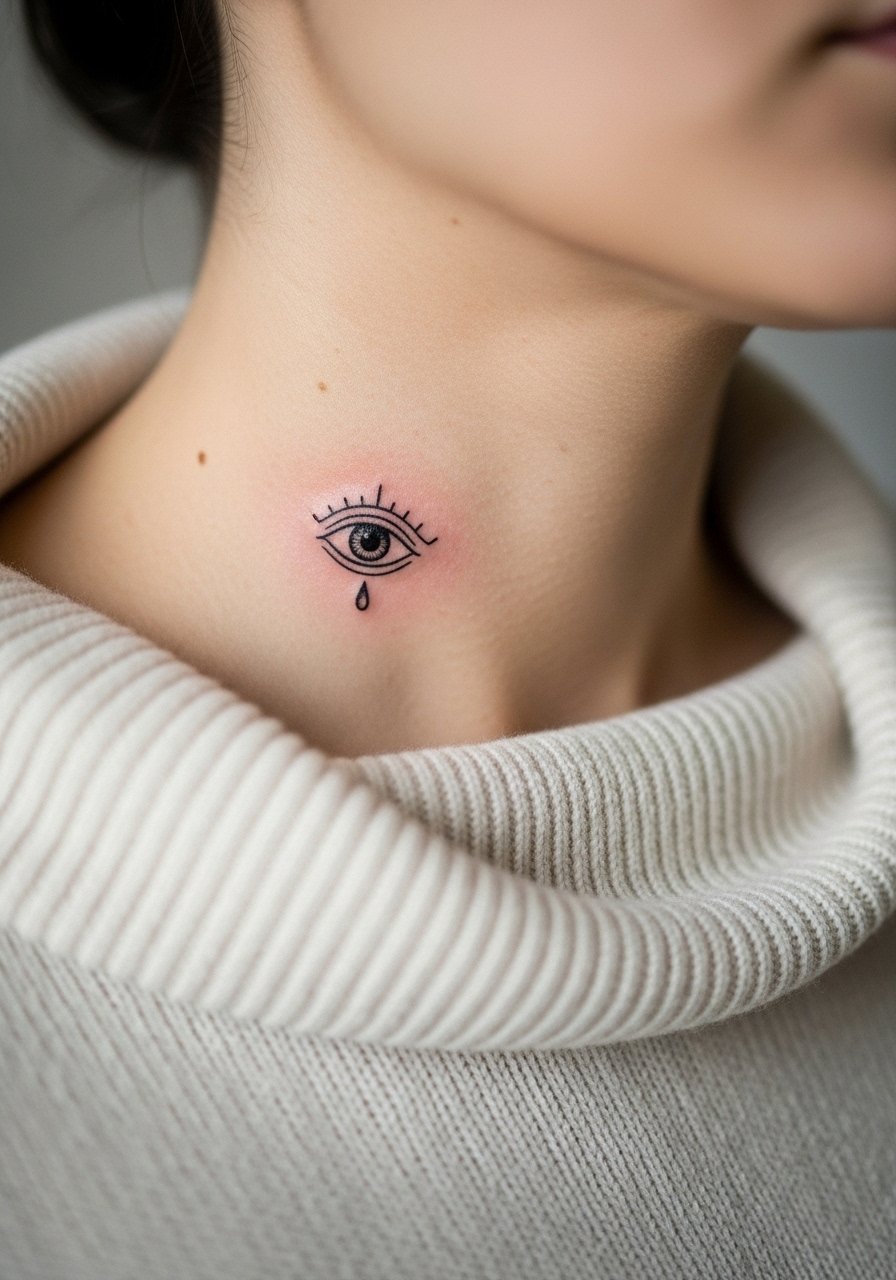
18. Tiny Scripted Eye on the Side of the Neck
Styling lead, side-neck placements read strong with collar framing and require a careful discussion about visibility. The session is a 5 out of 10 in pain and healing depends on clothing rubbing. For the appointment wear a wide-neck sweater you can pull aside. Professionals often debate neck visibility, so consider career implications before booking. Ask the artist about healed neck examples and where they place the base of the design relative to the collarbone.
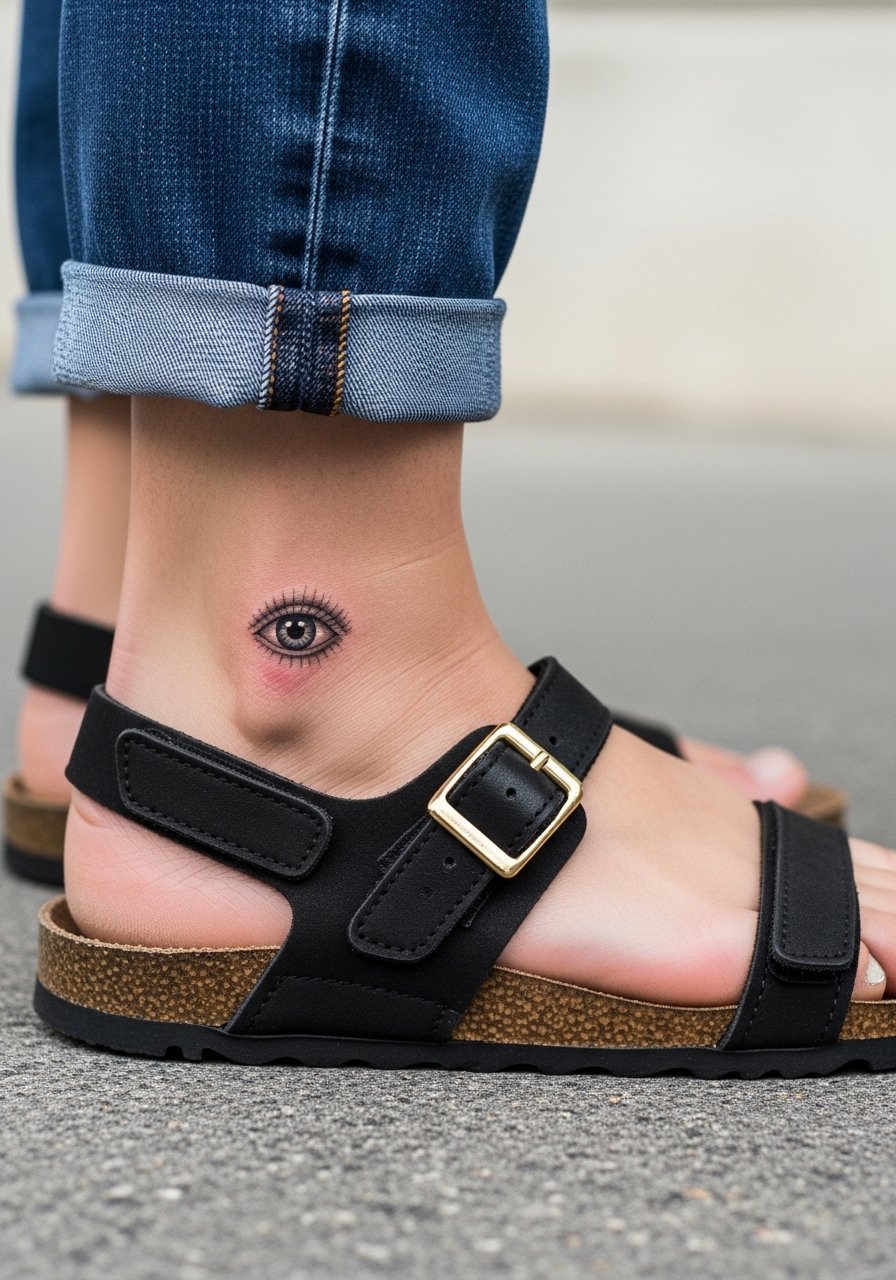
19. Micro-Realism Eye on the Ankle
Aging and healing lead, ankle work endures fairly well if you avoid constant friction from shoes and socks while it scabs. Session pain is mild to moderate depending on proximity to bone. For the appointment wear sandals or pants you can roll up to avoid pressure during healing. A common mistake is placing the main detail directly over the ankle bone where movement distorts the image. Ask the artist to center the pupil on softer flesh slightly above the bone.
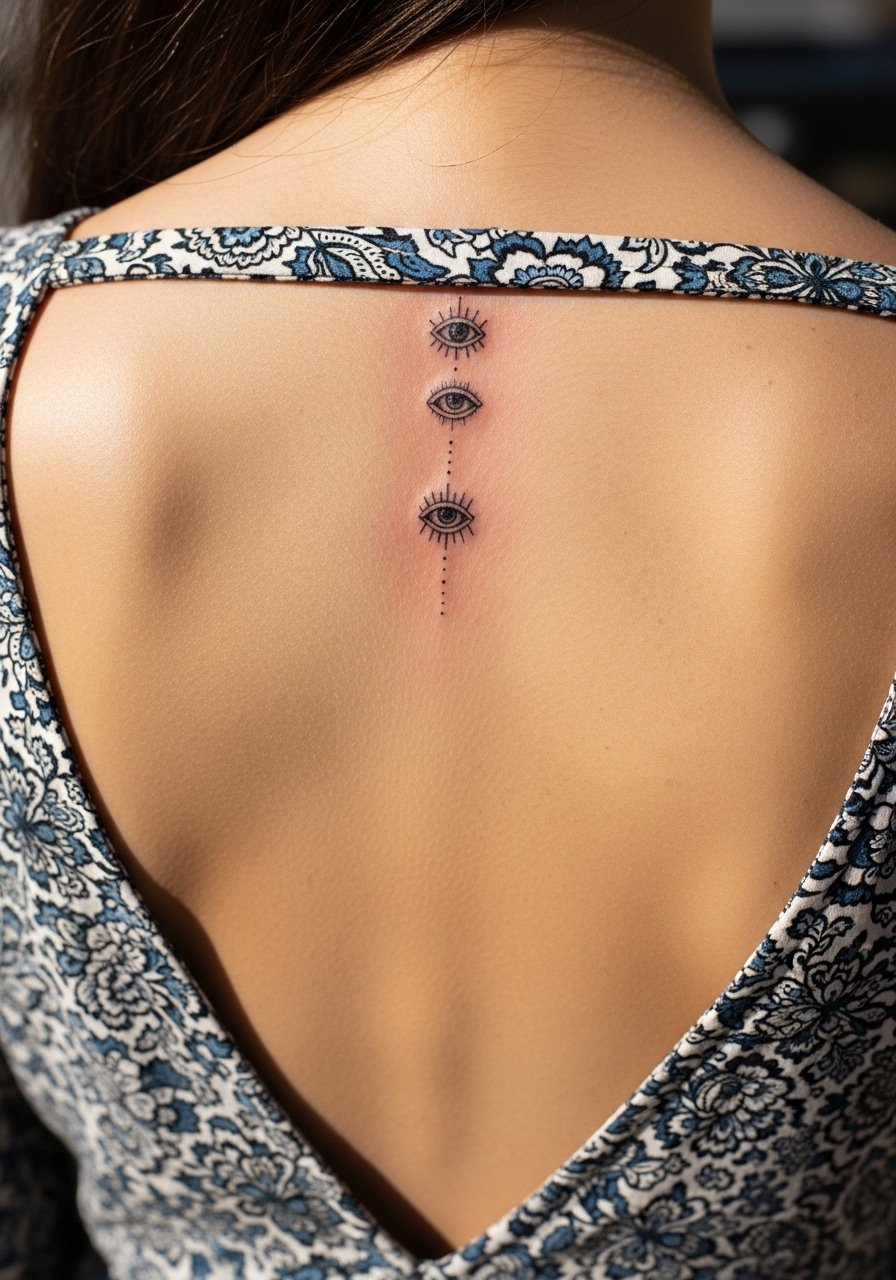
20. Tiny Third Eye on the Upper Back Along the Spine
Visual impact lead, a vertical stack of tiny third eyes aligned along the upper spine reads like a subtle talisman under open-back tops. The spine area holds linework well if lines avoid the vertebra ridge, and the session can be split into two short sittings. For showing it off choose open-back pieces like halter tops or an open-back midi dress. Expect less sun exposure here so the design keeps contrast longer, but plan a touch-up around year four for fine details.
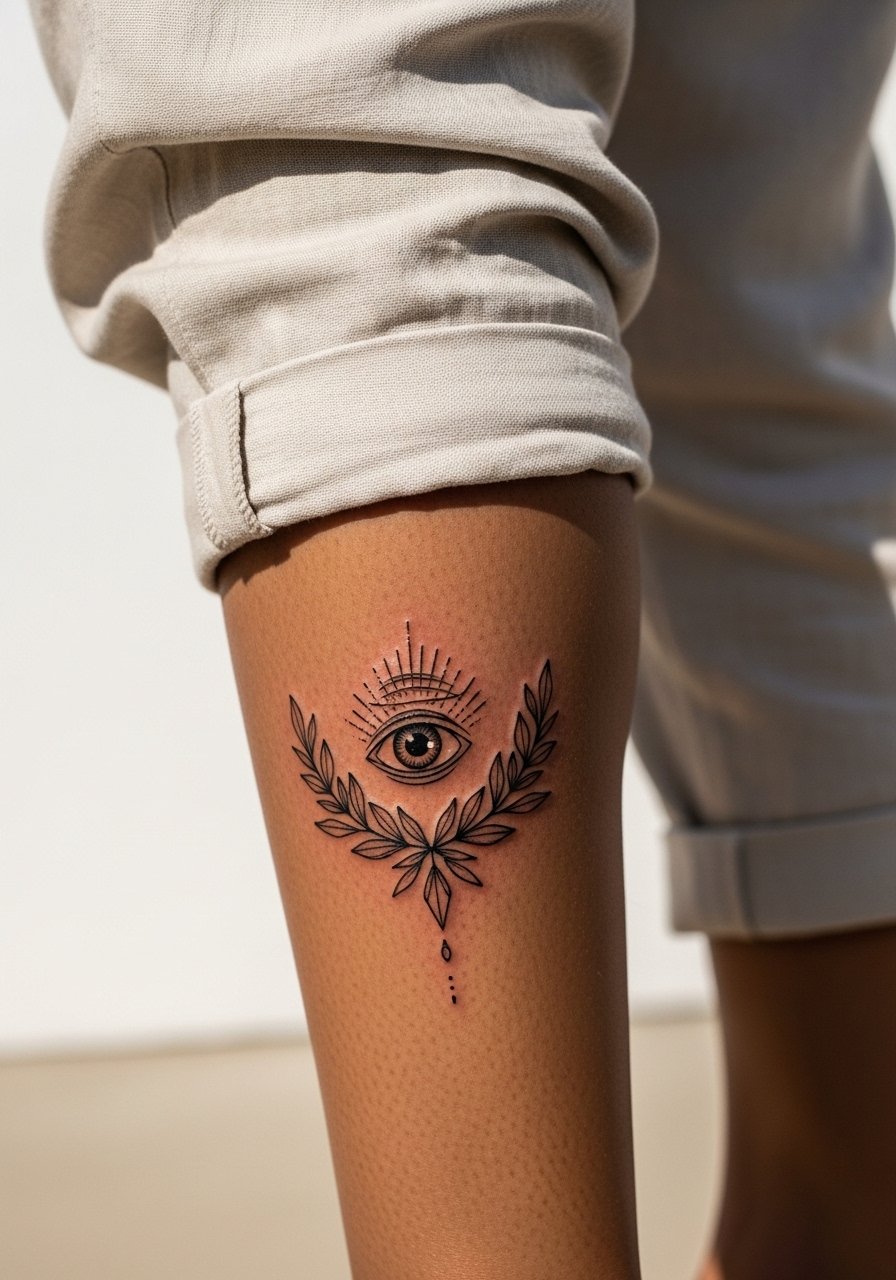
21. Botanical Framed Third Eye on the Calf
Mistake lead, calf work is forgiving for micro detail but suffers if the design is too compressed. The calf gives a flat canvas and typically feels like a 4 out of 10 in pain with one to two hours of work. Ask for botanical spacing that leaves breathing room around the third eye so the leaves age separately from the pupil. For session comfort wear loose drawstring linen pants you can roll up without pressure on the healing area. This placement looks great in cropped trousers and sandals.
Frequently Asked Questions
Q: Will a micro third eye on the forehead affect my job prospects?
A: It depends on your industry and local norms. Face and forehead placements are still visible and can affect first impressions in conservative workplaces. If you are unsure, consider a placement that can be covered by hair or choose a tucked location like behind the ear.
Q: How often do micro fine line third eyes need touch-ups?
A: For most fine line micro third eyes expect a small touch-up within two to three years, especially on high-wear areas like the wrist, hand, and forehead. Less exposed areas like upper arm or spine often go longer without work.
Q: Are there wardrobe tips that help show off a sternum or collarbone third eye safely?
A: Yes. For sternum work choose fitted bandeau tops or open-back dresses that reveal only the tattoo zone. For collarbone pieces a v-neck blouse sits naturally and frames the design without tugging at the area.
Q: Is a tiny third eye more likely to blow out on the temple or the inner wrist?
A: The inner wrist gets more friction and washing so it has a higher risk of early softening. The temple is thinner but benefits from hair coverage. Both can hold well if the artist spaces lines correctly and avoids hairline-thin strokes.
Q: Should I ask for a stencil hold before the artist starts?
A: Yes. Ask for the stencil to be applied and photographed while you hold the position that matches your typical expression. Tiny placements on the face and temple especially benefit from a stencil check so you can confirm spacing before the needle touches skin.
Q: Are there cultural concerns with third eye imagery I should consider?
A: Some third eye motifs connect to spiritual traditions. If you plan a design that ties to specific cultural or religious symbols, mention that to your artist and consider slight variations or personalized elements rather than direct replicas. This respects origin while keeping the piece personal.
