
The pieces that still look intentional at year five are rarely the ones everyone double-taps on at year zero. Neo traditional work pairs old-school boldness with modern color and flow, and the choices you make now about placement, spacing, and wardrobe change how those pieces read in real life. Read these ideas with an eye toward how they heal, how they age, and what to tell your artist in the consult.
1. Neo Traditional Floral on Inner Forearm

I have seen this exact placement age nicely when the stems are given room and the petals get bold outlines. Fair warning, the inner forearm is forgiving on pain but shows sun fading faster than covered areas. Tell your artist to use slightly heavier linework around petal edges and keep color blocks large enough to hold saturation at year three. A common mistake is asking for tiny petals with tight detail. Expect a two- to three-hour session for a medium piece. For showing it off, rolled-up sleeves work best paired with rolled+linen+shirt or a simple racerback+tank+top+womens.
2. Brother-Sister Matching Anchor Wrists

When siblings choose mirrored anchors on the outer wrists, the symmetry reads well in casual photos and when hands are in motion. Pain is low but friction from bracelets and watch straps can rub the outer wrist in the first week. Ask for slightly thicker anchors with a solid fill to avoid patchy fading. The session is usually under an hour each for small pieces. A common mistake is getting ultra-fine linework for a wrist design. If you plan to show these, consider a stacked bracelet look like a thin+chain+bracelet to frame the anchor without covering it.
3. Paired Neo Traditional Wolves on Upper Arms

There is something about bold outlines and saturated fills that read from across a room, which is why neo traditional wolves work on upper arms. The upper arm tolerates a lot of saturation and it heals predictably. Tell your artist you want defined jawline linework and broad shadow blocks rather than tiny fur strokes. Most sessions take two to three hours for medium pieces. The biggest mistake is packing in too many small fur details that blur together as the ink settles. For the session wear, pull on a loose button-down shirt you can slide aside.
4. Matching Sibling Compass on Sternum

This placement feels intimate and deliberate, so expect a higher pain score and a longer session. Sternum work demands careful spacing because the skin pulls differently across the breastbone. Artists are split on sizing. One camp favors tight detail at the original scale and the other camp says the sternum needs breathing room to avoid merging lines. Ask where your artist stands before booking. A common mistake is asking for tiny compass points too near the center. Plan for a two- to four-hour session. Wear a fitted sports bra or a top you can loosen for access like a sports+bra+seamless on session day.
5. Linked Chain Design Across Collarbones

The collarbone offers elegant framing when the chain links are spaced to follow bone contours. Pain is moderate at the collarbone, especially near the bone edges. Tell the artist to map links so they sit parallel to the bone rather than trying to force a straight line across curved anatomy. Tiny gaps that look fine at first can close with movement, so avoid overly intricate link detail. Sessions are usually one to two hours for matching sibling pieces. Pair with open-neck tops like a wide+neck+blouse to let the chain read during evenings out.
6. Neo Traditional Crescent Moon Behind Ear

Behind-the-ear placements read as hidden details that peek out with hair tucked. This spot is sensitive and requires a small, steady hand for clean curves. Artists debate whether the thin skin there holds crisp micro-curves long term. Be explicit in consultation about line weight and discuss touch-up timelines. The session itself is short but slightly more uncomfortable than the forearm. For the appointment, let your stylist pin your hair back or wear a low bun so the artist has clear access. A tiny hair+clips+set kept in your bag helps.
Studio Day Picks
Those upper chest, collarbone, and wrist pieces above require different prep and first-week care than larger back pieces, so a small kit smooths the session and the first days of healing.
-
Stencil transfer paper kit. Lets you see how the placement sits on skin before the needle touches down, which helps with collarbone and wrist mapping.
-
Topical numbing cream. Applied per instructions about 45 minutes before can reduce edge pain for sternum or behind-ear work without affecting detail.
-
Thin protective film roll. Useful for wrist and forearm pieces that see frequent washing and rubbing in week one.
-
Fragrance-free gentle body wash. Cleans healing skin without stripping the ink, helpful for larger arm sessions in the ideas above.
-
Aquaphor healing ointment. A thin layer applied in the first days keeps linework from drying into flakes, which matters for fine floral edges and neo traditional solid fills.
7. Matching Neo Traditional Phoenix on Back Shoulders

Back-shoulder pieces look dramatic when wings flow with the shoulder blade. Pain is moderate and sessions are longer for clean symmetry. When you sit for a matching phoenix, ask the artist to start the wings with bold anchors and then layer color blocks. The typical mistake is insisting on micro-detail in the feathers that fades into muddiness as the skin moves. Expect multiple hours split across sessions for large symmetric work. For session wear, put on a loose+button+down so you can remove or adjust it without rubbing the area.
8. Small Neo Traditional Sun and Moon on Ankles

Ankle tattoos are compact and show well with shoes or sandals. The downside is friction from socks and shoes in the first week. Tell your artist you want solid fill and slightly thicker outlines to resist patchy fading. A common mistake is expecting micro shading in a shoe-prone area. Session times are brief, often under an hour per ankle. For showing them off, sandals and cropped pants work well with a minimalist+ankle+bracelet.
9. Paired Script with Birth Coordinates on Ribs

The ribs are a high-pain, high-impact canvas that requires careful spacing. Artists split into two camps on fine script here. One camp says the stretch and movement blur fine line ribs within two years. The other camp says proper needle depth and spacing keep script legible for years. Ask your artist about their rib experience and touch-up policy. A common mistake is asking for very small script near the sternum. Expect a longer session and plan for breaks. Wear a cropped top you can lift easily like a cropped+athletic+top on the day.
10. Neo Traditional Heart Lock on Chest Near Sternum
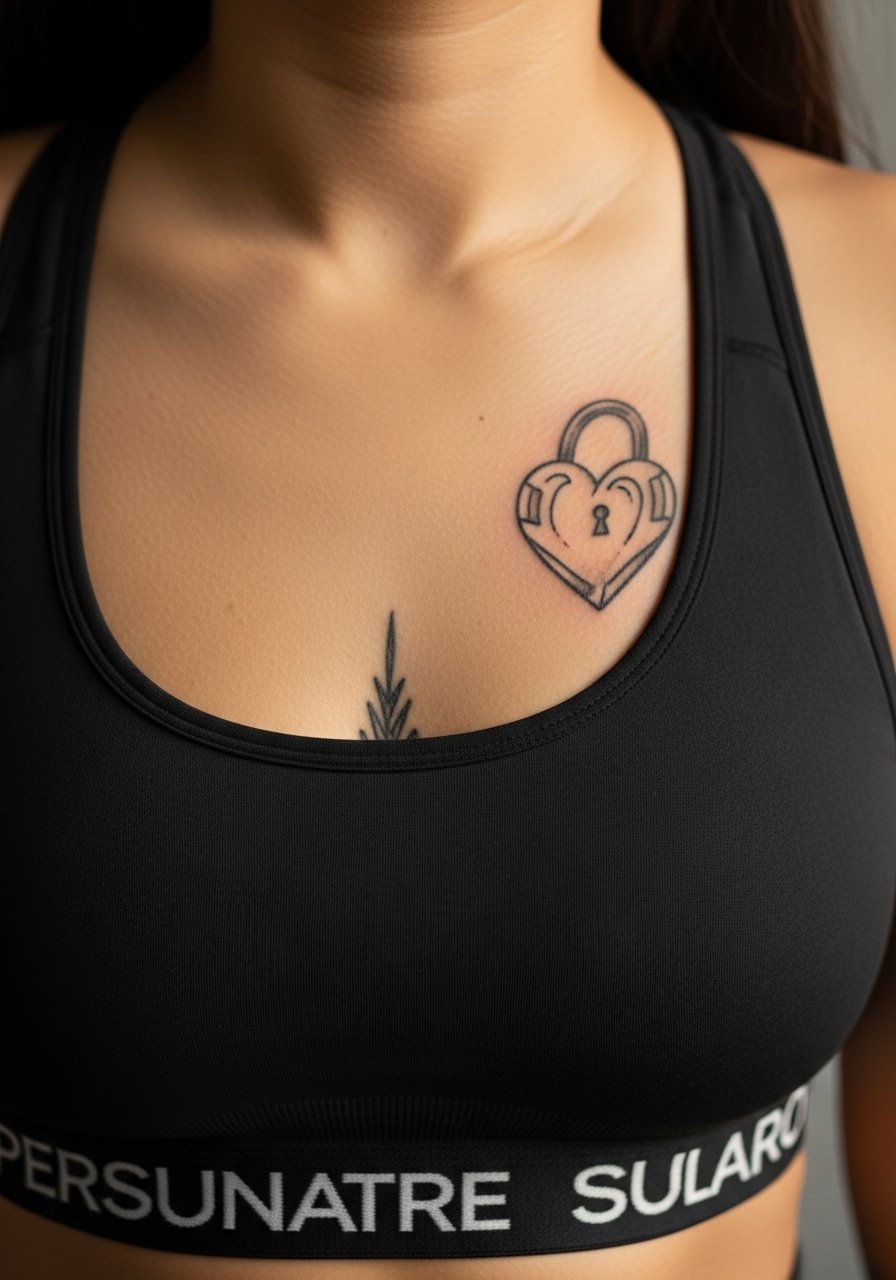
Chest pieces read as bold statements when placed near the sternum. The skin across the chest can alter how tight linework settles. If you want crisp bars and keyholes, ask for slightly heavier outlines and larger negative spaces. The common mistake is cramming in ornate filigree at a small scale. Plan for a two-hour session for a medium piece. For showing it off, open-neck dresses pair nicely with a thin+chain+pendant+necklace that sits above the lock.
11. Neo Traditional Anchor and Rose on Thigh
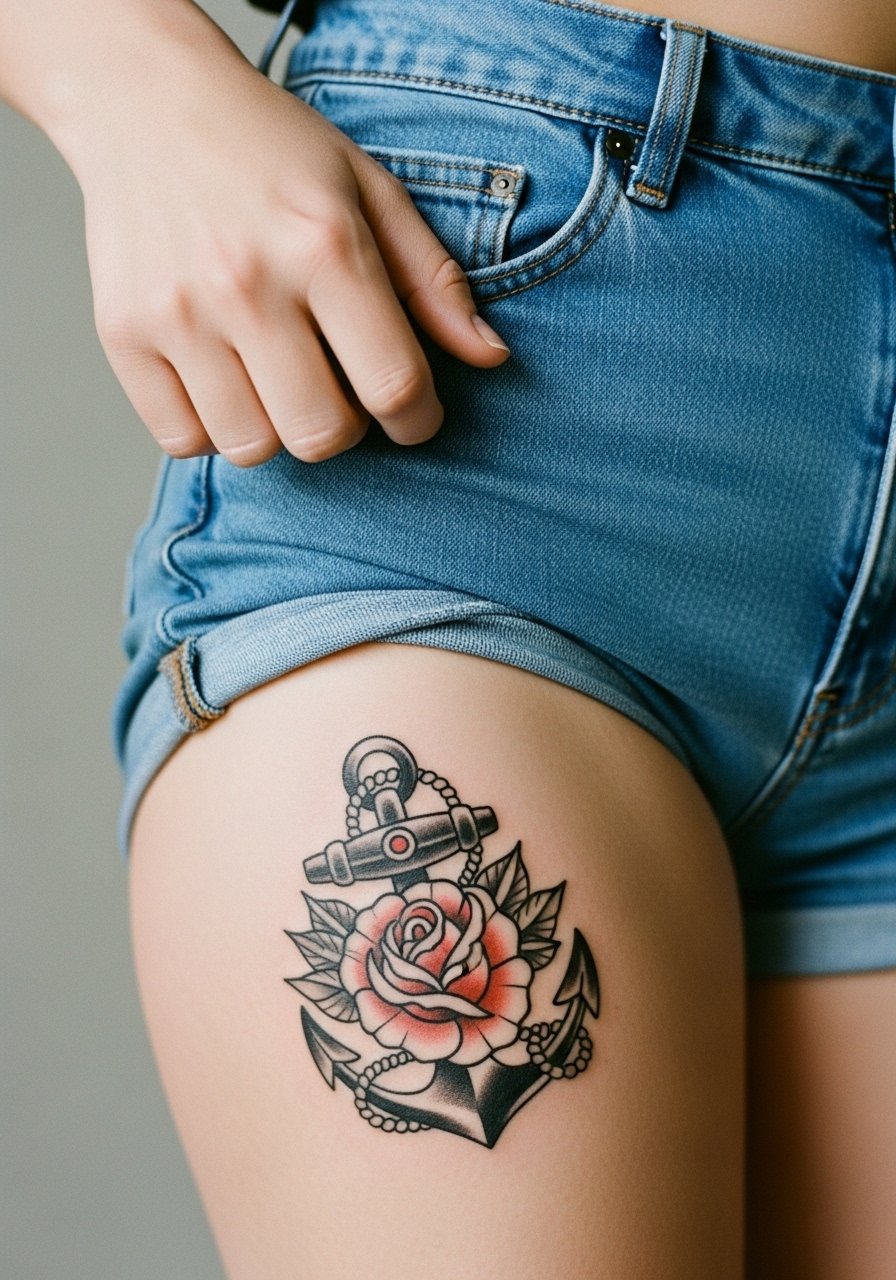
Thigh pieces allow for saturated color and larger compositions that age well. Pain is moderate and sessions can be long if you go full leg. Tell the artist to use bold color blocks and to keep the rose petals larger to maintain saturation. A common mistake is asking for very small fine shading that disappears over time. Sessions can be two to four hours depending on scale. For the appointment, wear high-waisted bottoms you can lower slightly like high+waisted+denim.
12. Mini Neo Traditional Portraits on Upper Arm
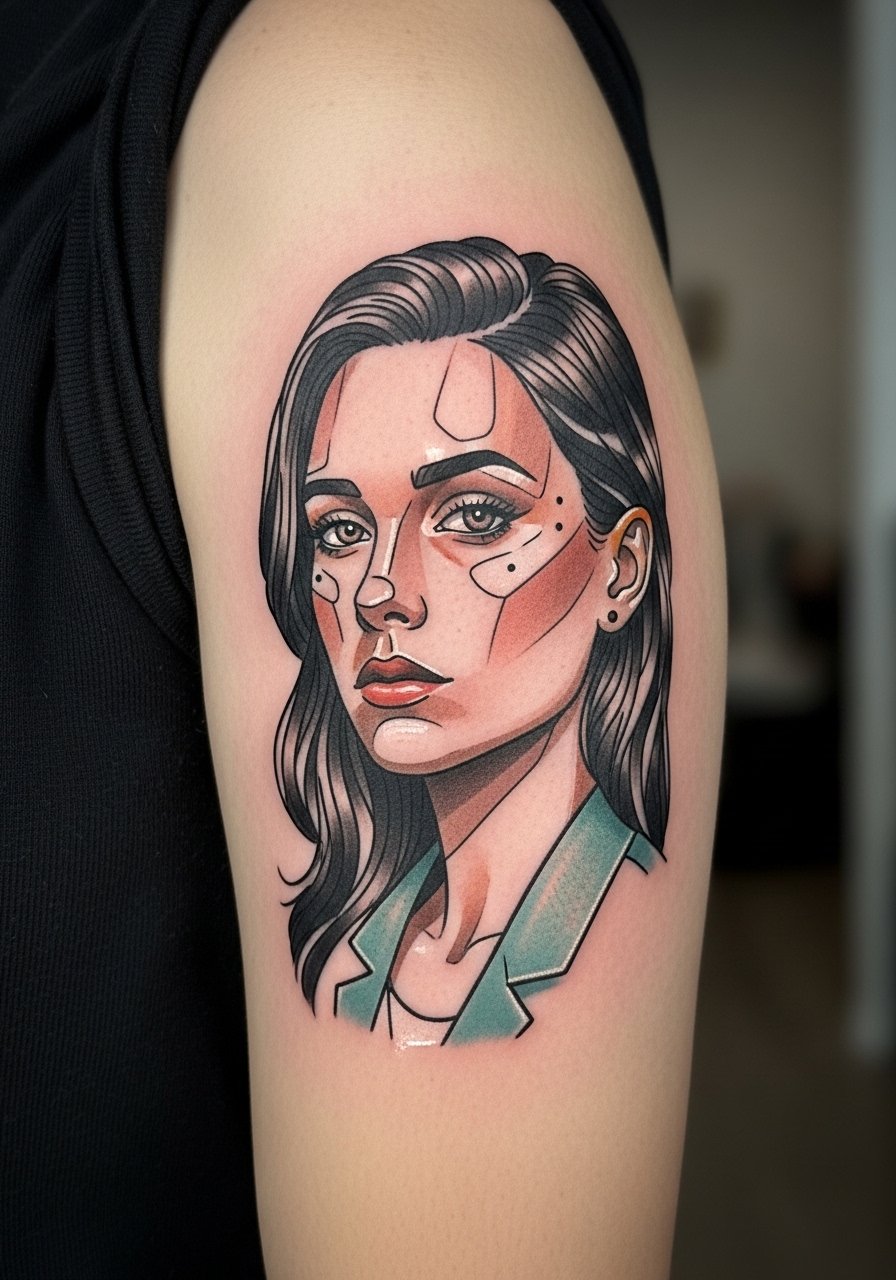
Mini portraits in neo traditional style depend on simple shapes and strong silhouettes rather than tiny facial detail. If you want likeness that lasts, ask the artist to focus on bold features and contrast rather than hairline textures. Small portraits on the upper arm sit in a low-to-moderate pain zone and usually take one to two hours. The mistake is requesting ultra-fine facial detail at a small scale. For pairing, short sleeves and rolled cuffs show off placement with a short+sleeve+linen+shirt.
13. Sibling Puzzle Pieces on Fingers

Finger tattoos are delicate and the skin there moves a lot. Expect touch-ups sooner than with arm work. Tell your artist you want solid, simplified shapes with robust outlines to resist blowout. The most common mistake is overcomplicating tiny finger art with shading that disappears. Sessions are quick but the upkeep is higher. For subtle accessorizing pair with a thin minimalist+ring+set that frames but does not press on the tattoo.
14. Neo Traditional Compass Spine Line

Spine pieces have a dramatic vertical presence and can hold bold linework when sized correctly. Pain varies depending on how close to the bone the needle travels. Ask for stronger anchors in the design and avoid tiny concentric details that blur over time. Expect longer sessions and the need for steady breathing. A common mistake is scaling down a design meant for a wider canvas. Pair with open-back summer tops like a backless+dress to show the line when healed.
15. Neo Traditional Floral Anklet Band
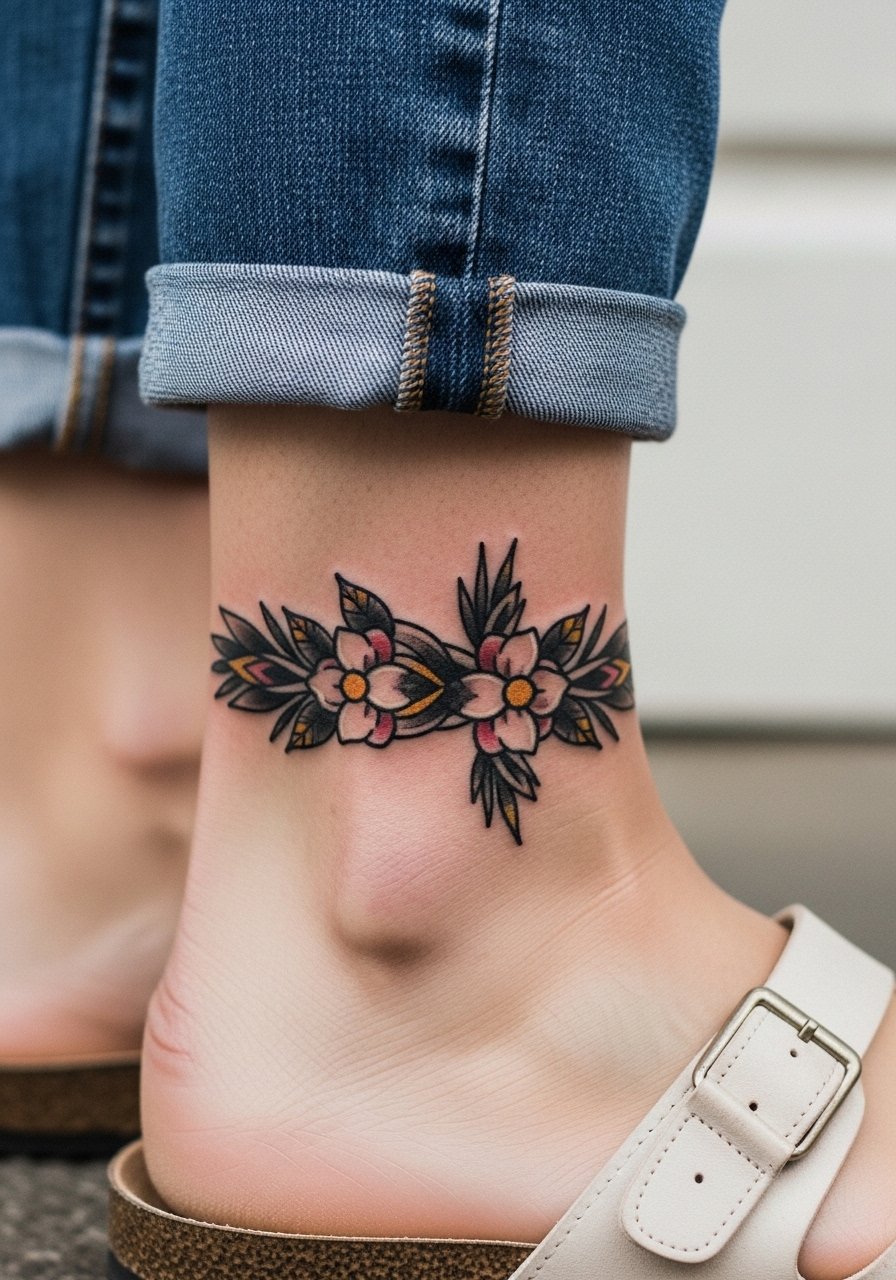
An anklet band reads as jewelry and benefits from bold outlines to stand up to shoe friction. The ankle can sting during the session but heals predictably. Tell your artist to keep petal shapes broader and to avoid micro-dot shading inside tiny leaves. Mistakes include trying to replicate fine lace detail that fades in months. Sessions are under an hour for small bands. Style it with sandals and a minimalist+ankle+bracelet for evenings out.
16. Sibling-Matched Neo Traditional Swallows on Chest Sides

Swallows on the chest sides work with body contours and look timeless when given ample negative space. Pain is moderate and sessions are shorter for smaller birds. Tell your artist to emphasize wing anchors and to avoid tiny feather detail that blurs. A common mistake is requesting heavily stippled shading at small scale. Sessions typically last one to two hours. Pair with open-neck shirts like a wide+neck+tee to frame the birds.
17. Neo Traditional Hourglass on Inner Bicep

Inner bicep placements hide well and age differently from outer arm pieces because the skin is softer. Pain can be higher and touch-ups are often needed. When asking for an hourglass, request bold silhouettes and larger fill areas instead of tiny sand grains. The mistake is packing too much small-scale detail in a small inner bicep design. Plan for a one- to two-hour session. For the day, wear a loose tank like a racerback+tank+top+womens so the artist can access the area easily.
18. Neo Traditional Floral Sleeve Start on Shoulder Cap

Starting a sleeve at the shoulder cap allows for expansion and layering over years. The shoulder tolerates lots of saturation and the skin holds color well. Tell the artist you want broad petals and consistent saturation for longevity. The common mistake is asking for too many micro elements in the shoulder piece that later compete with adjacent panels. Expect multiple sessions to build a cohesive sleeve. For showing it off, sleeveless tops and a short+sleeve+linen+shirt work well.
19. Neo Traditional Hour Markers on the Wrist

Wrist markers are small but visible, and the area sees a lot of motion. Expect touch-ups earlier than for arm work. Tell the artist to use clean, slightly thicker outlines and to avoid micro-shading. A common mistake is asking for tiny script or thin numerals that blur after frequent hand use. Sessions are short but the maintenance is higher. Pair with a minimalist watch like a minimalist+watch+women to frame the wrist without rubbing the ink.
20. Neo Traditional Mandala on Upper Thigh

Thigh mandalas can accept dense patterning when scaled up. The skin there is stable and accepts saturation well. Tell the artist to keep negative space within the mandala to avoid dense areas that can blend. A mistake is shrinking a mandala designed for a larger surface. Sessions may be multiple hours depending on size. For the session, wear shorts you can lower slightly like high+cut+shorts.
21. Sibling Stars and Constellations on Upper Back

Small stars and constellations across the upper back age predictably because the skin is low-friction and less exposed to sun if you cover it often. Discuss exact spacing with your artist so dot spacing remains readable at year five. The session is short and generally low pain. A common mistake is centering everything exactly on the spine rather than following natural shoulder contours. For showing them, open-back tops and a backless+dress reveal the cluster elegantly.
22. Neo Traditional Knife and Rose on Forearm Ridge

This visual impact piece reads well from a distance when the blade and blossom are bold. The forearm is moderate pain and generally heals well. Ask for broad fill and clean negative space between blade and petals to avoid muddiness. People often ask for intricate handle detail that flattens over time. The session runs around two hours for a medium composition. Style with rolled sleeves and a rolled+linen+shirt to let the forearm be visible without overexposure.
23. Neo Traditional Globe and Banner on Calf
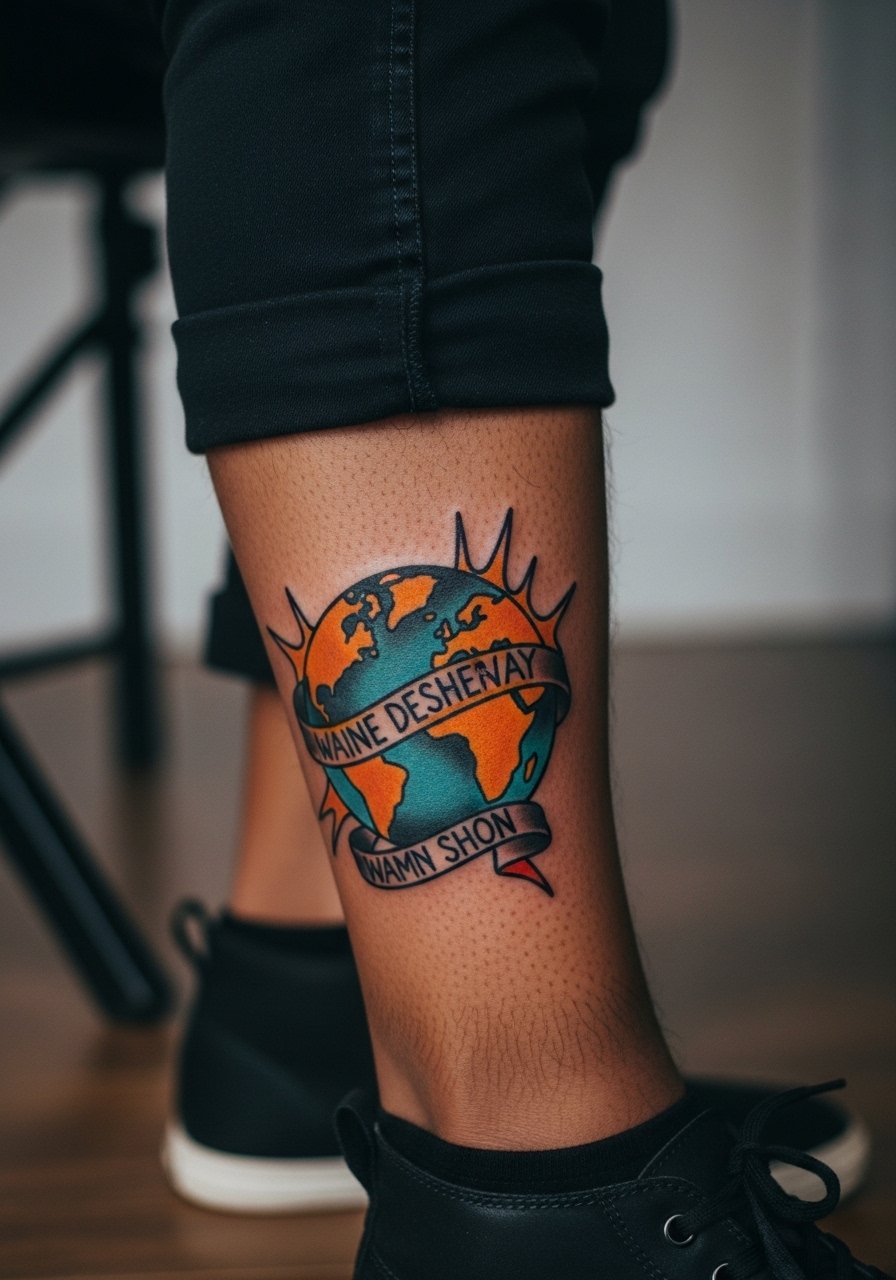
Calf placements give room for elongated designs that age well thanks to thicker skin and less direct abrasion. Tell the artist to use bold continents and strong banner lettering rather than tiny scripts that fill in. The common mistake is squeezing small text into a narrow banner. Sessions can be lengthy for larger globes. For the day, wear pants you can roll up easily like drawstring+linen+pants.
24. Neo Traditional Lion Paw on Shoulder Blade
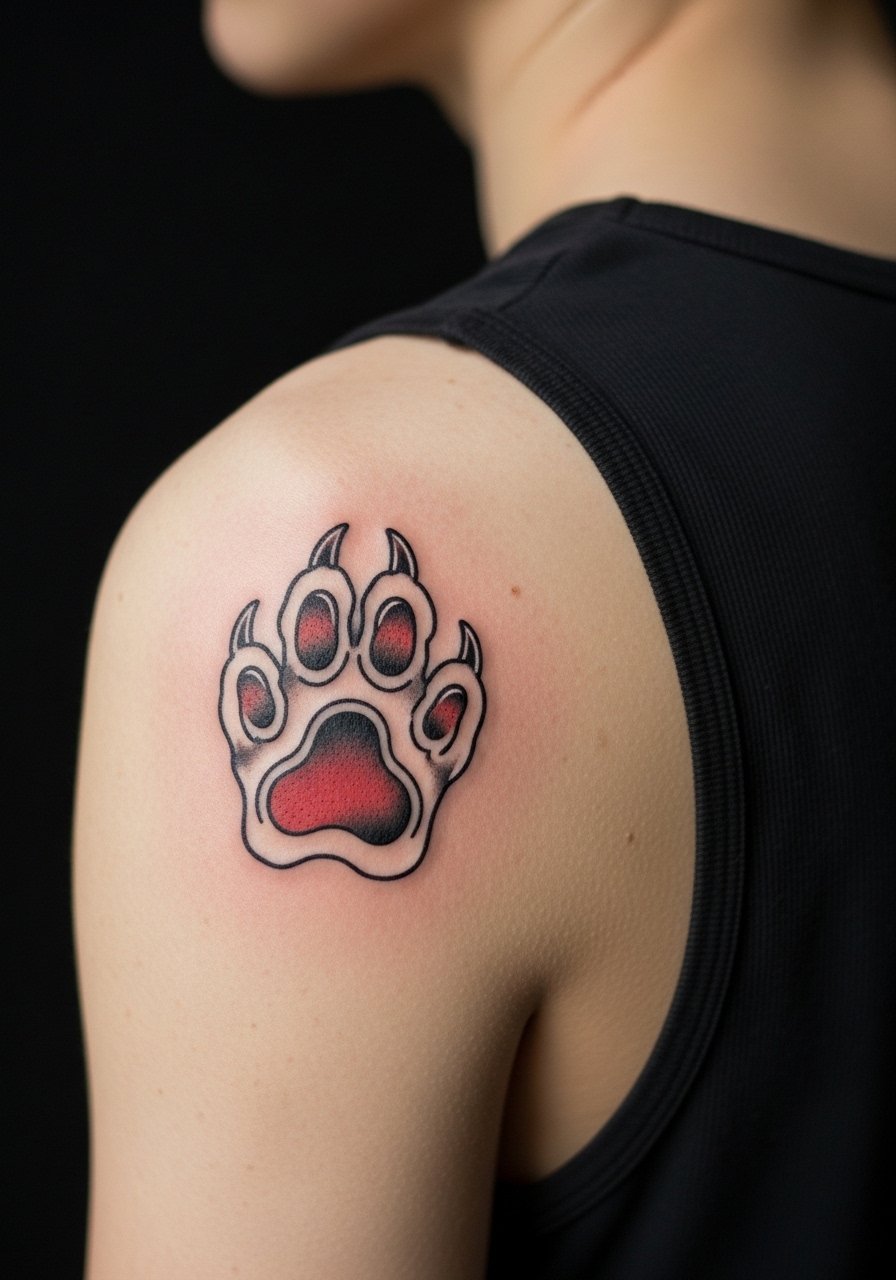
Shoulder blade pieces move elegantly with shoulder motion and tolerate solid saturations. Ask for bold pads and contrast in the paw to maintain silhouette. A mistake is trying to render fur texture at a small scale that later blends. Sessions are moderate in length. Pair with sleeveless layers and a loose+button+down for casual display.
25. Neo Traditional Rose and Dagger on Hip

Hip work can be very personal and the skin in that area moves with clothing and body changes. Pain varies and sessions can be sensitive. Tell the artist to keep the dagger linework bold and to avoid tiny shadow clipping near the hip crease. The common mistake is asking for micro-dot shading that washes out from clothing friction. Wear high-waisted bottoms you can lower easily like high+waisted+denim on session day.
26. Neo Traditional Clock on Outer Thigh

Outer thigh is generous real estate for neo traditional clocks with readable faces and bold hands. The skin accepts saturation and detail when scaled properly. Request clear numerals and strong negative space so the clock reads at a glance. Mistakes include overcomplicated inner cogs that clutter the face. Sessions can run multiple hours. For showing it off later, skirts or shorts pair well with high+waisted+skirt.
27. Neo Traditional Sibling Knot on Nape of Neck
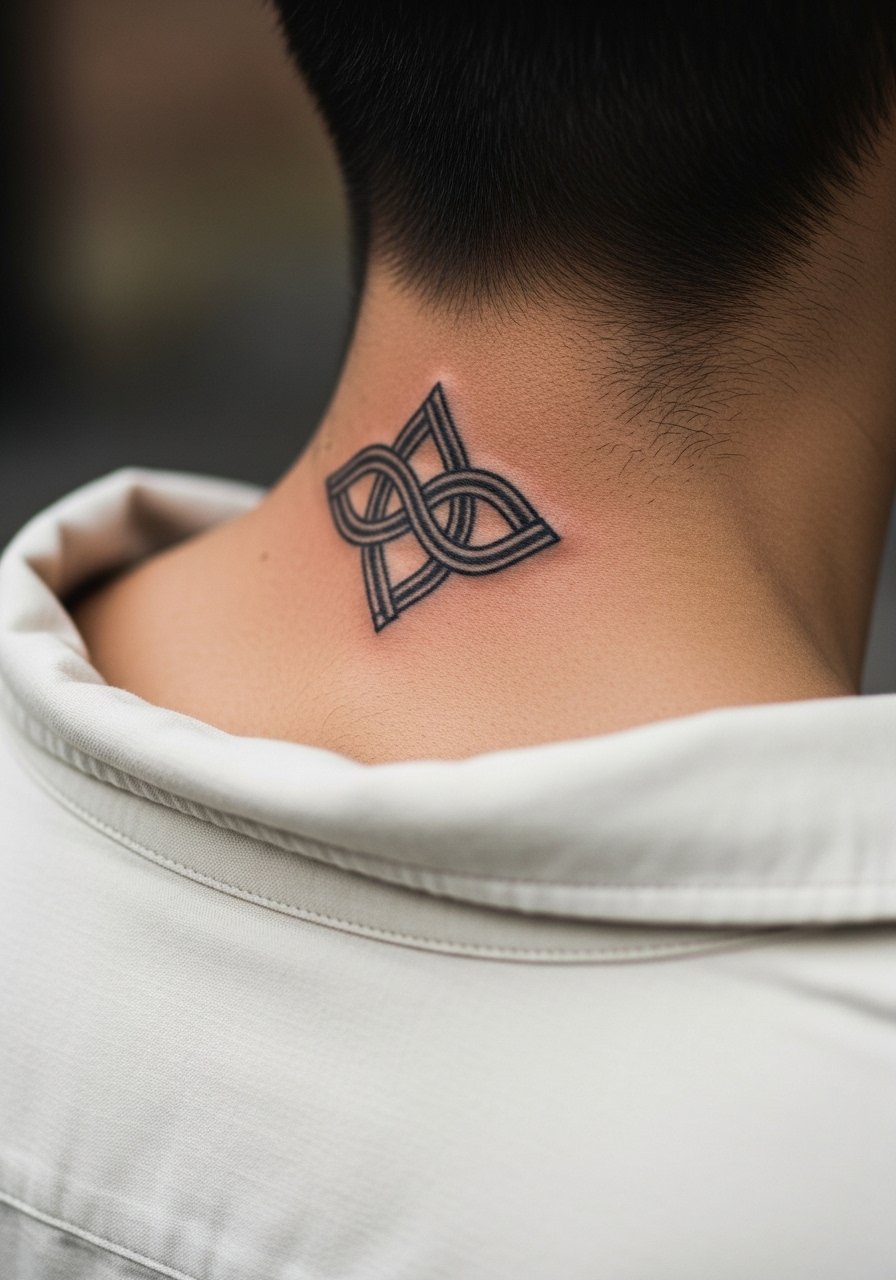
Nape placements are discreet and strike a nice balance between visibility and privacy. The skin there is thin and sensitive so linework should be bold enough to survive motion from hair and collars. A mistake is asking for tiny interlaced detail that blurs when the hair rubs the area. Sessions are brief but possibly more uncomfortable than the forearm. For the appointment, wear a wide-neck shirt you can pull aside like a wide+neck+tee.
Frequently Asked Questions
Q: Will neo traditional color fade faster on forearms than on thighs?
A: In my experience forearms get more sun and washing exposure so color can fade sooner than on thighs. Thigh skin tends to hold saturation longer, especially if you cover it frequently. Use sunscreen long term and plan for occasional touch-ups if the forearm piece is important to you.
Q: How do I decide between fine line and bold neo traditional for a sibling matching piece?
A: Think about longevity and lifestyle. Bold neo traditional with heavier outlines and saturated fills usually needs fewer touch-ups than fine line in high-motion spots. If you and your sibling want something subtle, pick a placement less exposed to friction and ask the artist how they scale detail to the site.
Q: Are ribcage and sternum placements worth the extra pain for neo traditional work?
A: They are worth it if the placement matters to you, but be realistic about pain and touch-up needs. Ribs and sternum offer dramatic placement, and many artists will caution about sizing for longevity. If you choose those spots, plan for longer sessions and a possible touch-up at year one or two.
Q: Can I wear jewelry with new wrist or collarbone tattoos right away?
A: Wait until the scabs are gone and the skin is closed before consistently wearing bracelets or necklaces that sit on the tattoo. When you do, choose lightweight pieces like a thin+chain+pendant+necklace that do not rub constantly. Short term, avoid tight bands that press into the healing skin.
Q: How often should siblings plan touch-ups for matching small pieces like fingers or wrists?
A: Expect touch-ups sooner for fingers and wrists than for larger arm or thigh work. From what I have seen, small visible pieces commonly need a touch-up around year one to two. Discuss a realistic timeline with the artist and factor that into your decision before booking.
