
Neo traditional highland cow tattoos keep popping up in saved boards, and not all of them age the same. The style lives between bold, saturated neo traditional color and a softer illustrative take, and what looks viral fresh can read muddled in a few years if placement and spacing are wrong. Read these 27 ways to wear a highland cow motif so you get the look that still reads clean after multiple summers.
1. Inner Forearm Highland Cow Portrait
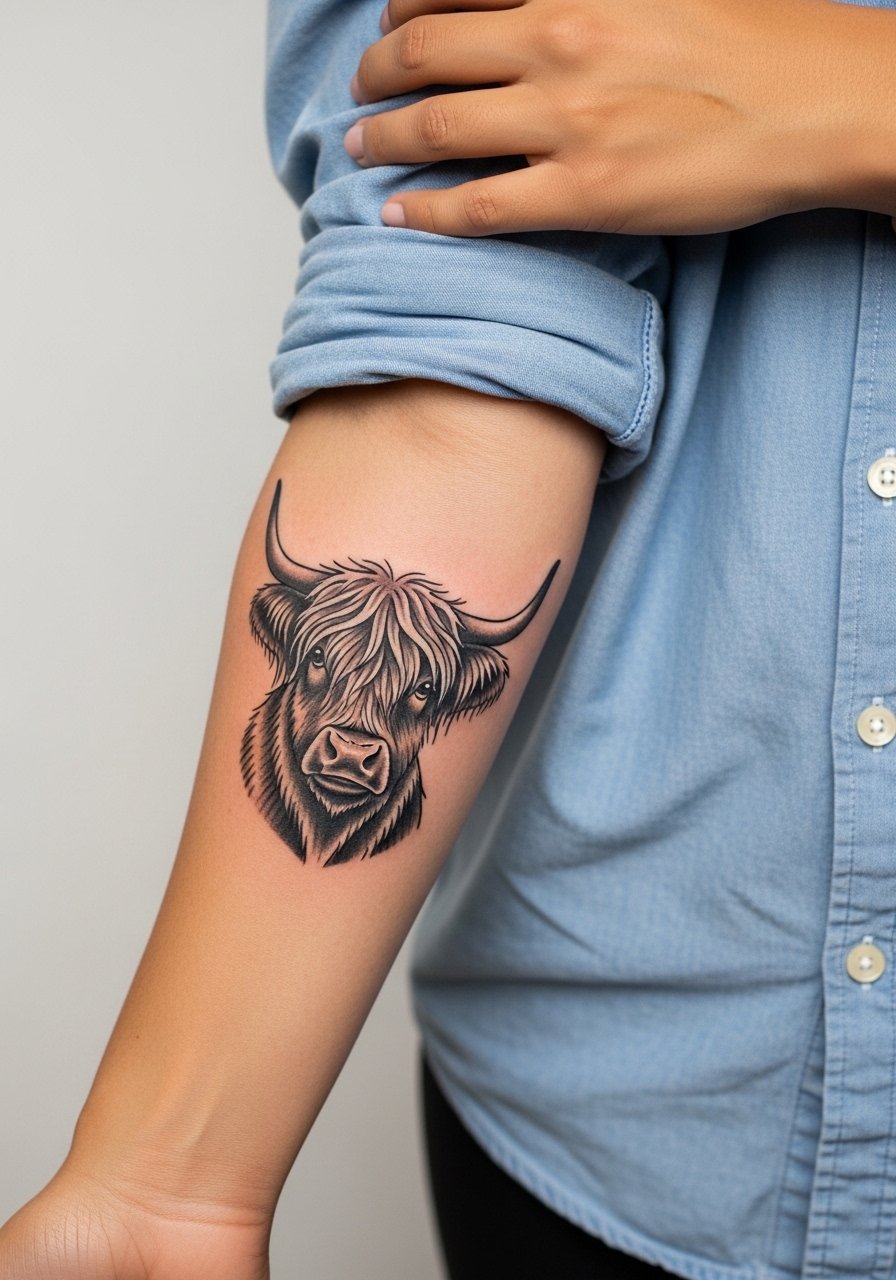
I recommend the inner forearm when you want a design that stays visible and can be scaled without losing detail. Pain is mild to moderate and most sessions are under two hours for a medium-sized portrait. During consultation ask for bolder outer linework with softer stipple shading inside the fur to keep the texture legible at two and five years healed. A common mistake is asking for too much tiny detail in the hair, which blurs faster than the surrounding shapes. Pairing this with a rolled-sleeve linen shirt lets the piece show off without competing fabrics.
2. Upper Arm Shoulder Cap with Floral Frame
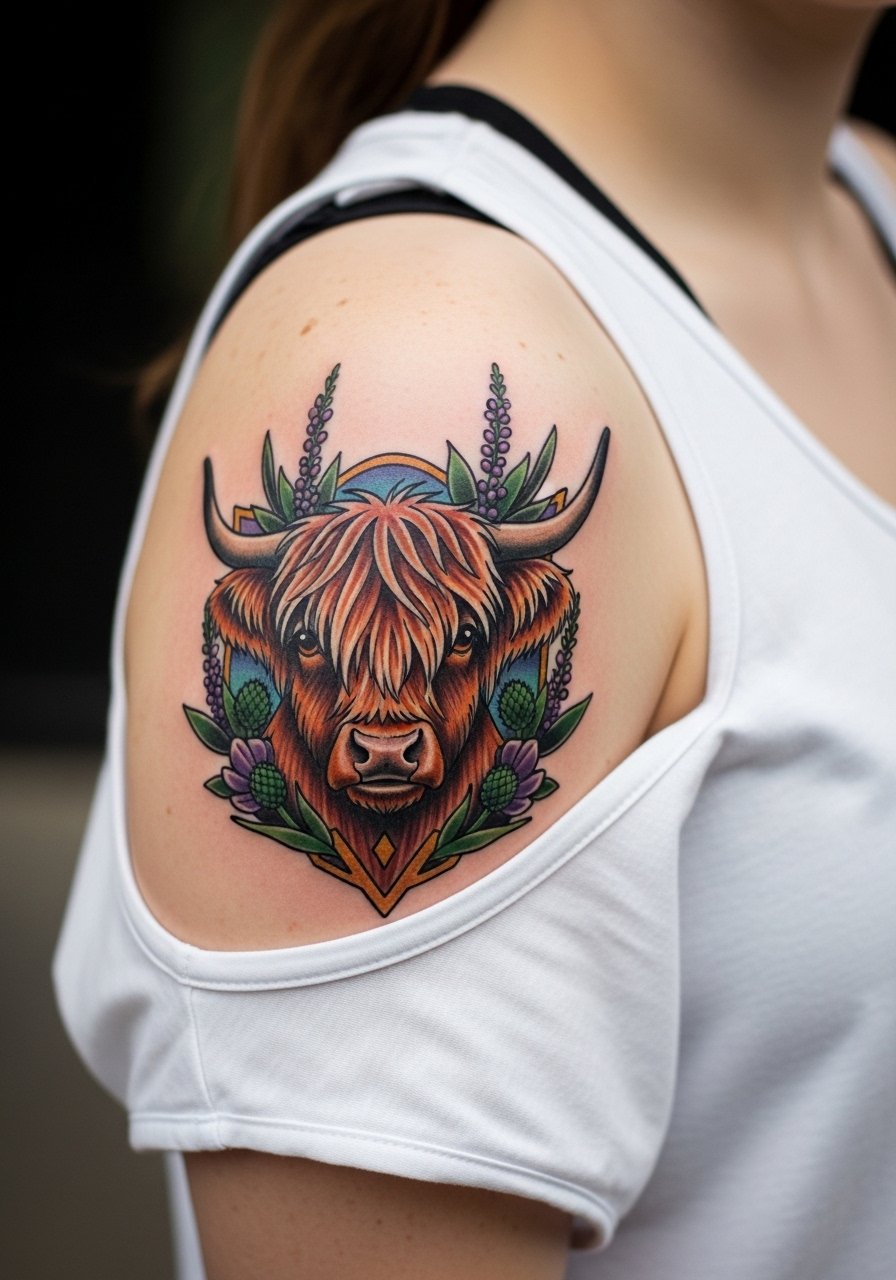
This placement reads bold from a distance and fits the neo traditional palette well. Expect a session time of 1.5 to 3 hours depending on color saturation. Tell your artist you want solid saturation in the main shapes and restrained stipple in the flowers so the cow silhouette remains strong. The biggest mistake is crowding the composition toward the shoulder seam, which can distort while you move. For sessions wear a loose tank top so the artist has clear access without you feeling exposed.
3. Chest Piece Over the Sternum with Symmetry
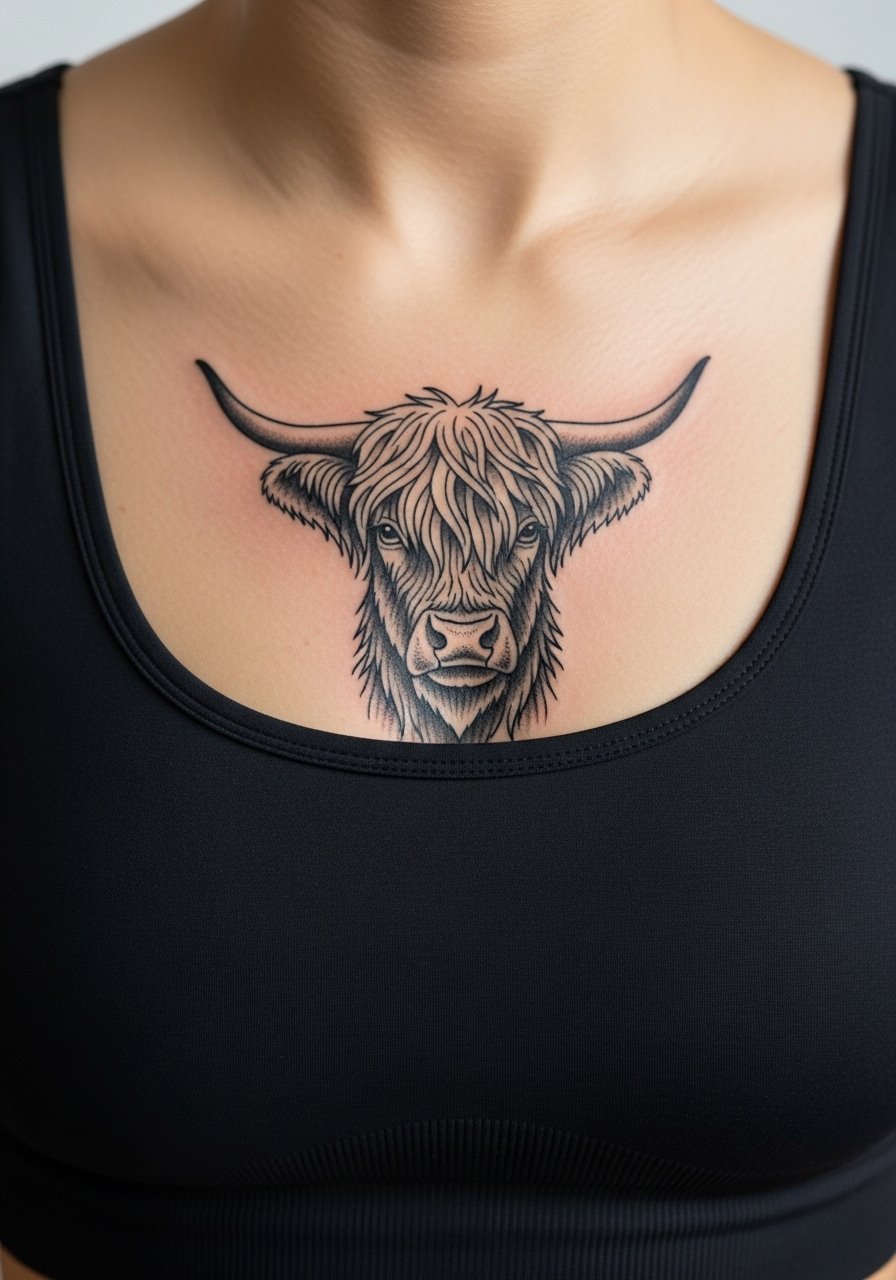
Sternum work is more sensitive, and sessions feel longer because of breathing and movement. Artists split on fine line detail here. One camp says small delicate lines blur with chest expansion and contraction. The other camp claims well-spaced linework with solid saturation settles fine. If you lean into a neo traditional look, ask for slightly thicker key lines and open shadow areas so the piece reads through the body's motion. Expect a touch-up around year two to maintain crispness. For showing this off, an open-neck or a bandeau top frames the central composition cleanly.
4. Ribcage Portrait with Decorative Scrolls
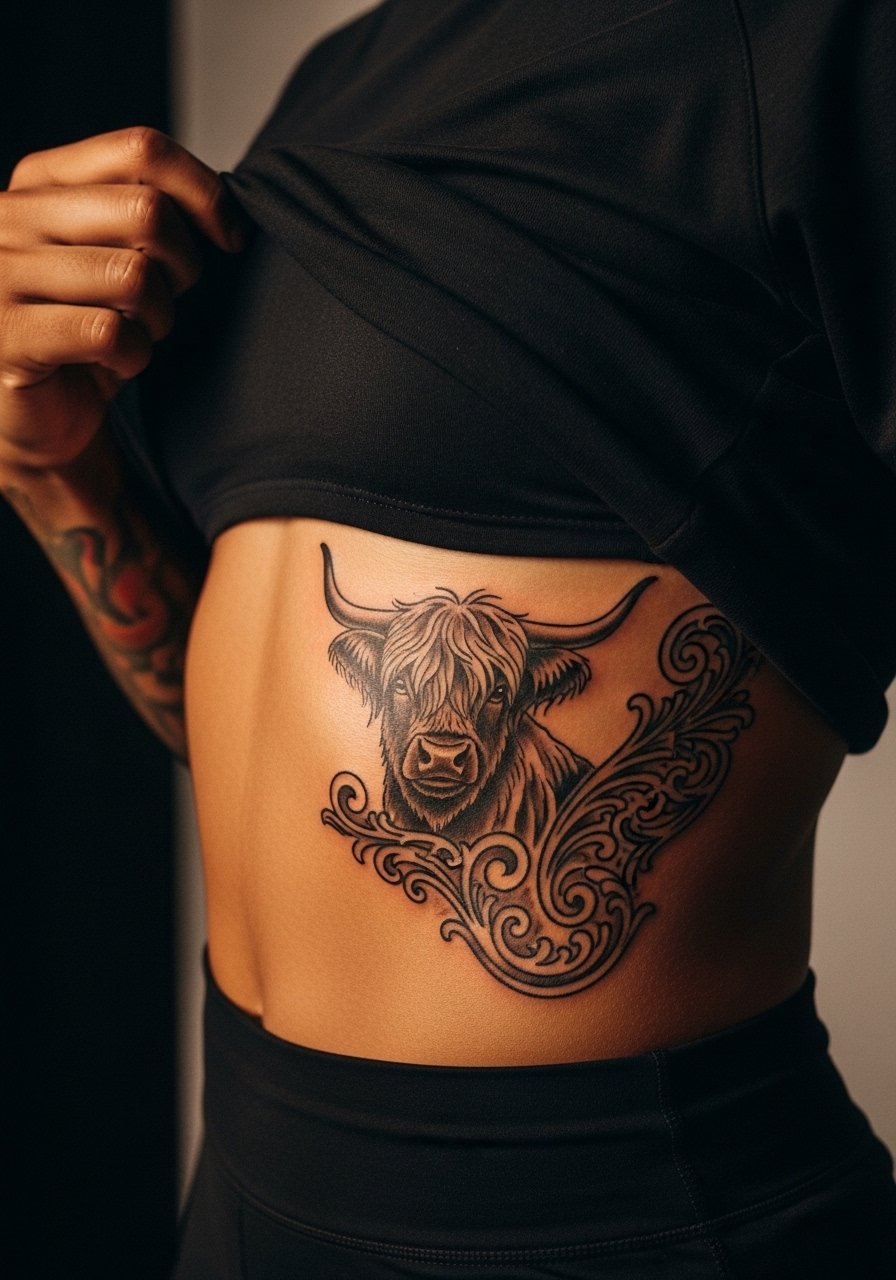
Fair warning, ribs are a high-sensitivity spot and sessions can feel sharp between breaths. The ribcage also ages differently because of skin stretch and torso movement. The common error is packing too many thin line curls into a small rib piece. My suggestion is to space the decorative scrolls and rely on saturated color blocks rather than micro-line hair detail. Ask the artist for mock-ups showing how the scrolls fall when you bend. For session wear choose a cropped athletic top so the artist can work without you being uncomfortable.
5. Thigh Panel with Celtic Knot Accents
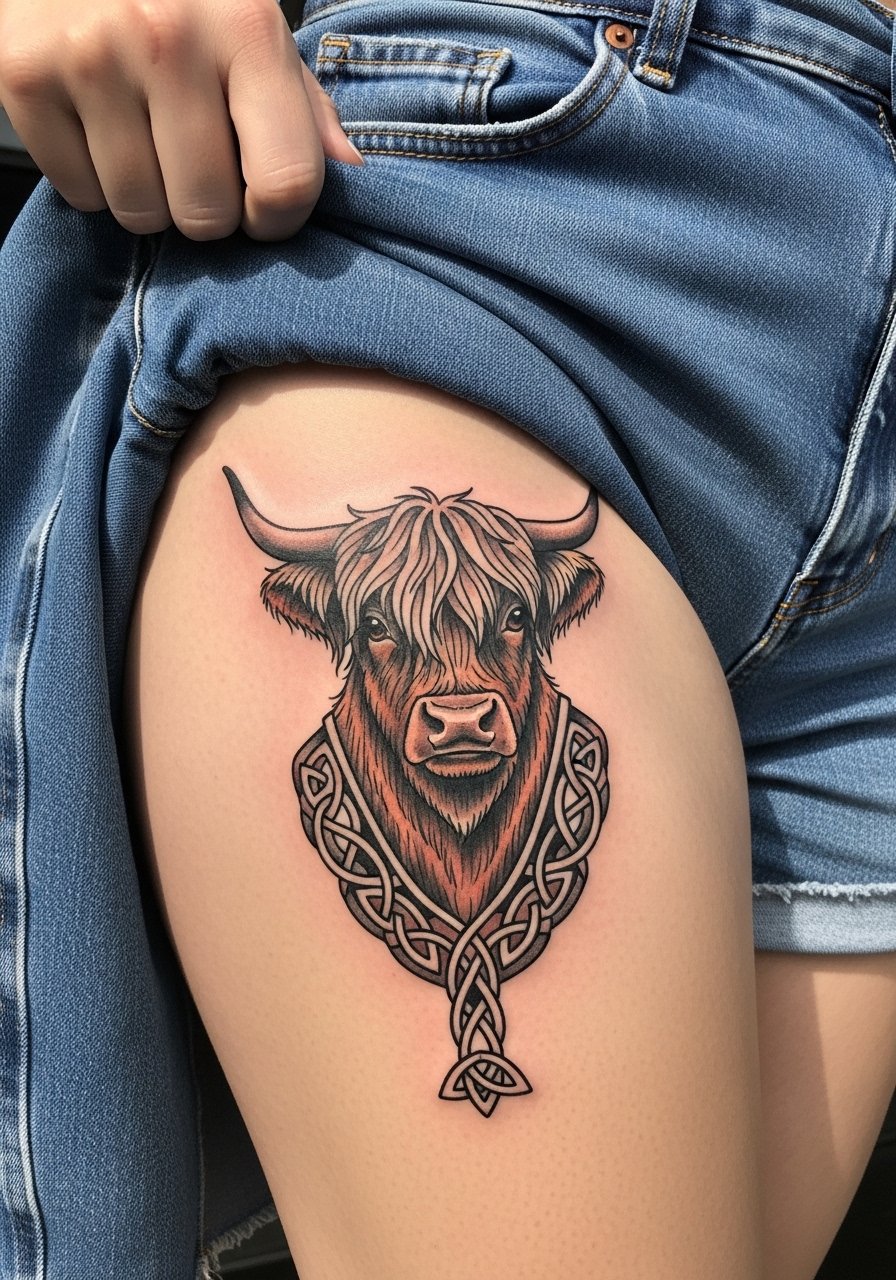
Upper thigh pieces tolerate dense detail and larger scale, which suits intricate knotwork around the cow. Sessions run longer, often two to four hours. A mistake I see is wanting tiny knot lines that read like a blur after a year. Use clearer negative space between knots and heavier outline where the knot meets the cow for long-term legibility. Thigh work heals well under clothing so pick breathable fabrics the day of the session, like a loose drawstring linen pant for comfort and easy access.
6. Calf Portrait with Contrasting Background
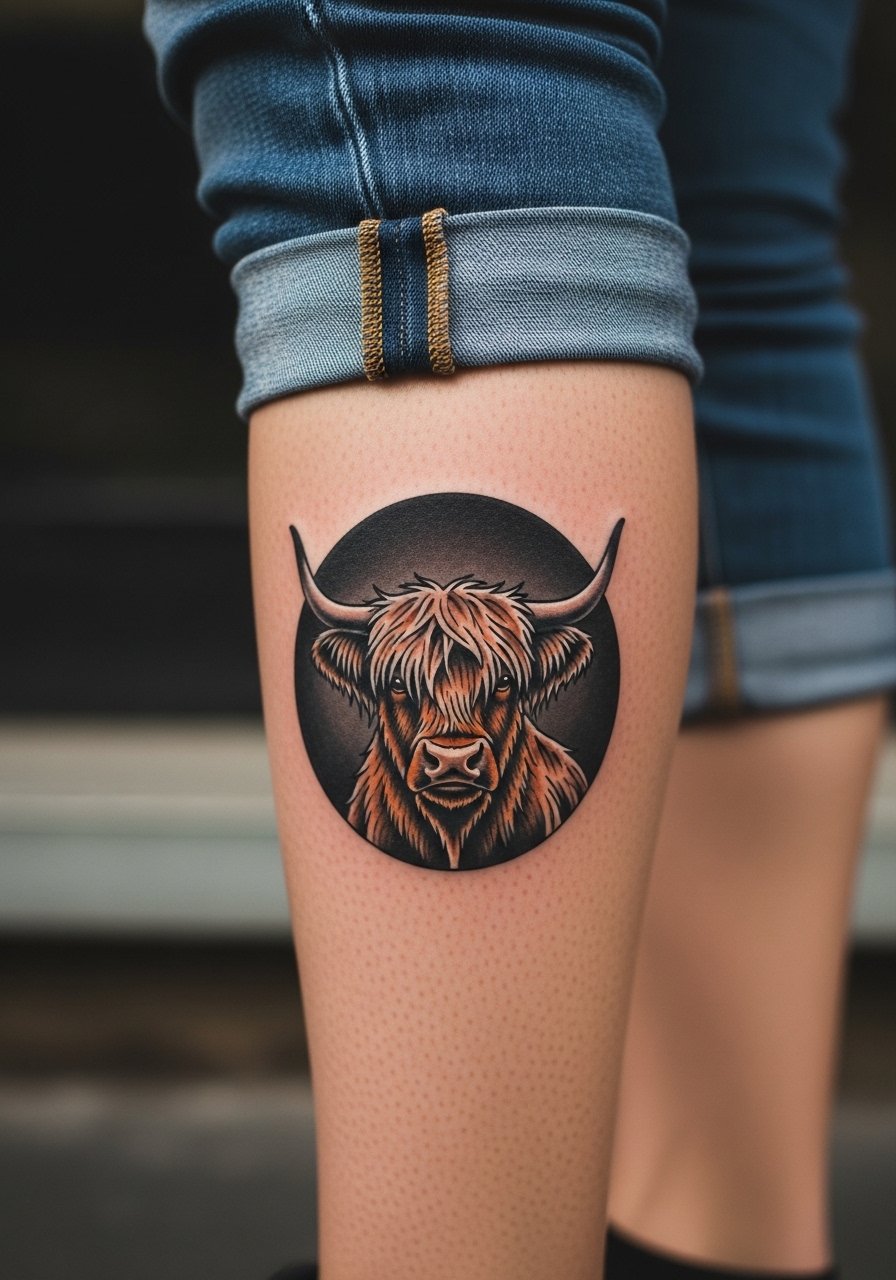
Calf placements tolerate bold color and age nicely because the skin there is stable. Expect moderate pain and a session under three hours for a mid-sized piece. Tell your artist you want a clear contrast between the cow and background color to prevent color bleed into facial features over time. A usual misstep is too gradual a gradient behind the head, which can make the facial linework appear soft later. For styling, pair this with rolled jeans or a mid-rise denim jacket cuffed to keep focus on the calf art.
Studio Day Picks
The chest, sternum, and ribcage pieces above demand different prep than forearm or calf work, so a few targeted items smooth the session and the first week.
-
Stencil transfer paper kit. Lets you preview the placement and line thickness on skin, which is useful for asymmetric forehead tufts in Highland cow designs.
-
Topical numbing cream. Applied 45 minutes before can ease rib and sternum sensitivity without changing how the artist works.
-
Thin protective film roll. Great for small wrist or finger-adjacent placements that face friction from clothing in the first days.
-
Fragrance-free body wash. Cleanses healing areas without irritating the saturated color blocks common in neo traditional pieces.
-
Aquaphor healing ointment. Thin layers help the initial healing window for areas with dense saturation without suffocating the skin.
7. Small Wrist Highland Cow Icon
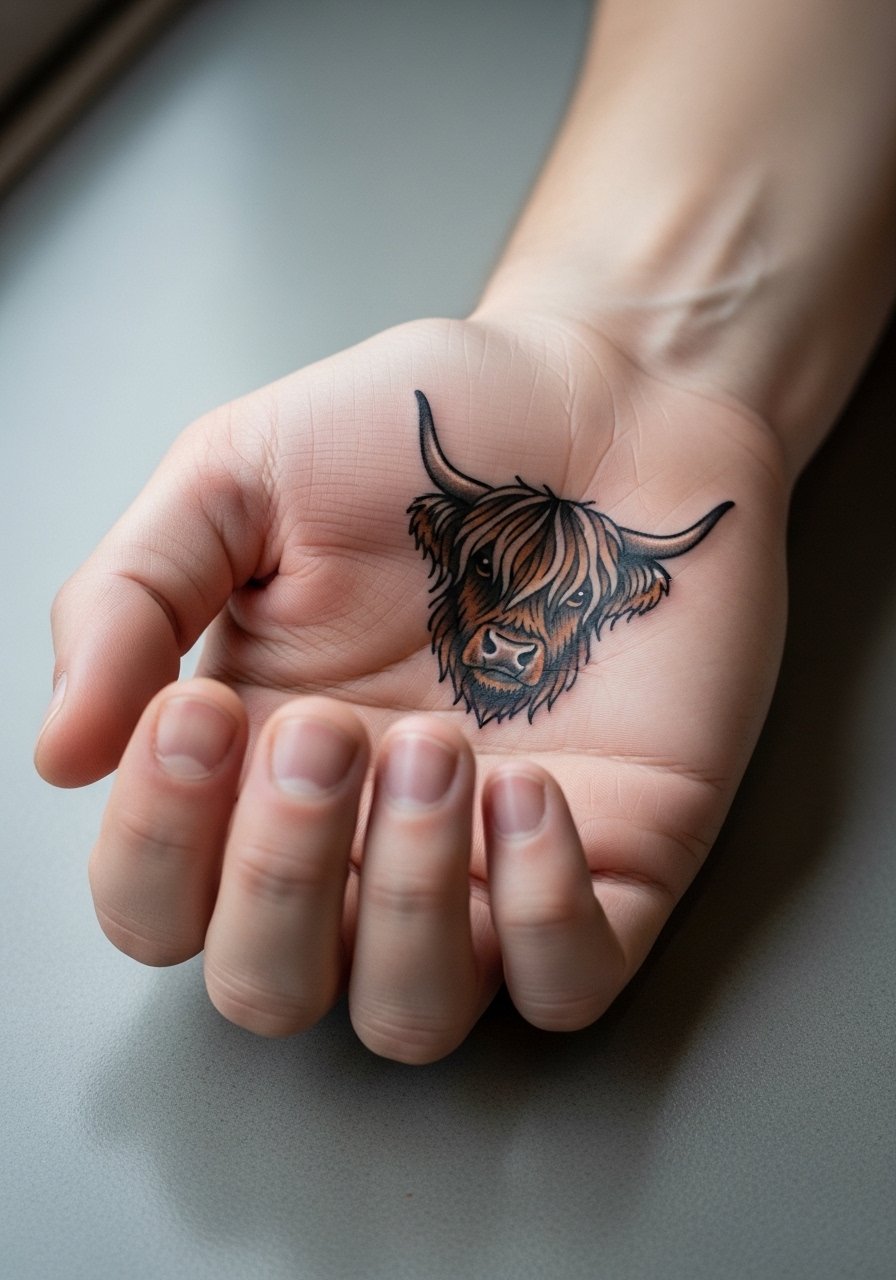
Wrist tattoos are visible and behave differently because of constant washing and movement. Pain is low to moderate and a small wrist icon often takes under an hour. The common mistake is trying to cram too much fur texture into a tiny wrist piece. Ask for simple silhouette shapes with a solid outline and minimal internal dots to suggest hair. Expect a touch-up sooner than on the arm, usually around year two. Show it off with a thin chain bracelet that complements without covering the piece.
8. Collarbone High-Centered Cow with Crescent Motif
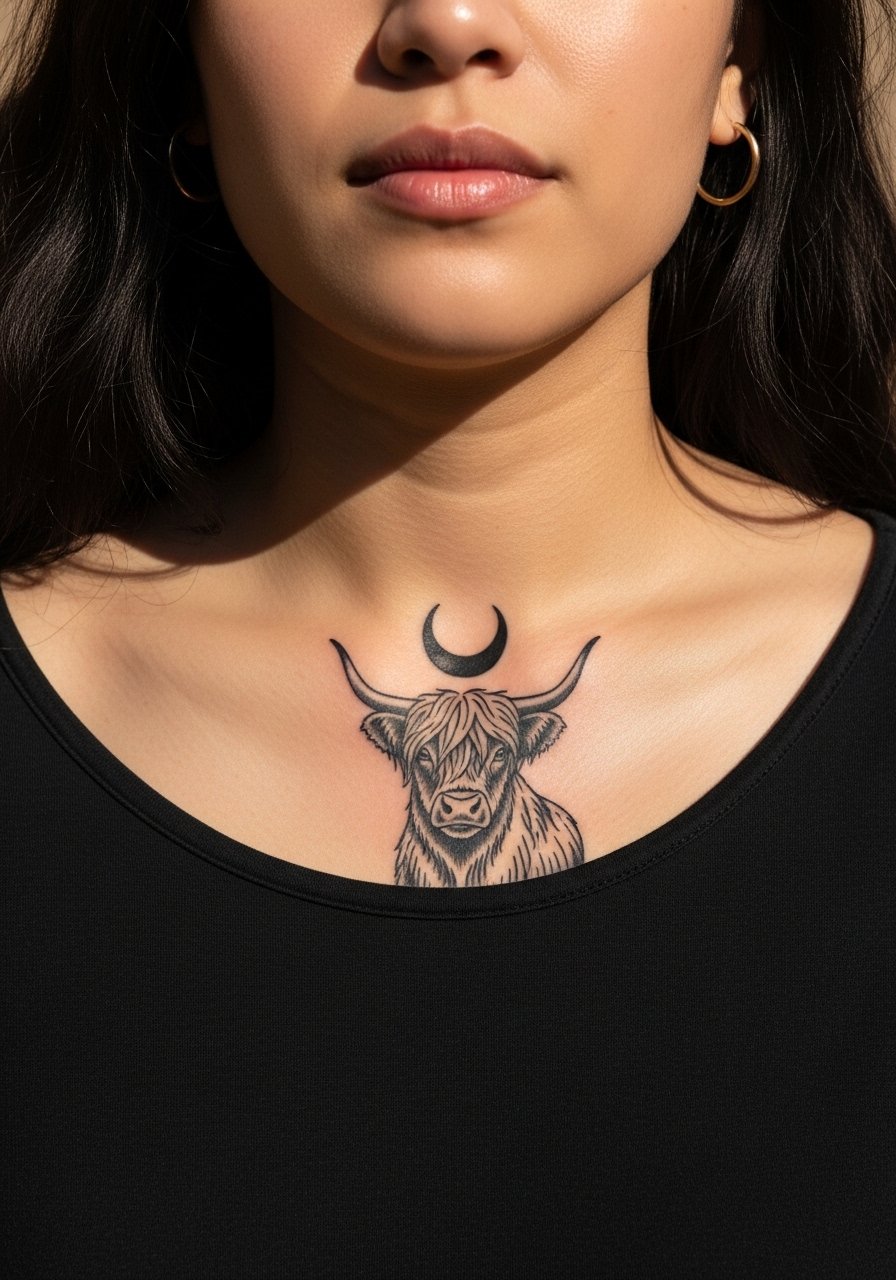
Collarbone placements sit close to bone and can be sharp during the session, but they photograph well. Sessions vary from one to two hours based on scale. The mistake is placing the main detail right over the bone where touch-ups wear faster. Ask for the main focal point just below the collarbone line. If you want to show evening looks, pair it with an open-back midi dress that keeps the tattoo visible without compromising collarbone coverage in cooler weather.
9. Back Piece Between the Shoulder Blades
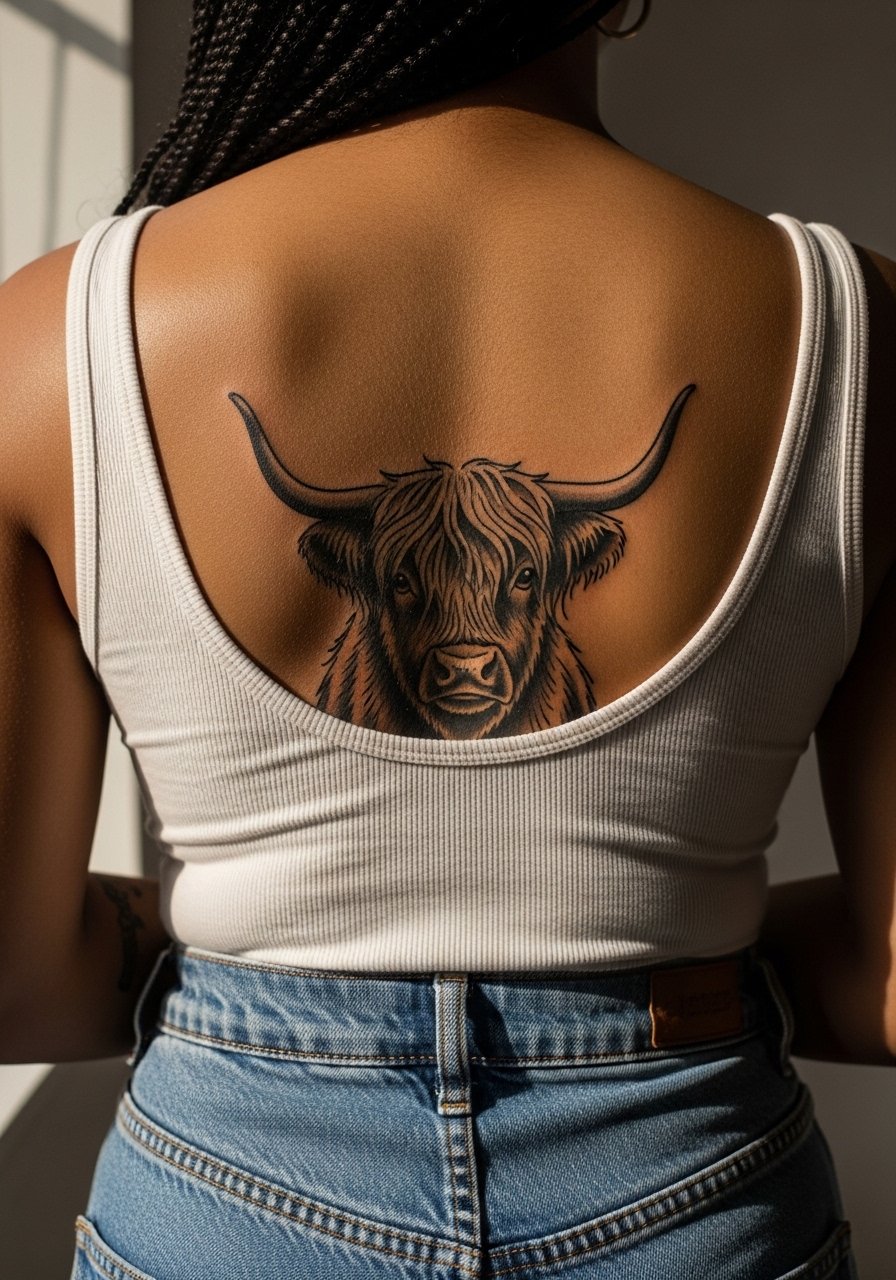
Center-back pieces can be large and allow for dramatic framing and negative space. Pain is moderate and sessions often happen across two sittings for larger color fills. A frequent error is overfilling with symmetrical motifs that fight the natural curvature of the back. During your consult ask for mock-ups that consider how fabric sits and how your posture changes. For the appointment wear a button-down shirt you can pull to the side for access while keeping comfortable.
10. Throat or Side Neck Accent
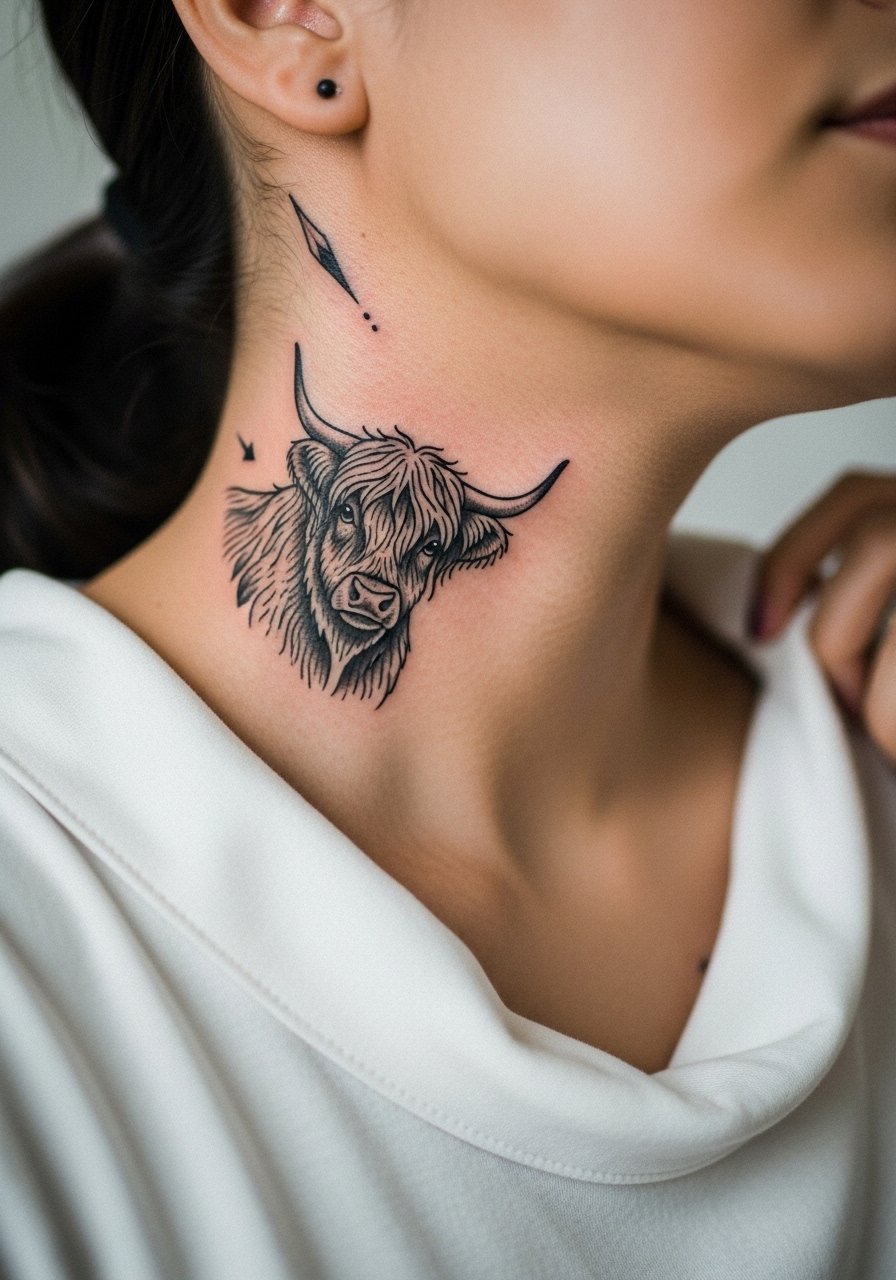
Neck tattoos read loud because of limited space and public visibility. Pain is moderate and you should plan short sessions. Artists debate neck details. One camp favors bold simplified shapes to avoid early blur. The other camp will execute finer linework with increased spacing to keep detail. If you choose neck placement, ask where your artist stands and see healed examples. Consider how this impacts professional settings and plan placement accordingly.
11. Small Finger Accent Behind Knuckle
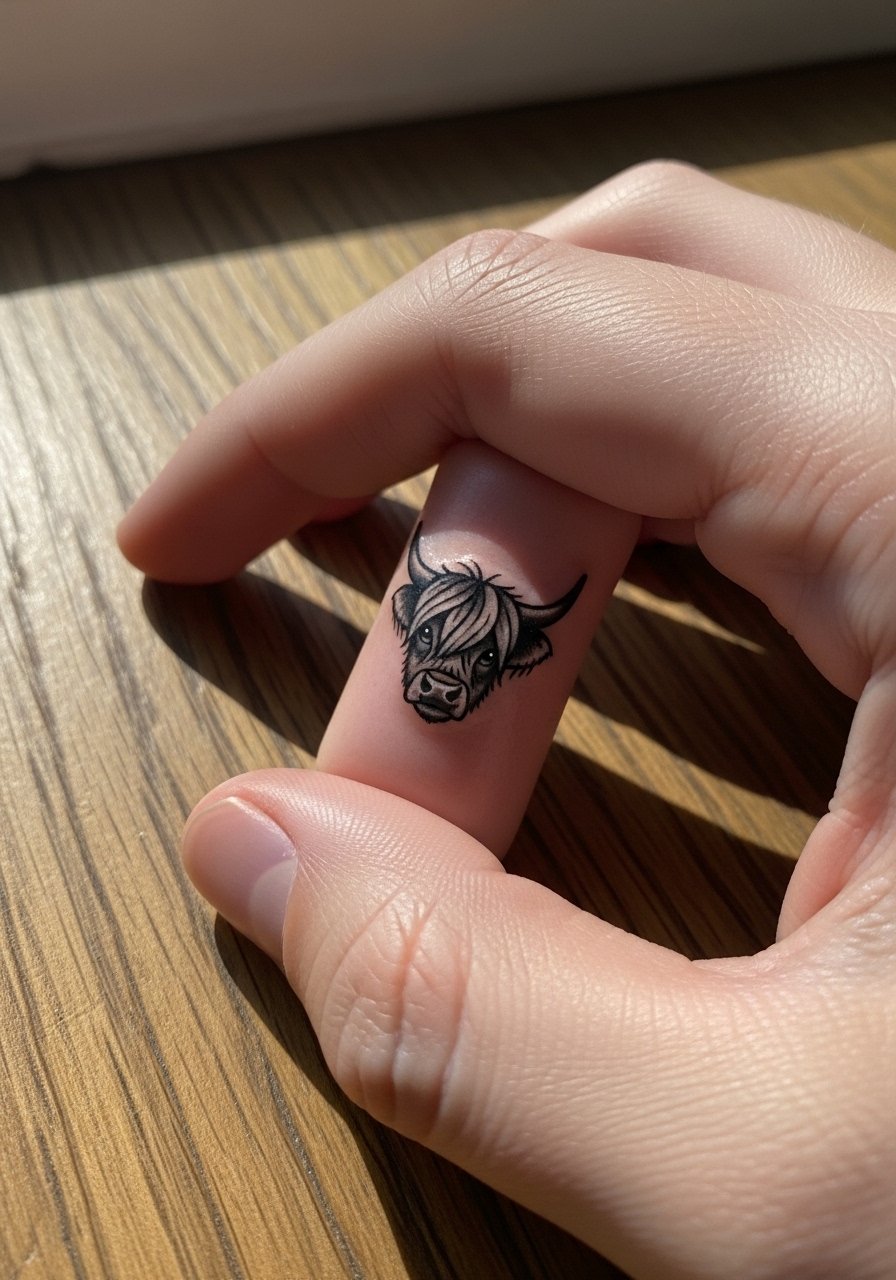
Finger placements are high-maintenance and fade faster thanks to skin turnover and constant washing. Sessions are short and feel sharp because the area is bony. The biggest mistake is expecting the same permanence as forearm work. Opt for a tiny simplified motif with solid black anchors rather than micro shading. If you want it to last, plan for touch-ups annually. Finger art pairs with a minimalist stack ring set that draws attention without rubbing the ink.
12. Full Sleeve with Highland Herd Scene
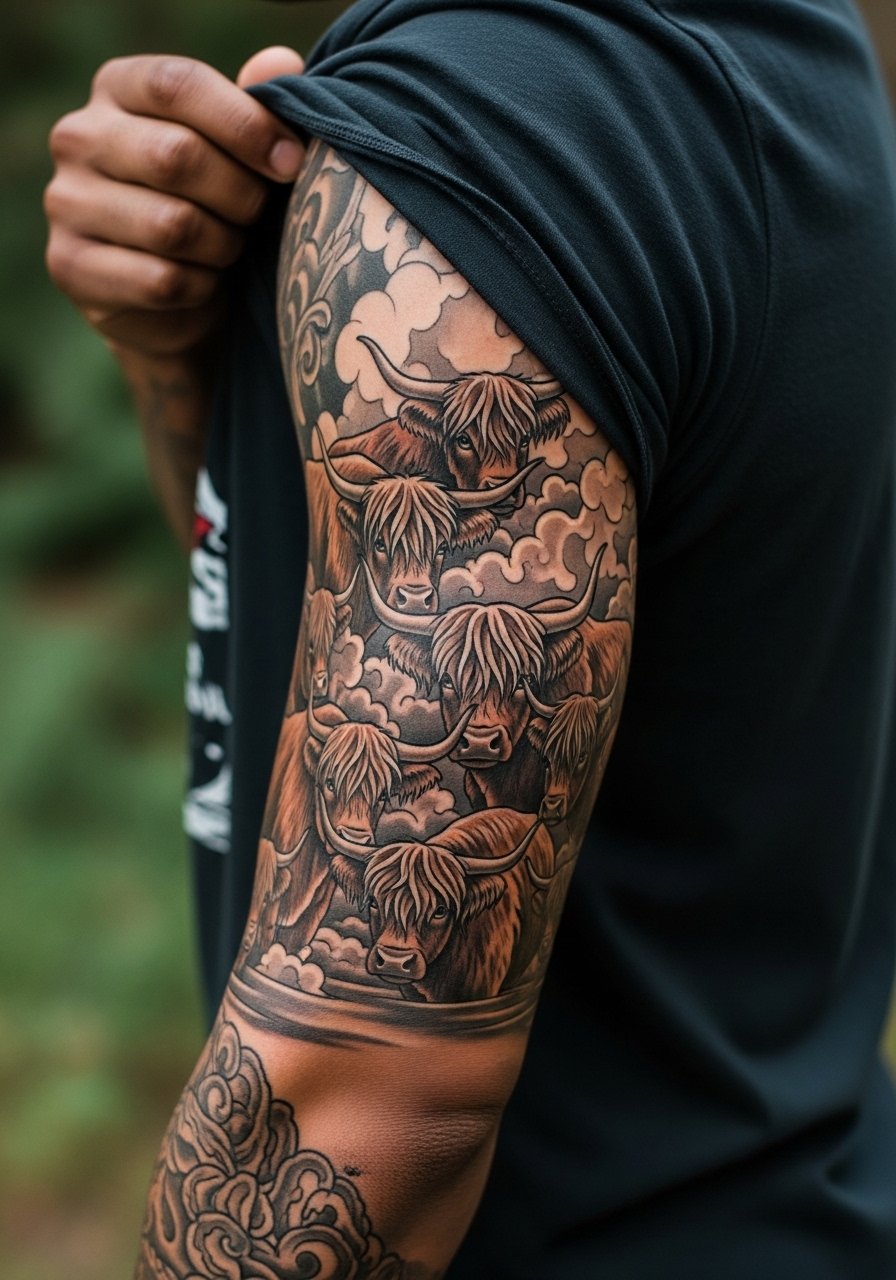
Sleeves let you tell a story and use consistent neo traditional color motifs across pieces. Expect multiple long sessions and gradual layering of saturation. A common error is mixing too many tiny styles within the sleeve. Keep the herd's silhouettes bold and let background elements like florals or hills be simpler. During consultation map the narrative flow from shoulder to wrist so the herd reads as a composition while standing and while moving. For session days wear a short-sleeve button-down that is easy to roll without compressing fresh work.
13. Hip Pocket Cow with Decorative Chain
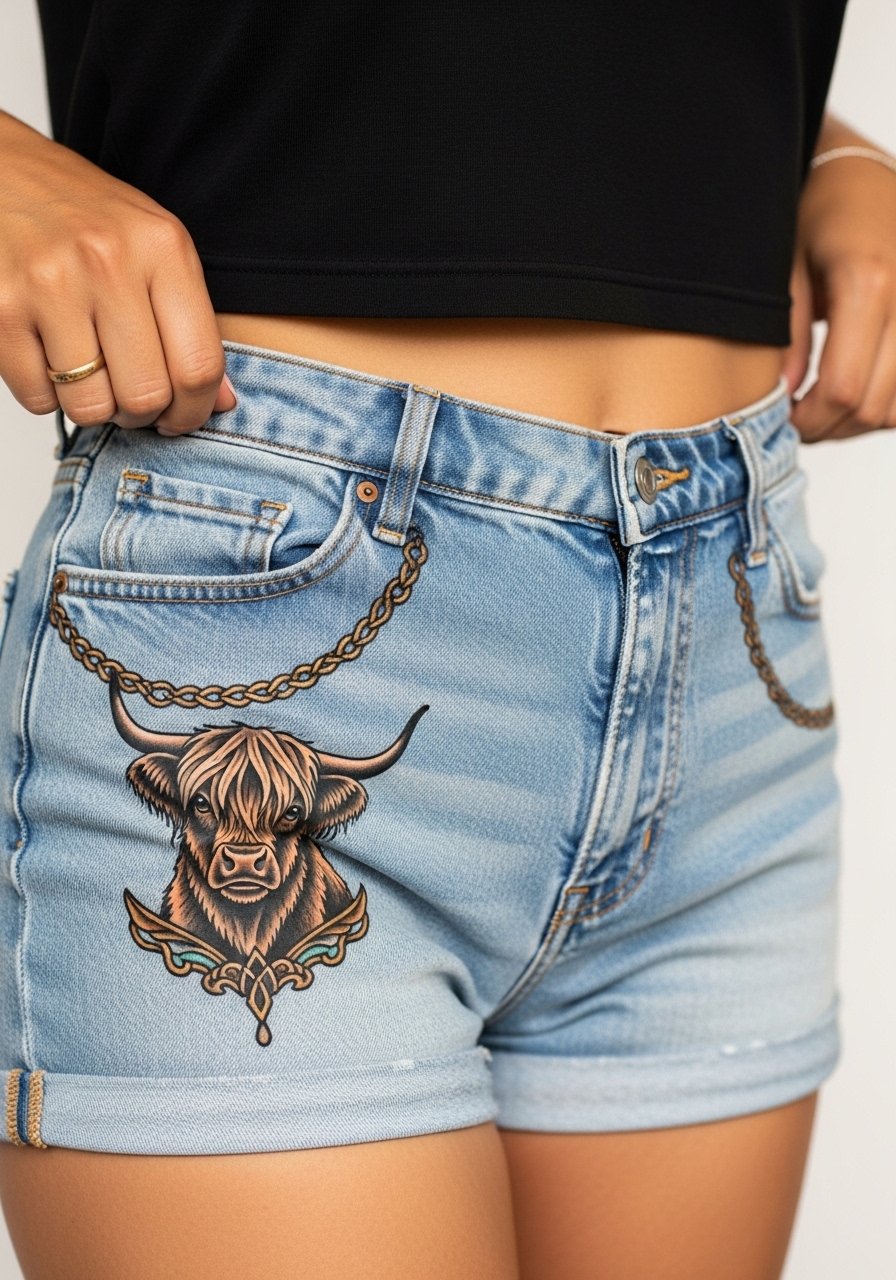
Hip pieces sit in a stretch-prone area and can change with body movements. Sessions feel moderate and healing under clothing is common. The mistake is placing fine chain links too close to the crease lines where friction wears them out. Ask for slightly thicker link outlines and open negative space near the crease. For the session, choose high-waisted bottoms that are easy to lower slightly like high-waisted denim shorts so the artist has full access without discomfort.
14. Ankle Accent with Floral Border
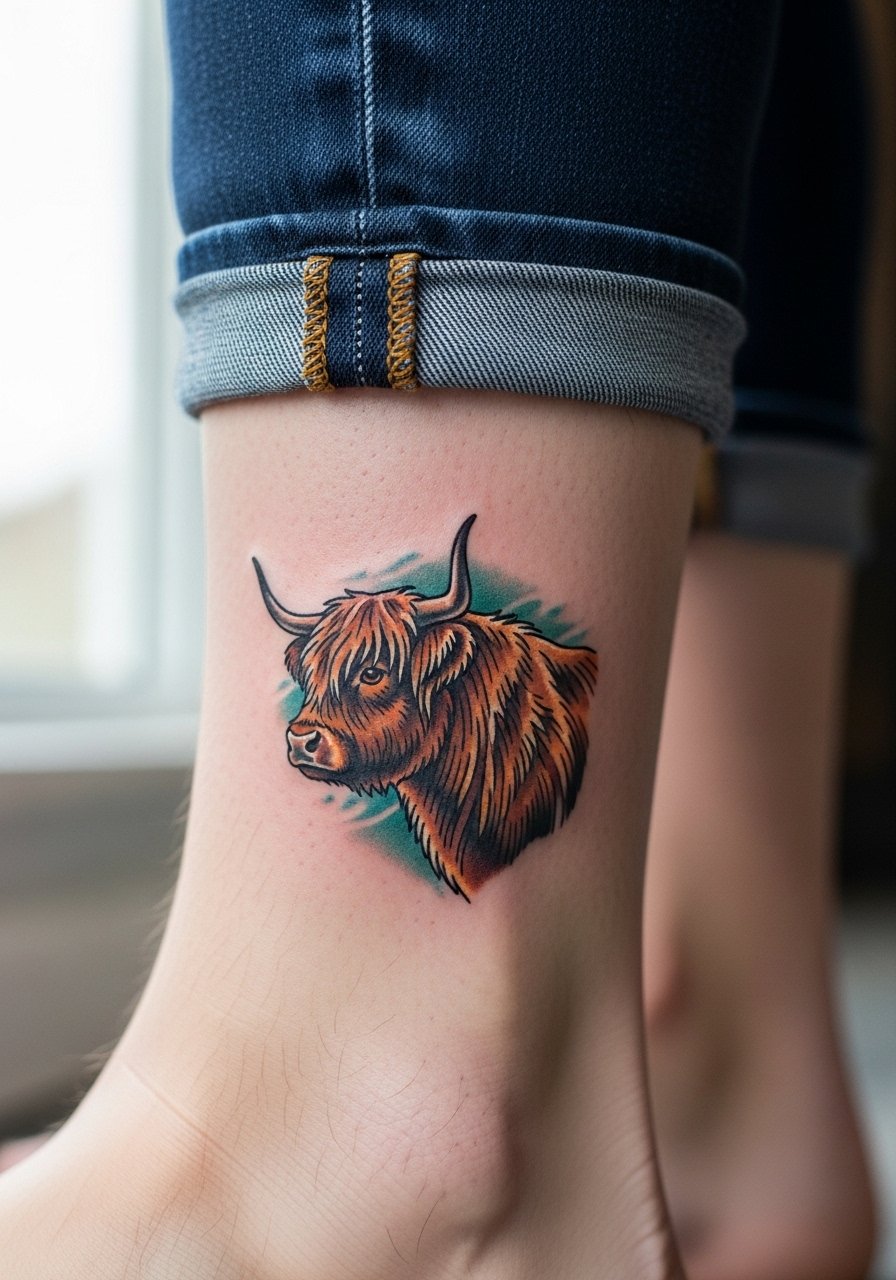
Ankle tattoos are great for subtlety but face a lot of friction from socks and shoes. Pain is moderate and sessions are quick. The usual error is dense shading at the base where shoes rub, which fades quickly. Opt for cleaner outlines and minimal low-lying color close to the ankle bone. Pair this with low-cut sandals or a pair of simple leather sandals that avoid direct rubbing during the first weeks.
15. Lower Back Landscape Cow Mark
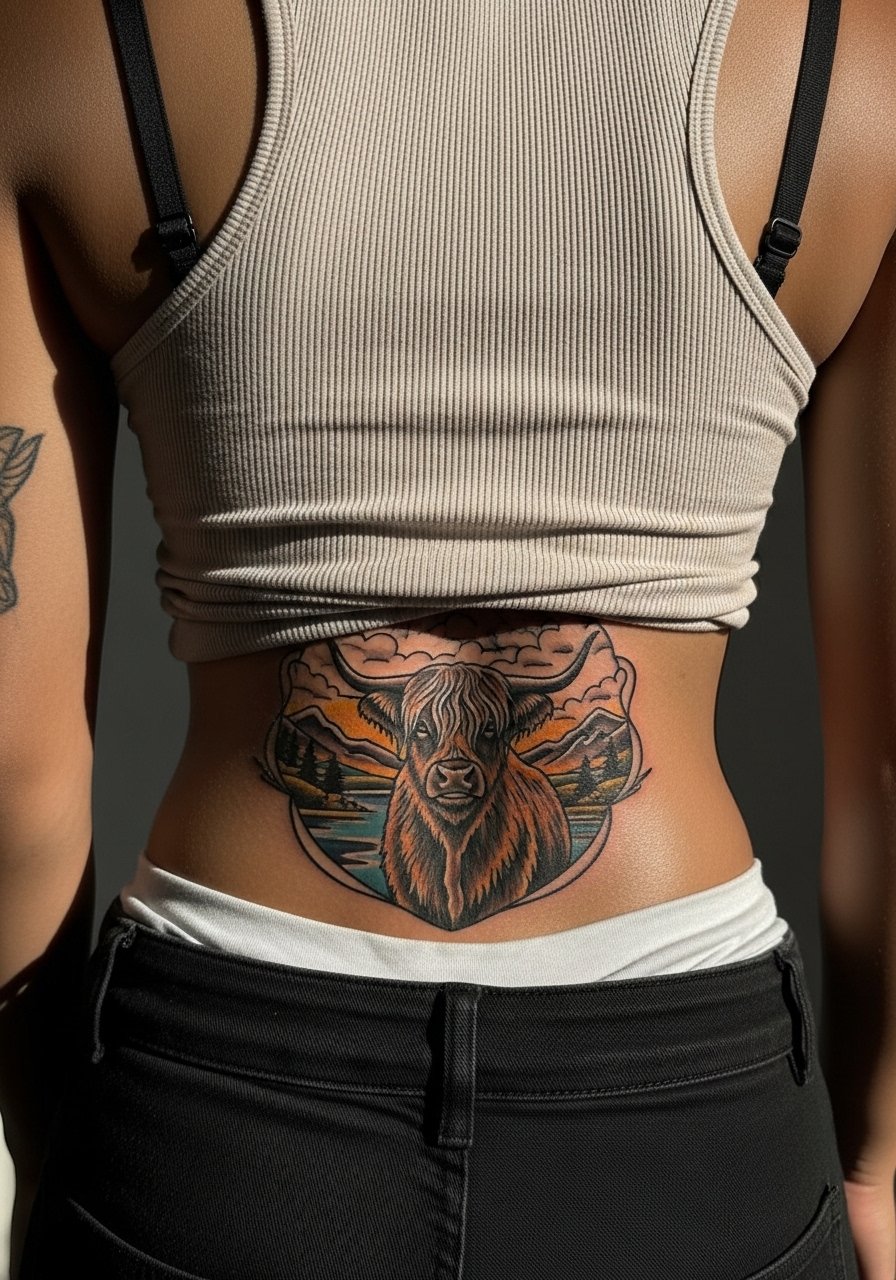
Lower back pieces let you create horizontal landscapes and strong color bands. Pain is moderate and sessions can be longer for wider compositions. A common mistake is concentrating too much detail at the center where clothing pressure sits. Ask your artist to balance negative space across the lower back and to think about how waistbands might rub. For comfort during the appointment wear a stretchy high-waisted pant you can lower slightly without losing coverage.
16. Behind-Ear Tiny Cow Accent
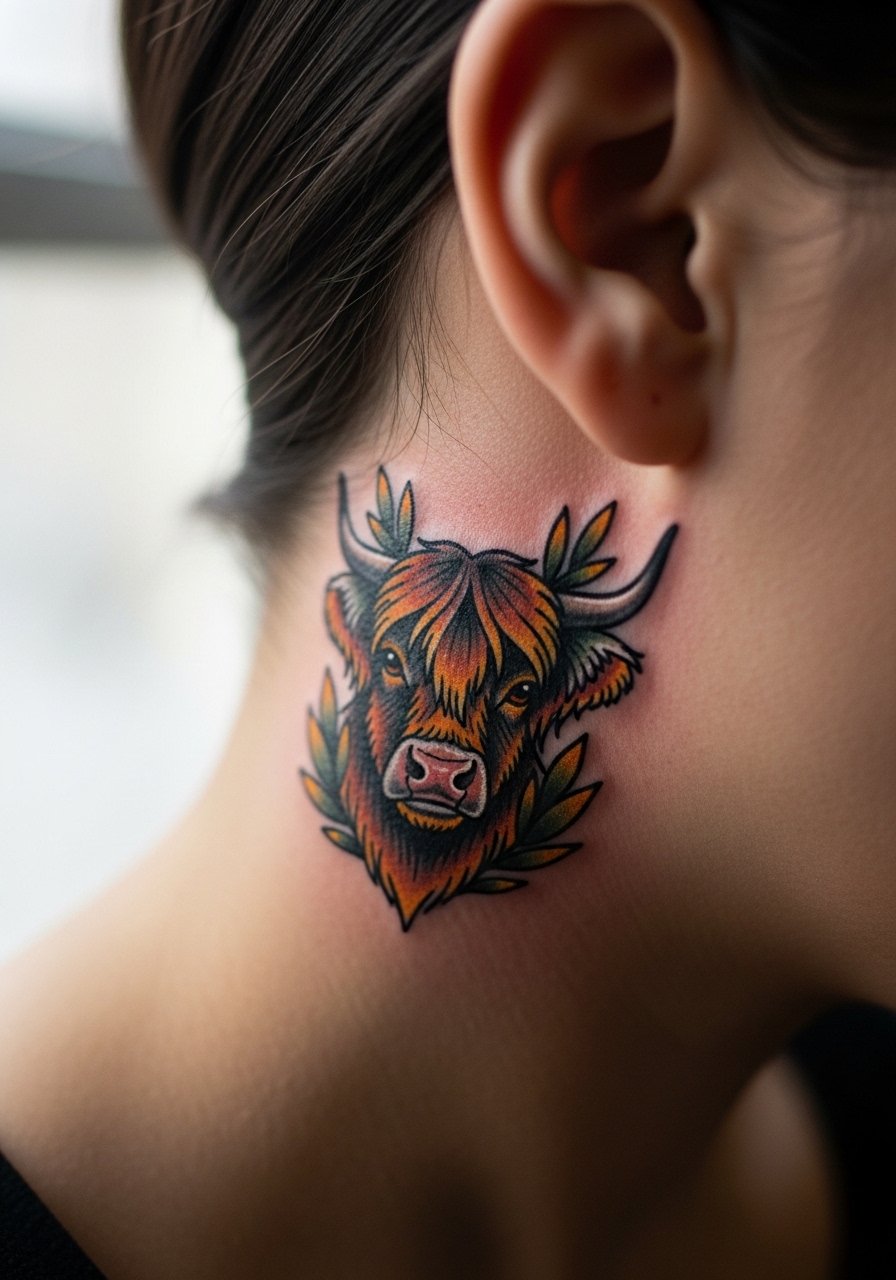
Behind the ear is subtle and sensitive. The area heals differently because of hair oils and limited air. The mistake is expecting dense color here. Keep it small and bold. This spot also requires an artist confident with tight, shallow lines. If you want it concealed or revealed on command, place it slightly below the hairline. For styling, a short haircut or updo shows the accent without fuss.
17. Throat-Side Script with Cow Silhouette
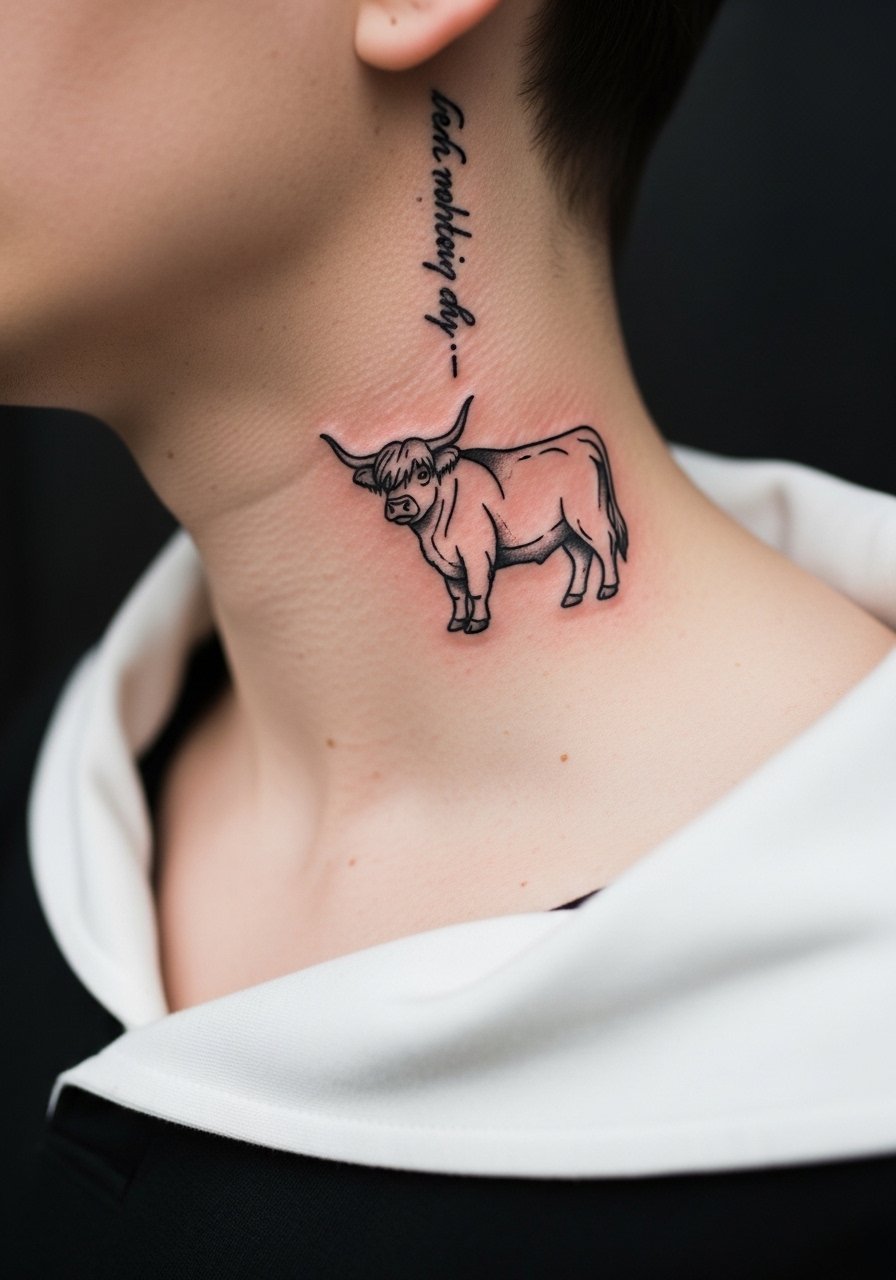
Combining script with an animal motif needs scale discipline so letters do not overpower the silhouette. Pain is moderate and sessions are short. Ask the artist to set the script weight slightly lighter than the cow's outline so the silhouette remains the focal point. The controversy here is about mixing text and imagery on visible zones. One approach is to use minimal lettering set away from the main face. The other is to interweave script into the border. Decide during consult which you prefer.
18. Thigh Wrap Scene with Celtic Fringe
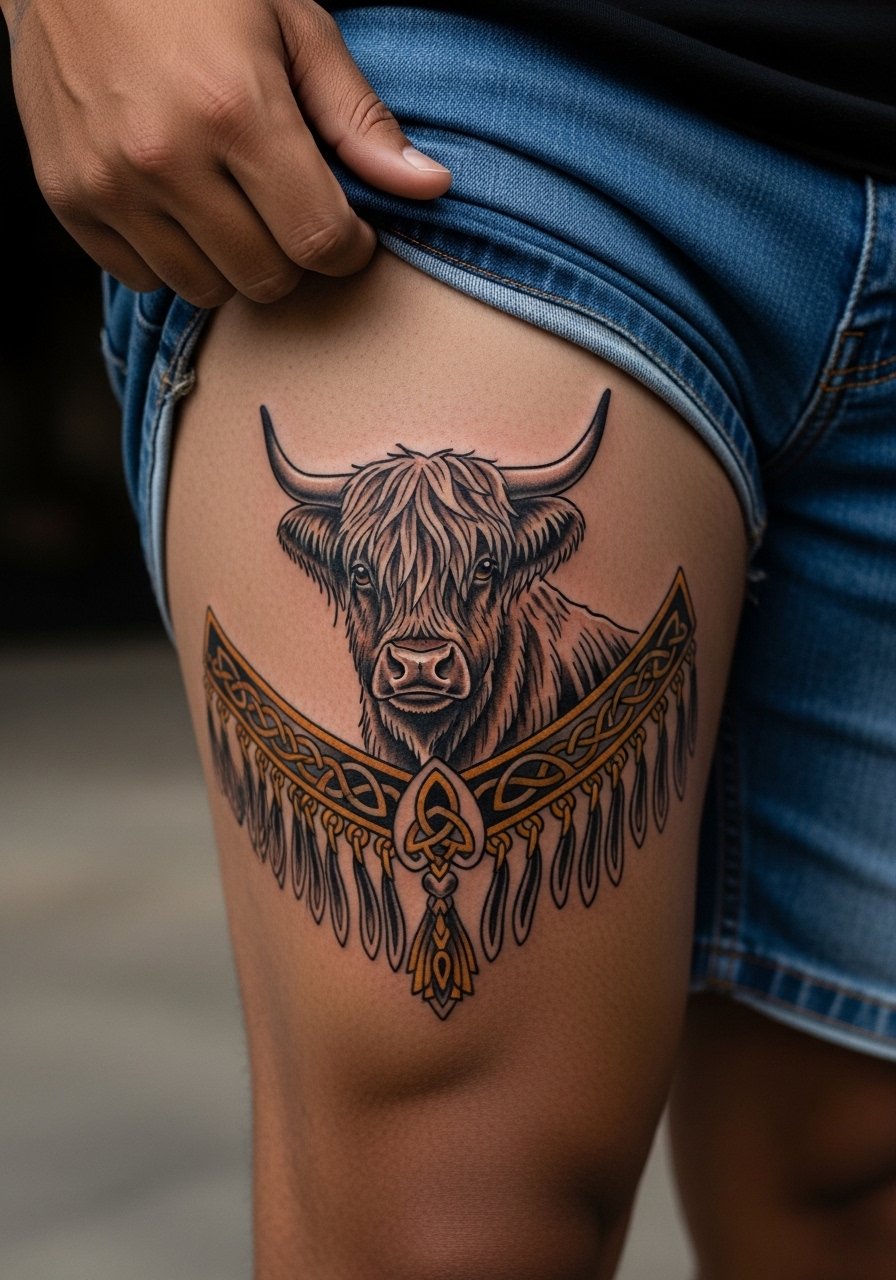
Wrap pieces use the thigh's surface to create motion. Pain is lower than ribs but sessions may be long if the wrap is wide. A mistake is compressing fringe details so they disappear when you stand. Ask for stronger anchors where the fringe meets the cow silhouette and cleaner negative spacing. For session comfort bring breathable shorts like athletic drawstring shorts you can adjust easily.
19. Ear-Adjacent Mini Horn Accent
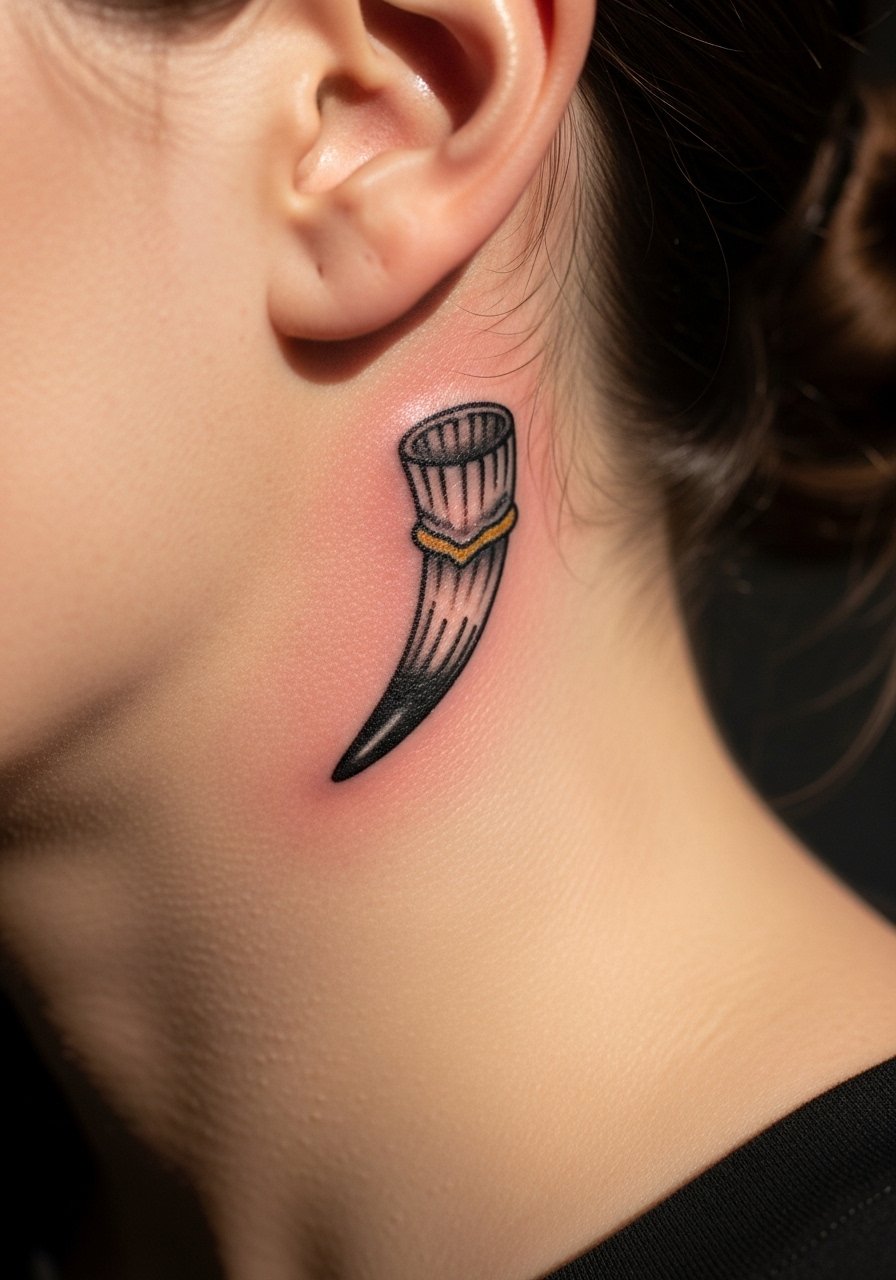
Small accents near the ear are discreet and tend to heal fast because they are out of friction zones. Sessions are brief and feel sensitive. Avoid overly intricate curves that can merge with skin texture. If you plan to show it for performances or events, plan your hair and accessories accordingly.
20. Chest Pocket Mini with Banner Name
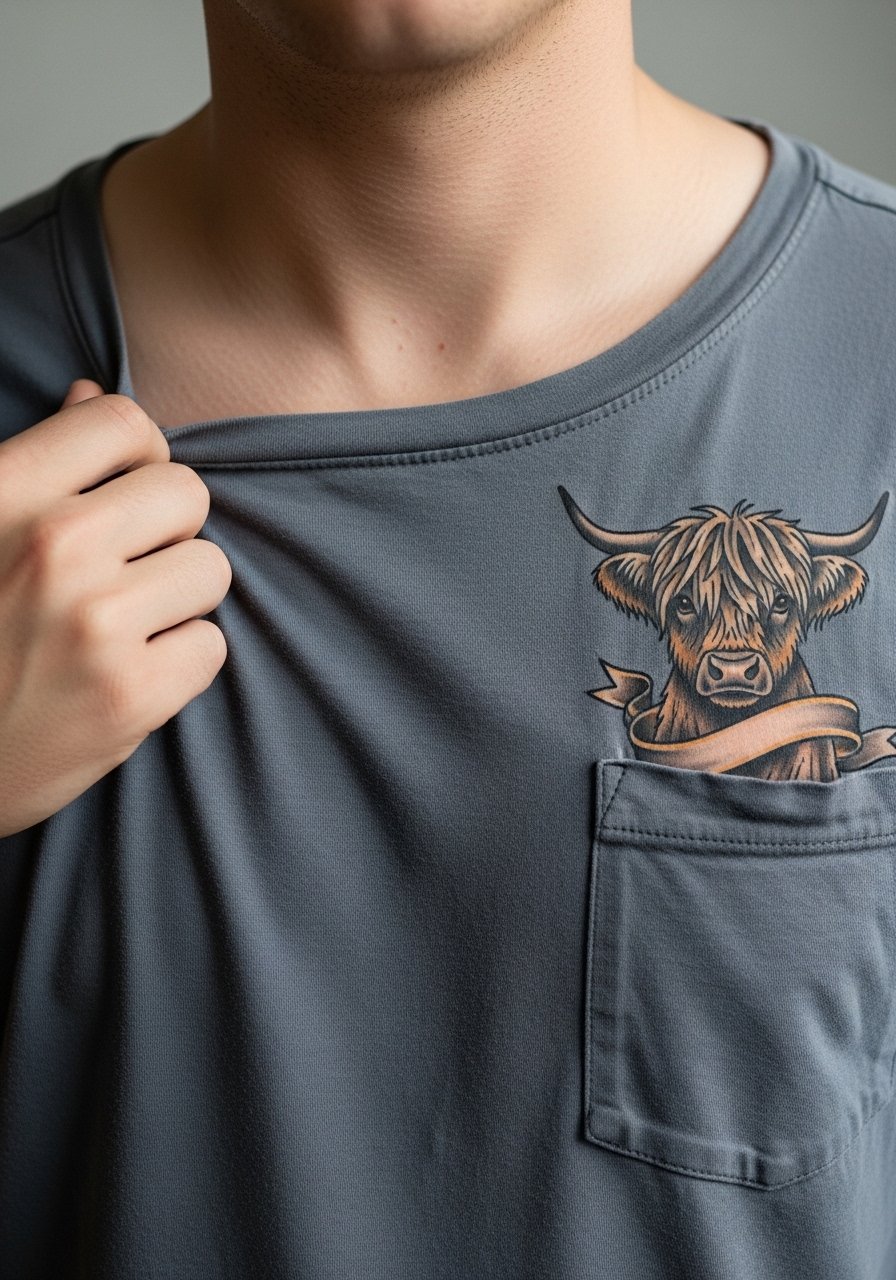
Combining banners and names with animal portraits risks crowding. Keep banner text short and the letters chunky so they remain legible. Pain over chest is moderate. A frequent mistake is tiny script that blurs into shaded areas. Ask for bold letter spacing and request a mock-up on your skin before inking. For show-off looks, a thin chain pendant necklace sits nicely above the banner without competing.
21. Outer Thigh Panel with Color Gradient
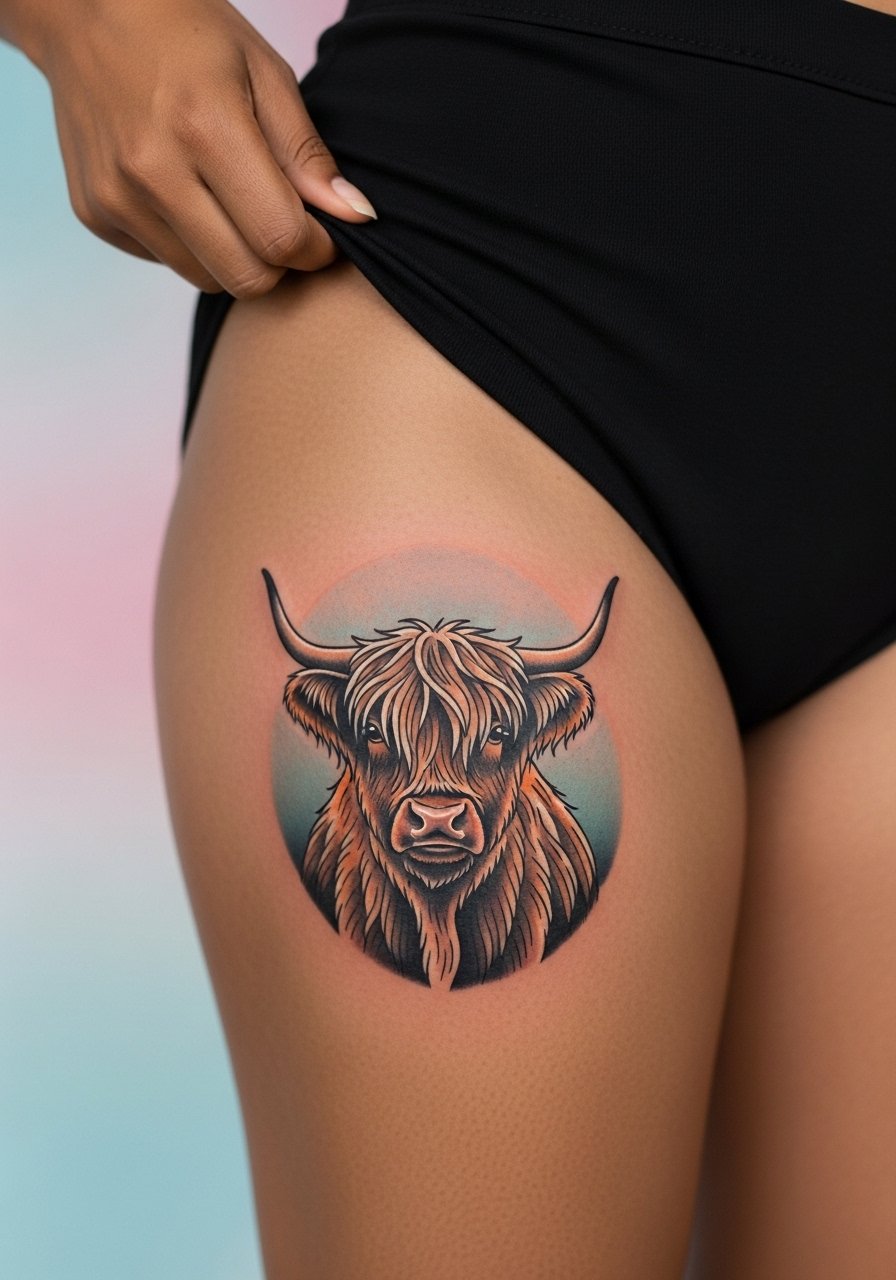
Outer thigh tolerates smooth gradients and larger swathes of color. Sessions can be long depending on background complexity. Mistakes include overworking gradients into the skin so they look muddy after healing. Ask for color blocks with deliberate transitions and let the artist build saturation gradually. For showing the artwork pair with a slip dress with a thigh slit that keeps attention on the panel.
22. Rib-to-Underbust Sweep with Floral Garlands
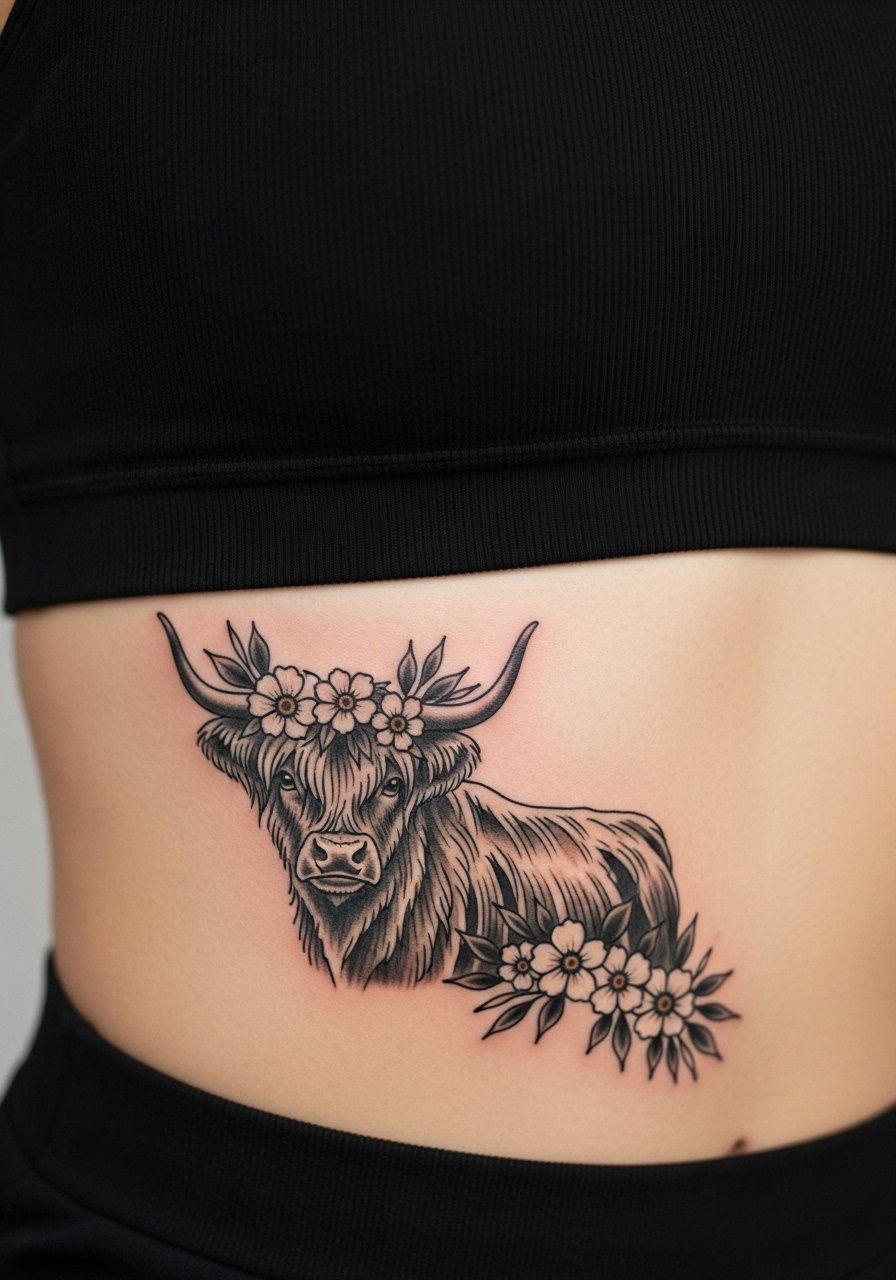
This placement moves with breathing and clothing. Sessions can be intense because of pain and movement. The common error is dense underbust shading that smudges with time. Favor open shapes and lighter floral fills near the fabric edge. For the session wear a supportive sports bra you can lower slightly like a fitted sports bra to keep comfort while exposing the work.
23. Collarbone-to-Shoulder Watercolor Accent
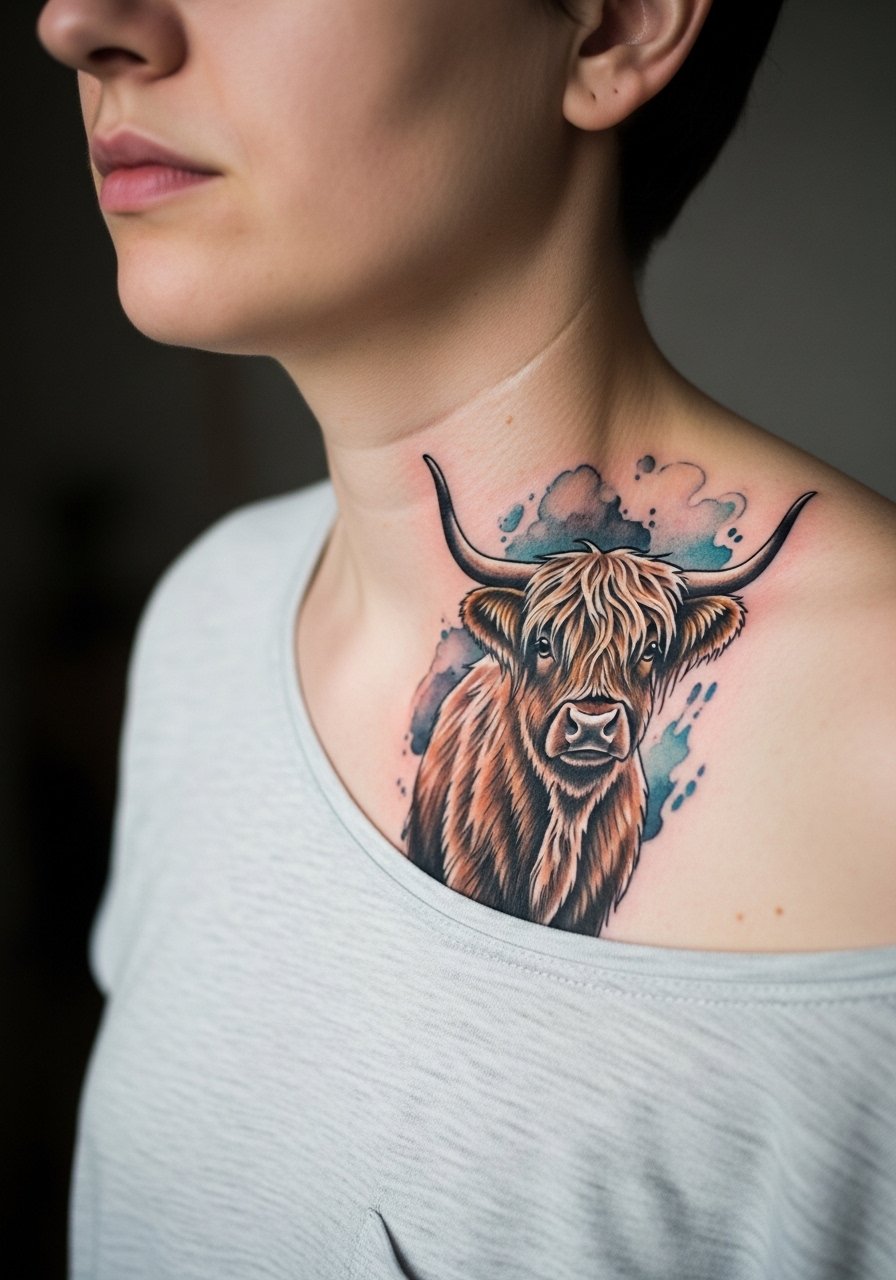
Watercolor-style backgrounds paired with neo traditional linework can be striking. The risk is the watercolor wash bleeding into fine details, which makes faces lose definition over time. Ask your artist to keep the watercolor separate from fine facial lines with a thin negative buffer. Sessions vary and you should expect a follow-up for saturation. For showing off this placement, an open-shoulder top keeps the blend visible.
24. Small Back-of-Arm Near Elbow Accent
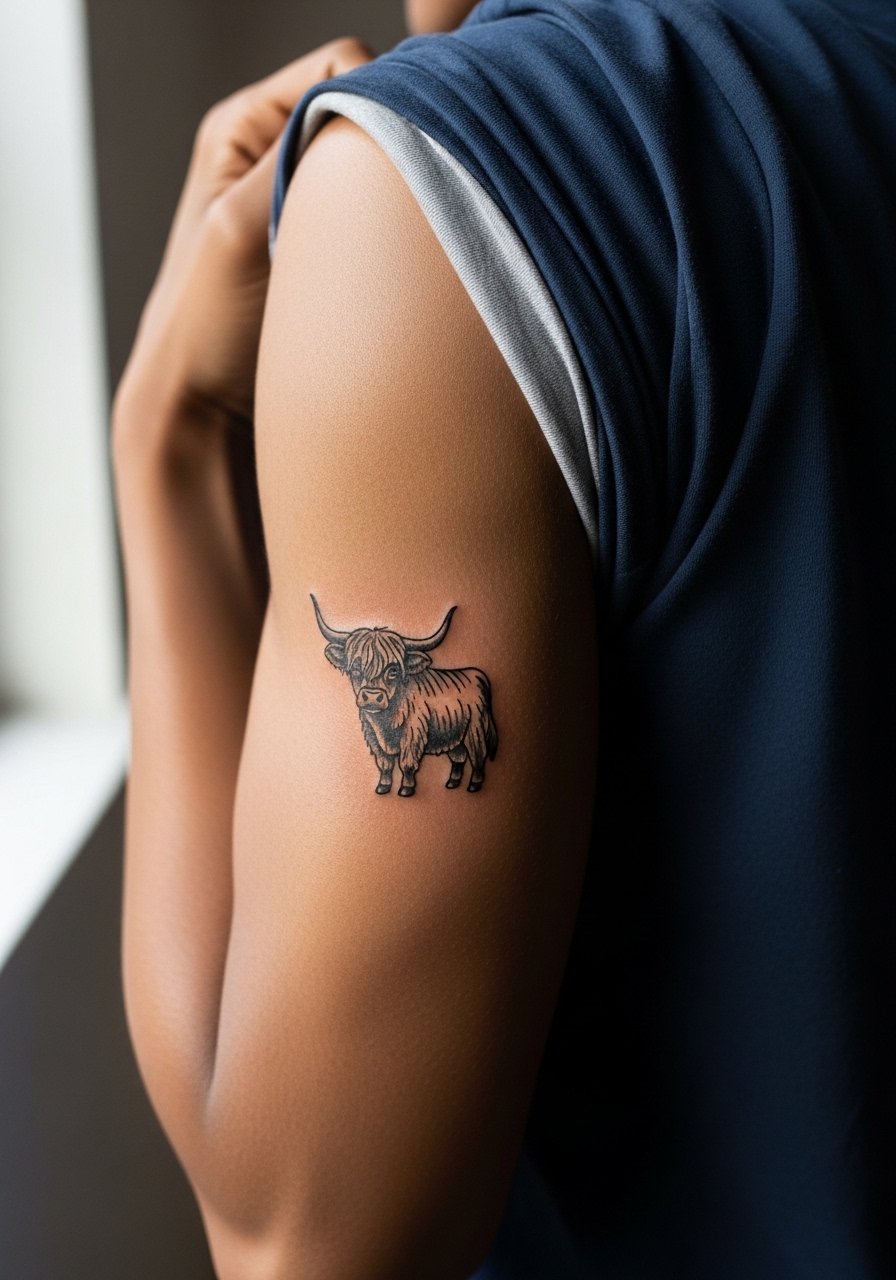
Back-of-arm placements are less common and sit in a zone of moderate movement. Sessions are short. The usual mistake is placing too much micro shading close to the crease. Keep the core shapes bold and use minimal internal texture. This spot pairs well with rolled sleeves or a short-sleeve knit that frames the accent.
25. Outer Hip to Thigh Transition
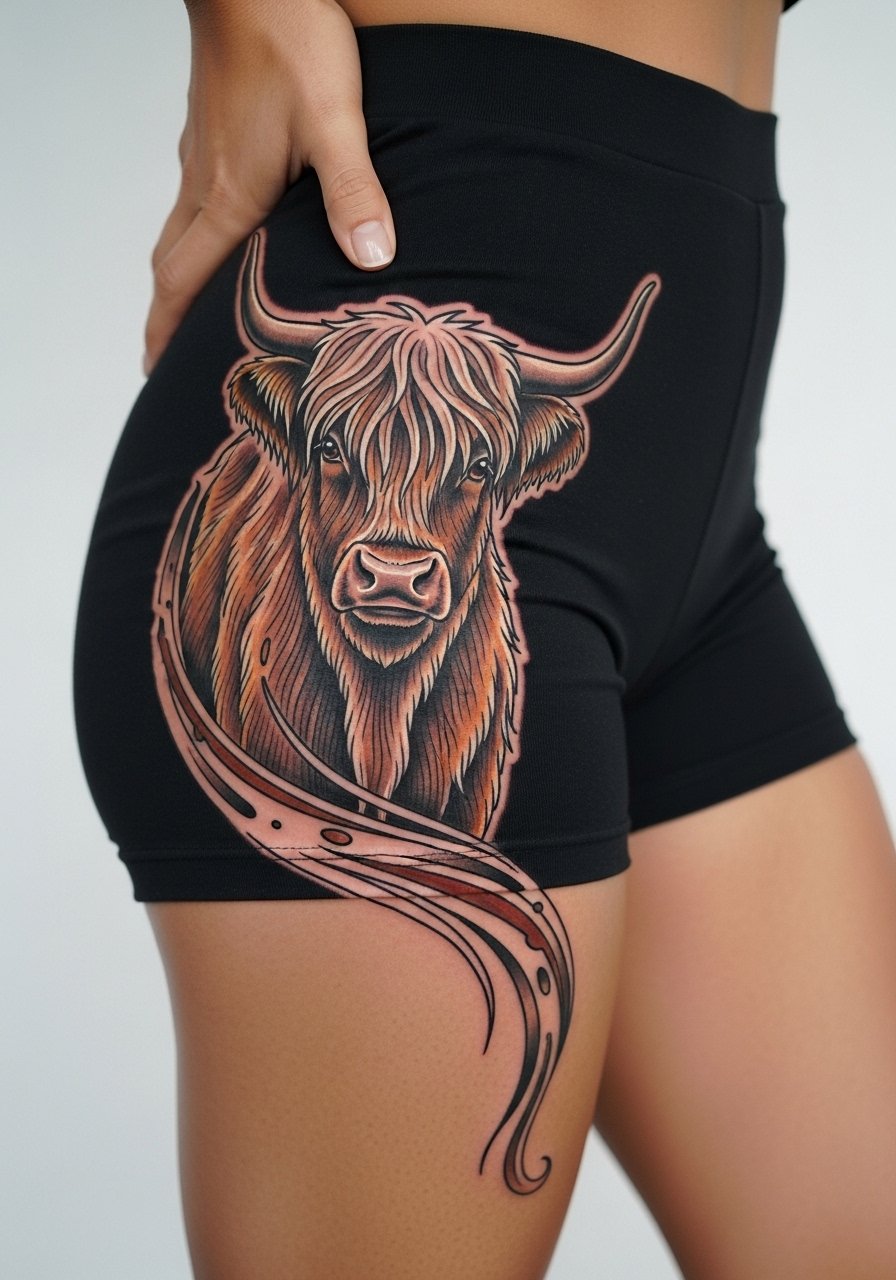
Pieces that cross the hip-thigh seam must consider how sitting and walking alter the design. Pain is moderate and longer sessions may be split. A common error is too many tight curls where fabric rubs. Ask for stronger outlines at transition points and test how the design looks seated. For session comfort pick adjustable high-cut shorts like high cut swim bottoms you can shift slightly for access.
26. Forearm Wrap with Small Horned Profile
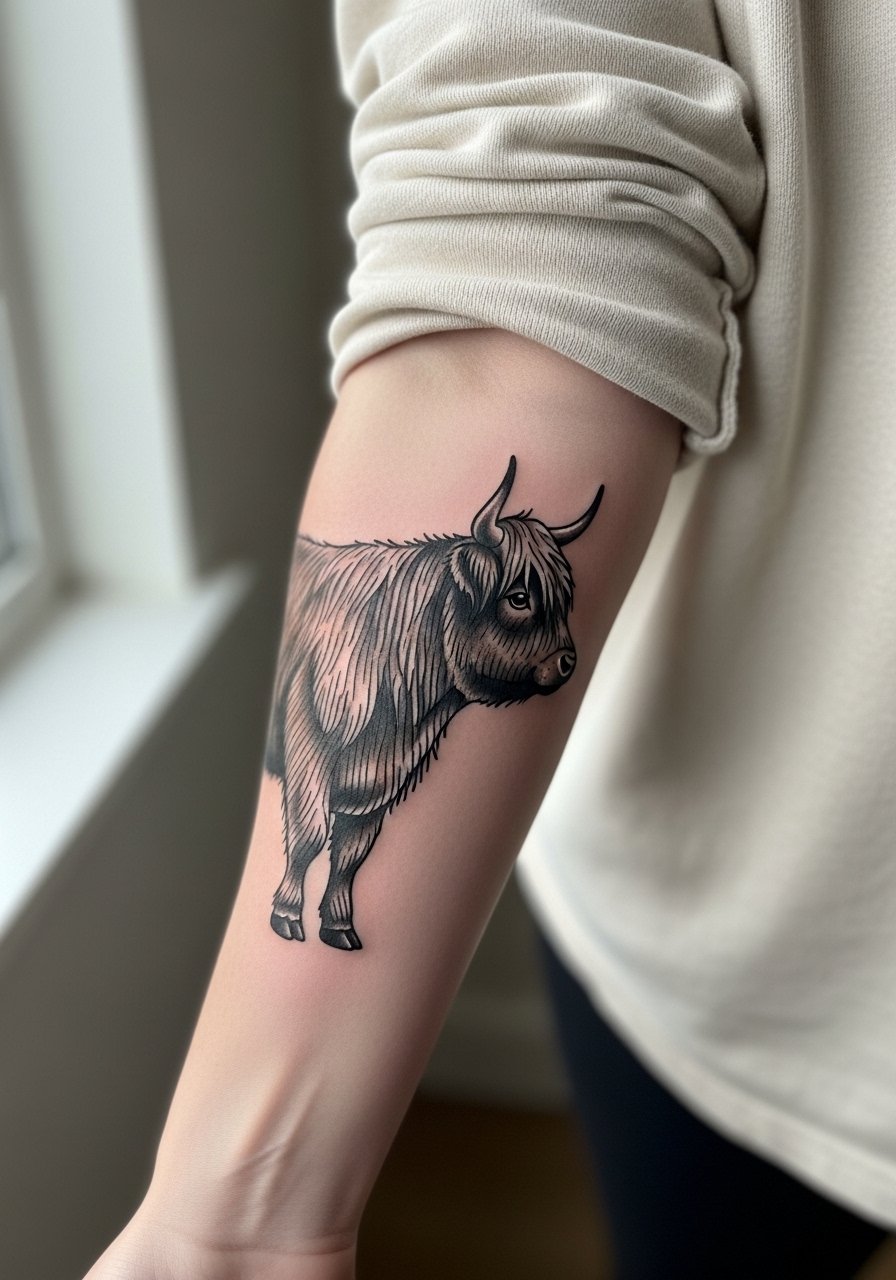
Forearm wraps are forgiving and show well. Sessions are moderate in length. Avoid filling the inner curve with tiny detail where the skin compresses. Tell the artist to prioritize outer contours and use dot work sparingly inside the fur. For a casual show-off, roll sleeves or wear a cream linen shirt to frame the wrap.
27. Small Chest Corner Accent Near Clavicle
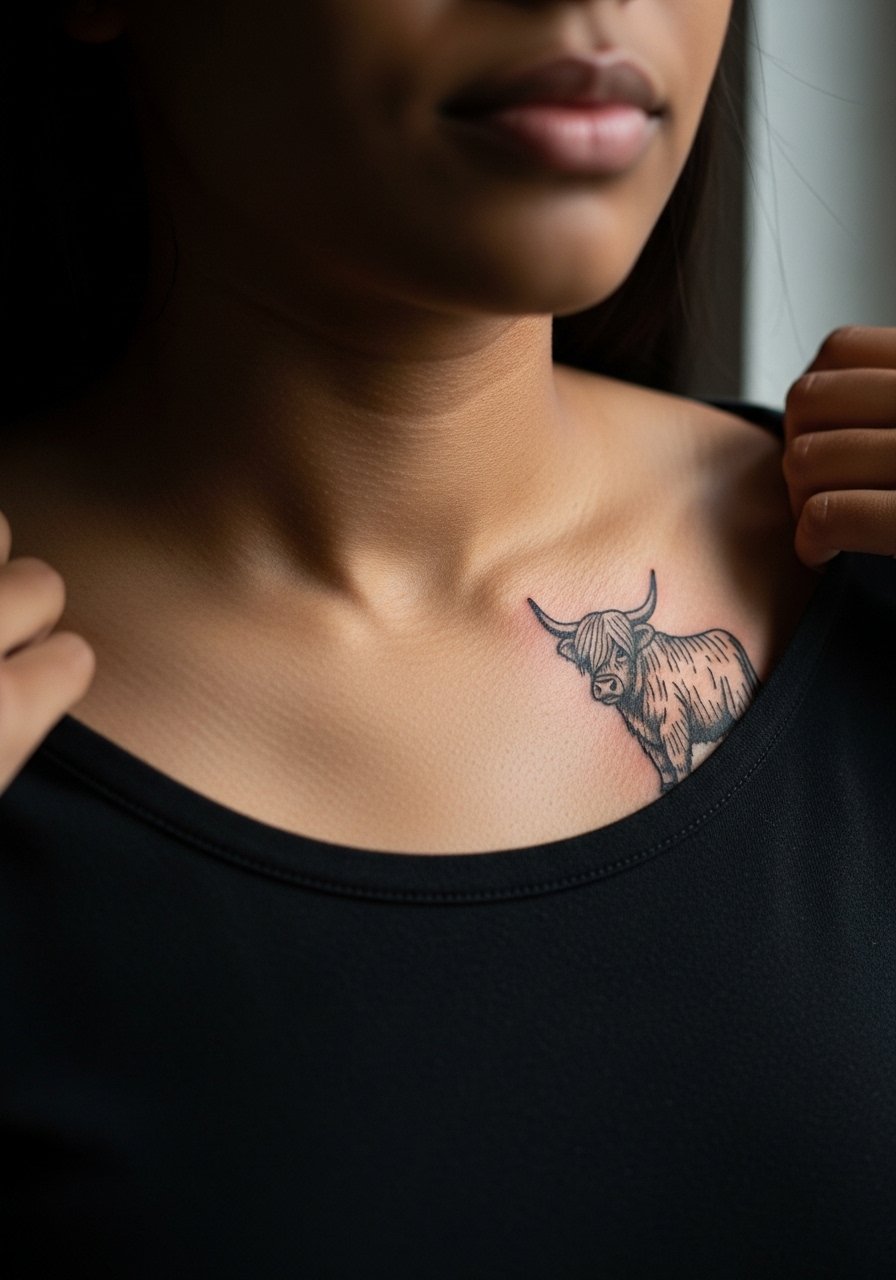
This small placement is visible without being center chest. Pain is mild to moderate. The common mistake is asking for too much internal fur texture in the tiny space. Request bolder silhouette anchors and light internal dots. If you need a discreet daytime look, plan clothing like a wide-neck top that reveals the accent when you want it to.
Frequently Asked Questions
Q: How does neo traditional saturation affect touch-up timelines for highland cow portraits on the forearm and calf?
A: Saturated neo traditional color holds differently by placement. Forearms face more sun and friction, so expect a touch-up sooner than calf work. From what I have seen, forearms often need a refinement at year two to three for bright elements, while calves hold color longer with touch-ups closer to year three to five.
Q: Are ribcage and sternum neo traditional cow pieces more likely to blur, and what should I ask my artist?
A: Yes, these spots are debated. One camp argues that torso expansion blurs fine work quickly. The other camp says properly spaced linework and deliberate saturation prevent that. Ask the artist for examples of healed work in the same placement and request slightly heavier outlines with open shadow fields rather than micro hair detail.
Q: I want a small wrist or finger cow accent. How should I tailor the design to last?
A: Keep shapes simple and lines bold, and avoid dense internal shading. Fingers and wrists are high-wear zones because of washing and movement. Plan for an annual touch-up and pick a design with anchor points in black so the silhouette reads even as color softens. Consider placement slightly off the knuckle to reduce friction.
Q: Can I combine script with a neo traditional cow without losing legibility?
A: Yes, when you separate the script from the main facial area or use chunkier letterforms. Tiny script close to dense color often softens into illegibility. Ask for bold letter spacing and try mock-ups on the skin to confirm scale.
Q: What clothing should I wear to a ribcage or sternum session to stay comfortable and give the artist access?
A: For sternum choose a fitted sports bra you can lower slightly. For ribs bring a cropped athletic top you can lift without exposing too much. These options let the artist work while keeping you comfortable and modest.
Q: Do watercolor backgrounds ruin neo traditional linework on highland cow tattoos?
A: Not necessarily. The risk is the wash blending into fine facial lines. A simple fix is to ask for a negative buffer between the watercolor wash and key facial contours so the linework keeps its definition as colors settle.
Q: How do I find an artist who specializes in neo traditional animal portraits without naming specific shops?
A: Use discovery pathways like location-based directories, event listings for conventions, hashtag searches for "neo traditional portrait" plus your city, and community forums where people post healed photos. Look for portfolios with healed images, and ask to see work on similar placements before booking.
