
The neo traditional spin on "One Life One Chance" cuts through trendy script and gives the phrase a visual life. It is a style that pairs bold outlines with painterly fills and clear iconography, and it wears differently depending on placement and spacing. Expect honest talk about pain, fading, and what to ask at consults, then detailed ideas that show how to make this theme last on skin.
1. Script Band with Neo Traditional Flourishes on Inner Wrist
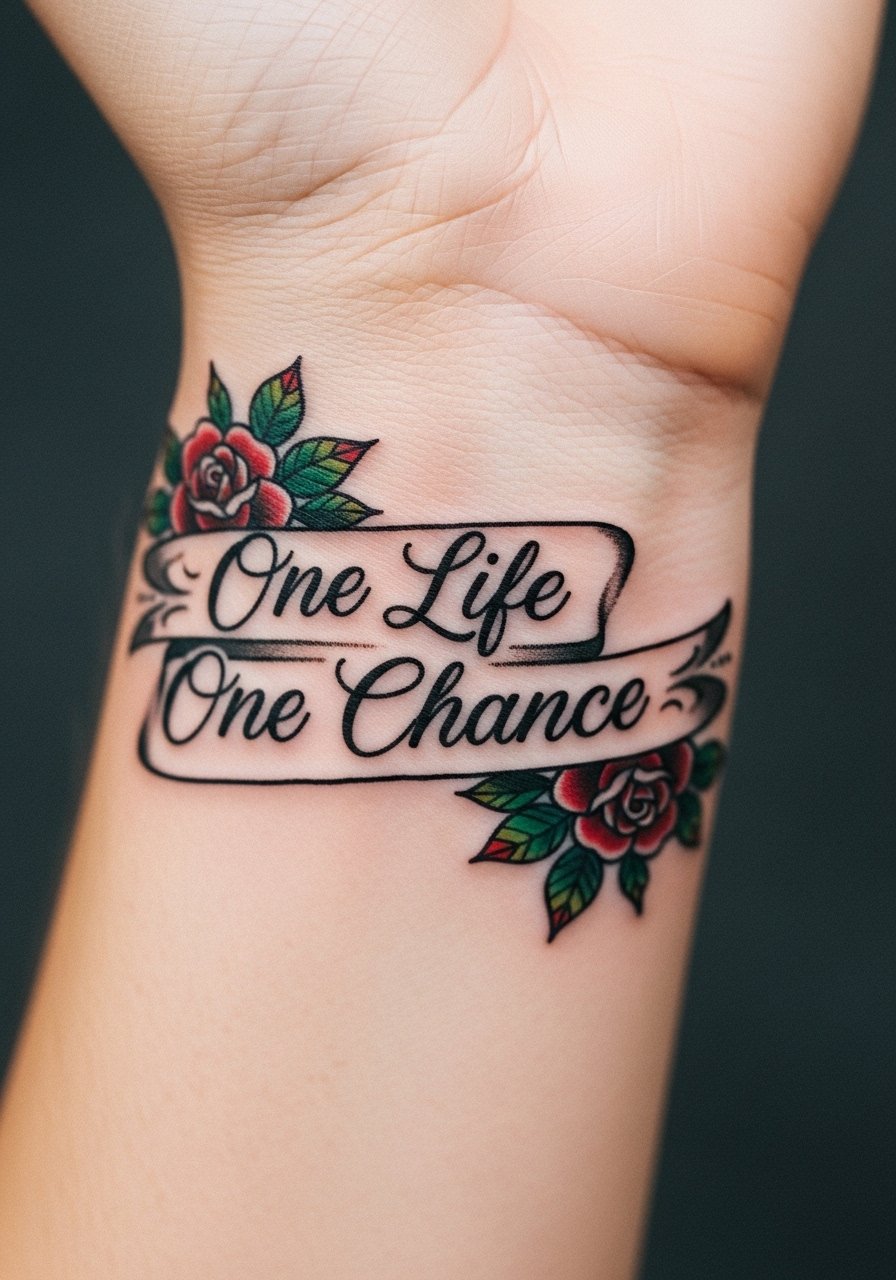
The inner wrist reads intimate and immediate. For this treatment, ask your artist for slightly heavier linework around the script so the letters keep definition after a year. Fair warning, wrists are high-motion zones and experience rubbing from watches and sleeves so expect a touch-up around year two to preserve the thin serifs. The session usually runs quick, under an hour, but the sting is sharper than forearm work. For showing it off, stack a few stackable dainty bracelets on the opposite wrist so attention balances without crowding the script.
2. Collarbone Banner with Stylized Rose
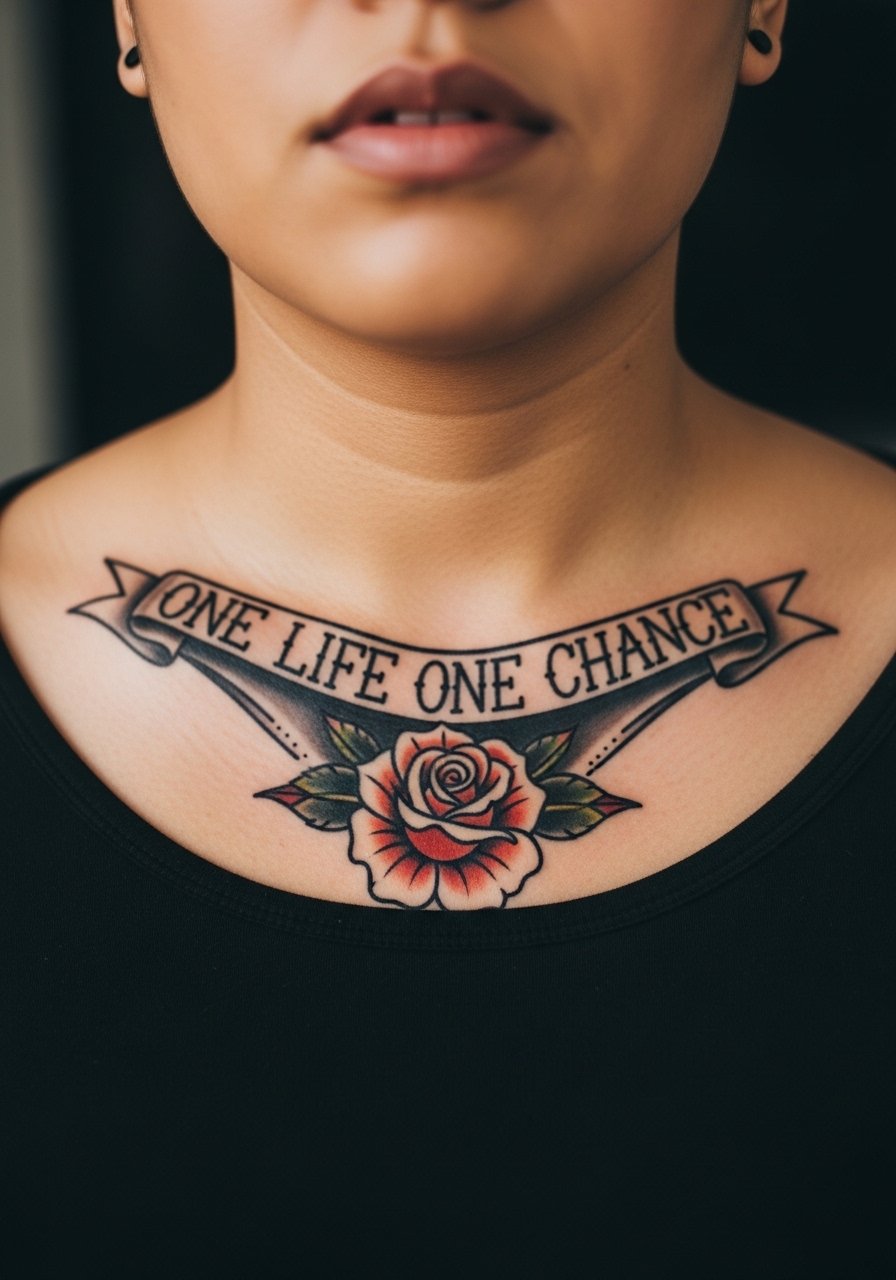
The collarbone is flattering for horizontal banners because the shape follows the bone. Tell your artist you want the banner to sit just above the clavicle and to keep the letters slightly spaced so they do not blur into the rose over time. Pain on the bone is a 6 out of 10 for most people. This placement ages well if the outline is bold and the shading has firm saturation, and it needs fewer touch-ups than wrist script. For the session wear a loose wide-neck shirt you can pull aside easily so the artist has a clean field.
3. Outer Forearm Heart, Dagger, and Banner
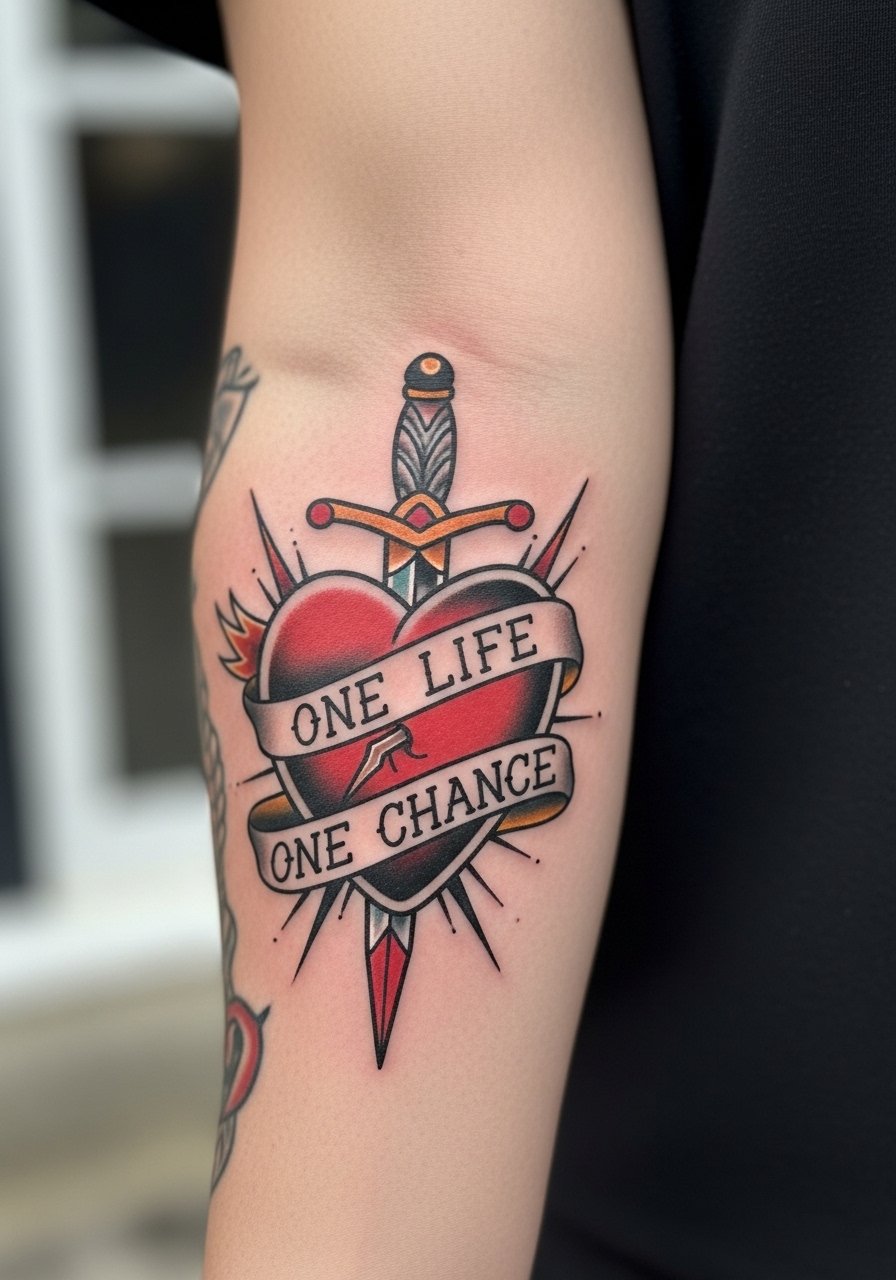
There is visual momentum in dagger and heart motifs that pair naturally with neo traditional shading. Bring reference showing the exact banner curve you want and ask for a thicker outline where the dagger pierces the heart to prevent color migration into the script. Forearm work is lower on the pain scale and shows well in sunlight, but dense cross-hatching near the script can age into softening by year three. A typical session takes two to three hours depending on color fills. Avoid asking for micro lettering within the dagger blade because tiny text loses clarity in this composition.
4. Ribcage Floral Panel with Script Banner
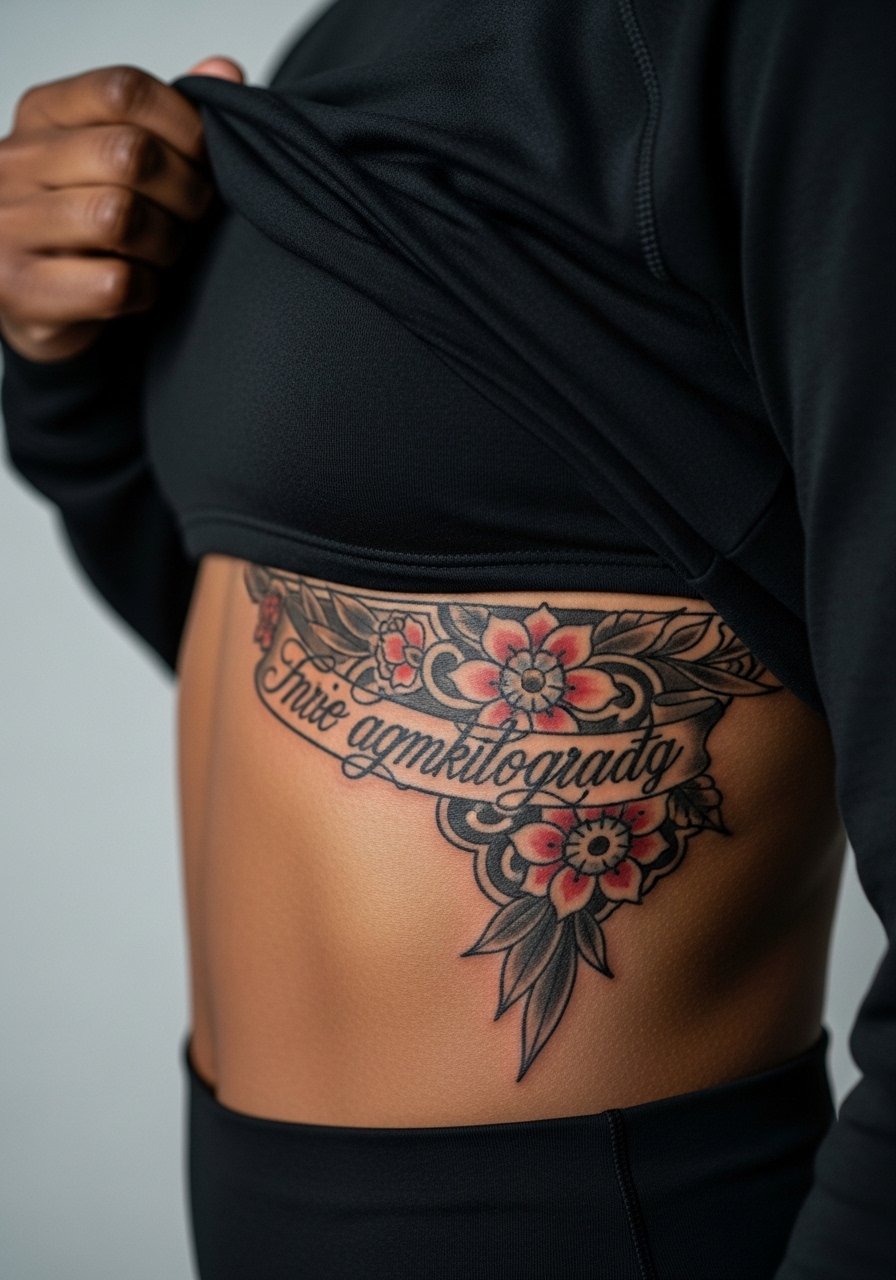
Ribcage placements split artists into two camps. One camp says fine line on ribs blurs quickly because of stretching and breathing motion. The other camp argues that if the line weight is set at the right depth and the spacing is generous, the design can stay crisp for years. The practical takeaway is to pick a slightly bolder line weight than you might want fresh. Pain here is higher, many report a 7 to 9 out of 10. Sessions may be longer because artists will pause for client comfort. Plan for a touch-up at year two for dense floral fills.
5. Sternum Mandala with Central Script
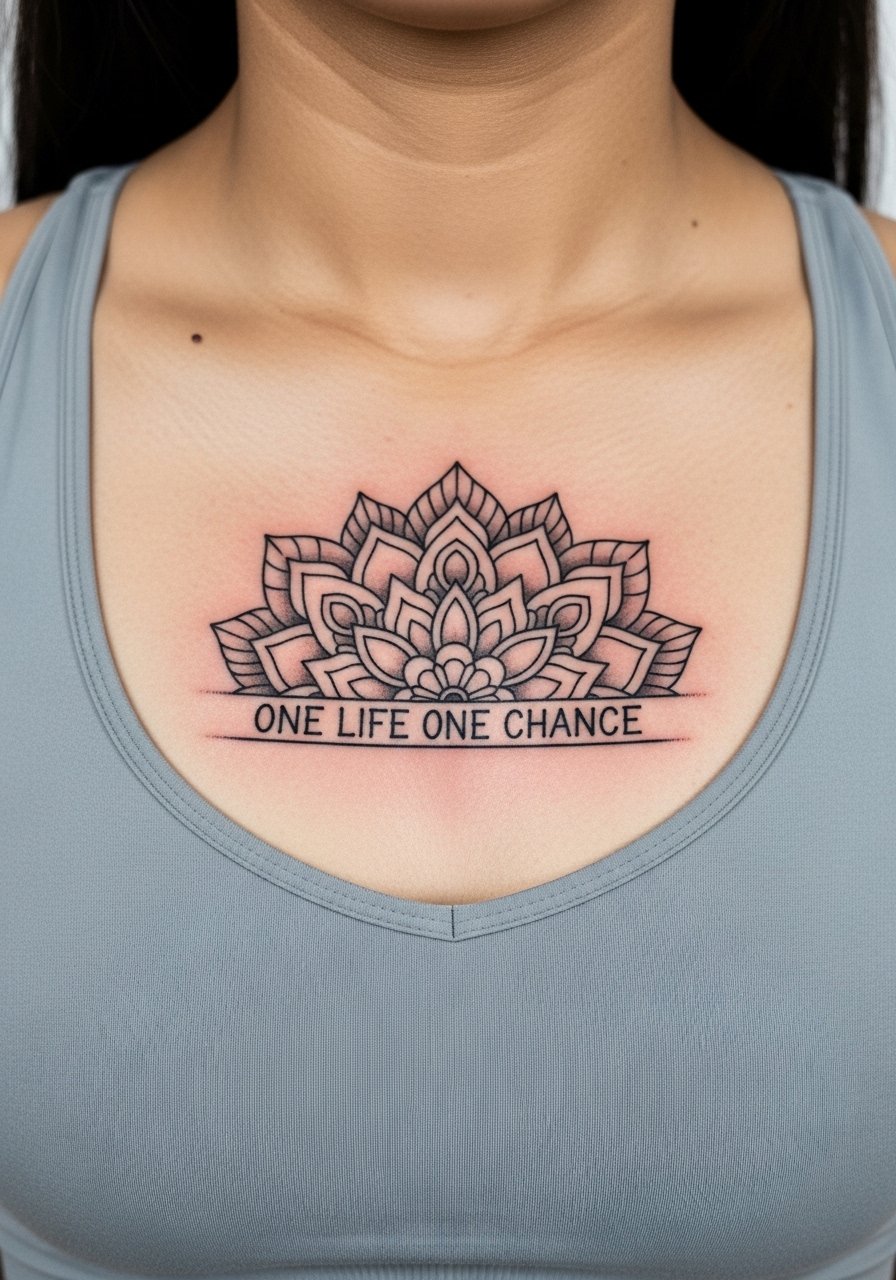
A sternum mandala needs breathing room. For this piece, tell your artist you want the central script set in an open banner rather than tiny letters tucked inside petals. Sternum skin moves with respiration and sessions can feel sharp at the start then settle into a dull throb. Many people prefer several short sessions so saturation can be built without excessive trauma to the area. Because the design centers on symmetry, ask to see a fresh stencil in multiple positions before the needle hits skin.
6. Upper Arm Compass with Ragged Banner
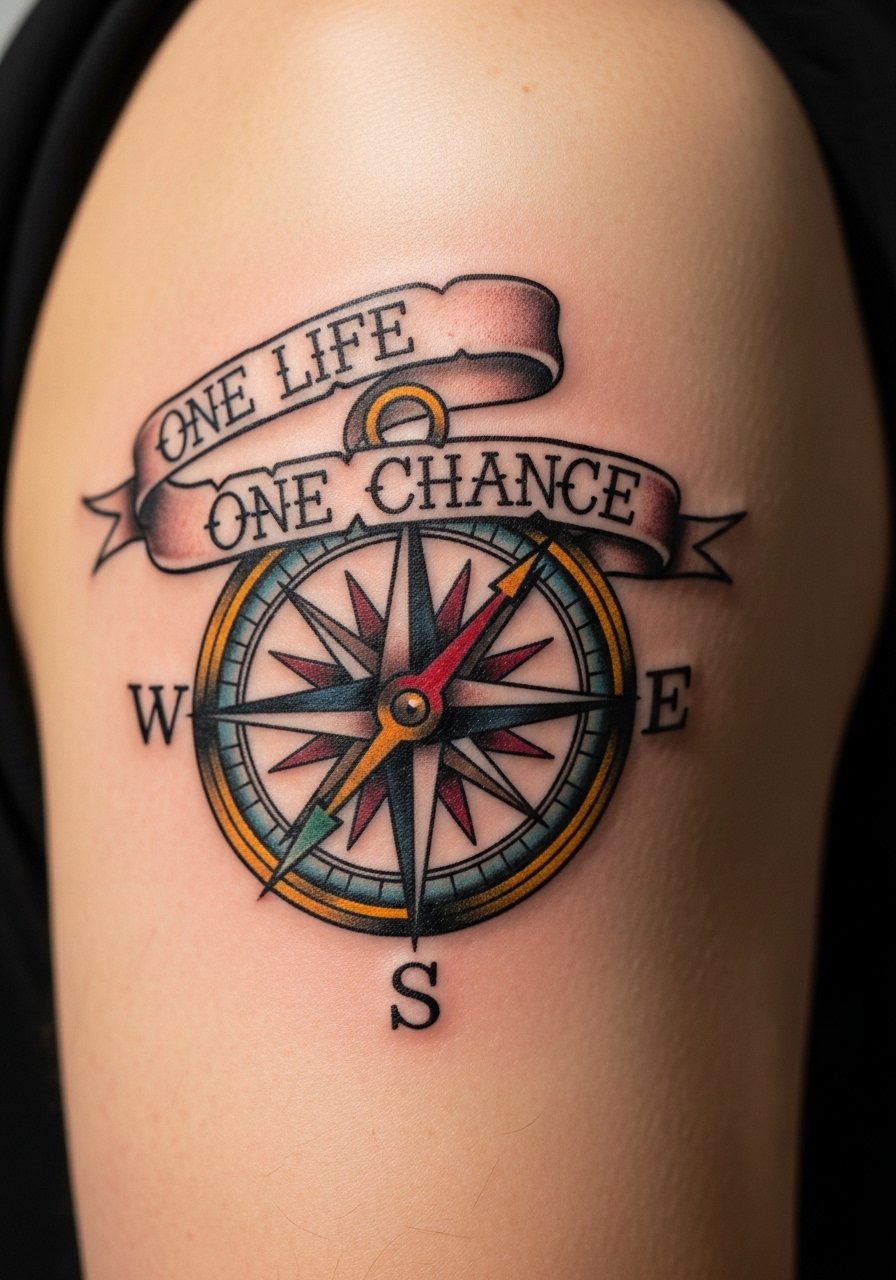
The upper arm is forgiving for size and detail. A compass motif gives you room to keep the script larger and still balanced. For consultation, ask for the compass points to have slightly heavier anchors so they hold through fading. Pain is moderate, and most clients describe long sessions there as manageable. Expect one or two sessions depending on color complexity and allow a touch-up at year three for the outer rim if you swim or spend a lot of time in the sun.
Studio Day Picks
The pieces above include wrists, ribs, chest, and upper arm work, and a few small things make the session and first week more comfortable for those placements.
-
Stencil transfer paper kit. Lets you preview how the banner and script sit on curved areas like the clavicle and ribs before the first pass.
-
Topical numbing cream. Applied per instructions about 45 minutes before can ease the sting for sternum and rib sessions without altering the artist's linework.
-
Thin protective film roll. Useful for wrist and forearm wraps where constant friction from clothing risks early scabbing.
-
Fragrance-free gentle body wash. Cleanses delicate new ink on areas like the upper arm and collarbone without irritating fresh linework.
-
Aquaphor healing ointment. Thin application in the first few days locks in moisture for fine script and helps reduce heavy scabbing on sensitive zones.
7. Neo Traditional Panther on Upper Thigh
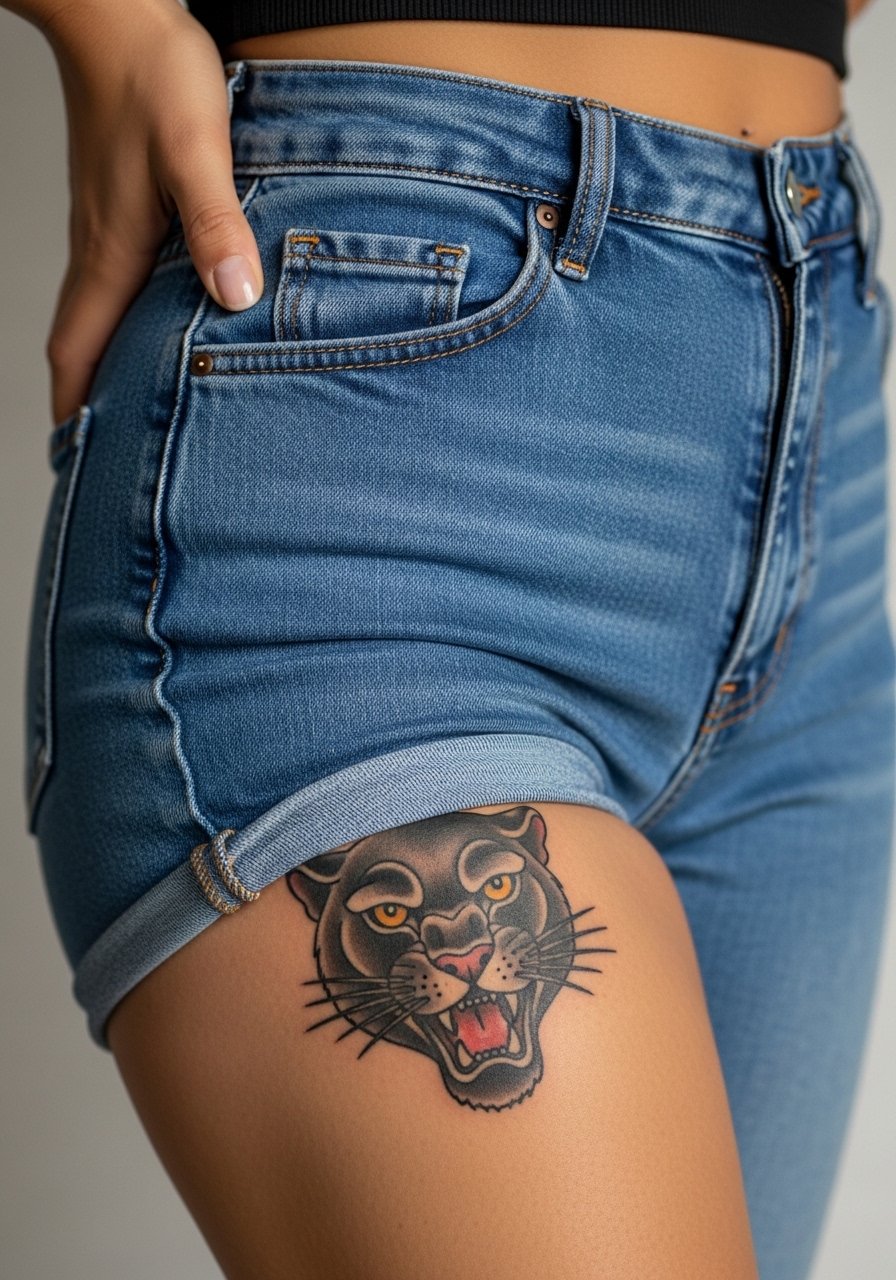
Upper thigh work is private and shows beautifully in summer shorts. Tell your artist you prefer bold contrasts between the panther's fur and the background to keep the shape readable if color loses saturation. The pain is lower than ribs, though deep shading can feel intense near the bone. Session length can be long if you want full color panels. For intimate placements like this, plan session wear that lets you expose only the area needed without discomfort.
8. Back of Hand Swallow with Script Ribbon
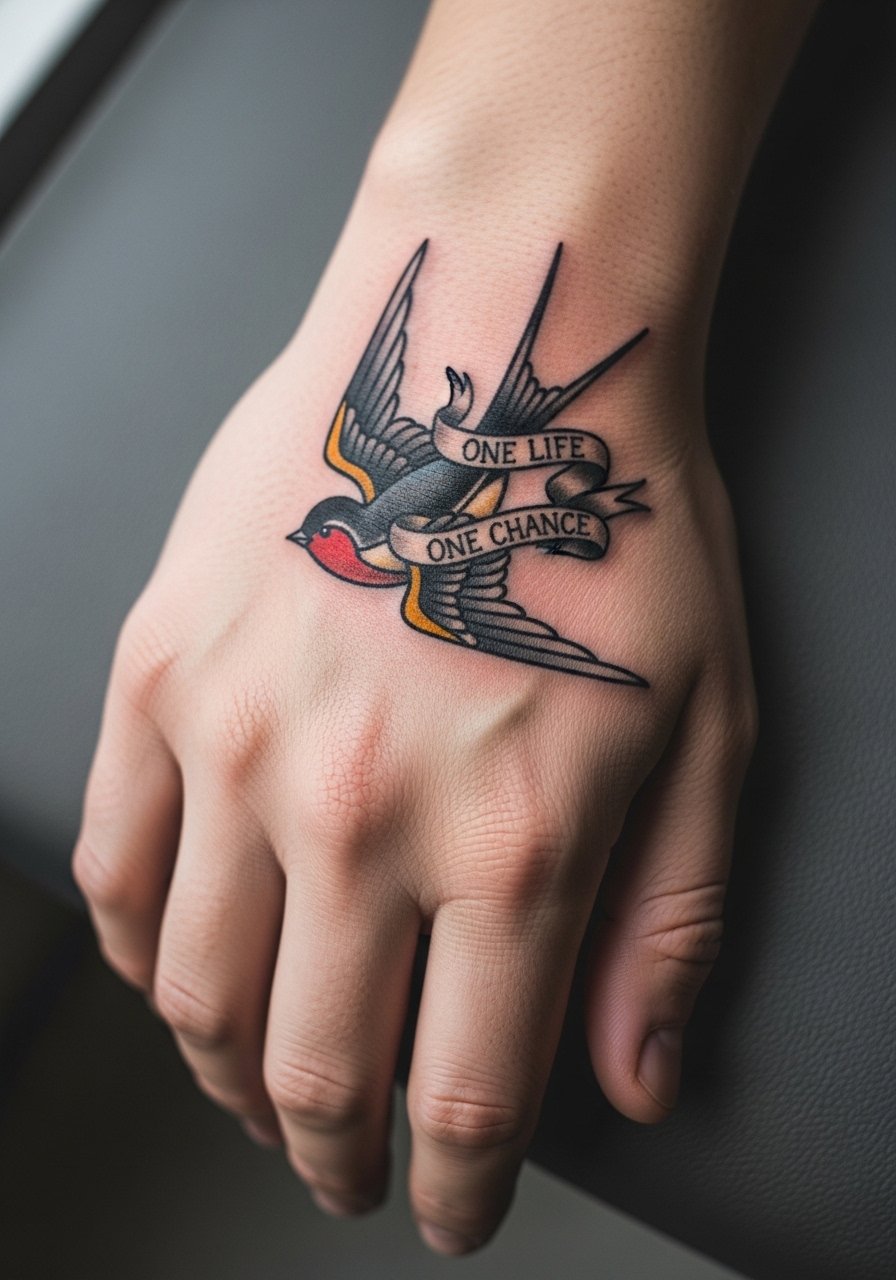
Hand tattoos are candid and age differently than arm work because hands get constant washing and friction. One camp says hands require frequent touch-ups. The other camp says careful placement over tendons with strong outlines can reduce migration. For a back-of-hand ribbon, ask for thicker outline and avoid tiny interior script. Sessions are painful and quick. For showing this off when healed, pair it with a minimalist watch on the opposite wrist so the hand art stands alone without competing accessories.
9. Inner Bicep Portrait with Banner
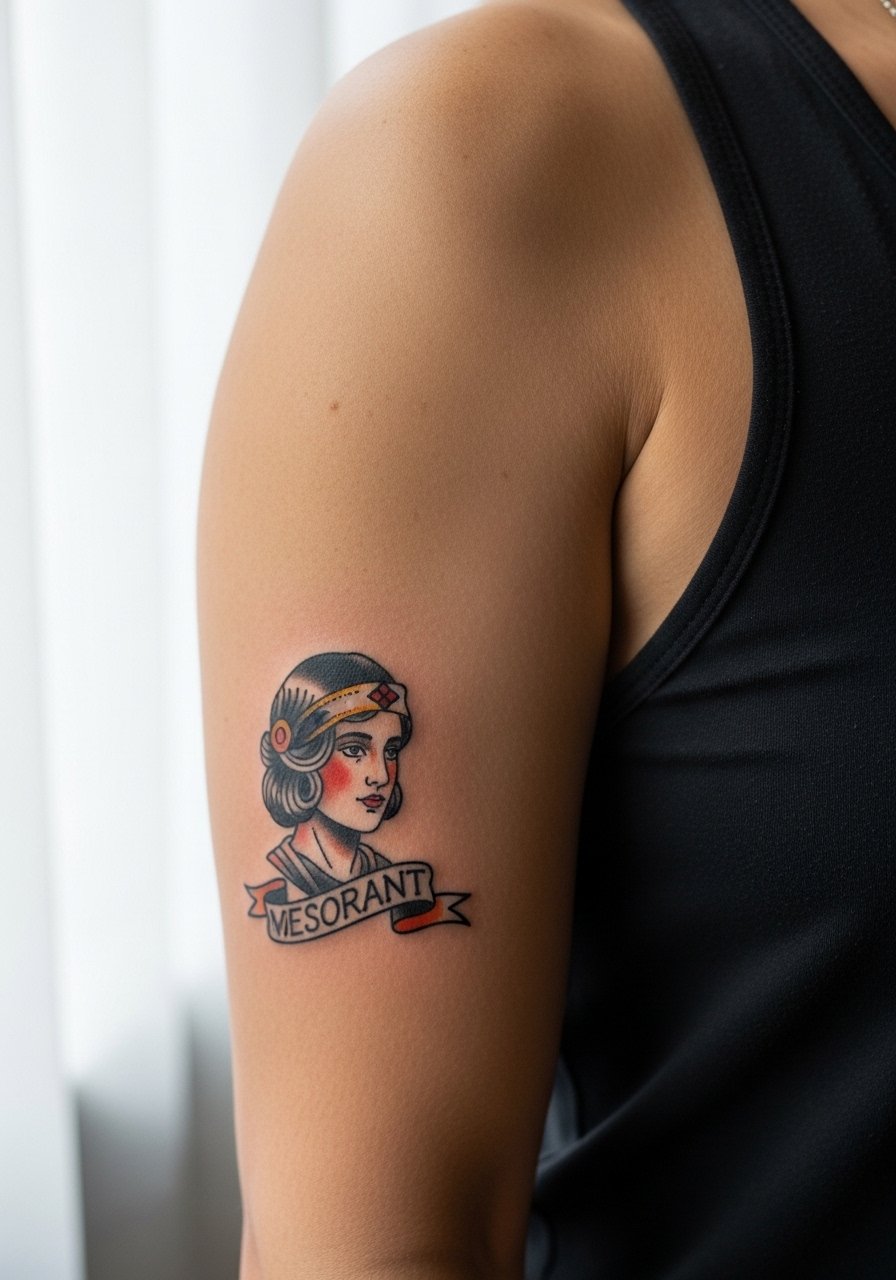
Inner bicep skin is soft and moves with every arm motion. Because of that, portrait elements need larger scale to maintain facial detail over time. The main mistake is asking for tiny facial lines inside a narrow banner. The session feels tender for many because the area is less exposed usually. For consults, show clear portrait references and ask the artist to simplify facial lines into graphic shapes that hold better as the tattoo heals.
10. Calf Panel with Anchor and Roses
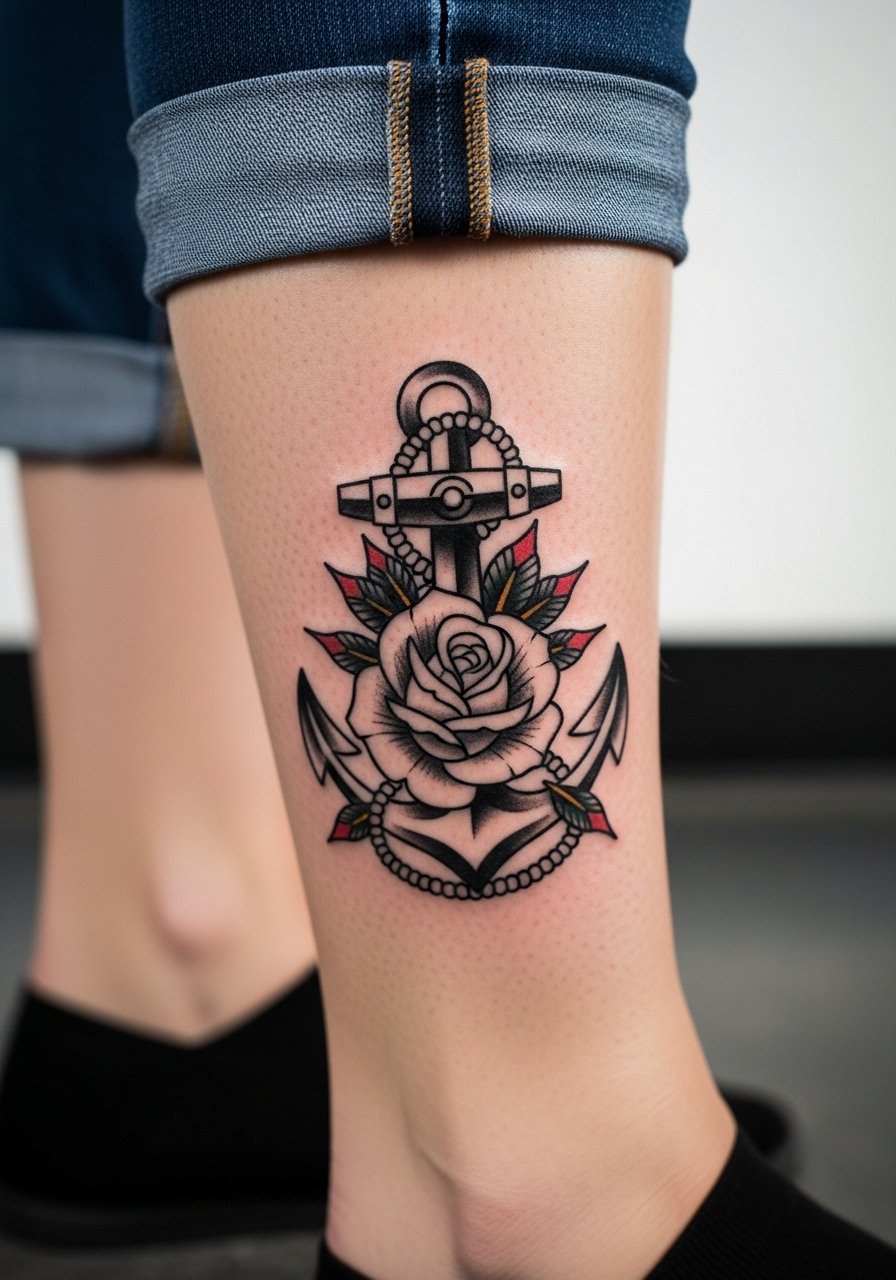
Calf pieces photograph well and tolerate larger saturation blocks. If you want the script tied into petals, ask for open negative space around letters so the shapes do not merge over time. Pain for calf work is mild to moderate depending on proximity to the shin. Sessions can be longer because the canvas is generous. This placement looks great with ankle boots or rolled denim that show the art without crowding it.
11. Ankle Script with Tiny Stars
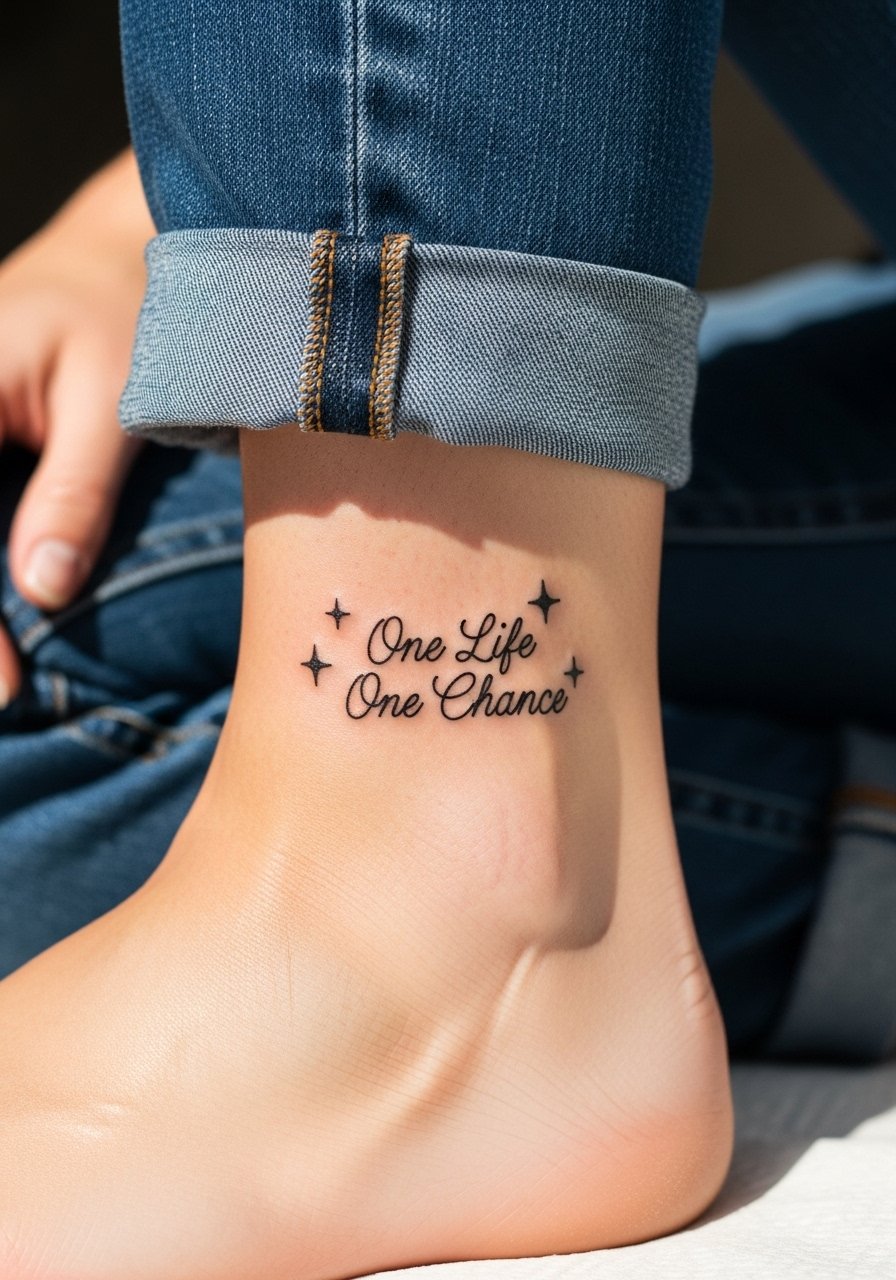
Ankle script is cute and fragile. The main mistake is going too small for letters that need to withstand shoe friction and seasonal socks. Expect slow healing if the wrap hits socks or boots, and plan to keep the area elevated when possible in the first 48 hours. For showing it off, sandals or low-cut sneakers work. Consider a single delicate anklet to frame the script after healing.
12. Full Forearm Sleeve Mix with Script Band
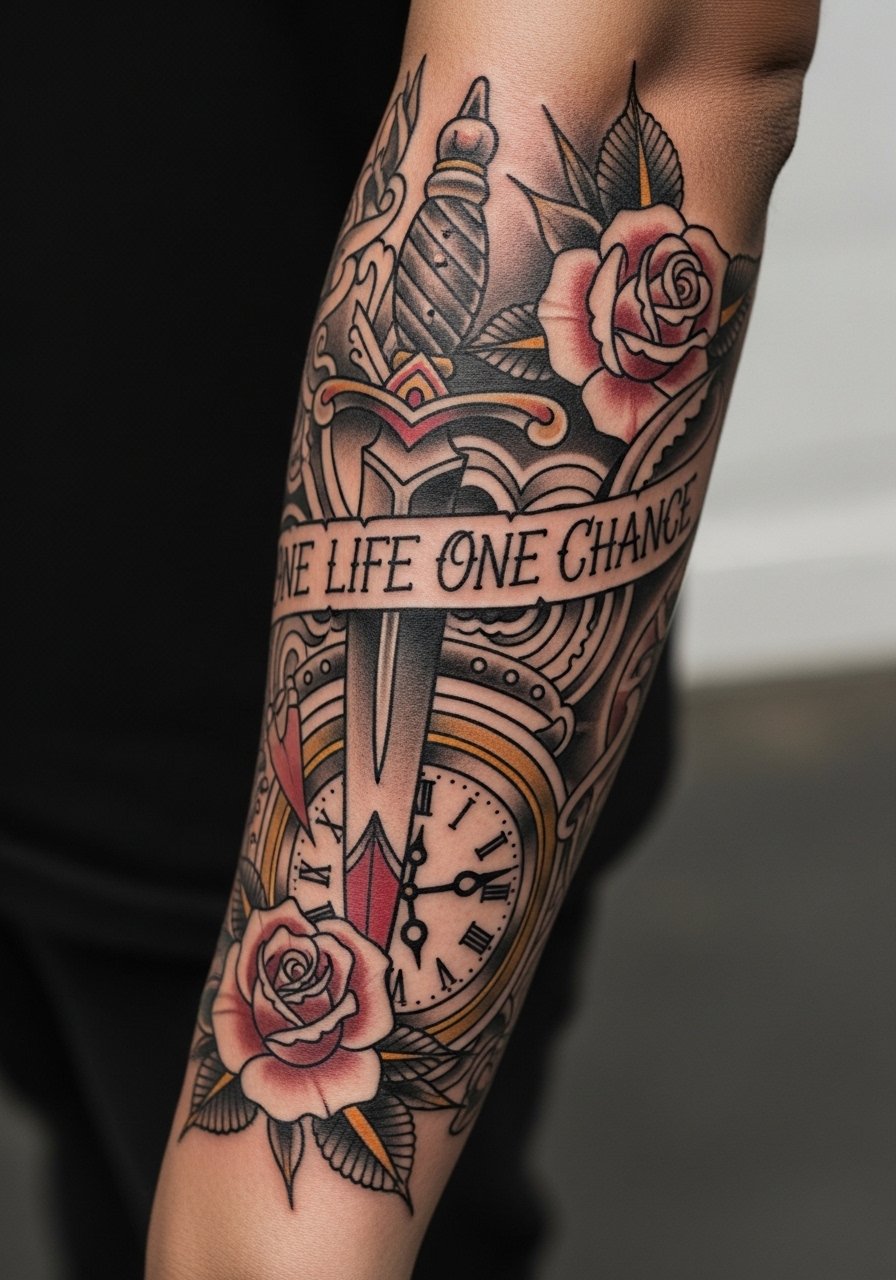
A forearm sleeve gives you narrative space for symbolic elements. Tell your artist which motif should read first at a glance, and have them map the band so it wraps without distortion when the arm moves. The common error is overcrowding details into tight spots. Expect multi-session work with color layering to build saturation gradually. Forearm sleeves age reasonably well when outlines are bolder and shading is applied in layers. For showing it off, roll sleeves or wear short-sleeve linen shirts that keep attention on the artwork.
13. Side Neck Script Below Hairline
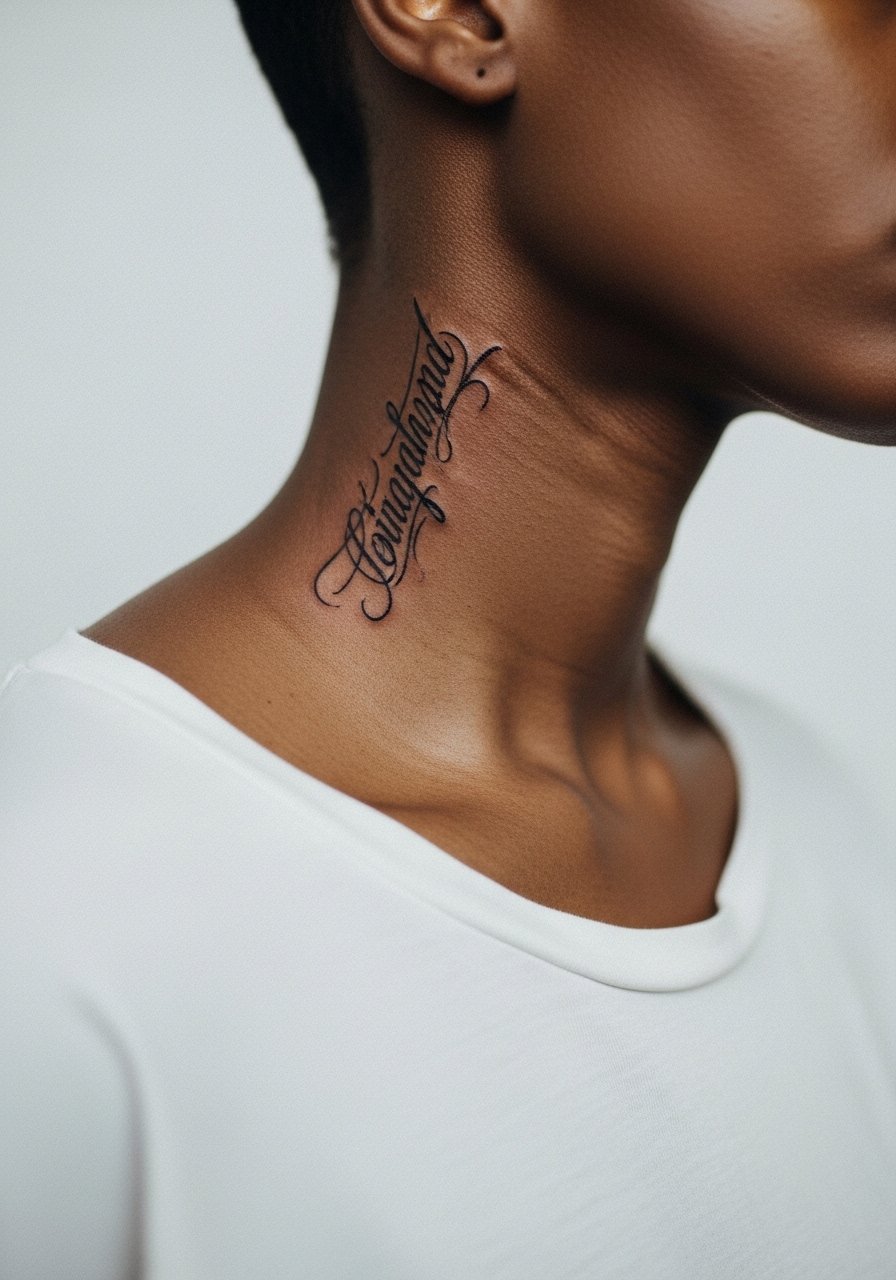
Neck placements carry visibility and social trade-offs. Artists divide into camps on small neck script. One camp warns that the skin and movement make tiny letterforms blur quickly. The other camp says with proper depth and spacing, small scripts can remain legible. Because the area is visible in many professional settings, think carefully about lifestyle implications. Expect a sharper sting in the session and plan for a touch-up at year one if you wear collared shirts that rub the area.
14. Shoulder Blade Large Floral with Banner Accent
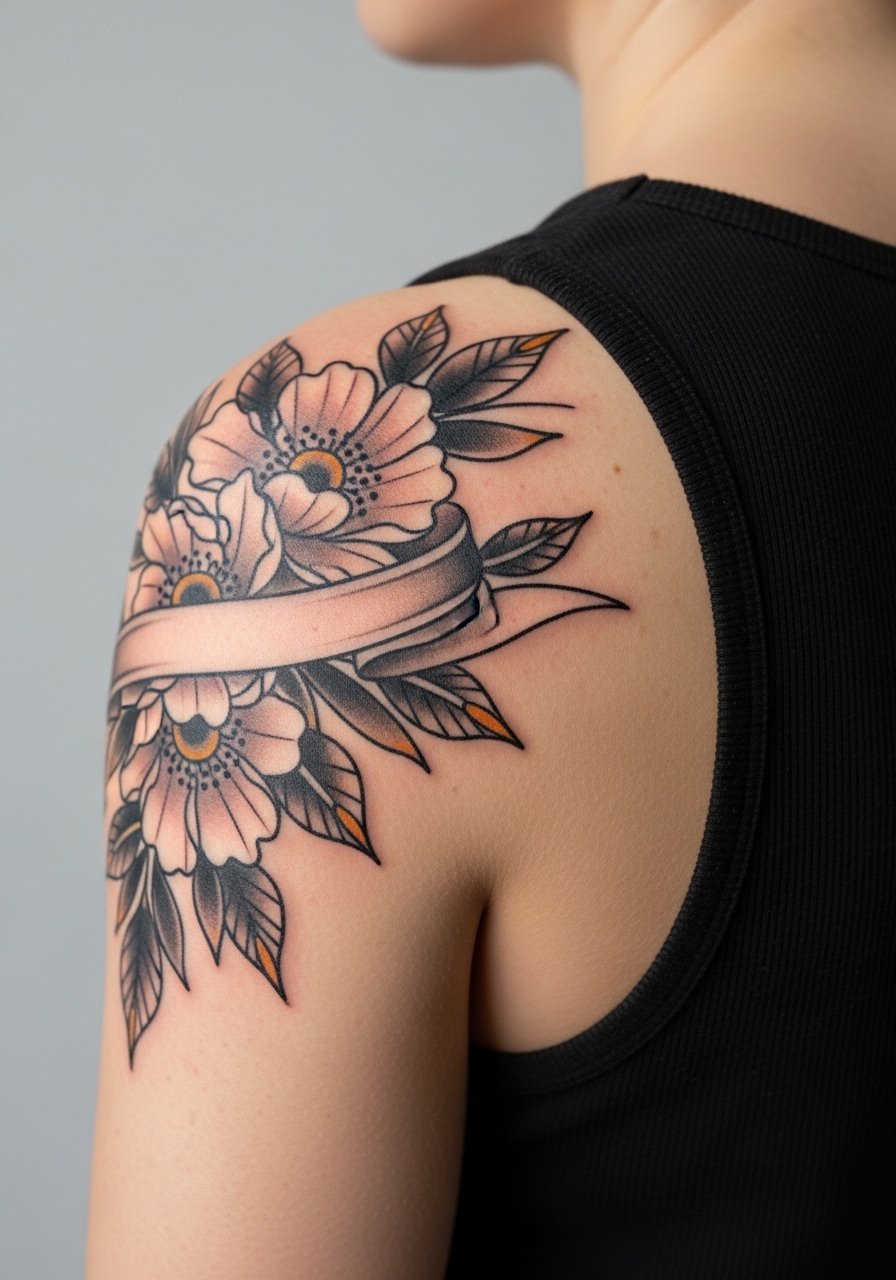
Shoulder blade canvases are forgiving for scale and detail. Ask for the banner to curve naturally with the scapula so the phrase reads when you move. Sessions are comfortable for most because you can lie on your stomach. The main mistake is asking for too many tiny scripted words in a narrow banner that crosses muscle. For evenings out, an open-back top shows this piece well. Try pairing it with an open-back midi dress once healed.
15. Lower Back Tiny Nautical Anchor
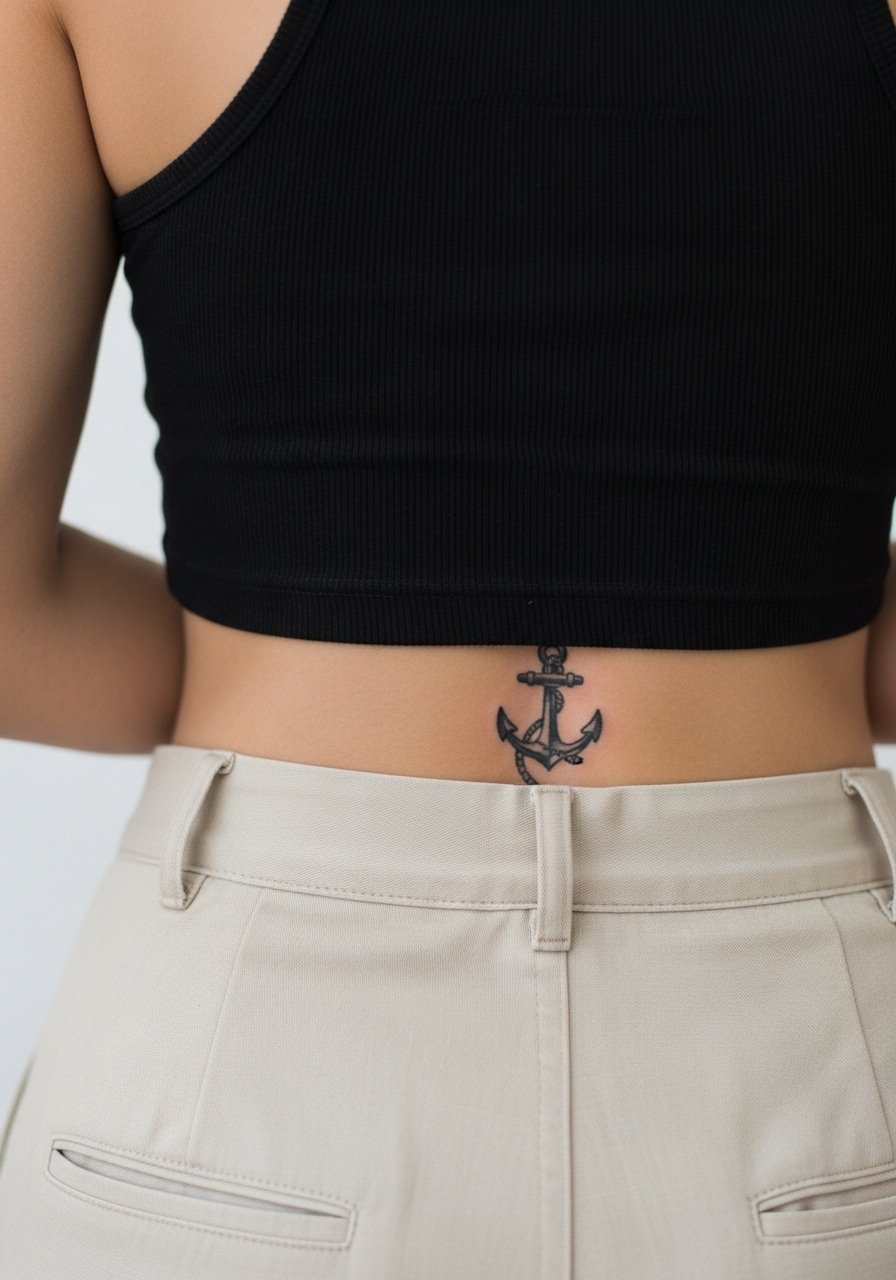
Lower back work remains a discreet choice. Because the area sees stretching with movement, keep linework bold and avoid micro script. The session is usually quick and tolerable. For placement clarity, have the artist mark the exact spot while standing and sitting so the anchor does not ride awkwardly with waistbands. If you plan on show-off looks, low-rise jeans and crop tops reveal this spot cleanly.
16. Hip Crescent Moon with Floral Banner
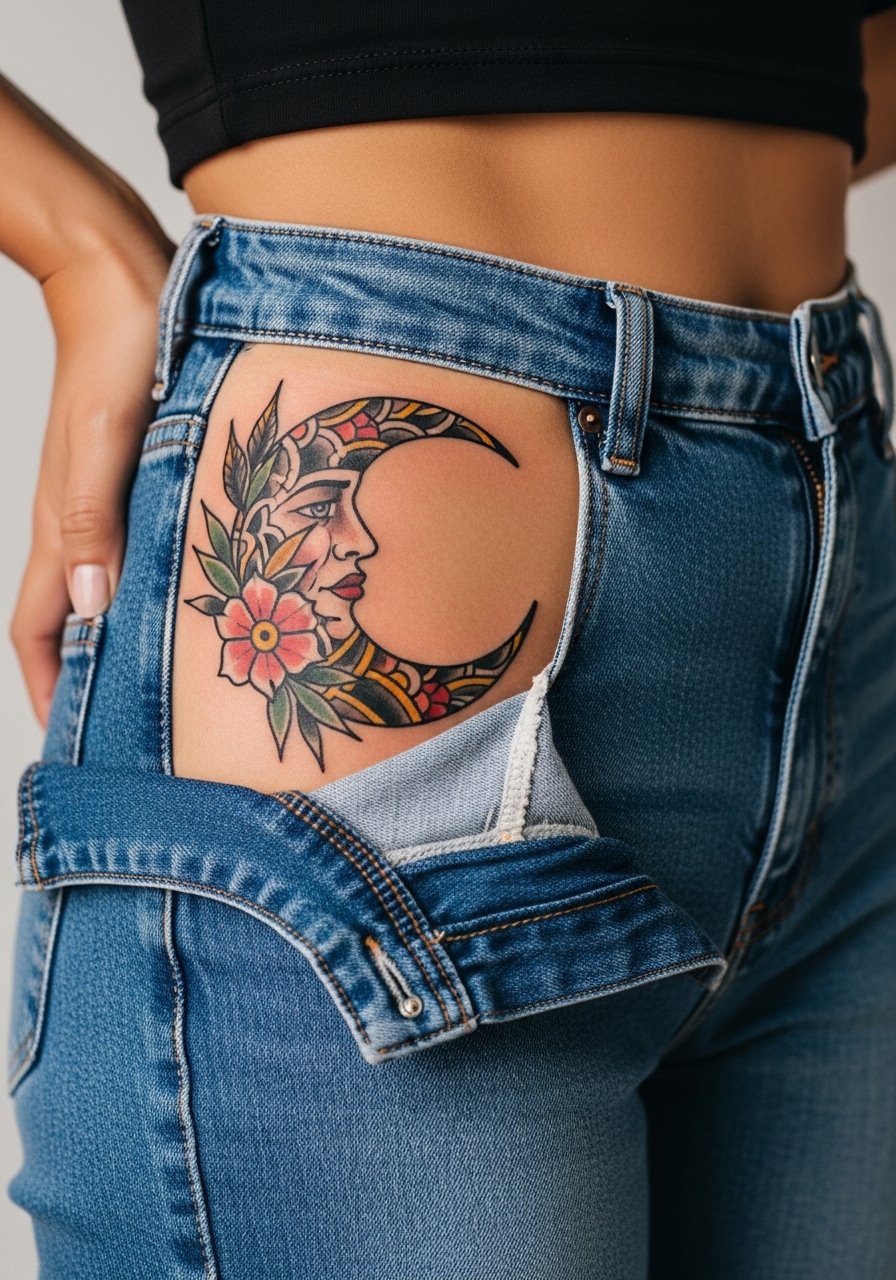
Hip tattoos sit where skin stretches with movement and weight changes. For banners that carry script across the hip, ask for larger letter spacing and thicker serifs. The main mistake is tiny script crossing the curve of the hip which blurs within a year. Sessions are moderate in pain because the area is fleshy. For the appointment wear high-waisted bottoms you can lower slightly without exposing more than necessary.
17. Micro Neo Traditional Icons on Fingers
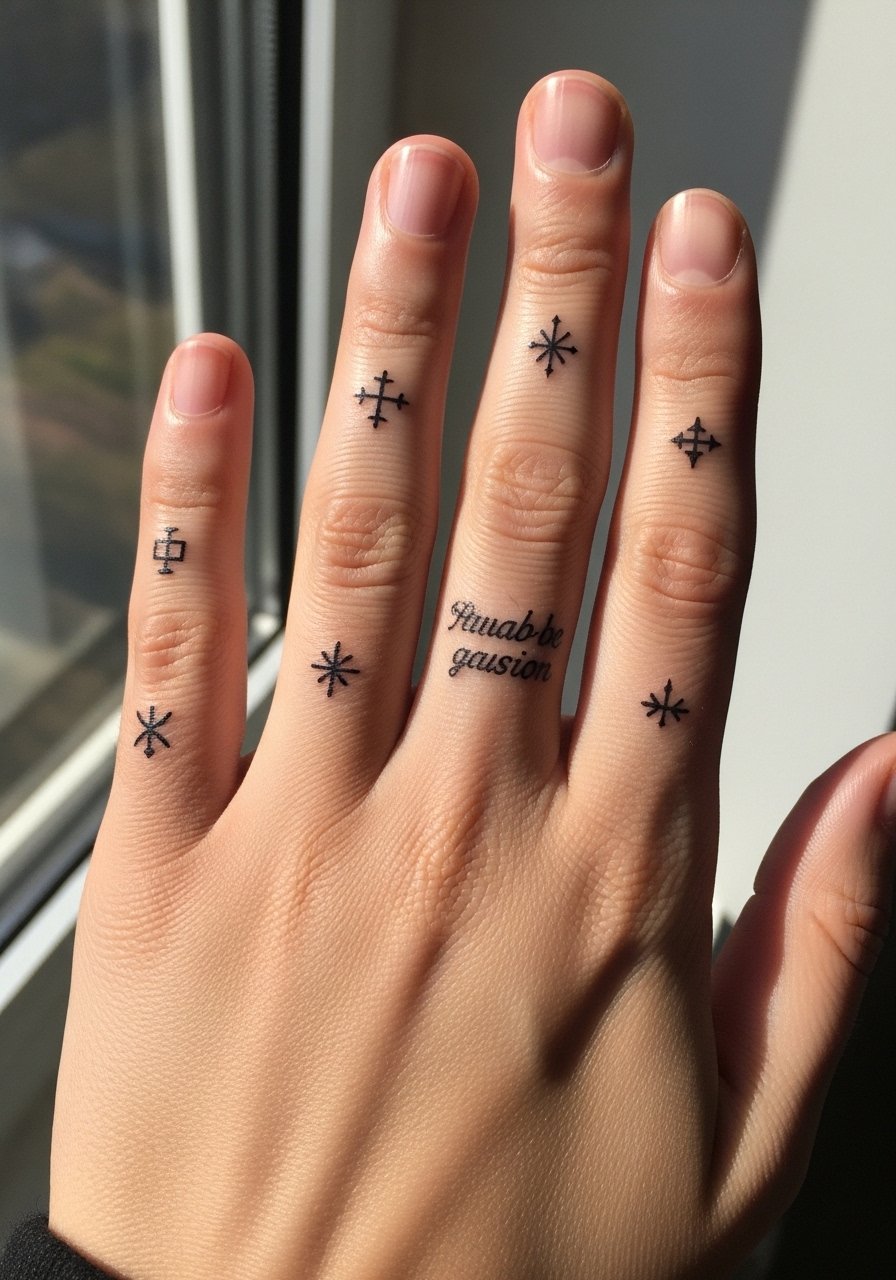
Finger tattoos are bold commitments because skin there wears quickly. The two camps here debate whether fingers are worth it. One camp accepts frequent touch-ups as the norm. The other camp avoids fingers for any micro script and sticks to tiny symbols with heavy outlines. If you want letters, make them larger and skip thin serifs. Sessions are sharp and short. For accessorizing after healing, pair with simple stackable rings so the fingers look intentional and styled.
18. Calf to Ankle Flowing Script and Petals
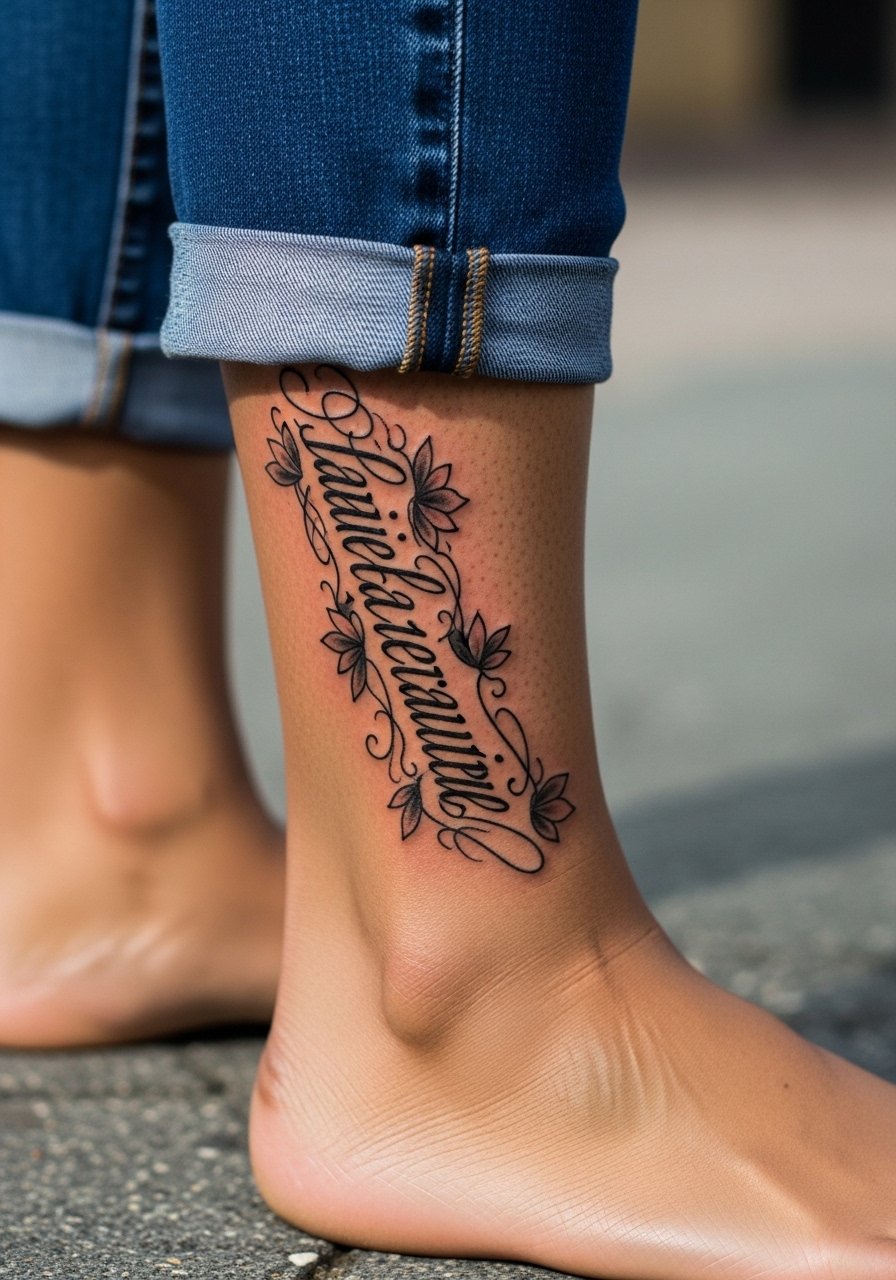
This vertical treatment reads like a verse when viewed from the side. Tell your artist you want the letters to have breathing room between the petals so they do not merge as the ankle sees friction. Pain is moderate at the calf and increases approaching the ankle. Sessions can be split into two so saturation stays consistent. For showing off, cropped pants or skirts frame the work. Consider a flowy midi skirt that moves around the calf to reveal glimpses.
19. Small Script Behind the Ear, Neck Edge
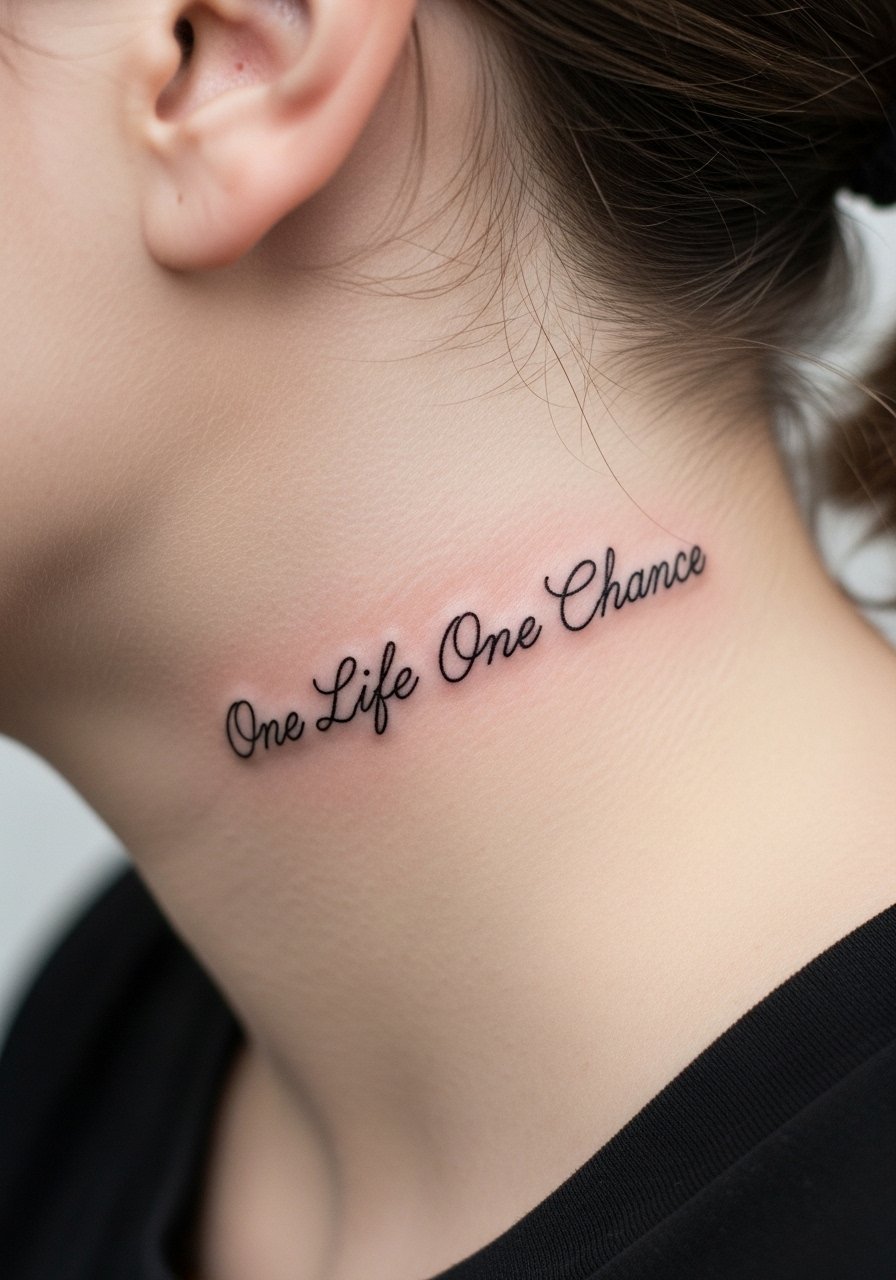
Behind-the-ear placements require careful scale. The skin there is delicate so keep letters larger than you might expect. Artists split on whether tiny text holds back there. One view says the area blurs fast. The alternate view says correct depth and spacing work fine. Sessions are quick but feel sharp given proximity to bone and cartilage. For consults, ask the artist to apply a stencil while your hair is up so you can see exact placement before committing.
20. Collarbones Script with Small Pendant Framing
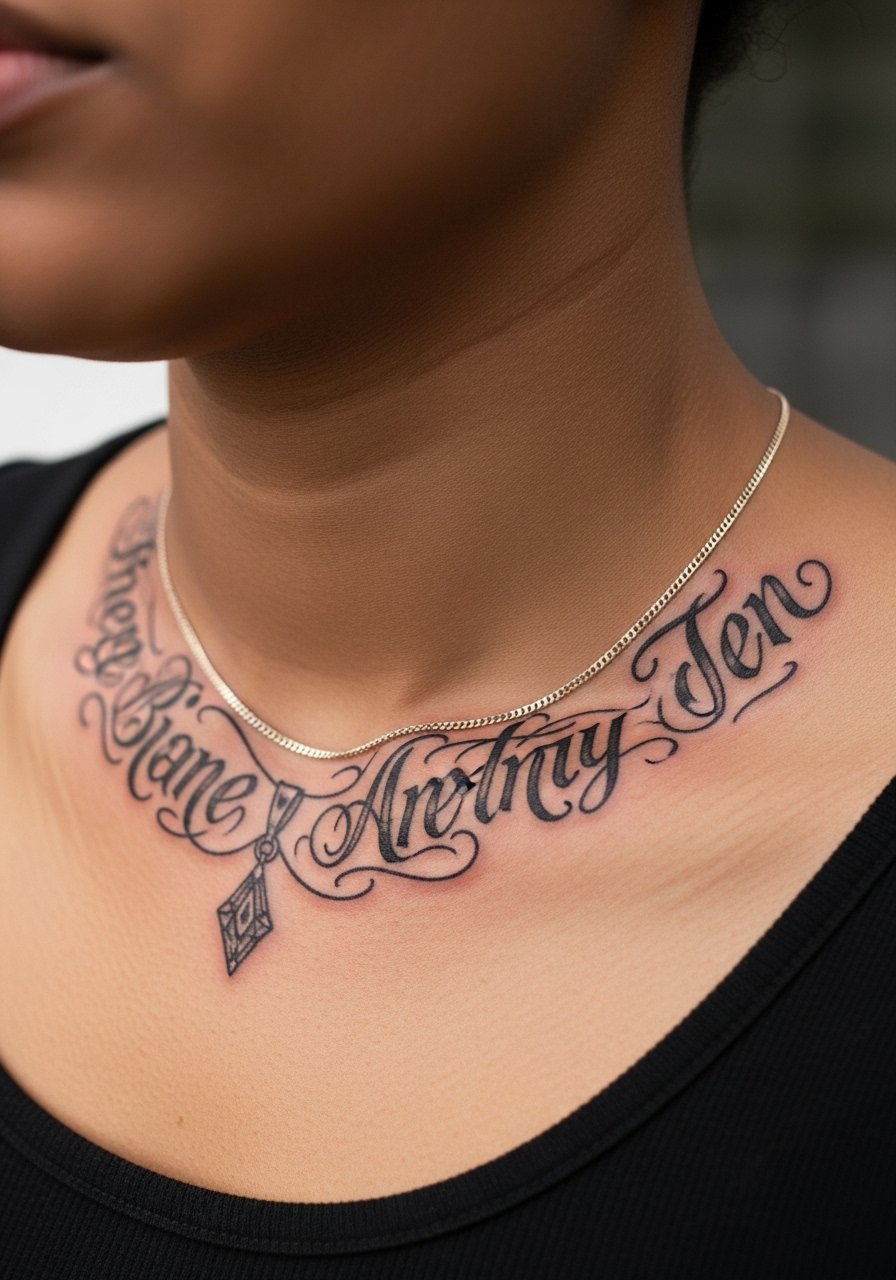
Collarbone scripts work beautifully when aligned with jewelry. Ask your artist to size the letters so they sit above necklaces and do not vanish under chains. The pain is sharp on the bone but short. Expect the piece to soften a bit by year three, especially in areas that catch sun. For showing off, a thin chain pendant necklace sits below the script and frames the composition without crowding it.
21. Outer Thigh Neo Traditional Rose Panel with Banner
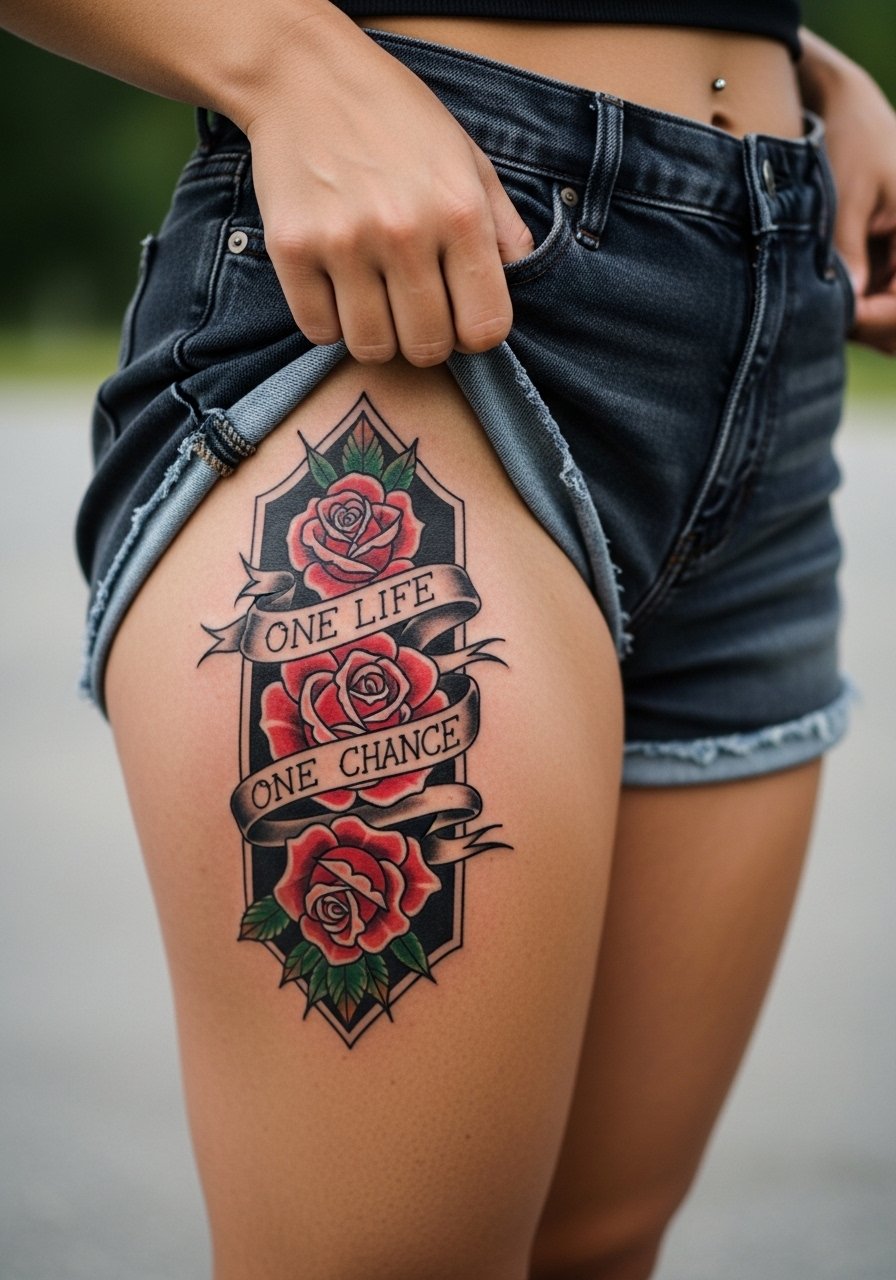
Outer thigh pieces handle scale and detail well because of the broader canvas. For a banner that curves with the muscle, ask for elongated letters and generous negative space. Pain is moderate and sessions are comfortable because you can recline. The main mistake is cramming too many small motifs into the strap of the thigh where movement distorts them. For the consult, have the artist show the stencil in seated and standing positions so you can assess how the banner will read during daily life.
Frequently Asked Questions
Q: Do neo traditional scripts blur faster on wrists and fingers than on the forearm?
A: From what I have seen, wrists and fingers take more friction and washing, so thin scripts there tend to need touch-ups sooner than forearm work. Thicker outlines and open spacing improve longevity. If you want a wrist script to last without frequent touch-ups, ask for slightly bolder linework in the consult.
Q: How should I size a sternum mandala so the central phrase remains legible over time?
A: Make the banner and letters proportionally larger than your visual instinct. Sternum skin moves with breathing and small letters can smear. Request a mock-up where the artist scales the text up and adds negative space so the phrase remains readable after healing.
Q: Is ribcage placement worth it given the controversy about fine line work there?
A: It depends. One camp warns ribs blur quickly because of stretching and motion. The other camp says careful depth and spacing keep lines stable. If you want fine line on ribs, pick an artist who shows healed rib photos and agree on bolder line weight than you might pick fresh.
Q: What should I wear to a session for an upper thigh or hip tattoo?
A: Wear high-waisted shorts or a wrap skirt so you can expose only the area needed without discomfort. A loose top that pulls up cleanly is practical. The goal is privacy and easy access for the artist.
Q: How often do hand and finger neo traditional icons need touch-ups?
A: Regular maintenance is common. Hands and fingers face constant washing and abrasion so expect touch-ups every one to three years for fine detail. If you want lower maintenance, choose thicker outlines and simplify interior details.
Q: Can I style collarbone script with jewelry without damaging the tattoo?
A: Yes. After the initial healing period avoid necklaces that rub directly over fresh ink. Once healed, a thin chain pendant works well to frame collarbone text without crowding it. After a few months you can rotate necklaces freely.
