
Realistic mother and son tattoos are about more than perfect photo copying. They live or flatten depending on scale, placement, and how the artist translates emotion into linework and saturation. I've noticed pieces that read like a living memory stick better when the eyes and hands get the boldest detail, and the background gets softer. Read the first idea to see a portrait treatment that keeps that eye contact intact on skin.
1. Micro-Realism Mother-and-Son Portrait on Inner Forearm

I've seen inner forearm portraits age well when artists go slightly larger than phone-photo scale. The forearm gives enough flat real estate to keep facial features readable at six months and two years, and the session usually lands in the two to three hour range depending on shading. Tell your artist you want slightly heavier linework around the eyes and hands, and ask for stipple shading for midtones so saturation stays even. Common mistakes are shrinking the face too small and relying on smooth gradients only, which can blur with time. For showing it off, roll up sleeves and try a rolled linen shirt that keeps the arm visible while framing the portrait.
2. Half-Profile Portrait on Outer Upper Arm

Fair warning: the outer upper arm settles differently than the inner forearm. The thicker skin and muscle movement help hold saturation, which makes the outer arm a solid choice for larger photo-realism pieces. Most sessions run three to five hours for a clean half-profile with layered black and gray. In consultation, bring a high-contrast photo and ask the artist to preserve the shadow edge along the jaw. A frequent mistake is overworking the hair texture with dense strokes, which can read muddy after healing. Expect a touch-up around year two for high-detail portraits that live outdoors often.
3. Tiny Portrait Locket on the Sternum

Most people are surprised by sternum pain, but the area frames small portraits beautifully because the clavicle gives visual balance. Session time is usually short for a tiny locket style, often under two hours, though the sternum can be sensitive. Ask for minimal background and strong contrast inside the locket so the face reads at arm's length. A common aging problem is placing too much fine detail inside a very small locket. For the appointment, plan to wear a fitted sports bra so the artist can work without wardrobe fuss.
4. Mother Holding Child Hands on the Wrist

This placement shows tenderness up close but fights friction from washing and bracelets. The wrist is a high-motion zone so the linework should be slightly bolder than you might choose for a forearm portrait. I recommend a one to two hour session for a simple hands study and a touch-up at year one is common. Tell the artist you want touch-up-friendly spacing between fingers and knuckles to limit blowout risk. For showing it off, stack with a thin chain bracelet that sits near the piece without rubbing directly on it.
5. Tiny Matching Portraits on Fingers

The finger is one of the most high-maintenance places for realism. Pain is brief but sharp and touch-ups are almost a given because constant washing and use fade saturation. If you want a tiny likeness there, keep the faces extremely simplified and ask for bolder contour lines rather than subtle gradients. The biggest mistake is trying to fit full facial detail into a fingernail-sized area. For session day, wear short sleeves or a loose button-down so the artist can access both hands without you tugging at clothing. Pair the visible finger pieces with a dainty ring set that frames but does not cover the ink.
6. Negative Space Silhouette on the Collarbone

This placement reads well with clothing and keeps the portrait concept readable without tiny facial detail. The collarbone area can be ticklish so plan for shorter sessions over multiple sittings for larger pieces. Ask your artist to use negative space as the primary device and to preserve a small buffer of skin between silhouette edges and the bone to prevent blowout. People often pick too many tiny interior details that age into muddiness. For evenings out, pair this with an open-neck blouse to let the silhouette breathe.
Studio Day Picks
The wrist, collarbone, and finger pieces above need different prep than a full-arm portrait, and a few targeted items make the session and first week much smoother.
-
Stencil transfer paper kit. Lets you preview placement on curved areas like the wrist and collarbone before the needle starts, which matters for the tiny and silhouette pieces above.
-
Topical numbing cream. Applied as instructed takes the edge off sensitive zones such as the sternum and inner wrist so the session stays manageable.
-
Thin protective film roll. Helps protect finger and wrist tattoos from friction during the first days when those pieces are most at risk.
-
Fragrance-free gentle body wash. Cleanses healing areas without irritating linework on forearms and collarbones where fine detail matters.
-
Aquaphor healing ointment. A thin application in the immediate days after a session provides moisture that supports even healing for black and gray portraits.
7. Large Photo-Realistic Back Piece of Mother and Son Embrace

There is something cinematic about a full-back portrait. The back gives room for background atmosphere and layered saturation that helps the emotional weight translate on skin. Sessions will span multiple days and each block can last four to six hours. When you book, ask the artist about coverage planning so highlights and darks hold across sessions. A common error is overfilling background contrast in the first session; slower build is kinder to the skin and the final read. For show-off looks, an open-back dress frames the piece and keeps the lines visible without crowding.
8. Single-Line Portrait with Stipple Shading on Inner Bicep

When done right, single-line portraits feel intimate and modern. The inner bicep tolerates stipple shading well but can be sensitive during the session. Tell your artist you want the stipple for midtones and slightly bolder eye contours so the portrait reads at a distance. The session usually runs one to three hours and a touch-up at year two is common for stipple density. A frequent mistake is using too fine a single line for the whole face, which loses presence after healing. For the appointment, a sleeveless top makes access simple.
9. Realistic Mother and Son Profiles Along the Spine

Spine work carries motion and vulnerability. Profiles down the spine use gravity and the body's vertical line to tell a story, and larger scale helps prevent detail loss. Sessions are moderate to long and you should expect at least two sittings for a multi-portrait column. Ask the artist to stagger contrast so the lower sections do not wash out over time. Controversy exists about very small fine-line work on the spine. One camp says it blurs quickly, another says proper depth and spacing make it last. Ask where the artist stands before booking. For showing off, low-back cut shirts and halter styles reveal the column cleanly.
10. Black and Gray Tearful Portrait on Ribcage

Artists split on fine detail on the ribs. One group warns the skin stretch and frequent movement make tiny lines blur within a couple of years. The other group says correct needle depth and spacing avoid that fate. I recommend larger scale and slightly stronger contour lines for rib portraits if you want longevity. Rib sessions are painful for many, often rated higher on pain scales, so plan short breaks and expect longer healing. People who try to cram photo detail into a postcard-sized rib piece often end up needing touch-ups sooner.
11. Miniature Realistic Portrait on Ankle

Ankle pieces face constant movement and occasional shoe friction. A miniature portrait can work here if you accept that touch-ups are likely by year two. For the session, bring comfortable shoes and expect brief sharp sensations. Tell your artist you prefer bolder contours around the main facial features and simplified shadow areas to preserve the image. Avoid packed-in background detail which will fade first. When dressing to show the ankle, ankle boots or strappy sandals let the portrait take center stage without rubbing the ink.
12. Mother and Son in Vintage Frame on Upper Thigh

Upper thigh offers expansive flat space for a framed scene and it hides easily when needed. Sessions are comfortable because the area tolerates longer blocks, but healing includes friction from pants so expect light scabbing. Ask for a margin of blank skin inside the frame to protect linework during healing. Mistakes occur when artists try to compress too much detail into the framed area without planning background washes that age differently. For the session, loose shorts make access simple.
13. Mother and Son Holding Umbrella Scene on Calf

Calf pieces benefit from muscle structure that keeps saturation even and readable over time. Large scenes with sky or rain textures translate nicely because the calf offers a vertical canvas with low friction. Sessions can be two to four hours depending on background work. Tell your artist you want the umbrella and hands crisp and allow softer detail for the backdrop. A mistake is prioritizing minuscule facial work at the expense of clear silhouette, which becomes indistinct from a distance. For show-off outfits, cropped trousers and rolled denim place the art front and center.
14. Photo-to-Script Composite on Chest Near Heart

A portrait paired with a name or date near the heart reads intimate because the chest placement creates constant visual alignment with clothing. The area can be sensitive and contouring around the clavicle needs careful planning. Tell the artist you want the script weight to match the portrait contrast so one does not overpower the other. A common mistake is crowding the portrait too close to the script which makes both elements compete. For date nights, a thin chain pendant necklace sits above the script without competing.
15. Micro-Realism Pocket Portrait Behind Ear

Behind-the-ear portraits are ultra-intimate and require expert placement because hair and movement obscure or reveal the piece unpredictably. The area takes only small designs, so simplify facial elements to expression lines and eye highlights. Sessions are short but the spot is delicate so expect a touch-up. For long hair, decide beforehand whether you want the piece shown or hidden and bring that up in the consult. The session feel is sharp and quick.
16. Duo Portraits on Shoulder Blades Facing Each Other

Shoulder blade pieces look balanced and allow conversation between portraits. The skin there tolerates heavier saturation which helps keep detail over time. Sessions are moderate and can often be completed in one long appointment. Tell your artist you want the faces to orient toward each other and keep midtone transitions stippled rather than fully blended for longevity. A common mistake is making the portraits too small to show expression at arm's length. When wearing open-back tops, a halter dress frames both pieces beautifully.
17. Sketch-Style Portrait with Whip Shading on Forearm

Sketch-style realism uses energetic linework and whip shading to suggest more than it spells out. The forearm is forgiving of that treatment and it keeps sessions shorter. Tell the artist you want intentionally loose lines with denser shading at focal points like the eyes. Aging is often kinder because the style relies on suggestion rather than tiny locked-in detail. People who ask for hyper-real numbers from this approach are disappointed because the aesthetic is about motion and hinting. For casual wear, rolled sleeves or a short-sleeve linen shirt shows off the sketch without covering it.
18. Mother and Son in a Boat Scene on Lower Back

Lower back canvases are broad and let you build atmosphere around a central portrait. The area can be friction-prone when sitting so plan the background accordingly and expect slower initial healing. Sessions are medium to long and often split. Ask for a lighter wash over the lowest zones that contact clothing to reduce scabbing contrast. Mistakes include over-saturating tiny facial detail without considering movement. For the appointment, wear bottoms you can easily lower slightly so the artist accesses the zone without full exposure.
19. Realistic Portrait with Floral Frame on Hip

Hip placements let you combine portrait realism with decorative framing. The skin there responds well to shading but can be sensitive during sessions. Ask for a clear margin between portrait edges and floral frame so the two elements do not bleed into each other with time. The common mistake is tight framing that leaves no breathing room. For showing the piece, high-waisted swimwear and a waist-slung denim jacket can reveal the design while keeping it private.
20. Child's Handprint Replica on Inner Wrist

A handprint keeps the emotional fidelity without relying on facial likeness. The wrist is high-motion so outline clarity matters more than tiny internal shading. Sessions are quick but plan for a touch-up as lines soften. Tell the artist you want a bold outline with minimal internal shading so the fingerprint ridges read longer. People sometimes over-texture handprints and end up with muddied edges. For daily style, stack a slim leather bracelet a finger's width away to frame the print.
21. Mother and Son Silhouetted Against Moon on Thigh
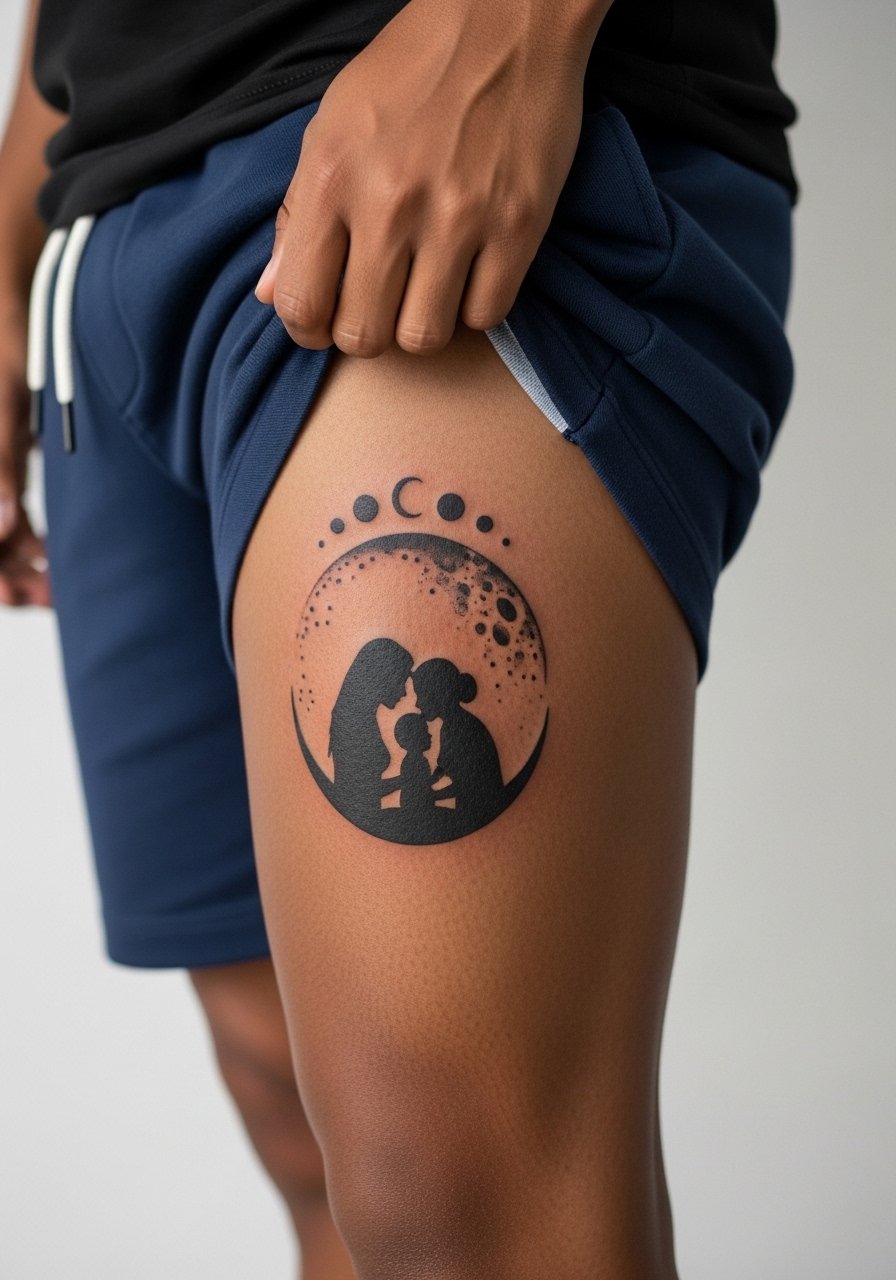
Outer thigh gives space for larger narrative scenes that age well because the skin moves less in display positions. Sessions are typically longer but comfortable, and the area hides easily during professional settings. Specify crisp silhouette edges and a soft halo for the moon rather than dense background texture to avoid muddying in a year. A mistake is packing stars and small dots too closely which can blur into a single tone later. For session comfort, choose shorts and bring seating cushions.
22. Matching Minimalist Portrait Bars on Upper Arm
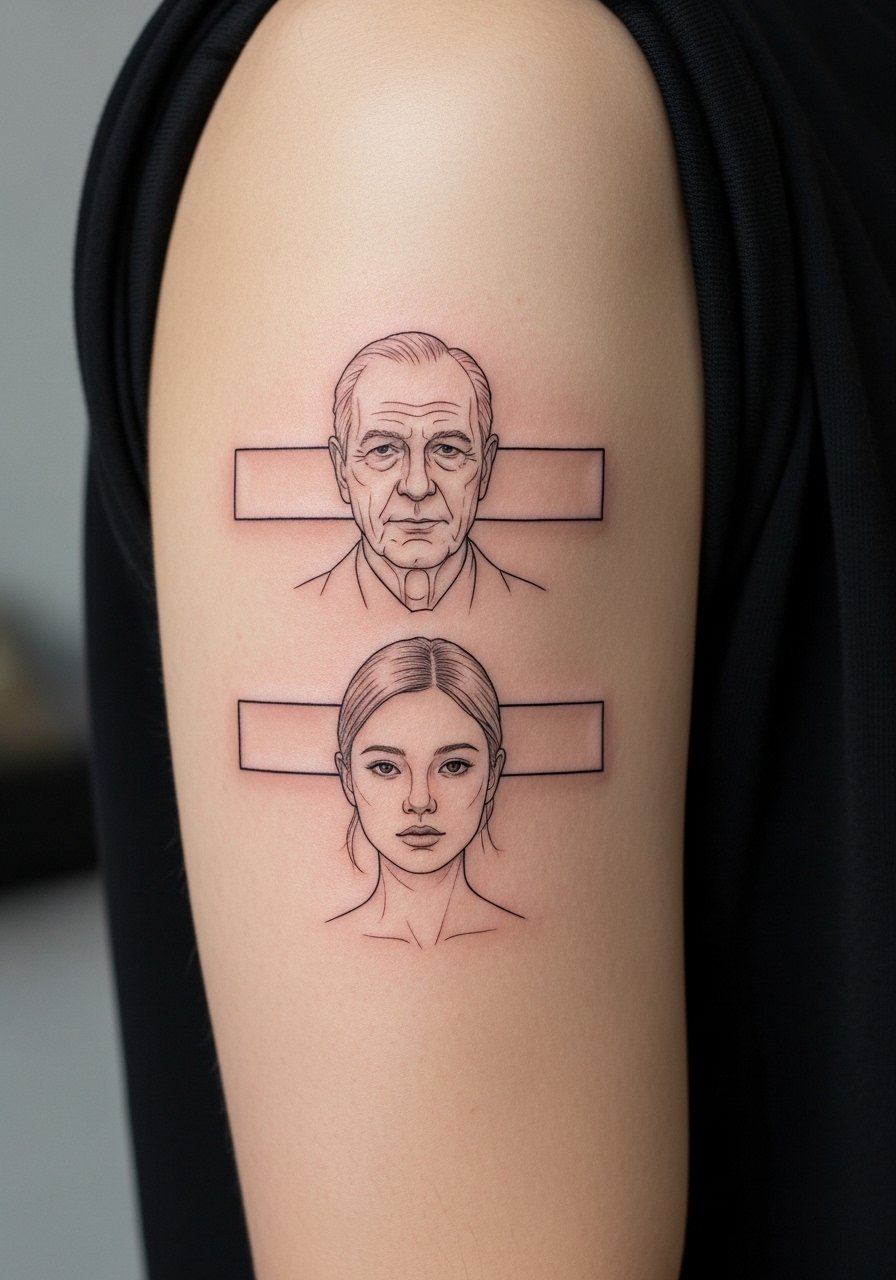
Minimalist bars that capture a profile strip read modern and sit well on the upper arm. The area tolerates bold linework which helps preserve the vertical portrait bars. Sessions are short and you can plan several bars in one appointment. Ask for slightly increased spacing between bars to avoid merging over time. A common mistake is compressing too many bars into a narrow band. Wear a loose button-down shirt to the appointment so the artist can access the upper arm easily.
23. Portrait in Candlelight with Subtle Glow in Black and Gray on Sternum

Sternum portraits with a glow effect are intimate and require careful contrast planning so highlights do not disappear. The sternum can be sensitive and the session may be interrupted for comfort. Tell the artist you want defined darks and small reserved skin highlights to read as glow after healing. A common error is over-smudging midtones which flatten the light. Expect a touch-up for sharp highlights after the first year.
24. Vintage Polaroid Portrait on Upper Arm Near Elbow

Polaroid framing gives a nostalgic edge to a mother and son portrait and the upper arm area offers a natural flat plane. The elbow proximity can make some areas tender, so plan short breaks. Ask for a clear frame border and slightly stronger corner contrast so the polaroid reads long-term. People who pack tiny textures into the negative space often see those elements fade first. Pair the visible upper arm with a short sleeve linen tee that lets the polaroid show when sleeves are rolled.
25. Realistic Portrait with Watercolor Sky Background on Back of Neck

Neck placements communicate visibility and commitment. A small portrait with a soft watercolor sky needs careful pigment placement because watercolor washes fade faster than black and gray. Sessions are short but touching up is likely for color elements every few years. Tell the artist to anchor the portrait with black contours and keep the watercolor as accent washes. For show-off looks, a wide-neck top that can be pulled to one side highlights the piece and keeps it tasteful. Consider that some workplaces remain conservative about neck tattoos.
26. Tiny Footprint and Portrait Combo on Foot Arch

Foot arch work is vulnerable to friction and shoes so expect significant early fading unless you're thoughtful about aftercare and footwear. The footprint pairs well with a tiny portrait when the portrait stays simplified. Sessions are brief but healing can be finicky because of pressure and sweat. Ask your artist to use bolder outlines and minimal interior shading. For showing the piece, sandals or open toe sandals keep the area visible while reducing rubbing.
27. Mother and Son Holding a Kite in Wind on Side Torso

Side-torso scenes like this look dynamic and let you play with motion in hair and kite tails. The rib area and side torso move with breathing so plan for slightly larger shapes and stronger contours to keep movement from softening the portrait. Sessions are moderate with strategic breaks for comfort. The common mistake is over-detailing hair and small accessories which blend during healing. For the appointment, wear a cropped tee to give the artist straightforward access without full body exposure.
Frequently Asked Questions
Q: How do realistic portraits on the ribs compare to those on the forearm for long-term clarity?
A: Ribs move and stretch more than the forearm so very fine pictured detail tends to blur sooner on the ribs. For longevity choose slightly larger scale, stronger contours, and ask for stippling rather than smooth gradients in midtones. If you want the photo-fidelity of a forearm piece on the ribs, expect more frequent touch-ups.
Q: Can tiny finger or ankle portraits ever keep their detail, or are touch-ups inevitable?
A: Expect touch-ups for tiny finger and ankle portraits because constant washing and friction remove pigment faster there. You can prolong clarity by requesting bolder contour lines and simplified shading. Also plan for one-year and multi-year refreshes as part of the design plan.
Q: When should I ask about an artist's stance on fine line work for sensitive placements?
A: Ask during the consultation. Artists often have strong opinions about fine line on places like ribs and fingers. One camp will avoid ultra-fine work there, another will accept it if they can control depth and spacing. Hearing their rationale helps you decide who to book.
Q: What should I wear to a sternum or lower chest session for comfort and access?
A: A fitted bandeau or sports bra is the simplest option because it exposes only the area the artist needs and keeps the rest covered. That makes positioning easier and reduces wardrobe adjustments during the session. Bring a zip-up hoodie to stay warm between sittings.
Q: Do watercolor backgrounds require different upkeep than black and gray portraits?
A: Yes, color washes typically fade faster than black and gray. Watercolor areas benefit from slightly denser pigment placement at the edges and more frequent sunscreen protection once healed. Expect color touch-ups earlier than monochrome refreshes.
Q: How do I find a shop that understands portrait realism without naming an artist?
A: Use discovery paths like local convention listings, dedicated portrait hashtags, portfolio directories, and community threads where clients share photos. Look for portfolios with multiple healed portrait photos and ask about healed results during consultation so you see how work ages over time.
