Fine line sand dollar tattoos are everywhere online right now, but what looks perfect on a screen can age into fuzzed linework if the placement and scale are wrong. Pick a style that suits the skin you have and the wear the area gets, and tell your artist exactly how bold or airy you want the star points. Below are 27 sand dollar tattoo concept ideas that map style, placement, aging, and what to wear the day of the session.
1. Minimalist Sand Dollar Outline on the Wrist
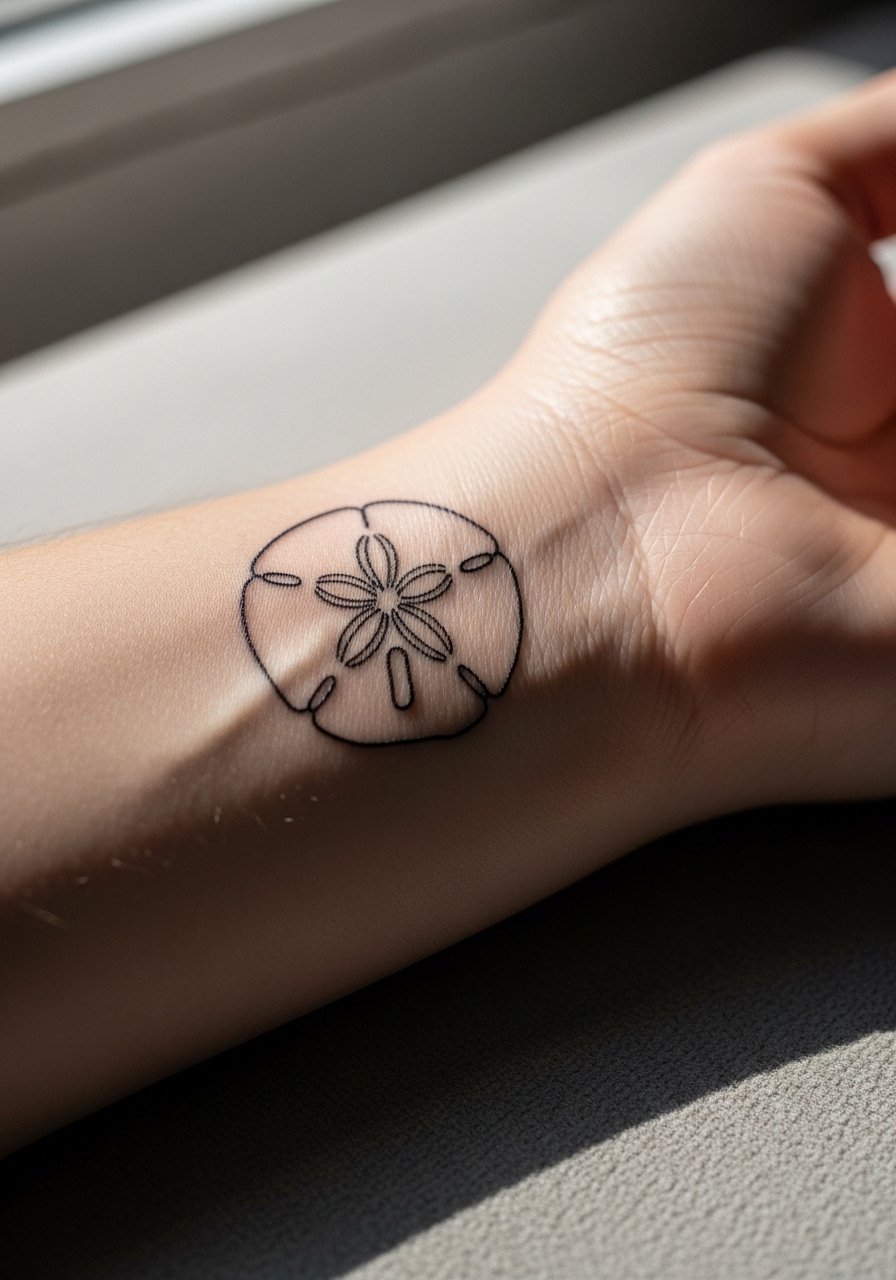
I've seen minimalist wrist pieces last best when artists use slightly bolder linework than clients request. Fair warning, the wrist gets sun and friction from watches, so too-fine lines blur by year two. Ask for 0.7-1.0 mm line weight rather than hairlines. Session time is usually under 30 minutes and pain sits around a 3 out of 10. For the appointment wear a sleeveless top and stash jewelry. This look pairs well with a thin chain bracelet that sits on the opposite wrist while the tattoo heals.
2. Micro-Realism Textured Sand Dollar on the Forearm
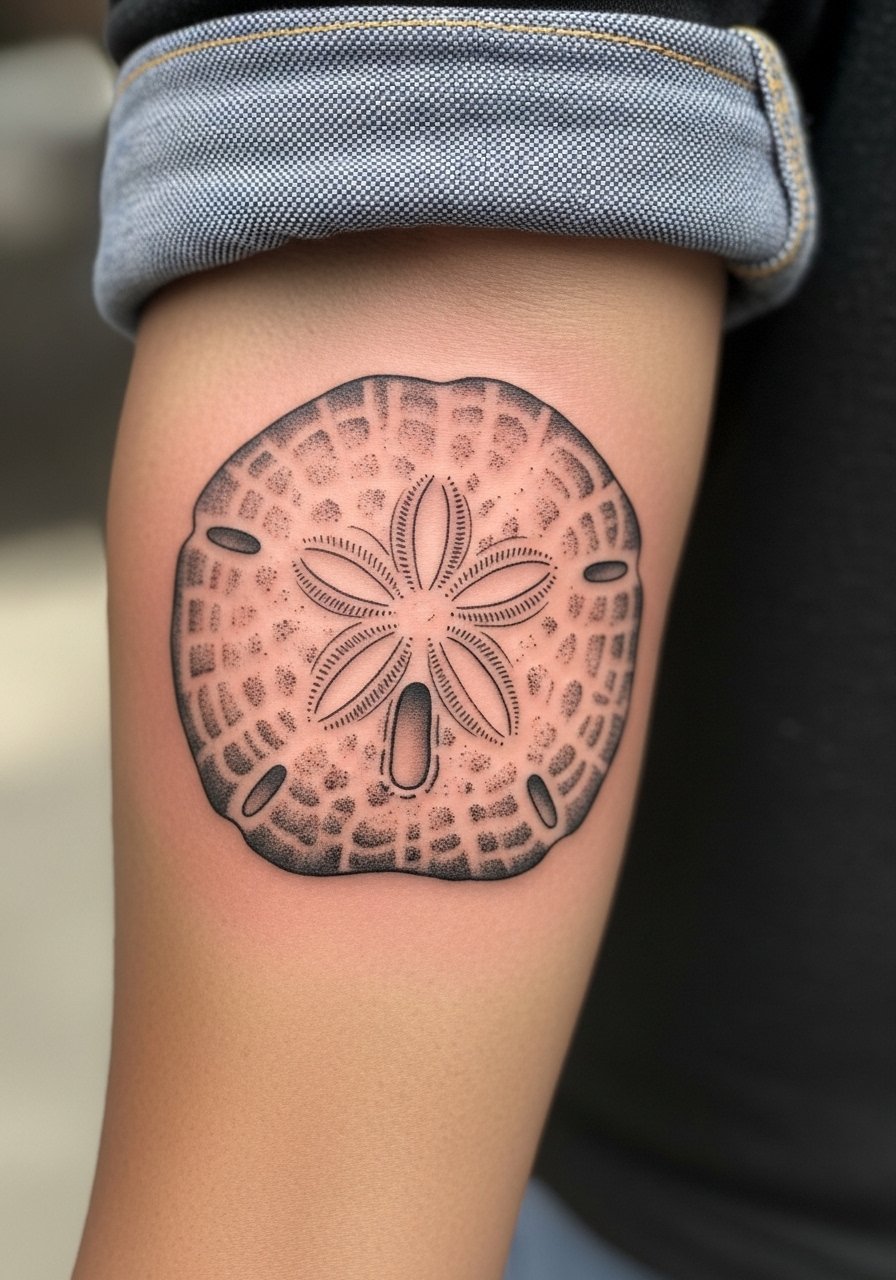
I recommend micro-realism for forearm work when you want the star markings to read like a sun-bleached shell. Tell your artist to focus on stipple shading for texture and avoid overly dense black that ages into a blob. The session runs 1 to 2 hours and pain is moderate. Expect touch-up at year three for the finest highlights. For showing it off, roll a chambray shirt sleeve and add a leather wrap bracelet for a nautical feel.
3. Geometric Sand Dollar Pattern on the Shoulder

The biggest mistake with geometric overlays is going too small. The shoulder gives room for symmetry and spacing so linework can breathe. Pain sits low and sessions are often a single two-hour block depending on size. Ask for a mockup showing spacing at actual scale. In two years tightly packed lines can merge, so demand clear gaps between rays. For the session wear a loose button-down shirt you can pull aside and pair the tattoo with a sleeveless tank olive to frame it once healed.
4. Watercolor Sand Dollar Splash at the Collarbone

Watercolor is gorgeous on the collarbone but it ages differently than black and gray. Most watercolor pieces soften notably by year three unless there is a strong black anchor. For this design ask for a subtle black outline beneath the wash to hold the shape. Session time is two sessions for layering color. Pain around the collarbone is a five to six out of ten because of thin tissue. Wear a strapless top or an off shoulder blouse to the appointment so the artist has clear access.
5. Sand Dollar with Star Markings on the Inner Bicep
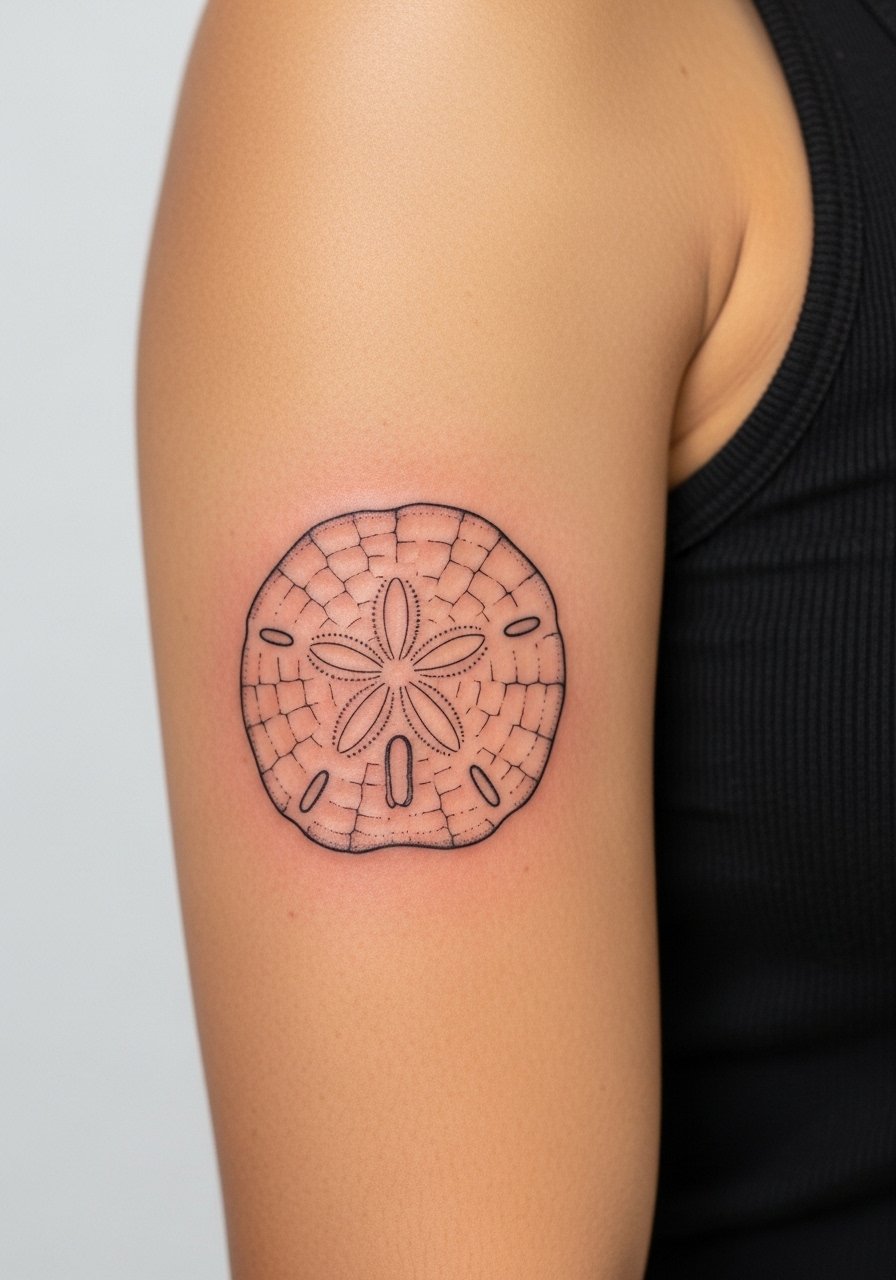
Fair warning, the inner bicep is one of those placements where fine line either floofs or reads crisp depending on technique. Artists split into two camps on this. One camp argues the skin there stretches and lines blur within two years. The other camp says precise depth and spacing let fine line hold up. Ask your artist which approach they use and request a test patch if needed. Session time is under an hour and pain is a 4 to 6. For the session wear a tank top so the artist can access the area cleanly.
6. Neo-Traditional Sand Dollar with Anchor on the Calf
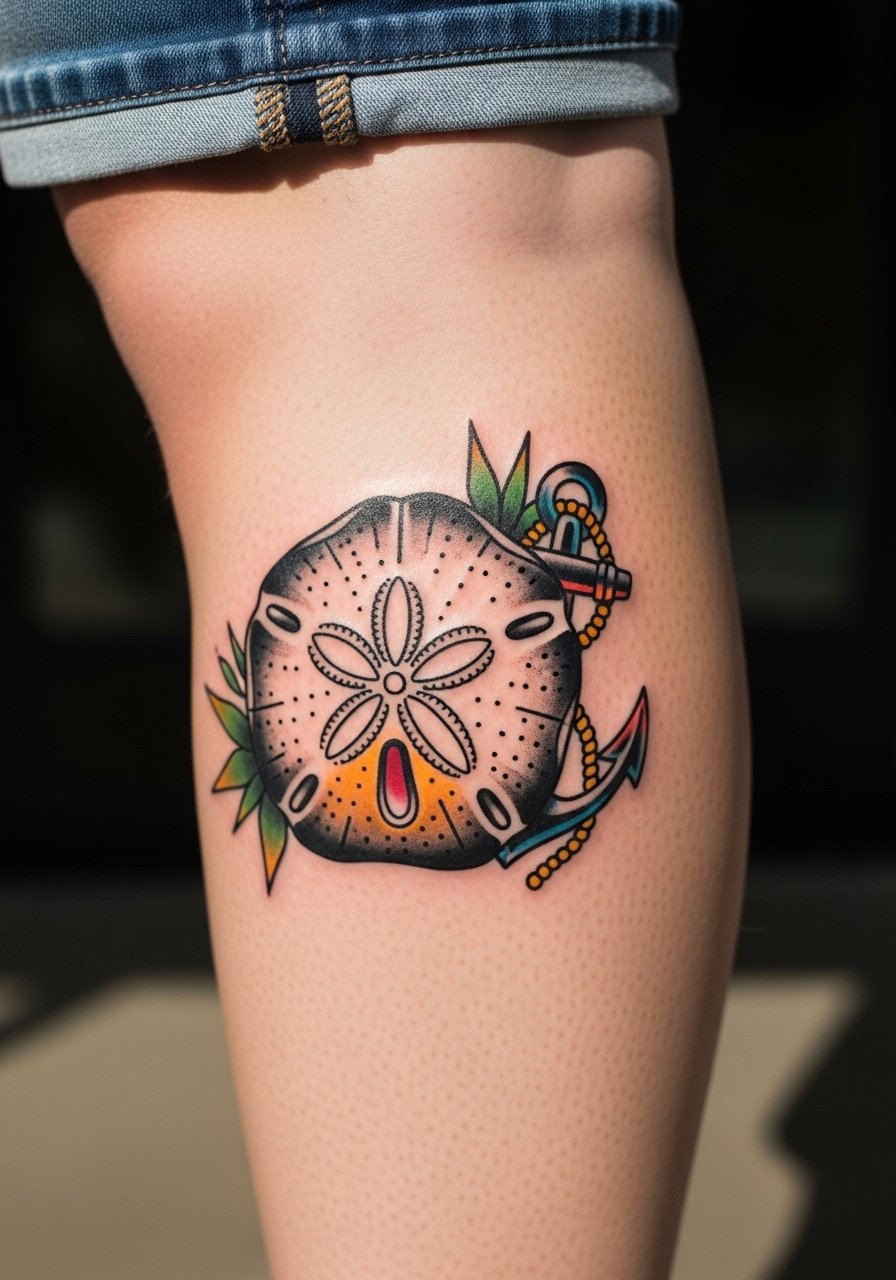
Calf pieces let you tell a nautical story and the thicker skin holds color well. The common mistake is over-detailing small elements that will soften as the pigment spreads. Ask for bold outlines around color fields and expect two sessions if you want saturation. Pain is lower on the calf, typically a two to three. When showing it off, slim joggers rolled up or shorts work best. Consider pairing with slim jogger roll cuff styling and leather ankle boot looks in cooler months.
Studio Day Picks
The small wrist, shoulder, and collarbone pieces above ask for different prep than lower body work, so a few targeted items smooth the session and the first week.
-
Stencil transfer paper kit. Lets you preview placement and scale on skin before the needle hits, especially helpful for wrist and collarbone references in ideas above.
-
Topical numbing cream. Applied per product instructions before the session it eases sensitivity on bony or thin areas like the collarbone and ribs.
-
Thin protective film roll. Useful for small ankle or finger pieces that face friction during the first week of walking and shoe wear.
-
Fragrance-free gentle body wash. Cleanses healing tattoos without irritating fine line work on wrists and forearms.
-
Aquaphor healing ointment. A thin layer during the initial days keeps moisture balanced for delicate linework without sealing in excess moisture.
7. Blackwork Sand Dollar Mandala on the Thigh

Thigh placement takes heavy blackwork well and it usually reads from a distance. The mistake is cramming mandala density into too small a space. Demand negative space to preserve radial symmetry. Sessions run two blocks for large fills and pain is moderate. Touch-ups for blackwork are typically needed at year five or later. For showing it off choose high-waisted shorts or a skirt. Consider pairing with high-waisted denim looks when you want to reveal the piece.
8. Fine Line Sand Dollar Cluster Along the Ribcage
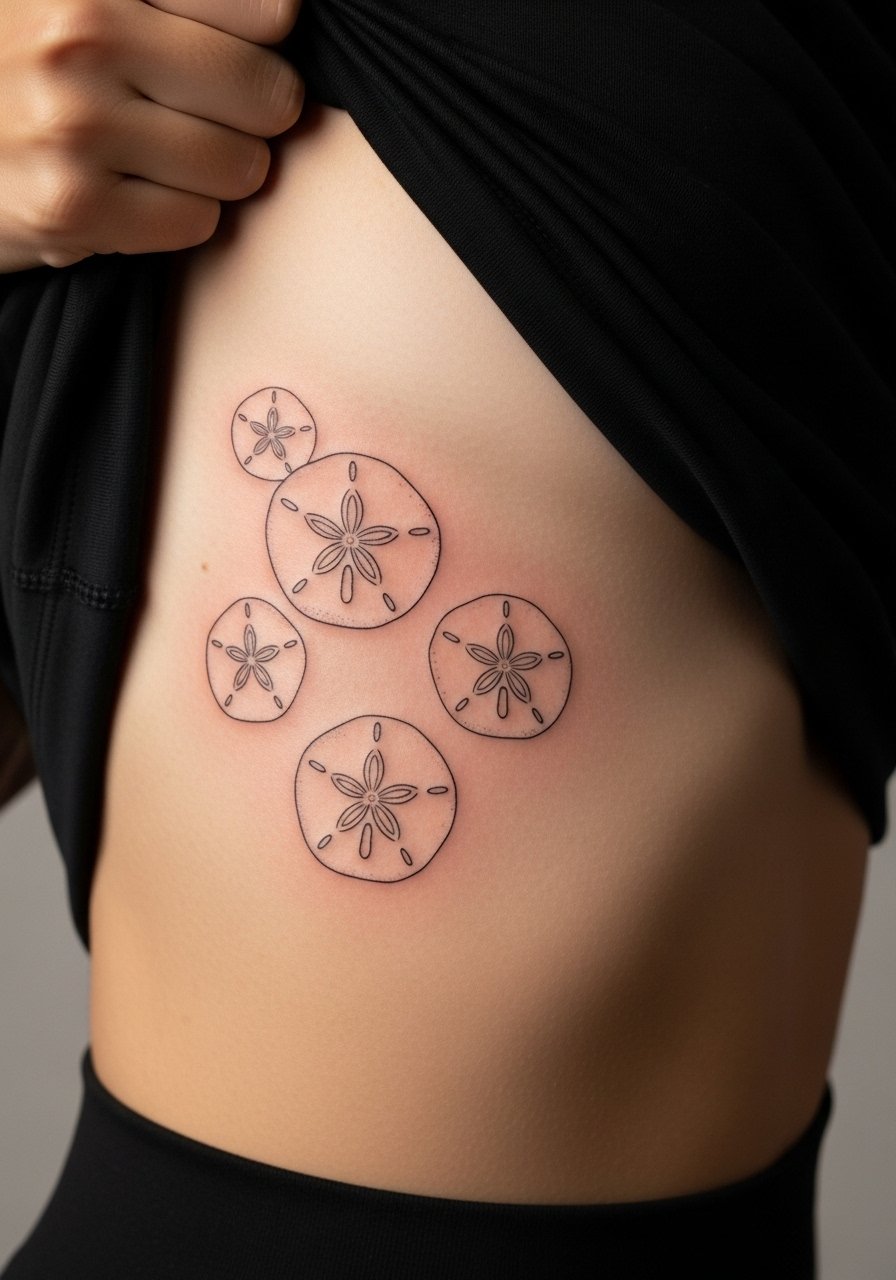
Most ribcage work is jawed about for pain. Fair warning, ribs are a 7 to 9 on common pain charts. Fine line clusters look delicate but are prone to blurring if placed too close together. If you want multiple shells, space them and vary sizes so each has room to settle. Expect a single long session. Artists split on whether fine line ages well on ribs. One group says skin movement ruins the detail, the other says careful spacing and depth preserve it. Ask the artist where they stand before booking. For session wear a cropped top you can lift, like a cropped athletic top.
9. Ornamental Sand Dollar Frame Around the Ankle

Ankle frames read like jewelry but the area rubs against shoes. A common version that ages poorly uses very fine dots that vanish with shoe friction. I suggest slightly bolder dot work and filling negative spaces so the frame keeps shape. Pain is low to moderate and sessions are short. For visibility in summer pair with strappy sandal flat styles and cropped pants. During the session roll pants up and remove tight socks to give the artist full access.
10. Micro-Realism Single Sand Dollar on the Wrist

Micro-realism wrist pieces are great first tattoos but they require a bit more line weight than clients expect. The error is requesting hairlines on a high-wear spot. Ask for denser dot shading and reserve the super-fine highlights for touch-up sessions. Session time is under 45 minutes and pain is mild. Expect a touch-up at year two for crisp highlights. For showing it off wear a minimalist bracelet stack on the opposite wrist to keep attention balanced.
11. Stipple-Shaded Sand Dollar in a Cluster Sleeve

If you are building a marine sleeve, stipple shading gives texture without heavy saturation. Tell the artist you want each shell to read individually at arm distance. A common mistake is matching shade density across pieces which flattens the sleeve. Sessions are modular by visit and blowout risk is low on the forearm. For the session wear a loose short-sleeve button-up for easy access and consider pairing the finished piece with rolled sleeves in neutral linen for photos. Try a loose button-up shirt to frame the forearm.
12. Tiny Sand Dollar on a Finger

Finger tattoos heal differently and see constant washing and friction. The usual mistake is sizing the sand dollar too small. A slightly larger, bolder outline keeps it readable for longer. Expect faster fading and possible yearly touch-ups. Pain is sharp but brief. For session prep remove rings and have a clean finger. Keep career considerations in mind because hand tattoos can still affect some workplaces.
13. Sand Dollar with Wave Motif on the Calf

Wave accents add motion to the sand dollar and work well on the calf because color saturation holds. The common mistake is layering watercolor over weak outlines without a black anchor. Ask for a subtle outline to support the wash. Sessions can be two blocks and pain is low. Pair the design with shorts for summer or roll joggers when cooler. Consider a slim jogger roll cuff so the piece peeks out.
14. Blackwork Silhouette Sand Dollar on the Upper Back
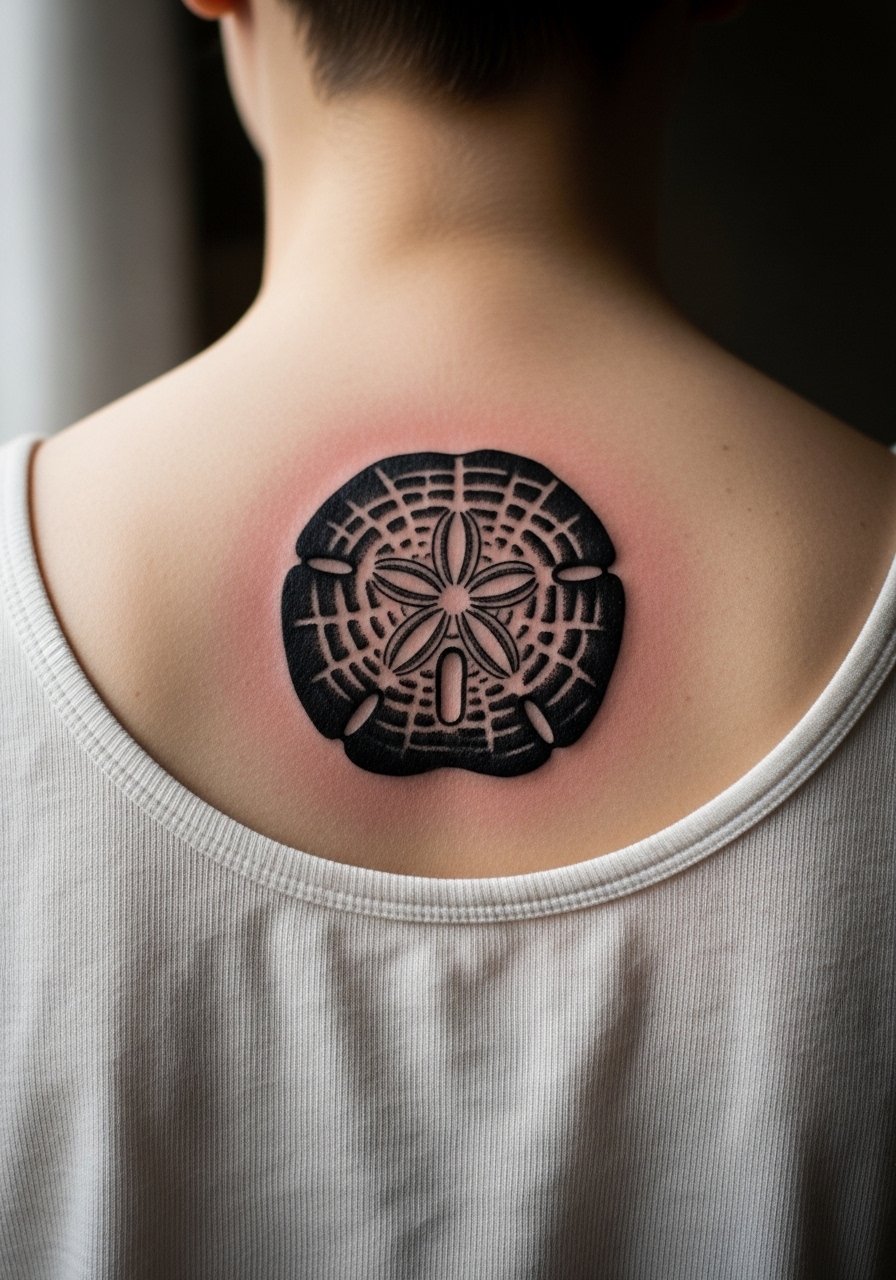
Upper back pieces tolerate solid black and usually age well because of less sun exposure. A mistake is too-small silhouettes that lose negative space detail. For better longevity, scale up so the five-point star reads. Sessions can be quick for single silhouettes. Pain is moderate. Wear a wide-neck shirt you can pull aside for the appointment. Pair with open-back dresses to reveal the piece.
15. Ornamental Sand Dollar on the Ankle Bone

Ankle bone placements look like anklets when framed correctly. Avoid tiny filigree that disappears under friction. Request a slightly raised frame and moderate dot work for contrast. Sessions are short and pain is low to moderate. For the appointment roll pants up and wear flat shoes off for care. When styling pick cropped linen pants and strappy sandal flat pairings that let the tattoo show.
16. Sand Dollar in a Nautical Compass Sleeve Accent

Use the sand dollar as an accent inside a larger nautical composition to tie sea themes without repeating shells. The mistake is over-detailing the compass so it competes with the sand dollar. Ask for visual hierarchy in the stencil so the shell reads first. Sessions are multiple shorter visits. For the session wear a loose short sleeve so the artist can access the forearm easily. Pair the look with rolled chambray sleeves for photos and a leather wrap bracelet.
17. Delicate Sand Dollar Over the Collarbone

Collarbone placements are visible and thin skinned. The aging reality is that tiny fine lines here can soften with sun exposure. Ask for slightly heavier anchor lines and plan for sun protection. Pain here is a five out of ten. Wear a wide-neck or strapless top that makes access easy. For showing it off pair with a delicate chain necklace that sits above the tattoo without crowding it.
18. Sand Dollar Framed by Seaweed on the Ribcage

Ribcage work looks stunning but that location is unforgiving for fine detail. The aging truth is repeated skin movement will soften thin fronds. If you want delicate seaweed, ask for slightly thicker stems and spaced leaves. Pain is high and sessions can be intense. Wear a cropped top you can lift. Expect touch-ups in a few years to keep crisp edges.
19. Sand Dollar with Tiny Starfish Cluster on the Ankle

Clusters make a small ankle design feel curated, but the error is crowding the zone. Space each element so shoes and socks do not blur detail. Sessions are quick and pain is mild. For the session roll pants up and wear sandals to minimize rubbing. For showing the piece pick cropped linen pants and cropped linen pant styling.
20. Sand Dollar Mandala on the Upper Thigh

Upper thigh allows big mandala interpretations. The common mistake is too much micro-detail that blurs under flesh movement. Ask for larger stipple and open negative space so the radial pattern lasts. Sessions are multi-hour and pain is moderate. For the appointment wear high-cut shorts you can shift slightly and plan on loose bottoms for the healing window.
21. Tiny Sand Dollar Behind the Ear, Near Hairline

Behind-the-ear placements read small and secret. The sensitive rule is to describe it as the skin below the hairline on the neck. Keep the design small but not hairline thin. Sessions are brief and the pain is moderate. Styling is subtle; wear hair up in a low bun at the appointment and expect a quick touch-up if lines soften from hair products.
22. Sand Dollar with Geometric Overlay on the Shoulder Blade

Shoulder blade pieces benefit from the canvas of broad skin. A common mistake is compressing geometric elements into a narrow area. Ask for full-scale mockups and some breathing room between intersections. Sessions are single long visits for medium pieces and pain is low to moderate. Wear a loose tank top for the appointment and pair with asymmetrical earrings once healed to complete the modern look. Try asymmetrical earrings when you want to photograph the area.
23. Sand Dollar in a Minimalist Ankle Band

An ankle band reads like jewelry and is ideal if you want subtlety. The pitfall is making the band line too thin where it will fade. Ask for a firm but delicate band thickness to hold up under movement. Sessions are short and pain is mild. For showing it off pair with ankle strap sandal choices.
24. Sand Dollar with Script Coordinates on the Sternum

Sternum placements are sensitive and require special framing. Always describe the area with a fitted sports bra or bandeau in the photo prompt. The sternum holds fine line but the thin tissue makes pain high and sessions shorter. If adding text like coordinates, specify the exact digits in your reference. Plan for slower sessions and consider the fit of clothing while healing.
25. Blackwork Sand Dollar as a Chest Accent

The chest is great for small, bold accents that contrast with collarbone jewelry. The usual mistake is relying on fine line alone there; a small black anchor keeps the shape through sun exposure. Expect moderate pain and a single session. Wear a wide-neck shirt you can shift aside to give the artist clean access. Pair with a thin chain pendant necklace that sits above without crowding the art.
26. Clustered Sand Dollars Forming a Wave on the Side Torso

Side-torso waves look organic but the area moves a lot with breathing. The mistake is uniform sizes that flatten the motion. Vary shell sizes and spacing to maintain flow as the body moves. Sessions can be long and pain is moderate to high. Wear a cropped tee and high-waisted bottoms so only the tattoo strip shows during the session.
27. Sand Dollar Accent for a Sleeve Transition Piece

If you are stitching different sleeve styles together, sand dollars act as low-key connectors. A common mistake is mis-scaled accents that read like afterthoughts. Work with your artist to draft a transitional layout showing negative space, contrast, and touch-up timelines. Sessions are modular and pain is moderate. For the appointment wear a loose button-down so the artist can access the forearm easily.
Frequently Asked Questions
Q: Will a fine line sand dollar on my wrist blur faster than a bold black version?
A: Fine line tattoos on high-wear spots like wrists do tend to soften sooner than bold blackwork. The trade-off is delicacy versus longevity. If you want the thin aesthetic but longer life, ask your artist for slightly heavier line weight and plan a touch-up around year two or three depending on sun exposure and friction.
Q: How long should I plan for a realistic sand dollar on the forearm and when might I need a touch-up?
A: A realistic forearm piece usually takes one to two sessions totaling one to three hours. Expect the finest highlights to soften over the first three years. Many people return for a touch-up around year three to refresh contrast and tiny highlights.
Q: Are there placements where sand dollar designs commonly fail to age well?
A: Yes. Fingers, ankles, and ribs see more friction or movement and fine detail can blur faster. On fingers and ankles plan for annual checks. On ribs the skin movement is the main issue, so spacing and depth matter. Talk to your artist about which camp they sit in on fine line for those areas.
Q: What should I wear to a session for a collarbone or sternum sand dollar?
A: For collarbone or sternum work wear a wide-neck shirt, strapless top, or fitted sports bra so the artist has clean access. For showing the healed piece, delicate necklaces like a delicate chain necklace can frame the area without covering the art.
Q: Should I expect different aftercare needs for watercolor sand dollars versus blackwork?
A: Watercolor and blackwork both need gentle cleansing and sun protection, but watercolor relies more on layered color that can fade if overexposed to sun. Use broad sun protection measures once healed. For the first week follow your studio's advice and the specific products recommended at the time of booking.
Q: Where can I look to find artists who specialize in micro-realism or geometric sand dollars?
A: Search hashtags like #SandDollarTattoo and #OceanTattoo on image platforms and use directories with filters for micro-realism or geometric work. Community forums and local studio listings with portfolios are good for vetting portfolios and finding artists who specialize in the techniques you want.